Download Q-Optics Flip-Up Loupes User Manual
Transcript
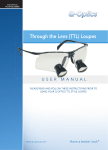
USER MANUAL
FLIP STYLE LOUPES
Flip Style Loupes
U S E R
M A N U A L
PLEASE READ AND FOLLOW THESE INSTRUCTION PRIOR TO
USING YOUR Q-OPTICS FLIP STYLE LOUPES
Table of Contents
Wearing the Frame . . . . . . . . . . . . . . . . . . . . . . . . . . . . . . . . . . . . . . . . . . . . . . . . . . . . . . . . . 2
Quick Set . . . . . . . . . . . . . . . . . . . . . . . . . . . . . . . . . . . . . . . . . . . . . . . . . . . . . . . . . . . . . . . . . . . 3
Optimize Hinge Setting . . . . . . . . . . . . . . . . . . . . . . . . . . . . . . . . . . . . . . . . . . . . . . . . . . . . . 4
Cleaning and Disinfecting . . . . . . . . . . . . . . . . . . . . . . . . . . . . . . . . . . . . . . . . . . . . . . . . . . . 5
Prescription Service – Rx . . . . . . . . . . . . . . . . . . . . . . . . . . . . . . . . . . . . . . . . . . . . . . . . . . . . 5
Removing and Changing Loupes . . . . . . . . . . . . . . . . . . . . . . . . . . . . . . . . . . . . . . . . . . . . 6
Attaching a Headlight . . . . . . . . . . . . . . . . . . . . . . . . . . . . . . . . . . . . . . . . . . . . . . . . . . . . . . . 6
Vertical Height Adjustment . . . . . . . . . . . . . . . . . . . . . . . . . . . . . . . . . . . . . . . . . . . . . . . . . . 7
Accessories . . . . . . . . . . . . . . . . . . . . . . . . . . . . . . . . . . . . . . . . . . . . . . . . . . . . . . . . . . . . . . . . . 7
Optional Accessories and Replacement Parts . . . . . . . . . . . . . . . . . . . . . . . . . . . . . . . . 8
Product Support Info
Toll-Free U.S. and Canada: 1-800-858-2121
Phone: (972) 298-2669
Fax: (972) 298-6592
Web Site: www.q-optics.com
Email: [email protected]
P.O. Box 382120 • Duncanville, TX 75138
Phone: (972) 298-2669 • 1-800-858-2121 • Fax: (972) 298-6592
1
Wearing the Frame
Frames should rest high on the nose.
Correct
Incorrect
Saddle / Nose Pad Adjustment:
To adjust the nose pads or saddle so the loupes will sit higher on the nose gently press the
pads/saddle closer together.
To adjust the nose pads or saddle so the loupes will sit lower on the nose
spread the pads/saddle further apart.
To raise loupes
on face
press pad
or saddle
closer together
To lower loupes
on face,
press pads
or saddle
further apart
Raise Loupes
Lower Loupes
Ear tips:
Bend ear tips for a more secure,
comfortable fit.
Note: You may also visit your local optometrist or eyeglass shop for an adjustment.
2
Quick Set –
Achieve the correct line of sight.
1
Push optics against frame lens.
2
Set Interpupillary Distance
Use interpupillary knob
(IP Knob) to adjust loupes to the
widest possible distance.
Slowly converge loupes until you see one image.
WRONG
Double image - too far apart
RIGHT
Single image
- slight oval image area
RIGHT - Optimum
Single image
- round image area
WRONG
Restricted image
- too close together
4
3
Too Steep
Too Shallow
Set Declination Angle
Set Loupe Height
See Vertical Height
Adjustment on page 7
3
Optimize Hinge Setting
High Ergonomic Viewing
(Chair Side)
1
Lower Vertical
2
3
Increase Downward Angle
Keep Loupe pushed
back toward Frame
Bench Work
(Lab Work)
1
Raise Vertical
2
3
Keep Loupe pushed
back toward Frame
4
Decrease Downward Angle
Cleaning / Disinfecting
It is OK to rinse your loupes under fast moving room temperature water.
NEVER SOAK LOUPES.
It is OK to disinfect loupes using alcohol, Lysol® spray, 10% bleach and water mix or other surface
disinfectant.
!
Warning
!
Never attempt to sterilize loupes by any method!
Never soak loupes in any solution – not even water!
Never place loupes in an ultrasonic cleaner!
Prescription Service – Rx
Q-Optics loupes provide a magnified view for improved performance. Q-Optics do not correct vision. If
you work with prescription lenses or you normally work with reading glasses then you should use Q-Optics
loupes with your prescription installed. Most single strength and bifocal prescriptions can be placed in the
frame by Q-Optics at a nominal charge with the purchase of a new set of loupes. For ease of use,
progressive lenses and trifocal prescriptions are typically converted to flat top bifocals. Prescriptions for
Q-Optics may also be obtained and placed by your local optometrist or eyeglass provider.
5
Removing & Changing Loupes
Remove Loupes
1
2
Applying pressure to
the area of the hinge
shown
Slide hinge to the
right as shown
Install Loupes
1
2
Align slot on left side
of hinge with screw
on front of loupes
Slide hinge to the
left as shown
Attaching a Headlight
interpupillary knob
Install Headlight
1
2
Large opening
Orient large opening
on clip with
interpupillary knob
Slide headlight onto
hinge as shown
6
Vertical Height Adjustment
1
2
3
Locking set screw
Loosen locking set screw (if necessary)
located on the back of the vertical slide
with the supplied hex wrench.
Adjust vertical slide to desired position.
Tighten the locking set screw.
CAUTION: Tighten the set screw until a
slight resistance is felt with the hex
wrench. It takes very little pressure to lock
the vertical slide in place.
Accessories
(included)
• Autoclavable / removable handle
• Side shields
• Micro fiber cleaning cloth
• Additional nose pad set or saddle
• Lens cap covers
• Sport strap or elastic band
Accessories will vary depending on frame
style and telescope type.
7
Optional Accessories & Replacement Parts
Combo Case
Loupe & Headlight
Sport Strap
Cloth End
Cleaning Solution
Loupe Case
Sport Strap
Silicone End
Disinfectant
8
Custom Color
Accent Clips
Replacement Nose Pads
Cleaning Cloth
For more information contact:
P.O. Box 382120 • Duncanville, TX 75138
1-800-858-2121 • (972) 298-2669 • Fax: (972) 298-6592
www.q-optics.com
[email protected]
© 2010 Q-Optics. All rights reserved. Product specifications are subject to change at any
time without prior notice.
UI308-10002-01, ECN 917


