1
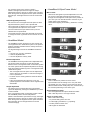
T +61 3 5251 3229
E [email protected] www.vorotek.com.au
Features, Specifications, Set-up & Troubleshooting
Converged Binocular Optics
• Converged binocular optics with 2 dioptre magnification
• Converged binocular optics are also a feature of
operating microscopes
• Without this, binocular vision in narrow cavities
(e.g. ears and noses) is not possible.
Indication that Battery Pack must be charged
• LED illumination cuts out and resets repeatedly.
NOTE: LED illumination does not fade, but the
protective circuit breaker keeps switching off (and
resetting).
NOTE: Charging is best done overnight, frequently and
before the Battery Pack runs flat.
LED Illumination
Battery Pack charging (Battery Pack indicator)
• Set switch on the Battery Pack to charge position.
• Light emitting diodes (LED) are a solid state device with
an average life of >35,000 hours.
• They rarely need replacing, but if this is necessary it
must be done by VOROTEK.
• The illumination colour is daylight and does not vary with the age of the LED or the level of charge of the
battery pack.
• Illumination uniformity and quality is much better than
with filament lamps.
• Brightness now compares with operating room
headlights.
Battery Pack and Charger / Direct
Mains Power Supply
Specifications and features
• Batteries are Lithium Ion: 7.4 Volts, 2,000mAh.
This provides 5 hours of “on time” at maximum level of
illumination. (Optional 10 hour Battery available)
• Memory effect for these batteries is negligible.
• The Battery Pack features short circuit protection and charging control circuitry.
• Use only the supplied Charger, otherwise warranty will
be void.
• For operations lasting several hours, the Direct Mains Power Supply is often a better option (see Direct Mains Power Supply).
• For numerous short procedures the Battery Pack is very convenient.
• It is designed for use on left side of belt or in shirt pocket of scrubs.
• If it is worn in the breast pocket the switch can be used by the operator through the operating gown.
• An alternative is to clip the Battery Pack to the back of the gown.
Switch on Battery Pack
• Switch on Battery Pack has three positions which are labelled ON, OFF and CHARGE.
• RED CONSTANT – Charging (takes up to 8 hours).
• GREEN – 90% plus charged but still trickle charging.
When charging reaches 100% trickling stops and
indicator reverts to red flashing.
•
RED FLASHING – Fully charged.
It will also flash red if incorrectly connected i.e. Battery
Pack switch not in the charge position or charger not
connected to mains.
Direct Mains Power Supply
• To connect the O Scope to the Direct Mains Power
Supply, the adaptor plug must be used. The adaptor plug is fixed to the Charger / Direct Mains Power Supply
lead - see diagram below.
NOTE: Battery Pack cannot be connected.
Set-up of O Scope
– SpecFrame Model (Chosen by most individual users)
Height adjustment
• The height of the converged binocular / illumination
system is adjusted by moving the system up or down on the Spec Frame bracket.
• Loosen the screw that connects the converged binocular / illumination system to the SpecFrame 1 turn and adjust.
• Do not leave screw loose, always re-tighten.
NOTE: If the light spot seems too high, the height
adjustment is likely to be low, so that the user is looking down through the converged binocular optics and below the light spot. If the light seems too low the reverse will
apply.
IPD (interpupillary distance):
• The mirrors in the converged binocular optics are laser aligned and fixed in place to suit a specific IPD.
• This means that no adjustment is ever required, and the converged binocular optics are more robust.
• Your IPD measurement (for distance vision) can be
obtained from an optometrist.
• Converged binocular optics with fixed IPD can be used
in a range of ±2mm e.g. 63mm can be used for 61 to 65 IPD.
– HeadBand & SpecFrame Model
Mirror check
• Should The best guide to precise adjustment is to look
into a mirror (with light switched off!) and look back through the converged binocular optics at the position of your own eyes. You should be able to see both of your pupils clearly (refer illustration).
• Good indirect lighting is needed e.g. bathroom or vanity mirror.
– HeadBand Model
• The HeadBand version requires more care to keep the converged binocular / illumination system in the optimal
position; therefore individual owners mostly choose the
SpecFrame model.
• The big advantage of the of the HeadBand model are that:
– It can be worn over any spectacles.
– It has an adjustable IPD.
– It can be adjusted to suit any head.
Bracket adjustment
• The HeadBand mounting bracket has 2 adjustable links.
• The shorter upper link mainly controls the forward distance of the converged binocular / illumination system.
• The 2 link system allows separate adjustment of viewing
angle and forward positioning of the converged binocular / illumination system:
– The converged binocular optics must be adjusted as close to the eyes as possible i.e. almost touching the nose or spectacles.
– For ENT use, the viewing direction should be almost horizontal.
– If the converged binocular optics are not in use
(rotated up) then the illumination can be angled further
downwards.
Height adjustment
• The height of the converged binocular / illumination
system is adjusted by moving the HeadBand up or down on the forehead.
• If the converged binocular / illumination system is tilted the HeadBand position will need adjustment.
NOTE: If the illumination spot seems too high, the height adjustment is likely to be low, so that the user is looking down through the converged binocular optics and below the illumination spot. If the light seems too low the
reverse will apply.
Double image
• This is a short term problem for some users.
Eye exercises such as looking at a + on a plain back
ground with one eye, other eye, then both eyes and at different distances will usually help. Also, recheck set-up for accurate positioning in front of the eyes.
Altered depth perception
• The converged binocular optics creates this effect.
After a few days use it is no longer noticed.
Toggle on wiring leash
• This is often worth using:
– To prevent sliding down the nose.
– For all lengthy procedures, e.g. operating.
– To take pressure off the nose.
– When gaze is downward.
Working with Corrective Lenses
Reading lenses (used for close work)
• Should be fitted to the SpecFrame of the O Scope.
• The HeadBand O Scope model should be used over the individuals own corrective spectacles
• When reading lenses are installed and used, the working
distance becomes closer.
• If the working distance is not close enough then an extra 0.5 or 1.0 dioptres in the corrective lens should be tried.
• The opposite may be encountered – especially for users with intrinsic short sight.
Bifocal lenses
• Can be fitted effectively, so long as the converged
binocular optics sits in front of the reading section and below the distance section.
• To achieve this, the distance section must be smaller
(i.e. upper one third only) and the reading section larger
(i.e. lower two thirds).
• The nose bridge may need to be adjusted to sit the
SpecFrame higher on the face. This extra frame height allows lower positioning of the converged binoculars so that they are in front of the reading section.
• Alternative nose bridges are available from most
optometrists.
Multifocal lenses
• Are best avoided because it is difficult to achieve sharp focus.
Lens fitment
• Please advise the optometrist to rotate the converged
binocular optics upwards when fitting lenses.
• There is no need to unscrew the converged binocular / illumination system or dismantle the scope in any way, other than the frame mounting screws for the lenses.
Troubleshooting
Illumination cuts off
• See section on ‘Indication That Battery Pack must be
charged’
Battery Pack will not charge
•See section on ‘Battery Pack and Charger’.
SpecFrame damage
• Most problems can be dealt with by an optometrist
e.g. missing screws, new nose pads and bent frames.
• For SpecFrame replacement contact VOROTEK.
Working distance
• Not close enough or too close – see section on corrective lenses.
Pneumatic Otoscope reflecting light back
into O Scope users eyes
• Change angle of view through the “puffer” lens. Suggest always rotating “puffer” so the tubing is directed forward towards the nose of patient.
• Light from a window can also cause reflection.
Pneumatic Otoscope system has excessive air leak
•
•
•
•
Use bigger speculum.
Insert deeper i.e. until canal hairs end.
Wrap Blu-Tack™ around tip of speculum.
It should be possible to achieve a complete seal in
every ear.
For all other problems contact VOROTEK.
Warranty
• Scopes - 3 year for any component defect or
manufacturing failure.
• Battery Pack - 18 months for any component defect or
manufacturing failure.
• Warranty does not cover abuse, misuse or transit
damage.
• Please contact VOROTEK to discuss problems or faults before sending for repairs.
VO_M0512 V1