1
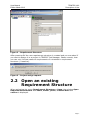
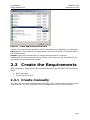
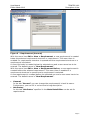
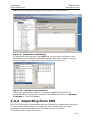
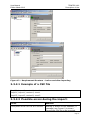
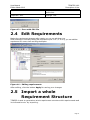
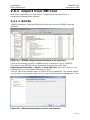
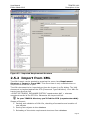
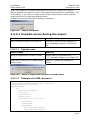
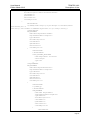
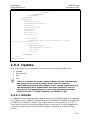
TEMPPO Requirement Manager User Manual Edition March 2013 Copyright © Atos IT Solutions and Services GmbH Microsoft, MS, MS-DOS and Windows are trademarks of Microsoft Corporation. The reproduction, transmission, translation or exploitation of this document or its content is not permitted without express written authority. Offenders will be liable for damages. All rights reserved, including rights created by patent grant or registration of a utility model or design. Right of technical modification reserved. User Manual Edition March 2013 TEMPPO V6.0 Contents Contents 1 Introduction ................................................................................................................... 5 2 Description of Use ......................................................................................................... 6 2.1 Create a new Requirement Structure ....................................................................... 6 2.2 Open an existing Requirement Structure .................................................................. 7 2.3 Create the Requirements ......................................................................................... 8 2.3.1 Create manually ................................................................................................ 8 2.3.2 Importing from CSV ......................................................................................... 11 2.3.2.1 Example of a CSV file .............................................................................. 13 2.3.2.2 Possible errors during the import: ............................................................. 13 2.4 Edit Requirements .................................................................................................. 14 2.5 Import a whole Requirement Structure ................................................................... 14 2.5.1 Import from RM Tool ....................................................................................... 15 2.5.1.1 DOORS .................................................................................................... 15 2.5.1.2 Possible errors during the import .............................................................. 20 2.5.1.3 Requisite Pro ........................................................................................... 21 2.5.2 Import from XML ............................................................................................. 24 2.5.2.1 Possible errors during the import .............................................................. 25 2.5.2.1.1 Special cases ........................................................................................ 25 2.5.2.1.2 Example of an XML document .............................................................. 25 2.5.3 Update ............................................................................................................ 27 2.5.3.1 DOORS .................................................................................................... 27 2.5.3.1.1 Example for Updating............................................................................ 28 2.5.3.2 RequisitePro ............................................................................................ 30 2.5.3.3 CSV ......................................................................................................... 31 2.5.3.4 XML ......................................................................................................... 32 2.5.3.5 Result of update ....................................................................................... 32 2.5.3.6 Apply requirement updates ...................................................................... 32 2.5.3.7 Example: Apply requirement updates ....................................................... 34 2.6 Task List................................................................................................................. 36 2.7 Export to XML ........................................................................................................ 37 2.8 Assign Attributes to Requirement Structures .......................................................... 38 2.9 Assign Requirement Structures to project .............................................................. 39 2.10 Link Requirements .............................................................................................. 40 2.11 Newsboard ......................................................................................................... 41 2.12 Version ............................................................................................................... 43 2.12.1 Merge .............................................................................................................. 47 2.12.2 Delete ............................................................................................................. 47 2.13 Split Requirement Structures .............................................................................. 47 2.14 Filter ................................................................................................................... 48 2.14.1 Predefined filter ............................................................................................... 48 2.14.2 Create Filter .................................................................................................... 49 2.14.3 Change Filter .................................................................................................. 51 2.14.4 Delete Filter..................................................................................................... 52 2.14.5 Select Filter ..................................................................................................... 52 2.14.6 Show Filter ...................................................................................................... 52 2.14.7 Define the filter criterion .................................................................................. 53 2.14.8 Export filter ...................................................................................................... 55 2.14.9 Import filter ...................................................................................................... 56 2.15 Evaluation ........................................................................................................... 56 Page 3 User Manual Edition March 2013 TEMPPO V6.0 Contents 2.15.1 Analysis........................................................................................................... 56 2.15.2 Progress Chart ................................................................................................ 58 2.16 Multi user ability .................................................................................................. 59 2.16.1 Lock modes..................................................................................................... 59 2.16.2 Edit.................................................................................................................. 59 2.16.2.1 Show a lock state ..................................................................................... 60 2.16.2.2 Change an item ........................................................................................ 60 2.16.2.3 Delete an item .......................................................................................... 61 2.16.2.4 Find invalid locks ...................................................................................... 61 2.16.3 Refresh ........................................................................................................... 61 2.16.3.1 Refresh manually ..................................................................................... 61 2.16.3.1.1 Reloading the whole requirement structure ......................................... 61 2.16.3.1.2 Refresh recursively ............................................................................. 62 2.16.3.1.3 Refresh on certain user actions ........................................................... 62 2.17 General principles ............................................................................................... 63 2.17.1 Multi-selection ................................................................................................. 63 2.17.2 Hyperlinks and Uploads .................................................................................. 65 2.17.2.1 Create hyperlinks ..................................................................................... 65 2.17.2.2 Edit hyperlinks .......................................................................................... 68 2.17.2.3 Remove hyperlinks................................................................................... 68 2.17.2.4 Download ................................................................................................. 68 2.17.3 Applying / Discarding....................................................................................... 68 2.17.4 Find and Replace ............................................................................................ 69 2.17.4.1 Find .......................................................................................................... 71 2.17.4.2 Replace .................................................................................................... 71 2.17.5 Settings ........................................................................................................... 72 2.17.5.1 Global Settings ......................................................................................... 72 2.17.5.2 Specific Settings....................................................................................... 72 2.17.5.3 Requirement Management ....................................................................... 73 2.17.5.3.1 IBM Telelogic DOORS ........................................................................ 73 2.17.5.3.2 IBM Rational RequisitePro .................................................................. 74 3 Literature ...................................................................................................................... 76 4 Abbreviations .............................................................................................................. 77 5 Appendix ...................................................................................................................... 78 5.1 DTD-Schema for XML-Import (Requirement Structure) .......................................... 78 6 Index ............................................................................................................................. 79 Page 4 User Manual Edition March 2013 1 TEMPPO V6.0 Introduction Introduction In the specification phase the definition of requirements is fundamental for every project defining the purpose exactly, e.g. how the implemented software should work or which features should be implemented. The organization of this information mostly occurs with documents. In large projects, there is mostly more than one document which specifies requirements, because subprojects are built. Now, the requirement environment of TEMPPO allows managing the requirements in structure(s). So a requirement structure contains requirements which can contain further requirements. Some time requirements changes in the life cycle of the project. Requirements can be changed easily and can be saved versioned in the database. TEMPPO Requirement Manager also provides the collaboration of TEMPPO with IBM Telelogic DOORS and IBM Rational Requisite Pro. For using the importing and updating feature the client for DOORS or RequisitePro must be installed where TEMPPO is used. TEMPPO Requirement Manager (RM) has integrated following features: Editing and administrating requirements together with attributes Version control including baseline and view concept Importing and updating requirement structures from DOORS or RequisitePro to TEMPPO (see 2.5.1 ff.) Importing and updating requirement structures from an XML file Importing and updating requirement lists (CSV file) The requirement managers have access to test management data to make statements about the actual situation of the project (progress and quality). Therefore, it’s important to assign the requirements to the test packages or test cases in order to fulfill requirement tracing. In the TEMPPO Administrator you can assign the requirement structures to the projects and then the requirements to test packages or test cases in the TEMPPO Test Manager with a read only access. Page 5 User Manual Edition March 2013 2 TEMPPO V6.0 Description of Use Description of Use 2.1 Create a new Requirement Structure A requirement structure is the first created element in TEMPPO Requirement Manager. You can either start by creating, importing a new requirement structure from DOORS, Requisite Pro or a XML file or opening an existing one. Figure 1 – Requirement Structure Properties When activating the menu Requirement Structure > New, the window Requirement Structure Properties opens (see Figure 1). A name, description, and an optional prefix can be filled in and by clicking the OK button a new structure is displayed (see Figure 2). Page 6 User Manual Edition March 2013 TEMPPO V6.0 Description of Use Figure 2 - Requirement Structure After pressing OK the new requirement structure is created and you are asked if you want to assign it to a project in TEMPPO Test Manager. Please remark, that you can only link test cases to requirements of a checked in requirement structure (= baseline). Figure 3 - Project assign request 2.2 Open an existing Requirement Structure When activating the menu Requirement Structure > Open, the window Open Requirement Structure with name, owner, prefix, creation date and version is displayed. Page 7 User Manual Edition March 2013 TEMPPO V6.0 Description of Use Figure 4 - Open Requirement Structure Exactly one requirement structure can be selected and is opened by clicking the Open button. The name of the requirement structure is shown in the title bar of the main window. Cancel closes the window and no requirement structure is opened. Additionally a requirement structure version (see Figure 4) can be selected, if a non latest version should be loaded. 2.3 Create the Requirements After creating or opening the requirement structure can be filled in the following ways: Build manually Importing from CSV 2.3.1 Create manually The user has to create requirements manually. Each requirement can have more requirements. So you can build a clear arrangement of your requirements. Page 8 User Manual Edition March 2013 TEMPPO V6.0 Description of Use Figure 5 – Requirement (General) With the menu item Edit > New > Requirement, a new requirement is created below the selected requirement structure or requirement. This menu item is enabled if a requirement structure is opened and the requirement structure or a requirement is selected. A new child node is created below the selected one and a new name has to be entered. The default name is “New Requirement”. With the menu item Edit > New > Requirement Before, a new requirement is created before the selected requirement. This menu item is enabled if a requirement structure is opened and a requirement is selected. A new requirement is created before the selected one and a new name has to be entered. The default name is “New Requirement”. General: In the tab “General” you can change the requirement’s id and its name. Furthermore, you can fill in a short and a long description. Attributes: In this tab “Attributes” specified in the Meta Data Editor can be set for requirements. Page 9 User Manual Edition March 2013 TEMPPO V6.0 Description of Use Figure 6 - Creating a requirement attribute After clicking OK, the attribute is created and the user is asked, if he wants to assign it to requirement structures. Figure 7 - Assign requirement attribute to requirement structure After pressing Yes, user has to select the requirement structures where he wants to add the attribute to a requirement. Figure 8 - Select requirement structure(s) If a requirement is selected and tab Attributes is activated, you can enter Planned coverage for the number of test cases which have to be created in order to get a “positive” coverage. This means, that in the following example “New Requirement” has be linked to at least 3 test cases and the requirement is displayed “covered” in TEMPPO’s requirement analysis. The default value is 1. Page 10 User Manual Edition March 2013 TEMPPO V6.0 Description of Use Additionally any requirement attribute can be assigned to the requirement. Figure 9 – Requirement (Attribute) By specifying a sub-string in the Find field you can easily navigate to the attribute(s) to be related to the requirements. Multi select allows “moving” several values to the right part of the window (see Figure 10). Figure 10 – Attribute value selection When the requirement structure is imported (DOORS, Requisite Pro), attributes can’t be assigned or deleted. The default plan value for Planned Coverage is 1 and not editable. 2.3.2 Importing from CSV With CSV files several requirements can be imported to a requirement structure or requirement. Depending on the selected node (requirement structure, requirement) the requirements are imported as a list of children. The CSV file has to have 4 columns: Page 11 User Manual Edition March 2013 TEMPPO V6.0 Description of Use 1. Requirement ID 2. Name 3. Description 4. Short description Attention: The fields have to be separated with a semicolon (see 2.3.2.1). The import of a CSV file can be started by pressing the menu item Requirement Structure > Import > From CSV. This menu item is only enabled when a requirement structure is opened and the requirement structure or a requirement is selected. The file to be imported can then be chosen in a file dialog. After the file selection the progress bar for importing is shown: Figure 11 – Importing CSV: Progress bar The new requirements are created as a list. Result of import: Page 12 User Manual Edition March 2013 TEMPPO V6.0 Description of Use Figure 12 – Requirement Structure – before and after importing 2.3.2.1 Example of a CSV file Req100; import0; content0; short0 Req101; import1; content1; short1 Req102; import2; content2; short2 2.3.2.2 Possible errors during the import: Errors Reaction The syntax of the CSV file isn’t correct. Nothing is written to the database, a message (see Figure 6) is shown. Correct the CSV file to be imported. Page 13 User Manual Edition March 2013 TEMPPO V6.0 Description of Use May there is a comma instance of a semicolon. Duplicate “IDs” Change “IDs” Figure 13 – Error with CSV file 2.4 Edit Requirements Maybe the requirements changes after creation, so you can edit them, too. After automatic or manually locking the requirement (see 2.16.1, 2.16.2.2), you can edit the requirement ID, name, short and long description. Figure 14 – Editing requirements After editing, click the button Apply for saving your changes. 2.5 Import a whole Requirement Structure TEMPPO is able to generate a whole requirement structure with requirements and its information etc. by importing. Page 14 User Manual Edition March 2013 TEMPPO V6.0 Description of Use 2.5.1 Import from RM Tool With this functionality you can import a requirement structure from a requirement management system. 2.5.1.1 DOORS TEMPPO maintains Telelogic DOORS and thus the client for DOORS must be installed. Figure 15 – DOORS: Requirement structure to be imported There is an existing module in DOORS which is wanted to use in TEMPPO. The import from DOORS can be started by pressing the menu item Requirement Structure > Import > From RM Tool. This menu item is only enabled when no requirement structure is open. This will cause the wizard shown in Figure 16 to be displayed. The wizard assists you to import requirement data from an external Requirement Management Tool. Figure 16 – Requirement import wizard: Introduction Page 15 User Manual Edition March 2013 TEMPPO V6.0 Description of Use When pressing Next Figure 17 is shown, in which you choose “Telelogic DOORS”. Figure 17 – Requirement import wizard: Choose a RM Tool Then the server for DOORS starts and the following progress bar is shown (Figure 18): Figure 18 – Starting server… In the next window you select a module from the tree. In the tree the projects and modules from DOORS are shown (see Figure 19). Figure 19 – Requirement import wizard: selection After selecting a module and pressing Next Figure 20 is shown where the user can select a baseline or the latest version of the module. Additionally the user has to select a view. Page 16 User Manual Edition March 2013 TEMPPO V6.0 Description of Use With the view it’s possible to use only a restricted number of requirements in TEMPPO, and not the whole tree from DOORS. Views also contain attributes which are imported, too (see Figure 24). With pressing Finish the module is imported to TEMPPO. Figure 20 – Baseline and view selection – Finish With the checkbox select another attribute it’s possible to use an attribute of the DOORS View as requirement ID. When activating this checkbox, the button Next is available (see Figure 21). In the next step you can select an attribute which is use as requirement ID in TEMPPO, see Figure 22. Figure 21 – Baseline and view selection - Next In the next step you can select an attribute which is used as requirement ID in TEMPPO, see Figure 22. The attribute’s name has to be unique in this DOORS module. The value of the specified attribute is shown in TEMPPO instead of the object number (ID) in DOORS. But this object number is used as attribute. So it means Page 17 User Manual Edition March 2013 TEMPPO V6.0 Description of Use that the object number and the selected attribute have exchanged their functions. See Table 1, for effect of selecting an attribute for requirement ID. Figure 22 – Attribute selection Columns in DOORS view Import setting Attributes in TEMPPO ID (object identifier) Level ReqID Updator define no requirement ID: ID (object identifier) is requirement ID Level Updator ReqID ID (object identifier) Level ReqID Updator define “ReqID” as requirement ID Level ID Updator Level ReqID Updator define no requirement ID: ID (object identifier) is requirement ID Level ReqID Updator Level ReqID Updator define “ReqID” as requirement ID Level Updator Table 1 – Attributes from DOORS to TEMPPO After selecting the attribute which has to shown as requirement id in TEMPPO and then pressing Finish the requirement structure is imported. The values of attribute which is specified as requirement id are checked if there are equal values or if there are no values. If there are such requirements, then Page 18 User Manual Edition March 2013 TEMPPO V6.0 Description of Use the import is canceled and a log file is written where these cases are described (see 2.5.1.2). When the import was successful, then the imported requirement structure and its requirements are shown in the tree: Figure 23 – Imported requirement structure with Views When there is an attribute specified as requirement id then the value of this attribute is shown for the ID (see also in Figure 23). This specified id is also displayed in the TEMPPO test environment. All imported attributes are shown in tab Attributes, see Figure 24: Page 19 User Manual Edition March 2013 TEMPPO V6.0 Description of Use Figure 24 – Requirement attributes The requirements, which are not available in DOORS, are not selectable and they are displayed grayed in TEMPPO Requirement Manager. In the TEMPPO test management environment, only selectable requirements are available for assignment to test packages or test cases. The not selectable requirements are not visible in the test management environment. In TEMPPO only the selectable requirements can be linked to test packages or test cases. 2.5.1.2 Possible errors during the import Errors Reaction The host for DOORS can’t be found and so the connection can’t be opened. A message is shown (see Figure 25). Check if Telelogic DOORS client is installed and correct the DOORS settings in the TEMPPO Requirement Manager settings (Windows > Settings). An attribute is defined as requirement id and there are equal values or no for requirement id. A message is shown (see Figure 26). Open the file and do the changes for the requirements in DOORS which are described in the file (example see Figure 27) and then import again. Page 20 User Manual Edition March 2013 TEMPPO V6.0 Description of Use Figure 25 – Error: Host not found Figure 26 – Error with requirement ids Figure 27 – Error text file 2.5.1.3 Requisite Pro The RequisitePro client must be installed. Figure 28 – RequisitePro project There is an existing project in RequisitePro which is wanted to use in TEMPPO. The import from RequisitePro can be started by pressing the menu item Requirement Structure > Import > From RM Tool. This menu item is only enabled when no requirement structure is open. This will cause the wizard shown in Figure 29 to be displayed. The wizard assists you to import requirement data from an external Requirement Management Tool. Page 21 User Manual Edition March 2013 TEMPPO V6.0 Description of Use Figure 29 – Requirement import wizard: Introduction When pressing Next Figure 30 is shown, in which you choose “IBM RequisitePro” is possible. Figure 30 – Requirement import wizard: Choose a RM Tool If you press Next the projects are read from the local registry (Figure 31). Page 22 User Manual Edition March 2013 TEMPPO V6.0 Description of Use Figure 31 – Requirement import wizard: project selection If you select a project, enter a valid account and password and press Next, Figure 32 is shown where the available views are displayed. With the view it’s possible to use only a restricted number of requirements in TEMPPO, and not the whole tree from RequisitePro. Views also contain attributes which are imported, too (see Figure 32). Figure 32 – View selection – Finish With pressing Finish the project is imported to TEMPPO. Page 23 User Manual Edition March 2013 TEMPPO V6.0 Description of Use Figure 33 - Imported Requirement Structure 2.5.2 Import from XML The XML-Import can be started by pressing the menu item Requirement Structure > Import > From XML. This menu item is only enabled when no requirement structure is open. The XML-document to be imported can then be chosen in a file dialog. The XML document is checked against the DTD (Document Type Definition). Your XML file has to have the first line <!DOCTYPE TEMPPO_EXCHANGE SYSTEM "requstructure.dtd" > whereas requstructure.dtd is the DTD file. Otherwise the import will fail. In your TEMPPO directory you’ll find the DTD (requstructure.dtd). Stages of Import: 1. Parsing and validation of XML-file, checking of semantics and creation of new objects 2. Saving new objects to the database 3. Reloading of the whole requirement structure from database Page 24 User Manual Edition March 2013 TEMPPO V6.0 Description of Use When the import of a manual requirement structure is finished, you will be asked, whether you want to check in the requirement structure immediately. This is necessary, if you plan to import a test structure afterwards, which contains requirements of the just imported structure. At last the following information dialog is displayed: Figure 34 – Import successful 2.5.2.1 Possible errors during the import Errors Reaction XML file doesn’t match DTD schema. Nothing is written to the database, a error message is shown. Correct the file. 2.5.2.1.1 Special cases Special cases Reaction Name of requirement structure exists. Unique name is generated like “_1”, “_2”. Message is shown, see Figure 35 Requirement structure or requirement doesn’t exist. Object is created. No message is shown. Figure 35 – name of requirement structure already exists 2.5.2.1.2 Example of an XML document <?xml version="1.0" encoding="UTF-8"?> <!DOCTYPE TEMPPO_EXCHANGE SYSTEM "requstructure.dtd"> <?TEMPPO_VERSION "V6.0 Build 05"?> <TEMPPO_EXCHANGE> <RS name="Benutzerhandbuch" version="V3" rmstype="Manual" prefix="prefix" createdrms="21.12.2009 15:00:39" > <DESCRIPTION> </DESCRIPTION> <REQUIREMENT name="import XML renamed" requirementnumber="import3" Page 25 User Manual Edition March 2013 TEMPPO V6.0 Description of Use type="Manual" shortdescription="Inhalt Kurzbeschreibun" createdrms="" updatedrms="" selectable="0" coveredbytcs="3" > <DESCRIPTION> <![CDATA[<html><body><p style="margin:0;">Geänderte Beschreibung mit <a href="http://www.siemens.at/TEMPPO">Hyperlink</a></p></body></html>]]> </DESCRIPTION> <REQUIREMENT name="New Requirement ADDED" requirementnumber="req41017" type="Manual" shortdescription="" createdrms="" updatedrms="" selectable="0" coveredbytcs="1" > <DESCRIPTION> </DESCRIPTION> <USER_DEFINED_ATTRIBUTE name="Requirment attribute" value="high" type="32" /> </REQUIREMENT> <REQUIREMENT name="New Requirementxcvxcv" requirementnumber="req41019" type="Manual" shortdescription="" createdrms="" updatedrms="" selectable="0" coveredbytcs="1" > <DESCRIPTION> <![CDATA[]]> </DESCRIPTION> <REQUIREMENT name="New Requirement" requirementnumber="req41020" type="Manual" shortdescription="" createdrms="" updatedrms="" selectable="0" coveredbytcs="1" > <DESCRIPTION> Page 26 User Manual Edition March 2013 TEMPPO V6.0 Description of Use <![CDATA[]]> </DESCRIPTION> </REQUIREMENT> </REQUIREMENT> </REQUIREMENT> <REQUIREMENT name="import XML 2" requirementnumber="import32" type="Manual" shortdescription="" createdrms="" updatedrms="" selectable="0" coveredbytcs="5" > <DESCRIPTION> <![CDATA[<html><head></head><body><p>import from XML file2 </p></body></html>]]> </DESCRIPTION> <USER_DEFINED_ATTRIBUTE name="Requirment attribute" value="high" type="32" /> </REQUIREMENT> </RS> </TEMPPO_EXCHANGE> 2.5.3 Update With this feature you can update requirement structures imported from DOORS Requisite Pro XML CSV There is a feature for undo a faulty update. On the one hand you can merge any version to latest one in case of a manual requirement structure (see chapter 2.12). On the other hand you can delete the latest requirement structure version if it is not used yet in test management in case of imported requirement structures from 3rd party products (see chapter 2.12). 2.5.3.1 DOORS In TEMPPO Requirement Manager data imported from DOORS cannot be updated by a TEMPPO user. DOORS requirements can be updated in DOORS and imported in TEMPPO or changed in latest. The update function is the same as in 2.5.1.3. This function checks in the actual latest version (see also 2.11) and updates the new latest version of the requirement structure, irrespective of the activated version. Page 27 User Manual Edition March 2013 TEMPPO V6.0 Description of Use By pressing the menu item Requirement Structure > Update the requirement update process starts, see chapter 2.5.1. The menu item is enabled when a requirement structure is opened and this requirement structure has the type for the RM tool “Telelogic DOORS”, not “Manual”. There is no preview or undo functionality when the wrong requirement structure is selected, but the latest version is checked in before updating. No changes are lost. 2.5.3.1.1 Example for Updating Figure 36 – DOORS: Before changing The module ‘Huge Module’ is changed in DOORS and then should be updated in TEMPPO. The requirement ‘Introduction’ is deleted and the requirement ‘Description of Use’ is renamed to ‘How to Use’ (see Figure 37). Page 28 User Manual Edition March 2013 TEMPPO V6.0 Description of Use Figure 37 – DOORS: Change requirements After changing the module in DOORS, start the update process. In the next figure (see Figure 38) you can compare the latest version of requirement structure with the version before. Page 29 User Manual Edition March 2013 TEMPPO V6.0 Description of Use Figure 38 – Compare: before and after updating 2.5.3.2 RequisitePro With this feature you can update your requirement structure from TEMPPO to the project in RequisitePro. Data imported from RequisitePro cannot be updated by a TEMPPO user. RequisitePro requirements can be updated in RequisitePro and imported in TEMPPO or changed in latest. The update function is the same as in 2.5.1. This function checks in the actual latest version (see also 2.11) and updates the new latest version of the requirement structure, irrespective of the activated version. By pressing the menu item Requirement Structure > Update the requirement update process starts, see chapter 2.5.1. The menu item is enabled when a requirement structure is opened and this requirement structure has the type for the RM tool “Rational RequisitePro”, not “Manual”. There is no preview or undo functionality when the wrong requirement structure is selected, but the latest version is checked in before updating. No changes are lost. After updating the requirement structure a new version (=2) is created. In Figure 39 there is displayed the new requirement. Some requirements are missing compared to V1. Page 30 User Manual Edition March 2013 TEMPPO V6.0 Description of Use Figure 39 - Requirement Manager – Updated 2.5.3.3 CSV If requirements have been imported from Excel (csv), they can be also updated in case of maintaining requirements is done in Excel: Change requirement name, content, short text. Also deleted requirements are concerned. If requirements are imported from csv (of course as a list) and the list is transformed to a tree, an update will keep this tree: The tree structure is NOT updated. Change requirements are updated. New requirements are added. Page 31 User Manual Edition March 2013 TEMPPO V6.0 Description of Use 2.5.3.4 XML If requirements have been imported from XML, and are maintained in XML they can be also updated: Changes in requirement name, content, short text. Also deleted requirements are concerned. If requirements are imported from csv (of course as a list) and the list is transformed to a tree, an update affects this tree. 2.5.3.5 Result of update After updating a requirement structure a window is shown that informs you, how many requirements were Updated Deleted Changed Figure 40 - Update information 2.5.3.6 Apply requirement updates Requirement structures and test structures live in fully separated environments. So it can be that a latest test structure version works with a not latest requirement structure version. This is always the case after an update of a requirement structure. An automatic update of the current test structure version to the latest requirement structure version may not be wanted by the user and would cause problems anyway, e.g. if more than one user work on this version. It’s only possible to propagate to the latest requirement structure version. So an update to the latest requirement structure version can only be made manually initiated. Open the TEMPPO Test Management environment and open the project and test structure. By pressing the menu Test Structure > Apply requirement updates… Figure 41 is shown. All assigned and updated requirement structures are shown in the lists. Select the requirement structures when the assignments should be updated. By clicking Apply, the test structure is checked in and then propagation is executed. Page 32 User Manual Edition March 2013 TEMPPO V6.0 Description of Use Figure 41 – Apply requirement updates Updating a requirement structure does not cause that a task list is created, a task list (2.6) is created internally if the test structure is updated to the latest requirement structure version. Deleted requirements are unassigned from the test cases. If only a new column (attribute) is added to view in Telelogic DOORS, but requirements aren’t changed. When applying requirement updates these requirements are recognized as unchanged. This means that no tasks are created for these requirements, but the new version of requirement is used and all attributes are available in test structures. If there is no implicit propagation to the latest requirement structure version, Figure 42 is shown. Figure 42 – No requirement structure for updating Page 33 User Manual Edition March 2013 TEMPPO V6.0 Description of Use 2.5.3.7 Example: Apply requirement updates Figure 43 – Assigned requirement The test case has assigned the requirement “1194” (see Figure 43). Nevertheless, this requirement is deleted in DOORS (Figure 44). Figure 44 – Delete in DOORS After deleting, the requirement structure in TEMPPO is updated (Requirement Structure > Update), see Figure 45. Page 34 User Manual Edition March 2013 TEMPPO V6.0 Description of Use Figure 45 – Before and after update Open the test structure again and the requirement which is assigned to a test cases isn’t the requirement of the latest requirement structure anymore. Now you have to update the assigns (Test Structure > Apply requirement updates…). Then all changed assignments and new requirements are listed in a task list (menu Test Structure > Task List > Show) (Figure 46), see also 2.6. Page 35 User Manual Edition March 2013 TEMPPO V6.0 Description of Use Figure 46 – After updating; Task List 2.6 Task List A task list contains tasks, each of which consists of a test case - requirement pair. The idea is that each task indicates a test case - requirement combination, which must be corrected. The task list is assigned to a test structure (and a given or latest version of the test structure). Each entry is defined by a requirement, the assigned test case and a text. The text contains the reason why the requirement – test case assignment could not be added to the DOORS DB. The possible states of the assignments are: Open Closed Page 36 User Manual Edition March 2013 TEMPPO V6.0 Description of Use Figure 47 - Task List The lists are represented by a tree structure. Each list consists of one or many entries. All entries are marked as open the first time they are stored in the DB. If the user clicks an entry, the test case of this entry is selected in the test structure window. The user now has the possibility to change the assignment, delete it or create a new assignment or do nothing (if the failure is DOORS-sided and cannot be corrected in TEMPPO). If all necessary actions are made, the user can mark the entry in the task list as closed (first “lock” then “apply”) and click upon another task. Task lists can be deleted in the task list window if all tasks are closed. The task list has to be selected and via the context menu item “Delete task list” a confirmation window comes up. Confirming with OK deletes the task list. 2.7 Export to XML This feature allows exporting the entire requirement structure into an XML document. When a requirement structure is open and the root node or a requirement is selected, the menu item Requirement Structure > Export to XML is enabled. After entering a name, the XML file is stored to the file system (conforming to requstructure.dtd). Page 37 User Manual Edition March 2013 TEMPPO V6.0 Description of Use The requstructure.dtd can be found in your TEMPPO/XML directory. The following window is shown after exporting successful. Figure 48 – Requirement structure – Exporting When you plan to exchange test and requirement structures over databases via XML, you have to be aware of exporting the correct version of a requirement structure. 2.8 Assign Attributes to Requirement Structures For a chosen requirement structure, attributes can be assigned to the requirement structure. Open the TEMPPO Administrator application and after connecting chose the tab “Metadata” and then tab “Requirement Structures”. Figure 49 – Assign attributes The assignment is made for each requirement structure. Page 38 User Manual Edition March 2013 TEMPPO V6.0 Description of Use Figure 50 – Meta data editor On the left side all available attributes are listed. By clicking the buttons >>, >, <,<< the attributes can be moved to right list box. The assignments on the right are saved by pressing the button “Apply”. 2.9 Assign Requirement Structures to project In the TEMPPO Administrator you can assign the requirement structures to the projects, so that the requirements are available for the test packages or test cases. Open the TEMPPO Administrator application and after connecting chose the tab “Projects”. Figure 51 – Assign Metadata Page 39 User Manual Edition March 2013 TEMPPO V6.0 Description of Use Then click the button “Assign Metadata” (see Figure 51) and then Figure 52 is opened. In the tab “Requirement Structure” you can select the requirement structures for the selected project. Figure 52 – Assign requirement structure 2.10 Link Requirements Before you can link test cases to requirements, you have to assign a requirement structure to the project. For linking requirements, start the TEMPPO Test Manager. After opening the project and the test structure, select a test package or test case and open the tab “Requirements” (see Figure 53). Figure 53 – Link requirements Page 40 User Manual Edition March 2013 TEMPPO V6.0 Description of Use The test case can inherit from the test package’s requirements. Additionally, the selected test case can have associated requirements. With the button “New” a new window opens, where you can select requirements (see Figure 54). In the combo box you select the requirement structure, and below its requirements are shown. If a requirement is already assigned, it’s written in black, but if there is a new assignment, the requirement is written in grey. Figure 54 – Requirement selection After selecting the requirements, the selected ones are shown as a list (see Figure 55). Figure 55 - Requirements 2.11 Newsboard The newsboard informs the user about changes done on the current requirement structure. It can be opened by calling the menu item Requirement Structure > Newsboard. In Settings it can be configured that is it shown automatically Page 41 User Manual Edition March 2013 TEMPPO V6.0 Description of Use after opening a requirement structure. Since time is going on and newsboard doesn’t poll, user has to press the Refresh button to get the latest “news”. The display of newsboard can be configured be setting last login, last hour, last day last week or user defined. If user defined is selected, a date with calendar and text fields for time (hh, mm) and the Apply button are editable. If “last login” is selected, the time stamp of user’s last logout is chosen! If a newsboard entry is activated, the corresponding requirement is selected automatically, except if one was deleted. In the newsboard table the action (new, changed, deleted), requirement ID, requirement name, date of action, and the person are shown. If an item of newsboard is selected, the corresponding one is also highlighted in the requirement structure. Figure 56 - Newsboard Page 42 User Manual Edition March 2013 TEMPPO V6.0 Description of Use 2.12 Version Configuration management is a task that covers all phases in projects. Supporting a large palette of CM tools from a very powerful but expensive one like ClearCase to a cheap one with restricted functionality would be a challenge. For example ClearCase offers attributes for each administration unit; VSS does not have such commands. In TEMPPO it is possible to check in an entire requirement structure, where “whole” means the hierarchical order of all requirements as well as their data. In contrast to other CM tools where check in and check out are separate steps, checking in a requirement structure in TEMPPO will check it out again, i.e. a new editable version is created automatically. Naturally you have the possibility to restore any version of the requirement structure that has been checked in. Versioning is meaningful when you have to change / extend your requirement structure due to version changes of your application. A requirement structure is automatically versioned before an update from a RM Tool. Versioning manually: You create and activate versions in TEMPPO Requirement Manager using Requirement Structure > Version. The following example should illustrate how the CM features of TEMPPO Requirement Manager works. There is a requirement structure “CSV import”, which has already requirements (see Figure 57). Figure 57 – Before check in Before importing a CSV – file, the requirement structure should be checked in: Page 43 User Manual Edition March 2013 TEMPPO V6.0 Description of Use 1. Consider the requirement structure displayed in Figure 58. Initially there exists just one version of the requirement structure, version "1" on the main line. In TEMPPO, every last version gets the label "latest", signaling that the requirement structure in this version is checked out for editing. Edit properties of selected version Check in active version Activate selected version Merge to latest version Delete latest version Change tree style Figure 58 - CM, Version tree before first check in Additionally you can add a so called view to the checked-in version (=baseline). A view is either a filter which is created when working with requirement structures or a self created logical expression in tab “view”. Figure 59 - Filter "All implemented requirements" If you want to test only a subset of all requirements, e.g. all “implemented” requirements (see Figure 59), change to tab “view”, select a filter and press the button “Apply” to set it to the current “view”. When pressing the button “Refresh”, you see how many requirements are in and not in the view. Page 44 User Manual Edition March 2013 TEMPPO V6.0 Description of Use Figure 60 - Requirements in view If you check-in that requirement structure with a view, the requirement structure looks like follows (requirements not in view are not displayed, or displayed grayed, if they cover child requirements): Figure 61 - Checked in requirement structure with view In the test structure you link test cases exactly to those requirements which are in the view. Requirements which are not in the view do not become visible in the test structure. 2. If you check in the requirement structure by using the Check in active version button in the Versions dialog you have the possibility to specify a label (“Release 1”). Then the version tree looks like displayed in Figure 62. The requirement structure gets checked out immediately and version “2” is created. The symbol signals the active version, which is again “latest”. Page 45 User Manual Edition March 2013 TEMPPO V6.0 Description of Use Figure 62 - CM, Version tree after checking in and labeling Changes in the latest version of the requirement structure will now not affect “Release 1”. E.g. when inserting a requirement .\Second the new requirement will only be available in the latest version of the requirement structure (see Figure 63). You can see the active version of your requirement structure in the title bar of the requirement structure explorer. Figure 63 – After check in 3. You can restore the version of a requirement structure by activating it in the versions dialog with button (Activate selected version). You cannot change a requirement structure in a version, which is not “latest”. Page 46 User Manual Edition March 2013 TEMPPO V6.0 Description of Use 2.12.1 Merge If you updated a requirement structure from XML or csv with a faulty file, you have the possibility to undo it by a merge of a previous version to the latest version. Activate the version you want to have as new latest version and press the button Merge. 2.12.2 Delete A version can only be deleted if another version is activated. You cannot delete the current activated version. If you updated a requirement structure from an RM tool and you have to undo it, you can select the version and press the button Delete. 2.13 Split Requirement Structures Since huge manual requirement structures (> 10000 requirements on first level) are uncomfortable to handle (long loading periods for editing and assigning), the split feature allows to move specific requirements to a new requirement structure. Assignments to test cases are not affected by this process, i.e. a newly created requirement structure is automatically assigned to all affected projects and test structures. Only first-level requirements are moved, i.e. if a first-level requirement is moved, it is moved to the new requirement structure with its entire sub-tree (see example below). Splitting is done over all version of a requirement structure. The new requirement structure will have exactly the same version tree, as its source. Via Requirement Structure – Split... the split dialog is opened (the menu is only enabled, if the root node is selected). Figure 64 - Split dialog A mask (wildcards * and ? are supported) for requirements to be moved to the new requirement structure and the name for the new requirement structure can be specified. When pressing OK, the move process is started. Before moving requirements, the uniqueness of the requirement structure name and locks in affected test structures are checked (no locks may exist). If the checks pass, the requirements will be moved, otherwise a corresponding message is displayed and the process is terminated. Page 47 User Manual Edition March 2013 TEMPPO V6.0 Description of Use The following example illustrates the splitting process: Requirement structure before splitting: Requirement Structure NAV_001 NAV_002 NAVIGATION_003 MAP_001 DestInput_001 MAP_002 Navi_004 RADIO_001 RADIO_002 Mask for requirements to move: NAV* Name of new requirement structure: NAV Requirements Case sensitive: no Requirement structures after splitting: Requirement Structure RADIO_001 RADIO_002 NAV Requirements NAV_001 NAV_002 NAVIGATION_003 MAP_001 DestInput_001 MAP_002 Navi_004 2.14 Filter Users can see their requirement structures in a filtered way by creating and selecting filters i.e. for the purpose of hiding requirements that are not of interest. All fixed and user-defined attributes can be used to define a filter criterion. Filters are stored to the database and are user specific not global. Set filters won’t remain associated to a requirement structure after closing and reopening TEMPPO Requirement Manager. 2.14.1 Predefined filter Like TEMPPO Test Manager, TEMPPO Requirement Manager provides a predefined filter. The filter “Selectable requirements” is used for requirement structures imported and updated from 3rd party tools. For the reason of already filtered requirement structures by a view, some requirements are displayed in gray Page 48 User Manual Edition March 2013 TEMPPO V6.0 Description of Use color, which means that they are not selectable. They are displayed in the requirement structure, because they could contain selectable requirements. If you set the filter “Selectable requirements” all grayed requirements are not displayed. Figure 65 - Predefined filter 2.14.2 Create Filter You can create a new filter using menu Edit > Filter or using the Filter- Combo box -Edit entries… in the requirement structure. Page 49 User Manual Edition March 2013 TEMPPO V6.0 Description of Use Figure 66 – Create new filter If you click the “Create new filter” – button, Figure 66 is shown. The name of the filter is set by default with New Filter and the filter conditions can be entered. The checkbox “Hide empty subtrees” is not available in TEMPPO Requirement Manager. After creation of a new requirement it may happen that it disappears after saving, if it doesn’t match to a set filter. Figure 67 - Filter Properties Page 50 User Manual Edition March 2013 TEMPPO V6.0 Description of Use Pressing the Save-Button, the new filter is saved to the database, if a new name was entered. Otherwise the information window comes up: After saving the new filter, Figure 67 is closed and Figure 66 is shown. The new filter is inserted and selected in the list box, the filter criterion is displayed read only and the table visible / hidden requirements is updated. 2.14.3 Change Filter You can change existing filters by pressing the edit filter button. This button is only enabled when a filter is selected that is not the empty filter (No filter). Figure 68 - Open item properties Depending on the selected filter, the conditions are displayed. Filter name is read only, filter conditions can be changed. (See Figure 67) If the filter is in use and was changed, the changes are then applied to the requirement structure. Page 51 User Manual Edition March 2013 TEMPPO V6.0 Description of Use 2.14.4 Delete Filter You can delete an existing filter by pressing the delete filter -button. This button is only enabled if the selected filter is not the empty filter (No filter). After activating the Delete item -button, the reconfirmation window comes up: If pressing Yes, the information window comes up and the filter is deleted. After deleting a filter, the No filter is highlighted in the list box. 2.14.5 Select Filter TEMPPO Requirement Manager offers a fast selection mode: with the combo box in the toolbar possible filters can be set without opening the filter window. 2.14.6 Show Filter If no filter was set before opening the filter window, the list box entry No filter is highlighted. If a filter is set before opening the filter window, the corresponding entry is highlighted. When clicking on an entry in the list box, the item is highlighted and its impact on the requirement structure is displayed. Page 52 User Manual Edition March 2013 TEMPPO V6.0 Description of Use Figure 69 - Show Filter When clicking Apply, Figure 69 is closed, the selected filter is set in the activated window and the combo box in the toolbar shows the current filter. When clicking Cancel, Figure 69 is closed and the previous set filter remains unchanged. 2.14.7 Define the filter criterion The values of the following attributes can be used as described in Table 2: Planned coverage, requirement name, requirement short description, requirement ID, owner, updater, created, updated, UDAs and selectable (if a requirement is in a view). First of all you have to choose an attribute and an operator (=, !=, IN, NOT IN). If IN or NOT IN is selected, the combo-box value changes to a text field together with the button “…”. Them you can enter A string with a wild card or Press the button “…” for selecting several values. After pressing the button “…” Figure 70 is displayed and the attribute values are selected by moving them to the right. Pressing OK applies the selection to the filter window. The selected values are displayed separated by a comma. Now the user can edit this line. Page 53 User Manual Edition March 2013 TEMPPO V6.0 Description of Use No blank is allowed, only a comma! Figure 70 - Selecting attribute values for IN, NOT IN Attributes Operato r =, != Operator IN, NOT IN Operator <,>, <=, >= Value edita ble1 Valu e set2 Value proje ct assig ned Wild card allowed Planned coverage Y N Y N N - N Requirem ent name Y N N Y N - Y Requirem ent short descriptio n Y N N Y N - Y Requirem ent ID Y N N N N - Y Owner Y Y N Y Y Y N Updater Y Y N Y Y Y N Created, Updated Y N Y N N - - Requirem ent attributes Y Y N Y Y Y Y 3 1 Yes, if operators IN, NOT IN are selected Yes, if a set of values can be selected 3 Yes, if editable is Yes. 2 Page 54 User Manual Edition March 2013 TEMPPO V6.0 Description of Use Table 2- Attributes meanings The user can write free text that may also contain wildcards like “*” any number of characters “?” any single character Figure 71 - Filter criterion 2.14.8 Export filter It is possible to export filters to XML and import them again. When either activating the menu Filter->Export or pressing the button “Export selected filters to XML” Figure 72 is displayed and the filter can be saved. Page 55 User Manual Edition March 2013 TEMPPO V6.0 Description of Use Figure 72 - Export dialog 2.14.9 Import filter It is possible to import filters from XML either directly by pressing the button “Import filter from XML”. A filter import is rejected, if the filter contains specific requirement attributes that are not assigned to the requirement structure the filter is imported to. An error message is displayed where the names of the NOT imported filters are listed. The filter contents are checked and the import is only successful, if the attributes match the ones of the selected requirement structure. If the filter is not syntactically correct, the import is cancelled and the user gets an information message. 2.15 Evaluation 2.15.1 Analysis The analysis feature is used to give you a quick overview about your requirement structure. You create an analysis chart by selecting the node to analyze and activating Evaluation > Analyse. In the Analysis dialog you can set values for X – Axis and group values on the Y - Axis. The following charts for displaying the data are possible: Horizontal bar chart Horizontal bar chart (3D) Line chart Stacked horizontal bar chart Stacked horizontal bar chart (3D) Stacked vertical bar chart Stacked vertical bar chart (3D) Vertical bar chart Vertical bar chart (3D) For x-axis you can select Created Owner Planned Coverage Updated Updator Self defined requirement attributes There is also the possibility to save the chart as .jpg or .png file by pressing the button Save As… Figure 73 shows an analysis from a requirement structure, displaying the number requirement for a requirement attribute “Requirement_state”. Page 56 User Manual Edition March 2013 TEMPPO V6.0 Description of Use Figure 73 - Requirement structure analysis, x-axis = requirement attribute Figure 74 - Requirement analysis, x-axis = Updated Page 57 User Manual Edition March 2013 TEMPPO V6.0 Description of Use 2.15.2 Progress Chart The progress chart feature is used to give you a quick overview about deltas of requirement structure versions. You can view the progress from one to the next or more versions. You create a progress chart by selecting the root node and activating Evaluation > Progress Chart. By selecting the button Select Versions Figure 75 is displayed where you have to select at least 2 versions to be compared. Figure 75 - Select versions After pressing OK the window is closed and Figure 76 is shown. Figure 76 - Requirement creation progress Page 58 User Manual Edition March 2013 TEMPPO V6.0 Description of Use 2.16 Multi user ability Multi user ability establishes an environment for working with several users in a parallel way on the same requirement structure. It prevents unintentional overriding of changes, manages the synchronization between viewed and stored data and avoids inconsistency, if multiple users work on the same database. Moreover it provides features to facilitate the collaboration in a team working on the same TEMPPO requirement structure. Chapter 2.16.1 describes the behavior when locking and editing an item. On the other hand chapter 2.16.3 illustrates the 2 possibilities of refreshing (manual, automatic). Multi user ability is not supported for MS Access databases. 2.16.1 Lock modes TEMPPO provides 2 possibilities of locking items (requirements): Manual lock Automatic lock If you are working with manual lock mode, you always have to press the button “Lock” before having the exclusive right to work on that item. On the other hand you simply have to select an item and it is automatically locked, if another user does not lock it. This feature can be configured when activating the menu Windows -> Settings. The following chapters are describing the locking in manual mode! 2.16.2 Edit Figure 77 - Lock state Page 59 User Manual Edition March 2013 TEMPPO V6.0 Description of Use After locking the requirement you can edit the selected requirement. 2.16.2.1 Show a lock state The locking state of the item is shown by: Special padlock icon (green: locked by the current user, yellow: locked by another user). Tool Tip “Locked by <user>” Figure 78 - Lock button 2.16.2.2 Change an item Before you can change an item, you have to press the button Lock (see Figure 78). If the locking was successful, the item can exclusively be changed by you. The lock is automatically released if you: select another item apply / discard changes If locking wasn’t successful after pressing the Lock button, you will get a dialog. If the reason was that another user has deleted the item in the meantime, the item is removed from the tree and Figure 79 is shown. Reload the whole requirement structure. Figure 79 - Item not found information Page 60 User Manual Edition March 2013 2.16.2.3 TEMPPO V6.0 Description of Use Delete an item If you try to delete an item, which itself or any of its children is locked, you will get a dialog (see Figure 80) and you cannot perform this deletion. Moreover the item and all children are refreshed, so you can see which one is locked. Figure 80 - Child element locked 2.16.2.4 Find invalid locks On starting and quitting TEMPPO Requirement Manager, the whole database is checked for any locks which where set by you. Normally there should be no one left. But if there is one (see Figure 81), this is an invalid lock, which can have two reasons: Your last TEMPPO session terminated abnormally (crash etc.). If so, you should confirm the dialog by pressing “Yes” to remove all invalid locks. Figure 81 – Locks found in the database on starting/quitting TEMPPO Requirement Manager 2.16.3 Refresh 2.16.3.1 Refresh manually 2.16.3.1.1 Reloading the whole requirement structure You can reload the whole requirement structure by pressing the reload button on top of the tree (see Figure 82). This has the same effect as manually reopening the requirement structure. Page 61 User Manual Edition March 2013 TEMPPO V6.0 Description of Use Figure 82 - Button Reload for reloading the whole tree 2.16.3.1.2 Refresh recursively You can refresh an item including all sub-items by selecting the “refresh recursive” function in the context menu (see Figure 83). Attention: The selected item with all sub-items will be completely (re)loaded from the database, so it may take a long time. Figure 83 - Refresh recursive menu (also in the context menu) 2.16.3.1.3 Refresh on certain user actions An item is automatically refreshed (including its lock state and the presence of all direct children) after the following actions: selecting in the tree view Page 62 User Manual Edition March 2013 TEMPPO V6.0 Description of Use pressing the Lock button If these actions are done on an actually deleted item, the following dialog is shown and the item is removed from the view. Figure 84 - Deleted item information (after trying to select or to lock) 2.17 General principles 2.17.1 Multi-selection TEMPPO offers a feature for multi select requirements. The multi-selection mode can be used for: Deleting requirements Cutting requirements Copying requirements Assigning attributes to requirements When the multi-selection mode is activated the items aren’t locked automatically. They are only locked during the time for saving. If items are locked by other users the changes are not applied to these items. They are displayed in a list. The multi-selection mode is activated when more than one item is selected. If a user selects at least 2 items, the right side (=detailed view) is completely empty. The user can only activate the multi-selection mode when he has the right. A multi-selection can be done by using different keys: Select all For selecting all, press <Ctrl> and <A>. The user can also activate the context menu Select All (Figure 85) or the menu item Edit Select All. Page 63 User Manual Edition March 2013 TEMPPO V6.0 Description of Use Figure 85 – context menu – “Select All” Requirement can be selected with <Ctrl> or with <Shift>. After pressing “Select all” all sub trees of the requirements are marked. Figure 86 - Multi selected items By clicking context menu all possible actions are provided to the user. Figure 87 - Context menu For selected items attributes can be assigned or deleted. Page 64 User Manual Edition March 2013 TEMPPO V6.0 Description of Use Figure 88 - Assigning attributes The color “grey” means that the attribute value is only assigned to a subset of the selected requirements. On right mouse click the menu “Assign to all requirements” can be called. 2.17.2 Hyperlinks and Uploads Generally you can mark text as Hyperlink to the web Hyperlink to a file Hyperlink to an upload 2.17.2.1 Create hyperlinks Hyperlinks to the web, to the file system and to upload can be created for the text field Description (requirement structure, requirement). Figure 89 - Menu hyperlink For creating a hyperlink it is necessary to select at least one character in editable text fields and activate the context sensitive menu Hyperlink (see Figure 89), which opens the Hyperlink window (see Figure 90). Page 65 User Manual Edition March 2013 TEMPPO V6.0 Description of Use Figure 90 - Hyperlink to the web You have the possibility to enter a link to the web (specified by an HTTP address) or to the file system (see Figure 91). Figure 91 - Hyperlink to the file system In case of changing drive letters, moving file shares and other similar problems it may be better to upload the files to the database. For referencing an upload you have 2 possibilities: you can upload a new file or use an existing one and create a reference on it. The philosophy of this concept is to upload a file only once and create more references on it (if necessary). Figure 92 - Upload properties Upload a new file: You have to activate the Upload button to open Figure 92 for specifying a special name and description. Additionally owner, creation date, size, the number of references and the type are displayed. Page 66 User Manual Edition March 2013 TEMPPO V6.0 Description of Use Figure 93 - Hyperlink database Use an existing upload: You have to activate tab database and press button create reference to uploaded file to open Figure 94, which shows all uploads of the database. For creating a new reference on an existing upload you simply have to select it and click OK in Figure 94 and Figure 93. Figure 94 - Uploads The upload limit of a file is set to 0.5 MB by default and is specified in the file admin.properties (dbsettings.upload.limit=500000). But it is only information. Of course, you can upload files that exceed that limit and/or change this value in admin.properties. Figure 95 – File size exceeds the upload limit Page 67 User Manual Edition March 2013 2.17.2.2 TEMPPO V6.0 Description of Use Edit hyperlinks If you select a hyperlink (web, file system, upload) and activate the context sensitive menu (mouse over hyperlink) and choose the menu hyperlink, Figure 91 is shown, where you can change the link into the web link into the file system upload 2.17.2.3 Remove hyperlinks If you select a hyperlink (web, file system, upload) and activate the context sensitive menu (mouse over hyperlink) and choose the menu remove hyperlink, the hyperlink is removed. But take care that an upload remains in the database. To remove obsolete uploads, see user manual (administrator) chapter 5.5.5 2.17.2.4 Download If you select a hyperlink (upload) and activate the context sensitive menu (mouse over hyperlink) and choose the menu download, Figure 96 is shown to select a directory for the file download. Figure 96 - Destination selection 2.17.3 Applying / Discarding When working with requirement structures, you can save your changes within requirements using the button Apply. By pressing button Discard, your changes will be undone after a confirmation message. The buttons are only enabled, if the selected node has been changed since it was loaded. Page 68 User Manual Edition March 2013 TEMPPO V6.0 Description of Use Figure 97 - Apply / Discard 2.17.4 Find and Replace TEMPPO offers a find and replace mechanism. With the menu item Edit > Find and Replace Figure 98 is shown. Figure 98 – Find and Replace A requirement can be found via searching for its user defined ID, name, short description or description. The search criteria can be specified using the wildcards * (0..n arbitrary characters) or/and ? (Exactly one arbitrary character) and is case sensitive. The replace function searches for the requirement and then the searched part will be replaced to the entered name. The replace function is available for name, short description and description. Example: You want to change the name of the requirements. The part “Requirement” should be changed to the German name “Anforderung”, so you select “Name” in Page 69 User Manual Edition March 2013 TEMPPO V6.0 Description of Use Search in: and write in the text field for: “Requirement”. In the Replace with – text field you write “Anforderung”. A searching direction can be chosen, too. The searching algorithm starts from the selected node in the tree. Is the tree root selected, the whole tree is searched whatever direction is selected. Page 70 User Manual Edition March 2013 2.17.4.1 TEMPPO V6.0 Description of Use Find There are two possibilities for finding requirements: Find Next: With clicking Find Next the first requirement is searched and selected in the tree. With the next click, the next one is searched. If there is no element (anymore) a message is shown (see Figure 99). Figure 99 – No more occurrences found List occurrences: With the button List occurrences the searching result is shown in a list (see Figure 100). When clicking a requirement in the list, it’s selected in the tree. Figure 100 – List occurrences 2.17.4.2 Replace There are also two possibilities for replacing: Replace: At first a requirement is searched and selected. The user has to click again for replacing the field and then searching the next one. If the requirement is locked, the requirement isn’t changed, i.e. the next requirement is searched. Replace All: The selected field of all requirements is changed which contains the text. After replacing all, a message is shown (see Figure 101) with the number of replaced requirements and number of requirements which couldn’t be replaced, because of locks, etc. Page 71 User Manual Edition March 2013 TEMPPO V6.0 Description of Use Figure 101 – Replace result The replace – functionality is disabled, if the user has not the right for changing requirements. 2.17.5 Settings TEMPPO differs between global and application specific settings. 2.17.5.1 Global Settings For global settings please refer to /1/ - chapter Settings 2.17.5.2 Specific Settings Specific settings e.g. tree display, etc. can be configured in the settings dialog in TEMPPO Requirement Manager. This dialog is opened via Windows > Settings. On the left side, there is a tree where the user can select the setting group which should be configured. Above the tree there is a “fast search” field for more efficient navigation. Enter a (sub)string a all matching settings are shown. Figure 102 - Settings - Fast search On the right side all single settings can be edited (see Figure 103). Page 72 User Manual Edition March 2013 TEMPPO V6.0 Description of Use Figure 103 - Settings Via button Restore Defaults all settings of the selected setting group are restored to the default values. Following settings can be configured in TEMPPO Requirement Manager: User Interface o Tree o Newsboard Database settings Requirement Management o IBM Telelogic DOORS o IBM Rational RequisitePro For user interface, database and notification settings please refer to /1/ - chapter Settings. 2.17.5.3 Requirement Management 2.17.5.3.1 IBM Telelogic DOORS The user, password, path to the local DOORS and a parameter can be edited. Page 73 User Manual Edition March 2013 TEMPPO V6.0 Description of Use Figure 104 - Settings: Telelogic DOORS User, password and DOORS path are needed for the start of connection to the DOORS server (see chapter 2.5.1). With the field Parameters you specify e.g. the database connection as DOORS command line parameter: Switch -data Parameter port@server Description Specifies which DOORS database to use. The parameter specifies the port that the server is using and the name of the server computer (for example, 36677@myserver). Note that a DOORS 8.2 client can't use a pre-8.0 database server. The path to DXL defines, where TEMPPO copies DXL scripts needed for the DOORS communication. 2.17.5.3.2 IBM Rational RequisitePro The version of RequisitePro can be changed here. Page 74 User Manual Edition March 2013 TEMPPO V6.0 Description of Use Figure 105 – Settings: RequisitePro Use Case “RequisitePro” is already installed If “RequisitePro” is already installed and TEMPPO is just installed, TEMPPO gets the RequisitePro version from MS Windows registry and stores it. In case of a not supported RequisitePro version, the last supported one will be stored. Use Case “TEMPPO” is installed and “RequisitePro” is updated If you update “RequisitePro” to a new version, you have to change the version in settings dialog (see Figure 105). Afterwards all TEMPPO applications have to be closed and a batch file (changeReqProVersion.bat) has to be executed. Page 75 User Manual Edition March 2013 3 TEMPPO V6.0 Literature Literature /1/ User Manual TEMPPO user manual March 2012 Page 76 User Manual Edition March 2013 4 TEMPPO V6.0 Abbreviations Abbreviations DB Database HW Hardware RM Requirement Management GUI Graphical User Interface SW Software DSN Data Source Name ODBC Open Database Connectivity UAI Universal Automation Interface Page 77 User Manual Edition March 2013 5 TEMPPO V6.0 Appendix Appendix 5.1 DTD-Schema for XMLImport (Requirement Structure) See XML directory of TEMPPO’s installation directory. Page 78 User Manual Edition March 2013 6 TEMPPO V6.0 Index Index Lock 59 A Apply 68 N Newsboard 41 C CSV Import 11 Import example 13 Update 31 D Discard 68 DOORS Attributes 17 Baseline 16 Import 15 Module 16 Requirement ID mapping 17 Update 27 View 16 E Evaluation Analysis 56 Progress chart 58 F Filter 48 Change 51 Create 49 Define criterion 53 Delete 52 Export 55 Import 56 Select 52 Show 52 Find and Replace 69 Find 71 Replace 71 H Hyperlink Create 65 Download 68 Edit 68 Remove 68 Hyperlinks 65 M R Refresh Recursively 62 Whole requirement structure 61 Requirement Edit 14 Link 40 New 8 Tab "Attributes" 9 Tab "General" 9 Requirement structure Assign attribute 38 Import 14 Split 47 Requirement Structure 5 Assign 39 Check in 43 Create 6 Export XML 37 Import from DOORS 15 Import XML 24 Open 7 Update 27 RequisitePro Import 21 Project 23 Update 30 View 23 T Task List 36 Test Structure apply requirement updates 32 V Version 43 Delete 47 Merge 47 View 44 View 44 X XML Import 24 Update 32 Multi user 59 Page 79