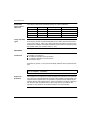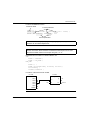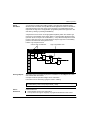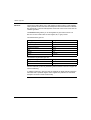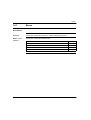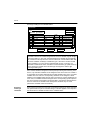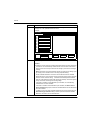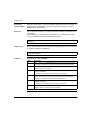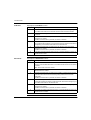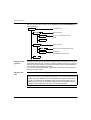
1
Concept
User Manual
Volume 2
33001604.01
840 USE 493 00 eng Version 2.5 - SR2
II
Table of Contents
The chapters marked gray are not included in this
volume.
About the book . . . . . . . . . . . . . . . . . . . . . . . . . . . . . . . . . . . . . XXI
Chapter 1
General description of Concept . . . . . . . . . . . . . . . . . . . . . . . . . 1
Chapter 2
New Performance Attributes of Concept 2.5 in
Comparison with Concept 2.2 . . . . . . . . . . . . . . . . . . . . . . . . . . 19
Chapter 3
Project structure . . . . . . . . . . . . . . . . . . . . . . . . . . . . . . . . . . . . . 29
Chapter 4
Creating a Project . . . . . . . . . . . . . . . . . . . . . . . . . . . . . . . . . . . . 43
Chapter 5
PLC configuration. . . . . . . . . . . . . . . . . . . . . . . . . . . . . . . . . . . . 63
Chapter 6
Main structure of PLC Memory and optimization
of memory . . . . . . . . . . . . . . . . . . . . . . . . . . . . . . . . . . . . . . . . . 107
Chapter 7
Function Block language FBD. . . . . . . . . . . . . . . . . . . . . . . . . 165
Chapter 8
Ladder Diagram LD. . . . . . . . . . . . . . . . . . . . . . . . . . . . . . . . . . 187
Chapter 9
Sequence language SFC . . . . . . . . . . . . . . . . . . . . . . . . . . . . . 217
Chapter 10
Instruction list IL. . . . . . . . . . . . . . . . . . . . . . . . . . . . . . . . . . . . 261
Chapter 11
Structured text ST. . . . . . . . . . . . . . . . . . . . . . . . . . . . . . . . . . . 321
11.1
11.2
11.3
At a Glance . . . . . . . . . . . . . . . . . . . . . . . . . . . . . . . . . . . . . . . . . . . . . . . . . . . .
General information about structured Text ST . . . . . . . . . . . . . . . . . . . . . . . . .
General Information about the ST Structured Text . . . . . . . . . . . . . . . . . . . . . .
Expressions. . . . . . . . . . . . . . . . . . . . . . . . . . . . . . . . . . . . . . . . . . . . . . . . . . . .
At a Glance . . . . . . . . . . . . . . . . . . . . . . . . . . . . . . . . . . . . . . . . . . . . . . . . . . . .
Operands. . . . . . . . . . . . . . . . . . . . . . . . . . . . . . . . . . . . . . . . . . . . . . . . . . . . . .
Operators . . . . . . . . . . . . . . . . . . . . . . . . . . . . . . . . . . . . . . . . . . . . . . . . . . . . .
Operators of the programming language of structured ST text . . . . . . . . . . . . .
321
323
323
324
324
325
326
329
III
11.4
11.5
11.6
IV
At a Glance . . . . . . . . . . . . . . . . . . . . . . . . . . . . . . . . . . . . . . . . . . . . . . . . . . . . 329
Use of parentheses "()" . . . . . . . . . . . . . . . . . . . . . . . . . . . . . . . . . . . . . . . . . . . 330
FUNCNAME. . . . . . . . . . . . . . . . . . . . . . . . . . . . . . . . . . . . . . . . . . . . . . . . . . . . 330
Exponentiation (**) . . . . . . . . . . . . . . . . . . . . . . . . . . . . . . . . . . . . . . . . . . . . . . . 330
Negation (-) . . . . . . . . . . . . . . . . . . . . . . . . . . . . . . . . . . . . . . . . . . . . . . . . . . . . 331
Complement formation (NOT) . . . . . . . . . . . . . . . . . . . . . . . . . . . . . . . . . . . . . . 331
Multiplication (*) . . . . . . . . . . . . . . . . . . . . . . . . . . . . . . . . . . . . . . . . . . . . . . . . . 331
Division (/) . . . . . . . . . . . . . . . . . . . . . . . . . . . . . . . . . . . . . . . . . . . . . . . . . . . . . 332
Modulo (MOD) . . . . . . . . . . . . . . . . . . . . . . . . . . . . . . . . . . . . . . . . . . . . . . . . . . 332
Addition (+) . . . . . . . . . . . . . . . . . . . . . . . . . . . . . . . . . . . . . . . . . . . . . . . . . . . . 332
Subtraction (-) . . . . . . . . . . . . . . . . . . . . . . . . . . . . . . . . . . . . . . . . . . . . . . . . . . 333
Comparison on "greater than" (>) . . . . . . . . . . . . . . . . . . . . . . . . . . . . . . . . . . . 333
Comparison on "greater than/equal to" (>=) . . . . . . . . . . . . . . . . . . . . . . . . . . . 333
Comparison with "equal to" (=) . . . . . . . . . . . . . . . . . . . . . . . . . . . . . . . . . . . . . 333
Comparison with "not equal to" (<>) . . . . . . . . . . . . . . . . . . . . . . . . . . . . . . . . . 334
Comparison with "less than"(<) . . . . . . . . . . . . . . . . . . . . . . . . . . . . . . . . . . . . . 334
Comparison with "less than or equal to" (<=). . . . . . . . . . . . . . . . . . . . . . . . . . . 334
Boolean AND (AND or &). . . . . . . . . . . . . . . . . . . . . . . . . . . . . . . . . . . . . . . . . . 334
Boolean OR (OR). . . . . . . . . . . . . . . . . . . . . . . . . . . . . . . . . . . . . . . . . . . . . . . . 335
Boolean Exclusive OR (XOR) . . . . . . . . . . . . . . . . . . . . . . . . . . . . . . . . . . . . . . 335
Assign instructions . . . . . . . . . . . . . . . . . . . . . . . . . . . . . . . . . . . . . . . . . . . . . . . 336
At a Glance . . . . . . . . . . . . . . . . . . . . . . . . . . . . . . . . . . . . . . . . . . . . . . . . . . . . 336
Instructions. . . . . . . . . . . . . . . . . . . . . . . . . . . . . . . . . . . . . . . . . . . . . . . . . . . . . 337
Assignment . . . . . . . . . . . . . . . . . . . . . . . . . . . . . . . . . . . . . . . . . . . . . . . . . . . . 337
Declaration (VAR...END_VAR) . . . . . . . . . . . . . . . . . . . . . . . . . . . . . . . . . . . . . 338
IF...THEN...END_IF . . . . . . . . . . . . . . . . . . . . . . . . . . . . . . . . . . . . . . . . . . . . . . 340
ELSE . . . . . . . . . . . . . . . . . . . . . . . . . . . . . . . . . . . . . . . . . . . . . . . . . . . . . . . . . 341
ELSIF...THEN . . . . . . . . . . . . . . . . . . . . . . . . . . . . . . . . . . . . . . . . . . . . . . . . . . 342
CASE...OF...END_CASE. . . . . . . . . . . . . . . . . . . . . . . . . . . . . . . . . . . . . . . . . . 343
FOR...TO...BY...DO...END_FOR . . . . . . . . . . . . . . . . . . . . . . . . . . . . . . . . . . . . 344
WHILE...DO...END_WHILE . . . . . . . . . . . . . . . . . . . . . . . . . . . . . . . . . . . . . . . . 346
REPEAT...UNTIL...END_REPEAT . . . . . . . . . . . . . . . . . . . . . . . . . . . . . . . . . . 348
EXIT . . . . . . . . . . . . . . . . . . . . . . . . . . . . . . . . . . . . . . . . . . . . . . . . . . . . . . . . . . 349
Empty instruction . . . . . . . . . . . . . . . . . . . . . . . . . . . . . . . . . . . . . . . . . . . . . . . . 349
Commands. . . . . . . . . . . . . . . . . . . . . . . . . . . . . . . . . . . . . . . . . . . . . . . . . . . . . 349
Call up of functions, Function Blocks (EFBs) and
Derived Function Blocks (DFBs) . . . . . . . . . . . . . . . . . . . . . . . . . . . . . . . . . . . . 350
At a Glance . . . . . . . . . . . . . . . . . . . . . . . . . . . . . . . . . . . . . . . . . . . . . . . . . . . . 350
Function Block/DFB Invocation . . . . . . . . . . . . . . . . . . . . . . . . . . . . . . . . . . . . . 351
Function Invocation . . . . . . . . . . . . . . . . . . . . . . . . . . . . . . . . . . . . . . . . . . . . . . 354
Syntax check and code generation . . . . . . . . . . . . . . . . . . . . . . . . . . . . . . . . . . 356
At a Glance . . . . . . . . . . . . . . . . . . . . . . . . . . . . . . . . . . . . . . . . . . . . . . . . . . . . 356
Syntax Check. . . . . . . . . . . . . . . . . . . . . . . . . . . . . . . . . . . . . . . . . . . . . . . . . . . 357
Code generation . . . . . . . . . . . . . . . . . . . . . . . . . . . . . . . . . . . . . . . . . . . . . . . . 358
11.7
11.8
Chapter 12
12.1
12.2
12.3
12.4
12.5
Chapter 13
13.1
13.2
Online functions of the ST programming language . . . . . . . . . . . . . . . . . . . . . .
Online functions. . . . . . . . . . . . . . . . . . . . . . . . . . . . . . . . . . . . . . . . . . . . . . . . .
Creating a program with the structured ST text. . . . . . . . . . . . . . . . . . . . . . . . .
Creating a program in structured ST text . . . . . . . . . . . . . . . . . . . . . . . . . . . . .
359
359
360
360
Ladder Logic 984 . . . . . . . . . . . . . . . . . . . . . . . . . . . . . . . . . . . 363
At a Glance . . . . . . . . . . . . . . . . . . . . . . . . . . . . . . . . . . . . . . . . . . . . . . . . . . . .
General about Ladder Logic 984. . . . . . . . . . . . . . . . . . . . . . . . . . . . . . . . . . . .
Working with Ladder Logic 984 . . . . . . . . . . . . . . . . . . . . . . . . . . . . . . . . . . . . .
At a Glance . . . . . . . . . . . . . . . . . . . . . . . . . . . . . . . . . . . . . . . . . . . . . . . . . . . .
Entering and Editing Logic Objects . . . . . . . . . . . . . . . . . . . . . . . . . . . . . . . . . .
Entering and Editing Variables . . . . . . . . . . . . . . . . . . . . . . . . . . . . . . . . . . . . .
Ladder and Network Editing . . . . . . . . . . . . . . . . . . . . . . . . . . . . . . . . . . . . . . .
Reference Zoom and DX Zoom . . . . . . . . . . . . . . . . . . . . . . . . . . . . . . . . . . . .
Search and Replace . . . . . . . . . . . . . . . . . . . . . . . . . . . . . . . . . . . . . . . . . . . . .
Subroutines . . . . . . . . . . . . . . . . . . . . . . . . . . . . . . . . . . . . . . . . . . . . . . . . . . . .
Equation Network Editor . . . . . . . . . . . . . . . . . . . . . . . . . . . . . . . . . . . . . . . . . .
At a Glance . . . . . . . . . . . . . . . . . . . . . . . . . . . . . . . . . . . . . . . . . . . . . . . . . . . .
Introduction . . . . . . . . . . . . . . . . . . . . . . . . . . . . . . . . . . . . . . . . . . . . . . . . . . . .
Equation Editing . . . . . . . . . . . . . . . . . . . . . . . . . . . . . . . . . . . . . . . . . . . . . . . .
Syntax and Semantics. . . . . . . . . . . . . . . . . . . . . . . . . . . . . . . . . . . . . . . . . . . .
LL984 Programming Modes . . . . . . . . . . . . . . . . . . . . . . . . . . . . . . . . . . . . . . .
363
365
367
367
368
370
371
373
375
376
378
378
379
381
383
387
DFBs (Derived Function Blocks). . . . . . . . . . . . . . . . . . . . . . . 389
At a Glance . . . . . . . . . . . . . . . . . . . . . . . . . . . . . . . . . . . . . . . . . . . . . . . . . . . .
DFBs (Derived Function Blocks) . . . . . . . . . . . . . . . . . . . . . . . . . . . . . . . . . . . .
At a Glance . . . . . . . . . . . . . . . . . . . . . . . . . . . . . . . . . . . . . . . . . . . . . . . . . . . .
General information about DFBs (Derived Function Blocks). . . . . . . . . . . . . . .
Global / Local DFBs . . . . . . . . . . . . . . . . . . . . . . . . . . . . . . . . . . . . . . . . . . . . .
Use of variables in DFBs. . . . . . . . . . . . . . . . . . . . . . . . . . . . . . . . . . . . . . . . . .
Combined Input/Output Variables (VARINOUT Variables) . . . . . . . . . . . . . . . .
Creating Context Sensitive Help (Online Help) for DFBs . . . . . . . . . . . . . . . . .
Programming and calling up a DFB . . . . . . . . . . . . . . . . . . . . . . . . . . . . . . . . .
At a Glance . . . . . . . . . . . . . . . . . . . . . . . . . . . . . . . . . . . . . . . . . . . . . . . . . . . .
Creating the DFB. . . . . . . . . . . . . . . . . . . . . . . . . . . . . . . . . . . . . . . . . . . . . . . .
Creating the Logic in FBD Function Block Language . . . . . . . . . . . . . . . . . . . .
Creating the Logic in LD Ladder Diagram . . . . . . . . . . . . . . . . . . . . . . . . . . . . .
Creating the Logic in IL Instruction List . . . . . . . . . . . . . . . . . . . . . . . . . . . . . . .
Creating the Logic in ST Structured Text . . . . . . . . . . . . . . . . . . . . . . . . . . . . .
Calling up a DFB in the FBD Function Block dialog . . . . . . . . . . . . . . . . . . . . .
Calling up a DFB in Ladder Diagram LD . . . . . . . . . . . . . . . . . . . . . . . . . . . . . .
Calling up a DFB in the IL instruction list. . . . . . . . . . . . . . . . . . . . . . . . . . . . . .
Calling up a DFB in structured text ST . . . . . . . . . . . . . . . . . . . . . . . . . . . . . . .
389
391
391
392
394
396
397
403
405
405
407
408
411
414
416
418
420
422
423
V
Chapter 14
14.1
14.2
Chapter 15
Macros . . . . . . . . . . . . . . . . . . . . . . . . . . . . . . . . . . . . . . . . . . . 425
At a Glance . . . . . . . . . . . . . . . . . . . . . . . . . . . . . . . . . . . . . . . . . . . . . . . . . . . . 425
Macro. . . . . . . . . . . . . . . . . . . . . . . . . . . . . . . . . . . . . . . . . . . . . . . . . . . . . . . . . 427
At a Glance . . . . . . . . . . . . . . . . . . . . . . . . . . . . . . . . . . . . . . . . . . . . . . . . . . . . 427
Macros: general . . . . . . . . . . . . . . . . . . . . . . . . . . . . . . . . . . . . . . . . . . . . . . . . . 428
Global / Local Macros . . . . . . . . . . . . . . . . . . . . . . . . . . . . . . . . . . . . . . . . . . . . 429
Exchange marking . . . . . . . . . . . . . . . . . . . . . . . . . . . . . . . . . . . . . . . . . . . . . . . 430
Creating Context Sensitive Help (Online Help) for Macros . . . . . . . . . . . . . . . . 433
Programming and calling up a macro . . . . . . . . . . . . . . . . . . . . . . . . . . . . . . . . 435
At a Glance . . . . . . . . . . . . . . . . . . . . . . . . . . . . . . . . . . . . . . . . . . . . . . . . . . . . 435
Occupying the macro . . . . . . . . . . . . . . . . . . . . . . . . . . . . . . . . . . . . . . . . . . . . . 437
Creating the logic . . . . . . . . . . . . . . . . . . . . . . . . . . . . . . . . . . . . . . . . . . . . . . . . 438
Calling up a macro from an SFC section . . . . . . . . . . . . . . . . . . . . . . . . . . . . . . 441
Calling a macro from an FBD/LD section. . . . . . . . . . . . . . . . . . . . . . . . . . . . . . 444
Variables editor . . . . . . . . . . . . . . . . . . . . . . . . . . . . . . . . . . . . 447
At a Glance . . . . . . . . . . . . . . . . . . . . . . . . . . . . . . . . . . . . . . . . . . . . . . . . . . . . 447
General . . . . . . . . . . . . . . . . . . . . . . . . . . . . . . . . . . . . . . . . . . . . . . . . . . . . . . . 448
Declare variables . . . . . . . . . . . . . . . . . . . . . . . . . . . . . . . . . . . . . . . . . . . . . . . . 448
Searching and replacing variable names and addresses . . . . . . . . . . . . . . . . . 450
Searching and Pasting Variable Names and Addresses . . . . . . . . . . . . . . . . . . 454
Exporting located variables . . . . . . . . . . . . . . . . . . . . . . . . . . . . . . . . . . . . . . . . 457
Chapter 16
Project Browser . . . . . . . . . . . . . . . . . . . . . . . . . . . . . . . . . . . . 459
At a Glance . . . . . . . . . . . . . . . . . . . . . . . . . . . . . . . . . . . . . . . . . . . . . . . . . . . . 459
General information on the Project Browser . . . . . . . . . . . . . . . . . . . . . . . . . . . 460
Operating the Project Browser. . . . . . . . . . . . . . . . . . . . . . . . . . . . . . . . . . . . . . 462
Chapter 17
17.1
17.2
17.3
17.4
VI
Derived data types . . . . . . . . . . . . . . . . . . . . . . . . . . . . . . . . . . 465
At a Glance . . . . . . . . . . . . . . . . . . . . . . . . . . . . . . . . . . . . . . . . . . . . . . . . . . . . 465
General information on Derived Data Types . . . . . . . . . . . . . . . . . . . . . . . . . . . 467
At a Glance . . . . . . . . . . . . . . . . . . . . . . . . . . . . . . . . . . . . . . . . . . . . . . . . . . . . 467
Derived Data Types . . . . . . . . . . . . . . . . . . . . . . . . . . . . . . . . . . . . . . . . . . . . . . 468
Global / Local Derived Data Types . . . . . . . . . . . . . . . . . . . . . . . . . . . . . . . . . . 471
Syntax of the data type editor . . . . . . . . . . . . . . . . . . . . . . . . . . . . . . . . . . . . . . 473
At a Glance . . . . . . . . . . . . . . . . . . . . . . . . . . . . . . . . . . . . . . . . . . . . . . . . . . . . 473
Elements of the Derived Data Types . . . . . . . . . . . . . . . . . . . . . . . . . . . . . . . . . 474
Key Words . . . . . . . . . . . . . . . . . . . . . . . . . . . . . . . . . . . . . . . . . . . . . . . . . . . . . 475
Names of the derived datatypes . . . . . . . . . . . . . . . . . . . . . . . . . . . . . . . . . . . . 479
Separators . . . . . . . . . . . . . . . . . . . . . . . . . . . . . . . . . . . . . . . . . . . . . . . . . . . . . 480
Comments . . . . . . . . . . . . . . . . . . . . . . . . . . . . . . . . . . . . . . . . . . . . . . . . . . . . . 481
Derived data types using memory . . . . . . . . . . . . . . . . . . . . . . . . . . . . . . . . . . . 482
Use of Memory by Derived Data Types . . . . . . . . . . . . . . . . . . . . . . . . . . . . . . . 482
Calling derived data types . . . . . . . . . . . . . . . . . . . . . . . . . . . . . . . . . . . . . . . . . 484
Chapter 18
Reference data editor . . . . . . . . . . . . . . . . . . . . . . . . . . . . . . . . 487
At a Glance . . . . . . . . . . . . . . . . . . . . . . . . . . . . . . . . . . . . . . . . . . . . . . . . . . . .
General Information about the Reference Data Editor . . . . . . . . . . . . . . . . . . .
Converting RDE templates . . . . . . . . . . . . . . . . . . . . . . . . . . . . . . . . . . . . . . . .
Changing signal states of a Located variable . . . . . . . . . . . . . . . . . . . . . . . . . .
Cyclical setting of variables . . . . . . . . . . . . . . . . . . . . . . . . . . . . . . . . . . . . . . . .
Unconditional locking of a section . . . . . . . . . . . . . . . . . . . . . . . . . . . . . . . . . . .
Animation . . . . . . . . . . . . . . . . . . . . . . . . . . . . . . . . . . . . . . . . . . . . . . . . . . . . .
Replacing variable names. . . . . . . . . . . . . . . . . . . . . . . . . . . . . . . . . . . . . . . . .
Load reference data . . . . . . . . . . . . . . . . . . . . . . . . . . . . . . . . . . . . . . . . . . . . .
Chapter 19
19.1
19.2
19.3
19.4
Chapter 20
20.1
20.2
487
488
489
491
492
494
495
497
497
ASCII Message Editor. . . . . . . . . . . . . . . . . . . . . . . . . . . . . . . . 499
At a glance . . . . . . . . . . . . . . . . . . . . . . . . . . . . . . . . . . . . . . . . . . . . . . . . . . . .
ASCII Editor Dialog . . . . . . . . . . . . . . . . . . . . . . . . . . . . . . . . . . . . . . . . . . . . . .
At a glance . . . . . . . . . . . . . . . . . . . . . . . . . . . . . . . . . . . . . . . . . . . . . . . . . . . .
Generals to ASCII editor dialog. . . . . . . . . . . . . . . . . . . . . . . . . . . . . . . . . . . . .
Text . . . . . . . . . . . . . . . . . . . . . . . . . . . . . . . . . . . . . . . . . . . . . . . . . . . . . . . . . .
Variables . . . . . . . . . . . . . . . . . . . . . . . . . . . . . . . . . . . . . . . . . . . . . . . . . . . . . .
Control code . . . . . . . . . . . . . . . . . . . . . . . . . . . . . . . . . . . . . . . . . . . . . . . . . . .
Spaces . . . . . . . . . . . . . . . . . . . . . . . . . . . . . . . . . . . . . . . . . . . . . . . . . . . . . . .
Carriage Return. . . . . . . . . . . . . . . . . . . . . . . . . . . . . . . . . . . . . . . . . . . . . . . . .
Flush (buffer) . . . . . . . . . . . . . . . . . . . . . . . . . . . . . . . . . . . . . . . . . . . . . . . . . . .
Repeat. . . . . . . . . . . . . . . . . . . . . . . . . . . . . . . . . . . . . . . . . . . . . . . . . . . . . . . .
User Interface of ASCII Message Editor . . . . . . . . . . . . . . . . . . . . . . . . . . . . . .
At a glance . . . . . . . . . . . . . . . . . . . . . . . . . . . . . . . . . . . . . . . . . . . . . . . . . . . .
How to Use the ASCII Message Editor . . . . . . . . . . . . . . . . . . . . . . . . . . . . . . .
Message Number . . . . . . . . . . . . . . . . . . . . . . . . . . . . . . . . . . . . . . . . . . . . . . .
Message Text . . . . . . . . . . . . . . . . . . . . . . . . . . . . . . . . . . . . . . . . . . . . . . . . . .
Simulation Text . . . . . . . . . . . . . . . . . . . . . . . . . . . . . . . . . . . . . . . . . . . . . . . . .
How to Continue after Getting a Warning . . . . . . . . . . . . . . . . . . . . . . . . . . . . .
ASCII Editor in Offline/Combination/Direct Modes . . . . . . . . . . . . . . . . . . . . . .
ASCII Message Editor in Offline/Combination/Direct Modes . . . . . . . . . . . . . .
499
501
501
502
503
504
505
505
506
507
508
509
509
510
511
512
512
513
514
514
Online functions . . . . . . . . . . . . . . . . . . . . . . . . . . . . . . . . . . . . 515
At a Glance . . . . . . . . . . . . . . . . . . . . . . . . . . . . . . . . . . . . . . . . . . . . . . . . . . . .
General information about online functions. . . . . . . . . . . . . . . . . . . . . . . . . . . .
General information. . . . . . . . . . . . . . . . . . . . . . . . . . . . . . . . . . . . . . . . . . . . . .
Link PLC . . . . . . . . . . . . . . . . . . . . . . . . . . . . . . . . . . . . . . . . . . . . . . . . . . . . . .
At a Glance . . . . . . . . . . . . . . . . . . . . . . . . . . . . . . . . . . . . . . . . . . . . . . . . . . . .
General Information. . . . . . . . . . . . . . . . . . . . . . . . . . . . . . . . . . . . . . . . . . . . . .
Presettings for ONLINE operation. . . . . . . . . . . . . . . . . . . . . . . . . . . . . . . . . . .
Modbus Network Link . . . . . . . . . . . . . . . . . . . . . . . . . . . . . . . . . . . . . . . . . . . .
Modbus Plus Network . . . . . . . . . . . . . . . . . . . . . . . . . . . . . . . . . . . . . . . . . . . .
Modbus Plus Bridge . . . . . . . . . . . . . . . . . . . . . . . . . . . . . . . . . . . . . . . . . . . . .
TCP/IP-Network Link. . . . . . . . . . . . . . . . . . . . . . . . . . . . . . . . . . . . . . . . . . . . .
Connecting IEC Simulator (32 bit). . . . . . . . . . . . . . . . . . . . . . . . . . . . . . . . . . .
515
517
517
518
518
519
521
522
523
528
530
530
VII
20.3
20.4
20.5
20.6
20.7
Chapter 21
21.1
21.2
21.3
21.4
VIII
State of the PLC. . . . . . . . . . . . . . . . . . . . . . . . . . . . . . . . . . . . . . . . . . . . . . . . . 531
Setting up and controlling the PLC . . . . . . . . . . . . . . . . . . . . . . . . . . . . . . . . . . 532
At a Glance . . . . . . . . . . . . . . . . . . . . . . . . . . . . . . . . . . . . . . . . . . . . . . . . . . . . 532
General Information . . . . . . . . . . . . . . . . . . . . . . . . . . . . . . . . . . . . . . . . . . . . . . 533
Setting the Time for Constant Scans . . . . . . . . . . . . . . . . . . . . . . . . . . . . . . . . . 533
Single Sweeps . . . . . . . . . . . . . . . . . . . . . . . . . . . . . . . . . . . . . . . . . . . . . . . . . . 534
Deleting memory zones from the PLC . . . . . . . . . . . . . . . . . . . . . . . . . . . . . . . . 535
Speed optimized LL984-Processing . . . . . . . . . . . . . . . . . . . . . . . . . . . . . . . . . 535
Save To Flash . . . . . . . . . . . . . . . . . . . . . . . . . . . . . . . . . . . . . . . . . . . . . . . . . . 536
Reactivate flash save. . . . . . . . . . . . . . . . . . . . . . . . . . . . . . . . . . . . . . . . . . . . . 539
Set PLC Password. . . . . . . . . . . . . . . . . . . . . . . . . . . . . . . . . . . . . . . . . . . . . . . 539
Selecting Process information (status and memory) . . . . . . . . . . . . . . . . . . . . . 542
At a Glance . . . . . . . . . . . . . . . . . . . . . . . . . . . . . . . . . . . . . . . . . . . . . . . . . . . . 542
General information . . . . . . . . . . . . . . . . . . . . . . . . . . . . . . . . . . . . . . . . . . . . . . 543
PLC state . . . . . . . . . . . . . . . . . . . . . . . . . . . . . . . . . . . . . . . . . . . . . . . . . . . . . . 543
Memory Statistics. . . . . . . . . . . . . . . . . . . . . . . . . . . . . . . . . . . . . . . . . . . . . . . . 544
Loading a project . . . . . . . . . . . . . . . . . . . . . . . . . . . . . . . . . . . . . . . . . . . . . . . . 546
At a Glance . . . . . . . . . . . . . . . . . . . . . . . . . . . . . . . . . . . . . . . . . . . . . . . . . . . . 546
General information . . . . . . . . . . . . . . . . . . . . . . . . . . . . . . . . . . . . . . . . . . . . . . 547
Loading . . . . . . . . . . . . . . . . . . . . . . . . . . . . . . . . . . . . . . . . . . . . . . . . . . . . . . . 548
Download Changes . . . . . . . . . . . . . . . . . . . . . . . . . . . . . . . . . . . . . . . . . . . . . . 549
Uploading the PLC. . . . . . . . . . . . . . . . . . . . . . . . . . . . . . . . . . . . . . . . . . . . . . . 551
Upload Procedure . . . . . . . . . . . . . . . . . . . . . . . . . . . . . . . . . . . . . . . . . . . . . . . 553
Section animation . . . . . . . . . . . . . . . . . . . . . . . . . . . . . . . . . . . . . . . . . . . . . . . 555
At a Glance . . . . . . . . . . . . . . . . . . . . . . . . . . . . . . . . . . . . . . . . . . . . . . . . . . . . 555
IEC-Sections animation . . . . . . . . . . . . . . . . . . . . . . . . . . . . . . . . . . . . . . . . . . . 556
LL984 Programming Modes. . . . . . . . . . . . . . . . . . . . . . . . . . . . . . . . . . . . . . . . 557
Online Diagnosis . . . . . . . . . . . . . . . . . . . . . . . . . . . . . . . . . . . . . . . . . . . . . . . . 558
Diagnostics Viewer . . . . . . . . . . . . . . . . . . . . . . . . . . . . . . . . . . . . . . . . . . . . . . 558
Import/Export . . . . . . . . . . . . . . . . . . . . . . . . . . . . . . . . . . . . . . 561
At a Glance . . . . . . . . . . . . . . . . . . . . . . . . . . . . . . . . . . . . . . . . . . . . . . . . . . . . 561
General Information about Import/Export. . . . . . . . . . . . . . . . . . . . . . . . . . . . . . 563
Exporting sections . . . . . . . . . . . . . . . . . . . . . . . . . . . . . . . . . . . . . . . . . . . . . . . 564
Exporting variables and derived data types . . . . . . . . . . . . . . . . . . . . . . . . . . . . 567
Section import . . . . . . . . . . . . . . . . . . . . . . . . . . . . . . . . . . . . . . . . . . . . . . . . . . 568
At a Glance . . . . . . . . . . . . . . . . . . . . . . . . . . . . . . . . . . . . . . . . . . . . . . . . . . . . 568
Importing Sections . . . . . . . . . . . . . . . . . . . . . . . . . . . . . . . . . . . . . . . . . . . . . . . 569
Procedure for importing sections . . . . . . . . . . . . . . . . . . . . . . . . . . . . . . . . . . . . 572
Importing IL and ST Programs to FBD, SFC, IL or ST Sections
(with Conversion) . . . . . . . . . . . . . . . . . . . . . . . . . . . . . . . . . . . . . . . . . . . . . . . . 580
Importing (insert file) IL and ST programs into IL or ST sections. . . . . . . . . . . . 583
Procedure for "Copying" an IL section from an existing project into a
new project. . . . . . . . . . . . . . . . . . . . . . . . . . . . . . . . . . . . . . . . . . . . . . . . . . . . . 584
Procedure for converting FBD sections from an existing project into
IL sections of a new project. . . . . . . . . . . . . . . . . . . . . . . . . . . . . . . . . . . . . . . . 585
21.5
21.6
Chapter 22
22.1
22.2
Chapter 23
23.1
23.2
Chapter 24
Variables import . . . . . . . . . . . . . . . . . . . . . . . . . . . . . . . . . . . . . . . . . . . . . . . .
At a Glance . . . . . . . . . . . . . . . . . . . . . . . . . . . . . . . . . . . . . . . . . . . . . . . . . . . .
Importing Variables in "Text Delimited" Format. . . . . . . . . . . . . . . . . . . . . . . . .
Importing structured variables . . . . . . . . . . . . . . . . . . . . . . . . . . . . . . . . . . . . . .
Importing variables in Factory Link format . . . . . . . . . . . . . . . . . . . . . . . . . . . .
Import/Export of PLC Configuration . . . . . . . . . . . . . . . . . . . . . . . . . . . . . . . . .
Introduction . . . . . . . . . . . . . . . . . . . . . . . . . . . . . . . . . . . . . . . . . . . . . . . . . . . .
Import/Export of PLC Configuration using Concept . . . . . . . . . . . . . . . . . . . . .
Import/Export of PLC Configuration using Concept Converter . . . . . . . . . . . . .
Documentation and Archiving. . . . . . . . . . . . . . . . . . . . . . . . . 599
At a Glance . . . . . . . . . . . . . . . . . . . . . . . . . . . . . . . . . . . . . . . . . . . . . . . . . . . .
Documentation of projects, DFBs and macros . . . . . . . . . . . . . . . . . . . . . . . . .
At a Glance . . . . . . . . . . . . . . . . . . . . . . . . . . . . . . . . . . . . . . . . . . . . . . . . . . . .
Documentation contents . . . . . . . . . . . . . . . . . . . . . . . . . . . . . . . . . . . . . . . . . .
Documentation Layout . . . . . . . . . . . . . . . . . . . . . . . . . . . . . . . . . . . . . . . . . . .
Defining Page Breaks for Sections . . . . . . . . . . . . . . . . . . . . . . . . . . . . . . . . . .
Use of keywords . . . . . . . . . . . . . . . . . . . . . . . . . . . . . . . . . . . . . . . . . . . . . . . .
Managing projects, DFBs and macros . . . . . . . . . . . . . . . . . . . . . . . . . . . . . . .
At a Glance . . . . . . . . . . . . . . . . . . . . . . . . . . . . . . . . . . . . . . . . . . . . . . . . . . . .
Archiving projects, DFBs, EFBs and Data Type Files used . . . . . . . . . . . . . . .
Deleting projects, DFBs and macros. . . . . . . . . . . . . . . . . . . . . . . . . . . . . . . . .
599
601
601
602
603
605
608
609
609
610
611
Simulating a PLC . . . . . . . . . . . . . . . . . . . . . . . . . . . . . . . . . . . 613
Preview . . . . . . . . . . . . . . . . . . . . . . . . . . . . . . . . . . . . . . . . . . . . . . . . . . . . . . .
Simulating a PLC (16-bit simulator). . . . . . . . . . . . . . . . . . . . . . . . . . . . . . . . . .
Simulating a Controller . . . . . . . . . . . . . . . . . . . . . . . . . . . . . . . . . . . . . . . . . . .
Simulating a PLC (32-bit simulator). . . . . . . . . . . . . . . . . . . . . . . . . . . . . . . . . .
At a Glance . . . . . . . . . . . . . . . . . . . . . . . . . . . . . . . . . . . . . . . . . . . . . . . . . . . .
Concept-PLCSIM32 . . . . . . . . . . . . . . . . . . . . . . . . . . . . . . . . . . . . . . . . . . . . .
Simulating a PLC. . . . . . . . . . . . . . . . . . . . . . . . . . . . . . . . . . . . . . . . . . . . . . . .
Simulating a TCP/IP interface card in Windows 98. . . . . . . . . . . . . . . . . . . . . .
Simulating a TCP/IP interface card in Windows NT . . . . . . . . . . . . . . . . . . . . .
613
615
615
617
617
618
619
621
622
Concept Security . . . . . . . . . . . . . . . . . . . . . . . . . . . . . . . . . . . 625
At a Glance . . . . . . . . . . . . . . . . . . . . . . . . . . . . . . . . . . . . . . . . . . . . . . . . . . . .
General Description of Concept Security . . . . . . . . . . . . . . . . . . . . . . . . . . . . .
Access Rights . . . . . . . . . . . . . . . . . . . . . . . . . . . . . . . . . . . . . . . . . . . . . . . . . .
Changing Passwords . . . . . . . . . . . . . . . . . . . . . . . . . . . . . . . . . . . . . . . . . . . .
Activating Access Rights . . . . . . . . . . . . . . . . . . . . . . . . . . . . . . . . . . . . . . . . . .
Protecting Projects/DFBs . . . . . . . . . . . . . . . . . . . . . . . . . . . . . . . . . . . . . . . . .
Index
587
587
588
590
594
595
595
596
597
625
626
627
634
635
635
................................................i
The chapters marked gray are not included in this
volume.
IX
X
Appendices
. . . . . . . . . . . . . . . . . . . . . . . . . . . . . . . . . . . . . . . . . . . . . . 637
Appendix A
Tables of PLC-dependent Performance Attributes. . . . . . . . 639
Appendix B
Windows interface . . . . . . . . . . . . . . . . . . . . . . . . . . . . . . . . . . 659
Appendix C
List of symbols and short cut keys . . . . . . . . . . . . . . . . . . . . 679
Appendix D
IEC conformity . . . . . . . . . . . . . . . . . . . . . . . . . . . . . . . . . . . . . 707
Appendix E
Configuration examples . . . . . . . . . . . . . . . . . . . . . . . . . . . . . 733
Appendix F
Convert Projects/DFBs/Macros . . . . . . . . . . . . . . . . . . . . . . . 837
Appendix G
Concept ModConnect . . . . . . . . . . . . . . . . . . . . . . . . . . . . . . . 841
Appendix H
Convertion of Modsoft Programs. . . . . . . . . . . . . . . . . . . . . . 849
Appendix I
Modsoft and 984 References . . . . . . . . . . . . . . . . . . . . . . . . . 855
Appendix J
Presettings when using Modbus Plus for startup . . . . . . . . 859
Appendix K
Presettings when using Modbus for startup. . . . . . . . . . . . . 873
Appendix L
Startup when using Modbus with the EXECLoader . . . . . . . 879
Appendix M
Startup when using Modbus with DOS Loader. . . . . . . . . . . 899
Appendix N
Startup when using Modbus Plus with the EXECLoader. . . 913
Appendix O
Startup when using Modbus Plus with DOS Loader . . . . . . 933
Appendix P
EXEC files . . . . . . . . . . . . . . . . . . . . . . . . . . . . . . . . . . . . . . . . . 949
Appendix Q
Settings in the CONCEPT.INI . . . . . . . . . . . . . . . . . . . . . . . . . 953
Glossary
. . . . . . . . . . . . . . . . . . . . . . . . . . . . . . . . . . . . . . . . . . . . . . 961
About the book
At a Glance
Document Scope
This user manual is intended to help you create a user program with Concept. It
provides authoritative information on the individual program languages and on
hardware configuration.
Validity Note
The documentation applies to Concept 2.5 for Microsoft Windows 98, Microsoft
Windows 2000 and Microsoft Windows NT 4.x.
Note: Additional up-to-date tips can be found in the Concept README file.
Related
Documents
User Comments
Title of Documentation
Reference Number
Concept Installation Instructions
840 USE 492 00
Concept IEC Block Library
840 USE 494 00
Concept EFB User Manual
840 USE 495 00
Concept LL984 Block Library
840 USE 496 00
We welcome your comments about this document. You can reach us by e-mail at
[email protected]
840 USE 493 00 September 2001
XI
About the book
XII
840 USE 493 00 September 2001
Structured text ST
11
At a Glance
Overview
This Chapter describes the programming language structured text ST which
conforms to IEC 1131.
What’s in this
chapter?
This chapter contains the following Sections:
Section
Topic
11.1
General information about structured Text ST
323
11.2
Expressions
324
11.3
Operators of the programming language of structured ST text
329
11.4
Assign instructions
336
11.5
Call up of functions, Function Blocks (EFBs) and Derived
Function Blocks (DFBs)
350
11.6
Syntax check and code generation
356
11.7
Online functions of the ST programming language
359
11.8
Creating a program with the structured ST text
360
840 USE 493 00 September 2001
Page
321
Structured text ST
322
840 USE 493 00 September 2001
Structured text ST
11.1
General information about structured Text ST
General Information about the ST Structured Text
Introduction
With the programming language of structured text (ST), it is possible, for example,
to call up Function Blocks, perform functions and assignments, conditionally perform
instructions and repeat tasks.
Spell Check
Spelling is immediately checked when key words, separators and comments are
entered. If a key word, separator or comment is recognized, it is identified with a
color surround. If unauthorized key words (instructions or operators) are entered, it
is likewise identified in color.
IEC Conventions
The IEC 1131 does not permit the input of direct addresses in the usual Concept
form. To input direct addresses see Operands, p. 325.
In accordance with IEC 113-3, key words must be entered in upper case. Should the
use of lower case letters be required, they can be enabled in the dialog box Options
→ Preferences → IEC Extensions... → IEC expansions with the option Allow
case insensitive keywords.
Blank spaces and tabs have no influence upon the syntax and can be used freely.
Context help
With the right mouse button an object can be selected and at the same time a
context sensitive menu called up. Therefore, for example, with FFBs the right mouse
button can call up the associated block description.
Syntax Check
A syntax check can be performed during the program/DFB creation with Project →
Analyze section, see also Syntax Check, p. 357.
Codegeneration
The codegeneration is automatically performed when closing the section. Using the
Project → Code Generation Options menu command, you can define options for
code generation, see also Code generation, p. 358.
Editing with the
Keyboard
Normally editing in Concept is performed with the mouse, however it is also possible
with the keyboard (see also Short Cut Keys in the IL, ST and Data Type Editor,
p. 693).
IEC Conformity
For a description of the IEC conformity of the ST programming language see IEC
conformity, p. 707.
840 USE 493 00 September 2001
323
Structured text ST
11.2
Expressions
At a Glance
Overview
This section contains an overview of the expressions in the programming language
of structured text ST.
expressions consists of operands and operators.
What’s in this
section?
This section contains the following topics:
324
Topic
Page
Operands
325
Operators
326
840 USE 493 00 September 2001
Structured text ST
Operands
At a Glance
An operand can be:
l a literal,
l a variable,
l a multi-element variable,
l an element of a multi-element variable,
l a function call up,
l a FB/DFB output or
l a direct address.
Access to the
field variables
When accessing field variables (ARRAY), only literals and variables of ANY_INT
type are permitted in the index entry.
Example: Using field variables
var1[i] := 8 ;
var2.otto[4] := var3 ;
var4[1+i+j*5] := 4 ;
Type conversion
Data types, which are in an instruction of processing operands, must be identical.
Should operands of various types be processed, a type conversion must be
performed beforehand.
An exception is the data type TIME in conjunction with the arithmetic operators "*"
(multiplication) and "/" (division). With both these operators, an operand of TIME
data type can be processed together with an operand of ANY_NUM data type. The
result of this instruction has in this instance the data type TIME.
Example: Integer
variable and real
variable
In the example the integer variable i1 is converted into a real variable before being
added to the real variable r4.
r3 := r4 + SIN_REAL(INT_TO_REAL(i1)) ;
Example: Integer
variable and time
variable
In the example the time variable t2 is multiplied by the integer variable i4 and the
result is stored in the time variable t1.
t1 := t2 * i4 ;
840 USE 493 00 September 2001
325
Structured text ST
Default data
types of direct
addresses
Using other data
types
The following table shows the default data types of direct addresses:
Input
Output
Default data type
possible data type
%IX,%I
%QX,%Q
BOOL
BOOL
%IB
%QB
BYTE
BYTE
%IW
%QW
INT
INT, UINT, WORD
%ID
%QD
REAL
REAL, DINT, UDINT, TIME
Should other data types be assigned as default data types of a direct address, this
must be done through an explicit declaration (VAR…END_VAR (See Declaration
(VAR...END_VAR), p. 338)). VAR…END_VAR cannot be used in Concept for the
declaration of variables. The variable declaration is performed conveniently by using
the Variable Editor (See Variables editor, p. 447).
Operators
Introduction
An operator is a symbol for:
l an arithmetic operation to be executed or
l a configured operation to be executed or
l the function call up.
Operators are generic, i.e. they are automatically matched with the operands data
type.
Note: Operators can be either entered manually or generated with assistance from
the menu Objects → Operators.
Expression
Evaluation
326
The evaluation of an expression consists of applying the operators to the operands,
in the sequence, which is defined by the order of the operators rank (see table). The
operator with the highest rank in an expression is performed first, followed by the
operator with the next highest rank etc. until the evaluation is complete. Operators
with the same rank are performed from left to right, as they are written in the
expression. This sequence can be altered with the use of parentheses.
840 USE 493 00 September 2001
Structured text ST
Table of
Operators
ST programming language operators:
Operator
Meaning
possible operand
Order of
rank
see also
()
Use of
parentheses:
Expression
1
(highest)
Use of
parentheses "()",
p. 330
FUNCNA Function editing
ME
(call up)
(current
parameter
list)
Expression, literal, variable, 2
direct address of ANY data
type
Function
Invocation, p. 354
-
Negation
Expression, literal, variable, 3
direct address of
ANY_NUM data type
Negation (-),
p. 331
NOT
Complement
Expression, literal, variable, 3
direct address of ANY_BIT
data type
Complement
formation (NOT),
p. 331
**
Exponentiation
Expression, literal, variable, 4
direct address of REAL data
type (basis), ANY_NUM
(exponent)
Exponentiation
(**), p. 330
*
Multiplication
Expression, literal, variable, 5
direct address of
ANY_NUM data type or
TIME data type
Multiplication (*),
p. 331
/
Division
Expression, literal, variable, 5
direct address of
ANY_NUM data type
Division (/), p. 332
MOD
Modulo
Expression, literal, variable, 5
direct address of ANY_INT
data type
Modulo (MOD),
p. 332
+
Addition
Expression, literal, variable, 6
direct address of
ANY_NUM data type or
TIME data type
Addition (+),
p. 332
-
Subtraction
Expression, literal, variable, 6
direct address of
ANY_NUM data type or
TIME data type
Subtraction (-),
p. 333
840 USE 493 00 September 2001
327
Structured text ST
328
Operator
Meaning
possible operand
Order of
rank
see also
<
Less-than
comparison
Expression, literal, variable, 7
direct address of
ANY_ELEM data type
Comparison with
"less than"(<),
p. 334
>
Greater-than
comparison
Expression, literal, variable, 7
direct address of
ANY_ELEM data type
Comparison on
"greater than" (>),
p. 333
<=
Less or equal to
comparison
Expression, literal, variable, 7
direct address of
ANY_ELEM data type
Comparison with
"less than or equal
to" (<=), p. 334
>=
Greater or equal
to comparison
Expression, literal, variable, 7
direct address of
ANY_ELEM data type
Comparison on
"greater than/
equal to" (>=),
p. 333
=
Equality
Expression, literal, variable, 8
direct address of
ANY_ELEM data type
Comparison with
"equal to" (=),
p. 333
<>
Inequality
Expression, literal, variable, 8
direct address of
ANY_ELEM data type
Comparison with
"not equal to"
(<>), p. 334
&, AND
configured AND
Expression, literal, variable, 9
direct address of ANY_BIT
data type
Boolean AND
(AND or &), p. 334
XOR
Configured
exclusive OR
Expression, literal, variable, 10
direct address of ANY_BIT
data type
Boolean Exclusive
OR (XOR), p. 335
OR
Configured OR
Expression, literal, variable, 11
direct address of ANY_BIT (lowest)
data type
Boolean OR (OR),
p. 335
840 USE 493 00 September 2001
Structured text ST
11.3
Operators of the programming language of
structured ST text
At a Glance
Overview
This section describes the operators of the programming language of structured ST
text.
What’s in this
section?
This section contains the following topics:
Topic
Page
Use of parentheses "()"
330
FUNCNAME
330
Exponentiation (**)
330
Negation (-)
331
Complement formation (NOT)
331
Multiplication (*)
331
Division (/)
332
Modulo (MOD)
332
Addition (+)
332
Subtraction (-)
333
Comparison on "greater than" (>)
333
Comparison on "greater than/equal to" (>=)
333
Comparison with "equal to" (=)
333
Comparison with "not equal to" (<>)
334
Comparison with "less than"(<)
334
Comparison with "less than or equal to" (<=)
334
Boolean AND (AND or &)
334
Boolean OR (OR)
335
Boolean Exclusive OR (XOR)
335
840 USE 493 00 September 2001
329
Structured text ST
Use of parentheses "()"
Description
Brackets are used to alter the execution sequence of the operators.
Example of
parentheses "()"
If the operands A, B, C, and D have the values "1", "2", "3", "and -4",
A+B-C*D
has the result 15 and
(A+B-C)*D
has the result 0.
FUNCNAME
Description
The function processing is used to perform functions (see Function Invocation,
p. 354).
Exponentiation (**)
Description
For exponentiation "**" the value of the first operand (basis) is potentiated with that
of the second operand (exponent).
Note: Exponentiation operates in the ST programming languageand with a
resolution of 23 bits. For the graphic languages the exponentiation operates with a
resolution of 24 bits..
Example
exponentiation
"**"
330
In the example OUT will be"625.0", when IN1 is "5.0" and IN2 is "4.0".
OUT := IN1 ** IN2 ;
840 USE 493 00 September 2001
Structured text ST
Negation (-)
Description
During negation "-" a sign reversal for the value of the operand takes place.
Example
negation "-"
In the example OUT will be "-4", when IN1 is "4".
OUT := - IN1 ;
Complement formation (NOT)
Description
In NOT a bit by bit inversion of the operands takes place.
Example NOT
In the example OUT will be"0011001100", when IN1 is "1100110011".
OUT := NOT IN1 ;
Multiplication (*)
Description
For multiplication "**" the value of the first operand is multiplied with that of the
second operand (exponent).
Example
multiplication "*"
OUT := IN1 * IN2 ;
Multiplication of
TIME values
Normally the data types of the operands to be processed must be identical to an
instruction. However, the multiplication forms an exception when combined with
data type TIME. In this case an operand with the datentype TIME combined with an
operanden of data type ANY_NUM can be processed. In this case the result of this
instruction has the data type TIME.
Example:
Multiplication of
TIME values
In the example the Time variable t2 is multiplied by the integer variables i4 and the
result is deposited in the t1 Time variables.
t1 := t2 * i4 ;
840 USE 493 00 September 2001
331
Structured text ST
Division (/)
Description
For division "/" the value of the first operand is divided by that of the second operand
(exponent).
Example division
"/"
OUT := IN1 / IN2 ;
Division of TIME
values
Normally the data types of the operands to be processed must be identical to an
instruction. However the division forms an exception when combined with data type
TIME. In this case an operand with the data type TIME combined with an operand
of data type ANY_NUM can be processed. In this case the result of this instruction
has the data type TIME.
Example division
of TIME values
In the example the Time variable t2 is divided by the integer variables i4 and the
result is deposited in the t1 Time variables.
t1 := t2 / i4 ;
Modulo (MOD)
Description
For MOD the value of the first operandis divided by that of the second operand and
the remainder of thedivision (Modulo) is displayed as the result.
Example MOD
OUT := IN1 MOD IN2 ;
Addition (+)
Description
For the addition "+" the value of the first operand is added to that of the second
operand.
Example
addition "+"
OUT := IN1 + IN2 ;
332
840 USE 493 00 September 2001
Structured text ST
Subtraction (-)
Description
For the subtraction "-" the value of the second operand is subracted from that of the
first operand.
Example
Subtraction "-"
OUT := IN1 - IN2 ;
Comparison on "greater than" (>)
Description
With ">" the value of the first operand is compared with that of the second operand.
If the first operand is greater than the second, the result is a boolean "1". If the first
operand is less than or equal to the second, the result is a Boolean "0".
Example greater
than ">"
In the example "OUT" will be "1" if "IN1" is greater than "10" and "0", if "IN1" is less
than "0".
OUT := IN1 > 10 ;
Comparison on "greater than/equal to" (>=)
Description
With ">=" the value of the first operand is compared to that of the second operand.
If the first operation is greater than or equal to the second, the result is a Boolean
"1". If the first operand is less than the second, the result is a Boolean "0".
Example greater
than/equal to
">="
In the example "OUT"will be "1"if "IN1" is greater than/equal to "10" and otherwise
"0".
OUT := IN1 >= 10 ;
Comparison with "equal to" (=)
Description
The value of the first operation is compared with the value of the second with "=". If
the first operation is equal to the second, the result is a Boolean "1". If the first
operation is not equal to the second, the result is a Boolean "0".
E.g. equal to "="
In the example, "OUT" will be "1", if "IN1" is equal to "10" – otherwise it will be "0".
OUT := IN1 = 10 ;
840 USE 493 00 September 2001
333
Structured text ST
Comparison with "not equal to" (<>)
Description
The value of the first operation is compared with the value of the second with "<>".
If the first operation is not equal to the second, the result is a Boolean "1". If the first
operation is equal to the second, the result is a Boolean "0".
E.g. Not equal to
"<>"
In the example, "OUT" will be "1", if "IN1" is not equal to "10" – otherwise it will be "0".
OUT := IN1 <> 10 ;
Comparison with "less than"(<)
Description
The value of the first operation is compared with the value of the second with "<". If
the first operation is smaller than the second, the result is a Boolean "1". If the first
operation is bigger than or the same size as the second, the result is a Boolean "0".
E.g. less than "<"
In the example, "OUT" will be "1", if "IN1" is less than "10" – otherwise it will be "0".
OUT := IN1 < 10 ;
Comparison with "less than or equal to" (<=)
Description
The value of the first operation is compared with the value of the second with "<=".
If the first operation is less than or equal to the second, the result is a Boolean "1".
If the first operation is greater than the second, the result is a Boolean "0".
E.g. Less than or
equal to "<="
In the example, "OUT" will be "1", if "IN1" is less than or equal to "10" – otherwise it
will be "0".
OUT := IN1 <= 10 ;
Boolean AND (AND or &)
Description
With "AND" or "&" a configured AND link occurs between the operations.
With the BYTE and WORD data types, the link is performed bit by bit.
E.g. Boolean
"AND or &"
In the examples, "OUT" will be "1" if "IN1", "IN2" and "IN3" are "1".
OUT := IN1 AND IN2 AND IN3 ;
or
OUT := IN1 AND IN2 AND IN3 ;
334
840 USE 493 00 September 2001
Structured text ST
Boolean OR (OR)
Description
With OR, a configured OR link occurs between the operations.
With the BYTE and WORD data types, the link is performed bit by bit.
E.g. Boolean OR
"OR"
In the example, "OUT" will be "1" if "IN1", "IN2" or "IN3" is "1".
OUT := IN1 OR IN2 OR IN3 ;
Boolean Exclusive OR (XOR)
Description
With XOR, a configured Exclusive OR link occurs between the operations.
With the BYTE and WORD data types, the link is performed bit by bit.
E.g. Boolean
Exclusive OR
"XOR"
In the example "OUT" will be "1", if "IN1" and "IN2" are not equal. If "IN1" and "IN2"
have the same state (both "0" or "1"), "OUT" is "0".
OUT := IN1 XOR IN2 ;
Linking more
than 2 operations
If more than two operations are linked, the result is "1" with an odd number of 1states and "0" with an even number of 1-states.
Example:
Linking more
than 2 operations
In the example, "OUT" will be "1" if 1, 3 or 5 operations are "1". "OUT" will be "0" if
0, 2 or 4 operations are "1".
OUT := IN1 XOR IN2 XOR IN3 XOR IN4 XOR IN5;
840 USE 493 00 September 2001
335
Structured text ST
11.4
Assign instructions
At a Glance
Overview
This section describes the instructions for the programming language of structured
ST text.
What’s in this
section?
This section contains the following topics:
336
Topic
Page
Instructions
337
Assignment
337
Declaration (VAR...END_VAR)
338
IF...THEN...END_IF
340
ELSE
341
ELSIF...THEN
342
CASE...OF...END_CASE
343
FOR...TO...BY...DO...END_FOR
344
WHILE...DO...END_WHILE
346
REPEAT...UNTIL...END_REPEAT
348
EXIT
349
Empty instruction
349
Commands
349
840 USE 493 00 September 2001
Structured text ST
Instructions
Description
Instructions are the "commands" of the ST programming language.
Instructions must be completed by semicolons. Several instructions can be entered
in one line (separated by semicolons).
Note: Instructions can be either entered manually or generated using the menu
Objects.
Assignment
At a Glance
When an assignment is performed, the current value of a single or multi-element
variable is replaced by the result of the evaluation of the expression
An assignment consists of a variable specification on the left side, followed by the
assignment operator ":=", followed by the expression to be evaluated. Both variables
must be of the same data type.
Assigning the
value of a
variable to
another variable
Assignments are used to assign the value of a variable to another variable.
The instruction
A := B ;
is for instance used to replace the value of the variable "A" by the current value of
the variable "B". If "A" and "B" are of an elementary data type, the individual value
"B" is passed to "A". If "A" and "B" are of a derived data type, the values of all
elements are passed from "B" to "A".
Assigning the
value of a literal
to a variable
Assignments are used to assign a literal to variables.
The instruction
C := 25 ;
is for instance used to assign the value "25" to the variable "C".
840 USE 493 00 September 2001
337
Structured text ST
Assigning the
value of an FFB
to a variable
Assignments are used to assign a value to a variable which is returned by a function
or a function block.
The instruction
B := MOD_INT(C,A) ;
is for instance used to assign the modulo of the variables "C" and "A" to the variable
"B".
The instruction
A := TON1.Q ;
is for instance used to assign to the variable "A" the value of the output "Q" of the
function block TONI.
Assigning the
value of an
operation to a
variable
Assignments are used to assign to a variable a value which is the result of an
operation.
The instruction
X := (A+B-C)*D ;
is for instance used to assign to the variable "X" the result of the operation "(A+BC)*D".
Declaration (VAR...END_VAR)
At a Glance
The VAR instruction is utilized for declaring the function blocks used and DFBs and
declaring direct addresses if they are not to be used with the default data type. VAR
cannot be used for declaring a variable in Concept. Declaring the variables may
conveniently be done via the Variables editor.
The END_VAR instruction marks the end of the declaration.
Note: The declaration of the FBs/DFBs and direct addresses applies only to the
current section. If the same FFB type or the same address are also used in another
section, the FFB type or the address must be declared again in this section.
338
840 USE 493 00 September 2001
Structured text ST
Declaration of
function blocks
and DFBs
Every time a FB/DFB example is used, a unique example name is assigned when it
is declared. The example name is used to mark the function block uniquely in a
project. The example name must be unique in the whole project; no distinction is
made between upper/lower case. The example name must correspond to the IEC
Name conventions, otherwise an error message will be displayed.
After specifying the example name, the function block type, e.g.CTD_DINT is
specified.
In the case of function block types no data type is specified. It is determined by the
data type of the actual parameters. If all actual parameters consist of literals, a
suitable data type will be selected.
Any number of example names may be declared for an FB/DFB.
Note: The dialog Objects → Insert FFB provides you with a form for creating the
FB-/DFB declaration in a simple and speedy manner.
Note: In contrast to grafic programming languages (FBD, LD), it is possible to
execute multiple calls in FB/DFB examples within ST.
Example
Declaration of function blocks and DFBs
Exemplar-Namen
VAR
RAMP_UP, RAMP_DOWN, RAMP_X : TON ;
COUNT : CTU_DINT ;
CLOCK : SYSCLOCK ;
Pulse : TON ;
END_VAR
Funktionsbaustein-Typen
Declaration of
direct addresses
In the case of this declaration, every direct address used whose data type does not
correspond to the default data type will be assigned the required data type (see also
Default data types of direct addresses, p. 326).
Example
Declaration of direct addresses
VAR
AT %QW1 : WORD ;
AT %IW15 : UINT ;
AT %ID45 : DINT ;
AT %QD4 : TIME ;
END_VAR
840 USE 493 00 September 2001
339
Structured text ST
IF...THEN...END_IF
Description
The IF instruction determines that an instruction or a group of instructions will only
be executed if its related Boolean expression has the value 1 (true). If the condition
is 0 (false), the instruction or the instruction group will not be executed.
The THEN-command identifies the end of the condition and the beginning of the
command(s).
The END_IF instruction marks the end of the instruction(s).
Note: Any number of IF…THEN…ELSE…END_IF commands may be nested to
generate complex selection commands.
Example
IF...THEN...
END_IF
If FLAG is 1, the instructions will be executed; if FLAG is 0, they will not be executed.
IF FLAG THEN
C:=SIN_REAL(A) * COS_REAL(B) ;
B:=C - A ;
END_IF ;
Example IF
NOT...THEN...
END_IF
Using NOT, the condition may be inverted (execution of both instructions at 0).
IF NOT FLAG THEN
C:=SIN_REAL(A) * COS_REAL(B) ;
B:=C - A ;
END_IF ;
Related topic(s)
ELSE (See ELSE, p. 341)
ELSEIF (See ELSIF...THEN, p. 342)
340
840 USE 493 00 September 2001
Structured text ST
ELSE
Description
The ELSE command always comes after an IF…THEN-, ELSIF…THEN- or CASEcommand.
If the ELSE command comes after IF or ELSIF, the command or group of commands
will only be executed if the associated Boolean expressions of the IF and ELSIF
command have the 0 value (false). If the condition of the IF or ELSIF command is 1
(true), the command or group of commands will not be executed.
If the ELSE command comes after CASE, the command or group of commands will
only be executed if no identification contains the value of the selector. If an identification contains the value of the selector, the command or group of commands will
not be executed.
Note: As many IF…THEN…ELSE…END_IF-commands as required can be
encapsulated to create complex selection commands.
E.g. ELSE
IF A>B THEN
C:=SIN_REAL(A) * COS_REAL(B) ;
B:=C - A ;
ELSE
C:=A + B ;
B:=C - A ;
END_IF ;
Related topic(s)
IF (See IF...THEN...END_IF, p. 340)
ELSIF (See ELSIF...THEN, p. 342)
CASE (See CASE...OF...END_CASE, p. 343)
840 USE 493 00 September 2001
341
Structured text ST
ELSIF...THEN
Description
The ELSIF-command always comes after an IF…THEN-command. The ELSIFcommand establishes that a command or group of commands will only be executed
if the associated Boolean expression of the IF-command has the 0 value (false) and
the associated Boolean expression of the ELSIF command has the 1 value (true). If
the condition of the IF-command is 1 (true) or the condition of the ELSIF-command
is 0 (false), the command or group of commands will not be executed.
The THEN-command identifies the end of the ELSIF-condition(s) and the beginning
of the command(s).
Note: As many IF…THEN…ELSIF…THEN…END_IF-commands as required can
be encapsulated to create complex selection commands.
E.g.
ELSIF…THEN
IF A>B THEN
C:=SIN_REAL(A) *
B:=SUB_REAL(C,A)
ELSIF A=B THEN
C:=ADD_REAL(A,B)
B:=MUL_REAL(C,A)
END_IF ;
COS_REAL(B) ;
;
;
;
E.g.
Encapsulated
Commands
IF A>B THEN
IF B=C THEN
C:=SIN_REAL(A) * COS_REAL(B) ;
ELSE
B:=SUB_REAL(C,A) ;
END_IF ;
ELSIF A=B THEN
C:=ADD_REAL(A,B) ;
B:=MUL_REAL(C,A) ;
ELSE
C:= DIV_REAL (A,B) ;
END_IF ;
Related topic(s)
IF (See IF...THEN...END_IF, p. 340)
ELSE (See ELSE, p. 341)
342
840 USE 493 00 September 2001
Structured text ST
CASE...OF...END_CASE
Description
The CASE instruction consists of an INT data type expression (the "selector") and a
list of instruction groups. Each group is provided with a marke which consists of one
or several whole numbers (ANY_INT) or zones of whole number values. The first
group is executed by instructions, whose marke contains the calculated value of the
selector. Otherwise none of the instructions will be executed.
The OF instruction indicates the start of the mark.
An ELSE instruction may be carried out within the CASE instruction, whose
instructions are executed if no mark contains the selector value.
The END_CASE instruction marks the end of the instruction(s).
Example
CASE...OF...
END_CASE
Example CASE...OF...END_CASE
Selector
CASE SELECT OF 1,5: C:=SIN_REAL(A) * COS_REAL(B) ;
2: B:=C - A ;
6..10: C:=C * A ;
ELSE B:=C * A ;
Mark
C:=A / B ;
END_CASE ;
Related topic(s)
ELSE (See ELSE, p. 341)
840 USE 493 00 September 2001
343
Structured text ST
FOR...TO...BY...DO...END_FOR
Description
The FOR instruction is used when the number of occurrences can be determined in
advance. Otherwise WHILE (See WHILE...DO...END_WHILE, p. 346) or REPEAT
(See REPEAT...UNTIL...END_REPEAT, p. 348) are used
The FOR instruction repeats an instruction sequence until the END_FOR
instruction. The number of occurrences is determined by start value, end value and
control variable. Start value, end value and the control variable must be the same
type of data (DINT or INT) and may not be modified by one of the repeated
instructions. The FOR instruction increments the control variable value of one start
value to an end value. The increment value has the default value 1. If a different
value is to be used, it is possible to specify an explicit increment value (variable or
constant). The control variable value is checked before each renewed loop running.
If it is outside the start value and end value range, the loop will be left.
Before running the loop for the first time a check is made to determine whether
incrementation of the control variables, starting from the initial value, is moving
towards the end value. If this is not the case (e.g. initial value ≤ end value and
negative increment), the loop will not be processed.
Using this ruler, continuous loops will be prevented.
Note: For the end value of the data type DINT the range of values -2 147 483 646
to 2 147 483 645 will apply.
The DO command identifies the end of the repeat definition and the beginning of the
instruction(s).
Repetition may be terminated early by using the EXIT instruction. The END_FOR
instruction marks the end of the instruction(s).
Example: FOR
with increment
"1"
FOR with increment "1"
Control variable
Start value
End value
FOR i:= 1 TO 50 DO
C:= C * COS_REAL(B) ;
END_FOR ;
FOR with
increment not
equal to "1"
344
If an increment other than "1" is to be used, this can be defined by BY. The
increment, the initial value, the end value, and the control variable must be of the
same data type (DINT oder INT). The criterion for the processing direction (forward,
backward) is the sign of the BY expression. If this expression is positive, the loop will
run forward; if it is negative, the loop will run backward.
840 USE 493 00 September 2001
Structured text ST
Example:
Counting
forward in two
steps
Counting forward in two steps
Control variable Start value
End value Increment
FOR i:= 1 TO 10 BY 2 DO (* BY > 0 : Forward loop *)
C:= C * COS_REAL(B) ; (* instruction will be 5 x executed *
END_FOR ;
Example:
Counting
backward
Counting backward
FOR i:= 10 TO 1 BY -1 DO (* BY < 0 : Backward loop *)
C:= C * COS_REAL(B) ; (* Application will be executed 10
x *)
END_FOR ;
Example:
"Unique" loops
The loops in the example are run once precisely, as the initial value = end value. In
this context it does not matter whether the increment is positive or negarive.
FOR i:= 10 TO 10 DO (* Unique Loop *)
C:= C * COS_REAL(B) ;
END_FOR ;
or
FOR i:= 10 TO 10 BY -1 DO (* Unique Loop *)
C:= C * COS_REAL(B) ;
END_FOR ;
Example: Critical
loops
If in the example there is the increment j > 0, the instructions will not be executed,
as the situation initial value > end value only permits an increment ≤ 0. A continuous
loop can only arise if the increment is 0. If this situation is identified during the section
analysis, an error message will be generated. If the error is identified during running
time, an error message will be generated in the event indicator...
FOR i:= 10 TO 1 BY j DO (* Backward loop *)
C:= C * COS_REAL(B) ;
END_FOR ;
If in the example there is the increment j < 0, the instructions will not be executed,
as the situation initial value < end value only permits an increment ≥ 0. A continuous
loop can only arise if the increment is 0. If this situation is identified during the section
analysis, an error message will be generated. If the error is identified during running
time, an error message will be generated in the event indicator...
FOR i:= 1 TO 10 BY j DO (* Forward loop *)
C:= C * COS_REAL(B) ;
END_FOR ;
840 USE 493 00 September 2001
345
Structured text ST
Example: Illegal
loops
Illegal loops
FOR i:= 1 TO 10 BY 0 DO (* Error with Section- *)
C:= C * COS_REAL(B) ; (* Analysis, as continous loop *)
END_FOR ;
or
FOR i:= 1 TO 10 BY j DO (* at j=0, Error message *)
C:= C * COS_REAL(B) ; (* in of Event indicator *)
END_FOR ;
WHILE...DO...END_WHILE
Description
The WHILE instruction has the effect that a sequence of instructions will be
executed repeatedly until its related Boolean expression is 0 (false). If the
expression is false right from the start, the group of instructions will not be executed
at all.
The DO command identifies the end of the repeat definition and the beginning of the
command(s).
The occurrence may be terminated early using the EXIT.
The END_WHILE instruction marks the end of the instruction(s).
WARNING
Risk of program crashing
WHILE must not be used to carry out synchronization between
processes, e.g. as a "waiting loop" with an externally determined end
condition. This means that a continous loop must not be created, unless
you prevent this using the function Project → Options for code
generation → Activate loop control.
Failure to observe this precaution can result in severe injury or
equipment damage.
346
840 USE 493 00 September 2001
Structured text ST
WARNING
Risk of program crashing
WHILE must not be used in an algorithm for which fullfilling the loop end
condition or the execution of an EXIT instruction can not be guaranteed.
This means that a continuous loop must not be created, as this may
result in crashing the program, unless you prevent this by using the
function Project → Options for code generation → Activate loop
control.
Failure to observe this precaution can result in severe injury or
equipment damage.
Example
WHILE...DO...EN
D_WHILE
var := 1
WHILE var <= 100 DO
var := var + 4;
END_WHILE ;
Related topic(s)
EXIT (See EXIT, p. 349)
840 USE 493 00 September 2001
347
Structured text ST
REPEAT...UNTIL...END_REPEAT
Description
The REPEAT instruction has the effect that a sequence of instructions is executed
repeatedly (at least once), until its related Boolean condition is 1 (true).
The UNTIL instruction marks the end condition.
The occurrence may be terminated early using the EXIT.
The END_REPEAT instruction marks the end of the instruction(s).
WARNING
Risk of program crashing
REPEAT must not be used to carry out synchronization between
processes, e.g. as a "waiting loop" with an externally determined end
condition. This means that a continous loop must not be created, unless
you prevent this using the function Project → Options for code
generation → Activate loop control.
Failure to observe this precaution can result in severe injury or
equipment damage.
WARNING
Risk of program crashing
REPEAT must not be used in an algorithm for which fullfilling the loop
end condition or the execution of an EXIT instruction can not be
guaranteed. This means that a continuous loop must not be created, as
this may result in crashing the program, unless you prevent this by
using the function Project → Options for code generation → Activate
loop control.
Failure to observe this precaution can result in severe injury or
equipment damage.
Example
REPEAT...UNTIL
...END_REPEAT
var := -1
REPEAT
var := var + 2
UNTIL var >= 101
END_REPEAT ;
Related topic(s)
EXIT (See EXIT, p. 349)
348
840 USE 493 00 September 2001
Structured text ST
EXIT
Description
The EXIT command is used to terminate repeat instructions (FOR, WHILE,
REPEAT) before the end condition has been met.
If the EXIT instruction is within a nested occurrence, the innermost loop (in which
EXIT is situated) is left. Next, the first instruction following the loop end (END_FOR,
END_WHILE or END_REPEAT) is executed.
Example EXIT
If FLAG has the value 0, SUM will be 15 following execution of the instructions.
If FLAG has the value 1, SUM will be 6 following execution of the instructions.
SUM : = 0 ;
FOR I := 1 TO 3 DO
FOR I := 1 TO 2 DO
IF FLAG=1 THEN EXIT;
END_IF;
SUM := SUM + J ;
END_FOR ;
SUM := SUM + I ;
END_FOR
Related topic(s)
CASE (See CASE...OF...END_CASE, p. 343)
WHILE (See WHILE...DO...END_WHILE, p. 346)
REPEAT (See REPEAT...UNTIL...END_REPEAT, p. 348)
Empty instruction
Description
Empty instructions are generated by a semicolon (;).
Commands
Description
Within the ST editor, commands start with the string (* and end in the string *). Any
comments may be entered between these two strings. Comments may be entered
in any position in the ST editor. Comments are shown in colour.
Note: In accordance with IEC 1131-1, nested comments are not permissible.
However, if you wish to place theses elsewhere, you can release them by using
Options → IEC Extensions → Enable comments as admissible anywhere in
the text.
840 USE 493 00 September 2001
349
Structured text ST
11.5
Call up of functions, Function Blocks (EFBs) and
Derived Function Blocks (DFBs)
At a Glance
Overview
This section describes the call up of functions, Function Blocks (EFBs) and Derived
Function Blocks (DFBs).
What’s in this
section?
This section contains the following topics:
350
Topic
Page
Function Block/DFB Invocation
351
Function Invocation
354
840 USE 493 00 September 2001
Structured text ST
Function Block/DFB Invocation
Use of Function
Blocks and DFBs
Function blocks are provided by Concept in the form of libraries. The logic of the
function blocks is created in C++ programming language and cannot be altered in
the ST Editor. The names of the available function blocks can be taken from the
block libraries.
DFBs are function blocks which can be defined in Concept-DFB. There is no
difference between functions and function blocks for DFBs. They are always
handled as function blocks regardless of their internal structure.
The use of function blocks and DFBs consists of three parts in ST:
l the declaration (See Declaration, p. 352),
l the function block/DFB invocation (See Function Block/DFB Invocation, p. 352),
l the use of the function block/DFB outputs (See Use of the Function Block/DFB
Outputs, p. 354).
Note: The declaration of the function block/DFB invocation can take place
manually or you can create the block end and the assignment of the parameters
using the menu command Objects → Insert FFB.
Function Blocks
with Limited Use
Use of the following EFBs from the DIAGNO block library is limited in ST (function
blocks can be used, but the expanded diagnostic information cannot be evaluated):
l XACT, XACT_DIA
l XDYN_DIA
l XGRP_DIA
l XLOCK,
l XPRE_DIA
l XLOCK_DIA
l XREA_DIA
Function Blocks
with Limited
Invocation
For EFBs which have one or more outputs with data type ANY but no inputs with
data type ANY (generic outputs/inputs), the block invocation can only take place in
compact form (See Function Block/DFB Invocation in Compact Form, p. 354). e.g.
in the block library LIB984:
l GET_3X
l GET_4X
840 USE 493 00 September 2001
351
Structured text ST
Unusable
Function Blocks
Unusable Function Blocks:
l EFBs which use several registers with only the entry for the first register on the
input/output (e.g. MBP_MSTR from the COMM block library) cannot be used.
l EFBs which contain outputs with input information (e.g. GET_BIT, R2T from the
LIB984 block library) cannot be used
l The following EFBs from the COMM block library cannot be used for the technical
reasons listed above:
l CREADREG
l CREAD_REG
l CWRITREG
l CWRITE_REG
l READREG
l READ_REG
l WRITEREG
l WRITE_REG
l MBP_MSTR
l The following EFBs from the LIB984 block library cannot be used for the technical
reasons listed above:
l FIFO
l GET_BIT
l IEC_BMDI
l LIFO
l R2T
l SET_BIT
l SRCH
l T2T
Declaration
Before invoking the function block/DFBs, they must be declared using VAR and
END_VAR (See Declaration (VAR...END_VAR), p. 338).
Function Block/
DFB Invocation
Function blocks/DFBs are invoked using an instruction consisting of the instance
name for the FB/DFB, which is followed by a list, in brackets, of value assignments
(current parameters) to formal parameters. The order of the formal parameters in a
function block invocation is not significant. It is not necessary for all formal
parameters to be assigned a value. If a formal parameter is not assigned a value,
the initial value defined in the variable editor is used when executing the function
block. If an initial value is not defined, the default value (0) is used.
Note: Inputs of type VARINOUT (See also Use of the DFB in FBD/LD, p. 399)
always have to be assigned a value.
352
840 USE 493 00 September 2001
Structured text ST
Function block/DFB invocation:
Instance name
Formal parameter
CLOCK () ;
COUNT (CU:=CLOCK.CLK3, R:=reset, PV:=100 + value) ;
Pulse (IN:=COUNT.Q, PT:=t#1s) ;
Current parameter
Note: In ST, unlike the graphic programming languages (FBD, LD), FB/DFB
instances can be called multiple times.
Note: Even if the function block has no inputs or the input parameters are not to be
defined, the function block should be invoked before the outputs can be used.
Otherwise the initial values for the outputs are given, i.e. "0".
Declaration and invocation of a function block in ST:
VAR
CLOCK : SYSCLOCK ;
COUNT : CTU_DINT ;
END_VAR
CLOCK () ;
COUNT (CU:=CLOCK.CLK3, R:=reset, PV:=100) ;
out:=COUNT.Q ;
current:=COUNT.CV ;
Invocation of the function block in FBD.
CLOCK
SYSCLOCK
CLK1
CLK2
CLK3
CLK4
CLK5
TIMER
840 USE 493 00 September 2001
COUNT
CTU_DINT
reset
100
CU
R
PV
Q
CV
out
current
353
Structured text ST
Function Block/
DFB Invocation
in Compact Form
The block invocation and the assignments for the inputs/outputs are also possible in
a more compact form, which saves runtime:
VAR
CLOCK : SYSCLOCK ;
COUNT : CTU_DINT ;
END_VAR
CLOCK () ;
COUNT (CU:=CLOCK.CLK3, R:=reset, PV:=100,
Q=>out, CV=>current) ;
Use of the
Function Block/
DFB Outputs
The outputs of the function block/DFBs can always be used when a variable (read
only) can also be used.
Instance name
Formal parameter
out := COUNT.Q ;
current := COUNT.CV ;
Current parameter
Function Invocation
Using Functions
Functions are provided by Concept in the form of libraries. The logic of the function
is created in C++ and cannot be edited in the ST Editor. The names of the available
function can be taken from the block libraries.
Note: The declaration of the function invocation can take place manually or you
can create the block end and the assignment of the parameters using the menu
command Objects → Insert FFB.
Invoking a function in ST:
out := LIMIT_INT (MN:=0, IN:=in1, MX:=5 + var) ;
Invoking the function FBD:
.1.2
.1.1
ADD_INT
5
var
354
LIMIT_INT
0
in1
MN
out
IN
MX
840 USE 493 00 September 2001
Structured text ST
Unusable
Functions
Functions which have one or more outputs with data type ANY but no inputs with
data type ANY (generic outputs/inputs) cannot be used in ST.
Invoking a
Function: Variant
1
The function can also be invoked using an instruction consisting of a current
parameter (variable) followed by the instruction assignment ":=" followed by the
name of the function followed by a list of value assignments (current parameters) for
the formal parameters in brackets. The order of the formal parameters in a function
block invocation is not significant.
Current parameter (output)
Formal parameter
out:=LIMIT_INT (MN:=0, IN:=in1, MX:=5 + var) ;
Name of the function
Invoking a
Function: Variant
2
Current parameter (inputs)
Functions are invoked using an instruction. The instruction consists of the current
parameter (variable) for the output followed by the instruction assignment ":="
followed by the name of the function followed by a list of current input parameters in
brackets. The order of the current parameters in a function invocation is significant.
Current parameter (output)
out:=LIMIT_INT (0, in1, 5 + var) ;
Name of the function
840 USE 493 00 September 2001
Current parameter (inputs)
355
Structured text ST
11.6
Syntax check and code generation
At a Glance
Overview
This section describes the syntax check and the code generation of the structured
ST text.
What’s in this
section?
This section contains the following topics:
356
Topic
Page
Syntax Check
357
Code generation
358
840 USE 493 00 September 2001
Structured text ST
Syntax Check
Introduction
A syntax check can be performed during the program/DFB creation with Project →
Analyze section.
Syntax Check
Options
With the menu command Options → Preferences → IEC extensions... → IECextensions the syntax check options can be defined.
Note: The settings in this dialog are used in the project description (PRJ.DSK) and
in the Concept installations description (CONCEPT.DSK), i.e. they are valid for the
entire Concept installation.
If a project is opened, that was created using different settings (e.g. Allow nested
comments in the project and not in the actual Concept Installation), errors can
occur when opening the project.
Allow Case
Insensitive
Keywords
If the check box Allow case insensitive keywords is checked, upper and lower
case for all keywords is enabled.
Allow nested
comments
If the check box Nested comments authorized is checked, nested comments can
be entered. There are no limits to the nesting depths.
Allow Leading
Digits in
Identifiers
If the check box Allow leading digits in identifiers is checked, figures as the first
character of identifiers (i.e. variable names, step names, EFB names) are possible.
Identifiers, which consist solely of figures are, however, not authorized, they must
contain at least one letter.
Unused
Parameters
Cause Warnings
The IEC 1131-3 permits functions and Function Blocks to be called up without
calling up the assignment of all the input parameters. These unused parameters are
implicitly assigned a 0, or they retain the value from the last call up (Function Blocks
only).
If in the menu command Options → Preferences → Analysis... → Analysis the
check box Unused parameters lead to warnings is checked, a list of these unused
parameters is displayed in the message window when generating the code.
840 USE 493 00 September 2001
357
Structured text ST
Code generation
At a Glance
The menu command Project → Options for code generation is used to define
options for code generation.
Fastest code
(restricted
check)
If the check box Fastest Code (restricted check) is activated, a runtime-optimized
code will be generated.
This runtime optimization is achieved with integer arithmetic (e.g. "+" or "-") with
simple process commands instead of EFB calls.
Process commands are much faster than EFB calls, but they generate no error
messages, such as e.g. Arithmetic or Array overrun. This option should only be used
if it has been ensured that the program is free of arithmetic errors.
Example: Fastest
code
IF i <= max THEN
i := i +1 ;
END_IF;
(*i and max are of INT type*)
If Fastest Code (restricted check) is selected, the addition "i1 + 1" is executed with
the process command "add". The code is now faster than if EFB ADD_INT had been
called up. However, no runtime error is generated if "max" is 32767. In this case, "i"
would overrun from 32767 to -32768!
Activate loop
control
This check box activates a software watchdog for continuous loops.
If this check box is checked, with loops within IL and ST sections, it is tested whether
these loops are again exited within a certain time. The time authorized depends on
the manually defined watchdog time. The authorized time for all loops combined
constitutes 80% of the Hardware watchdog time. In this way triggering of the
hardware watchdog by endless loops is disabled. If a time consuming loop or an
endless loop is detected, processing of the affected section will stop, an entry in the
Event display will be generated and processing of the next section will begin. In the
next cycle, the segment will be re-processed until a time consuming loop or an
endless loop is detected once again, or until the segment is finished correctly.
Note: If the hardware watchdog stops the PLC when a time consuming loop or an
endless loop is detected, this option should not be activated. The hardware
watchdog itself is not switched off by this function.
358
840 USE 493 00 September 2001
Structured text ST
11.7
Online functions of the ST programming language
Online functions
Description
The online functions available in the programming language Instruction List (IL) are
available here (see Online functions of the IL instruction list , p. 314).
840 USE 493 00 September 2001
359
Structured text ST
11.8
Creating a program with the structured ST text
Creating a program in structured ST text
At a Glance
The following description contains an example of the creation of a program in the
programming language of structured ST text. This creation is divided into 2 main
steps:
Step
Generating a
section
Action
1
Generating a section (See Generating a section, p. 360)
2
Creating the logic (See Creating the logic, p. 361)
The procedure for generating a section is as follows:
Step
1
Action
Using the menu command File → New section... and enter a section name.
Note: The section name (max. 32 characters) is not case-sensitive and must be
unique throughout the project. If the name entered already exists, a warning is
given and another name must be chosen. The section name must correspond to
the IEC name conventions, otherwise an error message is displayed.
Note: In accordance with IEC1131-3, only letters are permitted as the first
character of names. Should numbers be required as the first character, however,
the menu command Options → Presettings → IEC expansions... → Enable
leading figures in identifiers.
360
840 USE 493 00 September 2001
Structured text ST
Creating the
logic
The procedure for creating the logic is as follows:
Step
1
Action
Declare the Function Block and DFBs, which are to be used, with assistance
from VAR…END_VAR.
Example:
VAR
RAMP_UP, RAMP_DOWN, RAMP_X : TON
COUNT : CTU_DINT ;
END_VAR
2
Declare the variables and their initial value in the Variable Editor.
3
Create the logic of the program.
Example:
SUM : = 0 ;
FOR I = 1 TO 3 DO
FOR J = 1 TO 2 DO
IF FLAG = 1 THEN EXIT;
END_IF;
SUM := SUM + J ;
END_FOR ;
SUM = SUM + I ;
END_FOR
4
840 USE 493 00 September 2001
Save the section with the menu command File → Save project .
361
Structured text ST
362
840 USE 493 00 September 2001
Ladder Logic 984
12
At a Glance
Introduction
This chapter describes the programming language Ladder Logic 984.
What’s in this
chapter?
This chapter contains the following Sections:
Section
Topic
12.1
General about Ladder Logic 984
365
12.2
Working with Ladder Logic 984
367
840 USE 493 00 September 2001
Page
12.3
Subroutines
376
12.4
Equation Network Editor
378
12.5
LL984 Programming Modes
387
363
Ladder Logic 984
364
840 USE 493 00 September 2001
Ladder Logic 984
12.1
General about Ladder Logic 984
General about Ladder Logic 984
Introduction
Ladder logic is displayed in a graphic window. Each window contains exactly one
ladder logic section. One or more different ladder sections can be viewed or edited
(multiple windows of the same section is not supported).
If you are adding a new section the section number is posted for your reference.
Correlation
between
Sections and
Segments
Each ladder logic section becomes tied to a PLC ladder logic segment (e.g., one
section equals one segment) by a segment number entry in the Section Properties
dialog.
One network at a time is visible in each section.
Using the
Keyboard
Editing in Concept is ordinarily done with the mouse, but it is also possible with the
keyboard (see also Short Cut Keys in the LL984-Editor, p. 705).
Project
Analyzation
Ladder logic is analyzed before the program is downloaded to the controller.
The editor permits only valid Ladder Logic to be entered in the editor, e.g.:
l Only those logic elements supported by the current PLC configuration are visible
for selection. You must configure the controller before entering logic.
l The analyzer does not allow references outside the range of the current
configuration.
l The analyzer does not allow duplicate coils unless supported by the current
configuration.
l The analyzer does not allow loadables that are not in the current configuration.
l All subroutines must exist in a single section.
l The section containing subroutines cannot be scheduled.
l All jumptosubroutine instructions must reference the same section.
l Multiple variables per reference are supported. A user preference is available to
enable or disable this feature. When multiple variables are declared for a given
reference either a warning or error is generated, depending on this preference.
Note: Your changes to configuration may cause the program to become
incompatible with the configuration.
Note: Contacts or coils may be entered without references. This not allowed, but
not covered by the project analyzation.
840 USE 493 00 September 2001
365
Ladder Logic 984
Capacity and
Limitations
366
Capacity and Limitations:
l Editor cannot permit more sections than number of segments
l Editor cannot permit more networks than can fit in controller memory
840 USE 493 00 September 2001
Ladder Logic 984
12.2
Working with Ladder Logic 984
At a Glance
Introduction
This section describes how to work with Ladder Logic 984.
What’s in this
section?
This section contains the following topics:
Topic
Page
Entering and Editing Logic Objects
368
Entering and Editing Variables
370
Ladder and Network Editing
371
Reference Zoom and DX Zoom
373
Search and Replace
375
840 USE 493 00 September 2001
367
Ladder Logic 984
Entering and Editing Logic Objects
Prerequisite
Requirements
Only those logic objects supported by the current PLC configuration are visible for
your selection. You must configure the controller before entering logic.
For Loadables that require settings in Project → Configurator → Configure →
Config. extensions, provisions must be made before inclusion in a Ladder
program.
Navigation
368
When you are in the middle of a section, the next or previous network can be viewed
by scrolling with PgUp and PgDn keys.
When you are at the top or bottom of a section, the next or previous section can be
viewed by scrolling with PgUp and PgDn keys, if the section exists.
For instance if you are at the end of networks in the last section (and it is not section
32), you are prompted with a dialog to allow appending a new section. Each network
is compared against the database on PgUp/PgDn (in Combo-Mode).
You can go to a network within a section by using the Go to Network dialog. You
can select the first or last network within the current section, or go to a network by
entering a network name or number. A sortable list of networks (with names) is
provided.
840 USE 493 00 September 2001
Ladder Logic 984
Dialog
Interaction
Your actions for entering and editing Ladder Logic follow the standards of MSWindows and conventions of major MS-Windows applications. When an element is
selected with the mouse, the mouse cursor changes to a graphical picture that
represents the logic item. The application programmer places the logic item in the
edit area by clicking or pressing the Enter key.
A keyboard cursor is shown as a high lighted cell (block) within the Ladder Logic
network. For each editing mouse action there is a corresponding keyboard action
(see also Short Cut Keys in the LL984-Editor, p. 705). When the keyboard is used
to enter a logic item, there is no initial selection step the logic item is immediately
placed in the network at the keyboard cursor.
Ladder Logic sample network:
Column and row indicator
Logic composition area
Example
1
1
2
2
3
4
5
6
7
8
9
10
11
000001
# 10
T0.1
000001
000002
# 60
400001
UCTR
3
000002
000003
# 60
400002
UCTR
4
000003
# 24
400003
000004
UCTR
000004
400004
5
6
7
Placing Objects
The entire range of programming objects is available from the Object main menu
and selected sub menu items.
Occupied nodes of equivalent height can be overwritten.
Instructions can be entered by typing the name in a dialog.
Note: When possible, Concept uses Ctrl key in place of the Modsoft Alt key (see
also Modsoft Keys with Concept Equivalents, p. 856).
Online
Restriction
Online restrictions:
l Online deletes require user confirmation.
l Concept does not support drag/drop of programmed elements when online.
840 USE 493 00 September 2001
369
Ladder Logic 984
Entering and Editing Variables
Introduction
References of nodes in logic items can be viewed or edited by double clicking an
item in a network or by pressing the Enter key on an item that has the focus. An
Object Properties dialog is presented when you double click on a highlighted object
or by pressing the Enter key on an item that has the focus.
You can view the already created variables by clicking on the Lookup button.
You can create new variables by clicking on the Variable declarations button.
Editing
References
References of each node of the logic element (e.g., multi-node) can be edited. When
applicable, you can enter the sub-function name (from a drop-down list). If both a
constant and a reference can be entered, the # sign must be entered before a
constant beginning with 0, 1, 3, or 4. You may enter a variable name for references.
Object properties with Lookup Variables dialog:
Example
1
2
1
3
CLSD
4
000001
T0.1
000001
6
7
8
9
10
11
000001
# 10
2
5
Lookup...
0x 1x
000002
# 60
400001
UCTR
Normally
closed
contact
400002
000002
3
OK
000003
4
000003
# 60
Cancel UCTR
Help
Variable declarations...
000004
# 24
400003
UCTR
Lookup Variables
000004
400004
5
Data Type
6
Elementary
Structured
7
ANY
Filter Name
Filter Kind
Constant
Unlocated Variable
Located Variable
none
begins with
contains
Rescan
IN1
IN2
IN3
IN4
IN5
OUT1
OUT2
OUT3
OUT4
OUT5
10
Entrie(s) found
Components...
370
OK
Cancel
Help
840 USE 493 00 September 2001
Ladder Logic 984
Entry Format of
Reference
Values
When entering references, the first digit is always the reference type (e.g., 0x) and
the following digits are the reference number. You may change the format of the
displayed references by setting Options → Preferences → Common.
Status Bar
The variable name (if applicable) is shown on the display status line, for the element
in focus. When online, the value of the reference is also shown. The initial display
format of the reference value depends on the instruction in the program. You can
change the display format using the following keys in combination to define the data
precision and then format.
Table of display formats:
Precision
Format
L (32bit)
D (signed decimal)
U (unsigned)
A (ascii)
H (hex)
S (16bit)
D (signed decimal)
U (unsigned)
A (ascii)
H (hex)
Reference
Offsetting
Program references can be offset using Edit → Offset References. Multiple
references can be offset in the same step (while offline). Sections/networks that are
being offset are selectable. You are asked to put in the first and last reference to be
affected and put in the number you want the offset to be.
Ladder and Network Editing
Introduction
Ladder and network edit functions are available from the main menus Edit and
Networks.
Note: Menu items in diminished brightness are not selectable given the current
configuration, status, etc.
Undo Delete
The Edit → Undo delete function, is an ofline mode function that allows up to the
most current 5 deletes to be undone. The Undo delete is provided for each ladder
logic section and includes element and network cut/delete events.
Insert, Append or Reorder network operations cause a reset of the delete-save
area therby assuring the network numbers are not contaminated.
840 USE 493 00 September 2001
371
Ladder Logic 984
Select/De-select
All, Cut, Copy
and Paste
Select all, Cut, Copy, and Paste operations on individual language elements occur
within a single network (at a time). Your can select-all or unselect-all elements in a
single network. You can also select, cut, copy, and paste language elements within
and between ladder logic networks or sections.
In an online paste operation, the item being pasted is done in increments of scans
until complete.
Selecting
Elements
You cannot select multiple language elements (e.g., accumulate selections) across
networks or sections.
Setting focus to an element is done by moving the cursor (either with mouse or arrow
key) to the element.
Selection of elements is done by clicking or pressing the Spacebar key on the
element which has the focus.
Multiple elements can be selected by using mouse-rubber-band actions. Multiple
elements can also be selected by holding down the Shift key and then clicking on
the elements or pressing the Spacebar key on the elements.
An entire row or column can be selected by clicking on the rung or column header
in the network.
The mouse provides a finer level of selection than the keyboard. If two or more
elements appear in a cell (e.g., both a vertical short and a contact), pressing the
Spacebar key selects all items in that cell. Clicking the mouse selects the element
closest to the mouse pointer.
Open Row
A new row is opened at the current cursor position. This command is executed only
if there is enough free space (i.e., the last row is empty). The rest of the network is
shifted down accordingly. Function boxes and other objects with a height of more
than one node are not split by this command.
Open Column
If the rightmost node column is free, the rest of the network is shifted right, and an
empty column is opened at the current cursor position.
Close Row
If the node row on which the cursor is positioned is empty, all node elements below
are shifted up one row, and an empty bottom row remains.
Close Column
If the node column on which the cursor is positioned is empty, all node elements to
the right are shifted left one column and an empty right column remains.
372
840 USE 493 00 September 2001
Ladder Logic 984
Network
By using the Networks main menu and it’s subcommands, you can insert (before)
or append (after) a single empty network or delete one or more networks.
In addition, within a single section, you can cut/copy a network then you can copy/
paste networks in any section. You are provided with a list of networks to consider
for the cut/copy operation
Reorder
Networks
Network execution reordering is an offline function. You may change the execution
order of networks within a single section. Networks are solved in the order they
appear in the section.
The execution order of networks is changed by using the Network Execution Order
dialog. i.e. select Network → Reorder....
Network
Comments
A section description can be included. Each network can be individually commented
using network comments and online comments.
A network name can be entered in the Network Comment dialog.
Reference Zoom and DX Zoom
Introduction
Concept offers you two different zoom types:
l the Reference Zoom
l the DX Zoom
Reference Zoom
Some programming elements allow parameters to be set which in effect customize
a network implementation for this specific element. Such features as ranges and
limits etc., are input using this zoom edit capability.
Information on individual references can be viewed or edited.
The Reference Zoom dialog shows the following information about a reference:
l State-ram value
l The drop/rack/slot if the reference is in I/O map
l If reference is 0x or 1x, then the disable/enable state is shown
The initial display format of 3x and 4x reference values depends on the instruction
in the program. The display format can be changed. The state ram value or disable/
enable state (if applicable) can also be changed. Constants cannot be zoomed. You
cannot zoom on variables without a reference. Reference Zoom dialogs can be used
for 4x references and for 0x references that are disabled.
840 USE 493 00 September 2001
373
Ladder Logic 984
DX Zoom
The DX Zoom editor allows you to edit registers for DX functions. These registers
used by the DX function also have text descriptions associated with them to aid with
DX programming. There is both keyboard and mouse access to DX zoom from the
Ladder Logic editor.
The DX Zoom dialog allows you to edit registers for given DX functions. The
DX zoom screen contains text for each register, bit, or group of bits.
The allowed data types are:
Data Type
Length
Unsigned Integer
16 bit
Signed Integer
16 bit
Unsigned Long Integer
32 bit
Signed Long Integer
32 bit
float
32 bit
bit (flag)
1 bit
bitfield
1-16 bits
The allowed complex data types are:
Complex Data Types
Length
equation
1-16 bits
ASCII
String up to 80 characters
Absolute addressing is the only addressing method allowed. There is no support for
indirect addressing.
In addition to data entry, DX zoom has the capability to display textual information
associated with a particular register. Each register entry will have an associated
descriptor as well as context sensitive help.
374
840 USE 493 00 September 2001
Ladder Logic 984
Search and Replace
Trace
The Online → Trace function finds coils from 0x references in the program. You can
trace a coil by first setting focus to a 0x reference and then running the trace
function. The result of trace is to position the network with the found coil on the edit
area. After a successful trace, with Online → ReTrace you can go back to the initial
0x reference.
Online Search
A separate dialog is available for Project → Search in direct mode. The Online
Search dialog. On each find, the choice to search previous or next is provided.
Search can be canceled at any time.
There is no support for searching variable names if in Ladder Logic direct mode.
Replace
References
Search and replace of references occur throughout an entire program. You can
select which sections/networks are being searched.
The Edit → Replace References dialog is modal. Request may be prompted for
each individual replace, or request to replace all with no prompting. Replaced
references are listed in the Project → Search → Search History list.
You may exclude DX functions with discrete references from the search. DX
functions require 0x and 1x references to be on a 16 bit boundary.
840 USE 493 00 September 2001
375
Ladder Logic 984
12.3
Subroutines
Subroutines
Example
The example below shows a series of three user logic networks, the last of which is
used for an up-counting subroutine. Segment 32 has been removed from the orderof-solve table in the segment scheduler.
Scheduled Logic Flow
Segment 001
Network 00001
Subroutine Segment
Segment 032
Network 00001
Network 00002
10001
00001
JSR
00001
LAB
00001
40256
40256
00001
ADD
40256
40256
SUB
40256
RET
00001
40256
00010
SUB
40999
00001
JSR
00001
Segment 002
Network 00001
376
840 USE 493 00 September 2001
Ladder Logic 984
Description of
Example
Description of example:
Stage
840 USE 493 00 September 2001
Description
1
When input 10001 to the JSR block in network 2 of segment 1 transitions from
OFF to ON, the logic scan jumps to subroutine #1 in network 1 of segment 32.
Result: The subroutine will internally loop on itself ten times, counted by the
ADD block.
2
The first nine loops end with the JSR block in the subroutine (network 1 of
segment 32) sending the scan back to the LAB block.
3
Upon completion of the tenth loop, the RET block sends the logic scan back to
the scheduled logic at the JSR node in network 2 of segment 1.
377
Ladder Logic 984
12.4
Equation Network Editor
At a Glance
Introduction
This section describes the LL984 equation network editor.
What’s in this
section?
This section contains the following topics:
378
Topic
Page
Introduction
379
Equation Editing
381
Syntax and Semantics
383
840 USE 493 00 September 2001
Ladder Logic 984
Introduction
Overview
The equation network is a combination of both Ladder Logic and an algebraic
equation. This network type allows a control designer to incorporate an algebraic
equation into a Ladder Logic program The Equation Network Editor dialog has no
row/column numbers since they have no significance. The grid display option is not
available for the equation network because the row/column concept does not apply
to this new network type. You have the ability, using Ladder Logic notation, to
indicate when the equation will be solved.
Equation network is a special type of Ladder Logic network that allows you to specify
the value of a result register in algebraic notation. If your PLC has an floating point
processor, equation network will take advantage of this feature for faster processing.
It uses a full Ladder Logic network to compose the equation, with a contact or
horizontal short as the enabling input and up to five output coils to describe the state
of the result.
Available Menu
Items
The Networks main menu includes two submenu entries to support equation
networks: Insert Equation and Append Equation. If you page through the
networks and reach the start/end of the section, you have the opportunity to insert/
append a new equation network, in addition to the other choices available (insert/
append ladder network, cancel, etc.).
840 USE 493 00 September 2001
379
Ladder Logic 984
Representation
The Ladder Logic network display changes to accommodate an initialized equation
network. The row and column numbers are removed and also the grid lines are
removed if they are currently being displayed.
The initial display is replaced by the figure below when you double click on the
default equation body.
Equation Network Editor
Equation Result
:=
<0
Equation Enable
=0
>0
!
OK
380
Cancel
Help
Variables
840 USE 493 00 September 2001
Ladder Logic 984
Equation Editing
Equation Entries
In the first column of the network, row 1 column 1, the legal equation enable entries
are:
l Normally open contact ( -| |- )
When a normally open contact is entered as the first node of the network the
equation is solved when the contact’s referenced coil or input is ON.
l Normally closed contact ( -|/|- )
When a normally closed contact is entered as the first node of the network the
equation is solved when the contact’s referenced coil is OFF.
l Horizontal short ( ----- )
When a horizontal short is entered as the first node of the network the equation
to be solved on every scan.
The horizontal short is used for display purposes only and is not sent to the PLC
as part of the network; the absence of an enabling contact node in the network
sent to the PLC indicates that the network should always be solved.
l Horizontal open ( - --- )
When a horizontal open is entered as the first node of the network the execution
of the equation network is prevented.
Equation Results
Equation network can produce five possible outputs from the top five rows of the
network to describe the result of the equation. You choose the outputs you want to
use by assigning 0x reference numbers to them.
The outputs are displayed as coils in the last column of the equation network.
The row in which the output coils are placed determines their meanings:
l Done without error ( -(√) )
When the equation passes power to the output from the top row, the equation has
completed successfully without an error.
l Result < 0 ( -(< 0) )
When the equation passes power to the output from the second row, the equation
has completed successfully and the result is less than zero.
l Result = 0 ( -(= 0) )
When the equation passes power to the output from the third row, the equation
has completed successfully and the result is equal to zero.
l Result > 0 ( -(> 0) )
When the equation passes power to the output from the fourth row, the equation
has completed successfully and the result is greater than zero.
l Done with error ( -(!) )
When the equation passes power to the output from the fifth row, the data in the
equation has caused a calculation error.
840 USE 493 00 September 2001
381
Ladder Logic 984
Cut, Copy and
Paste
Text may be pasted into the edit box of an Equation Network Editor dialog. These
are standard Windows text operations, and are the only cut/copy/paste operations
allowed within equation networks. No validation is performed at the time of a cut or
paste; the equation is validated when the user decides to terminate the dialog with
the OK button.
You can cut/copy/paste equation networks using Network → Cut/Copy... in which
a netwotk is manipulated in its entirety.
When a network is cut or copied it may be pasted as a new equation network. In this
case, "paste" means "insert new network". This is the same operation as is used with
ladder networks.
Validity Check
382
When OK is selected in the Equation Network Editor dialog, the equation is
checked for validity. If an error is detected the cursor is placed as near to the error
as possible and an error message is displayed.
840 USE 493 00 September 2001
Ladder Logic 984
Syntax and Semantics
Operators
The operators are listed below in order of precedence highest to lowest. If required
competing operators are evaluated left to right.
Operator Group
Operators
Description
Unary
-
Negation
~
Ones complement
Exponentiation
**
Exponentiation
Multiply/divide
Add/subtract
Bitwise
Relations
Conditional
840 USE 493 00 September 2001
*
Multiply
/
Divide
+
Addition
-
Subtraction
&
And
-
Or
<<
Left shift
>>
Right shift
^
Xor
<
Less than
< =
Less than or equal
=
Equal
< >
Not equal
= >
Greater than or equal
>
Greater than
?:
Test
383
Ladder Logic 984
Functions
Additionally the following functions are recognized (and predefined) in an equation:
Function
Equation Syntax
384
Description
ABS
Absolute value
ARCCOS
Arc Cosine
ARCSIN
Arc Sine
ARCTAN
Arc Tangent
COS
Cosine of Radians
COSD
Cosine of Degrees
EXP
Exponential function, e** argument
FIX
Convert float to integer, presumes floating point argument
FLOAT
Convert Integer to Floating point
LN
Natural Logarithm (base e)
LOG
Common Loagarithm (base 10)
SIN
Sine of Radians
SIND
Sine of Degrees
SQRT
Square Root
TAN
Tangent of Radians
TAND
Rangent of Degrees
Equation syntax conventions:
Command
Description
[abc]
Any one of a b c
[a-z]
Any characters in the range a trough z
expr*
Zero or more expr
expr+
One or more expr
840 USE 493 00 September 2001
Ladder Logic 984
Lexical Classes
Table of lexical classes
letter
Constants
a-z A-Z
bit
0-1
octal_digit
0-7
digit
0-9
hex_digit
0-9 a-f A-F
letter_or_digit
letter | digit
identifier
letter letter_or_digit*
assignment_op
:=
relational_op
> < >= <= = <>
bitwise_op
& | ^ >> <<
add_sub_op
+ -
Mul_div_op
* /
exp_op
**
unary_op
- ~
optional_sign
+ - /*nothing*/
Constants consist of:
l binary_const 2# bit binary_const_body
l decimal_const digit decimal_const_body
l octal_const 8# octal_digit octal_const_body
l hex_const 16# hex_digit hex_const_body
l float_const mantissa exponent
840 USE 493 00 September 2001
385
Ladder Logic 984
Register
References
reg_rvalue consists of:
discrete_rvalue
0 digit+
1 digit+
int_reg_rvalue
3 digit+
4 digit+
6 digit+
uint_reg_rvalue
U3 digit+
U4 digit+
U6 digit+
long_reg_rvalue
L3 digit+
L4 digit+
L6 digit+
ulong_reg_rvalue
UL3 digit+
UL4 digit+
UL6 digit+
float_reg_rvalue
F3 digit+
F4 digit+
F6 dgit+
reg_lvalue consists of:
int_reg_lvalue
Note
4 digit+
6 digit+
uint_reg_lvalue
U4 digit+
U6 digit+
long_reg_lvalue
L4 digit+
L6 digit+
ulong_reg_lvalue
UL4 digit+
UL6 digit+
float_reg_lvalue
F4 digit+
F6 dgit+
Because of Concept IEC standards, placement of lexical identifiers differ between
Modsoft and Concept. However, an existing Modsoft Equation is properly
transformed using the Modsoft program converter.
For example a Modsoft equation
400100F := 400001UL + 400002U + 400003L + #23
becomes a Concept equation
%F400100 := %UL400001 + %U400002 + %L400003 +23
386
840 USE 493 00 September 2001
Ladder Logic 984
12.5
LL984 Programming Modes
LL984 Programming Modes
Direct
Programming
There are two situations that determine how direct mode ladder editing is applied:
l The first is where there is no open project and you are connected to a PLC that
has a valid program in it. When you select the command Direct-mode 984LL
Editor the first program in the first segment is displayed. You can see the direct
mode status at the right side of the status bar and the network window is labled
984LL Direct.
l The second case occurs when you have a project open and you are connected
to the PLC (but not EQUAL). When you select Direct-mode 984LL Editor in this
case a dialog is displayed listing segments and the number of networks contained
in each. Click on the segment you want click on OK and the Network edit window
is displayed with a window labeled 984LL Direct. If you have an orignal edit
window it will remain on the display.
Combination
Mode
Combination programming occurs when the programming panel is online. Valid
program changes are immediately written to both the controller and the program
database simultaneously.
840 USE 493 00 September 2001
387
Ladder Logic 984
388
840 USE 493 00 September 2001
DFBs (Derived Function Blocks)
13
At a Glance
Overview
This Chapter describes the procedure for creating DFBs (Derived Function Blocks)
with help from Concept DFB.
What’s in this
chapter?
This chapter contains the following Sections:
Section
Topic
13.1
DFBs (Derived Function Blocks)
391
13.2
Programming and calling up a DFB
405
840 USE 493 00 September 2001
Page
389
DFBs (Derived Function Blocks)
390
840 USE 493 00 September 2001
DFBs (Derived Function Blocks)
13.1
DFBs (Derived Function Blocks)
At a Glance
Overview
This section provides an overview on creating and applying DFBs (Derived Function
Blocks).
What’s in this
section?
This section contains the following topics:
Topic
Page
General information about DFBs (Derived Function Blocks)
392
Global / Local DFBs
394
Use of variables in DFBs
396
Combined Input/Output Variables (VARINOUT Variables)
397
Creating Context Sensitive Help (Online Help) for DFBs
403
840 USE 493 00 September 2001
391
DFBs (Derived Function Blocks)
General information about DFBs (Derived Function Blocks)
At a Glance
DFBs are created with the help of the Concept DFB software.
DFBs (Derived Function Blocks) can be used for setting both the structure and the
hierarchy of a program.
In programming terms, a DFB represents a subroutine.
Meaning:
l Delivery/transfer of defined values to/from the subroutine
l Any complex program
l Nesting of one or more DFBs in a DFB
l Multiple DFB call up in the whole program, where the program code is bound only
once during the whole program
l DFB specific local variables
l Initial value for variables
l freely definable Interface
Programming
languages
DFBs can be created in the Function Block language (FBD), ladder diagram (LD),
instruction list (IL) and structured text (ST) programming languages.
Structure of a
DFB
A DFB firstly provides an empty space, which contains a manually defined input/
output and any manually programmed logic. The hierarchic structure of this logic
corresponds to a project in Concept which consists of one or more sections. These
sections contain the actual logic.
Internal structure of the DFB in the FBD editor:
.6.5
ADD_DINT
IN1
IN2
.6.6
MUL_DINT
OUT
.6.7
SUB_DINT
IN3
IN4
Processing
sequence
392
The processing sequence of the logic, the programming rules and the usable FFBs
and DFBs correspond overall to those of the FBD, LD, IL and/or ST programming.
840 USE 493 00 September 2001
DFBs (Derived Function Blocks)
Nesting
It is possible to call up one or more already existing DFBs in a DFB, where the called
up DFBs themselves can call up one or more DFBs. A DFB cannot however contain
itself. A nesting depth of 5 should not be exceeded. The exact border depends,
among other factors, upon parameterization (e.g. the number of DFB input/output
variables) of the CPU in use and its configuration.
Note: If nested DFBs are used, the whole nested DFB hierarchy is not checked
consistently in the DFB editor, but only the DFB on the next level. This means that,
for example, with a DFB with 3 or 4 levels, the deep nested DFBs can be altered
(i.e. Pin assignment), without this being apparent. In Concept, an error is not
reported until project analysis.
Note: NEVER use diagnostic EFBs (diagnostic library) in DFBs.
Context help
Personalized context-sensitive help (online help) can be created for DFBs (see
Creating Context Sensitive Help (Online Help) for DFBs, p. 403).
Calling up a DFB
DFBs are visually denoted in the FBD and LD editor window by double vertical lines
on the DFB border. Using the command button Refine… in the properties dialog box
of the DFB a document window can be opened, in which the programmed logic of
the DFB can be viewed (even when it was created with IL or ST). This document
window has a gray background, which denotes that the DFB in this document
window cannot be edited.
DFBs are treated as Function Blocks after they are called into Concept.
Call up of the DFB in the FBD editor:
FBI_3_7
SKOE
IN1
IN2
IN3
OUT
IN4
Archiving and
Documentation
The archiving and documentation of a DFB is the same as with projects (see
Documentation and Archiving, p. 599).
840 USE 493 00 September 2001
393
DFBs (Derived Function Blocks)
Global / Local DFBs
Description
Global and local DFBs differ in the locality of their directory hierarchy.
Depending on the directory or subdirectory in which the DFB is stored, it can be
called up globally, i.e. within all the projects created under Concept, or locally, in a
specific project.
In the Defining the Storage of Global DFBs during Upload, p. 957 you can ensure
that during the IEC upload process a GLB directory containing the global DFBs is
created in the project directory. By doing this, the existing global DFBs in the
Concept → DFB will not be overwritten and therefore it will not have any effect on
other projects.
Directory structure without uploaded project:
C:\\
Installation drive
Concept
Concept directory
DFB
Global DFB directory
...
PRJ
Project directory
DFB
Local DFB directory
...
394
840 USE 493 00 September 2001
DFBs (Derived Function Blocks)
Directory structure according to INI settings ([Upload]: PreserveGlobalDFBs=1)
for uploaded projects:
C:\\
Installation drive
Concept
Concept directory
DFB
Global DFB directory
...
PRJ
Project directory
DFB
Local DFB directory
GLB
Global DFB directory for
uploaded project
...
If a local and a global DFB have the same name, the local DFB is given priority.
Note: The length of the DOS path name in which the DFBs are stored is limited to
29 characters. Care should be taken that the DFB directory does not exceed this
limit.
840 USE 493 00 September 2001
395
DFBs (Derived Function Blocks)
Use of variables in DFBs
At a Glance
When programming DFBs, two forms of variables are distinguished:
l internal variables
l Formal parameters (Input/Output variables)
Internal variables
Internal variables are variables, which are only used within the logic of DFBs. These
variables can only be altered in Concept DFB itself. This alteration is therefore valid
for all copies of this DFB.
The following are authorized as types of variables:
l Unlocated variables,
l Unlocated multi-element variables,
l Constants and
l Literals.
These variables are declared in the Variable Editor (See Global / Local DFBs,
p. 394).
Formal
parameters
Input and output variables are required to transfer values to or from a DFB. These
types of variables are called formal parameters. These variables are led out of the
DFB and displayed as input/output when calling up the DFB.
In the Variable Editor (See Global / Local DFBs, p. 394) define the formal parameter
names (the names of the inputs/outputs), the type of data and the position of the
inputs/outputs (for the FBD /LD editor) on the DFB.
A maximum of 32 input and 32 output variables are possible. The width of the DFB
symbol is automatically matched to the length of the name of the inputs/outputs.
Input and output variables are always unlocated variables.
An initial value can also be defined for input variables. Input variables, i.e. inputs,
are always shown to the left of the DFB in the FBD/LD editor. Output variables, i.e.
outputs, are always shown to the right of the DFB.
A special form of input/output variables are the so-called VARINOUT variables (See
Combined Input/Output Variables (VARINOUT Variables), p. 397).
396
840 USE 493 00 September 2001
DFBs (Derived Function Blocks)
Transfer of
values during the
program runtime
During program runtime, the value of the current parameters in the DFB program are
passed and redistributed via the formal parameters. The value of these formal
parameters are determined by the value of the current parameters, which have been
linked with the corresponding DFB input/output. The current parameters can be
direct addresses, located variables, unlocated variables, located multi-element
variables, unlocated multi-element variables, elements from multi-element
variables, constants or literals.
Through this, the same DFB type can be called up several times and each copy of
the DFB assigned with individual parameters.
Exchanging
positions
If all 32 possible input or output variables are occupied when creating the DFB and
the exchange of the positions of 2 variables is required, a variable can be placed in
position 33 in the meantime. This enables the alteration of the variable positions.
However, saving a DFB with 33 input or output variables is not possible. Position 33
only serves as an auxiliary position when editing.
Combined Input/Output Variables (VARINOUT Variables)
Introduction
Combined input/output variables are a special form of input/output variables. These
are also called VARINOUT variables.
Application
Purpose
DFBs are often used to read a variable on input (input variables), to process it and
to restate the altered values of the same variable (output variables). If the variables
are structured variables and elements unaffected by the processing are also to be
output again at the output, it is necessary to copy the complete variable within the
DFB from the input to the output. This is also necessary when only a single element
of a structured variable is processed in the DFB. To save memory and shorten the
execution time, it is sensible to use VARINOUT variables in this case. This variable
type can (must) be used simultaneously at DFB inputs and the associated DFB
outputs.
Creating a
VARINOUT
variable in DFB
The following conditions must be noted when creating a VARINOUT variable:
l Like all input/output variables, VARINOUT variables are created in the Variable
Editor.
l VARINOUT variables are declared twice. Once as input variables and once as
output variables.
l The same formal parameter names must be used in both declarations.
l The same data types must be used in both declarations.
l The same pin positions must be used in both declarations.
l The input variable is declared first, and then the output variable.
l After confirming the declaration with OK, it is no longer possible to modify the
input variable.
840 USE 493 00 September 2001
397
DFBs (Derived Function Blocks)
Specific
Features during
Creation
The following special features are to be noted when creating DFBs with VARINOUT
inputs/outputs.
l If the DFB VARINOUT input has been assigned an initial value, this is not used,
as it is imperative that the input is switched on.
Example
DFB logic:
XXX
IN1
IN2
yyy
zzz
aaa
OUT1
jjj
kkk
OUT2
IO1
FFF
OUT1
IO1
ggg
mmm
(* IO1 = VARINOUT variable *)
Declaration of inputs:
Variable Editor
Search/Paste
Type
Variables
Constants
Inputs
Variable Name
Outputs
Data Type
Search/Replace
InitValue Position Used
1
IN1
INT
1
1
2
IN2
DINT
3
1
3
IO1
MYTYPE
2
2
4
5
6
OK
398
Cancel
Help
840 USE 493 00 September 2001
DFBs (Derived Function Blocks)
Declaration of outputs:
Variable Editor
Search/Paste
Type
Variables
Constants
Inputs
Variable Name
Outputs
Data Type
Search/Replace
InitValue Position Used
1
OUT
REAL
1
2
OUT2
REAL
3
1
1
3
IO1
MYTYPE
2
2
4
5
6
OK
Use of the DFB in
FBD/LD
Cancel
Help
The DFB is invoked and used in FBD/LD editor (see also Calling up a DFB in the
FBD Function Block dialog, p. 418 and Calling up a DFB in Ladder Diagram LD,
p. 420) just like any other DFB. The inputs/outputs of type VARINOUT are
characterized by a dotted line.
Use of the DFB in the FBD editor:
DFBX
V1
V5
V6
Specific features
in usage
IN1
IO1
IN2
OUT1
IO1
OUT2
V4
V5
V3
The following special features are to be noted when using DFBs with VARINOUT
inputs/outputs.
l It is essential that VARINOUT inputs/outputs are linked. Otherwise an error
message appears during the section analysis.
l The same variables/variable components must be attached at the VARINOUT
input and the VARINOUT output.
l No graphical links can be attached to VARINOUT inputs/outputs.
l No literals or constants can be attached to VARINOUT inputs/outputs.
l No Boolean variables can be attached to VARINOUT inputs/outputs, because
this leads to problems in the code generation.
l No negations can be used at VARINOUT inputs/outputs.
l If a DFB with VARINOUT inputs/outputs is used within another DFB (nested
DFBs), the VARINOUT inputs/outputs of the inner DFB can be linked to those of
the outer DFB.
840 USE 493 00 September 2001
399
DFBs (Derived Function Blocks)
Use of the DFB
in ST
The DFB is invoked and used in ST Editor (see also Function Block/DFB Invocation,
p. 351) like any other DFB.
Use of the DFB in the ST Editor:
(* Function Block declaration *)
VAR
Instance_Name : DFBX;
END_VAR
(* Block invocation *)
Instance_Name (IN1 := V1,
IO1 := V5,
IN2 := V2);
(* Assignments *)
V4 := Instance_Name.OUT1;
V3 := Instance_Name.OUT3;
The following special features are to be noted when using DFBs with VARINOUT
inputs/outputs.
l It is essential that VARINOUT inputs be assigned a value on DFB invocation.
Otherwise an error message will appear during the section analysis i.e. the
following block invocation is not allowed, because the assignment of a value at
the VARINOUT input "V5" is missing:
Instance_Name (IN1 := V1,
IN2 := V2);
l VARINOUT outputs are not to be assigned a value. Otherwise an error message
will appear during the section analysis i.e. the following output assignment is not
allowed, because a value has been assigned at the VARINOUT output:
V5 := Instance_Name.IO1;
l No literals or constants are to be assigned to VARINOUT inputs.
l No Boolean variables can be attached to VARINOUT inputs/outputs, because
this leads to problems in the code generation.
l If a DFB with VARINOUT inputs/outputs is used within another DFB (nested
DFBs), the VARINOUT inputs/outputs of the inner DFB can be linked to those of
the outer DFB.
400
840 USE 493 00 September 2001
DFBs (Derived Function Blocks)
Use of the DFB
in IL
The DFB is invoked and used in IL editor (see also Use of Function Blocks and
DFBs, p. 302) like any other DFB.
Use of the DFB in the IL editor:
(* Function Block declaration *)
VAR
Instance_Name : DFBX;
END_VAR
(* Block invocation *)
CAL Instance_Name (IN1 := V1, IO1 := V5, IN2 := V2)
(* Assignments *)
LD Instance_Name.OUT1
ST V4
LD Instance_Name.OUT3
ST V3
The following special features are to be noted when using DFBs with VARINOUT
inputs/outputs.
l It is essential that VARINOUT inputs be assigned a value on DFB invocation.
Otherwise an error message will appear during the section analysis i.e. the
following block invocation is not allowed, because the assignment of a value at
the VARINOUT input "V5" is missing:
CAL Instance_Name (IN1 := V1, IN2 := V2)
l VARINOUT outputs are not to be assigned a value. Otherwise an error message
will appear during the section analysis i.e. the following output assignments are
not allowed, because a value has been assigned at the VARINOUT output:
LD Instance_Name.IO1
ST V5
l No literals or constants are to be assigned to VARINOUT inputs.
l No Boolean variables can be attached to VARINOUT inputs/outputs, because
this leads to problems in the code generation.
l If a DFB with VARINOUT inputs/outputs is used within another DFB (nested
DFBs), the VARINOUT inputs/outputs of the inner DFB can be linked to those of
the outer DFB.
840 USE 493 00 September 2001
401
DFBs (Derived Function Blocks)
Special features
when modifying
There are 3 general possibilities for modifying VARINOUT variables:
l Modify existing VARINOUT variables:
l Rename the variables
l Change the data type
l Change the pin position
l Two existing variables can be joined in one VARINOUT variable
l Split a VARINOUT variable into two variables
Change existing
VARINOUT
variables
To change (rename, change data type, change pin position) existing VARINOUT
variables, proceed as follows:
Step
1
Join variables to
VARINOUT
variable
402
Action
Open the Variable Editor (F8).
2
Select the Outputsoption.
3
Implement the required changes.
Response: The changes are automatically transferred to the input variable.
4
Confirm the changes with OK.
To join two variables to a VARINOUT variable, perform the following steps:
Step
Action
1
Open the Variable Editor (F8).
2
Select the Inputsoption.
3
Create a new input variable (e.g. INOUT1).
4
Select the Outputsoption.
5
Create a new output variable with the same name (e.g. INOUT1), data type and
pin position as the input variable.
6
Confirm the changes with OK.
7
Replace all uses of the input and output variable with the VARINOUT variable in
your program.
8
Open the Variable Editor (F8) and delete the now redundant input and output
variable.
840 USE 493 00 September 2001
DFBs (Derived Function Blocks)
Splitting
VARINOUT
variable
To split a VARINOUT variable into two variables, proceed as follows:
Step
Action
1
Open the Variable Editor (F8).
2
Select the Inputsoption.
3
Create a new input variable (e.g. IN1).
4
Select the Outputsoption.
5
Create a new output variable (e.g. OUT1).
6
Confirm the changes with OK.
7
Replace all usages of the VARINOUT variable with the input and output
variables in your program.
8
Open the Variable Editor (F8) and delete the now redundant VARINOUT
variable.
Creating Context Sensitive Help (Online Help) for DFBs
Introduction
In Concept, help is provided for each EFB, which can be invoked according to the
context (the Help on Type command key in the EFBs properties dialog). There are
of course no corresponding help texts in Concept for the DFBs created by you.
You can, however, create your own help for each DFB, which can be invoked in
Concept with Help on Type.
File Format:
You can create your help in the following file formats:
l .chm (Microsoft Windows compiled HTML help file)
l .doc (Microsoft Word format)
l .htm (Hypertext Markup Language)
l .hlp (Microsoft Windows help file (16- or 32-Bit Format))
l .pdf (Adobe Portable Document Format
l .rtf (Microsoft Rich Text Format)
l .txt (Plain ASCII Text-Format)
Name
The name of the help file must be exactly the same as the name of the DFB (e.g.
SKOE.ext)
The only exceptions are standardized DFB names (e.g. SKOE_BOOL,
SKOE_REAL etc.) In these cases the help file name is the DFB name without the
datatype extension (e.g. DFB name) SKOE_BOOL has the help file SKOE.ext).
840 USE 493 00 September 2001
403
DFBs (Derived Function Blocks)
Directory
The help file can be stored in the following directories:
l Concept directory
l Concept Help directory (if defined in the file Concept.ini, see readme)
l Global DFB directory
l Local DFB directory
Invoking the Help
File
Concept carries out the following procedure to invoke the help file:
Phase
1
Description
Search for the help file DFBName.ext in the local DFB-directory.
The help file is searched for in the following sequence:
l .hlp
l .chm
l .htm
l .rtf
l .doc
l .txt
l .pdf
Result: If the search result is positive the help file will be displayed, otherwise it
will continue with phase 2.
2
Search for the help file DFBName.ext in the local DFB-directory.
For the order, see phase 1.
Result: If the search result is positive the help file will be displayed, otherwise it
will continue with phase 3.
3
Search for the help file DFBName.ext in the Concept-directory or Concept-Help
directory.
For the order, see phase 1.
Result: If the search result is positive the help file will be displayed, otherwise it
will continue with phase 4.
4
404
Display of the comment created in Concept DFB with Project → Properties.
840 USE 493 00 September 2001
DFBs (Derived Function Blocks)
13.2
Programming and calling up a DFB
At a Glance
Overview
This section describes programming and calling up a DFB.
What’s in this
section?
This section contains the following topics:
Topic
Page
At a Glance
406
Creating the DFB
407
Creating the Logic in FBD Function Block Language
408
Creating the Logic in LD Ladder Diagram
411
Creating the Logic in IL Instruction List
414
Creating the Logic in ST Structured Text
416
Calling up a DFB in the FBD Function Block dialog
418
Calling up a DFB in Ladder Diagram LD
420
Calling up a DFB in the IL instruction list
422
Calling up a DFB in structured text ST
423
840 USE 493 00 September 2001
405
DFBs (Derived Function Blocks)
At a Glance
At a Glance
Programming and calling up a DFB is divided into 3 main steps:
Step
Occupying the DFB (See Creating the DFB, p. 407)
2
Creating the logic in:
l Function Block language (FBD) (See Creating the Logic in FBD Function
Block Language, p. 408)
l Ladder diagram (LD) (See Creating the Logic in LD Ladder Diagram, p. 411)
l Instruction list (IL) (See Creating the Logic in IL Instruction List, p. 414)
l Structured text (ST) (See Creating the Logic in ST Structured Text, p. 416)
3
406
Action
1
Calling up the DFB in:
Function Block language (FBD) (See Calling up a DFB in the FBD Function
Block dialog, p. 418)
l Ladder diagram (LD) (See Calling up a DFB in Ladder Diagram LD, p. 420)
l Instruction list (IL) (See Calling up a DFB in the IL instruction list, p. 422)
l Structured text (ST) (See Calling up a DFB in structured text ST, p. 423)
l
840 USE 493 00 September 2001
DFBs (Derived Function Blocks)
Creating the DFB
Description
The procedure for creating the DFB is as follows:
Step
Close Concept and start Concept DFB.
2
Create a new DFB using the menu command Data file → New DFB.
Reaction: The name now appears on the title bar:[untitled].
3
Using the menu command Data file → New section... , generate a new section
and enter a section name.
The section name (max. 32 characters) must be clear throughout the DFB, and
is not case-sensitive. If the section name entered already exists, a warning is
given and another name must be chosen. The section name must correspond to
the IEC Name conventions, otherwise an error message appears.
Note: In accordance with IEC1131-3, only letters are permitted as the first
character of names. If, however numbers are required as the first character, this
can be enabled using the menu command Options → Pre-settings → IEC
Expansions... → IEC Expansions → Enable leading figures in identifiers.
4
840 USE 493 00 September 2001
Action
1
Select a programming language for the section:
Function Block language (FBD) (See Creating the Logic in FBD Function
Block Language, p. 408)
l Ladder diagram (LD) (See Creating the Logic in LD Ladder Diagram, p. 411)
l Instruction list (IL) (See Creating the Logic in IL Instruction List, p. 414)
l Structured text (ST) (See Creating the Logic in ST Structured Text, p. 416)
l
5
The menu command Project → Properties can be used to generate a comment
about the DFB.
Reaction: This comment can be shown in Concept in the DFB properties box
with the command button Help for type.
6
Save the DFB with the menu command Data file → Save DFB.
Reaction: The first time the Save is used, the Save as dialog box opens –
specify the DFB name and directory where it is to be saved here.
7
Select the directory to be occupied by the DFB. Attention should be paid to the
difference between global and local DFBs (see also Global / Local DFBs,
p. 394).
8
Enter the DFB name (max. 8 characters, always with the .DFB extension).
The name must be clear throughout the directory, and is not case-sensitive. If
the section name entered already exists, a warning is given and another name
must be chosen.
407
DFBs (Derived Function Blocks)
Creating the Logic in FBD Function Block Language
Description
The procedure for creating the logic in FBD function block language is as follows:
Step
1
Action
To insert an FFB into the section, select the Objects → Select FFB... menu
command.
Result: The FFB dialog box from the library is opened.
FFBs in IEC Library
Group
Arithmetic
Bistable
Comparison
Converter
Counter
Edge detection
Logic
Numerical
EFB Type
DFB Type
AND_BOOL
AND_BYTE
AND_WORD
NOT_BOOL
NOT_BYTE
NOT_WORD
OR_BOOL
OR_BYTE
LIGHTSS
NEST1
NEST2
FFB sorted...
Library...
DFB
Close
Help on Type
Help
2
In this dialog box you can select a library and an FFB from it by using the
Library... command button. You can, however, also display the DFBs that you
created and select one of them using the DFB command button.
3
Place the selected FFB in the section.
4
When all FFBs have been positioned, close the dialog box with OK
5
Activate select mode with Objects → Select Mode, click on the FFB and move
the FFBs to the desired position.
6
Activate the link mode with Objects → Link and connect the FFBs.
For example:
.6.5
ADD_DINT
.6.6
MUL_DINT
.6.7
SUB_DINT
408
840 USE 493 00 September 2001
DFBs (Derived Function Blocks)
Step
7
Action
Activate the Variables Editor withProject → Variable Editor to declare the DFB
variables and inputs/outputs (formal parameters).
Example (inputs):
Variables Editor
Search/Paste
Type
Variables
Constants
Inputs
Variable Name
Outputs
Data Type
Search/Replace
InitValue Position Used
1
IN1
DINT
1
0
2
IN2
DINT
2
0
3
IN3
DINT
3
0
4
IN4
DINT
4
0
5
6
Help
Cancel
OK
Example (outputs):
Variable Editor
Search/Paste
Type
Variables
Constants
Inputs
Variable Name
1
OUT1
Outputs
Data Type
DINT
Search/Replace
Position Used
3
0
2
3
OK
8
840 USE 493 00 September 2001
Cancel
Help
Then re-activate the select mode with Objects → Select Mode and double-click
on one of the unconnected inputs/outputs.
Result: The Connect FFB dialog box opens, in which you can allocate a current
parameter to the input/output.
409
DFBs (Derived Function Blocks)
Step
9
Action
Back up the DFB with the File → Save menu command.
For example:
.6.5
ADD_DINT
.6.6
N1
MUL_DINT
N2
OUT
.6.7
SUB_DINT
N3
N4
410
840 USE 493 00 September 2001
DFBs (Derived Function Blocks)
Creating the Logic in LD Ladder Diagram
Description
The procedure for creating the logic in LD ladder diagram is as follows:
Step
Action
1
To insert a contact or coil in the section, open the Objects main menu and select
the desired contact or coil. Contacts and coils can also be selected using the tool
bar. Place the contact or coil in the section.
2
To insert an FFB into the section, select the Objects → Select FFB... menu
command.
Result: The FFBs from Library dialog box is opened.
FFBs in IEC Library
Group
Arithmetic
Bistable
Comparison
Converter
Counter
Edge detection
Logic
Numerical
840 USE 493 00 September 2001
EFB Type
DFB Type
AND_BOOL
AND_BYTE
AND_WORD
NOT_BOOL
NOT_BYTE
NOT_WORD
OR_BOOL
OR_BYTE
LIGHTSS
NEST1
NEST2
FFB sorted...
Library...
DFB
Close
Help on Type
Help
3
In this dialog box you can select a library and an FFB from it by using the
Library... command button. You can, however, also display the DFBs that you
created and select one of them using the DFB command button.
4
Place the selected FFB in the section.
5
When all FFBs have been positioned, close the dialog box with OK
6
Activate select mode using Objects → Select Mode, and move the contacts,
coils and FFBs to the required position.
411
DFBs (Derived Function Blocks)
Step
7
Action
Activate link mode with Objects → Link, and connect the contacts, coils and
FFBs. Connect the contacts, FFBs and the left power rail.
For example:
.6.5
EN
ADD_DINT
ENO
.6.6
MUL_DINT
EN
ENO
.6.7
EN
412
SUB_DINT
ENO
840 USE 493 00 September 2001
DFBs (Derived Function Blocks)
Step
8
Action
Activate the Variables Editor withProject → Variable Editor to declare the DFB
variables and inputs/outputs (formal parameters).
Example (inputs):
Variable Editor
Search/Paste
Type
Variables
Constants
Inputs
Variable Name
Outputs
Data Type
Search/Replace
InitValue Position Used
1
IN1
DINT
1
0
2
IN2
DINT
2
0
3
IN3
DINT
3
0
4
IN4
DINT
4
0
5
6
OK
Help
Cancel
Example (outputs):
Variable Editor
Search/Paste
Type
Variables
Constants
Inputs
Variable Name
1
OUT1
Outputs
Data Type
DINT
Search/Replace
Position Used
3
0
2
3
OK
840 USE 493 00 September 2001
Cancel
Help
9
Then re-activate select mode with Objects → Select mode, and double-click on
a contact or coil.
Result: The Properties: LD Objects dialog box is opened, in which you can
allocate an actual parameter to the contact/coil.
10
To connect the FFB input/outputs to the current parameters, double-click on one
of the unconnected input/outputs.
Result: The Connect FFB dialog box is opened, in which you can allocate a
current parameter to the input/output.
413
DFBs (Derived Function Blocks)
Step
11
Action
Back up the DFB with the File → Save menu command.
For example:
.6.5
EN
ADD_DINT
ENO
N1
.6.6
N2
MUL_DINT
EN
ENO
OUT
.6.7
EN
SUB_DINT
ENO
N3
N4
Creating the Logic in IL Instruction List
Description
The procedure for creating the logic in Instruction List (IL) is as follows:
Step
1
Action
Declare the function block and DFBs to be used using VAREND_VAR.
Note: Functions do not have to be declared:
Example:
VAR
CLOCK : CLOCK_DINT ;
END_VAR
414
840 USE 493 00 September 2001
DFBs (Derived Function Blocks)
Step
2
Action
Declare the variables and their initial value in the Variable Editor.
Example (inputs):
Variable Editor
Search/Paste
Type
Variables
Constants
Inputs
Variable Name
Outputs
Data Type
Search/Replace
InitValue Position Used
1
IN1
DINT
1
0
2
IN2
DINT
2
0
3
IN3
DINT
3
0
4
IN4
DINT
4
0
5
6
Help
Cancel
OK
Example (outputs):
Variable Editor
Search/Paste
Type
Variables
Constants
Inputs
Variable Name
1
OUT1
Outputs
Data Type
DINT
Search/Replace
Position Used
3
0
2
3
OK
3
Cancel
Help
Create your program’s logic.
For example:
LD IN1
ADD IN2
MUL (
LD IN3
SUB IN4
)
ST OUT
4
840 USE 493 00 September 2001
Back up the section with the File → Save Project menu command.
415
DFBs (Derived Function Blocks)
Creating the Logic in ST Structured Text
Description
The procedure for creating the logic in ST structured text is as follows:
Step
1
Action
Declare the function block and DFBs to be used using VAREND_VAR.
Note: Functions do not have to be declared:
Example:
VAR
CLOCK : CLOCK_DINT ;
END_VAR
416
840 USE 493 00 September 2001
DFBs (Derived Function Blocks)
Step
2
Action
Declare the variables and their initial value in the Variable Editor.
Example (inputs):
Variable Editor
Search/Paste
Type
Variables
Constants
Inputs
Variable Name
Outputs
Data Type
Search/Replace
InitValue Position Used
1
IN1
DINT
1
0
2
IN2
DINT
2
0
3
IN3
DINT
3
0
4
IN4
DINT
4
0
5
6
OK
Help
Cancel
Example (outputs):
Variable Editor
Search/Paste
Type
Variables
Constants
Inputs
Variable Name
1
OUT1
Outputs
Data Type
DINT
Search/Replace
Position Used
3
0
2
3
OK
3
Cancel
Help
Create your program’s logic.
For example:
OUT := (IN1 + IN2) * (IN3 - IN4)
4
840 USE 493 00 September 2001
Back up the section with the File → Save Project menu command.
417
DFBs (Derived Function Blocks)
Calling up a DFB in the FBD Function Block dialog
Note
When a DFB is called up, it is not significant which program languages it was created
in. The DFB can be called up in all the IEC sections.
Description
The procedure for calling up a DFB in the FBD Function Block dialog is as follows:
Step
Action
1
Close the Concept DFB and start Concept.
2
Open or create a project and open or create a section.
3
As with an EFB, the DFB is called up using the command button: Objects →
Select FFB....
Reaction: The dialog box FFBs from library is opened.
4
Press the DFB command button to display the global and local DFBs.
For example:
FFBs in IEC library
Group
Arithmetic
Bistable
Comparison
Converter
Counter
Edge detection
Logic
Numerical
5
EFB type
DFB type
MOVE
MUL_DINT
MUL_INT
MUL_REAL
MUL_UDINT
MUL_UINT
SUB_DINT
SUB_INT
LIGHTSS
SKOE
Sorted by FFB...
Library...
DFB
Close
Help about type
Help
Now click on the desired DFB in the list, and position it in the Editor window.
For example:
FBI_3_7
SKOE
IN1
IN2
IN3
IN4
6
418
OUT
Double-clicking on the DFB opens the Properties: Derived Function Block
dialog box, where the Refine... command button can be used to open a
document window with the internal DFB logic. The gray background indicates
that the DFB cannot be edited in this document window.
840 USE 493 00 September 2001
DFBs (Derived Function Blocks)
Step
7
Action
Now only the actual parameter needs to be defined. This is performed in a way
corresponding to the normal EFB link using the Link FFB dialog box (doubleclick on the inputs/outputs to be parametered.
For example:
SKOE1
SKOE
VALUE1
VALUE2
VALUE3
VALUE4
IN1
IN2
IN3
IN4
OUT
RESULT1
OUT
RESULT2
SKOE2
SKOE
VALUE5
VALUE6
VALUE8
VALUE9
IN1
IN2
IN3
IN4
Reaction: As is clear from the example, two different sets of parameters are
used in the DFB calls 1 and 2. The formal parameters are the same in both calls
because the program code of the DFB is only occupied once.
840 USE 493 00 September 2001
419
DFBs (Derived Function Blocks)
Calling up a DFB in Ladder Diagram LD
Note
When a DFB is called up, it is not significant which program languages it was created
in. The DFB can be called up in all the IEC sections.
Description
To call up a DFB in Ladder Diagram LD, do the following:
Step
Action
1
Close the Concept DFB and start Concept.
2
Open or create a project and open or create a section.
3
As with an EFB, the DFB is called up using the command button: Objects →
Select FFB....
Reaction: The dialog box FFBs from library is opened.
4
Press the DFB command button to display the global and local DFBs.
For example:
FFBs in IEC library
Group
Arithmetic
Bistable
Comparison
Converter
Counter
Edge detection
Logic
Numerical
5
EFB type
DFB type
MOVE
MUL_DINT
MUL_INT
MUL_REAL
MUL_UDINT
MUL_UINT
SUB_DINT
SUB_INT
LIGHTSS
SKOE
Sorted by FFB...
Library...
DFB
Close
Help about type
Help
Now click on the DFB required in the list, and position it in the Editor window.
For example:
FBI_3_7
SKOE
EN
IN1
IN2
IN3
IN4
420
ENO
OUT
840 USE 493 00 September 2001
DFBs (Derived Function Blocks)
Step
6
Action
Double-clicking on the DFB opens the Properties: Derived Function Block
dialog box, where the Refine... command button can be used to open a
document window with the internal DFB logic. The gray background indicates
that the DFB cannot be edited in this document window.
7
Use the left power rail to link the EN input.
8
Now only the actual parameter needs to be defined. This is performed in a way
corresponding to the normal EFB link using the Link FFB dialog box (doubleclick on the inputs/outputs to be parametered.
For example:
SKOE1
SKOE
VALUE1
VALUE2
VALUE3
EN
IN1
IN2
IN3
VALUE4
IN4
ENO
OUT
RESULT1
SKOE2
SKOE
VALUE5
VALUE6
VALUE8
EN
IN1
IN2
IN3
VALUE9
IN4
ENO
OUT
RESULT2
Reaction: As is clear from the example, two different sets of parameters are
used in the DFB call 1 and 2. The formal parameters are the same in both calls
because the program code of the DFB is only occupied once.
840 USE 493 00 September 2001
421
DFBs (Derived Function Blocks)
Calling up a DFB in the IL instruction list
Note
When a DFB is called up, it is not significant which program languages it was created
in. The DFB can be called up in all the IEC sections.
Description
To call up a DFB in the IL instruction list, do the following:
Step
Action
1
Close the Concept DFB and start Concept.
2
Open or create a project and open or create a section.
3
Calling up a DFB in the IL is performed like Calling up a Function Block (See Use of
Function Blocks and DFBs, p. 302).
For example:
VAR
SKOE1, SKOE2 : SKOE;
END_VAR
(* Instancing the DFBs *)
CAL SKOE1(IN1:=VALUE1,IN2:=VALUE2,IN3:=VALUE3,IN4:=VALUE4)
LD SKOE1.out
(* DFB Call 1 *)
ST RESULT1
CAL SKOE2(IN1:=VALUE5,IN2:=VALUE6,IN3:=VALUE7,IN8:=VALUE4)
LD SKOE2.out
(* DFB Call 2 *)
ST RESULT2
Reaction: As is clear from the example, two different sets of parameters are used
in the DFB calls 1 and 2. The formal parameters are the same in both calls because
the program code of the DFB is only occupied once.
422
840 USE 493 00 September 2001
DFBs (Derived Function Blocks)
Calling up a DFB in structured text ST
Note
When a DFB is called up, it is not significant which program languages it was created
in. The DFB can be called up in all the IEC sections.
Description
The procedure for calling up a DFB in structured text ST is as follows:
Step
Action
1
Close the Concept DFB and start Concept.
2
Open or create a project and open or create a section.
3
Calling up a DFB in the ST is performed like Calling up a Function Block (See
Function Block/DFB Invocation, p. 351).
For example:
VAR
SKOE1, SKOE2 : SKOE;
END_VAR
(* Instancing the DFBs *)
SKOE1(IN1:=VALUE1, IN2:=VALUE2, IN3:=VALUE3, IN4:=VALUE4);
RESULT1:=SKOE1.OUT ;
(* DFB Call 1 *)
SKOE2(IN1:=VALUE5, IN2:=VALUE6, IN3:=VALUE7, IN4:=VALUE8);
RESULT2:=SKOE2.OUT ;
(* DFB Call 2 *)
Reaction: As is clear from the example, two different sets of parameters are used
in the DFB calls 1 and 2. The formal parameters are the same in both calls because
the program code of the DFB is only occupied once.
840 USE 493 00 September 2001
423
DFBs (Derived Function Blocks)
424
840 USE 493 00 September 2001
Macros
14
At a Glance
Overview
This Chapter describes the procedure for creating macros with help from Concept
DFB.
What’s in this
chapter?
This chapter contains the following Sections:
Section
840 USE 493 00 September 2001
Topic
Page
14.1
Macro
427
14.2
Programming and calling up a macro
435
425
Macros
426
840 USE 493 00 September 2001
Macros
14.1
Macro
At a Glance
Overview
This section provides an overview on creating and applying macros.
What’s in this
section?
This section contains the following topics:
Topic
Page
Macros: general
428
Global / Local Macros
429
Exchange marking
430
Creating Context Sensitive Help (Online Help) for Macros
433
840 USE 493 00 September 2001
427
Macros
Macros: general
At a Glance
Macros are used to duplicate frequently used sections and networks (including their
logic, variables and variable declaration).
Creating macros
Macros are created with the help of the Concept DFB software.
Programming
languages
Macros can only be created in the FBD and LD programming languages.
Properties
Macros have the following properties:
l Macros only contain one section.
l Macros can contain a section of any complexity.
l From the point of view of program technology, there is no difference between an
instanced macro, i.e. a macro inserted into a section and a conventionally created
section.
l It is possible to call up DFBs in a macro.
l It is possible to declare macro-specific variables for the macro.
l It is possible to use data structures specific to the macro
l Automatic transfer of the variables declared in the macro.
l Initial values are possible for the macro variables.
l It is possible to instance a macro many times in the entire program with different
variables.
l The name of the section, variable names and data structure names can contain
up to 10 different exchange marks (@0 to @9).
Hierarchic
structure
The hierarchic structure of a macro corresponds to a project in Concept which
consists of only one section. This section contains the actual logic.
Context help
Personalised context-sensitive help (online help) can be generated for macros (see
Creating Context Sensitive Help (Online Help) for Macros, p. 433).
Processing
sequence
The processing sequence of the logic, the programming rules and the usable FFBs
and DFBs correspond overall to those of the FBD or LD programming.
428
840 USE 493 00 September 2001
Macros
Calling up a
macro
A macro can be called up from SFC, FBD and LD sections.
There is a fundamental difference here:
l Call from an SFC Section
When a macro is called up (instanced) from an SFC section (e.g. as a network
for the action variable), a new FBD/LD section containing only the macro’s logic
is automatically created
l Calling up an FBD/LD section
When a macro is called up from an FBD or LD section, the macro’s logic is
inserted into the current FBD or LD section. In this case a new section is not
created.
Archiving and
Documentation
The process for archiving a macro is the same as for archiving and documenting a
project (see Documentation and Archiving, p. 599).
Global / Local Macros
Description
Global and local macros differ in the locality of their directory hierarchy.
Depending on the directory or subdirectory in which the macro is stored, it can be
called up globally, i.e. within all the projects created under Concept, or locally, in a
specific project.
In the Defining the Storage of Global DFBs during Upload, p. 957 you can ensure
that during the IEC upload process a GLB directory containing the global macros is
produced in the project directory. By doing this, the existing global macros in the
Concept → DFB will not be overwritten and therefore it will not have an effect on
other projects.
Directory structure without uploaded project:
C:\\
Installation drive
Concept
Concept directory
DFB
Global DFB/macro directory
...
PRJ
Project directory
DFB
Local DFB/macro directory
...
840 USE 493 00 September 2001
429
Macros
Directory structure according to INI settings ([Upload]: PreserveGlobalDFBs=1)
for uploaded projects:
C:\\
Installation drive
Concept
Concept directory
DFB
Global DFB/macro directory
...
PRJ
Project directory
DFB
Local DFB/macro directory
GLB
Global DFB/macro directory for
uploaded project
...
If a local and a global macro have the same name, the name of the local macro is
displayed in lower case letters and that of the global macro in upper case letters
when they are inserted.
Note: The length of the DOS path name in which the macros is stored is limited to
29 characters. Care should be taken that the macro directory does not exceed this
limit.
Exchange marking
At a Glance
The exchange markings (@0 to @9) in macros are used to insert the macro in a
Concept section. When inserting a macro into a section, you will input a character
string that will replace the character strings. It is therefore possible to use a logically
identical macro with different variables, data structures and comments, because
different series of character strings can be pre-set during each insertion.
The exchange flags can be used in the following elements:
l Section names
l Variable names
l Comments
430
840 USE 493 00 September 2001
Macros
Comment on
exchange
markings
A comment on the macro’s exchange marking can be written usingFile → Section
Properties. This comment will be displayed when the macro is called up in Concept
the in the exchange marking’s replacement dialog.
Exchange
marking in the
section name
When a macro is instanced, i.e. when it is called up from an SFC section, a new
section is automatically occupied with the name of the macro section, as well as
other procedures. The section name must be changed with each instancing so that
the macro can be instanced several times in one project. The exchange marking in
the section name is used for this. Therefore an exchange marking (@0 to @9)
should always be entered when a section is created in the macro. Otherwise the
macro can only be called up once from an SFC section and used in the project.
When a macro is called up from an FBD/LD section, the section name of the macro
is not significant because no new section is created in this case.
Exchange
marking in
variable names
Input and output variables are required to transfer values to or from a network.
These variables are already declared in the macro and are connected to the macro’s
EFBs.
To declare these variables, the variable name (with exchange markings), the data
type and possibly a comment (possibly with exchange markings) should be declared
in the variables editor. An initial value can also be defined for input variables.
When a macro is instanced in Concept, the exchange markings in all the variable
names are replaced with the pre-set character strings. This ensures that the
variables required for each use of the macro are clearly declared. If a variable is
used in all cases of macro instancing, it should be given a name without the
exchange marking.
The same applies to variables with Derived Data Types (data structures). This
means that the type of one data structure can be used in as many macros as
required as often as required.
840 USE 493 00 September 2001
431
Macros
Exchange markings in the Variables Editor
Variable Editor
Find/insert
Type
Variables
Constants
Find/replace
Variable name
Data type
Initial
value
Use
1
@0_on
BOOL
2
@0_value
VALUE
3
@1_error
INT
@1 reports error
4
@1
BOOL
@1 = Action variable
5
@2_result
REAL
@2 result
OK
@0 switched on
@0 Default value
Set…
Cancel
Help
Note: If the macro is to be connected as an action to a step in a sequence, it is
advisable to denote the variable designated as an action variable only with the @0
exchange marking. In this case, the designated action variable will automatically
be connected to the step when the macro is instanced. Care should be taken that
the action variables are always of the BOOL type. If the macro contains several
action variables (e.g. for the forward and backward running of a motor), it is
advisable to define these action variables in a Derived Data Type (data structure)
and to denote the variable which this data type is assigned to with the @0
exchange marking only.
Since a clear variable is assigned to each input/output during the instancing of the
macro, only unlocated variables can be assigned to the macro when it is created. It
is not possible to use direct addresses and located variables in the macro. If located
variables are to be used, the corresponding variables can be assigned a direct
address in the variables editor after the macro is instanced. If direct addresses are
to be used, no variables should be assigned to the corresponding inputs/outputs in
the macro and the inputs/outputs should be linked to the address desired after the
macro is instanced. If variables have already been declared, they are used
(references and initial values are retained).
Exchange
marking in
comments
432
When a macro is instanced in Concept, the exchange markings in all the comments
are replaced with the pre-set character strings. The same applies to text objects in
the section and to variable comments in the variables editor.
840 USE 493 00 September 2001
Macros
Creating Context Sensitive Help (Online Help) for Macros
Introduction
In Concept, help is provided for each EFB, which can be invoked according to the
context (the Help on Type command button in the EFB properties dialog). There is
of course no corresponding help text in Concept for the macros that you created.
You can, however, create your own help for each macro, that can be invoked in
Concept with Help on Type.
File Format:
You can create your help in the following file formats:
l .chm (Microsoft Windows compiled HTML help file)
l .doc (Microsoft Word format)
l .htm (Hypertext Markup Language)
l .hlp (Microsoft Windows help file (16- or 32-Bit Format))
l .pdf (Adobe Portable Document Format
l .rtf (Microsoft Rich Text Format)
l .txt (Plain ASCII Text-Format)
Name
The name of the help file must be exactly the same as the name of the macro (e.g.
SKOE.ext)
The only exceptions are standardized macro names (e.g. SKOE_BOOL,
SKOE_REAL etc.). In these cases the help file name is the macro name without the
datatype extension (e.g. macro name) SKOE_BOOL has the help file SKOE.ext).
Directory
The help file can be stored in the following directories:
l Concept directory
l Concept Help directory (if defined in the file Concept.ini, see readme)
l Global macro directory
l Local macro directory
840 USE 493 00 September 2001
433
Macros
Invoking the Help
File
Concept carries out the following procedure to invoke the help file:
Phase
1
Description
Search for the help file MacroName.ext in the local macro-directory.
The help file is searched for in the following sequence:
l .hlp
l .chm
l .htm
l .rtf
l .doc
l .txt
l .pdf
Result: If the search result is positive the help file will be displayed, otherwise it
will continue with phase 2.
2
Search for the help file MacroName.ext in the global macro-directory.
For the order, see phase 1.
Result: If the search result is positive the help file will be displayed, otherwise it
will continue with phase 3.
3
Search for the help file MacroName.ext in the Concept-directory or ConceptHelp directory.
For the order, see phase 1.
Result: If the search result is positive the help file will be displayed, otherwise it
will continue with phase 4.
4
434
Display of the comment created in Concept DFB with Project → Properties.
840 USE 493 00 September 2001
Macros
14.2
Programming and calling up a macro
At a Glance
Overview
This section describes programming and calling up a macro.
What’s in this
section?
This section contains the following topics:
Topic
Page
At a Glance
436
Occupying the macro
437
Creating the logic
438
Calling up a macro from an SFC section
441
Calling a macro from an FBD/LD section.
444
840 USE 493 00 September 2001
435
Macros
At a Glance
At a Glance
Programming and calling up a macro is divided into 3 main steps:
Step
Occupying the macro (See Occupying the macro, p. 437)
2
Creating the logic (See Creating the logic, p. 438)
3
436
Action
1
Calling up the macro in:
Sequence language (SFC) (See Calling up a macro from an SFC section,
p. 441)
l Function Block language (FBD) (See Calling a macro from an FBD/LD
section., p. 444)
l Ladder Diagram language (LD) (See Calling a macro from an FBD/LD
section., p. 444)
l
840 USE 493 00 September 2001
Macros
Occupying the macro
Description
The procedure for occupying the macro is as follows:
Step
Close Concept and start Concept DFB.
2
Create a new macro usingFile → New macro... menu command.
Reaction: The name now appears on the title bar: [untitled].
3
Using the menu command File → New section... generate a new section and
enter a section name (with an exchange marking such as @0).
The section name (max. 32 characters) must be clear throughout the macro, and
it is not case-sensitive. If the section name entered already exists, a warning is
given and another name must be chosen. The section name must correspond to
the IEC Name conventions, otherwise an error message appears.
Note: In accordance with IEC1131-3, only letters are permitted as the first
character of names. If, however numbers are required as the first character, this
can be enabled using the menu commandPresettings → Presettings → IEC
Expansions... → IEC Expansions → Enable leading figures in identifiers .
4
840 USE 493 00 September 2001
Action
1
Select a programming language for the section:
Function Block language (FBD)
Ladder Diagram (LD)
l
l
5
The menu command Project → Properties can be used to generate a comment
on the macro.
Reaction: The comment can then be displayed in Concept using the Help for
type command key in the selection dialog for macros.
6
The menu command File → Section properties can be used to generate a
comment on the exchange markings.
Reaction: This comment then appears automatically in the Replace dialog for
the exchange markings.
7
Save the macro with the menu command File → Save macro.
Reaction: The first time the Save is used, the Save as dialog box opens –
specify the macro name and directory where it is to be saved here.
8
Select the directory to be occupied by the macro. Attention should be paid to the
difference between global and local macros (see also Global / Local Macros,
p. 429).
9
Enter the macro name (max. 8 characters, always with the Extension Mac).
The name must be clear throughout the directory, and it is not case-sensitive. If
the section name entered already exists, a warning is given and another name
must be chosen.
437
Macros
Creating the logic
Description
The procedure for creating the logic is as follows:
Step
1
Action
To insert an FFB into the section, select the menu command Objects → Select
FFB....
Reaction: The FFBs from library dialog box opens.
FFBs in IEC library
Group
Arithmetic
Bistable
Comparison
Converter
Counter
Edge detection
Logic
Numerical
438
EFB type
DFB type
MOVE
MUL_DINT
MUL_INT
MUL_REAL
MUL_UDINT
MUL_UINT
SUB_DINT
SUB_INT
LIGHTSS
SKOE
Sorted by FFB...
Library...
DFB
Close
Help about type
Help
2
In this dialog box a library can be selected and an FFB selected from it by using
the Library... command button. Also with the command button DFB the
manually generated DFBs can be shown and one selected from them.
3
Place the selected FFB in the section.
4
When all FFBs have been positioned, close the dialog box with OK
5
Activate the selection mode with Objects → Selection mode, click on the FFB
and move the FFBs to the position required.
6
Activate the link mode with Objects → Link and connect the FFBs.
840 USE 493 00 September 2001
Macros
Step
7
Action
Activate the Variables Editor withProject → Variables Editor to declare the
variables.
For unlocated variables, declare a name here (with exchange markings), a data
type, an initial value and a comment if necessary (possibly with exchange
markings).
For constants, declare a name here (with exchange markings), a data type, a
value and a comment if necessary (possibly with exchange markings).
For example:
Variable Editor
Find/insert
Type
Variables
Constants
Find/replace
Variable name
Data type
Initial
value
Use
1
@0_on
BOOL
2
@0_value
VALUE
3
@0_error
INT
@0 reports error
4
@0
BOOL
@0 = Action variable
5
@0_result
REAL
@0 result
OK
@0 switched on
@0 Default value
Set…
Cancel
Help
Note: If located variables are to be used, the corresponding unlocated variables
can be assigned a direct address in the variables editor after the macro is
instanced.
If direct addresses are to be used, no variables should be assigned to the
corresponding inputs/outputs in the macro and the inputs/outputs should be
linked to the address required after the macro is instanced.
Note: If a variable or constant is to be used in all cases of macro instancing, this
variable or constant should be given a name without any exchange marking.
840 USE 493 00 September 2001
439
Macros
Step
8
Action
Then re-activate the selection mode with Objects → Select and double-click on
one of the unconnected inputs/outputs.
Reaction: The Link FFB dialog box opens, where an actual parameter can be
assigned to the input/output.
Linking FFB .2.15 ( AND_BOOL )
Input: IN1 ( BOOL)
Inverted
Link with
Variable
Literal
Direct address
Name
@0_free
Look up…
Variable declaration…
9
OK
Help
Cancel
Save the macro with the menu command File → Save.
For example:
Concept - Macro [SKOE] - [@0_Math]
File
Edit
View
Objects
Project
Online
Options
Window
Help
.6.5
AND_BOOL
@0
@0_on
FBI_13_4
@0_values
440
OWN_DFB
EN
ENO
VALUE
@0_result
@0_error
840 USE 493 00 September 2001
Macros
Calling up a macro from an SFC section
Description of
the action
The procedure for calling up a macro from an SFC section is as follows:
Step
Action
1
Close Concept DFB.
2
Start Concept, open or create a project and open or create an SFC section.
3
Double-click to open the step properties of the step which the macro is to be
connected to.
4
Use the command button Instance section... to call up the dialog for instancing
the macros.
5
Select the desired macro from the list.
If section groups have been created in the Project Browser, the section group
where the section is to be inserted can be selected in the Insert into section
group text field.
Confirm with OK.
Example:
Authorize section
Available templates:
SKOE.MAC
TEST.MAC
(None)
OK
Cancel
Help about type
Help
Object name:
Insert into section group:
Motor1
Reaction: The dialog Replace is opened to replace the exchange markings.
840 USE 493 00 September 2001
441
Macros
Step
6
Action
Pre-set for the text fields @0 to @9 the character strings which the exchange
markings are to be replaced with in the macro.
Example:
Step properties
Replaceable mnemonics
@0
Section Comment:
I
Motor 1
@1
@2
@3
@4
@5
@6
@7
@8
@9
File access
Load list...
OK
Cancel
Help
Load list...
7
Confirm the inputs with OK.
Reaction:
The following occurs after the procedure described above has been performed:
l A section is now automatically created whose name consists of the macro
section name and of the pre-set character strings in place of the exchange
marking.
Note: This section is not automatically opened. To perform any editing, open
by clicking on the variable name in the step properties dialog.
l All the variables declared in the macro are transferred into the variables
declaration of the current project and the exchange marking is also replaced
with the current character string. If variables have already been declared,
they are used (references and initial values are retained). The same applies
to any comments containing the exchange flags.
l If the macro contains a single Boolean input variable, it is automatically
transferred as an action variable.
l If the macro contains several Boolean input variables, the Select one of
these variables dialog opens, where the variable desired can be selected as
an action variable.
l If a data structure has been marked individually with the exchange flag, the
Select Bool type elements dialog is called up and the Boolean variable
desired for the action can be selected there.
442
840 USE 493 00 September 2001
Macros
Step
8
Action
This action can be used to call the macro as often as required without any name
collisions occurring. The instanced macro and its variables are completely
identical to the sections and variables generated beforehand.
Example of an instanced macro:
Concept [Plant1] - [Motor1_Math]
File
Edit
View
Objects
Project
Online
Options
Window
Help
.6.5
AND_BOOL
Motor1
Motor1_on
FBI_13_4
OWN_DFB
EN
Motor1_values
840 USE 493 00 September 2001
VALUE
ENO
RESULT
ERROR
Motor1_result
Motor1_error
443
Macros
Calling a macro from an FBD/LD section
Description of
the action
The procedure for calling up a macro from an FBD/LD section is as follows:
Step
1
Action
Close Concept DFB.
2
Start Concept, open or create a project and open or create an FBD/LD section.
3
With the menu command Objects → Macro insert the dialog Select macro to
insert macros into FBD/LD sections.
Select macro
Available macros:
SKOE.MAC
TEST.MAC
(None)
OK
Cancel
Help about type
Help
4
Select the desired macro from the list and confirm with OK.
Reaction: The dialog Replace is opened to replace the exchange markings.
5
Pre-set for the text fields @0 to @9 the character strings which the exchange
markings are to be replaced with in the macro.
Example:
Step properties
Replaceable mnemonics
@0
Section Comment:
I
Motor 1
@1
@2
@3
@4
@5
@6
@7
@8
@9
File access
Load list...
OK
Cancel
Help
Save list...
444
840 USE 493 00 September 2001
Macros
Step
Action
6
Confirm the inputs with OK.
Reaction:
The following occurs after the procedure described above has been performed:
l There is now an automatic shift to Insert mode and the macro’s logic can be
inserted in any position in the FBD or LD section.
l Moreover, all the variables declared in the macro are transferred into the
variable declaration of the current project and the exchange marking is also
replaced with the current character string. The same applies to any
comments containing the exchange markings.
7
This action can be used to call the macro as often as required without any name
collisions occurring. The inserted macro and its variables are completely
identical to the sections and variables generated conventionally.
Example of an instanced macro:
Concept [Plant1] - [Motor1_Math]
File
Edit
View
Objects
Project
Online
Options
Window
Help
.6.5
AND_BOOL
Motor1
Motor1_on
FBI_13_4
OWN_DFB
EN
Motor1_values
840 USE 493 00 September 2001
VALUE
ENO
RESULT
ERROR
Motor1_result
Motor1_error
445
Macros
446
840 USE 493 00 September 2001
Variables
editor
15
At a Glance
Overview
This Section contains information about declaring variables in the variables editor.
What’s in this
chapter?
This chapter contains the following topics:
Topic
Page
General
448
Declare variables
448
Searching and replacing variable names and addresses
450
Searching and Pasting Variable Names and Addresses
454
Exporting located variables
457
840 USE 493 00 September 2001
447
Variables editor
General
At a Glance
The Variables-Declaration serves as data exchange in user program. Hence you
can address Variables (Located and Unlocated Variables) and/or assign a value to
constants
Variables or direct addresses will be assigned via the addressing of the I/O-Map and
can be used with symbolic names (variable) or with the direct addresses in the
programming. In so doing, values will be exchanged between different Sections via
the variables or the direct addresses.
Note: In accordance with IEC1131-3, only letters are permitted as the first
character of variable names. If, however numbers are required as the first
character, this can be enabled using the menu command Options → Presettings
→ IEC Expansions... → IEC Expansions → Enable leading figures in
identifiers enable.
Note: Undeclared variables will be denied during programming.
Declare variables
At a Glance
At variable declaration the Data type, address and symbolic name are determined.
Via the addressing define the inputs (1x/3x) and outputs (0x/4x), assigned in the
user program with the selection of the data type of the respective function, or the
respective Function Blocks.
An initial value may also be provided for each variable; this will be transferred into
the PLC during the first load.
A comment may be written for each Variable or direct address, to aid recognition of
the assignment of a function.
If Declarations are changed, deleted or added, this alteration will be identified
through certain symbols in the first column.
Changes in
ONLINE mode
Variable names and addresses can be changed online. Apart from that, an
unlocated variable can be changed into a located variable (i.e. it will be assigned its
own address or the address will be deleted). Clicking on the command button OK
transfers the changes to the affected sections i.e. the sections in which the changed
variables will be used.
448
840 USE 493 00 September 2001
Variables editor
This has the following effects:
If…
Then…
the variables are modified, the status of all affected sections will be set to MODIFIED and
the affected sections must be loaded into the PLC using Online
→ Load modifications.
a transition section is
affected by the
modifications,
the SFC section assigned to it is also set to the status
MODIFIED.
an affected section is
animated,
the animation is aborted.
a modified variable is used no more variables can be inserted into the editor window, and
in the reference data
the animation of the reference data editor is stopped. This is
editor,
valid until the modifications are loaded into the PLC using
Online → Load modifications and the status EQUAL is
restored.
Note: The assignment of direct addresses and comments can also occur outside
Concept on completion of the programming.
Variable
declaration
outside the
variable editor
Copying rows in
the variable
editor
Procedure for completing variable declaration outside the variable editor:
Step
Action
1
Export the variable declaration using File → Export → Variables: Text
delimited.
2
Open the exported file.
3
Enter the addresses and comments.
4
Import the edited variable declaration using File → Import → Variables: Text
delimited.
It is possible to copy individual rows and whole blocks of rows and to paste them into
another position in the variable editor, before editing them. This operation is
performed using shortcut keys.
Copying and pasting can only take place inside the open variable editor; pasted
rows are marked red. These rows must subsequently be changed or they will
disappear on exiting the dialog. Identical settings are not permitted in the variable
editor.
Note: A maximum of 500 rows can be copied.
840 USE 493 00 September 2001
449
Variables editor
Procedure for
copying and
pasting
Printing the
variable list
To copy and paste entire rows proceed as follows:
Step
Action
1
Select the relevant row in the first column in the table.
Reaction: The entire row is displayed in a different color.
Note: When copying a block of rows, select the first row in the block, and press
Shift, while simultaneously selecting the last row in the block.
2
To copy use the shortcut Ctrl+Insert or Ctrl+Alt+c.
Reaction: The selected rows are copied into the cache.
3
Select the row off which is to be pasted.
Reaction: The entire row is displayed in a different color.
4
To paste use the shortcut Shift+Insert or Ctrl+Alt+v.
Reaction: The copied rows are pasted off the selected row in the table, and are
marked red.
Note: When pasting between two existing rows, the selected row is moved down
according to the number of copied rows.
Printing the variable list is done in the main menu File. Using the menu command
Print... open the dialog Document contents, in which the print undertaking is set
by checking the box Variable list.
Note: It should be noted that all 32 characters (maximum) of the symbol name do
not always appear on the paper when printing.
Searching and replacing variable names and addresses
At a Glance
450
Use command button Search/Replace to call up a dialog box to search and replace
variable names and addresses. Therefore, unlike Search/Insert the existing
variable names/addresses are changed.
Use option button Name and Address to choose whether to search for variable
names or addresses.
If Search and Replace are to be restricted to a certain area of variables or
addresses, this area can be selected. In this case, searching and replacing is only
carried out in the selected area. If nothing is selected, search and replace are
applicable to all variables and addresses in the variable editor.
On activating check box Extend address the addresses specified in text box
Address are automatically extended to Standard format.
840 USE 493 00 September 2001
Variables editor
Use of wildcards
The following wildcards can be used for searching and replacing:
* This character is used to represent any number of characters. * can only be used
at the beginning or the end of a line.
? This character is used to represent exactly one character. If several characters are
to be ignored, a certain number of ? have to be used.
The wildcards can be combined. The combinations *? and ?* are, however, not
permitted.
Note: When searching and replacing, the number of wildcards in the Search
character sequence and the Replace character sequence have to be equal. See
also the following examples in the table.
Examples of
Search/Replace
Search and
replace name
The example shows different search methods and the respective results when
replacing:
Search:
Replace with:
available names
Result
Name1
Name2
Name1
Name1A
Name A
Name B
Name2
Name1A
NameA
NameB
???123
???456
abc123
cde123
abcd123
abc1234
abc456
cde456
abcd123
abc1234
Name1*
Name2*
Name1A
Name1B
NameAB
Name2A
Name2B
NameAB
*123
*456
abc123
cde123
abc1234
abcde123
abc456
cde456
abc4564
abcde456
*123*
*456*
abc123abc
cde123defghi
abcde123def
abc456abc
cde456defghi
abcde456def
???123*
???456*
abc123abc
cde123defghi
abcde123def
abc456abc
cde456defghi
abcde123def
Select this option button to search and replace variable names. However, the search
for the occurrence of the character sequence to be found is exclusively carried out
in column Variable name of the variable editor.
840 USE 493 00 September 2001
451
Variables editor
Search and
replace address
Select this option button, to search and replace addresses. However the search for
the occurrence of the address to be found is exclusively carried out in column
Address of the variable editor.
Search for:
Enter a character sequence, according to which the variables or addresses are to
be searched.
Without entering a character sequence that leads to a successful search result,
none of the possible functions of the dialog are executed.
Note: Entries in the field Search remain intact for future use, even after closing the
dialog box.
Replace with:
Enter a character sequence, which replaces the character sequence to be searched
for in the new variables or addresses
Note: Entries in the field Replace with remain intact for future use even after
closing the dialog box.
Find Next
Description of function Find Next:
Stage
452
Description
1
The command button Find Next starts the search process at the beginning of
the variable editor table or the selected area and marks the found variable.
2
A query appears, asking whether a search for further occurrences of the
character sequence is required.
3
By activating command button Yes, the next location of the searched character
sequence is selected.
By activating command button No, the search is terminated.
4
When the search process has reached the end of the variable editor table, the
system asks whether or not the search process should be restarted at the
beginning of the variable editor table or the selected area.
5
By activating command button Yes, the next location of the searched character
sequence is selected.
By activating command button No, the search is terminated.
6
If no further occurrences of the character sequence are found, a message
appears, indicating that the search is terminated.
840 USE 493 00 September 2001
Variables editor
Replace
Description of function Replace:
Stage
1
Replace all
Description
The command button Replace starts the search process at the beginning of the
variable editor table or the selected area and marks the found variable.
Note: This function cannot be undone.
2
The system asks whether the found character sequence is to be replaced.
3
By activating command button Yes, the variable/address is replaced by the
character sequence in the text box Replace with:
By activating command button No, the search is terminated.
4
If there are several uses of the searched character sequence, the next site where
it is found is selected and a new query appears.
5
When the search process has reached the end of the variable editor table, the
system asks whether or not the search process should be restarted at the
beginning of the variable editor table or the selected area.
6
By activating command button Yes, the next location of the searched character
sequence is selected.
By activating command button No, the search is terminated.
7
If no further occurrences of the character sequence are found, a message
appears, indicating that the search is terminated.
Searches for all occurrences of the character sequence and replaces these (without
first querying) with the inputs in the text box Replace with:. When the search
process has reached the end of the variable editor table, the system asks whether
or not the search process should be restarted at the beginning of the variable editor
table or the selected area.
Note: This function cannot be undone.
840 USE 493 00 September 2001
453
Variables editor
Searching and Pasting Variable Names and Addresses
Introduction
The Search/Paste command button can be used to invoke a dialog for creating new
variables based on existing ones. Unlike with Search/Replace, a copy of the
existing variables with a new name/address is generated.
If, for example, you have already declared the variables for a motor and you want to
declare the same variables but with different names and addresses for another
motor, this is easily achieved with this dialog.
If you simply want to generate further variables from a specific range of variables,
this area can be selected. In this case, a search will only be carried out in the
selected range. If nothing is selected, search and paste applies to all variables in the
variable editor.
If you check the Extend Address check box, the addresses entered in the Address
text box are automatically extended to Standard format.
Using Wildcards
The following wildcards can be used for searching and pasting:
* This character is used to represent any number of characters. * can only be used
at the beginning or the end of a line.
? This character is used to represent exactly one character. If several characters are
to be ignored, the corresponding number of ? have to be used.
The wild cards can be combined. The combinations *? and ?* are, however, not
permitted.
Note: When searching and pasting, the number of wildcards in the Search string
and the Replace string has to be equal.
Find Name
If you select this option button, you can search for variable names. Occurrences of
the string to be found are searched for exclusively in the Variable Name column of
the variable editor.
Find Address
This field is only unavailable for constants.
If you select this option button you can search for addresses. Occurrences of the
address to be found are searched for exclusively in the Address column of the
variable editor.
454
840 USE 493 00 September 2001
Variables editor
Find What:
Enter a string to be searched for in variables or addresses.
The search is only carried out in the Variable Name and Address columns in the
variable editor table. A search in other areas (e.g. Data type) is not possible.
If you do not enter a string that leads to a successful search result, none of the
possible functions of the dialog are executed.
Note: Entries in the Search field are retained for future use, even after the dialog
box is closed.
Replace With:
Enter a string to be replaced in the new variable or address with the string being
searched for.
If the name entered already exists, no new variable is created.
Note: Entries in the Replace With field are retained for future use even after the
dialog box is closed.
Offset Address
By:
This field is only unavailable for constants.
Enter a value by which the addresses of the existing variables are to be increased.
Note: If you do not enter an offset value, the new variable will be placed in the
same address as the one already present.
With unlocated variables, it is not necessary to enter a value.
Entries in this field are retained for future use even after the dialog has been closed.
Example of
Offset Address
By
SKOE1 has the address 000012
Find What: SKOE1
Replace With: SKOE2
Offset Address By: 1
This results in the creation of the following new variable:
SKOE2 on address 000013
840 USE 493 00 September 2001
455
Variables editor
Find Next
Description of Find Next function:
Stage
Start Paste
1
The Find Next command button starts the search process at the beginning of
the variable editor table or the selected area and marks the found variable.
2
A query appears, asking whether a search for further occurrences of the string
is required.
3
If the Yes command button is pressed, the next location of the string being
searched for is marked.
If the No command button is pressed, the search is finished.
4
When the search process has reached the end of the variable editor table, a
query appears asking whether or not the search process should be restarted at
the beginning of the variable editor table or the selected area.
5
If the Yes command button is pressed, the next location of the string being
searched for is marked.
If the No command button is pressed, the search is finished.
6
If no further occurrence of the string is found, a message appears to inform you
that the search is done.
Description of Start Paste function:
Stage
456
Description
Description
1
The Start Paste command button is used to start the search process at the
beginning of the variable editor table or the selected area and the found variable
is marked.
Note: This function cannot be undone.
2
A query appears asking whether a new variable with the displayed name and
address should be created.
3
If the Yes command button is pressed, the variable is created and the process
continued until all occurrences of the string being searched for have been
"exhausted".
If the No command button is pressed, the search is finished.
4
When the search process has reached the end of the variable editor table, the
system asks whether the search process should be restarted at the beginning of
the variable editor table or the selected area.
5
If the Yes command button is pressed, the next location of the string being
searched for is marked.
If the No command button is pressed, the search is finished.
6
If no further occurrence of the string are found, a message appears to inform you
that the search is finished.
840 USE 493 00 September 2001
Variables editor
Paste All
Searches for all occurrences of the string to be found and replaces them (without
asking first) with the new variables given in the Replace With: text box. This process
is carried out until all occurrences of the string being searched for have been
exhausted, or until an error appears.
If an error appears, the function is immediately cancelled. However, all the
previously created variables are retained.
Note: This function cannot be undone.
Exporting located variables
At a Glance
For data exchange with MMI units, all Located variables in the column Exp can be
selected and transferred using the Export function in the main menu File.
Located variables can be exported via ModLink, Factory Link and via export format
"text delimited".
Removing the
selection
After export, the selection (in the column Exp) of the exported variables using the
shortcut Ctrl+Alt+F3 can be removed at once.
Note: This removal cannot be undone, not even with the command button Cancel.
840 USE 493 00 September 2001
457
Variables editor
458
840 USE 493 00 September 2001
Project Browser
16
At a Glance
Overview
This chapter describes the Project Browser.
What’s in this
chapter?
This chapter contains the following topics:
Topic
Page
General information on the Project Browser
460
Operating the Project Browser
462
840 USE 493 00 September 2001
459
Project Browser
General information on the Project Browser
Introduction
The project browser can be used to create groups of sections to make the layout
clearer and to facilitate operations. These groups have unique names and can
contain sections and further section groups. The representation and operation are
performed graphically by means of a structure tree. The Project Browser functions
represent a convenient, more extensive way of operating as an alternative to the
Concept functions already present.
Project Browser:
Project Browser
Project: CC_Demo
Demo
FBD FBD_Left
FBD FBD_Right
LD
LD1
FBD DFB
FBD MAC1
FBD DDT1
SFC
SFC1
IL
IL1
ST
ST1
Test1
FBD Test11
FBD Test12
Test2
FBD Test21
Test3
FBD Test31
460
840 USE 493 00 September 2001
Project Browser
Functions
The Project Browser provides the following functions:
l Creating new sections
l Open sections (locking the editor)
l Changing section properties (names, comments)
l Reverse execution order
l Delete section
l Create section groups
l
l
l
l
l
Open section groups (show substructure)
Close section groups (hide substructure)
Rename section groups
Find section groups/sections in the Project Browser
Moving sections groups or sections (modification of execution order!)
l Start up offline memory prognosis
l Deletion of section groups
l Opening the configurator
l
l
l
l
Minimize open windows
Open minimized windows
Close all windows
Maximizing windows
l Excluding individual sections from the alignment between the primary CPU and
standby CPU with Hot Standby systems.
l Animate enable states (animation of the structure tree)
l Switch enable state
Restrictions
Please take note of the following restrictions:
l Section groups can only be created with the Project Browser.
l Transition sections are not displayed in the Project Browser.
l It is only possible to modify the execution order using Project → Execution
Order if no section groups exist in the Project Browser. After the first section
group has been created, no further modifications can be performed using Project
→ Execution Order.
l It is only possible to change the enable status of a section if the variable
belonging to the section (.disable) has not been used.
840 USE 493 00 September 2001
461
Project Browser
Specific
Features of
LL984
Please take note of the following specific features when using LL984:
l If one or several LL984 sections exist, the Project Browser automatically
generates an LL984 section group.
l LL984 sections cannot be moved.
l No IEC sections can be put into or before the LL984 section groups.
Operating the Project Browser
Introduction
The browser allows keyboard and mouse operation.
Mouse operation
Operating the project browser with the mouse:
Function
Key
Selecting a group or section
(during selection, a section which is already
open is put before all other open sections)
left mouse button
Switching off the context menu
right mouse button
Using the first menu entry of the context menu Double-click with the left mouse button
Moving a group or section
left-click on the corresponding symbol and
hold the mouse button, select the target
position by moving the mouse and release
the mouse button
or
Call context menu (right mouse button) →
Select Move → Find target position by
cursor up/down → Confirm position with
Enter.
Opening or closing a section group
click on the corresponding +/- symbol with
the left mouse button
Note: Context menus do not only appear when symbols are clicked on. The
following way to insert a new group or section is available: If the cursor is positioned
to the right of the connecting line between two symbols, it changes to show that a
context menu can be called in this location by clicking with the right mouse button.
This means that a new group or section can be inserted in the line selected.
462
840 USE 493 00 September 2001
Project Browser
Keyboard
operation
Operating the project browser with the keyboard:
Function
Key
selecting the next/previous group/section
(during selection, a section which is already
open is put before all other open sections)
Cursor up/Cursor down
Selecting a group/section on the next or
previous page
Scroll up/Scroll down
Selecting a project symbol
Pos1
selecting the last group or section
End
Scrolling with the keyboard
CTRL + Cursor up/Cursor down
or
CTRL + Scroll up/Scroll down
Switching off the context menu
SWITCH + F10
or List
Carrying out the first menu entry
Entry
Moving a group/section
Call context menu (SWITCH + F10) →
Select Move → Find target position by
cursor up/down → Confirm position with
Enter
or
CTRL + SWITCH → Cursor up/down /
Scroll up/down → Confirm position with
Enter
Opening or closing a section group
+ or where: + restores the status before the last -
Opening a section group and all sub-groups
*
Deleting a group or section
Delete
Selecting the group above
Cursor left or backspace delete
If the element actually selected is a group
when cursor left is used, the group is closed
before the higher group is selected.
Selecting the first section/group in a group
Cursor right
If the group is closed and contains a section
or groups, it is opened.
Canceling the move
ESC
840 USE 493 00 September 2001
463
Project Browser
464
840 USE 493 00 September 2001
Derived data types
17
At a Glance
Overview
This Chapter describes the data type editor and the procedure for creating derived
data types.
What’s in this
chapter?
This chapter contains the following Sections:
Section
Topic
17.1
General information on Derived Data Types
467
17.2
Syntax of the data type editor
473
17.3
Derived data types using memory
482
17.4
Calling derived data types
484
840 USE 493 00 September 2001
Page
465
Derived data types
466
840 USE 493 00 September 2001
Derived data types
17.1
General information on Derived Data Types
At a Glance
Overview
This section contains general information about Derived Data Types.
What’s in this
section?
This section contains the following topics:
Topic
Page
Derived Data Types
468
Global / Local Derived Data Types
471
840 USE 493 00 September 2001
467
Derived data types
Derived Data Types
Introduction
Derived data types are defined using the data type editor. All the elementary data
types that already exist in a project and the Derived Data Types can be used to
define new data types.
Note: Open the Data Type Editor in Concept/Concept-DFB using File → Open →
File Format Data Type Files (*.dty).
Note: Note that the File → Save and File → Save as menu commands are not
available in this editor. To save the Derived Data Types, select the menu command
File → Exit.
468
840 USE 493 00 September 2001
Derived data types
Using Derived
Data Types
Various block parameters can be transferred as one set through Derived Data
Types. This set is then divided into individual parameters again in the DFBs and
EFBs; these are processed and then output again as a set or as individual
parameters.
Using Derived Data Types in a DFB:
FBI_3_7
EXAMP
IN1
OUT
IN
OUT1
.6.5
ADD_DINT
IN.PAR1
IN.PAR2
.6.8
AND_BOOL
OUT.PAR1
.6.6
.6.7
SUB_INT
INT_TO_DINT
IN.PAR3
IN.PAR4
.6.9
.6.11
AND_BOOL
BOOL_TO_WORD
IN.PAR5
IN.PAR6
.6.12
AND_BOOL
.6.10
OUT.PAR2
OR_WORD
IN.PAR7
IN.PAR8
Note: For a definition of the Derived Data Types IN and OUT, see Example of a
Derived Data Type, p. 474.
840 USE 493 00 September 2001
469
Derived data types
Definition of
Derived Data
Types
The definition of Derived Data Types appears in textual form.
When text is entered, all the standard Windows services for word processing are
available. The data type editor also contains some further commands for text
processing.
Spelling is immediately checked when key words, separators and comments are
entered. If a key word, separator or comment is recognized, it is identified with a
color surround.
Name
Conventions
470
The following name conventions apply to derived data types:
l Multi-element variable
If a Derived Data Type is assigned to a variable (field or structure), it is designated
as a multi-element variable.
l Structured variable
If a derived data type is assigned to a variable consisting of several elements, it
is designated as a structured variable. If this is the case, the declaration contains
the keyword STRUCT (See STRUCT ... END_STRUCT, p. 475). This also
applies if the derived data type only contains ARRAY declarations.
e.g.
TYPE
EXP:
STRUCT
PAR1: ARRAY [0..1] OF INT;
PAR2: REAL;
PAR3: TEST;
END_STRUCT;
END_TYPE
l Field variable
If a derived data type is assigned to a variable which consists of several ARRAY
Declarations (See ARRAY, p. 476), it is designated as a field variable. The key
word STRUCT is not used in this case.
e.g.
TYPE
TEST: ARRAY [0..1] OF UINT;
END_TYPE
840 USE 493 00 September 2001
Derived data types
Global / Local Derived Data Types
Description
Concept differentiates between global Derived Data Types and local Derived Data
Types. Global Derived Data Types can be used in any project (Concept) or in any
DFB (Concept DFB). Global Derived Data Types must be placed in the DFB
subdirectory of the Concept Directory. Local Derived Data Types are only
recognized in the context of a project or its local DFBs and can only be used there.
Local Derived Data Types must be located in the DFB subdirectory of the project
directory.
In the General information on the Concept INI file, p. 954 you can specify that a GLB
directory containing the global Derived Data Types is generated in the project
directory during the IEC upload process. This means existing global Derived Data
Types in Concept → DFB are not overwritten, and there is no effect on other
projects.
Note: This file structure should be noted at the creation stage of the Derived Data
Types, because the menu command File → Save as is not available for these. For
this reason it is imperative to ensure that the correct path has been selected prior
to pressing OK.
Directory structure without uploaded project:
C:\\
Installation drive
Concept
Concept directory
DFB
Directory for global Derived Data Types
...
PRJ
Project directory
DFB
Directory for local Derived Data Types
...
840 USE 493 00 September 2001
471
Derived data types
Directory structure after setting up INI file ([Upload]: PreserveGlobalDFBs=1) for
uploaded projects:
C:\\
Installation drive
Concept
Concept directory
DFB
Directory for global Derived Data
Types
...
PRJ
Project directory
DFB
Directory for local Derived Data Types
GLB
Directory for
uploaded Derived Data Types
...
Number of data
type files
Maximum File
Size
472
Concept only supports one single local data type file for each project and only one
single global data type file. To ensure consistency between the host computer and
the PLC, the project containing one of the Derived Data Types must be reloaded into
the PLC after either of these files is edited.
If a local and a global Derived Data Type have the same name, the local Derived
Data Type is given priority.
Note: The maximum file size (.dty) for global and local Derived Data Types (i.e. the
definitions and including all comments) is 64 kbytes. If this maximum file size is too
small, the data type definitions can be shared between the global and local data
type file. To avoid having to repeatedly modify the local data type files, use the
global data type file only for the data type definitions for which modifications are
expected. Define all the other data types in the local data type file.
840 USE 493 00 September 2001
Derived data types
17.2
Syntax of the data type editor
At a Glance
Overview
This section describes the syntax to be noted when generating Derived Data Types.
What’s in this
section?
This section contains the following topics:
Topic
Page
Elements of the Derived Data Types
474
Key Words
475
Names of the derived datatypes
479
Separators
480
Comments
481
840 USE 493 00 September 2001
473
Derived data types
Elements of the Derived Data Types
At a Glance
The following elements can be used to generate the Derived Data Types:
l Key words (See Key Words, p. 475)
l Names (See Names of the derived datatypes, p. 479)
l Separators (See Separators, p. 480)
l Comments (See Comments, p. 481)
Indents
Indents and line breaks can be inserted at any position where a blank character is
also allowed to make the layout clearer. This does not affect the syntax.
Example of a
Derived Data
Type
Defining Derived Data Types:
Keyword (beginning of data type definitions)
TYPE
(* Derived data type IN for EXAMP*)
Name of derived data type
Data types of structure elements
IN:
STRUCT
PAR1:
PAR2:
PAR3:
PAR4:
PAR5:
PAR6:
PAR7:
PAR8:
DINT;
DINT;
INT;
INT;
BOOL;
BOOL;
WORD;
WORD;
END_STRUCT;
(* 1. Param. for addition *)
(* 2. Param. for addition *)
(* 1. Param. for subtraction *)
(* 2. Param. for subtraction *)
(* 1. Param. for AND operation *)
(* 2. Param. for AND operation *)
(* 1. Param. for OR operation *)
(* 2. Param. for OR operation *)
Separators
Comments
Keyword (beginning of data type definitions)
(* Derived data type IN for EXAMP*)
OUT:
Name of structure elements
STRUCT
PAR1: DINT;
(* Result of the arithmetic operations
PAR1: DINT;
(* Result of the arithmetic operations
END_STRUCT;
Keyword (beginning of data type definitions)
Definition of array “EXP”
EXP: ARRAY
[0..4] OF UINT
Keyword (end of data type definitions)
END TYPE
474
840 USE 493 00 September 2001
Derived data types
Key Words
Introduction
The following key words can be used to define the Derived Data Types:
l TYPE ... END_TYPE (See TYPE ... END_TYPE, p. 475)
l STRUCT ... END_STRUCT (See STRUCT ... END_STRUCT, p. 475)
l ARRAY (See ARRAY, p. 476)
l "Data types" (See "Data types", p. 479)
In accordance with IEC 113-3, key words must be entered in upper case. If lower
case is also to be used, however, this can be enabled in the dialog box Options for
analysis using the option Allow case insensitive keywords.
If a key word is recognized, it is identified in colour.
TYPE ...
END_TYPE
The key word TYPE denotes the beginning of the data type definitions. The key word
TYPE is only entered once at the beginning of the data type definitions and is then
valid for all subsequent data type definitions.
The key word END_TYPE denotes the end of the data type definitions. The key word
END_TYPE is only entered once at the end of the data type definitions.
STRUCT ...
END_STRUCT
The key word STRUCT denotes the beginning of the elements of a Derived Data
Type. Structures are collections of various Elementary and Derived Data Types.
Variables, to which a Derived Data Type like this is assigned, are designated as
structured variables.
The key word END_STRUCT denotes the end of the elements of a Derived Data
Type.
Syntax for
STRUCT
STRUCT
NAME1: Data type;
NAME2: Data type;
NAMES: Data type;
END_STRUCT;
840 USE 493 00 September 2001
475
Derived data types
Example:
STRUCT ...
END_STRUCT
TYPE
Example1:
STRUCT
Name1: BOOL; (* Comment *)
Name2: INT; (* Comment *)
Name3: ARRAY [0..5] OF BOOL; (* Comment *)
END_STRUCT;
END_TYPE
ARRAY
If several consecutive elements with the same data type are in use, they can be
defined as a field with the key word ARRAY.
After the key word ARRAY, the zone is given, i.e. the number of elements and the
number of the elements’ sub-elements if need be. Finally, the data type common to
all the elements is given. Elementary or Derived Data Types can also be used.
If a Derived Data Type is assigned to a variable in the variable editor consisting of
an ARRAY declaration, it is designated as a field variable.
Syntax for
ARRAY
NAME: ARRAY [No. 1.Element .. No. last element, no. 1st element .. no. last
element etc. ] OF data type;
Encapsulation
Depth
The encapsulation depth is practically unlimited but should be restricted to a few
stages, e.g. to 2 or 3 dimensions to ensure clarity. The maximum size of a data type
file should not exceed 64KB.
Restrictions
ARRAY indices can not be used in generic functions/function blocks (i.e. SEL and
MUX).
The following operations would generate an error:
k := Arr[a,b,MUX(i,in1=2)];
Arr30[0,1,MUX_INT( K := K, IN0 := 0, IN1 := 1, IN2 := 0)];
ARRAY indices can be used in all other functions/function blocks.
The following operation is possible:
B[8] := Arr3[REAL_TO_INT(TAN_REAL(ie.real1[2]),j,2]);
476
840 USE 493 00 September 2001
Derived data types
Example: Onedimensional
ARRAYs
In the following example, a Derived Data Type is defined with the name par. This
Derived Data Type contains 6 elements (par[0] to par [5]) of the BOOL data type.
par: ARRAY [0..5] OF BOOL;
It is not absolutely necessary to begin the range with "0". Any range can be defined.
In this example the Derived Data Type contains 14 elements (par[51] to par [64]) of
the BOOL data type.
par: ARRAY [51..64] OF BOOL;
Example: A onedimensional
ARRAY in a
structured
variable
ARRAYs can also be used as elements in structured variables (definition with the
key word STRUCT):
Par3: STRUCT
Name1: ARRAY [0..5] OF INT);
Name2: BOOL;
Name3: REAL;
END_STRUCT;
Variables of the Par3 data type contain 3 elements:
l Name1 with 6 sub-elements (Par3.Name1[0] to Par3.Name1[5] of the INT data
type
l Name2 with 1 element of the BOOL data type
l Name3 with 1 element of the REAL data type
Multidimensional
ARRAYs
In multi-dimensional ARRAYs the statements in [ ] are expanded by the number of
sub-elements of each element. i.e. the element given in the ARRAY contains in turn
a specific number of elements of the same data type.
Example: Twodimensional
ARRAY
The following example shows a two-dimensional ARRAY.
Par4: ARRAY [0..5, 1..3] OF BOOL;
Variables of the Par4 data type contain 6 elements of the BOOL data type each with
3 sub-elements of the BOOL data type:
l Par4 [0,1] to Par4 [0,3]
l Par4 [1,1] to Par4 [1,3]
and so on up to
l Par4 [5,1] to Par4 [5,3]
840 USE 493 00 September 2001
477
Derived data types
Example: Threedimensional
ARRAY
The following example shows a three-dimensional ARRAY.
Par5: ARRAY [0..5, 1..4, 11..14] OF REAL;
Variables of the Par5 data type contain 6 elements of the REAL data type each with
4 sub-elements of the REAL data type: Each sub-element contains 4 further subelements of the REAL data type:
l Par5 [0,1,11] to Par5 [0,1,14]
l Par5 [0,2,11] to Par5 [0,2,14]
and so on up to
l Par5 [0,4,11] to Par5 [0,4,14]
l Par5 [1,1,11] to Par5 [1,1,14]
and so on up to
l Par5 [5,4,11] to Par5 [5,4,14]
Example: A
multidimensional
ARRAY in a
structured
variable
As for one-dimensional ARRAYs, multi-dimensional ARRAYs can also be used as
elements in structured variables (definition with the key word STRUCT).
Par6: STRUCT
Name1: ARRAY [0..5, 1..3] OF INT;
Name2: BOOL;
Name3: REAL;
END_STRUCT;
Variables of the Par6 data type contain 3 elements:
l Name1 with 18 sub-elements:
l Par6.Name1[0,1]
to
l Par6.Name1[5,3] of the INT data type
l Name2 with 1 element of the BOOL data type
l Name3 with 1 element of the REAL data type
Example: Step by
step definition of
multidimensional
ARRAYs
478
Multi-dimensional ARRAYs can also be defined step-by-step.
Par71: ARRAY [1..100] OF WORD;
Par72: ARRAY [1..3] OF Par71;
Par73: ARRAY [1..33] OF Par6;
840 USE 493 00 September 2001
Derived data types
"Data types"
The names of the elementary data types and the names of already defined Derived
Data Types are recognized as a key word (in contrast with the names of elementary
data types, the names of derived data types are not displayed in color). Data types
must be closed with the separator ";".
If a different Derived Data Type is in use while defining a Derived Data Type, it must
be defined before it can be invoked.
Names of the derived datatypes
Description
Names are given to the derived data types and the elements in the data type editor.
Names should not be longer than 24 characters and must be ended with the
separator ":"
Names are displayed in black
Note: Names should not begin with figures even if the option Presettings → IEC
expansions... → Enable leading figures in identifiers is activated.
Note: Within the data type editor it is possible to use special symbols (umlauts,
accents etc.). These symbols are also permitted in Concept EFBs created with
Concept-EFB can NOT be used however. The above is based on the internal
processes of Borland products. It is therefore strongly recommended that NO
special symbols are used in names.
840 USE 493 00 September 2001
479
Derived data types
Separators
Introduction
The following separators can be used to define the derived data types:
l : (colon) (See Separator ":" (colon), p. 480)
l ; (semi-colon) (See Separator ";" (semi colon), p. 480)
l [ ] (square brackets) (See Separator "[ ]" (square brackets), p. 480)
l .. (full stops) (See Separator ".." (full stops), p. 481)
Separator ":"
(colon)
Marks the end of a name (name of the derived data type, name of the element).
Example:
TYPE
Example1:
STRUCT
Name1: BOOL; (* Comment *)
Name2: INT; (* Comment *)
Name3: ARRAY [0..5] OF BOOL; (* Comment *)
END_STRUCT;
END_TYPE
Separator ";"
(semi colon)
Indicates the end of an instruction.
Example:
TYPE
Example1:
STRUCT
Name1: BOOL; (* Comment *)
Name2: INT; (* Comment *)
Name3: ARRAY [0..5] OF BOOL; (* Comment *)
END_STRUCT;
END_TYPE
Separator "[ ]"
(square
brackets)
Encloses the range specification of the keyword ARRAY.
480
840 USE 493 00 September 2001
Derived data types
Example:
TYPE
Example1:
STRUCT
Name1: BOOL; (* Comment *)
Name2: INT; (* Comment *)
Name3: ARRAY [0..5] OF BOOL; (* Comment *)
END_STRUCT;
END_TYPE
Separator ".."
(full stops)
Separates the beginning and end of range for the keyword ARRAY.
Example:
TYPE
Example1:
STRUCT
Name1: BOOL; (* Comment *)
Name2: INT; (* Comment *)
Name3: ARRAY [0..5] OF BOOL; (*Comment *)
END_STRUCT;
END_TYPE
Comments
Description
In the data type editor begin comments with the character sequence (* and end with
the character sequence *). Between these character sequences any comments can
be entered.
Comments can be entered at any position in the data type editor
Comments are displayed in color.
Using the menu command Options → Analyze options → Nested comments
authorized you can enable nested comments to be authorized. There are then no
limits to the nesting depths.
Example:
Comments
TYPE
Example1:
STRUCT
Name1: BOOL; (* Comment *)
Name2: INT; (* Comment *)
Name3: ARRAY [0..5] OF BOOL; (* Comment *)
END_STRUCT;
END_TYPE
840 USE 493 00 September 2001
481
Derived data types
17.3
Derived data types using memory
Use of Memory by Derived Data Types
Boolean
Elements
Boolean elements are conveyed as bytes, the bit information is in the first bit.
Storage of Boolean elements:
Bit information
27 26 25 24 23 22 21 20
482
840 USE 493 00 September 2001
Derived data types
WORD Elements
There are no gaps when Derived Data Types are stored in memory.
Example of a Derived Data Type:
TYPE
SKOE:
STRUCT
PAR1: BOOL;
PAR2: WORD;
PAR3: BOOL;
PAR4: WORD;
END_STRUCT;
END_TYPE
Storage of the Derived Data Type in memory:
PAR2 (LSB)
PAR1
215 214 213 212 211 210 2 9 2 8 2 7 2 6 2 5 2 4 2 3 2 2 2 1 2 0
PAR3
PAR2 (MSB)
215 214 213 212 211 210 2 9 2 8 2 7 2 6 2 5 2 4 2 3 2 2 2 1 2 0
PAR4 (MSB)
PAR4 (LSB)
215 214 213 212 211 210 2 9 2 8 2 7 2 6 2 5 2 4 2 3 2 2 2 1 2 0
It should be ensured that WORD elements begin with word addresses (a dummy bit
could be inserted).
Note: If the structured variable is associated with a direct address and is further
processed externally (e.g. is read by a visualisation system from the PLC), the
WORD elements (including ANY_NUM elements) absolutely must begin with a
word address.
Located Derived
Data Types
If derived data types are passed to the hardware (located Derived Data Types) they
may only be stored in the 3x or 4x registers. Storage in the 0x or 1x registers is not
possible.
840 USE 493 00 September 2001
483
Derived data types
17.4
Calling derived data types
Calling Derived Data Types
At a Glance
When a Derived Data Type is defined in the DatatypeEditor the name of the Derived
Data Type appears automatically in the variable editor (Column Data type). The
assignment of a variable to a Derived Data Type occurs in the same way as for
elementary data types.
Calling up multi-element variables can occur as text input of the individual elements
or using a dialog box Lookup variables. In such a case, according to the selection
of a multi-element variable in the dialog box Choose the elements of type, the
corresponding elements are chosen.
Addressing a
structure
element
To address a structure element the variable names are first assigned and then
separated from the element name by a dot
(e.g.VARIABLE_NAME.ELEMENT_NAME). If this element also consists of a
Derived Data Type as well, it is again separated from the next element name by a
dot (e.g. VARIABLE_NAME.ELEMENT_NAME.SUB_ELEMENT_NAME) etc.
Example:
Addressing a
structure
element
Addressing a structure element:
484
Step
Action
1
Define a Derived Data Type. For example:
TYPE
Example1:
STRUCT
Par1: BOOL;
Par2: INT;
END_STRUCT;
END_TYPE
2
Declare a new variable in the variable editor (e.g. with the name TEST).
3
Assign these variables the data type of the Derived Data Type created (e.g.
Example1).
4
Close the variable editor with OK.
Reaction: A new multi-element variable called "TEST" of data type "Example1
was created.
5
To address this multi-element variable in its "entirety", simply enter the name of
the variable (TEST) into the program as usual.
To address only a single element of this muli-element variable (e.g. the element
"Par1"), enter the variable name and (separated by a dot) the name of the
element (e.g. TEST.Par1) into the program.
840 USE 493 00 September 2001
Derived data types
Addressing an
ARRAY element
To address an ARRAY element the variable name comes first followed by the
element number in square brackets (e.g. VARIABLE_NAME[4]).
Example:
Addressing an
ARRAY element
Addressing an ARRAY element
Step
Action
1
Define a Derived Data Type.
For example:
TYPE
Example2: ARRAY [0..5] OF BOOL;
END_TYPE
2
Declare a new variable in the variable editor (e.g. with the name MY_VAR).
3
Assign these variables the data type of the Derived Data Type created (e.g.
Example2).
4
Close the variable editor with OK.
Reaction: A new multi-element variable called "MY_VAR" of data type
"Example2 was created.
5
To address this "entire" multi-element variable, simply enter the name of the
variable (MY_VAR) into the program as usual.
To address only a single element of this multi-element variable (e.g. the 4th
element of the ARRAY), enter into the program the variable name and in square
brackets the number of the element (e.g. MY_VAR[4]).
Addressing an
ARRAY element
in a structure
To address an array element which is part of a structure the variable name is
indicated first, followed by a dot and the ElementName, followed by the element
number in square brackets (e.g. VARIABLE_NAME.ELEMENT_NAME[4]).
840 USE 493 00 September 2001
485
Derived data types
Example:
Addressing an
ARRAY element
in a structure
Addressing an ARRAY element in a structure:
Step
1
Action
Define two Derived Data Types (in which the second Derived Data Type uses
the first as an element).
For example:
TYPE
Example3:
STRUCT
Par1: BOOL;
Par2: ARRAY [0..5] OF BOOL;
Par3; BOOL;
END_STRUCT;
Example4:
STRUCT
Elem1: Example3:
Elem2: INT;
END_STRUCT;
END_TYPE
2
Declare a new variable in the variable editor (e.g. with the name
COMPLEX_VAR).
3
Assign these variables the data type of the Derived Data Type created (e.g.
Example4).
4
Close the variable editor with OK.
Reaction: A new multi-element variable called "COMPLEX_VAR" of data type
"Example4 was created.
5
To address this "entire" multi-element variable, simply enter the name of the
variable (COMPLEX_VAR) into the program as usual.
To address, for example, only a single element of this multi-element variable
(e.g. to call the fifth element of the array of "Par2" elements (Derived Data Type
"Example3") as an element of the element "Elem1"). Enter into the program the
variable name, separated by a dot from the name of the element (in the "current"
Derived Data Type, here "Example4"), separated by a dot from the name of the
element of the "current" Derived Data Type of the called Derived Data Type (here
"Example3") and followed in square brackets by the number of the element (e.g.
COMPLEX_VAR.Elem1.Par2[5]).
486
840 USE 493 00 September 2001
Reference data editor
18
At a Glance
Overview
This Chapter describes the reference data editor (RDE) and its use with activated
animation.
What’s in this
chapter?
This chapter contains the following topics:
Topic
Page
General Information about the Reference Data Editor
488
Converting RDE templates
489
Changing signal states of a Located variable
491
Cyclical setting of variables
492
Unconditional locking of a section
494
Animation
495
Replacing variable names
497
Load reference data
497
840 USE 493 00 September 2001
487
Reference data editor
General Information about the Reference Data Editor
Introduction
In the reference data editor (RDE) variables can be displayed in animation mode, 0x
and 1x references can be disabled (forced) and unlocated elementary variables can
be set to cyclical. The behavior of variables can be tracked and changed online via
direct access to the variables and direct addresses used in the IEC program. In
animation mode the conditions of the variables (disabled, cyclically set) are
displayed using different colors.
Creating an RDE
Template
To create an RDE template, accept the variables declared in the variable editor.
There are various ways to do this:
If…
Then…
you double-click on the first column of the
corresponding number box,
open the Lookup Variables dialog to select
a declared variable or components of
structures.
the name of a declared variable is entered in
the Variable Name column,
the declared parameters are transferred to
the RDE template.
you enter the direct address in the Address
column,
the value, format and if applicable also the
defined name of the corresponding signal are
transferred to the RDE template.
use the Insert address... menu command to the values and the formats of the
insert complete reference blocks in the
corresponding signals are transferred to the
Address column,
RDE template.
Displaying
Signal
Conditions
When an RDE template is opened the stored signal states are always overwritten by
current values in the PLC.
The signal conditions in the PLC can be displayed in online mode using the PLC
Status... menu command. When the PLC starts up, the signal conditions can be
viewed in animation mode depending on how the program is running.
Printing RDE
Templates
In the RDE main menu, click on the Print menu command to print out an open RDE
template. An exact screen printout of the RDE template is created on paper.
Note: Changing the printer properties in the operating system (Windows) to the
landscape paper setting is recommended. By doing this you can keep the complete
reproduction of the RDE template to one page.
488
840 USE 493 00 September 2001
Reference data editor
Using the RDE
Template
Using the same RDE template in several projects is not recommended. This can
result in duplicated variable names and variable names which were not in the
original RDE template. The variables in the RDE template are always displayed with
the current reference addresses.
Converting RDE
Templates
The procedure to follow for this is found in the Converting RDE Templates (See
Converting RDE templates, p. 489) description.
Converting RDE templates
Introduction
RDE templates from an earlier version of Concept are automatically converted into
the template format of the new Concept version. To differentiate between the
converted RDE templates and the other RDE templates, they are saved with the file
extension *.RDF.
CAUTION
Incomplete RDE templates are created!
Before the conversion make sure that the variables in the RDE template
are declared in the opened project in the new version of Concept. New
variables are listed in an error message and cannot be displayed in the
RDE template (*.RDF) created from it.
Failure to observe this precaution can result in injury or
equipment damage.
840 USE 493 00 September 2001
489
Reference data editor
Automatic
Conversion
Automatic Conversion is performed when the RDE template of a previous version of
Concept is opened:
Step
490
Action
1
Start the new version of Concept and open the project.
2
In the Online main menu click on the Reference data editor menu command.
Result: The RDE main menu appears in the men bar.
3
In the Online main menu click on the Reference data editor menu command.
4
Select the directory, in which the RDE template (*.RDE) is saved (e.g.
D:\CONCEPT_OLD).
Result: All existing RDE templates (*.RDE or *.RDF) are displayed.
Note: The files with the *.RDF extension come from the conversion of generated
RDE templates (*.RDE).
5
Select the *RDE RDE template to be converted.
6
Click on the command button OK.
Result: The RDE AutoConvert message appears. This informs you that the
*RDE template was created in a previous version of Concept and is now being
saved in a new format, so that it can be used in this version of Concept. The
converted template is saved in a file with the *.RDF extension.
7
Click on the command button OK.
Result: The converted RDE template (*.RDF) is displayed.
Warning: All RDE template variables must be declared beforehand in the
project. For new variables, the RDE Template Errors error message appears
now, in which all faulty variables are listed. After closing the window, the
converted RDE template opens, but only containing the declared variables.
8
Using the Save reference data table under... menu command, it is possible to
save the converted RDE template in the directory in the new version of Concept
(C:\CONCEPT_NEW).
Result: The converted RDE template is stored in the Concept directory with the
*.RDF file extension.
840 USE 493 00 September 2001
Reference data editor
Changing signal states of a Located variable
At a Glance
Located variables can be changed by checking the corresponding signal box in the
columnDisable and editing the value. Upon locking, the variable is separated from
the hardware and is only used in the logic again if the disablement is undone. In this
way, the changed signal states of all editors (FBD, SFC, LD, ST, LL984) are taken
into account.
Forcing inputs
and outputs
When inputs are forced, signal states are transferred until the value in the RDE table
is changed again. When outputs are forced, the new value appears at the beginning
of each program cycle. When a subsequent change is made using the program
logic, this value is not saved in the state RAM until the locking of the output has been
removed.
CAUTION
All changed signal states are loaded directly onto the PLC.
Though not in the case of forced located variables.
Failure to observe this precaution can result in injury or
equipment damage.
Display of
disabled
variables
Variables that have been disabled by checking the check mark are shaded in color
in the editor display. By removing the check symbol, the colored background of the
corresponding variable is also no longer visible.
Loading
reference data
Cyclically set values and disabled variables can be loaded onto the PLC using the
menu command Load reference data.
These settings then remain the same until the user makes a change in the RDE
table, or the PLC loses the loaded data (e.g. by loading a different project).
Note: In an open RDE table, the changed date is then automatically saved using
the menu command Load reference data. The menu command Save table then
no longer needs to be used.
840 USE 493 00 September 2001
491
Reference data editor
Cyclical setting of variables
At a Glance
Variables and structure elements can be changed by entering a set value
corresponding to the data type of the variable in the Enter value column. This value
will be written uniquely, if the corresponding signal’s box in the Cyclical setting
column is subsequently checked. The new signal state is loaded directly onto the
PLC and is transferred to the cyclically set variables administrator. The signal state
of the variable, attained after logic editing at the end of the cycle, is specified in the
Value column. In animation mode, the cyclical setting of variables in IEC sections is
displayed.
Cyclical setting
Note: Cyclical setting of variables can only be performed ONLINE and in EQUAL
mode, not in animation mode. Depending on logic, the displayed value may deviate
from the cyclically set value.
When the cyclical setting check box is checked, the set value in the Enter value
column can still be changed.
If the box in the column Cyclical setting is unchecked, the signal state in the column
Value is loaded onto the PLC and is used in the logic.
A maximum of 300 variables can be cyclically set. For cyclical setting, the length of
the entry is limited to 150 characters in the column Variable name, because this
name is sent to control. If a variable is used several times in the reference editor, the
most recently entered value will always be the one taken into account for cyclical
setting.
Note: All changed signal states are loaded directly onto the PLC.
Cyclical setting and locking of signal states in the operating modes:
Mode
Option
Meaning
LOCAL
Lock
The variables declared in the Variable Editor can be written in the RDE
table in local mode. The signal states specified in online mode are
displayed in local mode but cannot be changed and have no effect.
ONLINE Lock
LOCAL
The changed signal states of located variables are transferred directly
from the program logic.
Cyclical Cyclical setting of variables cannot be executed in local mode.
setting
ONLINE Cyclical The signal state in the column Enter value is used in logic editing by
setting checking the box (check mark visible), and supplies a value at the end
of the cycle, which is displayed in the column Value.
492
840 USE 493 00 September 2001
Reference data editor
Getting/deleting
cyclical set list
The cyclical values set in animation mode can be inserted into the RDE table in
disabled animation using the menu command Get CSL.
Cyclically set values are recognized in the RDE table by the check mark in the
column Cyclical setting, and are automatically recognized row by row. It is
therefore referred to as a cyclical set list. Using the menu command Online → Get
CSL this recognized list will be inserted dependently from the selected row in the
RDE table. Getting and inserting the cyclical set list can be done as often as
required. The most recent cyclical set list is always located on the clipboard and can
only be deleted using the menu command Delete CSL. Thereafter, getting and
inserting is no longer possible until values are cyclically set at the next animation.
Note: Each time, the system getsall cyclically set values.
Loading
reference data
Cyclically set values and disabled variables can be loaded onto the PLC using the
menu command Load reference data.
These settings then remain the same until the user makes a change in the RDE
table, or the PLC loses the loaded data (e.g. by loading a different project).
Note: In an open RDE table, the changed date is then automatically saved using
the menu command Download reference data. The menu command Save table
then no longer needs to be used.
840 USE 493 00 September 2001
493
Reference data editor
Unconditional locking of a section
At a Glance
At the section to be inhibited, the logic must carry a BOOL data type "output" and it
should be noted that the section is disabled at configured "1".
CAUTION
Risk of unwanted process states.
Locking a section does not mean that programmed outputs within the
section are deactivated. If an output was already set during a previous
cycle, this state also remains after the section has been inhibited. It only
ceases to be possible to change the state of these outputs once the
section has been inhibited.
Failure to observe this precaution can result in injury or
equipment damage.
Note: A section that contains a logic to lock/release other sections should not be
disabled, if possible. Output state disabled sections cannot be changed.
Procedure for
unconditional
locking of a
section
494
The following procedure is performed to disable a section unconditionally in the RDE
table:
Step
Action
1
By double-clicking in a text box in the first column in the table (1 … 100) open
the dialog box Look up variables.
2
In the zone Data type select the option button Structured and from the list select
SECT_CTRL.
Reaction: The names of all sections are displayed.
3
Select the name of the file to be disabled and using the command button
Elements... open the dialog box Select elements by type.
4
Select the line disable : BOOL and confirm with OK.
Reaction:The structured variable (Sectionname.disable) to which the section to
be disabled is assigned, is entered in the RDE table.
5
Link the PLC and the programming device (Online → Link...), and load the user
program onto the PLC (Online → Load...).
Reaction: The PLC is in ONLINE and ANIMATIONS mode.
6
In the column Value enter a configured "1".
Reaction: The section is disabled and will not be processed.
840 USE 493 00 September 2001
Reference data editor
Animation
At a Glance
Animation can only take place in ONLINE mode. By activating Animation in the
Reference data editor it is possible to display the signal states of the variables, and
to observe the behavior of the output signals while the program is running.
During animation, signal states can be changed online also. The new values are
automatically loaded onto the PLC and are taken into account during the next cycle.
Note: When changing a value it should be ensured that the locking of the variable
is subsequently removed. It is impossible to animate disabled variables correctly.
Animation status
The column Animation status specifies the status of entered unlocated Variables
during animation.
This table provides an overview of the animation status possibilities:
Display
Mode
Cause
Not used
Note: In LOCAL
mode, this display
changes to "Unequal
program"
ONLINE,
ANIMATED
A variable not used in the user program, which is
declared in the Variable Editor, was entered in the
RDE table.
Inhibited I/O flag bits
ONLINE
An unlocated variable was cyclically set during the
ANIMATIONS mode.
Unequal program
ONLINE
A variable that is used in the user program, which is
declared in the Variable Editor, was entered in the
RDE table. The program is in MODIFIED mode.
Unequal program
Note: In ONLINE
mode, this display
changes to "Not
used".
LOCAL
A variable not used in the user program, which is
declared in the Variable Editor, was entered in the
RDE table.
840 USE 493 00 September 2001
495
Reference data editor
Display of forced
and cyclically set
signals in
ANIMATIONS
mode
The variables that are forced or cyclically set in the reference editor are labelled with
a colored background in the individual editors.
Forced variables are displayed in the following way:
Editor
Display
IEC editors (FBD, LD, SFC, IL, ST)
When forcing occurs, variable names are shaded in
ochre (brown-yellow).
LL984 editor
When forcing contacts, variable names are
underlined.
When forcing spools, an opened contact ("inhibited")
is displayed before the spool.
Monitoring fields and Display dialog
When forcing occurs, variable names are shaded in
ochre (brown-yellow).
Cyclically set variables are displayed in the following way:
Editor
Display
IEC editors (FBD, LD, SFC, IL, ST)
When cyclical setting occurs, the variable name is
shaded in violet.
Monitoring fields and Display dialog
When cyclical setting occurs, the variable name is
shaded in magenta.
Note: In LD (Ladder Diagram) spools and contacts are displayed in color.
However, due to forcing and cyclical setting, it is possible that the colors of the
variable names will be different from the color display of spools and contacts.
Display of forced
and cyclically set
element
structured
variables in
ANIMATIONS
mode
496
If a structured variable element is forced or cyclically set, there are different display
possibilities.
Display
Cause
The name of the structured variable
(e.g. motor) is shaded in color.
In the editor, a multi-element variable (e.g. motor) is
displayed, in which one or more elements is forced
or cyclically set.
The name of the structured variable
element (e.g. right motor on) is
shaded in color.
In the editor, a forced or cyclically set element of a
multi-element variable (e.g. right motor on) is
displayed.
The name of the structured variable
element (e.g. right motor on) is
shaded in color, but the name of the
element is not.
In the editor, an element of a multi-element variable
that is not forced or cyclically set is displayed, but a
different element of this multi-element variable is
cyclically set or forced.
840 USE 493 00 September 2001
Reference data editor
Replacing variable names
At a Glance
When using an open RDE table it is possible to simultaneously edit the Variable
Editor. If variable names are changed in the Variable Editor using the Find/replace
function, these changes are automatically adopted in the open RDE table. In this
case the RDE animation is initially terminated and the RDE table must be reloaded.
Procedure and
reaction
For the automatic adoption of replaced variable names in the simultaneously open
RDE table, the following steps are to be performed:
Step
Action
1
Open a section and create an online link.
Note: The state between PLC and programming device must be EQUAL. If not,
load the program into the PLC.
2
Start the animation (Online → Animate binary values).
Reaction: The signal states of the section are displayed in color.
3
Open an existing RDE table (RDE → Open table...).
Reaction: The RDE animation is started.
4
Open the Variable Editor (Project → Variable declaration...).
5
Using the command button Find/replace open the dialog Find/replace.
6
Replace an existing variable name with a new name (Command button
Replace).
Reaction: The variable name was changed in the Variable Editor.
7
Exit the Variable Editor using OK.
Reaction: The section is automatically updated, and the RDE animation is
terminated.
8
Close the RDE table and save the changes (Command button Yes).
9
Reopen the saved RDE table (RDE → Open table...).
Reaction: The RDE animation with the changed variable name is recovered.
Load reference data
At a Glance
In the same cycle, the variables changed in the reference data editor are sent to the
PLC, using the menu command Online → Download reference data.
Note: To perform the loading, the animation must be disabled.
840 USE 493 00 September 2001
497
Reference data editor
498
840 USE 493 00 September 2001
ASCII Message Editor
19
At a glance
Introduction
This chapter describes the ASCII message editor.
What’s in this
chapter?
This chapter contains the following Sections:
Section
840 USE 493 00 September 2001
Topic
Page
19.1
ASCII Editor Dialog
501
19.2
User Interface of ASCII Message Editor
509
19.3
How to Continue after Getting a Warning
513
19.4
ASCII Editor in Offline/Combination/Direct Modes
514
499
ASCII Message Editor
500
840 USE 493 00 September 2001
ASCII Message Editor
19.1
ASCII Editor Dialog
At a glance
Introduction
This section describes the ASCII editor dialog.
What’s in this
section?
This section contains the following topics:
Topic
Page
Generals to ASCII editor dialog
502
Text
503
Variables
504
Control code
505
Spaces
505
Carriage Return
506
Flush (buffer)
507
Repeat
508
840 USE 493 00 September 2001
501
ASCII Message Editor
Generals to ASCII editor dialog
Introduction
Use the ASCII message editor to create, edit, and simulate ASCII messages. The
ASCII message text/control that is created in the editor can be transferred to the
selected PLC. Conversely, the ASCII messages internal to the controller can be
uploaded to the editor.
An ASCII message set consists only of a list of messages that satisfy certain rules.
The number of messages allowed and the maximum length of the ASCII message
set is defined as part of the PLC configuration. Each message consists of a list of
ASCII message fields separated by commas.
The following fields are currently supported:
l Text, p. 503
l Variables, p. 504
l Control code, p. 505
l Spaces, p. 505
l Carriage Return, p. 506
l Flush (buffer), p. 507
l Repeat, p. 508
Preconditions
502
This function is only available when using:
l Concept for Quantum
l The modules J892 or P892
l Programming language LL984
840 USE 493 00 September 2001
ASCII Message Editor
Text
Introduction
The text messages defined by text fields take the format ’Hello World’ whereby
Hello World becomes the text to be forwarded. The single quotation marks are
the delimiters. The ASCII message editor development dialog provides a
development area and a simulator area where the composed message is interpreted
and displayed for you to make any necessary edits before leaving the editor dialog.
Message Length
An ASCII message can be as long as 134 words. Three words are for overhead plus
the actual message maximum of 131 words (2 characters per word).
Message words are used up as follows:
Field type
Field length (in words)
ASCII text
1 + length of text / 2 rounded up
Return
1
Flush 0, 1
1
Flush 2, 3
2
Control
1
Variable
1
Repeat
2
Space
1
840 USE 493 00 September 2001
503
ASCII Message Editor
Variables
Introduction
A variable will be given the format NTF.
The meaning of this is:
l N representing the decimal number (1...99) of the data fields of the data type
defined by T.
l T is the data type of the variable.
l F the decimal field width for the variable.
Data Types
Example
The data types supported are:
Type
Repetition factor
A = ASCII character
1
B = binary number
1 to 16
H = hexadecimal
1 to 4
I = integer
1 to 8
L = integer with leading 0s
1 to 8
O = octal
1 to 6
For example: 2H2 means:
l 2 registers (N)
l in hexadecimal (T)
l containing 2 hexadecimal numbers (F)
N can fit into the number of data registers needed, but it is not an absolute
requirement.
The relationship is:
504
Type
Relationship
A
Number of registers = N/2 (next upper integer value)
B
Number of registers = N
H
for 1 ≤ F ≤ 4... Number of registers = N
for 5 ≤ F ≤ 8... Number of registers = 2 x N
I and L
The same as H
O
Number of registers = N
840 USE 493 00 September 2001
ASCII Message Editor
Control code
Meaning of
Control Code
A control code is given the format "Null", with Null being a three characters OOO,
and the double quotation marks are delimiters.
For example: "017"
Spaces
Meaning of
Spaces
A space field is given the format ddx, with dd being a decimal number (1..99) used
to determine how many spaces are to be added to the message.
Representation
of Dialog
Many spaces between text:
ASCII Message Editor
Delete
Message
1
Delete All
´Hello´,10x,´World´
View
Export
Import
Simulation:
Hello
World
Used Words: 12
OK
840 USE 493 00 September 2001
Free Words: 8
Cancel
Length: 12
Help
505
ASCII Message Editor
Carriage Return
Meaning of
Carriage Return
A carriage return field will add a carriage return to the output information, and it has
the format, /.
Representation
of Dialog
Carriage return:
ASCII Message Editor
Delete
Message
1
Delete All
´Hello´,/,´World´
View
Export
Import
Simulation:
Hello
World
Used Words: 12
OK
506
Free Words: 8
Cancel
Length: 12
Help
840 USE 493 00 September 2001
ASCII Message Editor
Flush (buffer)
Meaning of Flush
This will expressly specify for the P892 only how the input message buffer is to be
cleared. This field has the format <*>/.
The * can be any of the following:
*
Meaning
0
Remove all characters in the buffer. An example is: <0> clears all.
1;bbb
Removing the number of characters specified by bbb, whereby bbb is a number
(1...255). For example, <1;100> flushes the first 100 characters in a buffer.
2;hhhh
Scanning the message for the 2 characters that are specified by the
hexadecimal numbers hhhh. If a match is found, delete all characters up to but
not including the match.
An example is: <2;5445> causes the buffer ‘12TEST’ to become "TEST".
3;rrr;hhhh
Scanning the message for the 2 characters that are specified by the
hexadecimal numbers hhhh. If a match is found, delete all characters up to and
including the match. The search is to be performed as often as specified by rrr,
whereby rrr is representing a decimal number 1...255.
Example: <3;2;5445> causes the buffer ‘12TEST3456TEST789TEST’ to
become ST789TEST.
840 USE 493 00 September 2001
507
ASCII Message Editor
Repeat
Meaning of
Repeat
Use this message field to specify that a number of message fields will be repeated
several times. This field has the format dd(*), with dd being a decimal repetition
factor (1....99), ( ) are delimiters, and * is a series of message fields.
Representation
of Dialog
Repeated text:
ASCII Message Editor
Delete
Message
1
Delete All
3[´repeat´,2x]
View
Export
Import
Simulation:
repeat repeat repeat
Used Words: 10
OK
508
Free Words: 10
Cancel
Length: 10
Help
840 USE 493 00 September 2001
ASCII Message Editor
19.2
User Interface of ASCII Message Editor
At a glance
Introduction
This section describes the user interface of the ASCII message editor.
What’s in this
section?
This section contains the following topics:
Topic
Page
How to Use the ASCII Message Editor
510
Message Number
511
Message Text
512
Simulation Text
512
840 USE 493 00 September 2001
509
ASCII Message Editor
How to Use the ASCII Message Editor
Invocation of
ASCII Message
Editor
The ASCII message editor is invoked from the ASCII messages... menu item in the
Project menu. This editor allows you to add/modify/delete messages in a temporary
work space, then save or cancel the changes.
Add New
Messages
To add a new message, type the new message number into the Message text box
and type a syntactically correct message into the message text box. As you enter a
message into the message text box, its corresponding simulation is displayed in the
Simulation text box. When the message is syntactically incorrect, it is displayed in
red.
Modify Existing
Messages
To modify an existing message, select a message from the Message number list
and change the text.
Delete Messages
To delete a message, select a message from the Message number list and click on
Delete.
Clicking on the button Delete All will remove all messages in the temporary
workspace. The button is active if there is at least one ASCII message in the
message set. Selecting this option results in the display of a confirmation dialog.
View
Clicking at the button View will produce a view of the displayed ASCII message
dialog. The view message format is message number followed by message text.
You can select from the choices available. To download the editor from the view list,
click on the message and on OK.
Save Changes
Use the button OK to save processes performed while working with the ASCII editor
and to close the dialog. Each message that has been created or changed is checked
for syntactic correctness at this point. The checking begins at the current message
and wraps around until all messages are checked. If a syntax error is detected, a
definition of the error is displayed first, and as soon as the error dialog is cleared, the
message itself appears with the cursor on the faulty character. Every attempt to add
ASCII characters which will cause the size of the entire message area set in the
configuration to be exceeded will generate an error.
Length, Used
and Free
These fields display the length of the current message (in words), the number of
words used and the number of words remaining.
510
840 USE 493 00 September 2001
ASCII Message Editor
Message Number
Introduction
The combo box Message number is a dialog that contains a message selection list
with a check mark next to the currently selected message.
Use this dialog to select existing message numbers and/or to add new message
numbers. As long as there are no messages, text box and list are empty. If there are
messages, the editor is initially displayed with the text box containing the first
message number and a list of message numbers for existing messages. The
message number that relates to the currently displayed message is posted above
the list box.
Action
For the selection of an existing message, click at the list button and mark a number
in the list or type the number into the text field. A new message number can be
inserted by typing the number into the text field.
Effects
If the message number assigned to an existing message is changed (either text or
list entry), the text box Message will display the message text for the message
number and the box Simulation shows the simulation of the message. If a new
message number has been entered, the text boxes Message and Simulation will
be cleared.
Error handling
The following errors can be appearing:
If...
Then ...
an unauthoried character is entered a message field dialog will show: "Message number
in the number field of the message. contains illegal characters".
After acknowledging the error, the message number is
reset and the process will continue in the text box
Message.
the text box Message is not filled
out.
a message field dialog will show: "There must be a
message number before text can be
entered".
After acknowledging the error, the message number is
reset and the process will continue in the text box
Message.
the number is greater than the
a message field dialog will show: " Message number
maximum number set in Configure exceeds maximum set in configuration".
→ ASCII Setup....
After acknowledging the error, the message number is
reset and the process will continue in the text box
Message.
840 USE 493 00 September 2001
511
ASCII Message Editor
Message Text
Introduction
The text box Message is a text editor with free format for the entry of ASCII
messages. This editor allows one arbitrarily long line of free-format text. Although
the text should follow the ASCII message syntax, it does not necessarily have to be
syntactically correct prior to activating the OK button, even though a view note
regarding validity will appear already during entry of the messages.
Actions
A currently selected message is made available for editing, otherwise a new
message can be entered. The standard Windows edit operations (Cut, Paste,
Copy, ...) are allowed.
Effects
If the message is syntactically correct, its text will be displayed in normal textual
color, if not, the display will be in red. Text wraps so there is never a case where
horizontal scrolling is required.
Simulation Text
Introduction
The text box Simulation is a read-only multi-line field. The simulated output of the
current message is displayed in this window. As messages are added or changed,
the simulated output is displayed in the simulation window.
Special
Considerations
The simulation of control codes is shown as the ASCII character that corresponds
to the controller, except those control codes that are not authorized in Windows text
control and are written as an ’l’.
Note: Any simulation greater than 32 k characters is truncated to this maximum.
512
840 USE 493 00 September 2001
ASCII Message Editor
19.3
How to Continue after Getting a Warning
How to Continue after Getting a Warning
Introduction
A few conditions will allow continuing work with the ASCII editor although with
possibly restricted functionality.
Note: To match a configuration, messages may be deleted.
Exceeding the
Total Messages
Message numbers that are above the maximum limit set in Configure → ASCII
Setup... will only be available for display or delete. These messages appear grayed
out.
The accompanying warning reads: "Warning: Some message numbers
exceed the highest message number xx, defined in Configure.
All messages beyond xx can only be displayed or deleted."
Exceeding the
Message Area
Size
If the size of the message in the data base is greater than the size defined in
Configure → ASCII Setup..., a warning will appear. You can continue to view,
change, or delete but changes cannot be saved unless the size falls below the
configuration setting.
This warning reads: "Warning: The size of the ASCII message area,
xx, exceeds the maximum size, xx, defined in Configure."
Tips
Note: To match a configuration, messages may be deleted.
Note: Information about the ASCII character set can be found in the PLC User’s
Guide.
840 USE 493 00 September 2001
513
ASCII Message Editor
19.4
ASCII Editor in Offline/Combination/Direct Modes
ASCII Message Editor in Offline/Combination/Direct Modes
Offline
When using Concept to program in offline mode, the ASCII message editor is
displayed with the set of messages saved in the data base. By activating the OK
button, these messages will be saved in the database.
Direct
When using Concept to program in direct mode, the ASCII message editor will be
displayed with the set of messages saved in the controller. By clicking on the OK
button, the changes made to the ASCII messages will be downloaded to the
controller.
Combination
Mode
When entering the Combination mode, Concept checks whether the information in
the controller matches the information in the data base. If a match is found, the
controller is considered EQUAL to the database. A mismatch is marked as NOT
EQUAL. If the status is EQUAL, the ASCII message editor will be displayed with the
ASCII message set taken from the data base. If a displayed editor message is
changed, these changes will be saved to the database and the controller after
clicking the OK button.
514
840 USE 493 00 September 2001
Online functions
20
At a Glance
Overview
This chapter describes the various online functions.
What’s in this
chapter?
This chapter contains the following Sections:
Section
Topic
20.1
General information about online functions
517
20.2
Link PLC
518
20.3
Setting up and controlling the PLC
532
20.4
Selecting Process information (status and memory)
542
20.5
Loading a project
546
20.6
Section animation
555
20.7
Online Diagnosis
558
840 USE 493 00 September 2001
Page
515
Online functions
516
840 USE 493 00 September 2001
Online functions
20.1
General information about online functions
General information
At a Glance
After setting up a link via Modbus, Modbus Plus or TCP/IP between the
programming device and the PLC the project can be loaded onto the PLC. Now
special online functions for displaying and changing the current value in the PLC
state RAM are available in the separate editors. The PLC can be controlled.
CAUTION
A communication timeout or a general memory protection failure
could occur if the system clock of the programming device is
changed while it is online.
If the running program cannot be terminated, all animated program
sections should be closed , or the animation should be turned off in
order to reduce the possibility of getting into a time critical operation.
Failure to observe this precaution can result in injury or
equipment damage.
840 USE 493 00 September 2001
517
Online functions
20.2
Link PLC
At a Glance
Overview
This section contains information about linking the PLC.
What’s in this
section?
This section contains the following topics:
518
Topic
Page
General Information
519
Presettings for ONLINE operation
521
Modbus Network Link
522
Modbus Plus Network
523
Modbus Plus Bridge
528
TCP/IP-Network Link
530
Connecting IEC Simulator (32 bit)
530
State of the PLC
531
840 USE 493 00 September 2001
Online functions
General Information
Introduction
Several host computers can be connected to a PLC, but there can only ever be one
host computer that can access the PLC. The other host computers are then in
monitor mode and must re-update the screen if programming changes take place. If
two host computers simultaneously attempt to access the PLC, an error message
appears.
Consistency
Check
If a project is open and a link between a host computer and the PLC is set up, a
consistency check between program, EFBs and DFBs on the host computer and the
PLC is performed automatically. The result of this check (EQUAL, MODIFIED or
NOT EQUAL) is displayed in the status bar and written in a file. This file can be
found in the Concept project directory and is designated PROJEKTNAME.RMK. It
is used only for display and automatically changes its content. The meaning of the
individual entries can be found in the following diagram.
Meaning of the
Statuses
Meaning of the Statuses:
l EQUAL
The program on the host computer and the PLC is consistent.
l NOT EQUAL
The program on the host computer and the PLC is not consistent. You can
establish consistency by using the Online → Download... menu command.
l MODIFIED
The program on the host computer was modified. You can accept the changes
online into the PLC by using the Online → Download Changes menu command.
Note: Even in the case of changes that are not relevant to the code (e.g. creating/
changing comments in IL/ST, moving objects (without affecting logic) in FDB/LD/
SFC), the MODIFIED status is temporarily displayed. When the section is next
analyzed (Project → Analyze Project, Project → Analyze Section or Online →
Download Changes), the program automatically reverts to the EQUAL status (if
no changes have been carried out that are relevant to the code). Even if changes
that are relevant to the code have been carried out, only these sections appear
in the Download Changes dialog.
840 USE 493 00 September 2001
519
Online functions
Relationships
between
Statuses
The diagram shows the relationships between the different program statuses:
Open prog. with EQUAL (EqS)
Open prog. with "downloaded flag"
Close prog.
Change config.
Link saved prog.
to EQUAL
Using "modified flag"
Terminate connection
Dis
Link unsaved prog.
to EQUAL
Terminate connection
Using "modified flag"
change
Close prog.,
without saving
Close prog.,
Save
Open prog.
Open prog. after
FFB, DDT modification
Open prog. after FFB,
unk
DDT modification
Open prog.
Close prog.
Downloading ok
!Eq
Connect
E!s
Download failure
Terminate
connection
Connect with
EQUAL
Download
failed
Connect with
with MODIFIED
EqS
Close prog. with
Terminate connection
change
mod
Save
Load/download changes ok
change
Save
Unk UNKNOWN
Dis DISCONNECTED
!Eq NOT EQUAL
Mod MODIFIED
E!S EQUAL but not saved
EqS EQUAL and saved
520
840 USE 493 00 September 2001
Online functions
Presettings for ONLINE operation
At a Glance
The dialog box Connect to PLC can be used to specify settings for both the PLC
link and ONLINE mode resulting from it.
Access
It is possible to specify which functions will be executed in the ONLINE operation,
i.e. which menu commands are available in the Online main menu.
Protocol types
To link the programming device and PLC, it is important to know which network the
communicating nodes are in so that the correct protocol type is selected.
Use the table to decide which protocol type fits the network link used:
Linking the network nodes
Protocol type
Serial Interface
Modbus
SA85-Adapter
Modbus Plus
NOE-module (on Ethernet-Bus SINEC H1)
TCP/IP
TCP/IP Interface map (32-Bit Simulation)
IEC Simulator (32-Bit)
Note: The programming device can always only be linked to one PLC. This means
that before a link is made to another PLC, any existing link must be terminated with
the Disconnect menu command.
840 USE 493 00 September 2001
521
Online functions
Modbus Network Link
Introduction
For a Modbus network link, the settings of the modbus interface must correspond
with the settings on the PLC.
The interface is edited in the Modbus Port Settings dialog (PLC Configuration →
Modbus Port Settings...).
Protocol
Settings for
Modbus
When the Modbus protocol type is selected, specify further data in the Protocol
Settings: Modbus range. Specify the Node Address (Node No.) on the PLC and
enter this in the corresponding text box. You can determine the transfer mode for
communication between the PLC and the host computer.
The following modes are available according to the application:
Application
Mode
Communication with various host devices. The ASCII mode
works with 7 data bits.
ASCII
Communication with an IBM compatible personal computer. The
RTU mode works with 8 data bits.
RTU
After the serial interface for the Modbus network link has been specified, using the
Settings... command button, open the Settings for COMx dialog. Enter the settings
for the interface here, as in the Modbus port settings dialog.
Use the OK command button to create the ONLINE link.
SoftPLC as
Modbus Device
522
The SoftPLC (180-ASP-26x-xx) is used for remote bus control in the Modbus
network. The module has one Modbus Plus interface and two Modbus interfaces (on
one PC104-Board).
840 USE 493 00 September 2001
Online functions
Modbus Plus Network
Introduction
For a Modbus Plus network link, specify in the Protocol settings: Modbus Plus
range whether the 16-Bit IEC-Simulator (Port 0) or the Modbus Plus interface (Port
1) is being used. All nodes on the local network are displayed in the list box. In
addition, the routing path of the token rotation sequence, which can contain up to 5
node addresses is displayed in the network. Up to 64 nodes can be addressed on
one network, i.e. a routing path address can be between 1 and 64. Several networks
can be linked via a bridge.
Note: You can display the node list of a different network by double-clicking on a
listed bridge.
IEC Simulator
(16-Bit)
The simulator simulates a PLC linked via Modbus Plus. The address of the host
computer is displayed in the routing path in the list box.
The simulator is active, if in the Protocol Settings: Modbus Plus: range, the Port
0 option is selected.
Note: When the simulator is active, no other nodes can be displayed.
The simulator is only available for the IEC languages (FBD, SFC, LD, IL and ST).
PLC as Modbus
Plus Node
When the PLC is a Modbus Plus node, the address, which the PLC has in the routing
path, is displayed in the list box. This address corresponds to the node address,
which is set with a rotary switch on the back of the CPU.
SA85 as Modbus
Plus Node
The SA85 module is a Modbus Plus adapter for IBM-AT or compatible computers.
The port address is displayed in the list box. The address shows the network in
which the SA85 is installed.
Displaying a routing path with SA85:
Device
Device
Device
To other devices
or via a bridge
to another network
MODBUS PLUS
AT/MC-984
840 USE 493 00 September 2001
SA85
523
Online functions
Bridge Plus as
Modbus Plus
Node
A Bridge Plus (BP85) links nodes within two Modbus Plus networks. The Bridge is
displayed in the list box, and the next Modbus Plus network can be accessed by
double-clicking on the Bridge.
Displaying a routing path with a Bridge Plus (BP85):
Modbus Plus network A
5
Device
Device
Device
22
BP85
BRIDGE
PLUS
Modbus Plus network B
20
BP85
BRIDGE
PLUS
Device
Device
Modbus Plus network C
12
Device
Device
Device
Device
Connector
End connector
Example:
The example shows a routing path across 3 Modbus Plus networks. The task is to
send a message from node 5 in network A to node 12 in network C.
The routing path here is 22.20.12.00.00 and it is put together as follows:
524
Path
Meaning
22
The first address contains the Bridge Plus address from Network A of the
outgoing node 5. This means the message is sent from the outgoing node 5
over this Bridge to the next network, B.
20
The second address contains the Bridge Plus address of the next network, B.
Here, the message is sent from network B to the third network, C.
12
The third address contains the address of node 12, the destination.
00.00
Addresses four and five are set to 0 because there are no further forwarding
addresses.
840 USE 493 00 September 2001
Online functions
Bridge as
Modbus Plus
Node
A link between the Ethernet and the Modbus Plus network or between two Modbus
Plus networks is created via the Modbus Plus Bridge.
The Modbus Plus Bridge should be regarded as a host computer and must be
configured in the Protocol settings: TCP/IP range. Specify the IP address or the
host name of the Bridge and then switch to the Modbus Plus setting in the Protocol
type: text box.
The Modbus Plus Bridge is only listed in the list of nodes in the Modbus Plus network
as the host name that you entered previously in theProtocol Settings: TCP/IP
range. Double clicking on the corresponding host name opens the Modbus Plus
Bridge dialog box for 5 byte routing path configuration.
The further procedure in the dialog box can be found in the chapter Modbus Plus
Bridge, p. 528.
Example:
In the Modbus Plus Bridge (See Modbus Plus Bridge, p. 528) dialog box, create
the routing path 25.8.17.33.0, which defines the following link (from A to D):
NOE
ETHERNET
ETHERNET
IP address:
205.167.8.10
Modbus Plus
Bridge 1
:
:
TCP index 17:
205.167.8.10
:
:
25
B
Modbus Plus
Bridge 2
:
:
MBP index 33:
12.0.0.0.0
:
:
12
MODBUS PLUS
Host PC
A
B
840 USE 493 00 September 2001
A
Device
C
MODBUS PLUS
D
Modbus Plus routing path:
25.8.17.33.0
The message sent from the host computer contains the 5 byte Modbus Plus routing path.
The first byte with the node address of the host computer refers to the Modbus Plus Bridge
linked to it. The Modbus Plus Bridge 1 receives the message on internal path 8, as
specified in byte 2.
The TCP Index No. 17 (byte 3) managed in the Modbus Plus Bridge passes the message
on to the configured node with the IP address 205.167.8.10. In this case the node with this
IP address is another Modbus Plus Bridge.
525
Online functions
Bridge
Multiplexer as
Modbus Plus
Node
C
Modbus Plus Bridge 2 receives the message. The MBP Index No. 3 specified in 4 byte and
managed by the Bridge passes the message on to the configured Modbus Plus node. In
this case the node 12.0.0.0.0.
D
The message has reached its destination, Modbus Plus node 12.
The BM85 Bridge Multiplexer links up to four Modbus devices or Modbus networks
with a Modbus Plus network.
See also "User’s Guide BM85 Modbus Plus Bridge/Multiplexer."
Representation of a routing path with a Bridge Multiplexer (BM85):
M
Modem
Modbus Plus network A
Modbus connector
End connector
Connector
5
BM85
BRIDGE
MULTIPLEXER
1
MASTER
A
2 3
22
Device
X
4
M
25
BP85
BRIDGE
PLUS
SLAVE
A
24
NETWORK
SLAVE
50
M
NETWORK
SLAVE
80
M
Modbus Plus network B
2
30
Device
Y
526
Device
Z
840 USE 493 00 September 2001
Online functions
SoftPLC as
Modbus Plus
Node
The SoftPLC (180-ASP-26x-xx) is used for remote bus control in the Modbus Plus
network. The module has one Modbus Plus interface and two Modbus interfaces (on
one PC104-Board).
Representation of a routing path with a PC based Controller:
Device
Device
Device
To other devices
or via a bridge
to another network
MODBUS PLUS
PC based
Controller
AT/MC-984
ISA Bus
TIO 1
TIO 2
TIO
Remote bus without branch interface
840 USE 493 00 September 2001
527
Online functions
Modbus Plus Bridge
At a Glance
Enter the 5 byte routing path which defines the link from the host computer to the
Ethernet node in this dialog box.
Making settings
The following table describes how to define the routing path:
528
Setting zone
Routing path byte
Meaning
Bridge Path
2. Byte
A maximum of 8 links can go out from the
Bridge to the other network, and one of these
should be selected.
IP routing byte
3. Byte
Enter an index no. which is assigned to an IP
address. This IP address should correspond to
an Ethernet node address where the message
is then sent. If this IP address is being sent to
another Modbus Plus Bridge in the
Ethernet,another node address (MB+ routing
byte) must be given for it to be transferred
further into the Modbus Plus network.
MB+ routing byte
4. Byte
If a link is displayed between two Modbus Plus
networks via two Modbus Plus bridges, the
index no. of the Modbus Plus node must be
entered here. This index no. is also assigned to
a node address. If there is no link across a
different bridge, the value "0" is entered.
Complete address
5. Byte
The whole 5 byte routing path is displayed
according to the setting. The first byte is then
automatically adjusted to the node address of
the host computer.
840 USE 493 00 September 2001
Online functions
Modbus Plus
index no.
The assignments of the Modbus Plus index no. are pre-set and can be selected
between 0 and 255. Note that index no. 255 is reserved for specific operations.
When this index no. is selected, data selection or loading is permitted between a
TCP/IP node and the Modbus Plus Bridge via an internal command. Index nos.
250 – 253 are reserved and cannot be used.
The index in the Modbus Plus routing path is shown in the following table:
Index
TCP/IP Index No.
Modbus Plus routing path
1 ... 64
1.0.0.0.0 ... 64.0.0.0.0
65 ... 128
2.1.0.0.0 ... 2.64.0.0.0
129 ... 192
3.1.0.0.0 ... 3.64.0.0.0
193 ... 249
3.2.1.0.0 ... 3.2.57.0.0
The assignments of the TCP index no. follow automatically after the IP address of
the Modbus Plus Bridge has been specified in the Link → Protocol Settings:
TCP/IP dialog box. Each index is assigned to an IP address where the first 3 bytes
are assigned to the first 3 bytes of the Modbus Plus Bridge IP address. The 4th byte
is counted upwards from 1 to 255 at the most.
Example:
For a Modbus Plus Bridge IP address of 205.167.4.65, the TCP/IP addresses are
automatically pre-set, as in the following table:
Index
IP address
1
205.167.4.1
2
205.167.4.2
...
...
255
205.167.4.255
Note: Refer to the "174 CEV 200 30 TSX Momentum Modbus Plus to Ethernet
Bridge User Guide" for a detailed description of the Ethernet Bridge.
840 USE 493 00 September 2001
529
Online functions
TCP/IP-Network Link
Introduction
For an Ethernet link, select the protocol type TCP/IP in the Connect to PLC dialog
box.
Protocol
Settings for
TCP/IP
To connect to other Ethernet nodes, specify the IP address or the host name of the
Ethernet node in the Protocol Settings: TCP/IP range.
To connect to the Ethernet via Modbus Plus node, specify the IP address or the host
name of the Modbus Plus Bridge in the Protocol Settings: TCP/IP range (see also
"Bridge as Modbus Plus Node (See Bridge as Modbus Plus Node, p. 525)").
Connecting
Quantum to the
Ethernet
You can connect the Quantum to the Ethernet Bus by configuring the NOE module.
By doing this, it is possible to communicate with other automation components in the
Ethernet Bus system via the host computer.
Connecting IEC Simulator (32 bit)
Introduction
The simulator simulates a PLC connected via TCP/IP, where the signal status of the
I/O modules can also be simulated. Up to 5 host computers are connected to the
simulated PLC at the same time.
To activate the simulator, select the protocol type IEC simulator (32 bit) in the
Connect to PLC dialog box.
Protocol
Settings for IEC
Simulator (32 bit)
The simulator is active, if you specify the address of your TCP/IP interface board in
the Protocol Settings: IEC Simulator (32 bit) range.
The TCP/IP address can be obtained on the title bar of the Concept simulator
program PLCSIM32.
Note: At the present time the simulator is only available for IEC languages (FBD,
SFC, LD, IL and ST).
530
840 USE 493 00 September 2001
Online functions
State of the PLC
At a Glance
With a network link, the state of the PLC is displayed in the list of nodes in the
Modbus Plus network in the Connect to PLC dialog box.
States of the PLC
All the states which can arise are listed in the following table:
State
Meaning
Running
Identifies a PLC with a program running.
Stopped
Identifies a PLC with a program which has stopped.
Unknown
Identifies an unknown PLC.
Not configured
Identifies a PLC without a hardware configuration, i.e. no online
functions are possible.
840 USE 493 00 September 2001
531
Online functions
20.3
Setting up and controlling the PLC
At a Glance
Overview
This chapter contains information about setting up and controlling the PLC.
What’s in this
section?
This section contains the following topics:
532
Topic
Page
General Information
533
Setting the Time for Constant Scans
533
Single Sweeps
534
Deleting memory zones from the PLC
535
Speed optimized LL984-Processing
535
Save To Flash
536
Reactivate flash save
539
Set PLC Password
539
840 USE 493 00 September 2001
Online functions
General Information
Introduction
The PLC and CPU functions can be controlled in ONLINE mode. The PLC must be
connected to the host computer to establish ONLINE mode.
You can control the PLC directly with the following commands:
l Set Scan Time
l Single Scan Function
l Clear Controller
l Set Clock
l Run Optimized Solve
l Save in Flash
l Set Password for PLC
The commands for setting up and controlling the PLC can be found in Online →
Online Control Panel.
Setting the Time for Constant Scans
Introduction
You can specify a constant scan time for processing the user program in the Online
→ Online Control Panel → Const. Sweep On … → Settings for Constant Scan
dialog box.
If the actual scan time is longer than the constant scan time specified, however, the
system ignores the user settings and uses the normal scan running time (Scan Time
in Free Running Mode).
If you select a constant scan time that is longer than the actual scan time, the control
will wait during each scan until the set scan time has been reached.
Note: This function cannot be performed when there is a link with the simulator.
Selection
Condition
This dialog box is only available if the link has been established between the PLC
and the host computer (ONLINE mode).
Settings for
Constant Scan
A register (4x) must be specified first to determine the constant scan. You also need
to enter the scan time (10-200m) that is allocated to the register.
Note: The scan time increases, if several windows are open in Concept, e.g.
several sections are displayed in animation mode. Therefore if you are using
several windows you should reduce the scan time.
840 USE 493 00 September 2001
533
Online functions
Exiting Constant
Scan
After starting the constant scan with the Const. Sweep. On....command button, the
command button designation changes to Const. Sweep Off. By clicking on this
command button you exit the function again.
Single Sweeps
Introduction
You can specify single sweeps times for processing the user program in the Online
→ Online Control Panel → Single Sweep On… → Settings for Single Sweeps
dialog box.
After the specified number of scans has been performed the logic editing stops. This
function is helpful for diagnostic purposes. It allows the checking of edited logic,
modified data and calculations that have been carried out.
WARNING
It can lead to unsafe, dangerous and destructive operations of the
tools or processes that are attached to the controller.
Single sweeps should not be used for searching for errors in controlling
machine tools, processes or material maintenance systems if these are
running. When the number of scan times given has been processed, all
the outputs will be retained in their last state. Since no more logic editing
is taking place, the controller ignores all input information. Therefore the
single sweeps function should only be used for searching for errors
during start up.
Failure to observe this precaution can result in severe injury or
equipment damage.
Selection
Condition
This dialog box is only available if the link has been established between the PLC
and the host computer (ONLINE mode). Single sweeps are only performed in PLC
RUN mode.
Settings for
Single Sweeps
To determine the single sweeps, the scan time (10 – 200ms) and the number of
scans being performed must be specified. A maximum of 15 single sweeps is
possible.
Execution of
Single Sweeps
After the scan time and number have been specified you can perform the single
sweeps with the Trigger Sweep command button.
Note: The Trigger Sweep command button is only available in PLC RUN mode.
534
840 USE 493 00 September 2001
Online functions
Exiting Single
Sweeps Function
After the single sweeps function has been started with the Single Sweep On
command button, the designation of the command button changes to Single
Sweeps Off. Clicking on this command button terminates the function again, and
the Settings... and Trigger Sweep command buttons no longer appear in the
dialog box.
Deleting memory zones from the PLC
At a Glance
Specific memory zones can be deleted from the PLC by activating the
corresponding options key in the Online → Online Control → Delete PLC... →
Delete PLC contents dialog box.
The menu command Download... can be used to load the deleted memory areas
back onto the PLC.
Condition for
dial-in
This dialog box is only available if the link has been established between the PLC
and the programming device (ONLINE mode) and the PLC is in STOP mode.
Deleting a
configuration
If the hardware function of a PLC is deleted, no further online functions can be
performed. The NOT CONFIGURED and NOT EQUAL TO modes are displayed in
the status bar.
Deleting a
program
If the user program is deleted in the PLC, the PLC cannot be started. The NOT
EQUAL TO state is displayed in the status bar.
Deleting state
RAM
If the state RAM is deleted, the initial values of the located variables in the PLC are
set to 0.
Speed optimized LL984-Processing
At a Glance
A speed optimized LL984 Processing can be optimized in the dialog boxOnline →
Online Control with the Opt. processing in command button.
After the command button is activated its designation changes in Opt. Processing
out. This means that a click on this command button will deactivate the speed
optimization which is running again.
Note: This function only influences the LL984- program.
Condition for
dial-in
This dialog box is only available if the link has been established between the PLC
and the programming device (ONLINE mode) and the PLC is in STOP mode.
840 USE 493 00 September 2001
535
Online functions
Save To Flash
Introduction
For data protection purposes, you can save parts of the RAM in the PLC’s FlashEPROM. After a power cut, the contents of the Flash-EPROM is loaded back onto
the CPU RAM for the restart.
WARNING
Modified process status after next start!
It is important to choose the right time for saving to Flash, as there could
be signal values in the Flash memory which are downloaded later
following a power cut and which do not correspond to the process status
for the next start.
Failure to observe this precaution can result in severe injury or
equipment damage.
Selection
Condition
536
This function is available when using all 140 CPU 434 12 and 140 CPU 534 14
TSX Compact, Momentum and Quantum modules.
This function is not available with IEC Hot Standby operation with Quantum.
When using the simulator the Flash memory function is not available.
840 USE 493 00 September 2001
Online functions
Procedure
To save to Flash, carry out the following steps:
Step
Edit Flash
program
Action
1
Select in the Flash Type range depending on the hardware, the Internal or PC
Card option button.
Note: Applications, which require more than 480 kBytes, must be saved in the
PC card Flash.
2
Select in the Controller State range, in which operation mode (RUNNING or
STOPPED) the PLC is in after a restart.
3
Check the Allow Editing after Power-up check box if you want to edit the
uploaded Flash program when the voltage supply returns.
Warning: Since these later changes were not downloaded onto the FlashEPROM, this data is lost if there is a power cut.
4
Check the Save 4x Registers check box if you want to save all 4x registers to
Flash-EPROM.
Note: This selection is not available with the Momentum family, i.e. all
applications are always downloaded to Flash-EPROM.
5
If the Save 4x Registers check box has been checked, the number of registers
must be entered in the Number of 4x registers to be saved text box. The
corresponding register range, which is downloaded onto Flash-EPROM, is then
set from the 400001 address.
6
Activate the Save To Flash command button to load the user program, the
configuration, the initvalues of the IEC programming of RAM onto the FlashEPROM.
As soon as the Allow Editing after Power-up check box is activated; on saving to
Flash, information is loaded to the Flash-EPROM, which after uploading the
contents of Flash (e.g. in the case of the return of the power supply) allows the
program to be edited. However, because these subsequent changes were not
downloaded onto the Flash-EPROM, this data is lost if there is a power cut. To
prevent this, changes should be downloaded to Flash-EPROM by using the Save
To Flash command button.
840 USE 493 00 September 2001
537
Online functions
Modification of
the Flash
program is not
allowed.
As soon as the Allow Editing after Power-up check box is disactivated, the
program can be changed, but not downloaded to Flash-EPROM after uploading the
contents of Flash (e.g. when the power supply returns).
Changing the program leads to the following responses when uploading:
Procedure:
Changes protected
with Download
Changes...
Changes protected
with Save project
The following status
is established after
connection:
a)
yes
no
EQUAL
b)
yes
yes
NOT EQUAL
If the EQUAL status is established in the above case a), the contents of the host
computer are different from that of the Flash-EPROM. After a power cut, the FlashEPROM is uploaded, resulting in the loss of all changes.
If the UNEQUAL status is established in the above case b), the contents of the
Flash-EPROM are different from that of the host computer. After a power cut, the
Flash-EPROM is uploaded, resulting in the loss of all changes.
Note: To download a program change to Flash again, the Save To Flash
command button must be available again. To achieve this, specific steps must be
executed which the Reactivate flash save, p. 539 section describes.
M1 Ethernet CPU
538
When using the Momentum Ethernet CPU, the password is lost on saving to FlashEPROM. The password-protected application is therefore always downloaded on
each switching on/off cycle. This process can no longer be undone, so the PLC has
to be reversed, so that it can be reworked.
840 USE 493 00 September 2001
Online functions
Reactivate flash save
Introduction
If you have not checked the check box in Flash Save Allow Editing after Power Up
the program saved in Flash EPROM can no longer be changed. After a power failure
the Flash-EPROM will finish on restarting the PLC. However, the command buttons
Save to Flash and Clear Flash are not available.
Reactivate Flash
Save
In order to enable the Flash Save again, the following steps are necessary:
Step
Action
1
Turn off the controller.
2
Compact CPUs: Set the "Memory Protect" switch (Memory Protect) to ON.
Quantum CPUs: Set the switch to the "stop" position.
3
Turn the controller on again.
4
Compact CPUs: Set the "Memory Protect" switch (Memory Protect) to OFF.
Quantum CPUs: Set the switch to the "start" position.
5
Make the link between the host computer and the controller (Online →
Connect...).
6
Open the dialog box Save to Flash (Online → Online control panel → Flash
Program...).
Result: The command buttons Save to Flash and Clear Flash are now
available again.
Set PLC Password
Introduction
Unauthorized describing of the PLC via Modbus commands can be prevented by
using a password.
Before you can set a new password, however, you must first download the
configuration to the PLC. Afterwards enter the password and reload the
configuration to the PLC. The password is now saved so that password protection
operates during links between the host computer and the PLC in that the password
is asked for.
840 USE 493 00 September 2001
539
Online functions
Characters
Permitted
Besides the maximum character length of 16 the following characters are allowed:
l a ... z
l A ... Z
l 0 ... 9
l _
l "
Note: Spaces are not allowed!
Selection
conditions
This function is available when using all TSX Compact and Momentum Ethernet
CPUs with the 984 Ladder Logic programming language.
Setting a New
Password
To set a new password, proceed as follows:
Changing Old
Password
540
Step
Action
1
Using Online → Download... load the configuration onto the PLC
2
Using Online → Online Control Panel... → Set PLC password... open the
Change PLC password dialog.
3
Enter your new password in the Enter New Password: text box.
4
Enter your new password again in the Confirm New Password: text box.
5
Press the OK command button.
Response: The dialog is closed.
6
Using Online → Download... load the configuration onto the PLC
Response: The password was loaded onto the PLC, and will be requested the
next time the PLC and the host computer are connected.
To change an old password, proceed as follows:
Step
Action
1
Using Online → Online Control Panel → Set PLC password... open the
Change PLC password dialog.
2
Enter your old password in the Enter Old Password: text box.
3
Enter your new password in the Enter New Password: text box.
4
Enter your new password again in the Confirm Password: text box.
5
Press the OK command button.
Response: The dialog is closed.
6
Using Online → Download... load the configuration onto the PLC
Response: The password was loaded onto the PLC, and will be requested the
next time the PLC and the host computer are connected.
840 USE 493 00 September 2001
Online functions
Generating a
Forgotten
Password
To generate a forgotten password, proceed as follows:
Step
840 USE 493 00 September 2001
Action
1
Switch off the power supply to the PLC.
2
Move the Memory Protect switch on your hardware module to the MEM_PROT
position.
3
Remove the lithium battery from the PLC.
4
Switch the power supply to the PLC back on.
Response: By doing this, the battery backup RAM is deleted without
downloading the PLC program from Flash-EPROM. In this way the start status
of the PLC (configuration-free and without registration password) is reestablished.
5
Continue with the step table Setting a New Password, p. 540.
541
Online functions
20.4
Selecting Process information (status and
memory)
At a Glance
Overview
This chapter contains information about selecting the process information.
What’s in this
section?
This section contains the following topics:
542
Topic
Page
General information
543
PLC state
543
Memory Statistics
544
840 USE 493 00 September 2001
Online functions
General information
At a Glance
Certain processes and their storage occupancy can be controlled during operation
of the automation equipment.
Note: Errors can occur when selecting a configuration that has been generated by
another configuration tool (e.g. SyCon, CMD). The selection is based on removing
the memory, whereby this is not always compatible with the other software
programs. Therefore please use the Modsoft Converter to transfer the Modsoft
application according to Concept.
Read status bits.
Status bits provide information about the hardware communication with other
modules as well as existing errors in the running of the program. The user specifies
the status register already during configuration. In this register , status bits that
change their state as soon as a faulty signal is set in the process or a timeout word
is not observed are saved. The user can recognize via defined status states (0 or 1)
whether the process is faulty.
Read storage
occupancy
The user can control the storage occupancy for the current project in the memory
statistics. In an overview the total memory, free memory space and used memory
for the user program, as well as the user files and FFB libraries are displayed.
PLC state
At a Glance
All the PLC states are displayed in the multi-page dialog box.
There are 67 pages altogether, containing various state information
Condition for
dial-in
This function is only available if a link has been established between the PLC and
the programming device. When the simulator is active the PLC states cannot be
retrieved.
Programming
states
The following status information is obtained through the programming:
l Number of segments
l End of logic pointer address
l Run/Download/Debug Status
840 USE 493 00 September 2001
543
Online functions
Hardware states
The following state information is given about the hardware:
l CPU state
l S911 Hot Standby State
l Machine State
l State of the I/O processor
l Quantum I/O state
l DIO-State
Error codes
The following state information is given about errors arising:
l Machine stop code
l Quantum start error code S908
Transfer and
communication
states
The following state information is given about transfer and communication
executions:
l Data transfer state
l Message transfer state
l Communication state
Cable A + B
states
The following state information is given about the A + B cable:
l Cable A + B error counter
l A + B global state
l Cable A + B communication error counter
Memory Statistics
Introduction
An overview of the memory data for the open project is given in the Memory
statistics dialog box. The current scan time is also displayed if a real PLC is used
(and not the simulator).
Total IEC
memory
The memory statistics cover the following information:
544
Total IEC memory
Meaning
Configured
The displayed value corresponds to the value specified in the PLC
Selection dialog.
Note: If you use a simulator, the total memory is not given.
Used
The displayed value corresponds to that of the IEC program memory
space used by the user program.
Note: If you use a simulator, the used memory space is not given.
840 USE 493 00 September 2001
Online functions
Modifying Total
IEC Memory Size
The total IEC memory consists of the IEC program memory and the global data.
Additional space is required in the total IEC memory for program extensions and for
the administration of program modifications. The general recommendation is to set
the value so that 20-30% of the value entered in the Used text box also remains free.
Note: Changes can only be made offline and are only accepted once the program
has been downloaded to the PLC.
IEC Program
Memory
The values displayed correspond to the memory space used for
l Program code
l EFB code
l Program data (section and DFB instance data)
Global Data
The memory statistics cover the following information:
Changing the
Memory Size for
Global Data
Memory space
Meaning
Configured
The displayed value corresponds to the value specified in the memory
space for unlocated variables in the PLC Selection dialog.
Used
The displayed value corresponds to the value from the memory space
for the declared unlocated variables used by the user program.
You can change the memory size of the global data. It should be noted that an
increase in the global data size decreases the IEC program memory size. Each
object, e.g. FFB instance, variable, step etc., takes up several bytes in the IEC
program memory.
Because more memory space is not automatically gained by deleting unlocated
variables, it is recommended that sufficient memory space is planned. The general
recommendation is to set the value so that 20-30% of the value entered in the Used
text box also remains free.
Note: Changes can only be made offline and are only accepted once the program
has been downloaded to the PLC.
Scan Time
The value displayed corresponds to the current scan time. With the first call, the I/O
station is standardized so that a scan time of 0 ms/scan is specified. After
initialization, the scan time is calculated as an average value.
Note: If you are using the simulator, the scan time is not given. The display na
means "not available".
840 USE 493 00 September 2001
545
Online functions
20.5
Loading a project
At a Glance
Overview
This chapter contains information about loading a project.
What’s in this
section?
This section contains the following topics:
546
Topic
Page
General information
547
Loading
548
Download Changes
549
Uploading the PLC
551
Upload Procedure
553
840 USE 493 00 September 2001
Online functions
General information
At a Glance
To carry out an online command a transfer has to be made to the PLC after setting
up or changing sections. Otherwise a complete project can be transferred from the
PLC to the programming device. As soon as the user program is consistent on the
programming device and the PLC, the EQUALS status is displayed in the status bar.
The status display MODIFIED identifies the program in which at least one section
has been changed or where changes to the variable editor were performed. With
command button Download changes... the consistency between the programming
device and the PLC is restored. Status display NOT EQUALS identifies a program
in which critical changes were performed. Critical changes are for example changes
to EFBs, DFBs or derived data types. With command button Download... the
consistency between the programming device and the PLC is restored.
Loading, loading changes and selecting are not possible in the animation mode.
With command button Select... the following project areas can be selected from the
PLC:
l Configuration
l IEC sections
l 984 Ladder Logic sections
l ASCII messages
l State RAM
l Initial values
l Extended memory
Process for
loading
Loading the PLC can take place in two parts:
1. The exportable code (machine code) is always loaded onto the PLC.
2. The complete compressed user program is loaded onto the PLC
Note: The user program, consisting of user defined EFBs, DFBs, derived data
types and the program (variables, sections, etc.), is only loaded onto the PLC if in
dialog Options for generating codes (Project → Options for generating
codes...) check box contain IEC selection information was activated
beforehand. The option to also load the comments contained in the check box onto
the PLC, thereby making them available as selection information, is available, as
well.
During selection the entire user program can be transferred from the empty project
to the programming device.
840 USE 493 00 September 2001
547
Online functions
Loading
At a Glance
With command button Download... The configuration, the entire user program (IEC
or LL984 section) ASCII messages (only with Concept for Quantum) and the state
RAM with the initial values of a project can be sent in the PLC. This establishes
consistency between the user program on the programming device and the PLC so
the online functions are executable.
Loading single
parts onto the
PLC
Single parts to be loaded onto the PLC can be selected.
The following table contains the available options and their meaning:
Loading IEC
selection
information
548
Option to be loaded
Meaning
Configuration
This option sends the hardware configuration to the PLC.
Note: The Hardware Configuration can only be sent to the PLC
when a corresponding access privilegehas been authorized. This
option is not available with a Modbus Plus connection.
IEC Sections
This option sends the code from all the sections created with an
IEC programming language (FBD, SFC, LD, IL, ST) to the PLC.
984 Ladder Logic
This option sends the code from all the sections created with an
LL984 programming language to the PLC.
ASCII messages
This option sends ASCII messages for Ladder Logic to the PLC.
Note: This function is only available when using Concept for
Quantum.
State RAM
This option sends the State RAM to the PLC.
Only initial values
This option sends only initial values from the user program to the
PLC.
The initial values can only be loaded together with the State
RAM. This means that the check box is only available when
loading the State RAM.
Extended memory
This option assigns the PLC an extended memory allocation (6xReferenzen) zu.
Note: This function is only available when using Concept for
Quantum.
To receive a complete project when selecting from the PLC Options for code
generation the check box IEC selection information must be activated in the
dialog box before loading. If this check box is not activated only the executable code
(machine code) is loaded onto the PLC.
840 USE 493 00 September 2001
Online functions
If loading is not
possible…
There are several possibilities why loading is not possible:
l An active screen saver can lead to loading errors. It is therefore recommended to
deactivate the screen saver.
l If loading the problem is not possible due to insufficient program data memory,
the memory size can be optimized.Main structure of PLC Memory and
optimization of memory, p. 107.
Note: If, while loading the program, a warning appears due to inconsistent DFB
versions, use the menu command Project → Synchronize nested DFB versions.
Download Changes
Introduction
Download Changes is always used if sections have been changed, added or
deleted, whether in online or offline mode, and the program is in MODIFIED mode.
In this way the changes are displayed and can be transferred to the PLC.
The changes are downloaded into the PLC and the consistency between the user
program on the host computer and the PLC is restored.
Changes, which have no affect on the logic of the program (e.g. renaming a step
name, renaming a section, renaming a variable, graphic shift of a module etc.) are
not loaded into the PLC with the Downoad Changes function. If non-logic related
changes are to be loaded into the PLC (so that, for example, these changes are
available after the PLC has been uploaded to the PC), the entire project must be
loaded into the PLC with Online → Download. Only then are these changes
available after PLC uploading.)
If the changes cannot be loaded because of insufficient memory on the PLC, there
are 2 possible ways to proceed:
l Sequential Loading of Modified Sections
l Optimize Project
Note: If a warning occurs when downloading due to inconsistent DFB versions,
perform the menu command Project → Synchronize Versions of Nested DFBs.
840 USE 493 00 September 2001
549
Online functions
Sequential
Loading of
Modified/New
Sections
Modified/new sections can be loaded consecutively into the PLC.
When sequentially loading sections, pay attention to the following points:
l If the value of the constant was modified, sequential loading of the modified
sections is not possible.
l All deleted IEC sections are automatically deleted during the first sequential
loading to the PLC.
l All initial values of new variables and all modified values of literals are
automatically loaded into the PLC.
l If new sections already contain used variables, the value of these variables
remains.
l If the current project database is to be closed before all changes have been
loaded into the PLC, you must save the project. Otherwise it might not be
possible to continue the project after it is reopened with the remaining changes
loaded, or there will be "newer" sections (previously loaded changes) on the PLC
than on the host computer.
CAUTION
Danger of unwanted and dangerous process conditions
Sequential loading of sections can lead to unwanted and dangerous
process conditions in an operational PLC. It is therefore recommended
that the PLC be stopped for the duration of sequential loading
Failure to observe this precaution can result in injury or
equipment damage.
Modified Initial
Values
Modified initial values are no longer loaded onto the PLC. The initial value, which
was transferred to the PLC during the first load (Download.../Download
Changes...), cannot be overwritten by the Download Changes... menu command.
The initial values can however be changed in the reference data editor.
Procedure
during
Sequential
Loading
To sequentially load changes, perform the following steps:
550
Step
Action
1
Stop the PLC with Online → Online Control Panel → Stop PLC.
2
Select the section(s) to be loaded in the list box.
3
Confirm with OK.
4
Recall the dialog and repeat the steps until all modified/new sections are loaded
into the PLC and the EQUAL mode has been reached.
5
Start the PLC with Online → Online Control Panel → Start PLC.
840 USE 493 00 September 2001
Online functions
Loading IEC
Upload
Information
If, in the Code Generation Options dialog, the Include IEC Upload Information
check box is checked, IEC upload information is loaded onto the PLC with the
Download Changes... menu command.
Optimize Project
It is possible to remove possible gaps in the program data memory management in
the PLC with the Optimize project... menu command and thereby enable loading
again. In addition, the PLC must however be halted and the entire program
reloaded. Otherwise it may be necessary to alter the size of the program data
memory, see Memory Statistics (See Memory Statistics, p. 544).
It is also possible to optimize use of the program data memory with the Online →
Memory statistics menu command.
CAUTION
Changes are only transferred when the program is loaded onto the
PLC.
After optimizing the project or modifying the program data memory size
the PLC must be stopped and the program loaded onto the PLC.
Failure to observe this precaution can result in injury or
equipment damage.
Uploading the PLC
Introduction
With command button Upload... the configuration, the entire user program (IEC or
LL984 section), the ASCII messages and the state RAM with a project’s initial values
can be transferred from the PLC to the host computer.
Note: Upload information (PLC configuration), which was generated by the
Software programs as Concept, is possibly erroneous. The selection is based on
removing the memory, whereby this is not always compatible with the other
software programs. Please use the Modsoft converter for transferring your
Modsoft application to Concept.
840 USE 493 00 September 2001
551
Online functions
Reading
Individual Parts
from the PLC
552
Individual parts to be loaded from the PLC to the host computer can be selected.
The following table contains the available options and their meaning:
Option to be loaded
Meaning
Configuration
This option sends the hardware configuration to the host
computer.
Note: The hardware configuration can only be sent from the PLC
when a relevant authorization is granted in the Access Rights.
This option is not available with a Modbus Plus connection.
IEC sections
This option transfers the revertive presentation information of all
the sections created with an IEC programming language (FBD,
SFC, LD, IL, ST) to the host computer. In this way, however, no
current signal values from variables and registers are loaded.
984 Ladder Logic
This option sends the revertive information from all the sections
created with an LL984 programming language to the host
computer.
ASCII Messages
This option transfers ASCII messages for Ladder Logic to the
host computer.
Note: This function is only available when using Concept for
Quantum.
state RAM
This option transfers the state RAM to the host computer.
Initial values only
This option only transfers initial values from the user program to
the host computer.
The initial values can only be uploaded together with the state
RAM, i.e. the check box is only available when the State RAM is
activated to upload.
Extended memory
This option transfers the PLC’s available extended memory (6x
references) into the configuration.
Note: This function is only available when using Concept for
Quantum.
840 USE 493 00 September 2001
Online functions
Upload Procedure
Introduction
If the IEC upload information was being taken into account during loading into the
PLC (Project → Code Generation Options → Include IEC upload information),
a new project containing the IEC upload information is generated in Concept during
upload. In this way, the entire user program and user EFB libraries are always
downloaded, i.e. individual sections, EFBs etc, cannot be selected for transfer.
Note: During loading (Online → Download Controller) of the IEC upload
information, additional memory is required so that this function should only be
used, when you want to upload the project loaded into the PLC again.
Requirements
In order to carry out a PLC upload, an empty project must first be created.
There are several ways of doing this.
Selectio
n
Action
1
You can create an empty project using the File → New project menu command.
Then execute the Online → Upload... menu command.
Result: The Upload to project dialog is opened. Here you can determine (e.g.
D:\NEW\TESTPRJ.PRJ) where the project will be uploaded to.
Note: You can select a different directory or even create a new directory so as
not to come into conflict with existing projects. The preset project name
corresponds to the project name downloaded in the PLC and does not
necessarily have to be changed.
2
Using the File → Open... menu command you can create a new project (e.g.
D:\NEW\TESTPRJ.PRJ) Then execute the Online → Upload... menu command.
Result: The Upload Controller dialog is opened.
3
There is no project open and you have established a connection with the PLC
using the Online → Connect... menu command. Then execute the Online →
Upload... menu command.
Result: The Upload to project dialog is opened. Here you can determine (e.g.
D:\NEW\TESTPRJ.PRJ) where the project will be uploaded to.
Note: You can select a different directory or even create a new directory so as
not to come into conflict with existing projects. The preset project name
corresponds to the project name downloaded in the PLC and does not
necessarily have to be changed.
840 USE 493 00 September 2001
553
Online functions
Procedure
To upload loaded IEC information, proceed as follows:
Step
Double
Designation
554
Action
1
Open a new project.
Note:If, during upload, there is a second project still open, it must be closed. In
this case a query appears asking whether the project should be saved before it
is closed and all changes are lost.
2
Establish a connection between the PLC and the programming unit ( Online →
Connect...).
3
Start the upload procedure (Online → Upload Controller...).
Result: A window appears in which you can determine the path for the project
that is to be uploaded.
Conflicts with existing names can occur during the upload procedure.
Double designation is prevented for each program sequence as follows:
Program
sequence
process
User EFB library
A query appears, which can interrupt uploading. If not, a query appears,
asking whether the user EFB library should be overwritten, and whether
a backup of the old EFB library should therefore be created.
DTY File (derived
data types)
A query appears, which can interrupt uploading. If not, the DTY file of the
same name is automatically overwritten. No backup is made of the old
file.
DFB library
A query appears, which can interrupt uploading. If not, the DFB file of the
same name is automatically overwritten. No backup is made of the old
file.
840 USE 493 00 September 2001
Online functions
20.6
Section animation
At a Glance
Overview
This chapter describes the basic principles for animating sections. The details can
be found in the chapters on individual programming languages.
What’s in this
section?
This section contains the following topics:
Topic
Page
IEC-Sections animation
556
LL984 Programming Modes
557
840 USE 493 00 September 2001
555
Online functions
IEC-Sections animation
At a Glance
IEC sections can be animated, i.e. the program’s current states in the PLC /simulator
will be displayed.
Animation is possible with both a running and a stationary PLC. Display data is
automatically refreshed when the PLC is running. The static state of the program on
the PLC is displayed when the PLC is stationary.
Load and Download changes is not possible in animations mode. Should these
commands be executed, animation will be stopped automatically.
Requirements
for animation
Requirements for animation
l The section to be animated in the programming device and the section loaded
onto the PLC must be consitent. Otherwise, establish consistency using Online
→ Download... (if mode UNEQUAL) or Online → Download changes... (if
mode MODIFIED).
Note: Even when the program mode is MODIFIED, the sections that have not
been changed can be animated. The mode displayed in the footer refers to the
program and not to the currently displayed program.
l To animate, the programming device and the PLC must be online. Otherwise,
establish the link using Online → Connect....
Active animation
display
The active animations mode is indicated:
l by a check mark before the menu command, in the ANIMATED box on the status
bar,
l by a depressed animations button on the symbol bar and
l by the gray window background.
Animating more
than one section
If several sections are animated, an animated section is updated in each cycle. This
means that the more animations are active, the "older" the values of the individual
animations. Additionally, the animation increases the load on the PLC cycle. For this
reason, animations that are no longer necessary should be terminated. This also
applies to the animation of many variables or very large derived data types.
Note: When coupling using Modbus Plus, it is recommended that no more than 10
sections should be animated at one time.
Note: When coupling using Modbus, it is recommended that no more than 5
sections should be animated at one time.
556
840 USE 493 00 September 2001
Online functions
Animating a
disabled section
If a disabled section is animated, the state INHIBITED is displayed in the status bar.
Animation of a
transition
section
If the animated section is used as a transition section for the sequential control
(SFC), and the transition (and therefore also the transition section) is not processed,
the status INHIBITED appears in the transition section.
Changing a
animated section
into a symbol
If an animated section is changed into a symbol, the animation with the most current
values stops, and then restarts automatically once the section is called.
LL984 Programming Modes
Direct
Programming
There are two situations that determine how direct mode ladder editing is applied.
The first is where there is no open project and you are connected to a PLC that has
a valid program in it. When you select the command Direct Mode LL Editor the first
program in the first segment is displayed. You can see the direct mode status at the
right side of the status bar and the network window is labled 984 LL Direct.
The second case occurs when you have a project open and you are connected to
the PLC (but not EQUAL ). When you select Direct Mode LL Editor in this case a
dialog is displayed listing segments and the number of networks contained in each.
Click on the segment you want click on OK and the network edit window is displayed
with a window labeled 984 LL Direct. If you have an orignal edit window it will remain
on the display.
Combination
Mode
Combination programming occurs when the programming panel is online. Valid
program changes are immediately written to both the controller and the program
database simultaneously.
840 USE 493 00 September 2001
557
Online functions
20.7
Online Diagnosis
Diagnostics Viewer
Introduction
Using the diagnostics viewer in Concept (Online → Online Diagnostics...) it is
possible to view the content of the PLC diagnostics error buffer.
Selection
Condition
The diagnostics viewer is only available if the PLC is in online mode and the EQUAL
status has been created between the PLC and host computer.
The diagnostics viewer only works with the SFC, FBD and LD programming
languages and with the diagnostics blocks of the EXTENDED group.
Conditions of the
Diagnostics
Viewer
To activate diagnostics, a supervision time must first be set for the step (Transition
diagnostics) or the diagnostics block (Reaction diagnostics). In addition, in the Code
generation options dialog (Project → Code generation options...), the Include
diagnosis information check box must be checked. As a result memory space is
prepared on the PLC (max. 64 diagnostics entries) for the diagnostics error buffer.
Behavior of the
error buffer
A maximum of 64 events (errors) and a maximum 20 signals per event are read. If
the diagnostics error buffer overflows all further signals (21 onwards) are lost. The
next event (error) coming is only entered once an event (error) which has gone has
been acknowledged in the error buffer.
A diagnostics error buffer overflow is displayed in the dialog status line.
Note: A maximum of 16 events (errors) can be scheduled within one SFC section.
All further errors (17 onwards) are lost. The next event (error) is only entered once
a past event (error) has been acknowledged in the error buffer.
Transition
Diagnosis
Information on this can be found in the Transition diagnosis, p. 260section.
Reaction
diagnosis
Information on this can be found in the "Diagnostics Block Library" handbook.
558
840 USE 493 00 September 2001
Online functions
Diagnostics
viewer
After analysis, the events (errors) and the analyzed signals are written in the buffer
and displayed in the diagnostics viewer in Concept.
The following specific information is contained in transition diagnostics:
l Denotes the transition preventing the active step from being executed to the next
step.
l Denotes the TRANS type for transition in a PLC section
l Denotes the active step, which is not executed.
l If this is a transition section in the named transition, the analyzed signals are also
listed.
The following specific information is contained in reaction diagnostics:
l Denotes the diagnostics block preventing a reaction from being triggered due to
incorrect signals.
l Denotes type ACT, PRE, GRP, LOCK, REA for diagnostics blocks
l Diagnostics block drop number
l The analyzed signals are listed.
840 USE 493 00 September 2001
559
Online functions
560
840 USE 493 00 September 2001
Import/Export
21
At a Glance
Overview
This chapter describes the various import and export options for sections, variables
and PLC configurations.
What’s in this
chapter?
This chapter contains the following Sections:
Section
Topic
21.1
General Information about Import/Export
563
21.2
Exporting sections
564
21.3
Exporting variables and derived data types
567
21.4
Section import
568
21.5
Variables import
587
21.6
Import/Export of PLC Configuration
595
840 USE 493 00 September 2001
Page
561
Import/Export
562
840 USE 493 00 September 2001
Import/Export
21.1
General Information about Import/Export
General Information about Import/Export
Export Functions
You can export the following data in Concept/Concept DFB using File → Export:
l sections from a source project and import them into a target project
l sections from a source DFB and import them into a target DFB
l sections from a source DFB and import them into a target project
l sections from a source project and import them into a target DFB
l FBD, SFC and LD sections into IL or ST files
l variable declarations into an ASCII file (Concept only)
l PLC configuration (Concept only)
In Concept you can export the following data using Edit → Save as Text File...:
l contents of IL or ST sections into an ASCII file
l definitions of derived data types from the data type editor
In Concept Converter you can export the following data using File → Export →
Configuration:
l PLC Configuration
Import Functions
In Concept/Concept DFB you can import the following data using File → Import:
l exported sections from a source project or source DFB
l exported or externally created IL/ST files into IL/ST sections
l exported or externally created IL/ST files into FBD/SFC sections (with
conversion)
l variable declarations from an ASCII file (Concept only)
l PLC configuration exported with Concept (Concept only)
In Concept you can import the following data using Edit → Insert Text File...:
l contents of ASCII files IL or ST sections
l definitions of derived data types into the data type editor
In Concept converter you can import the following data using File → Import:
l PLC configuration exported with the Concept Converter
840 USE 493 00 September 2001
563
Import/Export
21.2
Exporting sections
Exporting Sections
Introduction
In Concept it is possible to export projects or DFBs selectively from a source project/
source DFB, and if desired, to then import them immediately into the current target
project.
Requirements
The project from which the export is to take place must be stable (check using
Project → Analyze Program).
Note: When exporting IL and ST sections, ensure that the settings for nested
comments (Options → Preferences → IEC Extensions → Allow nested
comments) are identical in the source and target projects.
Export range
The following are exported:
l the selected sections with their accompanying variables, DFBs, EFBs and data
types.
l In the case of SFC, the accompanying transition sections are also exported.
l The PLC configuration is not exported.
Exporting more
than one section
When more than one section is exported, a "pseudo SFC" is generated to maintain
the execution order. To do this, the following code is generated:
INITIAL_STEP
SECTION_SCHEDULER:
Section1 (N);
Section2 (N);
:
SectionN (N);
END_STEP
564
840 USE 493 00 September 2001
Import/Export
Exporting FBD,
SFC and LD
Sections
Using File → Export → Program: IEC Text FBD, SFC and LD sections can be
exported to IL and ST. The text languages of both export files follow the grammar of
IEC text languages, shown in IEC 1131-3 and in the process tables 52 - 56 of
IEC 1131-3.
The exported code is displayed in a PROGRAM … END_PROGRAM or
FUNCTION_BLOCK ... END_FUNCTION_BLOCK frame and contains all project or
DFB variables in a VAR ... END_VAR frame at the start of the file.
If more than one section is being exported, the code separation is expressed as an
artificial PLC frame, which is not a component of the original program. It only has
one INITIAL_STEP for all sections linked to it as actions (with the identifier N). These
actions (sections) are executed every time the step is active, which is always the
case. The actions follow as sections, which do not have variable declarations.
The artificial INITIAL_STEP has the name SECTION_SCHEDULER. It displays the
execution order as it was specified in the section execution order dialog box. The
artificial SFC frame is left out when re-importing in Concept. The criterion for this
omission is the specific name SECTION_SCHEDULER.
The ASCII file can be re-imported into a FBD or SFC section using the IEC text
import. Using exports and imports it is possible, for example, to convert a LD section
into a FBD section. Importing into a LD section is not possible.
If the EN and ENO optional imports/exports have been used in the FBD/LD sections,
they are ignored when exporting to IL/ST.
FBD section logic before export:
Z1(1)
Z2(2)
TON
TON
IN1
IN2
t#11s
EN
IN
PT
ENO
Q
ET
%4:00001
t#11s
EN
IN
PT
ENO
Q
ET
OT1
OT2
%4:00002
FBD section logic after import:
FBI_1_2(1)
FBI_1_3(2)
TON
TON
IN1
IN2
t#11s
EN
IN
PT
ENO
Q
ET
FBI_1_2Q_1
%4:00001
FBI_1_2Q_1
t#11s
IN
PT
Q
ET
OT2
%4:00002
The LD elements "N.C. contact" and "N.O. contact" are converted to AND and
ANDNOT.
840 USE 493 00 September 2001
565
Import/Export
The ASCII file can, however, also be imported into an IL or ST section using the
Insert Text File function. In this case, however, manual correction of the files is
necessary, since the extensions described above must be removed again from the
file.
SFC Export
Limitations
The following limitations should be noted when using SFC import:
l Only variables are permitted as actions. Direct addresses cannot be exported.
l Only literals are allowed as time variables for identifiers. Variables are converted
to literals with the value 0.
l Transition section names are changed to standard names.
l Step monitoring times and step delay times are lost when exporting.
Exporting IL and
ST Sections
Using Process → Save as Text File... it is possible to export the contents of IL or
ST sections into an ASCII file.
This export function is a simple text export function, which can also be performed via
the clipboard (cut/copy/paste). Data conversion does not take place. For this
reason, the required variable declarations, for example, are not exported with the
section contents. If the ASCII files are to be converted to an FBD or SFC section
using File → Import → Program: IEC Text, all information necessary for the project
(e.g. program frame, section name (see also Importing (insert file) IL and ST
programs into IL or ST sections, p. 583 and Procedure for "Copying" an IL section
from an existing project into a new project., p. 584)) must be entered manually.
566
840 USE 493 00 September 2001
Import/Export
21.3
Exporting variables and derived data types
Exporting variables and Derived Data Types
Exporting
variables in "Text
delimited" format
Using File → Export → Variables: Text delimited a project’s variables can be
exported into a ASCII file in text delimited format (refer to Importing Variables in
"Text Delimited" Format, p. 588 and Importing structured variables, p. 590).
The ASCII file can be re-imported into a Concept project with the help of the
importing text delimited (refer to Importing Variables in "Text Delimited" Format,
p. 588).
Exporting
variables for
Factory Link
Using File → Export → Variables: Factory Link a project’s variable declarations
can be exported into a ASCII file in "Factory Link" format.
If your Factory Link version of Concept is not supported, please call our hotline.
The ASCII file can be re-imported into a Concept project with the help of Factory Link
import (See Importing variables in Factory Link format, p. 594).
Exporting
variables for
Modlink
Using File → Export → Variables: Modlink a Modlink configuration file can be
generated, which can be used directly in Modlink.
The Modlink configuration file contains all those Located variables, which are
selected to be exported in the Variable Editor.
If no Located variables are selected to be exported, an error message appears and
a configuration file will not be generated.
Related information about Modlink is found in Modicon ModLink, User Guide.
Exporting
Derived Data
Types
In the data type editor, using Process → Save as text file... definitions of Derived
Data Types can be exported to a ASCII file.
840 USE 493 00 September 2001
567
Import/Export
21.4
Section import
At a Glance
Overview
This section describes the import of sections.
What’s in this
section?
This section contains the following topics:
568
Topic
Page
Importing Sections
569
Procedure for importing sections
572
Importing IL and ST Programs to FBD, SFC, IL or ST Sections (with
Conversion)
580
Importing (insert file) IL and ST programs into IL or ST sections
583
Procedure for "Copying" an IL section from an existing project into a new
project.
584
Procedure for converting FBD sections from an existing project into IL sections
of a new project.
585
840 USE 493 00 September 2001
Import/Export
Importing Sections
Introduction
In Concept, the possibility exists to export individual sections selectively from a
source project or source DFB, and if desired, to then import them immediately into
the current target project or DFB:
l Section export from source project, followed by section import into the target
project
This transfers section information, including transition sections at SFC, all used
global and local DFBs used, as well as all the variable declarations used.
Data types defined in data type files are not transferred, (refer to notes).
l Section export from source DFB, followed by section import into the target DFB
This transfers section information, all global and local DFBs used as well as all
declarations of variables, inputs and outputs used.
Data types defined in data type files are not transferred, (refer to notes).
l Section export from source project, followed by section import into the target DFB
This transfers section information, all global and local DFBs used as well as all
used declarations of unlocated variables.
Direct address and Located variable declarations must be deleted before export,
since they are not authorized in a DFB. Data types defined in data type files are
not transferred, (refer to notes).
l Section export from source DFB, followed by section import into the target project
This transfers section information, all global and local DFBs used as well as all
declarations of variables used.
Declarations of inputs/outputs in this DFB must be deleted before export, since
they are not authorized in a Concept project. Data types defined in data type files
are not transferred, (refer to notes).
Notes
Attention should be paid to the following notes:
l The imported sections will be inserted at the end of existing sections.
l The PLC configuration is not automatically imported. Instead, it must be imported
explicitly using the Concept converter (refer to Import/Export of PLC
Configuration using Concept Converter, p. 597.
l If projects with different local data structures are being imported (different DTY
files in the local DFB directories), they must be brought together in an individual
DTY file before import. This common file must then be saved in the local DFB
directories for source and target projects. Afterwards, open these files to make
them known to the individual projects.
l Ensure during import of IL and ST sections that the settings for nested comments
(Options → Preferences → IEC extensions → Nested comments authorised)
are identical in the source and target projects.
840 USE 493 00 September 2001
569
Import/Export
Checking the
Sections to be
Imported
Before the import actually takes place, a check of the following takes place:
l identical project environment (DFBs, EFBs, definition of Derived Data Types)
l existing sections
l existing SFC sections (not authorized in Concept DFB)
l existing step names
l Declarations of inputs/outputs (not authorized in Concept projects)
l Declarations of direct addresses (not authorized in Concept DFB)
If an error is identified, the import is canceled.
Errors that occur subsequently are "irreparable" and will cause the project to close
(i.e. all changes made since the last save are lost). Possible errors are:
l Name collisions between variables with different data types
l Name collisions between item names
l other errors
Name collisions between variables with different initial values or direct addresses
(located variable) cause a warning. The value of the target project is retained.
Automatic
adjustment of
standard preset
names
An automatic adjustment of standard preset names occurs in the case of:
l Standard generated names, such as SFC step names (S_x_y) and transition
section names (TransSection_x_y)
l Standard generated item names (FBI_x_y)
l Position of new DFB inputs/outputs (only with import into Concept DFB)
Specific
Changes
During import there are also the following possibilities for performing specific
changes, in order to adjust the sections that are to be imported specifically to the
target project / target DFB.
l Replacing names (variable names, section names, item names, names in text
languages, comments, etc)
l Address offset for located variables and direct addresses in graphic languages
(e.g. %3:10 -> %3:20) and text languages (%QW10 -> %QW20)
The following points are excluded from the replace function:
l DFB names
l Index of ARRAYs (e.g. a[1])
l Elements from multi-element variables (e.g. a.dummy)
l In the case of EFBs, the replace function is only used for non-automatically
generated names (i.e. Instance names)
570
840 USE 493 00 September 2001
Import/Export
Syntax for
replacing names
and address
offset (address
shift)
The following syntax applies when replacing names:
l Only entire names will be searched. If parts of names are to be replaced,
wildcards must be used.
l The "?" character is permitted as a wildcard. It is used to represent one character
exactly. If more than one character is to be ignored, a corresponding number of
"?" must be used. The "?" character is only permitted at the start of the name.
l The "*" character is permitted as a wildcard. It is used to represent any number
of characters. The "*"character is only permitted in the character string that is to
be searched for.
l Wildcards are only permitted in the search character string.
l There are no case distinctions.
l The section name, which is to be used as a replacement, must conform to IEC
name conventions, otherwise an error message occurs.
l In accordance with IEC1131-3, only letters are permitted as the first character of
item names. Should figures be required as the first character, however, the menu
command Options → Preferences → IEC extensions... → Allow leading
digits in identifiers.
l The specified value for the address offset is added to the corresponding address
zone for located variables and direct addresses.
l The offset value is given in decimal format by default. If it is given in hexadecimal
format, this can be marked as such with the prefix "16#" in front of the actual
offset value (e.g. 16#100).
Note: Replacing names has an effect on all variables, instance names and
comments. Using wildcards runs the risk of replacing names that also happen
incidentally to contain the same character string that is being searched. This would
normally lead to a cancellation.
Examples of search and replace:
Replaces:
By:
available names
Result
Name1
Name2
Name1
Name1A
NameA
NameB
Name2
Name1A
NameA
NameB
???123
456
abc123
cde123
abcd123
abc1234
abc456
cde456
abcd123
abc1234
Name1*
Name2
Name1A
XName1B
NameAB
Name2A
XName1B
NameAB
840 USE 493 00 September 2001
571
Import/Export
Syntax for
Creating the
Replace List with
an External
Editor
Replaces:
By:
available names
Result
*123
456
abc123
cde123
abcde123
abd123a
abc456
cde456
abcde456
abd123a
*123*
456
abc123abc
cde123defghi
abcde123def
abc456abc
cde456defghi
abcde456def
???123*
456
abc123abc
cde123defghi
abcde123def
abc456abc
cde456defghi
abcde123def
When creating the replace list using an external editor, the following syntax should
also be noted:
l The replace-by string (previous name-new name) must be separated by a
comma (e.g. name1,name2).
l The replace list is processed line by line. Individual replace instructions must be
separated by a line break.
l The instructions for the address offset have the following structure:
l to add an address offset:
<reg0>,www
<reg1>,xxx
<reg3>,yyy
<reg4>,zzz
l to subtract an address offset:
<reg0>,-www
<reg1>,-xxx
<reg3>,-yyy
<reg4>,-zzz
l Likewise, the value can be given in hexadecimal form, e.g.:
<reg1>,16#xxx
Procedure for importing sections
At a Glance
572
In principle, sections must firstly be exported from the source project /DFB into an
export file (*.sec) and then be imported by the target project/DFB. Exporting and
importing from project to project or from DFB to DFB can take place in shared or in
separate sessions. Exporting and importing from projects into DFBs or from DFBs
into projects must take place in separate sessions.
840 USE 493 00 September 2001
Import/Export
Section export
and section
import
To section export a source project and then section import into a target project, the
following procedure should be performed:
Step
Action
1
Open the target project in Concept.
2
Call File → Export → Program: section(s).
3
In the window Open file select the source project, e.g.
C:\SOURCE_DIR\SOURCE.PRJ
4
Select the sections to be exported from the source project.
5
In Save section export under , specify the name of the export file (*.SEC), e.g.
C:\TARGET_DIR\TARGET.SEC
Reaction: The sections are exported and saved in the *.SEC file, e.g. in
TARGET.SEC.
The question Import section into project now ? follows
6
If the question as to whether the sections should be imported is answered with
OK , the import will be performed now.
Answer Cancel, if you want to start the mport later, see also procedure
Resuming following canceled import (See Resuming after import cancelation,
p. 579).
7
Answer the question as to whether the project should be saved first with OK.
Note: The query Save project first ? should be answered with OK , because,
in the event of an import error, the current project is closed and all changes since
the last save are rejected.
840 USE 493 00 September 2001
8
If it is required or necessary, it is possible in the table Replace, to make
replacements for item names of variables, sections etc., as well as to define
address offsets for located variables and direct addresses (refer to Specific
Changes, p. 570).
9
Select OK to continue (the whole import process is canceled if Cancel is
selected).
Reaction: Sections, used DFBs, used derived data types and the declarations
for used variables, including comments, are imported into the target project.
The import is canceled and the current project closed, if
l the sections to be imported contain DFBs that are not available in the target
project.
l the sections to be imported contain DFBs whose versions differ from already
available DFBs. (The imported DFB version can be accepted or rejected.)
l other errors arise during import.
Errors are displayed in the messages window and have to be acknowledged.
10
If the import had been canceled, eliminate the cause of the cancelation and carry
out the Resuming after import cancelation (See Resuming after import
cancelation, p. 579)procedure.
573
Import/Export
DFB export and
DFB import
To section export a source DFB and to then section import into a target DFB, carry
out the following procedure:
Step
Action
1
Open the target DFB in Concept DFB.
2
Call File → Export → Program: section(s).
3
In the window Open file select the source DFB, e.g.
C:\SOURCE_DIR\SOURCE.DFB
4
Select the sections to export from the source DFB.
5
In Save section export under specify the name of the export file (*.SEC), e.g.
C:\TARGET_DIR\DFB\TARGET.SEC
Reaction: The sections are exported and saved in the *.SEC file, e.g. in
TARGET.SEC.
The question Import section into project now? is now displayed.
6
If this question is answered with OK, the import is performed now.
If the answer given is Cancel, the import is started later, refer to Resuming after
import break (See Resuming after import cancelation, p. 579)procedure.
7
Respond to the question as to whether the project should first be saved with OK.
Note: The query Save project first ? should be answered with OK , because,
in the event of an import error, the current project is closed and all changes since
the last save are rejected.
8
If required or necessary, it is possible in the table Replace, to replace item
names of variables, sections etc., as well as to define address offsets for located
variables and direct addresses (refer to Specific Changes, p. 570).
9
Select OK to continue (the whole import process is canceled if Cancel is
selected).
Reaction: Sections, used DFBs, used derived data types and the declarations
for used variables, outputs and inputs are imported into the target project.
The import is canceled and the current DFB closed, if
l the sections to be imported contain DFBs that are not available in the target
DFB.
l the sections to be imported contain DFBs whose versions differ from already
available DFBs. (The imported DFB version can be transferred or rejected.)
l other errors arise during import.
Errors are displayed in the messages window and have to be acknowledged.
10
574
If the import had been canceled, eliminate the cause of the cancel and carry out
the Resuming after import cancelation (See Resuming after import cancelation,
p. 579)procedure.
840 USE 493 00 September 2001
Import/Export
Section export
and DFB import
To section export a source project and to then section import into a target DFB, carry
out the following procedure:
Step
1
Action
In Concept, delete all declarations of direct addresses and located variables in
the sections to be exported. (They are not authorized in a DFB.)
2
Open the source project in Concept.
3
Call File → Export → Program: section(s).
4
In the window Open file select the source project, e.g.
C:\SOURCE_DIR\SOURCE.DFB
5
Select the sections to be exported from the source project.
6
In Save section export under specify the name of the export file (*.SEC), e.g.
C:\TARGET_DIR\TARGET.SEC
Reaction: The sections are exported and saved in the file *.SEC, e.g. in
TARGET.SEC.
The question Import section into project now? is now displayed.
7
Answer the question as to whether the sections should be imported with Cancel.
8
Close Concept.
9
Open Concept DFB and the target DFB.
10
Execute the menu command File → Import → Program: section(s).
11
Select the export file (e.g. TARGET.SEC)
12
Respond to the question as to whether the project should firstly be saved with
OK.
Note: The question Save project first ? should be answered with OK, because
in the event of an import error, the current project is closed and all changes made
since the last save are rejected.
13
840 USE 493 00 September 2001
If required or necessary, in the table Replace, it is possible to replace item
names of variables, sections etc., as well as to define address offsets for located
variables and direct addresses (refer to Specific Changes, p. 570).
575
Import/Export
Step
14
Action
Select OK to continue (the whole import process is canceled if Cancel is
selected).
Reaction: Sections, DFBs used, derived data types used and the declarations
of used variables, inputs and outputs are imported into the target DFB.
The import is canceled and the current DFB closed, if
l the sections to be imported contain DFBs that are not available in the target
DFB.
l the sections to be imported contain DFBs whose versions differ from those of
DFBs already available. (The imported DFB version can be transferred or
rejected).
l other errors arise during import.
Errors are displayed in the messages window and have to be acknowledged.
15
576
If the import had been canceled, eliminate the cause of the cancel and carry out
the Resuming after import cancelation (See Resuming after import cancelation,
p. 579)procedure.
840 USE 493 00 September 2001
Import/Export
DFB export and
section import
To section export a source DFB and to then section import into a target project, carry
out the following procedure:
Step
Action
1
Delete the input/output declarations in the DFB to be exported before exporting
into Concept DFB, as these are not authorized in Concept projects.)
2
Open the source DFB in Concept DFB.
3
Call File → Export → Program: section(s).
4
In the window Open file select the source DFB, e.g.
C:\SOURCE_DIR\DFB\SOURCE.DFB
5
Select the sections to export from the source DFB.
6
In Save section export under specify the name of the export file (*.SEC), e.g.
C:\TARGET_DIR\TARGET.SEC
Reaction: The sections are exported and saved in the file *.SEC, e.g. in
TARGET.SEC.
The question Import section into project now? is now displayed.
7
Respond to the question as to whether the sections should be imported with
Cancel.
8
Close Concept DFB.
9
Open Concept and the target project.
10
Execute the menu command File → Import → Program: section(s).
11
Select the export file (e.g. TARGET.SEC).
12
Respond to the question as to whether the project should firstly be saved with
OK.
Note: The question Save project first ? should be answered with OK, because
in the event of an import error, the current project is closed and all changes made
since the last save are rejected.
13
840 USE 493 00 September 2001
If required or necessary, it is possible in the table Replace, to replace item
names of variables, sections etc., as well as to define address offsets for located
variables and direct addresses (refer to Specific Changes, p. 570).
577
Import/Export
Step
14
Action
Select OK to continue (the entire import process is canceled if Cancel is
selected).
Reaction: Sections, DFBs used, derived data types used and the declarations
of variables used, incl. comments, are imported into the target project.
The import is canceled and the current project closed, if
l the sections to be imported contain DFBs that are not available in the target
project.
l the sections to be imported contain DFBs whose versions differ from those of
DFBs already available. (The imported DFB version can be transferred or
rejected.)
l other errors arise during import.
Errors are displayed in the messages window and have to be acknowledged.
15
578
If the import had been canceled, eliminate the cause of the cancel and carry out
the Resuming after import cancelation (See Resuming after import cancelation,
p. 579)procedure.
840 USE 493 00 September 2001
Import/Export
Resuming after
import
cancelation
To resume after an import cancelation, carry out the following procedure:
Step
Action
1
Open the target project/target DFB again.
2
Execute the menu command File → Import → Program: section(s).
3
Select the export file (e.g. TARGET.SEC).
4
Answer the question Back up project?: with Yes.
Note: The question Back up project? should be answered with Yes, because
in the event of an import error, the current project is closed and all changes made
since the last save are rejected.
5
If required or necessary, it is possible in the table Replace, to replace item
names of variables, sections etc., as well as to define address offsets for located
variables and direct addresses (refer to Specific Changes, p. 570).
6
Select OK to continue (the whole import process is canceled if Cancel is
selected).
Reaction: Sections, DFBs used, derived data types used and the declarations
of variables used, incl. comments, are imported into the target project.
The import is canceled and the current project closed, if
l the sections to be imported contain DFBs that are not available in the target
project/target DFB.
l the sections to be imported contain DFBs whose versions differ from those of
DFBs already available. (The imported DFB version can be transferred or
rejected.)
l other errors arise during import.
Errors are displayed in the messages window and have to be acknowledged.
840 USE 493 00 September 2001
579
Import/Export
Importing IL and ST Programs to FBD, SFC, IL or ST Sections (with Conversion)
Introduction
Using File → Import → Program: IEC text ASCII files with IL or ST programs can
be imported to FBD, SFC, IL or ST sections. ST and IL are able to have SFC
elements (when imported into SFC section). Both text languages must adhere to the
grammar of IEC text languages, shown in IEC 1131-3 and in the process tables 52
56 of IEC 1131-3.
Import units
The minimum import unit is a program organization unit (POU) to IEC (PROGRAM
END_PROGRAM; FUNCTION_BLOCK ... END_FUNCTION_BLOCK).
The ASCII file can contain several POUs in Concept. From one POU, one or more
sections bearing the same name as the POU arise, which is provided with a current
number. A new section will be begun if too little graphic space is available to store
the logic. FUNCTION_BLOCK ... END_FUNCTION_BLOCK-POUs are imported as
DFBs.
In Concept DFB, the ASCII file can only contain a single POU. From this POU
(FUNCTION_BLOCK END_FUNCTION_BLOCK) one section arises.
Inserting POUs:
Behavior in the
Event of Error
Type of POU
Import into open project
PROGRAM ... END_PROGRAM
as a section into the current not possible
project.
Import into open DFB
FUNCTION_BLOCK
...END_FUNCTION_BLOCK
as project DFB.
as a section into the
More than one POU can be current DFB. Only one
imported at the same time. POU can be imported.
FUNCTION ... END_FUNCTION
is changed as DFB. The
function name becomes
the DFB output
is changed as DFB. The
function name becomes
the DFB output.
In this case, sections are only stored if the ST/IL text is syntactically perfect. POUs
that cannot be reproduced are ignored completely, and an error message is
displayed in the message window.
Note: If the file to be imported contains more than 200 declarations (declarations
of variables and FFBs, a program error is caused. If this is the case, the
declarations should be divided amongst several VAR...END_VAR blocks.
580
840 USE 493 00 September 2001
Import/Export
Variables
The variables declared in POUs appear after the import in the Variable Editor
(exceptions: SFCSTEP_STATE and SECT_CTRL type variables).
EFBs with
extended
parameter set
EFBs with extended parameter set (PRE_DIA, GRP_DIA, LOOKUP_TABLE, ..) are
only supported up to the predefined number of inputs/outputs.
"Bracket
function" with
extended
number of inputs
If calls from a "bracket function" with extended number of inputs, such as
MUX_INT() are imported then all instances of this function work with the maximum
number of inputs that occur.
Changing from
IL/ST to FBD
The following restrictions occur when changing to FBD:
l The following restrictions occur when changing to FBD:
l Block items can only be called once
l only assignments and block calls
but none:
l RET (table 52, property 20)
l ELSIF (table 56, property 4)
l ELSIF (table 56, property 4)
l CASE (table 56, property 5)
l FOR (table 56, property 6)
l REPEAT (table 56, property 8)
l EXIT (table 56, property 9)
l IF not nesting (IEC 1131-3 table 56, property 4)
Changing from
IL/ST to SFC
The following limitations should be noted when making a SFC import from a text file:
l Only variables are permitted as actions. Direct addresses cannot be imported.
l Only literals are allowed as time variables for identifiers.
l Transition section names are changed to standard names.
l Step monitoring times and step delay times are lost when importing.
The following additional restrictions occur when changing to SFC (table = IEC 11313-table):
l Transitions conditions are stored in special FBD sections (TC_secname) (table
41, property 7a ,7c, 7d). The textual import of transition conditions is not possible.
l Actions are converted into FBD sections and not linked to steps.
l no identifier SD and SL (table 45, property 8, 10), they are imported as MOVE.
l Structure components and directly addressed variables are allowed as SFC
actions. This can be seen as an extension of the IEC 1131-3 standard. ST and IL
exports support neither.
l Using step variables ’step.X’ , ’step.T’ cannot be imported or exported and must
be generated again.
840 USE 493 00 September 2001
581
Import/Export
Changing from
IL/ST to ST or IL
The following restrictions apply when changing to ST or IL, that were not created in
Concept.
l FB, DFB and direct address declarations occur at the start of the section
(VAREND_VAR)
l the source formatting (indents, comments etc) applied only to the "logic part" of
the sections, i.e. no comments for declarations (VAREND_VAR), for example
l Function Block counters must be made consistent, e.g. CTU must be changed to
CTU_INT
l no Keywords
l TYPE_...END_TYP
l VAR_INPUT...END_VAR
l VAR_OUTPUT...END_VAR
l VAR_IN_OUT...END_VAR
l VAR_EXTERNAL...END_VAR
l FUNCTION...END_FUNCTION
l FUNCTION_BLOCK...END_FUNCTIONBLOCK
l PROGRAM...END_PROGRAM
l STEP...END_STEP
l TRANSITION...END_TRANSITION
l ACTION...END_ACTION
l no RETURN instruction (ST Editor)
l no RET instruction (IL Editor)
Changing to
Variable
Declarations
When importing variable declarations the following restrictions occur:
l No comments are imported.
l VAR_CONSTANT is imported as located variable.
(VAR_CONSTANT
i : INT := 10;
END_VAR
becomes located variable "I" with the initial value of "10")
l VAR_INPUT and VAR_OUTPUT definitions are imported into the programs as
located variables (VAR).
l VAR_INPUT and VAR_OUTPUT definitions are imported into DFBs as input/
output variables (VAR_INPUT, VAR_OUTPUT).
582
840 USE 493 00 September 2001
Import/Export
Importing (insert file) IL and ST programs into IL or ST sections
At a Glance
Using Edit → Insert text file... it is possible to import ASCII files with IL or ST
programs to IL or ST sections.
This import function is a pure text import function, which can also be performed via
the clipboard (cut/copy/paste). Data conversion does not take place. For this
reason, the necessary variable declarations for example (also if these are contained
in the ASCII file) are not automatically integrated into the Variable Editor. The
necessary variable declarations must be imported explicitly via File → Import from
a "variables file", or be newly created. If variable declarations are contained in the
section, they must be deleted, since they generate errors in the code generation of
the section. Apart from this, all information for the POU must be deleted from the
program (e.g. from the export of a graphic section using File → Export → Program:
IEC text).
Restrictions
When importing IL and ST programs the following restrictions occur:
l no keywords
l TYPE_...END_TYP
l VAR_INPUT...END_VAR
l VAR_OUTPUT...END_VAR
l VAR_IN_OUT...END_VAR
l VAR_EXTERNAL...END_VAR
l FUNCTION...END_FUNCTION
l FUNCTION_BLOCK...END_FUNCTIONBLOCK
l PROGRAM...END_PROGRAM
l STEP...END_STEP
l TRANSITION...END_TRANSITION
l ACTION...END_ACTION
l VAR...END_VAR
l only for Function Block declarations and DFBs
l only at the start of the section for all Function Blocks and DFBs in the section
l not for variable declarations
l apart from this, for making direct addresses consistent: VAR %Q10:INT;
END_VAR
l no RETURN instruction (ST Editor)
l no RET instruction (IL Editor)
840 USE 493 00 September 2001
583
Import/Export
Procedure for "Copying" an IL section from an existing project into a new
project.
Procedure
To "copy" an IL section from an existing project into an IL section of a new project,
perform the following steps:
Step
Action
1
Open the IL section to be exported.
2
Using Edit → Save as text file... from the menu.
3
Select a directory for the export file and give it a name. Confirm with OK.
Reaction: The IL section contents are copied into a new ASCII file.
4
Execute the menu command File → Export → Variables: Text delimited.
5
Select the filter settings Export variables and Export constants. Select comma
as the text delimiter. Confirm with OK.
6
Select a directory for the export file and give it a name. Confirm with OK.
Reaction: The variable declarations of your project are exported to an ASCII file.
7
Using File → New project generate a new project.
8
Using Project → Configuration open the configurator.
9
Using Configure → PLC type select a PLC. Confirm with OK.
10
Using File → New section generate an IL section.
11
Using Edit → Insert text file... import the IL file.
12
Using File → Import → Variables: Text delimited(Warning: Text delimiter
must again be comma), import the variables file into the project’s Variable Editor.
13
Check the import process using Project → Analyze section.
Reaction: The import process is now completed and the new project can be
edited in the normal way (Create further sections, complete the configuration
etc.)
584
840 USE 493 00 September 2001
Import/Export
Procedure for converting FBD sections from an existing project into IL sections
of a new project
Procedure
The process of converting FBD sections from an existing project into IL sections in
a new project consists of three main steps:
Step
Exporting FBD
section.
Importing FBD
section into an IL
section
Action
1
Exporting FBD section (See Exporting FBD section., p. 585).
2
Importing FBD section into an IL section (See Importing FBD section into an IL
section, p. 585).
3
Correcting the syntax (See Correcting the syntax, p. 586).
The procedure for exporting the FBD section is as follows:
Step
Action
1
Open the existing project.
2
Export the desired FBD section using File → Export... → Program: IEC text.
3
Select a directory for the export file and give it a name. Confirm with OK.
Reaction: The FBD section is exported into an ASCII file.
4
Execute the menu command File → Export → Variables: Text delimited.
5
Select the filter settings Export variables and Export constants. Select comma
as the text delimiter. Confirm with OK.
6
Select a directory for the export file and give it a name. Confirm with OK.
Reaction: The variable declarations are exported to an ASCII file.
The procedure for importing the FBD section into an IL section is as follows:
Step
840 USE 493 00 September 2001
Action
1
Using File → New project generate a new project.
2
Using Project → Configuration open the configurator.
3
Using Configure → PLC type select a PLC. Confirm with OK.
4
Using File → New section generate an IL section.
5
Using Edit → Insert text file... import the IL file.
6
Using File → Import → Variables: Text delimited(Warning: Text delimiter
must again be comma), import the variables file into the project’s Variable Editor.
Reaction: The FBD section (in IL format) and the variable declarations were
imported.
585
Import/Export
Correcting the
syntax
The procedure for correcting the syntax is as follows:
Step
Action
1
Delete the line PROGRAM. (It contains the name of the old project.)
2
Delete any lines between VAR and END_VAR which do not contain Function
Block or DFB declarations (e.g. variable declarations).
3
Delete all lines from INITIAL_STEP to END_STEP. (They contain the sections
processing sequence of the old project.)
4
Change the ACTION lines to comment lines, e.g. (* ACTION xxx *). (They
contain the names of the FBD sections.)
5
Delete the END_ACTION line.
6
Delete the END_PROGRAM line.
7
Verify the import process using Project → Analyze section and correct any
errors.
Reaction: The import process is now completed and the new project can be
edited in the normal way (Create further sections, complete the configuration
etc.)
586
840 USE 493 00 September 2001
Import/Export
21.5
Variables import
At a Glance
Overview
This section describes the importing of variables.
What’s in this
section?
This section contains the following topics:
Topic
Page
Importing Variables in "Text Delimited" Format
588
Importing structured variables
590
Importing variables in Factory Link format
594
840 USE 493 00 September 2001
587
Import/Export
Importing Variables in "Text Delimited" Format
Introduction
Using File → Import → Variables: Text Delimited, the variable declarations can be
imported from an ASCII file into the variable editor in text delimited format.
Importing Initial
Values
Initial values of variables in derived data types cannot be imported with this import
format. If you wish to import initial values of variables in derived data types, select
the IEC text import export/import format.
General Format
Description
An ASCII file in "text delimited" format must conform to the following conditions:
l The character set used conforms to ANSI (Windows).
l The parameters of a variable are executed within one line.
l The individual parameters are separated from one another by a user-defined
character.
l Leading and following spaces are allowed in any field (Exception: if a space has
been used as a separator), the import function deletes the latter (with the
exception of the comment field).
l The selected separator must not be contained in the individual parameters.
l Concept is not case-sensitive, in accordance with IEC name conventions. This
should be adhered to for variable names.
l Overlapping between pre-existing addresses and addresses to be imported can
be prevented in the following way: in the Options → Preferences → Analysis...
→ Analysis Preferences dialog, activate the Treat Overlap of Addresses as
an Error option.
Order of
Parameters
within a Line
Order of Parameters within a Line:
l Variable flag
l Variable name (symbolic name)
l Data type
l Hardware address
l Initial value
l Comment
588
840 USE 493 00 September 2001
Import/Export
Meaning of
Variable Flags
Possible values for the variable flags are:
l 0 or N= the symbolic name refers to a non-exportable variable
l 1 or E= the symbolic name refers to an exportable variable
l 2 or C= the symbolic name refers to a constant
l 3 or I = the symbolic name refers to an Input (See Formal parameters, p. 396)
(Concept DFB only)
l 4 or O = the symbolic name refers to an Output (See Formal parameters, p. 396)
(Concept DFB only)
l 5 or M = the symbolic name refers to a VARINOUT variable (See Combined
Input/Output Variables (VARINOUT Variables), p. 397) (Concept DFB only)
l S = Structured variable, see Importing structured variables, p. 590.
Only variables with the 0/N or 1/E variable flag value are imported as located
variables. All others are imported as unlocated variables.
If the variable flag is set at 2/C, the hardware address is ignored.
The values 3/I and 4/O are only permitted in Concept DFB. In this case, the values
of the address fields are used for the position of the corresponding inputs and
outputs. The variable flag value 1/E is imported into Concept DFB as variable flag
value 0/N.
Structure of the
Hardware
Address Field
Structure of the Hardware Address Field (Example: %4:100):
l Characters for direct addresses "%" (may be missing)
l Address type
l 0 = output, discrete
l 1 = input
l 3 = input word
l 4 = output word, discrete word
l Separator ":" or ".".
If no separator is used, the address must be 6 characters long.
l Address
Examples of an
Address
Description
Output register 123 :
l %400123 or
l %4.123 or
l %4:123 or
l 400123 or
l 4.123 or
l 4:123
840 USE 493 00 September 2001
589
Import/Export
IEC Address
Conventions
The IEC address conventions can also be used (e.g. %QX100 corresponds to
000100):
Address Type
Concept Designation
IEC Designation
Output, discrete
0x
%QX,%Q
Input
1x
%IX,%I
Input register
2x
%IW
Output register, discrete
register
3x
%QW
Empty Fields
Empty fields are represented by two consecutive separators.
The following fields are allowed to be empty:
l Hardware address
l Initial value
l Comment
Missing Fields
The following fields are allowed to be missing:
l Comment
l Comment and initial value
l Comment and initial value and hardware address
Importing structured variables
At a Glance
The basic structure of the file corresponds to that of the variables in text delimited
(See Importing Variables in "Text Delimited" Format, p. 588) format.
Additional usage
designations
In addition, the following points should be taken into account:
l Multiple rows are necessary to describe a variable.
l Each of these rows must correspond to the format of variables in delimited text
format.
l A structured variable with initial values is described by an introducing row with the
following structure:
1. Variable flag
2. Variable name (symbolic name)
3. Name of derived data type
4. Hardware address
5. Empty field
6. Comment
590
840 USE 493 00 September 2001
Import/Export
l This introductory line is followed by at least one component description. This
component description results from the description of the element components
(element data type) in the form of a row with the following structure (a component
does not have to be described if its initial value is the same as the standard
value). The sequence in which the individual components are executed is
insignificant.
1. Character "S" (S stands for structured)
2. Path of components (the variable name does not have to be included)
3. Field for IEC data type (this field can remain empty)
4. Empty field
5. Initial value
6. Empty field
Component
description error
trapping
Component description error trapping
l If a variable component is described more than once, the last description is used.
l If the specified component is not contained in the currently described variable, the
component description is ignored and a warning is given.
l If the field for the components path is empty, the component description is
ignored and a warning is given.
l If the field for the IEC data type is not empty, the specified data type is checked.
If the specified data type and the data type of the component are not the same,
the component description is ignored and a warning is given.
l Entries in the address field are ignored.
l Entries in the address field are ignored.
Example:
Structured
variables in "Text
delimited" format
Structured data type definition ESI_IN:
ESI_In:
(* ESI - input data *)
STRUCT
in:
ESI_InOut;
(* ESI input data *)
esi:
ESI_Status;
dummy:
BYTE;
(* supplement to modulo 16 *)
slot:
Exp_Status;
END_STRUCT;
ESI_InOut: (* ESI input / output data structure *)
STRUCT
tstat:
BYTE;
(* transfer status, handshake *)
blocks:
BYTE;
(* number of used blocks *)
res:
BYTE;
(* reserved *)
block:
ESI_BlockArr14;
(* data block *)
END_STRUCT;
ESI_BlockArr14: ARRAY[1..14] OF ESI_Block;
840 USE 493 00 September 2001
591
Import/Export
ESI_Block: (* datas of ESI *)
STRUCT
func:
BYTE;
(* function *)
mux:
WORD;
(* distribution *)
attr:
BYTE;
(* attribute *)
cause:
BYTE;
(* reason *)
station:
WORD;
(* station number *)
object:
WORD;
(* objekt number *)
data:
ByteArr9; (* data bytes *)
END_STRUCT;
ByteArr9:
ARRAY [1..9] OF BYTE;
ESI_Status: (* Status of ESI
STRUCT
wdog:
BYTE;
(*
stat1:
BYTE;
(*
stat2:
BYTE;
(*
stat3:
BYTE;
(*
slot:
WORD;
(*
user:
WORD;
(*
esitime:
DPM_Time; (*
END_STRUCT;
DPM_Time:
STRUCT
sync:
ms:
min:
hour:
(* 9 bytes *)
*)
expert watchdog-counter *)
error status 1 *)
error status 2 *)
error status 3 *)
slot number *)
virtual slot number *)
time stamp *)
(* time stamp *)
day:
mon:
year:
END_STRUCT;
BOOL;
WORD;
BYTE;
BYTE;
BYTE;
BYTE;
BYTE;
(*
(*
(*
(*
(*
(*
(*
(*
sync clock *)
milli-seconds *)
minutes *)
hours; (hour AND 16#80) *)
= day light saving time *)
days of week *)
month *)
year *)
STRUCT
Exp_Status:
ErrFlag1:
ErrFlag2:
(* error status of transfer *)
BOOL;
(* TRUE: epxert not pluged *)
BOOL;
(* TRUE: Bit 7 of DPM *)
(* Identcode is set; *)
(* logical DMP-access-error *)
UserStatus: WORD;
(* status of expert *)
ErrNo:
WORD;
(* errornumber *)
END_STRUCT;
592
840 USE 493 00 September 2001
Import/Export
Representation of variables "demo" of ESP_IN data type in delimited text
format:
1;demo;ESI_In;400002;;structured data type
S;in.tstat;BYTE;;16#0F;
S;in.blocks;BYTE;;16#0F;
S;in.res;BYTE;;16#0F;
S;in.block[1].func;BYTE;;16#0F;
S;in.block[1].mux;WORD;;16#000F;
S;in.block[1].attr;BYTE;;16#0F;
S;in.block[1].cause;BYTE;;16#0F;
S;in.block[1].station;WORD;;16#000F;
S;in.block[1].object;WORD;;16#000F;
S;in.block[1].data[1];BYTE;;16#0F;
S;in.block[1].data[5];BYTE;;16#0F;
S;in.block[3].func;BYTE;;16#0F;
S;in.block[3].mux;WORD;;16#000F;
S;in.block[3].func;BYTE;;16#0F;
S;in.block[3].cause;BYTE;;16#0F
S;in.block[3].station;WORD;;16#000F
S;in.block[3].object;WORD;;16#000F
S;in.block[3].data[1];BYTE;;16#0F
S;in.block[3].data[2];BYTE;;16#0F
S;esi.wdog;BYTE;;16#0F
S;esi.stat1;BYTE;;16#0F
S;esi.stat2;BYTE;;16#0F
S;esi.stat3;BYTE;;16#0F
S;esi.slot;WORD;;16#000F
S;esi.user;WORD;;16#000F
S;esi.esitime.sync;BOOL;;TRUE
S;esi.esitime.ms;WORD;;16#000F
S;esi.esitime.min;BYTE;;16#0F
S;esi.esitime.hour;BYTE;;16#0F
S;esi.esitime.day;BYTE;;16#0F
S;esi.esitime.mon;BYTE;;16#0F;
S;esi.esitime.year;BYTE;;16#0F;
S;dummy;BYTE;;16#0F;
S;slot.ErrFlag1;BOOL;;FALSE;
S;slot.ErrFlag2;BOOL;;FALSE;
S;slot.UserStatus;WORD;;16#000F;
S;slot.ErrNo;WORD;;16#000F;
840 USE 493 00 September 2001
593
Import/Export
Importing variables in Factory Link format
Description
Using File → Import → Variables: Factory Link variable declarations in Factory
Link format can be imported. In addition, carry out a Factory Link export and specify
the Factory Link version when importing into Concept.
If your Factory Link version of Concept is not supported, please call our hotline.
Note: Factory Link is case-sensitive with variable names. Concept does not
differentiate in accordance with IEC naming conventions. This should be adhered
to during import
594
840 USE 493 00 September 2001
Import/Export
21.6
Import/Export of PLC Configuration
Introduction
Overview
This Section describes the import and export of the PLC configuration with Concept
or Concept Converter.
What’s in this
section?
This section contains the following topics:
Topic
Page
Import/Export of PLC Configuration using Concept
596
Import/Export of PLC Configuration using Concept Converter
597
840 USE 493 00 September 2001
595
Import/Export
Import/Export of PLC Configuration using Concept
Introduction
Using the Import/Export function a PLC configuration can be exported out of a
current (open) project and subsequently re-imported.
Config. Export
and Config.
Import
To export and subsequently import SPS configurations, proceed as follows:
596
Step
Action
1
To export the PLC configuration from the current project, start the Concept
converter, open the desired project and select File → Export → Configuration.
2
In the Folder field, select the target directory for the PLC configuration to be
exported.
3
In the File name field, enter a name for the Export file (NAME.CCF) and press
OK.
Response: The PLC configuration is stored in the selected directory as an ASCII
file.
4
To import a PLC configuration into a project, open the desired project.
5
In Concept select the File → Import → Configuration menu command.
6
From the File type list select the Concept Configuration entry. (*.CCF).
7
In the Folder field, select the desired directory.
8
From the File name list select the PLC configuration to be imported
(NAME.CCF) and click on OK.
9
Warning: The current PLC configuration of the chosen project will be
overwritten.
Answer the question with OK.
Response: The PLC configuration is imported.
840 USE 493 00 September 2001
Import/Export
Import/Export of PLC Configuration using Concept Converter
Introduction
The Concept Converter’s import/export function enables you to export the
configuration from one project (Project A) and import it into another project
(Project B).
Config Export
and Config
Import
In order to export and then import a PLC configuration, carry out the following steps:
Step
840 USE 493 00 September 2001
Action
1
To export the PLC Configuration from project A, start the Concept Converter and
select File → Export → Configuration.
2
From the Folder field, select the Project A system directory.
3
Select the PLC configuration to be exported (PROJECTNAME.C1) and click on
OK.
Response: The PLC configuration is filed in the system directory in the form of
an ASCII file (PROJECTNAME.CON).
4
To import the PLC configuration into Project B, copy the exported file into the
system directory of Project B.
5
In Concept Converter select the File → Import menu command.
6
From the File Type list box select the Configuration (*.CON) entry.
7
From the Folder field, select the Project B system directory.
8
From the File Name list box, select the PLC configuration
(PROJEKTNAME.CON) to be imported and click on OK.
9
Caution: The current PLC configuration of the selected project will be
overwritten.
Answer the question with OK.
Response: The PLC configuration will be imported.
597
Import/Export
598
840 USE 493 00 September 2001
Documentation and Archiving
22
At a Glance
Overview
This chapter describes the documentation, the archiving and deleting of projects,
DFBs and macros.
What’s in this
chapter?
This chapter contains the following Sections:
840 USE 493 02 May 2001
Section
Topic
Page
22.1
Documentation of projects, DFBs and macros
601
22.2
Managing projects, DFBs and macros
609
599
Documentation and Archiving
600
840 USE 493 02 May 2001
Documentation and Archiving
22.1
Documentation of projects, DFBs and macros
At a Glance
Overview
This section describes the documentation of projects, DFBs and macros.
What’s in this
section?
This section contains the following topics:
840 USE 493 02 May 2001
Topic
Page
Documentation contents
602
Documentation Layout
603
Defining Page Breaks for Sections
605
Use of keywords
608
601
Documentation and Archiving
Documentation contents
At a Glance
The contents of the documentation can range in length from one on-screen page to
the entire documentation of a project. The order in the first chapter is given as in the
dialog box File → Print → Documentation contents and cannot be changed.
Project
documentation
The following chapter can be printed for project documentation using the menu
command File → Print:
l Project description
l Derived data types
l Using state RAM
l State RAM values
l Using the DFBs
l Using the EFBs
l PLC configuration
l I/O Map
l Execution sequence of the sections
l Project structure
l Messages
l ASCII messages only with Concept for Quantum
l Variable lists
l Use of variables
l Contents of sections
l Contents directory for the printed documentation
DFB/macro
documentation
The following chapter can be printed for DFB/macro documentation using the menu
command File → Print :
l DFB/macro description
l Derived data types
l Using the DFBs
l Using the EFBs
l Execution sequence of the sections
l Messages
l Variable lists
l Use of variables
l Contents of the sections
l Contents directory for the printed documentation
602
840 USE 493 02 May 2001
Documentation and Archiving
Documentation Layout
Print Format
The printout can be in either portrait or landscape mode. This is set up in the dialog
box File → Printer Setup → Select Printer.
Page Numbering
The pages are numbered linearly. The starting page number can be selected by the
user.
Page Size
The left margin is 12 characters wide. The area for text and graphics is
approximately 132 characters wide, the height depends on the header and footer
files. If the header and footer files are not activated or the keyword "%PAGENO" is
not contained in them, the page number will be printed automatically in the bottom
right corner of the page.
Page Breaks
If a graphics section does not fit on a printed page, the section will be divided - like
a map - in the printout. In this case page references are printed in all four corners of
the graphics area to show which page the graphics are continued on. The View →
Page Break menu option displays the page break corresponding to the printer set
in File → Printer Setup and to the enlargement factor in the editor window.
Also see the Defining Page Breaks for Sections, p. 605 description.
Size and Fonts
In text sections the font size in the printout cannot be altered. Emphasis of keywords
is represented in the printout using bold and italic typefaces.
840 USE 493 02 May 2001
603
Documentation and Archiving
Standard Layout
Standard Layout:
upper border
Header (max. 15 lines)
Blank line
Area to be printed
left
border
of
texts, tables
and graphics
Blank line [%PAGENO]
Footer (max. 15 lines)
lower border
Header
It is possible to give your documentation a header. The header is stored as an ASCII
file and can be created using any ASCII editor. The maximum file size is 15 lines or
approx. 2 Kbytes.
A sample file called "HEADER.TXT" is available in the Concept directory. This file
can be modified as required. Keywords (See Use of keywords, p. 608) can also be
used with it.
Footer
It is possible to give your documentation a footer. The footer is stored as an ASCII
file and can be created using any ASCII editor. The maximum file size is 15 lines or
approx. 2 Kbytes.
An sample file called "FOOTER.TXT" is available in the Concept directory. This file
can be modified as required. Keywords (See Use of keywords, p. 608) can also be
used with it.
Front Page
It is possible to give your documentation a front page. The front page is stored as an
ASCII file and can be created using any ASCII editor. The size of the file is unlimited.
An sample file called "FRONTPG.TXT" is available in the Concept directory. This file
can be modified as required. Keywords (See Use of keywords, p. 608) can also be
used with it.
The printout of the front page also contains the header and footer if these are
switched on.
604
840 USE 493 02 May 2001
Documentation and Archiving
Defining Page Breaks for Sections
Introduction
For printing graphics in FBD, LD and SFC sections, you can define the values for
the page break and paper orientation of the graphics. The higher the value you
select, the smaller the graphics will be displayed. But in return more space is
available on a page.
Settings
You can set the values for the page break for portrait and landscape. When
changing the paper format, the settings for the other format stay saved. Using the
Download standard values command button, the standard values from the
CONCEPT.INI file can be loaded.
When defining values for the width and height of the paper, you should make sure
that the different editors show different grid units.
The min. and max. values are:
Section
Example for FBD
section
1 grid unit equals the value
Paper Width
Paper Height
FBD
10
30 - 300
30 - 230
LD
8
30 - 400
10 - 230
SFC
1
4 - 32
4 - 60
Dialog setting
Section Options
FBD/LD/SFC
ST/IL
FBD/LD/SFC
Description
Description
Description
Graphics
Text
Graphics
Object Description
Network comm.
Variable usage
Variable usage
Variable usage
State RAM usage
State RAM usage
State RAM usage
Page break settings (grid per page)
Portrait
Landscape
Load standard values
OK
840 USE 493 02 May 2001
Width
Height
FBD
75
100
From Network
LD
70
35
To Network
SFC
11
20
Cancel
Help
605
Documentation and Archiving
Representation in the FBD editor window
Concept [C:\CC25T1”1\TESTPAJ\TESTPAJ] - [FBD1]
File Edit View Objects Project Online Options Window Help
.1.1 (1)
.1.4 (4)
AND_BOOL
OR_BOOL
LampTest1
LampTest2
%0:00017
FBI_1_2 (3)
.1.5 (5)
LIGHTS
S
OR_BOOL
01
02
03
04
05
%0:00018
.1.6 (6)
OR_BOOL
%0:00019
.1.7 (7)
OR_BOOL
1
%0:00020
.1.3 (2)
.1.8 (8)
OR_BOOL
OR_BOOL
Manual1
ACT4
%0:00021
This section is used to demonstrate one instance of LIGHTS.
The output values of LIGHTS are mapped to LEDs.
The LEDs can be tested by switching on LampTest1 AND LampTest2.
For this purpose the output of LIGHTS and lamptest are ORed.
2
3a
3b
1
FBD section
2
Grid view (View -> Grid)
3a Page break, width: 75 (View -> Page break)
3b Page break, height: 100 (View -> Page break)
606
840 USE 493 02 May 2001
Documentation and Archiving
Print-out
10
20
.1.1 (1)
30
40
50
60
70
75
.1.4 (4)
AND_BOOL
OR_BOOL
LampTest1
LampTest2
%0:00017
FBI_1_2 (3)
.1.5 (5)
LIGHTS
S
10
OR_BOOL
01
02
03
04
05
%0:00018
.1.6 (6)
OR_BOOL
%0:00019
20
.1.7 (7)
OR_BOOL
%0:00020
.1.3 (2)
.1.8 (8)
OR_BOOL
OR_BOOL
Manual1
ACT4
30
%0:00021
This section is used to demonstrate one instance of LIGHTS.
40
The output values of LIGHTS are mapped to LEDs.
The LEDs can be tested by switching on LampTest1 AND LampTest2.
For this purpose the output of LIGHTS and lamptest are ORed.
50
60
70
80
90
100
840 USE 493 02 May 2001
607
Documentation and Archiving
Use of keywords
At a Glance
Keywords allow project or object specific information to be inserted into the header,
footer and title page files.
Usable keywords
Table of usable keywords:
%PROJNAME
Project name
%SECTNAME
Section name
%VERSION
Program/DFB version
%CREDATE
Creation date
%MODDATE
Date of last project/DFB modification
%DATE_D
Current date (European format, DD.MM.YY)
%DATE_US
Current date (US format, DD.MM.YY)
%PAGENO
Current page numbers
%RECT(Column,Width,Height)
Draws a rectangle with its top left-hand
corner in the current line
%HLINE(Column,Length)
Draws a horizontal line in the current line
%VLINE(Column,Length)
Draws a vertical line starting in the current
line
Note: The total number of lines in the header, footer or title page file must agree
with the number of lines needed to print rectangles and vertical lines.
Example: Header
with keywords
Contents of the ASCII file:
%RECT (1,132,4)
%VLINE (24,4)
%VLINE (110,4)
S A
Project comment
Name
CONCEPT
%DATE_D
¶
Note: The symbol ¶ is not entered, it should only show that the file ends with a
blank line.
Expression:
S A
CONCEPT
608
Project comment
Name
01.04.99
840 USE 493 02 May 2001
Documentation and Archiving
22.2
Managing projects, DFBs and macros
At a Glance
Overview
This section describes the archiving and deletion of projects, DFBs and macros.
What’s in this
section?
This section contains the following topics:
840 USE 493 02 May 2001
Topic
Page
Archiving projects, DFBs, EFBs and Data Type Files used
610
Deleting projects, DFBs and macros
611
609
Documentation and Archiving
Archiving projects, DFBs, EFBs and Data Type Files used
Introduction
When archiving projects, used DFBs, EFBs and data type files all the data from the
project is collected and compressed. The *.PRZ file is created in the process and put
in the same directory as the project. The file can then be decompressed again at any
time.
Archiving
Projects
The procedure for archiving projects is as follows:
Unpacking
Archived
Projects
610
Step
Action
1
Start Concept.
Note: Projects should not be opened when archiving, otherwise the Archive...
menu command can not be selected.
2
To archive, select File → Archive....
Result: A window appears, displaying the Concept projects.
3
In the window, select the project to be archived, and click on OK.
Result 1: A check will be carried out to see whether a compressed *.PRZ-file of
the same name already exists. If a match is established, a query appears as to
whether the existing file should be replaced by the new file.
Result 2: The project data is compressed and put in the *.PRZ file and can be
found in the same directory as the project.
The procedure for unpacking archived projects is as follows:
Step
Action
1
Select File → Open.
Result: A window appears, displaying all the Concept projects.
2
In the File Type list box, select the option Archived Projects (*.prz).
Result: The archived Concept projects are displayed.
3
Select the project to be opened and click on OK.
Result 1: It will be checked to see whether a *.PRJ-file of the same name already
exists. If a match is established, a query appears as to whether the existing file
should be replaced by the new file.
Result 2: It will be checked to see whether DFBs, EFB libraries and data type
files of the same name already exist. If a match is established, a query appears
as to whether the existing file should be replaced by the new file.
Result 3: The project data is decompressed and saved as a normal Concept
project. The project is located in the same directory as the activated file.
Result 4: The project is automatically opened in Concept.
4
Using Online → Connect create a link between the PC and the PLC.
Result: The PC and SPS have the same status as they did before archiving.
840 USE 493 02 May 2001
Documentation and Archiving
Archiving/
Unpacking
global DFBs
The following sequence of steps is carried out when archiving or unpacking the used
global DFBs:
Step
Action
1
The project directory is searched for an existing GLB directory.
2
The relevant settings are checked in the CONCEPT INI file.
For example:
[Path]: GlobalDFBPath=x:\DFB
[Upload]: PreserveGlobalDFBs=0
In this example the global DFBs are looked for in the DFB directory of the path
defined.
3
The DFB directory under x:\CONCEPT\DFB is searched.
Global DFBs are only used from one directory or placed in one directory. I.e if step
1 is not fulfilled, step 2 follows and as a last possibility step 3 comes into force.
Diagnostics
Information
When downloading the project, diagnostics information is produced and placed in a
corresponding directory. Then the status EQUAL is achieved between the PC and
the PLC. When archiving the project, this diagnostic information is compressed with
the other project data and placed in a file.
In order to also be able to use the diagnostic information after unpacking, you must
make sure that when archiving, the EQUAL status exists between the PC and the
PLC . It is then no longer necessary to download and diagnostics can be carried out
straight away.
If you have a different status between the PC and PLC when archiving, e,g, NOT
EQUAL, then when unpacking and after connecting (Online → Connect...) the
same status is displayed. It is therefore necessary to download in order to put the
system into operation. However when downloading, new diagnostic information is
created, while the old in lost in the process.
Deleting projects, DFBs and macros
Deleting
projects, DFBs
and macros
840 USE 493 02 May 2001
The procedure for deleting projects, DFBs and macros is as follows:
Step
Action
1
Delete the project/DFB/macro directory (including the subdirectory "dfb").
If only certain DFBs/macros need to be deleted from this directory, open the
subdirectory and delete all files with the required DFB/macro name (name *).
2
Use global DFBs, and global macros in the project/DFB and if these also need
to be deleted, they must be deleted separately.
Open the subdirectory "dfb" of the Concept directory and delete all files carrying
the name DFBs/macros (name *).
611
Documentation and Archiving
612
840 USE 493 02 May 2001
Simulating a PLC
23
Preview
Overview
This chapter describes how to simulate a PLC. By using a simulator the functions of
a program may be tested without the actual required hardware.
What’s in this
chapter?
This chapter contains the following Sections:
Section
Topic
23.1
Simulating a PLC (16-bit simulator)
615
23.2
Simulating a PLC (32-bit simulator)
617
840 USE 493 00 September 2001
Page
613
Simulating a PLC
614
840 USE 493 00 September 2001
Simulating a PLC
23.1
Simulating a PLC (16-bit simulator)
Simulating a Controller
Introduction
This section describes the 16-bit simulator Concept SIM.
Area of
Application
Concept SIM may be used to simulate any PLC (Quantum, Compact, Momentum,
Atrium) in order to test the user program "online" without hardware.
The simulator is only available for the IEC languages (FBD, SFC, LD, IL and ST).
The 16-bit simulator Concept SIM is used for testing programs containing Concept
EFB generated 16-bit EFB.
Note: If your program does not contain 16-bit EFBs created with Concept EFB, you
should use the 32-bit simulator (PLCSIM) to simulate a PLC.
Max. Number of
Variables
When using the 16 bit simulator Concept SIM, a specific number of state RAM
references (Project → PLC configuration → Configuring → Memory Partitions)
may not be exceeded.
The table below shows the maximum number of these state RAM references:
Concept
vs. Concept SIM
Reference type
max. number
0x
60000
1x
5008
3x
4000
4x
24000
Concept SIM and Concept may only be opened independently, i.e. when starting
Concept SIM, Concept cannot be open. It is therefore advisable to decide before
starting Concept, whether the simulator or the controller should perform the test. In
each case, make sure that the simulator is turned on or off as required.
840 USE 493 00 September 2001
615
Simulating a PLC
Activating
Concept SIM
The procedure for activating Concept SIM is as follows
Step
Action
1
Close Concept if it is open.
2
Open Concept-SIM by double-clicking on the Concept-SIM icon.
3
Click on the File main menu and activate the Simulation on menu command.
Response: The simulator is on.
4
Exit Concept SIM via the File main menu using the Exit menu command.
5
Start Concept.
6
From Online → Connect... open the Connect to PLC dialog window.
7
For Protocol type: always select Modbus Plus, even if your real PLC will be
coupled via a different bus at a later stage.
Response: The simulator will now be displayed as a PLC in the node list of the
Modbus Plus network.
8
Now create a link to the simulated PLC by double clicking on the list entry or via
OK.
Response: You may now test the behavior of your IEC user program.
Note
Note: Please note that the simulator remains active even after rebooting the PC.
To build a link to a PLC the simulator must be explicitly terminated.
Disabling
Concept SIM
616
The procedure for disabling Concept SIM is as follows
Step
Action
1
Close Concept if it is open.
2
Open Concept-SIM by double-clicking on the Concept-SIM icon.
3
Click on the File main menu and select the Simulation Off menu command.
Response: The simulator is on.
4
Exit Concept SIM via the File main menu using the Exit menu command.
840 USE 493 00 September 2001
Simulating a PLC
23.2
Simulating a PLC (32-bit simulator)
At a Glance
Overview
This Section describes how to simulate a PLC with the 32-bit simulator Concept
PLCSIM32.
What’s in this
section?
This section contains the following topics:
Topic
Page
Concept-PLCSIM32
618
Simulating a PLC
619
Simulating a TCP/IP interface card in Windows 98
621
Simulating a TCP/IP interface card in Windows NT
622
840 USE 493 00 September 2001
617
Simulating a PLC
Concept-PLCSIM32
Introduction
The Concept-PLCSIM32 program simulates any PLC unit (Quantum, Compact,
Momentum, Atrium) and its signal states.
Area of Use
The simulator is presently only available for IEC languages (FBD, SFC, LD, IL and
ST).
Note: Not supported:
l LL984 language
l Loadables, e.g. ULEX
l 6x-Register (extended memory)
l RIO
l DIO
l Backplane Expander
Note for
Windows 98 and
Windows NT
Since the simulator is connected to Concept via a TCP/IP link, you need a card in
your computer to handle the TCP/IP interface (when using Windows 98 or Windows
NT). If your computer is not equipped with such a card, it can be simulated. Follow
the procedure described in Simulation of a TCP/IP interface card in Windows 98
(See Simulating a TCP/IP interface card in Windows 98, p. 621) or Simulation of a
TCP/IP interface card in Windows NT (See Simulating a TCP/IP interface card in
Windows NT, p. 622).
When using Windows 2000, simulating a TCP/IP interface card is not necessary
because all drivers needed for Concept PLCSIM32 are installed automatically.
618
840 USE 493 00 September 2001
Simulating a PLC
Structure of the
dialog box
The title bar shows the name of the application (PLC Sim32) and the address of your
PC-interface card.
The first text box in the simulator window shows the status of the simulated PLC.
This field is read-only. The displayed status is determined by Concept, as with a real
PLC.
The status may be shown as the following:
l DIM (Dim Awareness)
The simulator is in an undefined state.
l STOPPED
The simulator (the simulated PLC) is stopped.
l RUNNING
The simulator (the simulated PLC) is running.
The type of PLC to be simulated can be selected from the first list box.
The following registers are available:
l State RAM
Provides an overview of the signal memory.
l I/O Modules
Shows the configuration currently loaded or the signal memory of a selected
group of components.
l Connections
Displays connections between the simulator and programming device(s).
Simulating a PLC
Overview
A controller is simulated with the PLCSIM32 simulator using 4 main steps:
Step
Program
creation and
controller
configuration
Action
1
Program creation and controller configuration.
2
Activating the simulator.
3
Construction of the connection between Concept and simulator.
4
Downloading the program.
The following steps describe how to create programs and configure the controller.
Step
840 USE 493 00 September 2001
Action
1
Create your program and your controller configuration in Concept.
2
Save your project with File → Save.
619
Simulating a PLC
Activating the
simulator
Construction of
the connection
The following steps describe how to activate the simulator:
Step
Run PLCSIM32 simulator in the Concept program group.
2
Select the controller type appropriate to your project in the simulator.
The following steps describe how to construct the connection between Concept and
the simulator.
Step
Downloading the
program
620
Action
1
Action
1
Using Online → Connect... open the Connect to PLC dialog in Concept.
2
Select the IEC Simulator (32-Bit) entry in the Protocol Type list box.
3
In the Access range, activate the Change configuration option button.
4
Confirm with OK.
Response: A connection has been made between the programming unit and the
simulator. A note then appears, saying that the configurations of the
programming unit and the simulator are different.
The following steps describe how to download the program:
Step
Action
1
Using Online → Download open the Download Controller dialog.
2
Confirm with Download.
Response: Your program and your configuration are loaded into the simulator.
You will be asked if you wish to start the controller.
3
Confirm with Yes.
Response: You may now test the behavior of your IEC user program.
840 USE 493 00 September 2001
Simulating a PLC
Simulating a TCP/IP interface card in Windows 98
Introduction
As the coupling between Concept and the simulator PLCSIM32 is made via a TCP/
IP coupling, a TCP/IP interface card is needed in the PC. If your PC does not have
one of these cards, it may be simulated.
CAUTION
Risk of PC problems
Do NOT complete this procedure if your PC already has a TCP/IP
connection. The software installation of the TCP/IP connection would
be destroyed by this procedure. Only carry out this procedure once,
otherwise PC problems may arise.
Failure to observe this precaution can result in injury or
equipment damage.
Simulating a
TCP/IP Interface
Card
Carry out the following steps to simulate a TCP/IP interface card in Windows 98:
Step
Action
1
In Windows 98 invoke Start → Settings → Control Panel.
2
From Software open software settings.
3
From the Windows Setup register select the Links entry and click on the
Details... command button.
4
Check the DFU network entry here and confirm with OK. (To do this, you may
require the Windows system CD.)
Response: The computer reboots.
The DFU network and the TCP/IP protocol are available to the system after the
reboot. (Concept can only connect to the simulator.)
840 USE 493 00 September 2001
621
Simulating a PLC
Simulating a TCP/IP interface card in Windows NT
Introduction
As the coupling between Concept and the simulator PLCSIM32 is made via a TCP/
IP coupling, a TCP/IP interface card is needed in the PC. If your PC does not have
one of these cards, it may be simulated.
CAUTION
Risk of PC problems
Do NOT complete this procedure if your PC already has a TCP/IP
connection. The software installation of the TCP/IP connection would
be destroyed by this procedure. Only carry out this procedure once,
otherwise PC problems may arise.
Failure to observe this precaution can result in injury or
equipment damage.
Simulating a
TCP/IP Interface
Card
622
The main steps for simulating a TCP/IP interface card in Windows NT are as follows:
Step
Action
1
Setting the basic settings.
2
Installing a new modem.
3
Setting the workgroup.
840 USE 493 00 September 2001
Simulating a PLC
Setting the Basic
Settings
The procedure for setting the basic settings is as follows:
Step
840 USE 493 00 September 2001
Action
1
In Windows NT, invoke Start → Settings → Control Panel → Network and
answer Yes to the question.
Response: The Network Setup Wizard dialog is opened.
2
Deactivate the Wired to the network option.
3
Select the Remote access to the network option.
Response: The network card installation dialog will be opened.
4
Click on Next (without installing a network card).
Response: The dialog for selecting a network protocol will be opened.
5
Select the TCP/IP-Protocol option.
6
Deactivate all the other options and click on Next.
Response: The dialog for selecting services will be opened.
7
Click on Next (without making any changes in the dialog).
8
Answer the question with Next.
Response: The Windows NT Setup dialog is opened.
623
Simulating a PLC
Installing a New
Modem
Setting the
Workgroup
624
The procedure for installing a new modem is as follows:
Step
Action
1
Insert the Windows NT CD and specify the path for the installation data files (for
example D:\i386). Click on Resume.
Response: The TCP/IP Setup dialog is opened.
2
Click on No.
Response: The Remote Access Setup dialog is opened.
3
Click on Yes.
Response: The Install New Modem dialog is opened.
4
Select the Don’t detect my modem; I will select it from a list. option and press
Next.
Response: The dialog for selecting a modem is opened.
5
Select a standard modem (for example Standard 28800 bps modem) and press
Next.
Response: The dialog for selecting the connection is opened.
6
Select the Selected ports option and the COM interface. Click on Next.
Reaktion: Der Dialog Standardinformationen wird geöffnet.
7
Select your country.
8
Enter the code for your town (your area code) and click on Next.
Response: The Install New Modem dialog is opened.
9
Click on Finish.
Response: The Add Remote Access Setup device dialog is opened.
10
Click on OK.
Response: The Remote Access Setup dialog is opened.
11
Click on Next.
Response: The Network installation assistant dialog is opened.
12
Click on Next twice.
Response: The dialog for setting the workgroup is opened.
The procedure for setting the workgroup is as follows:
Step
Action
1
Select the Workgroup option and enter the WORKGROUP name. Click on Next.
2
Click on Finish.
Response: The Network Settings Changes dialog is opened.
3
Click on Yes to restart.
Response: Your PC now simulates a TCP/IP network and the 32-bit simulator
PLCSIM may be used.
840 USE 493 00 September 2001
Concept Security
24
At a Glance
Overview
This chapter describes Concept Security.
What’s in this
chapter?
This chapter contains the following topics:
Topic
Page
General Description of Concept Security
626
Access Rights
627
Changing Passwords
634
Activating Access Rights
635
Protecting Projects/DFBs
635
840 USE 493 00 September 2001
625
Concept Security
General Description of Concept Security
At a glance
With Concept Security, you can assign access rights (See Access Rights, p. 627)
(user definitions). The access rights limit the functionality of Concept and its auxiliary
programs in a user dependant manner.
Note: The LL984 Editor cannot be protected with Concept Security.
Additionally, you can protect (See Protecting Projects/DFBs, p. 635) projects/DFBs
from being edited using Concept Security.
Valid Scope
The access rights defined for the user are valid for all projects in the Concept
installation. If a user edits projects in different Concept installations, a user must be
defined for each Concept installation.
Max. number of
users
A maximum of 128 users may be defined.
Activate Concept
Security
After installing Concept, Concept Security is inactive and must be activated by the
system administrator (Supervisor).
The System
Admininstrator
Access rights are defined and Concept Security is turned on and off by the system
administrator (user name Supervisor).
When installing Concept, a password file with the user "Supervisor" (System
Administrator) is automatically created with an empty password. This user has
"Supervisor" access rights.
Changing access
rights online
Concept Security and Concept/Concept DFB can be started at the same time, i.e.
the access rights can be changed during Concept/Concept DFB runtime and are
immediately valid.
Creating a report
In Concept, if you go to the dialog Options → Preferences → Common... →
Common Preferences in the area recording and activate the option File and enter
a path, the recording function is activated. A file with the name YearMonthDay.log
(e.g. 19980926.log) is created in the directory you have selected which contains a
report of all changes critical to the system (relevant to runtime). This ASCII file
contains a report of the date, time, project name, type of change and if Concept is
protected by a password (Concept Security is active) the name of the user that made
the change. In Concept, you can display the current report using the menu
command File → display Report.
626
840 USE 493 00 September 2001
Concept Security
Access Rights
At a glance
The access rights are set up in a hierarchy; if the user has the rights for a certain
level, he also has the rights to all lower levels.
Access Right
Levels
The following levels are defined (from lowest to highest):
Level
Access rights
Assigned Functionality
1
Read only
The user can view projects offline and online, but cannot
change them. The user can establish a connection
between the programming device and PLC and casn
view variables online.
2
Reset SFC
The same functionality as above and also: Animation
panel can be use for control (e.g. disable steps, disable
transitions, force steps, etc.).
3
Change data
The same functionality as above and also: The user can
change literals online.
4
Force data
The same functionality as above and also: Forcing
variables.
5
Download
The same functionality as above and also: The user can
download the program to the PLC.
Note: To download the configuration, you at least need
the access rights Change configuration.
6
Change program
The same functionality as above and also: The user can
make any changes to the program, but not to DFBs or
EFBs.
7
Change configuration
The same functionality as above and also: The user can
change the PLC configuration.
8
Tools
The same functionality as above and also: The user can
use Concept DFB, Concept EFB and Concept
Converter.
9
Supervisor
The same functionality as above and also: The user can
use Concept Security in Supervisor mode (set up users,
activate/deactivate Concept Security).
840 USE 493 00 September 2001
627
Concept Security
Access Rights
for the Main
Menu File
628
The following table shows the minimum access rights required in Concept for the
menu commands in the main menu File:
Menu commands in the main menu File
Minimum access rights needed
New Project
Change program
Open / Close
Read only
Open / Close
(replacing/deleting EFBs/DFBs; error
messages: FFB does not exist; FFB formula
parameter was changed, DFB was changed
internally)
Change program
Save project
Change data
Save project as....
Change data
Optimize project...
Change program
New section...
Change program
Open section...
Read only
Delete section...
Change program
Section properties... (read)
Read only
Section properties... (write)
Change program
Section Memory
Read only
Import...
Change program
Export...
Read only
Print...
Read only
Printer setup...
Read only
Exit
Read only
840 USE 493 00 September 2001
Concept Security
Access Rights
for the Main
Menu Edit
The following table shows the minimum access rights required in Concept for the
menu commands in the main menu Edit:
Menu commands in the main menu Edit
Minimum access rights needed
Undo: Delete
Change program
Cut
Change program
Copy
Read only
Insert
Change program
Delete
Change program
Select all
Read only
Deselect all
Read only
Goto line... (text languages)
Read only
Goto counterpart (text languages)
Read only
Expand statement (text languages)
Change program
Lookup variables (text languages)
Change program
Search... (text languages)
Read only
Find Next (text languages)
Read only
Replace... (text languages)
Change program
Insert text file... (text languages)
Change program
Save as text file... (text languages)
Read only
Open Column (LL984 Editor)
Read only
Open Row (LL984 Editor)
Read only
Close Column (LL984 Editor)
Read only
Close Row (LL984 Editor)
Read only
DX Zoom... (LL984 Editor)
Read only
Reference Zoom (LL984 Editor)
Read only
Offset References... (LL984 Editor)
Read only
Replace References (LL984 Editor)
Read only
840 USE 493 00 September 2001
629
Concept Security
Access Rights
for the Main
Menu View
Access Rights
for the Main
Menu Objects
The following table shows the minimum access rights required in Concept for the
menu commands in the main menu View (only for FBD, LD and SFC):
Menu commands in the main menu View
Minimum access rights needed
Overview
Read only
Normal
Read only
Expanded
Read only
Zoom in
Read only
Zoom out
Read only
Grid
Read only
Page breaks
Read only
The following table shows the minimum access rights required in Concept for the
menu commands in the main menu Objects:
Menu commands in the main menu
Objects
Minimum access rights needed
Properties (read) (only for FBD, LD and SFC) Read only
Properties (write) (only for FBD, LD and SFC) Change program
630
Select
Read only
Text
Change program
Replace variables...
Change program
Link
Change program
Vertical Link (LD Editor)
Change program
FFB: Last Type (FBD, LD Editor)
Change program
Invert input/output (FBD, LD Editor)
Change program
Insert Macro... (FBD Editor)
Change program
FFB selection... (FBD, LD Editor)
Change program
Replace FFBs... (FBD, LD Editor)
Change program
FFB Show execution order (FBD Editor)
Read only
Reverse FFB execution order (FBD Editor)
Change program
Insert contacts, coils (LD Editor)
Change program
Select column structure (SFC Editor)
Change program
Select row structure (SFC Editor)
Change program
Insert steps, transitions (SFC Editor)
Change program
Insert FFB, Download, Save etc. (IL Editor)
Change program
840 USE 493 00 September 2001
Concept Security
Access Rights
for the Main
Menu Project
Access Rights
for the Main
Menu Online
Menu commands in the main menu
Objects
Minimum access rights needed
Insert FFB, Assignment, Operators,
Declaration etc. (ST Editor)
Change program
Coils, Insert contacts (LL984 Editor)
Change program
The following table shows the minimum access rights required in Concept for the
menu commands in the main menu Project:
Menu commands in the main menu Project Minimum access rights needed
Properties (write)
Change program
Memory Prediction
Read only
PLC configuration
Change configuration
Project Browser (write)
Change program
Execution order... (write)
Change program
Variable declarations... (write)
Change program
ASCII Messages
Read only
Search...
Read only
Trace
Read only
Find Next
Read only
Search Results
Read only
Used references...
Read only
Analyze section
Read only
Analyze program
Read only
Synchronize versions of nested DFBs
Read only
Code generation options...
Supervisor
The following table shows the minimum access rights required in Concept for the
menu commands in the main menu Online:
Menu commands in the main menu Online Minimum access rights needed
Connect... (view only)
Read only
Connect... (change data)
Reset SFC
Connect... (change program)
Download
Connect... (change configuration)
Download
Disconnect...
Read only
Online control panel... (all commands)
Download
840 USE 493 00 September 2001
631
Concept Security
Menu commands in the main menu Online Minimum access rights needed
632
Single sweep trigger
Download
Controller status......
Read only
Online events...
Read only
Online diagnostics (read)
Read only
Online diagnostics (acknowledge entries)
Change data
Record changes
Change program
Object information...
Read only
Memory statistics...
Read only
Download... (IEC Program, 984 Ladder
Logic, ASCII Messages, Status-RAM,
Extended Memory)
Download
Download... (configuration)
Change configuration
Download changes...
Change program
Upload... (Status-RAM, Extended Memory)
Change data
Upload... (IEC Program, 984 Ladder Logic,
ASCII Messages, Status-RAM)
Change program
Upload... (configuration)
Change configuration
Reference Data Editor (read only)
Read only
Reference Data Editor (write)
Change data
Reference Data Editor (force)
Force data
Disabled discretes...
Change data
Activate animation
Read only
Change literals during animation
Change data
Animation Panel (SFC Editor)
SFC Animation Panel
Animation Panel (forcing SFC steps)
SFC Animation Panel
Animation Panel (Resetting an SFC string)
SFC Animation Panel
Save animation (IL, ST Editor)
Read only
Restore animation (IL, ST Editor)
Read only
Direct-mode 984LL Editor... (LL984 Editor)
Read only
power flow (LL984 Editor)
Read only
Power flow with contact state (LL984
Editor)
Read only
Trace (LL984 Editor)
Read only
ReTrace (LL984 Editor)
Read only
840 USE 493 00 September 2001
Concept Security
Access Rights
for the Main
Menu Options
Access Rights
for the Main
Menu Window
The following table shows the minimum access rights required in Concept for the
menu commands in the main menu Options:
Menu commands in the main menu
Options
Minimum access rights needed
Confirmations...
Change program
Preferences → Common...
Change program
Preferences → Graphical Editor...
Change program
Preferences → Analysis...
Change program
Preferences → IEC Extensions...
Change program
Save settings
Change program
Save settings on close
Change program
The following table shows the minimum access rights required in Concept for the
menu commands in the main menu Window:
Menu commands in the main menu
Window
Minimum access rights needed
Cascade
Read only
Slit window
Read only
Tile
Read only
Arrange icons
Read only
Close all
Read only
Messages
Read only
Name of Open Sections
Read only
840 USE 493 00 September 2001
633
Concept Security
Changing Passwords
At a glance
This section describes the steps necessary to change the system administrator’s
password and enter new users.
Changing the
system
administrator’s
password
The following steps are only necessary when you start Concept Security for the first
time after installing Concept. They describe the procedure to changr the system
administrator’s password:
Entry for a user
and the access
rights
634
Step
Action
1
Start access management by double clicking on the Concept Security symbol.
2
Enter the user name for the supervisor and acknowledge with OK. Entering a
password is not necessary in this case.
3
Press the command button Change Password.
4
Enter a password in the text field Password (at least 6, maximum 12
characters).
5
To acknowledge, enter the same password in the text field Acknowledge
Password.
Reaction: If the two entries are identical, the command button OK is enabled.
6
Confirm the change by pressing the OK button
7
Exit access management with the command button Exit.
To enter users, assign access rights and activate Concept Security, follow these
steps:
Step
Action
1
Start access management by double clicking on the Concept Security symbol.
2
Enter a user name with supervisor access rights, enter the password and
acknowledge with OK.
3
Select the register User.
4
Press the command button Add.
5
Enter the user name (at least 2, maximum 16 characters) and acknowledge with
OK.
6
In the list box, select Access Rights: the desired access rights and
acknowledge with the command button OK.
7
Exit access management with the command button Exit.
8
To change the password for the new user, follow the procedure Changing the
system administrator’s password. Enter the user name for the user that was just
defined.
840 USE 493 00 September 2001
Concept Security
Activating Access Rights
Activating
access rights
To activate access rights, follow these steps:
Step
Action
1
Start access management by double clicking on the Concept Security symbol.
2
Enter a user name with supervisor access rights, enter the password and
acknowledge with OK.
3
Select the register Options.
4
Activate the check box Password Required.
5
Exit access management with the command button Exit.
Reaction: Concept, Concept DFB, Concept EFB, etc. can only be started by
authorized users and with the access rights defined for them.
Protecting Projects/DFBs
Introduction
With Concept Security, you can protect projects/DFBs from being changed.
Protected projects can only be loaded on the PLC but cannot be changed. Protected
DFBs can only be used and cannot be changed.
Protecting
projects/DFBs
To protect projects/DFBs, follow these steps:
Step
840 USE 493 00 September 2001
Action
1
Start access management by double clicking on the Concept Security symbol.
2
Enter a user name with supervisor access rights, enter the password and confirm
with OK.
3
Select the Protect register.
4
Press the command button Select and select the project/DFB to be protected.
Confirm with OK.
Reaction: The selected project/DFB will appear in a list box.
5
Select the project/DFB in the list box and press Protect.
Reaction: The dialog box Enter Password is opened.
6
Enter a password for Password and acknowledge it by entering the same
password for Confirm Password. Press OK.
Reaction: The project/DFB is now protected. This is identified by a (c) in the list
box.
7
In order to locate protected projects/DFBs quickly, it is advisable to save the list
in the Program/DFB list box using Save list....
635
Concept Security
Deactivate
protection for
projects/DFBs
636
To deactivate protection for projects/DFBs, follow these steps:
Step
Action
1
Start access management by double clicking on the Concept Security symbol.
2
Enter a user name with supervisor access rights, enter the password and confirm
with OK.
3
Select the Protect register.
4
Press the command button Select and select the protected project/DFB that
should have protection deactivated. Confirm with OK.
Reaction: The selected project/DFB will appear in a list box.
or
Use Load list... to load a previously saved list.
Reaction: All projects/DFBs in the loaded list will appear in the list box.
5
Select the project/DFB from the list box (identified by (c)) and press Unprotect.
Reaction: The Enter Password dialog box is opened.
6
Enter the password for Password and press OK.
Reaction: The project/DFB is no longer protected. This is identified by the (c)
not being shown in the list box.
840 USE 493 00 September 2001
Index
Symbols
=> Assignment, 306, 354
•General information about online functions,
517
’SFCSTEP_STATE’ variable, 223
’SFCSTEP_TIMES’ variable, 222
’Step’-variable, 223
A
Access Rights, 627, 634, 635
Action, 223
Action variable, 224
Actions
Process, 241
Activate dialogs, 86
Actual parameters
FBD, 173
LD, 201
Alias designations
step, 248
transition, 248
Alternative branch, 230
Alternative connection, 232
Animation, 495, 615, 617
General information, 555
IEC section, 556
IL, 315, 318
LL984 section, 557
Section, 555
FBD, 181
LD, 210
B
AC
SFC, 252, 255
ANY Outputs, 351
Archive
DFB, 610
EFB, 610
project, 610
ASCII message editor, 499, 501, 506
Combination mode, 514
Control code, 505
Direct mode, 514
Flush (buffer), 507
Generals, 502
How to continue after getting a warning,
513
How to Use, 510
Message Number, 511
Message text, 512
Offline mode, 514
Repeat, 508
Simulation text, 512
Spaces, 505
Text, 503
User interface, 509, 510
Variables, 504
ASCII messages, 52, 85
Assign instructions
ST, 336
Atrium - INTERBUS controller, 806, 810
Atrium configuration example
INTERBUS controller, 804
i
Index
Atrium first startup
DOS Loader, 940
EXECLoader, 922
Modbus Plus, 922, 940
Available functions in OFFLINE and ONLINE
modes, 69
B
Backplane Expander
Edit I/O Map, 92
Error handling, 93
Generals, 92
Backplane Expander Config
Configure, 91
Block call up
IL, 301
ST, 350
C
Call
FFB, 308
DFB, 300
FFB, 300
Chain jump, 229
Chain loop, 229
Change
coil, LD, 206
contact, LD, 206
FFB, FBD, 177
FFB, LD, 206
Change, set PLC password, 539
Changing signal states of a Located variable
Reference data editor, 491
Close Column
LL984, 372
Closer
LD, 192
Code generation
IL, 312
ST, 358
Code generation
FBD, 180
LD, 209
ii
Coil
change, LD, 206
replace, LD, 206
Coil - negated
LD, 194
Coil – negative edge
LD, 195
Coil – positive edge
LD, 194
Coil - reset
LD, 195
Coil - set
LD, 195
Coils
LD, 193
Cold start, 35
Color definition
INI file, 960
Comments
Data type editor, 481
Derived data type, 481
Communication, 14
Compact configuration
RTU extension, 99
Compact configuration example
Compact controller, 799
Compact first startup
DOS Loader, 903, 937
EXECLoader, 884, 918
Modbus, 884, 903
Modbus Plus, 918, 937
Concept DFB, 389, 425
Concept ModConnect, 841
Integrating new Modules, 845
Removing modules, 846
Use of Third Party Modules in Concept,
847
Concept PLCSIM32, 617
Concept Security, 625, 626, 627, 634, 635
Concept SIM, 615
CONCEPT.INI, 953
general, 954
LD section settings, 959
path for global DFBs, 957
path for help files, 957
print settings, 955
Index
project name definition, 956
reading global DFBs, 957
register address format settings, 956
representation of internal data, 959
settings for online animation, 960
storage of global DFBs during upload,
957
variable storage settings, 956
Configuration, 63
General information, 65
Optional, 84
Unconditional, 71
Configuration example - Quantum
remote control with RIO, 735
Configuration example Atrium
INTERBUS controller, 804
Configuration example Compact
Compact controller, 799
Configuration example Momentum
remote I/O bus, 813
Configuration example Quantum
INTERBUS control, 763
Profibus DP controller, 777
Remote control with DIO, 754
Remote control with RIO (series 800),
743
SY/MAX controller, 769
Peer Cop, 791
Configuration examples, 733
Configuration extensions, 86
Configuration in OFFLINE and ONLINE
mode, 68
General information, 69
Configuration of Peer Cop, 793
Configuration of various network systems,
94
Configurator
Ethernet I/O Scanner, 100
Configure
Backplane Expander Config, 91
INTERBUS, 95
RTU extension, 99
SoftPLC, 97
Ethernet, 98
Profibus DP, 96
Configure Ethernet, 822, 98
Configure INTERBUS system, 95
Configure network systems, 86, 94
Configure Profibus DP system, 96
Configure SoftPLC, 97
Connect PLC
general information, 519
Connecting IEC Simulator (32-bit), 530
Constant scan, 533
Constants, 34
Contact
change, LD, 206
replace, LD, 206
LD, 192, 193
Context help, 673
Controller status, 519
Convert
DFBs, 837
Macros, 837
Projects, 837
Converting RDE templates, 489
Convertion
Modsoft programs, 849
CPU selection for the PLC type, 73
Create
DFB, 405
Macro, 435
Program, 43
Project, 43
FFB, FBD, 176
FFB, LD, 205
Creating a program
IL, 319
Cyclical setting of variables
Reference data editor, 492
D
Data exchange between nodes on the
Modbus Plus network, 87
Data flow, 207
FBD, 178
Data Protection, 51
Data protection in the state RAM, 88
iii
Index
Data type editor, 465, 467, 468
Comments, 481
Elements, 474
Short Cut Keys, 693
Syntax, 473
key words, 475
separators, 480
use of memory, 482
Names, 479
Declaration of variables, 448
Declare
Actions, 241
Step properties, 239
transition, 246
Defining the LD contact connection
settings in the INI file, 959
Defining the number of LD columns/fields
settings in the INI file, 959
Delete
DFB, 611
Macro, 611
Project, 611
Deleting memory zones from the PLC, 535
Deleting PLC contents, 535
Derived data type, 465, 467, 468
Elements, 474
Export, 567
Syntax, 473
Comments, 481
Names, 479
global, 471
key words, 475
local, 471
separators, 480
use of memory, 482
Use, 484
Derived Function Block, 392
LD, 198
FBD, 171
DFB, 389, 392
archive, 610
call, 300
context sensitive help, 403
Create, 405
Delete, 611
Documentation, 601
iv
FBD, 171
global, 394
invocation, 302, 351
LD, 198
local, 394
Protect, 635
Convert, 837
Diagnosis
Transition diagnosis, 260
Diagnostics viewer, 558
Dialog boxes, 668
Dialog interaction
LL984, 369
Direct addresses, 34
Document section options, 605
Documentation
Contents, 602
DFB, 601
Keywords, 608
Macro, 601
Project, 601
layout, 603
DOS Loader
Atrium first startup, 940
Compact first startup, 903, 937
Momentum first startup, 906, 909, 943,
946
Quantum first startup, 900, 934
Startup when using Modbus, 899
Startup when using Modbus Plus, 933
Download changes, 549
Driver for 16 bit application capability with
Windows 98/2000/NT
Virtual MBX Driver, 866
Driver for connection between ModConnect
Host interface adapters and 32 bit
applications with Windows 98/2000/NT
MBX-Treiber, 867
Driver for Modbus Plus Function via TCP/IP
Ethernet MBX Driver, 869
Driver for Remote Operation
Remote MBX Driver, 868
DTY, 465, 467, 468
DX Zoom
LL984, 374
Index
E
Edit
Actions, 241
LL984, 368, 371
SFC, 236
Step properties, 239
SFC, 235
transition, 246
Edit I/O Map
Backplane Expander, 92
Editing local drop, 736, 744, 755, 765, 770,
806, 814, 833
Editing Networks
LL984, 373
Editing remote 800 drop, 751
Editing remote drop, 740, 748, 759, 774, 810
Editing remote drops, 818
Editors, 9
EFB
archive, 610
FBD, 169
LD, 196
Elementary Function
FBD, 169
LD, 196
Elementary Function Block
FBD, 170
LD, 197
Elements
Data type editor, 474
Derived Data Type, 474
EN
FBD, 172
LD, 200
ENO
FBD, 172
LD, 200
EQUAL, 519
Equation network
LL984, 378, 379
Equation network, Syntax and Semantics
LL984, 383
Error handling
Backplane Expander, 93
Establishing the hardware connection
Modbus Plus presettings, 871
Modbus presettings, 876
Ethernet, 530
Ethernet I/O Scanner
Configurator, 100
How to use the Ethernet / I/O Scanner,
104
Ethernet bus system
Momentum configuration example, 821
Ethernet bus system (Momentum), 822
Ethernet MBX Driver
Driver for Modbus Plus Function via TCP/
IP, 869
Ethernet with Atrium, 99
ethernet with Momentum, 99
Ethernet with Quantum, 98
Example
Profibus DP controller, 778
INTERBUS Controller with Atrium, 805
Example of hardware configuration
Remote control with RIO (Series 800),
743
Compact controller, 799
Ethernet bus system, 821
INTERBUS control, 763
INTERBUS controller, 804
Profibus DP controller, 777
remote control with DIO, 754
remote control with RIO, 735
remote I/O bus, 813
SY/MAX controller, 769
Example to Peer Cop, 791
Examples of hardware configuration, 733
Exchange Marking
Macro, 430
EXEC file
CPU 424 02, 117
CPU X13 0X, 117
Momentum, 152
EXEC files, 949
v
Index
EXECLoader
Atrium first startup, 922
Compact first startup, 884, 918
Momentum first startup, 888, 893, 925,
929
Quantum first startup, 880, 914
Startup when using Modbus, 879
Startup when using Modbus Plus, 913
Execution order
FBD, 177
Execution sequence
LD, 207
Section, 38
Export, 561
Derived Data Type, 567
PLC Configuration, 597
Section, 564
Variable, 567
general information, 563
PLC configuration, 596
Exporting located variables, 457
Expressions
ST, 324
Extended memory, 121
F
Factory Link, 594
FBD, 165
Actual parameters, 173
animation, 181
Calling a macro, 444
code generation, 180
data flow, 177, 178
Derived Function Blocks, 171
DFB, 171
EFB, 169
Elementary Function, 169
Elementary Function Block, 170
EN, 172
ENO, 172
execution order, 177
FFB, 169
Function, 169
Function Block, 170
vi
Icon bar, 683
link, 172
loop, 178
online functions, 181
program creation, 184
Short Cut Keys, 695
Text Object, 174
UDEFB, 172
User-defined Elementary Function, 172
User-defined Elementary Function Block,
172
FFB
Call, 308
call, 300
change, FBD, 177
change, LD, 206
create, FBD, 176
create, LD, 205
FBD, 169
insert, FBD, 176
insert, LD, 205
invocation, 302, 351, 354
LD, 196
position, 176, 205
replace, FBD, 177
replace, LD, 206
Function
FBD, 169
LD, 196
Function Block
FBD, 170
LD, 197
Function Block language, 165
G
General, 1
General information, 814
Loading a project, 547
Online functions, 517
Select process information, 543
connect PLC, 519
INTERBUS Controller, 764
INTERBUS Controller with Atrium, 805
Profibus DP Controller, 778
Index
General information about configuration in
OFFLINE and ONLINE mode, 69
General information about hardware
configuration, 65
General information about the online control
panel, 533
General information about the PLC
configuration, 66
General information about the reference
data editor, 488
General to the variables editor, 448
Generals
Backplane Expander, 92
Generals to Peer Cop, 792
Generate
Project symbol, 671
Global data transfer, 795
Global derived data type, 471
Global DFB, 394
Global DFBs
defining the path, 957
INI file, 957
reading, 958
storing, 958
Global macro, 429
H
Hardware
performance, 639
Head setup, 49
Help, 673
Help files
defining the path, 957
How to use the Ethernet / I/O Scanner
Ethernet / I/O Scanner, 104
I
I/O map, 48, 81
Icon bar, 681, 682, 683, 684, 686
Icons, 679, 681, 682, 683, 684, 686, 687,
688, 689, 690
Identifier, 244
IEC
Momentum first startup, 888, 925, 943
IEC conformity, 707
IEC Hot Standby data, 77
IEC section
Animation, 556
IL, 261
Animation, 315, 318
Block call up, 301
Code generation, 312
Creating a program, 319
Instruction, 264, 265
List of Symbols, 687
Modifier, 267
Online functionen, 318
Online functions, 314, 315
Operands, 266
Operators, 269, 276
Short Cut Keys, 693
syntax check, 311
Tag, 272
IL command
Comments, 275
Compare, 293, 294, 296
Declaration, 273
call function block, 302
Compare, 291, 292, 295
DFB invocation, 302
Function call, 308
invert, 285
Reset, 280
Set, 278
VAR...END_VAR, 273
IL operation
addition, 286
Boolean AND, 281
Boolean exclusive OR, 284
Boolean OR, 282
call DFB, 300
call function block, 300
download, 277
jump to label, 297
multiplication, 288
save, 277
subtraction, 287
division, 289
vii
Index
Import, 561
PLC Configuration, 597
Section, 568, 572, 583, 584, 585
Structured variables, 590
Variables, 587, 590, 594
general information, 563
PLC configuration, 596
section, 569, 580
variables, 588
Importing INTERBUS configuration, 810
Importing Profibus DP configuration, 784
INI file, 953
general, 954
LD section settings, 959
path for global DFBs, 957
path for help files, 957
print settings, 955
project name definition, 956
reading global DFBs, 957
register address format settings, 956
representation of internal data, 959
settings for online animation, 960
storage of global DFBs during upload,
957
variable storage settings, 956
Initial step, 221
Insert
FFB, FBD, 176
FFB, LD, 205
Install loadables, 48
Installing the EXEC file, 949
Installing the Modbus Plus driver
Windows 98/2000/NT, 865
Installing the SA85
Modbus Plus Presettings, 860, 863
Windows 98/2000, 860
Windows NT, 863
Instruction
IL, 264, 265
ST, 337
Instruction list, 261
INTERBUS control
Quantum-configuration example, 763
INTERBUS control with Atrium, 805
INTERBUS controller, 764
Atrium configuration example, 804
viii
INTERBUS export settings in CMD, 805
Interface settings in Windows 95/98/2000
Modbus Presettings, 874
Interface settings in Windows NT
Modbus Presettings, 876
Invocation
DFB, 302, 351
FFB, 302, 351, 354
Invoke
Project, 671
J
Jump
SFC, 228
K
Key combinations, 679, 691, 692, 693, 695,
699, 705
key words
data type editor, 475
derived data type, 475
Keys, 679, 691, 692, 693, 695, 699, 705
L
Ladder Diagram, 187
Ladder Logic 984, 363
LD, 187
actual parameters, 201
animation, 210
Calling a macro, 444
Closer, 192
code generation, 209
Coil - negated, 194
Coil – negative edge, 195
Coil – positive edge, 194
Coil - reset, 195
Coil - set, 195
Coils, 193
Contacts, 192, 193
Data flow, 207
derived function block, 198
EFB, 196
Index
elementary function, 196
elementary function block, 197
EN, 200
ENO, 200
Execution sequence, 207
FFB, 196
function, 196
function block, 197
Icon bar, 686
link, 200
loops, 207
online functions, 210
Opener, 192
program creation, 213
Shortcut keys, 699
Text object, 203
UDEFB, 199
user-defined elementary function, 199
user-defined elementary function block,
199
Learn monitoring times
SFC, 257
Libraries, 8
Limitations
LL984, 366
Link
PLC, 518
FBD, 172
LD, 200
List of Symbols, 679, 687, 688
List of Tools, 679, 687, 688
Literals, 34
LL984, 363
Close Column, 372
Combination mode, 387
Dialog interaction, 369
Direct programming, 387
DX Zoom, 374
Edit, 368, 371
Editing Networks, 373
Equation network, 378, 379
Equation network, Syntax and
Semantics, 383
List of Symbols, 688
Momentum first startup, 893, 909, 929,
946
Navigation, 368
Online Restriction, 369
Online Search, 375
Open Column, 372
Open Row, 372
Programming modes, 387
Reference Offset, 371
Reference Zoom, 373
References, 370
Replace References, 375
Requirements, 368
Section, 365
Segement, 365
Select, 372
Short Cut Keys, 705
Subroutines, 376
Trace, 375
Undo, 371
Variables, 370
LL984 processing
speed optimized, 535
LL984 section
Animation, 557
Load reference data, 497
Loadables, 78
CPU 424 02, 123
CPU X13 0X, 123
Atrium, 158
compact, 142
CPU 434 12, 131
CPU 534 14, 131
Loading, 548
Loading a project, 546
General information, 547
Loading firmware, 949
Local derived data type, 471
Local DFB, 394
Local macro, 429
Located variables
Changing signal states in RDE, 491
Lock
Section, 39
ix
Index
Loop
FBD, 178
LD, 207
M
Macro, 425, 428
Calling up from SFC, 441
Calls from FBD, 444
Calls from LD, 444
Create, 435
Delete, 611
Documentation, 601
Exchange marking, 430
context sensitive help, 433
global, 429
local, 429
Convert, 837
Maximum supervision time, 221
MBX Driver
Driver for connection between
ModConnect Host interface adapters and
32 bit applications with Windows 98/
2000/NT, 867
Memory
Memory optimization for Compact CPUs,
139
Memory Optimization for Quantum CPU
X13 0X and 424 02, 114
Optimize, 107, 111
PLC-Independent Memory Optimization,
111
Structure, 107
memory optimization for Momentum
CPUs, 149
memory optimization for Quantum CPU
434 12 and 534 14, 128
optimize, 110
Memory partitions, 47
Memory statistics, 544
Menu commands, 666
Minimum configuration, 47
Minimum supervision time, 222
MMS-Ethernet
specify coupling modules, 86
x
Modbus
Compact first startup, 884, 903
Momentum first startup, 888, 893, 906,
909
Quantum first startup, 880, 900
Startup with DOS Loader, 899
Startup with the EXECLoader, 879
Modbus communication, 49
Modbus network link, 522
Modbus Plus
Atrium first startup, 922, 940
Compact first startup, 918, 937
Momentum first startup, 925, 929, 943,
946
Quantum first startup, 914, 934
Remote MBX Driver, 868
Startup with DOS Loader, 933
Startup with the EXECLoader, 913
Virtual MBX Driver, 866
Modbus Plus Bridge, 528
Modbus Plus network link, 523
Modbus Plus network node, 87
Modbus Plus preferences
installing the Modbus Plus driver in
Windows 98/2000/NT, 865
Modbus Plus Presettings
Installing the SA85, 860, 863
Establishing the hardware connection,
871
Startup, 859
Modbus Presettings
Interface settings in Windows 98/2000,
874
Interface Settings in Windows NT, 876
Transfer problems, 877
Establishing the hardware connection,
876
Startup, 873
ModConnect, 841
MODIFIED, 519
Modifier
IL, 267
Modsoft
Convertion, 849
Function compatibility, 858
References, 855
Index
Momentum - Ethernet Bus System, 833
Momentum - remote controller with local
drop, 814
Momentum configuration example
Ethernet bus system, 821
remote I/O bus, 813
Momentum first startup
DOS Loader, 906, 909, 943, 946
EXECLoader, 888, 893, 925, 929
Modbus, 888, 893, 906, 909
Modbus Plus, 925, 929, 943, 946
N
Names
Datatype editor, 479
Derived datatype, 479
Navigation
LL984, 368
Network Configuration
TCP/IP, 823
Network link
Modbus, 522
Modbus Plus, 523
TCP/IP, 530
NOT EQUAL, 519
O
Objects
SFC, 220
insert, LD, 205
Offline functions in the configurator, 69
Online, 615, 617
SFC, 251
Online animation
INI file, 960
Online Control Panel, 536, 539
general information, 533
Online diagnostics, 558
Online functions, 14, 515
IL, 318
General information, 517
IL, 314, 315
ST, 359
FBD, 181
LD, 210
SFC, 252, 255
Online functions in the configurator, 69
Online help, 673
ONLINE Operation
Presettings, 521
Online Restriction
LL984, 369
Online Search
LL984, 375
Open
Project, 671
Open Column
LL984, 372
Open Row
LL984, 372
Opener
LD, 192
Operands
IL, 266
ST, 325
Operators
IL, 269, 276
ST, 329
ST, 326
Optimize
PLC Memory, 107, 111
PLC Memory Atrium CPUs, 155
PLC Memory Compact CPUs, 139
PLC Memory Momentum CPUs, 149
PLC Memory Quantum CPU X13 0X and
424 02, 114
PLC-Independent Memory Optimization,
111
PLC memory, 110
PLC memory Quantum CPU 434 12 and
534 14, 128
Optional Configuration, 84
xi
Index
P
Page breaks for sections, 605
Parallel branch, 233
Parallel connection, 234
Parameterize ASCII interface, 88
Parameterize interfaces
ASCII interface, 88
Modbus interface, 88
Parameterize Modbus interface, 88
Password Protection, 625, 626, 627, 634,
635
Path for global DFBs
settings in the INI file, 957
Path for help files
settings in the INI file, 957
Peer Cop, 87
Quantum Configuration example, 791
Peer Cop communication, 50
Performance
hardware, 639
PLC family, 639
PLC
Simulating, 613
Status, 663
PLC Configuration, 46, 47, 63
Export, 597
Import, 597
export, 596
General information, 66
icons, 689
import, 596
PLC family
performance, 639
PLC Memory, 107, 110, 111
Atrium CPUs, 155
Compact CPUs, 139
Memory Optimization for Quantum CPU
X13 0X and 424 02, 114
Momentum CPUs, 149
Optimize, 107, 111
PLC-Independent Memory Optimization,
111
Structure, 107
xii
memory optimization for Quantum CPU
434 12 and 534 14, 128
optimize, 110
PLC memory mapping, 77
PLC selection, 72
PLC state, 531, 543
Position
FFB, FBD, 176
FFB, LD, 205
Precondition for unconditional configuration,
72
Presettings for Modbus
Startup, 873
Presettings for Modbus Plus
Startup, 859
Presettings for ONLINE operation, 521
Print
settings in the INI file, 955
Printing sections, 605
Proceed in the following way with the
configuration, 67
Process
Actions, 241
Step properties, 239
transition, 246
Processing
program, 30
project, 30
PROFIBUS
specify coupling modules, 86
Profibus DP controller, 778
Quantum configuration example, 777
Profibus DP export settings in SyCon
example 7, 778
Program
Create, 43
Status, 663
Structure, 29
processing, 30
structure, 30
Program creating
ST, 360
FBD, 184
LD, 213
Programming, 6
Programming languages, 9
Index
Programming modes
LL984, 387
Programs, 34
Project
Create, 43
Delete, 611
Documentation, 601
Invoke, 671
Open, 671
Protect, 635
Structure, 29
archive, 610
processing, 30
structure, 30
Project Browser, 459
Keyboard operation, 462
Mouse operation, 462
Project name definition
settings in the INI file, 956
Project symbol
Generate, 671
Projects
Convert, 837
Protect
DFB, 635
Project, 635
Q
Quantum - INTERBUS controller, 765
Quantum - Peer Cop, 792, 793, 795, 797
Quantum - Profibus DP controller, 780
Quantum - remote controller with DIO, 755,
759
Quantum - remote controller with RIO, 736
Quantum - remote controller with RIO (series
800), 744
Quantum - SY/MAX controller, 770
Quantum Configuration example
Peer Cop, 791
INTERBUS control, 763
Profibus DP controller, 777
remote control with DIO, 754
remote control with RIO, 735
Remote control with RIO (series 800),
743
SY/MAX controller, 769
Quantum first startup
DOS Loader, 900, 934
EXECLoader, 880, 914
Modbus, 880, 900
Modbus Plus, 914, 934
Quantum Profibus DP controller, 784
R
RDE, 487
converting RDE templates, 489
Cyclical setting of variables, 492
general information, 488
RDE editor
toolbar, 690
Reactivate flash save, 539
Reading global DFBs
settings in the INI file, 957
Reference data editor, 487
Changing signal states of a Located
variable, 491
Cyclical setting of variables, 492
Replacing variable names, 497
converting RDE templates, 489
general information, 488
Reference Offset
LL984, 371
Reference Zoom
LL984, 373
References
LL984, 370
Register address format
settings in the INI file, 956
Remote control with DIO
Quantum configuration example, 754
Remote control with RIO, 740
Quantum configuration example, 735
Remote control with RIO (series 800), 748,
751
Quantum configuration example, 743
Remote controller with I/O bus (Momentum),
814, 818
xiii
Index
Remote I/O bus
Momentum configuration example, 813
Remote MBX Driver
Modbus Plus, 868
Replace
coil, LD, 206
contact, LD, 206
FFB, FBD, 177
FFB, LD, 206
Replace References
LL984, 375
Replacing variable names
Reference data editor, 497
Requirements
LL984, 368
RTU extension
Compact configuration, 99
Configure, 99
S
Save To Flash, 536
Scan
constant, 533
Scan times
single, 534
Search and Replace
Variable names and addresses, 450
Searching and pasting
variable names and addresses, 454
Searching and pasting variable names and
Addresses, 454
Section, 38
Animation, 555
Execution sequence, 38
Export, 564
Import, 568, 572, 583, 584, 585
import, 569
LL984, 365
Lock, 39
Status, 663
import, 580
Security, 625, 626, 627, 634, 635
Segement
LL984, 365
Segment manager, 80
xiv
Select
LL984, 372
Select process information
General information, 543
Status and memory, 542
Selecting process information
Status and memory, 542
Separators
data type editor, 480
derived data type, 480
Setting up and controlling the PLC, 532
Setup and control PLC
general information, 533
SFC
’SFCSTEP_STATE’ variable, 223
’SFCSTEP_TIMES’ variable, 222
Action, 223
Action variable, 224
Actions, 241
alternative branch, 230
Alternative connection, 232
animation, 252, 255
Calling up macros, 441
Edit, 236
edit, 235
Icon bar, 684
Identifier, 244
initial step, 221
Jump, 228
Learn monitoring times, 257
Link, 228
maximum supervision time, 221
minimum supervision time, 222
Objects, 220
Online, 251
online functions, 252, 255
Parallel branch, 233
Parallel connection, 234
Short Cut Keys, 695
Step, 221
step delay time, 221
step duration, 221
Step properties, 239
string, 255
Text object, 234
transition, 225, 246
Index
Transition diagnosis, 260
Transition section, 226
Transition variable, 227
waiting step, 221
Short Cut Keys, 679, 691, 692, 693, 695,
699, 705
Simple sequences, 228
Simulate
SPS, 615, 617
Simulation, 613, 615, 617
Single sweeps, 534
Special options, 89
Specific data transfer, 797
Speed optimized LL984- Processing, 535
ST, 321
Assign instructions, 336
Block call up, 350
Code generation, 358
Expressions, 324
Instructions, 337
List of Symbols, 687
Online functions, 359
Operands, 325
Operators, 326, 329
Program creation, 360
Short Cut Keys, 693
syntax check, 357
ST Command
, 334, 334
&, 334
=, 333
AND, 334
Boolean AND, 334
Boolean OR, 335
Commands, 349
ELSE, 341
ELSIF...THEN, 342
Equal to, 333
Less than, 334
Less than or equal to, 334
Not equal to, 334
OR, 335
XOR, 335
ST command
-, 331, 333
(), 330
*, 331
**, 330
+, 332
>, 333
>=, 333
Addition, 332
Assignment, 337
Call function block, 351
CASE...OF...END_CASE, 343
Complement formation, 331
Declaration, 338
Division, 332
Empty instruction, 349
EXIT, 349
Exponentiation, 330
FOR...TO...BY...DO...END_FOR, 344
FUNCNAME, 330
function invocation, 354
Greater than, 333
Greater than/Equal to, 333
IF...THEN...END_IF, 340
MOD, 332
Modulo, 332
Multiplication, 331
Negation, 331
NOT, 331
REPEAT...UNTIL...END_REPEAT, 348
Subtraction, 333
Use of parentheses, 330
VAR...END_VAR, 338
WHILE...DO...END_WHILE, 346
ST commandl
/, 332
Start behavior
variable, 35
Startup
Presettings for Modbus, 873
Presettings for Modbus Plus, 859
Startup with DOS Loader
Modbus, 899
Modbus Plus, 933
xv
Index
Startup with the EXECLoader
Modbus, 879
Modbus Plus, 913
State of the PLC, 531
Status, 519
Status bar, 663
ST-Command
Boolean Exclusive OR, 335
Step, 221
alias designations, 248
Step delay time, 221
Step duration, 221
Step properties
Process, 239
Storage of global DFBs during upload
settings in the INI file, 957
String
control, 255
Structure
PLC Memory, 107
Program, 29
Project, 29, 30
program, 30
Structured text, 321
Structured variables
Import, 590
Subroutines
LL984, 376
SY/MAX Controller, 774
Quantum configuration example, 769
Symax-Ethernet
specify coupling modules, 86
Symbols, 679, 687, 688
Syntax
Data type editor, 473
Derived Data Type, 473
Syntax check
IL, 311
ST, 357
xvi
T
Tag
IL, 272
TCP/IP
Network Configuration, 823
TCP/IP network link, 530
TCP/IP-Ethernet
specify coupling modules, 86
Text Object
FBD, 174
LD, 203
SFC, 234
Tool bar, 681, 682, 683, 684, 686, 690
Tools, 15
Trace
LL984, 375
Transfer problems
Modbus Presettings, 877
Transition, 225
alias designations, 248
declare, 246
process, 246
Transition diagnosis, 260
Transition section, 226
Transition variable, 227
U
UDEFB
FBD, 172
LD, 199
Unconditional Configuration, 71
precondition, 72
Unconditional locking of a section, 494
Undo
LL984, 371
Uploading the PLC, 551
User-defined Elementary Function
FBD, 172
LD, 199
Utilities, 15
Utility program, 15
Index
V
W
Variable
Export, 567
start behavior, 35
Variable Editor
Declaration, 448
Exporting located variables, 457
Search and Replace, 450
searching and pasting, 454
Variable storage
settings in the INI file, 956
Variables, 34
ASCII message editor, 504
Import, 587, 590, 594
LL984, 370
import, 588
Variables editor, 447
General, 448
VARINOUT variables, 397
Various PLC settings, 52
Virtual MBX Driver
Modbus Plus, 866
Waiting step, 221
Warm start, 35
Window, 661
Window elements, 663
Window types, 662
Windows, 659
Check box, 670
Command buttons, 669
Dialog boxes, 668
Lists, 669
Menu commands, 666
Option buttons, 669
Status bar, 663
Text boxes, 669
Window, 661
Window elements, 663
Windows
window types, 662
xvii
Index
xviii