1
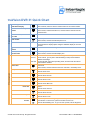
Display modes
truVision DVR 31 Quick Chart
View a single camera from a
multicamera display
Press the numeric button for the camera number.
Click Cameras, and then click the numeric button for the camera number.
View a camera on the spot
monitor
Press and hold a numeric button for two seconds.
Click Function, select the Monitor icon, and then select a camera from the
Cameras menu.
Freeze a camera, return to
live video
Press Pause.
Sequence cameras on the
main monitor
Press Seq.
Click Function, and then click the Sequence icon.
Mouse interface interaction
Move the mouse to display the mouse interface. Position the pointer over the
mouse interface to display options. Drag the date/time display to move the
interface.
Digital zoom in/out on a
camera
Press Enter. Use arrows to navigate on the zoomed camera.
View 4, 9, or 16 cameras at
the same time
Press Display.
Click Function, and then click the Display icon.
KTD-405 interaction
KTD-405
TVR 31
KTD-405
PTZ control
UI
PTZ and keyboard
PTZ operation
Pan/Tilt
Zoom Out
On the KTD-405, ensure the Zone Hub setting is DVMRe Triplex.
On the TVR 31, go to System > RS-485 Setting to setup Device ID/Zone
address and settings.
On the KTD-405, select Zone operating mode, and then enter the TVR 31
Device ID/Zone address.
Press PTZ.
Click Function, and then select the PTZ icon. Cameras > PTZ Setup menu.
Use the arrow buttons.
Click the arrow icons.
Press 8.
Click the Zoom Out icon.
Zoom In
Press 5 for 8-channel units. Press 16 for 16-channel units.
Click the Zoom In icon.
Focus Near
Press 4 for 8-channel units. Press 15 for 16-channel units.
Click the Focus Near icon.
Focus Far
Press 7.
Click the Focus Far icon.
Iris Close
Press 6.
Click the Zoom Out icon.
Iris Open
Press 3 for 8-channel units. Press 14 for 16-channel units.
Click the Zoom In icon.
PTZ Presets
6 Tours
© 2012 UTC Fire & Security. All rights reserved.
Press 1 to open Preset dialog. To go to or save a preset, use the number and
arrow buttons. To start a tour, press the number & “Run Tour”.
Click the Preset Setting icon. To go to or save a preset, use the keypad UI.
P/N 1072983 • REV A • ISS 06MAR12
Video search
Video playback
video archive
Network
Browser operation
Search for a specific date
and time
Press Search. Select Go To date and time. Select Play Data.
Click Function, and then click the Search icon. Select Go To date and time.
Select Play Data.
Search for an Alarm, Event,
or Motion segment of video
Press Search. Select Event List. Select Event, and then press Enter to play
back video.
Click Function, and then click the Search icon. Select Event List. Select Event,
and then press Enter to play back video.
Calendar view of recorded
video
Press Search. Select Calendar Mode. Use the arrow keys to select a date and
time. Select Play Data to play back video.
Click Function, and then click the Search icon. Select Calendar Mode. Select a
date on the calendar and time on the timeline. Click Play Data to play back
video.
Play back the last minute of
available video
In Live mode, press Playback .
Click Function, and then click the Playback icon.
Frame Reverse or Frame
Advance video playback
In Playback mode, press Pause. Press Left Arrow to perform Frame Reverse
and Right Arrow to perform a Frame Advance. Select Pause again to play back
video at normal speed.
In Playback mode, click Pause. Click the Frame Reverse icon to perform
Frame Reverse and the Frame Advance icon to perform a Frame Advance.
Click Pause again to play back video at normal speed.
Quick Archive (Live mode
only)
Insert the backup device into the DVR. Press Archive once. Press Archive
again to begin archiving the most recent video onto the media.
Insert the backup device into the DVR. Click Function, and then click the
Archive icon. Click Quick Archive to begin archiving the most recent video onto
the media.
Archiving a segment
(Playback mode only)
Insert backup device into the DVR. In playback mode, press Archive once to
set the archive marker at the start of the segment. Press Archive again to set
the archive marker at the end of the segment.
Enabling Bandwidth
Throttle
UI
Go to Network > IP Advanced. Set the Bandwidth Throttle value. The TVR 31
throttles network data to the specified value.
Setting up DDNS
UI
Ensure that the device is connected to the Internet. Go to Network > DDNS
Setting. Enter a unique host name. If the host name is not available, the device
automatically assigns a host name. The resulting domain is ****.ddns-tvr.net.
PTZ operation
You must have a protocol selected for the PTZ camera in the Cameras > PTZ
setup screen.
Bidirectional audio
Click the Microphone icon and speak into a microphone connected to your PC.
Enabling Live Dual Stream
mode
Click the Bandwidth icon to enter Live Dual Streaming mode. This mode is
ideal for lower bandwidth networks.
Zooming video in/out
Right-click a video tile. Use the mouse wheel to zoom in or out.
Download Archive Player
Click the Download Player icon.
Play back to a specific
date/time
Click Playback. Select a date and time in the Playback screen.
Search for video events
Click Search. Double-click an entry to play back video.
Display modes
Click the 2x2, 3x3, 4x4 icons to select the respective layout.
Windows Vista and 7 users
Add the DVR’s IP address to the browser’s list of trusted sites for complete
browser functionality. See Chapter 5 of the truVision DVR 31 User Manual.
Legend
UI
P/N 1072983 • REV A • ISS 06MAR12
Front panel or IR remote control method
Mouse method
User interface