1
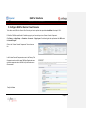
QAS for Salesforce Install Guide INTEGRATION AND CONFIGURATION INTRODUCTION This document provides an overview of installing, integrating and configuring address verification software for Salesforce. It will take you through the standard installation, integration and configuration process. If you have any questions that are not answered in the product documentation, please email [email protected]. Formatted Table BEFORE STARTING THIS DOCUMENT YOU SHOULD HAVE COMPLETED THE FOLLOWING: Received a license key from Experian QAS. If you have not yet received this, please contact your sales representative. If you do not yet have a sales representative and would like to try this product please give us a call at 888-707-8822. Page 1 QAS for Salesforce Install Guide INTEGRATION AND CONFIGURATION TABLE OF CONTENTS 1. 2. Installing QAS for Salesforce .............................................................................................................................................................................................................................. 3 1.1. “Get it Now” on the AppExchange ..................................................... 3 1.2. Installation ............................................................................................. 4 1.3. Choose security level........................................................................... 5 1.4. Deployment ........................................................................................... 5 Integration and Configuration .............................................................................................................................................................................................................................. 6 2.1. 3. Security and Permissions .................................................................... 6 Setting up QAS in your Salesforce Standard Objects ..................................................................................................................................................................................... 8 3.1. Adding QAS Custom Fields to Your Objects .................................... 9 3.2. Add QAS Fields to Account Layout ................................................. 16 3.3. Configure QAS point of capture Interactive Verification ............... 17 3.3. Add a custom trigger to maintain custom fields ............................. 18 3.4. Add Custom trigger which will enable the Web-To-Object functionality 19 3.5. Configure QAS Typedown Address Verification ............................ 20 4. Setting up QAS in your Salesforce Custom Objects ...................................................................................................................................................................................... 21 5. Configure QAS for Service Cloud Console .....................................................................................................................................................................................................26 6. Product Registration ...........................................................................................................................................................................................................................................28 7. Turn on QAS for Salesforce Address, Email and Phone Verification .......................................................................................................................................................... 30 8. Mapping Configurations and Country selection .............................................................................................................................................................................................. 32 8.1. Administration: .................................................................................... 32 8.2. Country selection section .................................................................. 36 8.3. Typedown Advanced Settings……………………………………… …37 8.4. My account 9. 37 Error reporting - add a custom trigger to report any errors from the application ........................................................................................................................................38 Appendix A: QAS Output Field Definitions ................................................................................................................................................................................................................ 41 Appendix B: Return Codes and Footnotes ............................................................................................................................................................................................................... 44 Page 2 QAS for Salesforce INTEGRATION AND CONFIGURATION 1. Installing QAS for Salesforce 1.1. “Get it Now” on the AppExchange In order to install QAS for Salesforce you need to find it on the AppExchange or use the following link to go directly to the AppExchange listing: https://sites.secure.force.com/appexchange/listingDetail?listing Id=a0N30000003JF80EAG Click “Get It Now” and login with your salesforce.com credentials. You must use an account with administrator access to install this app. After logging in you may be routed back to the AppExchange listing. If this occurs just click “Get It Now” again and choose your environment. You will be taken to the Package Installation Details page. This page lists all of the components of the QAS package. Click Continue Page 3 QAS for Salesforce INTEGRATION AND CONFIGURATION 1.2. Installation You will be presented a pop-up window as shown on the screenshot on the right. Please check the “Yes, grant access to these third-party web sites” checkbox to continue. You will be taken to the “Package Installer” page. These settings give the app API access to standard objects. Access will still be constrained by the user’s profile. Click Next Page 4 QAS for Salesforce INTEGRATION AND CONFIGURATION 1.3. Choose security level Select “Grant access to all users” as shown on screenshot. You can choose either “Grant access to all users” to give all users access to QAS or “Select security settings” and specify access level by profile. If you select “Select security settings” you will need to make sure all users you want to access are given access in order to use the app. Once you have made your selection. Click Next The package is ready to be installed. Leave the “Ignore Apex test failures” checkbox unchecked. Click Install to continue. Ensure that you only click Install once as the installation can take several minutes. 1.4. Deployment When you see the screenshot on the right, installation is complete. Click on the Deploy Now button to deploy the package. Page 5 QAS for Salesforce INTEGRATION AND CONFIGURATION You will be taken to the Deploy Package page. Click Deploy Congratulations, you have just installed QAS for Salesforce. Now you will have to integrate and configure the app to work with your Salesforce sObjects 2. Integration and Configuration 2.1. Security and Permissions QAS for Salesforce is designed to have three types of users which are controlled using Public Groups: QAS Admin - QAS Admin users have full access to the entire functionality of the product including app configuration settings. You will typically have one Administrator user who will configure the application settings. For the app to function properly you must have at least one QAS Admin user. QAS Batch - QAS Batch users are allowed to run batch jobs, review results and commit cleaned records. QAS Batch users do not have access to the administration panel and thus cannot modify app configuration settings. You only need to setup QAS Batch users if you want users to have this level of access to QAS. All other users - Users who have not been assigned either the QAS Admin or QAS Batch public group will be able to verify addresses on entry but cannot access the QAS tab for batch address cleaning. If a user who is not in the QAS Admin or QAS Batch Public Groups tries to access the QAS tab they will see an “Authorization Failed” message. Therefore, we recommend hiding this tab from users who are not in the QAS Admin or QAS Batch Public Groups. Page 6 QAS for Salesforce INTEGRATION AND CONFIGURATION 2.1.1. Assigning QAS Admin rights To assign QAS Admin rights: open Setup → Administration Setup → Manage Users → Public Groups then click New. For Group Name enter “QAS Admin” then choose Users for Search and use the arrows to associate your QAS administrators with the group. Please be aware that you have to associate individual users with the group, associating another group for example WILL NOT work. Finally hit Save. 2.1.2. Assigning QAS Batch rights To assign QAS Batch rights: Open Setup→ Administration Setup → Manage Users→ Public Groups then click New. For Group Name enter QAS Batch then choose Users for Search and use the arrows to associate your QAS Batch users with the group. Please be aware that you have to associate individual users with the group, associating another group for example WILL NOT work. Finally hit Save. Page 7 QAS for Salesforce INTEGRATION AND CONFIGURATION 3. Setting up QAS in your Salesforce Standard Objects QAS may be used to clean addresses in standard sObjects as well as in custom sObjects. You will need to configure QAS for each sObject in which you would like to clean addresses, emails or phones. The instructions below outline how to configure QAS for the Account sObject. The same process described below may be used to configure QAS in another sObjects. - Extend your sObject with three custom fields for each address, email and phone: Validation status of type Text with a size of 100. QAS uses this field to maintain the current validation status (Verified, Invalid etc.) of the address. Validation timestamp of type DateTime. QAS uses this field to store the timestamp of the last validation for this address, email or phone. Footnotes of type Text with a size of 100. This is an optional field. QAS uses this field to store informational codes returned by the address, email and phone correction function. - Add the custom fields you created to your page layout. - Create a custom trigger which is responsible for maintaining the Validation status of the addresses, emails and phones you want to clean with QAS. - Create an after update trigger on the sObjects for which you wish to use the Web-to-Object functionality. - Add the “QAS Console Helper” home page component to your home page layout if you wish to enable point of capture address, email or phone verification in the Salesforce Console, the Service Cloud Console or if you wish to use the Typedown address correction engine. - Add the “QAS Apex Session” custom link home page component to your home page layout if you wish to enable the Typedown engine. - Create and add to your layout the Custom Visual Force page which redirects to the address, email and phone validation Visual Force page. - Create the address, email and phone validation Visual Force page. Page 8 QAS for Salesforce INTEGRATION AND CONFIGURATION 3.1. Adding QAS Custom Fields to Your Objects The following process outlines how to add QAS custom fields to your “Accounts” object. The process can be repeated for any standard or custom object in your Salesforce instance, simply change the address/email/phone type in the field name (ex: Shipping, Mailing, Other).To add the custom fields: Go to Setup → App Setup→ Customize → Accounts and then click on the Fields link. Click on the New button near the bottom of the page below all fields. 1. Choose the field type Select DateTime for “Data Type” then click Next Page 9 QAS for Salesforce INTEGRATION AND CONFIGURATION 2. Enter the details Enter “QAS Shipping Address Validation Timestamp” for “Field Label”, “ValidationTimestamp_ShippingAddress” for “Field Name” and then click Next. Note: “Shipping” can be changed to Mailing, Other, etc as appropriate for your object it may also be left blank if the address is not classified. 3. Establish field-level security The next page is: “Establish field-level security” Click Next Page 10 QAS for Salesforce INTEGRATION AND CONFIGURATION 4. Add to page layouts You will be taken to the last page. Click Save & New. You will be taken to a page entitled “New custom field” which allows you to specify the type of information that the next custom field will contain. 5. Choose the field type Select Text for field type and click Next Page 11 QAS for Salesforce INTEGRATION AND CONFIGURATION 6. Enter the details Enter “QAS Validation Status Shipping Address” for “Field Label”, “ValidationStatus_ShippingAddress” for “Field Name”, and “100” for “Length”. Note: “Shipping” can be changed to Mailing, Other, etc as appropriate for your object. Click Next 7. Establish field-level security. You will be taken to Step 3: Establish field-level security. Click Next Page 12 QAS for Salesforce INTEGRATION AND CONFIGURATION If you would like to add the optional Address Footnotes field click Save & New otherwise click Savе 8. Choose the field type Select Text for field type and click Next 9. Enter the details Enter “QAS Footnotes Shipping Address” for “Field Label”, “Footnotes_ShippingAddress” for “Field Name”, and “100” for “Length”. Note: “Shipping” can be changed to Mailing, Other, etc as appropriate for your object. Click Next Page 13 QAS for Salesforce INTEGRATION AND CONFIGURATION 10. Establish field-level security. You will be taken to Step 3: Establish field-level security. Click Next 11. Add to page layouts click You will be taken to the last page “Add to page layouts” click Save. You now need to repeat steps 1-11 to add the two custom fields for the Billing address. The custom fields for the Billing address should be the following: Field Label: QAS Billing Address Validation Timestamp Field Name: ValidationTimestamp_BillingAddress Field Type: DateTime Label: QAS Validation Status Billing Address Name: ValidationStatus_BillingAddress Field Type: Text Length: 100 If you would like to keep the informational codes returned by the address correction function (see Appendix B) which resulted during address validation please add the Address Footnotes field as described below as well: Label: QAS Footnotes Billing Address Name: Footnotes_BillingAddress Field Type: Text Length: 100 Page 14 QAS for Salesforce INTEGRATION AND CONFIGURATION You need to repeat steps 1-11 to add the two custom fields for the Phone, Fax and Email if you would like to perform email and phone validation. The custom fields for the Phone should be the following: Field Label: QAS Phone Validation Timestamp Field Name: ValidationTimestamp_Phone Field Type: DateTime Field Label: QAS Validation Status Phone Field Name: ValidationStatus_Phone Field Type: Text(100) The custom fields for the Fax should be the following: Field Label: QAS Fax Validation Timestamp Field Name: ValidationTimestamp_Fax Field Type: DateTime Field Label: QAS Validation Status Fax Field Name: ValidationStatus_Fax Field Type: Text(100) The custom fields for the Email should be the following: Field Label: QAS Email Validation Timestamp Field Name: ValidationTimestamp_Email Field Type: DateTime Field Label: QAS Validation Status Email Field Name: ValidationStatus_Email Field Type: Text(100) Page 15 QAS for Salesforce INTEGRATION AND CONFIGURATION 3.2. Add QAS Fields to Account Layout Click Setup, go to App Setup → Customize → Accounts → Page Layout. For editions higher than professional click Edit next to the Account Layout. Drag-and-drop the QAS fields from the top panel to the Address Information section of the page layout. There are two QAS fields for each address/email/phone type that need to be added to the layout: QAS Validation Status {type}: Provides the validation status; QAS {type} Timestamp: Provides the last time the address,email or phone was validated; QAS Footnotes {type}: Provides additional information which resulted during validation and it is optional; These fields should be placed below the corresponding address/email/phone on the page layout. In the case of the Accounts object for addresses, Billing Address and Shipping Address per the screenshot: If you would like to use email and phone validation please place the email and phone fields below the corresponding email/phone. If you have configured email or phone validation please add the corresponding QAS fields for those as well. Page 16 QAS for Salesforce INTEGRATION AND CONFIGURATION 3.3. Configure QAS point of capture Interactive Verification To be able to use “Interactive” verification mode on entry you need to add a special Visual Force page to each Object Layout that you use to edit your Objects. This special Visual Force page redirects to the validation page which you will also need to create. If you are going to configure “Interactive” verification mode for the standard objects (Accounts, Contacts, Contracts or Leads) as is the case with Accounts QAS provides you with default implementations of the two Visual Force pages which you may use. 3.6.1 Add the “QASAccountsOverride” Visualforce page to your Accounts layout. Click Setup, go to App Setup → Customize → Accounts → Page Layout. For editions higher than professional click Edit next to the Account Layout. Select the Visualforce pages item and drag the CAAccountsOverride component somewhere on the page. Once it is placed, hover over it and click on the Properties icon which looks like a wrench in the upper right corner of the component. Page 17 QAS for Salesforce INTEGRATION AND CONFIGURATION A pop up with the Visualforce properties will appear. Enter 0 for Width in pixels and 0 for Height in pixels. Show scrollbars and show label should be left unchecked. Then click OK. Click Save to save the layout changes. 3.3. Add a custom trigger to maintain custom fields 1. The next step is to Install the before insert and before update trigger. This trigger allows QAS to maintain the custom fields you have just created. Go to Setup → App Setup → Customize → Accounts → Triggers 2. Click “New” to create a new trigger. 3. Paste the following code: trigger Account_CA_BIBU on Account(before insert,before update) { QAS_NA.RecordStatusSetter.InvokeRecordStatusSetterConstrained(trigger.new,trigger.old,trigger.IsInsert,2); } Page 18 QAS for Salesforce INTEGRATION AND CONFIGURATION Click Save to save the trigger 3.4. Add Custom trigger which will enable the Web-To-Object functionality Note: This should only be done for sObjects for which you would like to use the Web-To-Object functionality. 1. The next step is to Install the after insert and after update trigger. This trigger is responsible for doing the Web-To-Object verification which validates addresses, emails or phones for records inserted or updated by external sources. Go to Setup → App Setup → Customize → Accounts → Triggers 2. Click “New” to create a new trigger. 3. Paste the following code trigger Account_CA_AIAU on Account(after insert, after update) { QAS_NA.CAAddressCorrection.ExecuteCAAsyncForTriggerConfigurationsOnly(trigger.new); } Click Save to save the trigger Page 19 QAS for Salesforce INTEGRATION AND CONFIGURATION 3.5. Configure QAS Typedown Address Verification Note: This step is only necessary if you are going to use the QAS Typedown functionality. Please note that Typedown is only supported for Address verification and not for email and phone at the moment. Go to App Setup → Customize → Home → Home Page Layouts. For editions higher than professional click Edit next to the home page layout for your user. Check the checkbox next to the QAS Console Helper and QAS Apex Session component and click Next On the last page click Save. Page 20 QAS for Salesforce INTEGRATION AND CONFIGURATION Go to App Setup → Customize→ User Interface Check the checkbox “Show Custom Sidebar Components on All Pages” under the Sidebar section and click Save. 4. 4. Setting up QAS in your Salesforce Custom Objects Repeat the steps in the section “Add QAS Fields to Accounts Layout” for each sObject for which you would like to use QAS. Use the following custom fields template: QAS Validation Status { type}: Provides the validation status QAS { type} Timestamp: Provides the last time the address/email/phone was validated QAS Footnotes {type}: Provides additional information which resulted during validation Replace {type} above with the name of the address/email/phone for which you are adding the fields. For example for “Leads” replace {type} with “Address” for the address fields, replace {type} with “Phone” for the Phone fields, replace {type} with “Fax” for the Fax fields. For “Contacts” you have to create two set of fields one for “Mailing Address” and one for “Other Address” replacing {type} with “MailingAddress” and “OtherAddress” accordingly. If you would like to enable phone validation you have to create additional 4 set of fields one for “Home Phone”, one for “Mobile Phone”, one for “Other Phone” and one for “Fax” replacing {type} with “HomePhone”, “MobilePhone”, “OtherPhone” and “Fax” accordingly. If you would like to enable email validation you have to create an additional set of fields for “Email” replacing {type} with “Email”. Repeat the steps in the section “Add custom trigger which maintains the custom fields” for each sObject for which you would like to use QAS. Use the following custom trigger template: Page 21 QAS for Salesforce INTEGRATION AND CONFIGURATION trigger {sObject}_CA_BIBU on {sObject} (before insert,before update) { QAS_NA.RecordStatusSetter.InvokeRecordStatusSetterConstrained(trigger.new,trigger.old,trigger.IsInsert,2); } Replace {sObject} above with the name of the sObject. For example for Leads replace {sObject} with Lead, etc. If you are setting up a custom object please remove the trailing “__c” and the starting “{package_prefix}__” in case there is a package prefix from the Name. Repeat the steps in the section “Add Custom trigger which will enable the Web-To-Object functionality” for each sObject for which you would like to use the Web-to-Object functionality. Use the following custom trigger template: trigger {sObject}_CA_AIAU on {sObject}(after insert, after update) { QAS_NA.CAAddressCorrection.ExecuteCAAsyncForTriggerConfigurationsOnly(trigger.new); } Replace {sObject} above with the name of the sObject. For example for Leads replace {sObject} with Lead, etc. If you are setting up a custom object please remove the trailing “__c” and the starting “{package_prefix}__” in case there is a package prefix from the Name. For each sObject for which you would like to use QAS Interactive point of capture. Please follow the steps below: Create VisualForce Pages Go to App Setup → Develop→ Pages Click New to create a new Page Enter “CA{sObject}Override” for both Label and Name. Paste the following code into the Visualforce Markup area: Page 22 QAS for Salesforce INTEGRATION AND CONFIGURATION <apex:page showHeader="false" sidebar="false" standardController="{sObject} " extensions="QAS_NA.CARedirectToValidationPageController" action="{!DetermineRedirect}"> <QAS_NA:CAAddressValidationRedirectComponent IsUpdated="{!IsUpdated}" IsNewRecord="{!IsNewRecord}" IsAddress="{!IsAddress}" IsEmailPhone="{!IsEmailPhone}" ValidateOnlyIfInConsoleView="{!ValidateOnlyIfInConsoleView}" SFSessionId="{!SFSessionId}" RecordId="{!RecordId}" sObjectName="{!SObjectName}" RNextUrl="{!RNextUrl}" QASToolsSmallURL="{!QASToolsSmallURL}"> </QAS_NA:CAAddressValidationRedirectComponent> </apex:page> Replace {sObject} above with the name of the sObject. For example for Leads replace {sObject} with Lead, etc. If you are setting up a custom object please remove the trailing “__c” and the starting “{package_prefix}__” in case there is a package prefix from the Name. Click Save to save the Page You finally need to set the security and enable the profiles of the users who will be using QAS for this page. Click New to create a new Page Enter CAValidationPage_{sObject} for both Label and Name. Note: It is important that the naming convention is kept and the page is named exactly CAValidationPage_{sObject} for the sObject. Paste the following code into the Visualforce Markup area: Page 23 QAS for Salesforce INTEGRATION AND CONFIGURATION <apex:page sidebar="false" tabStyle="{sObject } " controller="QAS_NA.CARedirectToValidationPageController" > <apex:form > <QAS_NA:CAAddressesComponent id=”caAddressComponent” Results="{!Results}" EmailPhoneResults="{!EmailPhoneResults}" Results1="{!Results1}" HasResults1="{!HasResults1}" Results2="{!Results2}" HasResults2="{!HasResults2}" HasErrorOccured="{!HasErrorOccured}" sObjectName="{!ButtonMessageText}" ExecuteAddressCorrectionAndMoveNext="{!ExecuteAddressCorrectionAndMoveNext}" IsInConsole="{!IsInConsole}" WarningMessage="{!WarningMessage}" IsEmailPhoneValidation="{!IsEmailPhoneValidation}"> </QAS_NA:CAAddressesComponent> < QAS_NA:AsyncAddressValidationTriggerComponent DoAddressValidation="{!DoAddressValidation}" /> </apex:form> </apex:page> Replace {sObject} above with the name of the sObject. For example for Leads replace {sObject} with Lead, etc. If you are setting up a custom object please remove the trailing “__c” and the starting “{package_prefix}__” in case there is a package prefix from the Name. Click Save to save the Page You finally need to set the security and enable the profiles of the users who will be using QAS for this page. Repeat step 3.6.1 to add the “CA{sObject}Override” Visual Force page you created above to the layouts of your custom sObject. Page 24 QAS for Salesforce INTEGRATION AND CONFIGURATION Page 25 QAS for Salesforce INTEGRATION AND CONFIGURATION 5. Configure QAS for Service Cloud Console To be able to use QAS in the Service Cloud Console you have to perform the steps below in addition to the steps 3.1-3.6. 5.1 Add the “QASAccountsOverride” Visualforce page to your Accounts layout as a Custom Console Component. Click Setup, go to App Setup → Customize → Accounts → Page Layout. For editions higher than professional click Edit next to the Account Layout. Click on the “Custom Console Components” link as shown on the In the Custom Console Components screen in the Primary Tab Components section add the page QASHomePageLoader as a right side component and set its width to 2 pixels as shown on the screenshot: Finally click Save. Page 26 QAS for Salesforce INTEGRATION AND CONFIGURATION 5.2 If you have integrated QAS with custom sObjects or if you have customized the QAS validation pages you will need to create the “CARefreshConsole” Visualforce page for QAS to be able to work in the Console. This will be a second “CARefreshConsole” Visualforce page in addition to one that is created by the install. To create the “CARefreshConsole” follow the steps below: Click Setup, go to App Setup → Develop → Pages. Click New to create a new page. Enter CARefreshConsole for both Label and Name. Paste the following code into the Visualforce Markup area: <apex:page > <QAS_NA:CARefreshConsoleComponent > </QAS_NA:CARefreshConsoleComponent> </apex:page> Click Save to save the Page. Page 27 QAS for Salesforce INTEGRATION AND CONFIGURATION 6. Product Registration To register the application, click on the QAS tab. If you do not see the QAS tab in your tabs panel click on the “+“ sign to see all available tabs, the QAS tab should be listed there. If you would like to add it to your list of tabs click on the “Customize My Tabs” button and move it to the selected list of tabs then press “Save”. . Page 28 QAS for Salesforce INTEGRATION AND CONFIGURATION Once the QAS tab is clicked you will see the QAS registration screen pictured below. If you see the “Authorization failed” page and you are using Internet Explorer, your browser may be blocking cookies from https://online.qas.com. Look on the bottom status bar for a small red circle containing a {picture of red circle} and double click it. A window showing the blocked content will be shown. Right click on https://online.qas.com and choose “Always allow cookies from this web site” option. If you see the “Authorization failed” page and are not blocking cookies make sure you are a member of the “QAS Admin” public group. Enter your application key and click “Submit”. Your application key should have been provided after completing your purchase. If you do not have it or need it to be re-sent please contact QAS Support. DO NOT CLICK CREATE AN ACCOUNT WITH QAS IF YOU HAVE ALREADY PURCHASED. To proceed, you must be a member of the QAS Admin public group. To configure your settings click on the QAS tab then the Administration tab. This screen is used to configure your “Verify on Entry” and “Country Selection” settings. Page 29 QAS for Salesforce INTEGRATION AND CONFIGURATION 7. Turn on QAS for Salesforce Address, Email and Phone Verification BY DEFAULT VERIFICATION ON ENTRY IS TURNED OFF. YOU MUST TURN IT ON BY MAKING THE APPROPRIATE CONFIGURATIONS UNDER EACH OBJECT. Validate on Entry Settings If you would like to turn on QAS Address verification please check the Validate on Entry check box and the Address Capture & Verification check box. If you would like to turn on QAS Email verification please check the Validate on Entry check box and the Email Verification check box. If you would like to turn on QAS Phone verification please check the Validate on Entry check box and the Phone Verification check box. You then need to configure separately address verification on a per a layout basis as shown on the screenshot. The following sections explain more detail about the available admin settings. Object Options “Validate on Entry” - Recommended setting: ON. Allows to turn QAS verification on or off for the selected sObject. Validate on entry validates addresses, emails and phones immediately after they are entered manually in Salesforce. You can turn the “Validate on Entry” feature on/off by checking/unchecking the checkbox for each sObject. Because address validation is controlled on a per layout you will also have to configure address, email and phone validation for each layout as well. Page 30 QAS for Salesforce INTEGRATION AND CONFIGURATION “Web-to-Object” – Recommended setting: ON for the Leads object and OFF for the other objects. The Web-to-Object allows you to turn on/off address, email and phone validation for records created by Salesforce’s “Web-to-Lead” function or other external sources. The validation is done automatically when the object is created and does not require user interaction. In order for this to work properly you must make sure all mandatory fields in the sObject are populated as a part of your Webto-Lead or external entry process. “UPPER Case Addresses” – allows users to turn on/off functionality which controls upper casing of all characters in the address. Layout Options – Under the layout options you may set the QAS Address Verification and Email and Phone Verification behavior per a layout and configure the “Auto Accept” functionality. Options: “Passive” – Enables silent validation and the user will not be prompted for verification. If an address is verified by QAS or it matched to the building level but the required sub-building information could not be validated the address becomes "Verified" in all other cases the address will be "Invalid". “Typedown Only” – Uses the Typedown engine for both new and edited records. “Interactive Only” – Uses the Interactive address verification for both new and edited records. “Iteractive + Typedown” – Uses the Typedown engine for new records and the Interactive address verification for edited records. “Confirm Verified Matches” – Recommended setting: OFF. “Confirm Verified Matches” allows users to turn on/off automatic accepting of addresses, emails and phones validated by QAS. If you turn this functionality on you will experience a refresh on the page after you click on the “Save” button on a record. After the page has refreshed your address, email and phone will have undergone validation by Experian QAS and is automatically saved provided that it was successfully validated. If you turn this functionality off or if your address, email or phone was not validated by QAS after saving you will be presented with a page where you can decide whether to commit the address, email or phone as validated by Experian QAS or keep your original. Page 31 QAS for Salesforce INTEGRATION AND CONFIGURATION “Confirm Unmatche” – Recommended setting: ON. “Confirm Unmatched” allows users to turn on/off automatic accepting of addresses, emails and phones which could not be validated by QAS. If you turn this functionality on you will experience a refresh on the page after you click on the “Save” button on a record provided that QAS was not able to validate it. If you turn this functionality off you will be presented with a page where you can decide whether to commit the address, email or phone or modify it and submit for validation again. “Default Typedown Country” – You may choose the default dataset of the Typedown engine by selecting either US or CAN for the United States of America and Canada. You may change the default dataset from the Typedown window. In the “Verification Section” you may turn on or off Address, Email and Phone validation by checking or unchecking the corresponding checkbox. 8. 8. Mapping Configurations and Country selection Configuring QAS for Salesforce requires two steps: Mapping Configurations and setting Country Selection. 8.1. Administration: The administration tab is used to configure existing or create new mapping configurations, modify the valid country values and manage your QAS account. Page 32 QAS for Salesforce INTEGRATION AND CONFIGURATION Mapping Configuration The Address Mapping Configuration section in QAS for Salesforce allows you to edit, create or delete mapping configurations. To add new mapping configuration click the “New” button and follow the steps of the wizard as explained below. To edit a mapping configuration click the “Edit” button and follow the steps of the wizard as explained below. Mapping Wizard steps: 8.1.1. General Settings: sObject: If you are creating a new address mapping you will have to choose the sObject for which you are going to create the mapping. Name: The name of the configuration has to be unique. You may edit the configuration name if you are editing an existing configuration or enter a name for the new configuration if you are creating a new address mapping configuration. Attempt to standardize unmatched addresses: attempts to standardize the address in case it cannot be validated; Type: The type marks the configuration as being Address, Email or Phone. If you have selected “Address” you will be presented with the following two additional options: Output preferred city name (e.g., "New York" instead of "New York City"): Uses preferred mailing city name. Output alias street name (e.g., "6th Ave" instead of "Avenue of the Americas”): Uses alias street name, overriding preferred value. Click Next Page 33 QAS for Salesforce INTEGRATION AND CONFIGURATION 8.1.2. Input mapping You will be taken to the Input Mapping step. The “Input mapping” is used to identify/map the different address components (City,State, ZIP/PostalCode etc.) of your address or email and phone components if the configuration is of type “Email” or “Phone” respectfully. Use the select list on the left side to select an address field and the select list on the right side to select the type of address data stored in the field as shown on the picture below. You will have to create a mapping at least for “Address Line 1”, for “City”, “State” or “ZIP/Postal Code” and for “Country” if your configuration is of type “Address” and for “Email” and “Phone” if your configuration is of type “Email” or “Phone” respectfully. It is crucial to create your mappings correctly in order for QAS to be able to validate your address, email or phone. You may use the “Add another mapping” link to create a new mapping if needed. Click “Next” to move to the next page of the wizard. Page 34 QAS for Salesforce INTEGRATION AND CONFIGURATION 8.1.3. Output mapping You will be taken to the Output Mapping step. The output mapping allows you to configure how you would prefer to retain QAS output information. On the left side are the available fields from your sObject and on the right side are the available QAS output fields. You may refer to Appendix A for a complete reference of the QAS output fields. It is required that you map at least the “Last Validated” field and the “Validation Status” field. The “Last Validated” field is a Date/Time field which stores the timestamp of the last validation attempt by QAS. The “Validation Status” filed is a Text field which stores the current validation status. Please refer to: “Setting up QAS for your Salesforce objects” for more information about the required system fields. Click Next 8.1.4. Review and confirm settings You will be shown a summary of the address mapping configuration that you have just created or edited. Please review it and when finished, click “Save Settings” to the left at the bottom of the page. You will return to the Administration tab. Page 35 QAS for Salesforce INTEGRATION AND CONFIGURATION 8.2. Country selection section The “Country Selection” criteria are used to determine whether an address, should be validated or not. Only addresses with a country that matches the criteria in this list will be checked (values are not case sensitive). To add a country value enter the value in the text box next to the “Add” button and click “Add”. To delete a country value select the value in the list and click “Delete” To restore to default values click “Restore defaults” To validate addresses for which country value has not been specified, check the “Include addresses with an {empty} country” checkbox. To validate addresses regardless of the country, check the “Do not filter by country” checkbox. 8.3. Typedown advanced settings QAS does not recommend changing these settings without first contacting QAS. You may use these settings to manage the Address Validation Session token for Typedown. The address validation session token allows you to use Typedown for a period of 24 hours and it is refreshed every 24 hours via a batch job. You may use the settings in this section to customize the schedule. Manage Batch Job Automatically – if this checkbox is checked the Typedown session token batch job will be automatically scheduled for you when you have at least one Layout configuration configured with a value for Address options of “Typedown” or “Interactive+Typedown”. If you would like to manage the session token manually please uncheck Page 36 QAS for Salesforce INTEGRATION AND CONFIGURATION this checkbox. Job Starts At – if you have checked the “Manage Batch Job Automatically” checkbox you can configure the time the batch job will run via choosing a value for hour, minute and am/pm from the drop-downs. Current job status – the current status of the refresh session token batch job is shown in this table. Refresh Session Token – you may refresh your session token manually by pressing this button. A green message “Your session token was successfully refreshed” will appear bellow to indicate that you have successfully refreshed your session token. 8.4. My account The “My account” section at the bottom allows you to manage your account with Experian QAS, and gives you access to documentation. You can register another QAS application key from this section. Congratulations! QAS for Salesforce is now set up and ready to use. For instructions on how to use the application please refer to the user manual. Page 37 QAS for Salesforce INTEGRATION AND CONFIGURATION Error reporting - add a custom trigger to report any errors from the application In cases of unexpected behavior and errors the application will not interrupt your user’s regular workflow. If there is an error the application will not attempt validation within the next 5 minutes. If you would like to be notified of any errors you have to create a custom trigger which will report the errors in an email to you. By default, the code below will send a carbon copy of an email to QAS distribution list, so that QAS can proactively be aware about the issues. If you do not want the trigger to send an email to QAS, please comment out the lines in the code that are highlighted in red. To create the error reporting trigger follow the steps below: 1. Go to Setup → App Setup → Create → Objects 2. Click on the “QAS Account” sObject. 3. In the Triggers section click on the “New” button to create a new trigger. 4. Paste the following code: trigger QASErrorReporting on QAS_NA__QAS_CA_Account__c (after update) { for (Integer currentRecord = 0; currentRecord < trigger.new.size(); ++currentRecord) { QAS_NA__QAS_CA_Account__c newRecord = trigger.new[currentRecord]; QAS_NA__QAS_CA_Account__c oldRecord = trigger.old[currentRecord]; if((newRecord.QAS_NA__LastErrorMessage__c != null || oldRecord.QAS_NA__LastErrorMessage__c != null) && newRecord.QAS_NA__LastErrorMessage__c != oldRecord.QAS_NA__LastErrorMessage__c) { String[] ccAddresses = new String[1]; ccAddresses[0] = '[email protected]'; Formatted: Font color: Red Page 38 QAS for Salesforce INTEGRATION AND CONFIGURATION String[] toAddresses = new String[1]; toAddresses[0] =<YOUR EMAIL IN SINGLE QUOATES>; String subject = 'Error occurred in the QAS validation software'; String message = 'Hello,\nYour QAS for Salesforce.com integration is experiencing an error. Please contact Experian QAS support with questions at http://support.qas.com/contact.htm.\n\nScript-thrown exception: ' + newRecord.QAS_NA__LastErrorMessage__c; Messaging.SingleEmailMessage mail = new Messaging.SingleEmailMessage(); mail.setToAddresses(toAddresses); mail.setCcAddresses(ccAddresses); mail.setSubject(subject); mail.setUseSignature(false); mail.setHtmlBody(message); // Send the email Messaging.sendEmail(new Messaging.SingleEmailMessage[] { mail }); } } private static void TestAll() { QAS_NA__QAS_CA_Account__c accountSObject = new QAS_NA__QAS_CA_Account__c( QAS_NA__LicenseKey__c='NO_SUCH_KEY' , QAS_NA__IsNullOrEmptyValidCountry__c = true , QAS_NA__ValidCountryValues__c = '\'US\',\'United States\', \'Canada\', \'CAN\'' , QAS_NA__TriggerRecordsLimit__c = 2 , QAS_NA__InteractiveIntervalFromLastUpdate__c = 1000 , QAS_NA__InteractiveInvokeIntervalFromLastUpdate__c = 200 , QAS_NA__NumberOfFailedAttempts__c = 0 , QAS_NA__LastFailedValidation__c = System.now() , QAS_NA__ValidationTypes__c = 15 , QAS_NA__ValidationAttemptsPeriodInMinutes__c = 5); insert accountSObject ; accountSObject.QAS_NA__LastErrorMessage__c = 'Test error message'; update accountSObject; } } Page 39 Formatted: Font color: Red QAS for Salesforce INTEGRATION AND CONFIGURATION Please note that by default the error reporting trigger is made to cc Experian QAS. Click Save to save the trigger Replace the phrase <YOUR EMAIL IN SINGLE QUOATES> with the email where you would like to receive the errors in single quotes. For example ‘[email protected]’. Page 40 QAS for Salesforce INTEGRATION AND CONFIGURATION Appendix A: QAS Output Field Definitions Label Primary Number Pre-Directional Street Name Street Suffix Post-Directional Secondary Name Secondary Number City State/Province ZIP+4/Postal Code Description The house/building number for the street (Primary number). For example, [445] Hamilton Ave. A directional abbreviation specified before the street name in an address. For example, 445 [N] Hamilton Ave. The actual name of the street. For example, 445 N [Hamilton] Ave. The abbreviation of the type of street. Examples include: Ave, St, Blvd etc. A directional abbreviation specified after the street name in an address. For example, 445 Hamilton Ave [S]. The abbreviation of an apartment, suite, or other secondary housing name. Examples include: Apt, Ste, Fl, Rm etc. The apartment/suite number of the address. For example, 445 Hamilton Ave Ste [608] . Address city name. State abbreviation (USA) or province code (Canada). 5-digit Zone Improvement Plan code, plus the 4-digit extension (USA) or Postal Code (Canada). Size 10 2 28 4 2 4 8 28 2 10 Page 41 QAS for Salesforce INTEGRATION AND CONFIGURATION ZIP/Postal Code +4 (Addon) LOT Number DPC Record Type Address Line 1 Address Line 2 Last Line LACS Carrier Route PMB Recipient Urbanization County Name County Number LACS Code TIGER/Line ID Geo Match Flags Census Tract Number Census Block Number Latitude Latitude To Longitude 5-digit Zone Improvement Plan code (USA). 4-digit ZIP code extension which determines a more precise location within the ZIP. Line of Travel code composed of a four digit sequence number and an associated code (“A” or “D” for ascending and descending respectively). Denotes the direction that mail is delivered in for an address. Delivery point code. This field contains the last two digits of the house/box number, or if the match is made to a highrise record, the secondary unit number representing the delivery point information to form the 11-digit or delivery point barcode (DPBC). Possible values: “00” through “99” or spaces. Record type code. F = Firm, G = General Delivery, H = Highrise, P = PO Box, R = Rural Route/Highway Contract, S = Street Primary delivery address line. Contains the house number, pre-directional, street name, street suffix, post-directional, secondary abbreviation, and secondary number. For example, “445 N Hamilton Ave Ste 608”. Second delivery address line. This line is usually reserved for dual addresses. The house/building number for the street (Primary number). For example, [445] Hamilton Ave Locatable Address Conversion System indicator Code assigned by the USPS to a group of addresses to aid mail delivery within a ZIP code. Consists of a carrier route type and carrier route code. For example, “C001”. Private mail box number Name of individual, company, building, apartment complex, shopping center, or other entity identifier Urban development within a geographic area. This is an additional delivery line input for addresses in Puerto Rico. Name of county that the address belongs to. County is a local level of government below the state. County number within a state Locatable Address Conversion System indicator US Census Bureau's TIGER/Line ID record number US Census Bureau flags: contains Core Business Statistical Area (CBSA) indicator (5 bytes), followed by FIPS congressional district code (7 bytes), rest is filler US Census Bureau's tract number US Census Bureau's block number Latitude of the given location End range of the latitude (ZIP+4 level geocoder matching only) Longitude of the given location 5 4 4 2 1 64 64 64 1 4 12 40 28 25 3 1 200 20 120 80 220 220 240 Page 42 QAS for Salesforce INTEGRATION AND CONFIGURATION Longitude To Geo Addon End Geo Addon Start Geo Return Code Geo Error Codes End range of the longitude (ZIP+4 level geocoder matching only) Geocoder Addon End Range Geocoder Addon Start Range Geocoder Return Code Geocoder Error Codes Return Code Return value of the address correction function Address Footnotes ErrorDesc Country Name One or more informational codes returned by the address correction function ErrorDesc Country name: ''United States of America” or ''Canada” Delivery point check digit is a number that is added to the sum of the other digits in the DPBC to yield a number that is a multiple of ten. Delivery Point Validation indicators: Confirmation (1 byte), CMRA (1 byte), False Positive (1 byte), No-Stat (1 byte). Delivery Point Validation footnotes Delivery Point Validation vacant indicator Locatable Address Conversion System code SuiteLink indicator. Country code: ''US'' or ''CA” Country code: ''USA'' or ''CAN'’ Indicates the timestamp of the last address validation attempt Indicates the validation status (Verified, Could not be verified or User Preferred) of the address The address match type returned by QAS Formatted corrected address Formatted original address SuiteLink indicator Allotment lot Allotment number Building level Primary building name Secondary building name Primary department Secondary department Dependent thoroughfare name Dependent locality Check Digit DPV Indicators DPV Footnotes DPV Vacant Indicator LACS Return Code SuiteLink indicator Two character ISO country code Three character ISO country code Last Validated Validation Status Match Type Corrected Address Original Address SuiteLink Indicator Allotment Lot Allotment Number Building Level Building Name Building Name 2 Department 1 Department 2 Dependent Thoroughfare Name Dependent Locality 240 80 80 10 30 10 (int) 30 255 25 1 5 12 1 2 1 2 3 (date) 30 20 500 500 1 60 60 60 60 60 60 60 60 60 Page 43 QAS for Salesforce INTEGRATION AND CONFIGURATION Dependent Thoroughfare Descriptor Double Dependent Locality Floor Locality Postal Delivery Type Number Postal Delivery Type Postal District Street Type Suffix Sub Building Name Sub Building Number Suburb Thoroughfare Descriptor Thoroughfare Name Unit Unit Alpha Num Id Unit Alpha Num Type Unit Textual Id Unit Textual Type Delivery Line 3 Delivery Line 4 Delivery Line 5 Delivery Line 6 Dependent thoroughfare descriptor Double dependent locality Floor Locality Postal delivery type number Postal delivery type Postal district name Street type suffix Sub building name Sub building number Suburb Thoroughfare descriptor Thoroughfare name Unit name Unit alphanumeric identifier Unit alphanumeric type Unit textual identifier Unit textual type Delivery Line 3 Delivery Line 4 Delivery Line 5 Delivery Line 6 60 60 60 60 60 60 60 60 60 60 60 60 60 60 60 60 60 60 60 60 60 60 Appendix B: Return Codes and Footnotes The following return codes and footnotes are returned by the address verification service. To determine whether a foreign address has been encountered, users must check the first 2 bytes of the Footnotes string for a match against a foreign country code below. "30" – Canadian address Page 44 QAS for Salesforce INTEGRATION AND CONFIGURATION If the first two bytes match a foreign country code, the return code and remaining codes in the Footnotes strings will correspond to the codes particular to that country, as described in the tables below. If a foreign country code does not exist in the first two bytes of the Footnotes string, all return codes and footnotes will match the descriptions for the USPS codes provided in the section below. USPS Return Codes The Return Code is the integer value returned at completion of the validation process. Return Code 1 >1 <0 -1 -3 -99 Description Match found; four-digit ZIP add-on assigned. Multiple possible results, but no exact match made. Number of results is the value of return code. Multiple possible results only when footnote contains 11; no exact match made. Number of results is the absolute value of the return code. When footnote contains 07, delivery point validation failed; five-digit ZIP returned. When footnote contains 05 - PO Box, Rural Route or Highway contract; street name normalized though no match found. No match found, and the original input has been returned. USPS Footnotes The footnotes field generated by the address verification service is a 30-character string in which 2-byte codes are placed going from left to right. Each 2-byte number refers to a specific code as detailed below. Footnote Description Address is Default Highrise or Rural Route. 00 This address matched to a default delivery record in a multi-unit building, or a rural/highway contract record with route number in the street name field. See No match in 5-digit ZIP Code; match found in finance number. 01 Input ZIP code was incorrect. Correction applied successfully using city/state information provided. ZIP Code add-on not found; replaced with correct add-on. 02 Input +4 code was incorrect. Correction applied successfully. Page 45 QAS for Salesforce INTEGRATION AND CONFIGURATION 04 05 06 07 08 09 10 11 12 13 14 15 16 18 19 20 City name corrected. Input city name was incorrect. Correction applied successfully. PO Box, Rural Route or Highway Contract address standardized. Input address was a box, rural route or highway contract address in a non-standard form (e.g., P.O.Box, or POBOX). Standardization performed successfully. Street number not precise match in street range; e.g. alphanumeric 10A within numeric range 1-99. Input address contained extra characters in the street number. These characters were retained in the output. Address non-deliverable; no add-on assigned. Delivery Point Validation (DPV) check failed. Secondary number is not precise match in secondary range; e.g. alphanumeric 10A within numeric range 1-99. Input address contained extra characters in the secondary number. These characters were retained in the output. Address is Delivery Point Alternate. City is part of multiple counties. More than one county name is listed for the address city name. Preferred county name is returned. No match; failed CASS multi-component rule; number of results is absolute value of return code. Several problems were found in the input address. Unable to match using CASS logic. Number of near matches returned is equal to the absolute value of the return code. All highrise records returned Multiple records containing secondary ranges (apartment low – high numbers) returned. This footnote always appears with footnote “00”. Military address. Street address with appended apartment number. Input address contained secondary information that could not be resolved through the CASS process. Secondary number was retained in the output. No match Preferred city name used. Input city name was changed to a preferred city name for this address. DPV False Positive. DPV process stopped, ZIP+4 codes will no longer be assigned until DPV has been reenabled. Each subsequent call will return footnote “21”. No match; address found in Early Warning System database. Street name modified. Input street name was incorrect. Correction applied successfully. Page 46 QAS for Salesforce INTEGRATION AND CONFIGURATION 21 22 23 24 30 31 40 41 42 43 44 45 46 47 48 49 DPV processing already stopped; please contact IST to restart the module. See footnote “18”. LACSLink processing already stopped; please contact IST to restart the module. See footnote “24”. No match; no correlation between city and unique ZIP Code; 5-digit ZIP Code deleted. Input record contained a unique ZIP code, input city did not match the ZIP. According to CASS rules for handling unique ZIP codes, 5-digit ZIP code was deleted. LACSLink False Positive. LACSlink process stopped, ZIP+4 codes will no longer be assigned until LACSlink has been reenabled. Each subsequent call will return footnote “22”. Foreign address. Geocoder files missing or corrupt. Multiple matches; incorrect post-directional. Input address contained an incorrect post-directional abbreviation. Unable to correct automatically. Candidate records returned. Multiple matches; incorrect pre-directional. Input address contained an incorrect pre-directional abbreviation. Unable to correct automatically. Candidate records returned. Multiple matches; incorrect street suffix. Input address contained an incorrect street suffix. Unable to correct automatically. Candidate records returned. ZIP Code is PO Box or Rural Route only. ZIP code contains no street records. Match is made to a PO Box, route or general delivery record. Apparent extraneous information removed. Some input information was considered unnecessary and was removed. Street suffix modified. Input address contained an incorrect street suffix. Correction applied successfully. Street directional modified. Input address contained an incorrect pre- or post-directional abbreviation. Correction applied successfully. Address requires apartment/suite number; none input. Missing secondary number. Multiple matches; would resolve with pre-directional. Input address contained no pre-directional abbreviation. Unable to correct automatically. Candidate records returned. Multiple matches; would resolve with post-directional. Page 47 QAS for Salesforce INTEGRATION AND CONFIGURATION 50 51 52 57 58 59 60 61 64-81 Input address contained no post-directional abbreviation. Unable to correct automatically. Candidate records returned. Multiple matches; would resolve with street suffix. Input address contained no street suffix. Unable to correct automatically. Candidate records returned. Address does not require apartment/suite; none input. This address matched to a default delivery record in a multi-unit building, or a rural/highway contract record with route number in the street name field. (See footnote “00”.) No secondary information was required. Address does not require apartment/suite; incorrect input. This address matched to a default delivery record in a multi-unit building, or a rural/highway contract record with route number in the street name field. (See footnote “00”.) Secondary information was provided, but incorrect. Address not standardized; not enough information provided. Address not standardized; invalid ZIP Code. Input ZIP code was incorrect. Unable to standardize address. Address not standardized; belongs to US territory. Unable to standardize address. State abbreviation indicates that the address belongs to one of the territories. Internal error House number not on street. Input street number was incorrect. Internal error Canada Post Return Codes Return Code 1 0 <0 Description A non-ambiguous match was made to a Canadian address. No match could be made for this address, nor could any near matches be found. No exact match could be resolved for this address. The number of near matches returned is equal to the absolute value of the return code. Canada Post Footnotes Page 48 QAS for Salesforce INTEGRATION AND CONFIGURATION Footnote 01 02 03 05 06 07 08 09 11 12 13 14 15 16 18 19 20 21 23 24 25 26 27 28 29 30 31 32 33 34 35 Description Valid address Correctable address – reformatted Invalid / noncorrectable address Civic address Civic address with route service PO Box address Route Service address General Delivery address Large Volume Receiver address type A Large Volume Receiver address type B Large Volume Receiver address type C Large Volume Receiver address type D Large Volume Receiver address type E Large Volume Receiver address type F Municipality incorrect Postal code invalid or missing and matching address has wrong municipality Invalid province name / abbreviation Postal code invalid Civic number out of range Missing unit number Invalid unit number Invalid civic suffix Invalid street Street name typo Unit number in front of civic without a dash Civic suffix with space Invalid unit designator Street type missing / invalid Street type typo Street direction missing Street direction invalid Page 49 QAS for Salesforce INTEGRATION AND CONFIGURATION 36 37 39 40 42 43 44 45 47 49 50 51 52 53 55 56 58 59 61 62 63 64 65 66 67 68 69 70 71 72 Street direction typo Route information missing on civic route service address PO Box number out of range PO Box identifier typo Route type identifier typo Route type incorrect Route Service number incorrect and missing postal code Route Service number incorrect General Delivery indicator typo Delivery Installation type typo Delivery Installation name missing Delivery Installation type missing Delivery Installation name incorrect Delivery Installation info missing Pound sign removed Postal code missing Warning - address invalid for corresponding LVR postal code - address deemed valid based on postal code Warning - correctable address for corresponding LVR postal code Warning - address invalid for corresponding rural postal code Warning - correctable address for corresponding rural postal code - address deemed valid based on postal code Point of Call excluded address Postal Code changed from Rural to Urban Postal Code corrected Postal Code LDU changed Postal Code FSA changed Valid Questionable - incoming address has no unit number and there is no unit number in CPC Valid Questionable - incoming address does not contain a recognizable delivery mode Valid Questionable - incoming address delivery mode does not exist in Postal Code Processed using Point of Call (PoC) Address Data Processed using Postal Code Address Data (PCAD), even though Point of Call (PoC) data was requested Page 50