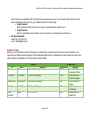
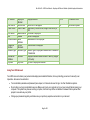
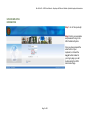
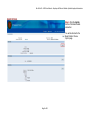
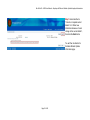
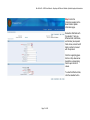
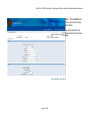
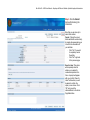
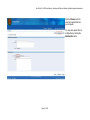
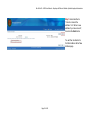
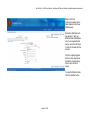
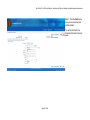
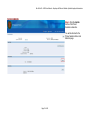
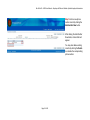
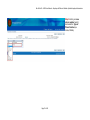
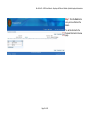
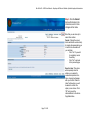
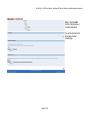
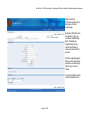
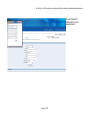
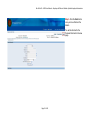
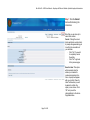
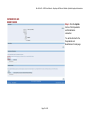
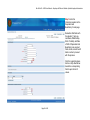
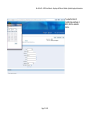
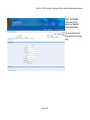
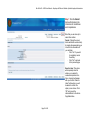
1
Doc Ref: eUP – HRIS User Manual – Employee Self-Service Module: Update Employee Information INTRODUCTION This manual was developed for the purpose of guiding Human Resource Development Officers in using, navigating and utilizing the HRIS. As the country’s premier University, UP aims to adapt new technology to make our operations more effective and more efficient. With HRIS, all HR operations across the entire UP system will be consolidated into one secure system accessible to both the employees and Human Resource Department Offices (HRDOs). This will not only help both the HR and the employee to easily access employee record and information across CUs; it will also lessen the paperwork and the effort exerted in passing information from one campus to another. Though HR Information is exclusive to HRD Offices, some information are needed to be shared to other offices such as Accounting (for Payroll). Through the HRIS, shared processes will be integrated for easier transactions for both offices sharing the same information. Symbols and Conventions Used in This Manual To highlight the codes and Uniform Resource Locators (URLs), they are written in monospace font. They will be found in this manual like this: hris.up.edu.ph It is also important to be familiar with the symbols used both in the HR Information System and this manual. Some of the buttons and symbols used are listed below: Icon Description Search Button: This button indicates that a field has a List of Values, which contains universal values for that field. However, there are fields which may have a List of Values, but also accept free texts. There are also some fields with a List of Values that strictly follow the universal List of Values. Page 2 of 41 Doc Ref: eUP – HRIS User Manual – Employee Self-Service Module: Update Employee Information Calendar Button: These icons usually appear in fields that require dates. Clicking this icon will redirect you to another window that contains a calendar. Select the correct month, day and year from the calendar and click OK to apply that date. Delete Button: Click this icon located beside a field, if you want to remove that entry from the section (e.g. Phone Number) GETTING STARTED Technical Guidelines For the system to run properly, note that is important to check on the following technical requirements: Browsers The HRIS Self Service runs best on the following web browsers: Mozilla Firefox Safari Internet Explorer (version 10 and below only) Google Chrome Operating Systems HRIS works on all major operating systems e.g. Windows7, Windows 8, Linux, Mac OS X Internet Connection Though HRIS works on any operating system and browser, you cannot log-in or access any of its features without an internet connection. As long as you are connected to an internet connection (e.g. campus/office network, home broadband, DSL, USB dongle, etc.), you can access HRIS anywhere around the globe. Any connectivity problem should be referred to your local IT offices (CU-/office-based) or internet service provider (PLDT, Globe, Smart, etc.). In cases when your concerns are HRISrelated, refer to the local HRIS Technical assigned to your CU. User Accounts Page 3 of 41 Doc Ref: eUP – HRIS User Manual – Employee Self-Service Module: Update Employee Information User accounts are usually distributed by the HR personnel assigned to your unit. If you’re having trouble using the issued account credentials, simply click the Log-In Assistance Option in the log-in page. Forgot Password Enter username and instruction on how to reset your password will be emailed to you. Forgot Username Enter the email address associated with your account and your username will be emailed to you. eUP System Helpdesk Contact no.: (02) 376-3100 e-mail: [email protected] Definition of Terms Before you can fully utilize the features of the system, it will also help to remember that there may be terms and features in the system that use different labels as opposed to the international standard terms. The table below shows the basic terms used in the system and their counterparts used in UP operations outside of HRIS. TERMS Title UP Title HRIS Meaning Ex. Dr.; Ms.; Prof.; Atty. etc First Name First Name First Name of Employee Middle Name Middle Name Middle Name of Employee Surname Last Name Last Name of Employee Name Extension Suffix Ex. I, II, III, Jr. Sr. Page 4 of 41 ACRONYMS Abbreviation Meaning HRDO Human Resource Development Office HRIS Human Resource Information System URL Uniform Resource Locator CSC Civil Service Commission HRD Human Resource Department Doc Ref: eUP – HRIS User Manual – Employee Self-Service Module: Update Employee Information UP Number Date of Birth Place of Birth Civil Status Sex E-mail Address Telephone Number Address Type Residential Address Zip code Employee Number Date of Birth Place of Birth Employee Number CU's Constituent Units Date of Birth of Employee Determine by Town/Province, Region and Country of Birth Civil status of employee Gender of Employee Valid address of the employee IS Information System Marital Status Gender Email Address Phone Phone number of employee Numbers Address Type Address Type of employee's address either Permanent or Residential Address Employee's address determine with Town/City, Region and Country Zip Code Zip Code of employee's address Using Your HRIS Account Your HRIS account contains your personal and employment-related information, hence, protecting your account’s security is an imperative. Here are a few reminders: Your credentials (username and password) are unique, but it can also be used to log-in to other information systems. Do not share your log-in credentials to anyone. Make sure to lock your computer or log out your account before leaving your computer. The system may have an auto-log out option, but there may still be an instance in between that may allow other people to view and use your profile. Change your password regularly, and make sure you report any suspicious encounters in your account. Page 5 of 41 Doc Ref: eUP – HRIS User Manual – Employee Self-Service Module: Update Employee Information UPDATE EMPLOYEE INFORMATION Page 6 of 41 Doc Ref: eUP – HRIS User Manual – Employee Self-Service Module: Update Employee Information UPDATE EMPLOYEE INFORMATION Step 1. Go to hris.up.edu.ph Step 2. Enter your username and password to log-in the HR Information System. Once you have pressed the enter button of your keyboard, or clicked the Log in button located in your log-in page, you will be directed to the HRIS User Home Page. Page 7 of 41 Doc Ref: eUP – HRIS User Manual – Employee Self-Service Module: Update Employee Information Step 3. On the menu tab on your left, select the UP Employee Self-Service folder, then click the Personal Information folder. You will be directed to the Personal Information page. Page 8 of 41 Doc Ref: eUP – HRIS User Manual – Employee Self-Service Module: Update Employee Information BASIC DETAILS Step 4. Click the Update button of the Basic Details subsection. You will be directed to the Basic Details: Choose Option page. Page 9 of 41 Doc Ref: eUP – HRIS User Manual – Employee Self-Service Module: Update Employee Information Step 5. Select whether to “Correct or complete current details” or to “Enter new information because of a real change to the current details”, then click the Next button. You will then be directed to the Basic Details: Update Information page. Page 10 of 41 Doc Ref: eUP – HRIS User Manual – Employee Self-Service Module: Update Employee Information Step 6. Enter the information needed on the Basic Details: Update Information page. Remember that fields with the asterisk (*) sign (ex. Effective Date, Last Name, and Gender) are required fields, hence, cannot be left blank in order to proceed with the process. Click the magnifying glass button or drop down arrow beside the corresponding field to open the list of values. To enter the Effective Date, click the calendar button. Page 11 of 41 Doc Ref: eUP – HRIS User Manual – Employee Self-Service Module: Update Employee Information Step 7. Click the Next button once you have entered your basic details. You will be directed to the Personal Information: Review page. Page 12 of 41 Doc Ref: eUP – HRIS User Manual – Employee Self-Service Module: Update Employee Information Step 8. Click the Submit button after checking the information. Note that you can also opt to select other actions: Cancel. Clicking the cancel button will delete current activity. A prompt will appear asking you to confirm the cancelation of your activities. - Click “Yes” if you wish to completely cancel the activity. - Click “No” to go back to the previous page. Save for Later. This option will temporarily store the entries you’ve made for revisions/completion in the future. A prompt will appear after you click the “Save for Later” button where you will be asked to confirm the option you’ve chosen. Click “OK” and you will be redirected back to the Home Page/Main Menu. Page 13 of 41 Doc Ref: eUP – HRIS User Manual – Employee Self-Service Module: Update Employee Information Since the changes require the approval, you may attach electronic copies of supporting documents, as proof of validity and references for your manager or supervisor. Click the Add button under the Additional Information – Attachments subsection. You will be directed to the Add Attachment page. Page 14 of 41 Doc Ref: eUP – HRIS User Manual – Employee Self-Service Module: Update Employee Information Click the Browse button to select and upload files from your computer. You may also upload other or multiple files by clicking the Add Another button. Page 15 of 41 Doc Ref: eUP – HRIS User Manual – Employee Self-Service Module: Update Employee Information After clicking the Submit button, you will receive a Confirmation message that your request has been submitted for your Manager’s approval. Page 16 of 41 Doc Ref: eUP – HRIS User Manual – Employee Self-Service Module: Update Employee Information MAIN AND OTHER ADDRESSES Step 4. Click the Update button of the Main Address subsection. You will be directed to the Main Address: Choose Option page. Page 17 of 41 Doc Ref: eUP – HRIS User Manual – Employee Self-Service Module: Update Employee Information Step 5. Select whether to “Correct or amend the address” or to “Enter a new address if you have moved”, then click the Next button. You will then be directed to the Main Address: Enter New Address page. Page 18 of 41 Doc Ref: eUP – HRIS User Manual – Employee Self-Service Module: Update Employee Information Step 6. Enter the information needed on the Main Address: Enter New Address page. Remember that fields with the asterisk (*) sign (ex. Effective Date and Address Line 1) are required fields, hence, cannot be left blank in order to proceed with the process. Click the magnifying glass button or drop down arrow beside the corresponding field to open the list of values. To enter the Effective Date, click the calendar button. Page 19 of 41 Doc Ref: eUP – HRIS User Manual – Employee Self-Service Module: Update Employee Information Step 7. Click the Next button once you have entered your address details. You will be directed to the Personal Information: Review page. Page 20 of 41 Doc Ref: eUP – HRIS User Manual – Employee Self-Service Module: Update Employee Information Step 8. Click the Submit button after checking the information, and no more changes will be made. Note that you can also opt to select other actions: Cancel. Clicking the cancel button will delete current activity. A prompt will appear asking you to confirm the cancelation of your activities. - Click “Yes” if you wish to completely cancel the activity. - Click “No” to go back to the previous page. Save for Later. This option will temporarily store the entries you’ve made for revisions/completion in the future. A prompt will appear after you click the “Save for Later” button where you will be asked to confirm the option you’ve chosen. Click “OK” and you will be redirected back to the Home Page/Main Menu. Page 21 of 41 Doc Ref: eUP – HRIS User Manual – Employee Self-Service Module: Update Employee Information After clicking the Submit button, you will receive a Confirmation message that your request has been submitted for your Manager’s approval. Page 22 of 41 Doc Ref: eUP – HRIS User Manual – Employee Self-Service Module: Update Employee Information PHONE NUMBERS Step 4. Click the Update button of the Phone Numbers subsection. You will be directed to the Phone Numbers: Enter and Maintain page. Page 23 of 41 Doc Ref: eUP – HRIS User Manual – Employee Self-Service Module: Update Employee Information Step 5. Enter a new phone number record by clicking the Add Another Row button. After clicking the Add Another Row button, a blank field will appear. You may also delete existing records by clicking the Delete icon beside the corresponding phone number. Page 24 of 41 Doc Ref: eUP – HRIS User Manual – Employee Self-Service Module: Update Employee Information Step 6. Enter your new phone number record, and select the Type of Phone Number (ex. Home, Mobile). Page 25 of 41 Doc Ref: eUP – HRIS User Manual – Employee Self-Service Module: Update Employee Information Step 7. Click the Next button once you have filled out the details. You will be directed to the Personal Information: Review page. Page 26 of 41 Doc Ref: eUP – HRIS User Manual – Employee Self-Service Module: Update Employee Information Step 8. Click the Submit button after checking the information, and no more changes will be made. Note that you can also opt to select other actions: Cancel. Clicking the cancel button will delete current activity. A prompt will appear asking you to confirm the cancelation of your activities. - Click “Yes” if you wish to completely cancel the activity. - Click “No” to go back to the previous page. Save for Later. This option will temporarily store the entries you’ve made for revisions/completion in the future. A prompt will appear after you click the “Save for Later” button where you will be asked to confirm the option you’ve chosen. Click “OK” and you will be redirected back to the Home Page/Main Menu. Page 27 of 41 Doc Ref: eUP – HRIS User Manual – Employee Self-Service Module: Update Employee Information After clicking the Submit button, you will receive a Confirmation message that your request has been submitted for your Manager’s approval. Page 28 of 41 Doc Ref: eUP – HRIS User Manual – Employee Self-Service Module: Update Employee Information EMERGENCY CONTACTS Step 4. Click the Add button of the Emergency Contacts subsection. You will be directed to the Emergency Contact: Create page. Page 29 of 41 Doc Ref: eUP – HRIS User Manual – Employee Self-Service Module: Update Employee Information Step 5. Enter the information needed on the Emergency Contact: Create page. Remember that fields with the asterisk (*) sign (ex. Last Name, Relationship, Start of Validity) are required fields, hence, cannot be left blank in order to proceed with the process. Click the magnifying glass button or drop down arrow beside the corresponding field to open the list of values. To enter the Effective Date, click the calendar button. Page 30 of 41 Doc Ref: eUP – HRIS User Manual – Employee Self-Service Module: Update Employee Information To enter the Start of Validity Date, click the calendar button. Page 31 of 41 Doc Ref: eUP – HRIS User Manual – Employee Self-Service Module: Update Employee Information Step 6. Click the Next button once you have filled out the details. You will be directed to the Personal Information: Review page. Page 32 of 41 Doc Ref: eUP – HRIS User Manual – Employee Self-Service Module: Update Employee Information Step 7. Click the Submit button after checking the information. Note that you can also opt to select other actions: Cancel. Clicking the cancel button will delete current activity. A prompt will appear asking you to confirm the cancelation of your activities. - Click “Yes” if you wish to completely cancel the activity. - Click “No” to go back to the previous page. Save for Later. This option will temporarily store the entries you’ve made for revisions/completion in the future. A prompt will appear after you click the “Save for Later” button where you will be asked to confirm the option you’ve chosen. Click “OK” and you will be redirected back to the Home Page/Main Menu. Page 33 of 41 Doc Ref: eUP – HRIS User Manual – Employee Self-Service Module: Update Employee Information After clicking the Submit button, you will receive a Confirmation message that your request has been submitted for your Manager’s approval. Page 34 of 41 Doc Ref: eUP – HRIS User Manual – Employee Self-Service Module: Update Employee Information DEPENDENTS AND BENEFICIARIES Step 4. Click the Update button of the Dependents and Beneficiaries subsection. You will be directed to the Dependents and Beneficiaries: Create page. Page 35 of 41 Doc Ref: eUP – HRIS User Manual – Employee Self-Service Module: Update Employee Information Step 5. Enter the information needed on the Dependent and Beneficiary: Create page. Remember that fields with the asterisk (*) sign (ex. Last Name, Relationship, Start of Validity, and Date of Birth of Dependent and Beneficiary) are required fields, hence, cannot be left blank in order to proceed with the process. Click the magnifying glass button or drop down arrow beside the corresponding field to open the list of values. Page 36 of 41 Doc Ref: eUP – HRIS User Manual – Employee Self-Service Module: Update Employee Information To enter the Start of Validity Date and Date of Birth, click the calendar button. Page 37 of 41 Doc Ref: eUP – HRIS User Manual – Employee Self-Service Module: Update Employee Information Step 6. Click the Next button once you have entered your dependent and beneficiary details. You will be directed to the Personal Information: Review page. Page 38 of 41 Doc Ref: eUP – HRIS User Manual – Employee Self-Service Module: Update Employee Information Step 7. Click the Submit button after checking the information for correctness and completeness. Note that you can also opt to select other actions: Cancel. Clicking the cancel button will delete current activity. A prompt will appear asking you to confirm the cancelation of your activities. - Click “Yes” if you wish to completely cancel the activity. - Click “No” to go back to the previous page. Save for Later. This option will temporarily store the entries you’ve made for revisions/completion in the future. A prompt will appear after you click the “Save for Later” button where you will be asked to confirm the option you’ve chosen. Click “OK” and you will be redirected back to the Home Page/Main Menu. Page 39 of 41 Doc Ref: eUP – HRIS User Manual – Employee Self-Service Module: Update Employee Information Page 40 of 41 Doc Ref: eUP – HRIS User Manual – Employee Self-Service Module: Update Employee Information After clicking the Submit button, you will receive a Confirmation message that your request has been submitted for your Manager’s approval. Page 41 of 41