1
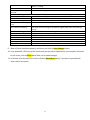
EHoodCleaner Software User Manual
Contents
1. System Requirements, Schedule of Access, and Customer Support
2. Log In
3. Add Users/Employees to Your Account
4. Add Clients to Your Account
5. Schedule a Client’s First Service
6. Schedule Jobs for a Particular Month
7. Update a “Cleaned” Job and Create a Digital Invoice
8. Record a Payment for an Invoice
9. Reduce the Size of Your Before and After Pictures with Easy Thumbnails
10.
Post Before and After Pictures to the System for a Particular Invoice
To download the most updated version of this user manual, please visit the page below:
http://www.ehoodcleaner.com/software-manual.html
1. System Requirements
1. You must have high speed internet access. Ask your phone provider for rates if you are currently only using
dial-up.
2. You must use the web browser Internet Explorer version 6.0 or above. Thankfully, most all computers come
with Internet Explorer already. You may also use Mozilla Firefox. Other browsers have not been tested for
compatibility with the software.
Schedule of Access
The EHoodCleaner system is available 24 hours a day, approximately 6 days a week. There is a weekly
scheduled downtime between 4PM CT on Friday and 8:30PM CT on Saturdays. On Friday afternoon,
EHoodCleaner will email all users their job schedule for the weekend.
Customer Support
FREE support video tutorials are available on the website:
http://www.ehoodcleaner.com/video-tutorials.html
For personal technical support, please call:
615-807-0544
Sunday – Thursday 4:30PM CT till 9:30PM CT, Friday till 4PM
Technical support is free during the first 30 days of registration. Afterwards, it costs $1.00 per minute.
Please email us if you observe any bugs in the system at [email protected].
For questions regarding billing or your account information, please call 615-807-0544.
1
2. Log In
1. Open up Internet Explorer.
2. Now go to ehoodcleaner.com, by typing the address ehoodcleaner.com into the web address field and
pressing ENTER.
3. Scroll down on the home page till you see the link, Click Here to Log In.
4. Click on that link.
5. If the EHoodCleaner window does not open automatically, then you may need to disable the pop-up
blocker. Usually, a white screen will appear with a peach bar at the top notifying you that a pop-up was
blocked. Click on the link that says, “A pop-up blocker is on. To view the Web page, turn off the pop-up
blocker or click here.” You should then see the EHoodCleaner system login page.
6. Another way to bypass the popup blocker each time you login is to either hold down the Ctrl key while you
click on the login link mentioned above, or change your pop-up blocker settings to allow pop-ups from the
ehoodcleaner.com website.
7. Welcome to the EHoodCleaner system login screen! In order to log in to EHoodCleaner, you need two
things, a User Id and a Password, which you receive by email after you sign up and register for EHoodCleaner.
8. On the Login Screen, type in your User Id and Password in the fields specified. Then click the Login button.
2
3. Add Users/Employees to Your Account
1. You must be logged in to the EHoodCleaner system.
2. On the main menu choose the Employee Maintenance button.
3. On the Employee Maintenance Screen, click on the button Add New Employee.
4. Fields will appear in the Edit Employee Details window. The yellow ones require input, while the white
ones can be left blank if you desire. Fill in the Edit Employee Details window. Click within the field into
which you want to enter data. You can use the tab key to move to the next field or just click into the
next one for editing. Under the Employee Type field, you can choose whether to add someone as an
administrator or employee. An employee status only allows someone to view and edit their own
schedule. Administrator status gives someone access to edit and view all schedules, reports, etc. Each
user will log in to the system with his or her unique username and password that you assign them.
5. When you are done editing the employee fields, click the Save Changes button.
6. If you want to add another employee/user to your account, just click on the Add New Employee
button again and follow steps 4 and 5.
7. When you are ready to do other tasks in the system, just click on the Main Menu button.
3
4. Add Clients to Your Account
1. You must be logged in to EHoodCleaner.
2. From the main menu screen, click on the Client Maintenance button.
3. On the Client Maintenance screen, click on the Add New Client button. There are two radio buttons in
the Edit Client Details window. One is for the local contact at the restaurant with which you schedule
cleanings. The other is for the billing contact with which you arrange payment for services. Click on
the radio button to choose which contact you want to edit. If you have already entered the Local
Contact information and the information is the same for the billing contact, you can click the button
Same As Local Contact to copy the information from Local Contact to Billing Contact.
4. Fields appear in the Edit Client Details window so you can you add your client’s information. Yellow
fields require input, while white fields are optional.
5. To add information, just click into the field you want to edit. When you move from field to field, you
can either click on each field or hit the Tab key.
Local Contact Field Names
Contact Name
Business Name
Address
Store #
Phone Number
Base Fee
State/Local Tax
Service Every __ Months
Best Day
Best Time
Email Address
Status
Date Inactive
Employee Assigned to This
Account
Contract Expiration Date
User ID and Password
Billing Contact Field Names
Billing Name
Billing Address
Store #
Phone Number
Description
the person at the local restaurant with which you arrange scheduling
Actual store name, e.g. Wendy’s
Local restaurant store address where cleaning takes place
Stores in a chain usually have a number ID to differentiate them. If a restaurant
does not belong to a chain, you may consider creating a store number of 1.
Phone number of contact person with whom you schedule cleanings
Base price you charge for the hood cleaning service at this location
% total of State and Local Tax if applicable in that location (e.g. 7%)
Frequency of cleanings
Best day of the week to schedule cleanings
Best time to schedule cleanings
Email of contact person for scheduling cleanings
Active means you currently have a contract with that client. Inactive means you
no longer are contracted to clean their hoods.
Date that you lost the contract with that client
The hood cleaner you assign to clean this restaurant on a regular basis
Date when the contract is up for renewal
The restaurant’s log in information for accessing the system to pay their bill and
view the pictures of their cleanings
Description
The contact person or department responsible for making payment
Address of the restaurant’s accounts payable person or department
Stores in a chain usually have a number ID to differentiate them. If a restaurant
does not belong to a chain, you may consider creating a store number of 1.
Phone number of contact person or department responsible for making payment
4
Email Address
Fax Number
Email of contact person responsible for payment
Fax number of person or department responsible for payment
6. When you are finished filling in the fields for your client, click the Save Changes button.
7. If you need to add another client, click the Add New Client button again and follow steps 4 and 5.
8. When ready to exit the Client Maintenance Screen, click the Main Menu button.
5
5. Schedule a Client’s First Service
1. You must be logged in to EHoodCleaner.
2. On the Main Menu, choose Client Maintenance button.
3. In order to locate the client for which you want to schedule their first cleaning job, use the filter
options and client list on the left side of the Client Maintenance Screen. You can search for your client
by contact name, business name, address, or phone number.
4. When you find the client you want to schedule, click one time on the client in the client list. The
client’s information details should appear in the right Edit Client Details window.
5. Click the View Schedule/Invoices button.
6. On the Client Data page, click on the Create a New Job/Invoice button.
7. On the Scheduling Screen, you must first assign the client to an unscheduled month of service. This
means that you first assign them to a general month and year, without assigning them a particular date
within that month. Please note that even though you may have a particular date in mind, you must
first assign the client to a general unscheduled month of service.
8. After you select the month and year, click the Save button.
9. Then click the Close button to return to the previous screen.
10. From there, you can click the Main Menu button to access other tasks.
6
6. Schedule Jobs for Particular Month
1. You must be logged in to EHoodCleaner.
2. From the Main Menu, click on the Job Scheduling button.
3. Under the Retrieval Options, select the Month and type in the Year of the calendar you want to
schedule. Click the Retrieve button.
4. In the upper right hand corner, you will see your unscheduled job list for the month. These jobs are
due to have their hoods cleaned this month but have yet to be assigned to a particular date. Click one
time on the job in the list that you want to schedule.
5. In the Job Data Screen, you must change the Unscheduled Month of Service to N/A and delete the Year
of Service. Then under Date of Service, type in the exact date that you want to schedule the job. Type
in the Time of Service field the time you are scheduled to arrive at the job.
6. Click the Update Appointment button when you have finished.
7. Click the Go Back to Schedule button to view the job in your calendar.
8. Return to step 4 to update other job appointments in your Unscheduled Job List for the month.
9. When you are finished scheduling your jobs for the month, you can click the Main Menu button from
any page to perform other tasks.
7
7. Update a “Cleaned” Job and Create a Digital Invoice
1. You must be logged in to EHoodCleaner.
2. From the Main Menu, click on the Job Scheduling button.
3. Under the Retrieval Options, select the Month and type in the Year of the calendar the date of the
cleaning performed. Click the Retrieve button.
4. Find the cleaned job in the calendar and double click on it.
5. In the Job Data Screen, beside Time of Service, click the check box labeled Cleaned.
6. Then click the Update Appointment button. The system has now rolled that client into their next
unscheduled month of service based on the frequency you set up in the Client Maintenance Screen.
(Please note, if you need to change the unscheduled month of service for that client which the system
assigned, just go to that month/year in the calendar and in the Unscheduled Job List, choose the job
and update the Unscheduled Month and Year of Service in the Job Data Screen and update your
appointment.)
7. In the Job Data Screen, below the fields Time of Service and Cleaned, you will notice several radio
buttons: Client Details, Invoice, Notes, and Record Payment. Click on the Invoice radio button.
8. Update the Invoice details in the window below.
Invoice Field
Invoice Number
State/Local Tax
Hoods
Filters
Fan Condition
Does Fan Work
Hood Lights Working
Hood Globes
Electrical Check
Duct Work
Pilot Lights Working
Roof Condition
Floor Condition
Description
Invoice number
System will update this field automatically when you click Save Changes button.
You should have set the state/local tax in the Client Details window.
Arrive – Assess status and any existing damage
Depart – Cleaned
Arrive – Assess status and any existing damage
Depart – Cleaned
Arrive – Assess status and any existing damage
Depart – Cleaned
Arrive – Assess status and any existing damage
Depart – Working Properly or Assess Status
Arrive – Assess status and any existing damage
Depart – Working Properly or Assess status
Arrive – Assess status and any existing damage
Depart – Cleaned
Depart – Appliances plugged back in
Arrive – Assess status and any existing damage
Depart – Cleaned
Arrive – Assess status and any existing damage
Depart – Working Properly or Assess Status
Arrive – Assess status and any existing damage
Depart – Cleaned
Arrive – Assess status and any existing damage
8
Depart – Cleaned
Depart – Done
Date of last fire extinguisher service
Inspection Sticker
Fire Extinguisher Last
Serviced
Note: For any damage or extraordinary observation, please make note in the corresponding comments section.
Service Approved By
Name of Person that Signed Hard Copy Invoice
Invoice Amount
System will update this field automatically when you click Save Changes button
Quantity of Cleanings
# of Cleanings
Hood, Filter, Duct Cleaning
Reflects Base Price for Cleaning the Restaurant
Price
Qty. Equipment Cleaning
# of other on-site cleaning not included in regular hood, filter, duct cleaning
service
Equipment Cleaning Price
Price for each other on-site cleaning service
Qty. Grease Containment
# of grease containment pads
Grease Containment Price
Price for each grease containment pad
Qty. Fan Belt
# of fan belt replacements
Fan Belt Price
Price for each fan belt replacement
Qty. Hinge Kits
# of hinge kits
Hinge Kit Price
Price for each hinge kit
9. When all fields have been updated, scroll down and click the Save Changes button.
10. If you would like a PDF copy of the invoice that you can print or download to your computer and email
to your client, click the Print button (after you’ve saved changes).
11. Scroll back up to the top of the screen to find the Main Menu button, if you want to proceed with
other tasks in the system.
9
8. Record a Payment for an Invoice
1. You must be logged in to EHoodCleaner.
2. Click on the Accounts Receivable button.
3. In the top window of the Accounts Receivable Screen, locate the invoice for which you want to record
a payment. Click once on the invoice in the list. The invoice details will appear in the window below.
4. Scroll down to the bottom of the screen and click on the Add Payment button. Fill in the details on the
row provided regarding the payment type, payment amount, and any other comments you want to
leave.
5. When finished, click the Save Changes button to update Accounts Receivable.
6. If you want to record a payment for another invoice, scroll back to the top and find that invoice in the
list and follow steps 3 through 5 again.
7. When finished with Accounts Receivable, scroll down to the bottom or to the top to access the Main
Menu button so you can perform other tasks in the system.
10
9. Reduce the Size of Before and After Pictures with Easy Thumbnails
1. If you haven’t done so already, you need to download and install Easy Thumbnails:
http://www.fookes.com/ezthumbs/
2. Open Easy Thumbnails from your computer. These instructions assume that you have already
downloaded pictures from your camera onto your computer hard drive.
3. In the Look In window, find the folder that contains the pictures you want to reduce. Click on that
folder.
4. Below the folder list, when a folder is open, you should see the individual picture files listed in the
window below.
5. You have two options in Easy Thumbnails: either you can reduce all the pictures in that folder list, or
you can choose certain picture files to reduce. To pick one picture file, click on the file name in the list
so that it is highlighted. If you want to choose a few more, hold down the CTRL key and click on the
other pictures you want to reduce. If you want to reduce all pictures in that folder list, then don’t click
on any of them.
6. On the right side, you will see the original size of the picture. There is a tab on the upper right side that
says Preview Output. Click on that tab to see how small the reduced picture will be when you reduce
it.
7. If you don’t like the size of the Preview Output picture, you can change the settings for reduction under
the Settings tab on the upper left hand side. Between 300x300 or 400x400 are good sizes for reduced
pictures. Hit the ENTER key after you’ve changed your settings to view the new Preview Output image.
8. When you are satisfied with the size of the Preview Output image, click the Make button below to
reduce selected pictures or the Make All button to reduce all pictures in that folder list. Easy
Thumbnails does not replace the original image. Instead, Easy Thumbnails creates another picture file
within the folder list with a “_tn” at the beginning of the old file name to show you which files are
thumbnail versions. Remember, the thumbnail images will be saved in the same folder as the original
pictures.
9. Click the Close button when you are ready to exit Easy Thumbnails. Otherwise, go back to the Look In
window to find more pictures to reduce.
11
10. Post Before and After Pictures to the System for a Particular
Invoice
1. If you haven’t done so already, you need to download and unzip the Picture Uploading
Software to your computer: http://www.ehoodcleaner.com/install-picture-uploading-software.html
We recommend moving the folder to your PROGRAMS folder in your C: drive. Then open the folder
and drag the shortcut icon to your desktop for easy access to the picture uploading software.
2. Please Note: In order to upload pictures, you will need to have already updated the invoice in the
EHoodCleaner system for that job.
3. Double click on the picture uploading software icon to open the program from your desktop. A little
box will appear asking you for the invoice number and the local contact phone number of the
restaurant.
4. Type in the invoice number and the local contact phone number for the cleaning you want to retrieve
in the system. Click on the Retrieve button. The Picture Upload window will appear.
5. Click on the Browse button in the lower right corner. Look through your computer folders and locate
the picture files you want to upload. Hold down the CTRL key while you click on multiple pictures you
want to upload for that invoice. Remember to choose your thumbnail pictures with the “tn_” file
names to avoid using up too much space on the server. Click the Open button to upload those pictures
to the program.
6. The pictures you chose should now appear in the bottom window of the software. Again, hold down
the CTRL key while clicking on the pictures you want to upload to the BEFORE pictures list. Then click
the Upload Pictures to the Before Picture Folder button. You should the see those pictures disappear
out of the bottom window and now appear in the top left Before Pictures window.
7. Hold down the CTRL key again while clicking on the pictures in the bottom window that you want to
upload to the AFTER pictures list. Then click the Upload Pictures to the After Picture Folder button.
You should also see those pictures disappear out of the bottom window and now appear in the top
right After Pictures window.
8. If you have more pictures to add from another folder on your desktop, return to step 5. If you are
done, click the Exit button in the bottom right corner to close the Picture Uploading Software. Your
customer can now log in to the EHoodCleaner system and view their pictures.
To download the most updated version of this user manual, please visit the page below:
http://www.ehoodcleaner.com/software-manual.html
12