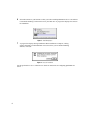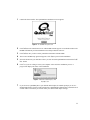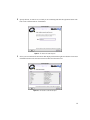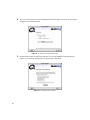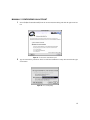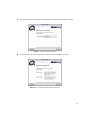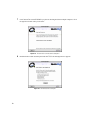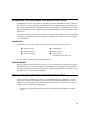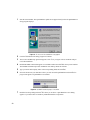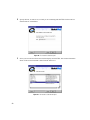
1
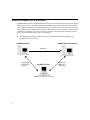
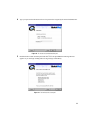
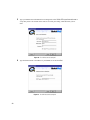
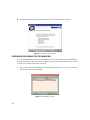
CONTENTS
Welcome to QuickMail Office ....................................... 1
Using this Guide .......................................................... 1
Educating End-Users .................................................... 1
How QuickMail Office Works ....................................... 2
What’s New in QuickMail Office 2.0 ............................ 3
QuickMail Pro Server Highlights .................................. 3
QuickMail Pro Directory System Highlights................... 3
QuickMail Pro Client Highlights ................................... 4
Installation and Setup Checklist .................................... 5
Requirements for QuickMail Office .............................. 6
QuickMail Pro Server for Macintosh ............................. 6
QuickMail Pro Directory System for Macintosh ............. 6
QuickMail Pro Client for Macintosh .............................. 6
QuickMail Pro Client for Windows ................................ 7
Installing QuickMail Pro Server .................................... 7
Upgrading QuickMail Pro Server .................................. 9
The Junk-Mail Filter .................................................... 9
Scripts ........................................................................ 9
Installing QuickMail Pro Directory System ................ 10
Installing the QuickMail Pro Macintosh Client........... 10
Configuring the QuickMail Pro Macintosh Client ...... 12
Automatically Configuring an Account ........................ 12
Manually Configuring an Account ............................... 15
Upgrading the QuickMail Pro Macintosh Client......... 19
Installing the QuickMail Pro Windows Client............. 19
Configuring the QuickMail Pro Windows Client ........ 21
Automatically Configuring an Account ........................ 21
Manually Configuring an Account ............................... 24
Upgrading QuickMail Pro for Windows ....................... 28
Registering QuickMail Pro .......................................... 30
Setting Passwords ........................................................ 31
Setting Up New QuickMail Office Features ................ 32
Setting Up Remote Address Books .............................. 32
Accessing Shared Mailboxes....................................... 36
i
ii
Contents
WELCOME TO QUICKMAIL OFFICE
QuickMail Office is a comprehensive electronic mail system that consists of three software components:
QuickMail Pro Server, QuickMail Pro client, and QuickMail Pro Directory System. Each component
can function as a stand-alone service, but the full functionality of each component is only available
when used within the QuickMail Office suite of products.
USING THIS GUIDE
This Getting Started with QuickMail Office guide is for mail administrators who are installing or
upgrading one or all of the components in QuickMail Office 2.0. It provides an overview of how QuickMail Office works, as well as a checklist of installation and setup tasks.
■
If you are installing and setting up QuickMail Pro client for Macintosh, see page 10, page 34,
and page 38.
■
If you are installing and setting up QuickMail Pro client for Windows, see page 19, page 34,
and page 38.
■
If you are setting up the entire suite of products offered in QuickMail Office, read this entire
Getting Started manual.
EDUCATING END-USERS
There is also a Getting Started with QuickMail Pro Client document in portable document format (PDF)
on the QuickMail CD that contains client-level instructions for your users. You can distribute the PDF to
users by printing it or by posting it on your intranet or network server. Just copy the PDF file to a server
and tell your users how to download it. The brief, client-level document provides installation instructions, as well as information that will acquaint your users with the QuickMail Pro software when they
first launch it. The Getting Started with QuickMail Pro Client document is not meant to replace the
larger, printed QuickMail Pro User Guide.
1
HOW QUICKMAIL OFFICE WORKS
QuickMail Office has three components that each perform a specific function in the mail system. QuickMail Pro Server is server software that handles POP, SMTP, and UUCP communication. The server also
passes contact information to the QuickMail Pro Directory System server. The directory server acts as a
contact database for QuickMail Pro client software. When the client software submits a query for a specific address, the directory server answers the query. All three components work in unison to provide
quick access to information that is vital to your mail users.
❖
The QuickMail Pro Directory System software can be installed on the same computer as the
QuickMail Pro Server software.
QuickMail Pro Server
QuickMail Pro Directory System
Contact data
Communication
via POP, SMTP,
and UUCP
QuickMail Pro client
Figure 1: QuickMail Office data transfer
2
Address book
updates and
LDAP searches
WHAT’S NEW IN QUICKMAIL OFFICE 2.0
QuickMail Pro Server, QuickMail Pro Directory System, and QuickMail Pro client offer new features
and enhancements that will make your mail system more powerful and efficient.
QUICKMAIL PRO SERVER HIGHLIGHTS
■
Address books can be automatically updated if the server and the QuickMail Pro Directory
System are working in tandem. Open the POP Local Domain dialog and in the Other tab, type
the name of the address book and click the directory server check box. Once users subscribe to
this “master” address book, the contact data in the address book is updated whenever users
click the Update button.
■
The “Public” folder you may remember from QuickMail LAN has been added and improved
upon in QuickMail Office. Get started creating “public” inboxes by selecting Shared Mailboxes
from the Configure menu.
■
Users can delay the sending of a message by selecting the date and time they want the message
sent.
■
Users can “unsend“ a message if they decide they don’t want it delivered. This feature is
automatically available on the server and cannot be disabled.
■
The MailManager feature that was previously only available at the client level is now available
at the server level. Users can set up server MailManager rules that process their mail at the
server before they download it.
QUICKMAIL PRO DIRECTORY SYSTEM HIGHLIGHTS
■
An all-in-one Web-based search interface and Sherlock plug-in generator is included when you
install the Mail Directory CGI application on your Web server.
■
The LDAP AppleEvent Suite allows you to administer the database through AppleScript when
AppleEvent Administration is enabled.
3
QUICKMAIL PRO CLIENT HIGHLIGHTS
The following highlights encompass both QuickMail Pro Macintosh and Windows clients.
4
■
A revised interface enables you to handle mail more quickly and efficiently.
■
A new Contacts Manager replaces old address books and enables you to update your contacts
with the click of a button.
■
From the Message Browser window, gather and view messages from multiple E-mail accounts.
For example, you can click the Check button and watch all your mail arrive in your respective
Message Browser inboxes.
■
Automatically handle your incoming and outgoing mail with server and client MailManager
rules.
■
Shared mailboxes enable multiple users to receive the same mail. Set up a shared mailbox to
simulate a “public” electronic bulletin board for posted messages.
■
Users can set default font preferences.
■
Return Receipts are automatically filed in your Receipts folder so they don’t clutter up your
Inbox.
■
Folders can now be nested so you can organize them more easily.
■
Remote address books can be updated whenever you click the Update button in the Contacts
Manager.
INSTALLATION AND SETUP CHECKLIST
When you are ready to install and configure QuickMail Pro Office 2.0, use the following checklist to get
your mail system functioning smoothly for your users. The checklist is most effective if you complete
each task in the order it is listed.
■
Install QuickMail Pro Server 2.0 on the computer you want to use as your mail server
following the instructions in the QuickMail Pro Server Administrator Guide. If you are
upgrading, make sure users remove as much mail from the server as possible before the
upgrade to make the process more efficient.
■
Create user mailboxes on the mail server using the “Adding Users“ instructions in Chapter 3 of
the QuickMail Pro Server Administrator Guide. If you are upgrading from a prior version of
QuickMail Pro Server, the existing mailboxes are automatically updated during the installation
of version 2.0.
■
Install QuickMail Pro Directory System 2.0 on the mail server or on another networked
computer following the instructions in the QuickMail Pro Directory System Addendum.
■
Point the QuickMail Pro Server software to the QuickMail Pro Directory System software
using the server’s Directory preference tab. See the “Directory” section of Chapter 4 in the
QuickMail Pro Server Administrator Guide for more information.
■
Set up local synchronization if you want to automatically distribute address books to your
users. Use the instructions in the “Setting Up Synchronization” section of Chapter 2 in the
QuickMail Pro Directory System User Manual to complete this task.
■
Create a shared mailbox with QuickMail Pro Server if you want “public” information
broadcasted to all your users. Use the instructions in the “Creating Shared Mailboxes” section
of Chapter 3 in the QuickMail Pro Server Administrator Guide to complete this task.
■
Click the Send Update Now button in QuickMail Pro Server‘s Directory preference tab. Clicking
this button will make address books and shared mailboxes available to your users. See the
“Directory” section of Chapter 4 in the QuickMail Pro Server Administrator Guide for more
information.
■
Install the QuickMail Pro client software on your users’ computers. Instructions for client
installation are available on page 10 of this Getting Started guide as well as in a Portable
Document Format (PDF) file located on the QuickMail Office CD.
■
Make the “master” address book available using the client software. See Page 32 for more
information.
■
Point the client software to the shared mailbox(es) you created on the mail server. See Page 36
for more information on setting up shared mailboxes on the client.
■
Test the client installations to make sure users can send and receive E-mail, view remote
address books, subscribe to shared mailboxes, and access directory services.
5
REQUIREMENTS FOR QUICKMAIL OFFICE
Before you install QuickMail Pro Office, verify that the computers you intend to use meet the requirements outlined in this section.
QUICKMAIL PRO SERVER FOR MACINTOSH
■
A PowerPC Processor
■
OS 7.6.1 or greater (System 8.5.1 or greater recommended)
■
32 MB RAM
■
10 MB Hard drive space (additional space required as mail accumulates)
■
TCP/IP network over Ethernet
■
Open Transport 1.2 or greater
■
Full-time or dial-on-demand Internet connection for Internet mail transfer
QUICKMAIL PRO DIRECTORY SYSTEM FOR MACINTOSH
■
A Macintosh PowerPC with 32 Megabytes of RAM
■
100 Megabytes of available disk space for the server installation and use
■
Mac™ OS 7.6.1 or later
■
OpenTransport™ 1.2 or later
QUICKMAIL PRO CLIENT FOR MACINTOSH
For full feature functionality, the client software must be used with QuickMail Pro Server and QuickMail Pro Directory System 2.0 or greater.
6
■
68040 processor or greater (PowerPC recommended)
■
OS 7.6.1 or greater (System 8.5.1 or greater recommended)
■
16 MB of RAM (32 MB recommended)
■
10 MB of hard drive space (Additional hard drive space required as mail accumulates)
■
TCP/IP network over ethernet or dial-up PPP
■
For full feature functionality the client must be used in conjunction with QuickMail Pro Server
software and QuickMail Pro Directory System software
QUICKMAIL PRO CLIENT FOR WINDOWS
For full feature functionality, the client software must be used with QuickMail Pro Server and QuickMail Pro Directory System 2.0 or greater.
■
A Pentium processor
■
Windows® 95, 98, or Windows NT 4.0
■
8 MB RAM (16 MB recommended)
■
15 MB hard drive space (Additional drive space is required as mail accumulates.)
■
SVGA video
INSTALLING QUICKMAIL PRO SERVER
This section offers the basic instructions for installing QuickMail Pro Server software. For more
detailed information, read the QuickMail Pro Server Administrator Guide that accompanied your order
of QuickMail Office.
1 Insert the installation CD-ROM into your computer’s CD-ROM drive.
2
Double-click the QuickMail Pro Server installer option. The QuickMail Pro Server introduction
screen appears.
3
Click Continue to start the installation. The ReadMe contents appear in a scrollable window. The
ReadMe information provides installation notes and tips about the software. Click Continue once
you have read the information in the ReadMe.
4
The License and Warranty agreement appears. Click Agree to proceed with installation.
5
A Warning dialog appears. Click Continue if you do not need to rename any QuickMail Pro Server
scripts.
Figure 2: Installer warning
7
6
Select the location on your hard drive where you wish to install QuickMail Pro Server. CE Software
recommends installing it at the main level of your hard drive. A progress bar displays the status of
the installation.
Figure 3: Installation progress
7
A progress bar displays during installation. When installation is complete, a dialog
appears informing you that installation was successful. If you are finished installing
software, click Quit.
Figure 4: Successful installation
See the QuickMail Pro Server Administrator Guide for instructions on configuring QuickMail Pro
Server.
8
UPGRADING QUICKMAIL PRO SERVER
If you are currently operating QuickMail Pro Server and you plan to install version 2.0 as an upgrade,
the installation can preserve much of your prior configuration, minimizing setup issues and ensuring
that existing mail messages, user and group lists, and preferences are maintained.
Follow these recommendations to ensure that the upgrade process goes smoothly:
■
Back up the contents of the QuickMail Pro Server folder.
■
Open the Log Window in QuickMail Pro Server and set the Log Level to Debugging.
■
Position the Log Window so that it is visible when the program is restarted after the version 2
installation.
THE JUNK-MAIL FILTER
Before you perform the upgrade, use the info-JunkMail@<yourdomain.com> command to determine what
data is contained within the JunkMail Filter. This filter will need to be repopulated after performing the
upgrade.
SCRIPTS
If you have created new scripts and saved them with new file names or in a new folder, they are preserved. If you have edited an existing script without changing the file name, the installer overwrites the
script and your changes are lost.
The upgrade and its changes to the system can be monitored as follows:
■
Complete the installation from CD. The first time you launch the 2.0 server, the Server Status
window displays the message, “Updating from old POP accounts.” With the Log Window open,
the status of each account will be shown as it is updated. If you have a large system with many
accounts, it may take some time for all of the processing to complete.
■
When the account upgrading successfully completes, the Server Status window returns to its
normal state and mail processing resumes.
■
Consult the log entries following installation to confirm that each of the accounts has been
successfully updated.
9
INSTALLING QUICKMAIL PRO DIRECTORY SYSTEM
This section offers the basic instructions for installing QuickMail Pro Directory System software. For
information about configuring the software, read the QuickMail Pro Directory System User Guide that
accompanied your order of QuickMail Office.
1 Insert the installation CD-ROM into your computer’s CD-ROM drive.
2 Click the Install QM Directory System option.
3 Click Continue at the prompt.
4 Read or print the readme that appears and click Continue.
5 Read the terms of the license and warranty agreement. Click Agree if you agree with the terms and
want to install the software.
6
Select the destination directory for QuickMail Pro Directory System.
7
Click OK when installation is complete.
Click Quit to exit the installation application. The QM Pro Directory System Folder appears open on
your desktop.
INSTALLING THE QUICKMAIL PRO MACINTOSH CLIENT
Before installing QuickMail Pro client software, back up the :System Folder:CE Software: folder and
restart the workstation with all virus-detection software disabled. Additionally, you must logout of prior
versions of QuickMail and quit all other QuickMail-related applications.
➣ You must have System 7.6.1 installed on your computer before running the QuickMail Pro installer.
10
1
Launch the client installer. The QuickMail Pro introduction screen appears.
Figure 5: The QuickMail Pro splash screen
2
Click Continue in the introduction screen. The ReadMe contents appear in a scrollable window. The
ReadMe information provides installation notes and tips about the software.
3
Click Continue once you have read or printed the information in the ReadMe.
4
The License and Warranty agreement appears. Click Agree to proceed with installation.
5
Select the location on your hard drive where you wish to install QuickMail Pro and click the Install
into... button.
6
Click Yes if you are willing to restart your computer at the end of the installation process. A
progress bar displays the status of the installation.
Figure 6: Monitor the installation process with
the progress bar.
7
If you do not use QuickMail Pro as your default mailto helper, the installer prompts you to set a
default mailto helper. Click Yes at the prompt to have QuickMail Pro launch when you double-click
a mailto URL or click No if you want to retain your current mailto helper settings.
11
8
When the installation process is complete, click Restart at the prompt. When the computer restarts,
you are prompted to select your account or set up a new account, depending on whether or not you
are upgrading from a previous version of QuickMail.
Figure 7: Click the Restart button to restart your
computer.
CONFIGURING THE QUICKMAIL PRO MACINTOSH CLIENT
You are ready to configure your E-mail account when the Account Assistant displays. QuickMail provides the option of automatically configuring your account or manually configuring it. If you have a network connection to the mail server, read the next section, which discusses automatic configuration. If
you have a dial-up connection to your mail server, skip to and read about manually configuring your
account.
AUTOMATICALLY CONFIGURING AN ACCOUNT
When you choose to auto-configure your account, you must complete a series of Account Assistant panels. Use the following instructions to complete the Account Assistant information.
1
Select Auto-configure the account from the Account Assistant dialog and click the right arrow button.
Figure 8: The Account Assistant Welcome panel
12
2
Specify the host, or mail server, to which you are connecting and click the right arrow button. The
host can be a domain name or an IP address.
Figure 9: The Account Assistant Host panel
3
Select your account from the account list that displays and click the right arrow button. The account
information shown in the Account Assistant is taken from the mail server.
Figure 10: The Account Assistant Account panel
13
4
Type your account password in the Password box and click the right arrow button. The password is
assigned by the mail administrator.
Figure 11: The Account Assistant Authentication panel
5
Read the final Account Assistant panel and click Finish. The QuickMail Pro Message Browser
appears so you can begin sending and receiving messages immediately.
Figure 12: The final Account Assistant panel
14
MANUALLY CONFIGURING AN ACCOUNT
1
Select Configure the account manually from the Account Assistant dialog and click the right arrow button.
Figure 13: The Account Assistant Welcome panel
2
Type an activation key number or choose to make the installation a 30 day demo and click the right
arrow button.
Figure 14: The serial key dialog
15
3
Type your name and E-mail address in the next panel that appears and click the right arrow button.
Figure 15: The Identity Account Assistant panel
4
Type your POP account information for incoming mail. Select Validate POP account information now to
verify that you have an account on the mail server before proceeding. Click the right arrow button
when you are done.
Figure 16: The POP Account Assistant panel
16
5
Type the domain name or IP address of your SMTP server and click the right arrow button.
Figure 17: The SMTP Account Assistant panel
6
Choose whether you want to work online or offline and click the right arrow button.
Figure 18: The sending and receiving Account Assistant panel
17
7
Click Leave mail on server until deleted if you plan on checking mail from multiple computers. Click
the right arrow button when you are done.
Figure 19: The leave mail on server Account Assistant panel
8
Read the final Account Assistant panel and click Finish. The Message Browser appears.
Figure 20: The final Account Assistant panel
18
UPGRADING THE QUICKMAIL PRO MACINTOSH CLIENT
QuickMail Pro 2.0 creates a new folder on your hard drive named “QuickMail Pro Folder,” which contains all the new 2.0 files. Additionally, the installer renames the “QuickMail Pro” folder installed with
prior version of QuickMail Pro “QuickMail Pro (old).” You can delete the “QuickMail Pro (old)” folder
after the upgrade after you have verified all of your old mail and address books were migrated to QuickMail Pro 2.0.
If you follow the order of tasks in the checklist provide on page 5, QuickMail Pro Server and QuickMail
Pro Directory System should already be installed and configured on the mail server when you upgrade
client workstations.
UNUSED FILES
QuickMail Pro 2.0 no longer uses the following files that were installed prior to version 2.0:
❖
■
Eudora Converter
■
FreePPPFlipper
■
Change Password
■
Directory Services
■
Connection Scripts
■
LAN Converter
(it’s available on the Office CD)
These files are not deleted during the upgrade process.
USER PASSWORDS
When you upgrade client workstations to version 2.0, users can still use their old passwords to login to
QuickMail Pro. However, the login architecture in QuickMail Pro 2.0 has changed, allowing different
local and remote passwords. See the section entitled, “Logging into QuickMail Pro“ in Chapter 1 of the
QuickMail Pro User Guide for more information.
INSTALLING THE QUICKMAIL PRO WINDOWS CLIENT
Before installing QuickMail Pro, back up the C:\CESoft\QMData directory. Additionally, you must
logout of prior versions of QuickMail Pro and quit all other QuickMail-related applications, such as
MailTicker. If your computer requires additional Windows components, you may need to restart your
computer after you complete the Setup program.
➣ You must have TCP/IP configured in the Network control panel for QuickMail Pro to function
properly.
19
1
Start the client installer. The QuickMail Pro splash screen appears briefly before the QuickMail Pro
Setup program displays.
Figure 21: The first screen in the QuickMail Pro Setup program
2
Click the Next button in the Setup program to continue.
3
The License and Warranty agreement appears. Click Yes if you agree with its conditions and proceed with installation.
4
Read the ReadMe contents that appear in a scrollable window and click Next when you are finished.
The ReadMe information provides installation notes and tips about the software.
5
Type your name and company name in the corresponding fields and click Next.
6
Select the location on your hard drive where you wish to install QuickMail Pro and click Next. A
progress bar appears as QuickMail Pro is installed.
Figure 22: QuickMail Pro tracks the progress of installation
7
20
Read the last Setup dialog and click Finish when you are done. A QuickMail Pro Users dialog
appears if you did not have to install any additional Windows components.
8
If you are installing QuickMail Pro for the first time, select Add New in the QuickMail Users dialog. If
you are upgrading, skip to the next section entitled, “Upgrading QuickMail Pro for Windows” on
page 28.
CONFIGURING THE QUICKMAIL PRO WINDOWS CLIENT
You are ready to configure your E-mail account when the Account Assistant displays. QuickMail provides the option of automatically configuring your account or manually configuring it. If you have a network connection to the mail server, read the next section, which discusses automatic configuration. If
you have a dial-up connection to your mail server, skip to page 24 and read about manually configuring
your account.
AUTOMATICALLY CONFIGURING AN ACCOUNT
When you choose to auto-configure your account, you must complete a series of Account Assistant panels. Use the following instructions to complete the Account Assistant information.
1
Select Auto-configure the account from the Account Assistant dialog and click Next.
Figure 23: The Account Assistant Welcome panel
21
2
Specify the host, or mail server, to which you are connecting and click Next. The host can be a
domain name or an IP address.
Figure 24: The Account Assistant Host panel
3
Select your account from the account list that displays and click Next. The account information
shown in the Account Assistant is taken from the mail server.
Figure 25: The Account Assistant Account panel
22
4
Type your password in the Password box. The password is assigned by the network administrator.
Figure 26: The Account Assistant Authentication panel
5
Read the final Account Assistant panel and click Finish. The QuickMail Pro Message Browser
appears so you can begin sending and receiving messages immediately.
Figure 27: The final Account Assistant panel
23
MANUALLY CONFIGURING AN ACCOUNT
1
Select Configure the account manually from the Account Assistant dialog and click Next.
Figure 28: The Account Assistant Welcome panel
2
Specify whether you are connecting to the mail server with a modem or through a network connection and click Next.
Figure 29: The Connection Method Account Assistant panel
24
3
If you chose Modem as your connection method, select your dial-up connection settings from the
menu that appears. Click Add to create dial-up settings. If you chose Network as your connection
method, ignore this step and skip to step 4.
Figure 30: The Dial-Up Connection panel
4
Type your name and E-mail address in the next panel that appears and click Next.
Figure 31: The Identity Account Assistant panel
25
5
Type your POP account information for incoming mail. Select Validate POP account information now to
verify that you have an account on the mail server before proceeding. Click Next when you are
done.
Figure 32: The POP Account Assistant panel
6
Type the domain name or IP address of your SMTP server and click Next.
Figure 33: The SMTP Account Assistant panel
26
7
Choose whether you want to work online or offline and click Next.
Figure 34: The sending and receiving Account Assistant panel
8
Click Leave mail on server until deleted if you plan on checking mail from multiple computers. Click
Next when you are done.
Figure 35: The leave mail on server Account Assistant panel
27
9
Read the final Account Assistant panel and click Finish. The Message Browser appears.
Figure 36: The final Account Assistant panel
UPGRADING QUICKMAIL PRO FOR WINDOWS
If you are upgrading from version 1.X of QuickMail Pro, your account will display in the QuickMail Users
dialog after installation. When you choose to upgrade your account, all of your address books and mail
is converted to a format recognized by version 2.0.
1
Select your account in the QuickMail Users dialog and click Choose. The “(1.x)” after your account
name indicates that you are upgrading.
Figure 37: The QuickMail Users dialog
28
2
Click OK if you want to migrate your account from QuickMail Pro 1.x to version 2.0.
Figure 38: QuickMail Pro verifies that you want to migrate
3
Type the password you used to login to version 1.x of QuickMail Pro and click Migrate. A window
tracks the progress of migration.
Figure 39: QuickMail Pro authenticates your account before it proceeds with the upgrade
4
The QuickMail login screen appears. Type your application password and click Login.
5
In the registration dialog (shown in Figure 40), choose how you want to activate your copy of
QuickMail Pro.
■
Select Activate using QuickMail Pro 2.0 Server if your mail system uses QuickMail Pro Server. 2.0
or greater.
■
Select Activation Key and type the activation key listed on your registration card if you do not use
QuickMail Pro Server 2.0 as your mail server.
29
■
Click Make 30 Day demo if you want to try out QuickMail Pro before you purchase it.
Figure 40: The product registration dialog
6
If QuickMail Pro is not set as your default mailto helper, you are prompted to make QuickMail Pro
your default mail program. Click Yes to have QuickMail Pro appear whenever you click on E-mail
addresses or click No if you want to use a different E-mail application.
Figure 41:
When the Mail Browser displays, you will see the new QuickMail Pro interface. For information about
the interface changes, see the “Introduction” chapter in the QuickMail Pro User Guide manual for your
particular platform.
REGISTERING QUICKMAIL PRO
If you have been using a demo version of QuickMail Pro, you can register it by following these steps:
30
1
Select Register QuickMail Pro from the Help menu.
2
Type your activation key in the registration dialog that appears and click OK. QuickMail Pro
instantly recognizes that it is no longer a demo copy, so you can begin using it again immediately.
SETTING PASSWORDS
When you upgrade client workstations to version 2.0, users can still use their old passwords to login to
QuickMail Pro. However, the login architecture in QuickMail Pro 2.0 has changed, allowing different
application and server passwords. Because of these changes, it is important that you not change user
passwords on the server prior to an upgrade unless you require users to first login to the 2.0 server with
their 1.5 clients. If you change user passwords on the server prior to client upgrades, the migration process will not work because it will be using the 1.5 password, which is stored locally on each workstation.
See the section entitled, “Logging into QuickMail Pro“ in Chapter 1 of the QuickMail Pro User Guide
for more information.
31
SETTING UP NEW QUICKMAIL OFFICE FEATURES
When you install or upgrade client software, there are usually some unforeseen “issues” that arise when
your users come in to work the next day. To help you avoid these issues, CE Software has included a
Getting Started for QuickMail Pro Users PDF file on the QuickMail Office CD, along with the version
of Acrobat® Reader that is required to view the PDF file. You can make this electronic file available to
your users over your network so their immediate questions about the client software are answered.
Along with the users’ concerns about changes in the software they use, administrators must deal with
new features included in upgrades. This section was developed to help administrators set up remote
(master) address books and shared mailboxes, two of the more involved features in QuickMail Office to
configure.
SETTING UP REMOTE ADDRESS BOOKS
There are two sets of instructions that must be completed for remote address books to work. The first set
of instructions must be completed on the server and the second set must be completed on the client
workstation.
SERVER SETUP
The following instructions assume you are using QuickMail Pro Server software for Macintosh on your
E-mail server.
1
Select Preferences from the Configure menu.
2
Click the Directory tab.
Figure 42: The Directory preferences tab
32
3
Click Add and complete the External Directory Server dialog that appears. If you have a full-time
network connection, complete the Local Directory options. If you have a dial-up connection, complete the External Directory option.
Figure 43: Set up your directory server from QuickMail Pro Server.
4
Click the Update... checkboxes to make both local and external addresses available to your users.
5
Click OK. The Directory preferences tab again appears in the foreground.
6
Choose how frequently you want to send local users address book updates and click OK when you
are done.
7
In the Configure menu, select Domain Setup.
8
Double-click the POP mail transport in the Domain Setup window to display the Local Domain
dialog.
9
Click the Contacts tab in the Local Domain dialog.
33
10 If the QuickMail Pro Directory System software is installed and configured, click the Create directory
server address book for this domain check box to make a central address book available to everyone in
the POP domain you selected.
Figure 44: Set up shared address books in the Local Domain dialog. Access the Local Domain dialog by double-clicking the POP address in the
Domain Setup window.
11 Type the name of the address book in the Address book name field.
12 Click OK. The server is now set up to periodically update a central address book for the users in the
selected POP domain.
CLIENT SETUP
These instructions can be used on both Macintosh and Windows-based computers.
➣ You must add a directory server to the client configuration before you can successfully complete
these instructions.
1
Select Address Books from the Configure menu.
2
Click the Add Remote button in the Address Books window.
3
Select the Find remote address books on directory server option and click OK. The Find Remote Address
Book dialog appears.
Figure 45: When users add a remote address book, they must choose whether or not to have it automatically located.
34
4
Select your directory server from the Directory Server menu and click Find. The status bar displays the
progress of your search. If QuickMail Pro locates remote address books that you have not yet subscribed to, they appear in the Found address books section of the dialog.
Figure 46: Locate the remote address books you want to use in the Find Remote Master Address Books window.
5
Select the remote address books you want to use and click Add. The selected address books appear
in the Added address books section of the dialog.
6
Click OK when you are finished adding remote address books. The Address Books dialog appears
with the remote address books listed.
7
Click OK in the Address Books dialog.
35
Now when your users select a remote address book in the Contacts Manager and click the Update
Address Book button, they will have the most current list of user addresses from which to choose.
Figure 47: Click the Update Remote Address Book button to update your address book.
ACCESSING SHARED MAILBOXES
There are also two sets of instructions that must be completed for shared mailboxes to work. The first set
of instructions must be completed on the server and the second set must be completed on the client
workstation.
SERVER SETUP
1
Select Shared Mailboxes from the Configure menu. The Shared Mailboxes window appears.
Figure 48: Create shared mailboxes in the Shared Mailboxes window. Access the Shared Mailboxes window from the Configure menu.
36
2
Click the Add Shared Mailbox icon and fill in the Account information. Most of the account details are
identical to those that are provided for an individual user account. Fill in the information identifying the mailbox name, address, and password.
Figure 49: Set up shared mailboxes using the Account, Settings, and Statistics tabs.
3
Select the Settings tab and provide the information that applies to that shared account. For a true
“public” mailbox, make sure the security options are all disabled.
Figure 50: The Shared Mailbox Settings tab
37
4
Click Save when you have completed the configuration to create the Shared Mailbox.
CLIENT SETUP
These instructions can be used on both Macintosh and Windows-based computers.
1
Select Shared Mailboxes from the Configure menu. The Shared Mailboxes window appears.
Figure 51: Monitor which shared mailboxes you are subscribed to using the Shared Mailboxes window.
2
Click the Update List button. The Subscribe Shared Mailbox dialog appears.
3
Choose when you want your shared mailbox updated and click OK. If a shared mailbox is available
on the server, the mailbox name appears in the Shared Mailboxes window with Not subscribed listed in
the Subscription column.
Figure 52: Choose when you want your shared mailbox updated.
38
4
Click the shared mailbox to which you want to subscribe and click the Subscribe button. The information in the Subscription column changes to show that you are now subscribed to the selected mailbox.
5
Click OK when you are finished. Next time you open the Message Browser, the shared mailbox displays so you can read any mail that is sent to that mailbox.
INDEX
D
Directory System
Features ............................................................................3
User Passwords ............................................................19, 31
UUCP...................................................................................2
F
Features ................................................................................3
H
How to
Install QuickMail Pro for Macintosh .............................10
Install QuickMail Pro for Windows ...............................19
Set up clients ........................................................1, 34, 38
Set up remote address books..........................................32
Set up shared mailboxes.................................................36
Use this guide...................................................................1
I
Installation
Checklist ..........................................................................5
Introduction..........................................................................1
M
Mac OS 7.6.1 .......................................................................6
Master Address Book
Setting up .......................................................................32
O
OpenTransport 1.2 ...............................................................6
P
POP ......................................................................................2
Q
QuickMail Office setup........................................................2
QuickMail Pro client
Features ............................................................................4
Installing Macintosh software........................................10
Installing Windows software..........................................19
QuickMail Pro Server
Features ............................................................................3
Remote address books....................................................32
Shared Mmilboxes .........................................................36
S
Setup
Checklist ..........................................................................5
Shared mailboxes
Setting up .......................................................................36
SMTP ...................................................................................2
U
Upgrading
QuickMail Pro Macintosh........................................19, 28
39