1
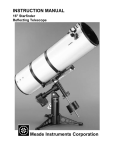
Northern Illinois University
Observatory User’s Manual
Dr. Matthew P. Wiesner
June 20, 2014
Contents
1 NIU Observatory User’s Manual
1.1 Observatory Equipment . . . . . . . . . .
1.2 Using the Telescopes . . . . . . . . . . . .
1.3 Using the Cameras . . . . . . . . . . . . .
1.4 Using Other Equipment . . . . . . . . . .
1.5 Using the Software . . . . . . . . . . . . .
1.5.1 Telescope Control: Maestro . . . .
1.5.2 Moon Map: Virtual Moon Atlas . .
1.5.3 CCD Control: IC Capture . . . . .
1.5.4 Sky Maps: Stellarium . . . . . . . .
1.6 Common Problems with Solutions . . . . .
1.6.1 Bird Nest in Dome . . . . . . . . .
1.6.2 Dome Will Not Turn . . . . . . . .
1.6.3 Attachment Between Right Angle
scope is Stuck . . . . . . . . . . . .
1.6.4 Finder Scope is Misaligned . . . . .
2 NIU Observatory Operations Manual
2.1 Safety . . . . . . . . . . . . . . . . .
2.2 The History of the Observatory . . .
2.3 Some Basic Rules for Operations . .
2.4 How to Give a Tour . . . . . . . . . .
2.5 Communications . . . . . . . . . . .
2.6 Outreach . . . . . . . . . . . . . . . .
2.7 How to Publicize the Observatory . .
.
.
.
.
.
.
.
.
.
.
.
.
.
.
.
.
.
.
.
.
.
. . . .
. . . .
. . . .
. . . .
. . . .
. . . .
. . . .
. . . .
. . . .
. . . .
. . . .
. . . .
Mirror
. . . .
. . . .
.
.
.
.
.
.
.
.
.
.
.
.
.
.
.
.
.
.
.
.
.
.
.
.
.
.
.
.
. . .
. . .
. . .
. . .
. . .
. . .
. . .
. . .
. . .
. . .
. . .
. . .
and
. . .
. . .
.
.
.
.
.
.
.
.
.
.
.
.
.
.
.
.
.
.
.
.
.
. . .
. . .
. . .
. . .
. . .
. . .
. . .
. . .
. . .
. . .
. . .
. . .
Tele. . .
. . .
.
.
.
.
.
.
.
.
.
.
.
.
.
.
.
.
.
.
.
.
.
.
.
.
.
.
.
.
.
.
.
.
.
3
3
4
4
5
6
6
6
7
7
8
8
8
.
.
8
9
.
.
.
.
.
.
.
10
10
12
13
13
14
14
15
3 Honors Astronomy Manual
17
3.1 The Purpose of Honors Astronomy . . . . . . . . . . . . . . . 17
1
3.2
General Suggestions . . . . . . . . . . . . . . . . . . . . . . . . 17
4 appendix
19
2
Chapter 1
NIU Observatory User’s
Manual
Please feel free to contact Matt Wiesner at [email protected] if you
have questions or need advice on Observatory equipment or operations.
1.1
Observatory Equipment
The NIU Observatory has the following equipment that is used regularly:
1. 14 inch Celestron Schmidt-Cassegrain reflecting telescope
2. 85 mm Televue refracting telescope
3. Skywalker telescope guidance system
4. six Galileoscopes
5. one small silver refracting telescope
6. one pair of binoculars
7. one LCD projector
8. one portable projector screen
9. a desktop computer with flat screen monitor
3
10. an 8-inch Celestron Schmidt-Cassegrain reflecting telescope (older model)
with tripod
11. a selection of 1.25 inch filters
12. a 1.25 inch spectrometer for taking spectra
13. a 1.25 inch Moon filter
14. a 2 inch nebula filter
15. 2 green laser pointers (stored in waiting area)
1.2
Using the Telescopes
The 14-inch telescope is usually operated by hand without the use of the
goto system (”Skywalker”). Typically the telescope is moved until it is close
to the object of interest and it is centered by hand by observing the object in
the small finder scope. Finally the Skywalker handpaddle is used to get the
object exactly centered in the crosshairs in the finder. In order to operate the
handpaddle, the main (Radio Shack) power supply must be turned on and
the switch on the top of the Skywalker ”S-Box” must be turned on. There
is another switch on top of the S-box (this is the black rectangular box with
red LEDs) that allows switching from handpaddle (Skywalker) to autofind
(System) operations. We have found that it is not usually necessary to use
this second switch; goto features work in handpaddle mode. If you do shift
the switch into autofind mode, you will need to use the joystick to move the
telescope.
1.3
Using the Cameras
There are two main cameras in use at the Observatory, a Canon digital SLR
and an Imaging Source IS-1MU USB Monochrome CCD Camera. Each is
useful for different purposes.
The Canon SLR is the more user friendly of the two cameras, and so we
encourage use of this one for student projects. It takes color images and can
be connected immediately to the computer in the Observatory in order to
download the images. In order to use this camera for astrophotography, the
4
lens should be removed and replaced with the T-mount and the T-mount
adapter that are kept in the filing cabinet in the dome. The T-mount can
then be mounted wherever 1.25 inch eyepiece would fit.
The CCD camera is connected through a long USB cable left attached
to the Observatory desktop. This camera is especially useful anytime it is
desirable to run a live feed of an object. For example, if a large group is
coming to observe the Moon, it may be useful to use the CCD and project
the image onto the projector screen.
1.4
Using Other Equipment
The 85mm Televue refractor is used with the same finder scope as the main
Celestron reflector. Note that the refractor has a solar filter, while the reflector does not. Thus for tour requiring use of a solar filter, the 85mm refractor
will be used. There are two other options for solar viewing: use the older
8 inch Celestron, which has a solar filter; and use the small red (bulbous)
Astroscan telescope. The latter does not have a solar filter, but it has a solar
projection system.
To use the Astroscan telescope, you also need the small metal holder
which should remain with it. There is also a red canvas bag that contains
some accessories. To use the solar projection feature, you need to attach the
long black metal bar to the screw mount on the top of the telescope. The
metal screen needs to be attached to the other end of the bar, using one of
the black screws. Insert the 25 mm eyepiece and then get the Sun centered
in the telescope. You will note the reflection of the Sun in the telescope
aperture. When the Sun is centered on the black plastic in the middle of the
aperture, there will be an image of the Sun. Focus the image.
In order to use the viewfinder for the Astroscan, it must be attached. It
is a small black metal piece in the canvas bag. It has a view hole in the end
of it. Once this is screwed in, calibrate it by centering the telescope on an
easily visible light or sign. Then center the viewfinder on the light or sign.
Now you will be able to use the finder for locating celestial objects.
BEWARE, when using the Astroscan telescope for public solar viewing,
do NOT let people look through the eyepiece. They may try if not warned,
and they will then burn their eyes.
5
1.5
Using the Software
The most commonly used software includes Maestro, Virtual Moon Atlas,
IC Capture and Stellarium.
1.5.1
Telescope Control: Maestro
Maestro is the program that interfaces with the main telescope. All parameters of telescope operation (such as movement speed, movement limits, etc.)
can be controlled using Maestro, and specific telescope actions can be coded
and run.
The most basic operation using Maestro is use of the goto function of
Skywalker. In order to use the goto function you must first connect the RS232
cable that is already attached to the Skywalker S-box. This is connected to
the port on the rear of the Desktop computer. Then open Maestro and allow
the computer to detect Skywalker. It will take about 10 seconds for Maestro
to load the star position database.
Next you must calibrate on a bright star. First, turn on computer sound
as Maestro has sounds to indicate its status. Next move the telescope to
a bright star not close to the horizon and get the star well centered in the
eyepiece. Then choose the tab ”Actions” and choose ”Align on Star”. Choose
the correct star from the list and click ”Align”. Then choose ”Calibrate” (just
to the right of ”Align”) and calibrate from the same star. You are now ready
to use goto operations; just go to the ”Objects” tab, pick out where you want
to go and hit ”Go”.
We have noticed that Skywalker has trouble using goto operations when
the object is in the western sky but very little trouble when the object is
in the eastern sky. Hopefully a future manager will identify and solve this
problem. Beyond this, Skywalker rarely goes exactly to the object chosen,
but will have an error of around a degree in position. We believe this error
is related to gear slippage in the two servo motors.
1.5.2
Moon Map: Virtual Moon Atlas
Virtual Moon Atlas is especially useful when introducing visitors to the Moon
and when conducting student research projects involving the Moon. This
program is quite user friendly, and when you click on a lunar feature you will
receive a large amount of information about the object. It is also possible to
6
change the date and time of the map; this is useful when explaining how the
appearance of the Moon changes as it goes through its monthly phases.
1.5.3
CCD Control: IC Capture
IC Capture is the program that interfaces with the Imaging Source CCD
camera. The camera itself is kept in the locked filing cabinet in the Observatory waiting area. This is done because temperatures are less extreme
in the waiting area than they are in the dome. Once you bring the CCD
camera up, plug it into the long USB cable. The computer will auto-detect
the camera. Then open IC Capture and you should see an image on the
display (initially it will be just bright or dark since the CCD camera has no
internal optics). You will need to screw the 1.25 inch adapter into the front
of the CCD camera after you remove the cover. This adapter is kept with
the eyepieces in the left drawer.
You will need to be well focused in order to see a reasonable image. The
best way to do this is to use a trick: Put the CCD camera in instead of an
eyepiece and center on a ground object like a sign. Now focus the telescope
until the image is clear. Next remove the CCD and put in an eyepiece with
focal length ≈ 25 mm. Move the eyepiece up or down until you see a focused
image. Now take the small black metal ring that is in the eyepiece drawer,
place it on this eyepiece and tighten it at the height the eyepiece needs to
be in order to have the sign appear well focused. Now when you look at a
celestial object, you can use the eyepiece with the ring to focus the object
and then when you put the CCD in, the image will also be close to focused.
You may need to change image brightness and gain or exposure length
in order to get a good image. For bright objects, decrease these quantities.
For dim objects, increase them. This can be done under the ”Device” tab in
IC Capture. In order to take an image, you can choose the ”Capture” tab
in IC Capture. It will allow you to choose where to save it and what type of
image to save.
1.5.4
Sky Maps: Stellarium
Stellarium is extremely useful as a live sky map. It is very helpful to open
and check Stellarium at the start of each night’s observing in order to verify
what is up and where various objects are located. Stellarium will allow you to
choose what night or time of night you want to see the sky and you can choose
7
to include Messier objects or not. You can also show both constellation lines
and the actual figures by turning on and off the toggle buttons at the bottom.
1.6
1.6.1
Common Problems with Solutions
Bird Nest in Dome
Every few years, a bird comes into the dome to build a nest. The nest is
typically built in the steel platform at the vertex of the dome where the
motor for opening and closing the dome is located. (Note that the dome
is not completely sealed at the bottom, so small birds can easily enter.)
This can be a problem because the bird will continually bring more nesting
materials into the dome and cause a big mess.
The solution is to remove the nest by raising the floor and using either
the steel ladder in the dome or the folding ladder stored in the waiting area.
You should use a dust mask and protective gloves while doing this.
1.6.2
Dome Will Not Turn
The dome is turned by a single wheel that engages the track that is part of the
dome. The wheel is attached to the electric motor that is mounted just left of
the Observatory desk. The most likely problem that would cause the dome
not to turn is for the wheel to be disengaged from the track. Usually when
this occurs, it is because the screws that attach the wheel to the platform at
the top of the brick wall have become loose. This platform was re-machined
in 2014, so hopefully no problems will occur for several years.
When this does become a problem again, the first solution is to unscrew
the wheel assembly from the platform and tighten the screws that secure it to
the platform. If this proves to be impossible, you should contact the Physics
Department Machine Shop.
1.6.3
Attachment Between Right Angle Mirror and
Telescope is Stuck
This happens occasionally when the screw ring that allows for adjustment
of the eyepiece holder is over-tightened. This is an issue because both the
holder and the screw ring are the same metal. If it is impossible to loosen the
8
screw ring, you may need to unscrew the entire right angle mirror apparatus
and take it to the machine shop in the basement of LaTourette Hall to have
them decoupled. The shop can spray the joint with a lubricant spray to
minimize the chance of this occurring again. The best prevention is to avoid
over-tightening.
1.6.4
Finder Scope is Misaligned
If you center an object in the crosshairs of the finder but note that the object
is not at all centered in the eyepiece, it is likely the finder is misaligned. To
correct this, find a terrestrial object like a sign and center it in the eyepiece.
(Remember to turn off Skywalker!) Then adjust the screws on the finder
scope until it is centered in the crosshairs. Verify that the object is now
centered in both the finder and the eyepiece.
9
Chapter 2
NIU Observatory Operations
Manual
Definitions:
We use the terms ”Observatory” and ”Observatory dome” interchangeably to indicate Room 900, the room actually containing the large telescope
and the moveable roof.
The term ”Observatory waiting area” refers to Room 800, the small area
just below the Observatory.
2.1
Safety
There are a few established safety rules when running the NIU Observatory.
We will discuss them briefly here:
(1) Never leave visitors alone in the Observatory dome. There are a
number of dangers in the Observatory, including especially the risk of fall.
It is important that a Physics Department representative be present in the
dome anytime there are visitors.
(2) Be aware of what is happening beneath the floor when the Observatory
floor is up. Typically we raise the floor to begin a tour and lower the floor to
end it. This presents a hazard as visitors can unknowingly ascend the stairs
and be present between the concrete base and the moveable floor; this is a
serious crush hazard. To this end, whenever we begin a tour, we put up a
chain across the entry to the stairs to make it clear that visitors should not
ascend. We also typically open the door to verify no one is beneath the floor
10
before we put the floor down at the end of a tour.
(3) Be aware of a fire plan. In the event of a fire or fire alarm, all people
should immediately proceed to the nearest egress. All people should leave the
dome and the waiting area. After passing through the large steel door, people
can continue down the stairs to one of the exits or can pass through the door
to classroom DH 702, as there is a fire escape inside this room. This room
should be unlocked at all times since it is part of the Observatory’s
fire safety plan. However in practice this room is frequently locked, so it
is necessary to periodically contact the Department of Geography to remind
them to keep this room unlocked.
(4) Do not allow more than 20 people in the Observatory dome at a time.
This number was given to us by the fire inspector as a maximum allowable
number of people.
(5) Do not raise the Observatory floor while people are in the Observatory waiting area. The hydraulics are extremely loud and can cause hearing
damage. If people do not want to ascend into the Observatory, advise them
to wait outside the steel door at the Observatory entrance.
(6) Be sure that there is a fully-charged fire extinguisher both in the
Observatory and in the Observatory waiting area. Be sure all Observatory
personnel are trained in the use of fire extinguishers.
(7) Beware of the fall hazard presented by the dome opening. The most
serious is the risk of falling out of the Observatory. This risk can be minimized
by not allowing people to stand on the steel ladder near the roof opening. It
is acceptable for visitors to stand on chairs to look out of the roof opening
as long as their waist is no higher than the edge of the dome. Use discretion
with this; if you have any concerns about a person, do not allow them to
stand on a chair. It is not uncommon for people who are intoxicated or
otherwise impaired to visit the Observatory, and these people will be at a
higher risk of making unsafe decisions.
(8) Beware of other fall hazards, such as visitors falling off the steel ladder
or falling when walking down the stairs to the waiting area. As these stairs
are steep, it is possible for visitors to loose their footing. It is recommended
that the Observatory manager who gave the tour leave the Observatory dome
first and then stand at the bottom of the stairs as people descend. In this
way the manager can attempt to break the fall of anyone who trips while
coming down the stairs.
(9) Beware of the radiator in the waiting area, it can get very hot and
people have to pass very close to it to enter and exit the Observatory.
11
2.2
The History of the Observatory
The Observatory dome was added onto the existing Davis Hall in the early
sixties. (There are plans for this addition in the upper drawer of the file cabinet in the waiting area.) The Observatory was opened to the public in 1965
and has been operated by a variety of entities. For some time the Observatory was operated by Geology personnel and also by volunteer managers.
For some time the Observatory was also operated by the NIU Astronomical
Society. Beginning in the 21st century, the Observatory was usually managed
by one or more graduate students. Below is a short list of recent managers:
* 1994-1996 Aman Udani
1996-1997 Dawn Mueller
* 1997-1999 Cullen Nicholson
* 1999-2002 Laura Layton
* 2002-2003 Donna Kubik
* 2003-2005 Andy Morrison
* 2005 Liz Holden
* 2006 Nelson Voldeng
* 2006-2007 John Powell
* 2006-2008 Eric Johnson
* 2008-2009 Matt Graziano
* 2009-2014 Matt Wiesner
* 2014- Daniel Stange
12
2.3
Some Basic Rules for Operations
2.4
How to Give a Tour
There are many ways to give a tour, but this is the method that worked well
for the authors. First, have a set time when the Observatory will be open
(preferably at least 2 nights per week). Turn on the TV and DVD player
to play ”The Elegant Universe” or some other science-related movie. Then
wait for visitors. When visitors do arrive, bring them up to the Observatory
dome. Make sure to put up the chain that says ”Employees Only” once
all people are up; this will prevent anyone from entering beneath the raised
floor. Make sure to warn visitors before raising the floor, otherwise they
will be startled. Then show them a sequence of celestial objects that are
viewable that night, while explaining what they are seeing. It is important
to give explanations and share interesting astronomy facts. This is one of
the few exposures to astronomy that these visitors will have this year: make
it fun and interesting! Below is a possible list of objects for June of 2014.
The precise list will depend on the time of year:
1. Saturn
2. Mars
3. The Moon
4. The Moon at higher magnification
5. Vega
6. Vega with spectrometer
7. Binary star Albireo (the head of Cygnus)
8. Binary star Mizar in the Big Dipper
9. The Ring Nebula in Lyra
10. Etc.
13
Usually during one tour, another group will ring the doorbell. As soon as
possible, call down on the intercom to let the new group know how long the
wait will be (hopefully no more than 15 minutes). After finishing the current
tour, open the hatch in the floor briefly to verify that no one is trying to
ascend the stairs. Then close the hatch and lower the floor. Descend the
stairs and wait at the bottom to catch anyone that might trip and fall. Thank
the exiting visitors and wish them goodnight. Then welcome the next group.
2.5
Communications
The Observatory has the following major methods of communication:
(1) Observatory phone and voicemail (815-753-1305) (2) Observatory email ([email protected]) (3) Observatory Facebook page (NIU Observatory, use observatory e-mail)
All of these need to be monitored on a regular basis. Voicemail should
be checked at minimum once a week. (Note that Observatory voicemail
can be checked from anywhere by calling (815) 753-7300 and entering the
Observatory phone number and password.) E-mail should be checked at
least every two days. Observatory Facebook is linked to the Observatory
e-mail. Make sure to post on Facebook on a regular basis to maintain our
social media presence. Post astronomy photos, event photos, announcements
of events, updates on interesting astronomical events and more.
2.6
Outreach
There are a number of opportunities for outreach. Many Scouting organizations contact the Observatory to arrange special tours, as do various professors teaching classes at NIU, teachers in local schools such as Sycamore
High School and St. Mary’s Catholic School and more. Requests for these
tours usually come to the [email protected] e-mail, so it is important to
monitor that closely.
It is important to maintain close communications with NIU STEM Outreach (especially Pati Sievert and Jeremy Benson). They manage much of
NIU’s STEM outreach and they put together several astronomy events involving the Observatory every summer (”Summer Under the Stars”).
STEM Outreach also puts together STEMFest in October each year. This
14
event is critical to Observatory outreach. We have traditionally run a double
booth at STEMfest where we use the Observatory projector and screen to
play Astronomy Jeopardy (have prizes!), we bring down the mobile telescopes
and Galileoscopes for kids to use, we put astronomy photos and games on
laptops we borrow from STEM Outreach and we provide lots of copies of the
Observatory brochure to hand out.
Other events can be useful as possible. Whenever a big astronomical
event occurs, it is good to have an Observatory event for the benefit of the
community. Frequently we would give talks or find someone to give a talk
on the event and then have open observing.
Warning: For larger events, you should have an observing party with
telescopes on the ground in addition to the Observatory. You can be overwhelmed by the number of visitors for a big event, such as the transit of
Venus or a lunar eclipse. It might be wise to have a simulcast of the event
in a lecture hall or to issue free tickets for specific times in order to avoid
overwhelming the Observatory.
2.7
How to Publicize the Observatory
There are a number of ways to publicize the Observatory. First, make sure
all professors teaching astronomy (Physics) or planetary science (Geology)
know about the Observatory. Encourage them to offer extra credit if students
visit the Observatory. Offer to visit their classes and give a brief talk about
what the Observatory offers. Always have plenty of Observatory brochures
around. The brochure PDF is also posted on Matt Wiesner’s website.
STEMFest is extremely important to publicizing the Observatory. So are
the various outreach events done throughout the year. When you have an
event you want to publicize, post announcements here:
• PlanIt DeKalb County: http://www.planitdekalbcounty.com/calendar/
• NIU Calendar: https://calendar.niu.edu/
• The Northern Star newspaper: http://northernstar.info/calendar/
• DeKalb County Convention and Visitors Bureau: http://www.dekalbcountycvb.
com/
• The Midweek: http://www.midweeknews.com/contacts/
15
• The Daily Chronicle: http://www.daily-chronicle.com/contact_
us/
Keeping people engaged through social media is also important. If you
post regular pieces of information about astronomy, you will obtain an audience. Then when you post open nights, people will come and if they enjoy
it and feel they learned something, they will tell their friends.
16
Chapter 3
Honors Astronomy Manual
3.1
The Purpose of Honors Astronomy
The purpose of Honors Astronomy is to give students in Elementary Astronomy (Phys 162-H) a taste of what observational astronomy is like. Thus
students should do a project that includes use of the Observatory facilities
or use of real astronomical data such as from the Sloan Digital Sky Survey.
Students also do weekly exercises in mathematical astronomy in a special lab
session.
3.2
General Suggestions
Mini-lab exercises for Honors Astronomy are kept here: http://nicadd.
niu.edu/~mwiesner/Honors/Honors.html. If you need the original Word
documents to modify, please e-mail Matt Wiesner.
The Observing projects are listed here: http://nicadd.niu.edu/~mwiesner/
Honors/Projects.html.
Students will need to learn how to use some astronomy-related software.
DS9 (http://ds9.si.edu/site/Home.html) is quite user friendly and is useful for learning how to do spectroscopy. The one downside is input images
need to be .FITS files. But GIMP (http://www.gimp.org/) can take in a
JPEG image and then export it as a .FITS file. Once a spectrum is taken
using the spectrometer and the Canon DSLR and you have converted the
image to FITS, you can use the ”Region”→”Shape”→”Projection” in DS9
to display a basic spectrum.
17
MicroObservatory Image (http://mo-www.harvard.edu/OWN/software.
html) is another program that can handle astronomical images and presents
a simple interface. It is also capable of producing color images from the
CCD’s monochrome images by taking the CCD images in three filters. MicroObservatory Image requires .GIF files, so input files must be saved in this
format. MicroObservatory is also a fascinating source of images. You can
either use archival images or request your own images of some basic objects.
18
Chapter 4
appendix
The following is an approximate inventory of small items contained in the
NIU Observatory. For larger items, see Chapter 1.
Small Filing Cabinet Inventory Top drawer:
1. Canon AV1 SLR camera
2. Minolta SLR1
3. Meade eyepiece mount (Diagonal mirror)
4. 135mm camera lense
5. Hoya HMC 55mm Skylight (1B) filter (For 135mm lense)
6. Box of assorted bolts and lense covers
7. Master padlock
8. 1 inch eyepiece mount
9. Pentax Minolta 965 eyepiece projector extender tube
10. Canon projector eyepiece extender tube
11. Pentax Minolta 25 arcsecond eyepiece projector
12. Eyepiece projector connection
13. Black metal camera adapter
19
14. Copper adapter
15. Meade CCD variable T-adapter
16. NIU 2 arcsecond eyepiece holder/receiver
17. 2 inch black metal adapter
18. Adapter ring
19. Adapter ring
20. Celestron visual back 1 1/4 inches
21. Hama T2/OM ring
22. Adapter ring with lense in middle
23. Small adapter ring
24. Older eyepiece extender tube
25. 3 inch adapter/holder
26. 2 inch adapter
27. Old light meter?
28. Piece of metal with 2 bolts in it
29. Computer port adapter
Middle drawer:
1. The Kendrick Dew Romover system 14 inch/16 inch heater
2. Teleview solar filter (With pinholes)
3. Kendrick Astro Instuments laser
4. Assorted Meade eyepiece cases
5. Assorted filter cases
6. Kedrick Dew Remover System power source
20
7. RS232 interface cord
8. Celestron 50mm finder scope
9. Circuit board
10. Elbow bracket
11. Indeterminate bracket
Bottom drawer:
1. Small circular stand
2. Mitutoyo 0-25mm vernier caliper?
3. Foam packing material
4. Extra ethernet cable
5. Extra keyboard
6. SMC EZ hub 10/100 network hub
7. Orion binoculars carrying case
8. Blank CD-roms
9. Software and cable for Linksys DSL router
10. Extension rod for small telescope
11. Box for Meade Deep-Sky Imager
Eyepiece case:
1. Televue 20mm
2. Sirius Plossl 25mm
3. Meade 2x telenegative amplifyer
4. Orion Sirius Plossl 10mm
5. Meade Super Plossl 52mm
21
6. Plossl 25mm
7. Meade series 4000 Super Plossl 9.7mm
8. Meade Super Plossl 6.4mm
9. University 6mm
10. K 60mm
11. Edmund Scientific company RKE Barlow 2.5x
12. Meade number 9 11N narrow band nebula filter
13. Meade series 4000 F/6.3 focal reducer/field flattener
14. Meade series 4000 F/3.3 focal reducer/field flattener
15. Edmund Scientific Company RKE 15mm
16. Meade Super Plossl 15mm
22