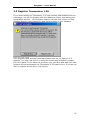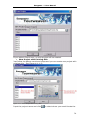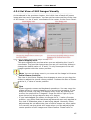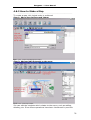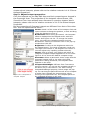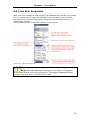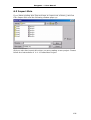
1
Easypano ** User Manual
Preface
⎯⎯⎯⎯⎯⎯⎯⎯⎯⎯⎯⎯⎯⎯⎯⎯⎯⎯⎯⎯⎯⎯⎯⎯⎯⎯⎯⎯⎯⎯⎯⎯⎯⎯⎯⎯⎯⎯⎯⎯⎯⎯⎯⎯⎯
This document explains the installation and operation of Easypano
Tourweaver 1.25. It is intended for both newbies and professionals who
engage in online virtual tour building and for real estate exhibitioners.
Readers of this document should:
• Have prior knowledge about panorama photography
• Know something of JavaScripting, API's or setting parameters
• A basic knowledge of HTML would be useful
Conventions and Definitions
Feedback
1
Easypano ** User Manual
Conventions and Definitions
⎯⎯⎯⎯⎯⎯⎯⎯⎯⎯⎯⎯⎯⎯⎯⎯⎯⎯⎯⎯⎯⎯⎯⎯⎯⎯⎯⎯⎯⎯⎯⎯⎯⎯⎯⎯⎯⎯⎯⎯⎯⎯⎯⎯⎯
We use the following typographical conventions and definitions in this
document:
Typeface or
Purpose
Icons
Italic
Used to emphasize new terms and concepts at the point
where they are introduced. Also used to designate the
quoted terms or menus of the software
Used to arouse the readers' attention towards certain
operations or things they should consider
Notes
Used to offer some extra techniques on how to use
Tourweaver 1.25
Tips
2
Easypano ** User Manual
Feedback
⎯⎯⎯⎯⎯⎯⎯⎯⎯⎯⎯⎯⎯⎯⎯⎯⎯⎯⎯⎯⎯⎯⎯⎯⎯⎯⎯⎯⎯⎯⎯⎯⎯⎯⎯⎯⎯⎯⎯⎯⎯⎯⎯⎯⎯
We welcome your comments and feedback on this manual. Please send your
comments to us by the following method:
Email: [email protected]
3
Easypano ** User Manual
1 Overview
1.1
1.2
1.3
1.4
1.5
1.6
⎯⎯⎯⎯⎯⎯⎯⎯⎯⎯⎯⎯⎯⎯⎯⎯⎯⎯⎯⎯⎯⎯⎯⎯⎯⎯⎯⎯⎯⎯⎯⎯⎯⎯⎯⎯⎯⎯⎯⎯⎯⎯⎯⎯⎯
Packing List
Introduction
Features
Edition Comparison
What's new in Tourweaver 1.25
Copyright Announcement
4
Easypano ** User Manual
1.1 Packing List
⎯⎯⎯⎯⎯⎯⎯⎯⎯⎯⎯⎯⎯⎯⎯⎯⎯⎯⎯⎯⎯⎯⎯⎯⎯⎯⎯⎯⎯⎯⎯⎯⎯⎯⎯⎯⎯⎯⎯⎯⎯⎯⎯⎯⎯
Thank you for choosing Tourweaver 1.25. One copy of Tourweaver 1.25
consists of:
• A License Key pair for the edition you have ordered
• Tourweaver 1.25 installer
• Tourweaver 1.25 user manual in electrical PDF format
CD copy is also available. An installer and an electrical PDF manual are both
included in the CD.
5
Easypano ** User Manual
1.2 Introduction
⎯⎯⎯⎯⎯⎯⎯⎯⎯⎯⎯⎯⎯⎯⎯⎯⎯⎯⎯⎯⎯⎯⎯⎯⎯⎯⎯⎯⎯⎯⎯⎯⎯⎯⎯⎯⎯⎯⎯⎯⎯⎯⎯⎯⎯
Never before does a virtual tour software have such powerful function as
Tourweaver, however fairly easy-to-use. Easypano keeps serving you the
best professional virtual tour utility with our cutting-edge technology.
Tourweaver possesses the unique features of interactive map with compass
effect, personalized viewer skin and customized walkthrough. It creates a
rich and vivid immersive virtual tour easily and fast, which can include:
- Spherical panoramas
- Cylindrical panoramas
- Still images
- Sound
- URL
- Hotspot
- Interactive map/ floor plan
- Slideshows
- Text
……?.
It provides you multiple ways to present your tour. Either a professional or
a newbie could build a charming virtual tour with Tourweaver. Tourweaver
offers the following solutions:
• Link spherical panorama, cylindrical panorama and still image
together to build a web based virtual tour
• Customize viewer skin and scene visually
• Add hotspots which can be linked to panorama, still images, audio or
another virtual tour.
• Set tour path to control the timing and virtual tour walkthrough
• Tailor an interactive map with compass effect
• Generate virtual tour as web applet format, which is easily posted to
web and no plug-in necessary when viewing.
Tourweaver 1.25 has been designed to be user-friendly. This manual will
guide you through the process of creating a multimedia presentation in a
logical order.
6
Easypano ** User Manual
1.3 Features
⎯⎯⎯⎯⎯⎯⎯⎯⎯⎯⎯⎯⎯⎯⎯⎯⎯⎯⎯⎯⎯⎯⎯⎯⎯⎯⎯⎯⎯⎯⎯⎯⎯⎯⎯⎯⎯⎯⎯⎯⎯⎯⎯⎯⎯
Some features of Tourweaver 1.25 are given below, which can give you brief
information:
1. Full individualization:
Tourweaver could enable you to customize a virtual tour of your own style.
It provides the user full freedom to make your conceived tour come true.
• Visually customize the skin
By customizing the skin, you can determine the final presentation of the
tour.
You can tailor every tour component in the viewer, even the small button.
• Adjust FOV, Pan, Tilt for each scene
You can have a full domination on how each scene zooms, rotates vertically
and horizontally.
• Customize the IE title bar
Advanced applet settings can enable you to customize the IE title bar,
including border color, background color, close button as well as text in the
IE title bar, i.e. virtual tour title.
2. Easy to use:
Tourweaver is an easy-to-use virtual tour creator. Even you are new in
virtual tour, it could guide you to build a surprising tour with no special
training.
• Viewer skin templates available
Diversified and fine viewer skin has been included in Tourweaver. You may
simply choose one skin, import images and output a dazzling virtual tour.
• Output to FTP server
In addition to publish the virtual tour to the hard drive, Tourweaver offers
FTP output option to save your time. A virtual tour can be directly uploaded
to the indicated FTP server.
• WYSIWYG
Create the virtual tour in a way of WYSIWYG. Once you import the scene
image, preview would be available for every action you take. You can
observe how your operation impacts the final output of the virtual tour at
the first time and accordingly modify your virtual tour to a more satisfactory
one.
3. Multimedia demonstration:
• Slideshow
Slideshow is automatically created for the default virtual tour
demonstration.
• Preset the timing and walkthrough
By setting tour path, user could control the timing for each scene, and
arrange the walkthrough for the whole tour.
• Transition effects
Transition effects make your virtual tour more pleasing: Fade in & fade out,
zoom in, blinds.
4. Multiple navigating options
• Support multiple hotspots
Either you wanna link the hotspots to a cylindrical panorama, spherical
panorama, still image, or to your favorite music, your own website, even to
another virtual tour, Tourweaver could easily fulfill the goal.
• Interactive map with compass effect available
7
Easypano ** User Manual
Setting an interactive map in Tourweaver would help you accomplish a more
vivid and interactive virtual tour. Tourweaver also allows you to personalize
the map as you like.
• Other options
Multiple ways of navigating virtual tour for your choice: combo box, list box,
thumbnails, text, image
5. Extensibility
• API scripting
Tourweaver specially offers API script for advanced users so that user could
implement the desired effect which is not included in the software.
8
Easypano ** User Manual
1.4 Edition Comparison
⎯⎯⎯⎯⎯⎯⎯⎯⎯⎯⎯⎯⎯⎯⎯⎯⎯⎯⎯⎯⎯⎯⎯⎯⎯⎯⎯⎯⎯⎯⎯⎯⎯⎯⎯⎯⎯⎯⎯⎯⎯⎯⎯⎯⎯
In order to cater for different user groups, Tourweaver 1.25 is designed to
develop two editions involving Professional Edition and Standard Edition.
The two editions possess almost the same functions, which are both
powerful and professional tools to create wonderful virtual tours. Below is
the comparison between the two editions.
Tourweaver 1.25 Edition Comparison
Key Features
Standard Edition Professional
Edition
Various Source Files
(spherical panorama,
cylindrical panorama, still
image and audio)
Customized Viewer Skin
Hotspots Capability (URL,
sound, scene, another
movie)
Scene Description
Scene Sound (background
sound and foreground
sound)
Scene Transition Effect
(Zoom-in, Blind, Fade in &
Fade out)
Interactive Map with
Compass Effect
Guided Tour
Encrypt Image with
Copyright Protection
Multiple Output Options
(Local, FTP)
Export to Java Applet
API Scripting
Fast Download Speed
Customize Private Branding
About Window not appear in
the published virtual tour
No plug-in needed while
viewing
No Hidden Fee, Pay Per
Computer License
9
Easypano ** User Manual
1.5 What's New in Tourweaver 1.25
[
[
[
[
⎯⎯⎯⎯⎯⎯⎯⎯⎯⎯⎯⎯⎯⎯⎯⎯⎯⎯⎯⎯⎯⎯⎯⎯⎯⎯⎯⎯⎯⎯⎯⎯⎯⎯⎯⎯⎯⎯⎯⎯⎯⎯⎯⎯⎯
Legend: ]
+ Added feature ]
- Bug fixed (we hope) ]
* Improved/changed feature ]
[+]PlayMovie button to play, pause and resume the customized
movie/walkthrough
[+]StopMovie button to stop the customized movie and return to the initial
scene of the movie
[+]Memorize user's font setting
[+]Press SHIFT to select multiple items in skin panel
[+]PreviousScene/NextScene button to play previous/next scene according
to the default sequence of the slideshow
[+]Backward/Forward button to move backward/forward according to
users' browse sequence
[*]Set compass initial angle synchronizing with the map in a WYSIWYG way
[*]Rename Path with Movie for a better understanding
[*]Same sound for different movies can be played continuously when
interacting
[-]Scene description do not show when displaying still images in slideshow
[-]Navigation buttons for still image in best fit status
-------------------------------------------------------------------------------------What's new in Tourweaver 1.20:
[ Legend: ]
[ + Added feature ]
[ - Bug fixed (we hope) ]
[ * Improved/changed feature ]
[+]Regulating scene auto rotation speed as well as the speed on clicking the
button
[+]Options to display still image: actual size and best fit
[+]Memorize users' path setting including local directory and FTP
[*]Much easier way to set compass initial angle
[*]Relieve the vertical line problem when viewing virtual tour due to
programme optimizing
[-]Waiting image not showing up
[-]Fail to save customized skin title
[-]Distortion of panoramic image from Remote Reality fixed
[-]Invisible property of the hotspot not functioning
-------------------------------------------------------------------------------------What's New in Tourweaver 1.10:
[ Legend: ]
[ + Added feature ]
[ - Bug fixed (we hope) ]
[ * Improved/changed feature ]
[-]The close button image can be seen in the Customize Applet Window, but
it does not appear in the published virtual tour.
What's New in Tourweaver 1.10 Professional Edition:
10
Easypano ** User Manual
[*]Remove the About Window of Easypano Virtual Tour Player in this edition
What's New in Tourweaver 1.10 Standard Edition:
[*]WaitingImage property in the Skin Panel appears grey and is not active
for user to edit
-------------------------------------------------------------------------------------What's New in Tourweaver 1.02:
[ Legend: ]
[ + Added feature ]
[ - Bug fixed (we hope) ]
[ * Improved/changed feature ]
[-]Failing to work properly while publishing and previewing at 85% and
Microsoft Error appearing
[*]Rotation speed while dragging is faster than ever
-------------------------------------------------------------------------------------What's New in Tourweaver 1.01:
[ Legend: ]
[ + Added feature ]
[ - Bug fixed (we hope) ]
[ * Improved/changed feature ]
[*]The quality of viewer is optimized to the same level as the one of
PTViewer Scripter
[*]The speed of downloading the viewer from the web is greatly increased
[+]Virtual tours created by trial Tourweaver 1.01 can be viewed on the web
[*]In the trial version of Tourweaver 1.01, a register warning dialogue box
pops up at intervals
[*]About Window of Easypano appears by right clicking within the applet
-------------------------------------------------------------------------------------What's New in Tourweaver 1.00:
[ Legend: ]
[ + Added feature ]
[ - Bug fixed (we hope) ]
[ * Improved/changed feature ]
[+]Panorama auto rotates when being navigated via ComboBox, ListBox
and Thumbnail
[+]Publish virtual tour in the trial version
[+]Scroll bar appears to display a longer scene description
[+]Support Win98 and WinMe by solving memory problems
[*]Faster system response during the tour presentation
[*]Watermark displays at intervals during the tour presentation
[-]Browser crashes when publishing the virtual tour
[-]IE shutting down when editing hotspots
[-]Failing in previewing the virtual tour
------------------------------------------------------------------------------------Version 1.00 Beta:
[ Legend: ]
[ +Added feature ]
[ - Bug fixed (we hope) ]
[ * Improved/changed feature ]
11
Easypano ** User Manual
[+]Visually customize viewer skin
[+]a variety of fine skin templates included in the software
[+]Support spherical panorama, cylindrical panorama and still image
[+]Multiple hotspot supported: image, sound, URL, even another virtual
tour
[+]Provide multiple ways for navigating virtual tour: Interactive map,
thumbnail, list box and comboBox
[+]Add external still image or text link to virtual tour
[+]Set compass effect in the map
[+]Add text description for each scene
[+]Visually adjust FOV, Pan, Tilt for each scene including initial, min, max
value
[+]Add *.au sound file to each scene
[+]Add background music(*.au supported) for the whole virtual tour by
setting path sound
[+]Select various transition effect between scenes
[+]Edit path to preset the timing and walkthrough of the virtual tour
[+]Set company info
[+]Preview virtual tour at any time
[+]Generate virtual tour as applet thus easily to be posted to web
[+]Multiple output options: Local, FTP
[+]Encrypt image to pretect your rights
[+]Generate files for Autorun CD when choosing local output
[+]Compress BMP Files as JPEG Format
[+]Auto play the tour available
[+]Customize IE title bar
[+]Provide API script for users
12
Easypano ** User Manual
1.6 Copyright Announcement
⎯⎯⎯⎯⎯⎯⎯⎯⎯⎯⎯⎯⎯⎯⎯⎯⎯⎯⎯⎯⎯⎯⎯⎯⎯⎯⎯⎯⎯⎯⎯⎯⎯⎯⎯⎯⎯⎯⎯⎯⎯⎯⎯⎯⎯
This manual, as well as the software described in it, is furnished under
license and may be used or copied only in accordance with the terms of such
license. The content of this manual is furnished for informational use only, is
subject to change without notice. Easypano assumes no responsibility or
liability for any errors or inaccuracies that may appear in this documentation.
Except as permitted by such license, no part of this publication may be
reproduced, stored in a retrieval system, or transmitted, in any form or by
any means, electronic, mechanical, recording, or otherwise, without the
prior written permission of Easypano.
Tourweaver 1.25 and Easypano are trademarks of Panorama Technologies
Corporation, Ltd. Microsoft, Windows and Internet Explorer are registered
trademarks of Microsoft Corporation. About more on license information
please refer to the license agreement included in the applications. Other
products mentioned in this manual have rights and marks held by their
respective owners.
13
Easypano ** User Manual
2 Installation Instruction
⎯⎯⎯⎯⎯⎯⎯⎯⎯⎯⎯⎯⎯⎯⎯⎯⎯⎯⎯⎯⎯⎯⎯⎯⎯⎯⎯⎯⎯⎯⎯⎯⎯⎯⎯⎯⎯⎯⎯⎯⎯⎯⎯⎯⎯
2.1 System Requirements
2.2 Installation Procedure
2.3 Register Tourweaver 1.25
14
Easypano ** User Manual
2.1 System Requirements
⎯⎯⎯⎯⎯⎯⎯⎯⎯⎯⎯⎯⎯⎯⎯⎯⎯⎯⎯⎯⎯⎯⎯⎯⎯⎯⎯⎯⎯⎯⎯⎯⎯⎯⎯⎯⎯⎯⎯⎯⎯⎯⎯⎯⎯
To install Tourweaver 1.25, the basic computer system requirements are
described as following:
To use Tourweaver 1.25, you will need:
Computer hardware: (PC-supported only)
• PentiumII 400 MHZ or faster processor
• 256M RAM or more
• 100M of free hard disk space or more
• Video display of 800x600 pixels or higher, 16-bit colors or higher
supported
Operating system:
• Microsoft Window98/98SE/ME/2K/XP
To view virtual tour, you will need:
Computer hardware:
For PC:
• Win 2K, Win XP, Win98,Win98SE,WinMe
• PentiumII 200 MHZ or faster processor
• 64M RAM minimum
• Video display of 800x600 pixels or higher, 16-bit colors or higher
supported
• Internet Explorer4 .0 or later version, Netscape 4.0 or higher
• Microsoft JVM (Java Virtual Machine)
Note: Windows 98/2K/Me have installed JVM by default.
However, for Windows XP, you need to install JVM seperately. Please
download it at http://www.easypano.com/download/msjavx86.exe.
For MAC:
• G3200 MHZ or faster processor
• 64M RAM or more
• Video display of 800x600 pixels or higher, 16-bit colors or higher
supported
Operating system:
• Win 2K, Win XP, Mac OSX
Browser:
• Internet Explorer 5.0 or later version, Netscape 7.1 for Microsoft
Windows, Netscape 7.0 for Mac OS
Note:
• You can only make a virtual tour on PC, but you can view it on PC and
MAC both.
Mac OS does not support JavaScript API.
15
Easypano ** User Manual
2.2 Installation Procedure
⎯⎯⎯⎯⎯⎯⎯⎯⎯⎯⎯⎯⎯⎯⎯⎯⎯⎯⎯⎯⎯⎯⎯⎯⎯⎯⎯⎯⎯⎯⎯⎯⎯⎯⎯⎯⎯⎯⎯⎯⎯⎯⎯⎯⎯
This procedure walks you through installing Tourweaver 1.25 to Windows.
(1) Close all other Windows applications which are currently running.
(2) Double click the Tourweaver 1.25 installation package to run the
installation application, the Welcome Screen will appear (see Figure ).
Figure 2-2-1 Welcome screen
(3) Click Next to go to the EULA (see Figure 2-2-2). After reading the license
agreement you should select I accept the terms in the license agreement,
then click Next to continue with the installation.
16
Easypano ** User Manual
Figure 2-2-2 EULA
(4) Then the following interface as Figure 2-2-3 showing up; Click Back to
back up to previous interface; Click No to stop installation. Select the folder
where you wish to install Tourweaver 1.01 in Figure 2-2-3 then click Next to
continue.
Figure 2-2-3 Destination folder
(5) Click Install to start installing the Tourweaver 1.25 Software. Figure
17
Easypano ** User Manual
2-2-5 indicates the installing progress:
Figure 2-2-4 Ready to install
Figure 2-2-5 Installing process
(6) Click Finish to complete installation (See Figure 2-2-6).
18
Easypano ** User Manual
Figure 2-2-6 Finish installation
19
Easypano ** User Manual
2.3 Register Tourweaver 1.25
⎯⎯⎯⎯⎯⎯⎯⎯⎯⎯⎯⎯⎯⎯⎯⎯⎯⎯⎯⎯⎯⎯⎯⎯⎯⎯⎯⎯⎯⎯⎯⎯⎯⎯⎯⎯⎯⎯⎯⎯⎯⎯⎯⎯⎯
If you start setting up Tourweaver 1.25 trial version downloaded from our
homepage, you will be greeted with the Welcome Screen requesting your
registration number - click Register Later to use the trial version or click
Register Now to input license key and serial number of this software.
Figure 2-3-1 Trial Version
Click Register Now and the following window pops up. As figure 2-3-2
appears, you may use Ctrl+C to copy the license key and serial number,
Ctrl+V to paste. If you have not got them yet, click Buy Now and your web
browser will be launched at the Tourweaver 1.25 order on line. If you do not
wish to register at this time, click Cancel.
20
Easypano ** User Manual
Figure 2-3-2 Enter License Key
After filling in the serial number and license key, you may also register
online to get more services which are listed in the Register Online window,
see Figure 2-3-3.
21
Easypano ** User Manual
Figure 2-3-3 Register Online
To uninstall Tourweaver 1.25, just click the
Start>Programs>Easypano>Tourweaver 1.25>Uninstall.
22
Easypano ** User Manual
3 GUI
⎯⎯⎯⎯⎯⎯⎯⎯⎯⎯⎯⎯⎯⎯⎯⎯⎯⎯⎯⎯⎯⎯⎯⎯⎯⎯⎯⎯⎯⎯⎯⎯⎯⎯⎯⎯⎯⎯⎯⎯⎯⎯⎯⎯⎯
3.1 Basic Window
3.2 Menu
3.3 Toolbar
23
Easypano ** User Manual
3.1 Basic Window
⎯⎯⎯⎯⎯⎯⎯⎯⎯⎯⎯⎯⎯⎯⎯⎯⎯⎯⎯⎯⎯⎯⎯⎯⎯⎯⎯⎯⎯⎯⎯⎯⎯⎯⎯⎯⎯⎯⎯⎯⎯⎯⎯⎯⎯
When you launch Tourweaver 1.25 the interface will open as shown below.
It is composed of menu, toolbar, and working window.
Figure 3-1 Basic window
24
Easypano ** User Manual
3.2 Menu
Menu
File
Brief Description
Keyboard
Shortcut
New
Create a new virtual tour
Ctrl+N
Open
Open an existing virtual tour Ctrl+O
project
Save current virtual tour
Ctrl+S
project
Save current virtual tour
Ctrl+A
project with a new name
Open an existing skin
Ctrl+M
Save current skin with a new Ctrl+E
name
Preview current virtual tour
Ctrl+P
(Switch to Preview Panel)
Publish current virtual tour as Ctrl+Shift+
JAVA Applet format (Switch to P
Publish Panel)
Quit Easypano Tourweaver
1.20 application
Multi-language
Save
Save as
Import Skin
Export Skin
Preview
Publish
Exit
View
Language
English
French
German
Italian
Spanish
Japanese
Korean
Skin
Action Manage
s
Scene
Path
Hotspots
Map
Help Topics
Help
www.easypano.com
Buy Now
Enter License Key…
Switch to the interface of Skin F2
Panel
Switch to the interface of
F3
Manage Panel
Switch to the interface of
F4
Scene Panel
Switch to the interface of
F5
Movie Panel
Switch to the interface of
F6
Hotspots Panel
Switch to the interface of Map F7
Panel
Help on how to use Easypano F1
Tourweaver
Visit
http://www.easypano.com
website
Purchase Easypano
Tourweaver online now
Enter serial number and
license key
25
Easypano ** User Manual
Register Online
About Tourweaver
Register online to have more
technical support
Display the program
information and copyright
26
Easypano ** User Manual
3.3 Toolbar
Button
Name
Skin
Action
Edit Skin
Shortcut
F2
Manage
Manage Scene
F3
Scene
Configure Scene
F4
Hotspots
Add Hotspots
F5
Movie
Set Playing Path for a Movie
F6
Map
Edit Map
F7
Preview
Preview Skin or Virtual Tour
Ctrl+P
Publish
Publish Virtual Tour
Ctrl+Shift+P
27
Easypano ** User Manual
4 Build a Virtual Tour
4.1
4.2
4.3
4.4
4.5
4.6
4.7
4.8
4.9
⎯⎯⎯⎯⎯⎯⎯⎯⎯⎯⎯⎯⎯⎯⎯⎯⎯⎯⎯⎯⎯⎯⎯⎯⎯⎯⎯⎯⎯⎯⎯⎯⎯⎯⎯⎯⎯⎯⎯⎯⎯⎯⎯⎯⎯
New or Open a Virtual Tour Project
Manage Scenes
Configure Scenes
Add Hotspots to Scenes
Set Virtual Tour Path of a Movie
Edit Map
Outline of Skin Editing
Preview Virtual Tour
Publish Virtual Tour
Tips: If you are a newbie, the following chart which displays the
brief procedures of creating a virtual tour project by Tourweaver 1.25
may offer you some
helps:
28
Easypano ** User Manual
4.1 New or Open a Virtual Tour Project
⎯⎯⎯⎯⎯⎯⎯⎯⎯⎯⎯⎯⎯⎯⎯⎯⎯⎯⎯⎯⎯⎯⎯⎯⎯⎯⎯⎯⎯⎯⎯⎯⎯⎯⎯⎯⎯⎯⎯⎯⎯⎯⎯⎯⎯
When you have just started this program, a Start Project window will pop up
and inquire you how to start a project: to create a new project or open an
existing one.
Figure 4-1 Start Project window
4.1.1 Create New Project
4.1.2 Open Existing Project
29
Easypano ** User Manual
4.1.1 Create New Project
⎯⎯⎯⎯⎯⎯⎯⎯⎯⎯⎯⎯⎯⎯⎯⎯⎯⎯⎯⎯⎯⎯⎯⎯⎯⎯⎯⎯⎯⎯⎯⎯⎯⎯⎯⎯⎯⎯⎯⎯⎯⎯⎯⎯⎯
• New Project with Blank Skin
The window below welcomes you when you just started the program. You
can create a new virtual tour project (*.VTP) via making appropriate
selections in the Start Project window.
Figure 4-1-1-1 New Project with Blank Skin
to select where you would like to locate
Input the project name and click
the project. Select Blank in the Skin List then click OK. Thus a new virtual
tour project with blank skin was created and you will be greeted with Skin
Panel.( To get more detailed information about skin, please refer to 6
Customize Personalized Skin)
Note: If you click Exit, you will quit the program.
If you click File>New in the menu when the program is running, a dialogue
box will pop up and ask you whether to save the current project:
Then the following window follows suit:
30
Easypano ** User Manual
If you select Cancel here, no new project will be created.
• New Project with Existing Skin
Just follow the above-mentioned steps and you can create new project with
existing skin. See Figure 4-1-1-2:
Figure 4-1-1-2 New Project with Existing Skin
Input the project name and click
to select where you would locate the
31
Easypano ** User Manual
project. In the Skin List you can select your favorite skin from those
available, which would appear in the Skin Preview Window - as shown on the
right side. then click OK. Thus a new virtual tour project with existing skin
was created and you will be greeted with Manage Panel.( As for more
detailed information about Scene Panel, please refer to 4.2 Manage Scenes
and 4.3 Configure Scenes)
32
Easypano ** User Manual
4.1.2 Open Existing Project
⎯⎯⎯⎯⎯⎯⎯⎯⎯⎯⎯⎯⎯⎯⎯⎯⎯⎯⎯⎯⎯⎯⎯⎯⎯⎯⎯⎯⎯⎯⎯⎯⎯⎯⎯⎯⎯⎯⎯⎯⎯⎯⎯⎯⎯
If you want to open an existing virtual tour project (*.VTP), please select
Open Project in the Start Project window. As Figure 4-1-2 appears, you can
select the virtual tour from recent project list and open it. Or you can click
to browse your folders for a project that you hope to open in your
system.
Figure 4-1-2 Open Existing Project
If you click File>Open in the menu when the program is running, a dialogue
box will pop up and ask you whether to save the current project:
Then the following window follows suit:
33
Easypano ** User Manual
you can also select the virtual tour from the list and open it by this means.
34
Easypano ** User Manual
4.2 Manage Scenes
⎯⎯⎯⎯⎯⎯⎯⎯⎯⎯⎯⎯⎯⎯⎯⎯⎯⎯⎯⎯⎯⎯⎯⎯⎯⎯⎯⎯⎯⎯⎯⎯⎯⎯⎯⎯⎯⎯⎯⎯⎯⎯⎯⎯⎯
The function of Manage Panel is to add, delete, organize and show the
information of spherical panoramas, cylindrical panoramas, or still images.
Figure 4-2-1 Manage Panel
•
Buttons: including
,
,
,
Add: Used to add spherical panoramas or cylindrical panoramas or still
images. Click the Add button, a dropdown list as Figure 4-2-2 pops up. After
you selected the image type, a file dialogue box opens (see Figure 4-2-3).
Then you can pick up a file and click OK. Thus this file is added to the file
display list in the Scene List.
Note: Tourweaver previous version can not correctly display the one
shot panorama from Remote Reality. However from Tourweaver 1.20 on,
this problem has been fixed. There will be no distortion for Remote Reality
images again.
In order not to confuse the user, we list Kaidan One Shot and Remote
Reality One Shot in the "Add" dropdown menu. In this way, people can
clearly define
which image type to choose. If you are using Kaidan One Shot solution to
create panorama, just select Kaidan One Shot and import the image.
Similarly, if you are using Remote Reality solution, please select Remote
Reality One Shot and import the image.
35
Easypano ** User Manual
Figure 4-2-2 Add Scenes
Figure 4-2-3 Select a file
Note: Size of spherical panoramic images should be no larger than
8000*4000 pixels for the sake of programme optimization.
Delete: When you hope to delete files in the Scene List, just select it
and click this button.
Up: Move up the current selected file.
Down: Move down the current selected file.
Note: Move the current selected file up or down may bring about
sequence changes of the frames on SlideShow. Hence this default virtual
tour may has a different presentation. But this operation does not affect
other paths which contain these image files.
• Scene List:
Image name, image type, scene name and file path of the image in your
computer are showed in this list.
• Image Detail Information:
36
Easypano ** User Manual
Figure 4-2-4
Image detail information
Size: Show the size of current selected scene in
KB
Dimension: Show the size of current selected
scene in pixels
Image Type: Show the image type of current
selected scene. You can also change the type of
image here when either the following errors
occurred:
• You have selected add > Still Image but
added a panorama image indeed ( or vise
versa)
• You have made correct selection and
added a panorama image but found that
you need this panorama to be a still image
later ( or vise versa)
For example, if you have chosen Add > Spherical
Panorama and added a spherical panoramic
image but you want it to be a cylindrical one
actually, you can change its image type here.
Select the spherical panoramic image in the
Scene List and click Cylindrical Panorama. You
will find the original spherical panoramic image
has been changed into a cylindrical one.
Note: This operation may bring about presentation time changes
of the frames on SlideShow. And scene configurations also changes with
the image type. (If a still image had been changed into a panorama, you
can configure its Pan, Tilt and FOV of initial view instead of its original
view center position.)
37
Easypano ** User Manual
4.3 Configure Scenes
⎯⎯⎯⎯⎯⎯⎯⎯⎯⎯⎯⎯⎯⎯⎯⎯⎯⎯⎯⎯⎯⎯⎯⎯⎯⎯⎯⎯⎯⎯⎯⎯⎯⎯⎯⎯⎯⎯⎯⎯⎯⎯⎯⎯⎯
The Scene Panel serves the following main purposes: to set the relevant
parameters of each scene, including name of the scene, foreground music,
scene transitional effect, image type and initial view parameters, etc. This
chapter will give you the detailed knowledge on how to set the scenes and
enable you to adjust your scenes freely.
The Scene Panel is displayed as follow:
Figure 4-3 Scene Panel
Note: Part of the Scene Panel varies with the scene image type.
If the selected scene in the Scene List is a panorama, you can set
Pan, Tilt and FOV here. If it is a still image, X and Y of image center
position can be configured here.
View Option will be activated for still image. Best Fit and Actual Size
can be specified to display the still image.
See the figure below:
38
Easypano ** User Manual
4.3.1
4.3.2
4.3.3
4.3.4
Scene List
Scene Options
Set View of Panoramic Images Visually
Set View of Still Images Visually
39
Easypano ** User Manual
4.3.1 Scene List
⎯⎯⎯⎯⎯⎯⎯⎯⎯⎯⎯⎯⎯⎯⎯⎯⎯⎯⎯⎯⎯⎯⎯⎯⎯⎯⎯⎯⎯⎯⎯⎯⎯⎯⎯⎯⎯⎯⎯⎯⎯⎯⎯⎯⎯
All the added scenes are showed in the Scene List:
Figure 4-3-1 Scene list
Note:
The functions and displayed contents of the Scene List on the Scene Panel,
Movie Panel and Hotspot Panel show no difference. So we will not discuss
it again in chapter 4.4 and 4.5.
40
Easypano ** User Manual
4.3.2 Scene Options
⎯⎯⎯⎯⎯⎯⎯⎯⎯⎯⎯⎯⎯⎯⎯⎯⎯⎯⎯⎯⎯⎯⎯⎯⎯⎯⎯⎯⎯⎯⎯⎯⎯⎯⎯⎯⎯⎯⎯⎯⎯⎯⎯⎯⎯
Figure 4-3-2 Scene Options
•
Scene Name: Name of the scene is displayed here. If you rename
the scene, you will find the name of the one in the Scene List of
Manage Panel had been changed simultaneously.
•
Scene Sound: Click
to browse your folders to find *.au audio files
as foreground music for the scene.
Tourweaver 1.25 can only support the sound files in the format of .au. If you
would like to use your own sound files as the foreground or background
music, you have to convert them into .au files by a converting tool called
Adobe Audition which is previous CoolEdit 2000. The unregistered version of
Adobe Audition offers you 1 month free trial. More information can be found
at
http://www.syntrillium.com/download/download.html?1
Note:
When you convert au files by Adobe Audition, two settings as follows must
be undertaken.
a) Adjust Sample Rate as 8000
b) Click the Options button to choose "mu-Law 8-bit" when saving as au
format
In this way, the converted au files can be played in Tourweaver.
• Transition Effects: It refers to the effects between the presentation
of the current scene and the next. Three modes available for your
41
Easypano ** User Manual
•
choice: Fade in & Fade out, Zoom in and Blinds.
Scene Description: Set the description of the scene here. You can
input the description directly or click
to browse your folders and
find a *.TXT document to describe the scene.
•
View Option: View Option is only available for still image. Users are
permitted to select in which way to display the still image in the
viewer: Best Fit or Actual Size.
Note: You cannot use navigation buttons including up, down, right,
left, zoom in, zoom out for the still images when they are set in best fit.
•
Auto Rotating Speed: Here you can adjust the auto rotation speed
for each scene via the slider. A positive number from 0 to 100 will
result in clockwise rotation. While negative number from -100 to 0
leads an anti clockwise rotation. 100 is max speed in clockwise
direction. -100 is the max speed in anti clockwise direction.
42
Easypano ** User Manual
4.3.3 Set View of Panoramic Images Visually
⎯⎯⎯⎯⎯⎯⎯⎯⎯⎯⎯⎯⎯⎯⎯⎯⎯⎯⎯⎯⎯⎯⎯⎯⎯⎯⎯⎯⎯⎯⎯⎯⎯⎯⎯⎯⎯⎯⎯⎯⎯⎯⎯⎯⎯
Maybe what impacts you most during a virtual tour presentation is the initial
view of each scene, which offers you direct observational impressions on
how the scene looks. You can set the parameters of initial view of panoramic
images, i.e. Pan, Tilt and FOV on the Scene Panel.
Figure 4-3-3 Set Pan, Tilt and FOV of Panoramic Images Visually
•
•
Scene Display Area:
This area displays the preview when you are adjusting Pan, Tilt or FOV.
The preview changes as soon as you move the sliders to change the
default value of Pan, Tilt and FOV.
Note: You can not drag, zoom out, or zoom in the image in this area.
View Setting Area:
The valid range of the parameters are given in above figure 4-3-3, Min
stands for minimum value; Max stands for maximum value; Initial
stands for initial value. You can drag the sliders to change their values.
The view in the Scene Display Area changes as soon as you drag the
sliders in the View Setting Area.
Tips:
· Slider supports mouse and keyboard operations. You can move
the sliders either by mouse dragging or by keyboard arrow keys
pressing. If you drag the mouse, the step is 1 degree every time.
By clicking the mouse, the step will be 5 degrees. Press the left or
right or up or down arrow key on your keyboard brings about a
step of 1 degree.
· If you had dragged the sliders to change the maximum,
minimum and initial value of Pan, Tilt or FOV, you would find that
these adjustments were only applied to the view of Slideshow
43
Easypano ** User Manual
when it was being played, i.e. probably you can not view the
whole panorama. However, these adjustments do not affect the
view of scene images on other paths. You can still see the whole
panorama when you are adjusting the view of scene images and
insert frames. Please refer to 4.5.3.2 Operations to Frame.
44
Easypano ** User Manual
4.3.4 Set View of Still Images Visually
⎯⎯⎯⎯⎯⎯⎯⎯⎯⎯⎯⎯⎯⎯⎯⎯⎯⎯⎯⎯⎯⎯⎯⎯⎯⎯⎯⎯⎯⎯⎯⎯⎯⎯⎯⎯⎯⎯⎯⎯⎯⎯⎯⎯⎯
As introduced in the previous chapter, the initial view of each still scene
image also has much importance. You can set the center position of the view
of still image, i.e. the X and Y coordinate of the center on the Scene Panel.
Figure 4-3-4 Set Center Position of Still Images Visually
•
•
Scene Display Area:
This area displays the preview when you are adjusting the X and Y
coordinate. The preview changes as soon as you move the sliders to
change the default value of X and Y. It only shows part of the still
image together with the center position.
Note: You can not drag, zoom in, or zoom out the image in this area.
Initial Viewer Position:
The view in the Scene Display Area changes as soon as you drag the
sliders to adjust the viewer center position. It shows the size of viewer
and the X, Y value of center position.
Tips:
· Slider supports mouse and keyboard operations. You can move the
sliders either by mouse dragging or by arrow keys pressing. If you
drag the mouse, the step is 1 degree every time. By clicking the
mouse, the step will be 5 degrees. Press the left or right or up or
down arrow key brings about a step of 1 degree.
· If you had dragged the sliders to change the X, Y value of center
position, you would find that these adjustments were only applied to
the view of Slideshow when it was being played. However, these
adjustments do not affect the view of scene images on other paths.
You can still see the whole still image when you are adjusting the
center position of still images and insert frames. Please refer to
45
Easypano ** User Manual
4.5.3.2 Operations to Frame.
46
Easypano ** User Manual
4.4 Add Hotspots to Scenes
⎯⎯⎯⎯⎯⎯⎯⎯⎯⎯⎯⎯⎯⎯⎯⎯⎯⎯⎯⎯⎯⎯⎯⎯⎯⎯⎯⎯⎯⎯⎯⎯⎯⎯⎯⎯⎯⎯⎯⎯⎯⎯⎯⎯⎯
Hotspots are clickable link areas within a panorama, and you can assign an
action to a hotspot. So when being clicked during the tour presentation,
depending on the action you assigned to it, it will open a new panorama or
still image, virtual tour movie, play an audio or open a web page. The
interface of Hotspots Panel is shown below:
Figure 4-4 Hotspot Panel
4.4.1
4.4.2
4.4.3
4.4.4
Hotspot Toolbar
Hotspot Operations
Set Hotspot Properties
Hotspot Map
47
Easypano ** User Manual
4.4.1 Scene Hotspot Toolbar
⎯⎯⎯⎯⎯⎯⎯⎯⎯⎯⎯⎯⎯⎯⎯⎯⎯⎯⎯⎯⎯⎯⎯⎯⎯⎯⎯⎯⎯⎯⎯⎯⎯⎯⎯⎯⎯⎯⎯⎯⎯⎯⎯⎯⎯
Below are the buttons and their functions of the hotspot toolbar:
Button Hint
Action
Zoom Actual Display the current selected scene in its original
Size
size
Best Fit
Zoom in, zoom out the current selected scene to
fit the Scene Display Area
Pointer
Use it to select the hotspots
Add a Scene
Hotspot
Add a HTML
Hotspot
Add a Sound
Hotspot
Add a Movie
Hotspot
Set the hotspots that link to panoramas or still
images
Set the hotspots that link to URL
Set the hotspots that link to sound file
Set the hotspots that display specified movies
48
Easypano ** User Manual
4.4.2 Scene Hotspot Operations
⎯⎯⎯⎯⎯⎯⎯⎯⎯⎯⎯⎯⎯⎯⎯⎯⎯⎯⎯⎯⎯⎯⎯⎯⎯⎯⎯⎯⎯⎯⎯⎯⎯⎯⎯⎯⎯⎯⎯⎯⎯⎯⎯⎯⎯
Scene Display Area shows the current selected scene and you can also edit
the hotspots here.
•
•
Add hotspots: To add a new hotspot, select
or
or
or
on the toolbar and click your mouse on the scene in the Scene
Display Area. Hence a hotspot is added to the scene. You can click
and drag on an edge to resize it. To delete it, click the hotspot then
press the Delete key on your keyboard.
Select hotspots: To select an existing hotspot, you can either click it
on the scene or select it in the ComboBox in Properties Area.
Figure 4-4-2 Select hotspot
Tips: Since the specific positions of the hotspots may vary from what
they look on the thumbnail of scenes in the Scene Display Area, we
to zoom in the image to its original
recommend that you should click
size and then add hotspots to the scene images.
49
Easypano ** User Manual
4.4.3 Set Scene Hotspot Properties
⎯⎯⎯⎯⎯⎯⎯⎯⎯⎯⎯⎯⎯⎯⎯⎯⎯⎯⎯⎯⎯⎯⎯⎯⎯⎯⎯⎯⎯⎯⎯⎯⎯⎯⎯⎯⎯⎯⎯⎯⎯⎯⎯⎯⎯
Click a hotspot in the Scene Display Area and its properties will be showed in
the Properties Area, where you can easily see and specify all of them. Now
let us take the properties of Scene hotspot as a sample:
Location: X and Y of the up-left corner of the hotspot.
Click and input numbers to change the position, or
click and drag inside the hotspot to move it.
Size: Width and height of the hotpot are showed here.
To input numbers is also applicable.
ForegroundColor: Normally the hotspots are
displayed as red concentric circles when you add them
to the scenes. To change their colors, just select one of
them and click ForegroundColor. Select your favorite
color in the pop-up window then click OK.
Image: Click to browse your folders and select an
image as hotspot appearance on the scene. It's the
"off " position but indicates a feature that the hotspot
can be clicked.
MouseOverImage & MouseDownImage: Click and
select different images to indicate different hotspot
states. MouseOverImage refers to the image that
appears on "mouse roll-over" the hotspot.
MouseDownImage stands for the hotspot state that
appears when the hotspot was clicked.
You can use just one (the same) image for all three
button states if the hotspot effect is not important to
you. All three images must be exactly the same size.
Image
MouseOver- MouseDown
Image
-Image
Sample:
Figure 4-4-3-1 Properties of
scene hotspot
Hint: Input the hint text for the hotspot. For example:
name of the scene image that the hotspot links to.
HintBackgroundColor: Click and set the background
color of the hint text.
Visible: Click to select whether the hotspot is visible.
SceneImage: Select a scene image that the hotspot
links to. Click and a window as figure 4-4-3-2 shows
pops up.
50
Easypano ** User Manual
Figure 4-4-3-2 Select scene image
Tips: Summary of hotspots' properties
Altogether there are four kinds of hotspots on this panel, they are: Scene
hotspot, HTML hotspot, Sound hotspot and Path hotspot. They share the
same properties except Behavior. Below are their differences:
Hotspots
Differences
Scene hotspot
HTML hotspot
Sound hotspot
51
Easypano ** User Manual
Movie hotspot
------------------------------------------------------------
Note: If there is no other
movies in the virtual tour project except the default
SlideShow, you can specify it as the only path of movie of
the Movie hotspot.
52
Easypano ** User Manual
4.4.4 Hotspot Map
⎯⎯⎯⎯⎯⎯⎯⎯⎯⎯⎯⎯⎯⎯⎯⎯⎯⎯⎯⎯⎯⎯⎯⎯⎯⎯⎯⎯⎯⎯⎯⎯⎯⎯⎯⎯⎯⎯⎯⎯⎯⎯⎯⎯⎯
Figure 4-4-4 Hotspot map
The links between all hotspots in a tour are displayed on the hotspot map. It
shows the relations between the hotspots and the linked scene images. This
map can not be showed in the viewer skin.
stands for an image and the
links of hotspots between scenes are showed by lines, whereas
for default value. If a scene is selected, the
stands
on it will be highlighted
. And if a Scene hotspot is selected, the link between this scene image
as
and the target will be highlighted as a red line.
And you can also select a scene by double click
will be highlighted in the Scene List.
and the selected scene
53
Easypano ** User Manual
4.5 Set Path of Virtual Tour Movie
⎯⎯⎯⎯⎯⎯⎯⎯⎯⎯⎯⎯⎯⎯⎯⎯⎯⎯⎯⎯⎯⎯⎯⎯⎯⎯⎯⎯⎯⎯⎯⎯⎯⎯⎯⎯⎯⎯⎯⎯⎯⎯⎯⎯⎯
Path can be comprehended as directed guided walkthroughs of the frames.
Movie can be watched when the frames are played through the set path. In
a movie there are various frames that can be set at arbitrary position on the
TimeLine. When the movie is being played through the path, the frames will
be presented in time sequence. By setting path of movie you can control the
timing for each scene and create automated or directed guided
walkthroughs which enable you to show off the features of the tour with one
single "play" button.
As Figure 4-5 shows, the functions of Movie Panel can be achieved in the
following four parts:
Figure 4-5 Movie panel
4.5.1
4.5.2
4.5.3
4.5.4
Movie Setting Area
Frame Preview Area
Movie Operations
Set Movie & Frame Properties
54
Easypano ** User Manual
4.5.1 Movie Setting Area
⎯⎯⎯⎯⎯⎯⎯⎯⎯⎯⎯⎯⎯⎯⎯⎯⎯⎯⎯⎯⎯⎯⎯⎯⎯⎯⎯⎯⎯⎯⎯⎯⎯⎯⎯⎯⎯⎯⎯⎯⎯⎯⎯⎯⎯
As showed by the figure below, Movie Setting Area is composed of several
parts:
Figure 4-5-1 Path Setting Area
4.5.1.1
4.5.1.2
4.5.1.3
4.5.1.4
TimeLine & TimePointer
Frame View Button
SlideShow
Movie Toolbar
55
Easypano ** User Manual
4.5.1.1 TimeLine & TimePointer
⎯⎯⎯⎯⎯⎯⎯⎯⎯⎯⎯⎯⎯⎯⎯⎯⎯⎯⎯⎯⎯⎯⎯⎯⎯⎯⎯⎯⎯⎯⎯⎯⎯⎯⎯⎯⎯⎯⎯⎯⎯⎯⎯⎯⎯
Figure 4-5-1-1 TimeLine & TimePointer
•
•
TimeLine: Marks the time position of each frame, the TimeLine is a
scale on which time point is showed every 5 seconds. Each small
scale stands for 1 second.
TimePointer: Which is used to coordinate the timing between the
frames. Its usage is given in 4.5.3.2 Operations to Frame.
56
Easypano ** User Manual
4.5.1.2 Frame View Button
⎯⎯⎯⎯⎯⎯⎯⎯⎯⎯⎯⎯⎯⎯⎯⎯⎯⎯⎯⎯⎯⎯⎯⎯⎯⎯⎯⎯⎯⎯⎯⎯⎯⎯⎯⎯⎯⎯⎯⎯⎯⎯⎯⎯⎯
You can change the view options of frames in the TimeLine, and display
sequences of frames with tinted cells. You can also include thumbnail
previews of frame content in the TimeLine. These thumbnails are useful as
an overview of the scene presentation, but they take up extra screen space.
To change the display of frames in the TimeLine:
Step1: Click the Frame View button in the upper right corner of the
TimeLine to display the Frame View Pop-up Menu. There are three view
options to identify and display the frame in time line: small, medium and
large.
Figure 4-5-1-2-1 Frame view Pop-up menu
Step2: Choose from the following options:
•
To change the view of frame cells, choose Small, Medium or Large.
Figure 4-5-1-2-2 Frame view options: Small
Figure 4-5-1-2-3 Frame view options: Medium
Figure 4-5-1-2-4 Frame view options: Large
•
To display thumbnails of each frame scaled to fit the TimeLine frames,
choose Preview. This can cause the apparent content size to vary.
57
Easypano ** User Manual
Figure 4-5-1-2-5 Frame view options: Preview
58
Easypano ** User Manual
4.5.1.3 SlideShow
⎯⎯⎯⎯⎯⎯⎯⎯⎯⎯⎯⎯⎯⎯⎯⎯⎯⎯⎯⎯⎯⎯⎯⎯⎯⎯⎯⎯⎯⎯⎯⎯⎯⎯⎯⎯⎯⎯⎯⎯⎯⎯⎯⎯⎯
Figure 4-5-1-3 SlideShow
SlideShow is the movie with default tour path and can not be deleted.
Whenever a new image is added into the Scene List, two default frames of
the image (Start and End) are added in the Slideshow and no others frames
can be added between the two. As showed in the figure above, the time
interval between frames is indicated by .
If you play the movie with default path, the transitional effects (Symbolized
by ) will last for 2 seconds between the End of the previous image and the
Start of the next one. As for how to set scene transitional effects, please
refer to Chapter 4.3.2 Scene Options.
• For panoramic images, default view of the Start is showed in Scene
Panel and Pan, Tilt and FOV are adjustable. Pan of the Start turned
around and then it reaches the view of the End after 20 seconds. The
views of Start and End share same Pan.
• For still images, the center position of the Start has also been given in
Scene Panel and it can be adjusted. Since it is a still image and there
is no view changes between the Start and the End, you can only see
the view of the Start lasts for 5 seconds from the Scene Display area.
You can create a new movie, insert many frames and adjust their views as
you like. For detailed information, please refer to 4.5.3 Movie Operations.
Note:
· You can not delete the default movie SlideShow. You can only copy the
frames on it.
· Sequence of the frame images on SlideShow can be changed in the
Manage Panel. Please read Chapter 4.2 Manage Scenes.
59
Easypano ** User Manual
4.5.1.4 Movie Toolbar
⎯⎯⎯⎯⎯⎯⎯⎯⎯⎯⎯⎯⎯⎯⎯⎯⎯⎯⎯⎯⎯⎯⎯⎯⎯⎯⎯⎯⎯⎯⎯⎯⎯⎯⎯⎯⎯⎯⎯⎯⎯⎯⎯⎯⎯
The buttons on the toolbar of Movie Panel are divided in to two types: to the
movie and to the frames.
Button
Hint
Function
Add a New
Create a new movie and you can also
Virtual Tour
modify the movie name
Movie
To Movie
Set Current
The default value is SlideShow.
Movie as Default Function of this button is to set the
current movie as default and show
an symbol next to the movie name.
-----------------------------------------------Operations: Select one (movie3 for
example) and click this button, you can
find the movie name is displayed as
, which means that
you have set Movie3 as the default
movie, here you can edit the path of this
movie. As a result, the applet auto plays
this movie according to the sequence set
in Movie3 as soon as it was opened when
you view the tour next time.
Play Current
Movie
To Frame
Play the movie through edited
complete path in the Scene Display
Area
Delete the selected movie
Delete Current
Movie
Insert a Frame Insert a frame in the current movie
Delete Current
Frame
Clear a selected frame in the current
movie
Note:
Selected one movie in the Movie Setting Area, then click
or press Enter
on your keyboard, the frames on the movie will start their presentation.
You can pause presentation by clicking in the Frame Preview Area and
press Enter on your keyboard to continue playing whereas click
replay the movie.
means
60
Easypano ** User Manual
4.5.2 Frame Preview Area
⎯⎯⎯⎯⎯⎯⎯⎯⎯⎯⎯⎯⎯⎯⎯⎯⎯⎯⎯⎯⎯⎯⎯⎯⎯⎯⎯⎯⎯⎯⎯⎯⎯⎯⎯⎯⎯⎯⎯⎯⎯⎯⎯⎯⎯
The 3D effects of the panoramas and original size of still image are showed
here. Along with the hotspots on the scenes, you can not only drag the scene
to an appropriate view with your mouse so as to set the frames (Specific
steps in 4.5.3.2 Operations to Frame) but also see the movie presentation
when all the movie settings were finished.
Note: You can not see the hotspot actions, such as open a new
panorama, movie, play an audio or open a web page by clicking the
hotspots in Frame Preview Area.
There is a toolbar by which you can drag and play the scene. The functions
and status of the buttons on the toolbar are described in the following table:
Button Name
Function
Left
Turn left ( or move left horizontally)
Right
Turn right ( or move right horizontally)
Up
Turn up ( or move upwards vertically)
Down
Turn down ( or move downwards vertically)
Zoom In
Magnify the image
Zoom Out
Minify the image
Reset
Restore the scene to its initial play position
Stop
Stop presenting the scene
Tips: A still image can only be zoomed in for nine times as much and
zoomed out to fit the size of viewer.
61
Easypano ** User Manual
4.5.3 Movie Operations
⎯⎯⎯⎯⎯⎯⎯⎯⎯⎯⎯⎯⎯⎯⎯⎯⎯⎯⎯⎯⎯⎯⎯⎯⎯⎯⎯⎯⎯⎯⎯⎯⎯⎯⎯⎯⎯⎯⎯⎯⎯⎯⎯⎯⎯
To create a new virtual tour movie, this logical order is preferred:
Add a new movie -> Adjust its properties (Rename it, add sound files,etc) ->
Select one scene image in the Scene List -> Drag it to an appropriate view in
the Scene Display Area -> Insert frame (which has the current view) -> Edit
frame (Copy, paste, adjust its positions, etc) -> Adjust its properties
(Direction and time of presentation) -> Repeat the above procedures to add
new movies and insert more frames -> Select one movie and view its
presentation result.
From above steps you can see movie operations include two parts actually:
to the whole virtual tour movie and to the frames in the current movie. See
the following chapters:
4.5.3.1 Operations to Movie
4.5.3.2 Operations to Frame
62
Easypano ** User Manual
4.5.3.1 Operations to Movie
⎯⎯⎯⎯⎯⎯⎯⎯⎯⎯⎯⎯⎯⎯⎯⎯⎯⎯⎯⎯⎯⎯⎯⎯⎯⎯⎯⎯⎯⎯⎯⎯⎯⎯⎯⎯⎯⎯⎯⎯⎯⎯⎯⎯⎯
Add:
To add a new movie, do one of the following:
•
•
then a movie can be added.
Click
Right-click your mouse on the empty area under movie name and a
menu pops up. Then select "New Movie". Please refer to the figure
below:
Select:
• Click the mouse on Movie Name or on Frame Area in the Movie
Setting Area. If the Movie Name is highlighted, it shows that the
selected movie is activated.
•
You can select the current movie and all the frames on it by double
clicking the mouse on Movie Name. At this time the Movie Name and
all the frames on the movie were highlighted.
Copy & paste:
• To copy and paste the path of a movie, please follow the instructions
below:
63
Easypano ** User Manual
Adjustments:
• You can modify movie name in the Properties Area when a certain
movie was selected. Just input movie name directly.
Delete:
To delete a movie, do one of the following:
•
•
and the current selected movie will be deleted.
Click
Right-click your mouse on the empty area under movie name and a
menu pops up. Then select "Delete Movie". Please refer to the figure
below:
Play:
•
To play current movie, just click
.
Tips: Different ways to view a movie
When you have finished the movie settings, there are several ways to
view the movie in a virtual tour:
• Set the Tour Button of Playmovie on the viewer skin. Specify one
movie in the drop down list of Playmovie in the Properties Area.
Presentation of the specified tour movie will start when the button
is clicked.
• Set movie hotspots on scene images via the Map Panel and Hotspot
Panel. Specify one tour movie in the drop down list of Playmovie in
the Properties Area. Just click these hotspots to view the movies
64
Easypano ** User Manual
during the tour presentation.
Set one movie as the default movie. As a result, the applet auto
plays this movie as soon as the virtual tour was opened when you
view the tour next time. But there can be only one default movie in
a virtual tour project.
65
Easypano ** User Manual
4.5.3.2 Operations to Frame
⎯⎯⎯⎯⎯⎯⎯⎯⎯⎯⎯⎯⎯⎯⎯⎯⎯⎯⎯⎯⎯⎯⎯⎯⎯⎯⎯⎯⎯⎯⎯⎯⎯⎯⎯⎯⎯⎯⎯⎯⎯⎯⎯⎯⎯
Add:
• Select one image in the Scene List, and then adjust it in the Scene
Display Area to an appropriate view as you need. After that you
should click the mouse to select one certain time point on which you
hope to insert the frame in the Moving Setting Area. Then click
or
refer to Right-click menu>Insert Frame. Thus current view of the
scene is added into the path of the movie as one of the frames.
Select:
• In the Frame area, you can select one frame by clicking the mouse on
it. Moreover, by holding on Ctrl on the keyboard and click the mouse,
you can multi-select the frames at the same time.
• You can select the current movie and all the frames on it by double
clicking the mouse on Movie Name. At this time the Frame area will be
highlighted.
Note:
Frames on two different movies can not be selected at the same time.
Edit: ( Copy & Paste )
You can copy and paste the selected frames to current movie or to other
movies. Select one frame and refer to the right-click menu as figure
4-5-3-2-1 shows:
66
Easypano ** User Manual
Note:
This copy & paste process can only be applied to the selected frames.
When being played, their relative time positions on the TimeLine do not
change.
Example: (Inside the [ ] are their positions on the TimeLine)
There are three frames: Frame1 [1s], Frame2 [5s] and Frame3 [15s] on
Movie1. If only Frame 1 and Frame 3 were copied and pasted into Movie2,
you will find the time interval between these two frames is still 14s when
this new movie is being played.
Example1: Frame1, Frame2 and Frame3 on Movie1 & Frame4 and Frame5 on Movie2
67
Easypano ** User Manual
Example1: Copy Frame1 and Frame3 into Movie2 between Frame4 and Frame5
•
To copy frame: Select one (or multiple) frame, right click the mouse
and select Right-click menu>Copy Frame. Thus this process is
achieved.
• To paste frame: Select a tour movie, then select a time point on
which you hope to paste frames, and then choose Right-click
menu>Paste Frame. Thus these frames were pasted.
• To paste frames is to insert copied frames actually. If you paste
frames on their original position, you can not see any paste effects.
Adjustments:
• You can manage the timing for each scene by adjusting their positions.
To adjust the position of a frame, just select it and drag it to an
appropriate position on the TimeLine with your mouse.
Delete:
•
or refer to Right-click menu>Clear Frame and the current
Click
selected frame will be deleted.
68
Easypano ** User Manual
4.5.4 Set Movie & Frame Properties
⎯⎯⎯⎯⎯⎯⎯⎯⎯⎯⎯⎯⎯⎯⎯⎯⎯⎯⎯⎯⎯⎯⎯⎯⎯⎯⎯⎯⎯⎯⎯⎯⎯⎯⎯⎯⎯⎯⎯⎯⎯⎯⎯⎯⎯
Properties of movie:
Figure 4-5-4-1 Properties
of movie
Movie Name: Show the name of current movie. You can
rename a movie here.
Time: Show the total time of current movie when it is
being played. ( Not editable. To change the total
presentation time of the movie, you should adjust the
timing of each frame.)
Sound: Specify a background sound file of the movie. *.au
formats supported. Click to select sound files.
AutoPlay: Indicate whether to auto play the movie when
you open the applet to view the default movie of virtual
tour movie or click a movie hotspot during the presentation
of a tour. So this option should always set to "Yes".
Loop: Indicate whether to circulate the presentation of the
movie. Two choices available: "Yes" and "No".
Properties of frame:
Panoramic images:
MovieName: Show the movie name. ( Not editable)
FrameID: Show the frame ID in the movie. ( Not editable)
SceneImage: Show the scene image name that the frame
belongs to. ( Not editable)
Time: Show time position of the frame on TimeLine. You
can input number here so as to adjust position of the frame.
Pan: Show Pan of the frame. (Editable)
Tilt: Show Tilt of the frame. (Editable)
FOV: Show FOV of the frame. (Editable)
Direction: Set the play direction from this frame to
another. Two Choices available: Clockwise and
Anti-Clockwise.
Figure 4-5-4-2 Properties
of frame: panorama
Still images:
Movie Name: Show the movie name. ( Not editable)
Frame ID: Show the frame ID in the movie. ( Not editable)
SceneImage: Show the scene image name that the frame
belongs to. ( Not editable)
Time: Show time position of the frame on TimeLine. You
can input number here so as to adjust its position.
X: Show X coordinate of the scene center in the original
image. (Editable)
Y: Show Y coordinate of the scene center in the original
image. (Editable)
ZoomLevel: Show the zoom level of the scene. (Editable)
Direction: Set the play direction from one frame to
another. Two choices available: Clockwise and
Anti-Clockwise.
Figure 4-5-4-3 Properties
of frame: still image
69
Easypano ** User Manual
Note: If you have applied changes to the "editable" options, you can
not observe any changes in the Frame Preview Area immediately. Instead,
the result of your adjustment can only be seen when you play the movie
again.
70
Easypano ** User Manual
Appendix: Sample Movie Making
⎯⎯⎯⎯⎯⎯⎯⎯⎯⎯⎯⎯⎯⎯⎯⎯⎯⎯⎯⎯⎯⎯⎯⎯⎯⎯⎯⎯⎯⎯⎯⎯⎯⎯⎯⎯⎯⎯⎯⎯⎯⎯⎯⎯⎯
Since the operations to movies and frames were introduced in the previous
chapters, it's time for you to start making a sample movie right away.
Step 1: Switch to Movie Panel and add a new path of movie
Step 2: Adjust movie properties
Select this new movie and modify tour path name in the Properties Area.
Just input path name directly. Moreover, you can add sound files to this
movie. If the sound effect is not important to you, just skip this step.
Click
and the current selected tour movie will be deleted.
Step 3: Select one scene image in the Scene List
Let's take the scene image of Art Gallery as an example.
Step 4: Adjust the view of selected scene image
By dragging your mouse on the scene image or clicking the Movie toolbar,
you can adjust the view in Frame Preview Area to an appropriate view as you
need.
Step 5: Insert frame
Click the mouse to select one certain time point on which you hope to insert
the frame in the Path Setting Area.
71
Easypano ** User Manual
Then click
or refer to Right-click menu>Insert Frame. Thus current view
of the scene is added into the tour path as one of the frames.
Step 6: Edit frame
You can copy and paste the selected frame to another time point on current
tour path or on other paths. Select one frame and refer to the right-click
menu.
If you hope to change the position of a frame, just select it and drag it to an
appropriate position on the TimeLine with your mouse.
72
Easypano ** User Manual
Click
or refer to Right-click menu>Clear Frame and the current frame
will be deleted.
Step 7: Adjust frame properties
Select this frame and set the play direction from this frame to another in the
Properties Area. Moreover, you can adjust Pan, Tilt and FOV of the current
frame by inputting numbers directly.
Step 8: Repeat the above steps to add new paths and insert more
frames.
Step 9: Select one movie and view its presentation result.
To play current tour movie, just click
.
73
Easypano ** User Manual
4.6 Edit Map
⎯⎯⎯⎯⎯⎯⎯⎯⎯⎯⎯⎯⎯⎯⎯⎯⎯⎯⎯⎯⎯⎯⎯⎯⎯⎯⎯⎯⎯⎯⎯⎯⎯⎯⎯⎯⎯⎯⎯⎯⎯⎯⎯⎯⎯
Setting an interactive map in Tourweaver would help you accomplish a more
vivid and interactive virtual tour. On the map you can set the hotspots which
links to panoramas, still images, sound files or websites on the Map Panel,
which help to form an interactive floorplan.
The interface of Map Panel is showed below:
Figure 4-6 Map Panel
4.6.1 Map Toolbar
4.6.2 How to Make a Map
Note: Different from the Hotspot Map which is not showed in the
viewer, map of the Map Panel will appear in the viewer if you have set the
control button of Map on the Skin Panel (See Chapter 6.5.1 Tour
Components:Map).
However, map settings are not obligatory. If you do not want to add a map
to the viewer skin, please skip this chapter.
74
Easypano ** User Manual
4.6.1 Map Toolbar
⎯⎯⎯⎯⎯⎯⎯⎯⎯⎯⎯⎯⎯⎯⎯⎯⎯⎯⎯⎯⎯⎯⎯⎯⎯⎯⎯⎯⎯⎯⎯⎯⎯⎯⎯⎯⎯⎯⎯⎯⎯⎯⎯⎯⎯
Below are the buttons and their functions of the map toolbar:
Button Hint
Action
Add a Map
Add map images. Click this button and a
dialogue box will pop up. Just to select a file and
click OK, then the selected file will be added into
the Map edit area as Map background image.
Delete Map
Delete map images together with all the
and Hotspots hotspots on it. Click this button, an information
dialogue box will pop up and remind you
whether to continue this operation.
Zoom Actual Display the current selected scene in its original
Size
size
Best Fit
Zoom in or zoom out the current selected scene
to fit the Scene Display Area
Pointer
Use it to select the hotspots
Add a Scene
Hotspot
Add a HTML
Hotspot
Add a sound
hotspot
Add a movie
hotspot
Add a
Panorama
Compass
Set the hotspots that link to panoramas or still
images
Set the hotspots that link to URL
Set the hotspots that link to sound file
Set the hotspots that display specified movies
Set the hotspots that achieve compass effect
75
Easypano ** User Manual
4.6.2 How to Make a Map
⎯⎯⎯⎯⎯⎯⎯⎯⎯⎯⎯⎯⎯⎯⎯⎯⎯⎯⎯⎯⎯⎯⎯⎯⎯⎯⎯⎯⎯⎯⎯⎯⎯⎯⎯⎯⎯⎯⎯⎯⎯⎯⎯⎯⎯
To create a map, this logical order is preferred:
Step 1: Add a map background image:
Figure 4-6-2-1 Select map background image
Step 2: Add and edit hotspots to the map:
Figure 4-6-2-2 Add map hotspot
You can edit the hotspots which relates to the scene, such as adding,
deleting, etc. Since these operations have been introduced in previous
76
Easypano ** User Manual
chapter about hotspots, please refer to the relative contents in 4.4.2 Scene
Hotspot Operations.
Step 3: Adjust hotspot properties:
Click the hotspots on the Map Edit Area and their properties are showed in
the Properties Area. The properties of the hotspots named Scene, URL,
Sound and Tour have already been discussed in previous chapter about
hotspots, please refer to the relative contents in 4.4.3 Set Scene Hotspot
Properties.
But the properties of Compass hotspot are different from that of the other
four. See the specifications below:
Figure 4-6-2-3 Properties of
Compass hotspot
Center: X and Y of the center of the hotspot. Click and
input numbers to change the position, or click and drag
inside the hotspot to move it.
BorderColor: When being previewed, the Compass
effect is displayed as fan-shaped sector with blue
border. See figure 4-6-2-4. To change the border
color, just select the compass hotspot and click
BorderColor. Select your favorite color in the pop-up
window then click OK.
Brightness: It refers to the brightness within the
fan-shaped sector. The range is between 0 and 100.
The larger the number is, the brighter the section is.
You can adjust it by inputting numbers directly.
Image: Click to browse your folders and select an
image as Compass hotspot appearance on the scene.
Figure 4-6-2-4 shows the default compass image.
Panorama: Select a panoramic scene image that the
Compass hotspot links to. So when the linked
panorama is being presented, the compass effect
appears on the map.
CompassInitialAngle: Different from Tourweaver
previous version, you can set the compass visually in
an easier way in Tourweaver 1.25. After clicking
CompassInitialAngel property, below image will pop
up. You can drag the panorama as well as the compass
to make them indicate the same position. When
moving to the specified view, the compass points to
the indicated direction on the map.
Figure 4-6-2-4 Setting compass initial angle
77
Easypano ** User Manual
Figure 4-6-2-4 Compass effect
Note:
1. Properties of Scene, Movie, Sound and URL hotspots on Hotspot
Panel and Map Panel has minor differences:
• The four kinds of hotspots on Map Panel are displayed as
transparent rectangles whereas they are presented by red
concentric circles on Hotspot Panel.
• The four kinds of hotspots on Map Panel do not have such property
of ForegroundColor.
2. You can only set Compass hotspot on panoramic scene images.
If you have set more than one Compass hotspots on the map, you
will find that only the first of them functions during the presentation
of the panoramic image. All the others are ignored by Tourweaver.
78
Easypano ** User Manual
4.7 Outline of Skin Editing
⎯⎯⎯⎯⎯⎯⎯⎯⎯⎯⎯⎯⎯⎯⎯⎯⎯⎯⎯⎯⎯⎯⎯⎯⎯⎯⎯⎯⎯⎯⎯⎯⎯⎯⎯⎯⎯⎯⎯⎯⎯⎯⎯⎯⎯
After you have created a new project, the software will provide you a blank
skin or require you to open an existing one which basic point is at the
top-left corner of Skin Design Area. These steps can be traced to Chapter
4.1.1 Create New Project.
You can customize the blank skin into your personalized one via the Skin
Panel by selecting, adding, moving and resizing control buttons. And further
discussion of these steps are given in Chapter 6 Customize Personalized
Skin.
Moreover, some of the control buttons, including StillImage and TextLink
from Tour Components and all the Tour Buttons have special actions which
can specify the links with these buttons. But if the skin was saved and
imported next time, all the actions would be restored to default and should
be specified again. You can adjust their actions via the Properties Area to get
more vivid effects.
Steps on how to set actions is given in Chapter 6.2.5 Set Control Button
Properties.
79
Easypano ** User Manual
4.8 Preview Virtual Tour
⎯⎯⎯⎯⎯⎯⎯⎯⎯⎯⎯⎯⎯⎯⎯⎯⎯⎯⎯⎯⎯⎯⎯⎯⎯⎯⎯⎯⎯⎯⎯⎯⎯⎯⎯⎯⎯⎯⎯⎯⎯⎯⎯⎯⎯
The previous chapters are all discussing how to design your tour. After these
steps you can preview the final output of your tour in the Preview Panel. If
you did not load any images, you can only preview the skin effects here,
including the tour components' effects, such as MouseOverSelectColor, etc.
If you did, then the publishing result can be achieved here.
When you have finished all the settings to your tour, please select
to switch to the Preview Panel. A progress bar will
File>Preview or click
pop up as Figure 4-8-1 shows:
Figure 4-8-1 Progress bar
Then the interface of your virtual tour appears as follow:
Figure 4-8-3 Preview tour
80
Easypano ** User Manual
Note: If your software has not been registered yet, the viewer will be
watermarked with an easypano logo which appears every 10 seconds.
81
Easypano ** User Manual
4.9 Publish Virtual Tour
⎯⎯⎯⎯⎯⎯⎯⎯⎯⎯⎯⎯⎯⎯⎯⎯⎯⎯⎯⎯⎯⎯⎯⎯⎯⎯⎯⎯⎯⎯⎯⎯⎯⎯⎯⎯⎯⎯⎯⎯⎯⎯⎯⎯⎯
Click File>Publish or
in the toolbar to open the Publish Panel so as to
publish the virtual tour as Applet format:
Figure 4-9-1 Publish virtual tour
Tourweaver 1.25 offers two output locations: Local and FTP. See the next
two chapters: 4.9.1 Local and 4.9.2 FTP.
As shown in Figure 4-9-1, there are some output parameters for each output
options. Chapter 4.9.3 Output Parameters has the detail. Moreover, you can
make advanced settings of JavaScript.
When all the settings are finished, click . Figure 4-9-2 reveals the publishing
progress,which can be cancelled by clicking Cancel.
Figure 4-9-2 Publish progress
82
Easypano ** User Manual
4.9.1 Local
⎯⎯⎯⎯⎯⎯⎯⎯⎯⎯⎯⎯⎯⎯⎯⎯⎯⎯⎯⎯⎯⎯⎯⎯⎯⎯⎯⎯⎯⎯⎯⎯⎯⎯⎯⎯⎯⎯⎯⎯⎯⎯⎯⎯⎯
Figure 4-9-1-1 Local
You can publish the virtual tour in your computer. An output path and file
name of the virtual tour should be specified here. Click and a dialogue box
pops up. Just select one folder and save the virtual tour.
Figure 4-9-1-2 Output
83
Easypano ** User Manual
4.9.2 FTP
⎯⎯⎯⎯⎯⎯⎯⎯⎯⎯⎯⎯⎯⎯⎯⎯⎯⎯⎯⎯⎯⎯⎯⎯⎯⎯⎯⎯⎯⎯⎯⎯⎯⎯⎯⎯⎯⎯⎯⎯⎯⎯⎯⎯⎯
Figure 4-9-2-1 FTP
You can publish the virtual tour to FTP server. FTP account configurations
should be specified here since there is no default value. Click and a dialogue
box pops up. Just fill in the blanks in the dialogue box and click OK.
Figure 4-9-2-2 FTP settings
84
Easypano ** User Manual
4.9.3 Output Parameters
⎯⎯⎯⎯⎯⎯⎯⎯⎯⎯⎯⎯⎯⎯⎯⎯⎯⎯⎯⎯⎯⎯⎯⎯⎯⎯⎯⎯⎯⎯⎯⎯⎯⎯⎯⎯⎯⎯⎯⎯⎯⎯⎯⎯⎯
Availabilities of Parameters:
Parameters
Output Options
Local
FTP
Compress BMP Files as JPEG Format
Yes
Yes
Copyright protection by Image Encryption Yes
Yes
Generate Files for Autorun CD
Yes
No
Open Result File Directory after Publishing Yes
No
Customize Applet
Yes
Yes
* Available = Yes
Unavailable = No
Specifications of Parameters:
• Compress BMP Files as JPEG Format: available when a *.BMP
image is imported. When marked, the button is at work. You can click
it and adjust the compress quality of your image.
Figure 4-9-3 Compress BMP Files as JPEG Format
•
•
•
Copyright protection by Image Encryption : When marked, all
your images can be encrypted here. As consequence your images are
protected from being copied and altered by others.
Generate Files for Autorun CD: When marked, an autorun.inf file
will be auto created.
Preview after Publishing: When marked, the result file directory
will open after the virtual tour was published and enable you to
preview the tour.
85
Easypano ** User Manual
4.9.4 Advanced Parameter Setting
⎯⎯⎯⎯⎯⎯⎯⎯⎯⎯⎯⎯⎯⎯⎯⎯⎯⎯⎯⎯⎯⎯⎯⎯⎯⎯⎯⎯⎯⎯⎯⎯⎯⎯⎯⎯⎯⎯⎯⎯⎯⎯⎯⎯⎯
It is used to make advanced settings of JavaScript. When marked, the
button is at work. Click it and a window pops up as Figure 4-9-4 shows,
where you can specify information of the title bar and border of Internet
Explorer via adjusting the properties of Title and CloseButton.
Figure 4-9-4 Advanced parameter setting
86
Easypano ** User Manual
5 View Virtual Tour
⎯⎯⎯⎯⎯⎯⎯⎯⎯⎯⎯⎯⎯⎯⎯⎯⎯⎯⎯⎯⎯⎯⎯⎯⎯⎯⎯⎯⎯⎯⎯⎯⎯⎯⎯⎯⎯⎯⎯⎯⎯⎯⎯⎯⎯
After successfully publishing the virtual tour in web applet format, you can
view the virtual tour via Easypano Tourweaver viewer shown as Figure 5-1.
Figure 5-1 View virtual tour
Note:By right clicking within the applet, the About Window of
Easypano Virtual Tour Player will appear in Tourweaver Standard Edition,
while this window does not exist in Tourweaver Professional Edition. The
About Window is shown as follows.
Figure 5-2 About Window
87
Easypano ** User Manual
6 Customize Personalized Skin
⎯⎯⎯⎯⎯⎯⎯⎯⎯⎯⎯⎯⎯⎯⎯⎯⎯⎯⎯⎯⎯⎯⎯⎯⎯⎯⎯⎯⎯⎯⎯⎯⎯⎯⎯⎯⎯⎯⎯⎯⎯⎯⎯⎯⎯
The reason for the skin functionality is for users to have FULL control over
how the virtual tour looks, as well as easily transfer interfaces and share
them, etc. Moreover, personalized viewer skin can make your virtual tour
looks more lively and attractive. You can achieve this process by adjusting
the parameters of various control buttons visually.
The Skin Panel is displayed as follow:
Figure 6 Skin Panel
6.1
6.2
6.3
6.4
6.5
Preparing Skin Images
Creating Skin
Import Skin
Classic Skin Samples
Control Buttons
88
Easypano ** User Manual
6.1 Preparing Skin Images
⎯⎯⎯⎯⎯⎯⎯⎯⎯⎯⎯⎯⎯⎯⎯⎯⎯⎯⎯⎯⎯⎯⎯⎯⎯⎯⎯⎯⎯⎯⎯⎯⎯⎯⎯⎯⎯⎯⎯⎯⎯⎯⎯⎯⎯
Figure 6-1 Sample Skin
Above is a simple skin sample made by Tourweaver 1.25. To make it you
should make the following preparations:
6.1.1 Tips on Preparing Image Files
6.1.2 Mandatory Control Buttons
89
Easypano ** User Manual
6.1.1 Tips on Preparing Image Files
⎯⎯⎯⎯⎯⎯⎯⎯⎯⎯⎯⎯⎯⎯⎯⎯⎯⎯⎯⎯⎯⎯⎯⎯⎯⎯⎯⎯⎯⎯⎯⎯⎯⎯⎯⎯⎯⎯⎯⎯⎯⎯⎯⎯⎯
As the interface of Skin Panel shows, the control buttons are divided into two
types: Tour Components and Tour Buttons. And their detailed functions are
introduced in Chapter 6.5 Control Buttons. Before you prepare the image
files, we advise you get brief information of these buttons first.
When you prepare your own images for a skin or control buttons, there are
a few points you need to be aware of:
(1) Tour Buttons will always appear as a rectangular area on the background.
Usually you won't want a button to be rectangular, for example, you may
want a round button or any shape else. In this case, you will need to keep
the outer edges of your buttons include the appropriate design of the skin
background or simply keep them transparent when saving the buttons. If
you do not do this, your buttons will appear with white colored outer edges
and will not blend in with the skin background.
Sample:
(Original Size: 36*36 pixels)
Tips:
· Although the skin image files may be in *.jpg, *.bmp or *.gif
format, *.gif format is recommended as the skin images since
transparent image effect is only available in *.gif format.
· It is not recommended to use *.bmp skin image files. If you have
used them, they will be converted into *.png format when the
skin is published by Tourweaver 1.25.
Note:
All Tour Buttons have "button-down" effects
which can be set in the Properties Area. If you hope the Tour Buttons to
appear round or any shape else, please select "No" in the drop-down list.
Otherwise white colored outer edges would still appear on the buttons.
ButtonDownEffect "Yes"
ButtonDownEffect "No"
Sample:
(2) The skin background can be set as a plain color or you can create a
separate background image using other graphics software.
90
Easypano ** User Manual
Sample:
(Original Size: 665*453 pixels)
(3) Button "States": Most of the control buttons have three button states Normal, MouseOver and MouseDown.
You can use just one (the same) image for all three button states if the
button effect is not important to you. All three images must be exactly the
same size.
Normal is the "selectable" state. This is the button state that will normally,
but not always, appear in the skin when first loaded. It's the "off " position
but indicates a feature that can be selected or switched on.
MouseOver is the button state that appears on "Roll-over".
MouseDown is the button state that appears when the button is pressed.
Normal
MouseOver
MouseDown
Sample:
(Original Size: 36*36 pixels)
91
Easypano ** User Manual
6.1.2 Mandatory Control Buttons
⎯⎯⎯⎯⎯⎯⎯⎯⎯⎯⎯⎯⎯⎯⎯⎯⎯⎯⎯⎯⎯⎯⎯⎯⎯⎯⎯⎯⎯⎯⎯⎯⎯⎯⎯⎯⎯⎯⎯⎯⎯⎯⎯⎯⎯
Only the viewer and several Tour Buttons, such as Left, Right etc. for the
panoramas are mandatory since you must define them to view the virtual
tour. But usually you are not trying to make the simplest skin, right ? In
most cases you should add other control buttons to achieve more functions
and to make the skin look better.
The mandatory control buttons for our skin sample are given below:
• Skin BackgroundImage
Skin BackgroundImage
Original Size
(in Pixels)
665*453
• Tour Components
Tour Components
Image Files
Original Size
(in Pixels)
Viewer
391*331
StillImage
59*49
101*116
59*49
92
Easypano ** User Manual
114*159
Thumbnail
See the default image
provided by the
software
• Tour Buttons
Tour Buttons Image Files
Normal
MouseOver
Default and you can resize
it by clicking and dragging
MouseDown
Original
Size
(in Pixels)
36*36
Left
Right
Up
Down
ZoomIn
ZoomOut
111*34
SceneLink
• Scroll bar
Sometimes horizontal and vertical scroll bars appear on some of the Tour
Components such as ListBox, Map, Thumbnail and SceneDiscription. You
can set their bar images and mouse effects so as to get more vivid effects.
As for how to set them please refer to Chapter 6.2.1 Set Skin Properties.
Original Size
Image Files
Normal
MouseOver MouseDown (in Pixels)
16*16
Besides, you should also prepare the download waiting image which appears
during the publishing process of the virtual tour. As for how to set it please
refer to Chapter 6.2.1 Set Skin Properties.
93
Easypano ** User Manual
6.2 Creating Skin
⎯⎯⎯⎯⎯⎯⎯⎯⎯⎯⎯⎯⎯⎯⎯⎯⎯⎯⎯⎯⎯⎯⎯⎯⎯⎯⎯⎯⎯⎯⎯⎯⎯⎯⎯⎯⎯⎯⎯⎯⎯⎯⎯⎯⎯
To create a new skin out of a blank one, this logical order is preferred:
Set skin properties (background color or image, scroll bars if necessary,
waiting image) -> Add and select control buttons -> Edit control buttons
(move, resize, delete) -> Set control button properties -> Preview and
export skin.
The following chapters are arranged in this order and they will surely offer
you help on skin designing.
94
Easypano ** User Manual
6.2.1 Set Skin Properties
⎯⎯⎯⎯⎯⎯⎯⎯⎯⎯⎯⎯⎯⎯⎯⎯⎯⎯⎯⎯⎯⎯⎯⎯⎯⎯⎯⎯⎯⎯⎯⎯⎯⎯⎯⎯⎯⎯⎯⎯⎯⎯⎯⎯⎯
After you have created a new project, the software will provide you a blank
skin or require you to open an existing one which basic point is at the
top-left corner of Skin Design Area. These steps can be traced to 4.1.1
Create New Project.
The interface of skin Properties Area is shown below:
Figure 6-2-1-1 skin Properties Area
Note: The WaitingImage Property is only active in Toureaver
Professional Edition while this property in Tourweaver Standard Edition
appears grey and does not allow user to edit.
95
Easypano ** User Manual
Figure 6-2-1-2 Waiting Image & Progress Bar Setting
Tips:
If you are not satisfied with your settings in the Properties Area and want to
delete them, just press Delete on your keyboard. The input numbers will be
restored to 0 and the others to default.
96
Easypano ** User Manual
6.2.2 Adding Control Buttons
⎯⎯⎯⎯⎯⎯⎯⎯⎯⎯⎯⎯⎯⎯⎯⎯⎯⎯⎯⎯⎯⎯⎯⎯⎯⎯⎯⎯⎯⎯⎯⎯⎯⎯⎯⎯⎯⎯⎯⎯⎯⎯⎯⎯⎯
To add the Tour Components and Tour Buttons, you can select one item and
then click the mouse on the skin. Hence it can be added to the skin. But this
operation can not be applied to the Pointer button.
Figure 6-2-2 Add control buttons
97
Easypano ** User Manual
6.2.3 Selecting Control Buttons
⎯⎯⎯⎯⎯⎯⎯⎯⎯⎯⎯⎯⎯⎯⎯⎯⎯⎯⎯⎯⎯⎯⎯⎯⎯⎯⎯⎯⎯⎯⎯⎯⎯⎯⎯⎯⎯⎯⎯⎯⎯⎯⎯⎯⎯
You can choose the control buttons on the Skin Panel by clicking them
directly, or select them from the Combobox.
Figure 6-2-3 Select control button
98
Easypano ** User Manual
6.2.4 Editing Control Buttons
⎯⎯⎯⎯⎯⎯⎯⎯⎯⎯⎯⎯⎯⎯⎯⎯⎯⎯⎯⎯⎯⎯⎯⎯⎯⎯⎯⎯⎯⎯⎯⎯⎯⎯⎯⎯⎯⎯⎯⎯⎯⎯⎯⎯⎯
• To move control buttons:
Click and drag inside the control buttons to the desired position. Then you
can adjust the parameters in the Properties Area for more precise
positioning.
Right-click the mouse on the control buttons and a menu will pop up, see the
figure below:
Figure 6-2-4 Control Button right-click menu
• To resize control buttons:
Select the component and drag the mouse to change its size. Or you can
adjust the parameters in the Properties Area for more precise resizing.
• To delete control buttons:
Press the Delete key on your keyboard, then you can delete the selected
control button on the skin.
99
Easypano ** User Manual
6.2.5 Set Control Button Properties
⎯⎯⎯⎯⎯⎯⎯⎯⎯⎯⎯⎯⎯⎯⎯⎯⎯⎯⎯⎯⎯⎯⎯⎯⎯⎯⎯⎯⎯⎯⎯⎯⎯⎯⎯⎯⎯⎯⎯⎯⎯⎯⎯⎯⎯
If you have successfully add your favorite tour components and tour buttons
to the skin, then you may consider aligning their positions, adjusting their
size and setting their background colors, etc. You can adjust the parameters
so as to modify the properties of the control buttons.
The Properties Area displays all the properties of the different control
buttons. Now let's take the properties of Textlink as an example:
Location: X and Y of the up-left corner of TextLink
button. Click and input numbers to apply changes.
Size: Width and height of TextLink button are showed
here. To input numbers is also applicable.
Text: Input the text that you want to appear in the
button.
TextAlign: Click to select the text alignment Left/Center/Right.
TextFont: Click to select a font face and font size. See
Figure 6-2-5-2.
TextColor: as Figure 6-2-5-3 shows, click to select a
text color to apply to the Text.
TextMouseOverColor & TexrMouseDownColor:
Select different colors to indicate different mouse
states.
LinkBehavior: Click to select the appearance of text
link AlwaysUnderline/HoverUnderline/NeverUnderline.
Actions: Click to specify actions. So when being
clicked, depending on the Action you assign to it, the
control button will open a new scene or open a web
page. See the pop-up window as Figure 6-2-5-4 shows.
Note: For scene buttons of "Up" "Down" "Left"
"Right" "Zoom In" "Zoom Out", Speed option in
Behavior panel is available. Please see Figure
6-2-5-5. You are free to control how fast the scene
should turn left, right, move up, down, as well as zoom
in, out. User can regulate the scene rotating speed
when clicking the buttons by choose a number in the
drop down list ranging from 5-100. 100 is the maximum
speed while 5 is the minimum one.
Figure 6-2-5-5
Figure 6-2-5-1 Properties of Textlink
100
Easypano ** User Manual
Figure 6-2-5-2 Textfont
Figure 6-2-5-3 Textcolor
101
Easypano ** User Manual
Figure 6-2-5-4 Actions
102
Easypano ** User Manual
6.2.6 Preview and Export Skin
⎯⎯⎯⎯⎯⎯⎯⎯⎯⎯⎯⎯⎯⎯⎯⎯⎯⎯⎯⎯⎯⎯⎯⎯⎯⎯⎯⎯⎯⎯⎯⎯⎯⎯⎯⎯⎯⎯⎯⎯⎯⎯⎯⎯⎯
After all the modification steps to the skin, you may wonder how it looks in
the final publication and what effects can the control buttons bring about.
to switch to
Thus you can preview it by selecting File>Preview or click
Preview Panel. For more information please refer to 4.8 Preview Virtual
Tour.
If you hope to save the settings of your viewer skin for future usage, just
click File>Export Skin.
Figure 6-2-6 Export Skin
103
Easypano ** User Manual
Appendix: Sample Skin Making
⎯⎯⎯⎯⎯⎯⎯⎯⎯⎯⎯⎯⎯⎯⎯⎯⎯⎯⎯⎯⎯⎯⎯⎯⎯⎯⎯⎯⎯⎯⎯⎯⎯⎯⎯⎯⎯⎯⎯⎯⎯⎯⎯⎯⎯
Figure on the left is a sample skin
provided by Tourweaver 1.25. To
make it, below are some steps which
may offer you some help on
skin-designing.
Step 1: Create new project with blank skin
After you have created a new project, you should select Blank in the Skin
List then click OK. Thus the software will provide you a blank skin.
Step 2: Set skin properties
To achieve the sample effects, the following properties should be set for the
skin:
Size(665*453), Title, BackgroundImage, WaitingImage
Step 3: Adding control buttons
Add control buttons to the skin:
Step 4: Selecting and editing control buttons
To this extent, you can see the basic layout of our sample skin from below:
104
Easypano ** User Manual
Figure 6-2-3-2 Basic layout of sample skin
Step 5: Set control button properties
To achieve the sample effects, which properties should be set for the control
buttons ?
Properties
Location, Size(391*331), FrameImage
Tour
Viewer
Location, Size, SizeMode, Image
Component StillImage
All (Note: RowMode:Single)
Thumbnail
All (Note: Text:None,
Tour Button Left, Right, Up,
ButtonDownEffect:No)
Down, ZoomIn,
ZoomOut
All (Note: ButtoDownEffect:No, Actions)
SceneLink
Step 6: Preview skin
105
Easypano ** User Manual
6.3 Import Skin
⎯⎯⎯⎯⎯⎯⎯⎯⎯⎯⎯⎯⎯⎯⎯⎯⎯⎯⎯⎯⎯⎯⎯⎯⎯⎯⎯⎯⎯⎯⎯⎯⎯⎯⎯⎯⎯⎯⎯⎯⎯⎯⎯⎯⎯
If you have existing skin files and hope to import one of them, just click
File>Import Skin and the following window pops up:
Figure 6-3 Import skin
And you can also import skin when you are creating a new project. Please
follow the instructions of 4.1.1 Create New Project.
106
Easypano ** User Manual
6.4 Classic Skin Samples
⎯⎯⎯⎯⎯⎯⎯⎯⎯⎯⎯⎯⎯⎯⎯⎯⎯⎯⎯⎯⎯⎯⎯⎯⎯⎯⎯⎯⎯⎯⎯⎯⎯⎯⎯⎯⎯⎯⎯⎯⎯⎯⎯⎯⎯
Shown below is the layout of the Tourweaver 1.25 classic skins. It serves as
a guide to various skin features and components.
That's it, now it's your turn...
107
Easypano ** User Manual
6.5 Control Buttons
⎯⎯⎯⎯⎯⎯⎯⎯⎯⎯⎯⎯⎯⎯⎯⎯⎯⎯⎯⎯⎯⎯⎯⎯⎯⎯⎯⎯⎯⎯⎯⎯⎯⎯⎯⎯⎯⎯⎯⎯⎯⎯⎯⎯⎯
6.5.1 Tour Components
6.5.2 Tour Buttons
108
Easypano ** User Manual
6.5.1 Tour Components
⎯⎯⎯⎯⎯⎯⎯⎯⎯⎯⎯⎯⎯⎯⎯⎯⎯⎯⎯⎯⎯⎯⎯⎯⎯⎯⎯⎯⎯⎯⎯⎯⎯⎯⎯⎯⎯⎯⎯⎯⎯⎯⎯⎯⎯
on the Skin Panel and its components will be
Press
showed in a drop-down list. Altogether there are 12 items described below :
(1)
Pointer
Used to select the tour components.
Viewer
(2)
Use this button to define the viewer, which is absolutely mandatory for a
virtual tour since it is the area where any virtual tour will be visible within the
skin.
Select this button then click inside the skin background area to add it. Click
and drag to move or resize the Viewer area or use the Properties Area to
apply changes.
Map
(3)
Adds the Map viewer area to the skin. This is where maps and hotspots will
appear and you can set them in the Map Panel.
Select this button then click inside the skin background area to add it. Click
and drag to move or resize the Map area or use the Properties Area to apply
changes. As for how to edit the map, please refer to Chapter 4.6 Edit Map.
Note: The map image may be larger than the size of this component on the
skin. When the skin is being previewed, both horizontal and vertical scroll
bar appear on the edges of this component. To set the scroll bar properties,
please refer to Chapter 6.2.1 Set Skin Properties.
StillImage
(4)
Set still image area on the skin. It can be used as image link.
Select this button then click inside the skin background area. Click and drag
to move or resize the StillImage. Select one image and adjust its SizeMode
in the Properties Area.
ListBox
(5)
Adds a single-column table which shares the same function with ComboBox
and can be used instead of it.
Select this button then click inside the skin background area. Click and drag
to move or resize the ListBox or use the Properties Area to apply changes.
Note: There may be many scene names and the names are so long that can
not be all listed in this component. When the skin is being previewed, both
horizontal and vertical scroll bar appear on the edges of this component. To
set the scroll bar properties, please refer to Chapter 6.2.1 Skin Properties.
ComboBox
(6)
Adds a Drop-Down menu which lists the names of all the scenes included in
a virtual tour presentation.
Select this button then click inside the skin background area. Click and drag
to move or resize the ComboBox or use the Properties Area to apply
changes.
Thumbnail
(7)
Adds the Thumbnail list to the skin. This is the area where the thumbnails of
scenes in the virtual tour will appear.
Select this button then click inside the skin background area. Click and drag
to move or resize the Thumbnail area or use the Properties Area to apply
changes.
109
Easypano ** User Manual
Note: The width of the tour component Thumbnail may be larger than that
of the skin and RowMode has been switched to "Multiple" in the Properties
Area. When the skin is being previewed, both horizontal and vertical scroll
bar appear on the edges of this component. To set the scroll bar properties,
please refer to Chapter 6.2.1 Skin Properties.
CompanyInfo
(8)
Adds company information to the skin. The company information is showed
so as to let the audience know your company better and contact you easily.
Select this button then click inside the skin background area. Click and drag
to move or resize the CompanyInfo area. Then set name, fax, telephone
number,web site, email address and logo of the company in the Properties
Area.
TextLink
(9)
Set text links on the skin.
Select this button then click inside the skin background area. Click and drag
to move or resize the TextLink area. Then set font, color and states of the
text in the Properties Area.
SceneDescription
(10)
Adds to show the brief description of the scene and its content may change
with the presentation of different scenes.
Select this button then click inside the skin background area. Click and drag
to move or resize the SceneDescription area or use the Properties Area to
apply changes. The content of description can be set on the Scene Panel,
please refer to 4.3.2 Scene Options to get more information.
Note: Description of the scene may contain too many words to be displayed
in this component if it has a small size on the skin. When the skin is being
previewed, you might not view the whole description. So we recommend
you not to use long descriptions.
StatusBar
(11)
Adds the StatusBar area to the skin. It indicates the status of the present
scene, that is, the position of the scene (scene number) being displayed. It
also indicates the total number of scenes in a virtual tour. For example "2 of
6".
Select this button then click inside the skins background area. Click and drag
to move or resize the StatusBar area or use the component's Properties Area
to apply changes.
Label
(12)
Set label area on the skin and its content do not change during the virtual
tour presentation.
Select this button then click inside the skin background area. Click and drag
to move or resize the Thumbnail area or use the Properties Area to apply
changes.
Note:
· The buttons with can be added to the skin time after time
whereas the others can be added once only.
· The buttons with have transparent background.
· The buttons with have special actions which can specify the
links with other images in the virtual tour or URLs. But if the skin
110
Easypano ** User Manual
was saved and imported next time, all the actions would be
restored to default and should be specified again. More
instructions in 6.2.5 Set Control Button Properties.
111
Easypano ** User Manual
6.5.2 Tour Buttons
⎯⎯⎯⎯⎯⎯⎯⎯⎯⎯⎯⎯⎯⎯⎯⎯⎯⎯⎯⎯⎯⎯⎯⎯⎯⎯⎯⎯⎯⎯⎯⎯⎯⎯⎯⎯⎯⎯⎯⎯⎯⎯⎯⎯⎯
The main function of Tour Buttons is to adjust the presentation of the scene
images. You can either put them on the viewer directly or locate them on the
other places on the skin to form a toolbar.
Press
on the Skin Panel and its components will be
showed in a drop-down list. Below is the detailed information:
Pointer
(1)
Used to select the tour buttons.
(2)
Left
Allows you to look in the horizontal-left direction of the current panoramic
scene (the view move left horizontally)
(3)
Right
Allows you to look in the horizontal-right direction of the current panoramic
scene (the view move right horizontally)
(4)
Up
Allows you to look in the vertical-up direction of the current panoramic
scene (the view move upwards vertically)
Down
(5)
Allows you to look in the vertical-down direction of the current panoramic
scene (the view move downwards vertically)
ZoomIn
(6)
When pressed, immersive panoramaic scene or still images will zoom in.
(7)
ZoomOut
When pressed, immersive panoramaic scene or still images will zoom out.
NextScene
(8)
The Next Scene button is used to auto play the next scene according to the
default sequence of the slideshow. Viewer will play next scene in ListBox,
ComboBox or Thumbnail when this button is clicked.
(9)
PreviousScene
As NextScene, the Previous Scene button is used to auto play the previous
scene according to the default sequence of the slideshow
Reset
(10)
When pressed, view of the current virtual tour will be restored to its initial
position.
Stop
(11)
When pressed, the Stop button stops the movement of the panorama at
current position.
Close
(12)
Press to close the whole Applet.
(13)
Mute
When pressed, sound of the presentation will be muted and you can restart
the sound by clicking this button again.
(14)
Help
Specify the help file when the button is clicked.
To specify the location of the help files, you can click HelpFile in the
Properties Area to browse your folders in the computer to apply changes.
URL
(15)
112
Easypano ** User Manual
When pressed, the related hyperlink opens.
You can refer to the Properties Area to apply changes. Input a web site
address in the Href. Click Target to select the appropriate hyperlink display
option.
(16)
SceneLink
Start playing the specified scene when the button is clicked. You can select
one scene in the drop down list of SceneLink in the Properties Area.
Forward
(17)
The Forward button is used to move forward according to users' browse
sequence, which depends on user's action on panorama, not the sequence
of scenes in ListBox, ComboBox, etc.
Backward
(18)
As Forward, Backward button is used to move backward according to users'
browse sequence.
PlayMovie
(19)
Click the button to play, pause and resume current movie.
StopMovie
(20)
When pressed, movie ceases playing and returns to the beginning.
Note:
· All buttons can be added to the skin time after time.
· All buttons have "button-down" effects which can be set in the
Properties Area. Please read the notes in 6.1.1 Tips on Preparing
Image Files before you start skin making.
· Stop differs from StopMoive. Stop ceases virtual tour at current
location, while StopMovie stops movie and comes back to the first
frame of specified movie.
113
Easypano ** User Manual
7 JavaScript API
⎯⎯⎯⎯⎯⎯⎯⎯⎯⎯⎯⎯⎯⎯⎯⎯⎯⎯⎯⎯⎯⎯⎯⎯⎯⎯⎯⎯⎯⎯⎯⎯⎯⎯⎯⎯⎯⎯⎯⎯⎯⎯⎯⎯⎯
The API (Application Program Interface) allows you to control your
panoramas and virtual tours from outside the viewer applet. For example,
you can offer the user viewer controls when presenting panoramas without
a skin. Users can control the panoramas by clicking on text links, images or
HTML form elements such as a buttons or drop-down lists. If you are familiar
with image mapping, you can map an image - floor plan or arial photograph
- linking different part of the image to different panoramas in your tour. The
API also allows you to create you own 'controls skin', remote and completely
separate from the viewer skin.
The parameters set in the applet code are static values - they are applied
when the applet is first loaded. Their functions are to instruct the applet to
"do this…" when it first loads. For example, the parameters tell the browser
which panorama to load and where to find it, what the frame rate should be,
whether to pan left or right, etc. The API, on the other hand, allows you to
override these parameters. It offers you and the user dynamic values that
can be changed from within a web page.
This manual does not assume the reader has prior knowledge of
JavaScripting, API's or setting parameters. A basic knowledge of HTML
would be useful.
7.1 Tips on Using the Codes
7.2 JavaScript API Methods
7.3 How to Implement JavaScript API
Note: Mac OS does not support JavaScript API.
114
Easypano ** User Manual
7.1 Tips on Using the Codes
⎯⎯⎯⎯⎯⎯⎯⎯⎯⎯⎯⎯⎯⎯⎯⎯⎯⎯⎯⎯⎯⎯⎯⎯⎯⎯⎯⎯⎯⎯⎯⎯⎯⎯⎯⎯⎯⎯⎯⎯⎯⎯⎯⎯⎯
If you have little or no experience of using JavaScript there are a few points
you should be aware of before using the codes:
• JavaScript is case sensitive - "A" and "a" are not the same.
• Copy the code exactly as showed in Chapter 7.2 JavaScript API
Methods and only change the values as stated below.
• It is usual to place JavaScript "Functions" in the "Head" part of your
web page code - that is, between the <head> and </head> tags. So
the "Head code" shown in Chapter 7.2 JavaScript API Methods should
be pasted into your web page head section. The body code can be
pasted in any position within the "Body" section of your web page that is, between the <body> and </body> tags.
• Replace "AppletName" with whatever name you choose to give to
your applet. You can leave the code as "AppletName" if you wish,
however, you must then remember to name your applet
"AppletName".
• You may also wish to replace "FormName" and "SelectName" with
your own choice of name. If you do, be sure to replace every instance
of the name in both the head and body codes shown for that method.
115
Easypano ** User Manual
7.2 JavaScript API Methods
⎯⎯⎯⎯⎯⎯⎯⎯⎯⎯⎯⎯⎯⎯⎯⎯⎯⎯⎯⎯⎯⎯⎯⎯⎯⎯⎯⎯⎯⎯⎯⎯⎯⎯⎯⎯⎯⎯⎯⎯⎯⎯⎯⎯⎯
The following is a complete list of the available methods that can be called
through the API, by using JavaScript. A description for each method,
example JavaScipts for calling a method and instructions on how to
implement the scripts for your own use are also included. You can quickly
make use of and experiment with the codes by using the templates.
To use them, just copy and paste any of the example codes into the web
page containing your applet.
Select a method below to view its details:
public void zoomIn()
public void zoomOut()
public void panLeft()
public void panRight()
public void panUp()
public void panDown()
public void autoPan(double dPPS, double dTPS, double dFOVPS)
public void autoPanAtRate(int panRate, int tiltRate, int fovRate)
public void stopAutoPan()
public void gotoView(double pan, double tilt, double fov)
public void backward()
public void forward()
public void showHS()
public void hideHS()
public void toggleHS()
public void switchToScene(int index)
public void switchToScene(int index, double pan, double tilt, double fov)
public void playPath(int index)
public void playMovie
public void playSound(int index, boolean loop)
public void stopSound()
public void stopMovie()
116
Easypano ** User Manual
7.3 How to Implement JavaScript API
⎯⎯⎯⎯⎯⎯⎯⎯⎯⎯⎯⎯⎯⎯⎯⎯⎯⎯⎯⎯⎯⎯⎯⎯⎯⎯⎯⎯⎯⎯⎯⎯⎯⎯⎯⎯⎯⎯⎯⎯⎯⎯⎯⎯⎯
Our installation package includes API templates which contain most of the
example codes detailed in the previous chapter. It may help you understand
how the various scripts and codes can be used collectively within a web
page.
Here you can see the two templates:
Sample 1: To control sound and scene hotspots in a virtual tour
Sample 2: To control Button, ComboBox and SceneLink on viewer skin
To understand how to implement JavaScript API, please refer to the
following steps:
Step1: Navigate to Sample 2 and open the HTML applet page. Then
right-click your mouse and select View Source. See the following figure.
Figure 7-3-1 Open HTML applet page
Step2: The source codes are displayed in a text editor program (such as
Notepad). According to the methods given in the previous chapter, you can
search for the codes which apply the functions of the control buttons.
Now let's take that of Button, ComboBox and SceneLink on the viewer skin
as samples:
117
Easypano ** User Manual
Figure 7-3-2 Source codes display
Figure 7-3-3 Search for the codes
Step3: Keep both the browser and text editor windows open and you can
switch between the two. Copy and paste your own applet codes into these
templates, or you can edit and delete code as required.
Step4: After you have modified the codes in the text editor, save the file,
then refresh or reload your browser's window to see the modified web page.
Step5: Save your HTML template using a suitable file name. The HTML page
can now be viewed in a browser window - MS Internet Explorer, Netscape or
similar.
118
Easypano ** User Manual
8 FAQ
8.1
8.2
8.3
8.4
⎯⎯⎯⎯⎯⎯⎯⎯⎯⎯⎯⎯⎯⎯⎯⎯⎯⎯⎯⎯⎯⎯⎯⎯⎯⎯⎯⎯⎯⎯⎯⎯⎯⎯⎯⎯⎯⎯⎯⎯⎯⎯⎯⎯⎯
General Concerns
Downloading and Purchasing
Using Tourweaver 1.25
Technical Support
119
Easypano ** User Manual
8.1 General Concerns
⎯⎯⎯⎯⎯⎯⎯⎯⎯⎯⎯⎯⎯⎯⎯⎯⎯⎯⎯⎯⎯⎯⎯⎯⎯⎯⎯⎯⎯⎯⎯⎯⎯⎯⎯⎯⎯⎯⎯⎯⎯⎯⎯⎯⎯
1. What is Tourweaver?
Tourweaver could integrate image, sound, URL, interactive map, hotspots
into the virtual tour thus to create a rich and vivid immersive virtual tour. It
provides you multiple ways to present your tour. Please see Chapter 1.2
Introduction for more information.
2. What can I do with it?
With Tourweaver, you are able to:
• Link spherical panorama, cylindrical panorama and still image
together to build a web based virtual tour
• Customize viewer skin and scene visually
• Add hotspots which can be linked to panorama, still images, audio or
another virtual tour.
• Set movie to control the timing and virtual tour walkthrough
• Tailor an interactive map with compass effect
• Generate virtual tour as web applet format, which is easily posted to
web and no plug-in necessary when viewing.
3. How to view a virtual tour?
When you are working on the tour project, you may use the menu or toolbar
or keyboard shortcut to preview the virtual tour whenever necessary.
After successfully publishing the virtual tour in web applet format, you can
view the virtual tour via Easypano Tourweaver viewer. Please refer to
Chapter 5 View Virtual Tour for more information.
4. What is the SlideShow? Can I delete it?
SlideShow is the default movie and can not be deleted. Whenever a new
image is added into the Scene List, two default frames of the image (Start
and End) are added in the Slideshow and no others frames can be added
between the two. You are not allowed to delete the SlideShow, even the
frames of the SlideShow. Copying the frames on it to other movies is
permitted in Tourweaver 1.25.
5. What does JavaScripter API stand for? What is its usage in
Tourweaver?
API means Application Program Interface. In the Skin Panel, users can
control the tours by clicking on text links, images or HTML form elements
such as buttons or drop-down lists. Besides, the JavaScripter API allows you
to control the panoramas or virtual tours from outside the viewer applet.
That is, you can modify a certain API method in Java Applet to realize a
function which cannot be achieved by a component in the Skin Panel. If you
are familiar with image mapping, you can map a floor plan which can
intuitionisticly indicate the exact location of the presenting image. The API
also allows you to customize your own 'controls skin', remote and
completely separate from the viewer skin.
The parameters set in the applet code are static values - they are applied
when the applet is first loaded. Their functions are to instruct the applet to
"do this…" when it first loads. For example, the parameters tell the browser
which panorama to load and where to find it, what the frame rate should be,
whether to pan left or right, etc. On the other hand, the API grants you an
120
Easypano ** User Manual
approach to override these parameters. It offers you the user dynamic
values that can be changed from within a web page.
121
Easypano ** User Manual
8.2 Downloading and Purchasing
⎯⎯⎯⎯⎯⎯⎯⎯⎯⎯⎯⎯⎯⎯⎯⎯⎯⎯⎯⎯⎯⎯⎯⎯⎯⎯⎯⎯⎯⎯⎯⎯⎯⎯⎯⎯⎯⎯⎯⎯⎯⎯⎯⎯⎯
1. Where can I get the free trial version of Tourweaver?
To download a trial version, please visit
http://www.easypano.com/download.htm.
2. What's the difference between trial version and registered
version? How to get the registered version?
The software you have downloaded is just a trial version, and you need
order and register to change it into a full version. Now our trial version
allows the published virtual tours to be viewed on the web. In Tourweaver
1.25, the restriction has been changed from the watermark limitation in
Tourweaver 1.00, to a popping-up dialogue box which warns user to register.
This box pops up every 40 seconds until the whole virtual tour is closed.
There are no such restrictions in the registered version.
122
Easypano ** User Manual
8.3 Using Tourweaver 1.25
⎯⎯⎯⎯⎯⎯⎯⎯⎯⎯⎯⎯⎯⎯⎯⎯⎯⎯⎯⎯⎯⎯⎯⎯⎯⎯⎯⎯⎯⎯⎯⎯⎯⎯⎯⎯⎯⎯⎯⎯⎯⎯⎯⎯⎯
1. Can I use Tourweaver in Macintosh?
No. We are sorry to inform you that Tourweaver can be merely used in
Windows OS.
2. Why can't I delete the frames on SlideShow?
As introduced in Chapter 4.5.1.3 SlideShow, SlideShow is the default path
and can not be deleted. You can only copy the frames on it to other paths.
3. I have designed a skin and saved it. But I can not find the
buttons' actions work any longer when I import it the next
time.
Some of the control buttons have special actions which can specify the links
with other images in the virtual tour or URLs. But if the skin was saved and
imported next time, all the actions would be restored to default and should
be specified again.
4. Why can't I see the hotspots effects after I added them?
Please switch to the Preview Panel and you can view the hotspots effects.
Map Panel and Hotspot Panel do not provide such functions.
5. I have changed the image order in the Manage Panel. Will this
operation affect the frame sequences in the movies?
No. Move the image files up or down may bring about sequence changes of
the frames on SlideShow. Hence this default virtual tour may has a different
presentation. But this operation does not affect other paths which contain
frames from these image files.
6. When I load an image into the Map Panel as map background
I found that I could not see it clearly. Do you have any ideas?
Maybe the image which you want to use as tour Map background has low
quality or its size is inappropriate. You can click
on the toolbar to
you can
display the selected scene image in its original size. By clicking
zoom in or zoom out the current selected scene to fit the Scene Display Area.
And we advise you choose one background image with good sharpness.
7. When I was adjusting the action of TourMovie, I found there
was only one path called SlideShow in the dropdown list of
Properties Area.
To link the control button of TourMovie to the specified movie, you should
create new paths first. Then it will appear in the dropdown list from which
you can select it.
8. I am a newbie, what are center position of the view of still
images and Pan, Tilt, FOV of panoramas?
Center position of the view refers to the position of initial viewer center.
123
Easypano ** User Manual
FOV is the field of view, the smaller the FOV, the closer you are to the scene
in the panorama.
Pan refers to the view in horizontal direction of panorama window.
Tilt refers to the view in vertical direction of panorama window.
9. What are the differences between the map designed by Map
Panel and the hotspot map?
The links between all hotspots in a tour are displayed on the hotspot map. It
shows the relations between the hotspots and the linked scene images. This
map can not be showed in the viewer skin.
124
Easypano ** User Manual
Different from the hotspot map which can not be showed in the viewer, map
of the Map Panel will appear in the viewer if you have set the control button
of Map on the Skin Panel (See Chapter 6.5.1 Tour Components). Above all
you should set Map control button first, otherwise you can not view this map
on the viewer skin neither.
10.When I clicked a movie hotspot on the scene, I found only a
still panorama welcome me instead of a live tour
presentation ! Why ?
Please open the tour project and switch to the Movie Panel. Select the movie
you want to play and set the AutoPlay option to be "Yes" in the Properties
Area. Then try to click the movie hotspot again. If the specified movie still
can not be played, please contact our technical support.
11.Part of the scene description missing on the control button of
SceneDescription !
Description of the scene may contain too many words to be displayed in this
component if it has a small size on the skin. You should resize this control
button on the skin or just use brief and clear scene descriptions.
12.What kind of source files can Tourweaver1.25 support?
Tourweaver 1.25 is a more powerful and professional virtual tour creating
tool than PTV Scripter. It can support various source files, involving
spherical panorama, cylindrical panorama, still image, Kaidan oneshot,
0-360 oneshot and audio.
13.What kind of audio format does Tourweaver support?
Tourweaver 1.20 can only support the sound files in the format of .au. If you
would like to use your own sound files as the foreground or background
music, you have to convert them into .au files by a converting tool called
Adobe Audition which is previous CoolEdit 2000. The unregistered version of
Adobe Audition offers you 1 month free trial. More information can be found
at
http://www.syntrillium.com/download/download.html?1
When you convert au files by Adobe Audition, two settings as follows must
be undertaken.
a) Adjust Sample Rate as 8000
b) Click the Options button to choose "mu-Law 8-bit" when saving as au
format
In this way, the converted au files can be played in Tourweaver.
14.Can I copy the .jar file of Tourweaver 1.20 to the output
folder Tourweaver 1.25?
No. Tourweaver 1.25 cannot be compatible with the viewer of Tourweaver
1.20. Therefore, do not copy the .jar file generated by original Tourweaver
1.20 to the output folder of Tourweaver 1.25.
15.When I put a component in the viewer or on the map, the
component seems not to work properly. Why?
In order to achieve a good balance between features and performance, we
have made some changes in the upgraded Tourweaver 1.01. We have got
rid of some functions which is relatively not very important but affects the
125
Easypano ** User Manual
performance very much. Accordingly, the speed is greatly improved, the
memory occupation is saved, and the quality is far better than the previous
version.In Tourweaver 1.01 and the succeeding versions, any components
are not allowed to be placed on the map or the viewer. Considering that
users may need to put some static hotspots on the viewer, we have carried
out some special solutions on this program. Any button that is located upon
the viewer will be regarded as the static hotspot of the viewer. Note that
these static hotspots are not allowed to run over the frame of the viewer.
16. I am using one shot solution, but neither Kaidan One Shot nor
Remote Reality One Shot. Tourweaver image type does not list it.
Which image type should I choose when adding my one shot
panoramic image?
Please import your image as cylindrical panorama first. Tourweaver should
display it normally. In case there is any distortion, please try again to switch
its image type to spherical panorama and test the result. If any more
problems, please contact [email protected].
126
Easypano ** User Manual
8.4 Technical Support
⎯⎯⎯⎯⎯⎯⎯⎯⎯⎯⎯⎯⎯⎯⎯⎯⎯⎯⎯⎯⎯⎯⎯⎯⎯⎯⎯⎯⎯⎯⎯⎯⎯⎯⎯⎯⎯⎯⎯⎯⎯⎯⎯⎯⎯
Before you contact technical support, have you:
• Read and followed the instructions provided in the users manual at
http://www.easypano.com/download/tw_manual.pdf
• Visited the support column in http://www.easypano.com for updated
troubleshooting information
You can get technical support by one of the following methods:
Email: [email protected]
Web: http://www.easypano.com
127
Easypano ** User Manual
9 Glossary
•
•
•
•
•
•
•
•
•
•
•
•
•
⎯⎯⎯⎯⎯⎯⎯⎯⎯⎯⎯⎯⎯⎯⎯⎯⎯⎯⎯⎯⎯⎯⎯⎯⎯⎯⎯⎯⎯⎯⎯⎯⎯⎯⎯⎯⎯⎯⎯⎯⎯⎯⎯⎯⎯
Tourweaver: Tourweaver is a virtual tour producer. It provides an
easy way to create a rich and vivid immersive virtual tour.
Easypano Tourweaver Viewer: It is a simple and humanized
viewer to view the standalone virtual tour created by Tourweaver.
The user may customize viewer's skin by themselves.
Virtual Tour: A virtual tour is a series of scenes, i.e. panorama
images, linked together, in which the viewer can "walk" from place to
place in an environment as if you were really there. Most of the
scenes allow a 360° viewpoint. You can also zoom in to get a closer
look in detail.
VTP File: The virtual tour project file created in Tourweaver.
Frame: Frame is the set of all picture elements that represent one
complete scene image. One scene contains at least two frames which
are the basic components of the tour path.
Scene: As part of the virtual tour, a scene is a relatively short and
continuous set of frames . By linking the scenes to each other, virtual
tour is produced.
Movie: Movie can be comprehended as directed guided walkthroughs
of the frames. In a movie there are various frames that can be set at
arbitrary position on the TimeLine. When the movie is being played,
the frames will be presented in time sequence.
Hotspot: Hotspots are clickable link areas within a panorama, you
can assign an action to a Hotspot. So when being clicked, depending
on the action you assign to it, it will open a new panorama, slideshow,
virtual tour, play an audio , open a web page or send an email.
Skin: Skin refers to the appearance of the viewer. It consists of the
background, button images and other features that you see around
the viewer. The Skin allows the user who is viewing a presentation to
interact with and control the media that is played inside the skin.
FOV: FOV stands for the field of view which the camera lens can
capture.
Pan: Pan refers to the view in horizontal direction of panorama
window.
Tilt: Tilt refers to the view in vertical direction of panorama window.
API: An application program interface (sometimes spelled
application programming interface) is the specific method prescribed
by a computer operating system or by an application program by
which a programmer writing an application program can make
requests of the operating system or another application.
128
Easypano ** User Manual
autoPan
public void autoPan(double dPPS, double dTPS, double dFOVPS)
Description: Auto rotate and zoom in the panorama according to the
turning speed of Pan, Tilt and FOV of your settings.
Remarks:
Please notice that the parameters of turning speed of Pan, Tilt and FOV
should be specified.
Parameters:
Value of dPPS, dTPS and dFOVPS: float.
dPPS - For panoramas, it shows how many radians the Pan rotates per
second; For still images, it shows how many pixels the image moves in
horizontal direction per second.
dTPS - For panoramas, it shows how many radians the Tilt rotates per
second; For still images, it shows how many pixels the image moves in
vertical direction per second.
dFOVPS - For panoramas, it shows how many radians the FOV changes per
second; For still images, it shows how many times the image zooms in per
second.
Example 1:
<FORM NAME="View">
<SELECT NAME="Pan"
onChange="document.applet.autoPan(parseFloat(document
.View.Pan.options[View.Pan.selectedIndex].text),parseFloat
(document.View.Tilt.options[View.Tilt.selectedIndex].text),p
arseFloat(document.View.FOV.options[View.FOV.selectedIn
dex].text))";>
<OPTION value="0.1">0.1
<OPTION value="0.15">0.15
<OPTION value="0.2">0.2
</SELECT>
<SELECT NAME="Tilt"
onChange="document.applet.autoPan(parseFloat(document.View.Pan.opti
ons[View.Pan.selectedIndex].text),parseFloat(document.View.Tilt.options[
View.Tilt.selectedIndex].text),parseFloat(document.View.FOV.options[Vie
w.FOV.selectedIndex].text))";>
<OPTION value="0.1">0.1
<OPTION value="0.15">0.15
<OPTION value="0.2">0.2
</SELECT>
<SELECT NAME="FOV"
onChange="document.applet.autoPan(parseFloat(document.View.Pan.opti
ons[View.Pan.selectedIndex].text),parseFloat(document.View.Tilt.options[
View.Tilt.selectedIndex].text),parseFloat(document.View.FOV.options[Vie
w.FOV.selectedIndex].text))";>
<OPTION value="0.1">0.1
<OPTION value="0.15">0.15
<OPTION value="0.2">0.2
</SELECT>
129
Easypano ** User Manual
</FORM>
Example 2:
Head code:
<SCRIPT LANGUAGE="JavaScript">
<!-function pan(dPPS, dTPS, dFOVPS)
{
document.AppletName.autoPan(dPPS, dTPS, dFOVPS);
}
// -->
</SCRIPT>
Body code:
<a href="JavaScript: pan(dPPS, dTPS, dFOVPS);"> pan</a>
130
Easypano ** User Manual
autoPanAtRate
public void autoPanAtRate(int panRate,int tiltRate,int fovRate)
Description: Auto rotate and zoom of the scene according to the rotating
speed rate of Pan, Tilt and FOV of your settings.
Remarks:
Please notice that the parameters of rotating speed rate of Pan, Tilt and FOV
should be specified.
The rate ranges from -100 to 100.
Parameters:
Value of panRate, tiltRate and fovRate: float.
panRate: specifies the rotating speed of the panorama and
moving speed of the still image in pan direction at certain rate. The rate
ranges from -100 to 100.
tiltRate: specifies the rotating speed of the panorama and
moving speed of the still image in tilt direction at certain rate. The rate
ranges from -100 to 100.
fovRate: specifies the zoom in/out speed of the scene at certain rate. The
rate ranges from -100 to 100.
Example 1:
<FORM NAME="View">
<SELECT NAME="Pan"
onChange="document.applet.autoPan(parseFloat(document
.View.Pan.options[View.Pan.selectedIndex].text),parseFloat
(document.View.Tilt.options[View.Tilt.selectedIndex].text),p
arseFloat(document.View.FOV.options[View.FOV.selectedIn
dex].text))";>
<OPTION value="20">20
<OPTION value="50">50
<OPTION value="70">70
</SELECT>
<SELECT NAME="Tilt"
onChange="document.applet.autoPan(parseFloat(document.View.Pan.opti
ons[View.Pan.selectedIndex].text),parseFloat(document.View.Tilt.options[
View.Tilt.selectedIndex].text),parseFloat(document.View.FOV.options[Vie
w.FOV.selectedIndex].text))";>
<OPTION value="20">20
<OPTION value="50">50
<OPTION value="70">70
</SELECT>
<SELECT NAME="FOV"
onChange="document.applet.autoPan(parseFloat(document.View.Pan.opti
ons[View.Pan.selectedIndex].text),parseFloat(document.View.Tilt.options[
View.Tilt.selectedIndex].text),parseFloat(document.View.FOV.options[Vie
w.FOV.selectedIndex].text))";>
<OPTION value="20">20
<OPTION value="50">50
<OPTION value="70">70
</SELECT>
131
Easypano ** User Manual
</FORM>
Example 2:
Head code:
<SCRIPT LANGUAGE="JavaScript">
<!-function panAtRate(panRate, tiltRate, fovRate)
{
document.AppletName.autoPanAtRate(panRate, tiltRate, fovRate);
}
// -->
</SCRIPT>
Body code:
<a href="JavaScript: panAtRate(panRate, tiltRate, fovRate);">
panAtRate</a>
132
Easypano ** User Manual
backward
public void backward()
Description: Back to previous action users operate on scene.
Remarks:
This function creates to go back to previous scene that users operate. It is
different from the scene in ListBox or ComboBox.
Example1:
<FORM NAME="Button">
<INPUT TYPE="button" value="Backward"
onClick="document.AppletName.backward();">
</FORM>
Example2:
Head code:
<SCRIPT LANGUAGE="JavaScript">
<!-function backward()
{
document.AppletName.backward();
}
// -->
</SCRIPT>
Body code:
<a href="JavaScript:backward();">backward</a>
133
Easypano ** User Manual
forward
public void forward()
Description: Go to next action users operate on scene.
Remarks:
This function creates to go to next scene that users operate. It is different
from the scene in ListBox or ComboBox.
Example1:
<FORM NAME="Button">
<INPUT TYPE="button" value="Forward"
onClick="document.AppletName.forward();">
</FORM>
Example2:
Head code:
<SCRIPT LANGUAGE="JavaScript">
<!-function forward()
{
document.AppletName.forward();
}
// -->
</SCRIPT>
Body code:
<a href="JavaScript:forward();">forward</a>
134
Easypano ** User Manual
gotoView
public void gotoView(double pan, double tilt, double fov)
Description: Rotate to a certain view of current panoramas or still images.
Remarks:
Please notice that the view of the scene should be appointed.
Parameters:
pan - For panoramas, the current scene switch to a certain view, Pan value
of which should be specified. For still images, the current scene switch to a
certain position, X coordinate of the center of which is in corresponding with
the value of Pan.
tilt - For panoramas, the current scene switch to a certain view, Tilt value of
which should be specified. For still images, the current scene switch to a
certain position, Y coordinate of the center of which is in corresponding with
the value of Pan.
fov - For panoramas, the current scene switch to a certain view, FOV value
of which should be specified. For still images, it shows that the image will be
zoomed in to the specified multiples of the current scene.
Example 1:
<INPUT TYPE="button" value="Reset"
onClick="document.AppletName.gotoView(-40,10,120)";>
</FORM>
Example 2:
Head code:
<SCRIPT LANGUAGE="JavaScript">
<!-function reset(pan, tilt, fov)
{
document.AppletName. gotoView(pan, tilt, fov);
}
// -->
</SCRIPT>
Body code:
<a href="JavaScript:reset(pan, tilt, fov);">reset </a>
135
Easypano ** User Manual
hideHS
public void hideHS()
Description: Switch the hotspot targets of current panoramas or still
images off.
Remarks:
This function only works if there are hotspots on the scene.
Example 1:
<FORM NAME="Button">
<INPUT TYPE="button" value="HideHS"
onClick="document.AppletName.hideHS();">
</FORM>
Example 2:
Head code:
<SCRIPT LANGUAGE="JavaScript">
<!-function hideHS ()
{
document.AppletName. hideHS ();
}
// -->
</SCRIPT>
Body code:
<a href="JavaScript: hideHS ();">hideHS </a>
136
Easypano ** User Manual
panDown
public void panDown()
Description: Auto turn downwards - The panorama or still image will start
moving downwards.
Remarks:
This function only works in panoramic scenes. However, it does not work
when the scene rotates to the lowermost position.
Example 1:
<FORM NAME="Button">
<INPUT TYPE="button" value="Down"
onClick="document.AppletName.panDown();">
</FORM>
Example 2:
Head code:
<SCRIPT LANGUAGE="JavaScript">
<!-function down()
{
document.AppletName.panDown();
}
// -->
</SCRIPT>
Body code:
<a href="JavaScript:down();">down</a>
137
Easypano ** User Manual
panLeft
public void panLeft()
Description: Auto turn left - The panorama or still image will start moving
to the left.
Example 1:
<FORM NAME="Button">
<INPUT TYPE="button" value="Left"
onClick="document.AppletName.panLeft();">
</FORM>
Example 2:
Head code:
<SCRIPT LANGUAGE="JavaScript">
<!-function left()
{
document.AppletName.panLeft();
}
// -->
</SCRIPT>
Body code:
<a href="JavaScript: left();">left</a>
138
Easypano ** User Manual
panRight
public void panRight()
Description: Auto turn right - The panorama or still image will start moving
to the right.
Example 1:
<FORM NAME="Button">
<INPUT TYPE="button" value="Right"
onClick="document.AppletName.panRight();">
</FORM>
Example 2:
Head code:
<SCRIPT LANGUAGE="JavaScript">
<!-function right()
{
document.AppletName.panRight();
}
// -->
</SCRIPT>
Body code:
<a href="JavaScript: right();">right</a>
139
Easypano ** User Manual
panUp
public void panUp()
Description: Auto turn upwards - The panorama or still image will start
moving upwards.
Remarks:
This function only works in panoramic scenes. However, it does not work
when the scene rotates to the upmost position.
Example 1:
<FORM NAME="Button">
<INPUT TYPE="button" value="Up"
onClick="document.AppletName.panUp();">
</FORM>
Example 2:
Head code:
<SCRIPT LANGUAGE="JavaScript">
<!-function up()
{
document.AppletName.panUp();
}
// -->
</SCRIPT>
Body code:
<a href="JavaScript:up();">up</a>
140
Easypano ** User Manual
playMovie
public void playMovie(int index)
Description: Play the number (int) movie in configure files.
Remarks:
This function does not work if the specified movie does not exist or it has a
wrong serial number. Make sure that the serial numbers of the movies are
correct. Moreover, please notice that you should set movies in the virtual
tour project.
Parameters:
index - Serial number of a movie in configure files.
Example 1:
<FORM NAME="Movie">
<SELECT NAME="SelectMovie"
onChange="document.applet.playMovie(parseInt(document.Movie.Select
Movie.options[Movie.SelectMovie.selectedIndex].text));">
<OPTION value="0">0
<OPTION value="1">1
<OPTION value="2">2
</SELECT>
</FORM>
Example 2:
Head code:
<SCRIPT LANGUAGE="JavaScript">
<!-function playMovie(index)
{
document.AppletName. playMovie(index);
}
// -->
</SCRIPT>
Body code:
<a href="JavaScript: playMovie(index);"> playMovie</a>
141
Easypano ** User Manual
playPath
public void playPath(int index)
Description: Play the number (int) movie in configure files.
Remarks:
Deprecated. This function should be replaced by playMovie in Tourweaver
1.25 and later. It may not be supported in future versions. This function
does not work if the specified movie does not exist or it has a wrong serial
number. Make sure that the serial numbers of the movies are correct.
Moreover, please notice that you should set tour movies in the virtual tour
project.
Parameters:
index - Serial number of a movie in configure files.
Example 1:
<FORM NAME="Path">
<SELECT NAME="SelectPath"
onChange="document.applet.playPath(parseInt(document.Path.SelectPat
h.options[Path.SelectPath.selectedIndex].text));">
<OPTION value="0">0
<OPTION value="1">1
<OPTION value="2">2
</SELECT>
</FORM>
Example 2:
Head code:
<SCRIPT LANGUAGE="JavaScript">
<!-function playPath(index)
{
document.AppletName. playPath(index);
}
// -->
</SCRIPT>
Body code:
<a href="JavaScript: playPath(index);"> playPath</a>
142
Easypano ** User Manual
playSound
public void playSound(int index, boolean loop)
Description: Play the number (int) sound file.
Remarks:
This function does not work if the specified sound file does not exist. Make
sure that the serial numbers of the sound files are correct.
Parameters:
index - Serial number of a sound file.
loop - Whether to circulate the sound file.
Example 1:
<FORM NAME="Sound">
<SELECT NAME="Loop">
<OPTION value="true">true
<OPTION value="false">false
</SELECT>
<INPUT TYPE="button" value="PlaySound"
onClick="document.applet.playSound(0,parseBoolean(document.Sound.Lo
op.options[Sound.Loop.selectedIndex].text));">
</FORM>
Example 2:
Head code:
<SCRIPT LANGUAGE="JavaScript">
<!-function play (index, loop)
{
document.AppletName. playSound(index, loop);
}
// -->
</SCRIPT>
Body code:
<a href="JavaScript: play (index, loop);"> play</a>
143
Easypano ** User Manual
showHS
public void showHS()
Description: Switch the hotspot targets of current panoramas or still
images on.
Remarks:
This function only works if you have set hotspots on the scene in the virtual
tour project.
Example 1:
<FORM NAME="Button">
<INPUT TYPE="button" value="ShowHS"
onClick="document.AppletName.showHS();">
</FORM>
Example 2:
Head code:
<SCRIPT LANGUAGE="JavaScript">
<!-function showHS ()
{
document.AppletName. showHS ();
}
// -->
</SCRIPT>
Body code:
<a href="JavaScript: showHS ();">showHS </a>
144
Easypano ** User Manual
stopAutoPan
public void stopAutoPan()
Description: Stop auto presenting the scene.
Remarks:
This function only works during the presentation of a scene.
Example 1:
<FORM NAME="Button">
<INPUT TYPE="button" value="Stop"
onClick="document.AppletName.stopAutoPan();">
Example 2:
Head code:
<SCRIPT LANGUAGE="JavaScript">
<!-function stop()
{
document.AppletName.stopAutoPan();
}
// -->
</SCRIPT>
Body code:
<a href="JavaScript:stop();">stop</a>
145
Easypano ** User Manual
stopMovie
public void stopMovie()
Description: Stop playing movie.
Remarks:
This function only works when specified movie is played. Moreover, please
notice that you should set movie files in the virtual tour project.
Example 1:
<FORM NAME="Button">
<INPUT TYPE="button" value="Stopmovie"
onClick="document.AppletName.stopmovie();">
</FORM>
Example 2:
Head code:
<SCRIPT LANGUAGE="JavaScript">
<!-function stopmovie()
{
document.AppletName. stopMovie();
}
// -->
</SCRIPT>
Body code:
<a href="JavaScript: stopmovie();">stopmovie()</a>
146
Easypano ** User Manual
stopSound
public void stopSound()
Description: Stop playing sound file.
Remarks:
This function only works when there are sound files being played. Moreover,
please notice that you should set sound files in the virtual tour project.
Example 1:
<FORM NAME="Button">
<INPUT TYPE="button" value="Mute"
onClick="document.AppletName.stopSound();">
</FORM>
Example 2:
Head code:
<SCRIPT LANGUAGE="JavaScript">
<!-function mute()
{
document.AppletName. stopSound();
}
// -->
</SCRIPT>
Body code:
<a href="JavaScript: mute();">mute()</a>
147
Easypano ** User Manual
switchToScene
public void switchToScene(int index)
Description: Switch to the default Pan, Tilt and FOV of number (int) scene.
Remarks:
This function does not work if the specified scene does not exist. Make sure
that the serial numbers of the scenes are correct.
Parameters:
index - Serial number of a scene. Possible values are 0, 1, 2 etc. Panorama
index starts at 0 for the first panorama, then 1 for the second panorama, 2
for the third, and so on.
pan - For panoramas, the current scene switch to a certain view, Pan value
of which should be specified. For still images, the current scene switch to a
certain position, X coordinate of the center of which is in corresponding with
the value of Pan.
tilt - For panoramas, the current scene switch to a certain view, Tilt value of
which should be specified. For still images, the current scene switch to a
certain position, Y coordinate of the center of which is in corresponding with
the value of Pan.
fov - For panoramas, the current scene switch to a certain view, FOV value
of which should be specified. For still images, it shows that the image will be
zoomed in to the specified multiples of the current scene.
Example 1:
<FORM NAME="SelectScene">
<INPUT TYPE="button" value="Scene 1"
onClick="document.applet.switchToScene(0);">
<INPUT TYPE="button" value="Scene 2"
onClick="document.applet.switchToScene(1);">
<INPUT TYPE="button" value="Scene 3"
onClick="document.applet.switchToScene(2);">
</FORM>
Example 2:
Head code:
<SCRIPT LANGUAGE="JavaScript">
<!-function Scene(index)
{
document.AppletName. switchToScene(index);
}
// -->
</SCRIPT>
Body code:
<a href="JavaScript: Scene(index);"> Scene</a>
148
Easypano ** User Manual
switchToScene
public void switchToScene(int index, double pan, double tilt, double fov)
Description: Switch to the specified Pan, Tilt and FOV of number (int)
scene.
Remarks:
This function does not work if the specified scene does not exist. Make sure
that the serial numbers of the scenes are correct. Moreover, please notice
that you should set the view of the target scene.
Parameters:
index - Serial number of a scene. Possible values are 0, 1, 2 etc. Panorama
index starts at 0 for the first panorama, then 1 for the second panorama, 2
for the third, and so on.
pan - For panoramas, the current scene switch to a certain view, Pan value
of which should be specified. For still images, the current scene switch to a
certain position, X coordinate of the center of which is in corresponding with
the value of Pan.
tilt - For panoramas, the current scene switch to a certain view, Tilt value of
which should be specified. For still images, the current scene switch to a
certain position, Y coordinate of the center of which is in corresponding with
the value of Pan.
fov - For panoramas, the current scene switch to a certain view, FOV value
of which should be specified. For still images, it shows that the image will be
zoomed in to the specified multiples of the current scene.
Example 1:
<FORM NAME="SelectScene">
<INPUT TYPE="button" value="Scene(1)"
onClick="document.applet.switchToScene(0,-40,10,120)";>
<INPUT TYPE="button" value="Scene(2)"
onClick="document.applet.switchToScene(1,-40,10,120)";>
<INPUT TYPE="button" value="Scene(3)"
onClick="document.applet.switchToScene(2,-40,10,120)";>
</FORM>
Example 2:
Head code:
<SCRIPT LANGUAGE="JavaScript">
<!-function Scene(index, pan, tilt, fov)
{
document.AppletName. switchToScene(index, pan, tilt, fov);
}
// -->
</SCRIPT>
Body code:
<a href="JavaScript: Scene(index, pan, tilt, fov);"> Scene</a>
149
Easypano ** User Manual
toggleHS
public void toggleHS()
Description: Switch between “on” and “off” of the visuality of current
panoramas or still images.
Remarks:
This function only works if there are hotspots on the scene.
Example 1:
<FORM NAME="Button">
<INPUT TYPE="button" value="ToggleHS"
onClick="document.AppletName.toggleHS();">
</FORM>
Example 2:
Head code:
<SCRIPT LANGUAGE="JavaScript">
<!-function toggleHS ()
{
document.AppletName. toggleHS ();
}
// -->
</SCRIPT>
Body code:
<a href="JavaScript: toggleHS ();">toggleHS </a>
150
Easypano ** User Manual
zoomIn
public void zoomIn()
Description: Magnify the scene image.
Remarks:
This function only works in scenes. However, it does not work when the
scene image was zoomed in to maximum.
Example1:
<FORM NAME="Button">
<INPUT TYPE="button" value="ZoomIn"
onClick="document.AppletName.zoomIn();">
</FORM>
Example2:
Head code:
<SCRIPT LANGUAGE="JavaScript">
<!-function zoomin()
{
document.AppletName.zoomIn();
}
// -->
</SCRIPT>
Body code:
<a href="JavaScript:zoomin();">zoomin</a>
151
Easypano ** User Manual
zoomOut
public void zoomOut()
Description: Minify the scene image.
Remarks:
This function only works in scenes. However, it does not work when the
scene image was zoomed out to minimum.
Example 1:
<FORM NAME="Button">
<INPUT TYPE="button" value="ZoomOut"
onClick="document.AppletName.zoomOut();">
</FORM>
Example 2:
Head code:
<SCRIPT LANGUAGE="JavaScript">
<!-function zoomout()
{
document.AppletName.zoomOut();
}
// -->
</SCRIPT>
Body code:
<a href="JavaScript:zoomout();">zoomout</a>
152
Easypano ** User Manual
Appendix: Tourweaver Classic Skin Templates
153
Easypano ** User Manual
154
Easypano ** User Manual
155
Easypano ** User Manual
156