1
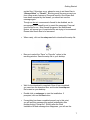
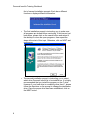
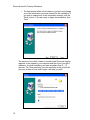
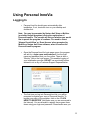
Personal
InnoVia
User
Manual
3rd Edition
Version 3.0
i
Personal InnoVia Training Workbook
Table of Contents
Personal InnoVia Overview...................................................................................1
Personal InnoVia Overview ...............................................................................1
Getting Started......................................................................................................3
System Requirements .......................................................................................3
Before Installing.................................................................................................5
Installation .........................................................................................................6
Using Personal InnoVia ......................................................................................13
Logging In .......................................................................................................13
Configuring Personal InnoVia..........................................................................15
Update Data ....................................................................................................19
Update Now .................................................................................................19
Scheduling Automatic Updates....................................................................21
Photo Download ..........................................................................................23
Update Options............................................................................................26
Basic Functionality ..........................................................................................27
Overview......................................................................................................27
Emailing Displays ........................................................................................28
Address Book ..............................................................................................30
Saving Searches..........................................................................................33
Building Custom Displays, Custom Search Forms ......................................34
Tips & Troubleshooting .......................................................................................35
Troubleshooting...............................................................................................35
Personal InnoVia Troubleshooting Overview ...............................................35
Internal Server Error ....................................................................................36
Invalid Login/Password................................................................................37
Page Cannot be Displayed ..........................................................................38
Could Not Establish Connection to Database ..............................................39
Error When Accessing a Full Display...........................................................41
Error: Connection w/host www.(xxxx).com could not be created .................42
Other Problems............................................................................................43
Other Frequently Asked Questions..............................................................44
Installing Personal InnoVia on a Network........................................................46
ii
Personal InnoVia Overview
Personal InnoVia Overview
Personal InnoVia is a Distributed Database. This means that the
database you normally search over the Internet is reproduced on
your own hard drive. It allows you to access and utilize MLS
information without a constant internet or dial-up connection.
When installed on your computer, Personal InnoVia stores MLS
information which is downloaded from the InnoVia web site.
Personal InnoVia is unique among distributed databases in that it
uses your internet browser to navigate the information that is
downloaded.
You can expect Personal InnoVia to function very similarly to the
online MLS InnoVia. This means that you are not going to have to
learn a new program. However there are some differences between
the two databases. The topics that follow illustrate the procedures
that are exclusive to Personal InnoVia.
1
Getting Started
System Requirements
•
•
Internet Browser - The latest (non-beta) version of
Microsoft Internet Explorer (7 or higher). Internet Explorer
must be installed, and it must be your default browser.
o
To check your IE version, go to "Help" and "About
Internet Explorer" in IE. If your version is less than 7,
you need to go to the login page for online InnoVia
and click the Internet Explorer link, and download
Internet Explorer 7 or higher. When asked about the
type of installation, choose "Typical".
o
To make sure IE is your default browser; click "Tools"
and "Internet Options" in IE. Go to the "Programs"
tab. Check the box beside "IE should check to see if
it is the default browser". Close and re-open your
browser, when asked whether to make IE your default
browser, click "Yes".
Free Hard Disk Space - At least 500 MB free space. Some
installations may require more.
o
Personal InnoVia will check to make sure you have
enough hard drive space during the installation
•
RAM - Windows XP minimum 128, recommend 256- Rightclick on "My Computer", then left-click "Properties", and this
information is on the "General" tab.
•
Processor - 366MHz or higher
•
Screen Display Settings - 1024 x 768 recommended.
o
Right click on an empty spot on the desktop, click
"Properties", then "Settings" tab, and screen settings
are in lower right corner.
•
Operating System - Windows XP or VISTA
•
Internet Connection - At least a 56k modem and a dialup
connection are required. (Broadband Internet connections
3
Personal InnoVia Training Workbook
such as ISDN, DSL or Cable access lines are
recommended)
•
Virus Protection Settings – Programs like McAfee and
Norton should be set to check program files only. Right click
on the virus scan icon in the lower right corner of your
screen, select PROPERTIES, and then make sure that
"Program Files Only" is checked under System Scan.
(Certain versions of Norton System scan may need to be
disabled if Personal InnoVia fails upon log in).
Norton Anti Virus 2005 and Norton System Works 2006 have
a feature called Internet worm protection. This can interfere
with the operation of Personal InnoVia.
4
Getting Started
Before Installing
•
Before you begin to install Personal InnoVia on your
computer, there are a few things that need to be done.
•
Please verify that you have the necessary System
Requirements.
•
Please close all open programs that are currently running on
your computer.
•
The first time Personal InnoVia is used, an internet
connection will be necessary.
5
Personal InnoVia Training Workbook
Installation
•
To begin the installation of Personal InnoVia, you will need
to log in to online InnoVia to download the setup file. Once in
InnoVia, click on the MISC tab on the InnoVia Menu Bar, and
then on the “Download Personal InnoVia” option.
•
From the following page, you will see instructions on
downloading the setup file. Before you download the setup
file, read this page for a pre-installation checklist. It is
important to review these settings before installing Personal
InnoVia.
•
NOTE: Before Installing: be sure that you disable any
AntiSpyware programs that will interfere with the installation. Ex:
Microsoft AntiSpyware. You can disable this real-time protection by
right clicking on the MS AntiSpyware icon on the system tray (by
the clock) and selecting Security Agents status (Enabled) and
clicking on Disable Real-time protection. After you reboot your
computer, this program can and will run as normal without affecting
Personal InnoVia.
If you have Spybot (or similar), you will also want to temporarily
shut it down for the installation. Find the Spybot icon in the system
tray (by the clock), right click on it, and click Exit. Once you install
and restart, Spybot will turn back on automatically.
(!) Virus Protection / Firewall Settings –
If you are using a firewall program like or similar to Norton Internet
Security or McAfee; During the installation and the initial use of
Personal InnoVia, you may be prompted by your firewall to block
6
Getting Started
certain files. If this does occur, please be sure to set these files to
“Always Allow” or “Permit”. Blocking such files may prevent you
from using certain features of Personal InnoVia. Once these files
have been accepted by the firewall, you should not see the
message again.
Though we do not recommend a firewall to be disabled, we do
recommend your firewall be set to permit the necessary Personal
InnoVia files to run. Most firewall programs, like McAfee and
Norton, will prompt you if suspicious files are trying to be accessed.
Please allow these files to be accessed.
•
When ready, click on the setup.exe link to download the setup file.
•
Be sure to select the “Save” or “Save As” option in the
resulting window. Save the setup file to your desktop.
•
Wait for the download to complete. Once it has completed,
you can close the download box, and locate the setup.exe
file located on your desktop.
•
Double click on setup.exe to start the installation. If
prompted, click on the Run button.
•
If everything has been completed properly up to this point,
you will see this message box appear immediately after
double-clicking "Setup.exe". Shortly after the Wise
Installation Wizard message box disappears, you will see the
7
Personal InnoVia Training Workbook
first of several installation prompts. Each has a different
function or displays different information.
8
•
The first installation prompt is instructing you to make sure
all programs are closed before continuing. If this has not yet
been done, please click on the cancel button and return to
the desktop to close the open programs, then repeat the
steps at the start of this topic. Otherwise, click on NEXT and
continue on.
•
The second installation prompt is instructing you to select
which drive Personal InnoVia is to be installed on. It is highly
recommended that you install the program on the C drive.
However if your hard drive is something other then C, please
follow the directions on the prompt to change the destination
drive. Once the proper drive has been established, click on
the NEXT button.
Getting Started
•
The next installation prompt will appear asking you to input your
IP address. Unless you are installing Personal InnoVia on a
server for use as a network application, ignore this prompt,
accept the default (127.0.0.1) and click “Next”.
**NOTE: If you are installing Personal InnoVia on a server as a
network application, input the IP address of the server in this field
and click “Next". Your network administrator should be performing
this installation, but if he/she is not, he/she will be able to tell you
what the IP address of the server is.
9
Personal InnoVia Training Workbook
•
The final prompt offers a final chance to go back and change
any of the information you have entered for the installation. If
you wish to change any of the information entered, click the
“Back” button. If you are ready to begin the installation, click
“Next”.
The amount of time that it takes to actually install Personal InnoVia
depends on the speed of your computer and the size of your MLS
database. A typical installation can take anywhere from 5 – 15
minutes. The “time remaining” function as shown in the picture will
give you an idea of how much longer it will take to install
10
Getting Started
•
Once the program is installed you will see an “Installation
Complete” screen. This new screen lets you know that
Personal InnoVia is installed correctly onto your computer,
and that you are now finished with this portion of the
installation process. Please click on the Finish button. If the
option is checked, Personal InnoVia will open immediately
after installation is complete.
•
You will also have a Personal InnoVia icon on your desktop.
11
Using Personal InnoVia
Logging In
•
Personal InnoVia should open automatically after
installation. If not, locate the icon on your desktop and
double-click.
Note: You may be prompted by Norton Anti Virus or McAfee
(or similar firewall programs) during the registration of
Personal InnoVia. The prompt will ask you whether you would
like to permit the program to continue. You need to select
'Always Permit/Allow' or ‘Grant Access’ when prompted by
McAfee or Norton Anti Virus software, when it involves the
Personal InnoVia program.
•
Once the Personal InnoVia Login page opens, the program
will ask for a login name and password. Use the login
name and password that you use online. There is also a
“Monitor” link on the login screen. This enables logging of
your initialization process. DO NOT use monitoring unless
advised to do so by a Customer Support Representative.
•
The first time you log into Personal InnoVia, you will be
prompted to register your copy of Personal InnoVia. To
register your copy of the program, click on the “CLICK
HERE TO REGISTER” link (make sure you are connected to
the Internet). You are allowed to register the program three
times using your login and password. Please make sure you
13
Personal InnoVia Training Workbook
are connected to the Internet to register. You can disregard
the Serial No. and Key fields.
14
•
As long as you are connected to the Internet, Personal
InnoVia will find the website, register your copy of Personal
InnoVia, and the next screen you see will thank you for
registering. Click the “Next” button. You can disregard the
unlock code.
•
The next screen confirms that your copy of Personal InnoVia
is now registered and ready for use. (NOTE— this process
will be repeated each time a NEW login / password is used
to log in to your copy of Personal InnoVia) Click on the
"Next" button.
•
You will then see a Welcome screen. Click “Next” to start
configuring your copy of Personal InnoVia.
Using Personal InnoVia
Configuring Personal InnoVia
•
The next page will ask you how many photos you would like
to download per listing when performing an update. These
selections will be used for your normal updates only. The
initial update upon installing may contain more or less
photos than you select. Select the number of photos from
the drop-down list and click “Next”. You can also check the
box to include “High Resolution Images” in your updates.
These are the enlarged versions of the main property photo.
•
The next page will ask you to select criteria to reflect the
data that you would like to download to your copy of
Personal InnoVia. Personal InnoVia will only download new
listings and changes to listings in the areas, property types,
and statuses that you select.
15
Personal InnoVia Training Workbook
16
•
You will then be taken to a page where you can schedule
unattended, automatic updates, which will run each day as
long as your computer is turned on and not in Suspend or
Sleep mode. Your computer must be connected to the
Internet when the updater is scheduled to run.
•
On the "Schedule Automatic Updates" screen, you will need
to specify what type of internet connection you have by
clicking on the corresponding radio button. If you use a dialup connection, the program will inform you that it is unable to
dial into the internet automatically. You will need to
schedule the automatic updates at a time in which you know
you will be dialed into the internet.
•
You will also need to provide the drive letter in which you
installed Personal InnoVia. This refers to the hard drive on
your computer, and what letter is used to represent the hard
drive (95% of the time it is the 'C' drive).
•
Enter in the time of day you wish to have the automatic
updates begin.
•
Check off the days of the week you wish to have the
automatic updates run.
•
Click "Save" to save the automatic updates you have
scheduled.
•
If you do not wish to set up automatic updates at this time,
you can click the “Skip” button at the bottom. To go back and
schedule them at a later time, you can click on the "Update
Data" tab on the InnoVia menu bar. In the menu options
under "Update Data", click on "Schedule Automatic
Updates". (It is recommended that you set up automatic
updates, to keep Personal InnoVia as current as possible)
Using Personal InnoVia
•
Once you have made the necessary configuration settings,
InnoVia will build your data and photos on the server, and
send you an email when the data is ready. The next
screen will notify you of this. After you receive the email
notification that your data and photos are ready for retrieval,
simply click on the link in the email to initiate the download
and login to Personal InnoVia. (Note: This email will be sent
to the email address on file for you in your online InnoVia
profile)
•
At this point you can click “OK” and close out of Personal
InnoVia until you receive the email.
•
Once the email comes, click on the link to log in to Personal
InnoVia, enter your ID and password, and your initial update
will automatically start. (Again, make sure you are
connected to the Internet before logging for your first
update)
•
While Personal InnoVia is updating, you will see the
following screen. The length of time it takes depends on the
size of your MLS and the amount of data and pictures that it
is downloading. It may appear unresponsive while this
update is taking place. Please let the update process
complete.
•
Once this update process completes, you will be logged
directly into Personal InnoVia.
17
Personal InnoVia Training Workbook
•
18
For all future logins to Personal InnoVia (after the initial
update), PI will ask you if you would like to run an update if it
has been more than 8 hours since your last update. Simply
click Yes to begin the update. If you choose No, you can
manually run the update at your convenience (discussed in
the next topic).
Using Personal InnoVia
Update Data
Update Now
Personal InnoVia gets its data from the online MLS system. This
data must be downloaded for Personal InnoVia to stay current. This
topic will show how to perform these downloads. Downloading data
is done with the Update Data section of Personal InnoVia. Updates
can be done as often as desired to keep Personal InnoVia and the
information in it current.
•
To Update Now, Click on the "Update Data" tab on the
InnoVia menu bar. In the menu options under "Update
Data", click on "Update Now".
•
On the Update Data screen will be the date and time of your
last download, the option to select the number of listing
photos you wish to download, and an “Update” button.
Before you click "Update", select the number of photos you
wish to download along with the listing data. You may also
have the ability to download the high-resolution images by
checking the box to include them in the update. This will
give you the ability in Personal InnoVia to click on the main
property photo from the full display and view the large, highresolution image, just as it does online.
Remember: Updating Personal InnoVia downloads the new listings
and changes to listings since the last time an update was run.
19
Personal InnoVia Training Workbook
•
20
To begin the update, connect to the Internet and click on the
“Update Now” button. The program will connect to the online
system, download the necessary data, and import it into your
database. Once the download is complete, the Update Data
screen will tell you that “Personal InnoVia has been
updated”.
Using Personal InnoVia
Scheduling Automatic Updates
Personal InnoVia will allow you to schedule unattended, automatic
updates which will run each day as long as your computer is turned
on and not in Suspend or Sleep mode. Your computer must be
connected to the Internet when the updater is scheduled to run.
NOTE: You may already have set these up during installation.
•
To schedule an automatic update, click on the "Update Data"
tab on the InnoVia menu bar. In the menu options under
"Update Data", click on "Schedule Automatic Updates".
•
On the "Schedule Automatic Updates" screen, you will need
to specify what type of internet connection you have by
clicking on the corresponding radio button. If you use a dialup connection, the program will inform you that it is unable to
dial into the internet automatically. You will need to
schedule the automatic updates at a time in which you know
you will be dialed into the internet.
•
You will also need to provide the drive letter in which you
installed Personal InnoVia to. This refers to the hard drive
on your computer, and what letter is used to represent the
hard drive (95% of the time it is the 'C' drive).
•
Enter in the time of day you wish to have the automatic
updates begin.
•
Check off the days of the week you wish to have the
automatic updates run.
•
Click "Save" to save the automatic updates you have
scheduled.
21
Personal InnoVia Training Workbook
22
Using Personal InnoVia
Photo Download
This option allows you to download listing photos for any listings
that are already in your Personal InnoVia database. (The
number of photos you can download may vary and depends on
your MLS system) You can use the criteria on this page to
determine what listings for which you would like to download
photos.
Note: Before you update Personal InnoVia, the Active and
Pending listings (from the initial download) will contain up to 3
property photos and the thumbnail photo. Only the main
property photo will be included for any other statuses (Closed
for example). In order to obtain more photos, you must use
the photo download, or specify how many photos you would
like to obtain with any new listings when you perform an
update (done from the Update Now section).
•
To download photos, Click on the "Update Data" tab on the
InnoVia menu bar. In the menu options under "Update
Data", click on "Photo Download".
23
Personal InnoVia Training Workbook
•
On the "Photo Download" screen, select the number of
photos you wish to download (per listing) by clicking on the
down arrow under the "Number of Photos" option.
•
If you wish, you can limit the number of listings you want to
download photos for, by using the other criteria options
provided on this page.
o You can input the MLS #'s for each listing you want to
download the photos for. Input the MLS #'s in the
corresponding field, separating them with a comma (no space
in between the comma and the MLS #). This option overrides
all other criteria (except # of photos).
o You can enter an activity date range to limit the number of
listings for which you wish to download the photos. (Note: if
you receive an error while downloading photos, your
download may be too large. Try reducing the size of the
activity date range to download less photos at one time)
o You can also select the statuses of the listings for which
you wish to download the photos. To select a status, highlight
the status you want. To select multiple statuses, hold down
the CTRL key while clicking on and highlighting your
selections.
24
Using Personal InnoVia
High Resolution Images
Some versions (depending on your Board or Association) of
Personal InnoVia can include high-resolution images with the
listings. High-resolution images are even larger images of the
main property photo. These images can be accessed by
clicking on the main property photo on the listing displays. To
include and check for listings that have high-resolution
images, place a check mark in the box were it states, "Get
High Resolution Images" (shown below).
•
Click "Next" at the bottom of the screen to begin the
download process.
•
You will be taken to a screen that will inform you of the
number of photos you requested to download, and the
amount of time it will take to download them. (This time will
be greatly reduced if downloading over a high-speed
connection) To proceed with the download, click "Yes". To
return back to the previous screen, click "No". Once you
click "Yes", the downloading of photos will begin. The
system may appear unresponsive during the download;
however, you will be notified on the screen when the
download is complete.
25
Personal InnoVia Training Workbook
Update Options
You have the ability in Personal InnoVia to customize the update
downloads to suit your needs. If, for instance, you are concerned
about hard drive space, you may want to download only residential
listings, or only listings in the area that you work. Note: These
selections were made when you first installed Personal
InnoVia. Only use the Update Options if you would like to
change the criteria that your copy of PI uses to pull down data,
for example, adding or removing an area.
26
•
To customize the downloads, click on the “Update Data” tab
on the Personal InnoVia menu bar, and select “PI Update
Options”.
•
Enter or edit the criteria to reflect the listings that you would
like your copy of PI to include.
•
Click “Save Update Options” button to save changes
•
You will see a confirmations screen, and similar to when you
installed PI, the system will build your data online, and send
you an email when it’s ready to be downloaded. At that time,
you can simply log in to PI and your download will start.
•
NOTE: These criteria should not be routinely changed.
You should perform a Normal Update prior to changing your
Area selections to insure you get the latest available data for
the Areas currently selected.
Using Personal InnoVia
Basic Functionality
Overview
The advantage of Personal InnoVia is that it functions exactly the
same way as Online InnoVia. Most of the searches, reports, etc.
that you perform over the internet through InnoVia can be done
offline in Personal InnoVia.
We would suggest that if you need direction on how to perform
searches or other InnoVia functions,that you refer to the help
documentation for online InnoVia.
The next several topics highlight functions that are exclusive to
Personal InnoVia.
You may notice that the command bar in personal InnoVia is the
same as Online InnoVia. Also, Personal InnoVia uses your
Browser (Internet Explorer) to search your own hard drive. The
Back, Forward, Print, etc. button on your browser work the same in
Personal InnoVia.
27
Personal InnoVia Training Workbook
Emailing Displays
You have the capability in Personal InnoVia to email displays to your clients, just as you do in
InnoVia. The way this is done depends upon whether or not you are connected to the internet
when you find a display you would like to send to someone. The following pages will guide you
through emailing a display “now” (when you are connected to the internet) and “later” (when you
are not connected to the internet). AOL Users can not use this function since the AOL
program does not allow integration with outside software.
Emailing “Now”
28
•
If, while working in Personal InnoVia, you are connected to the internet, you can email
displays immediately if desired.
•
Once you have found a display you would like to email to someone, click on the “Email”
button just as you would in on-line InnoVia.
•
The box that appears once you have clicked “Email” will look a little different to you. You
will still type in the email address of the recipient, the subject of your email, and a
message, but there will be two additional fields at the bottom of the box which you must
also fill in the “From” and “Mail Server” information.
•
The “From” field should contain your email address, and the “Mail Server” field should
contain the name of your mail server (this information should only have to be entered one
time). The “Mail Server” is going to be your outgoing mail server, sometimes referred to
as your “SMTP Mail Server”. This will differ from user to user, and can also depend on
where you are connected to the internet. Contact your Internet Service Provider, or
Network Administrator, if you have questions regarding your Mail Server.
•
Once all of the appropriate fields have been filled in, and you are certain that you are
connected to the internet, click on the “Send Now” button at the bottom of the box.
Using Personal InnoVia
Emailing “Later”
•
If, while you are working on Personal InnoVia, you are not connected to the internet, you
can save email messages to be sent at a later time.
•
Once you have found a display you would like to email to someone, click on the “Email”
button just as you did for the “Send Now” function.
•
Fill in all fields just as you did for “Send Now”, only select “Send Later” when you are
finished. The email will be saved on your hard drive so that when you are connected to
the Internet, they can be sent at that time.
•
In order to send these saved emails once you are connected to the Internet, go to
“Pending Mail” located under the Misc. tab in Personal InnoVia.
•
Under Pending Mail, you will see a list of saved emails. Check the messages you would
like to send, then click on “send”. If your attempt was successful, you will get a message
that reads “there are no messages awaiting delivery”.
•
If you get an error message, ensure your email address and mail server information is
correct, and try again.
•
If there are messages in Pending Mail which you would like to delete, check the
unwanted messages and click “delete”.
Emailing Multiple Displays
•
In order to email multiple displays, proceed exactly as you would in InnoVia. Place
checks beside the listings you would like to send, click “Use Checked”, then select
“Email” from the resulting pop-up box.
•
Once you’ve done this, the email display box will appear and you can proceed as you did
for emailing a single listing.
29
Personal InnoVia Training Workbook
Address Book
In Personal InnoVia, you have the capability of keeping an address
book to use in email situations. The Address Book appears inside
the “Email Display” box that pops up when you are emailing a
display. Once contacts are added to the address book, you need
only to double click on the name of the person you wish to email in
order to populate the “to” field.
Adding contacts to your Address Book
There are two ways to add contacts to your address book. You can
enter contacts manually, and you can import your address book
from the email client you normally use to check your email.
Note: Depending on your MLS, your online contacts may be
included when you first install.
Adding contacts to your Address Book manually
•
30
To add contacts to your address book manually, go to
“Address Book” under “Misc.” in Personal InnoVia.
Using Personal InnoVia
•
•
An “Edit Contact” box will appear. First, click on the gray
“Add” button at the bottom of the box. The Edit Contact box
will go away and reappear.
Once it has reappeared, you can add contact information to
it as desired.
•
Click on the gray “save” button at the bottom of the box. A
new box will appear that says “Contact Added”.
•
Click the “continue” button and the “Edit Contact” box
reappears. You may add another contact at this point, or go
to another part of Personal InnoVia. There is no “close”
function for the “Edit Contact” box.
Importing addresses from MS Outlook
•
To import an address book from your regular email client, go
to “ Address Book” under the “Misc.” drop down menu in
Personal InnoVia.
•
Once the “Edit Contact” box has appeared, click on the gray
“Import” button at the bottom of the box.
31
Personal InnoVia Training Workbook
•
Once this is clicked, you will find instructions for importing
the address book from your Outlook Express to the Personal
InnoVia address book.
Editing contact information in the address book
If you need to change information in your address book, go to the
“Edit Contact” box as described previously, highlight the contact
whose information you would like to edit, change the information,
and click on “save” at the bottom of the box.
Deleting contacts from your Address Book
32
•
To delete a contact from your address book, go to “Address
Book” under the “Misc.” drop down menu in Personal
InnoVia.
•
In the box of display names on the left, highlight the contact
you wish to delete, then click the gray “delete” button at the
bottom of the box.
•
Another box will appear asking you if you are sure you want
to delete this contact. Click “yes”, which will return you to the
“Edit Contact” box.
•
From here, you can delete another contact, add a contact, or
go to another part of Personal InnoVia.
Using Personal InnoVia
Saving Searches
You can save searches in Personal InnoVia just like you do in
InnoVia. When you are doing a search, and your criteria has been
selected, click the “Save Search” button to the left of the search
screen, and a “Save a Search” box pops up. Give your search a
title in the “Search Title” field, and click “OK” at the bottom of the
box.
•
When you wish to retrieve your search, go to the search
screen in which you saved the search (if you were in search
for Residential when you saved the search, go there, if you
were in search for land, go there).
•
Once you are at the correct search screen, click on the “Get
Search” button to the left of the search screen. The “Retrieve
a saved search” box appears.
•
Click the drop down arrow to find the search you wish to
retrieve, select it, click “continue”, and your saved search will
appear.
33
Personal InnoVia Training Workbook
Building Custom Displays, Custom Search Forms
Building your own custom displays and search forms functions the
exact same way it does in the online system. Adding the custom
displays to your display choices, also works the same way as it
does online. Under the 'Search' tab on the menu bar, you will see
the 'Custom Displays', ‘Custom Search Forms’ and 'Display
Preferences' options.
Help on this topic can be found on the online InnoVia system.
Access the “Help Topics” from the home page.
NOTE: Any Custom Displays or Search Forms that you had already built online
prior to installing Personal InnoVia, will be included in your copy of PI. However,
after your initial install, any more custom displays or search forms that you build
online will not come down to PI. Also, any that you build in PI, will not be
available online.
34
Tips & Troubleshooting
Troubleshooting
Personal InnoVia Troubleshooting Overview
This section will provide you with certain errors/problems found
while using Personal InnoVia. Included with the errors/problems
are possible solutions for correcting those issues. A list of the
errors/problems is provided below. You will find the details to the
errors/problems in the topics following this page.
If, after trying all of the solutions we have provided, you are still
experiencing difficulty, contact Support by emailing us at
[email protected] (PLEASE INCLUDE the name of
your Association of REALTORS in the email), or by calling the
support number located at the top of InnoVia.
Certain errors/problems you may encounter in Personal
InnoVia are;
Internal Server Error
Invalid Login/Password
Page Cannot be Displayed
Could Not Establish Connection to Database
Error When Accessing a Full Display
Error: Connection w/host www.(xxxx).com could not be created
Other Problems
35
Personal InnoVia Training Workbook
Internal Server Error
When opening Personal InnoVia, I get the message "Internal
Server Error", instead of being taken to the log in screen.
Problem:
Software conflict
Solution:
Perhaps a software firewall needs to be reconfigured. Some
examples of software that include a software firewall are; Norton
Internet Security, Windows Security Center, Zone Alarm, and
McAfee Personal Firewall. When reconfiguring your software
firewall, you will need to permit certain files to run.
The files you need to permit to run are;
C:\apache\cgi-xxx\LI_login.exe
C:\apache\cgi-xxx\pi_reg.exe
C:\apache\cgixxx\SD_datret.exe
C:\apache\cgi-xxx\pi_mail.exe
C:\apache\cgi-xxx\SD_disp.exe
C:\apache\apache.exe
C:\apache\cgi-xxx\log_mail.exe
C:\php\php.exe
C:\apache\cgi-xxx\lm_maint.exe
C:\mysql\bin\mysqlnt.exe or mysqld-max-nt.exe
For assistance with how to configure your software firewall, we
recommend you refer to the help section of the software firewall or
contact your software firewall vendor.
For some additional instructions on how to configure your software
firewall to permit these files to run, refer to the Personal InnoVia
section of the Help Topics section in online InnoVia.
36
Tips & Troubleshooting
Invalid Login/Password
After I type in my User ID/Password, and then click 'Log In', I
receive the message "Invalid Login/Password".
Problem:
User changed password online or has failed to keep PI updated
Solution:
After making sure it isn’t an “All Caps” issue, log in with old
password, and then do an update.
37
Personal InnoVia Training Workbook
Page Cannot be Displayed
I receive the message “Page cannot be displayed” upon opening
Personal InnoVia.
Problem:
Apache not running
Solution:
Could be that restarting your PC is necessary. Restart machine,
and try again. If that does not work, go to “Start”, Run, and type in
“services.msc”. Then Click “OK”.
In the window that appears, verify that Apache is indeed listed. If
not, reinstall PI. If it is present, double-click it. Change the startup
type to “Automatic” and then click “Start”.
Could also be that user has a firewall or anti-virus that is conflicting.
See tip for Internal Server Error.
38
Tips & Troubleshooting
Could Not Establish Connection to Database
Once I login to Personal InnoVia, I receive the message "Could not
establish connection to Database".
Problem:
MySQL not running
Solution:
Could be because the PC has not been restarted after installation.
Restart the machine.
Go to “Start", Run, and type in “services.msc”.
Click OK. In the window that appears, verify that MySQL is indeed
listed. If not, reinstall PI. If it is present, double-click it. Change the
startup type to “Automatic” and then click “Start”.
39
Personal InnoVia Training Workbook
40
Tips & Troubleshooting
Error When Accessing a Full Display
Recieveing an "Internal Server Error" or “sd_disp” error when
accessing listing displays in Personal InnoVia (usually when
clicking MLS# from one liner to go to Full Display). Could also
happen when clicking “Printer Friendly” or “Continue” from matches
found box.
Problem:
Conflict between InnoVia and Personal InnoVia
Solution:
Need to update Personal InnoVia. Check with the Board Office
Staff to see if they are having the same problem with PI. If their
installation of Personal InnoVia is updated and are they are not
having the problem, you need to update your copy of PI.
41
Personal InnoVia Training Workbook
Error: Connection w/host www.(xxxx).com could not be created
Problem:
Something stopping the update process
Solution:
Perhaps a software firewall needs to be reconfigured. Some
examples of software that include a software firewall are; Norton
Internet Security, Windows Security Center, Zone Alarm, and
McAfee Personal Firewall. When reconfiguring your software
firewall, you will need to permit certain files to run.
The files you need to permit to run are;
C:\apache\cgi-xxx\LI_login.exe
C:\php\php.exe
C:\apache\cgi-xxx\SD_datret.exe C:\apache\cgi-xxx\pi_reg.exe
C:\apache\cgi-xxx\SD_disp.exe
C:\apache\cgi-xxx\lm_maint.exe
C:\apache\apache.exe
C:\apache\cgi-xxx\log_mail.exe
C:\mysql\bin\mysqlnt.exe or mysqld-max-nt.exe
C:\apache\cgi-xxx\pi_mail.exe
For assistance with how to configure your software firewall, we
recommend you refer to the help section of the software firewall or
contact your software firewall vendor.
For some additional instructions on how to configure your software
firewall to permit these files to run, refer to the Personal InnoVia
section of the Help Topics section in online InnoVia.
Could also be a hardware firewall or router– Contact your network
technician to look into the issue. You need to be able to use FTP
connections.
Could also be the ISP—They may not be allowing ftp transactions.
Call your Internet Service provider for help. Tell them you need to
be able to use ftp.
42
Tips & Troubleshooting
Other Problems
Items to look for when Personal InnoVia is not working the
way it is supposed to:
Firewalls
Hardware and Software firewalls. They should be configured to
allow LI_Login.exe and php.exe, among others, to access the
internet when Personal InnoVia is running. Software firewalls can
sometimes be bundled in with your anti-virus software, so if you
don't think you have a firewall, check your anti-virus protection
settings to see if perhaps you are running one without knowing it.
Spyware
Spyware can be picked up in many different places, but you would
almost certainly not know it if you had spyware installed on your
machine.
Inconsistent Internet Service
If you have one of those Internet Services that routinely "drops"
your connection, or has serious problems with lag time, you may
want to go ISP shopping.
Virus Scan
Norton Internet Securities must be correctly configured to work well
with Personal InnoVia.
43
Personal InnoVia Training Workbook
Other Frequently Asked Questions
I am on a peer to peer network, and every time I try to login to
Personal InnoVia, I get a page cannot be displayed message.
This problem can be coming from a number of different issues, the
best thing to try is:
On your desktop right click on the Internet Explorer icon, select
Properties. Then select the Connection tab, please verify that your
radial button in the center of the page are either set to dial a
connection whenever a network connection is not present, or Never
Dial a connection. After verifying that this is set correctly, click on
the button that says LAN Settings.On this, please verify if you have
any Proxy Settings inserted into that particular field. If there are
some there, underneath those settings, there is a check box that
says “Bypass proxy server for local addresses” Please check that
box. This should rectify the Page cannot be displayed problem.
I try to login to Personal InnoVia, and the pop up box to
connect to the internet comes up. I click on work offline, and
then nothing happens.
If your computer is trying to connect to the Internet when you open
Personal InnoVia, DO NOT SELECT WORK OFFLINE. Click on
connect, and proceed as if you were trying to get online. Your
internet connector will not connect, and you will be able to get into
Personal Inno-Via.
I am not sure how to find out the name of my email server.
If you use Outlook, go to Tools, then Accounts. Inside the “Internet
Accounts” window, select the “Mail” tab. Highlight the account
name under the word "Accounts”. To the left of this, select the
button “Properties”. Inside the Properties window that appears,
select the “Servers” tab. Copy down the name of the “Outgoing
Mail” or SMTP. It should be in the form of “mail.server.com” . If you
are on a network, ask your network administrator what your SMTP
server name is. (AOL Users can not use this function since the AOL
program does not allow integration with outside software.)
I am having various problems running Personal InnoVia and I
have Norton anti-virus protection.
44
Tips & Troubleshooting
Norton Anti-virus protection does a good job of preventing viruses
from infecting your computer. Many Software manufacturer require
that Norton’s be disabled while running their programs. Norton
should be set to check program files only. To check this—Right
click on the virus scan icon in the lower right corner of your screen,
select PROPERTIES, then make sure that “Program Files Only” is
checked under System Scan. (Certain versions of Norton
System scan may need to be disabled if Personal InnoVia fails
to log in).
I have Microsoft Personal Web Server, and I get errors when I
use Personal InnoVia.
The Apache program is a web server as well, and will not run
properly if Personal Web Server is enabled while Personal InnoVia
is being used. You will need to disable Personal Web Server to use
Personal InnoVia.
I use AOL as my Internet Service Provider, and am having
trouble using Personal InnoVia.
If AOL is your Internet Service Provider, you will need to do
the following:
•
Make sure your Internet Explorer browser is set to “Dial only
when no network connection is found”.
•
Install normally, and when the screen appears that says
“You have an unregistered copy of Personal InnoVia”,
maximize AOL, log in to establish an Internet
connection,minimize AOL, go back to the Personal InnoVia
screen, and click on the CLICK HERE TO REGISTER link.
•
Make sure Internet Explorer is your default browser by right
clicking the Internet Explorer icon on your desktop and then
clicking on “Properties”. Go the “Programs” tab, and check
the box for “Internet Explorer should check to see if it is your
default browser”. Close Internet Explorer, then reopen it, and
a message will appear asking if you would like to make
Internet Explorer your default browser. Click “Yes”.
45
Personal InnoVia Training Workbook
Installing Personal InnoVia on a Network
1) Install Personal InnoVia on the server PC (NT or 2000). When
prompted, enter the IP address of the server PC. Your network
administrator should be installing this program on the server. If
he/she is not, he should be able to tell you what the IP address is
for the server.
2) As with other NT/2000 PI installations, start Apache as a service:
•
Go to a command prompt, navigate to the c:\apache folder
•
Type net start apache
•
Type exit
•
Go to “Start” and “Run”
•
Type in “services.msc”, click “OK”
•
Find Apache in the list, and Double click “Apache"
•
Make sure the Startup Type is set to “Automatic”, and the
Service Status is “Started”.
3) On each end-user PC, add a desktop shortcut to the server PC:
46
•
Right-click on desktop, select New - Shortcut
•
At the command-line prompt, enter
http://nn.nn.nn/xxx/start.html, where nn.nn.nn is the IP
address of the server PC, and xxx is the three letter
abbreviation for the client.
•
Enter an appropriate name for the shortcut (e.g., Personal
InnoVia). Note – Personal InnoVia does not run
efficiently on peer-to-peer networks.