1
POLYMATHIC COMPUTER
CORPORATION
PAYROLL SYSTEM
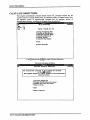
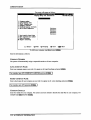
Congratulations on the purchase of your Polymathic Payroll System.
To install the enclosed software, please do the following:
1.
2.
Verify that you have the following diskettes:
•
Polymathic Payroll Disk 1
•
Polymathic System Disk
•
Example Company
Read the Installation Guide and follow the procedures for installing the programs on your
computer.
3.
Read the User's Manual and follow the Payroll Cycle processing checklists outlined in
Chapter 2.
4.
Complete and mail the Software Registration Form.
GENERAL LEDGER
SYSTEM
INSTALLATION GUIDE
COPYING PROGRAMS TO HARD DISK
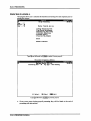
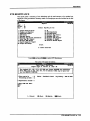
The Polymathic Payroll System is distributed on four diskettes.
Before using the Payroll programs you should copy all files on these four diskettes on to your
hard disk as outlined in the following example.This example assumes that your diskette drive
is Drive A: and your hard disk is Drive C:
1.
Insert the diskette labeled Polymathic Payroll Disk in Drive A:
2.
Run the installation procedure by typing:
3.
Follow the remaining instructions displayed by the installation program.
A:PYINSTAL A: C:
The Polymathic Payroll System is now ready to be initialized.
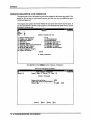
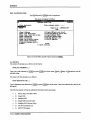
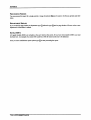
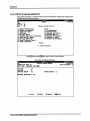
INITIALIZING THE POLYMATHIC PAYROLL SYSTEM
Setting the Drive Search Defaults
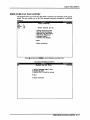
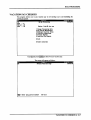
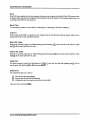
The Polymathic Payroll System allows the user to specify which drives are to be searched for
data and program files. Initially, the system will only search the logged on drive. This can be
changed to adapt to your computer's configuration by running a program known as SETDRIVE.
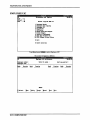
To run this program type SETDRIVE and press I<-*Enter). The screen will appear as follows:
Drives:
ABCDEFGHI
JKLMNOP
NNYYNNNNNNNNNNNN
In the above examples, Drives C: and D: are set to be searched. This means that the system will
only look for program and data files on the logged on drive and drives C and D. Any program or
data files on other drives that you have configured will be ignored. To change the settings, type
(y) to set a drive to be searched or (n) to exclude a drive from being searched or i^Enteri to keep the
existing value. Normally you would only set the hard drive(s) letters on which you intend to keep
your program and data files.You are now ready to setup your first company. To do this
follow the instructions outlined under Company Setup.
POLYMATHIC COMPUTER
CORPORATION
SOFTWARE LICENSE AGREEMENT
IMPORTANT! The enclosed materials are provided to you by Polymathic Computer
Corporation on the express condition that you agree to this Software License. By using the
enclosed diskette(s), you agree to the following provisions.
If you do not agree with these
provisions, return these materials to your dealer in original packaging, within three days from
receipt, for a refund.
TERMS:
This agreement is in effect from the date of receipt of the software and lasts
indefinitely unless cancelled by Polymathic for violation of the terms of
the agreement.
LICENSE:
This software, the diskette(s) on which it is contained, the documentation
and manuals related thereto (the Licensed Software), is licensed to you, the
end user, for your own internal use on one computer system only. You do
not obtain title to the Licensed Software or any copy rights or proprietary
rights in the Licensed Software. You may not transfer, sub license, rent,
lease, convey, copy, modify, translate, convert to another programming
language, decompile or disassemble the Licensed Software for any purpose.
LIMITED
The
WARRANTY:
representations of any kind with regard to the licensed software are hereby
Licensed
Software
is
provided
AS
IS.
All
warranties
and
disclaimed, including the implied warranties of merchantability and fitness
for a particular purpose. Under no circumstances will the manufacturer or
developer of the licensed software be liable for any consequential, incidental,
special or exemplary damages even if apprised of the likelihood of such
damages occurring.
POLYMATHIC COMPUTER
CORPORATION
SOFTWARE REGISTRATION FORM
IMPORTANT! In order that you can receive notification of modifications or updates of this
program you MUST complete this form and return it immediately. Technical support will not be
provided unless we receive a completed registration form.
Instructions For Use:
1.
Register one software package per form.
2.
The package name may be found on the binder spine.
3.
The serial number may be found on the MASTER diskette.
POLYMATHIC COMPUTER
CORPORATION
PAYROLL USER'S MANUAL
PROPRIETARY RIGHTS NOTICE
All rights reserved. This material contains the valuable properties and trade secrets of
Polymathic Computer Corporation, an Ontario corporation. The material embodies substantial
creative efforts and confidential information, ideas and expressions, no part of which may be
reproduced or transmitted in any form or by any means, electronic, mechanical or otherwise,
without the express written consent of Polymathic Computer Corporation. While reasonable
efforts have been made in the preparation of this manual to assure its accuracy Polymathic
assumes no liability resulting from any errors or omissions in this manual, or from the use of the
information contained herein.
Please refer to the Software License for limitations on use and reproduction of the software
package.
POLYMATHIC COMPUTER
CORPORATION
PAYROLL SYSTEM
USER'S MANUAL
CHAPTER 1: PAYROLL SYSTEM OVERVIEW
FEATURES
CHAPTER 2: PAYROLL CYCLE
PROCESSING CHECKLISTS
1-1
1-1
2-1
2-1
Initial Set Up Procedures
2-1
Pay Period Procedures
2-1
Monthly Procedures
2-1
Annual Procedures
2-1
INITIAL SET UP PROCEDURES
2-3
PAY PERIOD PROCEDURES
2-3
MONTHLY PROCEDURES
2-4
PROCESSING CHECKLIST
2-5
CHAPTER 3: GENERAL DATA ENTRY
INSTRUCTIONS
3-1
3-1
The ENTER Key
3-1
Menus and Submenus
3-1
Optional Fields
3-2
Date Fields
3-2
The Decimal Point
EDITOR
3-2
3-3
Rekey From a Field
3-3
Rekey/Display Line
3-3
Cancel Processing
3-3
F5 LOOKUP FEATURE
3-4
CHAPTER 4: MENUS
4-1
MAIN MENU - ALL SYSTEMS
4-1
MAIN MENU - PAYROLL SYSTEM
4-1
CHAPTER 5: DAILY PROCESSING
5-1
CHANGE PROCESSING DATA
5-2
Payroll Type
5-3
Payroll Period
5-3
Processing Year
5-3
Cheque Type
PAY PERIOD MAINTENANCE
5-3
5-4
Pay Type
5-5
Pay Period Number
5-5
Processing Year
5-5
Start of Pay Period
End of Pay Period
5-6
5-6
Date of Pay Period
5-6
DOE's to be Processed
5-6
EMPLOYEE PAY DATA ENTRY
Modify Employee Payroll Data
Modify G/L Codes
Modify SPLIT Allocation Values
CALCULATE DEDUCTIONS
5.7
5-8
5-9
5.9
5-12
Calculate Deductions
5-13
Process UIC/UIE Rates and Values
5-13
Process CPP Rates and Values
5-14
Help Facility
5-15
PROCESS PAYROLL
5-16
VACATION PAY CHEQUES
5-17
MAKING CHANGES TO PREPARED PAYROLL
5-19
CHAPTER 6: YEARLY PROCESSING
6-1
PAYROLL SYSTEM
6-1
YTD ADJUSTMENTS
6-2
YEAR END PROCESSING
6-4
TD1 Exemptions
6-5
DOE's
6-5
CHAPTER 7: REPORTS
7-1
CHEQUE RECONCILIATION REPORT
7-2
CHEQUE REGISTER AND CHEQUES
7-4
Cheque Stub Printing
7-5
Page Breaks by Departments
7-5
Cheque Type
7-5
Printing MICR Cheques
7-7
DEDUCTIONS REPORT
DOE MASTER LIST
EMPLOYEE MASTER.
7-8
7-10
7-13
List Individual Employee
7-14
List All Employees
7-16
EMPLOYEE PAY PERIOD INFORMATION
7-19
GROSS PAY EDIT REPORT
7-22
MULTIPLE DOE RECAP REPORT
7-24
PAYROLL REGISTER REPORT
7-26
SINGLE DOE RECAP REPORT
7-28
T4 PREPARATION
7-30
YTD ADJUSTMENTS REPORT
7-33
ETD REMITTANCE
7-35
Processing Periods
7-36
Department Breaks
7-36
Extra DOE's
7-36
EMPLOYEE PAY PROFILE
7-38
Detailed Report
7-39
Summary Report
7-40
EMPLOYEE DOE LIST
7-41
EMPLOYEE YTD REGISTER
7-43
Pay Year
7-44
Pay Type
7-44
Pay Code
7-44
Department Code
7-44
EMPLOYEE UI REPORT
7-46
VACATION EARNED REPORT
7-48
Pay Year
7-49
Pay Type
7-49
Starting Period
7-49
Ending Period
7-49
Employee Selection
7-49
CHAPTER 8: MAINTENANCE AND INQUIRY
EMPLOYEE MASTER
Employee Number
8-1
8-2
8-3
Last Name
8-3
First Name/Initial
8-3
Street
8-3
City
8-3
Province
8-4
Postal Code
8-4
Telephone Number
8-4
Birth Date
8-4
Sex
8-5
Marital Status
8-5
Social Insurance Number
8-5
Bank Transit Number
8-5
Savings Account Number
8-5
Hire Date
8-5
Termination Date
8-5
Pay Frequency
8-5
Pay Code
8-6
Pay Rate
8-6
Job Description
8-6
Vacation Pay
8-6
Federal Exemption
8-6
Provincial Exemption
8-6
Department
8-7
Annual Salary
8-7
Regular Hours
8-7
Hourly Rate
8-7
Overtime Rate
8-7
Pension Adjustment
8-7
EMPLOYEE MASTER - DOE ENTRY
8-8
DOE
8-8
Start Date
8-8
End Date
8-8
Current Units
8-8
Amount
8-8
MtdAmt
8-8
YtdAmt
8-8
Last Updated
8-9
DOE Rate
8-9
Identification
8-9
GL Codes
8-9
EMPLOYEE DATA INQUIRY
8-10
EMPLOYEE UIC
8-12
PAY PERIOD
8-14
DOE MASTER MAINTENANCE
8-15
DOE Number
8-16
DOE Description
8-17
DOE Short Description
8-17
Taxable/Non-taxable
8-17
Type
8-17
DOE Frequency
8-17
Rate
8-18
Rate Type
8-18
Amount
8-18
Debit GL Code
8-18
Credit GL Code
8-18
Zero Unit
8-18
Zero Rate
8-18
Zero Amount
8-19
MATCH CANCELLED CHEQUES
8-20
PURGE CHEQUES
8-22
RECORD OF EMPLOYMENT
8-23
Amended Number
8-24
Telephone Number
8-24
Issuer's Name
8-24
Date of Issue
8-24
RCT Employer Account Number
8-24
RCTNumber
8-24
Correspondence
8-24
For Employer's Use
8-24
Employer Name and Address
8-24
Employee Number
8-25
Occupation
8-25
Social Insurance Number
8-25
First Day Worked
8-25
Last Day Worked
8-25
UI Paid To
8-25
Ul Weeks Paid/Total Amount
8-25
Wage Loss from/Duration
8-25
Recall Date
8-25
Recall Status
8-26
Reason Code/Comment
8-26
Additional Monies Paid
8-27
Pay Period Type
8-27
Last P.P. End Date
8-27
Insurable Earnings by Pay Period
8-27
SORT PAY PERIOD FILE
8-28
MICR CHEQUE PRINTER SETUP
8-29
Printer Number
8-31
Printer Name
8-31
Description
8-31
MICR Settings
8-31
Network Information
8-32
CHAPTER 9: DATA FILE STATUS
DATA FILE STATUS
9_11|
:.
9_1
CHAPTER 10: COMPANY INFORMATION
10-11|
PAYROLL SYSTEM
Payroll Type
10_i
10_2
Payroll Period
10-2
Processing Year
10_2
Cheque Type
jq_2
Payroll/GL Interface
10-3
Pension Plan Number
10-3
Employee Account Number
10-4
CHAPTER 11: COMPANY SETUP
COMPANY INFORMATION
Company Number
'.
n-i j|
H-l
j]_2
Long Company Name
1 \_2
Short Company Name
\ \_2
Company Initials
1 j_2
Holding Company Initials
\ 1.3
Affiliated Companies
Last Month Closed Date
GST Registration Number
Home Directory
U_3
11.3
H_3
j 1_3
Batch Directory
U_3
Name
I j_4
Address
U_4
CHAPTER 12: PRINT REPORTS
PRINTING SPOOLED REPORTS
PRINT SCREEN FIELDS
FUNCTION KEYS AND PRINT COMMANDS
ZOOMING A REPORT
Functions
CHAPTER 13: DAILY STARTUP
ONE LOGICAL DRIVE
LOG ON INSTRUCTIONS
TWO OR MORE LOGICAL DRIVES
CHAPTER 14: MONTHLY CLOSING
MONTHLY CLOSING - AUTOMATIC
MONTHLY CLOSING - MANUAL
MONTHLY CLOSING - PAYROLL
Payroll MTD Register
12-11|
12-1
ZZZZZZZ!! 12-3
ZZZZZZZZZZZZZ!!.' 12-4
ZZZ!ZZZ" 12-4
12-5
13.11|
13.!
ZZZZZZZZZ 13-2
ZZZZZZZ!!! 13-4
14-11|
14_2
ZZZZ!!! 14-3
Z!ZZZZZ! 14-4
14_4
MTD Update
Payroll Journal
14-4
.,
14-4
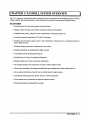
CHAPTER 1: PAYROLL SYSTEM OVERVIEW
The P.C.C. Interactive Payroll System offers a complete, easy to use procedure for the processing of payroll costs in
a timely, efficient and economical manner. It also provides for the receipt of accurate, timely financial reports.
FEATURES
• Processes payroll for both multi-company and multi-division.
• Handles weekly, bi-weekly, semi-monthly, monthly and annual pay frequencies.
• Calculates hourly, salary, salary plus hourly, shift premiums, commission payrolls, etc...
• Provides for automatic preparation of T4's and T4 summaries.
• Interfaces with the General Ledger system to allow distribution of payroll costs to an unlimited number of
general ledger accounts.
• Distributes employee gross pay to departments or cost centres.
• Distributes deductions to specified general ledger accounts.
• Accumulates totals for printing selected reports.
• Provides for up to 50 types of earnings and deductions.
• Handles multiple-rate overtime calculations automatically.
• Has complete employee file maintenance: add, delete, modify, display and list.
• Allows entry and editing of all earnings and deductions data, including hours, dollar amounts rates etc.
• Allows optional distribution of payroll costs to multiple General Ledger accounts.
• Automatically calculates the gross payroll, taxes and voluntary deductions.
• Allows manual entry of transactions to adjust the computer cheques.
• Prints payroll cheques including MICR encoding.
FEATURES ■ 1-1
CHAPTER 2: PAYROLL CYCLE
PROCESSING CHECKLISTS
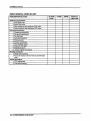
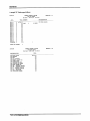
The following is a summary of the major stages in the Payroll Cycle:
Initial Set Up Procedures
Page
1.
Enter DOE codes.
8-15
2.
Spool DOE codes.
7-10
3.
Enter employees and employees DOE codes.
8-8
4.
Spool employees and employees DOE codes.
7-13
Pay Period Procedures
Page
5-2
5-4
5-7
5-12
5-16
5-17
7-26
7-22
7-8
7-4
Page
14-4
14-4
14-4
Annual Procedures
Page
1.
YTD adjustments
6-2
2.
Year end processing
6-4
PROCESSING CHECKLISTS ■ 2-1
PAYROLL CYCLE
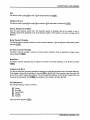
INITIAL SET UP PROCEDURES
1.
DOE Master Maintenance
DOE codes are used to define different deductions and earnings for each employee. For example different
DOE codes are set up for Salary (SAL), Canadian Pension Plan (CPP), Federal Income Tax (FIT),
Commission (COM)... When you set up a new employee you define which DOE codes are to be associated
with that employee. For example, a salary employee should at least have:
SAL
FIT
This DOE will contain the amount of the employee's gross salary on a per pay period basis.
This DOE will contain the amount of Federal Income Tax to be deducted. The amount will be
calculated during the Calculate Deductions step.
CPP
This DOE will contain the amount of Canada Pension to be deducted. It will also be
calculated during the Calculate Deductions step.
CPE
This DOE will contain the amount of Canada Pension - employer's portion. This amount will
not be deducted from the employee's salary but will be listed on the ETD Remittance report
that will display the amount owing to the government from the employer.
This DOE will contain the amount of Unemployment Insurance to be deducted. The amount
will be calculated during the Calculate Deductions step.
This DOE will contain the employer's portion of Unemployment Insurance. This amount will
UIC
UIE
not be deducted from the employee's salary.
During pay period setup you can modify the amounts for each DOE on a per employee basis. (DOE's can
also be calculated based on criteria specified during DOE setup). When the payroll is processed the
amounts will be added or deducted from the employee's wages.
Each DOE can have a GL code associated to it. If you have the Polymathic General Ledger system all your
GL codes will be updated to reflect current amounts after the payroll has been processed.
2.
Employee Master Maintenance
After the DOE codes are set up, you can enter the employee data . The employee database is set up initially
and modified to reflect the addition or deletion of employees and changes to information maintained on the
master file. You may print a list of your Employee Master for later.
PAY PERIOD PROCEDURES
1.
Change Processing Data
This program lets you define the payroll type, pay period number, the processing year and the cheque type
that is to be used for the pay period you are running.
2.
Pay Period Maintenance
In this program you define the start and end date of the pay period and which DOE's are to be included for
processing. The reason that you define what DOE's to include is because you don't always want to include
all DOE's. For example, you may have set up an Employee Shoe Expense DOE that is to come off each
employee's pay once a month. You would only include this DOE in the pay period that you want to deduct
the expense from so that you don't have to zero it out every other pay period.
3.
Entering Transactions
Debit and credit transactions for all Payroll activity are entered through the payroll program, Employee Pay
Data Entry. This is where you can modify the amounts of the DOE's for each individual employee. For
example, you would change hourly employee's wages here.
2-2 ■ INITIAL SET UP PROCEDURES
PAYROLL CYCLE
4.
Calculate Deductions
This program calculates any DOE's that you have set up as deductions. You can spool the Deductions
Report to ensure that the proper amounts will be deducted from each employee.
5.
Process Payroll
The Process Payroll program will calculate each employee's net pay and accumulate the data needed to
produce the following reports.
•
A Payroll Register report
•
A Gross Pay Edit report
•
A Deductions report
These reports should be printed and reviewed before you spool the Cheque Register and Cheques. Once
you spooled the cheques you can no longer modify the pay period.
6.
Spool Cheque Register and Cheques
This is the last step of the payroll process. You should NOT spool the Cheques and Cheque Register until
you have reviewed the Payroll Register. If something is wrong in your payroll register you can go back a
modify the data and reprocess the payroll but once you spool the cheques you cannot change the data for
that pay period.
MONTHLY PROCEDURES
All monthly procedures are handled through the Monthly Closing program. The payroll monthly closing will:
•
Produce the month-to-date payroll register.
•
Clear out the month-to-date totals for all employees' DOEs
•
Close the payroll to the general ledger by updating the GL summary for the month being closed and
creating the GL analysis records for the month.
MONTHLY PROCEDURES ■ 2-3
PAYROLL CYCLE
PROCESSING CHECKLIST
2-4 ■ PROCESSING CHECKLIST
CHAPTER 3: GENERAL DATA ENTRY
INSTRUCTIONS
A number of data entry procedures are the same for all the applications described in this manual. These data entry
procedures are as follows:
The ENTER Key
The enter key, [<-* Enter) is always pressed after every entry to start processing. The only time you don't press [4-*Enter!
is when you are using a function key such as [F5~).
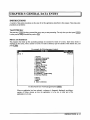
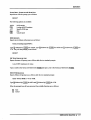
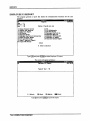
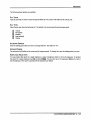
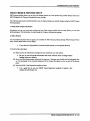
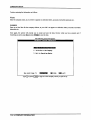
Menus and Submenus
The programs that make up this accounting package are accessed by means of a menu. Each menu choice is
displayed on the screen, with a number to its left. To make a selection, type the number of the desired item, and
press I ^ Enter 1.
For example, the following menu is typical:
To select Payroll you would type Q] and press l<-*Enter]
When an application has been selected, a submenu is frequently displayed, providing a
number of further choices on how the application is to be run, or what part of the
application is to be run.
INSTRUCTIONS ■ 3-1
GENERAL DATA ENTRY
To select Daily processing you would type Q and press I^Entar).
Optional Fields
Optional fields (fields not required) may be skipped by pressing I <-* Enter |.
A number of screen entry fields allow entry of data but also default to a particular value if I^Enter) is pressed. A
default value is simply a value automatically selected by the program if you do not enter a value.
For example:
• A date field will often default to the current date (system date) or the last date entered.
• [<-■ Enter \ can often be pressed to answer a Yes or No question by default.
Date Fields
Enter all dates in the format ddmmyy (six numeric digits, with no slashes) representing day month year. The
computer will check that the month entered is valid (1-12), as well as the day (1-31) and the year (0-99).
The Decimal Point
The decimal point does not have to be entered unless the characters to the right of the decimal point are non zero.
However, decimal points must be entered if the digits to the right of the decimal point are not equal to zero.
3-2 ■ INSTRUCTIONS
GENERAL DATA ENTRY
EDITOR
The system includes an Editor utility that allows the user to correct errors made during data entry. The EDITOR can
be accessed by pressing Ifi \.
Note:
Some older versions of the software use QQ or flo Shift FT) to access the editor. If I fi \ is not working
try one of these keys.
The Editor utility will not always bring up the same options because the options change according to where you are
calling the editor from. The options that are available through the editor and how they are to be used follows:
Rekey From a Field
This option may be used to rekey any of the data entered in a field. If you are on field number 6 and you want to
change something in field number 1 you will have to rekey the information from that field on. In most cases, you
can press I ^ Enter) back to line 6 because [<-* Enter) will remember what you entered in that field last.
To use this option type Q, and press I*-1 Enter).
The system will then display:
[
]: Enter [field number] or [ENTER] to return
Type the number of the field that is to be rekeyed and press [*-* Enter). The system will then automatically return to
this field number.
Simply make your corrections and continue entering your data.
Rekey/Display Line
In some of the programs such as invoices, you can have more than one line entry per item. The Rekey Line option
allows you to modify information within a specific line.
Type the number corresponding to Rekey line and press I*-1 Enter). The system will prompt you to enter the line
number that you want to change. It will then display that line allowing you to modify your entries. Once you have
made the changes you can continue where you left off.
The Display Line option will prompt you to enter the line number that you want to display. Once you type in the
line number and press I*-1 Enter), the line will be displayed. The system will request that you press 14-1 Enter) to continue
where you left off.
Cancel Processing
The Cancel option will cancel whatever you are doing. If you are in the middle of an invoice or sales order etc., and
you want to cancel press Ifi j and type the letter corresponding to cancel. The system will ask you if you are sure
you want to cancel before it performs this step.
EDITOR ■ 3-3
GENERAL DATA ENTRY
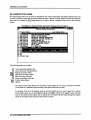
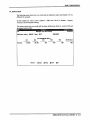
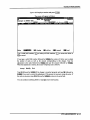
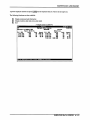
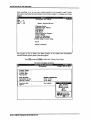
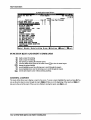
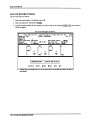
F5 LOOKUP FEATURE
The lookup feature allows you to search for information from various input fields. This feature eliminates the need
for users to memorize codes used for general ledger accounts, customer accounts, supplier account and numerous
other items. For instance the IF5 \ lookup feature can be used to display a supplier account code in the following
manner:
Press [F5 ) at the Supplier Number field and the following screen will appear:
Accounts
RH
Receiuable
TLARP01 5.051
Customer Haster Maintenance
31/03/93
16 Ser
17 Reg
IB Customer Type
The following options are available:
Cursor upwards through the data
Cursor downwards through the data
Page up one screen of data
Page down one screen of data
Move to the top of the data
Move to the bottom of the data
Exit the lookup feature
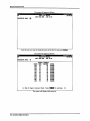
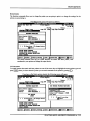
Options:
The options of the lookup feature vary according to what program you are using. This feature will allow
you to search for a particular record according to the search criteria that you enter.
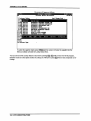
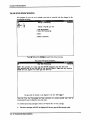
For example, if you are in the supplier master of Accounts Payable and you want to search for a supplier
by the supplier name, you can press |fi | for Options, then IF3 \ to search by the supplier's name and enter
three or more letters for the supplier you are looking for. The system will then search through the supplier
master for the closest match to the three letters that you entered.
3-4 ■ F5 LOOKUP FEATURE
GENERAL DATA ENTRY
Press |Fi ) and the Options screen will appear as follows:
Accounts
1
Z
3
4
5
6
7
B
9
10
11
12
13
14
15
Receiuable
TLARP01 5.05
31/03/93
Customer Master Maintenance
RH
Customer Nunber
Diu
PRECISION PftCKftGING COMPANY
Cus
1635-00
Add
1645-00
Add
1650-00
Add
1656-00
1665-00
ftdd
Pas
1666-00
Cus
1675-00
PROTOLOG SERUICES LIMITED
POLITY CORP.
Cus 1695-00
R.T. KELLY INC.
Con 1835-00
1840-00
REUERE - SETDN
Sal
Pro
PgUp
PgDn
Top
Bottom
Sel
Pay
Last Change Date
ESC-End
Fl-Optiom
16 Ser
17 Reg
IB Customer Type
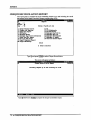
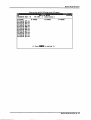
To search by supplier name, press (F
The screen will appear as follows:
Recounts
TLARP01 5.051
Receiuable
Customer Master Maintenance
RM
1 Customer Number
1635-00
1645-00
31/03/93
Last Change Date
PRECISION PACKAGING COMPANY
PRIOR'S ACTING ACADEMY
FDLYMATHIC COMPUTER CORPORATION
POLYMATHIC BUSINESS SYSTEMS LTD.
1656-00
Enter customer nane
16651666167516951835
1840-00
REUERE - SETOM
1650-00
PgUp
PgDn
Top
Bottom
ESC-End
Fl-Options
15
16 Ser
17 Reg
18 Customer Type
Type at least three letters for the supplier you are searching for and press I*-1 Enter).
The system will then search through the supplier master for the closest match to your search
criteria and will highlight that supplier in the lookup window.
F5 LOOKUP FEATURE ■ 3-5
GENERAL DATA ENTRY
The screen will appear as follows:
Accounts
mi
1 Customer Number
2 Diu Customers
3 Cus
1695-00
4 Add I 1656-60
5
6
7
8
9
10
11
12
13
14
15
16
17
IB
Receivable
TLfWOl 5.051
Customer Master Maintenance
31/83/93
Last Change Bate
POLITY CORP,
POLVMflTHIC BUSINESS SYSTEMS LTD.
POLYMATHIC COMPUTER CORPORATION
POLYMATHIC DEVELOPMENT CORP.,
POLYMATHIC GROUP
POLYMATHIC TECHNOLOGIES INC.
PRECISION PACKAGING COMPANY
PRI-COMP-TISE
Add
1650-09
Add
1625-00
Add 16891-00
Fos
1666H30
Cus
1635-00
Cus
1620-00
Con
1645-00
PRIOR'S ACTING ACADEMY
PROFESSOR D.C.S. KUHN
Sal
2325-00
Pro
Sel
PgUp
PgDn
Top
Bottom
Pay
Ser
Reg
Customer Type
ESC-End
Fl-Options
To select the supplier simply press I*-1 Enter) and the system will enter the supplier into the
field you initially activated the Lookup feature from.
You can exit out of the Lookup feature at any time by pressing lEsci. |Esc| will exit one level of the program,
therefore if you are in the options section of Lookup you will have to press [Esc| twice to exit completely out of
Lookup.
3-6 ■ F5 LOOKUP FEATURE
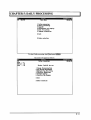
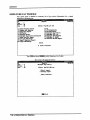
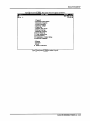
CHAPTER 4: MENUS
MAIN MENU - ALL SYSTEMS
MAIN MENU - PAYROLL SYSTEM
Payroll
CH
Sll/93
Main Henu
1
2
3
4
5
6
TLPAP1Q0 2.35
30/06/93
Daily processing
Vearly processing
Reports
Maintenance and inquiry
Data file status
Company information
E Exit
E Enter selection
MAIN MENU-ALL SYSTEMS ■ 4-1
CHAPTER 5: DAILY PROCESSING
CH
Sll/93
Payroll
Hain Menu
TLPftPlOD 2.35
30/06/93
1 Daily processing
2 Vearly processing
3 Reports
4 Maintenance and inquiry
5 Data file status
6 Company information
E Exit
E Enter selection
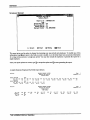
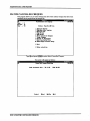
To select Daily processing, type Qj and press I ^ Enter |
The screen will appear as follows:
5-1
DAILY PROCESSING
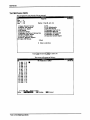
CHANGE PROCESSING DATA
This program allows you to change the payroll type (i.e. weekly, monthly), the period (i.e.
05 or 06), the year of the payroll which is being processed or the type of cheque used for
the payroll preparation.
Type Q and press I <-* Enter 1 to select Change processing data.
The screen will appear as follows:
TLPfiPlOO 2.35
Payroll
Daily Processing
Status: Pryl/GL Jrn run
CH
1
2
3
4
[_] Enter:
5-2 ■ CHANGE PROCESSING DATA
Payroll type ...
Payroll period .
Processing year
Cheque type
39/06/93
S
10
93
S
[Jl-Accept
Standard
]-Exit
DAILY PROCESSING
The available functions are as follows:
Field #
Q
flic")
Select a field number to modify
Accept and save modifications
Exit to main menu
Payroll Type
Type Q followed by I<-* Enter j to modify the payroll type. The following types are available:
Q
(M)
(D
©
(wj
Annual
Monthly
Semi-monthly
Bi-weekly
Weekly
Payroll Period
To change the payroll period, type (D followed by I ^ Enter). Type the payroll period number for this payroll. For
example, if you were doing payroll for May and payroll was done on a monthly basis the pay period would be "5".
Processing Year
This field automatically defaults to the current year. If you have to change the year, type (3) followed by l<-*Enter|
and type the year you want to process payroll for.
Cheque Type
To change the cheque style, type Q followed by 1 ^Enter!. The following cheque types are available:
CD
O
Standard
Non-standard
GD
(*)
Laser (MICR)
Special
(m)
Q
(3
<?"
Moore
Laser (Moore)
Laser (LT102)
This modification will permanently change the cheque type.
CHANGE PROCESSING DATA ■ 5-3
DAILY PROCESSING
PAY PERIOD MAINTENANCE
This program allows you to inform the system of the dates of the pay period and the DOE's
that are to be processed for this pay period.
Type (2) and press [+-1 Enter! to select Pay period maintenance.
The screen will appear as follows:
Pay Period Master Maintenance
CH
1
2
3
4
5
6
TLPAP130 1.11
Payroll
H
30/06/93
Pay type
Pay period number
Processing year
Start of pay period ..
End of pay period
Date of pay period ...
7 DOE's to be processed
No DDE Description
Select:
No DDE Description
jjid
5-4 ■ PAY PERIOD MAINTENANCE
^adify
flelete
No DDE Description
ghou
j>xt
jjjxit
DAILY PROCESSING
The functions available are as follows:
Q
IM)
(£j
(D
Q
(D
Add a new pay period
Modify an existing pay period
Delete an existing pay period
Display an existing pay period
Display the next pay period
Exit to the Payroll main menu
To add a pay period, type Q and press l<-*Enter). Enter the information as follows:
Pay Type
The pay types available are as follows:
Q.
(D
©
(D
©
Annual
Bi-monthly
Monthly
Semi-monthly
Weekly
This information is retrieved from the data collected in the Change Processing Data program. If you have to change
the Pay Type, type the character corresponding to the pay type you want and press I<-*Enter).
Pay Period Number
This information is retrieved from the data collected in the Change Processing Data program. To change the pay
period number modify this field and type the number of the pay period which you are processing.
Processing Year
This information is also retrieved from the data collected in the Change Processing Data program. To modify the
year, select this field and type two numeric characters to indicate the processing year and press I*-'Enter).
PAY PERIOD MAINTENANCE ■ 5-5
DAILY PROCESSING
Start of Pay Period
This field is coded by typing a date in the format ddmmyyyy to indicate the starting date of the payroll period. Type
the date and press I*-1 Enter j
End of Pay Period
This field is coded by typing a date in the format ddmmyyyy to indicate the ending date of the payroll period. Type
the date and press I*-*Enter).
Date of Pay Period
This field is coded by typing a date in the format ddmmyyyy to indicate the pay date of the payroll period. This is the
date that will appear on the payroll cheques. Type the date and press I<-*Enter!.
DOE's to be Processed
This field allows you to include the DOE's that are going to be processed in this pay period. You can enter each
DOE number individually until all DOE's to be processed are displayed on the screen or, you can recall the DOE's
from a particular pay period by pressing IF9 | and typing the pay period number that you want to recall the DOE's
from. IF5 | Can be used to list all DOE codes and Ifio | can be used to restart entering DOE's.
When you have finished entering the DOE's for the pay period type (D and the system will prompt you to Qccept or
(c)ancel your selections. If all the DOE's included are correct, type (a) to accept and save the data.
5-6 ■ PAY PERIOD MAINTENANCE
DAILY PROCESSING
EMPLOYEE PAY DATA ENTRY
This program allows you to enter any data which is required in the calculation of the payroll
period. You may modify any of the DOE amounts previously recorded for a particular
employee.
Type (jQ and press the 1+-1 Enter! to select Employee pay data entry.
The screen will appear as follows:
EMPLOYEE PAY DATA ENTRY ■ 5-7
DAILY PROCESSING
Modify Employee Payroll Data
Type Q and press IJ-1 Enter) to modify an employee's payroll data. The system will prompt you to enter the number of
the employee that you want to modify the data for. fFs"| can be used to list all employees.
Once you have entered the employee number the system will display the employee's name and prompt you to accept
this employee or display another employee. If the correct employee name is displayed, type Q to accept the
employee.
The following screen will appear:
Employee number: 000010 Nane: TEST
Gross:
1065.30 Earnings:
1080.00
Pays ft Benefits
Rate
Units
Fid
DOE
1 001 SAL
.00$
.00$
2 020 CPE
3 031 UIE
[
TLPfiP135 2.20
31/07/93
Payroll
Employee Pay Data Entry
CH
] Select:
Amount
1000.00
22.32
42.3B
,EMPLOYEE
Deductions:
Fid
DOE
4 005 FIT
5 009 EIT
6 030 CPP
7 032 UIC
CSIl-ftccept
[3]-Cancel
245.23 Net pay:
Deductions
Bate
Units
.00
]
1000.00$
754.77
Amount
.00
192.21
.00
.00
.00
22.32
30.70
[Q]-Ca leu late Tax Deductions
The following options will appear:
Field #
Q
(D
(c)
(D
Enter the number corresponding to the DOE you want to modify
Accept and save the changes
Calculate the tax deductions for this employee only
Cancel any modifications made
Exit back to the employee selection screen
Modify the required DOE's for each employee. Then proceed to the next step, Calculate deductions.
5-8 ■ EMPLOYEE PAY DATA ENTRY
DAILY PROCESSING
Modify G/L Codes
To modify the GL accounts that are debited and credited for each DOE, type (£) followed by I*-1 Enter). The system
will prompt you to enter the number of the employee that you want to modify the data for. IF5 i can be used to list
all employees.
Once you have entered the employee number the system will display the employee's name and prompt you to accept
this employee or display another employee. If the correct employee name is displayed, type Q to accept the
employee.
The screen will appear as follows:
Payroll
CH
TLPftP135 Z.19
Enployee Pay Data Entry
Employee lumber: 888010
Name:
TEST
.EMPLOYEE
CR5
[_] Select:
[(UJgglSSSB1
E^l-ftccept
[gl-Cancel
Each DOE with the GL debit and credit accounts will be displayed on the screen. Type the field number beside the
DOE that you want to modify the GL codes for and press I +-1 Enter). Enter the new debit and credit codes then type Q
to accept and save the changes when prompted by the system. This will make a permanent change to the DOE in the
Employee Master file.
Modify SPLIT Allocation Values
This program allows you to take the total amount for a DOE and allocate it to more than one GL code. This is useful
when an employee does more than one job and you want to allocate the salary to different expenses.
v
To allocate a DOE to more that one GL code you must set up the codes through the
Employee Master. When you set up a DOE for an employee you can have up to five
debit and credit accounts. The allocations that you set up in this program effect the
debit and credit GL codes that you set up for the employee DOE.
To modify the SPLIT allocation values, type (3) followed by I«-*Enter). The system will prompt you to enter the
number of the employee that you want to modify the data for. IF5 ) can be used to list all employees.
EMPLOYEE PAY DATA ENTRY ■ 5-9
DAILY PROCESSING
Once you have entered the employee number the system will display the employee's name and prompt you to accept
this employee or display another employee. If the correct employee name is displayed, type (£) to accept the
employee.
The following screen will then be displayed:
You can allocate the salary by percentage or by dollar amount. If you select to allocate by percentage the system
will prompt you to enter the percentage to be allocated to the debit and credit GL codes. Five different allocations
are available because you can have up to five debit and credit GL codes for each DOE. As you enter the percentage
the difference column displays the remainder that you have to allocate. When the remainder is zero the system will
prompt you to accept and save the allocations.
If you select to allocate the salary by dollar amount the system will prompt you to enter the gross salary. As you
allocate amounts the difference column will display the remainder to be allocated. Once the remainder is zero the
system will prompt you to accept and save the allocations.
5-10 ■ EMPLOYEE PAY DATA ENTRY
DAILY PROCESSING
GL Split Example
The following screen shows how you would take an employees salary and allocate it to two
different GL accounts.
In this example GL code 511210 is Salaries - Office and 511310 is Salaries - Support.
Account 313510 is Payroll Clearing.
EMPLOYEE PAY DATA ENTRY ■ 5-11
DAILY PROCESSING
CALCULATE DEDUCTIONS
This program automatically calculates federal income tax, provincial income tax, the
employee portion of Canada Pension Plan, the employer portion of Canada Pension Plan,
the employee portion of unemployment insurance and the employer portion of
unemployment insurance, providing you designate these six deductions.
Payroll
Daily Processing
CH
Type
..: S
Period : 10
Vear ..: 93
TLPAP100 2.35
30/06/93
Status: Pryl/GL jrn run
1
2
3
4
5
6
Change Processing Data
Pay Period Maintenance
Enployee Pay Data Entry
Calculate Deductions
Process Payroll
Vacation Fay Cheques
E Exit
E Enter selection
Type Q and press the [<-* Enter) to select Calculate deductions.
The screen will appear as follows:
Payroll
5-12 ■ CALCULATE DEDUCTIONS
TLPAP134 3.131
DAILY PROCESSING
Calculate Deductions
Type Q followed by I*-1 Enter) to calculate the deductions. The available functions are as follows:
Start
Exit
Type CD to start the calculations.
Process UIC/UIE Rates and Values
This option should be selected when the UIC and/or UIE rates have changed. A new calendar year is a situation
where this option could be used.
|<-*Enter| to select Process UIC/UIE rates and values.
The screen will appear as follows:
TLPAP134 3.13
30/06/93
Payroll
Calculate Automatic Deductions
CH
Ill calculations contained in this program are outlined
in the TTiTflfl booklet.
This program changes all tables related to the calculations
contained uithin.
Process UIC/UIE rates and ualues ***
1
2
3
«4
5
6
7
0
9
UIC
UIE
UIF
Pay
rate
rate
rate
type
:
:
:
: S
No. of pay periods
Minimum hours
Minimum earnings
Maximum earnings
Maximum premium per annum
Select:
jQodify
:
:
:
:
:
Update
3.070X
1.4080
1.4000
24
33
330.00
1630.00
1245.12
i|xit
To permanently modify a field type (m) followed by I<-* Enter j and the number of the field you want to modify. Once
you have completed your modifications type [0) followed by I *-* Enter |. The system will then prompt you accept and
save the data or continue modifying the data. Review the information on the screen and if everything is correct, type
(a) to accept and save the changes.
CALCULATE DEDUCTIONS ■ 5-13
DAILY PROCESSING
Process CPP Rates and Values
This option should be selected when the CPP rates have changed. A new calendar year is again a situation where
this option could be used.
Type (£) followed by l<-*Enter! to process CPP rates and values.
The screen will appear as follows:
TLPAP134 3.12
Payroll
Calculate Automatic Deductions
CH
30/66/93
Ill calculations contained in this program are outlined
in the THE® booklet.
This program changes all tables related to the calculations
contained within.
*** Process CPP rates and values *••*
1 CPP rate
:
2 Basic exemption :
«3 Pay type
: S
Select:
JJodify
2.680
141.66
Update
To permanently modify a field type (m) followed by [^ Enter! and the number of the field you want to modify. Once
you have completed your modifications type (u) followed by [<-* Enter!. The system will then prompt you accept and
save the data or continue modifying the data. Review the information on the screen and if everything is correct, type
(a) to accept and save the changes.
5-14 ■ CALCULATE DEDUCTIONS
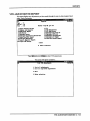
DAILY PROCESSING
Help Facility
To select Help facility, type Q followed by I*-1 Enter!
The screen will appear as follows:
TLPRP134 3.12
Payro11
CH
30/06/93
Calculate Automatic Deductions
|flll calculations contained in this program are outlined
|
Option 1 will be used in nost cases.
TaxCes) and deductions will be calculated automatically.
Options 2 and 3 need only be selected when the UIC and/or UIE and/or
CPP rates have changed.
For example, at the beginning of a new calendar year.
Press
to continue
E Exit
4 Enter selection
Press any key to return to the Daily processing menu.
CALCULATE DEDUCTIONS ■ 5-15
DAILY PROCESSING
PROCESS PAYROLL
This program allows you to calculate all deductions and earnings for each employee prior to
printing the cheques.
Type (D and followed by I^Enter) to select Process payroll.
The screen will appear as follows:
Payroll
TLPAP116 1.00
Employee Master DOE List
CH
Processing Vear : 93
[_] Select:
30/06/93
Pay Type : Semi-monthly
[g]]-Start
1-Exit
Type (s) followed by (<-*Enter! to process payroll.
If any errors occur during payroll processing they will be listed at the end of
processing with instructions.
5-16 ■ PROCESS PAYROLL
DAILY PROCESSING
VACATION PAY CHEQUES
This program allows you to pay vacation pay on all earnings up to and including the
current pay period.
Type (£) and press I ^ Enter 1 to select Process vacation pay.
The screen will appear as follows:
CH
Payroll
Process Uacation Pays
[QJJ]]: Enter [pay period number 1
TLPAP13B 1.04
30/86/93
[El-exit
VACATION PAY CHEQUES ■ 5-17
DAILY PROCESSING
The system will prompt you as follows:
(
]: Enter [pay period number]
[E|-exit
If you press IJ-1 Enter L the current period will be the cut-off date for the preparation of the vacation pay. After
selecting a cut-off period, the system will prompt you as follows:
I
1: Enter [employee number]
|F5]-lookup
|E]-exit
If you type a valid employee number, the system will prepare the vacation pay for this employee. The system will
then prompt you as follows:
[
): Enter [field number]
[ESC]-return
Type a field number followed by I*-1 Enter) to modify a DOE. After modifying a DOE or after pressing l<-*Enter| the
options available are as follows:
(S)
Q
(c)
Modify
Accept
Cancel
5-18 ■ VACATION PAY CHEQUES
DAILY PROCESSING
MAKING CHANGES TO PREPARED PAYROLL
If you wish to make any changes prior to printing cheques simply return to selection three (Employee Pay Data
Entry) of the Daily Processing menu and make the necessary modifications. After you have entered the required
changes, re-run the following options:
From the Daily Processing menu re-run:
1.
Option 4: Calculate Deductions
2.
Option 5: Process Payroll
3. Option 6: Vacation Pay Cheques (ifrequired)
From the Report menu re-run:
4.
Option 3: Deductions Report
5.
Option 7: Gross Pay Edit Report
6.
Option 9: Payroll Register Report
Review the revised output. If you still wish to make more changes prior to spooling the cheque register and cheques,
repeat the steps above again. If you are satisfied with the changes, Spool the cheque register and cheques.
MAKING CHANGES TO PREPARED PAYROLL ■ 5-19
CHAPTER 6: YEARLY PROCESSING
PAYROLL SYSTEM
Type (£) followed bvl^Enterho select Yearly processing.
The screen will appear as follows:
PAYROLL SYSTEM ■ 6-1
YEARLY PROCESSING
YTD ADJUSTMENTS
Type Q followed by H-'Enterl to select YTD adjustments.
The screen will appear as follows:
Payroll
CH
Employee no
Enter
[223ES33EECEES-'
6-2 ■ YTD ADJUSTMENTS
Enter VTD Adjustments
[[jjj]-lookup
TLPAPH0 1.10
30/06/93
YEARLY PROCESSING
Type a valid employee number and press I<-* Enter]
The screen will appear as follows:
Payroll
CH
Employe
no 688010 TEST
<
BEFORE
Rate
Enter
TLPAPHO 1.10
Enter VTD adjustments
riiJiljM.IIH.lJ8i
EMPLOYEE
> <— ADJUSTMENT —> <
Amount Adi units
[ijg]- lookup
[JZ|]-editor
AFTER
Amount Updtd units
>
Anountl
r.jjQo]]-cancel
Type a valid DOE number, |F5i to lookup all DOE numbers, |Fi| to access the editor or
1 fio | to cancel.
If you type a valid DOE number followed by [+-1 Enter L the system will allow you to adjust
the number of units as well as the amount corresponding to this change. Type the
adjustment to the units followed by I*-1 Enter! and type the amount followed by l<-*Enter|.
When the adjustment is entered, the screen will prompt you as follows:
Accept
Modify
Exit
Type (a) followed by I^Enterl if the change is recorded properly and type (m) followed by
I «-* Enter j if you want to correct the adjustment. If the amount is incorrect, retype the entry. If
the units are incorrect, type fFi I followed by l<-*Enter| to return to the units field.
You can continue modifying DOE's or type (§) to leave this function.
YTD ADJUSTMENTS ■ 6-3
YEARLY PROCESSING
YEAR END PROCESSING
Type [D followed by I ^ Enter! to select Year end processing.
The screen will appear as follows:
Payroll
Vear End Processing
CH
ILPflP195 1.96
30/66/93
NOTE: This process will only copy the ACTIVE enployees into the new filet
This process nust be run for each of the various Payroll types you are running
AFTER the last payroll for that type has been run.
Do you wish to create a new Payroll file for 1994
Once the Year End Processing has been activated the current payroll year will be
incremented by one to obtain the new year value.
To continue processing type Q to create a new Payroll file. To exit, type ©.
<?*
The above message will NOT be displayed if the new payroll file already exists.
6-4 ■ YEAR END PROCESSING
YEARLY PROCESSING
Type Q followed by I*-1 Enteri
The screen will appear as follows:
Payroll
TLPAP195 1.06
38/86/93
Year End Processing
CH
NOTE: This process will only copy the flCTIUE enployees into the new file!
This process must be run for each of the uarious Payroll types you are running
AFTER the last payroll for that type has been run.
TDl Exemptions for New Tax Year 1994
OLD TDl exemption:
M
Cl to B exemptions nay be specified)
NEW TDl exemption:
Suppress Zeroing of ¥TD Amounts for Selected DOEs
:
Cl to 16 DDEs nay be specified)
DOEs
Enter
[1 ILD
TDl exemption amount
This screen allows you to input the new TDl exemption amounts and exclude any DOE's
from zeroing the year-to-date amounts for each employee.
TDl Exemptions
Enter the OLD exemption amount and the corresponding NEW exemption amount. You can enter up to 8
exemptions.
To bypass changing the TDl exemption amounts, press fEscl
DOE's
You can enter up to 10 different DOE's which are to be excluded from zeroing the year-to-date amounts for each
employee during the year end processing. IF5 \ can be used to list all valid DOEs and lEsci can be used to bypass this
option or end inputting.
Once you have completed entering your TDl exemptions and DOEs the system will prompt you with:
[Si-Start
[M]-Modify
[E]-Exit
Type (s) to start the year end processing.
YEAR END PROCESSING ■ 6-5
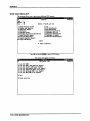
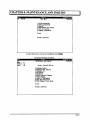
Type (£) and press I ^ Enter) to select Reports.
The screen will appear as follows:
7-1
REPORTS
CHEQUE RECONCILIATION REPORT
This report prints a complete list of all outstanding cheques up to and including the cutoff
date entered in the Match Cancelled Cheques program (page 8-20).
I*-1 Enter 1 to select Cheque Reconciliation.
The screen will appear as follows:
Payroll
CH
Cheque Reconciliation Report
Including cheques up to and including 31/ 5/93
Select:
Start
Exit
Type (s) followed by I^ Enter i to prepare the cheque reconciliation report.
7-2 ■ CHEQUE RECONCILIATION REPORT
TLPAPZ05 1.06
30/06/93
REPORTS
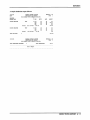
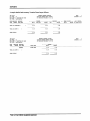
A sample Cheque Reconciliation report follows:
EXAMPLE COMPANY LIMITED
CHBQUB RBCONCILIATION REPORT
EXPAR20S
1.06
PAGB
INCLUDING CHBQUBS UP TO 30/ 6/93
CANCEL
EMPLOYEE
AMOUNT
NUMBER
NAME
00005
EMPLOYEE
00009
EMPLOYEE
2
CHEQUBS
TOTALLING
0 CHBQUBS TOTALLING
CHEQUE RECONCILIATION REPORT ■ 7-3
1
REPORTS
CHEQUE REGISTER AND CHEQUES
This report prints a list of all cheques as well as the cheques for the current pay period. This
should be the last step of your payroll process and only run once everything has been
verified and approved.
This program also updates the Payroll Master file and spools the Payroll Journal report. If
you have Polymathic's General Ledger program it will automatically update the pay period
files and GL codes as well.
Type CD followed by I ♦-'Enter) to select Cheques and Register.
The screen will appear as follows:
Payroll
CH
Typist 14
TLPAP165
Spool Cheques ft Register
Payroll type: S Period: 11 Vear:
93
Status: Processed
Cheque stub printing
: BDTH
Total/page break by departments: N
Cheque type
: R LASER - HICR
Select:
7-4 ■ CHEQUE REGISTER AND CHEQUES
§tart
Jodify
1.2Z
30/06/93
REPORTS
Cheque Stub Printing
The following options are available for Cheque Stub Printing:
Q
Year-to-date only
(u)
Units only
GD
Both
The cheque stub will only display the current earnings and the year-to-date totals.,
The cheque stub will only display the current units and corresponding earnings.
The cheque stub will display the current units and current earnings as well as year-to-date earnings.
Page Breaks by Departments
Type (N) if you don't want page breaks by departments or Q if you do.
Cheque Type
The cheque type field displays the type of cheque style that will be used when printing the payroll cheques. If the
cheque type is set to (R) for MICR cheque printing the printer number will also be displayed.
CHEQUE REGISTER AND CHEQUES ■ 7-5
REPORTS
A sample Cheque Register report follows:
CHEQUE
PAGE
RBGISTER
1.22
1
FOR PAYROLL TYPB S ENDING 15/06/1994
Period 11
EMPLOYBB
NUMBER
EXPAR16S
EXAMPLE COMPANY LIMITBO
30/06/94
DBPT
NAME
CHKQ
NO.
PAY
DATE
000005 BMPLOYBB NAME
000009 BMPLOYEB NAMB
S0276
15/06/1994
Company totals
7-6 ■ CHEQUE REGISTER AND CHEQUES
GROSS
FED.TAX
PROV.TAX
CPP/QPP
UIC MISC.DED
CHQ AMT
UIC BARN
REPORTS
Printing MICR Cheques
If you are printing your payroll cheques using the MICR cheque printing program the
system will automatically download the MICR font to the selected printer. The following
message will be displayed before the payroll cheques are printed to ensure you have the
MICR Toner cartridge in your printer.
POLYMATHIC COMPUTER CORPORATION
Typist:
LPI1:
14
Thu
Print Reports
Port: 05
PCPRIMT
2.34
HAY 12,1934
16:17:54
Report none
CHEQUE PRINT SETUP CODES EPSON
Start
copy D/K page
Status
Copy Page Messages
CASH DISBURSEMENTS
A/P CHEQUE LINEUP
ACCOUNTS PAYABLE CHEQUE PURGE
DETAILED FINANCIAL STATEMENTS
SUMMARY FINANCIAL STATEMENTS
ANALYTICAL REUIEU - INDIUIDUAL
ANALYTICAL REUIEU - ALL
CLIENT G/L LIST
GENERAL JOURNAL
G/L PRELIMINARY T
ACCRUALS LISTING
T4 PRINT CODES
<« ATTENTION >»
The NICR TONER cartridge
nust be loaded T
EMPLOYEE MASTER -
VTD PAYROLL ADJUS
PAYROLL EDIT REPO
PAYROLL CHEQUE RE
'AYROLL CHEQUES -
T
I
CHEQUE REGISTER AND CHEQUES ■ 7-7
REPORTS
DEDUCTIONS REPORT
This report prints a list of all deductions for each employee for the specified pay period.
Type CD and press IJ-1 Enter) to select Deductions Report.
The screen will appear as follows:
Payroll
CH
Spool Deductions Edit Report
Select:
Start
Exit
Type (s) followed by I^Enter) to prepare report.
7-8 ■ DEDUCTIONS REPORT
TLPAP160 1.01
30/06/93
REPORTS
A sample Deductions report follows:
TOTAL
FOR DBPT
30/06/94
EXAMPLE COMPANY LIMITED
DEDUCTIONS
EDIT REPORT
EXPAR160
PAGB
1.01
2
FOR PAYROLL TYPE S ENDING 15/06/1994
TOTAL EMPLOYEBS
TOTAL DEDUCTIONS:
PROCESSED:
End of
Report
DEDUCTIONS REPORT ■ 7-9
REPORTS
DOE MASTER LIST
This program allows you to print seven different DOE reports.
Type Q and press I*-1 Enter! to select DOE Master.
The screen will appear as follows:
Payroll
DDE Haster List
CH
1
2
3
4
5
6
7
List
List
List
List
List
List
List
All
All
All
All
All
All
All
DDE's
DOE's for specific Payroll
Taxable DOE's for Payroll
Non-taxable DOE's for Payroll
Deduction DOE's for Payroll
Earnings DOE's for Payroll
Hemo DOE's for Payroll
E Exit
E Enter selection
7-10 ■ DOE MASTER LIST
TLFAP125 1.03
30/86/93
REPORTS
The available functions are as follows:
(D
(D
Q
Q
CD
ID
(3
(D
List all DOE's
List all DOE's for specific Payroll
List all Taxable DOE's for Payroll
List all Non-taxable DOE's for Payroll
List all Deduction DOE's for Payroll
List all Earnings DOE's for Payroll
List all Memo DOE's for Payroll
Exit
Type your selection number followed by I«-* EnterL and the screen will prompt you as follows for all the reports with
the exception of report 1, All DOE's, where the report will be spooled instantly:
Enter payroll type (A/B/M/SAV):
The available functions are as follows:
Q
(D
(m)
Annual
Bi-monthly
Monthly
(w)
Weekly
(D
Semi-monthly
Type your selection followed by (e) and the report will automatically be spooled.
DOE MASTER LIST ■ 7-11
REPORTS
A sample DOE master list follows:
7-12 ■ DOE MASTER LIST
REPORTS
EMPLOYEE MASTER
This program is used to list information about an individual employee or all employees.
Type (D and press I<-*Enter! to select Employee Master.
The screen will appear as follows:
Payroll
Enployee Master List
CH
1
2
E
E
TLPAP115 2.09
30/86/93
List Individuals
List ALL
Exit
Enter selection
EMPLOYEE MASTER ■ 7-13
REPORTS
The options available are as follows:
CD
(D
(D
List individuals
List all
Exit
List Individual Employee
Type Q followed by I*-1 Enter! to list individual employees.
The screen will appear as follows:
Payroll
Employee Master List
CH
♦» 1 List
Indiuiduals
Enter employee nunber:
2 List ALL
E Exit
Enter
rmiiawmn«min»iiil
ILFAP115 2.09
30/06/93
Report file
Page
[ijgl-LOOKUP
: CHPAR115.PRT
:
E^l-Exit
Type the required employee number followed by I*-1 Enteri [fs \ can be used to list all employees.
7-14 ■ EMPLOYEE MASTER
REPORTS
A sample list follows:
EXAMPLE COMPANY LIMITED
30/06/93
EXPAR11S
Entployee Master File
Bmp no 000009
Page
2.09
1
ACTIVE
UI
WEEKS
.00
11
.00
.00
Units Mtd Amount Ytd Amount UP
.00
313010
PAYROLL TAXBS & DEDUCTIONS
020 23/10/1992
CPP
•
313010
PAYROLL TAXBS
030 23/10/1992
CPP
••/••/••••
PAYROLL TAXES
031 23/10/1992
••/••/••••
PAYROLL TAXES
- employee portion
313010
.00
PAYROLL CLEARING
510710
.00
.00$
CPP
EXPENSES
.00
313510
.00
.00$
PAYROLL CLEARING
.00
UIE
& DEDUCTIONS
032 23/10/1992 ••/**/****
UI
313510
.00$
CPP
£ DEDUCTIONS
- employer portion
313010
.00
10
CPE
& DEDUCTIONS
- employee portion
313010
UI
••/••/••••
employer portion
.00
.00
510910
.00$
UIC EXPENSE
.00
UIC
PAYROLL TAXBS & DEDUCTIONS
313510
PAYROLL CLEARING
EMPLOYEE MASTER ■ 7-15
REPORTS
List All Employees
Type [|) followed by I*-1 Enter) to list all employees.
The screen will appear as follows:
TLPAP115 2.03
Payroll
Employee Master List
CH
1 List Indiuiduals
30/86/93
Enter employee number:
Report file
E Exit
: CHPAR115.PBT
Page :
1
2
3
4
5
6
7
B
9
18 Single DOECunit,rate ft ant)
Mane ft Address
11 Multiple D0ECunit,rate ft ant)
Kane ft Job Description
12 Single DDE(ant ONLV)
Mane, Dept, Start date ft Rate
13 Multiple DOECant ONLY)
Nane ft Exemptions
14 UIC Hew Employee list
Kane ft Birth date
15 HTD/VTD Register
Kane. Sex ft Marital status
Kane ft Bank information
Complete employee profile
E Exit
Labels
E Enter selection
Select one of the fifteen possible reports and press I ^-* Enter |.
All reports
The system will prompt you as follows for all reports:
Enter pay code(H/S/C)......:
Type a pay code followed by I<-*Enter| or press I*-1 Enter) for all the codes. (Hjourly, (sjalary or (commission are the
available codes.
The system will then prompt you as follows:
Enter department code
:
Type a department code followed by [<-* Enter! or press I*-1 Enter) for all the codes. These two selections are valid for all
the reports.
The following reports will require additional information before processing:
•
3.
Name, Dept., Start date & Rate
•
10.
Single DOE
•
11.
Multiple DOE
•
12.
Single DOE (Amount Only)
•
13.
Multiple DOE (Amount Only)
•
14.
UIC New Employee List
•
15.
MTD/YTD Register
7-16 ■ EMPLOYEE MASTER
REPORTS
Name, Dept., Start date & Rate List
Report three will also prompt you as follows:
DOE#?
The following options are available:
DOE Reports
Reports ten to thirteen will prompt you as follows:
Enter processing type(C/M/Y):
Type (c) followed by I*-'Enter) for current, type (m) followed by I*-1 Enter! for MTD and Q followed by I^Enter) for
YTD. They will also prompt you as follows:
DOE#?
UIC New Employee List
Reports fourteen will prompt you as follows after the two standard prompts:
List all NEW employees for mmyy
Type a month in the format mm followed by [<-■ Enter) and type a year in the format;^ followed by I*-1 Enter
MTD/YTD Register
Reports fifteen will prompt you as follows after the two standard prompts:
Enter 'M1 for MTD or 'Y1 for YTD.
Type (m) followed by I ^ Enter) for MTD and Q followed by I*-* Enter) for YTD.
When the prompts have all been answered, the available functions are as follows:
(D
(2)
Start
Cancel
EMPLOYEE MASTER ■ 7-17
REPORTS
A sample Name & Address list follows:
19/06/94
EXAMPLE COMPANY LIMITED
BXPAR11S 2.01
Page
Name
& Address List
Employee
Phone
Number Last Name
First Name
000001 NAME
EMPLOYEE
222-222-222
STREET ADDRESS
CITY,
21/10/1950
000002 NAME
Address
905-738-4089
ACTIVE
905-738-4089
ACTIVE
905-738-4089
ACTIVE
POSTAL CODE
EMPLOYEE
STREET ADDRESS
CITY,
30/09/1953
POSTAL CODE
NAME
Status
PROVINCE
222-222-222
000003
Number
EMPLOYEE
PROVINCE
STREET ADDRESS
222-222-222
CITY,
23/09/1962
POSTAL CODE
7-18 ■ EMPLOYEE MASTER
PROVINCE
l
REPORTS
EMPLOYEE PAY PERIOD INFORMATION
This program allows you to print a list of pay period information for an employee. You can
print this information or display it on the screen.
Type Q and press Q=) to select Employee Pay Period Information.
The screen will appear as follows:
CH
Payro11
Employee Pay Period Information
Period number
nter
[pay period number]
TLPAP187 1.01
30/06/93
:
LE]-exit
EMPLOYEE PAY PERIOD INFORMATION ■ 7-19
REPORTS
Type the pay period number followed by I*-1 Enter!. The following functions will then be available:
(PJ
Print report
(£)
(D
Display employee information on the screen
Exit
Once you select one of the above options, the system will prompt you to enter the employee number that you want
the information for. IF5 \ can be used to lookup the employee number.
7-20 ■ EMPLOYEE PAY PERIOD INFORMATION
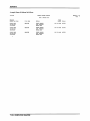
REPORTS
A sample of the Employee Pay Period Information report follows:
EXAMPLE COMPANY LIMITED
EMPLOYEE PAY PERIOD INFORMATION ■ 7-21
REPORTS
GROSS PAY EDIT REPORT
This report displays all earnings codes by individual employee. The report can be used as a
final check of the earnings updated in the employee file before running the payroll
calculations.
Type Q followed by l<-*Enterl to select Gross Pay Edit Report.
The screen will appear as follows:
Type (s) followed by I*-1 Enter) to prepare report.
7-22 ■ GROSS PAY EDIT REPORT
REPORTS
A sample Gross Pay Edit report follows:
JUN 30/94
EXAMPLB COMPANY LIMITBD
DBPT
GROSS PAY EDIT RBPORT
POR PAYROLL TYPB S
PAY PBRIOD 11
EMPLOYBB
NUMBER NAMB
00000S EMPLOYBB
000009
TEST
ENDING JUN 15,1994
T
P DOE
UNITS
S SAL
.00
EMPLOYEE
TOTAL FOR DEPT
JUN 30/94
BXAMPLB COMPANY LIMITED
GROSS PAY EDIT RBPORT
FOR PAYROLL TYPE S
PAY PERIOD 11
ENDING JUN 15,1994
GROSS AMOUNT:
TOTAL BMPLOYEBS PROCBSSBD:
Bnd of Report
GROSS PAY EDIT REPORT ■ 7-23
REPORTS
MULTIPLE DOE RECAP REPORT
This report lets you print current, month-to-date or year-to-date information for up to six
DOE's.
Type QO and press 14-1 Enter) to select Multiple DOE Recaps.
The screen will appear as follows:
Payroll
CH
Spool DOE Recap reports
Select:
Current
fltd
Vtd
7-24 ■ MULTIPLE DOE RECAP REPORT
Exit
TLPAP186 1.04
30/06/93
CHPAR1B6.PRT
REPORTS
The options available are as follows:
(c)
©
Q
CD
Current
MTD (month-to-date)
YTD (year-to-date)
Exit
Select one of the above options and the system will prompt you to enter up to six DOE numbers. |fs \ can be used to
list these numbers.
Once you have enter the DOE numbers, type (s) to start generating the report.
A sample DOE Recap report follows:
30/06/94
EXAMPLE COMPANY LIMITED
DEPT
EXPAR186 1.04
CUR RECAP FOR SAL DRW OHP CAR FIT HW
PERIOD 11
PAGE
FOR PAYROLL TYPE S ENDING IS/06/1994
EMPLOYEE
T
NUMBER NAME
P
SAL
000005 EMPLOYES
TBST
S
1533.33
000009 BMPLOYBB
TBST
S
435.00
TOTAL FOR DEPT
1968.33
TOTAL FOR COMPANY
1968.33
DRW
OHP
CAR
FIT
HW
MULTIPLE DOE RECAP REPORT ■ 7-25
1
REPORTS
PAYROLL REGISTER REPORT
The Payroll Register report prints a summary of information for each employee in the
current pay period. It includes the gross salary, all deductions and the net pay amount for
each employee. Summary totals of each DOE included in the pay period are also printed at
the end of the report.
Type |J] and press the [<-*Enter! to select Payroll Register.
The screen will appear as follows:
CH
Payroll
Spool Payroll Register
Pay Type: S Seni-nonthly
Pay Period:
Status
: PAVROLL/GL JOURNAL RUN
C_l Select:
[§jl-Start
TLPAP150 1.0?
30/06/93
11
Pay Vear: 93
I-Exit
Type (s) to start generating the report.
7-26 ■ PAYROLL REGISTER REPORT
REPORTS
A sample Payroll Register report follows:
PAYROLL
1.07
PAGE
REGISTER
1
FOR PAYROLL TYPE S ENDING 15/06/1994
PERIOD 11
EMPLOYEE
EMPLOYBB
NUMBER
NAMB
0000005
BXPAR150
EXAMPLE COMPANY LIMITED
30/06/94
DEPT
EMPLOYEE
T EARNINGS
P DOB
AMOUNT
MISC PAYS
DOE
AMOUNT
BENEFITS
DOE
AMOUNT
DEDUCTIONS
DOB
AMOUNT
S SAL
NUMBER ONE
0000009
EMPLOYBB
NUMBER TWO
TOTALS FOR DBPT
SAL
DRW
CAR
HW
VAC
COM
PAYROLL
1.07
PAGE
REGISTBR
FOR PAYROLL TYPE S ENDING 15/06/1994
PBRIOD 11
TOTAL EMPLOYEES PROCESSED:
BXPAR150
EXAMPLE COMPANY LIMITED
30/06/94
2
End of Report
PAYROLL REGISTER REPORT ■ 7-27
2
REPORTS
SINGLE DOE RECAP REPORT
This report displays the month-to-date and year-to-date totals for a single DOE.
TLPflFlOO 2.35
Payroll
Type ..: S
Period : IB
Year ..: 93
Status: Pryl/GL jrn run
11 14
12 VTD adjustments
13 ETD Remittance
1 Cheque Reconciliation
2 Cheques and Register
3 Deductions Report
14
15
16
17
IB
4 DOE Master
5 Employee Master
6
7
B
9
10
30/86/93
Reports
CH
Enployee Pay Period Information
Gross Fay Edit Report
Multiple DOE Recaps
Payroll Register Report
Single DOE Recaps
Employee
Employee
Employee
Employee
Uacation
Pay Profile
DOE List
VTD Register
UI Report
Earned Report
E Exit
E
Enter selection
Type QX2) and press (D to select single DOE Recaps.
The screen will appear as follows:
CH
Payroll
TLPAP185 1.05
Single DOE Recap report
30/86/93
CHFAR165.PRT
DOE to recap :
nter [DDE number]
[F5]-lookup
[flUTl-auto
[EJ-exit
The system will prompt you to enter the DOE number. [F5l can be used to list all numbers.
Once you have selected the DOE number, type Q to accept that number and the system will
start generating the report.
7-28 ■ SINGLE DOE RECAP REPORT
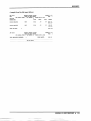
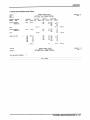
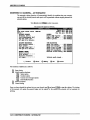
REPORTS
A sample Single DOE Recap report follows:
30/06/94
DEPT
EXAMPLE COMPANY LIMITED
RBCAP FOR Gross salary
BXPAR18S 1.05
PAGE
1
FOR PAYROLL TYPE S BNDING 15/06/1994
EMPLOYEE
NUMBER NAMB
000005 EMPLOYEE
TEST
000009 BMPLOYBB
TBST
TOTAL FOR DEPTi
2
TOTAL FOR COMPANY:
2
1968.33
21651.63
SINGLE DOE RECAP REPORT ■ 7-29
REPORTS
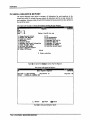
T4 PREPARATION
This program lets you print the T4's at year-end.
TLPAP1OD 2.351
30/06/93
Payroll
Reports
CH
Type
..:
S
Period : IB
Year ..: 93
Status: Pryl/GL jrn run
11
12
13
14
15
16
17
IB
1 Cheque Reconciliation
2 Cheques and Register
3 Deductions Report
4 DOE Master
5 Employee Master
6 Employee Fay Period Information
7 Gross Pay Edit Report
B Multiple DOE Recaps
9 Payroll Register Report
10 Single DOE Recaps
T4
VTD Adjustments
ETD Remittance
Employee Pay Profile
Employee DOE List
Employee VTD Register
Enployee UI Report
Uacation Earned Report
E Exit
E
Enter selection
The screen will appear as follows:
Payroll
T4 Production C1992)
1) is DOE 001 - Gross salary
Enter
[WiTOgjWdflBHi
7-30 ■ T4 PREPARATION
[ygl-Lookup
[iJ£t]]-Cancel
TLPflP199 1.14
30/06/93
REPORTS
The system will prompt you to enter the box letter that the DOE amount is to appear in on the T4 slip. (fjT| can be
used to list a description of what each box number on the T4 slip should contain.
As you cursor through the DOE's, the system will display a description of the DOE in the bottom left hand corner.
Once you have finished with all the DOE's the system will prompt you with:
[
1 Enter:
Ifield number]
[Fl]-printT4's
[F10]-Cancel
If you need to modify a DOE type the field number corresponding to that DOE and make the appropriate changes.
Once you are ready to spool the T4's press (£□ and they will automatically be generated.
Two reports will be generated, the T4's and a totals report that shows you which amounts got applied to which
boxes and totals for all DOE's.
T4 PREPARATION ■ 7-31
REPORTS
A sample T4 Totals report follows:
EXPAR198
EXAMPLE COMPANY LIMITED
30/06/94
1.14
1994 T4 TOTALS
Run Date
:
JUN 13/94
13:55:50
DOB/DBSCRIPTIOH
TOTAL COMMENTS
BOX
001 Gross
14
BOX 16
.00
BOX 18
.00
BOX 20
.00
BOX 22
.00
BOX
24
.00
BOX 26
.00
BOX 30
.00
BOX 32
.00
BOX 34
.00
BOX 36
.00
BOX 38
.00
BOX 40
.00
BOX 42
.00
BOX 44
.00
BOX 46
.00
BOX 48
.00
BOX 52
.00
.00
FOOTNOTBS
TOTAL T4S
.00
[CPP)
(
PRINTED
EXAMPLE COMPANY LIMITED
30/06/94
1994 DOB TOTALS
Run Date
: JUN 13/94
13:55:50
TOTAL
DOB/DESCRIPTION
001 Gross
4677B.92
salary
002 DRAWINGS
.00
003
OHIP
.00
004
Car allowance
005 Federal
006
income tax
.00
.00
.00
HOURLY WAGES
007 VACATION PAY PAID
.00
006
VACATION PAY EARNED
.00
009
EXTRA
INCOME TAX
.00
employer portion
.00
employee portion
.00
020 CPP 030 CPP
-
031 UI
-
employer portion
.00
032 UI
- employee portion
.00
-
Balary
[QPP]
035
ETD
ADDITIONAL
040
COMMISSIONS
EARNED
7-32 ■ T4 PREPARATION
.00
.00
BXPAR198
1.14
REPORTS
YTD ADJUSTMENTS REPORT
This report displays any adjustments you have made through the year-to-date program listed
under Yearly Processing.
TLPflPlOO 2.35
38/06/93
Payroll
Reports
CH
Type ..: S
Period : IB
fear ..: 93
Status: Pryl/GL jro run
11
12
13
14
15
16
17
IB
1 Cheque Reconciliation
2 Cheques and Register
3 Deductions Report
4 DOE Master
5 Employee Master
6 Enployee Pay Period Information
7 Gross Pay Edit Report
B Multiple DOE Recaps
9 Payroll Register Report
10 Single DOE Recaps
T4
YTD Adjustments
ETD Remittance
Employee Pay Profile
Employee DOE List
Enployee VTD Register
Employee UI Report
Uacation Earned Report
E Exit
E
Enter selection
Type Q(D and press I<-*Enter) to select YTD Adjustments.
The screen will appear as follows:
TLPAP141 1.04
Payroll
H
38/86/93
List VTD Adjustments
CH
1 List all adjustments
2 List all unprinted adjustments
E Exit
E Enter selection
YTD ADJUSTMENTS REPORT ■ 7-33
REPORTS
The options available are as follows:
Q
H)
List all adjustments
List all unprinted adjustments
(D
Exit
If you type (T) followed by I *-* Enter i the system will list all the payroll adjustments posted to date.
If you type (J) followed by I^EnterL the system will list all the unprinted posted payroll adjustments.
A sample YTD Adjustments report follows:
30/06/94
EMPLOYEE
NUMBER NAME
000005 EMPLOYEE
000007
EMPLOYEE
DOB TOTALS:
001
SAL
-1933.33
7-34 ■ YTD ADJUSTMENTS REPORT
REPORTS
ETD REMITTANCE
This report prints a summary of tax deductions and the total amount to be remitted per
employee to the government. Summary totals of all employees are also included at the end
of the report.
The screen will appear as follows:
Payroll
CH
TLPflP169 1.06
Spool Payroll Remittance
Payroll type: S Period: 11 Year: 93
30/86/93
The standard UIC. CPP, PIT ft FIT DDEs are always INCLUDED for processing.
Extra DDEs such as UIC, CPP, PIT, FIT ft (medical) DOEs may be specified
uia the [MODIFV] FUNCTION.
1 Enter period t
Processing periods
: 11
: 11
Status : Monthend closed
Pay Ending : JUN 15,1992
2 Departmental breaks: V
3 Extra DOE and TYPE :
009 F
EIT
[_] Select:
[jj]]-Start
[j]]-ttodify
]-Exit
ETD REMITTANCE ■ 7-35
REPORTS
Processing Periods
You can process this report for a single period or range of periods. fF5l can be used to list the pay periods and their
status.
Department Breaks
If you would like page breaks per department type Q otherwise type (n) and no page breaks will occur when a new
department's information is started.
Extra DOE's
All regular taxable DOE's are included as they are listed on the screen. If you have extra taxable DOE's you must
list them here. An example of an extra DOE could be a DOE for extra income tax to be deducted.
Once you have modified the report options type (s) to start processing the report.
7-36 ■ ETD REMITTANCE
REPORTS
A sample Source Deductions Remittance Summary report follows:
ETD REMITTANCE ■ 7-37
REPORTS
EMPLOYEE PAY PROFILE
This report prints a detailed or summary list of pay period information for a single
employee or all employees.
TLPAP100 2.351
Payroll
30/86/93
Reports
Status: Pryl/GL jrn run
11 14
1 Cheque Reconciliation
2 Cheques and Register
3 Deductions Report
12 VTD Adjustments
13
14
15
16
17
IB
4 DOE Master
5 Employee Master
6 Employee Pay Period Information
7 Gross Fay Edit Report
B Multiple DOE Recaps
ETD Remittance
Employee Pay Profile
Employee DOE List
Employee VTD Register
Employee UI Report
Uacation Earned Report
9 Payroll Register Report
10 Single DOE Recaps
E Exit
E
Enter selection
press I^Ertter) to select Employee Pay Profile.
The screen will appear as follows:
Payroll
CH
Type ..: S
Period : 11
Year ..: 93
Reports
Employee Pay Profile
Status: Pryl/GL JRN run
1 Detail report
2 Summary report
_ Enter selection
1-Exit
7-38 ■ EMPLOYEE PAY PROFILE
TLPAP10D 2.35
30/06/93
REPORTS
Detailed Report
TLPAP225 1.01
Payroll
30/66/93
Enployee Pay Profile
CH
Report file
Page
Starting period
Ending period
CHPAR225.PRT
Select:
Modify
jjjtart
93
93
Starting year
Ending year
01
11
jj>jxit
To modify the pay periods included, type (m) and enter the field number corresponding to the field you want to
change. |F5 \ can be used to list the dates and status of each pay period.
Once you have the correct pay period information, type (U to start the report processing. The system will then
prompt you to enter an employee number. If you would like to print the report for all employees, press Ipio|
otherwise enter the employee number for the employee you want the report for. IF5 \ can be used to list all
employees.
A sample Detailed Employee Pay Profile report follows:
31/07/93
EXAMPLE
COMPANY LIMITED
Employee Pay Profile
Starting PBRIOD/YBAR:
000005
S9311
001
SAL
002
DRW
008
V/C
009
BIT
1533.33
003
OHP
005
FIT
CAR
020
CPE
030
CPP
.00
.00
SAL
002
DRW
COM
031
UIE
032
UIC
003
EMPLOYEE
12/93
TBST
.00
.00
.00
Ending PBRIOD/YEAR:
.00
.00
40.00
1533.33
040
.00
.00
.00
001
004
11/93
OHP
.00
004
CAR
.00
005
.00
FIT
008
.00
31/07/93
V/C
.00
009
BIT
020
40.00
CPE
030
.00
CPP
031
UIE
.00
032
.00
UIC
040
.00
.00
Page
EXAMPLE COMPANY LIMITED
Employee Pay Profile
Starting PERIOD/YEAR:
Run
001
SAL
002
1533.33
032
OIC
DRW
.00
040
003
OHP
.00
004
CAR
.00
11/93
COM
EXPAR225
Ending PERIOD/YEAR:
2
1.04
12/93
totals
005
FIT
.00
008
V/C
.00
009
BIT
40.00
020
CPE
.00
030
CPP
.00
031
UIE
.00
COM
EMPLOYEE PAY PROFILE ■ 7-39
REPORTS
Summary Report
TLPAP2Z6 1.031
30/86/93
Payroll
Employee Pay Profile
Summary Report
CH
Report file
CHPAR226.PRT
Page
Processing year
93
Starting period
Ending period
Employee number
81
11
ALL EMPLOYEES
[_] Select:
[§]-Start
1-Exit
This report gives you the option to change the processing year, pay periods and employees. To modify any of this
information, type (m) and cursor to the field you want to modify. As in the detail report you can process information
for a range of pay periods or a single pay period. You may also include all employees or generate the report for a
single employee.
Once your report options are correct, type (a) to accept the options and (s) to start generating the report.
A sample Summary Employee Pay Profile report follows:
7-40 ■ EMPLOYEE PAY PROFILE
REPORTS
EMPLOYEE DOE LIST
This report lists active DOE's for each employee including the current DOE amount and the
credit and debit GL codes.
Type QCD and press I*-1 Enter) to select Employee DOE List.
The screen will appear as follows:
Type (s) to start generating this report.
EMPLOYEE DOE LIST ■ 7-41
REPORTS
A sample Employee DOE List follows:
EXAMPLE
30 JUK 94
COMPANY LIMITED
EMPLOYEB DOE LIST
Processing Year
Employees
000005
BMPLOYEE,
:
DOE#
Employee name
001
TEST
EMPLOYEE(2],
TEST
Total
:
Gross salary
Federal income tax
VACATION PAY EARNED
009
EXTRA
INCOME TAX
020
CPP -
employer portion
CPP - employee portion
031
UI
- employer portion
032
UI
-
040
COMMISSIONS EARNED
001
Gross salary
employee portion
Federal income tax
020
CPP - employer portion
030
031
CPP - employee portion
UI - employer portion
032
UI
- employee portion
°
inactive employees
---
7-42 ■ EMPLOYEE DOE LIST
Semi-monthly
008
005
Total ACTIVE employees
Pay Type
DOB Description
005
030
000009
94
END OP REPORT ---
REPORTS
EMPLOYEE YTD REGISTER
This program spools a year-to-date register grouping employees and subtotals by
department.
Type Q}© and press l<-*Enterl to select Employee YTD register.
The screen will appear as follows:
Payroll
CH
Enployee VTD Register
PAY YEAR
PAY TYPE (fl/B/H/S/U)
PAY CODE CH/S/C)
DEPARTMENT CODE
TLPAP11? 1.02
39/66/93
:
..:
:
:
EMPLOYEE YTD REGISTER ■ 7-43
REPORTS
The following report options are available:
Pay Year
Type the year that you want to report the payroll details for. The system will default to the current year.
Pay Type
Select the pay type from the following list. The default is the current payroll type being processed.
Q
ID
®)
(D
|w)
Annual
Bi-monthly
Monthly
Semi-monthly
Weekly
Pay Code
Select the pay code form the following list:
Q
ID
(D
I*-1 Enter|
Hourly
Salary
Commission
All pay codes
Department Code
Type the department code or press I^Enter) to product the report for all departments.
Type (D and press I<-*Enter! to generate the report.
7-44 ■ EMPLOYEE YTD REGISTER
REPORTS
A sample Employee YTD Register report follows:
JUN 30/94
Pay Type:
Semi -monthly
Pay Year:
94
Employee
Dept
Number Name
000005
SURNAME.
GIVEN NAMB
000009 SURNAME,
GIVEN NAME
000010 SURNAMB,
GIVEN NAME
25-JUN-1993
G
. 00N
.00D
. 00M
.00
G
22373.BIN
16689.SID
56B4.30M
1250.10
11
DBPARTMENT TOTALS
DOB T DOB
DOE
NUM P DSC
AMOUNT
032
590.50
D DIC
EXAMPLE COMPANY LIMITED
JUN 30/94
Pay Type:
Serai-monthly
Pay Year:
93
YTD
-
1.02
Page
2
Last
Employee
Dept
BXPAR117
REGISTER
Hire Date
Number Name
Per
CR GL
DB GL
COMPANY TOTALS
DOB T DOB
DOB
DOB T DOB
DOB
AMOUNT
NUM P DSC
AMOUNT
PIT
4230.40
009 D BIT
440.00
020 M CPB
423.40
031 M UIE
826.70
NUM
P DSC
005
D
END OP REPORT
EMPLOYEE YTD REGISTER ■ 7-45
REPORTS
EMPLOYEE UI REPORT
This program generate a report that details the Unemployment Insurance for the year
specified.
Type Q}Q and press l«-*Enteri to select Employee UI report.
The screen will appear as follows:
TLPflP221 1.00
Payra11
Employee UIC Report
CH
Payroll Vear
[_] Select:
[«j]-Start
: 93
[Jl-Hodify
Type (j|) and press [<-* Enter! to spool the report.
7-46 ■ EMPLOYEE UI REPORT
JUH 30/93
REPORTS
A sample detailed and summary Employee UI report follows:
JUN 30/94
Pay Year:
EXAMPLE
COMPANY
LIMITBD
94
UI
-
SUMMARY
Employee
Number
Last Name,
First Name
OOOO0S
SURNAME,
GIVEN NAME
000009
SURNAME,
GIVEN NAMB
000010
SURNAME,
GIVEN NAMB
JUN 30/94
Pay Year:
94
Employee
000005
Pay Type
Semi-monthly
StatuB
ACTIVE
Last Pay Period
Total UI Weeks
Total Premiums
Employee
SURNAMB,
10
111
32199.93
000009
SURNAME,
Pay Type
Semi-monthly
Status
ACTIVE
Last Pay Period
Total
UI
Weeks
10
6120.00
000010
SURNAME,
Pay Type
Semi-monthly
Status
ACTIVB
Last Pay Period
Total
UI Weeks
Total
Premiums
GIVEN NAME
111
Total Premiums
Employee
GIVEN NAMB
GIVEN NAME
10
111
.00
EMPLOYEE UI REPORT ■ 7-47
REPORTS
VACATION EARNED REPORT
This program generates a Vacation Earned report that details the earnings per employee and
department for the specified period.
Type Q}Q and press I*-1 Enter! to select Vacation Earned Report.
The screen will appear as follows:
Payroll
CH
UACATION EARNED REPORT
CURRENT PAV VEAR: 93
DOE [BOB 1: UACATION PAV EARNED
PAV VEAR
PAV TYPE
STARTING PERIOD
: 93
: S
: 01
ENDING PERIOD : 12
EMPLOYEE SELECTION: A ALL
[_] Select:
7-48 ■ VACATION EARNED REPORT
fJl-Start
[Jl-Modify
TLPAP600 1.00
AUG 05/94
LAST PAV PERIOD: 12
REPORTS
The following report options are available:
Pay Year
Type the year that you want to report the payroll details for. The system will default to the current year.
Pay Type
Select the pay type from the following list. The default is the current payroll type being processed.
Q
CD
(m)
(D
(w)
Annual
Bi-monthly
Monthly
Semi-monthly
Weekly
Starting Period
Enter the starting period that you want to earnings listed for. The default is "01".
Ending Period
The end period will default to the current period being processed. To change this, type the ending period you want.
Employee Selection
You can produce this report for a single employee, a range of employees (limit is 10) or all employees. To product
this report for a single employee type (s) and press I*-1 Enter). You can enter up to 10 employees. |F5 | can be used to
list all employees. This report is generated for all employees by default.
VACATION EARNED REPORT ■ 7-49
REPORTS
A sample detailed and summary Vacation Earned report follows:
JUN 13/94
PAY YEAR
DOB
[
EXAMPLE COMPANY LIMITED
:
007
PAY TYPE
:
VACATION EARNED DETAIL
94
]:
For Selected Periods:
VACATION PAY PAID
REPORT
01
Page:
1
EXPAR600
1.00
to 11
Semi-monthly
DEFT EMPLOYEE
EMPLOYEE
CODE
LAST NAME
NUMBER
TOTAL for EMPLOYBB
TOTAL for DBPT
|
>
CURRENT UNITS
DOB RATE
<
EARNINGS
AMOUNT
DOB
>
AMOUNT
<---
YEAR-TO-DATB
UNITS
--->
AMOUNT
<PAY
PERIOD>
NO START DATE
[
]
GRAND TOTALS
JUN 13/94
PAY YEAR
DOB
(
EXAMPLE COMPANY LIMITED
:
007
PAY TYPE
):
:
VACATION HARNBD
94
SUMMARY REPORT
For Selected Periods:
VACATION PAY PAID
01
to 11
Semi-monthly
DEPT
EMPLOYBB
CODE
NUMBER
TOTAL for DBPT
CURRENT
EMPLOYBB
[
LAST NAME
FIRST NAME
SURNAME
GIVEN NAMB
]
GRAND TOTALS
7-50 ■ VACATION EARNED REPORT
UNITS
Page:
1
EXPAR601
1.00
CHAPTER 8: MAINTENANCE AND INQUIRY
To select Maintenance and inquiry, type Q and press I ^ Enter |
8-1
MAINTENANCE AND INQUIRY
EMPLOYEE MASTER
This program is used to add and modify employee data. Information such as the employee's
address, social insurance number, hire date, salary, associated DOE's etc. are set up in this
file.
Type I
press [<-" Enter 1 to select Employee Master.
The screen will appear as follows:
8-2 ■ EMPLOYEE MASTER
MAINTENANCE AND INQUIRY
The available functions are as follows:
QtD
(SXD
(HD
(£XD
®E)
(MED
Add an employee
Modify an employee
Show an employee
Delete an employee
Add a DOE
Modify a DOE
GDQ
(DE)
(BKD
(D
Delete a DOE
Suspend an employee
Hide the functions box
End
HXd)
Show a DOE
To set up a new employee type (a)(J) and press l<-*Enteri Enter the information as follows:
Employee Number
This field is coded by entering a maximum of six numeric characters of you choice. The next employee number not
in use is the default.
Last Name
This field is coded by entering a maximum of twenty alpha numeric characters. Type the employee's last name and
press (*-* Enter L
First Name/Initial
This field is coded by entering a maximum of twenty alpha numeric characters. Type the employee's first name and
press !<-* Enter!.
Street
This field is coded by entering a maximum of thirty five alpha numeric characters. Type the employee's address and
press I*-1 Enter).
City
This field is coded by entering a maximum of twenty alpha numeric characters. Type the city and press I <-* Enter |.
EMPLOYEE MASTER ■ 8-3
MAINTENANCE AND INQUIRY
Province
This field is coded by entering three alpha characters. The three characters are the abbreviation of one of the ten
Canadian provinces or two territories.
The available abbreviations are as follows:
ALT
Alberta
B.C.
British Columbia
MAN
Manitoba
N.B.
New-Brunswick
NFL
Newfoundland
N.S.
Nova Scotia
ONT.
PEI
P.Q.
SAS
Ontario
Prince Edward Island
Quebec
Saskatchewan
NWT
North West Territories
YKN
Yukon
Postal Code
This field is coded by entering a maximum of six alpha numeric characters. Type the postal code and press I+-1 Enter).
Telephone Number
This field is coded by entering a maximum of ten numeric characters. Type the telephone number, including area
code and excluding dashes"-" then press [<-* Enter j
Birth Date
This field is coded by typing the employee's birth date in the format ddmmyyyy. Type the date and press I*-1 Enter >.
8-4 ■ EMPLOYEE MASTER
MAINTENANCE AND INQUIRY
Sex
This field is coded by typing (m) for male or Q for female followed by 11-* Enter).
Marital Status
This field is coded by typing (s) for single, (m) for married or (n) for other status's followed by I<-* Enterl
Social Insurance Number
Enter the social insurance number here. The maximum number of characters that can be entered is nine. A
validation check will be performed on the social insurance number. If the number is not valid, a message will be
displayed.
Bank Transit Number
This field is coded by entering a maximum of twelve numeric characters. Type the employee's bank transit number
and press [4-1 Enter).
Savings Account Number
This field is coded by entering a maximum of twelve numeric characters. Type the employee's savings account
number and press l<-*Enter).
Hire Date
This field is coded by typing the date the employee was hired in the format ddmmyyyy. Type the date and press
Termination Date
This field is coded when you want to terminate an employee by typing the termination date in the format ddmmyyyy.
If you happen to enter a date by mistake, you can press |fio| to clear the field. Once you enter a date, the system will
ask you if you want to Suspend the employee. You must suspend the employee so that they don't appear when you
process the next pay period. Press I ^ Enter) when setting up a new employee to bypass this field.
Pay Frequency
The valid pay frequency codes are as follows:
®
GO
(D
(M)
GD
Weekly
Bi-weekly
Semi-monthly
Monthly
Annually
Type your choice and press I+-1 Enter L
EMPLOYEE MASTER ■ 8-5
MAINTENANCE AND INQUIRY
Pay Code
The valid pay codes are as follows:
(H)
(D
(£)
Hourly
Salary
Commission
Type your choice and press I ^ Enter).
Pay Rate
This field is coded by entering the hourly rate for the employee. This field can be left blank if the employee is paid
by salary. Type the rate and press I*-1 Enter \.
Job Description
This field is coded by entering a maximum of twenty alpha numeric characters. Type a description of the job and
press | <—' Enter).
Vacation Pay
This field is coded by entering a maximum of five numeric characters with two decimals. Type the vacation pay
percentage and press I«-*Enter).
Federal Exemption
Enter the current years federal exemption amount in this field. If you press 1^ Enter | to bypass this field the system
will enter the current year's amount for a single taxpayer.
Provincial Exemption
This field is coded by entering a maximum of eight numeric characters with two decimals. Type the provincial
exemption amount and press l<-*Enter|.
8-6 ■ EMPLOYEE MASTER
MAINTENANCE AND INQUIRY
Department
This field is coded by entering a maximum of four alpha numeric characters that represent the department the
employee will belong to. Type the department and press I<-* Enter |.
Annual Salary
This field is coded by entering a maximum of nine numeric characters with two decimals. This field is mandatory
for salaried employees. Type the employee's salary and press !<-*Enter|.
Regular Hours
This field is coded by entering a maximum of four numeric characters with two decimals. This field is mandatory
for hourly employees. Type the number of regular hours and press I*-1 Enter \.
Hourly Rate
This field is coded by entering a maximum of eight characters with two decimals. This field is mandatory for
hourly employees. Type the employee's hourly rate and press |<-*Enter).
Overtime Rate
This field is coded by entering a maximum of eight characters with two decimals. This field is mandatory for
hourly employees. Type the overtime rate and press I*-1 Enter |.
Pension Adjustment
If your company has a pension plan and the employee you are adding is going to be a member, set this flag to Q. If
there is no pension plan or the employee is not a member, set this flag to (n).
Review the information you have entered so far. If everything is correct, type (a) and press |*-*Enteri to accept and
save the data.
EMPLOYEE MASTER ■ 8-7
MAINTENANCE AND INQUIRY
EMPLOYEE MASTER - DOE ENTRY
When you set up a new employee you must tell the system what DOE codes are to be included for that employee.
During the Pay Period Maintenance program you tell the system what DOE codes are to be included for the pay
period. If the DOE codes included for the pay period are listed in the employee's master record they will be listed
for the employee during the Employee Pay Data Entry step. During this step you can modify the DOE amounts
listed. Only DOE's that are included for the pay period will be processed.
Add a DOE code to a new employee as follows:
DOE
Enter the DOE code to be included for this employee. fFlH can be used to list all valid DOE's. You can enter each
DOE individually which will allow you to continue entering the field information for each DOE or you can enter a
batch of DOE's by typing BCH and then entering the DOE numbers. fFin can be used at any time to list the DOE's
for the employee.
Start Date
The default for the DOE start date is the Hire date. Press I ^ Enter) to accept this date of enter a new date in the format
ddmmyyyy.
End Date
The default end date would be the termination date. Press l^-'Enterj to bypass this field.
Current Units
The Current Units field is used for DOE's that are going to be calculated. For example an hourly employee's
earnings. You can enter a default amount for the units. The units amount will then be multiplied by the DOE Rate
and the calculated amount would appear in the Amount field. If you have an employee that is always going to work
the same amount of hours for every pay period you can save yourself time by entering a default amount in this
Current Units field. You can press [<-* Enter) to bypass this field if you do not want to enter a default amount.
Amount
It is useful to fill out the amount field for a DOE that is not to be calculated. A good example would be for a salaried
employee. You can enter the employee's gross pay amount (per pay period) in this field. This amount would
automatically appear with the DOE when you are in the Employee Pay Data Edit program (page 5-7) and you would
not have to modify the field every pay period. Enter a default amount or press I«-* Enter) to bypass this field.
Mtd Amt
This amount is calculated by the system and will display the month-to-date amount of the listed DOE.
Ytd Amt
This amount is calculated by the system and will display the year-to-date amount of the listed DOE.
8-8 ■ EMPLOYEE MASTER-DOE ENTRY
MAINTENANCE AND INQUIRY
Last Updated
This field will display the last update date. The date will reflect what date the month-to-date and year-to-date fields
were updated.
DOE Rate
The DOE Rate field is used in conjunction with the Current Units field. The current units are multiplied by the Doe
rate to get the Amount. An employee's hourly wage would be an example of what might go in this field.
Identification
Press l^-1 Enter | to bypass this field or enter a further description of the DOE.
GL Codes
Each DOE must have a least one debit and one credit GL code associated with it. You can have up to 5 debit and
credit codes set up for each DOE in which case you could use the Modify Split Allocation (page5-9) program to
split up the DOE amount to the different GL codes specified. fFsl can be used to list all valid GL codes.
Type (a) and press l«-*Enter| to accept the DOE code. You can then continue to enter new DOE's or press |Esc) to exit
the DOE entry program and Hicl again to exit the Employee Master program.
EMPLOYEE MASTER - DOE ENTRY ■ 8-9
MAINTENANCE AND INQUIRY
EMPLOYEE DATA INQUIRY
This program allows you to display current, or month-to-date and year-to-date totals of each
DOE for a specific employee.
Type (D and press I*-1 Enter! to select Employee Data Inquiry.
The screen will appear as follows:
Payroll
CH
Employee no 008010 TEST
Select:
Current
Other
8-10 ■ EMPLOYEE DATA INQUIRY
Enployee Data Inquiry
EHFLOVEE
Exit
TLPflP190 1.05
31/07/93
MAINTENANCE AND INQUIRY
Type the employee number and press I*-1 Enter! for the employee that you want to do an inquiry on.
The following functions are then available:
Display current periods information
Display month-to-date and year-to-date totals
Exit
A sample screen is a follows:
Payroll
CH
Employee Data Inquiry
EMPLOYEE
Employee no 888818 TEST
Pays ft Benefits
Amount
Units
Rate
Fid DOE
Fid DOE
1 881 SAL
.88$
.88
1888.88
4 885 FIT
2 828 CPE
.88$
.88
22.32
5 889 EIT
.88
3 831 UIE
42.9B
6 838 CPP
7 032 UIC
nd of
Employee s data.
Press
ILFAP190 1.05
31/87/93
Current
Deductions
Units
Rate
.88
.88
.88
.88$
1880.88$
.88
Amount
192.21
.88
22.32
38.78
CENTER] to continue
EMPLOYEE DATA INQUIRY ■ 8-11
MAINTENANCE AND INQUIRY
EMPLOYEE UIC
Payroll
Maintenance and Inquiry
CH
Type ..: S
Period : 11
Year ..: 93
TLPflPlOO 2.351
30/86/93
Status: Pryl/GL JRH run
1 Employee Master
2 Employee Data Inquiry
3 Employee UIC
4
5
6
7
B
9
Fay Period
DOE Master
Hatch Cancelled Cheques
Purge Cheques
Record of Employnent
Sort Pay Period File
10 HICn Cheque Printer Setup
E Exit
E Enter selection
Type (3) and press I +-> Enter j to select Employee UIC.
The screen will appear as follows:
Payroll
CH
Employee nunber
:
Employee name
:
Ucek
TLPAP133 1.02
Employee UIC Maintenance
Preniun
30/06/93
Total UI veeks :
Ueek
Ueek
Premium
Last pay period
Premium
TOTAL:
jjj Select:
ghow
8-12 ■ EMPLOYEE UIC
Jodify
Accept
gjancel
Jjpxt
ijxit
Ueek
:
Premium
MAINTENANCE AND INQUIRY
The available functions are as follows:
d)
(Ml
Q
(£)
©
(D
Show
Modify
Accept
Cancel
Next
Exit
To display or modify the UIC information for an you must select the desired function then enter the number of the
employee you want to display/modify. fF5l can be used to list all employees.
EMPLOYEE UIC ■ 8-13
MAINTENANCE AND INQUIRY
PAY PERIOD
This program allows you to inform the system of the dates of the pay period and the DOE's
that are to be processed for this pay period.
Type Q and press I*-* Enter! to select Pay Period Maintenance.
The screen will appear as follows:
TLPAP130 1.11
Payroll
1
30/66/93
Pay Period Haster Maintenance
CH
1 Pay type
2 Pay period number
3 Processing year
4
5
6
7
Ho
Start of pay period ..
End of pay period
Date of pay period ...
DOE's to be processed
DOE Description
Select:
Ho DOE Description
Ho DOE Description
^dd
Modify
fijelete
§how
Jext
Refer to Pay Period Maintenance (page 5-4).
8-14 ■ PAY PERIOD
jjcit
MAINTENANCE AND INQUIRY
DOE MASTER MAINTENANCE
DOE codes are used to define different deductions and earnings for each employee. For
example different DOE codes are set up for Salary (SAL), Canadian Pension Plan (CPP),
Federal Income Tax (FIT), Commission (COM)... When you set up a new employee you
define which DOE codes are to be associated with that employee.
Type (T) and press K-'Entarl DOE Master.
The screen will appear as follows:
Payroll
CH
TLPAP120 1.09
DDE Master Maintenance
38/86/93
1 DOE nunber
2 DOE description
3 DOE short description ..,
4 Taxable/Non-taxabletT/N)
5 TypeCD/E/H/P)
6 Frequency(ft/B/M/S/U)
7 Bate
B Rate type($/X)
9
IB
11
12
13
14
,
ftnount
DEBIT G/L code
CREDIT G/L code
Zero unitCV/N)?
Zero rateCV/N/I)?
Zero anountCY/N/I)?
jjj Select:
JJdd
JJodify
[jjelete
Jext
ijjrcwious
DOE MASTER MAINTENANCE ■ 8-15
MAINTENANCE AND INQUIRY
The available functions are as follows:
Add a new DOE
Modify an existing DOE
Delete an existing DOE
Show an existing DOE
Display the next DOE
Display the previous DOE
Exit
To set up a new DOE type (a) and press I*-*Enter!. Enter the information as follows:
DOE Number
This field is used to assign a number to the DOE. You may enter a maximum of three numeric characters.
The following DOE's are reserved by the system:
8-16 ■ DOE MASTER MAINTENANCE
MAINTENANCE AND INQUIRY
DOE Description
Enter a description for the DOE in this field. The maximum number of alpha numeric characters that can be entered
is thirty.
DOE Short Description
This field is used to give the DOE a short description that will appear with the DOE number in most reports. The
maximum number of characters that can be entered in this field is three.
Taxable/Non-taxable
This field is coded by typing Q for taxable DOE's or (N) for non-taxable DOE's.
Type
The valid DOE types are as follows:
GD
CD
@
GD
Deduction
Earnings
Memo
Miscellaneous pays
Type the letter corresponding to your choice and press I +-* Enter l
DOE Frequency
The valid DOE frequency codes are as follows:
(a)
(D
©
(D
(w)
Annually
Bi-weekly
Monthly
Semi-monthly
Weekly
Type the letter corresponding to your choice and press I <-* Enter j
DOE MASTER MAINTENANCE ■ 8-17
MAINTENANCE AND INQUIRY
Rate
If the DOE has a constant rate for every employee the amount can be entered in this field. If the DOE amount varies
by employee this field should be left blank and the information should be entered in the Employee Master when you
are setting up the DOE's for each employee.
Rate Type
You must specify whether or not the DOE is a dollar figure or a percentage. This field is mandatory.
Amount
If the amount for the DOE is constant for every employee enter it here otherwise enter the amount while you are
setting up the DOE for each individual employee.
Debit GL Code
Enter the gl code that is going to be debited during payroll processing. [F5 \ can be used to list all valid GL codes
and |F4 \ can be used to add a new GL code.
Credit GL Code
Enter the GL code that is going to be credited during payroll processing. [F5 ) can be used to list all valid GL codes
and IF4 | can be used to add a new GL code.
Zero Unit
This field is coded by typing Q or (n) followed by l<-*Entef|. (y) will zero unit field after updating and (n) will not
zero the units. This field is typically used for hourly payrolls.
Zero Rate
The available functions are as follows:
Q
©
Q
Zeros the rate field after updating.
Does not zero the rate field after updating.
Initializes the rate to the amount you set up in the Rate field.
Type your choice and press I *■* Enter \.
8-18 ■ DOE MASTER MAINTENANCE
MAINTENANCE AND INQUIRY
Zero Amount
The available functions are as follows:
Q
(n)
CD
Zeros the amount field after updating.
Does not zero the amount field after updating.
Initializes the amount to the value to entered in the Amount field.
Type your choice and press I ^ Enter l.
Once you have entered all fields, review the information and if everything is correct type (a) to accept and save the
data.
DOE MASTER MAINTENANCE ■ 8-19
MAINTENANCE AND INQUIRY
MATCH CANCELLED CHEQUES
This program allows you to cancel cheques that have been cashed. Cheques that have been
cancelled can be purged from the cheque file.
Type (U and press l^-*Enter| to select Match Cancelled Cheques.
The screen will appear as follows:
CH
Payro11
Cancelled Cheque Matching
Bank statement date
Select:
8-20 ■ MATCH CANCELLED CHEQUES
: 30/ 6/93
gtart
JJodify
TLPAP20O 1.05
30/06/93
[JAN 30/931
ijjxit
MAINTENANCE AND INQUIRY
The available functions are as follows:
(D
(Ml
(D
Start
Modify
Exit
If the sign-on date is the same as your bank statement, type (s) followed by I^ Enter L If the date is not the same type
(m) and modify the date.
The screen will appear as follows:
Payroll
Cancelled Cheque Hatching
CH
Bank statenent date : 30/ 6/93
Cancelled cheque no.
Amount
Employee name
Issue date
Cancel date
:
:
:
:
:
Enter
J]
TLPAP200 1.05
30/06/33
[JAN 38/93]
tgi-Next cheque
Enter the number of the cheque to be cancelled and the system will display the amount, employee name and issue
date as well as prompt you with:
Do you want to cancel this cheque (Y/N)?
Type (y) to cancel the cheque or (n) if you do not want to cancel the cheque.
The Q key can then be used to view the next cheque. Once you have finished cancelling cheques, press |Esc| to exit.
MATCH CANCELLED CHEQUES ■ 8-21
MAINTENANCE AND INQUIRY
PURGE CHEQUES
This program allows you to clear the file of all cheques that have been cancelled.
Payroll
CH
Type
Maintenance and Inquiry
..: S
Period : 11
Vear ..: 93
TLPAP1O0 2.35
38/86/93
Status: Pryl/GL JRN run
1
2
3
4
5
8
7
B
9
10
Employee Master
Enployee Data Inquiry
Enployee UIC
Pay Period
DOE Master
Hatch Cancelled Cheques
Purge Cheques
Record of Enploynent
Sort Fay Period File
MICR Cheque Printer Setup
E Exit
E Enter selection
(71 and Dress Rh'Enter!
The screen will appear as follows:
Payro11
Cheque File Purge
CH
Select:
Start
Exit
Type (s) and press l<-*Enter| to start the purge.
8-22 ■ PURGE CHEQUES
TLPRP218 1.04
30/06/93
MAINTENANCE AND INQUIRY
RECORD OF EMPLOYMENT
This program allows you to prepare the standard record of employment form required by
Revenue Canada for collection of unemployment insurance benefits.
Type [8) and press I ^ Enter) to select Record of Employment.
The screen will appear as follows:
Payroll
CH
TLPAP220 1.051
Record of Employment
1 Amended number :
2 Telephone no. .:
3 Issuer's name .:
4 Date of issue .:
ID Employee number:
Employee name
5 RCT employer acctS
6 RCT 8
7 Correspondence
13 1st day worked
14 Last day worked
CEng/Fr)
B For employer's use
9 Employer name
Employee address
Postal code ...
11 Occupation ..:
12 SIN
30/06/93
Employer address
Postal code
IB Recall date
:
:
19 Recall status
:
CUnkn/Not-ret)
20 Reason code/comment:
15 UI paid to ....
16 UI weeks paid .
Total amount ..
17 Uage loss from
Enter
ftn.i«niiwiii»Miiii.ii»»iy1
1-Exit
RECORD OF EMPLOYMENT ■ 8-23
MAINTENANCE AND INQUIRY
To prepare the Record of employment, enter the information as follows:
Amended Number
This field is coded by entering a maximum of nine alpha numeric characters. This number will replace the printed
number already assigned to the form by Revenue Canada. Type the amended number and press I ♦-'Enter!.
Telephone Number
This field is coded by entering a maximum of fourteen alpha numeric characters. Enter the telephone number of
issuer in the format (area code/number/extension). Type the telephone number and press I ^ Enter j.
Issuer's Name
This field is coded by entering a maximum of sixteen alpha numeric characters. Type the issuer's name and press
Date of Issue
This field is coded by typing a date in the format ddmmyy. Type the date and press I+-1 Enter I The default date is the
sign-on date, press [^ Enter | three times to accept.
RCT Employer Account Number
This field is coded by entering a maximum of nine alpha numeric characters. Type the Revenue Canada Taxation
employer account number and press I*-1 Enter j
RCT Number
This field is coded by entering a maximum of nine alpha numeric characters. Type the Revenue Canada Taxation
number used to obtain the form if the number is different from item number five and press I ♦-'Enter!.
Correspondence
This field is coded by typing (1) for English or Q for French followed by I+-1 Enter |.
For Employer's Use
This field is coded by entering a maximum of twenty five alpha numeric characters. Type a comment for employer's
use followed by I <-* Enter I
Employer Name and Address
The system will display the company information as entered when the company was set up. (page 10-1) Press
[<-■ Enter) if you want to use the displayed information. If you want to modify the displayed information, type the
required name and address. Press I ^ Enter) after each typed line.
8-24 ■ RECORD OF EMPLOYMENT
MAINTENANCE AND INQUIRY
Employee Number
This field is coded by typing the number of the employee for which the form is to be prepared. Type the number
followed by I*-1 Enter|. The system will then display the name, the address, the occupation, the social insurance
number, the first day worked and the sign-on date as the last work day. Press I*-*Enter! six times if you want to use
the displayed name and address. If you want to modify the displayed information, type the correct data on the
displayed lines. Press I*-1 Enter) after each typed line.
Occupation
Press 1^ Enter | if you want to use the displayed occupation. If you want to modify, type the correct occupation and
press I *-* Enter j
Social Insurance Number
Press 14^Enter) if you want to use the displayed social insurance number. If you want to modify it, type the correct
social insurance number and press I*-1 Enter).
First Day Worked
Press I*-1 Enter \ three times if you want to use the displayed date. If you want to modify, type the correct date in the
format ddmmyy and press [*-* Enter).
Last Day Worked
Press.l<-iEritir~l three times if you want to use the displayed date. If you want to modify, type the correct date in the
format ddmmyy and press I<-* Enter).
UI Paid To
Type the date in the format ddmmyy. The date used should be the last working day for which unemployment
deductions where taken.
UI Weeks Paid/Total Amount
Type the number of weeks during the last fifty-two weeks where unemployment insurance deductions were taken or
the number of weeks since the last record of employment form was issued followed by I +■>Enter). Type the total
amount of insurable earnings followed by I*-1 Enter j
Wage Loss from/Duration
Type the date in the format ddmmyy followed by [*-*Enter). The date used should be the last working day before a
sick or a maternity leave. Type the number of weeks or days from the wage loss date followed by I*-1 Enter).
Recall Date
Type the date in the format ddmmyy followed by I ^ Enter). The date used should be the first working day of the
employee's return.
RECORD OF EMPLOYMENT ■ 8-25
MAINTENANCE AND INQUIRY
Recall Status
The available functions are as follows:
Q
©
Unknown
Not returning
Reason Code/Comment
Type a reason code (letters ABCDEFGHJK) for issuing this record of employment followed by I^Enter). Revenue
Canada includes the definition of the codes on the standard form. You can also type five lines of thirty five
characters as a comment and an explanation. Press I *-* Enter! at the end of each line.
When The first screen of information is complete, the available functions are as follows:
©
Q
(£)
Modify
Accept
Cancel
8-26 ■ RECORD OF EMPLOYMENT
MAINTENANCE AND INQUIRY
Additional Monies Paid
1.
Vacation Pay
Type the amount of the vacation pay followed by I ^ Enter).
2.
Holiday Pay
Type the name (fifteen characters available) of the first statutory holiday after termination followed by
!<-■ EnteriTvpe the amount that would be paid for the holiday followed by I*-*Enter!.
Type the name (fifteen characters available) of the second statutory holiday after termination followed by
I ^ Enter I. Type the amount that would be paid for the holiday followed by (<-* Enter!.
3.
Other
Type the number (fifteen characters available) of additional paid days after termination followed by
I*-1 Enter!. Type the amount that would be paid for these days followed by I*-1 Enter!.
Pay Period Type
The valid pay periods are as follows:
(w)
Weekly
GQ
GD
(M)
Q
Bi-weekly
Semi-monthly
Monthly
Annually
Type the pay period type followed by [<-*Enter!.
Last P.P. End Date
Type the final pay period ending date in the format ddmmyy followed by I<-*Enter!.
INSURABLE EARNINGS BY PAY PERIOD
Type the amount of the pay period followed by I*-1 Enter! and the pay period number followed by I*-* Enter!. Enter up to
twenty pay periods starting with the most recent.
When the second screen of information is complete, the available functions are as follows:
(m)
Modify
Q
(£)
(D
Accept
Cancel
Screen #1
RECORD OF EMPLOYMENT ■ 8-27
MAINTENANCE AND INQUIRY
SORT PAY PERIOD FILE
Payroll
CH
Type ..: S
Period : 11
Year ..: 93
Maintenance and Inquiry
Status: Pryl/GL JRN run
1 Enployee Master
2 Enployee Data Inquiry
3 Enployee UIC
4 Pay Period
5 DOE Master
6 Match Cancelled Cheques
7 Purge Cheques
B Record of Employment
9 Sort Pay Period File
10 HICR Cheque Printer Setup
E Exit
E Enter selection
Type (9) and press I*-1 Enter! to select Sort Pay Period File.
The screen will appear as follows:
Type (s) and press l<-*Enteri to start the sort.
8-28 ■ SORT PAY PERIOD FILE
TLPAP100 2.35
30/06/93
MAINTENANCE AND INQUIRY
MICR CHEQUE PRINTER SETUP
MICR cheque printing allows you to print your cheques directly to a laser printer using a blank cheque form and a
MICR (Magnetic Ink Character Recognition) toner cartridge.
The following steps must be performed before you can begin printing your payroll cheques using the MICR Cheque
Printing program.
1. Setup Static Cheque Information
Information such as your bank name, address and your bank account number must be setup before you can start
printing cheques. This information is setup through the Company Information program.
2. Define Printers
You must define all printers that are going to be available for MICR cheque printing through MICR Cheque Printer
Setup. Further details follow in this chapter.
"*"
If you also have Polymathic's Accounts Payable system you can bypass this step.
3. Tools To Have On Hand
(A) Make sure that the MICR toner cartridge has been loaded into your laser printer.
*"
Be sure to read all special instructions that come with the toner cartridge before
loading it into your printer.
(B) Have your blank cheque paper loaded into the paper tray. This paper gets loaded with the pantograph face
up. The pantograph is the coloured background of the cheque that appears on the top part of the cheque
paper.
(C) Have the MICR Visual Inspection template on hand.
<?"
It is a good idea to use your MICR Visual Inspection template to inspect a few
cheques of each cheque run.
MICR CHEQUE PRINTER SETUP ■ 8-29
MAINTENANCE AND INQUIRY
Once everything is set up you may continue payroll as you normally would. Further
instructions on printing the payroll cheques can be found on page 7-4, Cheques and Cheque
Register.
Payroll
CH
Type ..:
Period :
TLPAP100 2.35
Maintenance and Inquiry
30/06/93
S
11
Year ..: 93
Status: Pryl/GL JBM run
1
2
3
4
5
6
7
Employee Master
Enployee Data Inquiry
Enployee UIC
Pay Period
DOE Master
Match Cancelled Cheques
Purge Cheques
B Record of Employment
9 Sort Pay Period File
10 MICH Cheque Printer Setup
E Exit
E Enter selection
This program is used to define your MICR printers. If you already have Polymathic's
Accounts Payable system please bypass this program.
Type Q[o) and press l<-*Enter| to select Micr Cheque Printer Setup.
The screen will appear as follows:
8-30 ■ MICR CHEQUE PRINTER SETUP
MAINTENANCE AND INQUIRY
The functions available are as follows:
Displays a list of available printers
Allows you to setup a new printer record
Allows you to modify an existing printer record
Delete an existing printer record
Temporarily removes the menu box from the screen
The options function is not available at the present time
Retrieve the next/previous printer record
Retrieve the first/last printer record
Move up of down through the menu functions
Exit this menu
To add a printer record type (a) and press I ^ Enter). Enter the information as follows:
Printer Number
Each printer must be assigned a unique printer number. Display all printers by using [fs \ and then assign the next
sequential printer number.
Printer Name
Type up to a 20 character name for the printer you are defining. This field is useful if your printers are on a
network. Each printer on a network has a unique name. Enter this name in this field.
Description
This field is best used to give the location and type of printer. The maximum number of characters that you can
enter is 35.
MICR Settings
When you are first testing your cheques with the Visual Inspection template sometimes the horizontal and/or
vertical offset of the numbers are off slightly. These fields allow you to adjust the offset of the font in order to get
the numbers to print within the allowable area.
The offset number is a decimal number representing the number of 1/720" to the position of the cursor. If you are
adjusting the horizontal offset a positive number would adjust the cursor position to the right and a negative number
would move the cursor position to the left. With the vertical offset a positive number moves the cursor
position down and a negative number moves the cursor position up.
Network Information
If the printer you are adding is a network printer these fields allow you to enter the name of the print server that the
printer is attached to and the printer queue name. Enter this information only if your printer is on a network.
MICR CHEQUE PRINTER SETUP ■ 8-31
CHAPTER 9: DATA FILE STATUS
DATA FILE STATUS
Type Q[) and press l<-*Enter| to select Data file status.
The screen will appear as follows:
Payroll
j
CH
TLPflPlOO 2.35
Data File Status
31/07/93
1 Payroll systen status
E Exit
E Enter selection
I*-1 Enter \ to select Payroll system status.
DATA FILE STATUS ■ 9-1
DATA FILE STATUS
The screen will appear as follows:
Payroll
CH
Data File Status
LAST VEAR END : JAN 31/93
TLPAP1OO 2.35
31/G7/93
PROCESSING VEAR :
Enter the year you want to display the status of the files for and press I <-* Enter |
The screen will appear as follows:
The system will display a file status list.
9-2 ■ DATA FILE STATUS
DATA FILE STATUS
Press any key and the following screen will appear:
DATA FILE STATUS ■ 9-3
CHAPTER 10: COMPANY INFORMATION
PAYROLL SYSTEM
This option allows you to display and/or modify any of the system information set up when
the Payroll system was first installed.
Type {£) and press I*-1 Enter) to select Company information.
The screen will appear as follows:
PAYROLL
30/66/93
Systen Information
GENERAL COMPANY INFORMATION
Company initials
:
CH
Short Conpany name ...:
FCL
Long Company name
:
1)
2)
3)
4)
Payroll Type
:
Payroll Period
:
Processing tear
:
Cheque Type
:
Last Cheque Number ..:
5) Payroll/GL Interface :
S
11
93
R
S0276
GL
PARSONS AND CUMMINGS LIMITED
Semi-nonthly
LASER - MICR
6) Pension Plan Number .:
7) Employer Account S ..: UHG717935
[_] Select:
C^l-Modify
screen
1-Exit
To modify any of the information type (m) and press I^Enterl. Type the number
corresponding to the field you want to modify and press I+-»Enter j
PAYROLL SYSTEM ■ 10-1
COMPANY INFORMATION
Payroll Type
The options available for this field are as follows:
®
®
(D
CD
621
Annual
Monthly
Semi-monthly
Bi-weekly
Weekly
Payroll Period
Enter the specific payroll period number to start your counter with.
Processing Year
Enter the current processing year. This counter will change automatically each year when you perform year end
processing.
Cheque Type
Enter the type of cheques you will be using when you print the payroll cheques. The following types are available:
(D
(H)
(m)
E)
(D
GD
(*)
Standard cheque format with the cheque number included.
Standard cheque format with no cheque number included.
Moore cheque style
Moore laser cheques
Laser cheques format number LT102
MICR Laser cheque style
Special cheque style
Please call Polymathic personally to get samples of the different cheque styles available.
10-2 ■ PAYROLL SYSTEM
COMPANY INFORMATION
Payroll/GL Interface
If you have Polymathic's General ledger system and you want the payroll figures to automatically be booked type
(gJQ m this field. If you don't own our GL system or you want to book payroll manually type "NOGL".
^
When the payroll system is being setup initially and the G/L interface has been
activated you will be prompted to enter the debit and credit GL account codes for
each default DOE. The default DOEs are as follows:
001
SAL: Gross Salary
003
EHT: Employer Health Tax
004
CAR: Car allowance
005
FIT:
020
CPE: CPP employer portion
Federal income tax
030
CPP: CPP employee portion
031
UIE:
UI - employer portion
032
UIC:
UI - employee portion
Pension Plan Number
If your company offers a pension plan to the employees enter this number here.
PAYROLL SYSTEM ■ 10-3
COMPANY INFORMATION
Employee Account Number
Enter your employee account number in this field. The account number entered will appear on the T4 slips.
Once all the information has been entered the system will prompt you to (A)ccept, (Mjodify or (c]
1. To save the
data entered type (a) and press I «-* Enter |.
The following screen will then appear
PAYROLL
Systen Information
GENERAL COMPANY
IMITPfi
1.151
31/07/93
INFORMATION
Company initials
:
Short Company nane ...:
Long Company name ....:
CH
FCL
PARSONS AND CUNNINGS LIMITED
PAYROLL - BANK INFORMATION
1) Bank Account Number
2) Bank Transit Number
3) Bank Name
:
:
:
4) Bank Address - Street ....:
5) Bank Address - City
:
6) Bank Address - Province ..:
7) Bank Address - Postal Code:
Select:
[gl-Accept
[j]]-lfodify
[g]-Cancel
The bank information fields only need to be filled in if you are going to be printing your payroll cheques with using
the MICR cheque printing program.
If you are printing your cheques with the MICR coding every field on this screen is mandatory.
Once you have entered all the information, type Q to accept and save the data.
10-4 ■ PAYROLL SYSTEM
COMPANY INFORMATION
Proceed directly to page Error! Bookmark not defined, if you are NOT setting up a new company and are adding
the payroll programs to an existing company. To set up a new company log on to the directory containing the
POLYMATHIC PAYROLL program files.
Type POLYSYS and press I*-1 Enter) to log on to the system.
The screen will appear as follows:
Type (£) to select Initialize a New Company.
COMPANY INFORMATION ■ 11-1
COMPANY SETUP
To Add a new company,
Enter the information as follows:
Company Number
The system will automatically assign a sequential number to all new companies.
Long Company Name
Enter your company name as you wish it to appear on all report headings and press I*-1 Enter]
For example, type ANY COMPANY LIMITED and press FrEnlin. |
Short Company Name
Enter a short name for your company as you wish it to appear on all screen headings and press I*-1 Enter|
For example, type ANY and press l-*-JEnte7j. |
Company Initials
Enter two initials for your company. The system uses these initials to identify the data files for your company. For
example type (a)
11-2 ■ COMPANY INFORMATION
COMPANY SETUP
Holding Company Initials
If you wish to consolidate this company with another enter the two initials of the holding company to be used for
consolidation purposes. The system uses these initials to identify holding company. For example type (hJc) and
press 1<-* Enter).
Affiliated Companies
Enter the initials and division number of any affiliated companies in this field. You can enter up to 5 affiliated
companies.
Last Month Closed Date
Enter the date of the last month closed in the form of mmyy.
GST Registration Number
Enter your company's GST number in this field.
Home Directory
Enter the drive letter and directory path to where the program files are for the payroll system.
Batch Directory
Enter the drive letter and directory path to where the batch files are kept.
The system will then prompt you to accept and save the information. Review the data you have entered and if
everything is correct, type Q to accept and save the data.
The screen will then appear as follows:
IMI10O
1.27
Wed APR 06,1994
POLYMflTHIC COMPUTER CORPORATION
Company Setup and Information
Company number
219
XX
Long Company name
Short Company name
Company initials
XX
XX
Nailing Address
1
2
3
4
5
B
Name
Address
Telephone number
Fax number
[_] Select:
[^l-ftccept
Ql-Kodify
[jjglQl-Preuious Screen
[iaRTBi-Exit
COMPANY INFORMATION ■ 11-3
COMPANY SETUP
Continue entering the information as follows:
Name
Enter the company name, as you wish it to appear on collection letters, accounts receivable statements etc.
Address
Enter up to four lines for the company address, as you wish it to appear on collection letters, accounts receivable
statements etc.
Once again, the system will prompt you to accept and save the data. Review what you have entered and if
everything is correct, type (a) and press [^Enter! to save the data.
The following screen will appear:
FQLMATHIC COMPUTER CORPORATION
1
Sign on to Existing Companies
2
Initialize a New Conpany
3
Exit to Operating System
Use scroll keys T I
rL-UIJ.UI.im]
[ijgl-Help
[i3RTB]-exit
Type Q or press l<-*Enter! to sign on to the company which you just set up.
11-4 ■ COMPANY INFORMATION
COMPANY SETUP
The following screen will appear:
Log on to the system as follows:
Enter your typist number. The default value is 1.
Enter your password. The default is [<-* Enter).
Enter the Company number or initials. The number should
The main menu will now appear.
Select the Payroll System
COMPANY INFORMATION ■ 11-5
COMPANY SETUP
The following screen will appear:
PAVROLL
Systen Information
IMITPft
1.151
30/66/91
GENERAL COMPANV INFORHflTION
Conpany initials
:
Short Company name ...:
Long Company name ....:
HH
ANYLTD
ANY COMPANY LIHITED
There is no PAYROLL SYSTEM
set up for this company?!
Do you want to set up a
PAYROLL SYSTEM ? Cy/n) J
Type (y) and press I «-* Enter \ to setup the Payroll system.
The following screen will then appear:
PAYROLL
Systen Information
IMITPA
1.151
38/86/91
GENERAL COMPANY INFORMATION
Company initials
Short Company nane
Long Company name
:
HH
...:
:
1) Payroll Type
2) Payroll Period
3) Processing Year
: 21
: 81
: 94
AMYLTD
4) Cheque Type
: S
Last Cheque Number ..:
ANY COMPANY LIHITED
Weekly
Standard
5) Payroll/GL Interface :
6) Pension Plan Number .:
7) Employer Account • ..:
Enter
[|£}]-L0OKUP
1-End
For more information on the above fields please refer to the beginning of this
chapter.
11-6 ■ COMPANY INFORMATION
CHAPTER 12: PRINT REPORTS
PRINTING SPOOLED REPORTS
Polymathic application software generates reports by spooling to disk files. This means that when you wish to
produce a report such as the Chart of Accounts, the report is not printed directly to the printer, but is saved or
spooled on your hard disk for printing at some later time. Spooling reports rather than printing them directly has
several advantages, some of which are as follows:
1.
Reports are produced faster, since writing to disk is faster than printing directly to a printer.
2. All reports which have been spooled to the disk may be printed at one time instead of waiting for the
printer to finish printing one report before printing the second report.
3.
You can print multiple copies of the same report without having to recreate and reprint the report.
4.
You can start printing at any page number.
After you have spooled one or more reports using the programs outlined in Chapter 7 you can print them by
selecting Print Reports from the Main Menu.
PRINTING SPOOLED REPORTS ■ 12-1
PRINT REPORTS
The screen will appear as follows:
MAIM
MENU
MASTER
RH
CRT It
3.16
Ued MAR 31/93
11:42:01
1
2
3
4
5
6
B
9
10
11
12
13
14
Payroll
Accounts Receivable
Accounts Payable
Sales Analysis
General Ledger
Security
System Utilities
Daily Closing
Monthly Closing
Print Reports
Tine Accounting
Fixed Assets
Inventory / Order Entry
Uertical Markets
Q
S
E
10
Query
Status
Exit
Enter selection
7
PRINT Reports
FAX Reports
T
1
To print a report press l<-*Enter|.
Please call Polymathic if you want to be able to Fax out reports.
The print screen will appear as follows:
PCPRINT
PDLYMAIHIC COMPUTER CORPORATION
Typist: 06
LPTl:
Port:
BB
Report name
Print Reports
copy D/K
Start
page
Ued
Status
Copy Page Nessages
1P-LJ2 SMALL PRINT
CHEQUE PRINT SETUP (HP LASER)
CHEQUE PRINT SETUP CODES EPSON
HP-LJ2 66 LINES/PAGE
PURCHASE JOURNAL
PURCHASE JOURNAL - GST
-Llet
CASH DISBURSEMENTS
A/F CHEQUE LINEUP
CHEQUES
ACCOUNTS PAYABLE PURGE
A/P OPEN ITEMS - NARROU
A/F AGED TRIAL BALANCE
A/F DETAILED AGED T/B
A/P DEBIT AGED LIST
FUTURE DATED CHEQUES
FUTURE DATED PAID INUOICES
CUSTOMER FAX NUMBER EXCEPTIONS
SALES JOURNAL
3-print
jjj-delete
£|-start printing
12-2 ■ PRINTING SPOOLED REPORTS
j^-zoom
[JJ-functions
QQQ-scroll
2,33
MAR 09.1994
11:19:44
PRINT REPORTS
PRINT SCREEN FIELDS
The print screen is made up of seven columns. The function of each column is as follows:
Report name:
cpy:
This is an identification label assigned to the various reports which may be spooled. Each
individual report is assigned a unique name by the system.
This column is used to indicate the number of copies of the individual report which are to be
printed.
D/K:
This column is used to indicate whether the spooled report should be deleted from or kept on
the disk after it has been printed.
Start page:
This column is used to indicate the page number on which you wish to start printing each
report. This would normally be page one.
Status:
The next three columns labeled Copy, Page and Messages are used by the system during
printing to display the current copy and page being printed and other status messages.
The system will automatically scan the disk for spooled print reports when you select print reports from the main
menu. This may take several minutes. The system will then display the names of the reports which it has found. To
print an individual report proceed as follows:
1.
If you do not wish to print the first report highlighted in reverse video move the cursor down to the desired
report using the |fi l key. If you wish to print the first report do not move the cursor at all.
2. Type Q on the highlighted report which you wish to print. If you wish to accept the system to defaults of
Q) for number of copies, (£) for delete report after printing, and Q for start printing on page one simply
move the highlight to the next report which you wish to print. If you wish change any of the defaults for
these three fields press l<-*Enterl.
a.
The cursor will now move to the "cpy" field. Type the number of copies that you wish to print and
press I ♦-'Enter | or simply press I*-* Enter! to accept the system default of Q.
b.
The cursor now moves to the "D/K" field. Indicate whether you wish the report to be the deleted or
kept after printing. To delete the report after printing press I*-*Enter! to accept system default. To keep
the report after printing type (k) and press I^Enterl.
c.
The cursor will proceed to the "page" field. Type the number of the page that you wish to start
printing on and press l<-*Enteri or press I<-*Enter)to accept the system default of Q-
3. Press (s) to start printing the desired reports.
PRINT SCREEN FIELDS ■ 12-3
PRINT REPORTS
A sample print screen follows:
POLVMAIHIC COMPUTER CORPORATION
Typist: Ob
LPTl:
Port:
06
Ued
Start
Report name
copy D/K
p HP-LJ2 SHALL PRINT
p CHEQUE PRINT SETUP (HP LASER)
:heque print setup codes epson
HP-LJ2 6b LINES/PAGE
PURCHASE JOURNAL
PURCHASE JOURNAL - GST
-Llet
CASH DISBURSEMENTS
A/P CHEQUE LINEUP
CHEQUES
ACCOUNTS PAVABLE PURGE
A/P OPEN ITEMS - NARROU
A/P AGED TRIAL BALANCE
A/P DETAILED AGED T/B
A/P DEBIT AGED LIST
FUTURE DATED CHEQUES
FUTURE DATED PAID INUOICES
CUSTOMER FAX NUMBER EXCEPTIONS
SALES JOURNAL
jjj-print
iTJ-delete
PCPRIMT
Print Reports
jjj-start printing
page
j^-zoom
2.33
MAR 89,1934
11:20:22
Status
Copy Page Messages
1
1
1
jJJ-functions
QQQ-scroll
FUNCTION KEYS AND PRINT COMMANDS
GD
marks a report for printing
marks a report for deleting
start printing or deleting the selected reports
view the details of the report on the screen. Press 1F5 \ to view the actual report.
change the printer defaults
moves highlight up one line allowing you to scroll through the reports
moves highlight down one line allowing you to scroll through the reports
exit the print reports screen without printing anything
ZOOMING A REPORT
The zoom utility allows you to display a report to the screen. To zoom a report, highlight the report and type (z) You
can use the arrow keys to move through the report. I Home ) will take you to the beginning of the report and I End) will
take you to the end of the report. When you have finished viewing the report, type (Esc| to exit.
12-4 ■ FUNCTION KEYS AND PRINT COMMANDS
PRINT REPORTS
Functions
The functions command allows you to change the printer you are going to print to or change the settings for the
printer you are printing to.
Press IF4 ) and the screen will appear as follows:
POLYMATHIC COMPUTER CORPORATION
Typist: 66
LPT1:
Fort: 88
PCPRINT
Print Reports
Report name
copy D/K
Hon
Start
page
2.331
MAR 14,1994
11:42:10
Status
Copy Page Messages
JP-LJZ SMALL PRINT
PRINTER SELECTION
Print Deuice [LPT1]
Printer
Status
[DOT KATRIX]
[NOT AVAILABLE
]
DOT MATRIX
LASER
f
1
Fl:functions F2:change deuice
323: exit
FUTURE BATED CHEQUES
FUTURE DATED PAID IhVOICES
CUSTOMER FAX NUMBER EXCEPTIONS
SALES JOURNAL
[J-print
fi]-delete
§-start printing
jjj-zoon
[|0-functions
QB-scroll
The printer selection area lets you switch between dot matrix and laser printers, send
commands to your printer and change the output device.
Fl Functions
To switch between dot matrix and laser printers use one of the cursor keys to highlight the correct printer type and
press I+-1 Enter). Once you have selected a printer you can send commands to the printer by pressing |fi |.
If you have a Dot Matrix printer selected, the following screen will appear:
POLVMATHIC COMPUTER CORPORATION
Typist: 86
LPT1:
PCPRINT
Mon
Print Reports
Port: 68
Report name
copy D/K
Start I
Status
2.33
MAR 14,1994
11:42:18
page! Copy Page Messages
1P-LJ2 SMALL PRINT
PRINTER SELECTION
DOT MATRIX PRINTER FUNCTIONS
Print Deuice [LPT11
Reset Printer
Printer
[DOT MATRIX]
Status
[NOT AVAILABLE
Condensed Print
Cancel Condensed Print
]
Setup 0-1/2" Cheques - EPSON
DOT MATRIX
LASER
I
Fl:functions
3JH:exit
Forn Feed
t
F2:change deuice
1
4J:send to printer
EETa
FUTURE DATED CHEQUES
FUTURE DATED PAID INVOICES
CUSTOMER FAX NUMBER EXCEPTIONS
SALES JOURNAL
jj-print
jjj-delete
g-start printing
g-zoow
jJE-functions
Hfl-scroll
FUNCTION KEYS AND PRINT COMMANDS ■ 12-5
PRINT REPORTS
If you a Laser printer selected, the following screen will appear:
FOLYMATHIC COMPUTER CORPORATION
Typist:
LPI1:
06
Port: OB
PCFRINT
Print Reports
Report name
copy D/K
1P-LJ2 SMALL PRINT
Hon
Start I
2.33
HAR 14,1994
Status
11:12:IB
page | Copy Page Messages
PRINTER SELECTION
Print Deoice UPTil
Printer
Status
[LASER
1
[NOT AVAILABLE
1
DOT MATRIX
LASER
T
1
Fl:functions
F2:change device
iM9:exit
FUTURE DATED CHEQUES
FUTURE DATED PAID INVOICES
CUSTOMER FAX NUMBER EXCEPTIONS
SALES JOURNAL
Q-prlnt
nj-delete
g-start printing
g-zoow
(g-functions
iTE-scroll
To send the command to the printer use one of the cursor keys to highlight the command
and press [<-* Enter!.
F2 Change Device
To change the printer port press IF2 \ and the following screen will appear:
POLYMATHIC COMPUTER CORPORATION
Typist: 06
Port:
FCPRINT
Print Reports
Hon
LPTl:
2.33
NAR 14,1994
13:14:42
Start
copy D/K page
Report name
Status
Copy Page Messages
1P-LJ2 SMALL PRINT
PRINTER SELECTION
Print Deuice [LPTl]
Printer
[LASER
Status
]
[NOT AVAILABLE
1
DOT HATHIX
LASER
T
I
Fl:functions
F2:change deuice
FUTURE DATED CHEQUES
FUTURE DATED PAID INVOICES
CUSTOMER FAX NUMBER EXCEPTIONS
SALES JOURNAL
jjf-prlwt
jl}-delete
jjj}-start printing
g-zoon
yEHunctions
fiB-scroll
Highlight the correct printer device and press t+^Enteri.
12-6 ■ FUNCTION KEYS AND PRINT COMMANDS
9?B-exit
CHAPTER 13: DAILY STARTUP
To start using your payroll system for daily use follow the steps outlined below:
ONE LOGICAL DRIVE
At the operating system prompt type POLYSYS and press I*-1 Enter]
The following screen will appear:
rOLVHAIHIC COMPUTER CORPORATION
1
Sign on to Existing Companies
2
Initialize a New Conpany
3
Exit to Operating System
Use scroll keys T 4
UJUail.1,1]
[ijg]-Help
Type Q] or press I ♦-'Enter! to sign on to an existing company.
The following screen will appear:
POLVMATHIC
HftRCH 24, 1934
COMPUTER
CORPORATION
3.04
SIGNON PROCESSING
Crt 0 7
12:21:46
Typist It
:
Last signon date:
Last month closed:
Conpany
Booted driue
Last year end
:
Prior year status:
:
: P:\DEMO\RM
1 User Number
2 Password
3 Company
Enter
[i4ll»ilAHi»MHBai
[J20]]-Exit to operating system
:
:
:
[i£]]-Help
1-Exit to menu
ONE LOGICAL DRIVE ■ 13-1
DAILY STARTUP
LOG ON INSTRUCTIONS
Log on to the system as follows:
1. Enter your typist number. The default value is Q.
2.
Enter your password. The default is |4-»Enter|.
3.
Type the company initials for the company you wish to sign on to and press l<-*Entert. |F5 \ can be used to
list all companies.
The screen will appear as follows:
POLVHATHIC
COMPUTER
CORPORATION
3.G4
MARCH 24, 1994
SIGNON PROCESSING
Crt t 7
12:22:99
Typist 8
:
1
Last signon date: DEC 23/92
Last month closed:
FEB/93
Company
: P.C.P.L
CRN: 8 26)
Last year end
: FES 28/93
Booted drioe
: P:NDEHDSRH
Prior year status: CLOSED
PPPPP
P
P
P
P
PPPPP
P
P
CCCC
PPPPP
P
P
P
P
PPPPP
P
P
P
C
C
C
C
C
C
C
PROCESSING DATE
§tart
L
L
L
L
L
LLLLL
P
CCCC
S Select:
LLL
: 31/03/93 CHAR 31/931
jjodify
Cancel
[Jcit
]J/S
Change the processing date so it is not more than one month later than the date of
last month.
13-2 ■ LOG ON INSTRUCTIONS
DAILY STARTUP
l<-*Enter|. The screen will now appear as follows:
MAIN
MflSTER
3.16
Ued MAR 31/93
15:16:18
MENU
m
CRT S
1
2
3
4
5
6
7
8
9
10
11
12
13
14
Payroll
Accounts Receivable
Accounts Payable
Sales Analysis
General Ledger
Security
Systen Utilities
Daily Closing
Monthly Closing
Print Reports
Tine Accounting
Fixed Assets
Inventory / Order Entry
Uertical Markets
Q Query
S Status
E Exit
E
Enter selection
Type Q) and press |<-*Enter| to select Payroll.
LOG ON INSTRUCTIONS ■ 13-3
DAILY STARTUP
TWO OR MORE LOGICAL DRIVES
At the operating system prompt, log on to the drive and directory/subdirectory on which the data files are contained
for the company that you wish to work on. The drive letter that you wish to log on to will be the one that you
indicated to the system following the procedures outlined under "INITIALIZING THE POLYMATHIC PAYROLL
SYSTEM" For instance type D: and press l<-*Enter|. Next type cd WEXAMPLE and press I*-1 Enter). These
instructions would allow you to log on to the subdirectory called EXAMPLE on drive d. This subdirectory could be
used to store the data files for EXAMPLE COMPANY LIMITED.
Instruct the operating system to use the master programs which you installed following the INSTALLATION
PROCEDURES under "COPYING THE PROGRAMS TO HARD DISK". To do this type c:polysys c:answer and
press I*-1 Enter |. Make sure that you are still in the data file directory logged on to in step 1 before typing in these
instructions. This example assumes that the master programs were installed on drive C. If the master programs were
installed on another drive replace the letter C with the letter of the drive on which the master programs were
installed.
■®"
If you have two or more logical drives set up on your hard disk you must always
log on to the drive containing the data files for the company on which you are
working and instruct the operating system to use the master programs from the
drive on which you installed them before spooling any reports.
Follow the DAILY STARTUP instructions outlined for ONE LOGICAL DRIVE on the preceding pages.
13-4 ■ TWO OR MORE LOGICAL DRIVES
MAIN
RM
CRT •
MENU
MASTER
3~16l
Ued NAR 31/93
4
15:16:IB
1 Payroll
2 Accounts Receivable
3 Accounts Payable
4 Sales Analysis
5 General Ledger
6 Security
7
B
9
10
System Utilities
Daily Closing
Monthly Closing
Print Reports
11
12
13
14
Tine Accounting
Fixed Assets
Inventory / Order Entry
Uertical Markets
Q Query
S Status
E Exit
E
Enter selection
[<-■ Enter) to select Monthly Closing.
The screen will appear as follows:
14-1
MONTHLY CLOSING
MONTHLY CLOSING - AUTOMATIC
The automatic closing function will automatically identify the modules that your company
uses and all the relevant journals and reports will be generated without stopping between the
selected options.
Type (a] and press 14-* Enter I to select Automatic.
The screen will appear as follows:
The functions available are as follows:
(D
()
Start closing
Modify option selections:
IF9 1
Select option
Unselect option
Used to move through options
Exit Modify function
(D
GD
Select all options
Cancel closing
Once you have selected the options that you want closed, type (s) and press I*-1 Enter I to start the closing. The closing
of the journals will update the general ledger and the reports for the options you selected will be available for
printing.
14-2 ■ MONTHLY CLOSING - AUTOMATIC
MONTHLY CLOSING
MONTHLY CLOSING - MANUAL
The manual closing function allows you to close one option at a time.
Type (m) and press l<-*Enter! to select Manual.
The screen will appear as follows:
The functions available are as follows:
Select option
Unselect option
Used to move through options
Exit Closing function
Once you have selected an option the following options are available:
CD
(D
Start closing
Cancel closing
Type (s) to start closing the option you select. Once the option is closed, the appropriate report will be available for
printing and the Closing screen will display "Completed" beside that selection.
MONTHLY CLOSING - MANUAL ■ 14-3
MONTHLY CLOSING
MONTHLY CLOSING - PAYROLL
Monthly
Closing
RM
TLAUTO
Signon date: HAR 31/93
Last month closed: 02/93
[FEB/931
CRT 8 7
ACCOUNTS PAYABLE
Purchases journal
Cash disbursements jrnl.
A/P open items list
A/P aged trial balance..
ACCOUNTS RECEIUABLE
Cash receipts journal...
Sales journal
A/B open itens 11st
A/B aged trial balance..
GENERAL LEDGER
General journal
Trial balance
Financial statements
Today's date: KAR 24/94
Vear end date: FEB 28/93
PAYROLL
Payroll MTD register
Payroll MTD update
Payroll journal
NOT INSTALLS
NOT INSTALL!)
NOT INSTALLS
TINE ACCOUNTING
Apply tine sheets.......
Apply cash receipts
Apply client billings...
Apply client expenses...
Apply UIP adjustments...
Detailed client history.
NOT
NOT
NOT
NOT
NOT
NOT
INSTALL!)
INSTALLS
INSTALLS
INSTALLS
INSTALLS
INSTALLS
Indicate month closed...
G/L report
[_] Select:
[^l-Autonatic
[]]]-Hanual
1-Exit
All three steps must be performed in order to close the Payroll month properly.
Payroll MTD Register
This option will produce the month-to-date payroll register.
MTD Update
This option will clear out the month-to-date totals for all employees' DOEs.
Payroll Journal
This option will close the Payroll to the General Ledger by updating the GL summary for the month being closed
and creating the GL analysis records for the month.
14-4 ■ MONTHLY CLOSING - PAYROLL
Editor
Additional Monies Paid
3-3
Cancel processing
3-3
Holiday pay
8-27
Rekey from a field
3-3
Other
8-27
Rekey/display line
3-3
Vacation pay
8-27
c
Calculate Deductions
Cheque Type
5-13
5-3
Cheques
MICR
7-7
Page breaks
7-5
Stub printing
7-5
Company Information
Company initials
11-2
Company number
11-2
Long company name
11-2
Short company name
11-2
CPP Rates
5-14
Daily Processing
Calculate deductions
5-12
Change processing data
5-2
Cheque register & cheques
7-4
Deductions report
7-8
Employee pay data entry
5-7
Gross pay edit report
7-22
Making changes to prepared payroll
5-19
Pay period maintenance
5-4
Payroll register report
7-26
Process payroll
5-16
Vacation pay cheques
5-17
Daily Startup
One logical drive
13-1
Two or more logical drives
13-4
DOE Master
Amount
8-18
Credit GL code
8-18
Debit GL code
8-18
DOE description
8-17
DOE number
8-16
DOE short description
8-17
Rate
8-18
Rate type
8-18
Taxable/non-taxable
Type
8-17
8-17
Zero amount
8-19
Zero rate
8-18
Zero unit
8-18
Employee Master
Annual salary
8-7
Bank transit number
8-5
Birth date
8-4
City
8-3
Department
8-7
DOE amount
8-8
DOE current units
8-8
DOE end date
8-8
DOE frequency
8-17
DOE GL codes
8-9
DOE identification
8-9
DOE last updated
8-9
DOE rate
8-9
DOE start date
8-8
DOE's
8-8
DOE's MTD amount
8-8
DOE's YTD amount
8-8
Employee number
8-3
Federal exemption
8-6
First name/initial
8-3
Hire date
8-5
Hourly rate
8-7
Job description
8-6
Last name
8-3
Marital status
8-5
Overtime rate
8-7
Pay code
8-6
Pay frequency
8-5
Pay rate
8-6
Pension adjustment
8-7
Postal code
8-4
Province
8-4
Provincial exemption
8-6
Regular hours
8-7
Savings account number
8-5
Sex
8-5
Social insurance number
8-5
Street
8-3
Telephone number
8-4
Termination date
8-5
Vacation pay
8-6
General Data Entry
Date fields
.3-2
Decimal points
3-2
Instructions
3-1
Payroll System
Menus and submenus
3-1
Payroll Type
Optional fields
3-2
Printing
The ENTER key
3-1
Company information
10-1
5-3
12-3
Function keys and print commands
12-4
Sample print screen
12-1
Spooled reports
12-1
Procedures
Annual
2-1
Entering
2-3
Monthly
2-3
Pay period
2-1
Processing Year
5-3
Maintenance And Inquiry
DOE master maintenance
8-15
EmploeeUIC
8-12
Employee data inquiry
8-10
Employee master
8-2
Match cancelled cheques
8-20
Micr cheques
8-29
Pay period
8-14
Purge cheques
8-22
Record of employment
8-23
Sort pay period file
8-28
Micr Cheques
Bank information
8-29
Initial steps
8-29
Printer setup
8-29
Tools required
8-29
Modify Employee Payroll Data
5-8
Modify G/L Codes
5-9
Modify SPLIT Allocation Values
5-9
Monthly Closing
Automatic
14-2
Manual
14-3
Monthly Procedures
Transactions
2-3
Record Of Employment
Occupation
8-25
Record Of Employment
Additional monies paid
8-27
Amended number
8-24
Correspondence
8-24
Date of issue
8-24
Employer name and address
8-24
Employer number
8-25
First day worked
8-25
For employer's use
8-24
Insurable earnings by pay period
8-27
Issuer's name
8-24
Last day worked
8-25
Last pay period end date
8-27
Pay period type
8-27
RCT employer account number
8-24
RCT number
8-24
Reason code/comment
8-26
Recall date
8-25
Recall status
8-26
Social insurance number
8-25
Telephone number
8-24
Unemployment insurance paid to date
8-25
Unemployment insurance weeks paid and amount paid8-25
Wage loss duration
Pay Period Maintenance
DOE's to be processed
5-6
End of pay period
5-6
Pay date
5-6
Pay period number
5-5
Pay type
5-5
Processing Year
5-5
Start of pay period
5-6
Pay Period Procedures
Printing reports
2-3
Transactions
2-3
Payroll Cycle
Annual procedures
2-1
Initial set up procedures
2-1
Monthly procedures
2-1
Pay period procedures
2-1
Payroll Period
5-3
8-25
Reports
Cheque reconciliation report
7-2
DOE master list
7-10
Employee DOE list
7-41
Employee master
7-13
Employee pay period information
7-19
Employee pay profile
7-38
ETD remittance
7-35
Multiple DOE recap report
7-24
Single DOE recap report
7-28
T4's
7-30
YTD adjustment report
7-33
u
UIC Rates
5-13
UIE Rates
5-13
Yearly Processing
Year end processing
6-4
YTD adjustments
6-2