1
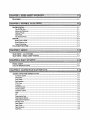
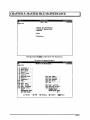
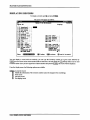
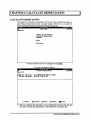
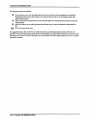
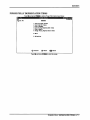
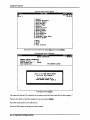
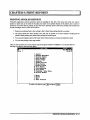
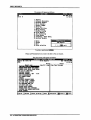
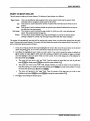
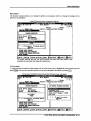
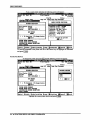
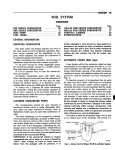
POLYMATHIC COMPUTER
CORPORATION
FIXED ASSETS SYSTEM
Congratulations on the purchase of your Polymathic Fixed Assets System.
To install the enclosed software, please do the following:
1.
2.
Verity that you have the following diskettes:
•
Polymathic Fixed Assets Disk 1
•
Polymathic System Disk
•
Example Company
Read the Installation Guide and follow the procedures for installing the programs on your
computer.
3.
Complete and mail the Software Registration Form.
FIXED ASSETS SYSTEM
INSTALLATION GUIDE
COPYING PROGRAMS TO HARD DISK
The Polymathic Fixed Assets System is distributed on three diskettes.
Before using the Fixed Assets program you should copy all files on these three diskettes on to
your hard disk as outlined in the following example.This example assumes that your diskette
drive is Drive A: and your hard disk is Drive C:
1.
Insert the diskette labeled Polymathic Fixed Assets Disk 1 in Drive A:
2.
Run the installation procedure by typing:
A:FAINSTAL A: C:
3.
Follow the remaining instructions displayed by the installation program.
The Polymathic Fixed Assets System is now ready to be initialized.
INITIALIZING THE POLYMATHIC FIXED ASSET SYSTEM
Setting the Drive Search Defaults
The Polymathic Fixed Assets System allows the user to specify which drives are to be searched
for data and program files. Initially, the system will only search the logged on drive. This can be
changed to adapt to your computer's configuration by running a program known as SETDRIVE.
To run this program type SETDRIVE and press I*-1 Enter). The screen will appear as follows:
Drives:
ABCDEFGHI
JKLMNOP
NNYYNNNNNNNNNNNN
In the above examples, Drives C: and D: are set to be searched. This means that the system will
only look for program and data files on the logged on drive and drives C and D. Any program or
data files on other drives that you have configured will be ignored. To change the settings, type
(y) to set a drive to be searched or (n) to exclude a drive from being searched or [^ Enter \ to keep the
existing value. Normally you would only set the hard drive(s) letters on which you intend to keep
your program and data files.You are now ready to setup your first company. To do this
follow the instructions outlined under Company Setup.
POLYMATHIC COMPUTER
CORPORATION
SOFTWARE LICENSE AGREEMENT
IMPORTANT! The enclosed materials are provided to you by Polymathic Computer
Corporation on the express condition that you agree to this Software License. By using the
enclosed diskette(s), you agree to the following provisions. If you do not agree with these
provisions, return these materials to your dealer in original packaging, within three days from
receipt, for a refund.
TERMS:
This agreement is in effect from the date of receipt of the software and lasts
indefinitely unless cancelled by Polymathic for violation of the terms of
the agreement.
LICENSE:
This software, the diskette(s) on which it is contained, the documentation
and manuals related thereto (the Licensed Software), is licensed to you, the
end user, for your own internal use on one computer system only. You do
not obtain title to the Licensed Software or any copy rights or proprietary
rights in the Licensed Software. You may not transfer, sub license, rent,
lease, convey, copy, modify, translate, convert to another programming
language, decompile or disassemble the Licensed Software for any purpose.
LIMITED
The
Licensed
Software
is
provided
AS
IS.
All
warranties
and
WARRANTY:
representations of any kind with regard to the licensed software are hereby
disclaimed, including the implied warranties of merchantability and fitness
for a particular purpose. Under no circumstances will the manufacturer or
developer of the licensed software be liable for any consequential, incidental,
special or exemplary damages even if apprised of the likelihood of such
damages occurring.
POLYMATHIC COMPUTER
CORPORATION
SOFTWARE REGISTRATION FORM
IMPORTANT! In order that you can receive notification of modifications or updates of this
program you MUST complete this form and return it immediately. Technical support will not be
provided unless we receive a completed registration form.
Instructions For Use:
1.
Register one software package per form.
2.
The package name may be found on the binder spine.
3.
The serial number may be found on the MASTER diskette.
POLYMATHIC COMPUTER
CORPORATION
FIXED ASSETS USER'S MANUAL
PROPRIETARY RIGHTS NOTICE
All rights reserved. This material contains the valuable properties and trade secrets of
Polymathic Computer Corporation, an Ontario corporation. The material embodies substantial
creative efforts and confidential information, ideas and expressions, no part of which may be
reproduced or transmitted in any form or by any means, electronic, mechanical or otherwise,
without the express written consent of Polymathic Computer Corporation. While reasonable
efforts have been made in the preparation of this manual to assure its accuracy Polymathic
assumes no liability resulting from any errors or omissions in this manual, or from the use of the
information contained herein.
Please refer to the Software License for limitations on use and reproduction of the software
package.
POLYMATHIC COMPUTER
CORPORATION
FIXED ASSETS SYSTEM
USER'S MANUAL
CHAPTER 1: FIXED ASSETS OVERVIEW
FEATURES
CHAPTER 2: GENERAL DATA ENTRY
INSTRUCTIONS
1-1
1-1
2-1
2-1
The ENTER Key
2-1
Menus and Submenus
2-1
Optional Fields
2-2
Date Fields
2-2
The Decimal Point
2-2
EDITOR
Rekey From a Field
2-3
2-3
Rekey/Display Line
2-3
Cancel Processing
2-3
F5 LOOKUP FEATURE
2-4
CHAPTER 3: MENUS
3-1
MAIN MENU - ALL SYSTEMS
3-1
MAIN MENU - FIXED ASSET SYSTEM
3-1
CHAPTER 4: DAILY STARTUP
4-1
FIXED ASSETS
4-1
LOG ON INSTRUCTIONS
4-2
CHAPTER 5: MASTER FILE MAINTENANCE
ADDING ITEMS FOR DEPRECIATION
5-1
5-2
Inventory number
5-2
Description
5-2
Cost Center
5-2
Serial number
5-2
CCA Class
5-2
Location
5-2
Own/Rent/Lease
5-2
Vendor number
5-3
Insurance number
5-3
Cost
5-3
ITC
5-3
Depreciation Rate
5-3
Depreciation Method
5-3
Depreciation Frequency
5-3
Salvage Value
5-3
Date Added
5-4
Date Check
5-4
Date Removed
5-4
Sale Price
5-4
Rent
5-4
Depreciation Override
5-4
Override Periods
5-4
Estimated Life
CORRECTING ERRORS WHILE ADDING RECORDS
5-4
5-5
DISPLAYING RECORDS
5-6
IMPORT
5-7
CHAPTER 6: CALCULATE DEPRECIATION
CALCULATE DEPRECIATION
6-1
6-1
CHAPTER 7: REPORTS
7-1
LIST BY COST CENTRE
7-2
LIST BY CCA CLASS
7-3
LIST CHANGES
7-4
FIXED ASSETS FULLY DEPRECIATED ASSETS REPORT
7-5
FIXED ASSETS LABELS
7-6
PURGE FULLY DEPRECIATED ITEMS
7-7
FIXED ASSETS MASTER DEPRECIATION REPORT
7-8
CHAPTER 8: COMPANY SETUP
COMPANY INFORMATION
8-1
8-1
Company Number
8-2
Long Company Name
8-2
Short Company Name
8-2
Company Initials
8-2
Holding Company Initials
8-2
Affiliated Companies
8-2
Last Month Closed Date
8-2
Name
8-2
Address
8-2
CHAPTER 9: PRINT REPORTS
9-1
PRINTING SPOOLED REPORTS
9-1
PRINT SCREEN FIELDS
9-3
FUNCTION KEYS AND PRINT COMMANDS
9-4
ZOOMING A REPORT
9-4
Functions
9-5
CHAPTER 1: FIXED ASSETS OVERVIEW
The P.C.C Fixed Asset System is designed to reduce the time and effort involved in maintaining the necessary
information for depreciation assets.
FEATURES
• Two methods of depreciation are available
• straight-line,
• declining balance.
• Depreciation on each asset is calculated for both book and tax purposes.
• Fields are provided for the location of each asset, serial numbers, investment tax credits, insurance and
property classes.
• The system allows for multiple locations, departments and classes of assets.
• The depreciation expense and accumulated depreciation for each asset can be viewed on the screen.
• The system will ensure that the accumulated Net Book Value does not exceed the cost of the asset.
• Depreciation is calculated by asset category to aid in general ledger accounting.
• Reports are available detailing asset additions and dispositions for the fiscal year to help in reparation of tax
returns.
• A report writer can be purchased separately to aid in creating customized reports.
As with all Polymathic software the Fixed Assets system features password protection, unlimited file sizes and multi
user/company capabilities.
FEATURES ■ 1-1
CHAPTER 2: GENERAL DATA ENTRY
INSTRUCTIONS
A number of data entry procedures are the same for all the applications described in this manual. These data entry
procedures are as follows:
The ENTER Key
The enter key, I^Enter! is always pressed after every entry to start processing. The only time you don't press I*-1 Enter!
is when you are using a function key such as [F5 !.
Menus and Submenus
The programs that make up this accounting package are accessed by means of a menu. Each menu choice is
displayed on the screen, with a number to its left. To make a selection, type the number of the desired item, and
press I*-1 Enterj.
For example, the following menu is typical
To select Fixed Assets,
INSTRUCTIONS ■ 2-1
GENERAL DATA ENTRY
When an application has been selected, a submenu is frequently displayed, providing a
number of further choices on how the application is to be run, or what part of the
application is to be run.
For example the following is the Fixed Assets submenu.
To select Master File Maintenance, type (T) and press l«-*Enter|.
Optional Fields
Optional fields (fields not required) may be skipped by pressing I ^ Enter |.
A number of screen entry fields allow entry of data but also default to a particular value if l<-*Enter| is pressed. A
default value is simply a value automatically selected by the program if you do not enter a value.
For example:
• A date field will often default to the current date (system date) or the last date entered.
• [^ Enter \ can often be pressed to answer a Yes or No question by default.
Date Fields
Enter all dates in the format ddmmyy (six numeric digits, with no slashes) representing day month year. The
computer will check that the month entered is valid (1-12), as well as the day (1-31) and the year (0-99).
The Decimal Point
The decimal point does not have to be entered unless the characters to the right of the decimal point are non zero.
However, decimal points must be entered if the digits to the right of the decimal point are not equal to zero.
2-2 ■ INSTRUCTIONS
GENERAL DATA ENTRY
EDITOR
The system includes an Editor utility that allows the user to correct errors made during data entry. The EDITOR can
be accessed by pressing Ifi 1.
Note:
Some older versions of the software use QQ or flOShiftj Q) to access the editor. If Ifi \ is not working try
one of these keys.
The Editor utility will not always bring up the same options because the options change according to where you are
calling the editor from. The options that are available through the editor and how they are to be used follows:
Rekey From a Field
This option may be used to rekey any of the data entered in a field. If you are on field number 6 and you want to
change something in field number 1 you will have to rekey the information from that field on. In most cases, you
can press 1<-*Enter! back to line 6 because I ♦-'Enter! will remember what you entered in that field last.
To use this option type Q, and press I ^ Enter |.
The system will then display:
[
]: Enter [field number] or [ENTER] to return
Type the number of the field that is be rekeyed and press I ♦-'Enter!. The system will then automatically return to this
field number.
Simply make your corrections and continue entering your data.
Rekey/Display Line
In some of the programs such as invoices, you can have more than one line entry per item. The Rekey Line option
allows you to modify information within a specific line.
Type the number corresponding to Rekey line and press [♦-'Enter!. The system will prompt you to enter the line
number that you want to change. It will then display that line allowing you to modify your entries. Once you have
made the changes you can continue where you left off.
The Display Line option will prompt you to enter the line number that you want to display. Once you type in the
line number and press !<-*Enter j the line will be displayed. The system will request that you press [♦-'Enter! to continue
where you left off.
Cancel Processing
The Cancel option will cancel whatever you are doing. If you are in the middle of an invoice or sales order etc., and
you want to cancel press [F1 ! and type the letter corresponding to cancel. The system will ask you if you are sure
you want to cancel before it performs this step.
EDITOR ■ 2-3
GENERAL DATA ENTRY
F5 LOOKUP FEATURE
The lookup feature allows you to search for information from various input fields. This feature eliminates the need
for users to memorize codes used for general ledger accounts, customer accounts, supplier account and numerous
other items. For instance the IF5 \ lookup feature can be used to display a supplier account code in the following
manner:
Press [F5 1 at the Inventory # field and the following screen will appear:
Fixed Assets
[
[
[
[
[
[
11
21
3]
41
5]
61
TLFIPO1O 1.09
Master File Maintenance
RM
Typist 04
31yO3/93
Add
I
D
C
S
[ 71 0
[ B] U
[ 91 I
[161 C
[11]
]
3 UMTS-IUAR CROSS BRACE GflLU.
[12] B]
[13] D
PgUp
PgDn
Top
Botton
[14]
[151 Salvage ualue ..:
COST
:
ACCUMULATED DEPR:
NET BOOK UALUE .:
Enter
[| inuentory number
ESC-End
[23] Estimated life .:
CURRENT DEPR ...:
DEPRECIATED FROM:
TO .:
[[lj]-lookup
£S3-retums
The following options are available:
Cursor upwards through the data
Cursor downwards through the data
Page up one screen of data
Page down one screen of data
Move to the top of the data
Move to the bottom of the data
Exit the lookup feature
Options:
The options of the lookup feature vary according to what program you are using. This feature will allow you to
search for a particular record according to the search criteria that you enter.
For example, if you are in the supplier master of Accounts Payable and you want to search for a supplier by the
supplier name, you can press fFl j for Options, then fF3~> to search by the supplier's name and enter three or more
letters for the supplier you are looking for. The system will then search through the supplier master for the closest
match to the three letters that you entered.
2-4 ■ F5 LOOKUP FEATURE
GENERAL DATA ENTRY
Press |fi j and the Options screen will appear as follows:
Fixed flsset!
RH
Typist 94
TLFIPO1O 1.09
31/83/93
Master File Maintenance
Add
Fixed Assets
16
17
IB
19
20
21
22
23
24
1
[
C
[
[
[
C
[
[
C
FRINCIP DESK OAK STAINED
ASH
T1™*T
F2 - Find inuentory code
F3 - Find serial nunber
ESC- Exit
OAK
BLACK
1
1
1
FRASSE TRESTLE BLACK
FRASSE TRESTLE BLACK
6 UNITS-STEN 174 SIDE FOSTS
]
3 UNITS-IUAR CROSS BRACE GALU.
[12]
[131
PgUp
PgDn
Top
Bottom
[141
[151 Salvage ualue ..:
COST
:
ACCUMULATED DEPR:
MET BOOK UALUE .:
Enter
ESC-End
Fl-Optiom
[231 Estimated life .:
CURRENT DEFR ...:
DEPRECIATED FROM:
TO .:
[ygl-lookup
inuentory nunber
031-returns
To find a serial number, press IF3 1.
The screen will appear as follows:
Fixed Assets
[
[
[
[
[
11
21
31
41
51
[ 61
[ 71
[ Bl
[ 91
[101
[111
[121
[131
[141
[151
TLFIP010 1.091
Master File Maintenance
RM
Typist 04
31/93/93
Add
Fixed Assets
C
S
C
25
26
27
2B
[
[
[
[
3 UNITS-IUAR CROSS BRACE GALU.
Enter serial
0
U
C
I
Enter
PgDn
IB UNITS-STEN 31 STORAGE SHELF
1
1
PRINCIP DESK OAK STAINED
3 UNITS-MARIN FRAME FOIL BLK
1
PRINCIP G 65 SIDE UNIT
number
39
31
32
33
34
D
PgUp
D
D
Salvage ualue ..:
COST
:
ACCUMULATED DEPR:
NET BOOK UALUE .:
1
Top
Bottom
ESC-End
[231 Estimated life
Fl-Options
.:
CURRENT DEPR ...:
DEPRECIATED FROM:
TO .:
[jig]-lookup
S3]-returns
Type at least three numbers or letters for the serial number you are searching for and press
I i-1 Enter L
The system will then search through the inventory master for the closest match to your
search criteria and will highlight that serial number in the lookup window.
F5 LOOKUP FEATURE ■ 2-5
GENERAL DATA ENTRY
The screen will appear as follows:
TLFIP010 1.03
31/93/93
Fixed Assets
Master File Maintenance
RH
Typist 04
ftdd
[15] Salvage value
COST
:
ACCUMULATED DEPR:
NET BOOK UALUE .:
Enter
inuentory nunber
[23] Estimated life
CURRENT DEPR ...:
DEPRECIATED FROM:
TO
.:
i-returns
To select the item simply press [<-* Enter! and the system will enter the supplier into the field
you initially activated the Lookup feature from.
You can exit out of the Lookup feature at any time by pressing flicl Use) will exit one level of the program,
therefore if you are in the options section of Lookup you will have to press lEscl twice to exit completely out of
Lookup.
2-6 ■ F5 LOOKUP FEATURE
MAIN MENU - ALL SYSTEMS
MAIN MENU - FIXED ASSET SYSTEM
MAIN MENU - ALL SYSTEMS ■ 3-1
CHAPTER 4: DAILY STARTUP
FIXED ASSETS
At the operating system prompt type POLYSYS and press I^Enter)
The following screen will appear:
FOLMATHIC COMPUTER CORPORATION
1
Sign on to Existing Companies
2
Initialize a Hew Company
3
Exit to Operating System
Use scroll keys T I
MAUAUAtWll
[igl-Help
]-exit
Type Q or press l<-*Enter| to sign on to an existing company.
FIXED ASSETS ■ 4-1
DAILY STARTUP
The following screen will appear:
POLHATHIC
HAY 24, 1994
13:41:46
Typist ft
:
Last signon date:
COMPUTER
SIGNON
CORPORATION
PROCESSING
Last month closed:
Company
:
Last year end
Booted drive
: P:\DEMDVRH
Prior year status:
:
1 User Number
2 Password
3 Company
Enter
J]
[J2£]]-Exit to operating system
LOG ON INSTRUCTIONS
Log on to the system as follows:
1. Enter your typist number. The default value is
2.
Enter your password. The default is I^Entarl.
3. Enter the Company number.
4-2 ■ LOG ON INSTRUCTIONS
3.64
Crt ft
Cijgl-Help
1-Exit to menu
1
DAILY STARTUP
The screen will appear as follows:
POLYMATHIC
COMPUTER
CORPORATION
3.04
Crt S
1
SIGNON
PROCESSING
HAY 24, 1934
13:42:12
Typist ft
:
4 SHftUNfl REDKOND
Last signon date: HAR 31/93
(RH: S 2b)
Company
: P.C.P.L
Booted dpiwe
: P:\DEHOSRN
PPPPP
P
P
PPPPP
P
P
P
P
CCCC
P
P
PPPPP
C
C
C
P
C
P
P
C
C
S Select:
C
gjtart
LLL
L
L
L
L
PPPPP
P
P
P
CCCC
PROCESSING DATE
Last nonth closed:
FEB/93
Last year end
: FEB 28/93
Prior year status: CLOSED
L
LLLLL
: 31/03/93 [MAR 31/931
Jodify
Jancel
2* it
]]/S
Change the processing date so it is not more than one month later than the date
of last month.
Type (s) and press I +-1 Enter j
The screen will now appear as follows:
LOG ON INSTRUCTIONS ■ 4-3
DAILY STARTUP
The screen will appear as follows:
11
Fixed Assets
Main
m
Typist 84
Menu
1 Master File Maintenance
2 Calculate Depreciation
3 Reports
E Exit
E Selection
4-4 ■ LOG ON INSTRUCTIONS
TLFIP030 2.05
31/93/93
CHAPTER 5: MASTER FILE MAINTENANCE
Type Qj and press I ^ Enter) to select Master File Maintenance.
The screen will appear as follows:
5-1
MASTER FILE MAINTENANCE
The following functions are available:
Q
(£)
Q
GQ
Add a new inventory item
Display an existing inventory item
Import file
Exit to fixed asset main menu
ADDING ITEMS FOR DEPRECIATION
To add a new item for depreciation, type (a) and press [<-* Enter j
Enter the information as follows:
Inventory number
This area is coded using up to six alphanumeric characters.
Description
This area is coded using up to thirty characters to describe the asset.
Cost Center
This area is coded using up to ten alphanumeric characters. The general code set up for this particular type of fixed
asset could be used.
Serial number
Record the serial number of the fixed asset here. The maximum number of alphanumeric characters is twenty.
CCA Class
This area is coded using up to 3 numeric characters and represents the capital cost allowance class as per the income
tax act.
Location
This area may be coded using up to thirty alphanumeric characters and is used to specify the location of the asset.
Own/Rent/Lease
The options available are:
(°)
GD
Q
Own
Rent
Lease
5-2 ■ ADDING ITEMS FOR DEPRECIATION
MASTER FILE MAINTENANCE
Vendor number
This area may be coded using up to five numeric characters. The system will automatically display the supplier
name from the supplier master file. If the Accounts Payable system exists on your computer, FITI can be used to list
all vendors.
Insurance number
Enter the insurance policy number here. The maximum number of numeric characters that can be entered is five.
Cost
Enter the cost of the asset here. The maximum number of characters, including the decimal point is ten. The largest
number that can be entered in $9,999,999.99.
ITC
This area may be coded using up to eight numeric characters. This amount will be deducted from the cost of the
asset in all depreciation calculations.
Depreciation Rate
This is the rate of depreciation for the frequency selected.
Depreciation Method
Valid responses for this field are as follows:
(D
(D
[blank]
Straight line method
Fixed method
No depreciation
Type the letter corresponding to the depreciation method you would like to use and press I^Enterl
Depreciation Frequency
This is the number of times you wish to depreciate the asset in one year. The frequencies available are:
(M)
(o)
(D
(3
Monthly
Quarterly
Semi-annually
Yearly
Salvage Value
This is the amount you think your asset will be worth if sold at the end of its expected useful life. The depreciation
module will depreciate your asset to the salvage value.
ADDING ITEMS FOR DEPRECIATION ■ 5-3
MASTER FILE MAINTENANCE
Date Added
This is the date you acquired your asset. Depreciation will start from this date. Enter the date in the form of
ddmmyy.
Date Check
This is the last time you checked this item. Enter the date in the form of ddmmyy.
Date Removed
This is the sale date of your asset. Enter the date in the form of ddmmyy.
Sale Price
This is entered upon recording of the sale or disposal of the asset. The maximum number of characters, including
the decimal point is ten. The largest number that can be entered in $9,999,999.99.
Rent
This field represents the rent or lease payment. It will be bypassed if you own the asset.
Depreciation Override
This field allows the user to set up an amount which overrides the normal rate. This works in conjunction with the
next field.
Override Periods
This field instructs the system to take the number of overrides off first before reverting to the normal depreciation
method. This can be helpful when setting up old assets.
For example:
•
old depreciation amounts to 4569.87 user sets up 1 override period for 4569.87
as depreciation override amount.
Estimated Life
This field is the number of periods you expect to use the asset before retiring it or disposing of it. The number of
periods is based on the type of depreciation frequency that you entered. For example, if you entered (£) for semi
annual depreciation and you enter "10" for estimated life, you expect the asset to last for 5 years or 60 months.
Once you enter the estimated life of the asset, the value in months will be entered by the system.
5-4 ■ ADDING ITEMS FOR DEPRECIATION
MASTER FILE MAINTENANCE
CORRECTING ERRORS WHILE ADDING RECORDS
When using the ADD function an interactive editing function has been included. To activate the EDITOR type Q
and the system will respond as follows:
Select [
]
1 - rekey from a field
2 - cancel this entry
3 - continue
Type the appropriate number and press I*-1 Enter!.
You can also Modify the record once you have finished entering all the information. If you have a field to change
simply type (m) to modify and the system prompt you to enter the field number you want to change. Type the field
number, make your changes then type [<-* Enter) to accept the record.
CORRECTING ERRORS WHILE ADDING RECORDS ■ 5-5
MASTER FILE MAINTENANCE
DISPLAYING RECORDS
To display a record, type (d) and press I*-1 Enter |
The screen will appear as follows:
TLFIFO1D 1.03
Fixed fissets
Raster File Maintenance
RM
Typist 84
31/83/93
Display
[
[
[
[
[
[
11
2]
3]
4]
51
61
Inventory ft ....
Description ....
Cost center ....
Serial S
CCA. class ...
Location
[
71
Own/rent/lease
.
[161 Date added
..
[ Bl Uendor ft
[ 91 Insurance • ....
[17] Date checked
[IB] Date renoued
[181 Cost
[Ill I.T.C
[121 Depr. rate
[19] Sale price
[201 Rent
[13] Depr. nethod ...
[211 Depr. override .
[221 Override periods
[231 Estimated life .
CURRENT DEPR ...
DEPRECIATED FROM
TO .
[14] Depr. frequency
[15] Salvage ualue ..
COST
ACCUMULATED DEPR
MET BOOK UALUE .
Enter
inuentory nunber
-lookup
1-returns
..
[Q]-serial S search
You can display a record with two methods, you can type the inventory number of a given asset followed by
Ii-1 Enter! or move down to the serial number field and enter that. On both fields the |F5 ) lookup feature can be used
to list the assets. Once you have typed one of these numbers and pressed l<-*EnterL the record will be displayed.
From the display menu, the following options are available:
Accept the record
Modify the information (The inventory number cannot be changed when modifying.)
Next record
Previous record
Exit display mode
5-6 ■ DISPLAYING RECORDS
MASTER FILE MAINTENANCE
IMPORT
The import program imports a file into the Asset Master file. For more details please contact
Polymathic at 905-738-4089.
IMPORT ■ 5-7
CHAPTER 6: CALCULATE DEPRECIATION
CALCULATE DEPRECIATION
This program will calculate the depreciation for the time frame specified and generate a
report listing the depreciated amounts. An update program will then be run to update the
assets' accumulated depreciation amount the net book value amount.
To select Calculate Depreciation, type (D and press I*-1 Enter |
The screen will appear as follows:
Fixed Assets
Calculate Depreciation
RH
TLFIP02O 1.11
31/83/93
Typist 84
START Date Cdd/nn/yy)
END Date (dd/nm/yy)
[_] Select:
: Last DEPRECIATION DATE per ASSET
:
31/83/93
[iJl-Preuiew
CHAR 31/931
[gl-Start
[Jl-Hodify
1-Exit
Before you calculate the depreciation, you can modify the run date to the date that
you wish to calculate the depreciation to. The default date is the signon date.
CALCULATE DEPRECIATION ■ 6-1
CALCULATE DEPRECIATION
The following options are available:
Q
Preview allows you to view the depreciation amount for each asset without updating the accumulated
depreciation and net book value amounts. You must use Start in order to run the update program that
(D
(M)
updates these amounts.
Start will calculate the depreciation for each asset and update the accumulated depreciation and net book
value amounts.
Modify will allow you to modify the start and end dates that you want to calculate the depreciation for.
file
(licl
Exit to fixed asset main menu
It is suggested that you first run Preview to verify each assets accumulated depreciation amount. Preview will
generate a Fixed Asset Depreciation report that will list the capital cost, depreciation amount and net book value for
each asset. Once you have reviewed this report you can select Start so that the update program will be run to update
each asset's amounts.
6-2 ■ CALCULATE DEPRECIATION
CHAPTER 7: REPORTS
Type Q and press 1<-* Enter \ to select Reports.
The screen will appear as follows:
7-1
REPORTS
LIST BY COST CENTRE
TypeQ]
I*-1 Enter I to select List by Cost Centre.
Type (s) and press l«-*Enterl
The system will prompt you to select one of the following report types:
Q
(£D
GD
(u)
List all items
Lisa all new items
List disposal items
List unsold items
Select a report type and the system will then prompt you to enter starting and ending dates in the form of ddmmyy.
Enter these dates and the Inventory Master in Cost Centre Sequence report will be generated.
A sample of this report follows:
7-2 ■ LIST BY COST CENTRE
REPORTS
LIST BY CCA CLASS
Type (£) and press I^Enter) to select List by CCA Class.
Type (sj and press I*-* Enter t
The system will prompt you to select one of the following report types:
(a)
(ID
(ID
(u)
List all items
Lisa all new items
List disposal items
List unsold items
Select a report type and the system will then prompt you to enter starting and ending dates in the form of ddmmyy.
Enter these dates and the Inventory Master by CCA Class report will be generated.
A sample of this report follows:
DATE 26/06/94
EXAMPLE COMPANY LIMITED
BXFIR032
Inventory Master by CCA Clasa CCA CLASS 10
1.1
Page
1
Inv.
NUMBER
DESCRIPTION
123456 AUDI
1
Items
5000
SERIAL NUMBER
A999900-1234
LOCATION
CITY,
-DEPRECIATION-
PROVINCE
HATB
.00
MTD
FR
TO
.00
.00
.00
.00
LIST BY CCA CLASS ■ 7-3
REPORTS
LIST CHANGES
TLFIPO30 2.05
Fixed Asset;
RH
31/03/93
REPORTS
Typist 04
1
2
3
4
5
6
List
List
List
List
List
by Cost Centre
by CCA Class
Changes
Fully Depreciated Itens
Labels
Purge Fully Depreciated Itens
E Exit
3 Selection
RMFIR033.PRT
Report completed. Press
Page
to continue.
This report will list any changes made to an asset whether they are Additions, Deletions or Modifications.
A sample Changes report follows:
TBSTQUAL
-
PIXED ASSET
1)
INVENTORY #
2)
AUDI
3)
4)
INVENTORY ADDITIONS
123456
<
S)
COST CENTRE
1900
(
6)
SBRIAL#
A999000-1234
CATBGORY
10
5000
7-4 ■ LIST CHANGES
LOCATION
CITY,
PROVINCE
REPORTS
FIXED ASSETS FULLY DEPRECIATED ASSETS REPORT
Type Q and press l<-*Enter| to select List Fully Depreciated Items.
The Fully Depreciated Items report will be generated automatically.
A sample of this report follows:
DATE 26/06/94
EXAMPLE COMPANY LIMITED
Fully Depreciated Items in Cost Centre Sequence COST CENTRE
EXFIR034
1900
Page
CAPITAL
Inv.
NUMBER
0
0
DESCRIPTION
Items
SERIAL NUMBER
LOCATION
COST
1.1
1
-DEPRECIATION
T0DATE
RATE MTD PR
TO
0.00
0.00
FIXED ASSETS FULLY DEPRECIATED ASSETS REPORT ■ 7-5
REPORTS
FIXED ASSETS LABELS
Type Q and press I*-* Enter! to select List Labels.
Type (s) and press l<-*Enter|.
The system will prompt you with the following:
Number of lines on label
6
Enter the number of lines on each label or press I*-1 Enter) if there are 6 lines.
The system will then request that you enter the sort sequence of the report. The following sequences are available:
(£)
CD
Q
©
C.A.
Inventory
Location
Default Cost Centre
Once you have entered the sort sequence, the labels will be generated.
A sample label follows:
123456 AUDI
5000
A967B94-1234
1900
7-6 ■ FIXED ASSETS LABELS
REPORTS
PURGE FULLY DEPRECIATED ITEMS
Type (p and press l«-*Enter| to select Purge Fully Depreciated Items.
Type (s) and press I ^ Enter! to start the purge.
PURGE FULLY DEPRECIATED ITEMS ■ 7-7
REPORTS
PURGE FULLY DEPRECIATED ITEMS
Type (£) and press [♦-'Enter) to select Purge Fully Depreciated Items.
purge.
PURGE FULLY DEPRECIATED ITEMS ■ 7-7
CHAPTER 8: COMPANY SETUP
COMPANY INFORMATION
To set up a new company log on to the directory containing the POLYMATHIC program files.
Type POLYSYS and press I ^ Enter) to log on to the system.
The screen will appear as follows:
POLVMATHIC COMPUTER CORPORATION
1
Sign on to Existing Companies
2
Initialize a New Company
3
Exit to Operating System
Use scroll keys T 4
rl-UU»UM.ni
[iJJl-Help
Type GQ to select Initialize a New Company.
The screen will appear as follows:
COMPANY INFORMATION ■ 8-1
COMPANY SETUP
To Add a new company, type (a) and press I ^ Enter |. Enter the information as follows:
Company Number
The system will automatically assign a sequential number to all new companies.
Long Company Name
Enter your company name as you wish it to appear on all report headings and press I ^ Enter I For example, type
ANY COMPANY LIMITED and press I*-* Enter!.
Short Company Name
Enter a short name for your company as you wish it to appear on all screen headings and press I*-1 Enter j For
example, type ANY and press IJ-1 Enter).
Company Initials
Enter two initials for your company. The system uses these initials to identify the data files for your company. For
example type (aJQ and press I *-* Enter |.
Holding Company Initials
If you wish to consolidate this company with another enter the two initials of the holding company to be used for
consolidation purposes. The system uses these initials to identify holding company. For example type (h}Q and
press I*-1 Enter|.
Affiliated Companies
List any affiliated companies here. Type a two initials for the company and the division number.
Last Month Closed Date
Enter the last month that was closed in the format mmyy.
Name
Enter the company name, as you wish it to appear on collection letters, accounts receivable statements etc.
Address
Enter up to four lines for the company address, as you wish it to appear on collection letters, accounts receivable
statements etc.
Review the information which you have just entered and if you are satisfied with it press I^Enter).
The system will then ask "On what drive do you want to set this company up ?" Press [<-*Enter! and the files will be
set up on the current drive.
The system will then display the message "Initializing Company Files. Please Wait...".
Type (D and press |4-"Enter| to exit from the Company Setup and Information Menu.
8-2 ■ COMPANY INFORMATION
COMPANY SETUP
The following screen will appear:
FOLYMflTHIC COI1PUTER CORPORATION
1
Sign on to Existing Conpanies
2
Initialize a Neu Company
3
Exit to Operating System
[|£}]-Help
Use scroll keys T I
1-exit
Type Q and press [<-* Enter! to sign on to the company which you just set up.
The following screen will appear:
POLVHflTHIC
COMPUTER
CORPORATION
3.04
HflY 24, 1994
SIGNON PROCESSING
Crt I
1
13:41:46
Typist ft
:
Last slgnon date:
Last nonth closed:
Company
:
Last year end
:
Booted drive
: PADOHKRM
Prior year status:
1 User Number
:
2 Password
:
3 Company
:
[[2 3-Help
C(20]]-Exit to operating system
1-Exit to nenu
Log on to the system as follows:
Enter your typist number. The default value is 1.
Enter your password. The default is I*-1 Enter).
Enter the Company number or initials. The number should be
COMPANY INFORMATION ■ 8-3
COMPANY SETUP
The main menu will now appear.
MAIN
RH
CRT 8
HENU
MASTER
3.16
Wed HAR 31/93
13:16:47
1
1
2
3
4
5
6
7
B
9
10
11
12
13
14
Payroll
Accounts Receivable
Accounts Payable
Sales Analysis
General Ledger
Security
System Utilities
Daily Closing
Monthly Closing
Print Reports
Tine Accounting
Fixed Assets
Inventory / Order Entry
Uertical Markets
Q Query
S Status
E Exit
E Enter selection
Select the Fixed Assets System by typing Q(£) and pressing I *-* Enter 1
The following screen will appear:
FIXED ASSETS
Systen Information
GENERAL CDHPANV INFORNATION
Company initials
:
HH
Short Company nane ...:
ANVLTD
Long Conpany nane ....:
IMTFI
1.02
30/06/91
ANY COMPANY LINITED
There is no FIXED ASSETS SYSTEM
set up for this conpanyff
Do you want to set up a
FIXED ASSETS SYSTEM ? Cfl/J]) J
Type Q and press |4-"Enter|.
The system will then ask "On what drive do you want to set up the Fixed Assets files for this company ?"
Type the drive letter on which the company was set up and press I«-*Enter!.
The Fixed Assets System is now ready for use.
Proceed to Daily Startup according to the user's manual.
8-4 ■ COMPANY INFORMATION
CHAPTER 9: PRINT REPORTS
PRINTING SPOOLED REPORTS
Polymathic application software generates reports by spooling to disk files. This means that when you wish to
produce a report such as the Chart of Accounts, the report is not printed directly to the printer, but is saved or
spooled on your hard disk for printing at some later time. Spooling reports rather than printing them directly has
several advantages, some of which are as follows:
1.
Reports are produced faster, since writing to disk is faster than printing directly to a printer.
2. All reports which have been spooled to the disk may be printed at one time instead of waiting for the
printer to finish printing one report before printing the second report.
3. You can print multiple copies of the same report without having to recreate and reprint the report.
4.
You can start printing at any page number.
After you have spooled one or more reports using the programs outlined in Chapter 7 you can print them by
selecting Print Reports from the Main Menu.
To select Print Reports type QX2)> and press I<-* Enter)
PRINTING SPOOLED REPORTS ■ 9-1
PRINT REPORTS
The screen will appear as follows:
MAIN
MEHU
MASTER
3.16
Wed MAR 31/93
RH
CRT 8
11:42:61
1 Payroll
2 Accounts Receivable
3 Accounts Payable
4 Sales Analysis
5 General Ledger
6 Security
7 System Utilities
B Daily Closing
9 Monthly Closing
IB Print Reports
11 Tine Accounting
12 Fixed Assets
13 Inventory / Order Entry
14 Uertical Markets
Q
S
E
10
Query
Status
Exit
Enter selection
PRINT Report:
FAX Reports
T
I
]-exit
To print a report press I*-'Enter).
Please call Polymathic if you want to be able to Fax out reports.
The print screen will appear as follows:
Typist: QB
LPTl:
Port:
BB
PDLYMATHIC COMPUTER CORPORATION
Print Reports
Report name
copy D/K
Start
page
PCPRINT
2.33
MAR 09,1994
11:19:44
Status
Ued
Copy Page Messages
P-LJ2 SMALL PRINT
CHEQUE PRINT SETUP (HP LASER)
CHEQUE PRINT SETUP CODES EPSON
HP-LJ2 66 LINES/PAGE
PURCHASE JOURNAL
PURCHASE JOURNAL - GST
-Llet
CASH DISBURSEMENTS
A/P CHEQUE LINEUP
CHEQUES
ACCOUNTS PAYABLE PURGE
A/P OPEN ITEMS - NARROU
A/P AGED TRIAL BALANCE
A/P DETAILED AGED T/B
A/P DEBIT AGED LIST
FUTURE DATED CHEQUES
FUTURE DATED PAID INVOICES
CUSTOMER FAX NUMBER EXCEPTIONS
SALES JOURNAL
3~print
HJ-delete
jjj-start printing
9-2 ■ PRINTING SPOOLED REPORTS
jj-zoon
30~functions
QQQ-scroll
333-exit
PRINT REPORTS
PRINT SCREEN FIELDS
The print screen is made up of seven columns. The function of each column is as follows:
Report name:
This is an identification label assigned to the various reports which may be spooled. Each
individual report is assigned a unique name by the system.
cpy:
This column is used to indicate the number of copies of the individual report which are to be
printed.
D/K:
This column is used to indicate whether the spooled report should be deleted from or kept on
the disk after it has been printed.
Start page:
This column is used to indicate the page number on which you wish to start printing each
report. This would normally be page one.
Status:
The next three columns labeled Copy, Page and Messages are used by the system during
printing to display the current copy and page being printed and other status messages.
The system will automatically scan the disk for spooled print reports when you select print reports from the main
menu. This may take several minutes. The system will then display the names of the reports which it has found. To
print an individual report proceed as follows:
1. If you do not wish to print the first report highlighted in reverse video move the cursor down to the desired
report using the IF1 1 key. If you wish to print the first report do not move the cursor at all.
2. Type (£) on the highlighted report which you wish to print. If you wish to accept the system to defaults of
Q] for number of copies, (£) for delete report after printing, and Q for start printing on page one simply
move the highlight to the next report which you wish to print. If you wish change any of the defaults for
these three fields press I^Enter).
a.
The cursor will now move to the "cpy" field. Type the number of copies that you wish to print and
press l«-*Enterl or simply press l<-*Enter| to accept the system default of Q-
b.
The cursor now moves to the "D/K" field. Indicate whether you wish the report to be the deleted or
kept after printing. To delete the report after printing press I^Enter! to accept system default. To keep
the report after printing type (k) and press I<-* Enter).
c.
The cursor will proceed to the "page" field. Type the number of the page that you wish to start
printing on and press I^Enter! or press I ^ Enter! to accept the system default of Q.
3. Press (J) to start printing the desired reports.
PRINT SCREEN FIELDS ■ 9-3
PRINT REPORTS
A sample print screen follows:
PCPRIMT
PDLVHftTHIC COMPUTER CORPORATION
Typist: 66
LPTi:
Fort: 66
Print Reports
Report name
copy D/K
Start
page
Ued
2.33
HAB 69,1994
11:26:22
Status
Copy Page Messages
p HP-LJ2 SHALL PRINT
p CHEQUE PRINT SETUP CHP LASER)
;hedue print setup codes epsdn
HP-LJ2 66 LINES/PAGE
PURCHASE JOURNAL
PURCHASE JOURNAL - GST
CASH DISRURSEHENTS
A/P CHEQUE LINEUP
-Llet
ACCOUNTS PAVARLE PURGE
A/P OPEN ITEMS - NARROU
A/P AGED TRIAL BALANCE
A/P DETAILED AGED T/B
A/P DEBIT AGED LIST
FUTURE DATED CHEQUES
FUTURE DATED PAID IKUDICES
CUSTOMER FAX NUMBER EXCEPTIONS
SALES JOURNAL
yj-print
jjj-delete
jj}-start printing
gj-zoon
jjjj-functions
QQ}-scroll
3*2~ex**
FUNCTION KEYS AND PRINT COMMANDS
marks a report for printing
marks a report for deleting
start printing or deleting the selected reports
view the details of the report on the screen. Press IF5 1 to view the actual report.
change the printer defaults
moves highlight up one line allowing you to scroll through the reports
moves highlight down one line allowing you to scroll through the reports
exit the print reports screen without printing anything
ZOOMING A REPORT
The zoom utility allows you to display a report to the screen. To zoom a report, highlight the report and type (z) You
can use the arrow keys to move through the report. I Home! will take you to the beginning of the report and |End| will
take you to the end of the report. When you have finished viewing the report, type |Esc| to exit.
9-4 ■ FUNCTION KEYS AND PRINT COMMANDS
PRINT REPORTS
Functions
The functions command allows you to change the printer you are going to print to or change the settings for the
printer you are printing to.
Press IF4 1 and the screen will appear as follows:
POLYMATHIC COMPUTER CORPORATION
Typist: 06
LPI1:
Fort:
6B
PCPRIMT
2.33
KAR 14,1994
11:42:18
Status
Hon
Print Reports
Report nane
copy D/K
Start
page
Copy Page Hessages
1P-LJ2 SMALL PRIM
PRINTER SELECTION
Print Deuice [LPT11
Printer
[DOT HATHIX]
Status
[NOT AVAILABLE
]
DOT MATRIX
LASER
T
1
Fl:functions
F2:change deuice
[£3: ex it
FUTURE DATED CHEQUES
FUTURE DATED PAID INVOICES
CUSTOMER FAX NUMBER EXCEPTIONS
SALES JOURNAL
jf-print
[jj-delete
jg-prinx
ly-aeiexe
jsj-start printing
priming
g-sxari
3~zoon
g-zoon
[jQ-f unctions
i£j-t unctions
QQQ-scroll
mj-scrou
The printer selection area lets you switch between dot matrix and laser printers, send
commands to your printer and change the output device.
Fl Functions
To switch between dot matrix and laser printers use one of the cursor keys to highlight the correct printer type and
press I*-1 EnterL Once you have selected a printer you can send commands to the printer by pressing |F1 ).
If you have a Dot Matrix printer selected, the following screen will appear:
POLYMATHIC COMPUTER CORPORATION
Typist: 65
LPT1:
Port: 68
Hon
Start I
Report nawe
Status
2.331
MAR 14,1994
11:42:IB
copy D/K page I Copy Page Hessages
1P-LJZ SMALL PRINT
PRINTER SELECTION
DOT MATRIX PRINTER FUNCTIONS
Print Deuice CLPT1)
Printer
[DOT MATRIX]
Status
PCPRINT
Print Reports
[NOT AVAILABLE
Condensed Print
1
Cancel Condensed Print
Setup B-l/2" Cheques - EPSON
DOT MATRIX
Form Feed
LASER
T
1
Fl:functions
i
F2:change deuice
CSS: ex it
:send to printer
ilHiexit
FUTURE DATED CHEQUES
FUTURE DATED PAID INVOICES
CUSTOMER FAX NUMBER EXCEPTIONS
SALES JOURNAL
g-print
n]-delete
§-start printing
g-zoom
ig-functions
ClB-scroIl
TTB-exit
FUNCTION KEYS AND PRINT COMMANDS ■ 9-5
PRINT REPORTS
If you a Laser printer selected, the following screen will appear:
POLVMATHIC COMPUTER CORPORATION
Typist: SB
LPT1:
Fort: 08
PCPRINT
Print Reports
Report nane
copy D/K
IP-LJ2 SMALL PRINT
Hon
Start I
Status
2.33
MAR 14,1994
11:42:IB
page | Copy Page Messages
LASER PRIHTER FUNCTIONS
PRINTER SELECTION
Print Degice [LPT11
Printer
[LASER
1
Status
[NOT AUAILABLE
Landscape 16.66 - LETTER
Landscape 16.66 - LEGAL
Landscape THS RHN 6 point
]
Portrait - snail print
Landscape - snail print
Portrait - large print
DOT HATRIX
LASER
Forn Feed
T
I
Fl:functions
US: exit
FZ:change deuice
f
1
4J:send to printer
FUTURE DATED CHEQUES
FUTURE DATED PAID INUOICES
CUSTOMER FAX NUMBER EXCEPTIONS
SALES JOURNAL
jj-print
ip-delete
jjfr-start printing
g-zoon
ij^-functions
flflg-scroll
Sag-exit
To send the command to the printer use one of the cursor keys to highlight the command
and press I^Entsr).
F2 Change Device
To change the printer port press IF2 \ and the following screen will appear:
PCPRINT
PDLVMATHIC COMPUTER CORPORATION
Typist: 86
LPTl:
Print Reports
Port: BB
Hon
2.331
HAR 14,1934
13:14:42
Start
copy D/K page
Report name
Status
Copy Page Messages
1P-LJ2 SMALL PRIMT
PRINTER SELECTION
Print Deuice CLFTU
Printer
Status
[LASER
1
[NOT AVAILABLE
1
DDT MATRIX
LASER
T
1
Fl:functions
1^3: ex it
FZ:change deuice
FUTURE DATED CHEQUES
FUTURE DATED PAID INUOICES
CUSTOMER FAX NUMBER EXCEPTIONS
SALES JOURNAL
jj-print
[i]-delete
g-start printing
jjj-zoon
[JJ-functions
QQQ-scroll
Highlight the correct printer device and press I ^ Enter 1.
9-6 ■ FUNCTION KEYS AND PRINT COMMANDS
sxit
Adding Records
5-2
F5 Lookup Feature.
,2-4
Asset cost
5-3
Features
.1-1
Asset description
5-2
Asset location
5-2
CCA class
5-2
Cost center
5-2
Date asset added
5-4
Date asset checked
5-4
Date asset removed
5-4
Depreciation frequency
5-3
Depreciation method
5-3
Depreciation override
5-4
Depreciation rate
5-3
Estimated life
5-4
Insurance number
5-3
Inventory Number
5-2
ITC
5-3
Lease payment
5-4
Override periods
5-4
General Data Entry
Date fields
.2-2
Decimal points
.2-2
Instructions
.2-1
Menus and submenus.
.2-1
Optional fields
.2-2
The ENTER key
.2-1
Importing data
Initial Company Setup
.5-7
8-1
Own/rent/lease
5-2
Rent payment
5-4
Sale price
5-4
Salvage value
5-3
Log On Instructions,
,4-2
Serial number
5-2
Lookup Feature
.2-4
Vendor number
5-3
Menus
Company Informaiton
Holding company initials
8-2
General ledger system.
.3-1
Main system
,3-1
Company Information
Affiliated companies
8-2
Company initials
8-2
Company number
8-2
Last month closed
8-2
Long company name
8-2
Short company name
8-2
Company setup
8-1
Correcting Errors
5-5
D
Daily Startup
4-1
Display Record
5-6
E
Editor
Cancel processing
2-3
2-3
Rekey from a field
2-3
Rekey/display a line
2-3
Overview
Printing
1-1
.9-3
Function keys and print commands.
.9-4
Sample print screen
,9-1
Spooled reports
.9-1
Purge Fully Depreciated Items
.7-7
Reports
.7-1
Fixed assets labels
.7-6
Fully depreciated assets.
.7-5
List by CCA class
.7-3
List by cost centre
.7-2
List changes
.7-4
Master depreciation
.7-8