1
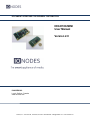
DOCUMENT APPROVED FOR GENERAL DISTRIBUTION ION-E100-MINI User Manual Version 2.0 IONODES INC. Laval, Québec, Canada www.ionodes.com Intertest, Inc. • 303 Route 94, Columbia, NJ 07832 • 908-496-8008 • [email protected] • www.intertest.com Table of Contents 1 2 BEFORE YOU BEGIN ............................................................................................................................... 4 1.1 ABOUT THE ION-E100-MINI ................................................................................................................ 4 1.2 PARTS LIST ............................................................................................................................................ 5 HARDWARE INTEGRATION ................................................................................................................. 6 2.1 3 TEMPERATURE CONSIDERATIONS .......................................................................................................... 6 CONNECTIONS ......................................................................................................................................... 7 3.1 PINOUT DESCRIPTION ............................................................................................................................ 7 3.1.1 J1 – Debug Port ................................................................................................................................ 8 3.1.2 J2 – Composite Video Input .............................................................................................................. 8 3.1.3 J3 – Serial Port RS422/485 ............................................................................................................... 8 3.1.4 J4 – Network ..................................................................................................................................... 9 3.1.5 J4 – Status LEDs ............................................................................................................................... 9 3.1.6 J4 – UART ....................................................................................................................................... 10 3.1.7 J4 – Reset ........................................................................................................................................ 10 3.1.8 J5 – Power ...................................................................................................................................... 11 3.1.9 J5 – VBAT ....................................................................................................................................... 11 3.1.10 J5 – Audio ................................................................................................................................... 11 3.1.11 J5 – I/O Out ................................................................................................................................ 12 3.1.12 J5 – I/O Input .............................................................................................................................. 13 3.1.13 J6 – 24 Pin HD Sensor Connector .............................................................................................. 13 3.1.14 J7 – 10 Pin Micro SD Connector ................................................................................................ 14 3.2 UNDERSTANDING LED STATUS ........................................................................................................... 15 Normal Operation: ...................................................................................................................................... 15 Special Operations: ..................................................................................................................................... 15 4 INITIAL SYSTEM CONFIGURATION ................................................................................................ 16 4.1 NETWORK CONFIGURATION ................................................................................................................. 16 4.2 USING THE ION-E100-MINI WEB APPLICATION ................................................................................. 20 Welcome Screen........................................................................................................................................... 21 4.2.1 System Configuration ...................................................................................................................... 22 Configuration / System ................................................................................................................................ 22 Configuration / Date Time ........................................................................................................................... 22 Intertest, Inc. • 303 Route 94, Columbia, NJ 07832 • 908-496-8008 • [email protected] • www.intertest.com ION-E100-MINI – User manual Configuration / Network .............................................................................................................................. 22 Configuration / Video In .............................................................................................................................. 23 Configuration / Audio In.............................................................................................................................. 24 Configuration / Audio Out ........................................................................................................................... 24 Configuration / Serial Ports ........................................................................................................................ 24 Configuration / User Accounts .................................................................................................................... 25 5 PERFORMING A FIRMWARE UPDATE ............................................................................................ 26 5.1 6 BATCH FIRMWARE UPDATE ................................................................................................................. 27 POINT TO POINT CONNECTIONS ..................................................................................................... 30 ANNEX B – TROUBLESHOOTING GUIDE ................................................................................................ 31 ANNEX C – STATEMENT LIMITED WARRANTY ................................................................................... 32 Page 3 of 32 Intertest, Inc. • 303 Route 94, Columbia, NJ 07832 • 908-496-8008 • [email protected] • www.intertest.com ION-E100-MINI – User manual 1 Before you begin 1.1 About the ION-E100-MINI The ION-E100-MINI single port OEM encoder module delivers high quality H.264 video encoding to the video surveillance market. It is an embedded, high-performance digital video OEM encoder module designed for integration into SD or HD cameras or other video capture products. Embedding support for networked API‟s, products based on the ION-E100-MINI can be integrated into a networked video management system allowing for centralized monitoring and management in a scalable and expandable IP surveillance system. Contact IONODES for a list of supported VMS systems. The high-performance encoding capability of the ION-E100-MINI offers a cost-effective way to convert existing cameras designs to benefit from video over IP networks. The ION-E100-MINI provides innovative configuration options and tools that can significantly decrease the amount of time and effort required to deploy a unit. Using web-based configuration tools, users can easily and remotely manage all aspects of the appliance. To support high-performance encoding, while keeping the total cost of ownership within budget constraints, the ION-E100-MINI uses highly efficient dual stream H.264 compression and supports an optional MJPEG stream. Advanced features, such as “edge-recording” allow you to extend usage of the ION-E100-MINI well into the future. Page 4 of 32 Intertest, Inc. • 303 Route 94, Columbia, NJ 07832 • 908-496-8008 • [email protected] • www.intertest.com ION-E100-MINI – User manual 1.2 Parts List Qty Description 1 ION-E100-MINI Module Note: When unpacking, inspect the shipment box and appliance to identify any possible damages due to shipping. Make sure all items have been delivered and that no items are missing. Contact your Ionodes representative should you find any damages or defects. Note: The product serial number label helps the Ionodes product support team identify your device and its factory configuration in the event that your ION-E100-MINI or its components require service. The label is attached on the underside of the PCBA module. . Page 5 of 32 Intertest, Inc. • 303 Route 94, Columbia, NJ 07832 • 908-496-8008 • [email protected] • www.intertest.com ION-E100-MINI – User manual 2 Hardware Integration The ION-E100-MINI has been designed to allow for flexible hardware integration to existing or new product designs. The ION-E100-MINI proposes four (4) mounting holes for securing to your enclosure. In addition, through holes placed on the edge of the product allow for soldering onto a carrier card or other base module; these through holes provide connectivity as well as serving as a mounting option. When integrating the ION-E100-MINI into a product design, position the module to allow for minimal airflow in order to maximize the chances of heat dissipation. Warning: Be careful not to damage the module when using mounting screws. 2.1 Temperature Considerations The ION-E100-MINI has been designed with industrial temp. components (-40C to +85C) aside from the video codec chip which is spec‟d for 0C to 90C (case temp.); however, the video codec chip‟s actual temp. support is much better than specified and some hardware integrations were able to operate at temperatures as low as -20C. Although low temperatures will not damage the codec chip, we recommend that OEM customers put in place a heating system which will bring temperatures to above -10C before resetting the ION-E100-MINI to ensure proper operational behaviour. Note: The product datasheet mentions 70C as a maximum for ambient temperature, whereas 90C would be the max. on the chip case. Page 6 of 32 Intertest, Inc. • 303 Route 94, Columbia, NJ 07832 • 908-496-8008 • [email protected] • www.intertest.com ION-E100-MINI – User manual 3 Connections Familiarize yourself with the ION-E100-MINI‟s available connectors and connection points before integrating into a product design. The ION-E100-MINI offers composite and HD video inputs as well as associated I/Os and audio connections. 3.1 Pinout Description Page 7 of 32 Intertest, Inc. • 303 Route 94, Columbia, NJ 07832 • 908-496-8008 • [email protected] • www.intertest.com ION-E100-MINI – User manual J1 – Debug Port 3.1.1 The debug port is for internal use by IONODES and should be left disconnected on production designs. 3.1.2 J2 – Composite Video Input Use this connector to provide a standard resolution (NTSC/PAL) video input to the ION-E100MINI. Note that the module will selectively process the composite video input or HD sensor input depending on software configuration; they cannot both be used simultaneously. 3.1.3 J3 – Serial Port RS422/485 The serial port provided on J3 is typically to be used for integrating with your device‟s controller (such as a PTZ controller). J3 provides RS422/485 access to the device‟s serial port; TTL levels for this same serial port are accessible via UART pins (TX and RX) on connector J4. To connect a serial controller to an ION-E100-MINI using RS-422/485 4-wire configuration, use the following steps: 1. Ensure proper connection between RS-422 4-wire or RS-485 4-wire serial equipment and the ION-E100-MINI, use the following scheme: Equipment Serial Port ION-E100-MINI Serial Port TX+ RX+ TX- RX- RX+ TX+ RX- TX- GND GND 2. Select the desired operation mode (RS-422 4-wire, RS-485 2-wire or RS-485 4-wire) using the devices web interface or external VMS interface. Page 8 of 32 Intertest, Inc. • 303 Route 94, Columbia, NJ 07832 • 908-496-8008 • [email protected] • www.intertest.com ION-E100-MINI – User manual To connect serial equipment to an ION-E100-MINI using RS-485 2-wire configuration, use the following steps: 1. To create the negative data signal, please connect Rx- and Tx- pins together on the ION-E100-MINI. 2. To create the positive data signal, please connect Rx+ and Tx+ pins together on the ION-E100-MINI. 3. To ensure proper connection between RS-485 2-wire serial equipment and the IONE100-MINI, use the following scheme: Equipment Serial Port ION-E100-MINI Serial Port Data + Data + Data - Data - GND GND Note: The pins on connector J3 are only active if the mode of the serial port is set to RS422 or RS485 via the devices web interface. If the serial port is set to any other mode, the RS422/485 driver is disabled and the serial port can only be accessed using TTL pins on connector J4. 3.1.4 J4 – Network J4 provides standard 4-wire network connectivity. Note: Magnetics are included on the ION-E100-MINI, J4 can therefore be connected directly to network switching equipment. 3.1.5 J4 – Status LEDs J4 provides a means for exposing status LEDs on your product. The ION-E100-MINI has been designed to make use of two distinct bi-color LEDs. The first bi-color LED can be used via GN0 (Green 0) and RD0 (Red 0). The second bi-color LED can be used via GN1 (Green 1) and RD1 Page 9 of 32 Intertest, Inc. • 303 Route 94, Columbia, NJ 07832 • 908-496-8008 • [email protected] • www.intertest.com ION-E100-MINI – User manual (Red 1). In both cases, the LEDs are to be powered via the provided 3V3 signal on connector J4. (There is a 150ohms resistor on the board for each LED.) Note: LED color states and behaviour are described later in this manual. 3.1.6 J4 – UART J4 provides TTL level RX an TX access to the serial port. The serial port exposed here is the same serial port link that is provided on J3, but at TTL levels (5V). The TTL UART pins on J4 are always active regardless of configured serial port mode; below is part of the schematic which shows how the external TTL level is converted to internal 3.3v. 3.1.7 J4 – Reset The ION-E100-MINI provides a software reset signal input. To trigger the reset signal, short the RST pin to the GND. The reset signal can be used to perform a hardware reset, or to perform a complete reset to default settings of the device‟s configuration parameters. To reboot the device without triggering a factory reset, short the RST pin of connector J4 and immediately release. The device should perform a complete reboot. To reset the device to the factory default configuration, short the RST pin of connector J4 for approx. 20 seconds – release the pin once the LED pattern on LED1 (RD1 + GN1) displays alternating RED/GREEN colors. After the device reboots, it should be reset to the default factory configuration. Page 10 of 32 Intertest, Inc. • 303 Route 94, Columbia, NJ 07832 • 908-496-8008 • [email protected] • www.intertest.com ION-E100-MINI – User manual 3.1.8 J5 – Power The module must be powered using a 12VDC power source. 3.1.9 J5 – VBAT VBAT is provided in order to allow for optional integration of an external battery source (CR2032) for feeding the module‟s realtime clock (RTC). VBAT is only required to keep the date/time when the main power supply is not connected. All other data is saved in persistent FLASH memory. Note: VBAT is not a mandatory signal to operate the ION-E100-MINI 3.1.10 J5 – Audio The ION-E100-MINI provides a single channel line level audio input as well as a single channel line level audio output; both exposed via J5. Page 11 of 32 Intertest, Inc. • 303 Route 94, Columbia, NJ 07832 • 908-496-8008 • [email protected] • www.intertest.com ION-E100-MINI – User manual 3.1.11 J5 – I/O Out The ION-E100-MINI provides a digital output for providing functionality such as driving a relay. The open state of the I/O output is at 3.3V and the closed state is to the board ground (GND). The below schematic excerpt describes functions of the I/O OUT exposed via J5. Page 12 of 32 Intertest, Inc. • 303 Route 94, Columbia, NJ 07832 • 908-496-8008 • [email protected] • www.intertest.com ION-E100-MINI – User manual 3.1.12 J5 – I/O Input The ION-E100-MINI provides two (2) input pin signals, IN1 and IN2, for eventing purposes. To trigger an input pin (closed stated), you must connect the appropriate IN signal with the provided GND located on connector J5. To set the open state, leave the input floating. 3.1.13 J6 – 24 Pin HD Sensor Connector P/N: TE CONNECTIVITY 2-1734592-4 Pin No. Name Level 1 GND 2 Sensor TxD TTL Level (0V – 5.0V) 3 Sensor RxD TTL Level (0V – 5.0V) 4 Reset-In Reset: Low (GND) Normal: Open 5 GND 6 N/C 7 GND 8 N/C 9 GND 10 N/C 11 GND 12 Y Out 13 GND 14 Pb Out 15 GND 16 Pr Out 17 GND 18 Power 6.0V – 12.0V DC 19 Power 6.0V – 12.0V DC 20 Power 6.0V – 12.0V DC 21 Power 6.0V – 12.0V DC 22 GND 23 Power 24 GND HD Analog Component HD Analog Component HD Analog Component 6.0V – 12.0V DC Page 13 of 32 Intertest, Inc. • 303 Route 94, Columbia, NJ 07832 • 908-496-8008 • [email protected] • www.intertest.com ION-E100-MINI – User manual Note: The HD sensor connector has been designed to be directly compatible with SONY‟s 24 Pin ribbon cables used with most of their camera blocs. Note: The following cable is recommended for connectivity between connector J6 and the SONY camera blocs which expose a 24-pin connection: MOLEX P/N: 21020-0259 : CABLE FLAT FLEX 6" .50MM 24 POS 3.1.14 J7 – 10 Pin Micro SD Connector P/N: TE CONNECTIVITY 1-1734592-0 Pin No. Name 1 Write Protect 2 Card Detect 3 Data Bit 2 4 Data Bit 3 5 Command Line 6 Power 7 Clock 8 GND 9 Data Bit 0 10 Data Bit 1 Level 2.7V – 3.6V DC Note: In order to use the micro SD functionalities, make sure to use a 2GB to 32GB micro SD card of class 6 or above. You must also make sure the card is formatted in FAT32 or EXT3. Page 14 of 32 Intertest, Inc. • 303 Route 94, Columbia, NJ 07832 • 908-496-8008 • [email protected] • www.intertest.com ION-E100-MINI – User manual 3.2 Understanding LED Status Status of the ION-E100-MINI is exposed via the first bi-color LED (GN0/RD0). The following describes the system status LED mappings of the ION-E100-MINI: Normal Operation: Operating system boot up – LED is steady orange (max. 30 seconds) Internal application startup – LED is flashing orange (2 second interval) ION-E100-MINI system ready – LED is steady green Media streaming – LED is flashing green (1/2 second interval) Special Operations: Identify command received – LED is flashing orange/green Hardware reload default settings – LED is flashing rapidly red/green Software watchdog is rebooting the appliance – LED is flashing rapidly red Firmware update in progress – LED is flashing slowly red/green Note: Under normal operation, the ION-E100-MINI takes up to 1-2 minutes to boot up. Page 15 of 32 Intertest, Inc. • 303 Route 94, Columbia, NJ 07832 • 908-496-8008 • [email protected] • www.intertest.com ION-E100-MINI – User manual 4 Initial System Configuration For initial set-up, the ION-E100-MINI needs to be configured prior to using it with your network video management system. In most cases, only network configuration will be required. Since not all ION-E100-MINI parameters can be controlled via networked video management systems, advanced parameters may need to be set-up as well through the ION specific software tools. The initial configuration can be done locally on the ION-E100-MINI using a laptop directly connected to the device‟s network port, or remotely over the network. 4.1 Network Configuration By factory default, the ION-E100-MINI is configured in DHCP. If you are not using a DHCP server it will automatically allocate itself an APIPA (Automatic Private IP Addressing) address in the range 169.254.0.1 to 169.254.255.254 with subnet mask 255.255.0.0. Initial device network configuration is done via the IonConfigTool (ICT), a tool provided by IONODES and that can be found on the company‟s web site. The ICT plays 5 important roles: 1. Discovery of all ION-E100-MINI and other ION devices on the network 2. Remote configuration of the IP address and subnet mask 3. Identify an ION device by flashing the LED (orange/green) 4. Batch firmware upgrade of all common ION devices 5. Access to the web based ION management application Page 16 of 32 Intertest, Inc. • 303 Route 94, Columbia, NJ 07832 • 908-496-8008 • [email protected] • www.intertest.com ION-E100-MINI – User manual Once your device is installed on your network and powered up, launch ICT from any computer on the network and the following window will be displayed: The ICT supports 2 ways to discover a device. The first way doesn‟t need any configuration and uses the Bonjour discovery protocol. In order to be able to discover a device via Bonjour, the network must support multicast delivery. If it is not the case, you can use the second way, which is the Unicast Discovery. The Unicast Discovery can be configured by using the “Unicast Discovery” configuration form. This configuration form is available via the Admin / Unicast Discovery menu option. Page 17 of 32 Intertest, Inc. • 303 Route 94, Columbia, NJ 07832 • 908-496-8008 • [email protected] • www.intertest.com ION-E100-MINI – User manual To configure the Unicast Discovery, add one or more IP address ranges. The Unicast Discovery tries to reach a device at a specific IP address in the configured ranges. The discovery can be a long process if the range of IP addresses is huge and the device is at the end of the range. To accelerate the discovery, add several small ranges of IP addresses. The ping timeout option can be increased for a high latency network. The ICT will display as many devices as it discovers on the network. Page 18 of 32 Intertest, Inc. • 303 Route 94, Columbia, NJ 07832 • 908-496-8008 • [email protected] • www.intertest.com ION-E100-MINI – User manual If no DHCP server was able to assign an IP address to an ION-E100-MINI, it will appear in the ICT device list with an APIPA address (169.254.*.*). If an ION-E100-MINI displays an APIPA address it must be configured with a valid IP address before it can be remotely configured by selecting the „‟Assign IP address‟‟ from the selection list and configuring the TCP/IP settings. Page 19 of 32 Intertest, Inc. • 303 Route 94, Columbia, NJ 07832 • 908-496-8008 • [email protected] • www.intertest.com ION-E100-MINI – User manual Once the IP information is set, the Silverlight web application served by the ION-E100-MINI can be launched from the ICT or directly in your web browser by typing the device‟s IP address in the address bar. You can start to use your networked video management system for final system configuration or you can configure advanced parameters using the ION-E100-MINI‟s web based management. 4.2 Using the ION-E100-MINI Web Application When entering the Web Application, you will be asked a username and password. The default user name and password is „admin‟. The following window will be displayed: Page 20 of 32 Intertest, Inc. • 303 Route 94, Columbia, NJ 07832 • 908-496-8008 • [email protected] • www.intertest.com ION-E100-MINI – User manual Welcome Screen Upon successfully logging into the web interface, a welcome screen will be displayed. The welcome screen shows general devices health status as well as firmware version, system uptime and internal temperature. Page 21 of 32 Intertest, Inc. • 303 Route 94, Columbia, NJ 07832 • 908-496-8008 • [email protected] • www.intertest.com ION-E100-MINI – User manual 4.2.1 System Configuration Configuration / System Under the Configuration section, select the System tab to perform the following operations: View product model information, current firmware version and serial number. Specify a custom name; this name can be used by third-party software to display a friendly name for the device. Enable edge recording by checkboxing the “Use Recorder Module” checkbox. Disabling edge recording will accelerate the device‟s boot time. Configuration / Date Time Under the Configuration section, select the Date Time tab to perform the following operations: Set the timezone in which the device is operating. Manually set the current date and time for the device‟s internal clock. Configuration / Network Under the Configuration section, select the Network tab to perform the following operations: Set the encoder‟s IP parameters; DHCP or static IP information. Configure an NTP server to allow the device to automatically update its internal clock using an NTP server. Change the device‟s HTTP configuration; avoid changing these settings unless absolutely necessary. Enable the required Network APIs. Enable PSIA or GENETEC API depending on which VMS platform you intend to use with the device. Disabling any unrequired APIs will accelerate boot time. Set Bonjour discovery protocol settings. Modify SNMP settings to match with any SNMP software you wish to use for monitoring the device. Page 22 of 32 Intertest, Inc. • 303 Route 94, Columbia, NJ 07832 • 908-496-8008 • [email protected] • www.intertest.com ION-E100-MINI – User manual Configuration / Video In Under the Configuration section, select the Video In tab to perform the following operations: Configure video input type; SD or HD. Configure video source settings; for HD you are asked to select a support camera bloc / sensor and related parameters. For SD you are asked to select the proper input format and related parameters. Set audio association. When associating the audio input to the video input, the following resulting behavior will occur: o Edge recording will record audio associated to video content. o RTSP streaming will allow for combined audio/video streaming. Configure camera bloc / sensor parameters. These parameters will also be saved to the camera bloc itself if possible. Configure video compression parameters for any of the three available codec instances (Primary H.264, Secondary H.264 and MJPEG). Most VMS software solutions will interact with these parameters and thus it is suggested to leave these at defaut values in the web interface. VBR aggressiveness however is unique to IONODES encoders and proposes various levels (disabled to aggressive) of motion triggered rate control. The more aggressive the setting, the more variation motion will have on the rate control. It is strongly suggested to disable VBR aggressiveness for low bit rate scenarios (below 1Mbps) as this parameter may negatively affect perceived video quality. Configure point to point video connections (up to three) for creating persistent video streams from the encoder to a network endpoint. This feature is particularly useful when combined with an IONODES decoder (ION-R100). Configure PTZ control. Add text overlay to encoded video streams. Note that these strings will be embedded into the images streamed out of the device. Configure motion detection regions of interest. Most VMS platforms will control motion detection parameters and thus would not require setting anything within the web interface. Setting privacy zones. Page 23 of 32 Intertest, Inc. • 303 Route 94, Columbia, NJ 07832 • 908-496-8008 • [email protected] • www.intertest.com ION-E100-MINI – User manual Note: When the video input is configured in 1080p25/30, the device will only support 2 encoders (Primary H264 and either Secondary H264 or MJPEG). Since the thumbnail images displayed in the web GUI are from the MJPEG encoder, none can be displayed when the secondary encoder is set to H264. The image will read “Video Input JPEG not configured”. Configuration / Audio In Under the Configuration section, select the Audio In tab to perform the following operations: Configure audio input compression parameters. Configure point to point audio connections (up to three) for creating persistent audio streams from the encoder to a network endpoint. This feature is particularly useful when combined with an IONODES decoder (ION-R100). Configuration / Audio Out Under the Configuration section, select the Audio Out tab to perform the following operations: Configure audio output parameters. Configure a point to point audio connection for receiving a persistent audio stream from a network endpoint. This feature is particularly useful when combined with an IONODES decoder (ION-R100). Configuration / Serial Ports Under the Configuration section, select the Serial Ports tab to perform the following operations: Configure serial port parameters. Configure a point to point serial port connection for creating a persistent serial port connection with a network endpoint. This feature is particularly useful when combined with an IONODES decoder (ION-R100). Page 24 of 32 Intertest, Inc. • 303 Route 94, Columbia, NJ 07832 • 908-496-8008 • [email protected] • www.intertest.com ION-E100-MINI – User manual Configuration / User Accounts Under the Configuration section, select the User Accounts tab to perform the following operations: Select the web interface‟s authentication method. A dual passphrase is made available for additional security. Manage user accounts which have access to the device. Page 25 of 32 Intertest, Inc. • 303 Route 94, Columbia, NJ 07832 • 908-496-8008 • [email protected] • www.intertest.com ION-E100-MINI – User manual 5 Performing a Firmware Update This section describes how to update your ION-E100-MINI to newer firmware versions from the web application. 1. Navigate to your device‟s web application using your favorite web browser. 2. Click on the Maintenance tab. 3. Click on the Update button. You will be asked for the firmware update file; please select the .iof file which was provided by IONODES. 4. You will see the following messages indicating the status of the update: o Firmware upload in progress... (100%) Lasts around 95 seconds. Status LED is green. o Firmware uploaded. Saving to internal storage... (0%) Lasts around 45 seconds. Status LED is flashing red-green. o Validating and decompressing firmware... (0%) Lasts around 105 seconds. Status LED is flashing red-green. o Firmware ready for installation. Rebooting device... (0%) Web page will disconnect from device until device has rebooted. You will be prompted for login once the device is up again. Lasts around 110 seconds. Status LED is orange. o Testing firmware stability... (26%) Lasts 120 seconds. Status LED is flashing red-green. o Firmware update complete. (100%) Page 26 of 32 Intertest, Inc. • 303 Route 94, Columbia, NJ 07832 • 908-496-8008 • [email protected] • www.intertest.com ION-E100-MINI – User manual 5.1 Batch Firmware Update This section describes how to perform a batch update of multiple ION-E100-MINI devices to newer firmware versions from the ICT. The batch firmware update works by starting a firmware update session. Only one session at time is allowed and only 20 devices can be selected by session. From the ICT, select one or more devices of the same type. By using the right mouse button on the selected devices, choose the “Firmware Update” menu option. Page 27 of 32 Intertest, Inc. • 303 Route 94, Columbia, NJ 07832 • 908-496-8008 • [email protected] • www.intertest.com ION-E100-MINI – User manual To start a firmware update session, choose the “.iof” file corresponding to the new firmware by clicking to the “Select File …” button. Once selected, click to the “Start” button. Once started, the “Firmware Update Session” window shows the progress of the firmware update. This window can be closed at any moment without losing the current session. Page 28 of 32 Intertest, Inc. • 303 Route 94, Columbia, NJ 07832 • 908-496-8008 • [email protected] • www.intertest.com ION-E100-MINI – User manual If closed, the progress of the current session can be followed by reopening the “Firmware Update Session” window by clicking the button from the “Tools” toolbar. Once done, clear the current session from the “Firmware Update Session” window and restart a new session if needed. Page 29 of 32 Intertest, Inc. • 303 Route 94, Columbia, NJ 07832 • 908-496-8008 • [email protected] • www.intertest.com ION-E100-MINI – User manual 6 Point to Point Connections Point-to-point connections between an ION-E100-MINI and an ION-R100 can be configured using the device‟s web application. In the ION-E100-MINI‟s web application, in the Configuration section, go to the Video In tab. Scroll down all the way to the bottom of the configuration page. The last 3 sections are named Point to Point 1, 2 and 3. Here‟s a quick overview of the settings available for a connection: Enabled: Indicates whether this connection is to be used. Description: Free-form user description of the connection, not used by the device. Encoder: Indicates which video feed is to be sent over the point-to-point connection. Possible values include «Primary H.264 » and «Secondary H.264». These values refer to the encoders configured in previous sections of the same web page. Destination IP: Address where to send the video. This is usually the address of an IONR100. The destination can also be a multicast group address. DNS names are not yet supported, only IP addresses. Destination Port: Network port where to send the video. This value must match the port value in the ION-R100. Once all the settings have been set, click on Save at the bottom of the page to apply them. The ION-E100-MINI then creates or updates the connection as needed. Page 30 of 32 Intertest, Inc. • 303 Route 94, Columbia, NJ 07832 • 908-496-8008 • [email protected] • www.intertest.com ION-E100-MINI – User manual Annex B – Troubleshooting Guide Device does not seem to boot-up o Verify that a 12VDC power supply is connected to the device. o When a valid power source is detected, the status LED will light up orange. o Verify the status of the system status LED to determine the state of the device as it powers up. Cannot discover the device or communicate via the network o Before the device can be discovered, the status LED must be lit GREEN as this indicates ready state of the device. o Make sure you have connected the device to your network. o Make sure the GREEN LED on the RJ45 connector is lit. If it is not lit, verify the network connectivity with the network switch. o Dynamic discovery of the ION-E100-MINI requires multicast networking to be supported by your network and switch equipment. (Bonjour protocol) Page 31 of 32 Intertest, Inc. • 303 Route 94, Columbia, NJ 07832 • 908-496-8008 • [email protected] • www.intertest.com Annex B Annex C – Statement Limited Warranty The warranties provided by Ionodes Inc. (Ionodes) in this Statement of Limited Warranty apply only to ION-E100-MINI products purchased from an authorized Ionodes Inc. (Ionodes) Reseller, Integrator or Distributor and returned from European, Asian or North American countries, and excludes all Latin American countries. The term "ION-E100-MINI" means an ION-E100-MINI module, any module upgrade, or accessories, or any combination of them. The term "ION-E100-MINI" does not include any software programs, whether pre–loaded with the ION-E100-MINI, installed subsequently or otherwise, and any installed Micro SD Card, which are covered by a separate Limited Warranty. Nothing in this Statement of Warranty affects any statutory rights of purchaser that cannot be waived or limited by contract. If you have any questions regarding this Limited Warranty, contact Ionodes Inc. and its resellers. The Warranty period for the ION-E100-MINI is 2 years from date of billing for the ION-E100-MINI product. The Ionodes Warranty for ION-E100-MINI Ionodes warrants that each ION-E100-MINI is free from defects in materials and workmanship, and conforms to the ION-E100-MINI Official Published Specifications (See http://www.ionodes.com for details). The warranty period for an ION-E100-MINI is a specified, fixed period commencing on date of billing by Ionodes for the Product. If a valid proof of billing cannot be found, the warranty may be void by Ionodes Inc. or measured from the date the ION-E100-MINI has shipped from a Ionodes Depot center based on its serial number. If, during the warranty period, the ION-E100-MINI is not in good working order, Ionodes will, at its option, repair or replace it at no additional charge, except as is set forth below. In some cases, the replacement product may not be new and may have been previously installed. Regardless of the replacement product used, Ionodes‟ appropriate warranty terms apply. In case Ionodes or your reseller are unable to repair an Ionodes ION-E100-MINI, you can alternatively ask for a partial refund as far as justified by the reduced value of the unrepaired ION-E100-MINI or ask for a cancellation of the respective agreement for such ION-E100-MINI and get your money refunded. Extent of Warranty The warranty does not cover the repair or exchange of an ION-E100-MINI resulting from misuse, accident, modification, unsuitable physical or operating environment, improper maintenance by the end user, or failure caused by a product for which Ionodes is not responsible. The warranty is voided by removal or alteration of ION-E100-MINI or parts identification labels, but not by the installation or replacement of Micro SD medium. THESE WARRANTIES ARE YOUR EXCLUSIVE WARRANTIES AND REPLACE ALL OTHER WARRANTIES OR CONDITIONS, EXPRESS OR IMPLIED, INCLUDING, BUT NOT LIMITED TO, THE IMPLIED WARRANTIES OR CONDITIONS OF MERCHANTABILITY AND FITNESS FOR A PARTICULAR PURPOSE. Items Not Covered by Warranty Ionodes does not warrant uninterrupted or error–free operation of an ION-E100-MINI. Any technical or other support provided for an ION-E100-MINI under warranty, such as assistance via telephone with "how–to" questions and those regarding ION-E100-MINI set–up and installation, will be provided WITHOUT WARRANTIES OF ANY KIND. Intertest, Inc. • 303 Route 94, Columbia, NJ 07832 • 908-496-8008 • [email protected] • www.intertest.com