1
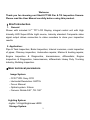
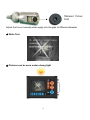
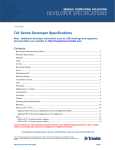
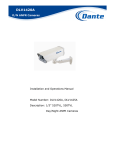
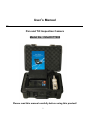
User’s Manual _ Pan and Tilt Inspection Camera Model No.: iShot® PT200 Please read this manual carefully before using this product! 1 Welcome Thank you for choosing our iShot® PT200 Pan & Tilt Inspection Camera. Please read the User Manual carefully before using this product. Ⅰ. Brief Introduction 1. General Shown with included 5.7" TFT LCD Display, integral control unit with High Intensity LED Super-White Light source, Industry standard Composite video signal output allows connection to video recorders to store your inspection results. 2. Application: Pipe & Tank Inspection; Boiler Inspection; Internal corrosion, crack inspection of pipes; Chimney inspection; Automotive repairs; Marine & boating repairs; Engine Inspection & Diagnostics, transmissions, differentials; Engine Inspection & Diagnostics, transmissions, differentials Heavy Duty Trucking Industry; Building Inspection. ⅡMain technical parameters Image System - CCD TYPE: Sony CCD - Horizontal Resolution: 520TVL - Focus: Manual - Optical system: 2.8mm - Camera: Rotate 360°, Tilt: 180° Lighting System -Lights: 14 High Brightness LEDS Storage System 2 - Video format: MPEG4/MJPEG - Picture format: MJPEG - Memory Card: 4G - Output: USB Display Systems - 5.7’’ Blanview TFT-LCD - Resolution: 640*480 Power Supply -Power: DC12V Waterproof Standard: IP67 Ⅲ. Features ★ Rotate: 360° Tilt: 180° ★ Manual Focus 3 Manual focus tool Adjust the focus manually when apply into the pipe of different diameter. ★ Write Text ★ Pictures can be seen under strong light 4 Ⅳ. Display controller 5.7 inch TFT Monitor 1. Control Panel ON/OFF The buttons for other products The brightness of the LEDS 5 Control the camera head: Pan &tilt Control the 5.7’’ monitor Main Menu/Back Choose left; choose right Choose the document above Choose next document Enter 2. Characters keyboard Caps Lock The characters can be hidden by pressing the button 6 Enter “1/ABC” by pressing the buttons for different times Enter “2/DEF” by pressing the buttons for different times Enter “3/GHI” by pressing the buttons for different times Enter “4/JKL” by pressing the buttons for different times Enter “5/MNO” by pressing the buttons for different times Enter “6/PQR” by pressing the buttons for different times Enter “7/STU” by pressing the buttons for different times Enter “8/VWX” by pressing the buttons for different times Enter “9/YZ” by pressing the buttons for different times Enter “0/., ;” by pressing the buttons for different times Delete one character 7 Move the mouse pointer Battery indicator 3. The side of the controller TF Card Video out Audio Out USB Interface For other products Charging Interface Power supply: ON/OFF Signal Interface ⅤOperation of the System 8 1. Power control Switch of the system ON/OFF of the screen 2. Indicator POWER (power): Green light RUN (running): Green light ALM (alarm): Red light 3. Battery Built in battery Ⅵ. Other Operation and Settings for Monitor 9 Main Menu of the Screen 1. Record Video& Take Photo Press the button entering into record video& take picture interface. System default: photographing Press Press to take pictures directly. switching to video mode then press Repress to stop recording. 2. Play Video 10 to record video. Press the button entering into playing video interface. Then press to check the video list. Pressing press or for a second to choose the right video, and then to check the video. Fast Forward: press button in playing status; Fast Backward: press Stop/Exit: press button in playing status; / button. 3. Play Picture Press the button entering into playing picture interface. Then press to check the picture list. Pressing or for a second to choose the right picture, and then press to check the picture. Exit: press 4. Delete Video/Picture 11 Under video/picture list, pressing the video/picture. Press repress or to delete then press to confirm. Video list Picture List 12 for a second to choose to choose “yes”; 5. Setting a. Output setting Press or choose LCD/PAL/NTSC/1080P. b. Language setting Press to select language c. Brightness setting 13 Press entering into the brightness setting. Press choose the brightness, then press to save; press or to or to exit. d. Time Setting Press entering into time setting interface,Press select year/month/day , Press press to save; press or exit. 14 to adjust the right time, then e. System Information Indicate the space data of the TF Card g. Default Setup 1. In the setting mode, choose restore default and press restore default; “NO” will be exit. 15 button will Ⅶ. Flexible data storage Data can be exchanged between USB interface and SD card; you can rename/ edit and transfer to CD. Ⅷ. Care, maintenance and troubleshooting Please use damp soft cloth to remove oil and dirt. Always dry the 16 camera after cleaning, and replace into the packing case. Keep all instruments into the packing case whenever not in use. Operate the instruments within temperature of -20 to 50℃ Keep battery active with periodic charging. In any faulty situations, check connections and if fault persists, call hotline or check with nearest agents. 303 Route 94 Columbia, NJ 07832 Office: 908-496-8008 Fax: 908-496-8004 Email: [email protected] Website: www.intertest.com 17