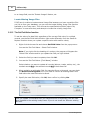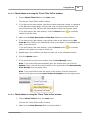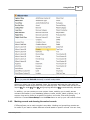
1
CATraxx User Manual
Version 9.44
Copyright FNProgramvare 1996-2012
I
CATraxx Help
Table of Contents
3
Part I Introduction
1 Getting started
...................................................................................................................................
3
2 System Requirements
...................................................................................................................................
7
3 Add-Ons ...................................................................................................................................
7
4 How to order
...................................................................................................................................
CATraxx
8
5 Support
...................................................................................................................................
8
6 Contacting...................................................................................................................................
FNProgramvare
8
11
Part II Using CATraxx
1 Working with
...................................................................................................................................
databases
11
About databases .......................................................................................................................................................... 11
Create a new database
.......................................................................................................................................................... 11
Open a database .......................................................................................................................................................... 12
Password protect a..........................................................................................................................................................
database
12
Compact a database
.......................................................................................................................................................... 13
Transfer data between
..........................................................................................................................................................
databases
13
Backup database and
..........................................................................................................................................................
restore backup
13
Repair corrupted database
.......................................................................................................................................................... 14
Importing and exporting
..........................................................................................................................................................
data
14
Overview
......................................................................................................................................................... 14
Export to CDPlayer.ini
......................................................................................................................................................... 15
Export to Excel ......................................................................................................................................................... 16
Export to HTML......................................................................................................................................................... 16
Export to iPod notes
......................................................................................................................................................... 16
Export to text file
......................................................................................................................................................... 17
Export to XML ......................................................................................................................................................... 17
Import from Excel
......................................................................................................................................................... 17
Import from text.........................................................................................................................................................
file
17
Customizing the database
.......................................................................................................................................................... 18
Overview
......................................................................................................................................................... 18
The Database Setup
.........................................................................................................................................................
window
18
The Form Designer
......................................................................................................................................................... 21
Overview
......................................................................................................................................... 21
Add a data field
......................................................................................................................................... 22
How to use the tab control
......................................................................................................................................... 23
Select form object
......................................................................................................................................... 24
Move form object
......................................................................................................................................... 24
Resize form object
......................................................................................................................................... 24
Modify form or object properties
......................................................................................................................................... 25
Move a form object to .........................................................................................................................................
another tab
25
Delete form object
......................................................................................................................................... 26
How to set the tab order
......................................................................................................................................... 26
The Auto Update Tab.........................................................................................................................................
Order function
27
The Auto Update Groups
.........................................................................................................................................
function
27
The Auto Update Use.........................................................................................................................................
Property function
28
© 2012 FNProgramvare
Contents
II
2 Data entry
...................................................................................................................................
28
Types of information
.......................................................................................................................................................... 28
Edit albums
.......................................................................................................................................................... 30
Edit album media .......................................................................................................................................................... 31
Edit tracks
.......................................................................................................................................................... 31
Edit credits data
.......................................................................................................................................................... 34
Track templates
.......................................................................................................................................................... 36
Copy track data
.......................................................................................................................................................... 37
Use lineup information
.......................................................................................................................................................... 38
Edit box sets
.......................................................................................................................................................... 39
Edit lookup information
.......................................................................................................................................................... 41
Split a lookup item.......................................................................................................................................................... 44
Enter lineup information
..........................................................................................................................................................
for artists
45
Edit the want list .......................................................................................................................................................... 46
Edit images
.......................................................................................................................................................... 47
The Set Field Value..........................................................................................................................................................
function
51
Using the CDDB service
.......................................................................................................................................................... 52
Loan management .......................................................................................................................................................... 54
Overview
......................................................................................................................................................... 54
Check albums out
.........................................................................................................................................................
one at a time
55
Check albums in
.........................................................................................................................................................
one at a time
55
Check albums out
.........................................................................................................................................................
using the 'Check Titles In/Out' window
56
Check albums in
.........................................................................................................................................................
using the 'Check Titles In/Out' window
56
Reserve an album
......................................................................................................................................................... 57
Clear reservations
......................................................................................................................................................... 57
Send e-mail notifications
......................................................................................................................................................... 58
Extend loan period
......................................................................................................................................................... 59
3 Cataloging
...................................................................................................................................
audio files
Overview
59
.......................................................................................................................................................... 59
Scan folders: Add audio
..........................................................................................................................................................
files
60
Rescan folders
.......................................................................................................................................................... 61
Attach audio files to
..........................................................................................................................................................
albums
62
Update audio file tags
.......................................................................................................................................................... 63
Rename audio files.......................................................................................................................................................... 64
Play audio files
.......................................................................................................................................................... 65
Update the file path.......................................................................................................................................................... 66
Setting up playlists.......................................................................................................................................................... 67
Overview
......................................................................................................................................................... 67
The Playlist View
......................................................................................................................................................... 67
Manual playlists......................................................................................................................................................... 68
Dynamic playlists
......................................................................................................................................................... 72
4 Customizing
...................................................................................................................................
views
73
Working with views.......................................................................................................................................................... 73
Marking records and
..........................................................................................................................................................
showing the marked records
76
Select multiple records
..........................................................................................................................................................
in browse list
78
List layouts
.......................................................................................................................................................... 79
Sort orders
.......................................................................................................................................................... 81
Filters
.......................................................................................................................................................... 83
Grouping
.......................................................................................................................................................... 84
The explorer
.......................................................................................................................................................... 86
5 Searching
...................................................................................................................................
and querying
89
How to search
.......................................................................................................................................................... 89
Quick search
.......................................................................................................................................................... 90
© 2012 FNProgramvare
II
III
CATraxx Help
Simple search
.......................................................................................................................................................... 90
Advanced search .......................................................................................................................................................... 91
Summary search .......................................................................................................................................................... 92
Global search
.......................................................................................................................................................... 93
The special searches
.......................................................................................................................................................... 94
Search and replace.......................................................................................................................................................... 95
6 Reporting...................................................................................................................................
About reports
96
.......................................................................................................................................................... 96
The report designer
.......................................................................................................................................................... 97
Report files
Report options
.......................................................................................................................................................... 98
.......................................................................................................................................................... 99
Report bands
.......................................................................................................................................................... 103
Report objects
.......................................................................................................................................................... 105
Print the report
.......................................................................................................................................................... 109
The report menu .......................................................................................................................................................... 110
112
Part III The CATraxx Database
1 Overview
...................................................................................................................................
112
2 Album table
...................................................................................................................................
112
Standard fields
.......................................................................................................................................................... 112
Custom fields
.......................................................................................................................................................... 122
3 Track table
...................................................................................................................................
123
Standard fields
.......................................................................................................................................................... 123
Custom fields
.......................................................................................................................................................... 130
4 Box Set ...................................................................................................................................
table
131
5 Loan table
...................................................................................................................................
132
6 Want List
...................................................................................................................................
table
133
7 Playlist table
...................................................................................................................................
134
8 Lookup ...................................................................................................................................
tables
137
Acquired From table
.......................................................................................................................................................... 137
Album Credit Role..........................................................................................................................................................
table
138
Appraiser table
.......................................................................................................................................................... 139
Artist/Person table.......................................................................................................................................................... 140
Standard fields......................................................................................................................................................... 140
Custom fields ......................................................................................................................................................... 144
Artist/Person Type
..........................................................................................................................................................
table
144
Artist Role table .......................................................................................................................................................... 145
Author/Publisher ..........................................................................................................................................................
Role table
146
Award table
.......................................................................................................................................................... 146
Borrower table
.......................................................................................................................................................... 147
Standard fields......................................................................................................................................................... 147
Custom fields ......................................................................................................................................................... 148
Borrower Category
..........................................................................................................................................................
table
149
Company table
.......................................................................................................................................................... 149
Condition Cover table
.......................................................................................................................................................... 150
Condition Record..........................................................................................................................................................
table
151
Conductor/Arranger
..........................................................................................................................................................
Role table
152
Country table
.......................................................................................................................................................... 152
Distributor table .......................................................................................................................................................... 153
File Link Type table
.......................................................................................................................................................... 154
© 2012 FNProgramvare
Contents
Format table
IV
.......................................................................................................................................................... 154
Format Group table
.......................................................................................................................................................... 155
Genre table
.......................................................................................................................................................... 156
Instrument table .......................................................................................................................................................... 156
Insurance table
.......................................................................................................................................................... 157
Keyword table
.......................................................................................................................................................... 159
Label table
.......................................................................................................................................................... 159
Location table
.......................................................................................................................................................... 160
Music Chart table.......................................................................................................................................................... 161
Owner table
.......................................................................................................................................................... 161
Packaging table .......................................................................................................................................................... 162
Personal Rating table
.......................................................................................................................................................... 162
Playlist Category ..........................................................................................................................................................
table
163
Playlist Created by
..........................................................................................................................................................
table
164
Playlist Status table
.......................................................................................................................................................... 164
Production Role table
.......................................................................................................................................................... 165
Sound table
.......................................................................................................................................................... 166
SPARS table
.......................................................................................................................................................... 166
Status table
.......................................................................................................................................................... 167
Studio table
.......................................................................................................................................................... 167
Studio Role table .......................................................................................................................................................... 168
Tape Type table .......................................................................................................................................................... 169
Tour table
.......................................................................................................................................................... 170
Venue table
.......................................................................................................................................................... 170
Vinyl Color table .......................................................................................................................................................... 171
Web Link Type table
.......................................................................................................................................................... 172
Part IV Other products
1 AssetCAT
...................................................................................................................................
Index
174
174
175
© 2012 FNProgramvare
IV
1
Foreword
© 2012 FNProgramvare
Part
I
3
CATraxx Help
1
Introduction
1.1
Getting started
CATraxx is a powerful music collector database program which will help you catalog a
music collection of any kind, from vinyl records to CDs to MP3s. Automatically download
CD data from the Internet, or scan your hard drive for audio files. A comprehensive set
a data fields enables you to keep track of a wide range of information. With CATraxx,
you are in control of your music collection.
The first time you start CATraxx, you see the "Welcome" screen. To open the sample
database (Sample.mdb) click Open Sample Database. This database contains a few
albums to help you familiarize yourself with the program. Before you can start
cataloging your collection, you must create your own database 11 .
The main CATraxx window is divided into three parts:
1. The menu/toolbar at the top of the window.
2. The view bar to the left.
3. The rest of the window is occupied by the active view. There are a total of 9
different views: Explorer View, Album View, Track View, Box Set View, Lookup
View, Loan View, Want List View, Playlist View and Playlist Track View.
© 2012 FNProgramvare
Introduction
4
When you open a database, the program opens the Album View by default. To activate
another view, click the view you want to activate in the view bar, select from the View
button on the toolbar, or use the View menu.
For example, to activate the Explorer View, open the View menu and choose Explorer
View (you can also press the Ctrl+1 shortcut). The Explorer is a fully featured browser
integrated into the main window that allows you to search/browse your collection.
You will probably use the Album View the most. This is the view you use when you want
to add new albums. To active the Album View, choose Album View from the View
menu (or simply press the Ctrl+2 shortcut).
© 2012 FNProgramvare
5
CATraxx Help
All views, except the Explorer view, utilize the same layout.
The main part of the view is occupied by the browse list, with the explorer pane below
the list.
To the left of the browse list you see the grouping list, and above this, the drop-down
list with available grouping definitions 84 . The grouping feature is used to determine
which albums that are displayed in the browse list, and makes it possible to work with a
subset of the database (for example, albums released by a specific artist).
Above the browse list, you see three drop-down lists:
·
The drop-down list to the left includes available list layouts 79 . A list layout
contains information about which fields to display in the album list. You can
create as many list layouts as you want.
·
The drop-down list in the middle includes available sort orders 81 . A sort order
defines the order in which albums are displayed. The data in the database
remains the same; only the way data is being displayed changes. Note: You can
also change the sort order by clicking the header of the column you want to sort
© 2012 FNProgramvare
Introduction
6
on.
·
The drop-down list to the right includes available filters 83 . A filter is used to
determine which albums that are displayed in the browse list, and makes it
possible to work with a subset of the database (for example, live albums, or
albums that are for sale).
To add a new album and manually enter the data, choose Add from the Album menu
(or simply press the Ctrl+N shortcut). To download CD data from CDDB, insert the CD
into the CD-ROM drive and choose Add - Download from CDDB from the Album menu
(or press the Ctrl+Y shortcut).
To edit an album, simply double-click the album in the browse list. You see the 'Album
Edit' window.
To edit the tracks on the album, click the Tracks tab and double-click the track you
want to edit. To add a new track, click the Add Track button
below the track list.
To close the data entry window, click the OK button (or choose Close Window from
the File menu). All changes are automatically saved.
To catalog your audio files, choose Scan Folders: Add Audio Files from the Audio
© 2012 FNProgramvare
7
CATraxx Help
menu. For more information, see Audio files
59
.
For information on how to create your own playlists, see Playlists
67
.
If you need support 8 , don't hesitate to contact us. If you want to order CATraxx,
please see our web site.
We hope you enjoy using CATraxx!
CD-related data through the Internet from the CDDB™ Music CD Database, Copyright
1999, 2000 CDDB, Inc. CDDB Client Software, Copyright 1999, 2000 CDDB, Inc.
CDDB-Enabled, CDDB, CDDB2 and the CDDB Logo are trademarks of CDDB, Inc. Disc
Recognition Service and DRS are service marks of CDDB, Inc.
1.2
System Requirements
To run CATraxx you need
· Windows 7/Vista/XP
· 1 GHz processor or better
· 1 GB memory
· 40 MB available hard-disk space
· Minimum 1024x768 screen resolution
1.3
Add-Ons
CATraxx Importer
CATraxx Importer can import data from many applications, including Music Collector,
Music Label and Music Library.
Report Archive Reader
This freeware program is used to read and print archived reports. Report archiving lets
you store report output so that it can be previewed and printed later, without reaccessing the data from which the report was generated. While archiving is very useful
for maintaining historical records, it can also be used as a method of report distribution.
Feel free to give this application to friends or colleagues, who can then preview and
print your archived reports.
For more information about the add-ons available for CATraxx, visit http://www.fnprg.
com/catraxx/addons.html.
© 2012 FNProgramvare
Introduction
1.4
8
How to order CATraxx
For information on how to buy your own CATraxx license, visite our website.
Upgrade policy
Upgrades with the same major version number (for example from v9.00 to v9.10) are
free. In addition, all new versions released within 6 months of your registration are
free. There will be an upgrade fee for a new version with a new major version number
(for example an upgrade from v9.30 to v10.00).
1.5
Support
Technical support is available by e-mail, or you can use the online support forum.
Although we answer all questions, we give priority to registered users. Before you
contact us, check out the help file first!
When reporting problems, the more information you can provide the better our
response can be. If possible, include the following:
·
What version of CATraxx are you running? You can determine this by choosing
About from the CATraxx Help menu. Include the entire "version line"; for example
9.10.02.
·
What version of Microsoft Windows are you running? For example, Windows 7 or
Windows XP.
·
Is the problem reproducible? If so, how?
·
If you see a dialog box with an error message when the problem occurs, please
include the complete error message.
E-mail
[email protected]
Support Forum
http://www.fnprg.com/forum
1.6
Contacting FNProgramvare
All bug reports and suggestions are welcome.
E-mail
© 2012 FNProgramvare
9
CATraxx Help
[email protected]
World Wide Web
http://www.fnprg.com
Postal address
FNProgramvare
Pb 721 Krapfoss
N-1509 Moss
Norway
© 2012 FNProgramvare
Part
II
11
CATraxx Help
2
Using CATraxx
2.1
Working with databases
2.1.1
About databases
The information about your music collection is stored in a database. A database is a file
on your hard disk, with the extension .MDB, that contains all the information you have
entered into the database.
For more information, see the CATraxx database
2.1.2
112
.
Create a new database
1. Choose New Database from the File menu.
You see the 'New Database' window.
2. Select the database template you want to base the new database on.
In general, we recommend you select the Standard template.
3. Click OK.
You see the 'New Database – Specify File Name' window.
4. Select the drive and directory where you want to create the database.
In general, we recommend that you create the database in the Database folder.
This folder is selected by default, unless the open database is located in another
folder.
5. In the File name text box, type the name of the database.
The name should be one that easily reminds you of the information in the
database, for example My CD Collection or Music Library. The file extension
identifying the database, .MDB, is added automatically.
6. Click Save.
CATraxx creates the database and opens it. The file name of the database is displayed
on the title bar of the main CATraxx window. You can now begin adding information.
If you want to organize your collection using only one database, then you do not have
to think about databases again. CATraxx will always open this database when you start
the application. If, however, you choose to organize your collection in a way that
requires several databases, follow the steps above to create as many as you need. To
switch from one database to another, see Open a database 12 .
© 2012 FNProgramvare
Using CATraxx
2.1.3
12
Open a database
To open a database, choose Open Database from the File menu and select the
database file you want to open.
Note that CATraxx will automatically open the last database you had open the next
time you start the program.
The last five databases you have had open are displayed at the bottom of the File
menu (right above Exit). Simply select the database you want to open.
2.1.4
Password protect a database
CATraxx allows you to password protect your database to prevent unwanted users from
opening the database. In addition to setting up a master password, which will give full
access to the database, you can also set up a guest password. A guest will not be able
to add, edit, or delete any information in the database.
1. Choose Change Password from the File menu.
You see the 'Change Password' window.
2. If the database is already password protected, specify the current master
password in the Master password/Current password field.
3. Type the new master password in the Master password/New password field.
A password can contain any combination of letters, numerals, spaces, and
symbols, and it can be up to 25 characters long. As you type the password, the
program displays an asterisk (*) for each character you type.
4. Retype the new password in the Master password/Verify new password field.
5. If you would like to set up a guest password, fill in the Master password/
Current password field (if a master password has already been set up), then
type the new guest password in the Guest password/New password field, and
retype the password in the Guest password/Verify new password field.
Note: You can check the Log in as guest without password box to add the
ability for guests to log in without having to specify a password.
6. Click OK.
The next time you open the database you must specify a password.
When you create a password, write it down and keep it in a secure place. If you lose
the password, you cannot open or gain access to the password protected database.
© 2012 FNProgramvare
13
CATraxx Help
If you would like to remove the password protection, click the Remove button and
enter the current master password.
2.1.5
Compact a database
As you change data in a database, the database file can become fragmented and use
more disk space than necessary. Periodically, you can compact your database to
defragment the database file. The compacted database is usually smaller.
To compact the database, choose Compact Database from the File menu.
2.1.6
Transfer data between databases
CATraxx lets you work with as many databases as you like. This means that you can
split your collection into different databases and organize them to meet your needs. You
can later merge existing databases.
You use the Transfer command to transfer information between databases. In addition
to albums, you can also transfer lookup tables, field definitions, form layouts, and views
setup between databases.
Choose Transfer from the File menu to open the Transfer window. Click the Help
button if you need help about the various options in this window.
2.1.7
Backup database and restore backup
We recommended that you backup your database(s) on a regular basis, for example
once a week. You should especially do a backup after adding many new albums. The
backup can be used if some unusual event occurs which causes your database to
become corrupt and non-recoverable.
The built-in backup feature will automatically backup your database to a standard zip
file.
You can use the auto-backup feature to automatically backup the database when you
close the database/exit the program. You activate the auto-backup feature in the
Options window (Tools / Options / Backup).
Backup database
To backup a database, choose Backup Database from the File menu, and select the
folder you want to save the backup file.
Restore backup
To restore a backup, choose Restore Backup from the File menu, navigate to the
folder the backup file is located, select the backup file, then specify the folder you want
© 2012 FNProgramvare
Using CATraxx
14
to restore the backup to.
Since the backup file is a standard zip file, you can also open the backup file with
WinZip (or a similar program), and unzip the database file to the desired folder.
2.1.8
Repair corrupted database
If you get an error message when you try to open a database, use the Repair Database
function to try to repair the database. The CATraxx database can become corrupted if
the program is terminated while it is attempting to write to the database. This can
happen when there is a power-failure or a computer hardware problem.
To repair a database, choose Repair Database from the Tools menu, then select the
database file you want to repair.
2.1.9
Importing and exporting data
2.1.9.1
Overview
CATraxx lets you export data to various formats, including CDPlayer.ini, Excel files,
HTML files, text files and XML files, in addition to the notes section on an iPod.
You can import data from both Excel files and text files.
For more import options, download CATraxx Importer from our web site. With this
program you can import data from other database programs, including CD Trustee,
Davilex Music Manager, Music Collector, Music Label, Music Library and OrangeCD. Let
us know if you are using another music database application and you would like to
import your data into CATraxx.
The user interface is the same in all import and export windows. The list to the left
displays the saved import/export definitions. You can create as many definitions as you
like. Simply click on the definition you want to open.
Create a new definition
To create a new definition, click the Add button
above the list. You see the 'Add
New' window. For more information about the various options in this window, click the
Help button.
Clone definition
Click the Clone button
to clone (create a copy of) the currently open definition.
Specify a new name, then click OK.
© 2012 FNProgramvare
15
CATraxx Help
Delete definition
Click the Delete button
to delete the active definition. Confirm by clicking Yes.
Set options
Click the Options button
to set various options:
· AutoSave - Determines whether changes are automatically saved or not.
· Change Folder - This allows you to set the folder where the definitions files are
stored.
Rename definition
Click the Rename button
and click OK.
to rename the active definition. Specify the new name
Save or cancel changes
To save any changes you have made, simply click the Save button
is not necessary if AutoSave is enabled.
To cancel any changes, click the Cancel button
2.1.9.2
. Note that this
.
Export to CDPlayer.ini
To open the 'Export to CDPlayer.ini' window, choose Export / CDPlayer.ini from the
File menu.
From this window you can export CD information to CDPlayer.ini.
CDPlayer.ini is a file that is used to store CD information such as artist, title, and track
titles. This file was originally generated by the default CD player that shipped with
Windows 95. Since then, many other audio programs have adopted this standard and
can read and write to this file.
Click the Help button for more information about the options on the General tab.
Click the Export button to start the export process.
© 2012 FNProgramvare
Using CATraxx
2.1.9.3
16
Export to Excel
To open the 'Export to Excel' window, choose Export / Excel from the File menu.
This window has two tabs (three if you export albums): General and Fields (or General,
Album Fields and Track Fields when exporting album data). Click the Help button for
more information about the options on these tabs.
Click the Export button to start the export process.
2.1.9.4
Export to HTML
You can export data to a set of HTML pages you can upload to any web site. To open
the 'Export to HTML' window, choose Export / HTML from the File menu, or click the
Export to HTML button
on the toolbar.
When you create a new export definition you see the 'Add New' window. Here you must
specify whether you want to create a 'Standard' or 'Code based' setup. Select 'Code
based' if you want to manually create and edit the xsl templates.
If you select 'Standard', you have five tabs available in the export window (General,
Index, List, Detail Page and Notes). If you select 'Code based', you only have two
(General and Notes).
Click the Help button for more information about the options on these tabs.
To start generating the HTML pages, click the Export button. Make sure you have
specified the correct output folder first.
Check the Test mode box to activate "test mode". This means that the program will
only export the first three records. This is useful if you want to check the layout of the
output without having to export all records.
Check this Preview in browser when finished box if you want the program to
automatically launch your web browser with the index page loaded after the export
process is completed.
2.1.9.5
Export to iPod notes
To open the 'Export to iPod Notes' window, choose Export / iPod Notes from the File
menu.
This function will let you export a list of your albums to the notes section on your iPod.
You can now always check which albums you already own when you shop. To access
your database on the iPod, select the Notes menu entry, and then CATraxx.
The albums are automatically grouped by artist. You can export a simple list, or include
a detail page for each album. You can easily set up which fields you want to export, and
© 2012 FNProgramvare
17
CATraxx Help
a filter to limit which albums to export.
This window has two tabs: General and Detail Page. Click the Help button for more
information about the options on these tabs.
Click the Export button to start the export process.
2.1.9.6
Export to text file
To open the 'Export to Text File' window, choose Export / Text File from the File
menu.
This window has two tabs (three if you export albums): General and Fields (or General,
Album Fields and Track Fields when exporting album data). Click the Help button for
more information about the options on these tabs.
Click the Export button to start the export process.
2.1.9.7
Export to XML
To open the 'Export to XML' window, choose Export / XML from the File menu.
This window has two tabs: General and Fields. Click the Help button for more
information about the options on these tabs.
Click the Export button to start the export process.
2.1.9.8
Import from Excel
To open the 'Import from Excel' window, choose Import / Excel from the File menu.
The first you need to do is to create a new import definition. In the 'Add New' window
you must give the new import definition a name, and select the table you want to
import data into. You can import data to any table, for example Album, Track, Want
List, or any of the lookup tables (Artist/Person, Format, Genre, etc.).
This window has two tabs (three if you import albums): General and Fields (or General,
Album Fields and Track Fields when importing album data). Click the Help button for
more information about the options on these tabs.
Click the Import button to start the import process.
2.1.9.9
Import from text file
To open the 'Import from Text File' window, choose Import / Text File from the File
menu.
The first you need to do is to create a new import definition. In the 'Add New' window
© 2012 FNProgramvare
Using CATraxx
18
you must give the new import definition a name, and select the table you want to
import data into. You can import data to any table, for example Album, Track, Want
List, or any of the lookup tables (Artist/Person, Format, Genre, etc.).
This window has two tabs (three if you import albums): General and Fields (or General,
Album Fields and Track Fields when importing album data). Click the Help button for
more information about the options on these tabs.
Click the Import button to start the import process.
2.1.10 Customizing the database
2.1.10.1 Overview
CATraxx allows you to customize your database to suit your needs. Not only can you
rename data fields and hide the fields you don't want to use, but you can also change
the layout of all data entry windows. Perhaps you want to make the Artist field wider, or
move the Reference No field to the General tab? Change fonts or colors? Add an image
to spice up the look? No problem. You modify the layout of a data entry window in the
Form Designer.
There are two ways to bring up the Form Designer; either from the 'Database Setup'
window, or from the actual data entry window. You can also change field properties
(field name, default value, etc.) from both the 'Database Setup' window and the Form
Designer.
To open the 'Database Setup' window, choose Database Setup from the Tools menu.
For more information, see The Database Setup window 18 .
To open the Form Designer, either select the appropriate table in the 'Database Setup'
window and click the Form Designer button, or choose Form Designer from the File
menu in the data entry window. For more information on how to use the Form Designer,
see The Form Designer 21 .
2.1.10.2 The Database Setup window
To open the 'Database Setup' window, choose Database Setup from the Tools menu.
The main part of this window is occupied by a tab control with two tabs: Tables and
Fields.
The list on the Tables tab gives you an overview of all tables in the database.
© 2012 FNProgramvare
19
CATraxx Help
This list has three columns. The first column displays the default table name, the
second column the active table name, and the last column indicates whether the table
is in use or not.
You can change the sort order by clicking the heading of one of the columns. The
properties list to the right displays the properties of the selected table. Context
sensitive help is available for each property.
To edit the fields in the selected table, click the Fields tab.
© 2012 FNProgramvare
Using CATraxx
20
The list on the Fields tab gives you an overview of all fields in the selected table. This
list has four columns. The first column displays the default field name, the second
column the active field name, the third column the field group, and the last column
indicates whether the field is in use or not.
You can change the sort order by clicking the heading of one of the columns. The
properties list to the right displays the properties of the selected field. Context sensitive
help is available for each property.
When you want to modify a field, it is important that you select the correct table before
you activate the Fields tab. For example, to modify the Version field in the Track table,
first select the Track table on the Tables tab, then click the Fields tab to display the
fields in the Track table.
You can save the database setup as a database template. This template can then be
used when creating a new database. This is useful if you want to share the database
setup with others.
© 2012 FNProgramvare
21
CATraxx Help
2.1.10.3 The Form Designer
2.1.10.3.1 Overview
You use the Form Designer to modify the layout of data entry windows. You can add or
remove data fields, move fields around, change the size of field controls, modify fonts
or colors, etc.
Please note that you cannot create any *new* data fields.
To activate the Form Designer, either select the appropriate table in the 'Database
Setup' window and click the Form Designer button, or choose Form Designer from
the File menu in the data entry window.
Before you start modifying a form, we recommend you backup the original layout to a
file by choosing Save to File from the File menu. If you later decide you want to revert
to the original layout, you can load the form layout file with the Load from File
command.
There are 7 object types you can add to a form:
Text
The text object is usually linked to a data field, but you can also use it,
for example, to add a heading to the form.
When you add a data field, the program will by default also add a
corresponding text label. The text label is then linked to a data field by
the Field property, and the actual field name is displayed (and
automatically updated if you rename the field). You can override this by
filling in the Text property if you want to display a different text.
Field
This is the form object you will use the most. When you add a data
field, the user interface control for the selected field is added to the
form. The control type depends on the actual type of field. For a
standard text field (for example Title or Version) this is a text box, for a
lookup field (for example Label or Format) this is a drop-down list, and
for a checkbox field (for example Live or Bootleg) this is a checkbox.
The tab control is a set of pages used to create a multipage control.
Tab
Control
Group
Box
For more information on how to use the tab control, see How to use the
tab control 23 .
Use the group box to group fields. All fields placed inside a group box is
part of this box, and will move when you move the group box. If you
delete the group box, all fields within are also deleted. You can give the
group box a title by using the Title property. The title is displayed along
the top edge of the group box.
© 2012 FNProgramvare
Using CATraxx
Button
Line
Image
22
The button object allows you to add a button to the data entry form.
The button will execute a specific action when you click it (for example
save the changes and close the window, cancel the changes, or go to
the next record). The action is determined by the button's Type
property.
The Line object will add a vertical or horizontal line. The orientation of
the line is determined by the Orientation property.
Add an image object if you want to add an image to spice up the look of
the form. When you add an image object, you first see the 'Select
Image File' window. Here you select image file. When you click Open,
the image is added to the form. Note that the image is saved with the
form layout.
2.1.10.3.2 Add a data field
You can add a field directly on the form itself, in a group box, or on a page in a tab
control.
1. Click the Field button
on the toolbar.
2. Click where you want to add the field.
You see the 'Insert Field' window.
3. Select the field you want to add to the form.
4. If you want the program to automatically add a corresponding text label that will
display the name of the field, select either Label/Left or Label/Top.
If you do not want to add a text label, select Label/No label.
Note: A checkbox field does not have a corresponding text label.
5. Click OK.
CATraxx adds the field control where you clicked.
6. If you need to move or resize the field, see Move a form object
form object 24 .
24
or Resize a
7. If you want to edit the field properties, see Modify form or object properties
© 2012 FNProgramvare
25
.
23
CATraxx Help
2.1.10.3.3 How to use the tab control
The tab control is a set of pages used to create a multipage control. You select a tab
(page) by clicking one of the tabs that appear at the top of the control.
The use of a tab control is especially useful if you are working with many data fields
that can be grouped into two or more categories. You will probably only add one tab
control to a form (although you can have several tab controls on the same form). You
can add as many tabs (pages) as you like to a tab control.
To add a tab control to the form, click the Tab Control button
click where you want to add the tab control.
on the toolbar, then
To resize the tab control, first click to select it, then drag the control's surrounding
sizing handles to increase or decrease the size.
To add a tab, right-click the tab control and choose Add Tab from the popup menu.
To remove a tab, activate the tab you want to remove, then right-click and choose
Remove Tab from the popup menu.
You can change the ordering of the various tabs by using the Move Tab Left and Move
Tab Right functions available on the popup menu.
To rename the tabs, right-click and choose Properties, then specify the tab titles under
the Tab titles heading.
If you leave a tab title empty, the program will automatically fill in the name of the
© 2012 FNProgramvare
Using CATraxx
24
first field on the tab when you open the data entry window.
2.1.10.3.4 Select form object
To do certain things with an object (change the font, move it, resize it, etc.), you first
have to select it. Select means to point to the object with the mouse and then to click
the left mouse button.
To select a single object
Click on the object.
Sizing handles appear around the object to indicate that it is selected.
Selecting multiple objects
Hold down the Shift key and click on the objects you want to select.
Handles appear on each selected object. You can then move or delete the objects as a
group. You can also change the font or text formatting for all selected objects in one
operation.
2.1.10.3.5 Move form object
1. Select the object(s)
24
you want to move.
2. Click on the object with the mouse, and drag it to the new position.
If multiple objects are selected, click on one of the objects and drag.
You can move the selected object(s) one pixel at a time by holding down Ctrl while you
use the arrow keys.
You cannot drag an object from one tab to another tab on a tab control. You must copy
the object to the clipboard, activate the other tab, and then paste the object onto this
tab. For more information, see Move a form object to another tab 25 .
2.1.10.3.6 Resize form object
1. Select the object
24
you want to size.
2. Drag the field's surrounding sizing handles to increase or decrease the size of the
© 2012 FNProgramvare
25
CATraxx Help
object.
You can resize the object one pixel at a time by holding down Shift while you use the
arrow keys.
The height of text boxes and drop-down lists is always based on the actual font size
and cannot be changed.
2.1.10.3.7 Modify form or object properties
To modify either the form properties, or the properties of a form object, right-click the
form background or the form object, and choose Properties from the popup menu.
2.1.10.3.8 Move a form object to another tab
You cannot drag an object from one tab to another tab on a tab control. You must copy
the object to the clipboard, activate the other tab, and then paste the object onto this
tab.
1. Select the object(s)
24
you want to move to another tab.
2. Choose Cut from the Edit menu.
CATraxx copies the object to the clipboard, and removes the object from the tab it
was located on.
3. Activate the tab you want to add the object to.
© 2012 FNProgramvare
Using CATraxx
26
4. Right-click where you want to paste the object(s) on the clipboard, and choose
Paste from the popup menu.
2.1.10.3.9 Delete form object
1. Select the object
24
you want to delete.
2. Choose Delete from the Edit menu (or press the Ctrl+Del shortcut).
2.1.10.3.10 How to set the tab order
The tab order is the order in which controls are activated when you press the Tab key to
move from control to control in the data entry window. The control with the Tab order
value of 0 is the control that has the focus when the form first appears.
Initially, the tab order is always the order in which the controls were added to the form.
The first control added to the form has a Tab order value of 0, the second is 1, the third
is 2, and so on.
Fields placed on a tab page, or within a group box, have their own tab order.
If you want to use the Tab key to move from field to field, it is important that the tab
order is correct for the cursor to move in a logical order.
There are three ways to update the tab order:
· Right-click a form control and choose Properties from the popup menu, then
manually update the Tab Order property.
· Update the tab order in the 'Tab Order' window.
To activate this window, either choose Edit Tab Order from the File menu (to
update the tab order of all controls on the form), or right-click a tab page and
choose Edit Tab Order from the popup menu (to edit the tab order of only the
controls on this tab page).
The main part of this window is occupied by two lists. You select 'container' control
from the list to the left. A container control is a special control that can contain
other controls, and is either the form itself, a tab page of a tab control, or a group
box. The tab numbering is separate for each container control.
The list to the right displays the controls in the selected container control. The
order of the controls corresponds to the current tab order. To automatically update
the tab order of these controls, click the Automatic button.
© 2012 FNProgramvare
27
CATraxx Help
· Let the program automatically update the tab order of all form objects. For more
information, see The Auto Update Tab Order function 27 .
2.1.10.3.11 The Auto Update Tab Order function
Choose Auto Update Tab Order from the File menu. Confirm by clicking Yes.
CATraxx automatically updates the tab order of all objects on the form.
Sometimes the program may be unable to correctly set the tab order of all fields (this
depends on the actual layout of the fields; left and top positions as well as width and
height). You then have to manually 'fine tune' the tab order in the 'Tab Order' window.
2.1.10.3.12 The Auto Update Groups function
Each data field has a Group property which is used in lists where you choose a field (for
example when creating a report or a sort order) to group the fields in the list.
By default, the group corresponds to the tab the field is located on in the data entry
window. If you move a field from one tab to another, we recommend you update the
Group property of the field.
You can do this by right-clicking the field and choosing Properties from the popup menu
to manually modify the Group property, or you can use the Auto Update Groups
function:
© 2012 FNProgramvare
Using CATraxx
28
Choose Auto Update Groups from the File menu. Confirm by clicking Yes.
2.1.10.3.13 The Auto Update Use Property function
If you add a field to the form, or remove a field, you should also update the Use
property of the field. This property indicates whether the field is 'in use', or not.
Only fields that are considered to be in use are shown in lists where you select a field
(for example when creating a report, a sort order, or when searching). Use the Auto
Update Use Property function to automatically update the Use property of all fields in
the table.
Choose Auto Update Use Property from the File menu. Confirm by clicking Yes.
2.2
Data entry
2.2.1
Types of information
CATraxx stores several types of information:
·
Albums. You can enter information such as artist, title, format, label,
catalog number, purchase price, genre, reference number, etc. "Album" is a
general term that can mean a CD, a LP, a vinyl single, a digital album, and so
forth. An album can contain an unlimited number of tracks.
You work with albums in the Album View.
·
Tracks. You can enter information such as artist, title, songwriters,
producers, musicians, lyrics, etc. "Track" is a general term for any song,
movement, or work that is contained within an album.
You work with tracks in the Track View.
Note: To add new tracks, bring up the 'Album Edit' window for the album
containing the tracks, and add tracks via the track list.
·
Box sets. A box set allows you to link multiple albums together. You can
enter information such as artist, title, release date, and notes.
You work with box sets in the Box Set View.
·
Lookup tables. Lookup tables are lists that contain information linked to
data fields, for example the Artist, Format or Label lists. When you modify an
entry in a lookup table, for example to fix a typing error, the change will be
reflected in all data fields that are linked to this lookup table.
© 2012 FNProgramvare
29
CATraxx Help
You work with lookup tables in the Lookup View.
Select the lookup table you want to edit from the View button on the toolbar.
·
Loan data. This includes both albums that currently are on loan, and the
complete loan history.
Open the Loan View to look at the loan history.
To get an overview of albums current out on loan you can also use the Album
View (select the On Loan filter).
·
Want list. The want list allows you to keep track of albums you have on
your want list. You can enter information such as artist, title, format, release
© 2012 FNProgramvare
Using CATraxx
30
date/year, label, catalog number, order date, and price.
You edit the want list from the Want List View.
Playlist data. You can create both manual
·
68
and dynamic
72
playlists.
Open the Playlist View to work with playlists. You add tracks to playlists from both
the Album View and the Track View. You can also edit manual playlists from the
'Manual Playlists' window.
Open the Playlist Track View to browse all tracks on manual playlists.
2.2.2
Edit albums
You add, edit and delete albums from the Album View.
Add new albums
To manually add a new album, click the Add button
the 'Album Edit' window.
on the toolbar. This will open
To download data from CDDB, insert the CD into the CD drive, then click the Add Download from CDDB button
on the toolbar.
To download data from the Internet using the Manual Query, click the Add - Manual
Query button
on the toolbar. You see the 'Manual Query' window. Here you enter
the artist name and/or the title/UPC code, select the site you want to query, then click
the Search button. Select the album you want to download, then click the Add button
to add the album to the database.
Edit albums
Select the album you want to edit in the album list, and either click the Edit button on
the toolbar, or simply double-click the album. This will open the 'Album Edit' window in
edit mode.
Delete albums
Select the album you want to delete in the album list, then click the Delete button
on the toolbar. You can also press the Ctrl+D shortcut. Confirm that you really want to
delete the album by clicking Yes.
If you have selected
© 2012 FNProgramvare
78
more than one album, all selected albums will be deleted.
31
2.2.3
CATraxx Help
Edit album media
You can edit album media (disc titles, etc.) from the 'Edit Media' window.
To open the 'Edit Media' window, click the Edit Media button
the 'Album Edit' window.
2.2.4
below the track list in
Edit tracks
You add, edit and delete tracks on a specific album from the 'Album Edit' window. You
can also edit tracks from the Track View.
Add new tracks
Open the 'Album Edit' window, and click the Add Track button
below the track list.
© 2012 FNProgramvare
Using CATraxx
32
You see the 'Track Template' window. Here you can specify information that is relevant
to all, or most of, the tracks on the album (for example artist, songwriters and
musicians). Click OK. You see the 'Track Edit' window, and can start entering
information.
To add the next track on the album, click the Add button
on the toolbar in the
'Track Edit' window (or simply press the Ctrl+N shortcut). When you have added all the
tracks on the album, click OK to close the 'Track Edit' window.
To add the first track on side B (for example on a LP), or the first track on the next disc
(for example the second CD of a double CD), click the Change Side button
specify the disc number and side.
and
Edit tracks
To edit a track from the 'Album Edit' window, simply double-click the track you want to
edit in the track list.
© 2012 FNProgramvare
33
CATraxx Help
You can also edit tracks from the Track View.
Delete tracks
Locate the album that contains the track you want to delete, open the 'Album Edit'
window, select the track in the track list, then click the Delete Track button
the track list. Confirm by clicking Yes.
below
To delete multiple tracks, first select (click while you hold down the Ctrl key) the
tracks you want to delete, then click the Delete Track button.
Rearrange the order of the tracks
To rearrange the track order, simply use drag-and-drop in the track list in the 'Album
Edit' window. Select the tracks you want to move, and then drag it to the new position.
You can also rearrange tracks from the 'Track Edit' window. Choose Rearrange from
the Track menu to open the Rearrange window.
Here you specify the new disc no, side and index number for the selected track.
If you move the track to a new disc/side, CATraxx will ask you if you also want to
transfer the rest of the tracks on the same disc/side.
If you would like to manually set the track index only (not change the item and side),
choose Set Track Index from the Track menu. From the 'Set Track Index' window you
can set the track index for all tracks on the album.
© 2012 FNProgramvare
Using CATraxx
2.2.5
34
Edit credits data
You use the 'Edit Credits' window to register credits information like songwriters,
studios, producers, and musicians. Here you can edit credits information for all tracks
on the album.
To open the 'Edit Credits' window, click the Edit Credits button
the 'Album Edit' window.
© 2012 FNProgramvare
on the toolbar in
35
CATraxx Help
Click the tab containing the data you want to edit. You enter names and roles in the list
to the left. The list to the right displays which tracks the person, or studio, is linked to.
By default, all tracks are checked. Simply check and uncheck the tracks as needed.
Right-click the track list and choose from the popup menu to check or uncheck multiple
tracks.
© 2012 FNProgramvare
Using CATraxx
36
You can use the following shortcuts:
2.2.6
·
Space - Check or uncheck the selected track
·
Alt+1 - Check All
·
Alt+2 - Uncheck Al
·
Alt+3 - Invert
·
Alt+4 - Check Disc (only applies to multi-disk albums)
·
Alt+5 - Uncheck Disc (only applies to multi-disk albums)
Track templates
A track template allows you to specify information that is relevant to all tracks (or most
of the tracks) on the album. The information you specify is automatically used when
you add new tracks to the album. You can save a track template to a file and reuse it
later.
You can also use a track template to register track information after all tracks are added
to the album. For example, if you only specified song titles when you originally
registered the album, you can assign a track template to the tracks on the album at a
© 2012 FNProgramvare
37
CATraxx Help
later time. This allows you to register information for all tracks on the album in one
operation.
You can also register credits information (songwriter, producer, musician, etc.) in the
'Edit Credits' window. You will probably find this easier than to use templates when
registering credits information. For more information, see Edit credits data 31 .
Modifying the active template
1. Choose Template from the Track menu (you can do this from both the 'Album
Edit' and the 'Track Edit' window).
You see the 'Track Template' window.
2. Modify the template information as necessary.
3. Click OK.
The updated template is activated, and is automatically used when you add new
tracks to the current album.
Assigning a track template to tracks
1. Choose Template from the Track menu (you can do this from both the 'Album
Edit' and the 'Track Edit' window).
2. Modify the template information as necessary.
3. Click the Assign to Tracks button
on the toolbar.
You see the 'Assign Template to Tracks' window.
4. Select the tracks you want to assign the template to.
Note: You can click and drag up or down to select multiple tracks.
5. Click the OK button to assign the template to the selected tracks.
2.2.7
Copy track data
The Copy Track Data function will copy data from one track to another. From the Track
Edit window, you can copy data to the track you are editing. From the Track View, you
can copy data to multiple tracks in one operation.
Which fields that are copied depends on the template you select. The default template
will copy all fields, except Artist, Length and Audio/Video file links. To set up your own
templates, choose Options=>Copy Track Data from the Tools menu. You can create
as many templates as you like (you can for example have one template that will copy
© 2012 FNProgramvare
Using CATraxx
38
all data, one that will copy only songwriters, etc.).
Track Edit window - Copy data to the currently selected track
1. Open the 'Track Edit' window with the track you want to copy data to (the target
track).
2. Click the Copy Track Data button
on the toolbar if you have not set up any
custom templates. Or, click the drop-down button and select template from the
drop-down menu.
You see the 'Copy Track Data' window.
3. Select the track you want to copy data from (the source track).
4. Click the OK button, then confirm by clicking Yes.
Track View - Copy data to multiple tracks
1. Open the Track View.
2. Select
78
the tracks you want to copy data to (the target tracks).
3. Select Copy Track Data from the Track menu if you have not set up any custom
templates. Or, open the sub-menu and select the template you want to use.
You see the 'Copy Track Data' window.
4. Select the track you want to copy data from (the source track).
5. Click the OK button, then confirm by clicking Yes.
2.2.8
Use lineup information
CATraxx lets you specify members of a group (the lineup). You can use the lineup
information when you register credits information like songwriters, producers, and
musicians. This is a great time saver. For more information on how to enter the lineup
information, see Enter lineup information for artists 45 .
1. Right-click the relevant field, for example Author/Publisher, and choose Use
Lineup from the popup menu.
© 2012 FNProgramvare
39
CATraxx Help
You see the 'Use Lineup' window.
2. Specify when the album/song was recorded, and click OK.
CATraxx fetches the relevant lineup information (the persons that were members
of the group when the album/song was recorded, instruments are included if you
are registering musicians) and adds it to the data field.
2.2.9
Edit box sets
A box set allows you to link multiple albums together. You can create a new box set
from either the Box Set View, the Album View, or the 'Album Edit' window.
Edit box set in the 'Album Edit' window
To create a new box set from the 'Album Edit' window, click the Add Box Set button
below the Box Set field. This will open the 'Box Set Edit' window.
To link the album to an existing box set, simply select the box set from the Box Set
field drop-down list.
To go to one of the other albums in the box set, click the Album button
select from the menu.
and
© 2012 FNProgramvare
Using CATraxx
40
Create a box set in the Album View
Select all albums in the box set in the Album View list, then right-click and choose
Create Box Set from the popup menu.
Manage box sets in the Box Set View
From the Box Set View you can manage all box sets. Here you can also add new albums
to a box set, remove albums, or rearrange the album order.
© 2012 FNProgramvare
41
CATraxx Help
2.2.10 Edit lookup information
You can edit lookup tables from both the Lookup View, and the 'Edit Lookup Table'
window. To open this window, right-click a data field linked to a lookup table (for
example Label), and choose Edit Lookup Table from the popup menu.
© 2012 FNProgramvare
Using CATraxx
© 2012 FNProgramvare
42
43
CATraxx Help
If you prefer to use the Lookup View, select the lookup table you want to edit from the
View button on the toolbar.
© 2012 FNProgramvare
Using CATraxx
44
In the Lookup View you can browse lookup items the same way you, for example,
browse albums in the Album View.
From both the Lookup View and the 'Edit Lookup Table' window you can add, edit and
delete lookup items.
2.2.11 Split a lookup item
After you have downloaded disc data from CDDB, or added audio files by scanning
folders, you may end up with a lookup item you need to split up into multiple items.
This is easy, just follow this procedure:
1. Bring up the data entry window for the lookup item you want to edit.
2. Click the Split button
© 2012 FNProgramvare
on the toolbar.
45
CATraxx Help
You see the 'Split Lookup Item' window.
3. Specify the separator you want to use when splitting up the text, then click the
Split button.
4. CATraxx adds the new lookup values to the list below.
You can now edit the new lookup values before you save the changes to the database.
5. Click the Update button to save the changes.
CATraxx adds the new lookup items to the lookup table, then updates all data
fields linked to this lookup table.
Please note that single item lookup fields (for example Format) will only contain the
value on the first row in the list after you have used the Split function. For example, if
you split up "CD & DVD" into two separate items ("CD" and "DVD"), all albums where
the format was set to "CD & DVD", will now have the format "CD".
2.2.12 Enter lineup information for artists
CATraxx lets you specify members of a group. This information is called the lineup. You
can use the lineup 38 information when you register credits information like
songwriters, producers, and musicians. This is a great time saver!
© 2012 FNProgramvare
Using CATraxx
46
1. To edit the lineup you must first open the 'Artist/Person Edit' window. You can do
this from the Lookup View, or simply right-click an artist name in the Artist field
and choose Edit from the popup menu.
2. Click the Edit Lineup button
on the General tab.
on the toolbar, or click the Edit Lineup button
You see the 'Edit Lineup' window.
Click the Help button for more information about the various options in this window.
3. When you are finished editing the lineup, click the OK button to save the changes
and close the window.
2.2.13 Edit the want list
You use the want list to keep track of albums you have on your want list. You can track
basic information like artist, title, format, release date/year, label, catalog number,
order date, and price. You can also add your own notes.
© 2012 FNProgramvare
47
CATraxx Help
To add an album on your want list to your collection, choose Add to Collection from
the Want List menu. This will open the 'Album Edit' window.
To download disc data from CDDB, insert the CD into the cd drive and choose Update Download from CDDB from the Album menu.
For media other than CD, use the Manual Query to download data (Update - Manual
Query from the Album menu).
To download the cover art, choose Download Cover Art from the Album menu.
2.2.14 Edit images
CATraxx allows you to store up to 9 images with each album, box set and artist/person.
You can enter notes for each image.
You can either store images in the database, or link to external image files. Linking to
external image files will keep the size of the database down, and give better
performance. You can change this setting from the Options window
© 2012 FNProgramvare
Using CATraxx
48
(Tools=>Options=>Multimedia), or by right-clicking the image field in the data entry
window and selecting from the popup menu ("Store Images in Database" or "Link to
Image Files"). To "extract" images stored in the database and save them as external
files, click 'Extract images' in the 'Database Maintenance' window. To load external
images and store them in the database, click 'Load external images' in the 'Database
Maintenance' window.
Select image
To select one of the other 9 images, simply click the corresponding button:
Add a new image
To add a new image, click the Insert Image/Link to Image File button
image file, and click Open.
. Select
Instead of loading an image file, you can paste the image from the clipboard by rightclicking the image field and choosing Paste from the popup menu.
You can also drag an image from your web browser and drop it on the image field.
Download cover art
To download cover art from the Internet, open the 'Album Edit' window and choose
Download Cover Art from the Album menu.
As long as the 'Automatically download cover art' setting is activated in the Options
window, CATraxx will automatically download cover art (if available) when you
download disc data from CDDB, or use the Manual Query function.
Scan image
If you have a TWAIN compatible scanner, you can use the Acquire Image from Scanner
© 2012 FNProgramvare
49
CATraxx Help
function to scan the image directly into the image field.
To scan the image, click the Acquire button
. This passes control to your scanner's
Twain software. Follow the instructions you see on the screen.
If you have selected to store images externally, you see the 'Save Image' window.
Specify a filename, then click the Save button.
Rearrange images
You can easily move an image from one of the image slots to another. Click on the
image, and while you hold down the mouse button, drag the image to the button
corresponding to the image slot you want to move the image to.
Remove an image
Click the Remove Image button
.
Confirm by clicking Yes. If you have linked to an external image file, select whether
you want to only remove the link to the image file, or also delete the file.
© 2012 FNProgramvare
Using CATraxx
50
The popup menu
Right-click the image field to open a popup menu with various options. From this menu
you can resize the image, open the folder containing an external image, paste an image
from the clipboard, or copy the image to the clipboard.
Auto-Organize image files
You can automatically organize external image files into a folder structure and filename
format of your choice. To use this feature, choose Auto-Organize Image Files from the
Tools menu.
If you have selected "Link to Image Files", these settings are also used when you
download images from the Internet, paste an image into an image field, drag an image
© 2012 FNProgramvare
51
CATraxx Help
to an image field, use the "Extract Images" feature, etc.
Locate Missing Image Files
If CATraxx is unable to locate external image files because you have moved the files
you link to from your database, you can use the Locate Missing Image Files function
available on the Tools menu. This will scan the specified drive/folder (select "My
Computer" to scan all drives) and attempt to locate the missing image files.
2.2.15 The Set Field Value function
To set the value of a data field, regardless of the current field value, for multiple
records, use the Set Field Value function (this works differently from the Search &
Replace function where you replace a specific value with another value).
1. Right click the browse list and choose Set Field Value from the popup menu.
You see the 'Set Field Value - Select Field' window.
Note: If you right-click the heading of a column, the program will bypass the
'Select Field' window and let you update the field you right-clicked.
2. Select the field you want to update, then click OK.
3. You see the 'Set Field Value: [Field Name]' window.
Select whether you want to update all records (albums, tracks, artists, etc.), the
marked records 76 or the selected records 78 in the browse list.
4. When updating a multivalue field, for example Genre or Keyword, you can check
the Remove existing data box if you want to remove all existing data in this
field before the new field value is saved.
5. Specify the new field value, click OK, then confirm by clicking Yes.
When you update a multivalue field (for example Genre or Keywords), the new field
value is added to the existing lookup items if you do not check the 'Remove existing
data' box.
© 2012 FNProgramvare
Using CATraxx
52
2.2.16 Using the CDDB service
CATraxx allows you to both download information about new CDs you add to your
database, and to update existing CDs you have previously added.
Downloading disc data from CDDB is easy. All you need to do is insert the CD into the
CD drive, and let CATraxx scan the CD. CATraxx will then connect to CDDB and
download the disc data.
Note that it is not possible to download disc data from CDDB unless you have the
original CD.
Download disc data
1. Insert the CD into the CD drive
2. Choose Add - Download from CDDB from the Album menu in either the main
window or the 'Album Edit' window.
3. CATraxx scans the CD, connects to CDDB, and searches for the CD.
You see the 'CDDB Disc Information' window.
4. Click OK to add the CD to the database.
If you want to add the second CD (or third, etc.) in a multi-disc set, click the Add CD Download from CDDB button
below the track list in the 'Album Edit' window.
Update existing albums
1. Open the 'Album Edit' window, and choose Update - Download from CDDB from
the Album menu.
2. CATraxx connects to CDDB, and searches for the CD.
You see the 'CDDB Disc Information' window.
3. Click OK button to update the database.
4. If you are updating a multi-disc set, CATraxx will repeat step 2 for the rest of the
CDs in the disc set.
Submit disc data to CDDB
All information in the CDDB database was submitted by users like you. If you have any
CDs that are not already in the database, you are encouraged to type the information
manually and then submit it for use by others.
© 2012 FNProgramvare
53
CATraxx Help
You are also encouraged to submit CDs if you have manually added credits information
like songwriters, producers, and musicians.
1. Open the 'Album Edit' window, and choose Submit to CDDB from the Album
menu.
You see the 'CDDB Disc Information' window.
2. Check the data and make sure that the disc data is correct, then click the OK
button to submit the CD.
3. If you are submitting a multi-disc set, CATraxx will repeat step 2 for the rest of
the CDs in the disc set.
Clean up CDDB data
After downloading data from CDDB, sometimes you may have to "clean up" the data.
You find various functions that will help you do this on the Track menu in the 'Album
Edit' window. These functions will update all tracks on the selected album.
CDDB License Terms
This application contains software from CDDB, Inc. of Berkeley California ("CDDB"). The
software from CDDB (the "CDDB Client") enables this application to do online disc
identification and obtain music-related information, including name, artist, track and
title information ("CDDB Data") from online servers ("CDDB Servers") and to perform
other functions.
© 2012 FNProgramvare
Using CATraxx
54
You agree that you will use CDDB Data, the CDDB Client and CDDB Servers for your
own personal non-commercial use only. You agree not to assign, copy, transfer or
transmit the CDDB Client or any CDDB Data to any third party. YOU AGREE NOT TO
USE OR EXPLOIT CDDB DATA, THE CDDB CLIENT, OR CDDB SERVERS, EXCEPT AS
EXPRESSLY PERMITTED HEREIN.
You agree that your non-exclusive license to use the CDDB Data, the CDDB Client and
CDDB Servers will terminate if you violate these restrictions. If your license terminates,
you agree to cease any and all use of the CDDB Data, the CDDB Client and CDDB
Servers. CDDB reserves all rights in CDDB Data, the CDDB Client and the CDDB
Servers, including all ownership rights. You agree that CDDB, Inc. may enforce its
rights under this Agreement against you directly in its own name.
The CDDB Client and each item of CDDB Data are licensed to you "AS IS." CDDB makes
no representations or warranties, express or implied, regarding the accuracy of any
CDDB Data from in the CDDB Servers. CDDB reserves the right to delete data from the
CDDB Servers or to change data categories for any cause that CDDB deems sufficient.
No warranty is made that the CDDB Client or CDDB Servers are error-free or that
functioning of CDDB Client or CDDB Servers will be uninterrupted. CDDB is not
obligated to provide you with any new enhanced or additional data types or categories
that CDDB may chose to provide in the future.
CDDB DISCLAIMS ALL WARRANTIES EXPRESS OR IMPLIED, INCLUDING, BUT NOT
LIMITED TO, IMPLIED WARRANTIES OF MERCHANTABILITY, FITNESS FOR A
PARTICULAR PURPOSE, TITLE AND NON-INFRINGEMENT. CDDB does not warrant the
results that will be obtained by your use of the CDDB Client or any CDDB Server. IN NO
CASE WILL CDDB BE LIABLE FOR ANY CONSEQUENTIAL OR INCIDENTIAL DAMAGES OR
FOR ANY LOST PROFITS, OR LOST REVENUES.
2.2.17 Loan management
2.2.17.1 Overview
CATraxx lets you to track albums out on loan; you can easily loan out an album, set a
due date and search for all albums out on loan and albums overdue.
You can use a bar code scanner when checking albums in and out of the library.
CATraxx will handle any bar code scanner that enters data via a keyboard interface.
These are often referred to as "wedge" readers as they wedge themselves in between
the keyboard and your computer.
If you have a bar code scanner, use the 'Check Titles In/Out' window to quickly check
albums in and out of the library. If you do not have a bar code scanner, you can
manually check albums in and out one at a time, or you can use the 'Check Titles In/
Out' window if you manually look up albums and borrowers.
To get an overview of albums current out on loan you can select the On Loan filter in
the Album View. From the Loan View you can browse the complete loan history. On the
Report menu you find various loan reports that you can print out.
© 2012 FNProgramvare
55
CATraxx Help
In addition, CATraxx also allows you to place reservations
automatically clear reservations 57 .
57
for albums on loan, and to
You can also send e-mail notifications to borrowers. This could be a reminder that an
album should be returned soon or is overdue, or a notification that a reserved album is
ready for collection. For more information, see To send e-mail notifications 58 .
2.2.17.2 Check albums out one at a time
1. Locate the album you want to check out.
2. Choose Check Out from the Loan menu.
You see the 'Check Out' window.
3. Select the name of the borrower from the Borrower drop-down list.
If the borrower is not registered, right-click the Borrower field and choose Add
from the popup menu. Complete the information requested in the 'Borrower Edit'
window, then click the OK button.
4. In the Date Borrowed field, specify the date the album was borrowed. By
default, CATraxx fills in today's date.
5. In the Date Due field, specify the date the album is due to be returned.
6. Click OK.
Even though CATraxx lets you change the name of the borrower in the 'Check Out'
window, always check the album in before you check it out again. This is important if
you want the loan history to be correct.
2.2.17.3 Check albums in one at a time
1. Locate the album you want to check in
2. Choose Check In from the Loan menu.
You see the 'Check In' window.
3. In the Date Returned field, specify the date the album was returned. By default,
CATraxx fills in today's date.
4. Click OK.
Even though CATraxx lets you change the name of the borrower in the 'Check Out'
window, always check the album in before you check it out again. This is important if
you want the loan history to be correct.
© 2012 FNProgramvare
Using CATraxx
56
2.2.17.4 Check albums out using the 'Check Titles In/Out' window
1. Choose Check Titles Out from the Loan menu.
You see the 'Check Titles In/Out' window.
2. If you have a bar code scanner (and the borrower's barcode number is registered
in the Borrower lookup table), scan the bar code on the borrowers library card
into the Borrower field. CATraxx will automatically lookup the borrower name.
If you don't have a bar code scanner, click the Search button
search for the borrower.
to manually
3. Make sure the Date Borrowed and Date Due fields are correctly filled in.
4. If you have a bar code scanner, scan the bar code on the album into the Bar
Code No field. CATraxx will automatically look up the album in the database and
add it to the list below.
If you don't have a bar code scanner, click the Search button
search for the album you want to check out.
to manually
5. Repeat step 4 for all albums you want to check out to the selected borrower.
6. Click the Update button.
7. If you would like to print out a receipt, click the Print Receipt button.
Note: If you would like to automatically print the receipt when you click the
Update button, click the drop-down button to the right and select Automatically
Print Receipt from the popup menu.
Note: If you would like to edit the layout of the receipt, click the drop-down
button to the right and choose Open in Report Designer from the popup menu.
2.2.17.5 Check albums in using the 'Check Titles In/Out' window
1. Choose Check Titles In from the Loan menu.
You see the 'Check Titles In/Out' window.
2. Make sure the Date Returned field is correctly filled in.
© 2012 FNProgramvare
57
CATraxx Help
3. If you have a bar code scanner, scan the bar code on the album into the Bar
Code No field. CATraxx will automatically look up the album in the database and
add it to the list below.
If you don't have a bar code scanner, click the Search button
search for the album you want to check in.
to manually
4. Repeat step 3 for all albums you want to check in.
5. Click the Update button.
6. If you would like to print out a receipt, click the Print Receipt button.
Note: If you would like to automatically print the receipt when you click the
Update button, click the drop-down button to the right and select Automatically
Print Receipt from the popup menu.
Note: If you would like to edit the layout of the receipt, click the drop-down
button to the right and choose Open in Report Designer from the popup menu.
2.2.17.6 Reserve an album
1. Locate the album you want to reserve.
2. Choose Reserve from the Loan menu.
You see the 'Reserve' window.
3. Select the name of the borrower from the Borrower drop-down list.
If the borrower is not registered, right-click the Borrower field and choose Add
from the popup menu. Complete the information requested in the 'Borrower Edit'
window, then click OK.
4. In the Reserved Date field, specify the reservation date. By default, CATraxx fills
in today's date.
5. Click OK.
2.2.17.7 Clear reservations
1. Choose Clear Reservations from the Loan menu.
© 2012 FNProgramvare
Using CATraxx
58
You see the 'Clear Reservations' window.
2. Specify the age of the reservations you want to clear.
For example, if you specify 7 days, the program will clear all reservations placed
more than one week ago.
3. Click OK.
You can manually clear a reservation if you select the album in the Album View, and
then choose Loan / Clear Reservation from the Album menu.
2.2.17.8 Send e-mail notifications
1. Choose Send E-mail Notifications from the Loan menu.
You see the 'Send E-mail Notification' window.
2. Make sure the From / Name and From / Address fields are filled in.
3. If you haven't already done so, click the Server button and specify mail server,
account name, and password.
4. To send notifications to borrowers that have albums that will become overdue
soon, click the Reminder tab.
To send notifications to borrowers that have albums that are overdue, click the
Overdue tab.
To send notifications to borrowers that have reserved albums ready for collection,
click the Reservation tab.
5. Specify the relevant time period.
6. Make sure the Subject, Body 1,and Body 2 fields are filled in.
Body 1 is the text that is added before the list of albums. Body 2 is the text that
is added after the list.
You can use the following codes in the text (the code is replaced with the field
value when the e-mail message is generated):
%
The current date.
DA
TE
%
%
© 2012 FNProgramvare
The borrower's full name.
59
CATraxx Help
NA
ME
%
%
The borrower's first name.
FIR
ST
%
%LAST
%
The borrower's last name.
7. Click the Send button to send the e-mail notifications.
2.2.17.9 Extend loan period
You can extend the loan period by a specified number of days.
1. In either the Album View or the Loan View, select
update.
78
the records you want to
2. From the Loan menu, choose Extend Loan Period.
3. Enter the number of days you want to extend the loan period by.
4. Confirm by clicking Yes.
CATraxx updates the 'Date Due' field.
2.3
Cataloging audio files
2.3.1
Overview
In addition to cataloging physical media, you can also use CATraxx to catalog your
audio file collection. Use the Scan Folder 60 function to have CATraxx automatically
create albums from folders containing audio files. CATraxx will read artist, title, etc.
from either the audio file tag or the filename, and use this information to populate the
database.
If you later add, or remove, audio files in a folder, use the Rescan Folder 61 command
to update the database. CATraxx will rescan the folders containing audio files linked to
the database, and add new audio files not already in the database, and delete tracks
that link to audio files that have been deleted.
If you would like to attach audio files to an album you have already added to the
database, use the Attach Audio Files 62 function. Specify the folder the files are located
in, and CATraxx will automatically attach the audio files to the correct tracks.
© 2012 FNProgramvare
Using CATraxx
60
After you have edited the track information, you can have CATraxx update the audio file
tag in the attached audio files. Choose Write to Tag 63 from the Audio menu to do this.
Audio files can be automatically organized into a folder structure and filename format of
your choice based on information in the database. Use the Auto-Organize Files 64
function to do this.
If you move all your audio files from one drive/folder to another, use the Update Path /
Multimedia 66 function on the Tools menu to update the file path stored in the
database.
You can also create your own playlists. For more information, see Setting up playlists
.
2.3.2
67
Scan folders: Add audio files
To automatically add audio files to the database, use the Scan Folder function on the
Audio menu. CATraxx will add all audio files in the folders you select. By default, all the
files in a specific folder will be registered as one album. If folders contain audio files
from multiple albums, make sure you check the 'Group by album' box.
Please note that CATraxx will not scan folders that contains audio files that have been
already added to the database. To have CATraxx rescan these folders, use the Rescan
Folder 61 function.
1. Open the Audio menu and choose Scan Folders: Add Audio Files.
You see the 'Scan Folders: Add Audio Files' window.
2. In the Folder field, specify the path to the folder you want to scan.
3. Click the Scan button to scan the folder (if you clicked the Select folder button to
select folder, it is not necessary to click Scan).
CATraxx scans the folder (including all sub-folders), and displays the result.
© 2012 FNProgramvare
61
CATraxx Help
4. If you do not want to add the files in some of the folders, uncheck the box next to
the folder name.
5. Click the Add button to add the audio files to the database.
2.3.3
Rescan folders
Use the Rescan Folders function to rescan folders containing audio files already linked
to the database. CATraxx can add new audio files not already in the database, and
either attempt to locate missing audio files, remove links to missing files, delete the
tracks that links to missing files, or show these tracks in the Track View.
1. Choose Rescan Folders from the Audio menu.
You see the 'Rescan Folders' window.
2. Select whether you want to rescan folders linked to all albums, the marked
albums 76 or the selected albums 78 in the browse list.
3. Click OK.
CATraxx rescans the folders.
© 2012 FNProgramvare
Using CATraxx
62
When completed, you see the 'Rescan Folders - Result' window.
4. On the Missing files tab you see the missing files that the program is unable to
locate.
Select action you want to take from the Action drop-down list.
5. On the New files tab you see the new audio files not already added to the
database.
6. Click OK to process the selected files.
2.3.4
Attach audio files to albums
Use Attach Audio Files function to attach audio files to albums you already have added
to the database. You can either attach audio files to one album at a time, or you can let
CATraxx automatically attach audio files to all albums in one operation.
Attach audio files to all albums
1. Choose Attach Audio Files
from the Audio menu.
You see the 'Attach Audio Files' window.
2. Select whether you want to attach audio files to all albums (without any attached
audio files), the marked albums 76 or the selected albums 78 in the browse list.
3. In the Folder field, specify the path to the folder containing the audio files.
4. Click the Scan button to scan the folder.
5. CATraxx starts to scan the folders, and will read the necessary information
(album title, track index, etc.) from the tag or file/folder name.
When completed, CATraxx will build a list of albums without any attached audio
files, and then try to attach the scanned audio files to these albums.
Please be patient, this may take a while if you have selected many albums and/or
scanned many folders!
6. Click OK to attach the audio files to the database.
7. If you have checked the 'Auto-organize' box, CATraxx now opens the 'AutoOrganize Audio Files' window 64 . From this window you can automatically
organize the newly attached audio files into a folder structure and filename
format of your choice.
© 2012 FNProgramvare
63
CATraxx Help
Attach audio files to a single album
You can also attach audio file to a specific album.
1. Open the 'Album Edit' window, then choose Attach Audio Files
Audio menu.
from the
You see the 'Attach Audio Files' window.
2. In the Folder field, specify the path to the folder containing the audio files.
Note: You can drag the folder from Windows Explorer and drop it on the 'Attach
Audio Files' window.
3. Click the Scan button to scan the folder.
CATraxx scans the folder and tries to automatically attached the audio files to the
tracks. Files that the program is unable to attach are shown in the files list to the
right.
4. If a file is attached to the wrong track, or not attached at all, you can use dragand-drop to attach it to the correct track. You can drag a file from the files list
over to the track list to the left.
5. Click OK to attach the audio files to the database.
6. If you have checked the 'Auto-organize' box, CATraxx now opens the 'AutoOrganize Audio Files' window 64 . From this window you can automatically
organize the newly attached audio files into a folder structure and filename
format of your choice.
2.3.5
Update audio file tags
Use the 'Write to Tag' function to write data from the database to audio file tags.
1. Choose Write to Tag from the Audio menu.
You see the 'Write to Tag' window.
2. Select whether you want to update all albums, the marked albums
selected albums 78 in the browse list.
76
or the
3. To only write data to the audio file tag if you have edited the track since you last
updated the tag, check the Compare dates box.
4. Click OK.
CATraxx can automatically update the audio file tag(s) when you edit an album or a
© 2012 FNProgramvare
Using CATraxx
64
track. To activate this feature, choose Audio File Options from the Tools menu ,and
check the Auto-update tag option on the Tag Miscellaneous tab.
2.3.6
Rename audio files
Use the Auto-Organize function to automatically rename audio files attached to your
database. The file and folder names are generated based on information in the database
(not the tags!) according to the format you specify. For example, you can organize your
audio files following this format: C:\My Music\<Artist>\<Album title>\Track # Title.
1. Choose Auto-Organize from the Audio menu.
You see the 'Auto-Organize Audio Files' window.
By default there are three setups: Soundtracks (all soundtracks - the audio files
will be saved in a separate folder named !Soundtracks), Compilations (all
compilations - the audio files will be saved in a separate folder named !
Compilations) and General (the rest of the albums).
2. Select whether you want to auto-organize all albums, the marked albums
the selected albums 78 in the browse list.
76
, or
3. Specify Base folder. The folders containing the audio files will be created below
this folder.
© 2012 FNProgramvare
65
CATraxx Help
4. The Folder/filename setups list shows the various folder/filename setups. Each
setup is associated with a filter. All albums matching this filter will use the
specified folder and filename setup. Albums that doesn't match any of the filters
will use the "General" setup.
The various setups are processed in the order they are shown in the list.
To create a new setup, click the Add button. To clone the selected setup, click
the Clone button. To edit the selected setup, click the Edit button. This will open
the 'Add/Edit Folder/Filename Setup' window.
5. In the 'Auto-Organize Audio Files' window, click the OK button to start generating
the new file and folder names.
6. You see the 'Auto-Organize Audio Files - Preview' window.
Please review the new file and folder names carefully before you continue. Files
and folder with a new name are highlighted in bold.
Note: The program has not yet actually renamed any files or folders.
7. Click the OK button to start the reorganize process.
Click Yes to confirm that you want to rename the files.
Wait while the program reorganizes your audio files.
2.3.7
Play audio files
In either the Album and Track View, select the albums/tracks you want to play, then
click the Play button
on the toolbar (or simply press F2).
You can also play a single album from the 'Album Edit' window (or just the selected
tracks in the track list), or a single track from the 'Track Edit' window.
In the explorer you can click the play icon next to either the album or track title.
© 2012 FNProgramvare
Using CATraxx
66
By default, audio files are enqueued if you hold down the Ctrl key when you start
playback (to enqueue an audio file means that it is placed at the end of the player's
current playlist instead of being played immediately). If you don't hold down Ctrl the
current playlist in the player will be cleared.
If you would to reverse this (that is, let enqueue be the default behavior), choose
Audio File Options from the Tools menu and uncheck the Ctrl to enqueue audio
file box.
For information on how you create playlists, see Setting up playlists
2.3.8
67
.
Update the file path
Use this function if you have moved the audio files from one drive to another drive, or
from one folder to another folder.
1. Choose Update Path / Audio Files from the Tools menu.
You see the 'Update Path' window.
2. In the Old Path text box, specify where the audio files were previously stored.
3. In the New Path text box, specify where the audio files are stored now.
For example, if you have moved your MP3 files from C:\My MP3 Files to D:\MP3s,
type C:\My MP3 Files in the Old Path text box, and D:\MP3s in the New Path
text box.
© 2012 FNProgramvare
67
CATraxx Help
4. Click the OK button.
2.3.9
Setting up playlists
2.3.9.1
Overview
A playlist is a selection of tracks you can choose to listen to rather than your entire
music library. CATraxx will let you create two types of playlists: "Manual" and
"Dynamic".
A manual playlist 68 is a playlist where you manually add tracks to the playlist. You add
the tracks from either the Album View or the Track View.
A dynamic playlist 72 is a playlist based on a filter. For example, this can be "5 star"
tracks, live recordings, tracks produced by a specific producer, tracks where a specific
musician appears, or tracks you have not played the last 3 months. The playlist can
also be randomized. The contents of a dynamic playlist is automatically updated as you
add, edit and delete information in the database.
2.3.9.2
The Playlist View
You use the Playlist View to create and edit playlists. This view has two browse lists. The list at
the top gives you an overview of the various playlists. The list at the bottom displays the tracks in
the selected playlist.
On the statusbar at the bottom of the window you see the number of tracks in the open playlist
and the total playing time.
If you would like to reopen a dynamic playlist, click the Reopen button
To import a standard playlist file (m3u), click the Import button
To export the playlist to a m3u file, click the Export button
.
.
.
To copy the files in the playlist to a folder, click the Copy to Folder button
. This is useful if
you for example want to copy the files to your portable audio player, or want to burn the audio
files in the playlist to a CD.
When you create a new playlist, or edit an existing playlist, you see the 'Playlist Edit' window. You
must always give the playlist a title, and select type of playlist. The other fields are optional. Click
the Help button for more information about the available data fields.
© 2012 FNProgramvare
Using CATraxx
2.3.9.3
68
Manual playlists
A manual playlist is a playlist where you manually add tracks to the playlist. You add
the tracks from either the Album View or the Track View.
You use the 'Manual Playlists' window when you add tracks to playlists. This window has
the basic functionality of the Playlist View, but you can have this window open at all
times (also when the 'Album Edit' or 'Track Edit' window is open).
By default, the window will stay "floating" on top of the main CATraxx window. If you
want to keep the window out of the way, simply minimize it. The window has it's own
icon on the Windows taskbar. Click this icon to open the window again, or simply press
Ctrl+P (this is the shortcut for the Manual Playlists command on the Audio menu).
Adding tracks to playlist
To add tracks to a playlist, first choose Manual Playlists from the Audio menu to open
the 'Manual Playlists' window. Then either create a new playlist, or select an existing
playlist you want to add tracks to.
To add all tracks on an album to the playlist, select the album in the Album View, then
© 2012 FNProgramvare
69
CATraxx Help
choose Add to Playlist from the Audio menu (or press the F3 shortcut). If the Track
View is open, this command will add the selected track to the playlist.
If multiple albums, or tracks, are selected, this will add all the selected albums or
tracks to the playlist.
You can also click 'the add to playlist' icon
track to the playlist.
in the explorer pane to add an album or
You can also add tracks to a playlist from both the 'Album Edit' and the 'Track Edit'
window. In the 'Album Edit' window, the Add to Playlist command will add all tracks on
the album to the playlist, except if the track list has the focus. Then this will add the
selected tracks in the track list to the playlist. You can also drag tracks from the track
list over to the 'Manual Playlists' window.
Moving tracks from one playlist to another
You can easily move (or copy) tracks from one playlist to another: Either use drag-anddrop (hold down Ctrl to copy), or use the clipboard (Copy/Cut and then Paste). This
works in both the 'Manual Playlists' window, and the Playlist View.
To use drag-and-drop, first make sure the playlist you want to move the tracks to (the
"target") is visible, then select the tracks you want to move, click and hold down the
mouse button while you drag track the tracks over to the target playlist. When you
release the mouse button the tracks are moved to the target playlist. If you hold down
the Ctrl key, the tracks are copied instead of moved.
© 2012 FNProgramvare
Using CATraxx
70
To use the clipboard, first select the tracks, then right-click and choose Cut (to move)
or Copy (to copy) from the popup menu.
© 2012 FNProgramvare
71
CATraxx Help
Then open the playlist you want to move the tracks to, right-click where you want to
add the tracks and choose Paste from the popup menu.
© 2012 FNProgramvare
Using CATraxx
72
The Playlist Track View
In the Playlist Track View you can browse all tracks on manual playlists. This works
similar to the Track View (except that if a track is, let's say, on 3 different playlists, this
track will appear 3 times in the list). There is also a corresponding report so you can
print out reports with playlist tracks.
Click the Playlist Track View button
2.3.9.4
on the toolbar to open this view.
Dynamic playlists
A dynamic playlist is a playlist that is based on a filter. For example, this can be "5 star"
tracks, live recordings, tracks produced by a specific producer, tracks where a specific
musician appears, or tracks you have not played the last 3 months. The playlist can
also be randomized. The contents of a dynamic playlist is automatically updated as you
add, edit and delete information in the database.
To set up the filter the playlist is to be based on, open the 'Playlist Edit' window from
the Playlist View, then click the Filter button.
© 2012 FNProgramvare
73
CATraxx Help
By default, the tracks are sorted by title and release year. You can change the sort
order by clicking the Sort Order button in the 'Playlist Edit' window.
Two of the data fields are of special interest when setting up a dynamic playlist: Max
and Random. In the Max field you define the maximum number of albums (if you filter
on album fields only), or tracks the playlist can contain. If you check the Random field,
CATraxx will pick the albums/tracks at random when opening the playlist.
For example, suppose you have set up a filter that returns 1000 tracks. If you set Max
to "50" and check the Random field, CATraxx will pick 50 of the 1000 tracks at random
each time you open the playlist.
If you do not check the Random field, CATraxx will always pick the first 50 tracks
according to the defined sort order.
Note that if you filter on album fields only, Max and Random will determine which
albums the program will select. All tracks on these albums will be added to the playlist
in the same order they exist on the album. For example, if you want to select one U2
album at random, filter on the Album.Artist field, set Max to 1 and check the Random
field.
2.4
Customizing views
2.4.1
Working with views
The main CATraxx window is divided into three parts:
1. The menu/toolbar at the top of the window.
2. The view bar to the left.
3. The rest of the window is occupied by the active view. There are a total of 9
different views: Explorer View, Album View, Track View, Box Set View, Lookup
View, Loan View, Want List View, Playlist View and Playlist Track View.
© 2012 FNProgramvare
Using CATraxx
74
You can select the view you want to open in the view bar. The currently open view is
highlighted in bold:
© 2012 FNProgramvare
75
CATraxx Help
You can also select view from the toolbar:
or the View menu (notice the shortcut keys):
In addition to this, you can also select view, including the lookup table you want to edit in the
Lookup View, from the View button on the toolbar:
© 2012 FNProgramvare
Using CATraxx
76
If the View button/View title section is hidden, choose Select View from the View
menu (or press the Ctrl+W shortcut) to select lookup table.
When you select one of the standard views, the program activates the view with the
same settings loaded as the last time you used the view. This means that the same list
layout 79 , sort order 81 , filter 83 , and grouping definition 84 are automatically activated.
In addition, you can create your own custom views, enabling you to easily access
relevant information in your database (albums, tracks, artists, labels, playlists, etc.). A
custom view can be linked to a specific list layout, sort order, filter and grouping
definition. Choose Views Setup from the View menu to set up your own custom views.
2.4.2
Marking records and showing the marked records
CATraxx allows you to mark records in any table. Marking and unmarking records can
be useful if you want to select different records based on specific criteria. You can view,
© 2012 FNProgramvare
77
CATraxx Help
edit, search among, or print only the records that have been marked.
The checkmark button
on the toolbar indicates whether the current record is
marked or not. If the button is "in" (pressed), the record is marked. If it is
"out" (released), the record is not marked. You can also simply press Ctrl + M to mark
or unmark the current record.
You can also mark / unmark records by clicking the checkbox in the first column in the
browse list.
To mark all records
1. Choose Mark / Mark All from the menu (for example the Album menu if the
Album View is active).
Note: If this command is disabled (not available), it means that all records
already are marked.
To unmark all records
1. Choose Mark / Unmark All from menu (for example the Album menu if the
Album View is active).
Note: If this command is disabled (not available), it means that no records are
marked.
At the bottom of the main window, notice the 4 numbers in the first section of the
statusbar:
It shows the active record's position in the list (1), number of records displayed in the
list (7), number of records that are marked (3), and the total number of records in the
table (30).
Notice, for example, how the statusbar is updated when you use the mark commands.
By default, CATraxx displays all records in the active table. If you want to view only the
© 2012 FNProgramvare
Using CATraxx
78
records that are marked, select the Marked Records option on the List menu. This
option toggles between the two modes. If only marked records were shown, all records
are now shown again. If all records were shown, only the marked records are now
shown.
2.4.3
Select multiple records in browse list
In order to set the field value of several records in one operation, delete multiple
records, etc, you must first select these records in the browse list:
· To select consecutive records, click the first record, press and hold down Shift,
and then click the last record.
· To select nonconsecutive records, press and hold down Ctrl, and then click each
record you want to select.
· To select all records, choose Select All from the List menu (or press the Ctrl+A
shortcut).
Here we have selected all "Alternative & Punk" genres in the Genre lookup table:
· To clear the selection, click in the upper left corner of the list:
© 2012 FNProgramvare
79
CATraxx Help
Don't confuse selecting records with marking records.
2.4.4
List layouts
Each view (except the Explorer View) contains a browse list. In a standard list layout,
each row in the grid corresponds to a record in the table (albums in the Album View,
tracks in the Track View, genres in the Genre Lookup View, and so on). Each field is
displayed in a separate column. The active row is highlighted so that it easy to see
which record that is selected. In a card list, there is one cell per record.
When you create a new database, CATraxx automatically adds various standard list
layouts to the database. A list layout contains information about which fields to display,
the font to use and so on. You can easily modify the default layouts, or create your own
layouts.
You select list layout from the drop-down to the left above the browse list.
You can also manage the list layouts in the active view by choosing List Layouts from
the View menu. Here you can both add, edit and delete list layouts.
Create a new list layout
To create a new list layout, right-click the list layout drop-down list and choose Add
List Layout from the popup menu.
© 2012 FNProgramvare
Using CATraxx
80
This will open the 'Add List Layout' window. Here you can select the fields you want to
display in the list, select font, etc.
When you create a new list layout in the Album View, Box Set View or Artist/Person
Lookup View, you first see the 'Add List Layout - Select Type' window. Here you must
select whether you want to create a standard list layout, or a card list.
Edit a list layout
To edit a list layout, first select the list layout you want to edit, then right-click the list
layout drop-down list and choose Edit List Layout from the popup menu. This will open
the 'Edit List Layout' window.
Add a new column
To add a new column, right-click the browse list and choose List Layout / Add
Column from the popup menu. This will open the 'Select Field window. Select the field
you want to display in the list, then click OK. Then you see the 'Column Properties'
window. Here you can modify the properties of the column, such a text alignment, color
and column width. Click OK to add the new column to the list.
You can move the column to a new position in the list by using drag-and-drop (hold
down the Alt key while you drag).
Edit a column
To edit the properties of a column, right-click the column you want to edit and choose
List Layout / Edit Column from the popup menu.
Rearrange the columns
To rearrange the order of the columns:
1. Press down the Alt key.
2. While you hold down the Alt key, click on the heading of the column you want to
move, and drag it to it's new position.
© 2012 FNProgramvare
81
CATraxx Help
3. Release both the mouse button and the Alt key.
Remove a column
To remove a column, right-click the column you want to remove and choose List
Layout / Remove Column from the popup menu. Confirm by clicking Yes.
Delete a list layout
To delete a list layout, first choose List Layouts from the View menu, then select the
list layout you want to delete and click Delete. Confirm by clicking Yes.
2.4.5
Sort orders
You use a sort order to define the order in which records are displayed. The data in the
database remains the same; only the way data is being displayed changes. CATraxx lets
you sort on up to five fields.
There are two ways to change the sort order:
· Select a sort order from the sort order drop-down list above the browse list.
· Click the heading of the column you want to sort on to create a temporary sort
order.
A field can be sorted in either ascending order (letters are sorted from A to Z and
numbers from 0 to 9) or descending order (letters are sorted from Z to A and numbers
from 9 to 0).
You select sort order from the drop-down in the middle above the browse list.
You can also manage the sort orders in the active view by choosing Sort Orders from
the View menu. Here you can both add, edit and delete sort orders.
Create a new sort order
To create a new sort order, right-click the sort order drop-down list and choose Add
Sort Order from the popup menu.
© 2012 FNProgramvare
Using CATraxx
82
This will open the 'Add Sort Order' window.
Edit a sort order
To edit a sort order, first select the sort order you want to edit, then right-click the sort
order drop-down list and choose Edit Sort Order from the popup menu. This will open
the 'Edit Sort Order' window.
Delete a sort order
To delete a sort order, first choose Sort Orders from the View menu, then select the
sort order you want to delete and click Delete. Confirm by clicking Yes.
Create a temporary sort order
Click on the heading of the column you want to sort on. Letters are by default sorted
from A to Z and numbers from 0 to 9. Hold down Shift while you click to create a
descending sort order (letters are sorted from Z to A and numbers from 9 to 0). Hold
down Ctrl while you click to sort on multiple columns. You can sort on up to five
columns.
A sort indicator is used to display the sort order status of a column. If the arrow points
upwards the column is sorted in ascending order. If the arrow points downwards the
column is sorted in descending order.
A temporary sort order is deleted when you select one of the saved sort orders.
Save a temporary sort order
1. Right-click the browse list and choose Save Sort Order as from the popup menu.
You see the 'Save Sort Order As' window.
2. Give the sort order a title, and click OK.
The sort order is now available from the sort order drop-down list.
© 2012 FNProgramvare
83
2.4.6
CATraxx Help
Filters
A filter is used to determine which records that are displayed in the browse list, and
makes it possible to work with a subset of the database (for example, compilation
albums in the Album View, or tracks with an attached MP3 file in the Track View).
You select filter from the drop-down to the right above the browse list.
You can also manage the filters in the active view by choosing Filters from the View
menu. Here you can both add, edit and delete filters.
Create a new filter
To create a new filter, right-click the filter drop-down list and choose Add Filter from
the popup menu.
This will open the 'Add Filter' window.
© 2012 FNProgramvare
Using CATraxx
84
Edit a filter
To edit a filter, first select the filter you want to edit, then right-click the filter dropdown list and choose Edit Filter from the popup menu. This will open the 'Edit Filter'
window.
Delete a filter
To delete a filter, first choose Filters from the View menu, then select the filter you
want to delete and click Delete. Confirm by clicking Yes.
Use the Quick Filter feature
The Quick Filter feature allows you to filter on a field value displayed in the browse list.
To create a quick filter, right-click the field value you want to filter on in the browse list,
and choose Quick Filter from the popup menu.
To clear the filter, right-click the browse list and choose Clear Filter from the popup
menu.
A quick filter is deleted when you select a saved filter. If you want to save the quick
filter, right-click the browse list and choose Save Quick Filter as from the popup
menu.
2.4.7
Grouping
The grouping feature is used to determine which records that are displayed, and makes
it possible to work with a subset of the database (for example, albums released by a
specific artist).
Using the grouping feature is similar to using a filter, except that it is easier to change
the value used in the filtering process. For example, if you group by artist, you can
simply select another artist to display the albums released by this artist (if you used a
filter you would have to modify the filter to get the same result).
The first item in the list represents the open database. Select this item to display all
records in the table.
You select grouping definition from the drop-down above the grouping list.
© 2012 FNProgramvare
85
CATraxx Help
You can also manage the grouping definitions in the active view by choosing Grouping
Definitions from the View menu. Here you can both add, edit and delete grouping
definitions.
Create a new grouping definition
To create a new grouping definition, right-click the grouping definition drop-down list
and choose Add Grouping Definition from the popup menu.
This will open the 'Add Grouping Definition' window.
Edit a grouping definition
To edit a grouping definition, first select the grouping definition you want to edit, then
right-click the grouping definition drop-down list and choose Edit Grouping Definition
from the popup menu. This will open the 'Edit Grouping Definition' window.
© 2012 FNProgramvare
Using CATraxx
86
Delete a grouping definition
To delete a grouping definition, first choose Grouping Definitions from the View
menu, then select the grouping definition you want to delete and click Delete. Confirm
by clicking Yes.
2.4.8
The explorer
CATraxx Explorer is a great way to browse your collection. The data is presented in the
same way as when you use your web browser. You can click hyperlinks to look at
related information. For example, you can click an artist’s name to see more
information about that artist, including a list of albums released by the artist.
You can use the explorer in three ways:
· From the Explorer View.
· Use the "preview pane" below the browse list. This preview pane is available in all
views.
· Use the separate Explorer window. Simply press F11 to bring up the window. The
displayed information depends on the type of data selected. With the cursor in the
Artist field, this will explore the selected artist. If the Track View browse list is
active, this will explore the selected track.
The preview pane is useful when you want to look at the basic information. The
Explorer window is better when you want all the details.
To change the default colors and other settings in the explorer, right-click the explorer
page and choose Options from the popup menu.
© 2012 FNProgramvare
87
CATraxx Help
Customizing the layout with XSL templates
You can completely customize the layout of the explorer with the help of XSL templates.
© 2012 FNProgramvare
Using CATraxx
88
XSL is a language for defining style sheets. It also includes a transformation language
for XML documents: XSLT. Originally intended for complex styling operations, like
generating indexes and tables of contents, it is now used as a general purpose XML
processing language.
Styling requires two things: a source XML document containing the information the
style sheet will display, and the style sheet itself (the XSL template) which describes
how the information will look.
This section is not intended to be a complete XSL/XML tutorial, but will give you some
basic information on the different types of xsl templates that CATraxx uses. For more
information about XSL and XML, see http://www.w3schools.com/xsl and http://www.
w3schools.com/xml.
A CATraxx XSL template is a text file containing HTML instructions defining the layout
of the page, and XSLT commands that extract and process data from the XML data file.
The standard CATraxx XSL templates are located in the \Explorer Templates folder.
To edit an existing template, right-click the explorer page and choose Edit XSL
Template from the popup menu. We recommend that you backup the original template
file before you edit the template.
CATraxx uses three different template types. The type of template is determined by the
data type instruction at the beginning of the xsl template file. Possible values are:
<?data type="index"?>
<?data type="record"?>
<?data type="list"?>
index
This type of template is only used by the Explorer view, and in the Explorer
window when you click the Home button.
For an example of this template type, see Index.xsl.
record This type of template is used to create a document with data about one
specific record. Use the data table instruction to specify which table the data
should be taken from, for example <?data table="album"?>.
For an example of this template type, see Album.xsl.
list
© 2012 FNProgramvare
This type of template is used to create a document with a list of multiple
records. Use the data table instruction to specify which table the data should
be taken from, for example <?data table="album"?>.
89
CATraxx Help
For an example of this template type, see AlbumList.xsl.
The explorer pane is by default displayed below the browse list. To display the explorer
pane to the right of the browse list, add the <?data previewpanepos="right"?>
instruction to the xsl template file. For an example, see the AlbumBrowse_Right.xsl
template.
2.5
Searching and querying
2.5.1
How to search
You can effectively search the database for information that you require. Search in all
fields with any combination of fields and operators.
There are several different ways to search and query data:
1. Quick Search 90 . This is the easiest and quickest way to search. The quick search
function will search the records displayed in the browse list. By default, it will only
search the text fields you actually see in the list. You can also search all fields in
the table (however, this is slower).
2. Simple search 90 . Lets you define a search criteria based on one or two fields. You
specify field, operator and the value you want to search for. The search criteria
can be saved to a file for later use.
3. Advanced search 91 . Lets you define a search criteria that can contain an (almost)
unlimited number of fields. You can group the fields in different ways using
parenthesis and the logical operators AND/OR. The search criteria can be saved to
a file for later use.
4. Summary search 92 . Specify the field you want to search in from the drop-down
list. All unique values, and the number of occurrences of each value, are then
displayed in a list. Select the value you want to search for and click OK.
5. Global Search
93
. Lets you search in all fields.
If you want to replace a field value with another value, use the search and replace
command.
In addition, CATraxx has various "special searches
available in the other searches.
94
95
" that give you features not
Before you execute a search, you must specify the following options:
Search marked
Select the 'Search marked' option if you only want to search the marked records.
© 2012 FNProgramvare
Using CATraxx
90
Show albums
When searching for tracks, select the 'Show albums' option if you want the albums
the tracks are located on as the search result.
Searches are case insensitive (that is, CATraxx does not distinguish between upper and
lower case).
You can add saved search criteria to the Search menu. If you save the search file in
the \Search folder, the search will automatically appear on the Search menu. You can
manually manage the searches on the menu by choosing Edit Menu from the Search
menu.
2.5.2
Quick search
The quick search will search the records displayed in the browse list. By default, it will
only search the text fields (standard text, lookup and memos) you actually see in the
list. You can also search all text fields in the table (however, this is slower).
You select this from the drop down menu linked to the Quick Search button on the
toolbar:
Type the text you want to search for in the text box, and click the Search button
(or simply press Enter).
The search result is immediately shown in the browse list. To clear the search, click the
Clear button
.
By default, the program will search for fields containing the text you specify. If you
would like to search for fields that begins with this text, add * after the text (for
example Summer*).
2.5.3
Simple search
The simple search lets you define a search criteria based on one or two fields. You
specify field, operator and the value you want to search for. The search criteria can be
saved to a file for later use.
To use the simple search, choose Simple from the Search menu.
© 2012 FNProgramvare
91
2.5.4
CATraxx Help
Advanced search
The advanced search lets you define a search criteria that can contain an (almost)
unlimited number of fields. You can group the fields in different ways using parenthesis
and the logical operators AND/OR. The search criteria can be saved to a file for later
use.
To use the advanced search, choose Advanced from the Search menu.
© 2012 FNProgramvare
Using CATraxx
2.5.5
92
Summary search
Choose Summary from the Search menu to open the 'Summary Search' window.
Specify the field you want to search in from the drop-down list. All unique values, and
the number of occurrences of each value, are then displayed in a list. Select the value
you want to search for and click OK.
© 2012 FNProgramvare
93
CATraxx Help
You can click the heading of one of the two columns to change the sort order. In the
example above we have sorted by the Count column in descending order.
2.5.6
Global search
With the global search you search in all album and track fields.
Choose Global from the Search menu to open the 'Global Search' window.
© 2012 FNProgramvare
Using CATraxx
2.5.7
94
The special searches
The special searches give you features not available in the other searches. You can, for
example, search for songs you have more than one recording of (based on either the
title only, or both the title and the songwriter), songs released by two specific artists,
songs written by two songwriters, etc.
© 2012 FNProgramvare
95
2.5.8
CATraxx Help
Search and replace
Use the search and replace function to replace a field value with another value.
Choose Replace from the Search menu to open the 'Search and Replace' window.
Click the Help button if you need help about the various options in this window.
To set the value of a field regardless of the current field value, use the Set Field Value
51 function.
© 2012 FNProgramvare
Using CATraxx
2.6
Reporting
2.6.1
About reports
96
When you want to print out data, you can bring up the Report Designer to create a new
report, select a pre-defined report from the Report menu, or use the Print List command
to print the contents of the browse list.
Printing the browse list
To print the browse list, choose Print from the File menu. This will open the 'Print List'
window.
Click the Help button if you need more help about the various options in this window.
Report Designer
CATraxx includes a report designer that lets you create almost any type of report. You
have full control over data fields, groups, sort order, columns, fonts, colors, paper size,
margins and print orientation. You can add your own reports to the Report menu so that
you can easily print them later.
© 2012 FNProgramvare
97
CATraxx Help
Choose Report Designer from the Report menu to open the Report Designer.
Predefined reports
On the Report menu you also find all the pre-defined reports that ships with CATraxx.
Simply select the report you want to print. This will open the 'Print Report' window.
2.6.2
The report designer
You use the Report Designer to create new reports, and to modify existing reports.
Reports are made up of bands. The way data appears in a report is determined by the
kind of band a report object (data field, image, line, shape, etc.) is in.
The Report Designer makes extensive use of popup menus. To display a popup menu,
right-click a band or report object. You can also specify the text formatting (font, font
size, color, and text alignment) from the Format toolbar. The text formatting affects all
selected objects.
To open the Report Designer, choose Report Designer from the Report menu.
© 2012 FNProgramvare
Using CATraxx
2.6.3
98
Report files
Before you can create a new report, or open a saved report, you must open the 'Report
Designer' window.
Create a new report
Choose New from the File menu. You see the 'New Report' window.
Select the type of report you want to create, then click OK.
© 2012 FNProgramvare
99
CATraxx Help
Save a report
To save the report you are working on, choose Save from the File menu. When you
save the report for the first time, you see the 'Save Report' window. Here you select the
folder you want to save the report in, and specify a filename.
If you have previously saved the report, CATraxx will just save all changes to the same
report file. Choose Save As from the File menu to save the report with a different
name.
Open a saved report
Choose Open from the File menu, locate the folder the report you want to open is
located in, select the report file and click Open.
2.6.4
Report options
Page setup
To change the page setup, choose Page Setup from the File menu.
© 2012 FNProgramvare
Using CATraxx
100
To specify default margins that are automatically used in all new reports, choose
Default Margins from the File menu.
Grouping
Grouping a report means breaking the data into meaningful groups before it appears in
your report. Data grouping is used to create easy-to-read blocks of data. You can create
up to five groups in a report.
For each group, there are two corresponding bands: the Group Header and the Group
Footer. These bands will only print when the value of the group field changes. The
Group Header is printed above the Detail band, while the Group Footer is printed below
the Detail band.
To set up the grouping, choose Grouping from the Report menu.
© 2012 FNProgramvare
101
CATraxx Help
Sort order
To change the sort order, choose Sort Order from the Report menu. You can sort on
up to five data fields.
© 2012 FNProgramvare
Using CATraxx
102
Filter
Use a filter to specify what information you want to print. To set up a filter, choose
Filter from the Report menu.
This will open either the 'Simple Filter' or the 'Advanced Filter' window based on the
'Search/filter type' setting in the 'Options' window.
What information to include
You can include all records in your report, or you can restrict your report to specific
records; either the marked records, the current record (record selected in the main
window), or let the filter specify what records to include.
You set this up by selecting from the Report / Include menu.
© 2012 FNProgramvare
103
2.6.5
CATraxx Help
Report bands
Reports are made up of bands. The way data appears in a report is determined by the
kind of band a report object (data field, image, line, shape, etc.) is in.
For example, objects in the Page Header band will appear at the top of each page.
Objects in the Page Footer band will appear at the bottom of each page. And the objects
in the Detail band will repeat down the page until no more page space is available, at
which point a new page will be started (the Detail band prints once for each record in
the table the report is based on).
The number of available bands depends on the report type. For example, the Sub-detail
band is only available in an album report, and the Column Header band is only available
if the report has more than one column (you set up the number of columns in the 'Page
Setup' window).
Band types
Title
The Title band prints on the first page of the report, above the Page Header band.
Page Header
The Page Header band prints at the top of each page, except the first page where it
© 2012 FNProgramvare
Using CATraxx
104
is printed after the Title band.
Column Header
The Column Header band prints at the top of each column. This band is only
available in reports with more than one column.
Group Header
The Group Header band prints before the Detail band each time the group value
changes. There is one Group Header band for each group (a report can have up the
five groups).
Detail
The Detail band prints once for each record in the table the report is based on. For
example, in an album report the Detail band prints once for each album that is
printed.
Sub-Detail
The Sub-Detail band prints once for each track on the album. The tracks are always
printed in the order they appear on the album. This band is only available in album
reports.
Detail 2
The Detail 2 band prints after the Sub-detail band, and is useful if you want to add
some space after the tracks before the next album, or if you want to print some
album fields after the tracks (you could for example print the artist and album title
on the Detail band, the track titles on the Sub-detail band, and then finally the
Review field on the Detail 2 band). This band is only available in album reports.
Group Footer
The Group Footer band prints after the Detail/Sub-detail/Detail 2 bands each time
the group value changes. There is one Group Footer band for each group (a report
can have up the five groups).
Column Footer
The Column Footer band prints at the bottom of each column. This band is only
available in reports with more than one column.
Page Footer
The Page Footer band prints at the bottom of each page.
Summary
The Summary band prints on the last page of the report, above the Page Footer
© 2012 FNProgramvare
105
CATraxx Help
band.
Edit band properties
To modify the properties of a band (for example height or fill color), right-click the band
and choose Properties from the popup menu.
Resize band
To resize a band click the band's title bar (the part of the band that displays the band
name) and drag while you hold down the mouse button. Release the mouse button
when the band has the desired height.
You can also edit the band properties, and manually set the Height property.
Hide and show band
To hide or show a band, simply open the Report menu and select the band you want
hide or show. If it is currently hidden, it will be shown. If it is currently shown, it will be
hidden.
2.6.6
Report objects
CATraxx has nine different objects you can use in reports. This enables you to put all
types of data in your reports; text, images, lines, shapes, etc
Text
The Text object simply prints the text you specify, and is typically used for report titles,
page headings, field names, etc.
When you add a Text object to the report, you see the 'Text' window. Here you enter
the text (you can later modify the text by editing the object properties).
© 2012 FNProgramvare
Using CATraxx
106
Use the code %date% to have CATraxx insert the current date when the report is
printed.
Use the code %filter:#% to have CATraxx insert the filter value when the report is
printed. For example, %filter:1% will print the first, and %filter:2% the second filter
value.
DBField
The DBField object is used to print text from a data field in the database, and is the
report object you will use the most.
When you add a DBField object to the report, you see the 'Select Field' window. Here
you select data field.
DBCalc
The DBCalc object is used to perform common report calculations and print the
resulting value. The calculation is performed based on the value of the specified data
field.
When you add a DBCalc object to the report, you see the 'Select Field' window. Here
you select the data field the calculation should be based on.
DBMulti-field
A DBMulti-field combines text from two or more report objects. This allows you to print
data from several data fields without unnecessary space between the fields. Each data
field can be formatted independently.
When you add a DBMulti-field object to the report, you see the '[DBMulti-field name]'
window. Here you select the report objects (Text, DBField, or DBCalc) you want to
include.
DBXsl
The DBXsl object will let you use an xsl template to format the output of the report
object. You can include any field from the table the report is based on, and use different
fonts and colors, tables, etc. The xsl template is used to create a html document, which
is then included in the report. To use this report object you need to know how to create
and edit XSL templates!
System
© 2012 FNProgramvare
107
CATraxx Help
The System object is used to print common report information, such as date or page
number. The data that is printed is determined by the Type property.
Shape
The Shape object is used to print graphical shapes. The shape that is printed is
determined by the Type property.
Line
The Line object is used to print a vertical or horizontal line. The orientation of the line is
determined by the Orientation property. Use the Style property to control whether a
single or double line is printed.
Image
Use the Image object to print a graphical image.
When you add an Image object to the report, you see the 'Select Image File' window.
Here you select image file.
Insert object
Select the report object you want to insert from either the Insert menu, or the toolbar,
then click in the band you want to add the report object to.
© 2012 FNProgramvare
Using CATraxx
108
Select object
To do certain things with an object (change the font, move it, resize it, etc.), you first
have to select it. Select means to point to the object with the mouse and then to click
the left mouse button.
To select a single object
Click on the object.
Sizing handles appear around the object to indicate that it is selected.
Selecting multiple objects
Hold down the Alt key and click on the objects you want to select.
Handles appear on each selected object. You can then move or delete the objects as a
group. You can also change the font or text formatting for all selected objects in one
operation.
Move object
First select the object you want to move, then click on the object with the mouse and
drag it to the new position.
You can move the selected object(s) one pixel at a time by holding down Ctrl while you
use the arrow keys.
Resize object
First select the object you want to resize, then drag the field's surrounding sizing
handles to increase or decrease the size of the object.
You can resize the object one pixel at a time by holding down Shift while you use the
arrow keys.
© 2012 FNProgramvare
109
CATraxx Help
Edit object properties
To modify the object properties (for example height or fill color), right-click the object
and choose Properties from the popup menu.
Delete object
First select the object you want to delete, then choose Delete from the Edit menu (or
simply press the Ctrl+Del shortcut).
Move object to another band
You cannot drag an object from one band to another band. You must copy the object to
the clipboard and then past it onto the other band.
1. Select the object you want to move to another band.
2. Choose Cut from the Edit menu.
CATraxx copies the object to the clipboard, and removes it from the band it was
located on.
3. Right-click the band you want to paste the object into, and choose Paste from
the popup menu.
2.6.7
Print the report
To print the report from the Report Designer window, click either the Print
Preview
or Print to File
, Print
button on the toolbar.
© 2012 FNProgramvare
Using CATraxx
110
If you just want to check the report layout, hold down Ctrl while you choose the print
command. This will tell CATraxx will only print the first page of the report.
You can also print reports from the main window by choosing a saved report from the
Report menu.
2.6.8
The report menu
CATraxx comes with many pre-defined reports. These reports are available from the
Report menu.
As long as you save the reports you create in the \Reports folder, CATraxx will
automatically show the reports on the Report menu.
If not, you can manually edit the Report menu by choosing Edit Menu from the Report
menu. Here you can add new reports, remove reports, or update the action that is
performed when a report is chosen from the menu (print the report, preview it, send it
to a file, show the 'Print Report' window, or bring up the Report Designer).
© 2012 FNProgramvare
Part
III
The CATraxx Database
3
The CATraxx Database
3.1
Overview
112
All information about your music collection is stored in a database. A database is a file
on your hard disk, with the extension .MDB, that contains all the information you have
entered into the database.
A database consists of several tables. Each table contains related information. For
example, there is one table with information about each album, one with information
about each track, one with information about each artist, one with information about
each label, and so on. Each table contains a various number of fields. For example, the
Artist/Person table has a field for the name, one field for the country of origin, one field
for notes and so on.
CATraxx lets you rename all tables and all fields. You can also specify a default value
for most fields. For example, if most of your collection consists of CDs, you can specify
CD as the default value for Format. You can hide the fields you don't want to use. They
will then disappear from all windows, menus, lists etc. You only use the fields you want.
CATraxx lets you work with an unlimited number of databases. This means that you can
split your collection into different catalogs and organize it to meet your needs. You can
later merge existing databases.
CATraxx uses a relational database model. This means that you register most
information only once. For example, you only need to type the name of an artist the
first time you add an album by this artist. Later, you simply choose the name from a
list. CATraxx then automatically creates a link between the album and the artist. When
you modify an entry in a lookup table, for example, to fix a typing error, the change will
be reflected in all fields that are linked to the lookup table.
The use of lookup tables to store information has two significant advantages. It saves
time and conserves valuable disk space on your computer. It also makes it easier to
search for exactly the information you are looking for, or create a group based report.
And finally, it allows you to store useful information about each entry in a lookup table.
For example, you can store an image of an artist or a label's home page URL.
3.2
Album table
3.2.1
Standard fields
The Album table contains information about all albums in the database. Information
from lookup tables (for example Artist or Format) is not stored in the Album table,
CATraxx only saves a link to the relevant item in the lookup table. This means that any
changes you make to a lookup item, for example fixing a typing error, is reflected in all
albums where the item is used.
Acquired From Text 50 (lookup
© 2012 FNProgramvare
137
)
113
CATraxx Help
Use this field to specify where you bought the album or who you got it from.
Album Credits (Text 100 - lookup
140
)
Album credits like Artwork or Cover Design.
Album ID (Numeric)
This is an unique ID number that is assigned to each entry in the table.
Appraiser (Text 50 - lookup
139
)
The name of the appraiser (this could be a person, a catalog, etc.).
Artist (Text 100 - lookup
140
)
The artist(s) that released the album.
The default artist roles are: Featuring, Vs. and With.
Artist Relation (Text 100 - lookup)
This field includes all related artists.
Award (Text 100 - lookup
146
)
Here you can specify awards. You can also specify the year the award was given and
any additional details.
Barcode (Text 50)
The bar code number.
Bootleg (Checkbox)
Select this field if the album is a bootleg.
Borrower (Text 50 - lookup
147
)
If the album is currently loaned out, this field contains the name of the borrower.
Borrower Category (Text 50 - lookup
149
)
If the album is currently loaned out, this field contains the category of the borrower.
Box Set (Text)
© 2012 FNProgramvare
The CATraxx Database
114
You can link an album to a box set.
Catalog No (Text 25)
The label catalog number.
CDDB2 - Download (Yes/No)
This field indicates whether the album was downloaded from CDDB2.
CDDB2 - Submit (Yes/No)
This field indicates whether the album has been submitted to CDDB2.
Change in Value (Numeric)
The difference between price and value.
Change in Value % (Numeric)
The difference between price and value in percent.
Company (Text 50 - lookup
149
)
The record company that released the album. In addition to the Label field you can use
this field to specify the labels parent company.
Compilation (Checkbox)
Select this field if the album is a compilation.
A compilation is an album with tracks by different artists, such as soundtracks or
samplers. Do not check the Compilation box if all tracks are by the same artist.
Condition Cover (Text 50 - lookup
150
)
Use this field to specify the condition of the cover.
Condition Record (Text 50 - lookup
151
)
Use this field to specify the condition of the record itself.
Country (Text 50 - lookup
152
)
The country where the album was manufactured.
Cover (Binary)
© 2012 FNProgramvare
115
CATraxx Help
This field contains the image if it is stored in the database.
Cover - Comments (Memo)
Comments about the image.
Cover - Compressed (Yes/No)
Specifies whether the image is compressed or not (only applies to BMP images).
Cover - External (Yes/No)
Specifies whether the image is stored externally (that is, only a link to the image is
stored in the database) or not.
Cover - File Name (Text 255)
If this is an external image, this field contains the file name.
Cover - Thumbnail (Binary)
This field contains a thumbnail of the image. The thumbnail is automatically created
when you add a new image.
Cover - Type (Numeric)
The type of image: 0 - bmp, 1 - gif, 2 - jpeg, 3 - png, or 99 - other.
Current Value (Numeric)
The current value of the album.
Date Acquired (Date)
The date you acquired the album. If you don't remember the day and month, just
specify the year. To bring up a calendar where you can select the date, click the button
to the right of the text box.
Date Borrowed (Date)
If the album is currently loaned out, this field contains the date it was borrowed.
Date Due (Date)
If the album is currently loaned out, this field contains the date it is due to be returned.
Days Since Played (Numeric)
© 2012 FNProgramvare
The CATraxx Database
116
The number of days since you last played the album.
Disc Count (Numeric)
This field contains the number of discs the album consists of (1 for ordinary albums, 2
for double albums, and so on). The value of this field is automatically maintained by
CATraxx.
Disc Label (Text 32)
The disc label is read from the CD when you use the Audio/Scan Folder function to scan
a CD for audio files.
Distributor (Text 50 - lookup
153
)
The company that distributes the albums.
Enhanced CD (Checkbox)
Select this field if the CD is an enhanced CD.
An enhanced compact disc (ECD) is an audio CD with multimedia content.
File Links (Text)
Here you can add links to files.
Format (Text 50 - lookup
154
)
Use this field to specify the album format, for example LP, CD, DVD, Cassette, etc.
Format Group (Text 50 - lookup
155
)
Indicates what format group the album format is linked to. Format groups are useful
when creating reports and for statistical summaries.
A vinyl album and a CD album should be specified as two different formats (for example
LP and CD), but can be linked to the same format group (for example Album).
Gatefold Cover (Checkbox)
If the album has a gatefold cover, select this field.
The cover of an album with a gatefold cover opens like the front cover of a book.
Genre (Text 102 - lookup
© 2012 FNProgramvare
156
)
117
CATraxx Help
A genre consists of a Main Genre and a Sub-Genre (Main Genre: Sub-genre), for
example:
Classical: Opera
Electronic: Jungle
Jazz: Fusion
Rock: Classic Rock
World: Celtic
You can add as many genres as you like. To open the popup menu to select a genre,
click the arrow button, or press Ctrl+Arrow Right. You can rearrange the genres in the
list with drag-and-drop.
Note: You can right-click the Genre field and choose Update Tracks from the popup
menu to update the Genre field for all tracks on the album with the same genre(s) as
the album field.
HDCD (Checkbox)
Select this field if the CD is HDCD encoded.
High Definition Compatible Digital, or HDCD, is a patented process for delivering on CD
the full richness and detail of the original microphone feed. When listening to HDCD
recordings, you hear more dynamic range, a focused 3-D soundstage, and extremely
natural vocal and musical timbre.
Insurance (Text 50 - lookup
157
)
Use this field to link the album to an insurance policy.
Keywords (Text 50 - lookup
159
)
This field is for listing keywords that describe the album.
Label (Text 50 - lookup
159
)
Use this field to specify the recording label.
Last Modified (Date)
The date/time the record was last modified. This field is automatically updated by
CATraxx when you edit data.
Live (Checkbox)
Select this field if this is a live album.
Note: You can right-click the Live field and choose Update Tracks from the popup menu
© 2012 FNProgramvare
The CATraxx Database
118
to update the Live field for all tracks on the album with the same value as the album
field.
Location (Text 50 - lookup
160
)
Use this field to specify where the album is located.
Marked (Yes/No)
This field indicates whether the album is marked or not.
Main Genre (Text 50)
The main genre (Main Genre: Sub-Genre).
Music Chart Info (Text 150 - lookup
161
)
This field allows you to keep track of music chart data: Chart name, year, peak position,
weeks in chart, and your own notes.
New Album (Yes/No)
This field indicates whether the album is new, and is based on the Date Acquired field.
By default, if it's less than 60 days since you acquired the album, this field returns Yes.
If not, it returns No.
Note: You can change the number of days used in this calculation by choosing
Tools=>Options=>Data Entry, and specifying the new value in the 'New album period'
text box. Default value is 60 days.
Nomination (Text 100 - lookup
146
)
Here you can specify award nominations. You can also specify the year the nomination
was given and any additional details.
Notes (Memo)
This field is for your own notes.
Number of Tracks (Numeric)
This field contains the number of tracks on the album, and is automatically updated by
CATraxx.
On Loan (Yes/No)
This field indicates whether the album is currently on loan.
© 2012 FNProgramvare
119
CATraxx Help
Original Pressing (Checkbox)
Select this field if the record is an original pressing.
Overdue (Date)
If the album is loaned out, this field indicates whether it is overdue or not.
Owner (Text 50 - lookup
161
)
Use this field to specify the owner of the album.
Packaging (Text 50 - lookup
162
)
Use this field to specify information about the packaging.
The most common CD packaging types are:
· Blisterpack - a plastic cover over the CD that allows the discs to displayed on a hook
instead of in a bin.
· Digipack - a card CD case with a bit of plastic to support/hold the CD.
· Jewelcase - a plastic case that holds the CD (the standard CD packaging).
· Longbox - a paperboard box that holds the CD.
Personal Rating (Text with image)
Use this field to specify your own personal rating. The default setup will let you select a
star rating between 0 and 5 stars.
In the data entry window, you can press the + or - button to select rating without
having to open the list.
Picture Disc (Checkbox)
Select this field if the record is a picture disc.
Playing Time (Numeric)
The total playing time. CATraxx automatically calculates the total playing time after you
have registered the tracks on the album.
Note: You can also calculate the total playing time by choosing Add Up Playing Time
from the Album menu.
© 2012 FNProgramvare
The CATraxx Database
120
Primary Genre (Text 50)
The primary genre is the first genre listed in the Genre field.
Promo (Checkbox)
Select this field if the album is a promotion release.
Purchase Price (Numeric)
Use this field to specify what you paid for the album.
Reference No (Text 25)
Use this field if you have your own system for identifying albums in your collection.
CATraxx will automatically generate the reference number. To configure this feature,
choose Options from the Tools menu, click the Reference No tab and make your
selections.
Registered (Date)
This field contains the date the album was added to the database. Today's date is used
automatically, but you can change it if you want.
Reissue (Checkbox)
Select this field if your copy of the album is a reissue.
Reissue Date (Date)
If the album is a reissue, use this field to keep track of the reissue date/year.
Released (Date)
Use this field to specify when the album was released.
Note: You can right-click the Released field and choose Update Tracks from the popup
menu to update the Released field for all tracks on the album with the same value as
the album field.
Remastered (Checkbox)
Select this field if you have a remastered copy.
Reviews (Memo)
© 2012 FNProgramvare
121
CATraxx Help
This field is for excerpts of reviews.
Reserved (Yes/No)
This field indicates whether the album is reserved or not.
Reserved Date (Date)
If the album is reserved, this field contains the date the album was reserved.
Reserved To (Text 50 - lookup
147
)
If the album is reserved, this field contains the name of the borrower the album is
reserved to.
Selling Price (Numeric)
Use this field to specify the selling price.
Sides (Numeric)
This field contains the number of sides (for example 1 for CDs and 2 for LPs). The value
of this field is automatically maintained by CATraxx.
Soundtrack (Checkbox)
Select this field if this is a soundtrack album.
SPARS (Text 50 - lookup
166
)
The SPARS (Society of Professional Audio Recording Studios) code indicates whether
different portions of the recording process were accomplished using either digital or
analog recording methods, for example AAA, ADD or DDD. Press Ctrl + W to add a new
entry to the list.
Status (Text 50 - lookup
167
)
Use this field to specify the status of the album, for example Own (you own the album),
Want (you have it on your want list), For sale (the album is for sale) or Reference (you
don't own it, but want to include it in the database).
Sub-Genre (Text 50)
The sub-genre (Main Genre: Sub-Genre).
Tape Type (Text 50 - lookup
169
)
Use this field to specify the tape type, for example Normal, Chrome or Metal.
© 2012 FNProgramvare
The CATraxx Database
122
Title (Text 253)
The album title.
Note: When you tab out of the Title field (or save the album), CATraxx will
automatically fill in the Title Sort field if it is empty.
Title Sort (Text 255)
This is the value that is used when sorting on the album title. When you tab out of the
Title field (or save the album), CATraxx will automatically fill in the Title Sort field if it is
empty. If the name begins with A or The, CATraxx will automatically update the Title
Sort field to reflect this. For example, if you type The Joshua Tree in the Title field,
CATraxx will add Joshua Tree, The to the Title Sort field. This means that the album is
sorted under "J" and not "T".
Valid CDDB Toc (Yes/No)
This field indicates whether the album has a valid CDDB Toc. The Toc is fetched from
the CD when you scan it. You can only submit, or update (download), CDs with a valid
TOC.
Valid MS Disc ID (Yes/No)
This field indicates whether the album has a valid Microsoft Disc ID or not. Only albums
with a valid MS Disc ID are exported to CDPLAYER.INI (Microsoft CD Player).
Vinyl Color (Text 50 - lookup
171
)
Use this field to specify the vinyl color.
Web Links (Text)
Here you can add links to web sites.
3.2.2
Custom fields
To rename a custom field, open the data entry window, right-click the data field and
choose Rename Field from the popup menu. You can also rename fields from the
'Database Setup' window (Tools=>Database Setup).
The Album table contains the following custom fields:
Text
Custom 01, Custom 02, Custom 03, Custom 04, Custom 18, Custom 19, Custom 37,
Custom 38
© 2012 FNProgramvare
123
CATraxx Help
Lookup
Custom 05, Custom 06, Custom 07, Custom 08, Custom 20, Custom 21
Multivalue lookup
Custom 44
Memo
Custom 43
Date
Custom 22, Custom 23, Custom 35, Custom 36
Numeric
Custom 09, Custom 10, Custom 11, Custom 34
Checkbox
Custom 12, Custom 13, Custom 14, Custom 15, Custom 16, Custom 17, Custom 18,
Custom 24, Custom 25, Custom 26, Custom 27, Custom 28, Custom 29, Custom 30,
Custom 31, Custom 32, Custom 33, Custom 39, Custom 40, Custom 41, Custom 42
3.3
Track table
3.3.1
Standard fields
The Track table contains information about all tracks in the database. Information from
lookup tables (for example Artist or Songwriter) is not stored in the Track table,
CATraxx only saves a link to the relevant item in the lookup table. This means that any
changes you make to a lookup item, for example fixing a typing error, is reflected in all
tracks where the item is used.
Album ID (Numeric)
This is the album's unique ID number.
Artist (Text 100 - lookup
140
)
The artist(s) that recorded the track.
The default artist roles are: Featuring, Vs. and With.
Artist 2 (Text 100 - lookup)
© 2012 FNProgramvare
The CATraxx Database
124
This field contains the track artist if it is different from the album artist. If the track
artist and the album artist are equal, this field is empty.
Artist Relation (Text 100 - lookup)
This includes all related artists.
Audio Filename (Text 255)
The full path to the audio file.
Audio Type (Numeric)
The type of audio file: 1 - mp3, 2 - wav, 3 - wma, 4 - aac, 5 - ape, 6 - flac, 7 - mp4/
m4a, 8 - ogg, 9 -shn, 10 -m4b, 11 - mpc, 12 - wavpack, or 99 - other.
Author/Publisher (Text 100 - lookup
140
)
The authors of the song.
The default Author/Publisher roles are: Author, Composer, Copyright, Librettist, Lyricist,
Publisher, Score, and Songwriter.
Band Member (Text 100 - lookup
140
)
The band members and the instruments they play.
Blank (Checkbox)
Select this field if the track is "blank" track (an empty one second track).
By default, blank tracks are excluded from all reports, the Track View, searches, and
the CD Player, but will be displayed in the track list in the Album Edit window. If you
also want to exclude blank tracks from the track list, choose Tools->Options>Miscellaneous, and select Hide blank tracks / Always.
Bonus (Checkbox)
If the track is a bonus track, select this field.
BPM (Numeric)
The number of beats per minute. This is occasionally entered by, and useful for, disc
jockeys for DJ synching of tracks.
Conductor/Arranger (Text 100 - lookup
The conductor/arranger credits.
© 2012 FNProgramvare
140
)
125
CATraxx Help
The default conductor/arranger roles are: Arranger, Conductor, Director, and
Orchestrator.
Counter Start (Numeric)
Use this field to specify the tape counter start position.
If you have specified both the counter start and stop positions, CATraxx will
automatically calculate the length of the track if the counter time format is set to Time.
If you haven't specified the counter stop position for the previous track, CATraxx will
automatically fill it in when you save the current track. For example, if the start counter
for the current track is 0:12:00, CATraxx will fill in the same counter in the counter
stop field for the previous track.
Counter Start-Stop (Numeric)
This field includes the counter start and stop positions (for example 0:12:00-0:15:30).
Counter Stop (Numeric)
Use this field to specify the tape counter stop position.
If you have specified both the counter start and stop positions, CATraxx will
automatically calculate the length of the track if the counter time format is set to Time.
Days Since Played
Numeric
The number of days since you last played the track.
Demo (Checkbox)
If the track is a demo recording, select this field.
Disc (Numeric)
This field contains the disc the track is located on, and is automatically maintained by
CATraxx. If the track is located on disc 2 of a double CD, the disc number is 2.
File Links (Text)
Here you can add links to files.
Full Title (Text)
This field combines Title, Version, Live, Demo, Instrumental, Bonus, Hidden and Blank
© 2012 FNProgramvare
The CATraxx Database
126
into one field. For example, if the track is a live recording of Losing My Religion, the
field value is "Losing My Religion [Live]".
Genre (Text 102 - lookup
156
)
A genre consists of a Main Genre and a Sub-Genre (Genre: Sub-genre), for example:
Classical: Opera
Electronic: Jungle
Jazz: Fusion
Rock: Classic Rock
World: Celtic
You can add as many genres as you like. To open the popup menu to select a genre,
click the arrow button, or press Ctrl+Arrow Right. You can rearrange the genres in the
list with drag-and-drop.
Guest Musician (Text 100 - lookup
140
)
The guest musicians and the instruments they play.
Hidden (Checkbox)
Select this field if the track is "hidden" (not included in the track list on the cover).
Index (Numeric)
This field contains the track index, and is automatically maintained by CATraxx. For
example, if the track is number 3 on side B, the index is 3.
Instrument (Text 50 - lookup
156
)
This field includes all instruments that are registered for the track.
Instrumental (Checkbox)
Select this field if the track is an instrumental.
Keywords (Text 50 - lookup
159
)
This field is for listing keywords that describe the track.
Last Modified (Date)
The date/time the record was last modified. This field is automatically updated by
CATraxx when you edit data.
Length
© 2012 FNProgramvare
127
CATraxx Help
Numeric
The length of the track.
CATraxx automatically registers the track length when you download disc data from
CDDB.
Live (Checkbox)
If the track is a live recording, select this field.
Lyrics (Memo)
Use this field to store the lyrics.
Marked (Yes/No)
This field indicates whether the track is marked or not.
Main Genre (Text 50)
The main genre (Main Genre: Sub-Genre).
Music Chart Info (Text 150 - lookup
161
)
This field allows you to keep track of music chart data: Chart name, year, peak position,
weeks in chart, and your own notes.
Musician (Text 50 - lookup
140
)
This field includes both band members and guest musicians.
Notes (Memo)
This field is for your own notes.
Original by (Text 100 - lookup
140
)
If the recording is a cover version, use this field to store the name of the artist that
recorded the original version.
Personal Rating (Text with image)
Use this field to specify your own personal rating. The default setup will let you select a
star rating between 0 and 5 stars.
In the data entry window, you can press the + or - button to select rating without
© 2012 FNProgramvare
The CATraxx Database
128
having to open the list.
Position (Text)
This field contains the "track position". By track position we mean what disc and side
the track is located on, and the index number.
For example:
· track 3 on a CD: "3"
· track 2 on side A on a LP: "A2"
· track 5 on side B on disc 2 of a double CD: "2-B5".
Note: If the album has only one side, the side is not included. If the album consists of
only one disc, the disc number is not included.
Primary Genre
Text 50
The primary genre is the first genre in the Genre field.
Production (Text 100 - lookup
140
)
The production credits.
The default production roles are: Assistant Engineer, Associate Producer, Coproducer,
Engineer, Executive Producer, Mastering, Mixing, Producer, Programming and Remixing.
Recording End (Date)
Use this field to specify when the recording process was completed. If you don’t know
the day and month, just specify the year.
Recording Start (Date)
Use this field to specify when the recording process started. If you don’t know the day
and month, just specify the year.
Released (Date)
The original release or publication date of the track.
Reviews (Memo)
© 2012 FNProgramvare
129
CATraxx Help
This field is for excerpts of reviews.
Side (Text 1)
This field contains what side (A or B) the track is located on, and is automatically
maintained by CATraxx.
Studio (Text 150 - lookup
167
)
The studios where the song was recorded, mixed, and mastered.
The default studio roles are: Mastering Location, Mixing Location and Recording
Location.
Sound (Text 50 - lookup
166
)
Use this field to specify sound information, for example Mono or Stereo.
Sub-Genre (Text 50)
The sub-genre (Main Genre: Sub-Genre).
Sub-Titles (Text)
Use subtitles if the track consists of several parts and you want to give each part a title.
Tag Read (Date)
The last time data was read from the audio file tag.
Tag Write (Date)
The last time data was written to the audio file tag.
Title (Text 253)
The title of the track. Use the Title Sort field to specify the value that is used when
sorting on the title.
Title Sort (Text 255)
This is the value that is used when sorting on the track title. When you tab out of the
Title field (or save the track), CATraxx will automatically fill in the Title Sort field if it is
empty. If the name begins with “A” or “The”, CATraxx will automatically update the
Title Sort field to reflect this. For example, if you type “The Sidewinder Sleeps Tonite” in
the Title field, CATraxx will add “Sidewinder Sleeps Tonite, The” to the Title Sort field.
This means that the track is sorted under "S" and not "T".
© 2012 FNProgramvare
The CATraxx Database
Tour (Text 150 - lookup
170
130
)
Use this field to specify the tour on which the track was recorded if it is a live recording.
Track ID (Numeric)
This is an unique ID number that is assigned to each entry in the table.
Venue (Text 150 - lookup
170
)
Use this field to specify the venue where the track was recorded if it is a live recording.
Version (Text 150)
Use this field to specify information about the version of the track (for example
Extended Mix, Club Mix, Cassette Demo, Acoustic Version, Studio Outtake or Live In
Studio).
Video Filename (Text 255)
The full path to the video file.
Video Type (Numeric)
The type of video file: 1 - Video for Windows (avi), 2 - MPEG, 3 - Quick Time (mov), 4 Flash Video (flv) or 99 - other.
Web Links (Text)
Here you can add links to web sites.
Year Copyright (Text 4)
Use this field to specify what year the song was copyrighted.
Year Written (Text 4)
Use this field to specify what year the song was written.
3.3.2
Custom fields
To rename a custom field, open the data entry window, right-click the data field and
choose Rename Field from the popup menu. You can also rename fields from the
'Database Setup' window (Tools=>Database Setup).
The Track table contains the following custom fields:
© 2012 FNProgramvare
131
CATraxx Help
Text
Custom 01, Custom 02, Custom 03, Custom 16, Custom 17, Custom 37, Custom 38
Lookup
Custom 04, Custom 05, Custom 06, Custom 18, Custom 19,
Multivalue lookup
Custom 42,
Memo
Custom 41
Date
Custom 30, Custom 31, Custom 33, Custom 34
Numeric
Custom 07, Custom 08, Custom 09, Custom 32
Checkbox
Custom 10, Custom 11, Custom 12, Custom 13, Custom 14, Custom 15, Custom 20,
Custom 21, Custom 22, Custom 23, Custom 24, Custom 25, Custom 26, Custom 27,
Custom 28, Custom 29, Custom 37, Custom 38, Custom 39, Custom 40
3.4
Box Set table
Album Count (Numeric)
The number of albums linked to this boxset.
Albums (Text)
The name of the albums linked to this boxset.
Artist (Text 100 - lookup
140
)
The artist name(s).
Cover (Binary)
This field contains the image if it is stored in the database.
© 2012 FNProgramvare
The CATraxx Database
132
Cover - Comments (Memo)
Comments about the image.
Cover - Compressed (Yes/No)
Specifies whether the image is compressed or not (only applies to BMP images).
Cover - External (Yes/No)
Specifies whether the image is stored externally (that is, only a link to the image is
stored in the database) or not.
Cover - File Name (Text 255)
If this is an external image, this field contains the file name.
Cover - Thumbnail (Binary)
This field contains a thumbnail of the image. The thumbnail is automatically created
when you add a new image.
Cover - Type (Numeric)
The type of image: 0 - bmp, 1 - gif, 2 - jpeg, 3 - png, or 99 - other.
Notes (Memo)
This field is for your own notes.
Released (Date)
The release date/year.
Title (Text 253)
The box set title.
Title Sort (Text 255)
This is the value that is used when sorting on the title.
3.5
Loan table
The Loan History table contains information about albums that are out on loan, and
albums that previously have been loaned out. You can't modify this table directly, but
CATraxx updates the table when you register an album as loaned out or as returned.
© 2012 FNProgramvare
133
CATraxx Help
Borrower (Text 50 - lookup
147
)
The name of the borrower.
Date Borrowed (Date)
The date the album was borrowed.
Date Due (Date)
The date the album is due to be returned.
Date Returned (Date)
The date the album was returned. If the album is not yet returned, this field is empty.
Marked (Yes/No)
This field indicates whether the record is marked or not.
Overdue (Yes/No)
If the album is loaned out, this field indicates whether it is overdue or not.
Returned (Yes/No)
This field indicates whether the album is returned or not.
3.6
Want List table
The Want List allows you to keep tracks of music you intend to buy.
Artist (Text 100 - lookup
140
)
The name of the artist(s).
Catalog No (Text 25)
The label catalog number.
Format (Text 50 - lookup
154
)
The media format (LP, 7", 12", etc.)
Label (Text 50 - lookup
159
)
© 2012 FNProgramvare
The CATraxx Database
134
The recording label.
Marked (Boolean)
This field indicates whether the record is marked or not.
Notes (Memo)
This field is for your own notes.
Order Date (Date)
The date you ordered the item.
Ordered From (Text 50 - lookup
137
)
The store you have ordered the item from.
Price (Numeric)
The price you paid.
Priority (Numeric)
The priority: 1, 2, or 3.
Released (Date)
The release date (or year only).
Title (Text 150)
The title.
Title Sort (Text 150)
The sort title.
3.7
Playlist table
Artist (Text 100 - lookup
140
)
The artist(s) the playlist is assigned to.
Category (Text 50 - lookup
163
)
You can group playlists into customizable 2-level categories. Right-click and choose Add
© 2012 FNProgramvare
135
CATraxx Help
from the popup menu to add a new category.
Created by (Text 50 - lookup
164
)
The person that created the playlist.
Creation Date (Date)
The date the playlist was created.
Favorite (Checkbox)
Indicates whether the playlist is a "favorite" or not. Favorite playlists are shown on the
Explorer home page, and are available from the toolbar in CATraxx Audio Player.
Filter (Binary)
The filter for dynamic playlists.
Genre (Text 102 - lookup
156
)
A genre consists of a Main Genre and a Sub-Genre (Genre: Sub-genre), for example:
Classical: Opera
Electronic: Jungle
Jazz: Fusion
Rock: Classic Rock
World: Celtic
You can add as many genres as you like. To open the popup menu to select a genre,
click the arrow button, or press Ctrl+Arrow Right. You can rearrange the genres in the
list with drag-and-drop.
Main Genre (Text 50)
The main genre (Main Genre: Sub-Genre).
Max (Numeric)
This is the maximum number of albums or tracks a dynamic playlist can contain.
Notes (Memo)
This field is for your own notes.
Number of Tracks (Numeric)
The number of tracks. This field is automatically updated by CATraxx.
© 2012 FNProgramvare
The CATraxx Database
136
Note: For dynamic playlists, this field is always 0.
Playing Time
Numeric
The total playing time. This field is automatically updated by CATraxx.
Note: For dynamic playlists, this field is always 0.
Primary Genre (Text 50)
The primary genre is the first genre in the Genre field.
Random (Checkbox)
If you have set the Max field, check the Random field if you want CATraxx to pick the
albums (if you filter on album fields only) or tracks at random when opening the
playlist.
Suppose you have set up a filter that returns 1000 tracks. If you set Max to "50" and
check the Random field, CATraxx will pick 50 of the 1000 tracks at random each time
you open the playlist.
If you do not check the Random field, CATraxx will always pick the first 50 tracks
according to the defined sort order.
Note that if you filter on album fields only, Max and Random will determine which
albums the program will select. All tracks on these albums will be added to the playlist
in the same order they exist on the album. For example, if you want to select one U2
album at random and play all tracks on this album, filter on the Album.Artist field, set
Max to 1 and check the Random field.
Reload (Checkbox)
When this field is checked, CATraxx Audio Player will automatically reload the playlist
when it is finished playing. This is especially useful for randomized dynamic playlists,
for example the default "Surprise me! - 25 Random Tracks" playlist. When playback is
completed, the player will select 25 new tracks and then automatically start playing
these tracks.
Shuffle (Checkbox)
Check this field to automatically "shuffle" the playlist before it is sent to the audio
player.
Note that if you filter on album fields only, CATraxx will shuffle the albums, not the
tracks on these albums (the tracks will always be played in the same order they exist
© 2012 FNProgramvare
137
CATraxx Help
on the album).
Sort Order (Binary)
The sort order for dynamic playlists.
Status (Text 150 - lookup
164
)
You can assign a status to the playlist ("In Progress", "Completed", etc.).
Sub-Genre (Text 50)
The sub-genre (Main Genre: Sub-Genre).
Title (Text 100)
The playlist title.
Type (Numeric)
The type of playlist. This can be either "Manual" or "Dynamic".
A manual playlist is a playlist where you have manually selected the tracks. You add
tracks to the playlist from either the Album View or Track View.
A dynamic playlist is a playlist based on a filter (for example "5 star" tracks, or tracks
by a specific artist). The contents of a dynamic playlist is automatically updated as you
modify information in the database.
3.8
Lookup tables
3.8.1
Acquired From table
Two fields are linked to this lookup table: Album.Acquired From and Want List.Ordered From.
Acquired From (Text 50)
The name of the store where you bought the album, who you got it from etc. Use the
Sort by field to specify the value that is used when sorting on this item.
Acquired From ID (Numeric)
This is an unique ID number that is assigned to each entry in the table.
Address (Memo)
This is a memo field where you can specify the address.
© 2012 FNProgramvare
The CATraxx Database
138
E-mail (Text 100)
Here you can specify the e-mail address.
Fax (Text 25)
Here you can specify fax number.
Marked (Yes/No)
This field indicates whether the record is marked or not.
Notes (Memo)
This field is for your own notes.
Phone (Text 25)
Here you can specify phone number.
Sort by (Text 52)
This is the value that is used when sorting on this item. When you tab out of the
Acquired From field (or save the item), CATraxx will automatically fill in the Sort by
field if it is empty.
Web Link (Text)
Here you can specify the home page URL.
3.8.2
Album Credit Role table
Each person in the Album Credits field can be linked to a role.
Album Credit Role (Text 50)
The name of the role, for example "Cover Design" or "Cover Photo".
Album Credit Role ID (Numeric)
This is an unique ID number that is assigned to each entry in the table.
Marked (Yes/No)
This field indicates whether the record is marked or not.
Notes (Memo)
© 2012 FNProgramvare
139
CATraxx Help
This field is for your own notes.
3.8.3
Appraiser table
One field is linked to this lookup table: Album.Appraiser.
Appraiser (Text 50)
The name of the appraiser (this could be a person, a magazine, a catalog etc.). Use the
Sort by field to specify the value that is used when sorting on this item.
Appraiser ID (Numeric)
This is an unique ID number that is assigned to each entry in the table.
Address (Memo)
This is a memo field where you can specify the appraiser’s address.
E-mail (Text 100)
Here you can specify the e-mail address.
Fax (Text 25)
Here you can specify fax number.
Marked (Yes/No)
This field indicates whether the record is marked or not.
Notes (Memo)
This field is for your own notes.
Phone (Text 25)
Here you can specify phone number.
Sort by (Text 52)
This is the value that is used when sorting on this item. When you tab out of the
Appraiser field (or save the item), CATraxx will automatically fill in the Sort by field if it
is empty.
Web Link (Text)
© 2012 FNProgramvare
The CATraxx Database
140
Here you can specify the home page URL.
3.8.4
Artist/Person table
3.8.4.1
Standard fields
The following fields are linked to this lookup table: Album.Artist, Track.Artist, Track.Original
by, Box Set.Artist, Playlist.Artist, Album.Album Credits, Track.Author/Publisher, Track.
Conductor/Arranger, Track.Production, Track.Band Member, Track.Guest Musician and
Want List.Artist.
Address (Memo)
The snail mail address.
Alternate Names (Memo)
Use this memo field for any alternate names.
Artist (Checkbox)
Check this field is this is an artist. Only items marked as "artist" are shown in the Artist
drop-down list in the Album and Track Edit windows. The name of artists are also shown
in bold text in the Artist/Person Lookup View.
The program will automatically check this field for all artists added via the Artist fields
(Album and Track Edit windows).
Artist/Person ID (Numeric)
This is an unique ID number that is assigned to each record in the table.
Biography (Memo)
In this memo field you can add the biography.
Birth Name (Text 100)
The birth name.
Birth/Formed Location (Text 150)
The birth (person), or formed (group), location.
Born/Formed (Date)
The year (or date) the person was born, or the group was formed.
© 2012 FNProgramvare
141
CATraxx Help
Country (Text 50 - lookup
152
)
The country of origin.
Death Location (Text 150)
The death location.
Died/Disbanded (Date)
The year, or date, the person died, or the group was disbanded.
E-mail (Text 100)
The e-mail address.
Fax (Text 25)
The fax number.
File Links (Text)
In this field you can add links to local files on your PC.
Genre (Text 102 - lookup
156
)
A genre consists of a Main Genre and a Sub-Genre (Genre: Sub-genre), for example:
Classical: Opera
Electronic: Jungle
Jazz: Fusion
Rock: Classic Rock
World: Celtic
You can add as many genres as you like. To open the popup menu to select a genre,
click the arrow button, or press Ctrl+Arrow Right. You can rearrange the genres in the
list with drag-and-drop.
Image (Binary)
This field contains the image if it is stored in the database.
Image - Comments (Memo)
Comments about the image.
Image - Compressed (Yes/No)
© 2012 FNProgramvare
The CATraxx Database
142
Specifies whether the image is compressed or not (only applies to BMP images).
Image - External (Yes/No)
Specifies whether the image is stored externally (that is, only a link to the image is
stored in the database) or not.
Image - File name (Text 255)
If this is an external image, this field holds the file name.
Image - Thumbnail (Binary)
This field contains a thumbnail of the image. The thumbnail is automatically created
when you modify the image.
Image - Type (Numeric)
The type of image: 0 - bmp, 1 - gif, 2 - jpeg, 3 - png, or 99 - other.
Lineup (Text)
This fields contains the lineup information (members of the group).
You can use the lineup information when you specify persons (songwriters, producers
and musicians) that participate on an album. If you do this you save a lot of time when
you add credits information.
For more information, see Enter lineup information
45
.
Main Genre (Text 50)
The main genre (Main Genre: Sub-Genre).
Marked (Yes/No)
This field indicates whether the record is marked or not.
Name (Text 100)
The name. Use the Sort by field to specify the value that is used when sorting on this
item.
Notes (Memo)
This field is for your own notes.
© 2012 FNProgramvare
143
CATraxx Help
Personal Rating (Text 50 - lookup
162
)
You can rate artists. This allows you to, for example, create a dynamic playlist
tracks by your favorite (5 star) artists.
72
with
In the data entry window, you can press the + or - button to select rating without
having to open the list.
Phone (Text 25)
The phone number.
Primary Genre (Text 50)
The primary genre is the first genre in the Genre field.
Relation (Text)
Use this field to link to other related artists/persons. For example, you can link The
Police to Sting, and Joy Division to New Order (and vice versa). You can also add your
own notes.
When you search or group by either the Album.Artist Relation or the Track.Artist
Relation field, CATraxx will automatically include all albums/tracks by the related
artists.
Sort by (Text 102)
This is the value that is used when sorting on this item. When you tab out of the Name
field (or save the item), CATraxx will automatically fill in the Sort by field if it is empty.
Sub-Genre (Text 50)
The sub-genre (Main Genre: Sub-Genre).
Type (Text 50)
The type of artist/person, for example Group, Solo Artist, Duo, Musician or Band
Member.
You can set up a background color for each type (to edit a type, right-click the type in
the Type field and choose Edit from the popup menu). The background color is used to
color code artists/persons in the Artist/Person Lookup View and in the Artist drop-down
list in the Album and Track Edit windows.
Web Links (Text)
In this field you can add links to web sites.
© 2012 FNProgramvare
The CATraxx Database
3.8.4.2
144
Custom fields
To rename a custom field, open the data entry window, right-click the data field and
choose Rename Field from the popup menu. You can also rename fields from the
'Database Setup' window (Tools=>Database Setup).
The Artist/Person table contains the following custom fields:
Text
Custom 01, Custom 02
Lookup
Custom 03, Custom 04
Multivalue lookup
Custom 12
Memo
Custom 05
Date
Custom 06
Numeric
Custom 11
Checkbox
Custom 07, Custom 08, Custom 09, Custom 10
3.8.5
Artist/Person Type table
One field is linked to this lookup table: Artist/Person.Type.
Artist/Person Type (Text 50)
The type of artist/person, for example Group, Solo Artist, Duo, Musician or Band
Member. Use the Sort by field to specify the value that is used when sorting on this
item.
Artist/Person Type ID (Numeric)
© 2012 FNProgramvare
145
CATraxx Help
This is an unique ID number that is assigned to each entry in the table.
Background Color (Numeric)
This color is used as the background color to color code artists/persons in the Artist/
Person Lookup View and in the Artist drop-down list in the Album and Track Edit
windows.
Marked (Yes/No)
This field indicates whether the record is marked or not.
Notes (Memo)
This field is for your own notes.
Sort by (Text 52)
This is the value that is used when sorting on this item.
3.8.6
Artist Role table
Each artist can be linked to an artist role.
Artist Role (Text 50)
This is the name of the artist role, for example "feat." or "with".
Artist Role ID (Numeric)
This is an unique ID number that is assigned to each entry in the table.
Exclude from Sort Order (Checkbox)
Uncheck this box if you want to exclude artists linked to this artist role from the sort
order when you sort on the Artist field.
Note: Make sure you select Tools->Database Maintenance->Update ArtistSort to
update albums/tracks already in the database if you modify this field.
For more information, see the online FAQ.
Field Name (Text 50)
This is the field name that is displayed in lists with available fields, for example when
creating a report or a filter. For example "Featuring Artist".
© 2012 FNProgramvare
The CATraxx Database
146
Marked (Yes/No)
This field indicates whether the record is marked or not.
Notes (Memo)
This field is for your own notes.
3.8.7
Author/Publisher Role table
Each person in the Author/Publisher field can be linked to a role.
Author/Publisher Role (Text 50)
The name of the role, for example "Composer" or "Lyricist".
Author/Publisher Role ID (Numeric)
This is an unique ID number that is assigned to each entry in the table.
CDDB Role (Drop-down list)
The CDDB role is used when submitting data to CDDB. You can not edit the contents of
this list.
Marked (Yes/No)
This field indicates whether the record is marked or not.
Notes (Memo)
This field is for your own notes.
3.8.8
Award table
Two fields are linked to this lookup table: Album.Award and Album.Nomination.
Award (Text 100)
Specify the name of the award. Use the Sort by field to specify the value that is used
when sorting on this item.
Award ID (Numeric)
This is an unique ID number that is assigned to each entry in the table.
© 2012 FNProgramvare
147
CATraxx Help
Marked (Yes/No)
This field indicates whether the record is marked or not.
Notes (Memo)
This field is for your own notes.
Sort by (Text 102)
This is the value that is used when sorting on this item. When you tab out of the Award
field (or save the item), CATraxx will automatically fill in the Sort by field if it is empty.
3.8.9
Borrower table
3.8.9.1
Standard fields
Three fields are linked to this lookup table: Album.Borrower, Album.Reserved to and
Loan History.Borrower.
Barcode (Text 50)
The bar code number.
Borrower ID (Numeric)
This is an unique ID number that is assigned to each entry in the table.
Address (Memo)
This is a memo field where you can specify the address.
Category (Text 50 - lookup
149
)
Use this field to assign the borrower to a user defined category.
E-mail (Text 100)
Here you can specify the e-mail address.
Fax (Text 25)
Here you can specify fax number.
Marked (Yes/No)
© 2012 FNProgramvare
The CATraxx Database
148
This field indicates whether the record is marked or not.
Name (Text 50)
In this field you specify the name of the borrower. Use the Sort by field to specify the
value that is used when sorting on this item.
Notes (Memo)
This field is for your own notes.
Phone (Text 25)
Here you can specify phone number.
Sort by (Text 52)
This is the value that is used when sorting on the name.
Web Link (Text)
Here you can specify the home page URL.
3.8.9.2
Custom fields
To rename a custom field, open the data entry window, right-click the data field and
choose Rename Field from the popup menu. You can also rename fields from the
'Database Setup' window (Tools=>Database Setup).
The Borrower table contains the following custom fields:
Text
Custom 01, Custom 02
Lookup
Custom 03, Custom 04
Multivalue lookup
Custom 12
Memo
Custom 05
© 2012 FNProgramvare
149
CATraxx Help
Date
Custom 06
Numeric
Custom 11
Checkbox
Custom 07, Custom 08, Custom 09, Custom 10
3.8.10 Borrower Category table
One field is linked to this lookup table: Borrower.Category.
Borrower Category (Text 50)
Specify category. Use categories to assign a borrower to a user defined category. Use
the Sort by field to specify the value that is used when sorting on this item.
Borrower Category ID (Numeric)
This is an unique ID number that is assigned to each entry in the table.
Marked (Yes/No)
This field indicates whether the record is marked or not.
Notes (Memo)
This field is for your own notes.
Sort by (Text 52)
This is the value that is used when sorting on this item. When you tab out of the
Borrower Category field (or save the item), CATraxx will automatically fill in the Sort by
field if it is empty.
3.8.11 Company table
Two fields are linked to this lookup table: Book.Publisher and Book.Original Publisher.
Address (Memo)
This is a memo field where you can specify the address.
© 2012 FNProgramvare
The CATraxx Database
150
Company (Text 50)
Specify the company name. Use the Sort by field to specify the value that is used when
sorting on this item.
Company ID (Numeric)
This is an unique ID number that is assigned to each entry in the table.
E-mail (Text 100)
Here you can specify the e-mail address.
Fax (Text 25)
Here you can specify fax number.
Marked (Yes/No)
This field indicates whether the record is marked or not.
Notes (Memo)
This field is for your own notes.
Phone (Text 25)
Here you can specify phone number.
Sort by (Text 52)
This is the value that is used when sorting on this item. When you tab out of the
Company field (or save the item), CATraxx will automatically fill in the Sort by field if it
is empty.
Web Link (Text)
Here you can specify the home page URL.
3.8.12 Condition Cover table
One field is linked to this lookup table: Album.Condition Cover.
Condition (Text 50)
Use this field to specify the condition, for example M-, EX or VG+. Use the Sort by field
to specify the value that is used when sorting on this item.
© 2012 FNProgramvare
151
CATraxx Help
Condition Cover ID (Numeric)
This is an unique ID number that is assigned to each entry in the table.
Marked (Yes/No)
This field indicates whether the record is marked or not.
Notes (Memo)
This field is for your own notes.
Sort by (Text 52)
This is the value that is used when sorting on this item. When you tab out of the
Condition field (or save the item), CATraxx will automatically fill in the Sort by field if it
is empty.
Note: To make sure the various conditions are sorted from "highest" to "lowest", the
Sort by field contains a numerical value by default (01 for the first item, 02 for the next
etc).
3.8.13 Condition Record table
One field is linked to this lookup table: Album.Condition Record.
Condition (Text 50)
Use this field to specify the condition, for example M-, EX or VG+. Use the Sort by field
to specify the value that is used when sorting on this item.
Condition Record ID (Numeric)
This is an unique ID number that is assigned to each entry in the table.
Marked (Yes/No)
This field indicates whether the record is marked or not.
Notes (Memo)
This field is for your own notes.
Sort by (Text 52)
This is the value that is used when sorting on this item. When you tab out of the
Condition field (or save the item), CATraxx will automatically fill in the Sort by field if it
© 2012 FNProgramvare
The CATraxx Database
152
is empty.
Note: To make sure the various conditions are sorted from "highest" to "lowest", the
Sort by field contains a numerical value by default (01 for the first item, 02 for the next
etc).
3.8.14 Conductor/Arranger Role table
Each person in the Conductor/Arranger field can be linked to a role.
CDDB Role (Drop-down list)
The CDDB role is used when submitting data to CDDB. You can not edit the contents of
this list.
Conductor/Arranger Role (Text 50)
The name of the role, for example "Arranger", "Conductor" or "Director".
Conductor/Arranger Role ID (Numeric)
This is an unique ID number that is assigned to each entry in the table.
Marked (Yes/No)
This field indicates whether the record is marked or not.
Notes (Memo)
This field is for your own notes.
3.8.15 Country table
Two fields are linked to this lookup table: Album.Country and Artist/Person.Country.
Country (Text 50)
Type the name of the country in this field. Use the Sort by field to specify the value
that is used when sorting on this item.
Country ID (Numeric)
This is an unique ID number that is assigned to each entry in the table.
Marked (Yes/No)
This field indicates whether the record is marked or not.
© 2012 FNProgramvare
153
CATraxx Help
Notes (Memo)
This field is for your own notes.
Sort by (Text 52)
This is the value that is used when sorting on this item. When you tab out of the
Country field (or save the item), CATraxx will automatically fill in the Sort by field if it is
empty.
3.8.16 Distributor table
One field is linked to this lookup table: Album.Distributor.
Address (Memo)
This is a memo field where you can specify the address.
Distributor (Text 50)
The name of the distributor. Use the Sort by field to specify the value that is used when
sorting on this item.
Distributor ID (Numeric)
This is an unique ID number that is assigned to each entry in the table.
E-mail (Text 100)
Here you can specify the e-mail address.
Fax (Text 25)
Here you can specify fax number.
Marked (Yes/No)
This field indicates whether the record is marked or not.
Notes (Memo)
This field is for your own notes.
Phone (Text 25)
Here you can specify phone number.
© 2012 FNProgramvare
The CATraxx Database
154
Sort by (Text 52)
This is the value that is used when sorting on this item. When you tab out of the
Distributor field (or save the item), CATraxx will automatically fill in the Sort by field if
it is empty.
Web Link (Text)
Here you can specify the home page URL.)
3.8.17 File Link Type table
You can assign a type to each link in the File Links field.
File Link Type (Text 50)
The type description.
File Link Type ID (Numeric)
This is an unique ID number that is assigned to each entry in the table.
Marked (Yes/No)
This field indicates whether the record is marked or not.
Notes (Memo)
This field is for your own notes.
3.8.18 Format table
Two fields are linked to this lookup table: Album.Format and Want List.Format.
Format (Text 50)
The format description, for example LP, CD or 2CD. Use the Sort by field to specify the
value that is used when sorting on this item.
Format ID (Numeric)
This is an unique ID number that is assigned to each entry in the table.
Format Group (Text 50 - lookup
155
)
Specify the format group the format should be linked to.
© 2012 FNProgramvare
155
CATraxx Help
Format groups are useful when creating reports and for statistical summaries. A vinyl
album and a CD album should be specified as two different formats (for example LP and
CD), but can be linked to the same format group (for example Album).
Format Image (Binary)
Select the image that is shown in the Tracks window when an album is linked to this
format.
Marked (Yes/No)
This field indicates whether the record is marked or not.
Notes (Memo)
This field is for your own notes.
Sort by (Text 52)
This is the value that is used when sorting on this item. When you tab out of the
Format field (or save the item), CATraxx will automatically fill in the Sort by field if it is
empty.
3.8.19 Format Group table
One field is linked to this lookup table: Format.Format Group.
Format Group (Text 50)
The format group description, for example Album, Box set or Single. Use the Sort by
field to specify the value that is used when sorting on this item.
Format Group ID (Numeric)
This is an unique ID number that is assigned to each entry in the table.
Marked (Yes/No)
This field indicates whether the record is marked or not.
Notes (Memo)
This field is for your own notes.
Sort by (Text 52)
This is the value that is used when sorting on this item. When you tab out of the
© 2012 FNProgramvare
The CATraxx Database
156
Format Group field (or save the item), CATraxx will automatically fill in the Sort by field
if it is empty.
3.8.20 Genre table
Four fields are linked to this lookup table: Album.Genre, Track.Genre, Artist/Person.
Genre and Playlist.Genre.
cddbGenre (Text)
The cddbGenre is used when submitting disc data to CDDB.
All CDs submitted to CDDB must be assigned a special CDDB genre. The CDDB genres
are fixed, you cannot create new genres or modify existing genres. Each of the CATraxx
genres is linked to one of the CDDB genres.
Genre ID (Numeric)
This is an unique ID number that is assigned to each entry in the table.
Genre (Text)
This field combines Main Genre and Sub-Genre into one field (Main Genre: Sub-Genre),
for example:
Classical: Opera
Electronic: Jungle
Jazz: Fusion
Rock: Classic Rock
World: Celtic
Main Genre (Text 50)
The main genre.
Marked (Yes/No)
This field indicates whether the record is marked or not.
Sub-Genre (Text 52)
The sub-genre.
3.8.21 Instrument table
One field is linked to this lookup table: Track.Instrument.
© 2012 FNProgramvare
157
CATraxx Help
cddbInstrument (Text)
Use this field to specify the instrument that is used when submitting disc data to CDDB.
The available CDDB instruments are fixed, you cannot add new instruments or modify
existing instruments. Each of the CATraxx instruments is linked to one of the CDDB
instruments.
Instrument (Text 100)
The name of the instrument. Use the Sort by field to specify the value that is used
when sorting on this item.
Instrument ID (Numeric)
This is an unique ID number that is assigned to each entry in the table.
Marked (Yes/No)
This field indicates whether the record is marked or not.
Notes (Memo)
This field is for your own notes.
Sort by (Text 102)
This is the value that is used when sorting on this item. When you tab out of the
Instrument field (or save the item), CATraxx will automatically fill in the Sort by field if
it is empty.
3.8.22 Insurance table
One field is linked to this lookup table: Album.Insurance.
Address (Memo)
This is a memo field where you can specify the insurance company's address.
Contact PersonAddress (Memo)
This is a memo field where you can specify the insurance company's address.
Contact Person (Text 50)
Type the name of the contact person.
Coverage (Numeric)
© 2012 FNProgramvare
The CATraxx Database
158
Specify the insurance coverage.
E-mail (Text 100)
Here you can specify the e-mail address.
Fax (Text 50)
Here you can specify fax number.
Insurance Company (Text 50)
In this field you specify the name of the insurance company.
Insurance ID (Numeric)
This is an unique ID number that is assigned to each entry in the table.
Marked (Yes/No)
This field indicates whether the record is marked or not.
Notes (Memo)
This field is for your own notes.
Phone (Text 25)
Here you can specify phone number.
Policy (Text 50)
Use this field to specify the name of the insurance policy. Use the Sort by field to
specify the value that is used when sorting on this item.
Policy Number (Text 25)
Type the insurance policy number.
Sort by (Text 52)
This is the value that is used when sorting on this item. When you tab out of the Policy
field (or save the item), CATraxx will automatically fill in the Sort by field if it is empty.
Web Link (Text)
Here you can specify the home page URL.
© 2012 FNProgramvare
159
CATraxx Help
3.8.23 Keyword table
Two fields are linked to this lookup table: Album.Keywords and Track.Keywords.
Notes (Memo)
This field is for your own notes.
Keyword (Text 150)
The keyword should be a word that will help you later locate what you are looking for.
Use the Sort by field to specify the value that is used when sorting on this item.
Keyword ID (Numeric)
This is an unique ID number that is assigned to each entry in the table.
Marked (Yes/No)
This field indicates whether the record is marked or not.
Sort by (Text 152)
This is the value that is used when sorting on this item. When you tab out of the
Keyword field (or save the item), CATraxx will automatically fill in the Sort by field if it
is empty.
3.8.24 Label table
Two fields are linked to this lookup table: Album.Label and Want List.Label.
Address (Memo)
This is a memo field where you can specify the address.
E-mail (Text 100)
Here you can specify the e-mail address.
Fax (Text 25)
Here you can specify fax number.
Label (Text 50)
The label name. Use the Sort by field to specify the value that is used when sorting on
this item.
© 2012 FNProgramvare
The CATraxx Database
160
Label ID (Numeric)
This is an unique ID number that is assigned to each entry in the table.
Marked (Yes/No)
This field indicates whether the record is marked or not.
Notes (Memo)
This field is for your own notes.
Phone (Text 25)
Here you can specify phone number.
Sort by (Text 52)
This is the value that is used when sorting on this item. When you tab out of the Label
field (or save the item), CATraxx will automatically fill in the Sort by field if it is empty.
Web Link (Text)
Here you can specify the home page URL.
3.8.25 Location table
One field is linked to this lookup table: Album.Location.
Location (Text 50)
The location of the album. Use the Sort by field to specify the value that is used when
sorting on this item.
Location ID (Numeric)
This is an unique ID number that is assigned to each entry in the table.
Marked (Yes/No)
This field indicates whether the record is marked or not.
Notes (Memo)
This field is for your own notes.
Sort by (Text 52)
© 2012 FNProgramvare
161
CATraxx Help
This is the value that is used when sorting on this item. When you tab out of the
Location field (or save the item), CATraxx will automatically fill in the Sort by field if it
is empty.
3.8.26 Music Chart table
Two fields are linked to this lookup table: Album.Music Chart Info and Track.Music Chart
Info.
Music Chart (Text 150)
The music chart, for example "Billboard 200".
Music Chart ID (Numeric)
This is an unique ID number that is assigned to each entry in the table.
Notes (Memo)
This field is for your own notes.
Marked (Yes/No)
This field indicates whether the record is marked or not.
Sort by (Text 152)
This is the value that is used when sorting on this item.
3.8.27 Owner table
One field is linked to this lookup table: Album.Owner.
Owner (Text 50)
Specify the name. Use the Sort by field to specify the value that is used when sorting
on this item.
Owner ID (Numeric)
This is an unique ID number that is assigned to each entry in the table.
Marked (Yes/No)
This field indicates whether the record is marked or not.
Notes (Memo)
© 2012 FNProgramvare
The CATraxx Database
162
This field is for your own notes.
Sort by (Text 52)
This is the value that is used when sorting on this item. When you tab out of the Owner
field (or save the item), CATraxx will automatically fill in the Sort by field if it is empty.
3.8.28 Packaging table
One field is linked to this lookup table: Album.Packaging.
Marked (Yes/No)
This field indicates whether the record is marked or not.
Notes (Memo)
This field is for your own notes.
Packaging (Text 50)
Specify the type of packaging. Use the Sort by field to specify the value that is used
when sorting on this item.
Packaging ID (Numeric)
This is an unique ID number that is assigned to each entry in the table.
Sort by (Text 52)
This is the value that is used when sorting on this item. When you tab out of the
Packaging field (or save the item), CATraxx will automatically fill in the Sort by field if it
is empty.
3.8.29 Personal Rating table
Three fields are linked to this lookup table: Album.Personal Rating, Track.Personal
Rating and Artist/Person.Personal Rating.
Marked (Yes/No)
This field indicates whether the record is marked or not.
Notes (Memo)
This field is for your own notes.
© 2012 FNProgramvare
163
CATraxx Help
Personal Rating (Text 50)
Use this field to specify your own personal rating, for example Excellent or Very Good.
Use the Sort by field to specify the value that is used when sorting on this item.
Personal Rating ID (Numeric)
This is an unique ID number that is assigned to each entry in the table.
Rating Image (Binary)
Use this field to store a rating image with the rating. The rating image is shown in lists
where you select rating (Album Edit and Track Edit windows), in the browse list, in
reports and in the explorer.
This image must be a GIF file and maximum size is 50x100 pixels.
Sort by (Text 52)
This is the value that is used when sorting on this item. When you tab out of the
Personal Rating field (or save the item), CATraxx will automatically fill in the Sort by
field if it is empty.
3.8.30 Playlist Category table
One field is linked to this lookup table: Playlist.Category.
Category (Text 50)
The main category.
Please note that, in the data entry windows, the Sub Category list is linked to the
Category list. When you select a category, only the sub categories in this category are
available in the Sub Category list.
Full Category (Text)
This field combines Category and Sub Category into one field (Category: Sub Category).
Marked (Yes/No)
This field indicates whether the record is marked or not.
Playlist Category ID (Numeric)
This is an unique ID number that is assigned to each entry in the table.
© 2012 FNProgramvare
The CATraxx Database
164
Sub Category (Text 52)
The sub category.
3.8.31 Playlist Created by table
One field is linked to this lookup table: Playlist.Created by.
Created by (Text 50)
Specify the name. Use the Sort by field to specify the value that is used when sorting
on this item.
Created by ID (Numeric)
This is an unique ID number that is assigned to each entry in the table.
Marked (Yes/No)
This field indicates whether the record is marked or not.
Notes (Memo)
This field is for your own notes.
Sort by (Text 52)
This is the value that is used when sorting on this item. When you tab out of the
Created by field (or save the item), CATraxx will automatically fill in the Sort by field if
it is empty.
3.8.32 Playlist Status table
One field is linked to this lookup table: Playlist.Status.
Background Color (Numeric)
This color is used as the background color to color code playlists (in the Playlist
Manager) linked to this status item.
Select Automatic if you don't want to color code playlists linked to this status item.
Color coding is not activated before you select the Use Status color coding option in the
'Options' window (Tools->Options->Misc).
Marked (Yes/No)
© 2012 FNProgramvare
165
CATraxx Help
This field indicates whether the record is marked or not.
Notes (Memo)
This field is for your own notes.
Sort by (Text 52)
This is the value that is used when sorting on this item. When you tab out of the Status
field (or save the item), CATraxx will automatically fill in the Sort by field if it is empty.
Status (Text 50)
Specify the status description (for example "In Progress", "Completed", etc). Use the
Sort by field to specify the value that is used when sorting on this item.
Status ID (Numeric)
This is an unique ID number that is assigned to each entry in the table.
3.8.33 Production Role table
Each person in the Production field can be linked to a role.
CDDB Role (Drop-down list)
The CDDB role is used when submitting data to CDDB. You can not edit the contents of
this list.
Production Role (Text 50)
The name of the role, for example "Engineer" or "Producer".
Production Role ID (Numeric)
This is an unique ID number that is assigned to each entry in the table.
Marked (Yes/No)
This field indicates whether the record is marked or not.
Notes (Memo)
This field is for your own notes.
© 2012 FNProgramvare
The CATraxx Database
166
3.8.34 Sound table
One field is linked to this lookup table: Track.Sound.
Marked (Yes/No)
This field indicates whether the record is marked or not.
Notes (Memo)
This field is for your own notes.
Sound (Text 50)
Type the sound description, for example Mono or Stereo. Use the Sort by field to specify
the value that is used when sorting on this item.
Sound ID (Numeric)
This is an unique ID number that is assigned to each entry in the table.
Sort by (Text 52)
This is the value that is used when sorting on this item. When you tab out of the Sound
field (or save the item), CATraxx will automatically fill in the Sort by field if it is empty.
3.8.35 SPARS table
One field is linked to this lookup table: Album.SPARS.
Marked (Yes/No)
This field indicates whether the record is marked or not.
Notes (Memo)
This field is for your own notes.
Sort by (Text 52)
This is the value that is used when sorting on this item. When you tab out of the SPARS
field (or save the item), CATraxx will automatically fill in the Sort by field if it is empty.
SPARS (Text 50)
The SPARS (Society of Professional Audio Recording Studios) code indicates whether
different portions of the recording process were accomplished using either digital or
analog recording methods. Use the Sort by field to specify the value that is used when
© 2012 FNProgramvare
167
CATraxx Help
sorting on this item.
SPARS ID (Numeric)
This is an unique ID number that is assigned to each entry in the table.
3.8.36 Status table
One field is linked to this lookup table: Album.Status.
Background Color (Numeric)
This color is used as the background color to color code albums (in the Album View)
linked to this status item.
Select Automatic if you don't want to color code albums linked to this status item.
Color coding is not activated before you select the Use Status color coding option in the
'Options' window (Tools->Options->Misc).
Marked (Yes/No)
This field indicates whether the record is marked or not.
Notes (Memo)
This field is for your own notes.
Sort by (Text 52)
This is the value that is used when sorting on this item. When you tab out of the Status
field (or save the item), CATraxx will automatically fill in the Sort by field if it is empty.
Status (Text 50)
Specify the status description. Use the Sort by field to specify the value that is used
when sorting on this item.
Status ID (Numeric)
This is an unique ID number that is assigned to each entry in the table.
3.8.37 Studio table
One field is linked to this lookup table: Track.Studio.
Address (Memo)
© 2012 FNProgramvare
The CATraxx Database
168
This is a memo field where you can specify the address.
E-mail (Text 100)
Here you can specify the e-mail address.
Fax (Text 25)
Here you can specify fax number.
Marked (Yes/No)
This field indicates whether the record is marked or not.
Notes (Memo)
This field is for your own notes.
Phone (Text 25)
Here you can specify phone number.
Sort by (Text 152)
This is the value that is used when sorting on this item. When you tab out of the Studio
field (or save the item), CATraxx will automatically fill in the Sort by field if it is empty.
Studio (Text 150)
The name of the studio. Use the Sort by field to specify the value that is used when
sorting on this item.
Studio ID (Numeric)
This is an unique ID number that is assigned to each entry in the table.
Web Link (Text)
Here you can specify the home page URL.
3.8.38 Studio Role table
Each studio in the Studio field can be linked to a role.
CDDB Role (Drop-down list)
The CDDB role is used when submitting data to CDDB. You can not edit the contents of
© 2012 FNProgramvare
169
CATraxx Help
this list.
Marked (Yes/No)
This field indicates whether the record is marked or not.
Notes (Memo)
This field is for your own notes.
Studio Role (Text 50)
The name of the role, for example "Mastering Location" or "Mixing Location".
Studio Role ID (Numeric)
This is an unique ID number that is assigned to each entry in the table.
3.8.39 Tape Type table
One field is linked to this lookup table: Album.Tape Type.
Marked (Yes/No)
This field indicates whether the record is marked or not.
Notes (Memo)
This field is for your own notes.
Sort by (Text 52)
This is the value that is used when sorting on this item. When you tab out of the Tape
Type field (or save the item), CATraxx will automatically fill in the Sort by field if it is
empty.
Tape Type (Text 50)
Specify the tape type, for example Normal, Chrome or Metal. Use the Sort by field to
specify the value that is used when sorting on this item.
Tape Type ID (Numeric)
This is an unique ID number that is assigned to each entry in the table.
© 2012 FNProgramvare
The CATraxx Database
170
3.8.40 Tour table
One field is linked to this lookup table: Track.Tour.
Marked (Yes/No)
This field indicates whether the record is marked or not.
Notes (Memo)
This field is for your own notes.
Sort by (Text 152)
This is the value that is used when sorting on this item. When you tab out of the Tour
field (or save the item), CATraxx will automatically fill in the Sort by field if it is empty.
Tour (Text 150)
Specify the tour name. Use the Sort by field to specify the value that is used when
sorting on this item.
Tour ID (Numeric)
This is an unique ID number that is assigned to each entry in the table.
3.8.41 Venue table
One field is linked to this lookup table: Track.Venue.
Address (Memo)
This is a memo field where you can specify the address.
E-mail (Text 100)
Here you can specify the e-mail address.
Fax (Text 25)
Here you can specify fax number.
Marked (Yes/No)
This field indicates whether the record is marked or not.
Notes (Memo)
© 2012 FNProgramvare
171
CATraxx Help
This field is for your own notes.
Phone (Text 25)
Here you can specify phone number.
Sort by (Text 152)
This is the value that is used when sorting on this item. When you tab out of the Venue
field (or save the item), CATraxx will automatically fill in the Sort by field if it is empty.
Venue (Text 150)
The name of the venue. Use the Sort by field to specify the value that is used when
sorting on this item.
Venue ID (Numeric)
This is an unique ID number that is assigned to each entry in the table.
Web Link (Text)
Here you can specify the home page URL.
3.8.42 Vinyl Color table
One field is linked to this lookup table: Album.Vinyl Color.
Marked (Yes/No)
This field indicates whether the record is marked or not.
Notes (Memo)
This field is for your own notes.
Sort by (Text 52)
This is the value that is used when sorting on this item. When you tab out of the Vinyl
Color field (or save the item), CATraxx will automatically fill in the Sort by field if it is
empty.
Vinyl Color (Text 50)
Type the color name. Use the Sort by field to specify the value that is used when
sorting on this item.
© 2012 FNProgramvare
The CATraxx Database
Vinyl Color ID (Numeric)
This is an unique ID number that is assigned to each entry in the table.
3.8.43 Web Link Type table
You can assign a type to each link in the Web Links field.
Marked (Yes/No)
This field indicates whether the record is marked or not.
Notes (Memo)
This field is for your own notes.
Web Link Type (Text 50)
The type description.
Web Link Type ID (Numeric)
This is an unique ID number that is assigned to each entry in the table.
© 2012 FNProgramvare
172
Part
IV
Other products
4
Other products
4.1
AssetCAT
174
Home page Download
AssetCAT is a powerful inventory database program that will assist you in keeping track
of your household items, valuables and collectibles. AssetCAT allows you to catalog a
wide range of information, and create customized reports with details on each item
including photos for your own records, or to share with your insurance agent so that
you will be prepared if a disaster strikes.
© 2012 FNProgramvare
175
CATraxx Help
Index
-AAAC 59
About databases 11
About reports 96
Acquire from scanner 47
Acquired from table 137
Add album 30
Add audio files 60
Add box set 39
Add column 79
Add image 47
Add lookup data 41
Add playlist 67, 68, 72
Add reservation 57
Add songs to playlist 67
Add to playlist 67
Add track 31
Add want list 46
Add-Ons 7
Advanced search 91
Album Credit Role table 138
Album media 31
Album table 112
Album table: Custom fields 122
Album View 28
Albums 30
Appraiser table 139
Artist Role table 145
Artist/Person table 140
Artist/Person table: Custom fields 144
Artist/Person Type table 144
AssetCAT 174
Attach audio files 62
Audio files 59, 60, 62
Audio files rename 64
Author/Publisher Role table 146
Auto-backup 13
Auto-organize 64
Auto-organize image files 47
Award table 146
-BBackup database 13
Bands 103
Borrower 54
Borrower Category table 149
Borrower table 147
Borrower table: Custom fields 148
Box Set table 131
Box Set View 28
Box sets 39
Browse list 79
Buy CATraxx 8
-CCard list 79
Catalog audio files 59
CATraxx database 112
CATraxx Importer 7
CDDB 52
cdplayer.ini 15
Change column order 79
Check album in 55
Check in 56
Check out 56
Check out album 55
Clear reservation 57
Column order 79
Compact database 13
Company table 149
Condition Cover table 150
Condition Record table 151
Conductor/Arranger Role table
Contact information 8
Copy track data 37
Corrupt database 14
Country table 152
Create database 11
Create filter 83
Create grouping 84
Create new report 98
Create playlist 67
Create reports 97
Create sort order 81
Credits data 34
152
© 2012 FNProgramvare
Index
Custom views 73
Customize database 18
Customize the explorer 86
-DData entry layout 18
Data fields 112
Database 11, 159
Database password 12
Database Setup window 18
Delete album 30
Delete filter 83
Delete grouping 84
Delete list layout 79
Delete playlist 67
Delete report object 105
Delete sort order 81
Delete track 31
Design reports 97
Disc titles 31
Discs 31
Distributor table 153
Download from CDDB 52
Dynamic playlist 67
Dynamic playlists 67, 72
-EEdit album 30
Edit artist lineup 45
Edit box set 39
Edit column 79
Edit credits 34
Edit field names 18
Edit filter 83
Edit grouping 84
Edit image 47
Edit lineup 45
Edit list layout 79
Edit lookup data 41
Edit media 31
Edit playlist 67, 68, 72
Edit report menu 110
Edit report object 105
Edit sort order 81
Edit track 31
© 2012 FNProgramvare
Edit want list 46
E-mail 58
Excel export 16
Excel import 17
Explorer 86
Explorer pane 86
Explorer view 86
Export 14
Export to cdplayer.ini 15
Export to Excel 16
Export to HTML 16
Export to iPod 16
Export to text file 17
Export to Windows CD Player
Export to XML 17
Extend loan period 59
15
-FField names 18
Field rename 18
File Link Type table 154
Filter 83, 99
Fix database 14
FLAC 59
FNProgramvare 8
Form Designer 21
Form Designer - Add data field 22
Form Designer - Delete object 26
Form Designer - Modify properties 25
Form Designer - Move field to another tab 25
Form Designer - Move object 24
Form Designer - Resize object 24
Form Designer - Select object 24
Form Designer - Set tab order 26, 27
Form Designer - tab control 23
Form Designer - Update group titles 27
Form Designer - Update Use property 28
Format Group table 155
Format table 154
-GGenre table 156
Getting started 3
Global search 93
Grouping 84, 99
176
177
CATraxx Help
Grouping definition 84
Guest password 12
-HHelp 8
How to export 14
How to import 14
How to order 8
How to search 89
How to start 3
HTML export 16
-IImages 47
Import 14
Import from Excel 17
Import from text file
17
Insert report object 105
Instrument table 156
Insurance table 157
iPod 16
iPod export 16
-KKeyword table
159
-LLabel table 159
Layout of fields 18
Lineup 38, 45
Link to audio files 62
List layout 78, 79
Loan 54
Loan management 54, 55, 56, 57, 58, 59
Loan out 56
Loan table 132
Loan View 28
Locate missing image files 47
Location table 160
Lookup 133
Lookup data 44
Lookup tables 41
Lookup View 28
-MManage lookup tables 41
Manual playlist 67
Manual playlists 67, 68
Mark records 76
MDB 11
Media 31
Move report object 105
MP3 59
MP4 59
Music Chart table 161
-NNew database 11
New filter 83
New grouping 84
New playlist 68, 72
New sort order 81
Notification 58
-OOGG 59
Open database 12
Open report 98
Order 8
Other products 174
Owner table 161
-PPackaging table 162
Password 12
Path update 66
Personal Rating table 162
Play audio files 65
Playback 65
Playlist Created by table 164
Playlist Track View 28
Playlist View 28, 67
Playlists 65, 67, 68, 72
Print data 96
Print out data 96
Print preview 109
© 2012 FNProgramvare
Index
Print report 109
Print to file 109
Production Role table
165
-QQuick Search
90
-RRemove list layout 79
Rename audio files 64
Rename fields 18
Rename tables 18
Repair database 14
Replace field value 89, 95
Report Archive Reader 7
Report bands 103
Report filter 99
Report grouping 99
Report menu 110
Report object 105
Report options 99
Report sort order 99
Reports 96
Rescan folders 61
Reservation 57
Reserve album 57
Resize report object 105
Restore backup 13
Return 56
-SSave report 98
Scan 61
Scan folders 60
Scan image 47
Scanner 47
Search 90, 91, 92, 93, 94
Search and replace 89, 95
Search list 90
Searching 89
Select multiple records 78
Select records 78
Selecting view 73
Selection 78
© 2012 FNProgramvare
178
Send e-mail notifications 58
Set field value 51
Set up artist lineup 45
SHN 59
Show marked records 76
Show subset 76
Simple search 90
Sort order 81, 99
Sound table 166
SPARS table 166
Special searches 94
Split lookup item 44
Standard list 79
Status table 167
Statusbar 76
Studio Role table 168
Studio table 167
Submit to CDDB 52
Subset 76
Summary search 92
Support 8
-TTab control 23
Table rename 18
Tag update 63
Tape Type table 169
Technical information 7
Technical support 8
Templates 36
Text file export 17
Text file import
17
The report designer 97
Tour table 170
Track data 37
Track table 123
Track table: Custom fields 130
Track templates 36
Track View 28
Track, add to playlist 67
Tracking albums on loan 54
Tracks 31
Transfer information between databases
Types of information 28
13
179
CATraxx Help
-UUpdate field value 51
Update file path 66
Update tags 63
Use lineup 38
-VVenue table 170
View bar 73
View button 73
Views 73
Vinyl Color table 171
-WWant list 46
Want list table 133
Want List View 28
WAV 59
WavPack
59
Web Link Type table 172
Welcome 3
What is CATraxx? 3
Windows CD Player 15
Write tags 63
-XXML export
17
© 2012 FNProgramvare