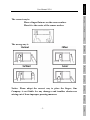
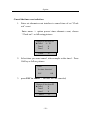
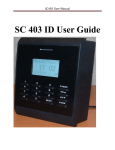
1
User Manual V2.0
User Manual V2.0
Contents
Before Start................................................................................................1
How to place the finger .................................................................. 2
Understanding the Operator Panel LEDs........................................ 4
Menu tree...............................................................................................5
Basic Concepts ........................................................................................7
User Identification/Verification .............................................. 8
Threshold ................................................................................ 8
User ID Numbers.................................................................. 10
Privilege (status) Levels ....................................................... 10
Start-up window.....................................................................11
Getting Start ..........................................................................................12
Enrolling Users ............................................................................. 12
Fingerprint Enrollmente........................................................ 13
Password Enrollment ............................................................ 14
Fingerprint & Password........................................................ 16
Enroll ID ★ .......................................................................... 17
Enroll ID Card ★ .............................................................. 19
Enroll Mifare Card★............................................................ 20
Testing an Enrollment................................................................... 22
Enrolling a Auxiliary Fingerprint of User..................................... 22
Authentication type....................................................................... 23
Fingerprint authentication..................................................... 23
Password authentication ....................................................... 26
RF/ MIFARE card authentication ★ .................................... 27
-I-
Contents
MIFARE card authentication ★............................................28
Hints for Successful Enrollments ..................................................30
Enroll Administrator......................................................................31
Delete enrolled Data ......................................................................32
Option ...................................................................................................34
System Option ...............................................................................35
Set Current Date Time ...........................................................35
Changing the Date Time Format ...........................................36
Changing the language ..........................................................36
Lock ★..................................................................................38
Unlock ★ ..............................................................................38
Advance Option.....................................................................40
Power Manager..............................................................................44
Power Option.........................................................................45
Time Alternate Condition ......................................................47
How to set time alternate condition.......................................48
Communication Option .................................................................51
Log Options...................................................................................53
Access Control Option★ ..............................................................54
Brief Introduction to Access Options ....................................56
Verification Flow of Access Options .....................................58
Function Description .............................................................59
Dress Options..........................................................................73
How to set the amount of failure to verify.............................77
Group Verification Type ........................................................77
Auto Test .......................................................................................78
How to Manage USB★ .............................................................................80
- II -
User Manual V2.0
Download the attendance data ...................................................... 80
Download Staff Data .................................................................... 81
Upload Staff Data ......................................................................... 81
Download SMS ............................................................................ 82
Upload SMS ................................................................................. 82
System Information ...............................................................................83
Relieve Alarm★ .......................................................................................85
View T&A Records★ ...........................................................................86
Maintained.............................................................................................90
Troubleshooting.....................................................................................92
Appendix ...............................................................................................95
U flash disk management ............................................................. 95
Condition key ............................................................................... 96
Time Ring ..................................................................................... 97
External Fingerprint Sensor.......................................................... 98
Modem Function .......................................................................... 99
Query funtion.............................................................................. 100
Print function .............................................................................. 101
MP3 function introduction.......................................................... 102
Short message management (Optional) ...................................... 106
Multi-combination Authentication Mode ................................... 108
Card Support (HID, iCLASS, EM, Mifare Card)................................112
About Host and Client Fingerprint Machine ......................................113
Remote server Solution ...............................................................118
IClock Time & Attendance ......................................................... 120
Web Server Access Control ........................................................ 123
Collect IP Address Automatically............................................... 124
- III -
Contents
About Wiegand............................................................................124
Understanding SOAP ..................................................................129
About POE(Power over Ethernet)..........................................130
Reserve Battery(Mini-UPS) ...................................................132
Digit Code ...................................................................................134
Automatically Synchronize Time ................................................134
Daylight Saving Time..................................................................136
Assign time to play voice (by time period, group) ......................137
Work code....................................................................................139
DHCP ..........................................................................................140
About the human rights privacy statement .................................................142
- IV -
●Fingerprint identification machine is a precision electronic
machine, all safety and operation instruction should be read before
-1-
USB Manage
Appendix
● The products warranty does not cover defects or damages arising
from the lock defects, improper installation, lack of or improper
maintenance, improper storage, shipping and handling, ordinary
Troubleshooting
Maintained
the product is operated.
System Info.
● Please do not place the product in the place with strong light,
because the strong light may significantly affect the fingerprint
scanning, and thus cause the fingerprint verification fail. This
product is designed for indoor installation, if it has to be installed it
outdoor, please place the equipment in proper environment, you
must beware of not exposing it to wet or harsh condition, the
product work temperature rang is 0-40℃. Do to use you machine in
every hot environment, keep you machine away from the heat
source and radiator. For long time use it outdoor and the internal
heat of the machine, will cause problem to the operation
Relieve Alarm
Notice: Do not attempt to service the machine yourself, except
as explain in your online documentation or in instruction
otherwise. Always follow this user guide closely.
View Records
Must to know
Options
Getting Start
Before Start
Before Start
1
Basic Concepts
User Manual V2.0
Before Start
wear and tear , misuse abuse, accident unauthorized service or use
with unauthorized service parts.
Fingerprint Enrollment and Identification shall be taken after the
installation the fingerprint identification machine
Enrollment
Enrollment
Installation
Identification
Installation
Identification
How to place the finger
Make sure the fingerprint image captured is of a core of presented
finger, a fingerprint is point to locate within innermost recurring
ridge of any give finger.
To obtain a higher success rate, enroll same finger 3times in a
slightly adjust angle, one to the center, one incline slightly to the
left. The third incline slightly to the right. You follow the following
place procedure; the success rate will increase dramatically.
-2-
Before Start
Options
Getting Start
The correct way is:
Place a finger flatware on the sensor surface
Place it to the center of the sensor surface
Basic Concepts
User Manual V2.0
-3-
Troubleshooting
Appendix
Notice: Please adopt the correct way to place the finger; Our
Company is not liable for any damages and troubles whatsoever
arising out of from improper pressing manners.
Maintained
View Records
Relieve Alarm
System Info.
USB Manage
The wrong way is
Before Start
Understanding the Operator Panel LEDs
The operator panel LEDs signify different, depending on their
sequences. LED s that are off, on or blinking indicates fingerprint
machine work.
1.
2.
3.
Normal work.
Green light blinks per second.
Failure authentication
Red light is of 3 second duration
4.
Verification successful
Green light is of 3 second duration
Note: If the fingerprint machine LED don’t follow above
description. Please contact us to get technical assistance
-4-
User Manual V2.0
2
Menu tree
★ Indicates this menu item only appear in specific and customize
fingerprint machine, this manual give a special instruction.
-5-
Before Start
-6-
Enrollment is the procedure to create an ID number and scan a
user’s finger to create a template three times. This template is
associated with a user ID number and stored up.
Though the stored fingerprint reference template match against
place user’s finger, this fingerprint template is used to identify
user’s Identity, so an enrolled user is able to achieve the time clock
in the appoint machine, the whole procedure take about 2 second,
for the same ID number the up to ten different fingerprint ability to
be enrolled, the user may own much more verification way.
Ideally. Every finger on each hand should be enrolled, so that if a
enrolled finger is injured, to alternate the backup finger is available,
-7-
Before Start
Basic Concepts
Getting Start
Options
USB Manage
System Info.
Relieve Alarm
User Enrollment
View Records
This section contains definitions and descriptions of the fingerprint
Identification system concepts,including:
l
User Enrollment
l
User Verification
l
Match Threshold Levels
l
User ID Numbers
l
Privilege (Status) Levels
The two most important Functions to Fingerprint Idenification are
user enrollment and user verification.
Maintained
Basic Concepts
Troubleshooting
3
Appendix
User Manual V2.0
Basic Concepts
in normal condition, it is better that last two finger is enrolled, like,
left or right index finger, so the user ability to use his (her) any
finger to identify and keep away the troubles is duo to he (her)
forget which finger has been enrolled
User Identification/Verification
The process of comparing place user’s finger against the stored
fingerprint reference template. when a user either input an ID
number or places a finger in the fingerprint sensor, then input
password or press fingerprint, after verification process carry out,
the system will show whether identify failure or success and store
up the successful result to equipment Verification occurs when a
user either enters an ID number or places a finger in the fingerprint
sensor, then input password for comparison with the stored
template.
Threshold
Threshold - A predefined number, often controlled by a biometric
system administrator, which establishes the degree of correlation
necessary for a comparison to be deemed a match. If the score
resulting from template comparison exceeds the threshold, the
templates are a “match” (though the templates themselves are not
identical).
The Threshold establishes a balance between False Acceptance
-8-
FAR
One-to-many
One-to-one
High
Low
45
25
Middle
Middle
35
15
Low
High
25
10
-9-
Getting Start
Options
USB Manage
Appendix
Troubleshooting
FRR
Basic Concepts
Before Start
Notice: FAR and FRR affect each other, if increases FAR then
reduce FRR. The default Threshold is 35, 1:1 matching Threshold
is 15.
Table 1—1 Suggested Threshold Settings
System Info.
Raising the threshold increases security, while lowering it increases
pass. The correct balance is vital. For a user whose finger is worn
or injured, the threshold should be reduced.
Relieve Alarm
You can set the threshold to all users. For a user who’s the
fingerprint verification is difficult, you can adopt ID & Fingerprint
verification (match one to one).
View Records
Rate (FAR) and False Rejection Rate (FRR). FAR mean the
probability that a biometric system will incorrectly identify an
individual or will fail to reject an impostor. The rate given normally
assumes FRR measure the probability that a biometric system will
fail to identify an enrolee, or verify the legitimate claimed identity
of an enrolee.
Maintained
User Manual V2.0
Basic Concepts
User ID Numbers
Before beginning fingerprint enrollment, a user is assigned User ID
Number. This ID number is used to call up the fingerprint template
or password each time that verification is requested.
ID numbers are normally inputted via the keypad, but they can be
called up by other means of such as RF Card, Mifare Card (the
realizing function condition is that there is card reader in the
machine)
Privilege (status) Levels
Privileges are permission that is give to use. These define the
ability of user to perform specified administrative and other task,
including the ability to view, edit, add, or renew specified
information categories.
Privilege levels are named set of permission that can be modified
as required, User’s four privilege levels are assigned by the
fingerprint machine, that are user, enroller, administrator, Super
administrator( supervisor).
The Fingerprint Identification systems have four Privilege or status
levels:
l
Users are people whose identity must be verified, such to
gain access to a facility or to have their attendance recorded.
l
Enrollers are Users who are authorized to enroll new
- 10 -
Press the power button and the screen showed on, a display of a
window was called the Start-up window. The following appears:
or”check out”
10:12
Getting Start
Options
Maintained
View Records
Feb
Troubleshooting
06-05-14
Relieve Alarm
check in
- 11 -
Appendix
Welcome
Basic Concepts
Before Start
Start-up window
USB Manage
users or delete on to the system.
l
Managers can do other operations, except set advanced
option and enroll manager’s privilege.
l
Supervisors are Users who access to all functions and
change all setup in the system.
Note: if there is no the Manager and Supervisor status in the system, the
Enroller will enroll them. And if there isn’t a Supervisor in the system,
the Manager will enroll him.
System Info.
User Manual V2.0
Getting Start
4
Getting Start
This chapter describes how to enroll and verify users on the Fingerprint
verification system
The following topics are included:
l
Enrolling User
l
Testing an Enrollment
l
Enrolling a Auxiliary Fingerprint of User
l
Verifying Your Identity
l
Hints for Successful Enrollments
Enrolling Users
After setting up your fingerprint machine and powering on, you
may enroll the user. If this is the first enrollment in a new or empty
system, everyone will become an enroller, if there is a manager in
the system, you should be allowed by a manager to enroll a new
user.
This machine provides with three ways to enroll, such the
Fingerprint Enrollment, the Password Enrollment, the Fingerprint
and the Password Enrollment. Above three kinds of ways are
correspond equal to different personnel whose fingerprint quality is
different. The Fingerprint Enrollment is suitable to the personnel
whose fingerprint quality is quite good; the fingerprint and the
- 12 -
Note: If this is the first enrollment in a new or empty system,
you will not be prompted for verification.
Fingerprint Enrollment
1) Press the MENU button to enter the User enroll,Access the
Enroll Fingerprint to press [OK], the following display:
Before Start
Basic Concepts
Getting Start
Options
USB Manage
To start the enrollment process, identify yourself firstly—press
[Menu], enter your ID number or fingerprint, and then verify your
identity.
System Info.
password are suitable to the personnel, whose fingerprint may be
enrolled successfully, but the verification process is the quite
difficult; the Password Enrollment is suitable to the personnel
whose fingerprint is unable to enroll successfully. According to the
actual situation, you may select a proper enrollment way.
Relieve Alarm
User Manual V2.0
- 13 -
Maintained
digit, if youu enrolled number does not arrive 5 digit, the
machine will add 0 in front of this figure , E.g. your number is
11, the 00011 will be displayed in the machine.
Troubleshooting
Note: this fingerprint machine default enrolling number is 5
Appendix
Enroll No 00011
ESC
OK
View Records
New Enroll
Getting Start
2)Input the enrolling number (the range is 1 to 65534), press [OK],
The following appears:
New Enroll
00011-0
ESC
Note:00005-0
The last number 0 means
The first fingerprint
OK [Save]
3)If the test is successful three times in a row, the following
appears:
New Enroll
00011-0
Place Finger……
ESC
4)Press [OK], the previous message continues to be displayed
while the template is created. If your identity cannot be verified,
you are prompted to try again. And you must restart the verification
procedure (Step 2).
Password Enrollment
1)Press the MENU button to enter the User enroll,Access the
password enrollment, press [OK], the following appears:
Enroll Pwd
New Enroll?
ESC
OK
2)Press [OK], the following appears:
- 14 -
Before Start
New Enroll
Enroll No 00006
ESC
OK
New Enroll
Input Pwd *****
ESC
OK
4)Input your password, the following appears:
5)Input the passwords again, press [OK], the following appears:
New Enroll
00006-P
- 15 -
Troubleshooting
6)Press [OK], the previous message continues to be displayed
while the template is created.
Maintained
OK [Save]
Appendix
ESC
Note:00006-P
The last letter P means
password.
View Records
Input Pwd *****
Pwd Affirm *****
Relieve Alarm
System Info.
New Enrollment
USB Manage
Options
3)
Input the enroll number (the range is 1 to 65534), press [OK], the
following appears:
Getting Start
Basic Concepts
User Manual V2.0
Getting Start
Fingerprint & Password
1) Press the MENU button to enter the User enroll,Access the
Fingerprint& Password, press [OK], the following appears:
FP& Pwd
New Enroll?
ESC
OK
2)Press [OK], the following appears:
New Enroll
Enroll No 00008
ESC
OK
3)Input the password (range is 1 to 65534), press [OK], the
following appears:
New Enroll
00008-0
Please
finger……ESC
4)If the test is successful three times in a row, the following
appears::
New Enroll
Input Pwd: *****
ESC
OK
5)Input your password, the following appears:
- 16 -
New Enroll
Input Pwd *****
Pwd Affirm *****
6)Input the password again, press [OK], the following appears::
Enroll ID ★
1)Press the MENU button to enter the User enroll,Access Reg
RFID, press [OK], the following appears::
RFID
New Enroll?
Before Start
OK
2)Press [OK], the following appears:
Maintained
ESC
System Info.
7)Press [OK], the previous message continues to be displayed
while the template is created
Relieve Alarm
Note:00008-0P; the second from the last 1 means one fingerprint,
The last letter P means password.
USB Manage
OK [Save]
View Records
ESC
Options
New Enroll
00008-0P
Getting Start
Basic Concepts
User Manual V2.0
- 17 -
Appendix
Enroll No: 00010
ESC
OK
Troubleshooting
New enroll
Getting Start
3)
Input the enroll number (the range is 1 to 65534), press [OK], the
following appears:
New enroll
Please show the card
Enroll No: 00010
ESC
OK
4)Slip the card near the area of induction follow the prompt, read
out Card ID, the follow appear:
New Enroll
RFID:16650449
Enroll No: 00010
ESC
OK
5)Press “OK” key to complete Enrollment,go on next operation.
the following appear:
New enroll
000010-C
ESC
Note :00010-C
The least letter C means ID card
OK
6)Press “ESC” key to cancel the new enrollment, press OK to save
enrolled data, so that complete registering ID card flow
Note:ID card is a option function on the fingerprint machine, if
you want to customize fingerprint machine with ID card
function, please contacts our market supporter and sale. If you
want to know more information please refer to (ID card use
guide)
- 18 -
HID standard card is encrypted by using specify format encode card ID
and the equipment code.
- 19 -
Before Start
Options
Appendix
Troubleshooting
Maintained
View Records
Relieve Alarm
Note:HID card is an option function on the fingerprint machine, if
you want to customize fingerprint machine with HID card function,
please contacts our market supporter and salesman.
USB Manage
This operation procedure is same as ID Card operation, use HID card
only by Using 125MHZ,13.56 MHz contactless smart card technology
only, these fingerprint products provide users with new options for
supporting multi-authentication of identity. Combine a contactless card
presentation with a fingerprint biometric. Or, use a personal
identification number (PIN) number along with a contactless card
presentation. (See multi-authentication)
System Info.
Enroll ID Card ★
Getting Start
Basic Concepts
User Manual V2.0
Getting Start
Enroll Mifare Card★
1)Press (MENU) KEY on the initial interface, after your privilege
are admitted, follow information appear on the screen:
User Manage
Enroll User
►FPCard Mng
Enroll Admin
▼
2)Press (ok) Key, enter next operation. Information show follows:
FPCardMng
▼
Create PINCard
►Enroll FPCard
Create FPCard
Reg FPCard
Unreg FPCard
Empty FPCard
Dump FPCard
ESC
Ok
There are eight sub-item, which is create fingerprint card, enroll
fingerprint into card, register fingerprint card, cancel fingerprint
card, erase fingerprint from card, copy fingerprint from card,
transfer fingerprint to card, the each follow detail explain is for
eight sub-item.
1. Create PIN. Card (Create PIN card): utilize registered user in the
fingerprint machine to Create PIN card, user may user the card to
identify himself, and don’t place the finger.
- 20 -
6. Erase fingerprint from Fingerprint (Empty FP Card): clear all
data (fingerprint, PIN) on the fingerprint card.
7. Copy Fingerprint from card. (Dump FP Card): Copy a
fingerprint from a card to Fingerprint machine, it is able to utilize
fingerprint direct attendance after finish this operation process.
8. Transfer fingerprint into card (Move to FP Card): the fingerprint
in fingerprint machine is transferred to a Fingerprint Card. there is
not fingerprint in the fingerprint machine after transferred.
- 21 -
Before Start
Basic Concepts
Getting Start
Options
USB Manage
System Info.
Relieve Alarm
5. Clean Fingerprint Card (Unreg FP Card): this operation is a
reverse process to above operation
View Records
4. Register Fingerprint Card (Reg FP Card): there is more than
two attendances machines, A enroll PIN. Card has been registered
in one fingerprint machine, which want to be use to anther
fingerprint machine, the Fingerprint Card must be registered firstly.
Maintained
3. Create Fingerprint Card (Create FP Card): copy fingerprint
from the fingerprint machine in which exist to a Card, user can use
the fingerprint to verify, also can utilize a fingerprint and a
Fingerprint Card to verify.
Troubleshooting
2.Enroll fingerprint into card (Enroll FP card): directly store the
fingerprint that has been register into card, at this time there is a
fingerprint in the card, and that does not exist in the machine, user
may user “Card + Fingerprint” to identify himself, must show the
Fingerprint card firstly, than place finger.
Appendix
User Manual V2.0
Getting Start
Note:Mifare card is an option function on the fingerprint
machine, if you want to customize the fingerprint machine with
Mifare card function, please contacts our market supporter
and salesman’s. If you want to know more information please
refer to (Mifare Card use guide)
Testing an Enrollment
Ask the users to place their finger to perform test verification. If the
test was successful, you will adopt Fingerprint enrollment. If the
poor quality of fingerprint, you will be recommended to use
Fingerprint & Password.
Enrolling a Auxiliary Fingerprint of User
For a long time using, if the system memory is allowed to store, it
is better to enroll more than two fingerprints a user. Enter the new
enrollment interface Press ‘OK ‘key to continue performing the
new user enrolling, Press ‘ESC’ key to cancel the new enrollment,
and to enter the backup enrollment interface, the following appears:
New Enroll
Display
Enroll No 00009
Enroll No 00008
ESC
OK
ESC
OK
This operation procedure is same as above enroll new user
- 22 -
Fingerprint authentication
Use fingerprints to validate access authentication with the
following types:
Before Start
Basic Concepts
Getting Start
Authentication type
Options
operation
Note: Where system memory permits, it is advisable to have at
least two fingers enrolled for a long-term user.
USB Manage
User Manual V2.0
Relieve Alarm
View Records
Operational trip:
In the initial interface, enter your ID number, the following
appears:
Maintained
In this mode, enter a pre-registered ID first and then a fingerprint.
The enrolled fingerprint corresponding to the ID will be compared
to the entered fingerprint on a 1:1 basis. The 1:1 authentication type
takes a short time regardless of the number of users. There is no
need to make any special settings in the system. After entering the
ID, enter the fingerprint to perform authentication. Block diagrams
of enrollment, verification, and identification tasks.
System Info.
(1)1:1 authentication(Verification)
Enroll No 00011
OK[Pwd]
- 23 -
Appendix
ESC
Troubleshooting
1:1 FP Verify
Getting Start
Note: This fingerprint machine default enrolling number is 5
digit, if you enrolled number does not arrive 5 digit, the
machine will add 0 in front of this figure , E.g. your number is
11, the 00011 will be displayed in the machine.
Press “OK”, then Place the finger on the sensor surface, the
following appears:
1:1 FP Verify
Please Move Finger
It continues for about 0.5 seconds. If the test is successful, it will
say “Thank you”, the following appears::
FP Verify
Enroll No 00001
Verified!
If your identity cannot be verified, you are prompted to try again,
the following appears:
FP Verify
Place Finger Agn!
It continues for about 0.5 seconds, return to the start-up window.
- 24 -
FP Verify
Please Move Finger
It continues for about 0.5 seconds. If the test is successful, it will
say “Thank you”, the following appears:
FP Verify
Enroll No 00001
Verified!
If your identity cannot be verified, you are prompted to try again,
the following appears:
FP Verify
Before Start
Basic Concepts
Getting Start
Options
USB Manage
Place the finger on the sensor surface, the following appears:
System Info.
Operational trip:
Relieve Alarm
Only enrolled fingerprints are used for authentication. Though the
authentication procedure is simple, this method will take a little
longer than the 1:1 authentication if there are many users. There is
no need to make any special settings in the system
View Records
(2)1:N authentication (Identification)
Maintained
User Manual V2.0
- 25 -
Appendix
It continues for about 0.5 seconds, return to the start-up window.
Troubleshooting
Place Finger Agn!
Getting Start
1: G; 1: H (Group authentication)
For group authentication, user can define a range of user ID, if user
ID is in the range, authentication way must be 1: N, otherwise the
authentication procedure is 1:1 matching.
--1: H authentication: user must input the advance part ID to
perform fingerprint authentication, if the input ID is entire No., the
system will carry on 1:1 authentication,
--1: G authentication: the user must be grouped before
authentication, you can specify a group ID of 1--4 digits long for
each user group. You will enter a group ID and press down -key,
and then place a fingerprint for authentication. You can specify a
group ID when you register a user. Unlike other methods, you must
enter the group ID, and then press down-key before entering the
fingerprint to perform group authentication.
Password authentication
A password of 1--5 digits long is used to validate access
authentication. You can use this method in such a special case as
when the fingerprints are damaged
To start the enrollment process, enter your ID number, the
following appears:
1:1FP Verify
Enroll No 00008
ESC
OK[Pwd]
- 26 -
Pwd Affirm
Enroll No:00008
Input Pwd:*****
Before Start
Basic Concepts
Press [OK], the following appears:
Getting Start
User Manual V2.0
Enroll No 00008
Error Pwd!
RF/ MIFARE card authentication ★
- 27 -
USB Manage
Appendix
Troubleshooting
The RF card of a user is used to identify the user. You can register
the RF card number to the system in advance to provide against
loss or theft of the RF card.
System Info.
Pwd Affirm
Relieve Alarm
If the password cannot be verified, the following appears:
View Records
Enroll No 00008
Verified!
Maintained
Pwd Affirm
Options
Input correct password, press [OK], the following appears:
Getting Start
MIFARE card authentication ★
The MIFARE card is a contact -less IC card, 1K card has its 1 K
byte memory assignment as 16 sectors, each with 4 blocks of 16
bytes. The MIFARE card interacts with the reader, which is able to
store fingerprint template inside, the fingerprint template is
transferred to reader, then the template against placed finger while
use performance verification.
The MIFARE card also own unique serial No. you can use it
instead of ID card. (For more detail see appendix.)
If the Mifare card has been used as created PIN card, need to enter
“MenuàOptionàSystem Optionà advance Option”, press
“▲/▼”, select “ No. Card” as Y (es), the validating as follow.
In the starting-up windows. place the PIN card near induction area
( distance is not far, otherwise the card will not be detected) the
screen show as follow:
Verify PIN Card
UserID 00008
Verified
If use other way to register Mifare card (the example: The
registration fingerprint card), Set “No. card” option as Y (es), then
confirmation flow same with above.
If Set No. card” option as N (O), then confirmation flow as follows:
- 28 -
It continues for about 0.5 seconds. If the test is successful, it will
say “Thank you”, the following appears::
Verifying FPCard
00009
UserID 00009
Verified!
If your identity cannot be verified, you are prompted to try again,
the following appears:
Verifying FPCard
00009
Please try again
Any key to cancel
It continues for about 0.5 seconds, return to the start-up window.
Note: beside of above authentication type, multi-authentication
also is privoded. See Appendices. If you want to this function
please contact our market support or salesmen.
- 29 -
Before Start
Basic Concepts
Getting Start
Options
USB Manage
System Info.
Verifying FPCard
00009
Please move finger
Any key to Cancel
Relieve Alarm
Place the finger on the sensor surface, the following appears:
View Records
Verifying FPCard
00009
Place Finger……
Any key to Cancel
Maintained
not be detected), screen display as follows:
Troubleshooting
In the initial interface, (distance is not far, otherwise the card will
Appendix
User Manual V2.0
Getting Start
Hints for Successful Enrollments
If the fingerprint is of good quality, the verification speed will fast;
otherwise, it will verify slowly or occur to FRR. In order to improve the
fingerprint verification quality, the following hint appears
Trouble
Solution
Fingerprints is
too dry or
dirty
Solve the dry problem that rubs the dry finger with
palm.
If the fingerprint is dry, you should adopt the way of
wetting up the finger, such as brow air over finger.
Have
no
enough
to
bring pressure
The user should place a finger firmly and flat on the
sensor surface.
How to select
the finger?
How to place
the finger?
Recommend to left or right index or middle finger.
Use fingerprints of good quality, without worn or
injury.
The user usually selects the forefinger, if it was of a
poor quality, you will be recommended to middle
finger or ring finger.
If the user’s finger is small, you will select the
thumb.
Place your finger firmly and touch the sensor
surface must be over 2/3.
The fingerprint does not touch upright on the sensor
surface.
- 30 -
In order to prevent unauthorized personal change the option of the
machine, the machine provide an option to set administrator.
1)Enter the menu of the machine,after verify successfully, the
following window appear:
Menu
►User Enroll
Option
Sys Info
2)Press OK key, Enter user managerment,the following windows
appear:
User Enroll
►User Enroll
Enroll Admin
Delete Datum
Before Start
Basic Concepts
Getting Start
Options
USB Manage
Enroll Administrator
System Info.
However, few people’s fingerprint quality is too
poor to verify, the fingerprint in gear. Please use ID
& fingerprint verification, and the Threshold can be
reduced or use password verification.
Relieve Alarm
Others
For a user with worn or injury finger, the
identification can be affected.
If the finger quality was poor, you should be select
password to verify.
View Records
The effect of
the fingerprint
pattern change
Maintained
Do not touch the finger too fast; Do not move the
finger on the sensor surface.
Troubleshooting
User Manual V2.0
- 31 -
Appendix
3)Using “▲/▼” key, select manager to enroll, the follow interface
Getting Start
appear.
User Enroll
User Enroll
►Enroll Admin
Delete Datum
4)Press OK key, Enter management enrollment the following
window appears.
Enroll Admin
►Enroll FP
Enroll PWD
FP&PWD
5)You can select a favor way to register an administrator, the
administrator authorization includes enroller authorization, manager
authorization, and super administrator (supervisor) authorization,
more detail see privilege level. The enrollment way is same as user
enrollment.
Delete enrolled Data
If a user wants to be deleted, you can take following step to cancel
the user.
1) Press Menu Enter the menu of the machine , after verify
successfully, the following window appear:
Menu
►User Enroll
Option
Sys Info
- 32 -
3)Using “▲/▼” key, select data to enroll, the follow interface
appear.:
5)input the number you want to cancel, pressOK to confirm, go on
next operation, follow the prompt on the window to cancel user.
Delete Datum
- 33 -
Before Start
System Info.
Appendix
Troubleshooting
Maintained
UseID 00008
ESC
OK
Relieve Alarm
User Enroll
User Enroll
Enroll Admin
►Delete Datum
View Records
4)Press OK key, Enter the process to cancel data the following
window appear.:
USB Manage
Options
User Enroll
►User Enroll
Enroll Admin
Delete Datum
Basic Concepts
2)Press OK key, Enter user manager, the following window
appear:
Getting Start
User Manual V2.0
5
Option
Option
Press the [Menu], and then verify your identity. The following
appears:
Menu
User Manage
Options
Sys Info
Access Options, press [OK], the following appears:
Options
System Opt
Power Mng
Comm Opt
▼
Log Opts
Access Option
Alarm Cnt
Group VerType
Auto Test
This following topic included: System Option, Power Manage
Communication Option Log Option and access option, Auto test.
Alarm Cnt, GroupVerType. The Alarm Cnt (Amount of failure to
verify until sending alarm) and GroupVerType (Verification by
group type) is an optional item, there are only in access control
machine.
- 34 -
The setup facility covers four areas: System Options, Language,
Lock and Advanced Options.
Set Current Date Time
Access Date Time, the following appears:
Date Time
2006-01-02
08:24:35
ESC
OK
- 35 -
Before Start
Options
Appendix
Troubleshooting
To change the date, press∨ and key, then input the correct date and
time, press [OK]
USB Manage
150
1
System Info.
Lock
Unlock
Adv Option
Relieve Alarm
System Opt
▼
Date Time
Language
Fmt YY-MM-DD
View Records
Access System Opt, the following appears:
Maintained
System Option
Getting Start
Basic Concepts
User Manual V2.0
Option
Changing the Date Time Format
Access Fmt YY-MM-DD, press ∨and∧ key, then input the
correct date and time format, press [OK]
System Option
▼
Date Time
Language
Fmt YY-MM-DD
There are ten formats: YY-MM-DD、YY/MM/DD、 YY.MM.DD、
MM-DD-YY 、 MM/DD/YY 、 MM.DD.YY 、 DD-MM-YY 、
DD/MM/YY、DD.MM.YY、YYYYMMDD.For change the Date
Time display format in the initial interface.
E.g.:YY/MM/DD format (left) become to the YY-MM-DD format
(right)
Welcome Check-in
Welcome check-in
17:37
17:37
05-08-30 Monday
05/08/30 Monday
Changing the language
Select the language you want and press OK, the default language is
English; the screen will show in English.
- 36 -
Before Start
▼
English
▼
Spai
Spain
Troubleshooting
Note:This fingerprint machine does not provide this option
that follows that standard approved for use with this machine,
if you need this function; please contact our market supporter
or salesman.
Relieve Alarm
Eng
Opc.Sist.
Fecha/Hora
Idioma
Opc.Avanz.
View Records
▼
- 37 -
Appendix
System Opts
Date Time
Language
Adv option
USB Manage
Choose the language you want, and press OK then press ESC to
exit system option, the system may prompt you to save the setup,
press to confirm and change the system language setup. Be sure to
restart you computer .so the setting take effect
System Info.
Press the up down key to change the type of language, the machine
fully supports multinational languages, on the screen there may be
display as English besides the language you favor and order.
Options
Getting Start
Eng
Maintained
System Opt
Data Time
Language
Adv Option
Basic Concepts
User Manual V2.0
Option
Lock ★
The Lock means the duration of lock drive, fingerprint machine
controls the time how long to open electronic lock. Select this
option, and press OK key to enter setup, key in figure through
digital key, press ESC to exit and save the setting.
This duration criterion unit is 20 ms, which max value is 254,
namely 5.08seconds. “0” means this function is in closed
Note:This is an optional setup, this option only exists in the
fingerprint machine that own simple Access Control function.
If the fingerprint machine is a specialty Access Control
machine, which contains this option.
Above parameter of the duration of lock drive follow that
standard approved for use with this machine. If you want to
know much more parameters. Please contact our market
supporter or salesman.
Unlock ★
This option means how many personal can unlock, Select this
“Unlock” option, and press OK key to enter setup, key in figure
through digital key, press ESC to exit and save the setting.
Default value is 1, that means only one user is able to unlock when
- 38 -
- 39 -
Before Start
Appendix
Troubleshooting
Maintained
View Records
Relieve Alarm
System Info.
USB Manage
Options
Note: this option corresponds with above option. This option is
owned by the fingerprint machine with simple access control.
Basic Concepts
his verification is positive, if this value is set as 3, that means the
fingerprint machine send a unlocking signal till only all three user
verify successfully, the interval of each personal is on more than 30
seconds. The max value set as 5 is available.
Getting Start
User Manual V2.0
Option
Advance Option
Access Advanced Option, press [OK], the following appears:
Adv Option
Restore Deflt
Del Logs
Clear all Data
.
Clr admin pri
Show Score
Match Thr
Only 1 to 1
1:1 thr
Two sensor
Voice
No.Card Only
R.card Only
FP Card Only
Upd firmware
Remote Auth
Auth Server
Work code
Button Beep
AdjVol(%)
Print
▼
45
N
25
N
Y
N
Y
Y
Y
N
Y
34
Press “▲/▼”to scroll up or down the screen to select the option.
n
Restore Default: restore all setup information to default of
leave factory.
- 40 -
Threshold: For helping in selecting threshold level settings,
see Table 1--1
n
Only 1 to 1: whether the staff`s ID number must be input.
n
1:1 Threshold: when use ID+ fingerprint to verify set the
Threshold level
n
Two Sensors: if need to connect a external additional Sensor,
choose the option as “Yes”
Note: After connect with fingerprint sensor; be sure to
restart the fingerprint machine, so the sensor takes effect.
n
Sound: whether use to phonic hint or not. If set the option as
(Yes), the machine will send a hint sound for every operation
example, after the verification is successful, the machine will
say (Thank you), if set the option as (No) the machine will
not send sound Hint, only utter one (do) sound after the
verification is positive, when the verification is negative, the
machine utter two (do).
- 41 -
Before Start
Basic Concepts
n
Getting Start
Show Score: whether show the quality value of fingerprint in
the screen or not.
Options
n
USB Manage
Clear Admin’ Privilege: change the Administer privilege into
ordinary users’ option.
System Info.
n
Relieve Alarm
Delete Logs: delete all logs of flash disk.
View Records
n
Maintained
Clear all Data: delete all enrolling user information and logs.
Troubleshooting
n
Appendix
User Manual V2.0
Option
n
Firmware Upgrade: if want to upgrade the firmware of
machine, may use the USB flash disk or connect the machine
to the PC, carry out the operation process.
Caution: The user does not random upgrade the firmware,
you must be allowed by the dealer before to upgrade the
firmware, voluntarily upgrade occur the question which
possibly affect your normal use.
n
No. Card:This item is set as “Yes”, only verify No. card to
pass authentication. If this item is set as “NO”, after verifying
Card, must go on fingerprint verification.
n
R.Card Only:This item is set as “Yes” must register card on
the fingerprint machine first; if this item is set as “No”, need
not to register card.
n
FPCard Key:After this item is set, the fingerprint machine
will be able to write in password to the card which has been
register in the fingerprint machine.
n
Remote:After this item set as “Yes”, this fingerprint machine
can be used in Remote Identification mode.
There are four mode to select (NL, LN NO, LO) in the
fingerprint machine, these option signify different thing,
NL, indicate that firstly perform network verification then
local verification,
LN, first perform local verification then go on network
verification,
- 42 -
Adjust Voice: adjust the voice volume of hint sound and
keyboard sound.
n
Imdt Prt:This item is set as RS232, when user verify
successfully the fingerprint machine will export signal through
serial port, if the machine connect with printer, ability to print
or view it via the super terminal.
Note: This function only support serial port (RS232)
printer, the parallel interface is not to be support, the
Baud rate of fingerprint machine and printer must be
same with. More detail see appendix
- 43 -
Before Start
Basic Concepts
Getting Start
n
Options
Button Beep: whether send sound hint while press key, if set
the option as (Yes), then as press the keyboard the machine
will utter, if set the option as (NO), when press the keyboard
the machine doesn’t utter.
USB Manage
n
System Info.
Work Code:This item set as “Yes”. The machine prompt ask
input work code while user go on authentication, then press
OK to save it, if this item set as “NO”, while go on normal
verification.
Relieve Alarm
n
View Records
AuthServer:: In the LAN the remote authentication Server’
IP address.
Maintained
n
Troubleshooting
NO, indicate only go on remote verification, only remote
database has fingerprint to pass verification,
NL, indicate only go on local verification, local
fingerprint terminal has fingerprint to pass verification.
Appendix
User Manual V2.0
Option
Note:
1) Additional fingerprint sensor and up grade firmware are
valid for these fingerprint machine that is provided with USB.
2) No. Card is valid for the fingerprint machine that is provided
with Mifare or ID Card.
3) R.Card Only. FPCard key only are used in fingerprint
machine with Mifare function.
4) Remote. AuthServer only are used in RIS function of
fingerprint machine.
5) Button Beep, Adjust Voice, only applies to these fingerprint
machine which use U.are.U Fingerprint sensor.
Power Manager
This product uses smart manage system, supports the time switch
and the timetable of time switch, lock power button as well as time
alternate state
- 44 -
Before Start
Basic Concepts
User Manual V2.0
Power Option
This product uses smart manage system, supports the time switch
and idle features, it can satisfy the user’s different demands.
Shutdown: auto shutdown follows the schedule.
Select this item .press OK key to enter following interface:
Press Ok key to set shutdown schedule,press ESC to give up.
- 45 -
Options
USB Manage
System Info.
Troubleshooting
Are you sure ?
ESC
OK
Maintained
Shutdown
Appendix
n
Relieve Alarm
Bell Delay
10
Scheduled
Idle
Idle min
0
Lock PWRBut N
WebHost IP
Time alter state
View Records
▼
N
N
N
Power Mng
►Shutdown
Power On
Sleep
Getting Start
Access Power Manage, the following appears:
Option
After complete setting schedule, press OK to confirm, so this
function take effect.
n
Power on: auto power up for the schedule ;
n
Sleep: automatic resting for the schedule , press any key to
enter working state;
n
Idle and Idle Minute: they are related each other, while the
idle minute is zero, the idle is closed; while the idle minute is
not zero (unit was minute), for example, it is one minute, the
user does not do anything in one minute, and the system will
enter the idle state.
n
Bell delay (Time ring and the duration of ringing):The
system total has eight Bell schedule to set, according to actual
need you may set time bell, when the time arrive at the
appointed time, the fingerprint machine will automatically
ring bell, the duration of ringing achieve assigned hour, the
ringing will stop automatically.
n
Web Host IP:Set IP address of PC which has been installed
Web server.
n
Adjust volume:If you don’t satisfy speaker to play MP3
value of the fingerprint machine. Can use the function to
adjust it.
n
Lock Power Button: Set this option as (NO), the press the
power key to shutdown the machine, if set this option as (Yes),
- 46 -
1.)If you have not find this Option, shutdown, Power on, it belongs
to the normal state. Only some machine have the time event
selection function, if you have any question, please contact our
technician.
2)Web Host IP setting is valid unless the fingerprint machine own
playing MP3 function. Please refer to (MP3 Function Introduction)
- 47 -
Before Start
Basic Concepts
Getting Start
Maintained
Troubleshooting
Event Selection:While the Time& Attendance machine under
using, the different time period need to correspond checking event,
the six event key allows the User to choose the desired event prior
to clocking in/out.
These event key are set by manual, may press the corresponding
key to select event you want, for convenience operation, There is
another setting provided that allows event selection to be set either
at IN or OUT in an event schedule table. The event schedule table
features up to 4 entries.
Appendix
Time Event Selection
View Records
Relieve Alarm
3.)Time ring and the duration of ringing only belong to these
fingerprint machine with Time ring and Playing MP3 function.
Options
Note:
USB Manage
the “Shutdown machine” Prompt will appear on the power
manage menu, in this time the machine is no able to be
shutdown, only enter the menu to choose “Shutdown
machine” to realize machine off.
System Info.
User Manual V2.0
Option
Time Event Selection: There are two fields of each event schedule
table entry: time field and corresponding event mode (IN/OUT)
field. When time up to the scheduled time, the fingerprint machine
will automatically switch event selection at IN or OUT by your
setting in event schedule table. Currently check condition will
appear on the initials interface of fingerprint machine.
How to set the time event selection
Setup time event selection
1.Enter menu->Option->Power Manage->Attstate Fun,such as
following picture:
Att state Fun
Check condition
On check-in
Exit (ESC) OK(OK)
2.Press “▲/▼”key to select check event you want set, there are
four event option that maybe set and four time period, that are
clock on, clock off, overtime check–in , overtime check-out, press
ok key to set, now take “ Clock out” to illustrate:
Changeoffcheckout▼
►Time1
N
Time2
N
Time3
N
- 48 -
4.Press ok key enter following interface, directly input time you
want via figure key:
Changeoff Check-Out
▼
►Time1 8:30
Time2
N
Time3
N
5.Press “ ▲/▼” key to select time you want set newly, as
following picture.
6.After completing setting, Press ESC to exit, then the prompt will
appear on the screen, follow the prompt, press Ok to save, press
ESC key to exit.
Change off check out
Save?
Invalid(ESC) Yes(OK)
7.If this setting has been save, upon appoint time, the check event
will switch clock out event.
- 49 -
Before Start
Basic Concepts
Getting Start
Options
USB Manage
Yes(OK)
System Info.
No(ESC)
Relieve Alarm
Time 1
Set time function?
View Records
3. Choose time you want set, first select time period, press OK key,
such as follow:
Maintained
N
Troubleshooting
Time4
Appendix
User Manual V2.0
Option
Cancel the time event selection
1. Enter set alternate event interface to cancel time of set “Clock
out” event
Enter menu –> option power->time alternate event, choose
“Clock out”: as following picture.:
Changeoff checkout ▼
►Time1 8:30
Time2
N
Time3
N
Time4
N
2. Select time you want cancel, take example as the time 1. Press
Ok Key as follow picture.:
Time1
Set time function?
ESC
OK
3. press ESC to cancel ,the time will be canceled,
Changeoff checkout ▼
►Time1
N
Time2
N
Time3
N
Time4
N
- 50 -
4.After completing setting, Press ESC to exit, now the prompt will
appear on the
machine, press OKto save, press ESC key to exit
Access Comm. Opt, the following message appears:
Y
N
N
0
Modem
Y
The machine fully supports RS232, RS485, TCP/IP, whether the
- 51 -
Before Start
USB Manage
View Records
Auto
Maintained
Net speed
IP address
Net Mask
Gateway
TCP/IP
RS232
RS485
Link code
Extern
▼
15200
1
N
Troubleshooting
Comm. Opt
►Baud Rate
Dev Num
DHCP
System Info.
Communication Option
Relieve Alarm
5.If performance saves, this option will take effect to cancel “time
1” of “Clock out”
Options
Yes(OK)
Appendix
No(ESC)
Getting Start
Chg off check-out
Save?
Basic Concepts
User Manual V2.0
Option
machine are used to a Single Unit or Link to Networking, it will
satisfy the user’s demands
n
Baud Rate: there are five options, 9600, 19200 38400, 57600
115200; this means the speed of communication.;
n
Machine Number: Identity ID, the range is 1 to 255;
n
DHCP (Dynamic Host Configuration Protocol): whether
start DHCP function in the fingerprint machine.
n
IP address: it defaults to IP address is 192.168.1.201;
n
Net speed: the Net default Speed is Auto, its option is 10M-F,
10M-H, 100M-F, 100M-H;
n
Net Mask: the Net Mask default is 255.255.255.0, as you
need to change it;
n
Gateway: it default to Gateway is 192.168.1.1. As you need
to change it;
n
Ethernet: whether use TCP/IP protocol or not;
n
RS232: whether use RS232 or not;
n
RS485: whether use RS485 or not;
n
Link code: it defaults to code is 0, but it can be set up.
n
Extern Modem:This item is set as Y(es), this fingerprint
machine may connect with additional Modem
- 52 -
Before Start
Basic Concepts
User Manual V2.0
n
Alarm Supervise Log: When the remainder the Manage log
capacity reached set numerical value, it will automatically
sound a warning that logs were full.
n
Alarm Attendance Log: when the remainder log capacity
reached set numerical value, it will automatically sound a
- 53 -
Options
View Records
Maintained
Log Opt
▼
►Alm SuperLog 99
Alm AttLog
99
Recheck Min 0
Troubleshooting
Access Log Opt, the following message appears:
Appendix
Log Options
Relieve Alarm
System Info.
2) After setting,be sure to restart fingerprint machine, so
the configuration take effect.
USB Manage
1) If the fingerprint machine is provided with “Getaway”
and “Sub mask”, the” Ethernet” Option will not exist in it,
which is defaulted as Ethernet is in opening; If the
fingerprint machine is not provided with “Getaway” and
“Sub mask”, the “Ethernet” Option will exit in it, if you
want to use Ethernet, this Option must be set as Y(es).
Getting Start
Note:
Option
warning that logs were full.
n
Recheck Minute: Set it within the scope (Unit: minute).
Someone’s enrollment has enrolled, then, the log twice was
not displayed in the system.
Access Control Option★
Unless this fingerprint machine is provided with a professional
Access Control function,this Option does not exist and is
invalid, this function does not exist in the fingerprint machine
which is used in T&A and Simple Access Control.
Enter the Access Option, press [OK], the following appears:
Access Option ▼
►Define TZ/TP
User Acc Opts
GRP TZ/TP Define
Access Comb
Lock
150
Dsen Delay
10
Dsen. mode
N
Dress Options
AlarmCnt
GroupVerType
Main function in Access Options:
- 54 -
Lock (Time duration of lock drive): fingerprint scanner
controls the time to open electronic lock.
n
Dsen.Delay Some segment time which begin after open door
just begin alarm;
n
Dsen. mode there are three option that is none( NONE),
normal open (NO), normal close(NC) .the none means the
door Sensor doesn’t apply, Normal Open is defined that Thee
door can be set to a Passage Mode in the normal condition,
Normal Close means that the door is close in the normal work
condition..
n
Duress Alarm Option: If the fingerprint registered has been
authenticated the system will send an alarm signal to prevent
someone is forced to open door. In the menu you can do to all
setting.
n
Alarm Cnt (the amount of failure to verify), if times of user
- 55 -
Before Start
Basic Concepts
n
Getting Start
Access Comb (Unlocking combination): defines different
unlocking combinations, each combination is composed of
different groups;
Options
n
USB Manage
Group Time period: is used to set group unlocking time;
System Info.
n
Relieve Alarm
User Access Option: is the definition User Group, User’s
Time period and unlock comb;
View Records
n
Maintained
Define TZ: is the definition of everyday Time period that can
unlock door in one week;
Troubleshooting
n
Appendix
User Manual V2.0
Option
failure to verify equal to the value set, the fingerprint machine
will send alarm signal.
n
GroupVerType: this means user who belong to group use
verification type.
Note:This option also is an optional item. It only is owned by some
fingerprint access control machine, if this option is set as Y (yes), the
fingerprint machine is able to perform Multi-combination
verification.
Brief Introduction to Access Options
Access Options function option is the settings of registered user’s
unlocking time period and unlocking combination.
Each user’s attribute is defined by one belonged grouping, use
group time period and user time period. Grouping is to divide users
into several groups, such as group 1, group2, etc. every group
include threes time period, which is named as group time period,
In group time period, user can select maximum three time periods
already being set. Relationships among these three time periods are
“OR” (i.e. it is only need to satisfy any one of these three time
periods). In user time period, user can select maximum three time
periods that has been set. Relationships among these three time
periods are also “OR”.
Simply put, conditions of registered user can unlock door are:
- 56 -
- 57 -
Before Start
Basic Concepts
Getting Start
Appendix
Troubleshooting
Maintained
View Records
Relieve Alarm
System defaults that new registered user belongs to group 1, default
grouping combination is group 1, and default group Time Period is
“1”. Under the condition that group 1 and Time Period 1 are in factory
default status, new registered user defaults in unlocking status (if user
changes correlative setting of Access Options, system will change
according to user’s modification). If the grouping that user belongs to
does not include in grouping combination setting, then user can only
record attendance and cannot unlock door.
Options
2: Current unlocking time should be in any effective Time Period
in user time period
USB Manage
1: The group that user belongs to should be in unlocking
combination (also this group can be in unlocking combination with
other groups, but it is required to unlock door together with them).
System Info.
User Manual V2.0
Option
Verification Flow of Access Options
- 58 -
Function Description
Before Start
Basic Concepts
User Manual V2.0
Note: System defaults that time period of serial number 1 is
all-day open, the new register user belong to the group1 and
own the serial number1 time period, so the new registered
user default can unlock door).
- 59 -
Options
USB Manage
System Info.
Relieve Alarm
View Records
Maintained
Effective time period for user to unlock: all-day open (00:00-23:59)
or end-time larger than start-time in time period.
Troubleshooting
End-time less than start-time (E.g. 23:57-23:56) represents all-day
forbidden. End-time larger than start-time (E.g. 00:00- 23:59) takes
effective in this range.
Appendix
Time period is the minimum time period unit of Access Options.
Whole system can be defined with maximum 50 time periods. And
7 time regions (i.e. one week) can be set in each time period. Each
time region is effective time period in 24 hours of a day. Each user
can own maximum 3 time periods. Relationships among these three
time periods are “OR”. It is effective as long as the time to verify
that can meet one of these three time periods. Each time period
format of time period is HH:MM-HH:MM and its format is
according to 24-hour mode and accurate to minute. This option can
only be configured by the User Administrator or the Super
Administrator.
Getting Start
Definition of Time Period
Option
The setting procedure of time period is follow. .
1) Enter “Define TZ” and screen displays as follows:
Define TZ
Time Period No
1
ESC
OK
Press “OK” to enter setting of time period 1 and screen displays as
follows:
Def Time Period
1 ▲
Sun 00:00-23:59
Mon 00:00-23:59
Tue 00:00-23:59
Wed 00:00-23:59
Thu 00:00-23:59
Fri 00:00-23:59
Sat 00:00-23:59
Definition of time period 1 above is all-day open, i.e. factory
default status.
2) For example: Time period can be redefined,
E.g.: Definition of time period 1 is:
Saturday and Sunday are break, and don’t allow to enter.
Working time of Monday to Friday is allowed to enter.
Working hour: 08:30-18:00
- 60 -
Definition of Grouping Function
An Access Group allows for users to be given standard access for
the workplace. Different departments may have different access
privileges and some corporation’s employers who are on shift
duties, and may need different access levels for each shift,
depending upon their time of entry and exit from the workplace. To
fasten the procedure of giving access privileges, it can now be done
for groups, instead of individuals to simplify the process and give it
more transparency.
Grouping function can divide users into group, and can also
combine different groups into different unlocking combinations;
- 61 -
Before Start
Basic Concepts
Getting Start
Options
USB Manage
System Info.
On analogy of this, multi time periods can be defied according to
practical requirements. Whole system can define maximum 50 time
periods.
Relieve Alarm
08:30-18:00
08:30-18:00
08:30-18:00
23:57-23:56
View Records
Wed
Tue
Fri
Sat
Maintained
Def Time Period
1 ▲
Sun 23:57-23:56
Mon 08:30-18:00
Tue 08:30-18:00
Troubleshooting
Setting is as follows:
Appendix
User Manual V2.0
Option
the grouping function can combine many unlocking combinations.
System ability to define total 5 groups: group 1, group 2, group 3,
group 4 and group 5. New registered user by default belongs to
group 1, and first uses time period of group, but the user can be
allocated into other group, selected serial number of Time period
already being set in group Time group Time, after user resets the
belonged group, the user uses default time period of correlative
group. So default time period of each group should be defined first.
Note: time period of system defaults that group 1 selects serial
number “1” of time period. (E.g. new registered user default
can unlock door)
The setting procedure of Access Group is follow.
1)
2)
Enter “GRP 1 TZ Define “ and screen displays as follows::
Press OK to enter.
GRP TZ Define ▲
Group No
1
ESC
OK
3)
There are 3 time periods in GRP TZ Define. Relationships
among these 3 time periods are “OR”.
- 62 -
6)
Press OK to enter.
Group 2 is effective in time periods of 2, 10 and 36, and can
also select other defined time periods.
GRP Dflt TZ
TZ1
TZ2
TZ3
7)
▲
2
10
36
On the analogy of this, time periods of each group can be
defied according to actual requirements. Whole system can
define time periods of maximum 5 groups.
- 63 -
Before Start
Options
USB Manage
GRP TZ Define ▲
Group No
2
ESC
OK
System Info.
Setting of time period of group 2:
Relieve Alarm
5)
View Records
Enter “GRP 2 Dflt TZ “ and screen displays as follows:
Maintained
Group 1 is effective in time periods of 1, 8 and 40, and can
also select other defined time periods
Troubleshooting
4)
Appendix
GRP 1Delt TZ ▲
TZ1
1
TZ2
8
TZ3
40
Getting Start
Basic Concepts
User Manual V2.0
Option
User Acc Opts
User Access Options is to process correlative setting according to
user’s requirements,which include: To belong to grouping setting,
use group time period and user time period.
Enter this menu to check certain user’s Access Options status.
n
Grouping: divides registered users into several groups, is easy
and convenient to manage.
n
Use GRP TZs (Use group time period): whether the user uses
default time period of belonged group.
n
User time period: is user to set user’s unlocking time and
select serial number of time period already being set.
Note:
Relationships between use group time period and user time
period.
Yes and No in “Use Group Time period” only have impact
on the following user time period:
If use group time period is “Yes”, then user time period will
automatically be assigned the value of serial number of time period
of belonged group (group time period should be set in
advance).
- 64 -
The following example is to distribute user 00001 and 00002 to group 1
and group
Enter option interface of serial number 00001, and screen
displays as follows:
1
Y
1
TZ2
TZ3
Type
GroupVerType
8
40
FP
Y
- 65 -
Before Start
Basic Concepts
System Info.
USB Manage
User 00001Opt ▲
Belong to GRP
Use GRP TZs
TZ1
Relieve Alarm
Press “OK” to enter Option menu of use group time period. Press
“UP” and “DOWN” keys and select “Yes”. User 00001 is effective in
time periods of 1, 8 and 48; “ Allow Group” is set as Yes, we suppose
that the Group 1 verifying type is password( ability to set it under
GroupVerType of Access Control Option)Screen displays as follows,
View Records
00001
OK
Maintained
Enroll ID:
ESC
▲
Troubleshooting
User Acc Opts
Appendix
A.
Getting Start
If User Time period is changed, then use group time period
automatically change to “No”.
Options
User Manual V2.0
Option
User of serial number 00001:
1)User’s belonged grouping is “1”, it uses time period of group 1
(serial number of user time period is serial number of group time
period) ;
User use GroupVer Type, In spite of user has chosen any individual
verifying type; all take only Group verifying type as the criterion.
B.
Enter setting interface of serial number 00002, and screen
displays as follows:
User Acc Opts
▲
Enroll No:
ESC
00002
OK
Press OK to enter,
If serial number of user time period is 1 or 20, then use group time
period automatically change to “No”
GroupVerType is set as NO,so user use type ( individual Verifying
type)as following figure.
User 00002Opt ▲
Belong to GRP
User GRP TZs
TZ1
TZ 2
TZ3
2
N
1
20
- 66 -
Type
GroupVer type
Before Start
FP
N
Basic Concepts
User Manual V2.0
- 67 -
Options
USB Manage
Maintained
Unlocking combination definition is to define different unlocking
combinations, and each combination is composed of different
groups. Unlocking combination directly uses group number and
does not consider user verification sequence between each group.
For example “123” represents group 1, group 2, group 3 and at
Troubleshooting
Unlocking combination is the direct representation of controlling
unlocking. E.g., if user wants that all registered users cannot unlock,
then the user can set all 10 unlocking combinations to null.
Appendix
Access Comb
View Records
Relieve Alarm
2)user use individual Verifying type, namely use fingerprint
verifying type
System Info.
1)User’s belonged grouping is “2”, it uses user time period and
does not use group time period, i.E. it is effective in time
periods of 1 and 20
When user wants to use group time period, then select “Yes”. In
user time period, serial number of group time period will be
automatically assigned the value of serial number of group time
period. Contrariwise, if user wants to use user time period, just
directly modify the serial number in user time period and use
group time period will automatically change to “No”.
Getting Start
User of serial number 00002:
Option
least one user in each group congregates and passes verification
together, then door can be unlocked. “4” represents that after
individual user in group 4 passes verification, and then door can be
unlocked. System can simultaneously define maximum 10
unlocking combinations. It is required that only one of them passes
verification.
Note:
Unlocking combination of system initial default setting is “1”
(i.e. new registered user default can unlock door).
The setting procedure of Access Combination is follow:
Press “MENU” and enter main interface.
Select “Options” and press “OK” to enter setting menu.
Select “Access Options” and press OK to enter menu.
Select “Unlocking Combination Definition” to enter “Unlocking
Combination” and screen displays as follows:
Access Comb
Comb 1
Comb 2
Comb 3
Comb 4
Comb 5
Comb 6
Comb 7
Comb 8
Comb 9
Comb 10
- 68 -
▲
1
If only want to allow some groups to unlock door together, then set
these groups in unlocking combination definition.:
From above combination setting, it can be seen that::
123 is a combination.
4 is a combination.
24 is a combination.
45 is a combination.
15 is a combination
- 69 -
System Info.
Relieve Alarm
View Records
45
15
Maintained
123
4
24
Troubleshooting
Comb 4
Comb 5
Comb 6
Comb 7
Comb 8
Comb 9
Comb 10
▲
Appendix
Access Comb
Comb1
Comb 2
Comb 3
USB Manage
For example:
Basic Concepts
Before Start
If do not want to allow all users to unlock door, then set 10
unlocking combination all to null.
Getting Start
When do not process setting yet (i.e. factory default status), system
defaults that group 1 is unlocking combination 1 and others are
null.
Options
User Manual V2.0
Option
Combination 1: when personnel of group 1, group 2 and group 3
are all on the scene and the time period is effective in which at least
one user in each group passes verification together, then door can
be unlocked.
Combination 2: only one of personnel belonged to group 4 is on
the scene, then door can be unlocked.
Combination 3: when personnel of group 2 and group 4 are all on
the scene and the time period is effective in which at least one user
in each group passes verification together, then door can be
unlocked.
Combination 4: when personnel of group 4 and group 5 are all on
the scene and the time period is effective in which at least one user
in each group passes verification together, then door can be
unlocked.
Combination 5: when personnel of group 1 and group 5 are all on
the scene and the time period is effective in which at least one user
in each group passes verification together, then door can be
unlocked.
Note:
Time periods that cannot pass verification
² User time period does not select serial number of time
period.
- 70 -
These 3 people belong to group 2, group 4 and group 5 respectively,
and have the right to unlock door within the same time period.
Select “Group 1” and press “OK” to enter edit status. Press digit
keys to enter 245. Then press ESC to exit and save setting
interface.
Note: When combination 245 is defined, then user cannot
- 71 -
Before Start
Basic Concepts
Getting Start
Options
USB Manage
System Info.
Relieve Alarm
2)For example: one bank treasury requires that 3 people are all on
the scene to open the door of treasury. Detailed settings are as
follows:
View Records
² When meet combination 2 above, user who displays
prompt of “Invalid Time period Access” cannot
unlock door, but can record attendance. (If there is
user in group 4 who can meet unlocking condition,
then combination 2 can unlock door)
² When meet combination 1, 3, 4, and 5 above, user who
displays prompt of “Invalid Time period Access”
cannot unlock door, but can record attendance
Maintained
If time period that user sets is the time period that cannot pass
verification.
Troubleshooting
² Group time period does not select serial number of
time period.
² Time in which user passes verification does not
include any time period that is set by user.
² Time period is defined as forbidden.
Appendix
User Manual V2.0
Option
define 24, 25, and 45 as combination.
Lock
The Lock means the duration of lock drive, System requires to set
fingerprint machine to control the time how long to open electronic
lock, setting to “0” is close. Close lock control function. One quantity
unit is 20ms; maximum value can be set as 254, i.e. 5.08s. Select this
item and press “OK” to enter Options. Then press digit keys to input
corresponding digits. Finally press “ESC” to exit and save setting.
DSen. Delay
DSen. Delav : Some segment time which begin after open door just
begin alarm;
Press “MENU” enter main interface;
Select “Options”,Press “OK” to enter;
Select “Acc Opts”,Press “OK”to enter menu ;
Press UP or Down to enter ,select DSen. Delav,display as follows:
Access Option
Access Comb
Lock
150
Dsen Delay
10
Press OK,select number,Press Up or Down key to modify DSen. Delay
- 72 -
DSen. Mode
DSen. Modes include three :No, NC, None;No: No use door
sensor; NC: When the door is open, the lock is open; none: When
the door is closed, the lock is closed.
Before Start
Getting Start
Basic Concepts
User Manual V2.0
Access Option
Dsen delay
10
Dsen mode
NO
Duress options
View Records
Press OK,select option,press Up or Down key to change the
condition of DSen. Mode.
USB Manage
Press Up or Down key enter , select DSen.Mode,display as follows:
System Info.
Select “Acc Opts”,press “ok” enter menu;
Relieve Alarm
Select “Options”,press “OK” enter menu;
Options
Press “MENU” enter main interface;
Dress Options
Press “▲” and “▼” to scroll up or down the screen to select the
- 73 -
Troubleshooting
Select “Access Option”,Press OK to enter Menu;
Appendix
Choose “Option”,Press”OK”key to enter the Option Menu
Maintained
Press “MENU”key to enter main interface;
Option
option.:
Access Option
Dsen .delay 10
Dsen .mode NO
Duress options
The Duress alarm option includes that duress fingerprint
management. Seeking help key, alarm by1:1 validate, alarm by 1:
N validate. Alarm by verifying password and alarm delay etc.
The duress fingerprint management
Use newly to enroll specialties fingerprint or define an enrolled
fingerprint as the duress fingerprint, the system will trigger an
alarm signal when this fingerprint has been authenticate through
fair and foul.
Enter the duress alarm option, Press “▲” and “▼”to scroll up or
down the screen to select the “Duress F P”, Press “ok” to enter :
Duress FP
New Enr
Def. duress
Undef duress FP
Undef all
- 74 -
Define the duress fingerprint (Def.duress):Change the enrolled
fingerprint to the duress fingerprint.
Cancel the duress fingerprint (Undef duress FP): Cancel the
single duress fingerprint.
N
If the seeking helps by key (help key) option is defined as “y”.
Keep hold to press the “▼” key (more than 3 sec.), the machine
will trigger appeal signal, keep hold to press “▼”key (no more than
3 sec.) and place finger or input ID No. After the authentication is
positive, the system will trigger the alarm signal. If the help key
option is set as “N”, well then it is invalid when the “▼”key is
pressed.
- 75 -
Before Start
Basic Concepts
Relieve Alarm
N
View Records
1:N trig
Maintained
Duress Option
Help Key
1:1 trig
Troubleshooting
Enter the duress alarm option, press up or down key to scroll,
choose the “help key”
Appendix
Seeking help by key
System Info.
USB Manage
Cancel all( Undef all) :Cancel all duress fingerprints
Getting Start
Newly enroll duress fingerprint (New Enr.) : Enroll new
fingerprint as the duress fingerprint.
Options
User Manual V2.0
Option
the mode of validation alarm
The fingerprint machine fully supports three verification modes:
1:1 match, 1: N match, Password authentication, and here you
can choose one or other several verification way for the duress
alarm, when a user uses the option is defined as Yes, the system
will produce alarm signal
Duress Option
Duress FP
Help Key
1:1 Trig
N
1:n Trig
N
PWD Trig
N
Alarm delay
10
Alarm delay
Defining automated alarm time:When the duress alarm happen and
the system do not directly trigger alarm signal immediately, but can
define a period time until automatically trigger alarm signal
(0-255sec.)
Duress Option
1:N trig
Y
Pwd trig
Alarm delay
Y
10
- 76 -
n
Select “option” then press “OK”, Press “▲” and “▼”to scroll
up or down the screen to select Alarm Cnt.
n
Press OK and Input the value you want, the system provides
with 0-9 digit to select, 0 means this function is invalid.
n
Press OK key. And exit
Group Verification Type
This option also is an optional item. It only is owned by some
fingerprint access control machine, if this option is set as Y(yes),
the fingerprint machine will able to perform Multi-combination
verification, its set step is follow.
- 77 -
Before Start
Basic Concepts
Getting Start
Options
USB Manage
System Info.
Press (MENU) to enter main interface.
Relieve Alarm
n
View Records
Access Option ▼
Duress Option
►Alarm Cnt
GroupVerType
Maintained
This option is a optional item, it only exist access control machine,
if times of user failure to verify equal to the value set, the
fingerprint machine will send alarm signal, the set step is follow.
Troubleshooting
How to set the amount of failure to verify
Appendix
User Manual V2.0
Option
Press “OK”, Press “▲” and “▼”to scroll up or down the screen to
select Group VerType, show as follow picture.
GroupVerType
▼
►1
FP / PW / RF
2
FP / PW / RF
34
FP
FP//PW
PW//RF
RF
5
FP / PW / RF
Press “▲/▼” key to choose group, press OK to local at this line,
Press “▲/▼” key to select verifying type of this group, after
completing. Press OK to confirm, press ESC to exit, the system
will prompt whether save revised item, press OK to save it.
Auto Test
Access auto test, the following message appears:
Auto Test ▼
►Run all test
Flash test
LCD test
Voice test
FP test
Key test
RTC test
MP3 test
- 78 -
- 79 -
Before Start
Basic Concepts
Getting Start
Appendix
Troubleshooting
Maintained
View Records
Relieve Alarm
System Info.
USB Manage
In the option, you can run system machine test. When the machine
broken down, it can analyze the cause of the machine’s fault and
the machines were quickly and easily maintained. It tests the
Memory, LCD, and Sound, Fingerprint sensor, keypad and
clock. In the course of test, you should guarantee the stability of the
power. Otherwise, the system’s hardware was probably damaged;
especially it runs the memory test.
Options
User Manual V2.0
USB Manage
6
How to Manage USB
Flash Disk ★
Choose USB flash disk management in the menu; press [OK], the
following appears:
Pen Drive Mng ▼
►Download AttLog
Download User
Upload User
Download SMS
Upload SMS
The USB flash disk can be used to download the attendance data, and
download and upload employee data、SMS.
Download the attendance data
1) Plug the USB flash in the USB slot
2) Press the Menu button to enter the “USB flash disk
management” menu , Press “▲” and “▼”to scroll up or down
the screen to select the “ Download AttLog”,
PenDrive Mng ▼
►Download AttLog
Download User
Upload User
- 80 -
The operation is similar with that of the attendance data, the file of
User data (user data) and Template. data(fingerprint template)will
be saved in the USB flash disk. These files shall be uploaded and
downloaded at same time; it will show data copy successful when
operation is finish. If it indicates NO USB Disk or Please insert the
USB Disk and make an examination.
Before Start
System Info.
Relieve Alarm
Download Staff Data
View Records
Note: It will show data copy successful when operation is finish. If it
indicates No USB Disk or Please insert the USB Disk and make an
examination.
Maintained
Copy
data
successfully!
USB Manage
Options
4) Press “ESC” key to exit initial interface,Take out U flash disk,
The files X_attlog.dat (attendance log), X_oplog .dat (management
log), and X_user will be saved in the USB flash disk(X is a symbol
of machine No.
Basic Concepts
3)Press “ok” to go on downloading data, after operation finish, this
interface show as follow.
Getting Start
User Manual V2.0
- 81 -
Appendix
Select Pendrive Management. Press “▲” and “▼”to scroll up or
Troubleshooting
Upload Staff Data
USB Manage
down to select the “ Upload Staff Data”, Press “OK” key to perform
this operation, the two file, Userdat. Template, in the U flash disk
will be uploaded to fingerprint machine at same time.
Download SMS
The operation is similar with that of the attendance data, enter
Pendrive Management, Press “▲” and “▼”to scroll up or down
to select the “ Download SMS”, Press OK key to perform this
operation, after finishing, show whether the operation is successful.
Upload SMS
After set Short Message where is under the software, “External
program”-> “Short message”. Select “External program”-> “U
flash disk management”-> “Export Short Message”-> “Export
SMS to U flash disk”, after export SMS successfully. Plug the U
flash disk into fingerprint machine. Select item from fingerprint
machine via “Menu”->“Pendrive Mng” -> “Upload SMS”. Send
the customized SMS to the fingerprint machine.
Note:These functions are only available to the fingerprint machine
which own USB flash disk function. If you want to use these
functions, please contact our market supporter or salesman.
- 82 -
Sys Info
►User Cnt
FP Cnt
Att Log
▼
206
173
8046
Admin Cnt 2
Pwd User
30
Super Logs
263
Free Space Inf
Dev Info
Before Start
Basic Concepts
Getting Start
Through system Information you can view machine all information,
Access [Menu] to Sys Info, press [OK], the following appears:
Options
System Information
USB Manage
7
System Info.
User Manual V2.0
n
Att log : The record of attendance which have been stored in
the system
n
Admin Cnt: The total amount of administer who has been
registered in the system.
n
Pwd User: The total amount of user who use password to
achieve authentication.
- 83 -
View Records
FP Cnt: The total amount of fingerprint.
Maintained
n
Troubleshooting
User Cnt: The total amount of use has been enrolled.
Appendix
n
Relieve Alarm
The follow table illustrates what LCD showing item means
System Information
n
Free space info: the remainder log capacity, how long reach
set numerical value.
n
Dev Info: About this machine information.
n
Firmware Ver: The version of the machine firmware.
n
Alg version: The version of the fingerprint identification
algorithm.
n
Serial Num: Manufacture serial number.
n
Manu time: Manufacture time.
n
S Logs: Supper administrator’s logs.
n
Vendor: This machine’s manufacture
n
Machine Name: This machine’s name.
- 84 -
Press (MENU) to enter main interface.
●Select “Relieve”.
●Press “▼” and “▲” to scroll up or down to set the value you
want.
Menu
Sys Info
PenDriv Mng
►Relieve Alarm
- 85 -
Before Start
Basic Concepts
Getting Start
Options
USB Manage
System Info.
During the installation and maintenance, occur the accident cause
to the anti-dismantle button loose, the fingerprint machine will
product alarm to prompt the machine has been dismantled, at this
time, please fix the machine’s anti-dismantle, use the relieving
alarm function to stop alarm. The operation step is follow:
Relieve Alarm
User makes a mistake, who use duress finger to verify, the machine
send an alarm, may utilize the function to relieve alarm.
View Records
This function only own by fingerprint access control machine. In
following situation this function is availability.
Maintained
Relieve Alarm ★
Troubleshooting
8
Appendix
User Manual V2.0
View T&A Records
9
View T&A Records ★
This fingerprint machine does not provide with this option that
follows that standard approved for use with this machine,if you
need this function; Please contact our market supporter or
salesman..
__________________________________________________________
This machine gains a new function to inquire the record, which provides
a capability to query individual or all Time & Attendance record.
1)The way of inquiring attendance record
This machine provide user with two inquiring way:
l
Enter menu->view attendance record-〉input a registered No. that
you want to inquire,choose[OK] key,ability to inquire staff's
attendance record whose PIN is appointed. If do not input staff’s
No. keep the screen displaying as “00000”, the inquiring function
will display crew’s all attendance record;
l
After a staff is checked, before the interface will restore to the
initial attendance interface (time display by big font), press Menu
key to inquire this staff attendance record.
- 86 -
2)The way of brows attendance record
The attendance record serration according to record time from newly
to old, while brows the record, ability to use following key to
operation:
Key
Function explain
▲
previous display content
▼
Next display content
1
move a rank to left for displaying content
3
move a rank to right for displaying content
OK
restore right and left displaying position to initial value
- 87 -
Before Start
Basic Concepts
Getting Start
Options
USB Manage
System Info.
Relieve Alarm
1/380
00001 05-27 18:46:21I
00012 05-27 18:32:09I
00217 05-27 18:30:52I
00031 05-27 18:29:01I
00016 05-27 18:27:55I
00029 05-27 18:22:08I
View Records
Query all attendance record interface:
Maintained
00014 2006-5
1/23
27 08:30 12:10 13:20
18:08
26 08:46 12:15 13:25
18:23 18:55 22:20
25 08:53 12:07 13:19
18:23
Troubleshooting
For example:Query T&A record which Attendance ID is 00014.
Appendix
User Manual V2.0
View T&A Records
2
move a line up for displaying content
5
move a line down for displaying content
4
Switch displaying mode of
the compact
forms/complete forms
record.
For example the right
figure is the compact form
of
“the
completely
attendance recording” and
the
complete
form
alterative effect figure.
l Compact form: it is
designed
to
the
record
displaying
form
that
can
demonstrate enough
many information on
the LCD screen.
l completes the form:
it is designed to
record demonstration
form
that
can
demonstrate
the
integrity field value
- 88 -
1/380
00001 05-27 18:46:21I
00012 05-27 18:32:09I
00217 05-27 18:30:52I
00031 05-27 18:29:01I
00016 05-27 18:27:55I
00029 05-27 18:22:08I
The compact form
00001
00012
00217
00031
00016
00029
27
27
27
27
27
27
1/380
18:46IF
18:32IF
18:30IF
18:29IF
18:27IF
18:22IF
The completes form
Big font
9
Up to the minute record
0
The oldest record
3)View records and print out
Getting Start
Troubleshooting
Maintained
When you view record on the fingerprint machine, you can press OK
key to print out record content the screen display currently, through the
super terminal this export may be viewed.
Basic Concepts
Before Start
26
08:30 12:10
13:20 18:08
08:46 12:15
13:25 18:23
18:55 22:20
Options
27
USB Manage
Small font
System Info.
00014 2006-5
1/23
27 08:30 12:10 13:20
18:08
26 08:46 12:15 13:25
18:23 18:55 22:20
25 08:53 12:07 13:19
18:23
Relieve Alarm
Alter
the fonts/small
font’s record displaying
mode, like as the right
figure, take “individual
attendance interface” as
an example, the effect
figure is to alter small font
and big font.
- 89 -
Appendix
6
View Records
User Manual V2.0
10
ecords
Maintained
Notice: Do not attempt to service the machine yourself unless you
are a trained service technician. Always follow instruction closely
_________________________________________________________
1、Cleaning
From time to time, the surface of optical sensor, the keypad and
display window will be required to clean. Since its working
environments differ, it is not possible to define when cleaning
should be performed. Following is guide
Item
Cleaning Frequency
Keypad and display
window
Cleaning when visibly dirty and hard to read.
See cleaning the keypad and display below.
Do not over clean. The sensor is designed to
work under greasy or dirty conditions.
Optical sensor
However, do clean if the sensor is affected or
people are reporting deteriorating performance.
See cleaning the Optical Sensor below.
2、Cleaning the Keypad and Display
To clean the keypad and display, use the same cleaning products as
for the soft cloth, and wipe dry.
- 90 -
(1) If dusty or gritty, first blow on surface of the sensor to
clean off any loose particles.
(2) Use the adhesive tape to clean surface of optical
sensor.
Do not use any other cleaner otherwise the sensor maybe occur
damaged.
- 91 -
Before Start
Basic Concepts
Appendix
Troubleshooting
Maintained
Cleaning solvent that contain alcohol or other strong substance may
discolor or crack the fingerprint machine cabinet.
View Records
Caution:
Relieve Alarm
System Info.
(3) Using a non-abrasive and soft, dry clothe. Be careful
not to scratch the surface of the sensor. If there are lint
particles here in the sensor surface, below them off when
the sensor is dry.
Getting Start
Clean the optical sensor as follows:
Options
3、Cleaning the Optical Sensor
USB Manage
User Manual V2.0
Troubleshooting
11
Troubleshooting
1.
Q: Some users’ fingerprints sometimes can’t be verified.
A: Cause: the follow circs result in staff are failure to use
fingerprint for punching in. The fingerprint quality is poor.
1) Some fingers the fingerprint is smooth by rub-down;
2) On the finger the drape are too many, frequently
change;
3) On the finger sheds skin seriously
Measure: You’d better select fine fingerprint (less crinkle, no
desquamation, clear image) when enroll fingerprint, make
your finger touch fingerprint sensor with larger area, a
comparable test should be made after enrollment, we suggest
you enroll more fingerprints. By the way our machine
supports 1:1 match method and password identified function,
you could choose one of them.
2.
Q: When the fingerprint machines fail to communicate, which
the reason cause it?
A: The possible reason:
1) The communication port configuration is not correct; elect
to connect communication port is not the COM port which is
actually used.
2) Baud rate of between the computer communication port and
the fingerprint machine setting value are different.
3) The fingerprint machine has failed to connect with the
- 92 -
A : 1).Can utilize the standalone communication program of
attendance machine between computer,after it’s successful,
enter attendance machine management page,click on the
‘cancel administrator’ button , able to clean attendance
machine administrator,after to break out connection,then can
enter attendance machine menu style.
2).Call technical support from a telephone near or at the
fingerprint machine so that technical support can assist you to
solve the problem with any necessary procedure.
5.
Q: When fingerprint machine go on connection communication
the sound “ding, ding” appears, what the cry reason is?
A: 1) when Uses the RS-232 communication, maybe the computer
- 93 -
Before Start
Basic Concepts
Getting Start
Options
USB Manage
System Info.
Q: How to clear the administrator of the attendance machine?
Relieve Alarm
4.
View Records
Q: after the fingerprint machine power on, the LCD show
incompletely, only one half, sometimes jumbled, what happen,
how should solve?
A: The possible reason is
1) Motherboard is bad;
2) Caused by Liquid crystal internal matter. By now need to
contact supplier, and return it to the service.
Maintained
3.
Troubleshooting
power source or the computer;
4) The fingerprint machine has connected but not starting up.
5) The serial number of linked terminal is not correct.
6) Data line or converter fails to communicate.
7) The computer COM port breaks down.
Appendix
User Manual V2.0
Troubleshooting
baud rate is inconsistent with the fingerprint machine baud
rate.
2) If uses the RS-485 communication, then possibly was two
lines of the converter counter- join, or sticks in.
6.
Q: After machine power is on, LCD display always shows
“Please try again”
A: Cause: ① For long time used, surface of fingerprint sensor
becomes dirty, or there are some scratches on it, the
machine takes it as a fingerprint and does verification,
② Fingerprint connection cable of fingerprint sensor
is loosed. Chip-on-board is broken down.
Measure: ① under such situation you can use scotch tape to
exhibit the dirt. ②、③ Need to contact suppler and ask for
repair.
7.
Q: When the terminal management carries on the operation,
download fingerprint and the password data all successfully,
but when read in the checking attendance record the system
actually prompts the failure or false occur, asked how solves?
A: This kind of situation is possible relative with the data line,
either converter, computer COM port, by now you are allowed to
reduce fingerprint and the computer communication baud rate, like
as, set it as 19200 or 9,600, try again to read in.
- 94 -
The function in the appendix introduced is additional, if needs the
machine with these functions, please consult our commercial
representative or the pre-sale technical supporter.
__________________________________________________________
Before Start
Options
Appendix
Getting Start
Basic Concepts
User Manual V2.0
1. The data transmission speed is quick, the traditional fingerprint
machine only supports the RS232, RS485 or Ethernet way data
transmission, when as a result of physical condition limit, data
quantity big, and the data transmission cost quite long time. But the
USB data transmission is more quick than the former any
transmission mode, may complete downloading data by U disk in a
- 95 -
Relieve Alarm
View Records
Maintained
The superiority to using U disk
Troubleshooting
U flash disk (to be named the U disk) is a substitute of floppy disk
the people have commonly used. It is a the miniature, high capacity
memory ,mobileable product which is no the physical driver
available, and with USB port, may through the USB port connect
with the computer , realize the plug and play, it own smart, light
and lively, reliable, easy using characteristic and so on..
Appendix
U flash disk definition
System Info.
USB Manage
U flash disk management
Appendix
short period of time, like this greatly enhances the efficiency.
2. Plug and play, facility use. When need to download data, first
plug the U disk into the fingerprint machine to download data, then
insert U disk into the computer to export data . Moreover our
fingerprint machine also supports mutually to passé the user
information and the fingerprint data for each other. Thus has solved
the tedious work that is the traditional fingerprint machine and the
computer transmits data. Do not worry for the traditional wiring.
How to use the U disk to transmit data?
The fingerprint machine with the USB slot all are allowed to use
the U flash disk to download and upload date. About U flash disk
management see (this manual chapter 6).
Event key
The Time& Attendance machine under using, the different event
corresponds the different event, like according to different situation
a job state will be divided into: clock in, clock out, overtime
check-in, overtime check out, going out, return in and so on, but
Access Control machine in out condition is divided into “comes in”
and “goes out” the different situation:
On some machine keyboards there are 6 conditions keys to set the
current condition. you may press “▲” and “▼” turn the page to
choose condition. But these ways need manually set, namely some
- 96 -
There are two way to ring bell:
1. Send sound from the speaker of fingerprint machine.
2. Connect the electrical bell to the fingerprint machine, when
arrive the appoint time, the fingerprint machine will send signal to
- 97 -
Before Start
Basic Concepts
Getting Start
Options
USB Manage
System Info.
Relieve Alarm
View Records
In many factories , ringing apply to broadcast message to inform
employee their duty are on or off, the traditional way is to ring bell
by manual or special electron machine, we have already embedded
the time ring module into the fingerprint T& A system, you may
benefit from this low cost and convenience management. There are
more two options that is Bell schedule and Bell duration in the
fingerprint machine time bell ring provide with. The system total
has eight Bell schedule to set, according to actual need you may set
time bell, when the time arrive at the appointed time, the
fingerprint machine will automatically ring bell, the duration of
ringing achieve assigned hour, the ringing will stop automatically.
Maintained
Time Ring
Troubleshooting
condition needs to be used according to corresponding state button.
In order to reduce the manual operation, we also could specially
develop time event selection function, upon arrival the set time by
user, the machine could automatically switch current condition and
show in the initial interface. If needs to custom-made the machine
with the time alteration function, please contact us specially to
custom-made, for the detail step of operation see 5.2.2
Appendix
User Manual V2.0
Appendix
trigger relay
For more detail see (instruction to time ring).
External Fingerprint Sensor
This is a unique function of the fingerprint machine with USB Port,
plug the fingerprint sensor into the USB slot, enter the
menu->Option->Advance Option -> external fingerprint sensor,
and set the “External Sensor” item as “Y”. Now external sensor and
internal sensor are owned by fingerprint biometric may be used
together.
For application of T&A system, it can influence crowd of
centralized check on attendance, eliminate stagnant state,
For application of Access Control System, the external fingerprint
sensor can be located in external door; the main machine is
installed in inside, this configure are not only controlled by internal
and external, but also ensure the main machine security and safety.
Note:
1) After connecting fingerprint sensor with fingerprint machine,
be sure to restart the fingerprint machine, so the external
fingerprint sensor take effect.
2)The external fingerprint sensor is not able to be used until
write SDK permission in.
- 98 -
3)before connection Modem please set “Extern Modem” value as “Y”
(Menu->Options->Comm.
Opt->ExternMODEM)
on
FINGERPRINT MACHINE menu.
4)When use Modem, RS232, RS485 for FINGERPRINT MACHINE
are forbidden. Once Extern Modem” value is “N” (non use of Modem),
RS232, RS485 is working.
5 ) PPP Server has already been embedded in FINGERPRINT
MACHINE, please use Widows “Dial up” etc PPP user terminal
program to connect with FINGERPRINT MACHINE, the default user
name is ppp, as well as the password.. After setting PPP communication,
- 99 -
Before Start
Options
USB Manage
System Info.
Relieve Alarm
2)you should use FINGERPRINT MACHINE controller to supply the
power for Modem once you used it.
View Records
1)Please use the cable which marks “ Modem Cable” to connect with
Modem and FINGERPRINT MACHINE.(We supply Modem cable).
Maintained
Modem notice:
Troubleshooting
In order to achieve PC and fingerprint machine communication
through remote connection without network area, some type machine
support using PPP connection, PPP connection is a point to point
connection through a line, PC does not dial up and connect network
through modem until the fingerprint machine connect with Modem and
telephone, then dial up, then successfully achieve connection network.
Appendix
Modem Function
Getting Start
Basic Concepts
User Manual V2.0
Appendix
default IP address is 192.168.1.133, user terminal IP address is
192.168.1.100.
6)Using standard Modem connection
Figure: Modem Cable
Query function
The fingerprint machines which support query function realize to
view attendance record for personal or all staffs. So provide with a
solution that relieves trouble that user unknown the attendance
result until complete to install T& A software, connect with
machine, and download attendance record. The query function
provides staff with convenience to know attendance record by him.
This machine not only ability to view persona’s attendance record,
but also support to query all staff’s record.
- 100 -
For detail step, see chapter 9, View T&A record.
Before Start
Basic Concepts
User Manual V2.0
The function fully support two way to print: 1.immediately print.2
view export content while go to print
Options
USB Manage
This function only support serial port (RS232) printer, the parallel
interface is not to be supported, you can directly connect with
printer to print, and also be able to connect with PC to view export
content.
Getting Start
Print function
While view the record from fingerprint machine, press (OK) key,
the content which display on the screen will be printed out, the
export content also be able to examine for super terminal.
Relieve Alarm
2. View record while go to print
View Records
Enter
Menu->Options->System
Option->Advance
Option->Imdt Prt, set the value as RS232.save it and exit
fingerprint machine will print log after you are verified.
System Info.
1. Immediately print
- 101 -
Appendix
Troubleshooting
Maintained
The linked cable of between fingerprint machine and printer:
Appendix
Fingerprint machine
printer
2 TXD
<-----> 3 RXD
3 RXD <-----> 2 TXD
5 GND <----->
7 FG
Note: the baud rate of fingerprint machine and printer is same
with.
MP3 function introduction
So-called MP3 play, is uses the MP3 player to carry on the
real-time decompressing MP3 file (decoding), like this, the high
quality MP3 music play. The fingerprint machine with the build-in
MP3 player is provided with the MP3 play function, is allowed to
play the form is MPEG1.0 Layer III mp3 sound. Its playing way is
similar with time bell, may set eight time period, will automatically
play the mp3 file at time period upon arrival.
According to need you may choose each kind of mp3 file which is
assigned as clock in bell sound, midday rests music, but also may
make inform from the mp3 file, time carries on the play through the
- 102 -
MP3 Play Setup
Before Start
System Info.
Open the menu “Menu Set->Power Management -> Scheduled Bell”,
There are eight period of time is available to set, according to your need
to set period of time, after time in range of time period you set, the MP3
will be play automatically.
USB Manage
Options
Along with the fingerprint machine there is the loudspeaker to play
MP3, also may insert the sound box audio output line into the audio
jack of the fingerprint machine, and play MP3. Through the sound
box
Basic Concepts
fingerprint machine. Thus meets your each kind of needs, but also
causes the work environment to change quietly and tastefully.
Getting Start
User Manual V2.0
Note:
MP3 file Save and Read
- 103 -
Appendix
Troubleshooting
Press any menu key when the machine is playing MP3, the play
process will stop at once
View Records
The fingerprint sensor will be in no responding while the
machine is in play MP3 process.
Maintained
The 1 period of time against 1.mp3 file, the 2 period of time
against 2.mp3. Such –and –such as it do.
Relieve Alarm
It is need to set the period of time as the 24 hour format.
Appendix
Because A6 don’t own the capable to save the mp3 file, there are
two ways to save and read the mp3 files:
1. By means of Web server save and read mp3 file.
First
step,
in
the
menu
“Menu-->Setup-->Power
Management-->WEB Host IP” input the IP address of the
computer which has installed the Web server.
Second step, Copy MP3 file to the Web server of compute:
If the Web server (IIS Apache) has been installed in your computer,
you can create a MP3 folder in the Virtual Host Virtual Server root
directory of Web server, and then copy the playing file to this folder.
Input the http://xxx.xxx.xxx.xxx/mp3/y.mp3 to inspect whether can
normally visit MP3 file via IE browser.
If the Web Server hasn’t been installed in your compute, you can
realize the function via our provided the software, the operation
process is following: release the WebServer.rar file to under a
directory (to take release to D:\ as a example), to run “webs.exe”
under the d:\webserver\web\mp3dirctory, Web server is running
and ensure the Web Server in normally course through all process.
And then copy the playing file to d:\webserver\web\mp3 Input the
http://xxx.xxx.xxx.xxx/mp3/y.mp3 to inspect whether can normally
visit MP3 file via IE browse
Note: Xxx.xxx.xxx.xxx is an IP address of the computer to install
Web server the y.mp3 is the order of mp3 file.
- 104 -
MP3 can via the own loudspeaker to play, and can insert the plug of
sound box audio frequency to the left jack of A6,play by means of the
sound box.
How to adjust Volume
This machine own the function to adjust the Volume, if the volume
of machine playing
is
improper, Please open
“ Menu->Setup->System setup-> Advance setup-> Volume” to
adjust.
MP3 file formats
This machine supporting format is an mp3 sound file which is the
MPEG1.0 Layer III, (this format is a familiar mp3 format, if it is
- 105 -
Before Start
Basic Concepts
Getting Start
Options
USB Manage
System Info.
How to play MP3
Relieve Alarm
:the order of playing MP3file is following: Search the playing file
in theWebServer, if it fail to visit Web Server or hasn’t defined the
file, and the search the playing file in the U disk file, if the are no
inserted U disk or no file in the U disk, the machine will play the
own ring
View Records
Copy the mp3 file to the U disk, after arrive at set playing time the
machine will search the file in the U disk to play automatically.
Maintained
2. By means of U disk to read and save file
Troubleshooting
Third step, when arrive at the playing period of time, the machine
will read MP3 file via Web server to play
Appendix
User Manual V2.0
Appendix
fail to play this file that is likely to too low for the file version
format, please charge other file).
Test MP3 file
If you want to test the effect of mp3 playing, you can open the
“menu--> “menu-->setup--> auto- test--> MP3 function test” to
test.
Short message management (Optional)
Our some product provide a function which can send a message to
assigned person through public to person way, We only need use
the back-end software to set it, then upload it to the fingerprint
machine, , as long as the attendance dive start the for public short
message will be seen on machine screen, and it will show for ever,
for a person short message will not display until the user’s
fingerprint verification is positive, Thus reduces the work load to
manager the human power , greatly enhances the working
efficiency.
Send a message to a assigned personal,if a staff’s birthday is on
October 20 , we may set back-end software to send out a short
message to him “ wish your Happy Birthday” on 20 October ,
upload it in the machine, after this staff the fingerprint verify
successfully on that day, this message will display on the screen
Send a message to public, if entire company needs to have a meet
- 106 -
Short message function setting:after setting Short message in the
Time& Attendance software, then upload it to fingerprint machine,
the fingerprint machine support two kind of way to import the short
message, which the software connect with fingerprint machine to
import it directly, other way by U flash disk.
Before Start
Basic Concepts
Getting Start
Options
on June 19, after we set back-end software to upload the machine,
upon this day, the message “holds XX meet in XX room” will
continuously display on the screen, asks everybody (certainly such
information you are allowed to revise according to your need) to
XX participation”
USB Manage
User Manual V2.0
Note: there is total 1024 items of public for personal short
- 107 -
Relieve Alarm
View Records
Maintained
Troubleshooting
Short message function effect:For public short message will be
seen and it will show for ever after this staff the fingerprint verify
successfully , this message will display on the screen.
Appendix
1. Through Time & Attendance software “external program”->
“short message management” complete to set short message, then
connect with the fingerprint machine and upload it, 2. through Time
& Attendance software “ external program”-> “ short message
management” complete to set short message, choose “ external
program”->“U flash disk manage”-> “ export short message”->
“export to U disk”, after exporting successfully, plug the U disk
into the fingerprint machine, press “Menu” key of the fingerprint
machine”-> “Pendri Mng”-> “ Upload short message”.
System Info.
Operation Step as follow:
Appendix
message.
Multi-combination Authentication Mode
Besides this function only is owned by the fingerprint access
control machine that has been appointed, the most fingerprint
machine only has two way to verified by fingerprint and password,
we provide a personal or group Multi-combination Authentication
Mode for high security Access control area, verification type main
include four elements that are Number PIN, Fingerprint (FP),
Password (PW) and RF card (RF), which can combine into filth
multi-combination.
Note:
The fingerprint machine with Mifare function needs to verify
Mifare card.
The Mifare card is regard as RF card in the verification
procedure, the function of Mifare card verification only is
validity in the machine which Mifare card function is provided
with.
These symbols illustrate what follow the table different means.
● “/” is or,
● “←” is confirm (Enter),
●”+” follow next operation
● “&” is and,
● FP (fingerprint)
● PWD (Password)
● RF (RF card)
● PIN (user ID)
- 108 -
Type
FP
What you do
Only fingerprint is verified.
Before Start
USB Manage
If fingerprint or Password has been used to enroll user, the
verification procedure is follow
Options
Getting Start
Basic Concepts
User Manual V2.0
2) FP (1:N Identification)
3)RF+FP(1:1)
Only PIN is verified
1)PIN( just have to input the digital through keyboard)
PW
Only verify password is verified
Relieve Alarm
PIN
System Info.
1) PIN+FP(1:1Verification)
2) RF+PW
RF
Only RF card is verified
View Records
1) PIN+”←”+PW
Fingerprint or Password is verified
1) PIN+FP(1:1)
3)PIN+”←”+PW
4)RF+PW
- 109 -
Troubleshooting
2)FP(1:N)
Appendix
FP/PW
Maintained
1)RF
Appendix
FP/RF
Fingerprint or RF is verified
1)PIN+FP(1:1)
2)FP(1:N)
3)RF
PW/RF
Fingerprint or RF is verified
1) RF
2) PIN+”←”+PW
FP/PW/RF
Fingerprint or RF or Password is verified
1) PIN+FP(1:1)
2) FP(1:N)
3) PIN+PW
4) RF
FP&PIN
Fingerprint and PIN are verified
1)PIN+”←”+FP(1:1)
2) RF+ PIN+”←”+FP(1:1)
FP&PW
Fingerprint and PIN are verified
1) FP(1:N)+PW
2) PIN+FP(1:1)+PW
3) RF+PW + FP(1:1)
FP&RF
Fingerprint and RF are verified
1)RF+FP(1:1)
2)FP(1:N)+RF
3)PIN+FP(1:1)+RF
PW&RF
Password and RF are verified
- 110 -
Before Start
Basic Concepts
User Manual V2.0
1) RF+PW
FP&PW&RF
Fingerprint, Password and RF are verified
1) FP(1:N)+PW+RF
Getting Start
2) PIN+”←”+PW+RF
3) RF+ PW+ FP(1:1)
FP&PIN&PW
Fingerprint, PIN and Password are verified
Options
2) PIN+FP(1:1)+PW+RF
2) RF+ PIN+”←”+PW+FP(1:1)
FP & PIN /RF
Fingerprint and PIN, or fingerprint and RF are verified
USB Manage
1) PIN+”←”+PW+FP(1:1)
2) FP +RF
3) PIN+FP(1:1) + PIN
System Info.
1) FP+ PIN
1) 1: N authentication mode include the 1: H, 1: G
authentication.
- 111 -
Appendix
Troubleshooting
2) In the multi -combination authentication, it is better to use
fingerprint and password to enroll, otherwise, sometimes fail
to pass verification.
Maintained
Note:
View Records
Relieve Alarm
4) PIN+FP(1:1) +RF
Appendix
Card Support (HID, iCLASS, EM, Mifare Card)
In order to meet security market need, our fingerprint biometric
verification reader can be embedded HID, iCLASS, EM, Mifare reader
module.
The HID iCLASS 50 OEM, EM and Mifare module addition that
can be used to field upgrade existing fingerprint biometric
verification readers to high fingerprint security level.
Using 125MHZ, 13.56 MHz contactless smart card technology,
these fingerprint products provide users with new options for
supporting multi-authentication of identity. Combine a contactless
card presentation with a fingerprint biometric. Or, use a personal
identification number (PIN) number along with a contactless card
presentation. (See multi-authentication).
The fingerprint products provide three levels of fingerprint
verification. During the enrollment process, the LCD prompt will
guide the user to place their finger on the sensor. The fingerprint
template is collected at the unit and immediately transferred to the
card. During this enrollment process, the fingerprint template is
stored on the card or the fingerprint machine.
During verification at the door, the LCD graphical display will
assist the user with instructions about finger placement on the
biometric sensor.
- 112 -
About Host and Client Fingerprint Machine
Before Start
Basic Concepts
For more detail see HID, iCLASS, EM, Mifare Card user Guide
Getting Start
User Manual V2.0
- 113 -
View Records
Maintained
Troubleshooting
the mission of the user information, fingerprint identification and
privilege validated accomplish on the Host machine, the Client
machine only is used as fingerprint reader, the software only
manage user’s information and attendance logs of the Host
fingerprint machine. Can be implemented to help alleviate this
problem of the two correlative machine’s user information and logs
is disordered
Appendix
There are two fingerprint machines to control one lock together,
one fingerprint machine is appointed as a host fingerprint machine
outside, other one is defined as a client machine inside, which
offers the best solution, that for arising out of fussy connection that
cause two machine control one lock.
Relieve Alarm
System Info.
USB Manage
Options
Summary
Appendix
This system is able to provide you with anti-passback feature,
prevent a tail enters a door follow user, but he/she does not go off
with together. In the event that the user did not read in at the in
reader, and tried to read out of area, the Anti-Passback violation
will occur
Work principle
Host Machine: Enroll fingerprint, verify fingerprint, configure
user’s privilege, validate user privilege, and receive the information
of card and fingerprint from client machine, go on verification, then
send the result to the client machine.
Client Machine: it only to be used as reader, achieve these
mission to collect fingerprint, read in card and send information
need to be verified to Host machine, the Host machine own the
option whether show validation result.
Instruction to Host and Client machine feature
1) Save logs
The default state of Host machine as out, the state of client machine
as in, and all logs is stored in the Host machine.
2) Anti-pass back feature
Depend on record of the user lately in and out to judge whether
anti-pass back violation occur, the in and out record must be
partnership, this fingerprint machine fully support four type of
anti-pass-back, that is out, in or in and out, (enter menu
- 114 -
1) He/she lately log record is not in, the system will prompt
“Anti-pass back rejects”, rejects to open the door.
2) He/she lately log record is in, the system will achieve
verification, and open the door.
“In anti-pass back” and “Out anti-pass back” is similar logic “
If the alarm function own by the fingerprint machine (such as F10),
when the event of alarm happen in client machine, the warn signal
will send to Host machine to process. If the machine do not have
the alarm function this feature will be invalid.
How to use Host and client fingerprint machine
Before Start
Basic Concepts
View Records
3) Alarm function
Relieve Alarm
System Info.
Notice:Be sure to restart you machine, so the option of anti-pass
back take effect.
Getting Start
If somebody want to go out.
Options
–>option->system-> advanced option –> anti pass back), now
take “out anti-pass back” as example.
USB Manage
User Manual V2.0
- 115 -
Troubleshooting
Client:May select anyone fingerprint machine from ZEM 100
series meet the condition of RS232 communication
Appendix
Host:Commonly adopt the fingerprint machine that ability to open
the door, like as ZEM 100 series: F7. F4. A3 etc.
Maintained
1) Select machine model
Appendix
Note :Only above5.22 version firmware support host and
client feature
2) Configure host menu
Enter “Menu->Option->System option->advance option”,there
are three option here,
Host and client:This machine can be defined as host by “Host”,
client” or “No” option (after configuring, be sure to restart the
machine, this option take effect
Display client operation:This option is defined as “Yes”, the client
operation will display on the host, otherwise this operation does not
show (this option doesn’t be showed until the machine is defined as
host)
Anti- pass back:This option may by defined as “Out anti-pass
back”, “In anti-pass back”, and In-out anti- pass back” and “no”
(this option dose not take effect until be sure restart the machine)
3) Host connect with client
a) After selecting the machine, connect host with client by RS232,
that wiring is such follow
Host
TXD
RXD
GND
Client
<-----> RXD
<-----> TXD
<-----> GND
- 116 -
If the “ mst unsupport” display on the client machine, it means the
host dose not support host feature, the buzzer send three sound,
please check the menu configuration, whether it is right
- 117 -
Before Start
Basic Concepts
Getting Start
Options
USB Manage
Appendix
Troubleshooting
If there are not fault information on the host and Client ,it show that
the host and client connection are successful and can be used, take
the host as normal access control machine, the client achieve the
following mission, collect fingerprint, examine and send content
user input to host, and display the result the host process. The host
implement operation fingerprint 1: N match, 1:1 match, password
verification, ID card validated.
System Info.
If the “con. must failed” display on the client machine, it s means
the client fail to connect to host, maybe occur communication
failure, the buzzer will sound three times, please check and
examine the communication of host and client, whether it is
expedite
Relieve Alarm
b) Accomplish connection before starting machine, the host
machine like as normal access control machine run, and the cline is
able to search for client automatically while it is starting.
View Records
Note:Now host and client only is able to support RS 232.It is
different from the with PC connection, RX and TX are
exchanged connection, GND directly connect each other
Maintained
User Manual V2.0
Appendix
Remote server Solution
Because of the limit of standalone machine capacity and speed,
there is impossibility to add a large mount of fingerprints (for
example, up to ten thousands of fingerprints). Even if the capacity
can be expanded, the standalone machine speed can’t be assured;
the speed is much slower than PC’s. Based on above reasons,
Standalone is an incapable for those large systems which have large
fingerprint capacity and high matching efficiency, so a fingerprint
solution, i.e. remote server solution, is put forward, which can deal
with large capacity and high efficiency.
Concept
Taking standalone machine as fingerprint scanner, its standalone
identification function is reserves. With identification and
verification, and then stores matching results in the background DB
and displays identification results on the fingerprint machine LCD,
to complete the task of identification process. Which Identification
algorithm adopts intellectual property algorithm Biokey , the
common PCs can act as remote server, the remote sever solution
has lower requirement of entire identification system and improve
algorithm efficiency, thus assure of feasibility and convenience of
solution.
Solution Purpose: large capacity of fingerprint identification,
enhanced enterprise internal management, intelligent management,
- 118 -
Before Start
In/Out control for personnel.
Architecture of Remote server
The basic mode adopts C/S mode, please see the following figure
Terminal
A5
Assign a primary server by logic partition acts as central database. In
some large applications, a special server can be selected to make sure
that each secondary server can access database fluently, the primary
server can also act as remote server, and it is in the secondary server
with respect to the role of identification service and identical with
other remote server. The only difference between them is that primary
server can play dual role, i.e. database service + identification service.
At present, database service is SQL Server.
As above the figure show there are three level in, and is divided by
logic. The direction of identification data stream is:
- 119 -
USB Manage
Server
System Info.
A5
PC_server
Relieve Alarm
A5
PC_server
View Records
Sec-Serv
Maintained
and Server
Options
Central database
Troubleshooting
PC
Appendix
Prim-Server
Getting Start
Basic Concepts
User Manual V2.0
Appendix
Primary Server:
1. Fingerprint Scanning.
2. Successful identification results.
3. Initiation setting of application system.
Secondary Server:
1. Fingerprint data of primary server.
2. Matching fingerprint information passed by third level server
Third level server
1. The fingerprint information will be got in the time of fingerprint
press.
2. Keyboard input.
For more detail please (Contact us to get technical assistance)
iClock Time & Attendance
IClock Summary
iClock is a base on Web Server technical Time & Attendance
system, use Page. Request technical to process and manage data, it
integrate
many feature ,such
local data collection ,
intellectualized port (RS232/RS485), communication protocol
conversion, image collection, alarm data stored up , and WEB
server etc. basing on this equipment to create an unifying
monitoring platform that supply one solution for equipment
- 120 -
2. Fully compatible with our company Inc program
WEB Server platform may be fully compatible with current
program each other entirely is mutually beneficial, ability to much
- 121 -
Before Start
Basic Concepts
Getting Start
Options
USB Manage
System Info.
Relieve Alarm
Thought TCP/IP and Ethernet, WEB Server is able to reliable apply
to local network, the data fingerprint machine store up can be
watch and deal via long distance network,with browser it is not
need to administrator or person specially assigned go to local for to
achieve task collect data, upload and download data, as well as
upgrade system, , not have other software and tools
View Records
1. a few or nobody keep watch
Maintained
Why does embedded Web Server into the fingerprint machine
Troubleshooting
management, Time &Attendance, as well as monitor, in addition
the Web Time & Attendance solution is independent on regional
limit, and do not need to install other software. utilize IE or
Netscape browser, downloading and remote on-line management,
handle time sheet corrections and create report table on the
fingerprint terminal is available , it supply easy way for manager of
enterprise know the employ in post or attendance state at any
moment, in time search for information, statistic data, deal with
operation at same time, provide a solution of staff attendance ,
check in or out management, pay roll management, in word and
deed realize that at everywhere any moment the information is
synchronization, its go far beyond traditional Time & Attendance
solution
Appendix
User Manual V2.0
Appendix
more flexible to meet customer need.
3. More reliable, fast through long distance transfer data
communication mode
Through WEBSERVER,the data is able to reliable and fast be
download local system, utilize browse ability to down all data in
short time, do not worry about the data’s reliability
4. More flexible, easy for data management and source share
Via the platform created by Web server, the application program,
data management becomes more easy and flexible.
5. May easy integrate OA, CRM system, reliable base on network
human force management.
How to use iClock serial fingerprint machine
This serial fingerprint machine fully support three connection
way—LAN, Dial –Up telephone, internet, though brows visit Web
server in the terminal, first login bibcock website, find your
terminal, the default name and password is administrator and our
company.
Note: For more detail see (iClock User Guide)
- 122 -
- 123 -
Before Start
Basic Concepts
Getting Start
Options
USB Manage
Appendix
Troubleshooting
Please see (iClock Time & Attendance).
Webserver Software User Guide.
If you first time user WebSever Software, input the IP address of
fingerprint machine, E.g., the fingerprint machine’s IP address is
192.168.1.115, input http://192.168.1.115 in IE address column, the
system default super administrator is admin, login password is
admin 888.For WebServer software detail, please see (Websever
Access Control Explain)
System Info.
The function of built-in Web Server
Relieve Alarm
Web Server Access Control Summary
We today announced the release of New Version of Access Control
system, New Version was based on Web Server technical and
TCP/IP Architecture, use WEB page request to process and manage
date, in addition the Web Sever Access Control solution is
independent on regional limit, permits downloading and remote
on-line management the fingerprint terminal through IE or
Netscape browser, handle time sheet corrections and create report
table , its go far beyond traditional Access Control Software, It also
incorporates the many years of experience of the team.
View Records
Web Server Access Control
Maintained
User Manual V2.0
Appendix
Collect IP Address Automatically
Maybe following circs occur, if there are many fingerprint
machines in corporate network, Administer maybe forget the IP
address of fingerprint, Administrators can manually check the IP
address on system, but it’s difficult task, especially when multiple
systems are involved, and still leaves much room for error, we
develop a software to detect IP address of fingerprint machine in
the local network.
Copy all DLLfile under the system 32 of system directory, click
start -> run regsvr32 zkemkeeper.dll, the system prompt register
successfully, and double-click Machine Search...exe to run
software.
About Wiegand
Wiegand is a commonly used interface between readers and control
panels used in access control, security, time and attendance, and
other related industries. F Series fingerprint access control
machines pursuant the Wiegand standard specified by the Security
Industry Association's (SIA) Access Control Standard Protocol for
the 26-Bit Wiegand Reader Interface document. Manufacturers
have adopted the Wiegand standard to establish a common
Wiegand interface. This provides a level of compatibility and
- 124 -
Table1 Pulse
Tpw
Pulse Width Time
100μm
Tpi
Pulse interval time
1ms
Before Start
Basic Concepts
Getting Start
Options
Reader typical Time
Maintained
Description
- 125 -
Appendix
Troubleshooting
Symbol
USB Manage
Figure 1 displays the timing pattern for data bits sent by the
reader to the access control panel. This timing pattern falls within
the Wiegand guidelines as proscribed by the SIA's Access Control
Standard Protocol for the 26-Bit Wiegand Reader Interface (a Pulse
Width time between 20 μS and 100 μS, and a Pulse Interval time
between 200 μS and 20 mS). The Data 1 and Data 0 signals are
held at logic high level (above the Voh level) until the reader is
ready to send a data stream. The reader places data as asynchronous
low-going pulses (below the Vol level) on the Data 1 or Data 0
lines to transmit the data stream to the access control panel (the
“saw-teeth” in Figure 2). The Data 1 and Data 0 pulses will not
overlap or occur simultaneously. Table 1provides the minimum and
maximum allowable pulse width times (the duration of a pulse) and
pulse interval times (the time between pulses),
System Info.
Data Signals
Relieve Alarm
interoperability for readers and control panels that can be used by
consultants, specifies, and end users when setting product design or
system installation criteria.
View Records
User Manual V2.0
Appendix
Figure1 Time
Wigand format
F Series Fingerprint Access Control Wiegand format is a general
Access Control protocol.
26-bit Wiegand formats
the composition of the open de facto industry standard 26 Bit
Wiegand format contains 8 bits for the facility code field and 16
bits for the ID number field .Mathematically these 8 facility code
bits allow for a total of just 256 (0 to 255) facility codes, while the
16 Id number bits allow for a total of only 65,536(0 to 65,535)
individual ID’s within each facility code.
26-Bit Wiegand length is 26 Bit, it include two parity bit.
1
2
EP
FC
9
10
25 26
CC
OP
- 126 -
OP
Odd parity bit, OP is definite by over bit 13
to
26, if there are odd “1” ,opposition it is 0
Pyramid Wiegand Format
Several alternatives exist for customers who require more codes.
The first is to switch to Keri's standard 39 bit Pyramid format. This
39 bit Wiegand format contains 17 bits for the facility code field
and 20 bits for the ID number field. Mathematically these 17
facility code bits allow for a total of 131,072 (0 to 131,071) facility
codes, while the 20 ID number bits allow for a total of 1,048,576 (0
to 1,048,575) individual ID's within each facility code. Since there
are so many facility codes in the Pyramid format, a new facility
code may be selected for each project. Additionally the large
number of ID's per facility code makes the Pyramid format ideal
- 127 -
Before Start
Basic Concepts
Card code ,(0-65,535) , bit10 is MSB
( most significant bit)
Getting Start
CC (bit10-bit 25)
Options
Facility code (0-255),
Bit 2 is MSB ( most significant bit)
USB Manage
FC(bit2-bit 9)
System Info.
Even parity bit, over bits 1 to 13 judge EP
field, if there are even “ 1”, EP is 0;
opposition it is 1.
Relieve Alarm
EP
View Records
Purpose
Maintained
Field
Troubleshooting
Table field definition
Appendix
User Manual V2.0
Appendix
for very large projects. For added security, Keri Systems tracks
credential coding to ensure that no duplication occurs.
Table-3 Pyramid Wiegand Format
Bit Number
Purpose
Bit 1
Even parity over bits 2 to 19
Bits 2 to 18
Facility code (0 to 131,071); Bit 2 is MSB
Bits 19 to 38
ID Number (0 to 1,048,575); Bit 19 is MSB
Bit 39
Odd parity over bits 20 to 38
Custom Wiegand Formats
The second alternative is to create a custom Wiegand format.
Typically, up to 64 bits are available for creating a custom Wiegand
format. With certain limitations, formats with greater than 64 bits
may be created. If a customer currently has a custom Wiegand
format from Wiegand or from other proximity manufacturers, Keri
can normally match that format. Although the customer is primarily
responsible for custom format card coding, as an added benefit
Keri Systems tracks card coding for additional security.
Table-4 Example of a Custom Wiegand Format
Bit Number
Purpose
Bit 1
Even parity over bits 2 to 22
Bits 2 to 9
OEM code (0 to 255); Bit 2 is MSB
Bits10 to 21
Facility code (0 to 4,096); Bit 10 is MSB
Bits 22 to 43
ID Number (0 to 524,287); Bit 22 is MSB
Bit 44
Odd parity over bits 23 to 43
- 128 -
SOAP application
Our fingerprint machine can fully support XML-based soap, you
can build in soap request in your software, use it to download,
upload the user’s information, fingerprint information and
verification record. It is convenient to import these datum
enterprise’s database, also can meet enterprise manage employee
and different software request.
- 129 -
Before Start
Basic Concepts
Getting Start
Options
Appendix
Troubleshooting
Maintained
Note : If you want more detail, please contact our technical
Assistance.
USB Manage
SOAP is a lightweight protocol intended for exchanging structured
information in a decentralized, distributed environment. SOAP uses
XML technologies to define an extensible messaging framework,
which provides a message construct that can be exchanged over a
variety of underlying protocols. The framework has been designed
to be independent of any particular programming model and other
implementation specific semantics.
System Info.
SOAP define
Relieve Alarm
Understanding SOAP
View Records
User Manual V2.0
Appendix
About POE(Power over Ethernet)
Summary
Power over Ethernet (PoE) is a revolutionary technology that
extends the already ultra-broad functionality of Ethernet by
supplying reliable DC power over the same Category 5/5e
twisted-pair cable that currently carries Ethernet data. PoE,
modeled after the technology used by the telecommunications
industry to supply reliable power to telephones, enables lifeline
quality power for IP telephones (VoIP) as well as many other low
power Ethernet network machines like wireless access points (WAP)
and security cameras.
POE application
After putting the fingerprint machine which embedded PoE
modeled into PoE system, it is not need to use the adopter to supply
power, its normal work only depend on the PoE supplying, this way
provide lower cost and more flexible installation, the table 1 show
as the Ethernet RJ45 connector pin number of the fingerprint
machine..
Table 1 Ethernet RJ-45 connector pin number (From left to right)
Number
1
2
Wire Colour
Source
White/Orange
TX+
Orange
- 130 -
TX-
Before Start
White/Green
RX+
4
Blue
Power
5
White/Blue
Power
6
Green
RX-
7
White/Brown
GND
GND
- 131 -
System Info.
Relieve Alarm
View Records
Maintained
Lower cost. PoE eliminates the need for running both data and
power wires to each network machine. WAPs and security cameras
can be installed without the additional expense of contracting an
electrician to install AC outlets where deployed. PoE also helps
protect IT investments as it is forward and backward compatible
with other Ethernet protocols. Furthermore, PoE machines that are
Simple Network Management Protocol (SNMP) manageable can
be remotely monitored and controlled to efficiently manage or
troubleshoot power consumption and/or failures.
• More flexible. Network machines can be installed and re-located
where performance is optimum and not tethered to an existing AC
outlet. This is especially important for machines like WAPs, which
may be installed in hard to reach places like the ceiling in order to
achieve the broadest coverage.
• More reliable. A SNMP manageable centralized power source
enhances the protection against power overloads, outages, surges
and spikes. When PoE is implemented, along with uninterruptible
power supplies (UPSs) or battery backups, it allows enterprises to
Troubleshooting
POE benefit
USB Manage
Options
Brown
Appendix
8
Basic Concepts
3
Getting Start
User Manual V2.0
Appendix
distribute power even when the AC electrical power is down. This
enables them to replace conventional telephones with feature rich
VoIP phones while retaining the lifeline reliability benefits.
Reserve Battery(Mini-UPS)
It is important to ensure the fingerprint machine power supply
under any circumstance, therefore besides of the standard adopter
we provide, we also prepare the special 5V Mini-UPS, according to
your actual need to purchase it, to extent possibility, help alleviate
this problem of the power supply that cause the fingerprint machine
down.
Work principle
In normal state,the reserve battery is idle state, the fingerprint
machine supply with directly current that is translated form
alternating current by adopter, if the reserve battery is in
non-saturation state, it will charge up automatically. When the
power cut down, the reserve battery will switch into discharge state
to power on fingerprint machine.
How to select reserve battery
model
Discharge hour
ZK-B1 (2000mAh)
3 hors
- 132 -
6 hors
ZK-B1 (4000mAh)
Before Start
Basic Concepts
User Manual V2.0
There is a danger of battery exploding, leak, fever, fire, break if
you don’t read the notice carefully.
l
DO NOT put the battery into water or let it to get wet.
l
Do NOT use and store battery near heat-generating machine
( such as fire or heater);
- 133 -
System Info.
Relieve Alarm
View Records
Notice
Maintained
When storing the batteries, ALWAYS store them at cool and dry
room temperature (-10℃~30℃). DO NOT store the batteries
under direct sunlight, higher temperature or high humidity above 3
months storing,it is need to keep50% rating capacity of the battery
(Charge the batteries at least once every three months ), keep the
batteries out of the touch deleterious substance, away from fire and
hot sources.
Troubleshooting
Store battery
Appendix
Note : Please be sure to connect the Mini-UPS to fingerprint
Machine firstly, then power on Mini-UPS.
USB Manage
Options
Getting Start
Connection mode
Appendix
l
Please use original charger only ;
l
DO NOT inverse polarity connection;
l
DO NOT plug the batteries directly into the outlet or the
cigarette receptacle of a car without inserting a proper charger
between the batteries and the outlet or the receptacle.;
DO NOT throw batteries into fire or hot battery. DO NOT use
l
wire or other metal short the positive and negative terminal
l
DO NOT break battery cause short-circuit battery
l
Dropping a battery may cause a strong physical shock that
may damage the performance of the battery
Digit Code
When go on enrolling user in the fingerprint machine, along with
the standard enrolling code is five digit(its range is 1-65535), if
you need that the enrolling code is longer in the actual application,
we can provide a customized design that the fingerprint machine
own nine digit code.
Automatically Synchronize Time
Automatically synchronize time provides the solution to system
time maintenance problems. If there are many fingerprint machines
in corporate network, Administrators can manually check the time
on internal system clocks, but this is a difficult task, especially
- 134 -
- 135 -
Before Start
Basic Concepts
Getting Start
Options
USB Manage
System Info.
Relieve Alarm
View Records
E.g. there are many fingerprint machine that are provide with
automatically Synchronize Time function , we assign the A
fingerprint machine as Time Server, it’s time show as XX year XX
month XX day, XX :00 o’clock , and its IP address as
192.168.1.100. There are M fingerprint machine that need to
synchronize time same as A fingerprint machine’s, enter the menu
of fingerprint machine->option->System option-> advance Option,
select automatically synchronize time, set it as Server IP address,
after setting finish. Be sure to restart you fingerprint machine so the
configuration option take effect, since after an interval of time the
fingerprint machine will search for Time Server to Synchronize
Time for itself,
for more detail to contact us to get technical
assistance.
Maintained
Our fingerprint machine may set as the time Sever and Client, set
one fingerprint machine as the Server of corporate network, it is
need to set the option of automatically Synchronized Time in
fingerprint machine that want to be calibrate time as time Server IP
address , modify the IP address of time client to connect with time
server.
Troubleshooting
when multiple systems are involved, and still leaves much room for
error. This powerful synchronize time system lets users set up a
virtually failsafe synchronized time environment for networks ,
automatically synchronize time allows creation of custom exact
time source in corporate network environment establishing
interconnected time synchronization system for each and every
machine on the network..
Appendix
User Manual V2.0
Appendix
Daylight Saving Time
Some fingerprint machine provides correct and current time in any
world time period, country or major city. Accurate adjustments for
Daylight Saving Time (or Summer Time) are made according to
each location's rules and laws. No matter what time period a
country or city is located in, this is your top choice for a clock
resource site.
This function can be set in the fingerprint machine option, Press
Manu key, enter the option->date time. In the XX Month XX
Date XX minute move forward an hour, and that in the XX Month
XX Date, XX Minute move Back an hour.
Set Daylight Save Time:
1、with every use, enter menu->option-> System Option, the
daylight saving option will appear; enter this option to set daylight
saving time. Menu display as follow:
Daylight Saving time
►Daylight
Y
Daylight Saving Time
Standard Time
Select “Daylight Saving Time” as “Yes” after setting finish, Press
“OK” to save it, then daylight saving time will start.
2、Select “ enter Daylight Saving Time” to set time:
- 136 -
MM-DD 24H
10-1 08:00
ESC
OK
Along with sound prompt user go on operation in the fingerprint
machine, example after the fingerprint authenticate is positive, the
- 137 -
Before Start
Options
Appendix
period, group)
Troubleshooting
Maintained
Assign time to play voice (by time
USB Manage
After setting this option ,be sure to restart your fingerprint machine,
so the configuration change take effect ,Such above figure, when
the data and time reach 8:00 o’clock of the first day in April, the
fingerprint machine enter day saving time, the time will jump
forward 1hour.
2、 Select “ Standard Time” , enter Time Option
After setting finish, the option does not take effect until the
fingerprint restart, like following figure, the day and time arrive at
8:00 o’clock of the first day in October, the fingerprint machine
will restore the standard time, Back an hour
System Info.
OK
Relieve Alarm
ESC
View Records
MM-DD 24H
4-1 08:00
Getting Start
Basic Concepts
User Manual V2.0
Appendix
fingerprint machine say “ thanking you!”, if the fingerprint
authenticate is negative, the machine will prompt “ please put
fingerprint again !”. In order to get more satisfy human nature
requestment and bring into play voice function, we provide with
assign time to play voice that design for carrying on assigned
operation depending on different need and send different voice
prompt contents, e.g. a staff go on duty at 8 o’clock. When she/he
check -in during 6:00-8:00, the fingerprint machine will say “thank
you!”, if the staff come lately during 8:00—10:00, the machine will
say “be lately, thank you”.
We can realize two type of setting.
By time period: according to time period to assign different sound
prompt, for one fingerprint go on operation during a time period
along with a sound, during other time period the fingerprint send
other sound.
By group: divide the user into different group, one user group use
one sound prompt.
For more detail, please see follow e.g.
1、 there are eight Time Period Voice to be set availably , enter
menuàOptionàSystem optionà Advance Option, select
Time Period Voice to set per day Time Period Voice, as
follow07:00-09:00 hour play,001,10:00-12:00 hour
play002:
- 138 -
00:00-00:00
00:00-00:00
00:00-00:00
00:00-00:00
00:00-00:00
Choose mode2 input work code firstly (1-9 digit), the place finger
- 139 -
Before Start
Basic Concepts
View Records
Maintained
Choose mode1, namely after passing fingerprint verification, be
sure to input work code, this verification record and work code you
input will store up together.
Troubleshooting
We offer the concept about work code that depend on the result of
fingerprint verification to distinguish different events and provide
convenience for program dealing with record, there is a option in
the fingerprint machine which support this function, press to enter
MenuàOptionà Advance Optionà work code, set the work code,
there are three option mode 1, Mode2, non.
Appendix
Work code
Relieve Alarm
System Info.
2、 After completing setting, Be sure to restart machine, so
configuration take effect.
Note:If you want more detail, please contact our technical
Assistance.
Getting Start
004
005
006
007
008
Options
Time Period Voice
001 07:00-09:00
002 10:00-12:00
003 00:00-00:00
USB Manage
User Manual V2.0
Appendix
to verify, this verification record and work code you input will store
up together.
Choose none, this function will be invalid.
Now the T&A software we provide can store this field into
databases while download record, fail to deal with it according to
the different category, thereby
Now the standalone communication SDK support second to
develop Work code, user may go to advance development.
According to the different category to deal with it, thereby it will
realize statistic different type of work and way of verification.
DHCP
Dynamic Host Configuration Protocol (DHCP) is a standardized
protocol that enables clients to be dynamically assigned with
various configuration parameters, such as an IP address, subnet
mask, default gateway, and other critical network configuration
information. DHCP servers centrally manage such configuration
data, and are configured by network administrators with settings
that are appropriate for a given network environment. DHCP
servers in turn communicate with DHCP clients through the use of
DHCP messages.
There must be DHCP sever in the network when the DHCP
function apply to our fingerprint machine, when the fingerprint
- 140 -
- 141 -
Before Start
Basic Concepts
Getting Start
Appendix
Troubleshooting
Maintained
View Records
Relieve Alarm
System Info.
For the fingerprint machine with this function provided, enter
menu-> option àcomm. optionàDHCP, and set the item as “Y”,
the fingerprint machine will send a request to DHCP sever to ask
for IP address when the fingerprint machine connect to network,
otherwise this item set as “N” , the fingerprint will not send the
request.
Options
machine is connected into network as DHCP client, which will
broadcast a message for all local network, after the DHCP sever
receive the request and assign a dynamic IP address and DNS
according the actual statue in the network.
USB Manage
User Manual V2.0
Appendix
About the human rights privacy statement
Dear customer:
First thank you for using fingerprint identification product we design
and produce. As one of the global famous fingerprint identification core
technology provider, we are unceasingly carrying on the development
and research, also we believe such action is necessary to: (a) comply
with the law or legal process served on Our company; (b) protect and
defend the rights or property of Our company (including the
enforcement of our agreements); or (c) be governed by related law or
legal that involve to the human rights and the privacy in each country.
We are committed to protecting your privacy.
We state as follows:
1. Our civil fingerprints identification equipment merely captures
fingerprint features point, but not the fingerprint image, does not involve
and retain privacy.
2. The fingerprint features points are not to be recovered the primitive
fingerprint image, will not involve the privacy.
3. We took an equipment provider, in no event shall we are liable for any
direct or the indirect against legal behavior arising out of use or inability
use our equipment.
4. If you have the different dispute for close the human rights or the
- 142 -
Note: There are limited rights to privacy and human rights in the
Chinese Constitution.
The personal dignity of citizens of the People's Republic of China is
inviolable and further, that insult, libel, false accusation or false
incrimination directed against citizens by any means is prohibited, the
protection of freedom of the person and the residence .The Constitution
provides for the freedom and privacy of correspondence of the citizen.
Before Start
Basic Concepts
Getting Start
Options
USB Manage
Our other the police fingerprint equipment or the development kit
provide with the function that ability to capture citizen's fingerprint
primitive image, as for whether will constitute the right infringement to
you, please contact with the local government or the equipment final
provider as the equipment original producer, we have not any legal
liability for any damage it cause.
System Info.
privacy arising out of using our equipment, please directly contacts with
your employer.
Relieve Alarm
User Manual V2.0
- 143 -
Maintained
Appendix
Troubleshooting
identification technology the fingerprint identification will apply to
electronic commerce, bank, insurance, law service industry in the future,
every year, all world cause from the lack of security password , the
humanity are suffering the heavy loss. In under high safe and secure
environment the fingerprint identification protect your status from
damage in fact.
View Records
Finally we hereby stressed that once again, as one kind of advanced