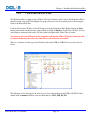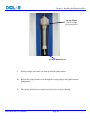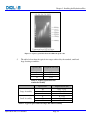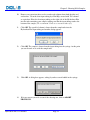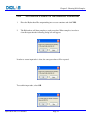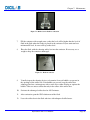
1
GENERAL INFORMATION Please complete the following section for your records. This information should be available to Digilab support staff when contacting us about your Hydroshear Plus. Serial Number Software Version Owned By Date Installed Service Contract Type Service Contract Dates CONTACTING DIGILAB Please contact Digilab directly with questions about operating and maintaining the Hydroshear Plus or if the Hydroshear Plus requires servicing. To help us assist you, please provide the following information: The name of your company or institution Your name and contact information The unit serial number (located on the back of the instrument) A full description of the problem Phone: +1-(508) 893-3130 Fax: +1-(508)-893-8011 E-mail: [email protected] Address: 100 Locke Drive, Marlborough, MA 01752, USA LEGAL INFORMATION © 2008 Digilab, Inc. All rights reserved. No part of this publication may be reproduced, transcribed, transmitted, or translated into any language, in any form, and by any means without the written permission of Genomic Instrumentation Services, Inc. Important notice: Digilab believes that the information in this document is accurate. The document has been carefully reviewed for technical accuracy. In the event that technical or typographical errors exist, Digilab reserves the right to make changes to subsequent editions of this document without prior notice to holders of the edition. The reader should consult Digilab if errors are suspected. IN NO EVENT SHALL DIGILAB BE LIABLE FOR ANY DAMAGE ARISING OUT OF OR RELATED TO THIS DOCUMENT OR THE INFORMATION CONTAINED IN IT. Trademarks: Digilab®, Hydroshear Plus® DNA Shearing Device Digilab® are registered trademarks of Genomic Instrumentation Services, Inc in the U.S. and some countries. Hydroshear Plus® DNA Shearing Device is a trademark of Genomic Instrumentation Services, Inc. Windows® is a registered trademark of Microsoft Corporation. Pentium® and Pentium III® are registered trademarks of Intel Corporation. Digilab Software License: General: All sales by Genomic Instrumentation Services, Inc. (the “Company”) of its products, including hardware components (“Instrument”) and software (“Software”) incorporated therein (collectively, the “Products”), to its original owner (“Customers”) are subject to the following terms and conditions (“Terms and Conditions”). “Instrument” means the tangible, physical components of Products, specifically the Hydroshear Plus® DNA Shearing Device. “Software” means any software or related documentation incorporated into the Products or provided under a separate agreement. “Customer” means any person who purchases Products directly from Company or one of its authorized distributors for internal use and is the original owner of the Product. Software license: The software is furnished to Customer under a nonexclusive license for use only on the single unit of Product for which the Software is provided. Such Software may not be used on or with any other Products or for activities outside the scope of this agreement without the prior written permission of the Company. Customer acknowledges that the Software constitutes valuable proprietary, confidential and trade secret information of the Company, or of third party suppliers of Software, as the case may be. Such Software may not be copied in whole or in part, or sublicensed, provided, transferred or otherwise disclosed or made available to third parties without the express prior written permissions of the Company or such third party Software supplier, as the case may be. Customer will notify the Company promptly of any unauthorized use, possession, knowledge of, Company or such third party Software supplier, as the case may be. If requested by the Company, Customer will execute and deliver a standard form or license agreement issued by the Company supplier with respect to any Software provided hereunder that is owned and licensed by such supplier. The software is protected by United States Copyright Law and International Treaty provisions. Under the copyright laws, this Software may not be reproduced or transmitted in any form, electronic or mechanical, including photocopying, recording, storing in an information retrieval system, or translating in whole or in part, without the prior written consent of Company. Trademarks shall be used in accordance with accepted trademark practice, including identification of trademark owners’ names. These Term and Conditions do not grant the Customer any intellectual property rights in this Software. ii Contents GENERAL INFORMATION ........................................................................................................................ I CONTACTING DIGILAB ............................................................................................................................ I LEGAL INFORMATION ............................................................................................................................ II CHAPTER 1 1.1 1.2 1.3 1.4 1.5 1.6 PRODUCT WARRANTY INFORMATION ........................................................................................7 COMPONENTS ..............................................................................................................................8 TECHNICAL SPECIFICATIONS .....................................................................................................8 COMPUTER/SOFTWARE REQUIREMENTS ..................................................................................8 ELECTRICAL REQUIREMENTS ....................................................................................................9 ENVIRONMENTAL REQUIREMENTS ............................................................................................9 CHAPTER 2 2.1 2.2 2.3 INSTALLING THE HYDROSHEAR PLUS FINDING A LOCATION FOR THE HYDROSHEAR PLUS..............................................................13 SOFTWARE INSTALLATION .......................................................................................................13 HYDROSHEAR PLUS ..................................................................................................................13 CABLE DRIVER SOFTWARE ......................................................................................................16 HARDWARE INSTALLATION ......................................................................................................26 WASH SOLUTIONS .....................................................................................................................27 SYRINGE INSTALLATION ...........................................................................................................28 SHEARING ASSEMBLY INSTALLATION .....................................................................................31 DESCRIPTION OF SHEARING ASSEMBLY COMPONENTS .........................................................31 DETERMINING THE ORIENTATION OF AN UNLABELED ORIFICE BOX ...................................33 ATTACHING THE SHEARING ASSEMBLY TO THE HYDROSHEAR PLUS ..................................34 CALIBRATING THE SHEARING ASSEMBLY ...............................................................................35 CHAPTER 4 4.1 4.2 4.3 4.3.1 4.3.2 4.3.3 4.3.4 4.3.5 4.3.6 HOW THE HYDROSHEAR PLUS WORKS SHEARING ASSEMBLY................................................................................................................11 PUMP SYSTEM ............................................................................................................................11 VALVE SYSTEM..........................................................................................................................12 CHAPTER 3 3.1 3.2 3.2.1 3.2.2 3.3 3.4 3.5 3.6 3.6.1 3.6.2 3.6.3 3.6.4 ABOUT THE HYDROSHEAR PLUS USING THE HYDROSHEAR PLUS SOFTWARE STARTING THE HYDROSHEAR PLUS SOFTWARE .....................................................................37 OVERVIEW OF THE MAIN CONTROL PANEL ...........................................................................39 SHEARING PARAMETERS ..........................................................................................................40 VOLUME .....................................................................................................................................40 NUMBER OF CYCLES .................................................................................................................41 SPEED CODE ..............................................................................................................................41 EDITING BASIC SHEARING PARAMETERS................................................................................41 FINDING THE MAXIMUM SPEED CODE ....................................................................................41 STEP-DOWN SHEARING METHOD ............................................................................................42 iii 4.3.7 4.3.8 4.3.9 4.3.10 4.3.11 4.4 4.5 4.5.1 4.5.2 4.5.3 4.5.4 4.6 SETTING UP A WASH SCHEME ..................................................................................................43 SAVING SHEARING PARAMETERS VALUES TO A FILE ............................................................45 LOADING SAVED SHEARING PARAMETERS FROM A FILE ......................................................46 SAVING NEW DEFAULT SHEARING PARAMETER VALUES......................................................47 RESTORING SHEARING PARAMETER DEFAULT VALUES ........................................................48 OPERATION CONTROLS ............................................................................................................48 STATUS .......................................................................................................................................49 CURRENT STEP ..........................................................................................................................49 RUN STATUS ...............................................................................................................................49 CURRENT PUMP VOLUME .........................................................................................................50 CURRENT VALVE POSITION ......................................................................................................50 MACHINE PARAMETERS ...........................................................................................................50 CHAPTER 5 5.1 5.2 5.3 5.3.1 5.4 5.4.1 5.4.2 SETTING SHEARING PARAMETERS .........................................................................................51 PREPARING DNA SAMPLES FOR SHEARING ............................................................................51 SHEARING DNA SAMPLES ........................................................................................................52 SAMPLE EJECTION FROM STANDARD AND LARGE SHEARING ASSEMBLIES ........................56 WASHING THE HYDROSHEAR PLUS .........................................................................................57 AUTOMATED WASHING OF THE SHEARING ASSEMBLIES.......................................................58 RECOMMENDED WASH SOLUTIONS .........................................................................................59 CHAPTER 6 6.1 6.2 6.3 MAINTENANCE GENERAL MAINTENANCE GUIDELINES ...................................................................................64 PERIODIC CLEANING.................................................................................................................64 CLEANING WITH WEAK DETERGENT ......................................................................................64 CLEANING WITH WEAK BASE AND ACID IN SEQUENCE ..........................................................65 CLEANING WITH 10% BLEACH ................................................................................................66 PERIODIC MAINTENANCE .........................................................................................................67 UNCLOGGING SHEARING ORIFICE BOXES USING SONICATION .............................................67 REPLACING HYDROSHEAR PLUS TUBING................................................................................70 REPLACING THE HYDROSHEAR PLUS OUTPUT TUBING .........................................................70 REPLACING THE HYDROSHEAR PLUS INPUT AND WASH TUBING .......................................71 REMOVING THE HYDROSHEAR PLUS SYRINGE .......................................................................71 DRIVE SCREW MAINTENANCE .................................................................................................72 CHAPTER 8 8.1 8.1.1 MANUAL OPERATION EXPLANATION OF MANUAL OPERATION CONTROLS .............................................................60 MANUAL ASPIRATION INTO THE HYDROSHEAR PLUS SYRINGE ............................................62 MANUAL EJECTION FROM THE HYDROSHEAR PLUS SYRINGE ..............................................63 CHAPTER 7 7.1 7.2 7.2.1 7.2.2 7.2.3 7.3 7.4 7.5 7.5.1 7.5.2 7.5.3 7.6 SHEARING DNA SAMPLES TROUBLESHOOTING PROBLEMS OBSERVED DURING SHEARING RUNS ...................................................................73 AIR BUBBLES IN THE SYRINGE .................................................................................................73 iv 8.1.2 8.1.3 8.1.4 8.2 8.2.1 8.2.2 8.2.3 8.3 8.3.1 8.3.2 8.3.3 8.3.4 8.3.5 8.3.6 8.3.7 8.3.8 8.3.9 8.3.10 8.3.11 CLOGGED SHEARING ASSEMBLY...............................................................................................73 DECREASING SAMPLE VOLUME ................................................................................................74 INCREASING SAMPLE VOLUME.................................................................................................74 SAMPLE AND FRAGMENT PROBLEMS ......................................................................................74 LOSS OF DNA.............................................................................................................................74 SIZE OF SHEARED DNA FRAGMENTS IS INCORRECT ..............................................................74 THE FRAGMENTS PRODUCED DO NOT CLONE WELL ...............................................................75 SOFTWARE ERROR MESSAGES .................................................................................................76 ERROR 37 AT SERIAL PORT ......................................................................................................76 MACHINE PARAMETERS ...........................................................................................................76 SYRINGE VOLUME .....................................................................................................................77 VOID VOLUME ...........................................................................................................................77 RETRACTION SPEED ..................................................................................................................77 RESIDUAL VOLUME ...................................................................................................................78 PORT NUMBER ...........................................................................................................................78 SETTING NEW DEFAULT MACHINE PARAMETER VALUES .....................................................79 READ TIMEOUT ERROR ............................................................................................................80 PUMP OVERLOAD OR PLUNGER OVERLOAD ERROR ..............................................................80 OTHER ERROR MESSAGES .......................................................................................................81 CHAPTER 9 9.1 9.2 9.3 9.4 9.5 9.6 9.7 PERFORMANCE DATA RELATIONSHIP OF FRAGMENT SIZE TO PUMP SPEED ..............................................................82 SMALLEST STARTING FRAGMENT SIZE THAT CAN BE SHEARED ..........................................83 SMALLEST STARTING SAMPLE VOLUME THAT CAN BE SHEARED ........................................84 SMALLEST FRAGMENTS THE HYDROSHEAR PLUS CAN CONSISTENTLY PRODUCE ...............85 INITIAL FRAGMENT LENGTH DOES NOT AFFECT SHEARING PERFORMANCE ........................86 SHEARING RESULTS ARE INDEPENDENT OF INITIAL SAMPLE VOLUME..................................87 SHEARING RESULTS ARE INDEPENDENT OF STARTING DNA CONCENTRATION ....................88 v LIST OF FIGURES FIGURE 2-1: HOW THE HYDROSHEAR PLUS WORKS ...........................................................................................10 FIGURE 2-2: HYDROSHEAR PLUS VALVE POSITIONS ...........................................................................................12 FIGURE 3-1: REAR VIEW OF HYDROSHEAR PLUS .................................................................................................26 FIGURE 3-2: SHEARING ASSEMBLY COMPONENTS ................................................................................................31 FIGURE 3-3: DETERMINING CORRECT SHEARING ASSEMBLY ORIENTATION.......................................................33 FIGURE 3-4: ATTACHING SHEARING ASSEMBLY TO THE HYDROSHEAR PLUS ....................................................34 FIGURE 3-5: AGAROSE GEL OF DNA SHEARED AT DIFFERENT SPEED CODES .....................................................36 FIGURE 7-1: DISMANTLED SHEARING ASSEMBLY .................................................................................................67 FIGURE 7-2: ORIFICE BOX IN FLASK FOR SONICATION.........................................................................................68 FIGURE 7-3: FLASK IN SONICATOR .......................................................................................................................68 FIGURE 7-4: OUTPUT TUBING AND ORIFICE BOX ................................................................................................70 FIGURE 7-5: SAMPLE INPUT TUBING .....................................................................................................................71 FIGURE 7-6: LUBRICATING THE DRIVE SCREW ....................................................................................................72 FIGURE 9-1: CORRELATION OF SPEED CODE WITH DNA FRAGMENT SIZE..........................................................82 FIGURE 9-2: DETERMINING THE LOWEST STARTING FRAGMENT SIZE ................................................................83 FIGURE 9-3: DETERMINING THE LOWEST POSSIBLE VOLUME OF STARTING MATERIAL.....................................84 FIGURE 9-4: SMALLEST SIZE RANGE FOR SMALL SHEARING ASSEMBLY .............................................................85 FIGURE 9-5: SHEARING RESULTS ARE INDEPENDENT OF STARTING FRAGMENT LENGTH...................................86 FIGURE 9-6: SHEARING RESULTS ARE INDEPENDENT OF STARTING FRAGMENT VOLUME ..................................87 FIGURE 9-7: SHEARING RESULTS ARE INDEPENDENT OF STARTING FRAGMENT CONCENTRATION....................88 vi Chapter 1: About the Hydroshear Plus Chapter 1 ABOUT THE HYDROSHEAR PLUS The Hydroshear Plus is an automated, Point-Sink Shearer, offering a simple, reproducible, and controllable method of fragmenting DNA. The Hydroshear Plus creates and controls hydrodynamic forces that work in conjunction with its innovative shearing assembly to shear DNA. A wide range of DNA samples are compatible with the Hydroshear Plus, and the shearing parameters can be adjusted to produce specific fragment lengths of DNA. 1.1 PRODUCT WARRANTY INFORMATION IMPORTANT ! The Hydroshear Plus is shipped with a Product Warranty Card that needs to be filled out and sent back to Digilab in order to be placed in the Digilab customer database and to initiate the Warranty. The Hydroshear Plus Limited Warranty is as follows: LIMITED WARRANTY Seller warrants that all Products consisting of new equipment shall be free of defects in material and workmanship, under normal use and service, for a period of one (1) year after the date of shipment. Seller warrants that all consumable Products and demonstration, remanufactured or refurbished Products will be free from defects in material and workmanship for a period of ninety (90) days after shipment. Seller’s obligation under these warranties will be limited to repair or replacement of any defective Products. Seller shall have the sold authority to determine the type and means or repair or replacement in the event of a claim. Seller shall have the option of requiring the return of defective products, transportation prepaid, to determine the claim. Seller shall not be responsible for repairs made by others. There are also offers Depot Only Extended Warranty Programs available. Please contact Digilab for more information. Hydroshear Plus User Manual Page 7 Chapter 1: About the Hydroshear Plus 1.2 COMPONENTS In addition to the base unit and software CD, each Hydroshear Plus comes complete with the following: 1. Power cord 2. USB to 2x RS-232 serial cable (includes CD with drivers for cable) 3. 500 µl syringe 4. Four shearing assemblies with tubing attached (2-standard, 1-large and 1-small) 5. Tool kit 6. Hydroshear Plus Software (CD) 7. Hydroshear Wash Solution Kit (box with 3 wash solutions) 8. Empty waste bottle 9. Laptop with preloaded software (optional) 1.3 TECHNICAL SPECIFICATIONS Fuse Current Rating: 3 Amps Fuse Voltage Rating: 250V Voltage: 100-250 VAC Frequency Range: 47-100 Hz Installation (Over voltage) Category: II 1.4 COMPUTER/SOFTWARE REQUIREMENTS The Hydroshear Plus software and the driver for the interface cable can be installed on any PC fulfilling the following requirements: IBM-compatible Operating system: Microsoft Windows XP One USB port available to connect to the Hydroshear Plus base unit Hydroshear Plus User Manual Page 8 Chapter 1: About the Hydroshear Plus 1.5 ELECTRICAL REQUIREMENTS One properly grounded 110 /15 amp or 220V/10 amp wall outlet 1.6 ENVIRONMENTAL REQUIREMENTS Pollution Degree: 2 Installation Category: II Altitude: any up to 2000 m Operating Temperature (mechanism): 59°F (15°C) to 104°F (40°C) Operating Humidity (mechanism): 20-95%RH at 104°F (40°C) Hydroshear Plus User Manual Page 9 Chapter 2: How the Hydroshear Plus Works Chapter 2 HOW THE HYDROSHEAR PLUS WORKS The Hydroshear Plus uses a syringe pump and a user-adjusted valve to push unsheared DNA samples through a narrow opening. The shear forces produced cause the DNA to break into smaller pieces. The size of the resulting fragments is directly related to the speed at which the DNA moves through the gap. After several repeated cycles of shearing, the DNA is ejected into a collection tube and the Hydroshear Plus is washed in preparation for the next sample. A more detailed description follows. The innovative design of the Hydroshear Plus appropriates hydrodynamic forces and a oneway, flow-though orifice to fragment DNA. This design is based on the hydrodynamic pointsink shearing method originally developed by Oefner et al. (Nucleic Acids Research, 24:3879-3886, 1996), a theoretical model of hydrodynamic flow through such a system. Strictly speaking, it is the rate-of-strain tensor that describes the force on a molecule and hence its breakage. In the present application, the breakage is caused by both the shearing forces when the fluid is inside the narrow tube or orifice and the extensional strain force when the fluid approaches the orifice. (Thorstenson et.al., Genome Research 8, Issue 8, 848855, Aug 1998) Figure 2-1: How the Hydroshear Plus Works The action of the syringe pump plunger forces the DNA in solution towards the orifice. Because the orifice is smaller than the tubing leading to it, there is an abrupt contraction in the diameter of the fluid’s path. As the solution is forced through the small opening, the pressure of the solution in the mechanism builds before the orifice and then drops dramatically after passing into the orifice. This dramatic pressure drop, in turn, compels the solution to accelerate in order to maintain its volumetric flow rate, in accordance with Bernoulli’s Equation for Frictionless Flow. The acceleration of the solution creates drag forces (i.e. extensional strain forces) that stretch the DNA until its molecular bonds begin to break and the DNA “snaps” into fragments. Fragmenting of the DNA continues until the pieces are too short for the drag forces to break the molecular bonds. The final fragment size i.e. the length at which the shearing force is too weak to break the bonds is determined by the flow rate of the fluid and the size of the shearing assembly orifice. Hydroshear Plus User Manual Page 10 Chapter 2: How the Hydroshear Plus Works 2.1 SHEARING ASSEMBLY In order to accomplish accurate, reproducible shearing, the Hydroshear Plus utilizes a precision-drilled ruby as its shearing orifice. The ruby is mounted inside the orifice box, which is connected by tubing to the valve system. 2.2 PUMP SYSTEM The Hydroshear Plus employs a syringe pump system. Air and fluid flow is pressurecontrolled by the movement of the plunger inside the glass syringe. The pump will “stall” if this pressure is too high. It is also likely that leaks will occur in the Hydroshear Plus tubing and/or valves if operated at higher than normal pressures. The most common cause of increased pressure is a blocked shearing assembly, as described in section 8.3.10, “Pump Overload or Plunger Overload”. Hydroshear Plus User Manual Page 11 Chapter 2: How the Hydroshear Plus Works 2.3 VALVE SYSTEM The Hydroshear Plus utilizes a single, seven-port valve. The default positions for the valve are as labeled below. These positions can be redefined in the Hydroshear Plus software. Port #1 Sample Input Port #2 To shearing assembly and Sample Output Port #6 Wash Solution #3 Port #3 Closed Port #7 To syringe pump Port #4 Wash Solution #1 Port #5 Wash Solution #2 Figure 2-2: Hydroshear Plus Valve Positions Hydroshear Plus User Manual Page 12 Chapter 3: Installing the Hydroshear Plus Chapter 3 INSTALLING THE HYDROSHEAR PLUS 3.1 FINDING A LOCATION FOR THE HYDROSHEAR PLUS Select a location for the Hydroshear Plus that meets the following guidelines: A properly grounded 110V/15amp wall outlet should be within reach of the Hydroshear Plus power cord. The Hydroshear Plus and the controlling CPU monitor should be placed in full view of each other. Choose a location away from any vents that could expel particulate material on the machine and contaminate the sample. Choose a location such that the Hydroshear Plus can be placed on a flat, level surface. Ensure that the location satisfies the Hydroshear Plus’s environmental requirements. NOTE: It may be advisable to use an APC Power Supply to prevent loss of sample in the case of a power outage. 3.2 SOFTWARE INSTALLATION 3.2.1 HYDROSHEAR PLUS 1. Insert the Hydroshear Plus installation CD into the computer. 2. Run the file setup.exe from the installation disk by double clicking on it. Hydroshear Plus User Manual Page 13 Chapter 3: Installing the Hydroshear Plus 3. A dialog will appear, asking which directory the software should be installed into (There is no need to change from the default directory, which is C:\Program File\Hydroshear). 4. Select the radio button, I accept the License Agreement, and click Next. Hydroshear Plus User Manual Page 14 Chapter 3: Installing the Hydroshear Plus 5. Click Next to start the installation. 6. Click Finish to close this dialog box and restart the computer to finalize the installation procedure. Hydroshear Plus User Manual Page 15 Chapter 3: Installing the Hydroshear Plus 3.2.2 CABLE DRIVER SOFTWARE The Hydroshear Plus is shipped with a USB to 2X Serial Connector cable. Unless the Hydroshear Plus is purchased with a laptop PC from Digilab, the proper drivers need to be installed prior to connecting the cable to the Hydroshear Plus. Load the CD into the CD Drive of the PC being used for the Hydroshear Plus. Right click on the Start button at the bottom left hand corner of the toolbar and click on Explore. Scroll to the CD drive as listed in the Explore menu and click on the CD drive where the Hydroshear Cable CD was loaded. You must use the same USB port on the computer each time the USB to 2X Serial Connector cable is connected otherwise the converter cable drivers will need to be re-installed. There is a selection of cable types listed. Double click on the USB to 2X RS232 icon as circled in red below. The following screen will appear. In order to get a copy of the manual for the USB to 2X RS232 cable, double click on manual, and then select the Icon that says WIN_2000_XP_EN. Hydroshear Plus User Manual Page 16 Chapter 3: Installing the Hydroshear Plus In order to install the drivers for the Hydroshear Plus cable, in the same screen as above select and double click on windows as shown below. After double clicking on windows, another screen will appear as shown below. To start to load the cable drivers, double click on Setup. Hydroshear Plus User Manual Page 17 Chapter 3: Installing the Hydroshear Plus Click Install. Click Continue Anyway. Hydroshear Plus User Manual Page 18 Chapter 3: Installing the Hydroshear Plus This window will appear twice, so it will be necessary to click Continue Anyway a second time. The USB cable driver installation is completed. Click Exit to complete the process. Plug the USB to RS232 adapter into an available USB port on the computer. The Welcome to the Found new Hardware Wizard will appear. Select No, Not this time and click Next. Hydroshear Plus User Manual Page 19 Chapter 3: Installing the Hydroshear Plus Select the radio button, Install the software automatically and click Next to continue. Click Continue Anyway to continue installation. Hydroshear Plus User Manual Page 20 Chapter 3: Installing the Hydroshear Plus Click Finish to complete the installation. The Welcome to the Found New Hardware Wizard will appear again to start the installation of the second serial port on the cable. Select the radio button No, not this time and click Next. Hydroshear Plus User Manual Page 21 Chapter 3: Installing the Hydroshear Plus Select the radio button Install the software automatically and click Next. Select the driver in the location C:\windows\inf\oem22.inf and click Next. Hydroshear Plus User Manual Page 22 Chapter 3: Installing the Hydroshear Plus Click Continue Anyway. Click Finish to complete the installation. The Found New Hardware Wizard will appear a third time. Select the radio button No, not this time and click Next. Hydroshear Plus User Manual Page 23 Chapter 3: Installing the Hydroshear Plus Select the radio button Install the software automatically and click Next to continue. Select the driver in the location C:\windows\inf\oem22.inf and click Next. Click Continue Anyway. Hydroshear Plus User Manual Page 24 Chapter 3: Installing the Hydroshear Plus Click Finish to complete the installation. The USB to serial port converter is now ready to use. If there is no communication between the Hydroshear Plus and the computer, check that your Ports are properly connected in Device Manager (My Computer, right click on Properties, and select Hardware tab). Hydroshear Plus User Manual Page 25 Chapter 3: Installing the Hydroshear Plus 3.3 1. HARDWARE INSTALLATION Plug the serial cable connectors into the ports on the back of the Hydroshear Plus. It does not matter which connector goes to which port on the Hydroshear Plus, as the software will guide you to select the appropriate COM ports, and instruct to switch the serial cable if necessary (See 4.1 Starting the Hydroshear Plus Software). Power Cord Two Serial Connectors Figure 3-1: Rear view of Hydroshear Plus 2. Secure the serial cable to the Hydroshear Plus by tightening the screws on either side of the connectors. 4. Plug the USB cable connector into a USB port on the CPU. 5. Plug one end of the power cord into the back of the Hydroshear Plus and the other end of the power cord into a properly grounded wall outlet. 6. Turn the Hydroshear Plus power switch – on the back of the instrument – to the on position (1 = ON, 0 = OFF). Hydroshear Plus User Manual Page 26 Chapter 3: Installing the Hydroshear Plus 3.4 WASH SOLUTIONS There are three Wash Solutions used with the Hydroshear Plus: Wash Solution #1, Acid. 0.2M HCL Wash Solution #2, Base. 0.2M NaOH Wash Solution #3, pH 8.0. Wash Solution 1-x Concentration of TE Buffer Wash Solutions Formulations Wash Solution 1 Dilute 1M HCL (Hydrochloric Acid) 5 fold with ultra-pure water Wash Solution 2 Dilute 10 M NaOH (Sodium Hydroxide) 50 fold with ultra pure water. 10 M NaOH available from BioUltra #72068 or Sigma # 72068 Wash Solution 3 Dilute Tris-EDTA buffer 100-x concentrate 100 fold with ultra pure water. 100-x Tris-EDTA buffer concentrate available from Sigma #T9285 Ulta Pure water available from BioChemica #95284 or Sigma #95284. Never use tap water! All final diluted solutions should be filter sterilized using either 0.45um or 0.2 um filter available from Millipore, Pall or Sartorius. It is recommended to purchase the Wash Solution Bottle Kit from Digilab, part number HSP00040. The Digilab Wash Solution Bottle Kit includes one each 250ml bottles. The Digilab Wash Bottle Solution Kit comes with three (3) caps with holes for the 1/16” tubing to go through in order to prevent particulates and reduce any contamination and are color coded to match the colored labels on the corresponding tubing. Also included is a piece of tubing which goes to waste, one empty waste bottle. All four bottles can be placed in the Hydroshear bottle holder which is part of the base of the Hydroshear Plus. Hydroshear Plus User Manual Page 27 Chapter 3: Installing the Hydroshear Plus 3.5 INSTALLATION Take care when working with the syringe; although the Hydroshear Plus syringe is designed for higher pressure, it is made of glass and could shatter under high pressure! Wear protective eyewear whenever the plastic door to gain access to the syringe is open. Please follow the instructions below before using a new Hydroshear Plus syringe to ensure that the syringe and plunger are aligned correctly with the valve assembly. 1. Lower the plunger mount on the pump. Since the plunger mount cannot be lowered manually with the Hydroshear Plus turned off, turn on the Hydroshear Plus using the switch on the rear of the unit. 2. Start the Hydroshear Plus software on the attached PC. The main Hydroshear Plus control panel is as follows: 3. On the main Hydroshear Plus control panel, click on “MANUAL OPERATION” to access manual syringe controls: Hydroshear Plus User Manual Page 28 Chapter 3: Installing the Hydroshear Plus 4. In the “Manual Operation” window, enter 500 in the Volume box and 10 in the Speed Code box, and then press START. 5. Once the syringe motor plunger has stopped moving, exit the Hydroshear Plus software, turn the instrument off and disconnect the power cable from the wall outlet. 6. Push the plunger into the syringe so that it will fit between the adaptor at the top and the plunger mount at the bottom. 7. Remove the syringe mount screw that is connected to the pump. 8. Screw the syringe counterclockwise into the syringe mount. Hydroshear Plus User Manual Page 29 Chapter 3: Installing the Hydroshear Plus Syringe Mount (Tip of syringe screws into place) Syringe Mount Screw 9. Pull the plunger down until it is lined up with the pump bracket. 10. Replace the syringe mount screw through the syringe plunger and tighten into the pump bracket. 11. The syringe should now be aligned correctly and is ready for shearing. Hydroshear Plus User Manual Page 30 Chapter 3: Installing the Hydroshear Plus 3.6 SHEARING ASSEMBLY INSTALLATION The shearing assembly must be oriented correctly, both to prevent irreversible damage to the orifice, and to function properly. Refer to Figure 3-2 and the instructions below to ensure that you install the shearing assembly correctly. 3.6.1 DESCRIPTION OF SHEARING ASSEMBLY COMPONENTS Figure 3-2: Shearing assembly components 1. Clear plastic output tubing: The sheared samples and used wash solution will be dispensed from this tubing. 2. Output tubing nut: This nut screws into the orifice box at the head of the arrow label and attaches the output tubing (1) to the shearing orifice box (4). 3. Output tubing plastic ferrule. The output tubing (1) is inserted through the ferrule (3), with the tapered end of the ferrule pointing toward the output tubing nut (2). When putting together a shearing assembly, the tubing should be flush to the flat end of the ferrule to ensure a good seal when the tubing nut is screwed into the orifice box. 4. Orifice box: The orifice box contains the high precision ruby and narrow gap that allows samples to be sheared (see Figure 2-1, “How the Hydroshear Plus Works”) and should be handled with care to minimize the risk of dislodging or damaging the orifice. The arrow on the orifice box label should always point towards the clear plastic output tubing. If the arrow is missing, you can examine the inside of the orifice to determine the correct orientation, as described in Section 3.6.2, “Determining the Orientation of an Unlabeled Orifice Box”. The identification number is useful for keeping calibration records. Hydroshear Plus User Manual Page 31 Chapter 3: Installing the Hydroshear Plus 5. Input tubing pressure fitting: The pressure fitting consists of a plastic ferrule and a metal ring. The input tubing (7) is inserted through the pressure fitting and attached to the input end of the shearing assembly box by screwing the shearing assembly input tubing nut (6) into the orifice box. 6. Input tubing nut: This nut screws into the orifice box at the tail of the orifice box’s arrow label. It attaches the orifice box to the input tubing (7) leading to the base screw. 7. Input tubing: This inflexible orange PEEK tubing is attached to the orifice box via the input tubing nut (6) and is attached to the Hydroshear Plus base unit via the base screw (8). 8. Base screw: This 1/16" hex screw attaches the shearing assembly to the Hydroshear Plus base unit. The threaded side should be closest to the metal ferrule (7) and should point toward the Hydroshear Plus valve. 9. Metal ferrule: the tapered end of this ferrule should be close to the end of the orange tubing and should point toward the Hydroshear Plus valve. Hydroshear Plus User Manual Page 32 Chapter 3: Installing the Hydroshear Plus 3.6.2 DETERMINING THE ORIENTATION OF AN UNLABELED ORIFICE BOX 1. Unscrew the input/output nuts and their associated tubing from the orifice box. 2. Look inside the ends of the orifice box to observe the ruby, which appears as a pinkish circle. 3. One side of the ruby will appear smaller and less reflective than the other – this is the output side of the orifice box. INPUT OUTPUT Figure 3-3: Determining correct shearing assembly orientation 4. Screw the output tubing nut into the output port and the input tubing nut into the input port. 5. The shearing assembly is now ready for use. Hydroshear Plus User Manual Page 33 Chapter 3: Installing the Hydroshear Plus 3.6.3 ATTACHING THE SHEARING ASSEMBLY TO THE HYDROSHEAR PLUS 1. Check to see that the components of the shearing assembly are correctly oriented, as described above (Figure 3-2: Shearing assembly components) 2. Attach the shearing assembly to the port by tightening the base screw into the default output port or to the location you have chosen in the software. Figure 3-4: Attaching shearing assembly to the Hydroshear Plus 3. Tighten the base screw connection with the 1/4" hex wrench. Do not over tighten. 4. If the shearing assembly is new, it will need to be calibrated as described in the following section. Each new shearing assembly must be individually calibrated, even if the shearing assembly is the same type as had been installed previously. Hydroshear Plus User Manual Page 34 Chapter 3: Installing the Hydroshear Plus 3.6.4 CALIBRATING THE SHEARING ASSEMBLY Each new shearing assembly needs to be individually calibrated. Since the size of each shearing assembly orifice is slightly different, the same speed code, when used with different shearing assemblies, may not result in the same fragment size. This calibration will determine the speed code to fragment size correlation for a specific shearing assembly. 1. Note the identification number on the shearing assembly orifice box. This will be used to match the calibration data with the assembly. 2. Shear several DNA samples at various speed code values, keeping the volume, the number of cycles and the DNA concentration constant. 3. Shearing at four different speed codes should be sufficient for accurate calibration, but we recommend 6 or more for increased precision. 4. Run the samples on an agarose gel and make a note of the average fragment size produced at each speed code. NOTE: Figure 3-4 on the following page shows an example of a gel-electrophoretic separation of samples of DNA sheared with a standard shearing assembly unit at speed codes raising from 3-19 (left to right). Hydroshear Plus User Manual Page 35 Chapter 3: Installing the Hydroshear Plus Figure 3-5: Agarose gel of DNA sheared at different speed codes 5. The tables below show the typical size ranges achieved by the standard, small and large shearing assemblies: Speed Code Fragment Size (kb) 3 9 15 1-2 1.5-3 5-10 Table 1: Typical speed codes for standard assembly Large Assembly Small Assembly Speed Code 20 14 4 6 10 14 Fragment Size (kb) 10.8 - 11.35 11.2 – 11.5 4.2 – 8.4 0.7-1.0 1.1 – 2.3 1.5 – 2.5 Table 2: Typical speed codes for large and small assembly Hydroshear Plus User Manual Page 36 Chapter 4: Using the Hydroshear Plus Software Chapter 4 USING THE HYDROSHEAR PLUS SOFTWARE 4.1 STARTING THE HYDROSHEAR PLUS SOFTWARE 1. To start the Hydroshear Plus software, locate the program titled “Hydroshear Plus” in the Windows Start > Programs menu. 2. The dialog box shown below appears, informing you that shearing parameters should be changed if you do not want to use the default settings. 3. Click OK to dismiss the dialog box. 4. Click OK to dismiss the dialog box. Hydroshear Plus User Manual Page 37 Chapter 4: Using the Hydroshear Plus Software 5. Select the COM ports for the pump and valve. The driver for the serial USB cable adds two COM ports to the computer. There is no way to know which COM port to select for the pump and valve initially, however, if your selection is incorrect there will be a prompt stating that they are not found. If this happens, switch the COM port selections between the pump and valve. 6. Change the automated valve selection switch to YES. If NO is chosen, the Hydroshear Plus will operate similar to the Hydroshear and will use only Input and Output ports and will ignore the wash ports. In this mode, you will be prompted to change the wash solutions. 7. Click Connect. 8. At this point, the syringe plunger and valve of the Hydroshear Plus should reinitialize and the Hydroshear Plus Main Panel becomes available. 9. If either the valve or the pump is recognized, but not both, and you are certain that you have assigned the correct port, click Connect again. Hydroshear Plus User Manual Page 38 Chapter 4: Using the Hydroshear Plus Software 4.2 OVERVIEW OF THE MAIN CONTROL PANEL The Hydroshear Plus Main Panel is the Hydroshear Plus’s control and feedback center. The Hydroshear Plus Main Panel is divided into three boxed areas titled Shearing Parameters, Operation Controls and Status. These are summarized as follows, with more detailed descriptions in the following sections. Shearing Parameters This box is used to customize parameters before a shearing run, save customized shearing parameters to a file, instruct the software to use parameters saved to a file, or set new default parameters. Operation Controls This box includes the buttons used to run the Hydroshear Plus and a button used to navigate to the Manual Operation window. (See 6. Manual Operation, page 57) Status This box displays the status of a current shearing run or wash, as well as the current pump volume and valve position. Hydroshear Plus User Manual Page 39 Chapter 4: Using the Hydroshear Plus Software 4.3 SHEARING PARAMETERS Three basic shearing parameters are referenced by the Hydroshear Plus software: Volume, Number of cycles, and Speed Code. The default value for each is displayed upon starting the software. These values can be adjusted for each run. If you use the same parameters frequently, you can save these as the default values, so that they are already preset when the software starts up. NOTE: Once the actual shearing procedure has been started, the shearing parameters cannot be changed. 4.3.1 VOLUME This is the volume of the sample, in microliters (µl) you are preparing to shear. This value can range from the void volume to the full syringe volume (500 µl). However, we have found that shearing will be incomplete unless the volume is at least 40 µl. The Hydroshear Plus default is set for 200 µl. Hydroshear Plus User Manual Page 40 Chapter 4: Using the Hydroshear Plus Software 4.3.2 NUMBER OF CYCLES This number refers to the number of shearing passes the Hydroshear Plus will perform on the sample. The default number of cycles is 20, since after the twentieth cycle additional shearing passes are unlikely to shear the sample any further. 4.3.3 SPEED CODE The speed code correlates with the speed of the syringe pump when performing the shearing passes. The optimal value depends on both the individual orifice size of the shearing assembly (there are slight variations in size among orifices) and the fragment size desired. The speed code can range from 0 to 40, with an increasing speed code value corresponding with a decreased pump plunger speed. A speed code of 0 (not recommended for actual shearing runs) results in the fastest speed (1.2 seconds per stroke), while a speed code of 40 results in the slowest speed (600 seconds per stroke). The default value on the Hydroshear Plus is 8. 4.3.4 EDITING BASIC SHEARING PARAMETERS To edit a parameter value, locate the text box next to the parameter name (e.g. “Volume”). Then, either click in the text box and type in the desired value, or click the arrows next to the text box to select the desired value. Should you edit the shearing parameters and wish to restore the default values, click the Restore to Defaults button, located at the bottom left corner of the Shearing Parameters box. This will replace the numbers in the text boxes with the last set of values saved as default values. (Note that restoring default shearing parameters will also restore default washing parameters too. Washing parameters are described below, in section 4.3.7). 4.3.5 FINDING THE MAXIMUM SPEED CODE In addition to calibrating each new shearing assembly to determine which fragment sizes are generated by each speed code, new small assemblies should also be tested to establish the maximum acceptable speed code for shearing. Both of these calibrations should be performed on the small assembly before any shearing runs are attempted. Hydroshear Plus User Manual Page 41 Chapter 4: Using the Hydroshear Plus Software To find the fastest allowable speed, shearing runs should be performed without any DNA, using distilled water or the buffer normally used to resuspend the DNA samples. Starting with a speed code of 10, step down one in a series of subsequent runs. These shearing runs should be performed using 30 cycles so if there is a slow leak it will be detected. When performing these test runs, click "No" when the Hydroshear Plus software asks "Do you want to wash the device before starting the shearing process?" Continue until liquid can be observed leaking from the shearing assembly connections or until the system gives a "Plunger Overload" error. Since this speed code is obviously too low, shearing should only be attempted using a speed code that is at least one level higher. For example, if the system fails at speed code 6 then the limit for a shearing run would be speed code 7. NOTE: The maximum speed code for a small shearing assembly is generally 6, and the maximum speed code for a standard shearing assembly is generally 3. 4.3.6 STEP-DOWN SHEARING METHOD If a sample is to be sheared at or near the speed code limit, it may be necessary to initially shear the sample at a higher speed code (i.e. with the syringe moving more slowly) followed by re-shearing the same sample at the low speed code. This will vary depending on the samples being sheared. For example, shearing at a speed code of 16 for 20 cycles, eject the sample, then reload the sample and shear at a lower speed code of 4-6 for 20 cycles. Note that, if the speed code entered is less than 20, the software will automatically insert three “pre-passes” into the shearing run. These pre-passes will occur before the actual shearing cycles and are executed at gradually higher speeds to prepare for the high-speed shearing passes. Standard shearing assemblies normally should not be operated at a speed code lower than 3; this will produce a pump overload message. Small shearing assemblies should not be used at a speed code lower than 6. Remember! Lower speed code = faster syringe! Hydroshear Plus User Manual Page 42 Chapter 4: Using the Hydroshear Plus Software 4.3.7 SETTING UP A WASH SCHEME The Hydroshear Plus should be washed before and after each shearing run to clean any residual sample solution from the machine. To edit the parameters used for this wash cycle, click on the Edit Wash Scheme button in the Shearing Parameters box. 1. Click in the first text box. By default this is prefilled with “Wash Solution #1”. 2. In the box to the right of the first wash solution box, specify the number of cycles to be performed using the first wash solution. This can be accomplished by clicking in the box and typing a number, or using the arrows on the left side of the box to adjust the number of cycles. 3. Repeat steps 1 and 2 for Wash Solution #2 and Wash Solution #3. Hydroshear Plus User Manual Page 43 Chapter 4: Using the Hydroshear Plus Software 4. A typical wash scheme would be 4 cycles of each wash, as shown above. 5. Enter the speeds you wish to use during the wash, and Click OK to exit this window and save these wash scheme steps. NOTE: For the standard and large shearing assemblies, the default of 6 for the Intake Speed and 12 for the Output speed are acceptable. For the small shearing assembly, it is recommended to change the Intake speed to 10 and Output speed to 14. Hydroshear Plus User Manual Page 44 Chapter 4: Using the Hydroshear Plus Software 4.3.8 SAVING SHEARING PARAMETERS VALUES TO A FILE Custom shearing parameters can be saved to a file, allowing for easy recall and entry when conducting future shearing runs. In this way, if you have several samples that are sheared frequently, the shearing parameters for each of these samples can be stored for easy access. This file is user-named and will be stored in the user-specified location. To save shearing parameters to a file, follow these steps: 1. After entering values for each basic shearing parameter and for the wash scheme as described above, click the Save to File button: 2. The save file dialog box appears: 3. Navigate to the location where you would like to save the file. 4. Type a name for the file in the text box. 5. Click the SAVE button. 6. The new shearing parameters values are saved with the specified name in the specified location. Hydroshear Plus User Manual Page 45 Chapter 4: Using the Hydroshear Plus Software 4.3.9 LOADING SAVED SHEARING PARAMETERS FROM A FILE To load custom shearing parameters that had been previously saved to a file: 1. Click on the Read from File button in the Shearing Parameters box of the Hydroshear Plus Main Panel. 2. In the dialog box that opens, select the desired settings file and click on Open. 3. Another window appears, allowing you to verify that the settings are correct: 4. If these settings are correct, click on the Use These Values button. If not, click on Cancel. Note that even though the settings in this dialog box can be changed, any changes made here will not be applied to the shearing parameters. The values stored in the saved file will be applied! Hydroshear Plus User Manual Page 46 Chapter 4: Using the Hydroshear Plus Software 4.3.10 SAVING NEW DEFAULT SHEARING PARAMETER VALUES If you use one set of shearing and washing parameters routinely, you can save these as the default settings. In this way, they will be preset whenever the Hydroshear Plus software is started. To change the default settings in this way, enter the desired values for shearing and washing, as described in section 4.3.4, “Editing Basic Shearing Parameters” and section 4.3.7, “Setting up a Wash Scheme” and then click on the Save as Default button in the Shearing Parameters box of the Hydroshear Plus Main Panel: A dialog box will appear, asking you to confirm this action. If you are sure you want to replace the current default settings, click Replace. These saved values will now be used as the starting values for the Hydroshear Plus software. Remember that these saved default values include those for shearing and for the wash scheme. Clicking the Save as Default button will save both the currently entered shearing parameters as well as the currently entered wash scheme values, even though the wash scheme is not visible. Make sure that both are set correctly before saving new default conditions. Hydroshear Plus User Manual Page 47 Chapter 4: Using the Hydroshear Plus Software 4.3.11 RESTORING SHEARING PARAMETER DEFAULT VALUES If, after changing the shearing parameters (i.e. shearing parameters and/or wash settings) you should decide that one or both were not appropriate for the shearing run you wish to use, it is possible to revert the default values. To do this, click on the Restore to Defaults button, located at the bottom left corner of the Shearing Parameters box on the Hydroshear Plus Main Panel. This will change all of the currently set parameters (both shearing and washing) to the last saved default values and display those in the appropriate text boxes. 4.4 OPERATION CONTROLS Five buttons are located in the Operation Controls box on the Hydroshear Plus Main Panel. Click the START button to start a shearing run, after setting the appropriate values. Click the STOP button to stop a shearing run already in progress. The machine will stop after the current pump pass is complete. Click the PAUSE button to pause the current shearing run. The machine will complete its current shearing pass and then pause. While paused, click this button again to resume the shearing run. Do not repeatedly click this button to “speed up” the software and/or machine’s response; each click is registered and acted upon. Thus, repeated clicking will start a cycle of pause/unpause/pause/unpause and so on. Click the MANUAL OPERATION button to display the Manual Operation window, where you can conduct individual shearing steps. (See Chapter 6 Manual Operation”). Click the WASH button to wash the shearing assembly. The wash parameters can be changed “Edit Wash Scheme”. (Section 4.3.7) Hydroshear Plus User Manual Page 48 Chapter 4: Using the Hydroshear Plus Software 4.5 STATUS The Status box provides information on four items - Current Step, Run Status, Current Pump Volume, and Current Valve Position - and is useful when diagnosing and resolving troubleshooting issues. (See Chapter 8, Troubleshooting, page 72). 4.5.1 CURRENT STEP This box displays a list of each step in the current shearing run. When a shearing run is in progress, the current step is highlighted. 4.5.2 RUN STATUS Under Completed on the right side of the Status box, the progress of the current step is displayed. Progress is displayed in the following format: <number of cycles completed> of <total number of cycles in step>. In the example below, 20 of 20 shearing pass steps has been completed. Note that when viewing the progress of a wash step the total number of cycles displayed is the total using all three wash solutions. For example, if you specified in your wash scheme that you would like to conduct four wash cycles with each of the three wash solutions, the total number of wash cycles is twelve. Hydroshear Plus User Manual Page 49 Chapter 4: Using the Hydroshear Plus Software 4.5.3 CURRENT PUMP VOLUME This box displays the volume of liquid (in µl) currently in the syringe. In the examples shown below, the pump volume is 50 µl. 4.5.4 CURRENT VALVE POSITION This box displays the valve that is currently open. In the example shown below, Valve #1 is open. 4.6 MACHINE PARAMETERS Several machine parameters that are determined and set at Digilab can be adjusted in the Machine Parameters window. New default values can be specified, or the saved default values or factory-set values can be restored. Do not adjust these parameters unless instructed to do so by Digilab. If Digilab suggest that these changes be made, an explanation of the Machine Parameters can be found in “Section 8.3 Software error Messages Hydroshear Plus User Manual Page 50 Chapter 5: Shearing DNA Samples Chapter 5 5.1 SHEARING DNA SAMPLES SETTING SHEARING PARAMETERS Before conducting a shearing run, the values for Volume, Number of Cycles and Speed Code must be specified in the Hydroshear Plus Main Panel, as described in section 4.3, “Shearing Parameters”. It is also advisable to set the wash scheme, as described in section 4.3.7, “Setting up a Wash Scheme”. To enter a parameter value, change the number in the window next to the parameter, either by clicking in the text box and typing a new value, or by clicking on the arrows next to the text box to adjust the value. In the example shown above, a sample with 100 µl volume will be sheared for 20 cycles at a speed code of 12. 5.2 PREPARING DNA SAMPLES FOR SHEARING Careful preparation of the sample is imperative! A clogged shearing assembly is the most common problem encountered by Hydroshear Plus users, and the sample itself usually acts as the clogging material. The DNA must be thoroughly resuspended in solution before shearing. NOTE: It is recommended to filter the DNA samples prior to shearing to reduce the chance of clogging the shearing assemblies. Hydroshear Plus User Manual Page 51 Chapter 5: Shearing DNA Samples Ensure that the DNA sample has been resuspended in distilled, deionized water (ddH20) or an appropriate buffer. We recommend either Wash solution #3 or DNase-free water. NOTE: 5.3 It is important to have DNA samples free of particles in the DNA which might lead to clogging. SHEARING DNA SAMPLES 1. Click the START button located on the Hydroshear Plus Main Panel. A dialog box appears asking if you want to perform a wash cycle: 2. Click YES unless the Hydroshear Plus has just been cleaned. This may be the case if you are conducting multiple shearing runs. Always clean the Hydroshear Plus before the first run of the day, even if it was cleaned after the last run of the previous day. 3. If you clicked YES, the specified wash scheme is performed. For a step-by-step explanation of the on-screen prompts and corresponding user actions involved in this process, see Section 5.4, “Washing the Hydroshear Plus”. Upon completion, of the prewash cycles, a dialog box appears informing you that the Hydroshear Plus prewash is complete. Click OK to continue. Hydroshear Plus User Manual Page 52 Chapter 5: Shearing DNA Samples 4. Another dialog box appears, asking if you want to continue the shearing process by loading the sample. 5. If the sample is already in the syringe, you should click NO. In most cases, you will not have loaded the sample yet and should click YES. If for any reason you do not wish to continue at this point (for example, if you discovered that your sample was not ready or you want to change the shearing parameters), you can click on ABORT PROTOCOL to exit the shearing run. 6. After clicking YES, a dialog box appears: 7. Make sure you have your sample prepared such that it is thoroughly in solution, as described above in Section 5.2, “Preparing DNA Samples for Shearing”. 8. Click OK and the following dialog box appears: 9. Bring the sample to the input tube. Hydroshear Plus User Manual Page 53 Chapter 5: Shearing DNA Samples 10. Remove any extension tubes used to reach wash solutions from both the inlet and outlet tubes. Clean the short input tubing by a KimWipe wetted with 70% ethanol or equivalent. Place the short input tubing on the right side of the Hydroshear Plus into the tube containing your sample, making sure that the input tubing reaches the bottom of the sample. (We recommend 1.5 ml as a convenient tube size). 11. Click OK. The specified volume is drawn from the sample tube into the Hydroshear Plus input tubing and another dialog appears: 12. Click OK. The sample is drawn from the input tubing into the syringe. At this point you can discard or set aside the sample tube. 13. Click OK. A dialog box appears, asking if you have an air bubble in the syringe: 14. If for any reason you wish to cancel the shearing run, click on ABORT PROTOCOL. Hydroshear Plus User Manual Page 54 Chapter 5: Shearing DNA Samples 15. If there is no air bubble in the syringe skip to step 18. 16. If there is an air bubble click on YES and the following dialog box will appear. Depending upon which answer is selected, the Hydroshear Plus will go through a sequence of plunger movements and valve actuations in order to clear the bubble. When complete, a dialog box will appear again and inquire about bubbles. Step #17 may have to be repeated a few times in order to clear the bubbles. 17. The “Is there an air gap or bubble in the syringe?” message box will appear again. Hopefully at this point, you will be able to click on NO as the answer to this question. However, if there is still a bubble, click on YES and repeat step 17 18. Irrespective of how you got to this point, click on NO in the “Is there an air gap or bubble?” dialog box and the Hydroshear Plus conducts the specified number of shearing passes. The number of passes completed is updated in the status area of the Hydroshear Plus Main Panel. Upon completion of the shearing cycles, a dialog box appears informing the user that the shearing process has ended. Hydroshear Plus User Manual Page 55 Chapter 5: Shearing DNA Samples IMPORTANT: We have discovered that in some cases the speed code used for sample ejection is too low for the small shearing assembly, and can cause “Plunger Overload” errors or sample leakage from the shearing assembly or the connecting tubing. For standard and large assemblies, proceed as instructed by the software prompts as outlined in section 5.3.1, “Sample Ejection from Shearing Assemblies” 5.3.1 SAMPLE EJECTION FROM SHEARING ASSEMBLIES 1. When the “Shearing cycles complete” message appears, click on OK and you will be asked to confirm sample ejection from the Hydroshear Plus: 2. Make sure there is a container at the output tube to collect the sample and click YES. The following dialogue box will then appear: Hydroshear Plus User Manual Page 56 Chapter 5: Shearing DNA Samples As stated previously, you must wash the device after each sample to ensure that there is no cross contamination between different samples. Click on YES to run the wash scheme defined for the shearing run. The steps for washing are described below in section 5.4, “Washing the Hydroshear Plus”. 3. 5.4 WASHING THE HYDROSHEAR PLUS Before and after the Hydroshear Plus performs a shearing run, you will be asked if you wish to wash the device. There is a Wash button in the Operations Control section of the software, and if you click on Wash the software will prompt you through an entire wash cycle. BEFORE SHEARING: AFTER SHEARING: Hydroshear Plus User Manual Page 57 Chapter 5: Shearing DNA Samples 5.4.1 AUTOMATED WASHING OF THE SHEARING ASSEMBLIES 1. Place the Hydroshear Plus output tubing into a waste container and click YES. 2. The Hydroshear will then complete a wash procedure. When complete, in order to clear the input tube the following dialog box will appear. In order to ensure input tube is clear, the same procedure will be repeated. To wash the input tube, select OK. Hydroshear Plus User Manual Page 58 Chapter 5: Shearing DNA Samples To clear all liquids from the shearing port tube, select OK. Click OK when the washing is complete. 5.4.2 RECOMMENDED WASH SOLUTIONS In order to prevent clogging of the shearing assembly, all wash solutions should be filter sterilized using a filter of 0.2 microns or less. Wash solutions should be made up using distilled and deionized water; never use tap water. See Page 27 Section 3.4 for details on wash solutions Hydroshear Plus User Manual Page 59 Chapter 6: Manual Operation MANUAL OPERATION Chapter 6 The Hydroshear Plus syringe plunger can be manually controlled using the Manual Operation window, which allows control over three functions: Aspirating fluid into the syringe Expelling fluid from the syringe Reinitializing the syringe pump To reach the Manual Operation window, click the MANUAL OPERATION button on the Hydroshear Plus software main panel: This will open the Manual Operation control window: 6.1 EXPLANATION OF MANUAL OPERATION CONTROLS Reinitialize Pump: This button causes the Hydroshear Plus syringe pump to reset to the zero position at the top of its range of movement. This is essential for the syringe to be able to accurately aspirate and dispense the correct amount of fluid. Note that the syringe pump should always be reinitialized after any manual operations have been performed. Hydroshear Plus User Manual Page 60 Chapter 6: Manual Operation Volume: This box allows users to enter a volume that will be either aspirated into or expelled from the Hydroshear Plus syringe. A positive value will cause fluid or air to be drawn into the syringe. To expel a certain volume from the syringe, precede the value with a negative (-) sign. Speed Code: The speed code can range from 0 to 40, with an increasing speed code value corresponding with a decreased plunger speed. A speed code of 0 (not recommended for actual shearing runs) results in the fastest speed (1.2 seconds per stroke), while a speed code of 40 results in the slowest speed (600 seconds per stroke). Valve Position: The valve position choices are Input, Output, Wash 1, Wash 2, and Wash 3 & Closed. If the Volume setting is a positive value, then liquid will be aspirated from the respective setting. If the volume setting is negative then the liquid will be dispensed to the respective setting. Start button: Each time the Start button is clicked, the syringe plunger and valve position will move according to the settings in the Volume, Speed Code and Valve Position boxes. If you attempt to enter too large a value the Hydroshear Plus software will warn you as follows: Entry of inappropriate volumes: Care should be taken to enter an appropriate value, since the syringe pump will have to be reset if the wrong value is entered. The following error message would be shown, for example, if you aspirated 300µl into the syringe, and then, instead of entering -300 in the Volume box to empty the syringe, you clicked Start and again tried to aspirate a further 300µl into the syringe, thereby exceeding its capacity: To recover from these errors, click OK to dismiss this dialog and then reset the syringe pump by clicking on Reinitialize Pump, as described above. If there is sample in the syringe, and the default position of the valve is “Input”, place the container at input to collect the sample. Hydroshear Plus User Manual Page 61 Chapter 6: Manual Operation 6.2 MANUAL ASPIRATION INTO THE HYDROSHEAR PLUS SYRINGE The following procedure should only be used when the syringe is empty. To draw a volume of fluid or air into the pump, follow these steps: 1. Locate the Status box on right-hand side of the Hydroshear Plus Main Window: 2. Verify that “0” appears in the “Current pump volume” text box to indicate that there is no fluid in the Hydroshear Plus syringe. 3. Click on the Manual Operation button to open the Manual Operation window. 4. If the Valve Position of Input is selected, the aspiration will be from the input tube. If it is desired to aspirate from one of the Wash tubes, then the appropriate Wash tube must be selected. 5. In the Volume box, enter a positive value for the volume you wish to aspirate into the syringe. For example, to aspirate 350µl, enter “350” in the Volume box: 6. In the Speed Code box, specify the speed code at which you wish the syringe pump to move. Remember, the higher the speed code, the slower the syringe pump will move. For manual operation, 10 is a reasonable speed code. Choose 20 if the shearing assembly is clogged or if you want a slow syringe movement. 7. Click the Start button. 8. One pump pass is conducted at the specified speed code and the specified volume is drawn into the syringe. Hydroshear Plus User Manual Page 62 Chapter 6: Manual Operation 6.3 MANUAL EJECTION FROM THE HYDROSHEAR PLUS SYRINGE The following procedure should not be used when the syringe is empty. To eject a volume of fluid or air from the syringe, follow these steps: 1. Locate the Status box on right-hand side of the Hydroshear Plus software main window: 2. Examine the Current pump volume text box to determine how much fluid or air is in the Hydroshear Plus syringe. 3. Click on the Manual Operation button to open the Manual Operation window. 4. Select the valve position to either the INPUT or OUTPUT position, depending upon whether you want to eject the sample into the input or output tubing. Place an appropriate tube or collection vial, if required, at the end of the input or output tubing to collect any sample that will be ejected. 5. In the Volume box, enter a negative value for the volume you wish to eject from the syringe. For example, if you wish to eject 350µl, enter “-350” in the Volume box. 6. In the Speed Code box, specify the speed code at which you wish the syringe pump to move. Remember, the higher the speed code, the slower the syringe pump will move. For manual operation, 10 is a reasonable speed code. Choose 20 if the shearing assembly is clogged or if you want a slow syringe movement. 7. Click the Start button. 8. One pump pass is conducted at the specified speed code and the specified volume is ejected from the Hydroshear Plus syringe. Hydroshear Plus User Manual Page 63 Chapter 7: Maintenance Chapter 7 7.1 MAINTENANCE GENERAL MAINTENANCE GUIDELINES Keep the Hydroshear Plus covered when not in use; dust can reduce the life of the valve. Wash the Hydroshear Plus after each use. The Hydroshear Plus syringe pump should not be run dry for more than a few cycles. Observe the Hydroshear Plus syringe pump for leaks; correct any problems immediately. Wipe up spills on and around the Hydroshear Plus immediately, especially wash solutions which could contain acidic or basic solutions. 7.2 PERIODIC CLEANING The cleaning procedures listed below are included as options for users who feel that their machine requires extensive cleaning or have neglected the daily maintenance tasks. However, if you perform the general maintenance steps outlined above, the more rigorous cleaning methods should not be required. For instructions on drawing fluid or ejecting fluid from the Hydroshear Plus, see Chapter 6, “Manual Operations”. 7.2.1 CLEANING WITH WEAK DETERGENT 1. Use the Manual Operation controls to fill the Hydroshear Plus syringe with weak detergent solution. Leave the input tubing immersed in the detergent. 2. Allow the detergent to remain in the pump, with the syringe fully lowered, for 30 minutes. Hydroshear Plus User Manual Page 64 Chapter 7: Maintenance 3. After the 30 minute period, remove the input tubing from the detergent. 4. Eject the fluid from the syringe into a waste container. 5. Leaving the inlet tubing open to air, fill the Hydroshear Plus syringe and then eject into an appropriate waste container. 6. Fill and then empty the Hydroshear Plus syringe with distilled or deionized water for at least 10 cycles. 7. Leave the input tube open to air. And fill the Hydroshear Plus syringe and then eject into an appropriate waste container. Repeat procedure 3 times. 7.2.2 CLEANING WITH WEAK BASE AND ACID IN SEQUENCE 1. Fill the Hydroshear Plus syringe with Wash Solution #2. 2. Allow Wash Solution #2 to remain in the syringe, with the syringe fully lowered, for 10 minutes. 3. After the 10 minute period, remove the reagent tubing from the Wash Solution #2. 4. Fill and then empty the Hydroshear Plus syringe once with distilled or deionized water. 5. Fill the Hydroshear Plus syringe with Wash Solution #1. 6. Allow Wash Solution #2 to remain in the pump, with the syringe fully lowered, for 10 minutes. 7. After the 10 minute period, remove the inlet tubing from the Wash Solution #1. 8. Leaving the inlet tubing open to air, fill the Hydroshear Plus syringe and then eject into an appropriate waste container. 9. Fill and then empty the Hydroshear Plus syringe with Wash Solution #3 for at least 10 cycles. Hydroshear Plus User Manual Page 65 Chapter 7: Maintenance 10. Fill and then empty the Hydroshear Plus syringe with distilled or deionized water for at least 10 cycles. 11. Leave the input tube open to air. And fill the Hydroshear Plus syringe and then eject into an appropriate waste container. Repeat procedure 3 times. 7.2.3 CLEANING WITH 10% BLEACH 1. Prepare a 10% bleach solution by adding 1 part commercial bleach to 9 parts water. 2. Fill the Hydroshear Plus syringe with the 10% bleach solution. 3. Allow the bleach solution to remain in the pump, with the syringe fully lowered, for 30 minutes. 4. After the 30 minute period, remove the reagent tubing from the bleach solution. 5. Fill and then empty the Hydroshear Plus syringe once with distilled or deionized water. 6. Leaving the inlet tubing open to air, fill the Hydroshear Plus syringe and then eject into an appropriate waste container. 7. Fill and then empty the Hydroshear Plus syringe with distilled or deionized water for at least 10 cycles. 8. Leave the input tube open to air. And fill the Hydroshear Plus syringe and then eject into an appropriate waste container. Repeat procedure 3 times. Hydroshear Plus User Manual Page 66 Chapter 7: Maintenance 7.3 PERIODIC MAINTENANCE Note: It is important that the Hydroshear Plus syringe and plunger are properly aligned for the device to work properly. Visually check the alignment of the syringe after conducting any maintenance procedures. If the syringe does not appear to be parallel to the Hydroshear Plus case, one of the components may be misaligned. If this is the case, follow the instructions in Section 3.5, “installation ” to realign the syringe and plunger. 7.4 UNCLOGGING SHEARING ORIFICE BOXES USING SONICATION During the course of using the Hydroshear Plus to shear DNA, shearing assemblies can sometimes become clogged. Because the Hydroshear Plus works using a restricted flow orifice, it is necessary that fluids are able to flow through the shearing assembly. Sonication can be used to unclog shearing orifices as described below. Note that these instructions show a single orifice box, but it is possible to sonicate multiple boxes simultaneously. 1. Loosen the shearing assembly from the Hydroshear Plus output port using the 1/4" hex wrench. 2. Remove the shearing assembly by unscrewing it the from the output port. 3. Unscrew the nuts connecting the tubing to the orifice box. Figure 7-1: Dismantled shearing assembly 4. Prepare a 1% solution of SDS (sodium dodecyl sulphate) in ultrapure water. 5. Place the orifice box into a glass flask. 6. Pour the SDS solution into a flask so that the orifice box is completely submerged. Hydroshear Plus User Manual Page 67 Chapter 7: Maintenance Figure 7-2: Orifice box in flask for sonication 7. Fill the sonicator with enough water so that the level will be higher than the level of fluid in the flask when the beaker is placed in the sonicator. If your sonicator has a minimum fill level, be sure to fill up to that level. 8. Place the flask, with the shearing orifice box into the sonicator. If necessary, use a weight to keep the container submerged. Figure 7-3: Flask in sonicator 9. Visually inspect the shearing devices to determine if any air bubbles are present in the openings of the orifice box. If air bubbles are present, keep the orifice box submerged and use a micropipette with a sterile tip to either dislodge or aspirate the bubble. Take care not to contact the ruby in the center of the orifice box. 10. Sonicate the submerged orifice box for 10-15 minutes. 11. After sonication, pour the SDS solution out of the flask. 12. Leave the orifice box in the flask and rinse with ultrapure distilled water. Hydroshear Plus User Manual Page 68 Chapter 7: Maintenance 13. Add fresh ultrapure water to the flask with orifice box and inspect for air bubbles. 14. Sonicate for 10-15 minutes. 15. Pour the water out of the flask, leaving the orifice boxes inside. 16. Pour isopropyl alcohol into the flask to cover the orifice box. 17. Place the flask into the sonicator, inspect for air bubbles as before, and sonicate for 10-15 minutes. 18. Pour the isopropyl alcohol out of the flask, leaving the orifice boxes inside. 19. Add ultrapure water to the flask, swirl gently and then discard the water. 20. Add fresh ultrapure water to the flask and inspect for air bubbles. 21. Place the flask into the sonicator and sonicate for 10-15 minutes. 22. Remove the orifice box, discard the water, and let the orifice box dry for at least 30 minutes. Hydroshear Plus User Manual Page 69 Chapter 7: Maintenance 7.5 REPLACING HYDROSHEAR PLUS TUBING In order to ensure proper shearing, the Hydroshear Plus tubing must be kept clean and free from blockages and crimps. Dirty, blocked, or crimped tubing can cause various problems including poor accuracy, loss of precision, and syringe stalling or break down. To replace the tubing for your Hydroshear Plus, contact Digilab to order new tubing. 7.5.1 REPLACING THE HYDROSHEAR PLUS OUTPUT TUBING Each new shearing assembly has the output tubing pre-attached. If necessary, you can replace the output tubing without replacing the entire shearing assembly. Refer to Figure 7-4: Output Tubing and Orifice Box” and follow the instructions below. 1. Unscrew the black plastic output tubing nut from the orifice box. 2. Push the new output tubing through the black plastic output tubing nut. 3. Attach the output tubing nut to the orifice box by screwing it into the output port. Do not over tighten. Figure 7-4: Output Tubing and Orifice Box Hydroshear Plus User Manual Page 70 Chapter 7: Maintenance 7.5.2 REPLACING THE HYDROSHEAR PLUS INPUT AND WASH TUBING 1. Using the 1/4" hex wrench provided in the Hydroshear Plus tool kit, loosen the hex screw that attaches the input tubing to the valve. Use your fingers to finish unscrewing the hex screw from the valve. 2. Pull the old tubing out of the hex screw. Figure 7-5: Sample input tubing 3. Insert the end of the plastic tubing without the metal pressure fitting attached into the threaded end of the hex screw. The tapered end of the metal ferrule should face away from the threaded end of the hex screw as shown. 4. Insert the ferrule of the new input tubing into the port on the right side of the valve. 5. Screw the hex screw into the port, tightening with the 1/4" hex wrench. 7.5.3 REMOVING THE HYDROSHEAR PLUS SYRINGE 1. Using the Manual Operation window, draw 500 µl of air into the syringe. (See Section 6.2, “Manual Aspiration into the Hydroshear Plus Syringe”).The syringe plunger cannot be manually pulled down with the Hydroshear Plus turned off. 2. Turn the Hydroshear Plus off, using the power switch on the back of the instrument and disconnect the power cable from the wall outlet. 3. Reverse the procedure as described in Section 3.5 (Installation of the syringe). Hydroshear Plus User Manual Page 71 Chapter 7: Maintenance 7.6 DRIVE SCREW MAINTENANCE If the pump is making a screeching noise or if the syringe is stalling frequently, the drive screw needs to be lubricated. Lubrication is usually only needed after 700,000 syringe strokes. If more frequent lubrication is required, there may be another problem. To lubricate the lead screw, use a cotton swab to spread a generous layer of gear lubricant along the lead screw: Figure 7-6: Lubricating the Drive screw Use the Manual Operation controls (see Chapter 7, “Manual Operation”) to retract and expel fluid or air from the syringe several times. The lubricant will be spread along the lead screw during operation of the syringe. Hydroshear Plus User Manual Page 72 Chapter 8: Troubleshooting TROUBLESHOOTING Chapter 8 8.1 PROBLEMS OBSERVED DURING SHEARING RUNS 8.1.1 AIR BUBBLES IN THE SYRINGE This is normal. When fluids are drawn into the Hydroshear Plus syringe, air bubbles sometimes form. The software will ask you if bubbles are present and guide you through the necessary steps to remove them as part of the shearing run procedure (see Section 5.3, “Shearing DNA Samples”). 8.1.2 CLOGGED SHEARING ASSEMBLY If any of the following symptoms are apparent during a shearing run, then a blocked or partially blocked shearing assembly is the likely problem: Air bubbles in the syringe when retracting sample from the output tubing Frothy bubbles in the output tubing The sample is retracted from the output tubing at a sporadic rate The sample continues to move after the syringe has stopped To rectify this problem: 1. Click the STOP button to stop the shearing run. (See section 4.4, “Operation Controls”) 2. Use the Manual Operation window to eject the DNA sample. (See section 6.3, “Manual Ejection from the Hydroshear Plus Syringe”). Store the DNA sample since you will want to resume the shearing run later. 3. Unclog the shearing assembly. (See section 7.4, “Unclogging Shearing Orifice Boxes using Sonication”) Hydroshear Plus User Manual Page 73 Chapter 8: Troubleshooting 8.1.3 DECREASING SAMPLE VOLUME Most likely, a fitting, valve, or the syringe is leaking. Tighten all the tubing connections and screws. If the problem persists, contact Digilab for assistance. 8.1.4 INCREASING SAMPLE VOLUME This may occur on a regular basis because of minimal liquid leftovers remaining within the output tubing after the washing procedure is completed. If dilution of your sample is a problem, you may concentrate the sample by precipitating the DNA fragments with ethanol, or iso-propanol according to the procedures of your choice. The use of membrane-based concentrators is not recommended. 8.2 SAMPLE AND FRAGMENT PROBLEMS 8.2.1 LOSS OF DNA Losing DNA is most likely a result of inadequate purging of the syringe after washing. If the syringe is not properly purged after washing, leftover wash solution may damage or destroy DNA. 8.2.2 SIZE OF SHEARED DNA FRAGMENTS IS INCORRECT There are three likely causes of incorrect fragment size: 1. Air bubbles were in the sample during calibration or sample shearing. During the next shearing run, carefully follow the step-by-step instructions in section 5.3, “Shearing DNA Samples”. This procedure includes the steps necessary to remove air bubbles from the sample. If the problem persists after you have verified that bubbles are not the problem, check possible causes 2 and 3 below. Hydroshear Plus User Manual Page 74 Chapter 8: Troubleshooting 2. The shearing orifice is partially clogged. Unclog the shearing assembly. (See section 7.4, “Unclogging Shearing Orifice Boxes using Sonication”). If you follow the unclogging procedure and the fragments produced are still the wrong size, recalibrate the shearing assembly (See section 3.6.4, “Calibrating the Shearing Assembly”). If, after recalibrating the shearing assembly, the fragments produced do not correspond to the speed codes determined during the calibration procedure, this is not the problem and you should proceed to possible cause #3 below. 3. The shearing assembly may have been dropped or mishandled and damaged. Discard the shearing assembly. Calibrate and then use a new shearing assembly. 8.2.3 THE FRAGMENTS PRODUCED DO NOT CLONE WELL Poor cloning can be caused by many factors unrelated to the shearing process or to the sheared DNA. However, solutions used in the washing process could damage or destroy DNA. Therefore, if the syringe was inadequately purged after washing, leftover wash solution could have damaged or destroyed the DNA being sheared. Hydroshear Plus User Manual Page 75 Chapter 8: Troubleshooting 8.3 SOFTWARE ERROR MESSAGES 8.3.1 ERROR 37 AT SERIAL PORT This message will appear if the wrong CPU serial port number is entered as the Port Number in the Machine Parameters window. To resolve this error, check to see that the correct serial port number is entered in the Port Number text box on the Machine Parameters window. For almost all users, this will be set to zero. 8.3.2 MACHINE PARAMETERS If you have been instructed by Digilab to change any of the Machine Parameters, the following describes each of the settings. Hydroshear Plus User Manual Page 76 Chapter 8: Troubleshooting 8.3.3 SYRINGE VOLUME This value is the volume of the syringe, in µl, that you have installed on your Hydroshear Plus. The volume of the standard syringe supplied with the Hydroshear Plus is 500µl. 8.3.4 VOID VOLUME This value is the volume of fluid that must remain in the orifice during shearing. The accuracy of this value is imperative for proper shearing. If the volume entered is too large, some DNA will be left unsheared because the fluid will not be retracted far enough into the syringe. If the volume entered is too small, fluid will be retracted too far past the orifice, creating a jet effect; DNA will move through the orifice so quickly that the resultant fragments will be shorter than the speed code would indicate. For the standard 500 µl syringe, the void volume should be 15 µl. 8.3.5 RETRACTION SPEED This value refers to the speed of the pump during the retraction pass and corresponds with the number of seconds required to complete one pump pass. The retraction speed must be kept slow relative to the speed code used to shear samples. This prevents the creation of air bubbles in the sample and prevents shearing from occurring during the retraction pass. For the small shearing assembly, we recommend a starting retraction speed code of 32. This should ensure that all of the sample will pass back through the orifice during each cycle. It should also minimize the formation of air bubbles in the sample. Note that this speed code of 32 is the suggested starting value, and this may need to be adjusted for different individual shearing assemblies and also on the sample being sheared. It is recommended that users observe the sample during the shearing run. If the entire sample does not pass back into the assembly or if there is excessive bubble formation, then the speed code should be increased (i.e. slowing the syringe pump’s movement). Please also refer to section 4.3.5, “Finding the Maximum Speed Code” for a description of the procedure for determining the maximum speed code (i.e. the maximum syringe speed) that an individual shearing assembly can withstand. Hydroshear Plus User Manual Page 77 Chapter 8: Troubleshooting 8.3.6 RESIDUAL VOLUME In current versions of the Hydroshear Plus software, the residual volume is the volume that is not recovered after the sample is ejected from the syringe. This value is approx 16-20 µl. If you are concerned about sample loss, note that it is possible to dilute your sample into a larger volume prior to shearing. This will reduce the amount of DNA lost during the shearing process. Following the shearing run, the DNA sample can be precipitated and concentrated for downstream applications. 8.3.7 PORT NUMBER The Port Number corresponds to the CPU serial port to which the Hydroshear Plus is connected. The possible CPU ports used and the corresponding Port Number are listed underneath the “Port Number” heading and value text box (e.g. “0= COM1”). If an incorrect Port Number is entered, an “error 37” message will appear when the Hydroshear Plus software starts up: Clicking OK on this error message window may bring up additional error messages: To correct this problem, dismiss these dialog boxes and then click on the Edit Machine Parameters button. Change the Port Number to the correct value and click on Save as Default. Hydroshear Plus User Manual Page 78 Chapter 8: Troubleshooting 8.3.8 SETTING NEW DEFAULT MACHINE PARAMETER VALUES To set new default machine parameters, either click in the text box and type in the desired value, or click the arrows next to the text box to adjust to the desired value. Then click the Save as Default button. A dialog appears, asking for confirmation. If you are sure you want to do this, click Replace. If you are not sure about this course of action, click Cancel. The new values are saved and will be used as the default values for every shearing run. Note that, as stated previously, there is usually no need to change these settings. Hydroshear Plus User Manual Page 79 Chapter 8: Troubleshooting 8.3.9 READ TIMEOUT ERROR This error message appears when the Hydroshear Plus and control computer are not communicating. To resolve this error, follow these steps: 1. Make sure the Hydroshear Plus is plugged in and turned on. 2. Check to see that the correct CPU serial port number is entered in the COM Port text box on the Machine Parameters window, as described in section 8.3.1 above. 3. Ensure that both serial cable connections are securely connected to the Hydroshear Plus and USB connector is securely connected to the controlling computer. 8.3.10 PUMP OVERLOAD OR PLUNGER OVERLOAD ERROR This error message appears when the pressure within the syringe becomes so high that the syringe could break. This situation is most commonly caused by a clogged shearing assembly. Pump overload also can occur if the speed code is too low (i.e. the syringe plunger is moving too fast). This is most common when using the small shearing assembly. Hydroshear Plus User Manual Page 80 Chapter 8: Troubleshooting To resolve these errors, follow these steps: 1. Reinitialize the pump as described in section 6.1, “Explanation of Manual Operation Controls”. 2. If the error message again appears, the shearing assembly is probably clogged. Follow the instructions in section 7.4, “Unclogging Shearing Orifice Boxes using Sonication” to unclog the shearing assembly. 3. Check the speed code setting. Make sure it is not too low for the appropriate shearing assembly, which are 7 for the small shearing assembly and 3 for the large or standard shearing assemblies. 8.3.11 OTHER ERROR MESSAGES Miscellaneous error messages will appear if the pump receives commands from the software that are illogical. The majority of these errors can be resolved by reinitializing the pump, as described in section 6.1, “Explanation of Manual Operation Controls. If reinitializing the pump is necessary when your sample is still within the syringe place a collection tube at the sample input tubing prior to performing this step Hydroshear Plus User Manual Page 81 Chapter 9: Performance Data Chapter 9 9.1 PERFORMANCE DATA RELATIONSHIP OF FRAGMENT SIZE TO PUMP SPEED The fragment size produced by the Hydroshear Plus is correlated with the pump speed. The pump speed for a shearing run is designated by the user. The higher the pump speed, the slower the syringe pump moves. Method: Several samples of bacteriophage lambda DNA were sheared at different speed codes. The sheared samples were run on an agarose gel to determine the resulting fragment sizes. Result: As speed code value was decreased (i.e. as pump speed increased), the fragment size produced decreased. Thus, fragment size is inversely correlated with pump speed and is directly correlated with the speed code. Lane Speed code 1 500bp ladder 2 3 4 5 5 7 6 9 7 11 8 13 9 15 10 17 11 19 12 500bp ladder Figure 9-1: Correlation of speed code with DNA fragment size Hydroshear Plus User Manual Page 82 Chapter 9: Performance Data 9.2 SMALLEST STARTING FRAGMENT SIZE THAT CAN BE SHEARED The Hydroshear Plus shears nearly all DNA in a sample of 4kb linear fragments. The Hydroshear Plus can shear a sample of 3kb linear fragments, but some DNA is left unsheared. Method: Samples of varying fragment sizes, ranging from 3 kb to 10 kb were sheared at speed code 3 using a standard shearing assembly. The sheared samples were then run on an agarose gel alongside unsheared samples of the same size as the starting material. Result: With starting material of 4kb or greater, nearly the entire DNA sample is sheared. With a 3kb starting fragment sample, shearing does occur, but some of the DNA in the sample remains unsheared. Lane Sample 2 Sheared 3 kb sample 3 Unsheared 3 kb sample 4 Sheared 4 kb sample 5 Unsheared 4 kb sample 6 Sheared 5 kb sample 7 Unsheared 5 kb sample 8 Sheared 6 kb sample 9 Unsheared 6 kb sample 10 Sheared 8 kb sample 11 Unsheared 8 kb sample 12 Sheared 10 kb sample 13 Unsheared 10 kb sample 1, 14 1 kb DNA ladder Figure 9-2: Determining the lowest starting fragment size . Hydroshear Plus User Manual Page 83 Chapter 9: Performance Data 9.3 SMALLEST STARTING SAMPLE VOLUME THAT CAN BE SHEARED The Hydroshear Plus can shear a sample volume as small as 40 µl. However, when such a small sample size is used a significant percentage of the sample can be lost due to the dead volume in the system. Digilab recommends a sample size of at least 100ul. Method: Samples of varied volumes ranging from 10µl to 100µl were sheared at speed code 10. The sheared samples were then run on an agarose gel. Result: Sample volumes of 40µl or greater resulted in a consistent fragment length range. Lane Sample Volume 2 10 µl 3 20 µl 4 30 µl 5 40 µl 6 50 µl 8 60 µl 9 70 µl 10 80 µl 11 90 µl 12 100 µl 1,7,13 500 bp ladder Figure 9-3: Determining the lowest possible volume of starting material Hydroshear Plus User Manual Page 84 Chapter 9: Performance Data 9.4 SMALLEST FRAGMENTS THE HYDROSHEAR PLUS CAN CONSISTENTLY PRODUCE The Hydroshear Plus can generate fragments in the range of 750 bp to 1.5kb, with the majority of fragments centered around 1 kb. Method: Three samples with a 50 kb initial fragment length were sheared, using a small shearing assembly, at a speed code of 3. The resulting fragments were then run on an agarose gel. Result: All three samples results in a fragment size range of 750 bp to 1.5 kb, with the majority of fragments centered around 1 kb: Figure 9-4: Smallest size range for small shearing assembly Hydroshear Plus User Manual Page 85 Chapter 9: Performance Data 9.5 INITIAL FRAGMENT LENGTH DOES NOT AFFECT SHEARING PERFORMANCE Once calibrated, the Hydroshear Plus will produce fragments of a given size consistently for a given speed code, regardless of the size of the starting DNA sample. Method: Three samples with sizes of 10, 48.5 and 180kb, respectively, were sheared at speed code 5. The resulting fragments were then run on an agarose gel. Result: Each sample resulted in sheared fragments of identical lengths. Thus, the initial fragment length of the sample does not affect the post-shearing fragment length Lane Starting Size 2 10 kb 3 48.5 kb 4 180 kb 1,5 1kb ladder Figure 9-5: Shearing results are independent of starting fragment length Hydroshear Plus User Manual Page 86 Chapter 9: Performance Data 9.6 SHEARING RESULTS ARE INDEPENDENT OF INITIAL SAMPLE VOLUME Once calibrated, the Hydroshear Plus will produce fragments of a given size consistently for a given speed code, regardless of the volume of the starting DNA sample. Method: A 100 µl sample and a 200 µl of lambda DNA were sheared at speed code 5. A 100 µl sample and a 200 µl sample of lambda DNA were sheared at speed code 10. After shearing, all four samples were run on an agarose gel. Result: Each sample resulted in sheared fragments of identical lengths. Thus, the initial volume of the sample does not affect the post-shearing fragment length Lane 2 Volume Speed 100 µl 5 3 200 µl 5 4 100 µl 10 5 200 µl 10 1, 6 1 kb ladder Figure 9-6: Shearing results are independent of starting fragment volume Hydroshear Plus User Manual Page 87 Chapter 9: Performance Data 9.7 SHEARING RESULTS ARE INDEPENDENT OF STARTING DNA CONCENTRATION Method: Two samples of Lambda DNA with a concentration 0.02 µg/µl were sheared at speed code 5 and 10. Two samples of Lambda DNA with a concentration of 0.25 µg/µl were sheared at speed code 5 and 10. After shearing, all samples of were run on an agarose gel. Result: Samples of different concentrations resulted in identical fragment lengths when sheared at the same speed code. Thus, the concentration of the DNA samples did not affect the shearing results for this range of concentrations. Lane Concentration Speed 2 0.02 µg/ µl 5 3 0.25 µg/ µl 5 4 0.02 µg/ µl 10 5 0.25 µg/ µl 10 1, 6 1 kb ladder Figure 9-7: Shearing results are independent of starting fragment concentration Hydroshear Plus User Manual Page 88