1
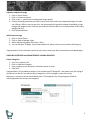
Getting Started with Twikster - User Manual SIGN UP and LOG-IN Sign up 1. Go to www.twikster.com 2. Choose a store name – make it easy to remember, user friendly and short. Choose something that you, your brand and your users can connect with. Don’t use hyphens and numbers. 3. Enter an email ID that you use regularly. This email ID will become your login username and it will also be the ID on which you get all notifications and updates from Twikster and from your customers – when they place an order or when they need to reach out to you. 4. Choose a password that you can remember. You will be using this password every time you need to login. (Login to what, you wonder? Well, when you create an account with Twikster, you get two things – a store to showcase your products and a backend to manage that store with ease. This is the backend panel you have to login to). 5. Enter a phone number. 6. Click on “Start Free Trial”. As soon as you do this, we will send you an email with an activation link. 7. Check your email (same email that you used when signing up!). Click on the activation link in the email. 8. Once you click on the link, the framework of your store is made ready and you can login to get store-ted. Login Log in via www.twikster.com (with the email id and password you used to sign up). All procedures described below in this document are post login. If you cannot remember your username or password, please reach out to us on [email protected] and we will help! 0 CHOOSE A THEME, CUSTOMIZE IT, ADD CONTENT PAGES Choose a theme 1. Click on ‘Store Theme’ 2. Click on “Select Theme” 3. Choose one of the 5 BRAND NEW theme layouts. 4. Click Save Basic Customization of the theme 1. Click on Store theme 2. Click on “Customize theme” 3. Click on “Choose Color Schemes” 4. On the pop up that opens, click on the Settings icon on the left 5. Choose one of the 6 color schemes provided for the selected layout – with each color scheme comes a variation in color and theme style. 6. Click Save Upload Logo 1. Click on ‘Store Theme’ 2. Click on ‘Customize theme’ 3. Click on the ‘+’ symbol next to upload logo 4. Choose the logo for your store 5. Click Upload and Save Upload a Favicon 1. Click on ‘Store Theme’ 2. Click on ‘Customize theme’ 3. Click on the ‘+’ symbol next to favicon upload 4. Choose the favicon for your store ( *.ico file and can be 16x16 px) 5. Click Upload and Save 1 Upload a background image 1. Click on ‘Store Theme’ 2. Click on ‘Customize theme’ 3. Click on the ‘+’ symbol next to background image upload 4. Choose the background that you want for your store (this can be any background image of a small size, 100 px X 100 px, that can get tiled - we recommend this approach instead of uploading a large background image to make sure that your website load time does not increase because of the heavy background file) 5. Click Upload and Save Add Content on Page 1. Click on ‘Store Theme’ 2. Click on ‘Add or Manage Pages’ 3. Add or edit existing pages and click on ‘Save’ 4. You can add upto 10 pages. If you need to add more, please reach out to us and we will help you. Congratulations! You’ve selected a theme for your store, done some basic customization and added pages. CREATING CATEGORIES and SUBCATEGORIES, ADDING PRODUCTS Create Categories 1. Go to the ‘Products’ tab 2. Click on ‘Add New Category’ 3. Enter category name, description and select status as active 4. Click Save Congratulations! You’ve added a category. You can add upto 12 Categories – but please note, the styling of the themes can break if you add too many categories, or of the category names are too big. Moreover, e-commerce stores should ideally have 7-10 categories only. Everything else should be sub-categorized under these main categories. 2 Create Sub-Categories 1. Go to the ‘Products’ tab and add a category 2. Once the category is added, click on the arrow in the category box to add new sub categories 3. Click on ‘Add new Sub Category’ 4. Enter sub category details and click Save Congratulations! You’ve added a new sub category. You can create unlimited sub categories on your store! Add Products 1. Go to the ‘Products’ tab 2. Click on ‘Add Product’ 3. Enter the relevant product details a. Product Name b. Short Description c. Long Description d. Quantity e. Choose Status as Enabled f. Select from one of the categories you created g. Enter a price h. Enter the tax applicable, if any i. Add images (Image has to be in the format of a PNG or JPEG) j. Add Variants, if any k. Add meta title, meta description and tags to improve the SEO of your website l. Click on Save Congratulations! You’ve added a product. Now you can add as many products as your plan allows you to. MAKING YOUR STORE LOOK GOOD :) Adding Sliders 1. Click on ‘Add-Ons’ on your Dashboard 2. Click on “Images” 3. Enable ‘Image Slider for your homepage.’ If it is already enabled, skip this step. 4. Click on ‘Configure’ 5. Enter the size (width and height) of the slider you are uploading. 6. Enter the duration of the transition between two sliders (in milliseconds). And enter the delay/pause between two sliders. 7. Choose whether you want the sliders to slide automatically or not by enabling or disabling autoplay. 8. Click on the “+” button on the right corner below the slider settings to add a slider. 9. Choose the file you want to upload, the slide title, the target URL, the caption and description. (Slide title - this will be the alt tag and the text that appears while the slider image loads. Target URL - this is the URL that the user will be taken to if he/she clicks on the slider image. Caption - this is what 3 appears when the user hovers their mouse over the slider. Description - this is used to describe the slider) 10. Enable it and click on ‘Save.’ 11. Add as many sliders as you can by repeating the last 3 points above. 12. Depending on the theme that you choose, the optimum size of the sliders may vary - please reach out to us if you need guidance on this and we will help you with the exact size! Congratulations! You have now added sliders to your website. Adding Banner Image 1. Click on ‘Add-Ons’ on your Dashboard 2. Click on “Images” 3. Enable ‘Banner’. If it is already enabled, skip this step. 4. Click on ‘Configure’ 5. Choose the file you want to upload, the banner URL, the banner description. (Banner URL - this is the URL that the user will be taken to if he/she clicks on the banner. Description - This description will be visible on hover over the banner. ) 6. Click on ‘Save.’ Congratulations! You have now added a banner to your website. *Note: You can use this banner to display promotions, discounts, sales etc on the homepage and increase conversions. The banner will appear at the very top of theme layout 1, theme layout 4 and theme layout 5, in between new products and featured products on theme layout 2, just below homepage slider on theme layout 3. Adding Homepage Images 1. Click on ‘Add-Ons’ on your Dashboard 2. Click on ‘Images’ 3. Enable ‘ Homepage Images .’ If it is already enabled, skip this step. 4. Click on ‘Configure’ 5. Click on ‘Add new image’ 6. Enter the image title. This is what will appear on the mouse hover. 7. Choose the location for the image.There are 3 locations that you can choose from. Top, Center and Footer. You can upload upto 2 images on Top, 5 images in the center and 1 image in the footer. To know more about the optimum size of these images and their location, please reach out to us. 8. Choose the file that you would like to upload and enter the height and width of the image. Please note that the images have various restrictions with size so if an image is too small or too big, it will get resized to fit that particular location. To know more about the size restrictions, please reach out to us for assistance. 9. Enter the URL that you want the image to be linked to. 10. Add any HTML if you’d like to and hit ‘Save’ 11. Note: These image can get very tricky due to size and locations so please don’t hesitate to reach out to us for any queries that you might have. We are here at your disposal for any help that you might need! 4 Congratulations! You have now added homepage images to your website. Advanced Customization using HTML, CSS, JavaScript editor Since Twikster is such a flexible platform, we allow you to add your own HTML, CSS and Javascript to design it and tweak it to your liking. Follow the steps below to add style to your store: 1. Click on ‘Add-Ons’ on your Dashboard 2. Click on ‘HTML, CSS, Java Script’ 3. Enable ‘Third Party Widgets’. If it is already enabled, skip this step. 4. Click on ‘Configure’ 5. Put any code(css,javascript) before </body> tag. This method can be used to integrate third party apps for chat, social sharing, referrals, etc. a. For chat we recommend an app called Zopim, its free to use (we all love the free goodies!) b. For exit pop up, social sharing discounts, feedback forms we recommend StoreYa - it comes at a monthly fee that is to be paid directly to them. c. For Instagram, we recommend a widget called SnapWidget which is free to use. 6. You can also use this box to make the following changes to your theme (at the end of this document we have provided the CSS code that you can use to make changes to various elements on your homepage - if you don’t find what you are looking for, please reach out to us and we will provide you the code for that as well!) a. font size b. font family c. font color d. color of header and footer e. titles of all the main blocks (new products, featured products, newsletter etc can be changed to other titles) f. and so much more! 7. Once done, click on ‘Save.’ 8. If you are not sure how to go about doing this, please reach out to us on [email protected] and we will be happy to help you! Congratulations! You have now learnt have to use HTML, CSS and JavaScript to edit your website. *NOTE: If by any chance, the changes you make breaks something on the website, Twikster will not responsible and will be able to support you to fix the changes. Any change that you will want us to make will be chargeable depending on the complexity of the change. OTHER ENHANCEMENTS TO YOUR STORE Now, what you have done so far to create your store is only a small part of what is actually possible. You can add a number of other features that come pre-installed in our Add-Ons section. Some are free, some have a one time, pocket friendly fee. BUT, if you need something that is not listed here, do reach out to us and we will definitely be able to provide it to you. The charges will vary based on your requirement. 5 Here is a list of great add-ons that we provide right now (and we keep adding to this list, ever so often!) ● New Products Display on Home Page ● Featured Products Display on Home Page ● Recently Viewed Products Display on Category Page ● "Notify Me" Feature for out of stock products ● Newsletter Subscriptions ● Product Reviews ● Add Unlimited Variants ● Related Products Display on Product Page ● Product Share on Social Media (FaceBook, Twitter, G+ and Pinterest) ● Quick View of Products on Home Page, Category Page, Search Results Page ● Customer Wish List ● Customer loyalty ● Customer referral ● Social Connect (Facebook, Paid Yes Yes Yes Twitter, G+, Pinterest, Instagram, RSS, Blog) ● SEO Friendly Product Pages (URL’s, MetaTags, MetaDescriptions, Image Alt tags for Product Images) ● Facebook like box on Homepage ● Contact Information on Homepage ● Custom Info boxes on Homepage ● Automated Invoice Soft Copy ● Sort option in Search results and Category Pages ● Guest Checkout ● Social Login ● Third Party Code Integration ● Cross Selling On Cart ● Google analytics If you’d like to use any of these features and dont know how, please reach out to us on [email protected] and we will help you! So your store is ready, now what? PAYMENT GATEWAY AND LOGISTICS SUPPORT Tie up with Payment Gateway We have tied up with many different payment gateways as listed under the Add-ons section for Payment Gateways. If you are already using one of the gateways that is not active on your store, please reach out to us to have it activated. If you don’t have an existing account with a payment gateway, you have to choose a plan with Twikster and pay for it. We will then assist you with the process of account creation. 6 The benefit of tying up through us is that you will not have to pay any deposit for the account and the payment gateway comes for free except for the transaction fee. Logistics Support We have tied up with many different logistic partners so we can help you get better rates. In order to create an account with our logistic provider, you have to choose a plan and pay for it. We will then assist you with the process of account creation. The benefit of tying up through us is that you will not have to pay any deposit and you will get better than market rates for shipping. Marketplaces In order to increase your reach and to get as many customers as possible, we recommend that you also get started with some of the popular Indian marketplaces. What marketplace you choose to go with ultimately is left to your decision. We will help you select the marketplaces, tie up with them, get your store set up with them. Once you are all set up, we will help you tie up with a marketplace management software from where you can manage all your orders, your inventory from across all platforms. It makes things very simple, really! Adding Promotions and Discounts 1. Click on ‘Promotions’ 2. Click on ‘Add Discount’ 3. Enter the Discount Name such as End of Season Sale or any such name for your users to know what the promotion is for. 4. Enter the promo code that your users will have to use in order to avail the discount. If you want the discount to automatically be applied for all customers, leave this field blank. 5. Choose the offer. You have the option of giving them a percentage discount of a flat rate discount or none of these and choose the free shipping discount option. 6. Choose the validity for this promotion. You have the following options - Discount is applicable if the bill amount is more than X Rs, discount is applicable on all products or discount is applicable only on specific products. 7. Fill in the number of times the discount can be used in all. If you want this offer to apply only for the first 10 shoppers, restrict it by entering 10 in this field. 8. Choose the start and end date of your promotion and hit the ‘Save’ button. Congratulations! You have now created a promotion for your store. Share the promo code with your customers and let them avail your offer! Customer Relationship Management Knowing who your customers are is very helpful. You can use this database to give them discounts, benefits and manage your customer relationship well. Here is how you can manage your customers: 1. Click on ‘Customers’ 2. This tab will show you all the customers who have registered on your store. Whether they have made a purchase or not, if they register on your store, you will have that information showing there. 7 3. If you have an offline customer or customer details that you want to manually enter, you can add him/her by clicking ‘Add new customer’ and fill in the necessary details as asked for further. Congratulations! You have added a new customer and can also view all your customers details including First name, Last name and their email id. Leverage this to interact with them and offer them discounts on various products. Managing Orders on your Twikster store Managing your orders can become very tedious. You do not want to miss an order that comes in and upset a customer. Twikster allows you to manage your orders with ease: 1. Click on ‘Orders’ 2. This tab will show you all the orders that have been placed on your store. 3. The order number, customer name, their phone number, date of order placed, order value and payment status is shown to give you a quick view of the order details. If you want to know in depth details of the order, you can click on the order and all the details available will be displayed. 4. If you wish to search for a particular order, you can search for them by Order Number, by Customers Name or by Phone Number. You can also sort your orders by Shipped and not shipped by clicking on “All” or “Not Shipped” on the top right corner. 5. If you have an offline order or an order that you want to manually enter, you can add it by clicking ‘Add new Order’ and fill in the necessary details as asked for further. Congratulations! You can now manage all your orders with ease and won’t miss out on even a single one. USING CUSTOM CSS TO MAKE CHANGES TO YOUR STORE Login to your admin panel. Click 'Add-Ons' Click 'Html,Css,javaScript' from Add-Ons category. Then Press 'Configure' button of 'Third Party Widgets' that displays the content box for writing your own css. Choose from the CSS code based on what you want to change. Place the css code inside a style tag [ For eg:- <style> Your css code </style> ] and press 'save' to apply changes. For Changing font size of ------------------1.Categories css code -------#block_top_menu .sf-menu > li > a{font-size:10px;} 2.Featured Products and New Products css code 8 -------#home-page-tabs > li > a{font-size:10px;} For layout2 css code -------------------.new-and-featured .product-new p,.new-and-featured .product-popular p{font-size:10px;} For layout4 css code --------------------.new-featured .title{font-size:10px;} 3.Everything in the footer css code --------.footer-container #footer h4{font-size:10px;} .footer-container #footer h4 a{font-size:10px;} .footer-container #footer ul li a{font-size:10px;} .footer-container #footer #block_contact_infos > div ul li{font-size:10px;} .footer-container #footer #block_contact_infos > div ul li > span, .footer-container #footer #block_contact_infos > div ul li > span a{font-size:10px;} .footer-container #footer .bottom-footer div{font-size:10px;} .footer-container #footer .bottom-footer div a{font-size:10px;} .footer-container #footer #block_contact_infos > div ul li i{font-size:10px;} 4.Sign in css code -------.header_user_info a{font-size:10px;} 5.Call us now banner css code -------.shop-phone,.shop-phone i,.shop-phone strong{font-size:10px;} For Changing font family of ----------------------------1.Featured Products and New Products 9 css code -------#home-page-tabs > li > a{font-family:arial;} For layout2 css code -------------------.new-and-featured .product-new p,.new-and-featured .product-popular p{font-family:arial;} For layout4 css code --------------------.new-featured .title{font-family:arial;} 2.Everything in the footer css code -------.footer-container #footer h4{font-family:arial;} .footer-container #footer h4 a{font-family:arial;} .footer-container #footer ul li a{font-family:arial;} .footer-container #footer #block_contact_infos > div ul li{font-family:arial;} .footer-container #footer #block_contact_infos > div ul li > span, .footer-container #footer #block_contact_infos > div ul li > span a{font-family:arial;} .footer-container #footer .bottom-footer div{font-family:arial;} .footer-container #footer .bottom-footer div a{font-family:arial;} 3.Call us now banner css code -------.shop-phone,.shop-phone strong{font-family:arial;} 4.Header nav bar css code -------For default layout :.shop-phone,.shop-phone strong{font-family:arial;} .header_user_info a{font-family:arial;} #contact-link a{font-family:arial;} For layout2 :- 10 .shop-phone,.shop-phone strong{font-family:arial;} .header_user_info a{font-family:arial;} For layout3 :.shop-phone,.shop-phone strong{font-family:arial;} .header_user_info a{font-family:arial;} form#searchbox input#search_query_block{font-family:arial;} .shopping_cart > a:first-child b{font-family:arial;} .shopping_cart > a:first-child .ajax_cart_quantity{font-family:arial;} .shopping_cart > a:first-child .ajax_cart_product_txt{font-family:arial;} .shopping_cart > a:first-child .ajax_cart_product_txt_s{font-family:arial;} .shopping_cart > a:first-child .ajax_cart_no_product{font-family:arial;} For layout4 :#header .my-acc a{font-family:arial;} .header_user_info a{font-family:arial;} form#searchbox input#search_query_block{font-family:arial;} #block_top_menu .sf-menu > li > a{font-family:arial;} For layout5 :#header .my-acc a{font-family:arial;} .header_user_info a{font-family:arial;} form#searchbox input#search_query_block{font-family:arial;} #block_top_menu .sf-menu > li > a{font-family:arial;} For changing color of --------------------1.Featured Products and New Products css code -------#home-page-tabs > li > a{color:red;} For layout2 css code -------------------.new-and-featured .product-new p,.new-and-featured .product-popular p{color:red;} 11 For layout4 css code --------------------.new-featured .title{color:red;} 2.Everything in the footer css code for color -----------------.footer-container #footer h4{color:red;} .footer-container #footer h4 a{color:red;} .footer-container #footer ul li a{color:red;} .footer-container #footer #block_contact_infos > div ul li{color:red;} .footer-container #footer #block_contact_infos > div ul li > span, .footer-container #footer #block_contact_infos > div ul li > span a{color:red;} .footer-container #footer .bottom-footer div{color:red;} .footer-container #footer .bottom-footer div a{color:red;} .footer-container #footer #block_contact_infos > div ul li i{color:red;} css code for background-color ----------------------------.footer-container{background:gray;} For layout5 css background-color ---------------------------#footer{background:gray;} 3.Call us now banner css code -------.shop-phone,.shop-phone i,.shop-phone strong{color:red;} 4.Header nav bar css code -------For default layout :.shop-phone,.shop-phone i,.shop-phone strong{color:red;} #contact-link a:before{color:red;} .header_user_info a{color:red;} #contact-link a{color:red;} 12 header .nav{background-color:black;} For layout2 :.shop-phone,.shop-phone i,.shop-phone strong{color:red;} .header_user_info a{color:red;} header .nav{background-color:black;} For layout3 :.shop-phone,.shop-phone i,.shop-phone strong{color:red;} .header_user_info a{color:red;} .header_user_info{border-color:blue;} form#searchbox input#search_query_block{color:red;border-color:red;} #search_block_left .search-btn{color:red;} .shopping_cart > a:first-child:before{color:red;} .shopping_cart > a:first-child b{color:red;} .shopping_cart > a:first-child .ajax_cart_quantity{color:red;} .shopping_cart > a:first-child .ajax_cart_product_txt{color:red;} .shopping_cart > a:first-child .ajax_cart_product_txt_s{color:red;} .shopping_cart > a:first-child .ajax_cart_no_product{color:red;} #header .shopping_cart > a:first-child:after{color:red;} #header .shopping_cart{border-color:blue;} header .nav{background-color:black;} For layout4 :#header .account-icon-container{background-color:black;} #header .account-icon:before{color:red;} #header .account-link-container{background-color:black;} #header .my-acc a{color:red;} .header_user_info a{color:red;} .search-container .search-icon-container{background-color:black;} .search-icon-container .srch-icon:before{color:red;} #search_block_left{background-color:red;} form#searchbox input#search_query_block{color:red;} form#searchbox .button.button-small{color:red;} #block_top_menu .sf-menu > li > a{font-family:arial;} .sf-menu>li>a:before{background-color:red;} #contact-link a{background-color:black;} #contact-link a:before{color:red;} .shopping_cart > a:first-child{background-color:black;} .shopping_cart > a:first-child:before{color:red;} .new-cart-quantity{color:red;background:black;} 13 #header .main-header{background-color:black;} For layout5 :#header .my-acc a{color:red;} .header_user_info a{color:red;} #header .my-acc{border-left-color:red;} .shopping_cart > a:first-child:before{color:red;} .shopping_cart .ajax_cart_quantity, .shopping_cart .ajax_cart_no_product{color:red;} .search-icon-container .srch-icon:before{color:red;} form#searchbox input#search_query_block{color:red;background-color:black;} #search_block_left .c-btn{color:red;} #block_top_menu .sf-menu > li > a{color:red;} #header .main-header{background-color:black;} For Alignment of elements/ sections in the footer - to occupy 25% space each instead of 16% and 33% -----------------------------------------------------------------------------------------------css code :--------.footer-container #footer .footer-block{width:25%;} 14