1
EUSF IT System User Manual Level-1 Public Beneficiary Body [Draft-5.1-26-02-2010] European Regional Development Fund EUSF IT System User Manual Level-1 Public Beneficiary Body Contents 1. GLOSSARY .........................................................................................................6 2. INTRODUCTION ..................................................................................................9 3. SYSTEM CONVENTIONS .................................................................................10 3.1. STRUCTURE OF SYSTEM ...............................................................................10 3.2. NAVIGATION .................................................................................................10 3.2.1. Top Menu......................................................................................10 3.2.2. Sub-Menu .....................................................................................10 3.2.3. Actions ..........................................................................................11 3.2.4. Moving Between Fields.................................................................11 3.2.5. Long Pages/Screen Text ..............................................................11 3.2.6. Standard Buttons ..........................................................................12 3.2.7. Moving between pages.................................................................13 3.2.8. Results of Searches......................................................................13 3.2.9. Going to Specific Screens ............................................................13 3.2.10. Changing Order of Results ...........................................................14 3.2.11. Error Messages ............................................................................14 3.3. SPECIAL FIELD TYPES ..................................................................................16 4. 3.3.1. Mandatory Fields ..........................................................................16 3.3.2. Drop Down Menus ........................................................................16 3.3.3. Date Fields....................................................................................16 LOGGING IN ......................................................................................................18 Draft 5.1-26-02-2010 Page 2 of 103 European Regional Development Fund EUSF IT System User Manual Level-1 Public Beneficiary Body 4.1. USER ACCESS LEVELS .................................................................................19 4.1.1. Single Sub Priority Access for a Level-1 Public Body...................19 4.1.2. Multiple Sub Priority Access for a Level-1 Public Body ................20 4.2. CHANGING YOUR PASSWORD ........................................................................21 5. LOGGING OUT ..................................................................................................22 6. LEVEL 1 PUBLIC BODY MENUS .....................................................................23 7. PROJECTS ........................................................................................................24 7.1.1. Static Project Data ........................................................................24 7.2. SEARCH PROJECT ........................................................................................25 7.2.1. View a Project...............................................................................27 7.2.2. Update a Project ...........................................................................28 7.3. CREATE A NEW PROJECT .............................................................................30 7.3.1. Unique Project Identifiers..............................................................34 7.4. DELETE A PROJECT......................................................................................35 8. DECLARE EXPENDITURE................................................................................36 8.1. DECLARE EXPENDITURE FOR A PROJECT ......................................................36 8.2. SEARCH FOR AN EXPENDITURE DECLARATION ..............................................43 8.2.1. View an Expenditure Declaration..................................................46 8.3. UPDATE AN EXPENDITURE DECLARATION .....................................................47 8.4. DELETE AN EXPENDITURE DECLARATION ......................................................49 8.5. ATTACHING DOCUMENTS TO AN EXPENDITURE DECLARATION .......................50 8.6. VIEW A DOCUMENT ATTACHED TO AN EXPENDITURE DECLARATION ...............52 Draft 5.1-26-02-2010 Page 3 of 103 European Regional Development Fund EUSF IT System User Manual Level-1 Public Beneficiary Body 8.7. DELETE A DOCUMENT ATTACHED TO AN EXPENDITURE DECLARATION...........53 9. PRIOR PERIOD ADJUSTMENTS – NEGATIVE ADJUSTMENTS ...................54 9.1. CREATE PRIOR PERIOD NEGATIVE ADJUSTMENT ..........................................54 9.2. ADD ADDITIONAL PRIOR PERIOD NEGATIVE ADJUSTMENTS ...........................63 9.3. SEARCH PRIOR PERIOD NEGATIVE ADJUSTMENTS ........................................65 9.3.1. View Prior Period Negative Adjustments ......................................67 9.4. UPDATE PRIOR PERIOD NEGATIVE ADJUSTMENTS ........................................68 9.5. DELETE PRIOR PERIOD NEGATIVE ADJUSTMENTS .........................................70 10. ADD A RELATED EXPENDITURE CHECK ......................................................71 10.1.1. View Related Expenditure Check .................................................72 10.1.2. Update Related Expenditure Check .............................................73 10.1.3. Delete Related Expenditure Check...............................................74 11. B1 MENU ...........................................................................................................75 11.1. CREATE A B1 DECLARATION ........................................................................76 11.1.1. Attaching Documents to a Created B1 Declaration ......................80 THE USER MUST CLICK THE SUBMIT BUTTON TO FINISH ATTACHING THE DOCUMENT. .80 11.1.2. View Documents included in a B1 Declaration .............................81 11.1.3. Delete Document included in a B1 Declaration ............................81 11.2. SEARCH FOR A B1 DECLARATION .................................................................82 11.2.1. View a B1 Declaration ..................................................................83 11.3. COUNTER SIGN B1 DECLARATION ................................................................84 11.4. REOPEN B1 DECLARATION ...........................................................................86 Draft 5.1-26-02-2010 Page 4 of 103 European Regional Development Fund EUSF IT System User Manual Level-1 Public Beneficiary Body 11.4.1. Update Reopened B1 Declaration ................................................87 12. REJECTED B1 DECLARATION FROM INTERMEDITE BODY .......................90 13. REPORTS ..........................................................................................................95 13.1. B1 REPORTS................................................................................................95 13.2. EXPORT REPORT TO EXCEL ..........................................................................96 13.2.1. Total Eligible - This Claim Only.....................................................97 13.2.2. Total Public Report – This Claim Only ..........................................98 13.2.3. Adjustments Report – This Claim Only .........................................99 13.2.4. Total Eligible Report – Cumulative to-date .................................101 13.2.5. Total Public Report – Cumulative to-date ...................................102 13.2.6. Total Adjustments Report – Cumulative to-date .........................103 Draft 5.1-26-02-2010 Page 5 of 103 European Regional Development Fund EUSF IT System User Manual Level-1 Public Beneficiary Body 1. GLOSSARY ERDF European Regional Development Fund ESF European Social Fund EFF European Fisheries Fund S&E OP Southern & Eastern Regional Operational Programme. BMW OP Border Midland & Western Regional Operational Programme. HCI OP Human Capital Investment Operational Programme SD OP Seafood Development Operational Programme CCI Code The term CCI stands for Common Identification Code. Each Operational Programme is assigned a unique CCI code by the EU Commission at Operational Programme Setup. Nomenclature of Territorial Units for Statistics – the EU method of subdividing countries for statistical reporting purposes. NUTS (locations) Level-1 Public Body (also referred to as Level-1 Public Beneficiary Body) (Level-1) In Ireland there are 8 NUTS-3 (corresponding to the 8 Regional Authorities) regions, there are 34 NUTS-4 (corresponding to the Local Authority) regions and there are 2 Nuts-2 Regions (BMW & S&E). This is a public body responsible for managing projects, issuing grants and declaring the eligibility of expenditure to the Intermediate Body in a process called B1 Declaration. Each Sub-Priority may have several Level-1 Public Bodies who all declare expenditure to the Intermediate Body using the B1 Declaration process. County Enterprise board, Local Authority, and Institute of Technology are all examples of Level-1 Public Bodies. Draft 5.1-26-02-2010 Page 6 of 103 European Regional Development Fund EUSF IT System User Manual Level-1 Public Beneficiary Body Intermediate Body (IB) Managing Authority (MA) This is a public body such as a Government Department or State Agency responsible for checking and verifying the correctness of expenditure declared by the Level-1 Public Body in the B1 Declarations and then aggregating and declaring the eligibility of this expenditure at Sub-Priority to the Managing Authority in a process called B2 Declaration. Each Sub-Priority has an Intermediate Body. Enterprise Ireland is an example of an Intermediate Body. This is a public body designated to manage an Operational Programme and responsible for checking and verifying the correctness of expenditure declared by the Intermediate Body in the B2 Declarations and then aggregating and declaring the eligibility of this expenditure to the Certifying Authority at Priority level in a process called B3 Declaration. The Southern & Eastern Regional Assembly is the Managing Authority for the Southern & Eastern Regional Operational Programme (S&E OP). The Border Midland and Western Regional Assembly is the Managing Authority for the Border Midland and Western Regional Operational Programme (BMW OP) The Department of Enterprise, Trade & Employment is the Managing Authority for the Human Capital Investment Operational Programme (HCI OP) The Department of Agriculture, Fisheries & Food is the Managing Authority for the Seafood Development Operational Programme (SD OP) Certifying Authority (CA) This is a national body designated to certify statements of expenditure for Operational Programmes and applications for payment before they are sent to the European Commission. The Department of Finance is the Certifying Authority for the Southern & Eastern Regional Operational Programme and the Border Midland and Western Regional Operational Programme. The Department of Enterprise, Trade & Employment is the Certifying Authority for the Human Capital Investment Operational Programme. Draft 5.1-26-02-2010 Page 7 of 103 European Regional Development Fund EUSF IT System User Manual Level-1 Public Beneficiary Body The Department of Agriculture, Fisheries & Food is the Certifying Authority for the Seafood Development Operational Programme. Audit Authority (Financial Control This is a national body designated to audit payment claims Unit)(FCU) for Operational Programmes after they are submitted to the EU Commission. URL to access the EUSF IT System The ERDF Financial Control Unit is the Audit Authority for the Southern & Eastern Regional Operational Programme and for the Border Midland and Western Regional Operational Programme. https://eusf.gov.ie/Production/ Helpdesk assistance on EUSF IT If you experience any difficulties or problems in using the System EUSF IT System or if you require training on the EUSF IT System please contact the Managing Authority for your Operational Programme Ms. Gerardine Lafferty, Border Midland & Western Regional Assembly tel. 094-9862970 Email: [email protected] Ms. Oonagh Hearne, Southern & Eastern Regional Assembly tel. 051-860700 Email: [email protected] Draft 5.1-26-02-2010 Page 8 of 103 European Regional Development Fund EUSF IT System User Manual Level-1 Public Beneficiary Body 2. INTRODUCTION The EUSF IT system is a purpose built web based solution designed to support the Expenditure Certification Process for Operational Programmes included in the 2007-2013 Structural Funds period. The system will allow the creation and administration of projects and is designed to capture, store and aggregate data for reporting purposes. The system will provide an audit trail from the initial project expenditure declaration through to the final payment claim to the Commission. The EUSF IT system has been specifically designed and will be used by: • The Certifying Authority • The Managing Authority • Intermediate Bodies • Level 1 Public Beneficiary Bodies • Audit Authority As a Level 1 Public Body user you are responsible for managing projects, issuing grants and declaring the eligibility of expenditure to the relevant Intermediate Body. Each Sub-Priority may have several Level 1 Public Bodies who report expenditure to the Intermediate Body. Draft 5.1-26-02-2010 Page 9 of 103 European Regional Development Fund EUSF IT System User Manual Level-1 Public Beneficiary Body 3. SYSTEM CONVENTIONS 3.1. Structure of System When using the EUSF IT system you will access a number of different screens, sometimes called pages. These screens are made up of a number of fields visible on the screen. This is where you enter the appropriate information. Once the information has been entered on a specific screen, there is a choice of actions that can be carried out by clicking on the appropriate button (i.e. Search, Generate or Delete buttons) in the lower left hand corner of the selected page. 3.2. Navigation All screens have a similar appearance with some common features that appear throughout. This helps in navigating through the application. This functionality is explained below. 3.2.1. Top Menu The bar at the top of the screen contains the menu options The top-level menu contains the main functional areas of the system and is the primary way of moving (or navigating) through the system. The current menu item selected is highlighted and appears shaded – e.g. in the example above the Projects menu is selected. 3.2.2. Sub-Menu There are sub-menus associated with the top-level menu items however, the number of sub-menus differ depending on the menu selected. Selecting a menu item will automatically result in the sub-menus being displayed, as shown below: In the example above, we are in the Projects menu and the Expenditure Declarations sub-menu is selected. We can perform project activities associated with expenditure declarations from this menu. Draft 5.1-26-02-2010 Page 10 of 103 European Regional Development Fund EUSF IT System User Manual Level-1 Public Beneficiary Body 3.2.3. Actions Actions such as searching or moving to the next page can be performed by clicking on the appropriate button. These are positioned at the bottom of the page on the left hand side and are consistent in appearance – dark blue buttons with bold white font text. The Search and Reset buttons are two common action buttons that appear throughout the EUSF IT system and are displayed below. 3.2.4. Moving Between Fields In addition to using the mouse to move around the screen, it is also possible to move forward between the fields on a page using the Tab key. The Tab key is found on the left hand side of the keyboard, marked . To move backwards through the fields, hold down the shift key (usually marked×) at the same time as the Tab key. The cursor will appear in the current field. If a field already has an entry, that value will be highlighted. Using the Tab key in this way will also move the cursor to menu items and buttons in sequence on the page. If the cursor has moved to a button in this way a dotted line box will appear on the button as shown in the example of the Reset button below: 3.2.5. Long Pages/Screen Text Where possible, the system has been designed for all standard pages to fit on one screen. In some cases, however, there is too much content to fit on one screen i.e. there are too many fields to display. On such screens it is possible to move up and down the page to see the hidden fields (i.e. the ones not displayed on the default screen). This process is known as scrolling. Draft 5.1-26-02-2010 Page 11 of 103 European Regional Development Fund EUSF IT System User Manual Level-1 Public Beneficiary Body The appearance of a scroll bar on the right hand side of the screen (as shown above in the pink border on the right) indicates that there are some other fields and or action buttons on the screen that cannot be seen at the moment. To scroll down a screen, put the cursor on the scroll bar and left click while moving the mouse up or down. You can also scroll through the screen by clicking on the arrow symbol at the top and bottom of the scroll bar or by using the wheel on the mouse. 3.2.6. Standard Buttons Buttons on each screen allow information entered to be processed, for example, a search to be performed. A number of standard buttons appear throughout the system. View Update Will permit the user to View details of a Search result Edits certain fields of information currently displayed. Updated information is not saved until it is successfully submitted using the Submit button. Delete Will permit the user to delete certain elements of data. Reset Clears all data you have just entered on the current page. If you are editing existing data, the data will return to its previous state – i.e. the data that was there when you last displayed the screen. Cancel Cancels the current operation and return usually to the previous screen. Add Where more than one element of data is permitted the Add button permits the user to add the additional data e.g. add another Prior Period Negative Adjustment Search Permits the user to search for projects, expenditure declarations etc. Submit Will save the information just entered. Before saving a check of the data is also performed most notably to ensure information has been completed correctly for mandatory fields. If there are errors, the screen will be redisplayed with appropriate error messages. Draft 5.1-26-02-2010 Page 12 of 103 European Regional Development Fund EUSF IT System User Manual Level-1 Public Beneficiary Body 3.2.7. Moving between pages It is advisable to avoid use of the Internet Explorer Back button to move back through screens as this may result in loss of data. To move between screens, either use the top menu bar or any direct link or button that may appear on the screen. If you do use the Back button, you may encounter a system error message such as the error message displayed below and pressing F5 may refresh your screen. Use of the Back button should generally be avoided on all internet applications. 3.2.8. Results of Searches Results of searches are usually displayed as rows of information – one row per record. These are displayed to a maximum of 50 rows to a screen. At the foot of the screen, the current screen number is displayed (if multiple screens are returned). It is possible to go directly to other screens by clicking on the screen number 3.2.9. Going to Specific Screens On many screens, some field entries may be linked to other relevant screens. These are known as hyperlinks. If the text is displayed in bold type, then it is possible to click on that entry and go to those details. This usually occurs in a list of details – typically a search result, such as shown next where the records under the heading Project Name are hyperlinks. By clicking on the hyperlink Donegal Crystal this will take you to the project details for Donegal Crystal project. Draft 5.1-26-02-2010 Page 13 of 103 European Regional Development Fund EUSF IT System User Manual Level-1 Public Beneficiary Body 3.2.10. Changing Order of Results When viewing data in tables, it is possible to change the order of the information, by clicking on any column name. The table will be redisplayed, ordered by information in that column. Clicking the column name again will reverse the order. The example below shows some sample projects displayed in Project Name order – as indicated by the (Ï) circled in red below. To display this same set of search results sorted by Local Project Reference, click on the Local Project Reference heading. The table will redisplay ordered by the information in that column as shown in the following example. 3.2.11. Error Messages The EUSF system checks certain fields to ensure appropriate or mandatory information has been entered correctly. This check does not take place as you are entering the data, but only after you have finished entering all information and click on an action button such as Submit. A message identifying the error or errors found will appear in red, followed by a specific error message or messages detailing the exact nature of the error(s). Draft 5.1-26-02-2010 Page 14 of 103 European Regional Development Fund EUSF IT System User Manual Level-1 Public Beneficiary Body The data will not be processed and saved until all errors have been addressed – in the example below the error message in red indicates that a user in Creating a Project has failed to populate some fields which are mandatory. These fields must be populated before the user can continue with the Create Project function. Draft 5.1-26-02-2010 Page 15 of 103 European Regional Development Fund EUSF IT System User Manual Level-1 Public Beneficiary Body 3.3. Special Field Types 3.3.1. Mandatory Fields Certain fields are mandatory and so the system will not proceed if information is not entered in these fields. A red asterisk * after the field name identifies that a field is mandatory, as illustrated below with the Project Name field: 3.3.2. Drop Down Menus To ensure data consistency and to make data entry more efficient some standard structural funds data such as the Project Location can be accessed by means of a drop down menu, as shown in the following example. Please note that you cannot enter any value other than one of those in the drop down list. To view the list of available options for a field, click on the down arrow symbol. 3.3.3. Date Fields Some fields require dates to be entered. They will all have the same format, as shown below: or by manual entry. The format for date entry if Dates can be entered either by use of a pop-up calendar done manually is DD/MM/YYYY and the ‘/’ separator must be entered when entering the date manually. An error will appear if the date is not entered in the correct format. To enter dates using the pop-up calendar click on the calendar icon next to the date field and this will display the short cut calendar as a pop-up window on top of the main page you are using. Draft 5.1-26-02-2010 Page 16 of 103 European Regional Development Fund EUSF IT System User Manual Level-1 Public Beneficiary Body This pop-up calendar defaults to today’s date (highlighted in red). Clicking on the appropriate date will automatically enter that date into the date field and close the window. To move to other months, click on the left and right arrows. Draft 5.1-26-02-2010 Page 17 of 103 European Regional Development Fund EUSF IT System User Manual Level-1 Public Beneficiary Body 4. LOGGING IN The system is delivered over the internet and can be accessed using any of the standard internet browsers e.g., Internet Explorer, Mozilla FireFox etc. https://eusf.gov.ie/Production/ and if you are using Microsoft The address for accessing the system is Internet Explorer to access the system then your screen should be similar to that displayed below. After successfully accessing the system the Login page will appear (see below). Enter your Username and Password in the mandatory fields provided. Draft 5.1-26-02-2010 Page 18 of 103 European Regional Development Fund EUSF IT System User Manual Level-1 Public Beneficiary Body When you have successfully logged into the EUSF system your name and access level will be displayed in the header of all pages 4.1. User Access Levels User access to the EUSF IT system is based around the Sub Priorities under which a Level-1 Public Body (eg. County Enterprise Board, Institute of Technology or a Local Authority) operate and a Level-1 User is linked to a Level-1 Public Body. 4.1.1. Single Sub Priority Access for a Level-1 Public Body Some Level-1 Public Bodies such as County Enterprise Boards will operate under just one Sub Priority, therefore when a Level-1 User from a County Enterprise Board logs in they are taken automatically to the only Sub Priority under which their County Enterprise Board operates. In the example below when Level-1 User, Snow White, from Galway County Enterprise Board (Level-1 Public Body) logged in she is automatically logged in under the Micro-Enterprise, Innovation & Entrepreneurship Sub Priority as this is the only Sub Priority under which Galway County Enterprise Boards operates on the EUSF IT system. Draft 5.1-26-02-2010 Page 19 of 103 European Regional Development Fund EUSF IT System User Manual Level-1 Public Beneficiary Body 4.1.2. Multiple Sub Priority Access for a Level-1 Public Body Some Level-1 Public Bodies such as the Institutes of Technology, Vocational Education Committees or the National Universities will need access to the EUSF IT system to operate under several Sub Priorities. Therefore, when a Level-1 User from, for example, an Institute of Technology (Level-1 Public Body) logs in they are presented with a menu of the Sub Priorities for which their Level-1 Public Body( eg. Institute of Technology) can operate. In this case the Level-1 User must Select which of the Sub Priorities they want to operate under in this session. In the example below for Athlone Institute of Technology(Level-1 Public Body) user Red RidingHood (Level-1 User) has logged in, she is presented with a menu of the Sub Priorities under which Athlone Institute of Technology can operate and she must first select which of the Sub Priorities (circled in red ) she wants to operate under in this session. The Level-1 user selects to operate under, for example, the Incubation Sub Priority so the Level-1 user clicks on the Select button to the right of the Incubation Sub Priority and the Incubation Sub Priority Search Project page is displayed. If this user completes their work under the selected Sub Priority and then wants to work under another of their Sub Priorities then the user selects the Change Role button on the top right of the screen to Select a different Sub Priority. Draft 5.1-26-02-2010 Page 20 of 103 European Regional Development Fund EUSF IT System User Manual Level-1 Public Beneficiary Body 4.2. Changing your password To change your password click on the Change Password button in the header of all pages within the EUSF system and circled in red in the example below. The Change Password screen will be displayed. Enter your new password (with a minimum of 8 characters and we recommend that you use both numeric and alphanumeric in creating your password) in the first field labelled Password and then re-type your new password in the second field labelled Confirm Password. Click on the Submit button. If there is a problem (e.g. the password is too short or if the password typed in the first field differs from that in the second), an error message will be displayed. If the password is accepted, a screen like this will appear to confirm the change: Draft 5.1-26-02-2010 Page 21 of 103 European Regional Development Fund EUSF IT System User Manual Level-1 Public Beneficiary Body 5. LOGGING OUT It is also essential to logout of the EUSF IT system by clicking on the Logout button that is displayed in the header of all pages of the EUSF system and as circled in red on the screen below. Draft 5.1-26-02-2010 Page 22 of 103 European Regional Development Fund EUSF IT System User Manual Level-1 Public Beneficiary Body 6. LEVEL 1 PUBLIC BODY MENUS The Projects menu is selected by default when a Level-1 user successfully logs on to the EUSF IT system and the Search Project page is the default view There are four sub-menus displayed under the Projects menu when a user logs on to the system. The menus are: • • • • Projects Expenditure Declarations Prior Period Negative Adjustments B1s It is possible to access the other menu items by clicking on the item name. The name of the sub-menu will appear shaded green in colour when selected, as illustrated above with the Prior Period Negative Adjustments sub-menu. Draft 5.1-26-02-2010 Page 23 of 103 European Regional Development Fund EUSF IT System User Manual Level-1 Public Beneficiary Body 7. PROJECTS 7.1.1. Static Project Data A project consists of different data types, the data about the project which rarely changes over the life of the project, for example the project address, is called Static Project Data. The Static project data must be setup on the EUSF IT System using the Create Project function and this must be completed before expenditure can be declared for a project. The data displayed below is an example of the Static Data for the project Atlantic Airventure. Draft 5.1-26-02-2010 Page 24 of 103 European Regional Development Fund EUSF IT System User Manual Level-1 Public Beneficiary Body 7.2. Search Project The Search Project page is the default display for a Level-1 Public Body user. tab located in the It is possible to search for projects already created just by clicking on the lower left corner of the Search Projects screen. Only those projects created by the Level-1 Public body will be displayed, therefore, if as displayed below the users is logged in under Clare County Enterprise Board then only those projects created by Clare County Enterprise Board will be displayed in the search. To search for projects click on the Search button – circled in red in the example above. The Search Projects Results will be displayed as in the following example. Draft 5.1-26-02-2010 Page 25 of 103 European Regional Development Fund EUSF IT System User Manual Level-1 Public Beneficiary Body If the project you are searching for is not found within the Search Project Results listing it is possible to perform another search by clicking on the Search Again button. It is also possible to search for a specific project if you know the project name. Enter the relevant project name on the Search Project screen and click on the Search button. The Search Project Results page will appear detailing any projects that match the criteria supplied. Draft 5.1-26-02-2010 Page 26 of 103 European Regional Development Fund EUSF IT System User Manual Level-1 Public Beneficiary Body 7.2.1. View a Project Search for the project using the Search Project facility outlined earlier. The Search Projects Results will be displayed. To View a project click on the project name or click in the View icon When you click on the View Project icon, displayed. Draft 5.1-26-02-2010 as indicated in the example below. or click on the project name, the Project Details will be Page 27 of 103 European Regional Development Fund EUSF IT System User Manual Level-1 Public Beneficiary Body 7.2.2. Update a Project The Level-1 Public Beneficiary Body and the Managing Authority can update the Static Project data. To update the static data for a project, search for the project using the Search Project facility outlined previously and when the static data for the project is displayed on the screen click on the Update button located on the lower right of the screen (circled in red in the example below). When the user clicks the Update button the static project data is displayed for update and any of the fields which the Level-1 Public Body entered can now be updated. Draft 5.1-26-02-2010 Page 28 of 103 European Regional Development Fund EUSF IT System User Manual Level-1 Public Beneficiary Body After amending any of the static data fields for a project the user must click Submit to commit these changes. If the user wants to abandon the changes they have made they should click Reset. When the user clicks Submit to commit the changes they have made to the project static data a message is displayed to indicate that the project static data was successfully updated. Draft 5.1-26-02-2010 Page 29 of 103 European Regional Development Fund EUSF IT System User Manual Level-1 Public Beneficiary Body 7.3. Create a New Project To Create a new project click on the Create Project button (circled in red below) and located in the lower left of the default Search Project screen displayed when the Level-1 user logs in to the EUSF IT System. The Create New Project screen will appear as displayed on the next page. Draft 5.1-26-02-2010 Page 30 of 103 European Regional Development Fund EUSF IT System User Manual Level-1 Public Beneficiary Body The Level-1 user can now enter the static data for the project Fields indicated with * are mandatory fields and must be entered to create a new project. After entering the project data the user must click Submit to create the project, or Reset to discard any data entered . Draft 5.1-26-02-2010 Page 31 of 103 European Regional Development Fund EUSF IT System User Manual Level-1 Public Beneficiary Body The fields on the Project Details screen are entered by the Level-1 Public Body and fields marked with an * are mandatory fields. Local Project Reference * This is the local reference under which the project is filed in the local offices and it is a mandatory field which must be completed by the Level-1 Public Body when creating a new project. It is used to locate the original supporting documents for checking and audit purposes and to identify the project. Project Name * This is the name of the project and is also a mandatory field at new project setup. Examples of project names are a company name or a training course name or a road scheme. If the project is a Company Name then the Project Name should indicate the grant type (Capital, Employment, Feasibility etc) where applicable. Beneficiary Name The Beneficiary Name must be entered here. Project Location Nuts4 * This is the physical location where the project expenditure is incurred and the location can be selected from a drop-down list. Project Location Nuts3 This field is automatically populated by the system when the Nuts4 location is selected, however, if the Nuts4 location is unknown then the user can choose to select a Nuts3 region. Project Location Nuts2 This field is automatically populated by the system if the user is logged-in under the Border Midland and Western or Southern & Eastern Operational Programme. For all other users this field is populated if either the Nuts 4 or Nuts 3 location is selected, however if the Nuts 4 or Nuts 3 locations are unknown then the user can select a Nuts 2 . Short Description of the Project This field should contain a brief description of what the project is and what it aims to achieve. Start Date of Project This field should contain the start date of the project (01/01/2007) - unless a contract/grant agreement specifying a different start date exists. Completion Date of Project Please complete this field if a contract/grant agreement specifying an end date exists. Otherwise, this field should be left blank and will be completed by the Managing Authority. Grant Approval Date Enter the grant approval date here – if applicable. Grant Approving Body Enter the name of the grant approving body – if applicable. Location of Detailed Supporting Documents ٭This field is a mandatory field and should contain the location where the original supporting documents for the project are held. Total Cost of Project This field should contain the total cost of the project regardless of the source of funds and amounts should be entered without the comma separators but including decimal places. See Example 1. Draft 5.1-26-02-2010 Page 32 of 103 European Regional Development Fund EUSF IT System User Manual Level-1 Public Beneficiary Body Total Eligible Expenditure Enter the total eligible expenditure (the portion of the Total Cost which is eligible for support) for the project here and amounts should be entered excluding comma separators but including decimal places. See Example 1. Total Public Eligible Expenditure Enter the public eligible expenditure for the project and amounts should be entered excluding comma separators but including decimal places. See Example 1. Amount Approved or Allocated This field is similar to the previous field and should contain the public grant amount allocated to this project under the EU co-financed scheme and amounts should be entered excluding comma separators but including decimal places. See Example 1. Cross Financing of Structural Funds This field should only be ticked if this project specifically relates to a training project – in all other cases this field should be left blank. Example 1: Project to build craft workshop and retail outlet €100,000.00 = Total Cost of Project Workshop component is eligible for support €60,000.00 = Total Eligible Expenditure Grant offer on basis of eligible cost €30,000.00 = Total Public Eligible Expenditure Having completed all the fields necessary for setup of a new project selecting the Submit button will create the project and assign a system generated reference to the project. A message will be displayed to indicate that the project was created successfully. After the user clicks on and before returning back to the main menu the user can View the project by clicking on View Project Details. Draft 5.1-26-02-2010 Page 33 of 103 European Regional Development Fund EUSF IT System User Manual Level-1 Public Beneficiary Body 7.3.1. Unique Project Identifiers The Unique System Generated Project Reference, highlighted in red in the example below, is assigned by the system when a new project is created. These Unique System Generated Project Reference numbers are not sequential for a specific Level-1 Public Body – i.e. two projects created by the same Level-1 Public Body in the same session may be assigned system generated project reference numbers which are not sequential. Draft 5.1-26-02-2010 Page 34 of 103 European Regional Development Fund EUSF IT System User Manual Level-1 Public Beneficiary Body 7.4. Delete a Project To delete a project search for the Project using the Search Project facility outlined previously. When the Project is displayed scroll down to the end of the project and the Delete button is available if no Expenditure Declarations exist for the project – see example below. When the user clicks on the Delete button a message is displayed telling the user that they are about to delete a project and click OK if they want to continue with the deletion of the project or click Cancel to abandon the process. Clicking OK will delete the project and a message appears to indicate that the project deletion was successful. Draft 5.1-26-02-2010 Page 35 of 103 European Regional Development Fund EUSF IT System User Manual Level-1 Public Beneficiary Body 8. DECLARE EXPENDITURE 8.1. Declare Expenditure for a Project Search for the project for which you wish to declare expenditure using the Search Project facility outlined earlier. From the Search Project results select the project for which you wish to declare expenditure by either clicking on the Project Name or by clicking on the View icon for the project (circled in red below). After selecting the required Project from the Search Project Results the project details are displayed and when the user scrolls down to the end of the project details a section called ‘Related Expenditure Declarations’ appears. Click on the Add button Draft 5.1-26-02-2010 to add the first Expenditure Declaration for this project Page 36 of 103 European Regional Development Fund EUSF IT System User Manual Level-1 Public Beneficiary Body To add subsequent Expenditure Declarations for this project click on the Add the example below. button – circled in red in After clicking on the Add button the Create New Expenditure Declaration screen will appear - as in the example for project ‘Enniscrone Water Surfing’ below. Draft 5.1-26-02-2010 Page 37 of 103 European Regional Development Fund EUSF IT System User Manual Level-1 Public Beneficiary Body The Operational Programme Name appears at the top of the screen together with the Priority and Sub-Priority Names. The name of the Level-1 Public Body for which the user is logged in, also appears on the top of the screen. The project name (highlighted in red in the previous example) is displayed on the top left of the screen and the local project reference (highlighted in red in the previous example) also assigned by the user at Create Project is displayed on the top right of the screen. To create the Expenditure Declaration the user must enter the Start Date for Expenditure Declaration. Where this is the first Expenditure Declaration for a project please be aware that the Start Date cannot be before 01/01/2007. Where expenditure has already been declared for a project and the user is now entering a subsequent Expenditure Declaration then the Start Date of the Subsequent Expenditure Declaration will be the End Date of the previous Expenditure Declaration + 1 Dates can be entered manually in the format dd/mm/yyyy (e.g. 01/06/2007) or the dates can be selected from the calendar, by clicking on the calendar option electronic calendar will be the default. beside the date field and the date selected in the The user must then enter the End Date for expenditure declaration and again the date can be entered manually or selected from the electronic calendar. The Start and End dates do not have to be in the same year. However, the End Date cannot be greater than the current (today’s) date. Draft 5.1-26-02-2010 Page 38 of 103 European Regional Development Fund EUSF IT System User Manual Level-1 Public Beneficiary Body The user must enter the amounts being declared for this period Total Project Eligible Expenditure for this Declaration (less applicable receipts). This is the total eligible expenditure spent on this project this period and net of any revenues/receipts received. This amount is entered beside the year corresponding to when the expenditure being declared was incurred. The amount is entered without the comma separator but including the decimal places e.g. €25,015.50 is entered as 25015.50 as the user is entering the figures the system automatically formats these figures indicating the thousands comma separator. Total Public Funding for this Declaration (less applicable receipts) This is the total public eligible expenditure spent on the project this period and net of any revenues/receipts received. As before, this amount is entered beside the year corresponding to when this expenditure was incurred and the amount is entered without the comma separators but including the decimal places. The following is an example for project declaring €25,600.50 Total Eligible and €25,600.50 Total Public, and where €25,015.50 of the amount being declared was incurred in 2007 and €585.00 was incurred in 2008. Draft 5.1-26-02-2010 Page 39 of 103 European Regional Development Fund EUSF IT System User Manual Level-1 Public Beneficiary Body Any amounts entered here must already be deducted from the amounts being declared this period. As before amounts are entered without the comma separators but including the decimal places. Where overheads are permitted subject to Managing Authority approval then overhead amounts should be entered without the comma separator but including decimal places. The user can now select Submit (circled in red below) to submit this expenditure Declaration. When the user clicks Submit the Expenditure Declaration is Created and a message is displayed to indicate this. Draft 5.1-26-02-2010 Page 40 of 103 European Regional Development Fund EUSF IT System User Manual Level-1 Public Beneficiary Body To View the Expenditure Declaration the user should click on the View Expenditure Declaration Details button. The Expenditure Declaration Totals appear (circled in red in the example above) and the user should check that everything is correct. Summary of Fields to be Entered on an Expenditure Declaration Draft 5.1-26-02-2010 Page 41 of 103 European Regional Development Fund EUSF IT System User Manual Level-1 Public Beneficiary Body The above is an example of an Expenditure Declaration Created after the User clicked Submit on the Create Expenditure Declaration screen. The rows of data in #1 to #8 provide summary information on this Expenditure Declaration and on the Cumulative To-Date declared expenditure for this project. If the user wants to attach documents to this Expenditure Declaration they can do so in the Related Expenditure Documents section and clicking the Add button. Note: Until this Expenditure Declaration is included in a B1 Declaration the Level-1 Public Body can continue to amend or delete this Expenditure Declaration. An expenditure declaration can be updated by clicking on the Update button . An Expenditure Declaration can be deleted by clicking on the Delete button Draft 5.1-26-02-2010 . Page 42 of 103 European Regional Development Fund EUSF IT System User Manual Level-1 Public Beneficiary Body 8.2. Search for an Expenditure Declaration If a declaration has already been made within EUSF IT System it is possible to search for that specific declaration. As there may be several Expenditure Declarations for a project it is recommended to filter the Search Expenditure Declaration or a specific project. Clicking on the Expenditure Declarations menu will display the Search Expenditure Declaration screen To see list of all Expenditure Declarations for this Level-1 Public Body click Search – i.e. no filtering in use. The list is displayed and the user can click the View icon for the Expenditure Declaration Draft 5.1-26-02-2010 . Page 43 of 103 European Regional Development Fund EUSF IT System User Manual Level-1 Public Beneficiary Body To filter the Search Expenditure Declaration for Expenditure Declarations for a specific project Click on the Choose Project button to select the project for which you want to View Expenditure Declarations. The Search Project screen is displayed. If you know the Project Name then enter the Project Name on the Search Project Screen, else click Search to see the entire list of Project for this Level-1 Public Body. The list of Project for this Level-1 Public Body will be displayed and the user can scroll down to find the relevant project. Select the project by clicking on the Project Name eg. Burren Flowers in the example below. Draft 5.1-26-02-2010 Page 44 of 103 European Regional Development Fund EUSF IT System User Manual Level-1 Public Beneficiary Body The Project ‘Burren Flowers’ is defaulted in to the Search Expenditure Declaration Screen Clicking Search on the Search Expenditure Declaration screen will display all the Expenditure Declarations for the project Burren Flowers. Draft 5.1-26-02-2010 Page 45 of 103 European Regional Development Fund EUSF IT System User Manual Level-1 Public Beneficiary Body 8.2.1. View an Expenditure Declaration Search for the Expenditure Declaration using the Search Expenditure Declaration facility outlined previously. To view the declaration, click on the View Expenditure Declaration icon or click one of the date fields. The Expenditure Declaration Details page will open in view mode. Draft 5.1-26-02-2010 Page 46 of 103 European Regional Development Fund EUSF IT System User Manual Level-1 Public Beneficiary Body 8.3. Update an Expenditure Declaration Search for the Expenditure Declaration using the Search Expenditure Declaration facility outlined previously. The Update icon is displayed if the Expenditure Declaration can be updated. Click on the Update icon to amend this Expenditure Declaration. When the Expenditure Declaration is opened for updating the End Date for the expenditure declaration can be amended and additional expenditure included in the expenditure declaration, or expenditure can be removed from the expenditure declaration. Remember to click Submit after any amendments have been made to the Expenditure Declaration. Draft 5.1-26-02-2010 Page 47 of 103 European Regional Development Fund EUSF IT System User Manual Level-1 Public Beneficiary Body A message will appear as follows indicating that the declaration was updated successfully. The user can now click on the View Expenditure Declaration Details to see the recalculated fields for the project. Draft 5.1-26-02-2010 Page 48 of 103 European Regional Development Fund EUSF IT System User Manual Level-1 Public Beneficiary Body 8.4. Delete an Expenditure Declaration Search for the Expenditure Declaration using the Search Expenditure Declaration facility outlined previously. It is possible to delete an Expenditure Declaration by first clicking on the View Icon for the Expenditure Declaration and then clicking on the Delete button when the user is sure that this is the Expenditure Declaration to be deleted. Alternately, the user can delete the Expenditure Declaration by clicking on the delete icon on the Expenditure Declaration Search results screen – however the user should be sure that they are deleting the correct Expenditure Declaration therefore it is advisable to first View the Expenditure Declaration as in the example above before selecting to delete. Draft 5.1-26-02-2010 Page 49 of 103 European Regional Development Fund EUSF IT System User Manual Level-1 Public Beneficiary Body 8.5. Attaching Documents to an Expenditure Declaration To attach documents to the Expenditure Declaration scroll down through the Expenditure Declaration, at the very end of the Expenditure Declaration there is a heading Related Expenditure Documents. button in the Related Expenditure Documents section will open the Create new Clicking on the Add Expenditure Document window. Click on the Browse button to find the document to be attached. A comment can be added in the Comment box if the user wants to convey some particular information about the attached document. The user must click the Submit button to finish attaching the document…see next page. Draft 5.1-26-02-2010 Page 50 of 103 European Regional Development Fund EUSF IT System User Manual Level-1 Public Beneficiary Body After the user clicks Submit a message is displayed to indicate that the document was attached. Draft 5.1-26-02-2010 Page 51 of 103 European Regional Development Fund EUSF IT System User Manual Level-1 Public Beneficiary Body 8.6. View a Document attached to an Expenditure Declaration Once a document has been attached to an Expenditure Declaration it can be Viewed using the View icon . Scroll down to the end of the Expenditure Declaration. If documents have been attached to the Expenditure Declaration they will be displayed. To View the document click on the View document name. Draft 5.1-26-02-2010 icon located to the right of the document name or click on the Page 52 of 103 European Regional Development Fund EUSF IT System User Manual Level-1 Public Beneficiary Body 8.7. Delete a Document attached to an Expenditure Declaration To delete a document attached to an Expenditure Declaration click the delete button the document name. located to the right of A message is displayed asking the user to confirm that they wish to delete the document. Clicking OK will delete the document and clicking Cancel will abandon the document deletion process. A message is displayed to indicate that the document deletion was successful. Draft 5.1-26-02-2010 Page 53 of 103 European Regional Development Fund EUSF IT System User Manual Level-1 Public Beneficiary Body 9. PRIOR PERIOD ADJUSTMENTS – NEGATIVE ADJUSTMENTS 9.1. Create Prior Period Negative Adjustment In the following example Clare County Enterprise Board has already declared €7,500.00 eligible expenditure for project St. Tola’s Cheese and the Certifying Authority has submitted this expenditure on a claim to the Commission. Clare County Enterprise Board has now identified that €1,920.30 of the previously declared eligible expenditure was ineligible and needs to be removed in a Negative Adjustment, in addition, Clare County Enterprise Board has an additional €2,400.90 of new eligible expenditure which needs to be declared for the project. • Step 1. The Level-1 User clicks Add to add another Expenditure Declaration for this project. Draft 5.1-26-02-2010 Page 54 of 103 European Regional Development Fund EUSF IT System User Manual Level-1 Public Beneficiary Body • Step 2. The Create New Expenditure Declaration Screen opens and the user enters the information about the €2,400.90 of new expenditure to be declared this period and clicks Submit. After the Level-1 User clicks Submit a message is displayed to indicate that the New Expenditure Declaration was created successfully. • Step 3. Level-1 User clicks Add Prior Period Negative Adjustment button to record information relating to the Negative Adjustment. Draft 5.1-26-02-2010 Page 55 of 103 European Regional Development Fund EUSF IT System User Manual Level-1 Public Beneficiary Body The Create New Priori Period Negative Adjustment screen is displayed for input. In the Create Prior Period Negative Adjustment screen the fields marked with ‘ *’ are mandatory fields and must be populated by the Level-1 User. Amounts entered in any of the financial fields are treated as Negative Amounts by the system. Draft 5.1-26-02-2010 Page 56 of 103 European Regional Development Fund EUSF IT System User Manual Level-1 Public Beneficiary Body • Step 4. To begin entering the Prior Period Negative Details the Level-1 User clicks on the Choose B1 reference button and the list of Processed B1 Declarations for this Level-1 Public Body is displayed. • Step 5. The Search B1 Declaration screen is displayed and the user clicks on the Submit button to search for their list of B1 Declarations. The list of B1 Declarations for the Level-1 Public Body is displayed, in the example below there’s only one B1 Declaration declared for this Level-1 Public Body. Draft 5.1-26-02-2010 Page 57 of 103 European Regional Development Fund EUSF IT System User Manual Level-1 Public Beneficiary Body • Step 6. The user selects(left click) on the B1 Declaration Number in which the expenditure now being adjusted out (removed) was originally declared. The B1 Declaration Number selected is defaulted in to the Create Prior Period Negative Adjustments Screen. • Step 7. Select the Year in which the Expenditure now being adjusted was originally incurred. Highlight the year in the dropdown list and left click to select the year. • Step 8. The Level-1 user must enter a brief Reason for the Adjustment. Up to 300 characters (approx 4 rows) of text can be entered. Draft 5.1-26-02-2010 Page 58 of 103 European Regional Development Fund EUSF IT System User Manual Level-1 Public Beneficiary Body • Step 9. The Level-1 User must indicate at which Level the error resulting in this adjustment was identified. Click on the down arrow for a list of the various bodies, select the relevant body and left click. In the example below the Level-1 User has selected the Intermediate Body as the body who identified the error. • Step 10. The Level-1 User must enter the Total Eligible Expenditure and Total Public Eligible Expenditure being adjusted. Amounts are entered without the comma separator and including decimal places. Step 11. If an element of Overheads or Receipts was included in the original expenditure declaration then these receipts or overheads will also need to be adjusted out. Please refer to the Managing Authority for guidance on adjusting overheads or receipts in a Prior Period Negative Adjustment. Step 12. The Level-1 User must indicate if this Prior Period Negative Adjustment is required because of an Administrative Error. The User clicks on the drop down arrow and selects either Yes or No. Examples of Administrative errors are totting errors, use of an incorrect formula, typing errors, double entry of the same element of expenditure or transposition errors. Draft 5.1-26-02-2010 Page 59 of 103 European Regional Development Fund EUSF IT System User Manual Level-1 Public Beneficiary Body • Step 13. The Level-1 User must click Submit when they have completed all the mandatory fields on the Prior Period Negative Adjustments screen or Reset to abandon the process. After the Level-1 User clicks Submit an message is displayed to indicate that the Prior Period Negative Adjustment was Created and the user can click on the View Prior Period Negative Details button to see the Prior Period Negative Adjustment. Clicking on the View Prior Period Adjustment Details will display the Prior Period Negative Adjustment. This Negative Adjustment has not yet been included in a B1 Declaration and therefore can be amended using the Update button. Draft 5.1-26-02-2010 Page 60 of 103 European Regional Development Fund EUSF IT System User Manual Level-1 Public Beneficiary Body The Expenditure Declaration Totals will now have been updated with the amount of the Prior Period Negative Adjustment. View the Expenditure Declaration using the View Expenditure Declaration facility outline previously. Scrolling down through the Expenditure Declaration the User will see that a Prior Period Negative Adjustment has been included in this Expenditure Declaration and that the Project Declared Expenditure Totals are updated - see following example. Draft 5.1-26-02-2010 Page 61 of 103 European Regional Development Fund EUSF IT System User Manual Level-1 Public Beneficiary Body View Expenditure Declaration Draft 5.1-26-02-2010 Page 62 of 103 European Regional Development Fund EUSF IT System User Manual Level-1 Public Beneficiary Body 9.2. Add Additional Prior Period Negative Adjustments Several Prior Period Negative Adjustments can be included in an Expenditure Declaration. To add additional Prior Period Negative Adjustments to an Expenditure Declaration scroll down through the Expenditure Declaration and click on the Add Negative Adjustments – see example below. button located just above the existing Prior Period After the Level-1 User clicks on the Add button the Create New Prior Period Negative Adjustments screen is displayed for input – see next page Draft 5.1-26-02-2010 Page 63 of 103 European Regional Development Fund EUSF IT System User Manual Level-1 Public Beneficiary Body The Level-1 User enters the Prior Period Negative Adjustment (see Create Prior Period Negative Adjustment as outlined previously). When the User clicks Submit the second Prior Period Negative Adjustment is created. In the following example the Level-1 Public Body is reporting three Prior Period Negative Adjustments in the Expenditure Declaration. Draft 5.1-26-02-2010 Page 64 of 103 European Regional Development Fund EUSF IT System User Manual Level-1 Public Beneficiary Body 9.3. Search Prior Period Negative Adjustments Search for the Prior Period Negative Adjustment using the Prior Period Negative Adjustment Menu Option. The Search Prior Period Negative Adjustment screen is displayed. Search for the Prior Period Negative Adjustment using the Search Prior Period Negative Adjustment screen. The user can filter the search by Project or Expenditure Declaration or B1 Declaration by clicking on these buttons selecting from a list and then clicking the Submit button in the lower left of the screen. Draft 5.1-26-02-2010 Page 65 of 103 European Regional Development Fund EUSF IT System User Manual Level-1 Public Beneficiary Body Alternately, for a full list of all Prior Period Negative Adjustment for the Level-1 Public Body the user should just lick the Search button on the lower left of the screen. The Search results are displayed on screen. . Draft 5.1-26-02-2010 Page 66 of 103 European Regional Development Fund EUSF IT System User Manual Level-1 Public Beneficiary Body 9.3.1. View Prior Period Negative Adjustments Search for the Prior Period Negative Adjustments using the Search Prior Period Negative Adjustment facility outlined previously. The Prior Period Negative Adjustment details are displayed on screen. To View the Prior Period Negative Adjustment click on the View icon located on the right and circled in red in the example below. . Draft 5.1-26-02-2010 Page 67 of 103 European Regional Development Fund EUSF IT System User Manual Level-1 Public Beneficiary Body 9.4. Update Prior Period Negative Adjustments To Update a Prior Period Negative Adjustment Search for the Prior Period Negative Adjustment using the Prior Period Negative Adjustment Search facility outlined previously. Select the Update button the example below. located to the right of the Prior Period Negative Adjustment and circled in red in Alternately search for the Expenditure Declaration which includes this Prior Period Negative Adjustment using the Search Expenditure Declaration facility outlined previously. Scroll down through the Expenditure Declaration and the Prior Period Negative Adjustment is displayed. To Update this Prior Period Negative Adjustment click on the Update button Adjustment. – see the following example. Draft 5.1-26-02-2010 beside the Prior Period Negative Page 68 of 103 European Regional Development Fund EUSF IT System User Manual Level-1 Public Beneficiary Body The Update Prior Period Negative Adjustment Screen is displayed. The user should make the required amendments to this Prior Period Negative Adjustment and click Submit. Draft 5.1-26-02-2010 Page 69 of 103 European Regional Development Fund EUSF IT System User Manual Level-1 Public Beneficiary Body 9.5. Delete Prior Period Negative Adjustments Search for the Prior Period Negative Adjustment using the Search Prior Period Negative Adjustment facility outlined previously. View the Expenditure declaration and scroll down to the Delete button. Clicking on the Delete button (circled in red below) will remove this Expenditure Declaration and all associated Prior Period Negative Adjustments. Draft 5.1-26-02-2010 Page 70 of 103 European Regional Development Fund EUSF IT System User Manual Level-1 Public Beneficiary Body 10. ADD A RELATED EXPENDITURE CHECK To add an Expenditure Check to an Expenditure Declaration, scroll down through the Expenditure Declaration to the section called Related Expenditure Checks and click on the Add button. The Create New Expenditure Check page will appear and the following three fields need to be populated by the Level-1 User. Date: This is the date the transaction check was completed and dates are entered using the popup calendar or manually in the format dd/mm/yyyy. Person who carried out on-site checks on project: The name of the person who carried out the check Amount of Eligible Expenditure Transaction Checked: Enter the amount of Eligible Expenditure transaction checked by the Level-1 Public Body to original supporting documents. Click Submit to Create the Expenditure check. A message will appear indicating that the check was created successfully. It is possible to view the check by clicking on the Expenditure Check Details button. Draft 5.1-26-02-2010 Page 71 of 103 European Regional Development Fund EUSF IT System User Manual Level-1 Public Beneficiary Body 10.1.1. View Related Expenditure Check To view an expenditure check search for and open the Expenditure Declaration which includes the Expenditure Check. Scroll down through the Expenditure Declaration to the section marked Related Expenditure Declarations. Click on the View icon circled in red in the example below. The Expenditure Check Details page will be displayed. Draft 5.1-26-02-2010 Page 72 of 103 European Regional Development Fund EUSF IT System User Manual Level-1 Public Beneficiary Body 10.1.2. Update Related Expenditure Check Scroll down through the Expenditure Declaration containing the Related Expenditure Check. The Related Expenditure Check section is displayed. Click on the Update button below. located to the right of the Expenditure Check and circled in red in the example The Update Expenditure Check screen is displayed and the Level-1 User can amend any of the three fields. The user must click Submit when they have completed their amendments to the data. When the Level-1 User clicks Submit a message is displayed to indicate that the Expenditure Check was updated. Draft 5.1-26-02-2010 Page 73 of 103 European Regional Development Fund EUSF IT System User Manual Level-1 Public Beneficiary Body 10.1.3. Delete Related Expenditure Check An Expenditure Check cannot be deleted once created, it can however be updated using the Update Expenditure Check facility outlined previously. Draft 5.1-26-02-2010 Page 74 of 103 European Regional Development Fund EUSF IT System User Manual Level-1 Public Beneficiary Body 11. B1 MENU A B1 Declaration while being processed in the EUSF IT system can be in any one of five different stages. Created The B1 Declaration has been created and is not yet countersigned by the Level-1 Public Body. Proposed The B1 Declaration has been countersigned by the Level-1 Public Body and the B1 Declaration is now with the Intermediate Body for further processing. The Level-1 Public Body cannot take any further action on this B1 Declaration – unless this B1 Declaration is Rejected back to the Level-1 Public Body by the Intermediate Body. Reopened The B1 Declaration was not countersigned by the Level-1 Public Body, instead it was reopened by the Level-1 Public Body counter-signer for further work. The Level-1 Public Body must take corrective action on this B1 Declaration, verify the corrective action taken and only then will the B1 Declaration be available for counter-signing. Processed The B1 Declaration which was Proposed to the Intermediate Body has passed Intermediate Body checks and has been included by the Intermediate Body in a B2 Declaration to the Managing Authority. Rejected The Intermediate Body, following its checks on the B1 Declaration, has identified errors in the B1 Declaration and has Rejected the B1 Declaration back to the Level-1 Public Body for further work. The Level-1 Public Body must take corrective action on this B1 Declaration. Draft 5.1-26-02-2010 Page 75 of 103 European Regional Development Fund EUSF IT System User Manual Level-1 Public Beneficiary Body 11.1. Create a B1 Declaration and the Search B1 Declaration page opens. Click on the Create B1 Click on the B1 menu option Declaration button – circled in red in the example below. The Create New B1 Declaration page will appear. Draft 5.1-26-02-2010 Page 76 of 103 European Regional Development Fund EUSF IT System User Manual Level-1 Public Beneficiary Body The columns A, B,C,P,D relate to the columns which were previously used in the paper B1’s – i.e. Cumulative Adjusted Declared Prior, Declared This B1 Declaration, Negative Adjustments This B1 Declaration, Adjusted Declared This B1 Declaration and Cumulative Adjusted Declared To-Date. The first row of the B1 Declaration reports on the Eligible Expenditure and the second row on the B1 Declaration reports on the Public Eligible Expenditure. The amounts being declared on the B1 Declaration are automatically aggregated from the Project Expenditure Declarations included in the B1 Declaration. The projects with declared expenditure included in this B1 Declaration are displayed just beneath the columns A-D on the B1 Declaration. The Level-1 User can verify the correctness of the B1 Declaration by clicking on the projects and checking on the expenditure being declared in this B1 Declaration. When the Level-1 User is ready to continue creating the B1 Declaration (having checked the correctness of the figures included in the table columns A-D) then the Level-1 User must complete the Expenditure Checks for B1 section on the B1 Declaration. This section is answered by selecting Yes or No from the drop down tab. All 15 checks are mandatory and must have either Yes/No selected – depending on which is appropriate for the expenditure checks performed. Failure to select Yes/No to each of the Expenditure Checks will result in an error message and it will not be possible to create the B1 Declaration. Draft 5.1-26-02-2010 Page 77 of 103 European Regional Development Fund EUSF IT System User Manual Level-1 Public Beneficiary Body If the Level-1 User selects Yes to the question Have any financial control weakness, risk or irregularities been identified in the execution of the project(s)/operation(s)? then the Level-1 User must supply details of the corrective action that has been taken, otherwise the user will not be able to create the B1 Declaration and an error message will be displayed. The user must indicate the controls applied to guarantee valid certification and the amount of expenditure actually checked during the on-the-spot verifications. This is a mandatory field and the Level-1 User will not be able to create the B1 Declaration unless this field is populated, an error message will also be displayed if this field is left blank. Finally, if the originator of the B1 Declaration is satisfied that the eligible expenditure returned is correct (highlighted in red below) the user can select the Submit button to create the B1. The B1 Declaration is automatically signed by the user Creating the B1 Declaration and the B1 Declaration history is updated. Draft 5.1-26-02-2010 Page 78 of 103 European Regional Development Fund EUSF IT System User Manual Level-1 Public Beneficiary Body When the user selects Submit a message is displayed indicating that the B1 Declaration was created successfully. To view the B1 Declaration, click on the B1 Declaration Details button. When a B1 is Created it is assigned a unique B1 Reference number and the status of the B1 Declaration changes to Created – see example below highlighted by red circle. A B1 Declaration will remain in Created status until it is countersigned by the Level-1 Counter-Signer. The Level-1 Counter-Signer cannot be the same Level-1 User that Created the B1 Declaration. Draft 5.1-26-02-2010 Page 79 of 103 European Regional Development Fund EUSF IT System User Manual Level-1 Public Beneficiary Body 11.1.1. Attaching Documents to a Created B1 Declaration To attach a document to a Created B1 Declaration the Level-1 User should scroll down through the Created B1 Declaration to the Related B1 Documents section at the end of the Created B1 Declaration screen and click on the Add button. The Create new B1 Document window appears. Clicking on the Add button in the Related B1 Documents section of the B1 Declaration will open the Create new B1 Document window. Click on the Browse button to find the document to be attached. A comment can be added in the Comment box if the user wants to convey some particular information about the attached document. The user must click the Submit button to finish attaching the document. Draft 5.1-26-02-2010 Page 80 of 103 European Regional Development Fund EUSF IT System User Manual Level-1 Public Beneficiary Body 11.1.2. View Documents included in a B1 Declaration Search for the B1 Declaration using the B1 Search facility. Scroll down through the B1 Declaration to the Related B1 Documents section. To View a document click on the View icon (circled in red) beside the document you want to view or click on the document name. 11.1.3. Delete Document included in a B1 Declaration Search for the B1 Declaration using the B1 Search facility. Scroll down through the B1 Declaration to the Related B1 Documents section. Click the delete icon the document you want to delete. Draft 5.1-26-02-2010 Page 81 of 103 beside European Regional Development Fund EUSF IT System User Manual Level-1 Public Beneficiary Body 11.2. Search for a B1 Declaration Select the B1 menu from the top-level menu. It will appear shaded green in colour. There are no submenus available from the B1 menu. The Search B1 Declaration page is displayed by default. It is possible to search for any B1 Declaration created within your Level-1 Public Body. Enter the B1 Declaration number and click on the Search button at the lower left of the page or for a full listing of all B1 Declarations for your Level-1 Public Body just click the Search button on the lower left of the Search B1 Declaration screen. The Search B1 Declaration Results page will appear listing any declarations that match the criteria supplied. Draft 5.1-26-02-2010 Page 82 of 103 European Regional Development Fund EUSF IT System User Manual Level-1 Public Beneficiary Body 11.2.1. View a B1 Declaration To view a B1 Declaration search for the B1 Declaration using the Search B1 Declaration facility outlined previously. When the Search Results are displayed the user can click on the View icon the B1 Declaration they want to View. located to the right of Alternately to View the B1 Declaration the Level-1 User can left click on the B1 Declaration Number of the B1 Declaration they want to View. The B1 Declaration will be displayed. Draft 5.1-26-02-2010 Page 83 of 103 European Regional Development Fund EUSF IT System User Manual Level-1 Public Beneficiary Body 11.3. Counter Sign B1 Declaration If the Counter-Signer of the B1 Declaration is satisfied with their checks and expenditure being declared they can Counter-Sign the B1 Declaration. Select the B1 Declaration using the Search B1 Declaration facility outlined previously and View the B1 Declaration either by clicking on the View icon or by clicking on the B1 Declaration Number. The B1 Declaration Details page will be displayed, scroll down through the B1 Declaration until you reach the section indicating that the B1 Declaration is not yet Counter-Signed. The Counter-Signer must satisfy themselves with the correctness of the checks which were performed on the eligible expenditure declared in this B1 Declaration. The Counter Signer can see the project declared eligible beside any of the projects (and expenditure included in the B1 Declaration and by clicking on the View icon circled in red below) the Counter Signer can View details of the expenditure declaration(s) included in this B1 Declaration. Draft 5.1-26-02-2010 Page 84 of 103 European Regional Development Fund EUSF IT System User Manual Level-1 Public Beneficiary Body If the counter signer is satisfied to counter-sign the B1 Declaration then the counter-signer clicks on the Counter-Sign B1 Declaration button, the Counter Sign B1 Declaration screen will appear. The counter-signer then clicks on the Submit button to proceed to counter-sign this declaration. When the B1 has been counter-signed the status of the B1 changes to Proposed as this B1 is now Proposed to the Intermediate Body and cannot be amended or Reopened by the Level-1 Public Body unless it is firstly Rejected by the Intermediate Body. Draft 5.1-26-02-2010 Page 85 of 103 European Regional Development Fund EUSF IT System User Manual Level-1 Public Beneficiary Body 11.4. Reopen B1 Declaration Search for the B1 Declaration using the Search B1 Declaration facility outlined previously. Open the B1 Declaration by clicking on the View icon located to the right of the B1 Declaration or open the B1 Declaration by left clicking on the B1 Declaration Number. The B1 Declaration will be displayed. Scroll down through the B1 Declaration until you get to the Reopen B1 Declaration button Draft 5.1-26-02-2010 Page 86 of 103 European Regional Development Fund EUSF IT System User Manual Level-1 Public Beneficiary Body When the counter-signer selects Reopen B1 Declaration the message ‘If you are sure you wish to reopen the B1 Declaration, press OK’ is displayed and the counter-signer can continue or abandon the Reopen B1 Declaration process. The counter-signer must then select Submit in order to Reopen the B1 Declaration. The B1 has now been Reopened by the counter signer. 11.4.1. Update Reopened B1 Declaration When the Creator of the B1 Declaration searches on the B1 Declaration using the B1 Declaration Search facility outlined previously they will see that the B1 Declaration Status is Reopened. The Creator of the Reopened B1 Declaration selects the Reopened B1 Declaration by clicking on the View icon or left clicking on the B1 Declaration Number. The Project Expenditure Declarations included in the Reopened B1 Declaration are now unlocked and can again or deleted using the Delete icon or additional Expenditure be updated using the Updated icon Declarations can be added using the Created Expenditure Declaration facility outlined previously. Draft 5.1-26-02-2010 Page 87 of 103 European Regional Development Fund EUSF IT System User Manual Level-1 Public Beneficiary Body The Creator of the B1 Declaration can Update the Expenditure Declarations included in the Reopened B1 Declaration (see Update Expenditure Declaration outlined previously) or the Creator of the B1 Declaration can Add additional Project Expenditure Declarations (see Create New Expenditure Declaration outlined previously) or the Creator of the B1 Declaration can Delete Expenditure Declaration from this Reopened B1 Declaration (see Delete Expenditure Declaration outlined previously). Having completed all the amendments to the Reopened B1 Declaration the Level-1 Creator of the Reopened B1 Declaration must Verify the Reopened B1 Declaration. The Creator of the Reopened B1 Declaration must now Verify this Reopened B1 Declaration by clicking on the Verify B1 Declaration button. After the Reopened B1 Declaration is Verified the Creator of the B1 Declaration must check that they have answered all of the Eligibility questions correctly on the Reopened B1 Declaration. When the Creator of the B1 Declaration has completed all the Eligibility checks on the Reopened B1 Declaration the Creator of the Reopened B1 Declaration clicks on Submit. Draft 5.1-26-02-2010 Page 88 of 103 European Regional Development Fund EUSF IT System User Manual Level-1 Public Beneficiary Body A message is displayed to indicate that the Reopened B1 Declaration was Verified. The Reopened B1 Declaration status changes to Created and the B1 Declaration is ready to be Counter Signed again (see Counter Sign B1 Declaration outlined previously). Draft 5.1-26-02-2010 Page 89 of 103 European Regional Development Fund EUSF IT System User Manual Level-1 Public Beneficiary Body 12. REJECTED B1 DECLARATION FROM INTERMEDITE BODY The Intermediate Body must perform its verification checks on the eligible expenditure included in the Proposed B1 Declaration and if the Intermediate Body is dissatisfied with its verification checks on the Proposed B1 Declaration the Intermediate Body will Reject the B1 Declaration. The Rejected B1 Declaration automatically reverts back to the Level-1 Public Body and the Intermediate Body must indicate the Reason for Rejection on the Rejected B1 Declaration. In the following example B1 Declaration Number 242 which was Proposed(countersigned) by Clare CEB has been Rejected (circled in red below) by the Intermediate Body following their verification checks. Draft 5.1-26-02-2010 Page 90 of 103 European Regional Development Fund EUSF IT System User Manual Level-1 Public Beneficiary Body The Level-1 Public Body (Clare CEB) scrolls down through the Rejected B1 Declaration and at the end of the Rejected B1 Declaration, in the Related Declaration Stage History, the Level-1 Public Body can see the Reason for Rejection entered by the Intermediate Body. To enable the Level-1 User to amend the Expenditure Declarations included in Rejected B1 Declaration the Level-1 User clicks on Verify B1 Declaration – see following example. Draft 5.1-26-02-2010 Page 91 of 103 European Regional Development Fund EUSF IT System User Manual Level-1 Public Beneficiary Body When the Level-1 User that Created the B1 Declaration (in this example Meg Ryan) clicks on Verify B1 Declaration and then clicks Submit a message is displayed to indicate that the Rejected B1 Declaration has been Verified. The Level-1 Counter Signer (in this example Demi Moore) now Reopens this B1 Declaration using the Reopen B1 Declaration facility outlined earlier in this manual. Draft 5.1-26-02-2010 Page 92 of 103 European Regional Development Fund EUSF IT System User Manual Level-1 Public Beneficiary Body When the Level-1 Counter Signer Reopened the B1 Declaration the Level-1 User who Created the B1 Declaration ( in this example Meg Ryan) can amend, delete or add now expenditure for this B1 Declaration using the Update Expenditure Declaration, Create New Expenditure Declaration or Delete Expenditure Declaration outlined previously. When the Level-1 User has completed all amendments to this Rejected B1 Declaration the Level-1 User clicks the Verify B1 Declaration button. After the Reopened B1 Declaration is Verified the Creator of the B1 Declaration must check that they have answered all of the Eligibility questions correctly on the Reopened B1 Declaration. When the Creator of the B1 Declaration has completed all the Eligibility checks on the Reopened B1 Declaration the Creator of the Reopened B1 Declaration clicks on Submit. A message is displayed to indicate that the Reopened B1 Declaration was Verified. Draft 5.1-26-02-2010 Page 93 of 103 European Regional Development Fund EUSF IT System User Manual Level-1 Public Beneficiary Body The Reopened B1 Declaration status changes to Created and the B1 Declaration is ready to be Counter Signed again (see Counter Signe B1 Declaration outlined previously) Draft 5.1-26-02-2010 Page 94 of 103 European Regional Development Fund EUSF IT System User Manual Level-1 Public Beneficiary Body 13. REPORTS There are specific Reports available from the system however, it is possible to print any screen the user requires from the system using the Print Screen or using the File Print options. As the screens are all wider than most A4 paper it is important to check that the data you want to print from the screen will fit on A4 and if not then the user needs to select Landscape before printing. 13.1. B1 Reports On the B1 Declaration Details screen under the Counter Signer section a list of Reports appear. There are eight reports accompanying each B1 Declaration. The Reports in the ‘This Claim Only’ tab report on the expenditure included in the current B1 Declaration for the Level-1 Public Body. The Reports in the ‘Cumulative to Date’ tab report on the cumulative to-date expenditure included in all B1 Declarations to-date for the Level-1 Public Body. Draft 5.1-26-02-2010 Page 95 of 103 European Regional Development Fund EUSF IT System User Manual Level-1 Public Beneficiary Body 13.2. Export Report to Excel To export a report to Excel, open the report by clicking on the report name in the B1 Declaration. Scroll down to the end of the report and click on the Export button located in the lower left of the report. Depending on the firewall security setting for your Level-1 Public Body you may need to request your IT help desk for your Level-1 Public Body to permit you to download the Excel file. If your firewall blocks the download of the Excel file you will receive a message similar to the following message. When your firewall policy permits you to download the file to Excel a message is displayed asking you to select Open or Save. If you select Save you will be asked to specify the destination in which you wan the file saved. Selecting Open will open the Excel file and display it for Viewing purposes but will not save a copy. . Draft 5.1-26-02-2010 Page 96 of 103 European Regional Development Fund EUSF IT System User Manual Level-1 Public Beneficiary Body 13.2.1. Total Eligible - This Claim Only From the B1 Declaration Details screen it is possible to view a Total Eligible Report. Click on the Total Eligible Report hyperlink under the Reports section. The Total Eligible report lists each project included in this B1 Declaration and the details relating to the Total Eligible figures included in the B1 Declaration together with BMW and S&E and overall Totals. The Total Eligible report reports on the data included in Row 1 of the B1 Declaration. Draft 5.1-26-02-2010 Page 97 of 103 European Regional Development Fund EUSF IT System User Manual Level-1 Public Beneficiary Body 13.2.2. Total Public Report – This Claim Only From the B1 Declaration Details screen it is possible to view a Total Public Report. Click on the Total Public Report hyperlink under the Reports section. The Total Public report lists each project included in this B1 Declaration and the details relating to the Total Eligible Public figures included in the B1 Declaration together with BMW and S&E and overall Totals. The Total Public report reports on the data included in Row 2 of the B1 Declaration. Draft 5.1-26-02-2010 Page 98 of 103 European Regional Development Fund EUSF IT System User Manual Level-1 Public Beneficiary Body 13.2.3. Adjustments Report – This Claim Only From the B1 Declaration Details screen it is possible to view the Adjustments Report. Click on the Adjustments Report hyperlink under the Reports section. The Adjustments Report lists each adjustment included in this B1 Declaration and reported in Column C of the B1 Declaration. To View the report place the cursor on the report name and left click. The report can also be exported to Excel. Where there are no Negative Adjustments included in the B1 Declaration (Column C of B1 Declaration) then the ‘Adjustments Report – This claim Only’ will display the message ‘No Results were Found’. Where the B1 Declaration does include Negative Adjustments – as in the following example for B1 Declaration Number 242 - then the Adjustments Report – this Claim Only displays details of these adjustments – see example on following page. Draft 5.1-26-02-2010 Page 99 of 103 European Regional Development Fund EUSF IT System User Manual Level-1 Public Beneficiary Body Draft 5.1-26-02-2010 Page 100 of 103 European Regional Development Fund EUSF IT System User Manual Level-1 Public Beneficiary Body 13.2.4. Total Eligible Report – Cumulative to-date From the B1 Declaration Details screen it is possible to view the Total Eligible Report – Cumulative todate. Click on the Total Eligible Report under the Cumulative to-date Reports section of the B1 Declaration. The Total Eligible – Cumulative to-date report details all Eligible Expenditure for all projects included in B1 Declarations to-date for the Level-1 Public Body. To View the report place the cursor on the report name and left click. The report can also be exported to Excel. Draft 5.1-26-02-2010 Page 101 of 103 European Regional Development Fund EUSF IT System User Manual Level-1 Public Beneficiary Body 13.2.5. Total Public Report – Cumulative to-date From the B1 Declaration Details screen it is possible to view a Total Public Report - Cumulative. On the Cumulative Reports tab of the B1 Declaration click on the Total Public Report hyperlink under the Cumulative Reports section. The Total Public – Cumulative to-date report details all Public Eligible Expenditure for all projects included in B1 Declarations to-date for the Level-1 Public Body. Draft 5.1-26-02-2010 Page 102 of 103 European Regional Development Fund EUSF IT System User Manual Level-1 Public Beneficiary Body 13.2.6. Total Adjustments Report – Cumulative to-date From the B1 Declaration Details screen it is possible to view the Total Adjustments Report - Cumulative. On the Cumulative Reports tab of the B1 Declaration click on the Total Adjustments Report hyperlink under the Cumulative Reports section. Draft 5.1-26-02-2010 Page 103 of 103


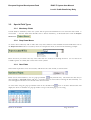


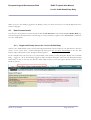
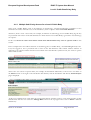


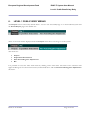

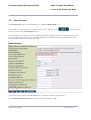


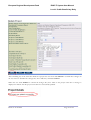
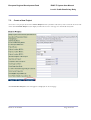
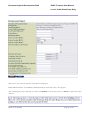

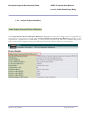
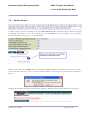
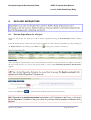


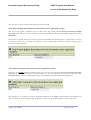


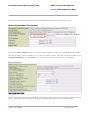
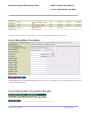
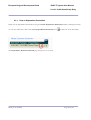
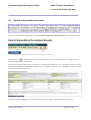
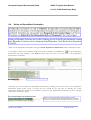
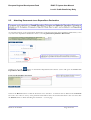


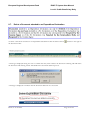

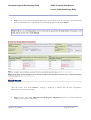

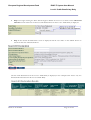
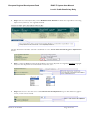


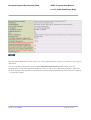
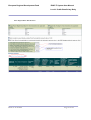
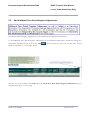
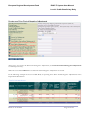

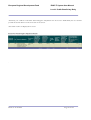
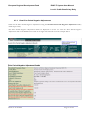

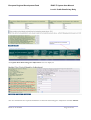
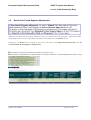
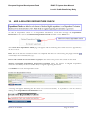
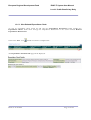
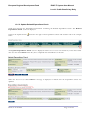

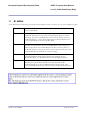

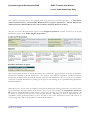

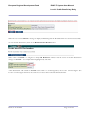
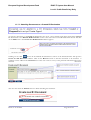

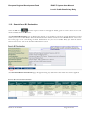
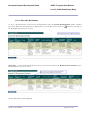


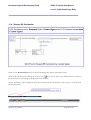
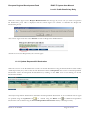


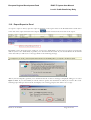

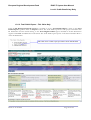

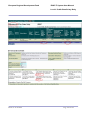

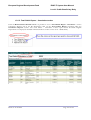
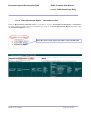


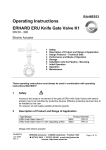


![ManualCover-3Panel10_03 [Converted]](http://vs1.manualzilla.com/store/data/005711777_1-408df82eece155ec198a9b3b174c8b0a-150x150.png)