1
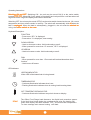
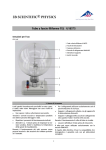
Unstirred Baths
FLD Series
Unstirred DuoBaths
Note:
Always maintain adequate water/oil levels in Foodbath.
Periodically check there is sufficient water/oil in the bath at all times.
Contents
About this Manual
Symbols
3
3
Location
Unpacking
Safety
Power Supply Lead and Connection to Electrical Supply
Liquid Level
4
4
4
4
4
Operating Instructions
- Switching On and Off
Heating Control Modes
- Control Panel
Keyboard Description
LED Indicators
5
5
5
5
5
5
Single Point Temperature Control
- Setting Temperature
- Setting Time
- Timer Operation
6
6
6
6
Cleaning
Warranty
Portable Appliance Testing
Duobath
7
7
7
7
Declaration of Conformity
8
Product Final Inspection and Electrical Safety Report
9
2
About this Manual
This Manual contains instructions for unstirred baths which must be followed in order that the
product is operated correctly - if you have a DuoBath, these instructions relate to each seperate
chamber.
Please ensure that each chamber has fluid in it before switching on the product.
General Notes
Please observe the following safety and operating precautions:
1.
2.
3.
4.
5.
6.
7.
8.
9.
9.
10.
11.
12.
Fill the tank with either water or oil prior to connection to power supply.
Connect only to a power supply with the corresponding voltage to that specified on the
rating label positioned on the rear of the unit.
Ensure that the power supply has a safety earth (ground) terminal.
Ensure that the mains switch and power supply connector are accessible during use.
The mains supply cord fitted to this product is a heat resistant type and should be replaced
by an equivalent.
DO NOT block or restrict ventilation slots; DO NOT place directly adjacent
to or near hot heat sources. Ensure that there is sufficient space around
the bath to allow it to provide optimum temperature control.
Always follow good safe kitchen practice.
Use only water or food grade oils within their specified temperature range. If the alarm
lamp is illuminated the liquid temperature may be above its recommended maximum.
The bath is designed primarily for sous vide/low temperature method using water.
- if oil is used for direct cooking, the bath will self adjust to oil.
- if reverting to water, you may need to run the bath for a couple of times in order
that the controller, re learns/adjusts its parameters for water and vice versa.
Use caution when topping up or draining the tank as the liquid in the tank may be very hot
or cold.
Drain before moving the bath. Allow the liquid to cool to 40°C before draining.
In the event of the over or under temperature alarm being illuminated do not touch the liquid
as it may be very hot or cold. Take care when lifting the lid - steam and hot vapours can
cause scalding.
Always use a lid when operating at temperatures above 60°C for continued
optimal temperature control.
Amendments
Issue 2
Issue 3
Issue 4
Issue 5
Issue 6
Issue 7
Issue 8
October
June
July
March
January
June
August
2005
2006
2007
2007
2008
2010
2010
Updates on use and quick tips added.
Opt function added.
New rear mains switch added.
Run back timer.
Amendment to footnote.
2010 model K30.
2010 model 2P.
Symbols
“Always use”
!
At a glance tips on operating baths.
Caution refer to Instruction Book
Protective earth conductor terminal
3
Location
The product must be placed on a smooth, level and sturdy work surface, preferably near a sink or
drain for emptying. Use in a ventilated kitchen. Suitable for use in ambient temperatures 5°C to
40°C with a maximum humidity 80% (temperature 31°C) decreasing to 50% (temperature 40°C).
The product is designed for kitchen use.
DO NOT block or restrict ventilation slots; DO NOT place directly adjacent to or near hot
heat sources. Ensure that there is sufficient space around the bath to allow it to provide
optimum temperature control.
Unpacking
Remove the product from its packaging. If any damage is discovered please notify immediately.
Retain the packaging over the warranty period. Supplied assembled complete ready for use (excludes cooking medium).
Safety
Do not touch any electrical contacts or open any closure panels.
!
RISK OF ELECTRICAL SHOCK!
The FLD Series are Class 1 (IEC519 - Part 2) = low liquid level protection,
reference to over temperature condition providing product over temperature
protection.
Power Supply Lead and Connection to Electrical Supply
Before connecting the product to the electrical supply, check
that the information on the rating label is compatible.
!
IF IN DOUBT CONSULT AN ELECTRICIAN. THE PRODUCT MUST BE
EARTHED! Where the mains supply or plug connection differs refer to local
regulations or qualified electrician.
Liquid Level
Fill the tank with water for sous vide method, or oil for direct cooking, prior to connection to
power supply. When using oil there is an initial heating period where the over temperature
alarm will sound and heaters cut in and out momentarily. This will cycle until the oil becomes
homogenised when normal control will resume.
Minimum liquid level - must cover the top of the shelf by 40mm.
Maximum liquid level - must not exceed the ridge in the tank.
!
If the bath fails to maintain water temperature or heat up,
please check to ensure that there is sufficient water/oil in the bath.
We recommend that this is checked periodically when in use.
Before filling or emptying the bath disconnect the unit from the
mains electrical supply.
4
Operating Instructions
Switching ON and OFF
OFF: Switching ON - the unit may be turned ON (I) at the mains switch
located at the rear
rear. When ON (I) the switch is illuminated and unit performs a self test where all
segments of the 3 digit LED display and indictors illuminate.
Switching OFF: the unit may be turned OFF(O) at the mains switch located at the rear. All current
temperature and time values remain in memory. The switch will automatically click off when the
bath is unplugged
unplugged. When the bath is subsequently plugged in, the unit must be switched on
using the mains switch at the rear.
Keyboard Description
FUNCTION
- Press once “SP1” is displayed.
- Press twice “t” is displayed, timer setting.
DOWN ARROW
- Used to decrease a value. Hold continously to scroll.
- When pressed for more than 1.5 seconds, “SP1” is displayed.
UP ARROW
- Used to increase a value. Hold continously to scroll.
RUN
- When pressed for more than 1.5 seconds will activate/deactivate timer
function.
- Used to turn off buzzer.
LED Indicators
HEATING INDICATOR
When LED is illuminated bath is being heated.
TIMER INDICATOR
- Continous illumination indicates timer is set.
- Flashing illumination indicates timer is running back/counting down.
°C
SET TEMPERATURE INDICATOR
- Continous illumination indicates set point is shown on display.
“FILL”
The Clifton Food Range bath features a low liquid level protection system.
If the liquid level drops below the predetermined point the heating will
cease and display will flash between “FILL” and actual bath temperature.
To clear message and resume heating refill bath.
5
Setting Temperature
1. Press and hold the down arrow for more than 1.5 seconds to display
“SP1” the set temperature.
°C
The 'set temperature' indicator will illuminate.
2. Use up and down arrow keys to select required temperature
temperature. If the
page button is pressed at this time it is immediately acknowledged and the
timer can be set.
3. After setting temperature the display flashes between “SP1” and set
temperature and will automatically revert to show actual liquid temperature.
Heater indicator will illuminate.
Setting Time
5. The Clifton Food range bath is now set and will heat and control the
temperature.
liquid at set temperature
1. Repeatedly press FUNCTION button until "t" appears on the display.
It will then alternate between showing "t" and time - displayed as hh.mm
2. Press either up or down arrow to select desired number of hours:minutes.
- Minimum time setting is 0 hours and 01 minutes - displayed as 00.01
- Maximum time setting is 99 hours and 59 minutes - displayed as 99.59
3. Once the desired time is entered press function button to confirm. Display
reverts to actual liquid temperature.
Timer Operation
1. To start timer press and hold RUN button for more than 1.5 seconds.
2. Heating indicator will flash when set temperature has been reached
and is being maintained.
3. The timer indicator starts to flash showing the timer is running.
4. To view time remaining, press UP ARROW button, “t” appears and time
remaining is displayed as h:mm.
5. An audible beeping and "End" message indicates timed period has
finished. Press RUN button to deactivate buzzer and clear "End" message.
!
If power is interrupted during Timer mode, the displays shows “P.OFF”
when resumed. To clear, press and hold the RUN button until display
reverts to actual temperature. Timer mode will then continue. To
deactivate timer mode, press and hold RUN button.
76
6
Cleaning
!
Important - please follow these cleaning instructions to avoid possible
damage to the unit which may affect its performance.
Disconnect the product from the electrical supply before cleaning.
The water bath must be cleaned at regular intervals:Casework
Casework: wipe with a cloth or sponge soaked in warm soapy water.
Stainless steel tank:
tank descale regularly to ensure that the corrosion resistance and normal
operating conditions are maintained throughout its working life. Descale by adding 1 litre of
vinegar to normal volume of water and gently heating to 50°C for an hour, empty and brush
the lime away. Rinse thoroughly afterwards.
Warranty
The water bath is covered by a 2 Year Warranty against defects in materials and workmanship.
In the event of a problem contact our Service Department at Nickel-Electro Limited, Oldmixon
Crescent, Weston super Mare, North Somerset BS24 9BL, England, Tel +44 1934 626691 Fax
+44 1934 630300.
Portable Appliance Testing
These tests should be conducted by a qualified person.
!
DO NOT PAT TEST THE BATH UNLESS IT CONTAINS WATER.
THIS EQUIPMENT MUST NOT BE FLASH TESTED!
Duobaths
We recommend that both chambers have liquid in them in case the bath is
inadvertently switched on when dry - otherwise this will damage the concealed heaters.
However, if desired, it is possible to immobolise one of the controllers:
To Immobilise Tank:
Press and hold both the
and
for 3 seconds.
“Stby” will appear on the display and it will remain in this state. All heating and control in this tank
is immobilised.
To reinstate control in the tank, repeat above.
7
EC Declaration of Conformity
We herewith confirm the following product:
FLD Food Range
Conforms with the requirements outlined by the following European Directives:
Low Voltage Directive (2006/95/EEC)
EMC Directive (89/336/EEC)
Conforms with the requirements of following standards:
BS EN 61010:1:1993
BS EN 61010:2.010:1995
Safety requirements for electrical equipment for
measurement, control and laboratory use.
BS EN 61326:1997
Electrical equipment for measurement
control and laboratory use - EMC requirements.
Nickel-Electro Limited
Oldmixon Crescent
Weston-super--Mare
North Somerset
BS24 9BL
England
t 01934 626691
f 01934 630300
w www.cliftonfoodrange.co.uk
e [email protected]
8
Final Inspection and Electrical Safety Test Report
BX0850K30-2P