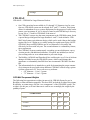
1
PMLCompleteFAQ.doc
PML COMPLETE FAQ
2/24/07
Information Layout In This FAQ
The information in this FAQ is laid out alphabetically. The headings for each section,
such as PML AIRFRAMES FAQ, are in all-capital letters to help you find each section in
the clickable Table of Contents/Index on the left side of the screen.
For more information on any of the systems or components discussed in this FAQ,
always refer to the appropriate page on the website at www.publicmissiles.com. Nearly
all details available for any of these components or systems (such as length, weight, wall
thickness, etc.) are shown on the website page where the component or system is sold.
Each Mini-FAQ as available on that item’s page in the webstore begins on a new page in
this Complete FAQ. This aids in being able to maintain the document and set up a
structure that makes the PDF file easily searchable.
02/24/07
1/74
PMLCompleteFAQ.doc
PML ADHESIVES FAQ
We say so in all our kit instructions, but make sure you lightly sand any area
to be bonded! This is important to get a good "bite" on the materials for the
epoxy, and will dramatically increase the strength of your finished rocket!
Adhesives/Epoxy
•
•
•
•
•
•
•
•
•
•
•
PML epoxy is competitively priced. Also, buying PML epoxy is a convenience to the
customer; you can get everything you need for your high-power kit from one place.
We recommend using our epoxy because it’s known to work well. We’ve used it on
kits and prototypes we’ve built.
PML can answer questions on our epoxy because we use it and have experience with
it. We can’t answer questions about epoxy from other manufacturers.
PML does not recommend use of CA (cyanoacrylate, “super glue”) in most of our
kits. Experienced modelers may find uses for CA, but do not use it in our kits unless
specifically instructed to do so, or unless you know for sure from experience that it’s
OK. CA should never be used as a replacement for epoxy; it should be used as an
assembly aid as opposed to as the main bonding agent (unless specified otherwise in
the kit instructions). NEVER use CA on or near piston strapping or shock cords. The
CA may attack the strapping and dramatically reduce the strength.
General Rule of Thumb: Slower setting time epoxy = stronger finished kit
5 min. epoxy can be used on all PML kits due to the precision fit of components and
interlocking design, but 12 min. is often recommended for those who don’t have the
experience to complete a procedure before the 5 min. type sets up. We recommend 12
minute or 30 minute epoxy for all “super-strength” needs.
Finishing epoxy:
• More brittle, but also more sandable.
• Is very thin, and good to use when fiberglassing because it wets the ‘glass cloth
well.
• Should not be used for structural work.
• It takes 12-24 hours before fully setting up and becoming sandable.
Mix ratio of the epoxy provided with the Nimbus ‘Glassing Kit is 4 parts white to 1
part clear.
When you see “lightly sand fillets” in our instructions, it means don’t sand with too
much pressure. High pressure will generate heat and gum up the epoxy while sanding.
Most brands of epoxy adhesive bond well with no adverse affect to Quantum Tubing.
The bonding area must be sanded prior to applying epoxy. Follow the suggestions in
“Do’s and Don’ts” in the Airframe FAQ Quantum Tubing section.
Scuff all areas where epoxy will be with 120-grit sandpaper. This includes motor
mounts, fins, INSIDE the airframe, etc. Use 220 or 320 on surfaces that will be
painted.
02/24/07
2/74
PMLCompleteFAQ.doc
Fiberglass Nosecones
If using epoxy in a fiberglass cone to retain nose weight, do just a little at a time,
allowing the epoxy to cool between batches. This will prevent the resin used in
manufacture of the cone from breaking down due to the heat of the setting epoxy. When
you put a lot of quick set epoxy into the tip of the cone the heat generated during curing
can exceed 200 degrees F. The resin the cone is made of begins to deteriorate at 170
degrees. Better yet, use a slow-setting (24-hour) epoxy or our Two-Part Expanding Foam
(sold on the Adhesives page of the webstore).
PML Two-Part Expanding Foam
This foam is great for fin encapsulation, securing noseweight, etc. It's especially handy
for those tight situations where you just can't get into the airframe to get nice internal
fillets on your fins, or when you know your rocket is going to see super-heavy-duty
flights and you want every bit of strength you can get. PML Expanding Foam is a simple,
inexpensive, and easy way to do it.
There is a PDF document on the Adhesives Page of our website explaining how to use
the Expanding Foam. The website PDF mentions that open flame and hot-wire cutting
can produce dangerous fumes, but the heat of a motor casing next to the foam is not a
concern.
Don't be fooled into thinking the expanding foam in a can you can buy at the hardware is
the same stuff...it isn't. The main problem with it is, unlike our foam, it needs air to cure,
which you don’t have inside the rocket in a foam-filled area. The can foam often doesn't
completely cure, or even can stop curing, and reactivate months later when you get the
rocket in the hot sun. PML foam stops expanding after 4-5 minutes. It will NOT expand
any more with heat, sunlight, etc.
The PML Expanding Foam features are:
• Expands up to 25 times its liquid volume. (Dependant on temp. and humidity)
• High temp formula. Perfect for fin root encapsulation.
• High adhesion rate.
• Two equal part (by volume) mix ratio.
• Does not need air contact to cure.
• Fast curing.
• Light weight.
• Easy to cut and sand. Very carvable.
• Shelf life of 1 year at moderate (70-80 F) temps. 2 yrs if kept cool and dry
• Great for strengthening thin wall nose cones or securing nose weight.
However, take care when using the foam in large batches, as it generates enough heat in
large batches to deform a fiberglass nosecone. We recommend multiple smaller batches
(about 4-6 ounces at a time) to fill large areas.
02/24/07
3/74
PMLCompleteFAQ.doc
PML AIRFRAMES FAQ
Airframe Tubes
Our tubing is specified by ID. Be sure to add 2x the wall thickness if you need to
determine the OD. Stock, full length tube length tolerance: -0.00, +0.25”.
Airframe Selection Criteria
Quantum Tube airframes are the best choice for most sport rocketry applications. QT is
very easy to work with and finish, with no spiral grooves to fill. It’s very strong for most
rocket flying, and is also very forgiving to the impacts of rough landings. However, QT is
NOT a replacement for fiberglassed phenolic; it is simply an easier-to-use material in
applications that do not require the specific features of phenolic. PML parts such as
nosecones, centering rings, couplers, etc., all fit QT just as well as they fit phenolic.
However, there are some limitations with QT:
1. It comes only in 2.1, 2.5, 3.0 and 3.9” diameters
2. It is not intended for near-mach (transonic) or above-mach (supersonic) flights.
(See our online FAQ for information on mach and near-mach flying)
3. It is not intended to be used as a base for fiberglassing, Kevlar, or other typical
tube-strengthening methods.
4. It is not intended for use in minimum-diameter rockets (rockets where the
airframe IS the motor mount; the motor casing touches the airframe directly)
If your rocket does not fit any of the above special applications (and about 90% of most
fliers’ rockets don’t), QT’s right for you.
Phenolic airframe tubing is the “staple” of high-power rocketry. It was first introduced
because it is much stronger than cardboard tubing, with almost 5x the compression
strength. It also comes in all sizes, from 1.1 to 11.4”. It fits all PML components such as
nosecones, centering rings, and etc. perfectly. It is also a very good base for rockets that
will require the strengthening of fiberglass, Kevlar, carbon fiber, or similar materials. For
this reason, we recommend phenolic as the appropriate tubing for rockets that are 6.0,
7.5, or 11.4” in diameter, or rockets that will require strengthening for the rigors of
transonic or supersonic flight. We also recommend phenolic for transonic or supersonic
flights in kits of 2.1” diameter, as phenolic can withstand those flights without
strengthening in most instances.
Fiberglassed phenolic is THE choice when high-stress flights of transonic, supersonic, or
“BIG-motor” flights are planned. Level 3 flights should all begin with fiberglassed
phenolic as the airframe tubing, as should any rocket above 2.5” diameter that will fly
greater than 950fps (see our online FAQ in the Kit Strengthening section for more).
Fiberglassed phenolic tubing is extremely strong and able to handle nearly any flight
profile you can imagine. PML fiberglassed tubes are manufactured using the latest high
temperature compression process to guarantee superior laminate bonding and the best
possible cloth to resin ratio (read: highest strength/lowest weight). It comes to you pre-
02/24/07
4/74
PMLCompleteFAQ.doc
glassed, initially sanded, and almost ready to paint. If you want the best, or need ultimate
strength, PML pre-glassed phenolic is for you.
QT Kits/Phenolic Kits
All kits from 2.1-3.9” diameter (except Nimbus) come standard in QT. All kits 6.0” and
larger are phenolic, as QT is not available larger than 3.9”. Any of our QT kits can be
special-ordered in phenolic. Contact "PML Central" about it at 586-421-1422 9-5pm EST
Mon-Fri or [email protected] for pricing and delivery details. (It
usually costs a little more and takes longer since it's a special request).
Premium Kraft Phenolic Tubing
• Tests show nearly 5x greater compression strength than cardboard.
• Doesn’t fray when cut or “fuzz” when sanded.
Phenolic is more brittle than cardboard, but:
• Damage is localized; impact damage doesn’t “travel” up the tube like cardboard.
• No “accordion” damage like cardboard with compression loading; again, damage
stays localized and is easily repaired by cutting off the damage and splicing on a new
piece. Accordion damage ruins the entire tube with cardboard in most cases.
• Phenolic is waterproof; good for wet sanding or if rocket lands in water, or if rocket is
lost and is exposed to the elements until found.
Real PML phenolic tubing has the PML logo printed inside the tubing. If it doesn’t have
the logo, it’s not real PML tubing. Beware of imitations, because all tubes are not the
same. One manufacturer’s 4” tube may not be the same size as another.
PML Tubing/Component Compatibility With Other Brands
We cannot tell you with certainty whether our tubing is compatible with that of another
manufacturer. This also includes whether our couplers, nosecones, pistons, CPR parts,
etc. will fit another manufacturer’s tubing. With the variation in tubing from one
manufacturer to another, we simply cannot tell you with certainty if our components will
match well with non-PML tubing.
PML Phenolic Tubing vs. “Flexible” Phenolic Tubing
The so-called “flexible” phenolic tubing available from others is nothing more than plain
cardboard with an inside and outside skin of phenolic, or interlaced layers of phenolic
and cardboard. In our testing, the tubing was not nearly as flexible as the claims would
lead you to believe, and doesn’t have the characteristics of true PML phenolic that have
made ours the industry standard for high power rockets for the last 10 years.
The flexibility features of the other tubing do not prevent damage, they simply “damage
differently”. Our tubing takes a big impact to fail at all, and fails by obvious cracking or
chipping. The competitors will fail through less impact specifically because of their
“flexibility”. Their flexibility allows the tubing to flex and the layers to delaminate with
an impact that our tubing would take without damage. Said another way, once you get to
a certain point, our tubing will crack or chip, but ours will take a bigger hit for it to suffer
02/24/07
5/74
PMLCompleteFAQ.doc
any damage at all. For this reason, we believe our tubing to be better overall because it
can absorb the smaller impacts that will begin hidden structural damage with
competitor’s flexible phenolic tubing. Better to have an airframe chip or crack on the
ground where you can see it and fix it first than to have the whole rocket destroyed under
the stress of flight from hidden structural damage.
PML Pre-Glassed Tubing Service
PML offers a fiberglassing service for our phenolic airframe tubing. All tubing is vacuum
bagged. The fiberglassing service leaves the tubes with a smooth finish, ready for
priming and painting with little if any prepwork required. Our pre-glassed tubing is
available on the Airframes section of the webstore.
•
•
Airframe tubes 2.1" through 3.9" get 3 wraps of 6-oz. cloth.
Airframe tubes 6.0" through 11.4" get two wraps of 16-oz. cloth.
Quantum Tube
These great airframe tubes are made in the USA from a special blended polymer that is
extremely durable and easy to use. Quantum Tube can be squeezed, dropped, or even
thrown and will not suffer any damage as can sometimes occur to cardboard or phenolic
tube. You will find this new material easy to work with and very forgiving, even during
those “less than perfect” flights. All components that fit PML phenolic tubing fit QT also.
• The Quantum Tube (QT) has been tested and found compatible with the following
paints: lacquer, enamel, epoxy and urethane, as well as many different primers. As
with any paint, apply several light coats allowing each to flash before re-coating.
• Most brands of epoxy adhesive bond well with no adverse affect to the tubing. The
bonding area must be sanded prior to applying epoxy. Follow the suggestions in
“Do’s and Don’ts” below.
• The Quantum Tubes are molded in medium gray and have a glass smooth finish, with
NO SPIRAL GROOVE! You no longer have to fill and sand the airframes to achieve
the perfect finish.
• All QT part numbers will be prefaced with the letters QT, such as “QT-2.15”.
• The Quantum Tubes are resistant to the heat of ejection charges. As with any tube,
repeated ejections will leave a black, gritty residue inside the tube. To remove the
residue simply wipe the tube interior with a wet cloth wrapped around a dowel or
broom stick and allow to dry.
• QT can be cut easily by hand with a hacksaw, and cuts nicely with a power miter box
or bandsaw as well.
• QT does not fiberglass well for body tube strengthening. We DO NOT recommend
QT for 0.85+ Mach kit strengthening as mentioned elsewhere in this FAQ.
Some customers have thought that QT is a replacement for ‘glassed phenolic. This is not
the case! Quantum Tubing is not intended for super-high-stress applications. It is
intended as a replacement for standard phenolic for sport rockets. QT makes it easier and
faster for flyers to achieve a nice finish, and to eliminate some of the problems of plain
phenolic in high-impact situations like landing on rocks, cold-weather flying, etc.
Fiberglassed phenolic is the best product for high stress flights. Also, follow the
02/24/07
6/74
PMLCompleteFAQ.doc
recommendations in the Kit Strengthening section of this FAQ if the flight will be near or
exceed 0.85 Mach.
Do’s and Don’ts for Quantum Tube (QT)
Do’s:
• Before applying paint to the QT lightly sand the outside of the QT using 320 or 400
grit sandpaper.
• Sand the fin fillet area on each side of fin slots using 150-grit sandpaper before
applying epoxy to fin and tube.
• Use the edge of an X-Acto knife to de-burr cut ends of QT. This will remove minor
deformation of the ID of the tube when it is cut.
• Sand the inside area of the QT using 120 or 150 grit sandpaper wherever parts are to
be epoxied to the QT. Sandpaper flappers on a drill, sandpaper glued to a large wood
dowel, sandpaper on the end of a stick, etc. can be used to prepare the inside of the
QT for epoxy.
• Using alcohol or mineral spirits will not damage the gloss finish on the QT.
Don’ts:
• Do not wipe or spill lacquer thinner or acetone on the Quantum Tube, either
will melt or distort the tube.
• CA (cyanoacrylate, “super glue”) may be used with QT, but only in “normal”
amounts. Heavy amounts of CA may distort the QT.
Pistons, QT Tubing, and Cold Weather Flying
• The first time you fly a QT rocket in cold weather, take it with the piston OUT to the
launch site with you, and set it outside while you're doing other things. Once the
rocket's come to ambient temperature, try to fit the piston; it'll probably be too tight.
Sand it until it has the nice slip-fit you'd expect. Voila...you're done. Your QT rocket
is now ready to go now and forever. Basically once you sand the piston for cold
flying conditions it'll fit well then, and also will be fine in warmer weather, as it's
nearly impossible to sand a piston so much it's too loose. Think of it sort of like
setting CG/CP...when you build the rocket, you add as much weight as the heaviest
motor you'll fly to the tail, then adjust the noseweight once until it's right. It's
something you do one time to make sure you're set for the future. Same thing with the
piston.
• It's no secret that all materials get brittle in the cold, plastics in particular. It’s not that
QT becomes unusable at temps below, say, 30 degrees, it's just that it's not as
forgiving when things go wrong as it is when it's warm. Customers have asked us to
specify a temperature at which QT should not be flown, but there’s no specific
number to be given…you just need to realize that the colder it is, the more likely
you’ll have a problem with plastic cracking due to the cold. There is no perfect
material but we truly believe our QT is the best all-around material for airframes on
the market, especially for the price. If we thought there was something better, we'd be
selling it.
02/24/07
7/74
PMLCompleteFAQ.doc
Pressure Relief Holes
There are many debates about the necessity of pressure relief holes. We think it is only
necessary in extremely fast-burn motors with rockets that will pass 5000’ very, very
quickly. If you are unsure or don’t want to take any chances then drill the following
holes: One 1/8” hole just above the uppermost centering ring of the MMT, one 1/8” hole
near the top of the main airframe (but below where a coupler or nosecone shoulder might
be), and one in the payload section. This should work with most sub-sonic rockets of 4”
dia. or less.
Working with PML Airframe Tubing
Cutting Phenolic or Quantum Tubing
Cutting phenolic tubing is a little different than cutting cardboard. First of all, put away
your X-ACTO knife and get an X-ACTO razor saw. It is possible to cut phenolic with a
knife, but it will take a dozen or so passes to get through. You should use the razor saw to
do almost all of your cutting. A hacksaw with a fine-toothed blade can also be used. A
good tip to ensure a straight cut is to put an automotive-style hose clamp around the
tubing when cutting to act as a guide for the hacksaw. If you have access to power wood
working tools, they can be used to cut PML tubing. We have used band saws, miter saws
and table saws, all with very good results. After cutting, it may be necessary to deburr the
edges inside and out using 150 grit or finer sandpaper. This is especially true with QT, as
the cutting process may “squeeze” the cut end ever so slightly, making it tight for
inserting a nosecone or for inserting the piston. Deburring or chamfering the inside edge
of a QT will eliminate those problems.
Filling Phenolic Tube Spiral Seams
Over the years, we have tried just about every kind of filler imaginable. Our favorite is
Elmer’s Professional Carpenter’s Wood Filler. It is easy to apply, inexpensive, dries
quickly, and sands easily. One can will finish at least 8 average rockets.
1. The wood filler sometimes is a little dry and chunky. It is water-soluble, so you can
put some into a separate container and add water, literally a drop or two at a time!
Water goes a long way in thinning the filler; if you make it too thin, add a little more
filler and mix it up again.
2. Spread the filler over the areas you want to fill using a putty knife, your finger, or an
auto body filler (“Bondo”) spreader. (You can find Bondo spreaders in any
automotive store or store like Kmart that has an automotive section). Using the
spreader, push the filler into any seams or grooves you want to fill. Using the
spreader will force the filler into the grooves and will scrape away any excess on the
body tube outside the seams. Wipe off any globs that occur. Allow to dry for an hour.
3. Sand the filler with 120 grit sandpaper until it is even with the surrounding surface.
Usually you will need a second coat, since the filler shrinks somewhat. After the
second coat, let dry and resand.
4. If needed, you can apply a final coat using automotive spot putty, again available at
automotive stores. Only squeeze out a little at a time and recap it, because the solvent
in it evaporates quickly and any unused portion will become thick and globby. You
02/24/07
8/74
PMLCompleteFAQ.doc
want the spot putty to be very spreadable, since it has a finer material grain size than
the Elmer’s filler and will provide a very smooth final finish.
5. Sand the entire surface smooth using 220 grit sandpaper. Do not apply any primer
coat at this time as the epoxy used in assembly must adhere to the raw tubing.
Custom Work
Custom Tube Slotting
• Pricing of custom tube cutting and slotting is covered in the Airframes section of the
webstore.
• There will be additional charges for the following slotting set-ups: Unequal slot
spacing around circumference of tube, odd number of slots (except 1 and 3), and/or
variations of slot width, length, or start point from one slot to the next on same tube.
• For tubes with four slots or less around the circumference of the airframe all slots
have an overall slot length limit of 22”. However, they must have 1” unslotted (skip)
section for any continuous slot over 14”. If there are more than four slots around the
airframe, they must have 1” unslotted every 10”. This is necessary because once the
first slot or two is cut, it is difficult to keep the remaining slots straight due to the
more-flexible tubing. Having a 1” skip section helps to be able to complete the
remaining slots. (Example: You need three 19” slots. Since this slot is longer than
14”, it must be interrupted for 1” at some point, such as making a 12” slot, a 1” gap,
then a 6” slot. Your fin tang must be then be notched to bridge the gap, and a CR
should be installed at the gap.)
• Dado slots for any tube size, in any length, and in any type cannot be wider than
0.125”. This is because the wider the dado, the deeper you must go to get usable
depth at the edges because the tube is round. With dados wider than 0.125” you have
to go nearly through the tube to get well-defined edges.
Slot Tolerances
• The following slots are actually 0.015” larger than listed because of G-10 variations
to ensure the G10 will fit even if it runs on the “high side” of thickness tolerances:
0.062”, 0.093” and 0.125”.
• The following slots are exactly as listed: 0.188”, 0.25”, 0.375”, 0.5”.
• Slot length tolerance: ± 0.062” for 3.9” and smaller. ± 0.125” for 6.0” and larger.
Slotting 3.9” tubes and smaller (PT and QT):
• Minimum start point from end of tube 0.375”.
• Maximum uninterrupted slot length is 12” (except for 0.188” wide slots; the
maximum slot length for these is 8”). If a longer slot is required, we must leave a
minimum of a 1” gap in slot. (Example: You need a 14” slot. Since this slot is longer
than 12”, it must be interrupted for 1” at some point, such as making a 6” slot, a 1”
gap, then a 7” slot. Your fin tang must be then be notched to bridge the gap, and a CR
should be installed at the gap.)
• Maximum total slot length is 18” (again except for 0.188” wide slots; the maximum
slot length for these is 8”).
02/24/07
9/74
PMLCompleteFAQ.doc
•
•
•
The following slot widths are available for tubes 3.9” and smaller (PT, QT, and
glass): 0.062”, 0.093”, 0.125”, 0.188” and 0.250”.
For fiberglassed tubes only, 0.062” – 0.093” slot widths are available with a
maximum of 10” slot length.
For fiberglassed tubes only, 0.125” – 0.250” slot widths are available with a
maximum of 18” slot length.
Slotting 6.0” tubes and larger:
• Minimum start point from end of tube 0.75”.
• Maximum total slot length is 26”
• The following slot widths are available for NON-glassed 6.0” and larger: 0.062”,
0.093”, 0.125”, 0.188”, 0.25”, 0.375”, and 0.5”.
• The following slot widths are available for fiberglassed tubes 6.0” and larger: 0.093”,
0.125”, 0.188”, 0.25”, 0.375”, and 0.5”.
• For fiberglassed tubes only, 0.093” slot widths are available with a maximum of 8”
slot length.
• For fiberglassed tubes with slot widths from 0.125” – 0.5” the maximum slot length is
26”.
Custom Tube Cutting
• Tube cutting ± 0.050” for 3.9” and smaller.
• Tube cutting ± 0.125” for 6.0” and 7.5”.
• Tube cutting ± 0.25” for 11.4”
Kit Strengthening
Any of our kits that are 2.56" or greater that will reach equal or greater than 0.85 Mach
need to be strengthened. Here are the calculations so you know the raw numbers:
Mach 1 @ STP (Standard Temperature & Pressure) = 1116 ft/s (fps) = 760.9 mph
1116 fps x 0.85 = 948.6 fps
760.9 mph x 0.85 = 646.7 mph
Therefore, PML kits 2.56" and larger should be reinforced for >950 fps or >650 mph
flight. We feel that kits 2.1” and smaller can be flown without body tube fiberglassing,
though all other items listed below should be done, as well as building the rocket with
plenty of epoxy and good sanding of areas to be bonded.
As mentioned in the chart itself, the Motor Recommendations Chart is highlighted for
kit/motor combinations that require strengthening. We recommend the following changes
for any "yellow-highlight" kit and motor combination:
• Fully-glassed airframe, which requires phenolic as a starting point, not QT. You must
special-order your kit with phenolic as all kits 3.9” and under (except Nimbus)
come standard with QT.
• Thicker fins (0.063" should go to 0.093", 0.093" should go to 0.125")
• Fin-to-airframe joints should be glassed
02/24/07
10/74
PMLCompleteFAQ.doc
• 30-minute epoxy should be used throughout the build.
Also, we say so in all the instructions, but make sure you lightly sand any area to be
bonded! This is important to get a good "bite" on the materials for the epoxy, and is
especially important in high-stress applications.
Something else to remember about strengthening your kits: you probably should upgrade
one 'chute size to compensate for the weight of the 'glassing as well. A larger chute
should also be considered due to the extra weight of many of the longer motor casings
that will generate flight conditions where reinforcement may be required.
Nimbus ‘Glassing Kit
When you purchase the Nimbus Fiberglassing Kit, the glass wrap kit supercedes/replaces
the glass patches for the fins in the base Nimbus kit. Follow the fiberglassing kit
instructions rather than applying the ‘glass fin patches as discussed in the Nimbus
instructions. The cloth in the Nimbus Fiberglassing Kit is 10 oz, and the mixing ratio of
the two-part epoxy is 4 parts white to 1 part clear.
02/24/07
11/74
PMLCompleteFAQ.doc
PML CENTERING RINGS and BULKPLATES
FAQ
Centering rings
•
•
•
•
Thickest and strongest in the industry. Precision made, guaranteed good fit.
Birch plywood 3/16” thick up to and including 3.9” diameter; larger are 1/2” thick.
Our ½” rings are made of 9-ply birch.
Any hole pattern can be produced. See Custom Centering Rings in this FAQ.
ID/OD tolerances for all centering rings and bulk plates is ± 0.010”.
Custom Centering Rings
• Need ring thickness, OD, number & ID of holes, & hole pattern/layout. 1/8" spacing
minimum.
• No custom centering rings in 3.9” or smaller diameters will be made of ½” ply. If you
feel you must have a thicker CR in 3.9” or smaller, order (2) 3/16” rings and epoxy
them together.
• Custom centering rings are only made to fit PML tubing sizes.
Custom Cluster Centering Rings
• PML now offers a line of standard Cluster Centering Rings (CLCR) for 3.0” and 3.9”
diameter Rockets.
• Cluster Centering Rings for 6.0”, 7.5”, and 11.4” are also available on a special order
basis. Since there are literally hundreds of cluster combinations possible in these
sizes, we cannot stock or even list all of the combinations. Turn-around time on the
special order rings is usually 2 days.
• Use the Custom Centering Ring Form on the Custom Work or Centering Rings pages
of our website when ordering the large cluster rings.
• On the 6.0” and 7.5” rings, the cluster holes are bored on a 4" diameter circle around
the center hole. On the 11.4” ring, the cluster holes are bored on a 7.75” diameter
circle around the center hole.
Bulkplates
A Bulkplate is simply a centering ring with no hole(s) in it. Same specifications and
requirements as above.
Custom Bulk Plates
• Need OD & thickness. Specify holes/no holes in center for eyebolt (no charge for
eyebolt hole).
• Maximum hole size in 6.0” bulkplate is 4.5”. Maximum hole size in 7.5” or larger
bulkplate is 6” diameter.
• Bulkplates are only made to fit PML tubing sizes.
02/24/07
12/74
PMLCompleteFAQ.doc
PML CLOSE PROXIMITY RECOVERY (CPR)
FAQ
CPR – Close Proximity Recovery; PML exclusive system which deploys a small drogue
chute at apogee to allow the rocket to descend quickly but stable, with the main chute(s)
deploying at a user-selectable altitude AGL (above ground level).
IMPORTANT NOTE TO HELP PREVENT BLOWBY DAMAGE:
Through testing we’ve determined that customer complaints of black powder blowby is
attributable in nearly every case to improper/incomplete prep of the charge cylinders.
In all CPR prep instructions there is a step (usually Step C) that states: “Push a small
wad of tissue into the hole using a pointed object. This will seal the hole and keep
the black powder from leaking out.” In our tests we’ve determined that not performing
this step completely is the #1 cause of BP blowby. The wad of tissue referenced must be
packed tight and must fill the hole completely. Please take additional care in the future to
check and recheck yourself on this important step. If our prep instructions are followed
carefully and completely there is very little chance of any significant blowby.
CPR3000
What is CPR?
• CPR is an altimeter based, two-step parachute deployment system. Using a dualdeployment altimeter, the first chute (a small drogue) is deployed at apogee allowing
for a fast but controlled descent. At a user-selectable approximately 200, 400, 600 or
800 feet, (refers to PML Co-Pilot altimeter) the altimeter fires a second charge
deploying the main chute allowing for a soft landing.
• The altimeter is centrally located in a special compartment within the main airframe.
The drogue chute is ejected from a split-point in the airframe just above the fin/motor
section while the main is ejected at the nose cone. Both chutes are deployed using our
exclusive Piston Ejection System.
• Once assembled, the altimeter/charge cylinder assembly can be easily moved to
another CPR3000 rocket, making it easy (and cost-effective, since you only need one
altimeter) to fly CPR3000.
• CPR 2.1 and 2.6 come with a 12’ streamer (cut to desired length) instead of an 18”
drogue chute, which comes with larger sizes. The chute is too large for these small
diameters.
• A CPR-based rocket must always be flown with the electronics installed. A CPRbased rocket cannot be flown with motor-based ejection. This is because the fin
section coupler/bulkplate assembly and the lower drogue piston block off the motor
section from the rest of the rocket.
• PML offers both CPR-Equipped kits, and CPR Retrofit Kits for converting an
existing PML kit or scratchbuild rocket for CPR. See the CPR Systems page in our
02/24/07
13/74
PMLCompleteFAQ.doc
webstore for details, including a graphic showing what modifications are required to
use CPR with many of our kits.
What is CPR3000?
• The most complete Close Proximity Recovery System ever. No need to purchase
separate ejection systems, external safety switch, or drogue chute. Also includes a
16 page, fully illustrated, comprehensive assembly and user manual. These
systems are perfect for retro-fitting into your existing rockets or for incorporating
into your new designs.
Here’s what you get:
• Complete altimeter bay assembly.
• Complete Threaded Airframe Coupler assembly made from 6061 aluminum with
a blue anodized finish.
• All mounting hardware for the PML Co-Pilot or Transolve P6 altimeter. Mounts
for Transolve P4, P5, Adept ALTS-25, and BlackSky ALTACC altimeters sold
separately)
• Two complete ejection systems including charge canisters and holders. (Designed
for E-matches. Charge cylinders for flash bulbs sold separately.) One set of fore
and aft altimeter O-rings provided, whether a CPR-based full rocket kit or a CPR
Retrofit kit for scratchbuild use.
• Dual piston systems.
• Drogue chute (or streamer) with tubular nylon shock cord.
• External safety switch and lead wires.
• 16-page fully illustrated comprehensive assembly and user manual.
See the CPR Systems page in our webstore for graphics and details.
IMPORTANT NOTE ON ALTIMETER FIT IN ALTIMETER BAY:
We’ve gotten reports of customers sometimes having difficulty getting the altimeter with
O-rings fitted to slide into the altimeter bay properly. We’ve tested the fit of the CPR Orings in the altimeter tube using both latest batches and older batches of parts. We’ve
combined them in all combinations. In all cases the parts will NOT fit if no baby powder
is used. With baby powder applied as per the CPR instructions provided with your CPRBased kit or CPR RetroFit Kit, all parts fit perfectly, seal well, and slide smoothly.
MISCELLANEOUS CPR CUSTOMER QUESTIONS/INFORMATION
• Some customers have asked if the altimeter vent hole should be drilled through
the airframe only (as our instructions tell you) or through the altimeter tube as
well. The hole only needs to go through the airframe. The air passes through the
airframe hole, works its way around the circumference of the altimeter tube and
enters the altimeter bay through the large slot in the altimeter tube. Also, keeping
the AF vent hole on the opposite side of the slot, as the instructions direct,
provides a buffer against tiny spikes in the airflow for better altimeter operation.
02/24/07
14/74
PMLCompleteFAQ.doc
•
•
•
Another question has been, “why is the drogue section of the rocket on the bottom
and the main chute section on the top?” This is one of those questions where once
you understand WHY, you will never forget the answer: Deploying the drogue
from the nose could jerk the rocket enough to pull apart the lower section and
deploy the main. Deploying the drogue from the middle doesn't jerk the nose
away from the chute compartment.
PML recommends that the fore and aft altimeter O-rings be used for only two
flights, then thrown away and replaced with new O-rings. This will help ensure
good sealing of the altimeter bay and protection of the altimeter from pressure
spikes and black powder residue. We offer a 12-pack (6 fore, 6 aft) O-rings on the
CPR/ERM of the webstore under part number CPR3K-OR-PK. One set of fore
and aft altimeter O-rings is provided with the CPR3000 system initially, whether
a CPR-based full rocket kit or a CPR Retrofit kit for scratchbuild use.
“I ordered the charge cylinder for flash bulbs, but the flash bulb is very loose
inside the charge cylinder.” Put a tissue "packing" around the flashbulb. Roll a
small tissue square (preferably Estes wadding, since it's flameproof) about 1.5 x
1.5 into a tooth pick shape then form it into a ring and use a small screwdriver to
pack it around the bulb once installed. Kind of like a tissue donut with the
flashbulb in the "hole" of the donut.
CPR3000 and Hybrids
Using CPR3000 with a hybrid-based rocket is usually impractical, due to the excessive
length that needs to be added to the rocket. CPR3000 requires nearly 3 feet to be added to
a hybrid-based rocket, effectively putting it “out of bounds” for use with hybrid rockets.
This is certainly true of PML’s hybrid-ready kits.
CPR3000 Component Weights
The following lists approximate weights (in ounces) for CPR3000 parts for use in
RockSim or other simulation programs:
02/24/07
Aluminum Threaded Airframe Coupler
1.7
Aluminum Threaded Airframe Sleeve
0.6
Charge Holder
0.4
Charge Cylinder — Ematches
0.4
Charge Cylinder — Flashbulbs
0.6
Fore Altimeter Mount
0.6
Aft Altimeter Mount
0.3
Switch, 6 screws (4 alt, 2 sw.) & wiring
0.2
15/74
PMLCompleteFAQ.doc
3 O-Rings
0.05
CPR-MAX
CPR-MAX = CPR3000 for Large-Diameter Rockets
•
•
•
•
•
Our CPR system has been available in 2.1 through 3.9" diameter sizes for years.
Our new CPR-MAX system was developed for 6” and 7.5” rockets. This system
allows for redundant recovery system deployment for the purpose of safety and to
protect your investment. If you`ve always wanted to add CPR3000-style recovery
to your 6.0 or 7.5 inch kit, CPR-MAX is the answer!
The CPR-MAX system uses the same components as the CPR3000 system, but in
a special design configured for large-diameter 6- and 7.5-inch airframes. CPRMAX also features twin-altimeter design, which can be used either as the backup
required for Level 3 flights or as a safety backup for regular sport flying. NOTE:
CPR-MAX does not REQUIRE the use of two altimeters. It can safely and
effectively be flown with only one. The second altimeter is a redundancy feature,
not a requirement.
The CPR-MAX System contains nearly everything you need (altimeters, epoxy,
ejection powder, and additional airframes, if required, not included) to convert
your existing rocket or as an enhancement to your own design.
The Bulldog, AGM-600 and Pterodactyl kits would require over 2 feet of airframe
tubing to be added to use the CPR-MAX system, which would change their
appearance so substantially that PML does not recommend CPR-MAX for these
kits.
The information below is intended as a guide for determining the proper amount
of ejection powder used with various diameter CPR-MAX rockets using a piston
ejection system and a 24” fore or aft recovery airframe:
o 6.0” diameter – 1.0 to 1.3 grams
o 7.5” diameter – 1.2 to 1.5 grams
CPR-MAX Component Weights
The following lists approximate weights (in ounces) for CPR-MAX parts for use in
RockSim or other simulation programs. This does NOT include the weight of the pistons,
KwikLinks, or piston straps, only the “core components” of the CPR-MAX system. The
weight is for one part, so if more than one is used be sure to multiply the weight by the
quantity of parts:
COMPONENT
02/24/07
QTY.
6.0
7.5
CT-6.0
1
10.75
15.75
CT-6.0x8”
1
6.9
10.2
CT-6.0x1.5”
2
1.3
1.9
16/74
PMLCompleteFAQ.doc
PT-6.0x2”
1
1.5
2.3
Aluminum Threaded Airframe Coupler
2
1.7
1.7
Aluminum Threaded Airframe Sleeve
2
0.6
0.6
PT-1.5x10”
2
1.7
1.7
Birch Bulkheads/Mounting Plates
2
3.65
3.95
Charge Caps, Vinyl
4
0.05
0.05
Charge Holder
4
0.4
0.4
Charge Cylinder — Ematches
4
0.4
0.4
Fore Altimeter Mount
2
0.6
0.6
Aft Altimeter Mount
2
0.3
0.3
Switch, 6 screws (4 alt, 2 sw.) & wiring
2
0.2
0.2
O-Rings
6
0.05
0.05
CPR2000
•
•
CPR2000 is designed to use the Transolve P4 or P5 altimeter or the Adept ALTS25.
We do not currently offer adapters to use electronics from other manufacturers.
CPR2000 components are still available on our webstore for customers who may own
CPR2000 kits and need replacement parts.
Differences in Mounts for CPR2000 and CPR3000
The mounts for the CPR3000 (for Co-Pilot and P5 or P6) are just more robust. Basically
the areas where the holes are located are thicker. If you tried to mount a Co-Pilot to a
2000 mount, not only would the holes not line up but also there’s more room than needed
to clear the parts on the altimeter. On the other hand, if you tried to mount an ALTS2 to a
3000 mount, the holes would not line up and there would be interference between the
mount and components on the altimeter.
PML Co-Pilot Altimeter for CPR3000
(See the Electronics page of our webstore for more details on each device and other
devices that may not be covered here).
PML currently carries the PML Co-Pilot altimeter. The Co-Pilot altimeter was developed
exclusively for Public Missiles Ltd. by Missile Works Corp., and was designed
specifically for PML’s CPR3000 Recovery System (though it can also be used in other
02/24/07
17/74
PMLCompleteFAQ.doc
applications as well, such as scratch-built deployment systems). The Co-Pilot is based
upon Missile Works’ RRC2 altimeter. The Co-Pilot provides two-stage barometricallycontrolled (pressure-sensing) deployment of rocket recovery systems and equipment.
Note Regarding CPR3000 and Altimeter Manufacturers
Some customers have asked why we chose to select the PML Co-Pilot and Transolve P6
as the standard altimeters that fit CPR3000, and the Transolve P4 or P5, Adept ALTS-25,
and BlackSky ALTACC altimeters with our optional additional-cost adapters.
First, we believe very strongly in supporting our customers. PML has sold hundreds of
CPR2000 kits that use the Transolve P4 or P5 or Adept ALTS-25 altimeter (and many of
those altimeters to go with the kits as well). We want our current customers to have
complete compatibility immediately. It makes sense for us and for them to use an
altimeter they're already familiar with and is interchangeable between their current
CPR2000 rockets and any CPR3000 systems they may choose to buy.
Second, the better question might be "How come the altimeter manufacturers don't make
theirs fit CPR?" We're the only company that offers a standardized "ready out-of-thebox" dual deployment system, and we have over a thousand of these systems in the hands
of rocketeers, so it would make sense for the altimeter manufacturer to make their
product fit the rocketry system that's most likely to use their product, wouldn't it? In our
opinion, it would make sense for the altimeter manufacturers to base their designs around
fitting CPR, and the scratchbuilders not using CPR can design mounting schemes for
their altimeters as they always have. We're in the rocket business, not the altimeter
business, so we leave the altimeter issues to those that make them.
Third, as you know there are many different sizes and shapes of altimeters available, and
it simply wouldn't be cost-effective for us to produce all the altimeter mounts to fit each
and every altimeter someone might like to use since we'd sell very few of any particular
adapter, not enough to offset the tooling cost of the adapter. It makes much more sense
for the altimeter manufacturers to either
a) offer a version of their product ready-made to fit CPR systems, or
b) make altimeter mounts to fit CPR and sell them to promote use of their altimeters.
It's in their best interests to do either a) or b) to sell more of their altimeters, and to
support their customer base (as we are with making CPR3000 compatible with what our
customers already own. Our CPR3000 altimeter bay is already designed in anticipation of
altimeter manufacturers "picking up the ball" by designing it long enough and wide
enough to accommodate any altimeter on the market at the time of it’s introduction.
BlackSky has done so by making an adapter available for their ALTACC line of
altimeters, which we now sell as well.
So, to summarize, we strongly believe in supporting our previous customers, and would
expect that the altimeter manufacturers can and should do the same by making their
products work with CPR, either through the base design or through offering CPRcompatible mounts for their products.
02/24/07
18/74
PMLCompleteFAQ.doc
BlackSky AltAcc Adapter; Modifying AltAcc to work with CPR3000
PML now sells a BlackSky ALTACC adapter which fits all ALTACC models up to and
including the 2C, the CPR3K-ALTACC-ADPTR, which is available on the CPR Systems
Page of the PML website. If you have any questions about using the ALTACC with
CPR3000, contact BlackSky. If you have an older ALTACC with a green board, 1/16"
has to be sanded off each end of the board for the CPR3K-ALTACC-ADPTR brackets to
fit.
Prior to the availability of the adapter some customers modified the CPR3000 mounts to
fit the ALTACC. The following information about modifying the mounts for ALTACC is
from a PML customer. We can neither confirm nor deny that it works, but provide it to
you here for your reference.
+++
“I called and talked to Scott at Blacksky and he stated that all you had to do was cut or
file four notches in the edge of the circuit board were the screws for the CPR mounting
would engage and hold the altimeter in place.
The copilot altimeter has holes in the circuit board, but the AltAcc has 2 metal standoffs
that normally hold it to the body tube. I took a triangular file and made 4 small notches
to hold the altimeter to the CPR module.
The Alt Acc uses a jumper to turn the unit on & off. The system is normally armed by
closing a screw on the circuit board (again via another hole in the airframe) and the status
of the unit is determined by looking at a LED on the circuit board via a hole in the
airframe.
I went a couple of steps further and wired the jumper block (on/off jumper) tothe CPR
switch mounted on the body tube. This allows the AltAcc to be armed without accessing
the altimeter directly. I also drilled another hole in the altimeter bay, so I could view the
LED indicator, to determine the status of the altimeter.”
+++
02/24/07
19/74
PMLCompleteFAQ.doc
PML CUSTOM WORK FAQ
Custom Work
•
All specifications/requirements for custom work are described in the FAQ for the
item in question. For example: Custom airframe slots? See the Airframes FAQ.
Custom centering rings? See the Centering Rings & Bulkplates FAQ.
• See our website at www.publicmissiles.com for current pricing on all custom work.
Check the appropriate page for the type of custom part involved. Example: for custom
centering ring hole boring, check the Centering Rings page.
• PML does not make custom nosecones.
• PML offers more custom work options than any other manufacturer. Most others only
offer fins and centering rings.
• PML also offers quick turnaround time on custom work except for very unique items.
Custom work is usually shipped within 48-72 hours of your order.
• There are no returns on custom items (unless we made a mistake). Custom items are
by definition unique, specialized parts, and they cannot necessarily be resold to
another customer.
We welcome customers forwarding us RockSim files of their projects, as it sometimes
helps us understand what you’re after. However, YOU STILL MUST PROVIDE US A
DETAILED PARTS LIST OF WHAT YOU NEED, INCLUDING CUT LENGTHS,
DIAMETERS, ETC. YOU MUST PROVIDE US WITH THE SAME LEVEL OF
DETAIL AS IF YOU HAD NOT INCLUDED THE ROCKSIM FILE. We will not
“decipher” the RockSim file to determine exactly which parts it contains. Look at the
RockSim file as a way to help us understand your parts list, not a way to produce your
parts list and measurement data.
02/24/07
20/74
PMLCompleteFAQ.doc
PML ELECTRONICS FAQ
Onboard Electronic Devices (Altimeters, Timers, Etc.)
(See the Electronics page of our webstore for more details on each device and other
devices that may not be covered here).
PML currently carries the Co-Pilot altimeter. The Co-Pilot altimeter was developed
exclusively for PML by Missile Works Corp., and was designed specifically for PML’s
CPR3000 Recovery System (though it can also be used in other applications as well, such
as scratch-built deployment systems). The Co-Pilot is based upon Missile Works’ RRC2
altimeter (though it differs in important ways such as location of electronic components,
which allow it to fit CPR systems). The Co-Pilot provides two-stage barometricallycontrolled (pressure-sensing) deployment of rocket recovery systems and equipment.
PML also carries the AccuFire Timer, made exclusively for PML by G-Wiz Partners. The
AccuFire is an adjustable (0-25 sec.) post-motor-burnout timer. Like the G-Wiz LC, LC
Deluxe, and MC, AccuFire uses a progressive launch detect algorithm. The timer must
“see” either 2g for 0.5 seconds, or 4g for 0.25 seconds, or 8g for 0.125 seconds to
determine that launch has occurred and begin monitoring for motor burnout.
Accelerometer-based detection of motor burnout occurs upon detection of deceleration
(negative g’s) after launch detection; the timing to the firing event begins at motor
burnout. The AccuFire uses a standard 9VDC battery as a power source, and provides an
output current to the pyro channel of up to 1.25A. Also, the AccuFire is NOT affected by
hybrid motor harmonics; it’s completely safe to use with hybrids.
IMPORTANT CUSTOMER ALERT:
For the AccuFire to function as a 2nd stage ignition device, you MUST use:
1) BlackSky HiRMI Standard electric match (preferably dipped in pyrogen) or
2) DaveyFire N28F (preferably dipped in pyrogen).
For the AccuFire to function as an ejection charge initiator the following electric matches
could also be used:
3) 1 or 2 above (without the pyrogen dip),
4) BlackSky HiRMI - Sensitive,
5) DaveyFire N28B, or
6) Oxral.
Other ignition devices WILL NOT FUNCTION PROPERLY with the AccuFire.
How Altimeters Work
The following is a generalized discussion of how the PML Co-Pilot and other barometric
altimeters work. It is not intended to be absolutely or entirely accurate, just descriptive of
basic operations as an educational tool.
02/24/07
21/74
PMLCompleteFAQ.doc
The Co-Pilot, and all other barometric altimeters I know of, takes an air pressure sample
when you first turn them on (and some like you to leave them on for a couple minutes so
they can take multiple baseline readings). They then set themselves to say, "OK, this
pressure reading I'll call zero". Doesn't matter what the actual launch site elevation is, it
says, "OK, this is zero. I'll base everything I do from now on based on changes from this
pressure reading". So, let's say your launch site is at 750 ASL (above sea level), and let's
pick some arbitrary scale for altitude. Let's say it ranges from 0 at sea level to 10000 at 10
miles altitude. When you turn your altimeter on, it takes the pressure reading at your
launch site, which being at 750' is, say, 15. It does it a few more times over the next few
seconds...15, 15, 15. It says, "OK, I keep getting 15, so I'm now going to reset all my
internal software to say "15 = 0". The next thing the Co-Pilot does is look for a pressure
drop corresponding to 300’ AGL to determine a launch has really taken place, so it
should arm it’s deployment circuits and look for apogee. So, now you launch, it sees 1516-17-18- and up (let's say 17 equals 1050', or 300' above your launch site altitude). It
says "OK, there's 17, that's 300' above the ground, so this is a real launch. I'm going to
start running the software to monitor when to deploy my chutes now". OK, the rocket's
still going up, is near the top of it’s flight, and it sees 800-801-802 on our arbitrary scale.
802-803-804----804-803-802. “OK”, it says, "I saw 804 as the highest reading I ever got,
but now I see 803 and then 802. Must be I'm over apogee and falling back to earth.
Deploy!"
Deployment Charge Igniter Selection
PML's Electronic Deployment Devices can work with flashbulbs, electric matches or
igniters. Flashbulbs are not recommended, though, due to their much lower reliability and
great variability in firing current requirements. Also, electric matches are preferred over
igniters due to the relatively low current requirements compared to most igniters intended
for motor ignition. The resistance reading of what you intend to use is important. Here’s
why:
E = I x R, where E is Voltage, I is Amperage, and R is resistance. We know the Voltage
involved depending on the onboard battery. We also know from the specifications of the
unit that the ignition device must fire with a certain amperage range. So, we need to find
R, the Resistance, to determine which ignition device can work successfully with the
device we intend to use. Below is an example of how to do the calculation, though if the
manufacturer of the electronic device specifies requirements for the ignition devices
connected to it, follow the manufacturer’s specifications over the calculation.
Co-Pilot Altimeter
Battery = 9 volts
Current = 1.25 amps
E = I x R, 9 = 1.25 x R; rearranging, we get R = 9/1.25 or 7.2 ohms
The ignition device must be 7.2 ohms or more to work properly with the
Co-Pilot.
02/24/07
22/74
PMLCompleteFAQ.doc
Igniter manufacturers will specify the electrical usability (ohms and volts) range for their
devices; contact the igniter manufacturer for their specifications. We strongly recommend
that you check each igniter you intend to use before flight to determine that it is good and
within the ohm range needed. We also strongly recommend that you ground-test the
electronic device you intend to use with the ignition device you intend to use before
committing that combination for use in an actual flight. Ground testing instructions are
included in our detailed instruction package provided with each of the Electronic
Deployment Devices we sell.
Timer Ignition Device Selection
The AccuFire is designed to work with electric matches or igniters, and outputs up to
1.25 amps to the pyro circuit. Flashbulb-based igniters are not recommended due to their
much lower reliability and great variability in firing current requirements. The AccuFire
pyro channel (output circuit) is a closed-loop feedback amplifier with a limit of 1.25
amps current output.
IMPORTANT CUSTOMER ALERT:
For the AccuFire to function as a 2nd stage ignition device, you MUST use:
1) BlackSky HiRMI Standard electric match (preferably dipped in pyrogen) or
2) DaveyFire N28F (preferably dipped in pyrogen).
For the AccuFire to function as an ejection charge initiator the following electric matches
could also be used:
3) 1 or 2 above (without the pyrogen dip),
4) BlackSky HiRMI - Sensitive,
5) DaveyFire N28B, or
6) Oxral.
Other ignition devices WILL NOT FUNCTION PROPERLY with the AccuFire.
Battery Testing is CRITICAL
One thing that is CRITICAL that many customers do not do is to test their battery before
EVERY FLIGHT. Onboard electronics systems are very sensitive to appropriate voltage
and current conditions; a just-slightly-weak battery can cause the electronics to fail.
Given that you’re flying hundreds of dollars of rocket, electronics, motor casing and
motor reload, taking time to test your $1.89 battery makes sense (not only from a cost
perspective, but from a safety perspective as well.) It always amazes me how someone
can walk out to a launch pad carrying $500+ of rocket, motor and electronics but wants to
“save money” on batteries or igniters/ematches on board! The short story is: make SURE
you test your battery as noted in the manufacturer’s instructions. Test a NEW battery
when you get it as well (it doesn't happen often, but sometimes a battery is bad right out
of the box), and test every battery before every flight. It’s asking a lot of an inexpensive
battery to run an onboard computer and fire two ematches every flight…make sure it can
do it, and replace it often.
02/24/07
23/74
PMLCompleteFAQ.doc
Ni-Cad Batteries for Electronic Systems
We recommend Radio Shack’s Hi-Capacity Ni-Cad battery part# 23-299 as a good NiCad for onboard electronic systems (unless specified otherwise by the instructions
provided for the device).
Ematches vs. Igniters
The difference between ematches and igniters is that ematches are intended to ignite an
easy-to-burn substance quickly, such as the BP used in rocket ejection charges. However,
an igniter is intended and constructed to produce a large, hot ball of flame for an
extended period (say, 0.5-0.75 seconds) to ignite a rocket motor. Ematches typically will
not ignite motors unaided as they do not produce a hot enough flame for long enough,
whereas igniters certainly could ignite BP. Another significant difference between them,
which is critically important for onboard rocket electronic use, is their current
requirements. Igniters typically require much more current than an e-match; the current
requirements are usually more than altimeters can provide. Therefore, for onboard
altimeters, which need to ignite deployment charges, ematches are needed. For staging
timers, which need to ignite motors, igniters are needed. Be sure to always check to be
sure an e-match or igniter will work with your onboard electronic device.
Our Magnelites are definitely igniters, and likely cannot be used in onboard systems due
to the current requirements issue. The sample calculations above and manufacturer’s
recommendations can be used to determine if a particular e-match will work with your
altimeter.
PML recommends that all flash bulbs and electric matches have the electrical wires
twisted together until just before installation in the rocket system. This can help prevent
accidental ignition of the device due to static discharge or radio frequency interference
(RFI).
The Daveyfire N28BR Electric Match works perfectly with the CPR3000 system for
parachute ejection charge ignition. The N28BR fits perfectly into the CPR3000 Ejection
Charge Cylinder. Of course, the N28BR can also be used in scratchbuild ejection systems
as well. (Not intended for motor ignition; our Igniters Page for Magnelite motor igniter
kits).
The Daveyfire N28F Electric Match works perfectly with onboard staging timers for
second stage ignition of G-80 single use motors. The N28F can also be used for ignition
of other popular rocket motors. For best results for motor ignition, dip N28F one time
into a Magnelite pyrogen mixture (sold on our Igniters page). (Electric matches will
usually require extra pyrogen for successful motor ignition). CAUTION: When dipping
take care so that resulting match head will pass easily into the motor grain hole. Blocking
motor hole can cause over-pressurization of motor which can rupture motor.
02/24/07
24/74
PMLCompleteFAQ.doc
Other Ignition Devices
• We also offer the Robby’s Rockets Loadable Ejection System (LES) kit for those
who prefer flashbulb ignition. This kit comes with everything you need for ten
ejection charges using flashbulb ejection ignition, except the FFFFg (“4F”) black
powder, which can be purchased locally in sporting goods or gun shops, especially
those that cater to antique firearms such as muzzleloaders. Everything but the
prewired flashbulbs can be used over and over again. This kit is intended primarily
for CPR2000-based rockets.
• However, we recommend use of electric matches over flashbulbs for onboard
electronic systems. Flashbulbs are not recommended due to their much lower
reliability and great variability in firing current requirements.
CPR2000 and CPR3000
A CPR-based rocket must always be flown with the electronics installed. A CPR-based
rocket cannot be flown with motor-based ejection. This is because the fin section
coupler/bulkplate assembly and the lower drogue piston block off the motor section from
the rest of the rocket.
•
PML doesn’t sell an altimeter housing kit, but we do have an altimeter and LES tube
mounting kit that goes along with our CPR2000-based systems. Many have used this
system in their scratchbuild electronic-deployment rockets. Check out the website at
www.publicmissiles.com in the CPR Systems section. Also, check out the Dec. 97
issue of High Power Rocketry Magazine. There's a good article on how to make a
Self-Contained Altimeter Bay that'll make the altimeter easily removable to switch
back and forth between rockets. However, you’ll have to modify the HPR Magazine
design slightly due to differences in altimeter layout from the ALTS2 altimeter used
in the article design.
Fitting ST-2 Timer to IS3000
The PML AccuFire is the recommended staging timer for the IS3000 system; the two
were designed together to complement each other. The Transolve ST-2b will also fit
directly. The ST-2 can be used if the customer drills holes in three of the corners of the
board. However, using an ST-2 can be potentially unsafe as it only has one set of two
screw terminals, requiring the customer to install a switch in series with the electric
match to safe the system from firing on the ground. Everything else uses off-board
power and will not fit the IS3000 system.
Customer Q&A and Miscellaneous Co-Pilot Information
1. Q: “…there was a cold solder joint on one of the sensor leads...”
A: Customers have noted that they think that some of the joints on the Co-Pilot
are cold-soldered (i.e. bad connections). The sensor, terminals, and discharge
capacitor are all hand-soldered so they will look different than the wave-soldered
joints. Only the circuit side components can be placed for wave soldering, and
the sensors cannot be washed, hence they are added post wave. The joints may
appear cold, but they likely are not. Remember these are plated feed-thru holes,
02/24/07
25/74
PMLCompleteFAQ.doc
2.
3.
4.
5.
6.
02/24/07
so the surface pad condition in no way visually indicates the integrity of the
joint.
Q: “I recently bought a Co-Pilot and powered it up for the first time today and
seem to have a problem. It does not detect continuity on either the drogue or
main outputs, when in input test mode it sees all five switches but not the
main or drogue but when in the output test mode it works properly and fires
both outputs, when first turned on with a e-match in both outputs the unit
does not beep indicating no continuity. Am I doing something wrong or do I
have a problem with my copilot?”
A: Your battery voltage is too low. The continuity circuit bias voltage is unable
to operate the circuit on a weak 9V battery (approximately 8V give or take). Your
Co-Pilot is working exactly as designed; it's "trying to tell you something" by not
going into certain operational modes properly. You need to read and follow the
instructions about testing the battery, even if it's a brand new battery right out of
the box. You MUST test your battery every single time you're going to use the
Co-Pilot. Very cheap insurance considering a $2.50 battery can make the
difference between getting your multiple-hundreds-of-dollars of rocket and
hardware back.
Q: Reading through the manual, I was trying to find some sort of 'rule-of-thumb'
for using the Mach Delay, and a description of what could likely happen in the
following scenarios:
a) transonic to sonic flight w/o Mach Delay
b) transonic to sonic flight w/ Mach Delay but delay time too short
c) transonic to sonic flight w/ Mach Delay but delay time too long
A: a) You run the risk of mach pressure spiking.
b) Same as a)
c) Not a problem *unless* delay exceeds time to apogee
One could also reverse these scenarios (sonic to transonic) and the same
would still hold true.
Q: “When not using the Co-Pilot for deployment, is it best to fly with main and
drogue connectors closed or open circuit? Does it have an impact on battery life?”
A: It will work in either configuration. If the outputs are open then no audible
chirping on the pad, if shorted then the unit will chirp. The battery will be used
up a bit sooner if the outputs are shorted. Leave one output shorted and the other
open for the best of both. The MosFET outputs of the Co-Pilot utilize an internal
crowbar circuit to limit current flow, so it makes them immune to shorts. Opens
are a “don't care” since no current flows.
Q: “Has PML considered using a RCA jack (normally closed) in place of the
SPST switch? Using a RCA plug allows a measure of safety...(remove me prior to
launch) and a pressure relief hole.”
A: We've considered it, but the RCA plugs can be less durable over time than a
"real" switch. Also, you need to mount the switch such that the movable "leaf"
will be forced INTO contact by the G forces of launch (rather than 180 deg. from
that where the launch will try to separate the switch). Also, the size of the
altimeter pressure hole would determine the size of the plug needed, so you'd
need to maybe use a "big" plug on a small rocket to get the size of the plug hole
26/74
PMLCompleteFAQ.doc
you need. One other thing is that all altimeter manufacturers I'm aware of
recommend that the pressure relief hole(s) be smooth and flush to the airframe.
All RCA plugs I've seen use a threaded "ring" to tighten them on, which makes a
turbulence-inducing obstruction right before the hole, and also by definition
makes the hole not flush to the airframe.
7. Q: I just noticed browsing Missile Works web site that the Co Pilot is ~25 bucks
more than an RRC2. What makes the Co-Pilot worth the extra bucks besides the
PML brand name?
A: -- Designed specifically to interface with the CPR-3k system
-- Minor revision to apogee detection software
-- Better layout of terminals for easier connections.
-- Clear markings for all connections and switches.
-- Lower altitude main chute deployment range available.
-- Superior documentation (instructions).
8. Q: What is the Co-Pilot’s altitude report-out accuracy?
A: The software interpolates and reports to the nearest foot. On a low flight it is
easily within 5% (2K AGL) and the accuracy increases from there as peak altitude
increases, then it rolls off again. Missile Works states that +/- 3% is a typical
accuracy (3-5K AGL). No barometric unit we know of for HPR currently
compensates for local ambient pressure conditions, so as that fluctuates you'll get
some slight variance in readings (only for extreme fluctuations).
02/24/07
27/74
PMLCompleteFAQ.doc
PML G10 FINS FAQ
Fins
Material and Usage
• G10 is a highly compressed fiberglass laminate in a high-temp epoxy resin. It looks
very similar to computer circuit board material. It is extremely tough, waterproof, and
solvent-proof. It is very rigid, yet has just enough flex to keep it from snapping under
most loads. When scuffed with sandpaper, epoxy bonds readily to it, and primers and
paints adhere well to it too. Fins can be made much thinner (much less drag) when
made of G10, and still be stronger than most other materials, especially wood. It is a
very consistent material and does not have any of the hidden structural flaws that
wood may have.
• PML was the first to use G10 fiberglass for fin material. G10 was exclusive to PML
for many years, though now other manufacturers have recognized the benefits and
offer it as well.
• G10 is used on every PML kit. Most other manufacturers use wood, especially in
larger sizes.
• All PML kits except minimum diameter use through-the-wall-to-the-motor-mount fin
mounting design for strength. Minimum diameter kits use dado slots in the body tube,
with fiberglass reinforcing patches for the fin-to-tube joints. (Dado – A groove or
“channel” that does not go all the way through a tube. Used in minimum-diameter
kits for fin mounting; also used for some canard-type fins.)
Building/Construction
• G10 is sanded most easily using 80-120 grit cloth-backed aluminum oxide sandpaper.
• Scuff all areas where epoxy will be with 80-120 grit sandpaper. Use 220 or 320 on fin
surfaces that will be painted.
• G-10 is extremely abrasive! Do not try to cut it with common shop tools, as it will
damage or destroy most common blades very quickly. The cost of having PML make
your G-10 fins for you on custom jobs is probably cheaper than buying the tools that
will allow you to cut the G-10 yourself.
• Fins leading/trailing edges do not need to be shaped. Simply lightly sand the edges to
remove any manufacturing burrs. If you do choose to shape the fin edges, protect
your power tools from the abrasive sanding dust, and wear a dust mask!
Mounting
• Be sure to apply epoxy fillets to the fins at all three of the following areas: Motor
Mount, inside airframe where fin passes through slot, outside airframe/fin joint.
• People have asked how to make internal fillets to the fins deep up into the airframe.
One technique we’ve had luck with is to use a piece of 1/4”, 3/8”, or 1/2” dowel as
appropriate. Mix your epoxy and “load up” the end of the dowel with a blob of epoxy,
then stick the dowel into the airframe and onto the fin joint you’re working on. After
02/24/07
28/74
PMLCompleteFAQ.doc
•
•
•
•
depositing enough epoxy in this fashion, you can then pull the dowel toward you,
making a fillet with the “fingertip-shaped” round profile of the dowel. It may be
beneficial to use masking tape to cover the inside of the bottom of the airframe and
the outside of the motor mount tubing while applying the epoxy inside. This will
make it easy to peel off the tape to remove any epoxy drips that may get on the
airframe and/or MMT and hinder you from installing the lower centering ring when
your internal fillet work is done. Another easy and strong option is to use our TwoPart Expanding Foam available on the Adhesives page of the webstore. No internal
fillets are needed! See the PDF on the Adhesives page for details on using the foam.
Some customers are concerned that the small canard fins at the top of the Bullpuppy
kit appear too long for the slot. This slight over-length is intentional. It would be
difficult to fill in the slot and make it look good if the fin were too short, so we make
them a touch long to ensure that will never happen. Go ahead and mount them, then
when the epoxy has cured use sandpaper or a small file to knock them back flush with
the top of the airframe.
Customers sometimes ask: “Is it OK to put the launch lug in the corner of a fin root
and the main body? The instructions say to put it in-between two fins, but it would
produce less drag near a fin root and would be stronger also.” This can be done if
you’re careful, but by putting the lug at the fin root, you limit the size of the fillet. If
you make the fillet too big, the epoxy will block the ends of the lug. Also, it just
makes it harder to sand that area of the rocket while painting.
One customer asked: “…and the upper fins have some small amount of twist in
them.” All flat stock materials are warped to some degree (and I mean ALL except
glass as in window pane and stone) and G-10 is no exception. At PML we know how
to cut the sheet so as to minimize the warpage.
Fin Tolerances
• Variations in G-10 thickness: +0.012” / -0.003” (PML sends back to manufacturer
any G-10 with greater variations.) A very small degree of warpage is common with
G-10 (but nowhere near the degree of warpage in any wood product) and does not
adversely affect the aerodynamics of the rocket.
• Fin dimension tolerance (stock and custom) ± 0.050. Matched fin sets accuracy ±
0.010 (FYI: a human hair is about 0.004).
Custom Fins
• You MUST use the custom fin template downloadable on either the Custom Work or
Fins page of our website for a custom fin order. Be sure to fill it out completely to
avoid delays.
• Minimum custom fin size is 2” by 1”, maximum size is 48” by 36”.
02/24/07
29/74
PMLCompleteFAQ.doc
Kit Strengthening
As mentioned on the first page of the Motor Recommendations Chart on the Specs Page
of the website, chart cells are highlighted for kit/motor combinations that require
strengthening. We recommend the following changes for strengthening:
• Fully-glassed airframe, which requires phenolic as a starting point, not QT. You must
special-order your kit with phenolic as all kits 3.9” and under (except Nimbus)
come standard with QT.
• Thicker fins (0.063" should go to 0.093", 0.093" should go to 0.125")
• Fin-to-airframe joints should be glassed
• 30-minute epoxy should be used throughout the build.
• Some customers have asked if they can “double-up” or “sandwich” two pieces of G10
to create a super-thick fin for very high impulse flights. We don’t recommend it; at
high speed airflow can split them.
02/24/07
30/74
PMLCompleteFAQ.doc
PML GENERAL ASSEMBLY &
PAINTING/FINISHING FAQ
General Assembly Tips
We say so in all our kit instructions, but make sure you lightly sand any area to be
bonded! This includes fins, airframe (inside and out), motor mount, etc. This is important
to get a good "bite" on the materials for the epoxy, and is especially important in highstress applications. It takes very little extra time to do this, and the sanding dramatically
improves overall strength. Don’t skip the sanding!
1. After filling tube seams as described in the Airframes FAQ under Filling Phenolic
Tube Spiral Seams (unless you’re using our Quantum Tube, which has no seams),
assemble according to the kit instructions. We recommend using a quality epoxy in
all gluing procedures (see the Adhesives FAQ for details). Be sure to apply epoxy
fillets to all critical areas, especially the fins.
2. Spray the entire rocket with a scratch filling sandable primer. Let dry, then sand with
220-grit sandpaper. Keep repeating the spraying and sanding process until all defects
are gone. Some people use alternating coats of gray and white primer to help identify
particularly high or low areas. Use white primer as the final coat for rockets you
intend to finish in light colors—especially white and the various fluorescent colors.
Gray is better for rockets you intend to finish in dark colors. It is all right to sand
through the primer except on the last primer coat. Also, the last primer coat may be
sanded with even finer sandpaper. Even better is using a green 3M ScotchBrite pad.
3. Now is the time to touch up any dings that may have occurred during assembly. Dab
a bit of automotive spot putty on the affected area, let dry and sand smooth.
Final Finishing/Painting
•
•
•
Stay with the same brand of paint throughout the process; primer, base color, accent
colors, and clear coat. Paints seem to work best as a “system”, so use those from the
same company to ensure compatibility. We’ve had good luck with Krylon, and it
comes in a wide variety of colors. However, the relatively new Krylon latex enamel
sprays can be rather “globby”. Be sure to test them first before using them on your
big project!
Some customers have noticed unpainted QT yellows slightly after long exposure to
sunlight. Here’s why: Prolonged exposure to UV will make any plastic brittle. This
may take years, though. Modern plastics like QT may also have some UV blocking
additives blended in to delay the deterioration further. The color pigments in the
plastic are the first to break down, hence the yellowing. Paint stops the breakdown
process.
DO NOT skimp on the “shake the can for at least two minutes after the ball rattles”
step! This is a mistake many people make. If you need to, stand in front of a clock
while you shake the can. Getting all the paint in the can well mixed is a very
02/24/07
31/74
PMLCompleteFAQ.doc
•
•
•
•
•
•
•
•
•
important step that should not be rushed! Also, as it notes on the can, shake it for a
few seconds every minute or so while you’re painting to help keep it well mixed.
Four or five light coats are better than one or two heavy coats. You will reduce the
risk of runs and sags in the paint dramatically, and it will dry faster as well.
For the very first coat, apply a very light coat of your base color. You’re really not
trying for any color coverage at all, just getting a bit of the paint stuck to the surface
of the rocket to allow the subsequent coats to bond to it. Allow this coat to dry for
about 5 minutes before applying more coats. This first very light coat seems to “set
the stage” for following coats so they won’t run as easily.
For the best finish, let each coat dry and sand lightly with 320 or 400 grit sandpaper;
you should let each coat dry overnight before sanding. Also, wet sanding is best to
sand paint because the water acts as a lubricant and a coolant, and flushes away the
paint that’s sanded off, keeping the sandpaper cleaner. Make sure you have sandpaper
that’s made for wet-sanding, and dip it in the water bucket at least every 30 seconds
or so.
Apply the last color coat as heavy as possible without running or sagging. There’s no
way to say how much is too much or too little; it’s just something you develop with
practice. This is another reason to stick with one brand of paint, because you develop
a feel for how the paint sprays and adheres to other layers and can learn how much is
just enough before it will run.
Let the paint cure for at least 48 hours before handling! This is difficult to do, but will
really pay off in the long run. Even though the paint feels dry, it is still quite soft
underneath the top layer and will be easily damaged until it’s fully cured.
Once the paint has cured you can apply your decals or self-adhesive Monokote accent
stripes (available at most hobby shops). Many hardware stores also carry various
colors of vinyl tape, what most people call electrical tape. We’ve used red, blue,
green, yellow, and white, as well as the usual black electrical tape for stripes. It’s a
little thicker than Monokote or paint for stripes, but is very fast and easy. If using
water-type decals, wet the area where the decal goes with slightly soapy water to
make positioning the decal easier. This is NOT recommended for the decals from
PML; they are self-adhesive and the soapy water will make them not stick.
PML offers both replacement decal sheets for our kits, as well as PML logo decals on
the Decals Page of our webstore. Customers often order AMRAAM or Bulldog decal
sheets for their scratchbuild military-look rockets, as those sheets have items that can
be used to mix ‘n’ match a military look to your own design.
We recommend a clear coat of some sort to help protect the decals as well as “seal”
their edges to help prevent them peeling off. There are three general gloss levels of
clear coat spray available (in order of decreasing gloss):
— Crystal Clear: very shiny, glossy finish; almost a “wet” look
— Matte (or Satin): not shiny, but not extremely flat/dull
— Testor’s Dullcote: very flat, dull finish; most “realistic” look to missiles, etc.
When using any clear coat, put on only VERY thin, light coats, and wait at least 5
minutes between coats. The clear coat can damage your decals or paint if you put it
on too heavily or don’t wait long enough between coats! This is especially true for the
first coat; you can go a little heavier after the first one is dry. There seems to be
something about the solvent used in the clear coat that will “eat” the decals or base
02/24/07
32/74
PMLCompleteFAQ.doc
paint if there’s too much clear coat on at a time. Please…go easy on the clear coat!
Don’t let this deter you from using the clear coat; it really is a benefit to use it. Just go
easy. Usually 2 coats are sufficient, though some people use three.
• Also, be sure to always test clear coating metallic paints. Often clear coats will dull
the metallic look you are trying to achieve. From the Ask Krylon feature of Krylon’s
website:
“The only product you want to top coat the metallics with is the Krylon Living Color
Latex Enamel Paint. It will darken the paint a few shades but it will keep the metallic
look. If you use any of our lacquer clears the metallic look will be completely stripped
out.”
02/24/07
33/74
PMLCompleteFAQ.doc
PML GENERAL INFO FAQ
Getting Started In Higher-Power Rocketry
If you’re completely new to rocketry as a hobby, the National Association of Rocketry
(www.nar.org) “specializes” in the beginning hobby rocketeer and the rockets best for
getting started. We’d recommend a visit to the NAR site to start off. One of the other
great places to “surf around”, whether you’re new to rocketry or have flown lots of model
rockets and are ready for something bigger is www.rocketryonline.com. This site has all
kinds of information and links about hobby rocketry, including higher power. However,
you’re here to see what PML has to offer, so below are some of the typical questions and
answers for people just getting into high-power rocketry:
What Do I Need to Get Started in High-Power Rocketry?
Many people see that PML offers kits and single-use 29mm motors, but also ask about
launch pads, launch controllers, bigger motors, flying fields, etc. High-power rocketry is
a little different than model (A through D motors) and midpower (E through smaller G)
rocketry. The equipment is larger (and more expensive), the flying fields must be bigger
(and therefore harder to find), and there are regulations governing where large rockets
can be flown and what altitudes are allowed.
We always recommend joining a NAR (National Rocketry Association) or TRA (Tripoli
Rocketry Association) club in your area. They'll already have the launch equipment,
they'll have suitable launch fields lined up, they'll know local regulations, they’ll already
be filing the paperwork necessary to fly big rockets (“FAA waivers”) and they'll also be
more than willing to help you out. Besides, it’s always more fun to fly with other people
that enjoy the hobby (and can help you out as you move along), so joining a club is the
way to go in keeping costs down, finding good flying fields, and complying with
regulations.
Be sure to visit the www.nar.org and www.tripoli.org websites. They have detailed
information about local clubs, the motor certification process (required for flying H
motors and above), and much more. Really, join a club…it’ll make your higher-power
rocketry experience a LOT easier and more fun!
I’ve Flown Lots of Model Rockets; What’s a Good “Starter” Kit for Higher
Power?
As far as getting started into high power, take a look at our 29mm motor AMRAAM-2,
Callisto, Io, or Tiny Pterodactyl, which fly on F and G motors (F and G being the next
step to the "lower edge" of high power). Or, try the 38mm X-Calibur or Small Endeavour
(or the 38mm Callisto or Io) with our ADPTR-38/29 optional motor adapter. That way
you can fly it on 29mm F and G motors, then move to 38mm H and I when you're ready.
You might also like the Bullpuppy. The military styling is cool, and it too can be flown
on some 29mm motors with a ADPTR-38/29 installed, but is built with a 38mm mount so
you can fly H and I on it when you're ready. Or you can fly our Bullpuppy 2.1 on 29’s.
02/24/07
34/74
PMLCompleteFAQ.doc
Callisto, Io, Phobos, Ariel, they're all popular kits and would be good starters. The best
bet is to take a look at the Motor Recommendations Chart (click on Specs Page on our
website) at the kits that will fly on Gs (and maybe some F's) and small H motors, and
then look at which one of those you might like. The KitSpecs Chart (also on the Specs
Page of the website) lists all the detailed information about all PML kits.
What PML Kit Should I Get for my Level 1 Flight?
I know it keeps coming up in this section of the FAQ, but the best is to take a look at the
Motor Recommendations Chart on the Specs Page section of our website. See the kits
there that will perform to a level that'd be good for the flying field you have available
(basically look at the predicted altitude on, say, H128 (29mm) or H123 and H242T
(38mm) motors, both popular Level One cert motors), then take a look at the webstore for
what the kits look like and find one that "strikes your fancy". Some quick ones that come
to mind are the Io, Callisto, Phobos, Quasar, Explorer, Black Brant VB, Ariel, Miranda,
D-Region Tomahawk, Tethys, Small Endeavour, and X-Calibur. It really depends on the
type of performance you want out of the rocket both for your L1 cert flight (under 2000'
altitude and simple are our recommendations there) and for “fun flying” after you've
achieved your L1. Some people who fly in the Midwest have smaller fields where
altitudes and trees surrounding the field are a limiting factor and like to/need to keep the
altitudes down, whereas people out West often have miles of uncluttered desert to fly on.
So, it all depends!
I Want to Get a PML Kit That’ll Be Good for Level 1 AND Level 2
Really there are a number of PML kits that would work well for L1 and L2, but a lot of
the decision depends on:
1) What you like as far as looks and features, and
2) The altitude waiver of the club you'll fly with at their field.
Take a look at the Motor Recommendations Chart on our Specs Page. It will tell you how
each kit will perform on various motors. Obviously you'll want to pick one that'll stay
under the waiver for your field when you fly it on the L2 motor you'd plan on using, yet
can achieve an altitude that you like when flown on an L1 motor. Then when you've
narrowed down which ones will fit the flying specs you'll need to meet, you can decide
which one has the looks or other features you like. Some kits that quickly come to mind
are: AMRAAM-4, Tethys, Endeavour, and Miranda. However, there are many PML kits
that can “fill the bill” for L1 and L2, depending on your situation!
Contacting PML and Information Resources
•
•
•
All telephone contacts (except fax: 24hrs./7days) are 9am-5pm EST Monday through
Friday.
Telephone 810-327-1710 or fax at 810-327-1712
For orders only (no technical or order status questions, please): 1-888-PUBLICM
Online at our web site: www.publicmissiles.com.
All pricing information quoted in FAQs is subject to change. Always see the website
for the latest prices. Our entire retail price list is available on the entry page to the
Webstore section of the site, and the prices for individual items are listed next to the
item in the webstore.
02/24/07
35/74
PMLCompleteFAQ.doc
•
•
Our catalog is FREE, and can be ordered at the above phone numbers or on the
Hardware page of our website. (However, the website is always the “freshest” source
of information, as the paper catalog can’t be updated after it’s printed, whereas the
website is updated regularly).
See the Contacting PML page of the website for how to direct your question to PML
via email.
Services, Returns, Timing
•
•
•
•
•
•
•
We nearly always ship within 24-48 hours after receipt of your order.
Custom work is usually shipped within 48-72 hours of your order.
Fiberglass nosecone and tube-wrapping orders usually ship within a week.
Parts damaged in shipping will be replaced quickly.
Return Policy: “If you don’t like it, send it back!” Remember, mistakes may happen,
but we will do whatever it takes to make the situation right with you. We are
absolutely committed to your satisfaction. Always have been, always will.
There are no returns on custom items (unless we made a mistake). Custom items are
by definition unique, specialized parts, and they cannot necessarily be resold to
another customer.
The PML website always has the latest Warranty information (on the Warranty Policy
page) and Shipping information (on the first page after clicking the Webstore button).
Check there for questions on these items or for the latest information.
PML Email Newsletter
Public Missiles, Ltd. has an email distribution list for distributing information about new
kits, new products, and new information direct to the rocketry community. People on this
list will be the first to know about new products, sales, and other information of interest.
There's no cost to you, and the list will only be used by PML to notify you of
developments at PML. Your email address or other information will not be distributed by
PML to other companies or organizations.
How do you sign up? Go to http://mx.blastzone.com/mailman/listinfo/pmlnewsletter to
manage your PML News subscription. The above URL is also on our Newsletters page of
our website at www.publicmissiles.com, so if you forget it some day in the future when
you need to do something with your subscription just visit the Newsletters page.
Glossary/Abbreviations/Terminology/Misc.
BP – Black Powder; used for ejection charges.
CG – Center of Gravity; the point on an object where it balances, where all the weight
seems to be centered. (See additional information under the section “Stability”.)
CP – Center of Pressure; the point on a rocket where all the corrective action of the fins
seems to be centered. (See additional information under the section “Stability”.)
Dado – A groove or “channel” that does not go all the way through a tube. Used in
minimum-diameter kits for fin mounting; also used for some canard-type fins.
G-10 – A type of fiberglass used in all PML kits for fins. Similar to circuit boards.
ID – Inside Diameter
02/24/07
36/74
PMLCompleteFAQ.doc
KS – KwikSwitch; motor mounting system
LES – Loadable Ejection System; system used with altimeter for deployment charges
MMT – Motor Mount
OD – Outside Diameter
VHA – Very High Altitude; a line of PML kits. This abbreviation used on our website
and our catalog.
Inches x 25.4 = Millimeters
Millimeters ÷ 25.4 = Inches
1 Pound = 4.45 Newtons
1 Pound = 16 ounces = 454 grams
1 Ounce = 28.3 grams
1 Kilogram = 2.2 Pounds = 35.2 ounces
Stability
Center of Pressure
CP stands for Center of Pressure. You're probably aware of the center of gravity; this is
the point on a rocket (or any object) where all the weight seems to be “centered”. The
center of pressure is similar; it is the point on the rocket where the corrective force of the
fins is “centered”. The center of pressure must be a minimum of one body diameter
behind the center of gravity on a rocket fully prepped for launch to ensure stability. CP
doesn't vary; it's controlled by the design of the kit. CP specifications given in the PML
catalog and on the website spec sheet are measured from the nose tip. However, you
CAN vary CG, by adding more nose weight. That's why we specify CP in the charts, so
the owner of the rocket can find their CG and compare it against the CP to see if they
need to add some nose weight for stability.
A very generalized rule of thumb: CP moves about 75-80% of the length of airframe
added to a rocket. Example: A rocket is “stretched” by adding 10” of airframe. The CP
will move rearward about 7.5, around 75% of the 10” that was added.
A quick description of CG vs. CP and how to properly adjust the relationship can be
found at www.rocketryonline.com. Go to the InfoCentral section, then to Rocketry Design,
then to CG/CP Relation. The information is repeated below for your convenience. It is
somewhat simplistic, but was intended to introduce the “newbie” to the concept of
CG/CP:
++++++
The CG (Center of Gravity) and CP (Center of Pressure) are very important fundamental
design and flight parameters of any rocket, and have an important relationship to each
other. The general relationship between the CG and CP is as follows: the center of
pressure must be a minimum of 1 body diameter BEHIND the center of gravity on a
rocket fully prepped for launch to ensure stability. Now we’ll explain why it must be this
way, and what you can do to make sure your rocket meets this requirement, whether it’s a
kit or a scratchbuilt design.
02/24/07
37/74
PMLCompleteFAQ.doc
You're probably aware of the center of gravity (CG); this is the point on a rocket (or any
object) where all the weight seems to be "centered". The center of pressure (CP) is
similar; it is the point on the rocket where the corrective force of the fins is "centered".
OK, now imagine just a simple stick, a piece of dowel 12” long. This is your “rocket”,
with one end the nose end and the other the motor end. It weighs the same on the first 6”
as it does on the rear 6”; that’s why the CG is exactly in the middle at 6”. That’s what the
CG means, where the weight (or, more correctly, mass) of the item is centered. Now,
drive an imaginary nail into your stick “rocket” into the table it’s sitting on right at that
CG point of 6”. OK, now push on the front of the rocket, and it spins right at the nail, the
CG. Push on the rear of the rocket, and it spins right at the nail, the CG. That’s a good
way to think of the CG…it’s the “nail” that your real rocket will turn around in flight.
Now, think about if you put fins on the back end of your stick (rocket). Though it’s not
completely true, say that the CP is exactly where you stuck the fins on your rocket (it’s
true enough for this example). If that stick was flying through the air front end first, and
wind pushes on the rocket, the fins will push on the stick. The stick will rotate around the
“nail”/CG. Since the fins are on the back, the rocket straightens back out and continues
nose forward. Now remove your imaginary fins from the back of the rocket and put them
only on the front near the “nose cone” end of your rocket. OK, now it’s flying again, and
wind pushes on the fins; push on the fins of your imaginary rocket. What happens? The
nose of the rocket turns around the “nail”/CG, and the front end flips over and turns into
the rear end. This is bad! Of course, you want the front end of the rocket to stay the front!
That’s the general reason why the CG must be ahead of the CP… keeping the CP behind
the CG makes sure the front of the rocket stays the front!
Many manufacturers specify the CP location on their kits. CP doesn't vary in kit rockets,
it's controlled by the design of the kit. CP is affected by such things as the rocket’s body
diameter, length of body, fin size, number of fins, and fin placement on the body tube. CP
can’t be changed in kits. However, you CAN vary CG, by adding more nose weight.
That's why the kit manufacturers specify CP, so the owner of the rocket can find their CG
and compare it against the CP to see if they need to add some nose weight (to move the
CG ahead of the CP) for stability.
The CG will be dependent upon how you build and use the rocket, which is why
manufacturers usually don't specify CG. Some people really use a bunch of epoxy, others
don't. It's variable enough on how the person builds the rocket, but even more so as what
type of payload you have (if any). You can imagine that given the same kit design, if
someone were carrying some complex and heavy video electronics that the CG would be
dramatically different from someone who flies no payload at all.
Once a kit is built and ready to fly (with payload), CG location is most dependent on the
motors used. Of course a G motor is much lighter than an I motor, but a certain kit may
be able to use G’s, H’s, and I’s. The motor is obviously in the back of the rocket, and
weight in the back of the rocket shifts the CG rearward, so the bigger (heavier) the motor,
the worse the CG/CP relationship will be. Remember, CP doesn’t change…any weight
added to the rear of the rocket will move the CG back (bad), and weight added to the
front of the rocket will move the CG forward (good).
02/24/07
38/74
PMLCompleteFAQ.doc
Mark the CP on the rocket, then mark a point at least one body diameter ahead of the CP.
Make sure you prep the rocket as it'll be in flight (with the motor you intend to use
installed, chute(s) installed, payload installed, etc.) before you do the CG/CP check. No
need to add black powder to an altimeter or the delay area of a reload casing, or to put in
igniters; they’re not heavy enough to matter. Now balance the rocket "teeter-totter style"
on a piece of dowel, back of a chair, something like that. If the rocket balances level with
the pivot point of the teeter-totter arrangement at or forward of the CG point you marked,
you’re good to go! If not, you’ll have to add nose weight until it does.
Up to two body diameters is usually even better, but don’t go much over two diameters or
the rocket will be overstable. By the way, this is what’s meant by “one-caliber” or “twocaliber” stability. It comes from wartime artillery terminology, where the diameter of a
gun is called the “caliber”, so “one-caliber” = one diameter, and so on. Don't forget that if
you use, say, a small H motor and set the CG, that if you then decide to use a big J motor,
the J weighs more and you may have to add nose weight again to compensate. That’s
why it’s usually recommended to set the CG/CP relationship with the largest motor you
intend to use in the rocket.
If you don’t have the biggest motor you intend to fly on hand, or if you haven’t reached a
certification level where you can buy one, check out the weight of the propellant you
intend to use and the reload casing from the manufacturer. Many times that information is
available on the manufacturer’s web site. Simulate the weight of the casing and
propellant in the motor mount tube. Use one or more rolls of coins, a baggie with dirt in
it, whatever you can come up with that's similar to the weight of the motor and casing.
++++++
02/24/07
39/74
PMLCompleteFAQ.doc
PML HARDWARE FAQ
Launch Lugs
•
•
•
•
All our round/tubular launch lugs under ¾” are thin-wall brass tubing, like a brass
soda straw. ¾” lugs are thin-walled copper tubing.
The round lug sizes refer to the size rod they fit. For example, if a kit has a 3/8”
launch lug, that means it loosely fits a 3/8” launch rod.
Customers sometimes ask: “Is it OK to put the launch lug in the corner of a fin root
and the main body? The instructions say to put it in-between two fins, but it would
produce less drag near a fin root and would be stronger also.” This can be done if
you’re careful, but by putting the lug at the fin root, you limit the size of the fillet. If
you make the fillet too big, the epoxy will block the ends of the lug. Also, it just
makes it harder to sand that area of the rocket while painting.
Our Linear Rail Lugs can be screwed or glued, or both. Any epoxy will work but JB
Weld is strongest. Some customers ask about screws interfering with the piston.
Usually there is dead space in the booster area so we glue and screw there. If the
screws might interfere with the piston travel or other functional item, we simply
epoxy it in place.
Motor Retention
Thrust Ring
High-power kits don't use a thrust ring in the front of the motor mount like Estes-class
rockets do, because high-power motors can vary greatly in length. Therefore, if you glued
in a thrust ring you'd be stuck flying only that length of motor.
If you use a reloadable motor for high-power flights, the lower closure has an OD larger
than the OD of the motor mount tube, so that provides the thrust ring by transmitting the
force against the bottom of the motor mount tube. If you're using a single-use motor, as
opposed to a reloadable, you'll need to wrap masking tape around and around the base of
the motor, until you've built up maybe 1/16-3/32" thickness of tape to act as a thrust ring
against the OD of the motor mount tubing. That's typically how it's done, and works just
fine.
Motor “Ejection Clip”
Regarding retaining the motor from ejection, you have a few options. In high power
rockets, there is no "engine clip" like you may be used to with model-rocket-sized
products. Many people use masking tape around the motor casing for a tight friction fit to
the inside of the motor tube. You need it to be tight enough that the motor will hold
against ejection charges, but not so tight you won't be able to get it out after the flight; it
just takes a little practice.
02/24/07
40/74
PMLCompleteFAQ.doc
A more solid retention option is to use one of our PMR or HAMR motor retainers
described below. They work great and are really easy to use.
HAMR Motor Retention System
PML has developed our own line of high quality, threaded motor retainers! The HAMR
(Highly Adaptable Motor Retainers) system has been designed specifically for use with
our rocket kits or any scratch-built rocket using PML motor tubes. These lightweight,
tool-free, threaded retainers are precision CNC turned from 6061 aluminum and
anodized.
These retainers fit virtually all popular motor brands and types including Aerotech RMS
™, CTI Pro XX ™, Animal Motor Works ™, Hypertech ™, Kosdon ™, Sky Ripper ™,
Loki ™, and others.
The HAMR system can be adapted to existing rockets if the motor tube extends at least
3/8” beyond the aft centering ring. The HAMR can also be used with boattail and tailcone
rockets.
PML offers both a HAMR system for standalone/single-diameter motor mounts, and a
HAMR system for PML’s popular Kwik-Switch 54/28/29mm motor mount system.
General notes for retro-fitting the HAMR system onto existing rockets and other
important information
1) The motor tube must protrude 3/8" beyond the aft ring for the sleeve to fit. If the
rocket is already built and the motor tube is flush with the ring, difficult but possible
surgery is required for a retro-fit. You will have to Dremel out the aft ring, Dremel back
the fin tabs about 1/4", then insert a new ring to the proper depth to expose 3/8" of the
motor tube. This is beyond what most people would want to do. In this case, the best
solution is the original Public Missiles Ltd. PMR.
If the motor tube protrudes more than 3/8”, the motor tube can be cut back to fit.
Depending on how much tube needs to be removed, you can use a hack saw, X-Acto
razor saw, or a coarse sanding block.
2) For years we have only sold the PMR for motor retention. Hence all of our kit
instructions state that the motor tube should be flush with the aft centering ring. But as
stated in note #1 above, the motor tube MUST protrude beyond the aft centering ring by
3/8”. You can confidently ignore the kit instructions and make the required adjustment to
facilitate the HAMR system. There will be no adverse effects to the rocket, it’s assembly,
or it’s flight characteristics. However, it is always prudent to check the CP/CG
relationship on any rocket before flight.
3) It is actually a very simple matter to retro-fit a rocket that uses a boattail or tailcone.
Simply scribe a line around the boattail or tailcone 3/8" from the base and cut this section
off with a Dremel cut-off wheel leaving the motor tube intact and exposed. Of course,
02/24/07
41/74
PMLCompleteFAQ.doc
you can perform the cut with a hacksaw blade or X-Acto razor saw just as easily. This
method works with kits where the motor tube is wedged into the narrow end of the
boattail without the use of a centering ring (IE. Bull Puppy, Pit Bull 256). It will not work
with the Bull Dog or Pit Bull 600 since these have a centering ring at the base. See note
#1 above for details.
4) JB Weld, Loctite Weld, or similar must be used to secure the sleeve to the motor tube.
These epoxies have a high temp rating, are not brittle, and bond very well with phenolic
and aluminum. Common hobby epoxy may soften from the heat of the motor and fail. Do
NOT use standard hobby epoxy or even the epoxy PML sells for general kit construction.
The high temperatures generated by the motor can cause these epoxies to fail.
The motor retainer sleeve should be inspected after every flight to make sure the impact
from landing did not loosen the retainer sleeve.
5) For the KS washers to work with older KS kits already in the field, both adapter tubes
must be cut 1/8" to 3/16" by the user. In the past, we made the adapter tubes a bit long to
aid in insertion and removal of the adapters within the mother tube. This is not really
necessary and now the adapter tubes are too long to work with the HAMR-KS adapters.
The tubes can be easily cut by the user with a hack saw, Dremel, miter saw, X-Acto saw,
etc. whether they are assembled or not. Beginning in mid-February 2007, we have
changed the length of the KS adapter tubes to accommodate the use of these retainers.
This includes all KS kits that were in stock at that time. Keep in mind that dealers may
have older kits on their shelves for an extended period of time. If all of the tubes in the
Kwik-Switch set (Mother tube and both adapter tubes) are the same length, then you have
the new version. This change will not affect the use of the original PMR KS version.
6) The bonding surface of the sleeve must be sanded with 80 grit sandpaper to thoroughly
scuff the anodized surface. The anodizing does NOT have to be removed (that's almost
impossible anyway), just scuffed.
7) The motor tube must be sanded with 80 grit as well. The retainer sleeve should fit
loosely on the motor tube. IE. It should just fall off when tipped. This will assure that the
JB Weld (or similar) is not just pushed out of the way when mounting the sleeve on the
tube. The sleeve's bonding surface and the tube should be coated with the epoxy and then
the sleeve should be pushed onto the tube with a slow twisting motion. Any epoxy
squeeze-out can be removed when the epoxy gels but before it cures.
8) After....and only after....the adapter sleeve is epoxied to the rocket, the threads can be
lubed with a tiny bit of grease for smoother threading of the 2 pieces and to prevent
future galling (however unlikely). The grease should not be applied before assembly
since even the slightest bit accidentally smeared on the bonding surface will weaken the
epoxy bond.
02/24/07
42/74
PMLCompleteFAQ.doc
PMR Motor Retention System
• Regular (non-KS) motor retainers use the lower centering ring as the anchoring point
for the threaded inserts. For Kwik-Switch motor retainers, they do not mount to the
KwikSwitch adapters, but actually span across to the CR that holds the KS Mother
tube to the airframe. Both KS retainers (one for 29/38mm and one for 54mm) have
the same bolt hole pattern, just the ID is different. The reason we had to do this is that
the Medusa nozzle on the 54mm motors is larger in OD than a 29mm motor casing;
two different retainers with different ID’s were required.
• The PMR-29/38-KS and the PMR-54 stainless steel retainers have the same “hole
pattern” dimensions. This means they can be interchanged on the same rocket.
However, they will NOT interchange with the hole pattern for a PMR-29/38. Said
another way, if you have a rocket that can use a 54mm and a 38 or 29mm, EVEN IF
IT DOES NOT USE A KWIK-SWITCH SYSTEM, you must buy the PMR-54 and
PMR-29/38-KS. The “non-KS” PMR-29/38 and the PMR-54 do not have the same
hole pattern; the PMR-29/38-KS and PMR-54 do.
• PMR-29/38 should not be used on CR-2.1-1.5 (1.5=38mm) and CR-2.5-2.1
(2.1=54mm) as there is not enough wood for ample insert anchoring. PMR-29/38KS
and PMR-54 should not be used in a Quasar kit or with any CR-2.5-2.1 application.
• CR-2.1-1.5 kit examples: Callisto 38mm, Io 38mm, Phantom/X-Calibur, Phobos
38mm, Explorer 38mm, Black Brant VB 38mm
• CR-2.5-2.1 kit examples: Quasar, Small Endeavour, Tempest, Thunder ‘n’
Lightning
• Since the threaded inserts for the KS-compatible retainers require a 3/16” hole drilled
in the aft centering ring, no retainer is available for a 2.5" diameter rocket using a
54mm motor mount. The PMR retainers cannot be used with boattailed or minimum
diameter rockets (with the exception of our Bulldog kit, which has enough exposed
centering ring area at the boattail). For ideas on other motor retention options for kits
which cannot use a PMR system go to Rocketry Online at www.rocketryonline.com,
click on InfoCentral, then on Construction, then on Motor Retention.
• PMR motor retainers should NOT be used on Loki motors. The retainer will very
slightly block the exit of the motor causing overheating of the retainer and/or motor
casing and potential failure of the retainer, motor casing, or both. For retainers to use
with Loki motors goto http://www.lokiresearch.com/retainer.asp.
• Extra PMR inserts are available separately so you can equip all your rockets for the
motor retention system without having to buy a complete retainer system for every
rocket.
• We recommend installing the PMR after the rocket is built. This gives the best
support for the ID of the centering ring when drilling for the inserts.
• The PMR-54 will work with many hybrid motors; it does not work with a Hypertek J
grain, the hole ID on the PMR is about 1/8” too small.
• The PMR system will work with Cesaroni Pro38 motors.
• The PMR-29/38KS and PMR-54 use 8-32 screws. The PMR-29/38 uses 4-40.
02/24/07
43/74
PMLCompleteFAQ.doc
Other Motor Retention Solutions
See the Motor Mounts FAQ for details on other potential positive motor retention
solutions for PML kits.
02/24/07
44/74
PMLCompleteFAQ.doc
PML HYBRID-READY FAQ
Hybrid Ready
What makes a kit “hybrid ready”? A long motor tube, an electronic deployment system
and/or compartment, and a venting hole. The customer must drill the venting hole as
motors differ as to where the hole should be located.
Hybrid Motor Mounts
Hybrid motors require very long motor mounts. Call us for specific assistance in
obtaining a hybrid motor mount for a scratch-build project. We offer kits that are already
designed specifically for hybrid motors; see the Hybrid Ready section of the webstore.
Our 54mm kits can take Hypertek’s "Standard J" and their "New Hammerhead J". Our
38mm kits are intended for Sky Ripper Hybrids and, with the use of a 29mm adapter,
RATT Works hybrids.
Some customers ask why the Ion kit has a shorter (28”) MMT than our other 38mm kits.
Simple…to keep the price, size and weight down for using smaller H and I hybrids and/or
smaller composite motors.
PMR Motor Retention System
The PMR-54, -38, and -29/38 will work with hybrid motors.
ERM System
The Electronic Recovery Module (ERM) system is based on our CPR3000 system, and is
designed specifically for hybrid rockets. ERM is designed for the PML AccuFire timer or
PML Co-Pilot altimeter, though others may work. All of our hybrid-ready rockets (except
Aurora, Tempest, and Nimbus) use the ERM System.
Here’s what you get with the ERM system:
• Complete altimeter/timer bay assembly.
• Complete Threaded Airframe Coupler assembly made from 6061 aluminum with a
blue anodized finish.
• All mounting hardware for the PML Co-Pilot or Transolve P6 altimeter. (Mounts
for Transolve P5 or P4 and Adept ALTS-25 altimeters sold separately).
• A complete ejection system including charge canister for e-matches and holder.
(Charge cylinders for flash bulbs sold separately.)
• Rear deployment piston system.
• External safety switch and lead wires.
See the Hybrids page of our website for graphics of ERM and additional details.
02/24/07
45/74
PMLCompleteFAQ.doc
ERM-Complete vs. ERM-Retrofit Systems
The ERM Complete includes the recovery airframe and the pre-cut nosecone. All you
will need with this is the MMT/fin section to make a rocket.
The ERM Retrofit does not include the recovery airframe nor the nosecone. This is good
for retrofitting an existing kit.
ESH-54 Timer Housing
An ESH54 is a timer housing made from a 54mm coupler tube, a couple of bulkplates, a
removable G-10 plate (that you mount the timer to) and an LES holder. The tank of a
Hybrid motor is approximately the same diameter as the ID of the coupler tube. This
allows the ESH to slip over the tank (must be friction fitted) by a distance of about 1/2"
to 1" and butt against the lower bulkplate. The upper bulkplate (cap) has the LES holder
attached to the topside and is removable for accessing the timer. This "cap" is actually
two bulkplates glued together in a fashion similar to the one on an Intellicone. The G-10
plate (with timer installed) is held centered within the tube via two opposing (wooden)
runners and can be slid out when the upper bulkplate (cap) is removed.
CPR3000 and Hybrids
Using CPR3000 with a hybrid-based rocket is usually impractical, due to the excessive
length that needs to be added to the rocket. CPR3000 requires nearly 3 feet to be added to
a hybrid-based rocket, effectively putting it “out of bounds” for use with hybrid rockets.
Our ERM system is a much better solution.
PML AccuFire and Hybrids
The AccuFire Staging Timer is NOT affected by hybrid motor harmonics; it’s completely
safe to use with hybrids.
02/24/07
46/74
PMLCompleteFAQ.doc
PML IGNITERS FAQ
Igniter manufacturers will specify the electrical usability (ohms and volts) range for their
devices; contact the igniter manufacturer for their specifications.
Igniters
PML offers an igniter-making kit: Magnelite igniter kits, which allow you to make your
own igniters, ranging from A size BP motors all the way up to M and larger motors,
depending upon the igniter wiring size purchased.
See the Igniters page in our webstore for more information.
Ematches vs. Igniters
The difference between e-matches and igniters is that ematches are intended to ignite an
easy-to-burn substance quickly, such as the BP used in rocket ejection charges. However,
an igniter is intended and constructed to produce a large, hot ball of flame for an
extended period (say, 0.5-0.75 seconds) to ignite a rocket motor. Ematches typically will
not ignite motors unaided, as they do not produce a hot enough flame for long enough,
whereas igniters certainly could ignite BP. Another significant difference between them,
which is critically important for onboard rocket electronic use, is their current
requirements. Igniters typically require much more current than an e-match; the current
requirements are usually more than altimeters can provide. Therefore, for onboard
altimeters, which need to ignite deployment charges, ematches are needed. For staging
timers, which need to ignite motors, igniters are needed. Be sure to always check to be
sure an e-match or igniter will work with your onboard electronic device.
02/24/07
47/74
PMLCompleteFAQ.doc
PML MOTOR MOUNTS FAQ
Kwik-Switch
•
•
•
•
•
PML is the only company with the Kwik-Switch quick-interchangeable motor mount.
The Kwik-Switch 2000 increases the ease of use and positive retention features of the
original Kwik-Switch system.
The standard Kwik-Switch has 13.75” of “usable length”, meaning motor cases less
than 13.75” will fit the KS. See the Motor Recommendations Chart on the Specs Page
of our website for casing lengths of various motors.
The Kwik-Switch 2000, whether as a stand-alone part for scratchbuilds or used in
kits, comes with the 54mm main motor tube, and 38mm and 29mm adapters included.
The Kwik-Switch 2000 ships with the 29mm adapter threaded piece screwed into the
mother tube mating half. This is done for shipping purposes. Some customers have
thought the 29mm piece was missing because they didn’t notice it already screwed in.
EXTENDED Kwik-Switch
The 54mm/1706 reload casing (K185W, K550W, K1100T) will not fit the standard
KS2000 system. For $5.00, you can upgrade to an extended KS2k system that will fit.
The standard extended KS is 17", which is long enough for a 54mm/1706 (K185W,
K550W, K1100T) case. Also, you do not need an extra (third) centering ring with the
extended KS for the center of the longer adapter tubes.
If you have already purchased a kit and wish to upgrade to the extended KS, you must
return your original, unbuilt KS2000 components with the $5.00. Keep in mind that you
may also need to have a longer airframe to compensate for the additional length of the
KS-EXT, depending upon the kit. That would also be additional cost and/or we’d need to
ship you some coupler and airframe extension pieces at additional cost to upgrade your
“standard length” kit.
Some of our rocket kits require strengthening from their stock configuration to fly certain
larger motors that would require an Extended KS. These rockets MUST use phenolic
airframe reinforced with fiberglass cloth and have the fins upgraded to a thicker G-10
material. There may be other considerations as well; it depends upon the specific
application. See the Kit Strengthening section of the Airframes FAQ for information on
when and how to strengthen.
Extended Kwik-Switch and J570
The super long 38mm casing (J570; 19.2”) does not fit the Extended KS. We do NOT
recommend a “super-extended” (even longer) KS to be used with the J570. We do not
believe the urethane KS mother tube and adapter tube mounts should be used with the
high thrust profile of the J570 motor.
For super-long casing mounts (such as the J570) or custom motor mounts, we
recommend our ADPTR 54/38HD shown on the Motor Mounts page of our webstore.
02/24/07
48/74
PMLCompleteFAQ.doc
This adapter is similar to ADPTR-54/38 on our Motor Mounts page, with additional
larger-OD centering rings on the bottom of the adapter. This allows the thrust of the
motor in the adapter to be transferred directly to the 54mm mother tube instead of
through the urethane adapter interface. This will stand up to J570 and other “high-thrust”
38mm motor thrust profiles (assuming of course that the motor mounts were built and
installed per instructions).
GIANT Kwik-Switch
PML also carries a “Giant KS” motor mount. This mount uses a 98mm mother tube and
can be equipped with both a 75mm and 54mm adapter tube. This Giant KS is based on
the original Kwik-Switch locking tab design. It comes standard with a 54mm adapter; the
75mm adapter can be purchased separately.
75/54 Kwik-Switch
PML carries a 75/54mm Kwik-Switch motor mount based on the original Kwik-Switch
locking tab design similar to the Giant KS discussed above. The KS-75/54 system comes
standard with the 54mm adapter, though it can also be purchased separately.
Friction-Fit Adapters
Friction fit adapters are available for those who do not want the KS system, or for kits
that are not equipped with the KS system. Available adapters are: ADPTR-38/29;
ADPTR-54/38; ADPTR-54/29.
PML recommends you purchase the 38mm mount option for all kits that can be
purchased standard with a choice of 38mm or 29mm motor mount, and also purchase an
adapter for 29mm (ADPTR-38/29). This allows maximum flexibility in motor selection,
since if you build with 29mm that’s all you can use. If you build with 38mm you can
always install the 29mm adapter if you want to step down to smaller motors, but can also
fly 38mm as well.
Some people have asked why the PML 29-to-38mm adapter (ADPTR-38/29) costs more
than the one from LOC, and why is ours worth the extra money? Our adapter is built up
of various tubing sizes so it ends up like a double-thickness tube. LOC’s is a standard
29mm tube with centering rings to adapt out to the 38mm tube. Ours are worth the extra
money for two reasons:
1. It’s easier to friction-fit ours because you have the entire tube area to work with
instead of just the two thin contact spots of the centering rings.
2. If you happen to have the misfortune of a motor blowing up, the super-thick
tubing of our adapter will tend to contain and absorb the explosion, usually
leaving the rocket without damage.
Hybrid Motor Mounts
Hybrid motors require very long motor mounts. Call us for specific assistance in
obtaining a hybrid motor mount for a scratch-build project. We do offer kits that are
already designed specifically for 54mm hybrid motors; see the Hybrid Ready section of
the webstore.
02/24/07
49/74
PMLCompleteFAQ.doc
Currently our Hybrid-Ready rockets are only 54mm. We sell the Tempest and Aurora as
Hybrid-Ready, which can both take the "Standard J" and the "New Hammerhead J".
Motor Retainers
Thrust Ring
High-power kits don't use a thrust ring in the front of the motor mount like Estes-class
rockets do, because high-power motors can vary greatly in length. Therefore, if you glued
in a thrust ring you'd be stuck flying only that length of motor.
If you use a reloadable motor for high-power flights, the lower closure has an OD larger
than the OD of the motor mount tube, so that provides the thrust ring by transmitting the
force against the bottom of the motor mount tube. If you're using a single-use motor, as
opposed to a reloadable, you'll need to wrap masking tape around and around the base of
the motor, until you've built up maybe 1/16-3/32" thickness of tape to act as a thrust ring
against the OD of the motor mount tubing. That's typically how it's done, and works just
fine.
Motor “Ejection Clip”
Regarding retaining the motor from ejection, you have a few options. In high power
rockets, there is no "engine clip" like you may be used to with model-rocket-sized
products. Many people use masking tape around the motor casing for a tight friction fit to
the inside of the motor tube. You need it to be tight enough that the motor will hold
against ejection charges, but not so tight you won't be able to get it out after the flight; it
just takes a little practice.
A more solid retention option is to use one of our PMR motor retainers described below.
They work great and are really easy to use.
PMR Motor Retention System
• Regular (non-KS) motor retainers use the lower centering ring as the anchoring point
for the threaded inserts. For Kwik-Switch motor retainers, they do not mount to the
KwikSwitch adapters, but actually span across to the CR that holds the KS Mother
tube to the airframe. Both KS retainers (one for 29/38mm and one for 54mm) have
the same bolt hole pattern, just the ID is different. The reason is that the Medusa
nozzle on the 54mm motors is larger in OD than a 29mm motor casing; two different
retainers with different ID’s were required.
• The PMR-29/38-KS and the PMR-54 stainless steel retainers have the same “hole
pattern” dimensions. This means they can be interchanged on the same rocket.
However, they will NOT interchange with the hole pattern for a PMR-29/38. Said
another way, if you have a rocket that can use a 54mm and a 38 or 29mm, EVEN IF
IT DOES NOT USE A KWIK-SWITCH SYSTEM, you must buy the PMR-54 and
PMR-29/38-KS. The “non-KS” PMR-29/38 and the PMR-54 do not have the same
hole pattern; the PMR-29/38-KS and PMR-54 do.
02/24/07
50/74
PMLCompleteFAQ.doc
•
•
•
•
•
•
•
PMR-29/38 should not be used on CR-2.1-1.5 (1.5=38mm) and CR-2.5-2.1
(2.1=54mm) as there is not enough wood for ample insert anchoring. PMR-29/38KS
and PMR-54 should not be used in a Quasar kit or with any CR-2.5-2.1 application.
• CR-2.1-1.5 kits: Callisto 38mm, Io 38mm, Phantom/X-Calibur, Phobos 38mm
• CR-2.5-2.1 kits: Black Brant VB 38mm, Explorer 38mm, Quasar, Small
Endeavour, Tempest, Thunder ‘n’ Lightning
Since the threaded inserts for the KS-compatible retainers require a 3/16” hole drilled
in the aft centering ring, no retainer is available for a 2.5" diameter rocket using a
54mm motor mount. The PMR retainers cannot be used with boattailed or minimum
diameter rockets (with the exception of our Bulldog kit, which has enough exposed
centering ring area at the boattail). For ideas on other motor retention options for kits
which cannot use a PMR system go to Rocketry Online at www.rocketryonline.com,
click on InfoCentral, then on Construction, then on Motor Retention.
Extra PMR inserts are available separately so you can equip all your rockets for the
motor retention system without having to buy a complete retainer system for every
rocket. Install inserts in all your rockets and you can use the PMRs in whichever
rocket you’re flying.
We recommend installing the PMR after the rocket is built. This gives the best
support for the ID of the centering ring when drilling for the inserts.
The PMR-54 will work with many hybrid motors; it does not work with a Hypertek J
grain, the hole ID on the PMR is about 1/8” too small.
The PMR system will work with Cesaroni Pro38 motors.
The PMR-29/38KS and PMR-54 use 8-32 screws. The PMR-29/38 uses 4-40.
Other Motor Retention Solutions
Many of the following are emails from PML customers with solutions they have come up
with for retaining motors in PML rockets. PML has not tried these solutions themselves,
and does not endorse them as viable, safe, and effective solutions. They are presented
here simply as “thought-starters” for you in coming up with your own solutions to motor
retention concerns you may have. PML cannot/will not be able to comment on using any
of the information below with your rocket.
+++
Mini-BBX and Terrier Booster
If possible I'd like to find an alternative to friction fitting the upper stage engine. I know
this subject has been discussed before on RMR.
I haven't, but will do, what Daniel Flury from Switzerland has done:
http://www.shuttle-endeavour.de/webimg/bbx_tailcone.jpg
The blue circle shows where the 29 mm engine is protruding from the tailcone, the red
shows to U-shaped lengths of 1 mm steel that are glued into small holes drilled into the
"lip" of the tailcone, between the engine and the 38 mm tube (shown with brown dots).
The steel Us can be bent outwards (see arrows) to allow changing the motor.
+++
Bullpuppy
I've started working on the Bullpuppy and I wanted to let you know that your assistance
was invaluable. I decided to go with the Aeropack retainer. Fortunately, Aeropack is
02/24/07
51/74
PMLCompleteFAQ.doc
based right here in San Diego so I was able to get the retainer directly from them. In fact,
Bob Mosley (the owner) met me personally to deliver it. Bob had a great suggestion,
which I have used and I thought I would pass on to you.
The outer diameter of the retainer is slightly larger than the boat tail. I shortened the
boattail by 3/8" so that the diameters matched - very clean look. The motor tube extends
the shortened boat tail by 3/8" to allow attachment of the ring so the motor is actually in
the same position as the stock kit. The outer diameter of the Aeropack ring was a nice
snug fit in the shortened boat tail.
+++
Bullpuppy/Little Lunar Express/Lunar Express
I've made a minor modification to my full-size Lunar Express that may work for you as
well. (I've also done it to my Bullpuppy...it works for any boattail kit). I'll try to describe
it to you, but bear with me! I've attached a crude JPG drawing that'll help make sense of
what I'll describe. What I did was to take about a 3" long piece of 3/4" dowel (you may
want to go smaller for the Little Lunar Express), and cut it lengthwise from "corner to
corner". Imagine taking a piece of flat wood 3" long by 3/4" wide and drawing a line
lengthwise from the lower left to the upper right corners, then cutting along that line. It's
the same idea with the dowel. Then, tape a piece of sandpaper to the boattail of the rocket
at the bottom end. Now take the dowel you cut and, moving the dowel up and down
along the centerline of the rocket, sand the flat area from the cut until it conforms to the
shape of the boattail. Now sand the boattail area well where the retainer will go, and
epoxy it in place. You might even want to drill a few holes through the boattail under the
retainer before installing it to allow epoxy to seep in and "rivet" the retainer to the
boattail. The most important thing is to ensure you get a very good bond of the retainer to
the boattail, since epoxy doesn't bond as well to the plastic as it does to other materials. In
my full-size LE I also slotted the front of the retainer to fit over the fin, but you can also
put it between fins. Whatever looks good to you.
Now that it's mounted, drill a hole for a woodscrew **parallel to the centerline of the
rocket**. Drill it small enough that the woodscrew will "cut threads" into the dowel when
you install it, but large enough that it won't split the wood. Be careful to go deep enough
but also not so deep you come through the side of the dowel. Now get a washer from
your local hardware that'll capture the edge of the motor when it's installed on the
woodscrew, and you're done. You may need to get what's called a "fender washer".
They're just like a regular flatwasher but with a much larger OD for the size of the center
hole. With careful installation of the woodscrew each flight to make sure you don't strip
the threads, this will work very well for you. If you spend a little time shaping the
retainer as well, you can make it blend in and look like it belongs there rather than just an
add-on piece. If you use a harder material for the retainer than wood, you can actually
thread the hole and use a threaded machine screw instead of the wood screw. I've done
'em both, and they both work.
02/24/07
52/74
PMLCompleteFAQ.doc
Figure 1 - Boattailed Kit Motor Retainer
+++
Bullpuppy
On my Bullpuppy, and all my minimum diameter rockets, I thread the inside of a piece of
brass tube. In this case choose tubing to fit a 6-32 screw. Then I drill a hole in the tail
cone parallel to the axis of the rocket. Be sure it is located far enough from the aft closure
of the motor to allow the screw to just clear it. I epoxy the brass tube in the tail cone and
to the motor tube. With a little filling you can blend this into the tail cone and it is almost
invisible on the finished rocket. I use 6-32 all thread rod for the actual retainer. I cut a
piece long enough to engage most of the treads in the brass tube plus about 1/2 inch. I
then bend it 90 degrees about 1/2 inch from the end. Thread the rod in the tube and turn it
down until it firmly holds the motor in. It works. It is cheap and easy. It takes up very
little room. It is a low CD approach.
++++++++++
Bullpuppy
Attached is a photo of a big external motor clip one customer made; looks like aluminum
stock to me. With this one you'd have to work with some retaining nuts, etc. on the inside
of the boattail before assembly, but it may be an idea you'd like.
Figure 2 - Bullpuppy Aluminum Retainer Clip
+++
Thunder ‘n’ Lightning
I think maybe I found a solution to retaining the motor in the booster for "Thunder &
Lightning". I acquired an Aeropack motor retainer. I took a "spare" piece of pml 38 mm
motor mount tube and rubber cemented a strip of 220 grit emery paper (The same width
as needed) around one end. I then inserted the other end into the aft end of the tail cone
and rotated to remove material from the inside of the aft end. (The forward extension of
the tube keeps the assembly square and by rotating the "relief" is constant. when the
Paper loads up pull it out and clean it with a brush. when the strip is all inside the cone,
pull it out, clean it and glue on another strip. (Try not to get glue on the working side of
02/24/07
53/74
PMLCompleteFAQ.doc
the emery paper). I'm holding a PML tailcone that has an Aeropack motor retainer that
looks like it belongs there.
+++
Sudden Rush
I believe it was Darrell Mobley (Darrell, can you confirm?) that epoxied a short piece of
54mm airframe inside the boattail, then screwed the boattail onto the airframe,
"sandwiching" the rear closure of the reload between the 54mm MMT and the short piece
of 54 in the boattail.
+++
BBX/Sudden Rush
I incorporated positive retention into my PML Black Brandt X. The BBX is a 4" kit
while the Sudden Rush is 3", but I believe you can find a variation on what I did that will
work.
I can't remember whether it was part of the kit or if I had to add it, but you need a
centering ring that will go immediately in front of the boat tail. Drill two holes 180
degrees apart for retaining screws. On the BBX, I inserted long screws (use washers to
keep from crushing the plywood ring) and threaded 3 hex joiners (these are used to join
threaded rod and can be obtained from Home Depot) onto each of them. 3 happens to be
the number that equals the length of the BBX boat tail. The tip of the screw should be
about half way into the final joiner so you have room to screw in the retaining screw
when finished.
Resting the boat tail's aft end on the table of my drill press, I drilled two holes 180
degrees apart that match the locations of the screws. This allows the boat tail to be
slipped over the studs we have created on the centering ring. Make sure the MMT holes
in the ring and boat tail line up! When it comes time to install the boat tail, apply epoxy
as directed and also apply epoxy to the base of the studs and to all the joints so the
assembly can't come unscrewed. Slip the boat tail over the studs and install the complete
assembly into the rocket.
I made my own retainer from aluminum sheet and it looks a lot like PML's retainer
except that it only has 2 tabs. Socket head screws hold it onto the studs, which are
recessed slightly into the boat tail. For the Sudden Rush, you may have to modify this
approach by allowing the screw threads to project through the boat tail and
anchor the retainer ring with nuts. Not as pretty, but effective. Another approach might
be to install blind nuts into the aft centering ring and use really long screws to hold the
retainer ring in place.
+++
Sudden Rush & Slimline Motor Retainer
If anyone else ever asks, the slimline tail cone does create problems with the Sudden
Rush kit.
Details:
The Slimline Tail Cone is shorter than the PML tail cone. In addition, the design of the
retainer has the end of the motor tube about 3/8 inch inside the tail cone. The
combination of a shorter cone, and the motor tube being inside the cone, pushed the
02/24/07
54/74
PMLCompleteFAQ.doc
motor tube's top centering ring close to 1.5 inches further up the body. The result is that
the 5 inch coupler that is used to form the top of the fin section can only be inserted about
3/4 inch into the top of the fin section before it hits the top centering ring. I doubt that a
3/4 shoulder is a good idea that close to the business end of the rocket.
Solution:
Since the SlimLine retainer was not cheap, I'm determined to use it. I plan to sand the
top centering ring on the motor tube until it fits INSIDE the 5 inch coupler. I'll attach the
strap to the motor tube per the instructions. I'll then dry fit everything. With everything
dry fit in place, I'll glue the motor tube into the coupler. I'll them assemble the rest of the
bulkhead per the instructions. I'll now have a bulkhead, with the top of the motor tube
glued inside. I'll then prep the outside of the coupler and the inside top of the body, apply
the epoxy, and slide the whole assembly into place, dry fitting the tail cone to ensure that
it is all in the right place. Once all that sets, I'll pull the tail cone and install the fins per
instructions. Make sense? I figure this will have a plywood to phenolic bond for the top
centering ring, and a 2.5 inch wide phenolic coupler to quantium tube bond for the
coupler/bulkhead. That combo should be strong as steel.
+++
Modification of PMR-29/38 motor retainer for CR-2.1-1.5 kits (PML Io):
As described in the PML Hardware FAQ, there is not enough wood in the aft centering
ring of the CR-2.1-1.5 kits (e.g., the Io with a 38 mm motor mount) to hold the brass
inserts that come with the PMR-29/38 motor retainer. A solution is to purchase some 440 nuts from a hardware store and epoxy them to the back of the aft centering ring before
gluing the centering ring in place.
1. Center the motor retainer on the centering ring and mark the position of the screw
holes on the centering ring.
2. Drill a small pilot hole (5/64” drill bit). Hold the centering ring securely, GO
SLOW and BE CAREFUL – if you rush this step or the next one, you could split
the centering ring.
3. Carefully enlarge the hole to the proper diameter for the bolt to pass through
(7/64” drill bit).
4. Line up a 4-40 nut with the hole in the centering ring. You probably will find the
nut is slightly wider than the centering ring. In this case, grind or file off part of
the outside edge of the nut until it’s the same width as the centering ring (a
Dremel tool works fine).
5. Scuff up both sides and edges of the nut with 100-150 grit sandpaper (to help
epoxy adhere to it).
6. For each of the 3 holes in the centering ring, insert a 4-40 bolt through the hole
and attach the nut on the other side of the centering ring (don’t use the bolts that
came with the retainer, since you might ruin them during the following steps).
Use a small amount of epoxy to tack the nut in place on the back of the centering
ring (the bolt is used to center the nut and pull the nut back against the centering
ring while the epoxy sets). While the epoxy sets, carefully back off the bolt a turn
or two (while holding the nut secure) to free up any epoxy that may have found its
way into the hole in the centering ring, or between the nut and bolt.
02/24/07
55/74
PMLCompleteFAQ.doc
7. After the epoxy has set, build up a “shoulder” of additional epoxy around the nut
to firmly anchor it to the centering ring. Make sure some the epoxy actually goes
up and over the edge of the nut. It will be difficult not to get epoxy between the
nut and bolt at this stage, but if you occasionally turn the bolt a turn or two while
the epoxy cures, you’ll break any bond that forms. Make sure you turn the bolt in
the direction that won’t pull additional epoxy down into the threads of the nut.
8. After the epoxy has cured, remove the bolt. It may be helpful to use a fresh bolt
and run it back and forth a couple of times through the nut to remove any epoxy
that found its way into the threads.
9. Attach the centering ring to the aft airframe/motor mount per the kit instructions.
Make sure the side of the centering ring with the nuts faces INTO the airframe,
and that the holes are NOT in line with the fins.
02/24/07
56/74
PMLCompleteFAQ.doc
PML NOSECONES FAQ
All PML nosecones (except as noted below) are 4.2:1 length/diameter ratio, with a true
ogive shape. Sizes indicate the size tubing they fit, i.e. the ID of the tubing they fit.
• 1.1 & 1.5” diameter are solid urethane; both are conical shape.
• 2.15, 2.56, 3, 3.9 are plastic.
• 6, 7.5, 11.4 are fiberglass
• 11.4 is 3.5:1 L/D ratio. We also offer a Harpoon-missile-style 11.4” fiberglass
nosecone.
• PML does not make custom nose cones.
• Some customers have asked about conical nose cones in larger than 1.1” (29mm) or
1.5” (38mm) diameter. A suggestion would be going to a craft store and buying a
Styrofoam cone used in craft projects and fiberglassing over it. That might work out
for you. Or, if you know a woodworker with a lathe, have them turn you one. Some
rockets can benefit from some nose weight, so the weight of the wood would be good.
• We cannot tell you with certainty whether our tubing is compatible with that of
another manufacturer. This also includes whether our couplers, nosecones, pistons,
CPR parts, etc. will fit another manufacturer’s tubing. With the variation in tubing
from one manufacturer to another, we simply cannot tell you with certainty if our
components will match well with non-PML tubing.
Nosecone Fits and Airframe Tubing
After cutting airframe tubing, it may be necessary to deburr the edges inside and out
using 150 grit or finer sandpaper. This is especially true with QT, as the cutting process
may “squeeze” the cut end ever so slightly, making it tight for inserting a nosecone or for
inserting the piston. Deburring or chamfering the inside edge of a QT will eliminate those
problems.
Plastic Nosecones (PNCs)
•
•
•
•
•
HDPE (high-density polyethylene).
Thicker wall than competitors; less flex, which reduces paint chipping/flakeoff.
Double shock cord/chute eyelets, which make them much stronger. You may need to
clear out flashing from manufacturing in the nosecone eyelets to pull the shock cord
through; use an X-Acto knife. If you must open up the eyelet to allow the shock cord
to pass through easier, do it toward the body of the nosecone, not toward the edges of
the eyelet (that will weaken the eyelet). An easy way to pull through a shock cord
strap is to put one corner through the eyelet and pull the strap through using pliers.
Ridges on shoulder that can be easily sanded to achieve perfect fit; shoulder also
provides better sealing, like piston rings in an engine.
Polyethylene is notorious for being difficult for adhesives to adhere to. First of all,
wash the OD in very hot, soapy water (and the ID for plastic boattails) and rinse. This
will help remove any mold release compound from manufacturing. Secondly, sand all
surfaces to be bonded with 120 grit sandpaper; sand exceptionally vigorously inside
02/24/07
57/74
PMLCompleteFAQ.doc
•
•
•
•
boattails made of our plastic nosecones, since appearance doesn't matter here...getting
a good bite on the epoxy does. Our Two-Part Expanding Foam (sold on the
Adhesives page of the webstore) is perfect for this application.
Urethane automotive topcoats over paint can increase resistance to paint chipping.
Fill imperfections in plastic nose cones with Squadron Green or White putty,
automotive spot putty, etc.
Neither acetone nor MEK causes any problem on our plastic NCs (used in moderation
and for short-term contact with the plastic, of course).
If you need to add noseweight for CG/CP adjustments, we recommend sand held in
place by our Two-Part Expanding Foam (sold on the Adhesives Page of the
webstore).
Custom PNC
• “Custom PNC” means changes to standard PML PNCs; we do not make custom
cones.
• See our website at www.publicmissiles.com for current pricing on all custom
work. The prices below are shown only to give you a general idea of the pricing
range for such work.
• Convert to boattail by cutting tip add $4.00. Customer must provide motor tubing size
(if base diameter is to be same as the motor tube) or base diameter.
• $4.00 charge includes cutting shoulder. Customer must provide shoulder length.
• Slotting for 3" & 4" only: add $3.50 per slot.
Intellicones
The PML Intellicone is intended to be used above a payload section to mount electronic
equipment. The Intellicone is not intended to have a shock cord attached to it; the shock
cord attaches to the payload section, to which the Intellicone is screwed, removablyriveted, or some other attachment scheme. The cable is used to retain the payload section
into the Intellicone. Put the two ends of the cable into the cone, put in the payload tube
with the cables going into the notches in the hole in the cone, then pull on the cable to
wedge the payload tube into the Intellicone. See the Nosecones page of the webstore for a
“click here” graphic showing more detail.
Fiberglass Nosecones (FNCs)
•
•
•
•
•
•
•
•
White epoxy surface coat.
6”: two layers of fiberglass cloth; one layer 10oz., one 6oz.
7.5 and 11.4”: one layer 18oz., one 6oz.
Molded in one piece, not two halves that are then joined. One piece is much stronger.
All fiberglass cones use a U-bolt into a ½” thick ply bulkplate for ‘chute and shock
strap attachment due to the size and weight of the cones.
Scuff fiberglass cones with fine sandpaper to paint.
Fill imperfections in fiberglass cones w/Bondo, automotive spot putty, etc.
When using epoxy in a fiberglass cone to retain nose weight, do just a little at a time,
allowing the epoxy to cool between batches. This will prevent the resin used in
manufacture of the cone from breaking down due to the heat of the setting epoxy.
02/24/07
58/74
PMLCompleteFAQ.doc
When you put a lot of quick set epoxy into the tip of the cone the heat generated
during curing can exceed 200 degrees F. The resin the cone is made of begins to
deteriorate at 170 degrees. Better yet, use a slow-setting (24-hour) epoxy, or our TwoPart Expanding Foam (sold on the Adhesives page of the webstore.
Custom FNC
• “Custom FNC” means changes to standard PML FNCs; we do not make custom
cones.
• If more strength is required, an additional layer of 16 oz. fiberglass can be added to
our FNC-6.0, 7.5, and 11.4 during fabrication for an additional charge of 30% of the
standard price of the FNC. (Example: FNC-6.0 is $84.95; 30% x $84.95 = $25.49; an
“extra strength” FNC-6.0 would be $84.95 + $25.49 = $110.44. This is only an
example. Always check the webstore for current FNC pricing).
• See our website at www.publicmissiles.com for current pricing on all custom
work. The prices below are shown only to give you a rough idea of the pricing
range for such work.
• Convert to boattail by cutting tip: add $6.00 for 6”. Add $10.00 for 7.5” and 11.4”.
• Slotting for 6” only, add $6.00 per slot.
• Slotting for 7.5” and 11.4” is done and charged on a “per order” basis, meaning the
charges are not standard. They will be quoted when the slotting job is specified.
Boattails
Boattails are long, ogive shaped components that are attached to the tail end of the rocket
and serve to reduce drag (and can add a "retro look" to the rocket). PML boattails are
made by modifying our existing line of nosecones. 2.1” through 3.9” boattails are made
of plastic while our 6.0” and 7.5” boattails are fiberglass. Centering rings are included.
In most cases the tip of the nosecone is cut off at the point that will allow the motor
mount tube to fit through the opening. In the larger 6.0 and 7.5" boattails, various motor
mount sizes can be used with the appropriate centering ring placed in the opening at the
base of the boattail. Unlike tailcones, the fins of the rocket are usually mounted through
the boattail and to the motor mount tube.
PML boattails vary in the following areas:
-- Number of slots (3, 4 or 6)
-- Slot width
-- Length of slots.
The above details are described for each boattail on the Nosecones page of the PML
website. Also, slotting charges are not included in the pricing of the boattail since it
varies (3, 4 or 6).
Tailcones
•
All tailcones (except Mini-BBX) are 1.75” exposed length with 3/16” to ¼” shoulder.
See the Nosecones page of the website for Mini-BBX tailcone details.
02/24/07
59/74
PMLCompleteFAQ.doc
PML RECOVERY COMPONENTS FAQ
Parachutes
Construction/Design
• PML chutes are made by a real parachute company, are not just “hobby parachutes”.
• All are multi-panel chutes, not a flat disc with shroud lines.
• All are a 15-degree conical design.
• All sizes use 1.9 ounce rip-stop nylon coated with urethane for zero porosity. Actual
weight of the fabric is 2.6 ounces/sq. yard.
• The lines used on 36” and smaller chutes are braided polyester with a breaking
strength of 180 pounds minimum.
• The lines used on 48” and larger chutes are flat braided nylon with a breaking
strength of 300 pounds minimum.
• 60” chutes and above have heavier lines and every seam and edge is reinforced with
high strength webbing.
Spill Holes
• The spill hole provides straighter descent and reduces swinging or rotation of rocket
under the chute while on descent; the swinging occurs with non-spillhole chutes due
to the chute trying to dump air. See the Recovery page of the webstore for
approximate spill hole sizes; they vary slightly from chute to chute within a size.
• If a rocket experiences rotation or swinging under a PML spill hole chute, this is
because the shroud lines are not completely equal lengths to the tie-off point.
• Our 18” chute has a relatively large spill hole as it is intended for drogue applications.
This chute is not a good choice as a replacement for a plastic 18” chute from other
manufacturers due to the large spill hole.
Sizing
• Chutes come in the following sizes: 18, 24, 30, 36, 48, 54, 60, 72, 84, 96, and 120”.
We also offer a drogue X-form chute and a 4”x144” streamer you can cut to length.
• Our diameter ratings for our chutes are measured as follows: From shroud line attach
point, along panel seam, across spill hole, down opposing panel seam to shroud line
attach point.
• Parachute Sizing Upgrades -- PML chutes are sized for Midwestern and Eastern
flying, as opposed to the open areas and hard landing surfaces of many Western sites.
We size our chutes for minimal drift for smaller landing sites, while still allowing a
safe descent rate into the grassy areas prevalent in the Midwest and East. However, if
you're flying in Western areas where drift is not as much a concern and where landing
areas are harder (such as desert playa), or if you 're flying from high-elevation launch
sites with lower-density air, we can upsize the chute in your kit. Nearly all of our kits
have an Upgrade Chute option listed right next to the kit itself in the webstore.
02/24/07
60/74
PMLCompleteFAQ.doc
•
•
•
Upgrade pricing will vary depending upon the base and upgrade chute. There is a
fairly large “jump” in upgrade pricing to move from a 54” to 60” chute. This is
because the 60” and up PML ‘chutes are a totally different construction. Lines are
heavier and every seam and edge is reinforced with high strength webbing.
RockSim, a popular rocket design and flight simulation program, has a parachute
descent calculator as one of it’s features. The parachute descent calculator function
routinely “over-recommends” what size PML chute is necessary; said another way,
RockSim will report that the chute we ship with a kit is far too small (rocket descends
too fast, according to RockSim). Apogee admits that the descent rate calculation in
RockSim 4.0 uses a fixed Cd, which may lead to incorrect chute sizing calculations.
Here's their reply when we asked them about it:
"This is one of the things we expect to change in a future version of RockSim. We
want to allow the user to change the Cd for the particular parachute. Right now, it is
fixed, and it may be too high or too low (depending on the parachute)."
People sometimes ask us for a “chute size calculator”. We don't really have any hard
and fast rules on chute sizing. We do it by "gut feel" and experience. We suggest you
look at the Kit Specs sheet on our website and find a rocket of comparable size and
weight to what you're working with, and select a chute of similar size to what we ship
with that kit. We also have a Parachute Size vs. Weight chart on the Recovery page of
our webstore that can help. Sometimes we will upsize a chute one notch from what a
similar kit might ship with because the kit in question has something special about it
that might need to descend slower. For example, if a kit that would normally ship
with a 30" chute has some protrusions, particularly big fins, or fins that extend well
below the airframe, we might ship it with a 36" instead to help it descend and land a
little softer.
Folding/Packing/Flying
• We have a guide to properly folding/packing PML chutes on the Recovery Page of
our website.
• We no longer recommend use of the Gradual Deployment feature on our larger
chutes. Successful operation of the system is too dependent on specific flight
conditions and exact setup of the system. We have not sold/shipped parachutes
equipped with Gradual Deployment for a number of years, but some customers may
still have some Gradual Deployment chutes.
Piston systems
Design/Operation
• Very efficient design; captures 95+% of ejection gases.
• A PML first, and exclusive to PML for years.
• Esssentially guarantees the chute will eject from rocket and will not be damaged from
the ejection charge. Ejection gases can’t leak past the chute and eject the nosecone
but not the chute, as can happen in non-piston rockets, especially the larger-diameter
ones.
02/24/07
61/74
PMLCompleteFAQ.doc
•
•
The operation of the piston system is quite simple. The piston sits in the airframe
"over" the motor and "under" the parachute. It is attached to the motor mount via a
nylon blend strap, which is epoxied to both the motor mount and the piston itself.
When the ejection charge goes off, the pressurization between the motor and the
piston bottom pushes the piston upward, which separates the rocket and pushes the
chute out. That's all there is to it. No special prep needed, nothing to do...just push in
the piston, load the chute, and you're done.
We use metal D-rings with a butt-welded joint for shock cord attachment to the piston
on all kits up to and including 4”. On 6” and larger kits, we use Kwik-Links.
Fitting the Piston
• After cutting airframe tubing, it may be necessary to deburr the edges inside and out
using 150 grit or finer sandpaper. This is especially true with QT, as the cutting
process may “squeeze” the cut end ever so slightly, making it tight for inserting a
nosecone or for inserting the piston. Deburring or chamfering the inside edge of a QT
will eliminate those problems.
• Phenolic pistons should slide easily in or out with just a little push or pull from you.
Sand until you achieve this fit, and chamfer (round) the edge of the upper and lower
portion of the piston. We also recommend that you keep some sandpaper in your
range box to adjust the fit at the field if necessary. The first few times you fly you
may need to "tune" the fit for differing temperature and humidity; once you've gotten
it dialed in you should be good for the life of the rocket. Sometimes it just takes a bit
of tweaking the first couple of times out.
• The first time you fly a QT rocket in cold weather, take it with the piston OUT to the
launch site with you, and set it outside while you're doing other things. Once the
rocket's come to ambient temperature, try to fit the piston; it'll probably be too tight.
Sand it until it has the nice slip-fit you'd expect. Voila...you're done. Your QT rocket
is now ready to go now and forever. Basically once you sand the piston for cold
flying conditions it'll fit well then, and also will be fine in warmer weather, as it's
nearly impossible to sand a piston so much it's too loose. Think of it sort of like
setting CG/CP...when you build the rocket, you add as much weight as the heaviest
motor you'll fly to the tail, then adjust the noseweight once until it's right. It's
something you do one time to make sure you're set for the future. Same thing with the
piston.
• A little baby powder on the ID of the body tube and OD of the piston helps lubricate
the piston assembly. Only do this when the rocket is completely finished! The baby
powder may prevent glues and paints from adhering.
Piston Systems and Black Powder Ejection Charges
Piston systems require less black powder (BP) than non-piston systems. This is very
important, as most recovery system damage we see to our kits can be traced back to too
much BP and a too-strong ejection charge. The following shows how much BP to use
with our piston systems, for a piston travel of under 30 inches.
• 1.5-2.0” diameter: 0.3-0.5g BP
• 2.5-3.0” dia.: 0.6-0.8g BP
• 4.0” dia.: 0.8-1.2g BP
02/24/07
62/74
PMLCompleteFAQ.doc
• 6.0” dia.: 1.4-1.7g BP
• 7.5” dia.: 1.7-2.0g BP
The measuring cup provided in our LES Kit measures out 1 gram. If you don’t have the
measuring cup from the LES kit, the cup provided in the kit measures out about ¼
teaspoon of 4f (FFFFg) black powder. We also offer the cup separately (CPR-1GM) on
our CPR Systems page.
The following will give you an idea of how much ejection charge BP is commonly
supplied with various size motors:
• G: 0.7g
• H: 1.4g
• I: 2.0g
• J, K: 2.1g
The values below are intended as a guide for determining the proper amount of ejection
powder used with various diameter CPR-MAX rockets using a piston ejection system and
a 24” fore or aft recovery airframe.
6.0” dia. — 1.0 to 1.3 grams
7.5” dia. — 1.2 to 1.5 grams
Using too much BP for the ejection charge causes damage like that described by this
customer in an email to us:
“I discovered damage to the piston tube on the piston ejection assembly.
About a 1-inch square portion on the end opposite the bulkplate was
broken off. Is this a common failure? Is there anything I can do to
prevent it from happening again? I showed it to someone else at the
launch and they indicated the same thing had happened to them.”
This damage to the piston is the classic indicator of too much BP used for the ejection
charge. What's happening is the piston is ejecting with so much force that it's coming to
the end of the piston strap at tremendous velocity, then snapping back against the top of
the airframe and, voila, chunked piston skirt. In phenolic airframe, this is usually
manifested by a cracked or chunked top of the airframe, too. QT can sometimes crack
from this problem. Look carefully at the top of your airframe and you may find a small
indentation or other witness mark of where the piston hit. Follow the directions on how
much BP to use on the sheet that was packed in your piston kit baggie, or as shown
above.
Post-Flight
There are debates as to whether the piston and airframe need to be regularly cleaned of
black power residue. All of us at PML occasionally run a damp cloth in the airframe and
around the OD of the piston (just like wiping off dirt) and let them dry. If necessary wrap
the cloth around a stick to reach inside.
02/24/07
63/74
PMLCompleteFAQ.doc
Piston strapping
Piston retaining strapping: 10mm tubular = approx. 500 lb., 3000 lb. (3/4”), and 6000 lb.
(2”). The piston strapping comes with a PML piston kit if you buy the piston kit
separately.
Piston Strapping Selection Criteria
• 10mm tubular for 1.5" rockets like the Cirrus.
• 0.75" for 2.1" through 3.9" rockets; strap 5’ long for these diameters
• 2.0" for 6.0" and larger rockets; strap is 6’ long for 6.0” and 7.5”
Piston Strap Heat Resistance/Nomex Protectors
We sometimes get questions about whether the piston strapping needs to be protected
from ejection heat. First, the strap is a nylon blend, not pure nylon, so it's relatively
resistant to the short-term heat of an ejection charge. Regarding strap protection, PML
has sold more than 20,000 kits over the past 10 years. That's probably 100,000 flights
assuming only 5 flights per kit (which is probably substantially too low, but for the sake
of argument that's what we'll use). We've only had two piston straps returned because of
burn-through damage. That's a 0.00002% failure of piston straps due to heat damage.
Clearly, customer experience has shown there’s no need to add piston strap protection; it
only adds unnecessary weight and cost.
Also, to be perfectly honest, most people will lose their rocket to either drifting away on a
very windy day, a motor cato, super-late ejection, or some other problem long before
degradation of the piston strap becomes a concern.
Shock cords
Tubular Nylon Shock Cords
• We offer three sizes of tubular nylon shock cords: 3/8”, 9/16” and ¾” (actually, the
3/8” isn’t tubular, but it is/should be used just as you would TN)
• Strength Ratings: 3/8” 1000#; 9/16” 2100#, ¾” 3100#
• You may need to clear out flashing from manufacturing in the nosecone eyelets to
pull the shock cord through; use an X-Acto knife. If you must open up the eyelet to
allow the shock cord to pass through easier, do it toward the body of the nosecone,
not toward the edges of the eyelet (that will weaken the eyelet). An easy way to pull
through a shock cord strap is to put one corner through the eyelet and pull the strap
through using pliers.
• We have a guide to properly tying tubular nylon available on the Recovery Page of
our webstore.
• Regarding why we have you attach the ‘chute to the shock cord and not to the
nosecone, if you attached to the cone and the cone came off the shock cord, the whole
rocket would plummet. If the chute is attached to the shock cord and the cone comes
loose, only the nose cone falls. The reason it's one-third of the way up is that if it
were exactly halfway, the nosecone would bang into the rocket on descent, since they
02/24/07
64/74
PMLCompleteFAQ.doc
were both equidistant from the chute. With it at 1/3 and 2/3, respectively, they are
separated on descent.
Shock Cord Selection Criteria
We use the following as general guidelines for kits. For scratchbuilders: more and wider
shock cord may be better if it fits. We recommend using our ½” Tubular Nylon for kits
up to 4” diameter, with ¾” Tubular Nylon for larger than 4”.
•
•
•
•
•
•
•
2.1" dia. rockets w/o payload (nosecone only at other end of shock cord): 3 yrds. ½”
TN.
2.1" and all 2.5" dia. rockets w/ payload (payload section and nosecone at other end
of shock cord): 4.5 yrds. ½” TN.
2.5" dia. rockets w/ payload (payload section and nosecone at other end of shock
cord) and 54mm motor mount (more weight and higher velocity; harder to predict
exact ejection time): 4.5 yrds. ½” TN.
Most 3.0" dia. rockets 4.5 yrds. ½” TN. Heavy or with large payload, section 7.5 yrds
½” TN.
Economy 3.9" dia. rockets 7.5 yrds. ½” TN. Heavy or with large payload, section 7.5
yrds ½” TN.
6.0" and 7.5" dia. rockets w/o payload (nosecone only at other end of shock cord): 7.5
yrds. ¾” TN.
6.0" and 7.5" dia. rockets w/ payload (payload section and nosecone at other end of
shock cord): We usually have each section come down with it's own chute and use 7.5
yrds. ¾” TN for the booster and 4.5 yrds. ¾” for the payload.
02/24/07
65/74
PMLCompleteFAQ.doc
PML ROCKSIM FAQ
We offer RockSim files for every PML rocket, and RockSim data on every PML
component on the RockSim Page of our website. PML was the first high-power
manufacturer to provide this to our customers, and is still the manufacturer that provides
the most simulation data and information to their customers.
What You Need To Know About Simulations
We use RockSim as our tool because it's one that's readily available and that many
modelers have. Real-life conditions in flight like temperature, launch site altitude,
humidity, launch lug drag on the rod, winds (a biggie) and variation in actual motor
performance from the "perfect motor" RockSim uses (another biggie) are going to affect
the real flight, sometimes substantially. Motor performance can vary up to 15% from
manufacturer's specs and still achieve certification. Also, the user's ignition technique
and/or device can make a big difference as well. A motor chuffing a bit on the pad can
make a big difference in an actual flight performance vs. the simulation which of course
ignites perfectly every time. Also note that an altimeter you may use to evaluate the
accuracy of the simulation prediction can be off by 10%-15% as well.
RockSim (or any simulator) is just that, a simulation, so use it as a guide, not a gospel.
We've provided the information to assist our customers in motor and delay selection, but
everyone needs to understand that it is indeed only a simulation. However, since we do
use RockSim for all our simulations, and also include the files we use on our website, the
individual modeler can download the files and run their own simulations for the flight
conditions they usually experience. As noted on the front page of our Motor
Recommendations Chart:
"Data was produced from RockSim simulation software with 500' elevation launch site,
70% humidity, 75 deg. F, 0 mph wind, 0 deg launch rod angle.”
These are clearly relatively "perfect" conditions to allow repeatability in producing our
charts. Sure, 0 mph wind might be unrealistic for most people's flying conditions, but
what is "realistic"? 5 mph? 10? Depending on the launch sites you personally fly at,
anything from 2 to 20 mph might be a typical wind condition. So, the only "fair" way for
us to produce the chart is to set it at known conditions, clearly state what those conditions
were, and leave it to the user's experience (or THEIR copy of RockSim) to make
adjustments to the data we provide as they deem prudent.
Motor Recommendations Chart
The numbers on the Motor Recommendations Chart, (available on the Specs Page of the
website) are from simulations run using RockSim software. All these simulations are run
on “bone-stock” kits, so if you add nose weight or make other modifications you will
need to adjust the file accordingly to match your situation. We recommend you weigh
02/24/07
66/74
PMLCompleteFAQ.doc
your kit when you’re done building and painting and enter that weight into RockSim to
get the most accurate simulation results.
Keep in mind that these predictions were made with the “flight day” in the simulator set
essentially “perfect” as mentioned above, and the real world isn’t. Your actual flight will
likely be different than the simulated one.
Days with absolutely no wind are quite rare, so be sure to compensate for flight
conditions on the day you actually fly. For example, if it is a windy day and you’ve added
some launch rod angle, the rocket’s altitude will be lower, the speed of the rocket at
apogee will be higher (since it will be going at an angle instead of straight up) and you
may also need a slightly shorter delay. Conversely, if you’re flying in a high-altitude area
(Denver, for example), the air is thinner and therefore produces slightly less drag on the
rocket. In that case you may want to choose a slightly longer delay. The essential thing to
remember is that these are just simulations. Launch conditions as mentioned above can
and WILL cause differences in actual flights. PML recommendations for motors, delays,
and altitude predictions are to be used only as a guideline to provide you a starting point
for making your decision as to what motor and delay to fly for the launch conditions at
the time of flight.
RockSim 5.0 and Higher
People sometimes ask if we intend to offer PML RKT files and component data for
RockSim 5.0 or higher. We worked with Apogee before they released version 5.0, so
updated PML data files are ALREADY in 5.0 and above. We updated our component
data files on the PML website at the same time 5.0 was released, so if you download our
component data you’ll have the latest as well.
Regarding updating our Motor Recommendations Chart simulations with 5.0 or higher,
the differences between 4.0 and 5.0 or higher files for generalized altitude and delay
predictions with various motors are not significant enough for us to rework all the files
for 5.0 or higher. Also, the files we have provided for 4.0 still work with 5.0 or higher,
though the reverse isn’t true. 5.0 or higher use a different file format that will not open
with 4.0.
Real-life flying conditions will cause variations greater than the difference between the
two versions. For example, motor thrust variation of up to 15% is allowed by both the
NAR and Tripoli motor testing organizations for a motor of a certain classification, and
the difference between the 4.0 and 5.0 or higher simulations isn’t nearly 15%. The
difference between simulations could very easily be “washed away” by real-world
conditions. It’s simply not worth the time involved to do it because the real world is
going to be different from the simulation anyway. Version 4.0 or 5.0 or 6.0 or “whateverpoint-oh”, the data will just be a guide for you to go by, not absolute data that you should
expect to match with your flight.
02/24/07
67/74
PMLCompleteFAQ.doc
Quantum Tubing and RockSim
Many people ask about why Quantum Tubing is not in the PML RockSim database...
here's the answer. The manufacturer says the QT density is 1.05 g/cc. However, when
you add QT to the materials database using that figure and construct tubes from it
(basically just pull up one of our phenolic tubes, change to "custom", then change the
material) you'll find that the weights in RockSim don't match our measured weights of
the tubes. We've tried "fiddling with" the 1.05 number, but then once one tube is right,
say the 2.1 at 10.7 oz, another tube is off by enough that the "fiddling" of the density in
the RockSim materials database is no good. What we suggest you do is just build the kit
in RockSim from phenolic, then add a mass object right at the CG point for the difference
in weight. (The weights of the tubes are shown in our webstore). Here's a quick reference
of tubing weight differences, all for 36" pieces of tubing:
Airframe Size PT Weight QT Weight Difference
2.1
8.7 oz.
10.7 oz.
2.0 oz.
2.5
10.3 oz.
11.3 oz.
1.3 oz.
3.0
12.1 oz.
15.2 oz
3.1 oz.
3.9
15.3 oz
18.0 oz
2.7 oz.
Also, keep in mind that RockSim 4.0 doesn't take into account the weight of fin tabs
through the airframe wall, epoxy, paint, etc. There's also no way to easily add piston
strapping or shock cord. We took care of these difficulties in the RockSim RKT files we
provide by adding a mass object to bring the RockSim weight of the kit up to our
measured weight of the actual kit. The minor weight difference you're going to get
between RockSim and QT is going to be different from what the real rocket weighs when
you build it anyway, since build techniques (amount of epoxy), painting, etc. will vary
from builder to builder.
What we suggest is to use RockSim as a design tool to figure fin sizes needed, etc., then
build the real rocket. Weigh the completed rocket, add a mass object at the CG to make
the RockSim rocket weigh what the real one does, THEN do your simulations. That way
your simulator rocket weighs exactly what your real one does, so you don’t have to worry
about build differences and slight component weight differences in the RockSim
component database. Also, there's going to be enough difference in RockSim's
"idealized/perfect" motor thrust and how your real motor burns, wind and temperature,
humidity, etc., that the little bit of difference between QT and phenolic isn't going to
matter much. You shouldn't worry about dialing in RockSim to the n-th degree, because
it's just a simulation...a real life flight is going to be different no matter how perfect your
input into RockSim is.
CPR Systems and RockSim
See the Close Proximity Recovery (CPR) Systems FAQ for information on CPR
component weights for use in RockSim. We recommend creating a Mass Object or
Objects with the weight of the CPR components involved.
02/24/07
68/74
PMLCompleteFAQ.doc
Parachute Sizing and RockSim Descent Rate Calculator
RockSim has a parachute descent calculator as one of it’s features. The parachute descent
calculator function routinely “over-recommends” what size PML chute is necessary in
4.0. Said another way, RockSim 4.0 will report that the chute we ship with a kit is far too
small; the rocket descends too fast, according to RockSim. Apogee admits that the
descent rate calculation in RockSim 4.0 uses a fixed Cd, which may lead to incorrect
chute sizing calculations. Here's their reply when we asked them about it:
"This is one of the things we expect to change in a future version of
RockSim. We want to allow the user to change the Cd for the particular
parachute. Right now, it is fixed, and it may be too high or too low
(depending on the parachute)."
PML has been designing and flying high-power rocket kits for nearly 12 years as of this
writing. We have a pretty good handle on how to size chutes for our kits, and tens of
thousands of customer flights have proven that out, so we recommend ignoring the chute
descent rate calculator feature of RockSim.
Custom Work and RockSim Files
We welcome customers forwarding us RockSim files of their projects, as it sometimes
helps us understand what you’re after. However, YOU STILL MUST PROVIDE US A
DETAILED PARTS LIST OF WHAT YOU NEED, INCLUDING CUT LENGTHS,
DIAMETERS, ETC. YOU MUST PROVIDE US WITH THE SAME LEVEL OF
DETAIL AS IF YOU HAD NOT INCLUDED THE ROCKSIM FILE. We will not
“decipher” the RockSim file to determine exactly which parts it contains. Look at the
RockSim file as a way to help us understand your parts list, not a way to produce your
parts list and measurement data.
02/24/07
69/74
PMLCompleteFAQ.doc
PML SPECS PAGE FAQ
Specification Sheets
PML provides various specification sheets on our website for customer convenience.
Public Missiles' specifications documents are made available to you in the Adobe
Acrobat Portable Document Format (*.pdf). We make them available to you in this
format so the document can be viewed or printed, either online or offline, using your
monitor and your own printer. If needed, the PDF viewer is available through a link on
our site as well. On rare occasions customers report they cannot view a PDF file while on
the website; this seems to usually be from unusual user computer configurations. We
would like to remind you that you can always right-click on a file and save it to your
local hard drive and open it from there.
Kit Specifications
The purpose of this chart is to show you various specifications customers are often
interested in, such as length, weight, diameter, fin thickness, Center of Pressure, launch
lug size, stock parachute size, and other information.
Motor Recommendations, Predicted Altitude and Ejection Delay Chart
The purpose of the Motor Recommendations Chart is to give you an example of possible
altitudes that can be attained with various rocket/motor combinations. All motors shown
except hybrids are made by Aerotech. Motors of different total or average impulse or
motors from other manufacturers may work as well. Consult your favorite motor
manufacturer or dealer. Match motor to rocket for approximate altitude and ejection
delay time. Optimum delay time is printed after the estimated altitude. The numbers on
the chart are from simulations run using RockSim 4.0 software. All these simulations are
run on “bone-stock” kits, so if you add nose weight or make other modifications you will
need to adjust accordingly. Be sure to read the information on the first page of the chart
thoroughly! It explains the chart in detail as well as giving you helpful tips on kits,
motors and delays.
Keep in mind that these predictions were made with the “flight day” set as no wind, no
launch rod angle, and with the launch site at 500’ above sea level, 70° F, and 75%
humidity. Days with absolutely no wind are quite rare, so be sure to compensate for flight
conditions on the day you actually fly. For example, if it is a windy day and you’ve added
some launch rod angle, the rocket’s altitude will be lower, and you may also need a
slightly shorter delay. Conversely, if you’re flying in a high-altitude area (Denver, for
example), the air is thinner and therefore produces slightly less drag on the rocket. In that
case you may want to choose a slightly longer delay. The essential thing to remember is
that these are just simulations. Launch conditions such as wind, temperature, and
variations in motor impulse due to manufacturing variations in the motor can and WILL
cause differences in actual flights. PML recommendations for motors, delays, and altitude
predictions are to be used only as a guideline to provide you a starting point for making
02/24/07
70/74
PMLCompleteFAQ.doc
your decision as to what motor and delay to fly for the launch conditions at the time of
flight.
Information is also shown in the chart regarding motor/kit combinations that should be
strengthened or otherwise require special treatment. This is explained in the chart, and
additional information can be found in the Kit Strengthening section of the Airframes
FAQ.
Data Sheets
The Data Sheets are available for nearly every kit PML makes, and are available by
clicking on a link under the description of the kit in the webstore. These sheets show a
photo of the kit, list the kit’s features and specs, and have a mini Motor
Recommendations Chart on them, all on a single “printer-friendly” page. (Of course we
recommend you always look at the full Motor Recommendations Chart on the Specs
Page of the website for the latest information).
02/24/07
71/74
PMLCompleteFAQ.doc
PML STAGING FAQ
Interstage Couplers
Interstage Couplers are used to house staging timers and to connect the upper and lower
stages together. The Interstage 3000, the latest version from PML, is used in our twostage rocket kits, but is now available for scratchbuilders designing their own staged
rockets. Using an IS3000 system from PML is a quick, simple solution to an oftendifficult design problem. Interstage 3000 kits are ready to ship in 2.1, 2.5, 3.0 and 3.9"
diameters.
To use an IS-3000 system, the booster needs 3" (regardless of diameter) at the top, just
like a regular rocket would for a payload coupler or nosecone shoulder. The sustainer
(upper stage) also requires 3" clear at the bottom. The Staging page of the website has a
PDF file that illustrates design requirements for the upper stage if you are designing a
scratchbuilt two-stage rocket. There is also a PDF file that shows design requirements for
the Terrier IS3000 system.
IS3000 Specifications
Weight
The weights given below are without the timer. See the Electronics Page on the PML
website for timer weight information.
• IS-3000-2.1 = 5.5 oz.
• IS-3000-2.5 = 6.8 oz.
• IS-3000-3.0 = 7.0 oz.
• IS-3000-3.9 = 9.3 oz.
• IS-3000-Terrier = 7.5 oz. (The urethane transition piece weighs 1.3oz. with the
rest of the system weighing 6.2 oz.)
Length
The timer enclosure tube, which comprises the entire length of the IS-3000, is 5” for all
systems except the IS-3000-TERR Terrier system, in which it is 8” long.
Fitting ST-2 Timer to IS3000
The PML AccuFire is the recommended staging timer for the IS3000 system; the two
were designed together to complement each other. The Transolve ST-2b will also fit
directly. The ST-2 can be used if the customer drills holes in three of the corners of the
board. However, using an ST-2 can be potentially unsafe as it only has one set of two
screw terminals, requiring the customer to install a switch in series with the electric
match to safe the system from firing on the ground. Everything else uses off-board
power and will not fit the IS3000 system.
02/24/07
72/74
PMLCompleteFAQ.doc
Two-Stage Rocket Booster Delay Timing
Shortly after the release of our Terrier Booster for our Mini-BBX kit, a customer wrote
with the following question: “What motor delay times do you recommend for the MiniBBX Terrier booster? Short medium or long? Does it matter which upper stage motor?”
ANSWER:
I think what you're asking is more correctly not what delay time is necessary for the
booster (but we'll talk about that, too), but when the upper stage motor should be ignited.
Well, as in lots of rocketry, it really depends. The general rule or situation you need to
look for is: if at booster motor burnout the rocket is not moving quickly, i.e. doesn't have
a lot of kinetic energy to keep it coasting, you want to get the upper stage motor lit NOW.
If it has a lot of velocity and can coast for a second or two, you can set your sustainer
stage ignition to be a little later. The idea is that you don't want the rocket slowing down
to the point where the fins aren't providing good guidance for it before the upper stage
gets lit and gets everything under power again. When considering when to ignite the
sustainer motor, also don't forget that the motor may require a bit of time to come up to
pressure and really begin a thrusting burn. You have to figure that into it too, which
depends upon the upper stage motor you've selected. Also take into consideration the
composition of the second-stage motor and account for that in the timing as well. For
example, a Blue Thunder motor will ignite and come up to pressure far quicker than will
a Blackjack. It also depends on what you're trying to achieve: the absolute maximum
altitude of a certain kit? A successful two-stage flight but staying under a certain waiver?
Etc. It all depends on what you're trying to do. Honestly your best bet would be to
simulate a number of different delay scenarios to see which one provides the flight profile
you're looking for (but always keeping in mind a generous safety factor of timing to
account for problems like a slow-pressurizing motor, etc.). Sometimes an immediate
ignition of the second-stage motor is best, but other times that can actually decrease the
ultimate altitude due to pushing the flight profile into a higher-drag situation. "It
depends" is the honest answer.
You really need a simulation program to help determine what you want/need to do
depending upon what motor combos you're using since of course the power level of the
booster motor, and the weight of the entire rocket, which of course depends upon what
motors are installed, play a big factor in it. We'd suggest RockSim, available at
http://www.apogeerockets.com/index.asp since we already have the data files for the
MiniBBX/Terrier available for RockSim on our RockSim Data page in our website.
Now, regarding actual booster motor ejection times, that of course depends somewhat on
the above now that you understand that, but there's more to it than just igniting the
sustainer stage and immediately ejecting the booster recovery system. The booster itself
will coast fairly well on it's own after separation, so you need to figure that out, too. A
good way to approximate what delay time you should use for the booster is to calculate
the coast time to apogee for the entire rocket as though there were no upper stage motor.
Basically use the entire two-stage rocket in your sim, but install only a booster motor and
no sustainer motor, run your simulation, and look for when the rocket reaches apogee.
That time is a pretty good estimate of what delay to select for the booster motor, because
02/24/07
73/74
PMLCompleteFAQ.doc
the booster itself will coast about that long after separation. Let's do a hypothetical
example: let's say you're going to use an I284W as your booster motor. Load your
simulation with an I284 in the booster, and no motor in the sustainer stage. Run the sim,
and see when it says the rocket will reach apogee. Let's say it's about 10 seconds. So,
you'll want to use about a 10-second delay in your booster motor for your real two-stage
flight, since the booster will tend to coast about that long. If you use anything too terribly
much shorter than that you run the risk of stripping the chute off the booster section. It
doesn't seem to make sense that the booster would coast that long without a nice
aerodynamic nosecone on it, but it will.
Two-stage rockets are a complex thing, and do definitely require special considerations,
experience, and lots of "what if" thinking and simulation.
02/24/07
74/74