1
Linguaware®
The Program for Professionals
Version 09/2012
Copyright© Linguaware®
Linguaware®
Leisaustr. 8
D-81249 Munich
Fed. Republic of Germany
Tel.: (+49) 89 871 30 852
Fax.: (+49) 89 871 30 853
e-mail: [email protected]
[email protected]
Internet: http://www.TextCount.com
TextCount
2
Table of Contents
1. NEW FEATURES IN VERSION 6.XX .................................................................5 2. INTRODUCTION.................................................................................................6 2.1 Counting algorithm ..............................................................................................................6 2.2 Words.....................................................................................................................................6 2.3 Differences between TextCount and the Statistics functions in the different
versions of Microsoft Word .................................................................................................7 3. LICENCE TERMS...............................................................................................9 3.1 Restrictions on liability ........................................................................................................9 3.2 Restriction on duplication ...................................................................................................9 3.3 Restriction in use .................................................................................................................9 3.4 Transfer of the utilisation right ...........................................................................................9 4. TYPOGRAPHICAL CONVENTIONS................................................................10 5. INSTALLING TEXTCOUNT..............................................................................11 6. THE PROGRAM WINDOW...............................................................................13 7. FILE ..................................................................................................................15 7.1 Select Files ..........................................................................................................................15 7.2 Selecting files with drag & drop........................................................................................16 7.3 Select New Files ... .............................................................................................................17 7.4 Print .....................................................................................................................................17 7.5 Include Profile Settings......................................................................................................17 7.6 Printer Setup... ....................................................................................................................18 7.7 Calculator ............................................................................................................................19 7.8 Close ....................................................................................................................................19 8. COUNT .............................................................................................................20 8.1 Count All Files ....................................................................................................................20 8.2 Count Selected Files ..........................................................................................................20 8.3 Count Uncounted Files ......................................................................................................20 8.4 Update Count Results ........................................................................................................21 8.5 Remove Selected Files From List .....................................................................................21 8.6 Change Document Format.................................................................................................21 9. INVOICE ...........................................................................................................22 9.1 Additional Costs .................................................................................................................22 9.2 Percentage Costs ...............................................................................................................22 TextCount
3
9.3 Value-added tax ..................................................................................................................23 9.4 Remove Selected Files From List .....................................................................................23 10. VIEW.................................................................................................................23 10.1 Count/Invoice Window .......................................................................................................23 10.2 Close Window .....................................................................................................................24 10.3 Full Path / Filename only ...................................................................................................24 10.4 Align to Window .................................................................................................................24 10.5 Adjust Columns ..................................................................................................................24 11. TABLE ..............................................................................................................25 11.1 To Clipboard .......................................................................................................................25 11.2 To File ..................................................................................................................................25 11.3 Add Totals Lines.................................................................................................................26 11.4 Delimiter ..............................................................................................................................26 11.5 Inserting a TextCount table into a Microsoft Word document.......................................26 11.6 Inserting a TextCount table into a Microsoft Excel document ......................................27 12. PROFILE ..........................................................................................................29 12.1 Load Profile... ......................................................................................................................29 12.2 Save Profile .........................................................................................................................29 12.3 Save Profile As ... ...............................................................................................................29 13. LANGUAGE......................................................................................................30 14. OPTIONS ..........................................................................................................30 14.1 Profile Settings ...................................................................................................................30 14.2 Count Options.....................................................................................................................30 14.3 Invoice Options...................................................................................................................34 14.4 Counting numbers..............................................................................................................36 14.5 RTF and Word Options ......................................................................................................36 14.6 Program Options ................................................................................................................37 15. HELP ................................................................................................................38 16. FILE FORMATS................................................................................................39 16.1 Rich text format (RTF)........................................................................................................39 16.2 HTML format........................................................................................................................39 16.3 PageMaker format ..............................................................................................................40 16.4 PowerPoint format..............................................................................................................40 16.5 PDF format ..........................................................................................................................41 16.6 Trados format .....................................................................................................................42 16.7 FrameMaker format ............................................................................................................42 TextCount
4
16.8 WordPerfect ........................................................................................................................42 16.9 Trados TagEditor................................................................................................................42 16.10 MIF....................................................................................................................................43 16.11 Trados 2011 .....................................................................................................................43 17. INDEX ...............................................................................................................45 5
TextCount
1. New features in version 6.xx
In the current version of TextCount, 6.xx, we have integrated many wishes and suggestions from
our users, including the following:
•
•
•
•
•
•
•
•
The drag & drop option to select files and entire folders with their subdirectories
Extended printing options for printing the count and invoice report
Additional setting options, for example counting with and without blank spaces
Column formatting in the count and invoice report
Adjustable window size and column width
Customer-specific profiles
Counting hidden text (for example Trados source and target files)
Counting Excel files (Excel 2000 or higher is required)
General Information:
•
We have pursued a different course with Version 6.xx of TextCount. Prior to counting of Word
files, the documents to be counted are converted into the RTF format. They are then counted
in this format. Word 2000 or a higher version must be installed for this purpose. The reason for
this is that the RTF format is standardised, unlike the Word format.
When counting Word files, slight counting differences may therefore occur between the older
Version 5.xx and the new Version 6.xx of TextCount. If these Word files are converted into
the RTF format and then counted, the results using the old Version 5.xx and the new Version
6.xx of TextCount will be identical. Please note in this respect that TextCount 5.xx also
counts all hidden characters and that the same results can only be attained with TextCount
6.xx if the two options Count hidden text and Count deleted text in the review mode are
activated in Options / Profile Settings / RTF and Word Options.
•
Excel files are converted into a pure text file before they are counted. MS-Excel Version 2000
or higher must be installed for this purpose. Texts in Excel text boxes and in Excel graphs will
not be counted.
•
When counting Excel documents, please note that hidden columns are also counted.
Important note: Word or Excel must be closed before you start counting files. Do NOT call them
up again during the counting process! The files you want to count must not be
open in any other program while you are counting them with TextCount!
6
TextCount
2. Introduction
Over the years, the constantly updated versions, individuality and reliability of the classic charge
calculation program TextCount have meant that it has become the standard charging program
used by both translators and technical authors. This latest version of TextCount builds on this
tradition by including not only the most frequently used file formatsfor word-processing programs,
but also their exchange formats such as RTF or ANSI.
We will continue to modify TextCount to handle the latest word-processing programs and their
updates. If these future programs are not yet supported by the current version of TextCount, we
will make every effort to offer an appropriate TextCount update.
The process of charging for quantities of text must be accurate, comprehensive and transparent.
This latest version of TextCount satisfies all these objectives.
We have included many suggestions from TextCount users in this new version. We are always
happy to receive constructive comments from real-life situations, which we can then include in
future versions of the program.
2.1
Counting algorithm
Unfortunately, the "wildest" charging methods such as dividing the total number of bytes by
55 or 50 or simply accepting the line count from a word-processing program are still being
used. These values do not match the number of characters on the printout! Some wordprocessing programs do not include numbers in their word counts. If a text contains a large
number of tables, this fact can be very bad news for translators. Some versions of Word
for Windows ignore blank spaces when they count characters, which means
translators and technical writers lose up to 30% of their total count!!!
TextCount counts all the characters that appear on the printout, including blank
spaces, unless they have been specifically excluded from the counting process in Options
/ Profile Settings / Count Options / Include one blank space every time.
Every text file created using a word-processing program contains special characters and
control characters. These special characters and control characters contain, for example,
information on the type of fonts used and font sizes, which printer types have been
assigned, formatting features, etc. In many word-processing programs these are called
hidden control characters which do not appear on screen. If a text is counted using the
various options available in a word-processing program (statistics function, lexicon, spellchecker), these special characters and control characters will be included in the count,
which results in incorrect values for the translator and the author. This is why TextCount
has a range of filters for each word-processing program it supports. This ensures that
these special characters are not included in the counting process. As a result, TextCount
counts only those characters which actually appear on the printout.
If a text contains a sequence of several blank spaces or tabs, TextCount counts only one
blank space or one tab each time. This may happen, for example, if the date is moved to
the right using the space bar. However if the word-processing program in this example
were used correctly, the date would be moved to the right with of one tab setting. For this
reason, TextCount counts only one character here. The same applies to tables.
If a left-justified text is formatted in justified text and the number of blank spaces between
two words increases as a result, TextCount also only counts one blank space each time
because the space bar was only pressed once to generate the spaces between the words.
In addition to numbers, TextCount counts characters in the extended ASCII character set,
for example £, °, ±, ², Ó, õ, µ, Û or ½ and special characters (©, , ☺, , , ) from the
ANSI character set.
2.2
Words
In some countries translation services are charged according to the number of words. As
there are no binding norms or recommendations in this case, the user can define the
7
TextCount
maximum word length and the word delimiters themselves in the Options / Profile Settings /
Count Options menu in the Maximum word length and Word delimiter options.
If the words in a text are counted using the various options (statistics function, lexicon,
spell-checker) in a word-processing system, a word is only defined by the usual delimiters
such as a blank space, full-stop, comma or hyphen. As a result, any translator who charges
according to the number of words in a text and uses a word-processing system to count
them would lose out if very long words were used. Words of this length or longer are not
unusual in technical and scientific texts.
TextCount also counts number values that are separated by a decimal point or a comma,
for example 1,234.56 or 27.02.1998, as a single word.
TextCount also counts characters from the extended ASCII character set, for example £, °,
±, ², Ó, õ, µ, Û or ½, as well as special characters from the ANSI character set.
2.3
Differences between TextCount and the Statistics functions in the different versions
of Microsoft Word
Original article from the magazine PC-world 07/2001
One of the problems with using Microsoft Word's Statistics function is that the count
process is not transparent. There is no publicly accessible documentation about how or
what is counted in Microsoft Word.
For example, Microsoft Word does NOT count texts in text boxes. Newer versions of
Microsoft Word include blank spaces in the counting process. However, they only take
"simple" blanks into account and not all those characters which correspond to a blank, e.g.
tabs, line breaks, column changes, etc. By contrast, TextCount counts all the characters
that appear on the printout and were entered by the user. Therefore, if customers were to
go to the effort of counting the characters and lines manually, they would obtain the same
result as TextCount.
Other differences between the counting process in TextCount and the various versions of
Microsoft Word are shown in the next table.
8
TextCount
This table is not comprehensive. The different versions of Word deliver different results for
the very same file. The difference may be up to +/- 30%!!!!!
Features
Comments
Footnotes
Headers
Footers
Text in text boxes
Letters/characters
Several blank spaces
between two words
Several consecutive
tabs
Lines/number of
characters
Lines/number of
characters
Simultaneous counting
of multiple files or entire
directories,
including
their
subordinate
subdirectories
Word
Word
counts
every
character, irrespective of
whether it was generated by
the program or the user.
Word counts all blank
spaces;
irrespective
of
whether they were entered
by the user. Some versions
of Word do not count blank
spaces.
Word counts all tabs, even if
they were used incorrectly.
TextCount
Settable
Settable
Settable
Settable
+
TextCount counts only the
visible characters, i.e. only the
letters/characters which the user
entered via the keyboard.
TextCount always counts only
one blank space, even if several
blank spaces follow each other.
Not possible in Word
No problem in TextCount.
TextCount always counts only
one tab, even if several tabs
follow each other.
The way lines/characters TextCount always delivers the
are calculated in Word same result, irrespective of the
depends on the layout layout settings.
settings.
The
way
in
which TextCount always delivers the
lines/number of characters same result, irrespective of which
are calculated in Word version of the word-processing
depends on what version of program is being used.
Word is being used.
It is generally recommended that the method used for charging is agreed with the customer
before the job starts. This can save a lot of trouble afterwards.
If both the translator and the customer have licensed versions of TextCount 6.xx, they can
exchange profile files with the agreed counting options.
IMPORTANT NOTE:
The number of lines shown in the Word Statistics option that
appears as the actual number of lines displayed in the
document is not a suitable basis for invoicing because each
one of these lines may contain a different number of
characters.
If you change the font size in Word, the counting result
changes as well! Do you really want to pay for an invoice
based on these figures or send one to your customer?
9
TextCount
3. Licence terms
TextCount Copyright © Linguaware®.
We are sad to say that TextCount is not only very popular with those users who purchased the
program legally, but also that it is increasingly being copied and distributed illegally. It appears
that many users don't actually realise that this is theft. As this kind of behaviour is not only unfair
to users who have acquired TextCount legally, but also drives the sales price up, we will take
legal proceedings against anyone who we can prove has made an illegal copy.
Only by selling the program can we invest in the further development of TextCount and therefore
guarantee its existence. We try hard to offer TextCount at a fair price and believe that this price
should be affordable to a professional translator.
A purchaser must accept the licence conditions listed below, which are detailed in the chapters
Restrictions on liability, Restriction on duplication, Restriction in use and Transfer of the utilisation
right.
When you buy or update TextCount you will be given a personal serial number which appears on
screen together with the address after you call up the program. The serial number, name and
address are copied onto the hard disk or a working floppy when TextCount is installed. The
purchaser is liable for any proven illegal copies that are made using this serial number.
3.1
Restrictions on liability
The manufacturer and distributor accept no responsibility that the software and its
accompanying documentation are completely free of errors. With regard to correctness,
care, reliability, currency etc., the manufacturer and distributor do not guarantee or accept
responsibility for any aspect of the use or results of the software or documentation. The
purchaser accepts all risks concerning the results and performance of the software. If the
software or documentation is damaged, the manufacturer or their distributor, sales
companies, representatives or members of staff are not liable for costs arising from any
necessary maintenance, repair or correction. The purchaser is wholly liable for these costs.
It is at the manufacturer's sole discretion to offer corrections or hotline and support services
free of charge.
Any verbal or written information either from the manufacturer or suggestions made by his
freelance staff are non-binding. The purchaser has no right to regard such information as
authoritative. The manufacturer and other persons involved with the creation, production or
sale of this product are not liable for any direct, indirect or accidental damage, or for
subsequent damage caused by using this software, even if the manufacturer has been
made aware of the possibility of damage.
3.2
Restriction on duplication
The manufacturer holds the copyright to the software and its accompanying
documentation. Unapproved duplication, either partially or in another medium, is forbidden.
The purchaser is liable for any proven illegal copies that are made using the serial number.
Legal action will be taken regarding all contraventions.
3.3
Restriction in use
The software may only be installed and operated on one single computer that is the
property of the purchaser. The manufacturer will charge an additional fee for the installation
or operation of the software on other computers owned by the person purchasing the
software. This additional fee will be fixed by the manufacturer and will be charged
according to the number of installations. The distribution of copies of the software or the
software itself to third parties is forbidden, and legal action will be taken in the event of
contraventions.
3.4
Transfer of the utilisation right
The right to use this software is granted exclusively to the purchaser. The utilisation right
may only be transferred to a third party with the prior approval of the manufacturer. Third
parties to whom the utilisation right is transferred must also agree to the clauses and terms
10
TextCount
in this contract. Transfer to third parties, the hire, lease or sale or any other short- or longterm utilisation of all copies or the software itself is forbidden.
4. Typographical conventions
All menu items in this manual are shown in italics. In addition to the Table of Contents, the index
on the last pages of the manual can be used to look up the description of particular points.
After the chapter "Program window", all menus and their functions starting with the File menu are
described in the sequence in which they appear on screen. Other functions are then described,
for example Select files ... or the description of individual dialogues.
You can also display help texts at any time when you are working with TextCount.
See also: 15.
Help, Page 38
Display Window:
This is the active window in TextCount. The Display Window shows
the Count Window or the Invoice Window.
Count Window:
The Count Window contains all selected files. Files that have already
been counted are displayed along with their counting results.
Invoice Window:
The Invoice Window contains the list/table of counted files together
with invoice details.
All copyrights of other manufacturers and products are recognised.
TextCount
11
5. Installing TextCount
Delivery by e-mail
The delivery includes 2 files, which are in a XXXXXXXXX.ZIP archive:
• XXXXXXXXX.pdf
• XXXXXXXXX.exe
XXXXXXXXX represents the name of the customer.
Unpack these two files to a directory/folder using the WINZIP program.
XXXXXXXXX.pdf
This is the invoice in pdf format issued in the name of the customer. To print out the file, call it up
using Adobe Reader and click on the printer symbol.
XXXXXXXX.exe
This is the TextCount installation file. Close any programs that are open. Double click the file
name “TCSetup_XXXXXXXX.exe”. When installing Version 6.xx of TextCount for the first time,
the following screen will appear.
Select English and click on OK. The Installation Assistant will then be displayed.
Click on Next > and enter in the displayed screen the name of the folder in which the TextCount
files are to be installed or use the pre-set name TextCount 6. Then click on Next.
TextCount
12
Carefully read the Licence Terms in the file TextCount-User-Manual-EN.pdf. Indicate that you
accept the licence conditions by clicking on the field on the left "I accept the terms in the Licence
agreement" ( ) and choosing Next > in the next screen. Use the suggested program folder
C:/Programme/TextCount or choose a separate directory with Search.... Then click on Install.
TextCount is installed. If the field to the left of "Implement TextCount 6.0" is activated ( ),
TextCount is called up when the installation is finished. To finish your installation, click on Finish.
The installation is finished and the TextCount program window appears.
For comprehensive instructions and information on TextCount, please download the TextCount
user manual from http://www.textcount.de
Delivery on CD-ROM
Insert the CD in your drive, select the CD drive using Windows Explorer and double click on
“TCSetup_XXXXXXXX.exe”. The other steps are identical with the above description.
The CD-ROM contains the manual in the form of a pdf file (TextCount-User-Manual-EN.pdf). Call
up the file ”TextCount-User-Manual-EN.pdf“ using the Acrobat Reader program.
13
TextCount
6. The Program window
You can call up TextCount as soon as it has been installed. To perform this step, click on the
TextCount icon.
The Program window is shown along with the title, icon and status rows:
Title bar
Tool bar
Status row
Title bar:
To move the TextCount Window, position the cursor in the title bar and hold down the left-hand
mouse button while moving the window with the mouse. For more information about moving,
maximising or minimising windows, please refer to your Windows documentation.
14
TextCount
Tool bar: Icons in the tool bar and their functions
Icon
Function
Function key
Select Files ...
Print ...
Exit
Show Count window
Show Invoice Window
Alt+F4
F2
Shift+F2
Count All Files
F5
Count Selected Files
F6
Count Uncounted Files
F7
Update Count Results
F8
Remove Selected Files From List
Del
Calculator
Display contents of TextCount Help, Content-sensitive
Help, How to use Windows Help, Display information
about TextCount and Licence.
Display and change the current profile
To call up the most important TextCount commands directly, click on the appropriate icon in the
Tool bar.
Status row:
The status row shows additional information. For example, if the cursor is located over a file
name in the Display Window, the setting used to count this file is displayed in the status row.
The Program window contains the File, Count, Invoice, View, Table, Profile, Language, Options
and Help menus together with their specific functions. To open a selection window, click on one
of the menu items.
15
TextCount
7. File
The File menu contains the following functions: Select Files ..., Select New Files ..., Print ...,
Include Profile Settings, Printer Setup ..., Calculator and Exit. To activate your selection, click on
the corresponding menu item.
7.1
Select Files
Click Select files ... to select the files you want to count.
In the File type field, you define the file format in which you want to count the file shown in
this dialogue box. Click on the arrow of the scroll bar to open a list of available formats and
then select one of them.
If you select Autoselect (*.*) as the file type, all the files in the selected directory will be
displayed. If you select this setting, TextCount will automatically recognise the file type or
the file format of the selected file(s) apart from the ASCII and ANSI formats. If you select a
specific file format in File type, TextCount only shows those files with the corresponding
file extension that are present in the selected directory.
16
TextCount
Example: If you select Word for Windows (*.doc) as the word-processing program in File
type, only those files in the selected directory that have the file extension .doc
will be displayed.
Note:
To prevent TextCount from counting files in the wrong format and therefore
giving an incorrect result, you should always use Autoselect (*.*) as the file type
because this setting automatically recognises all file formats apart from the
ASCII and ANSI formats.
To transfer an individual file, double-click on it in the Selection List. To select several files,
hold down the Ctrl key and click the left-hand mouse button on the file names you want to
select. To select several consecutive files, click on the first file name, hold down the Shift
key and then click on the last file name. Selected files are shown in a different colour. After
you have selected your files, click on Open to transfer them to the Selection List.
You can also include files from different directories and drives in the Selection List. To do
this, you have to open this menu item several times because only files from one directory
at a time can be selected.
Selected files remain in the Selection List until you choose Select New Files... to make a
new Selection List or close TextCount.
Note:
7.2
Each file can only appear once in the Selection List.
Selecting files with drag & drop
With the drag & drop option, you can transfer files or entire directories, including their
subdirectories, directly from Windows Explorer to the Selection List.
To do this, arrange the TextCount Program window and a Windows Explorer window so
that both windows are visible (see next Figure). You can adjust the size of the TextCount
Program window by clicking on the maximise/minimise button in the top right-hand corner
or by holding down the left-hand mouse button and pulling the right-hand bottom corner of
the Program window. Mark one or more several files in Windows Explorer, hold down the
left-hand mouse button and pull them into the TextCount Count Window.
With the drag & drop option, you can also select entire directories along with the files and
subdirectories in these directories. To do this, go to Explorer and select the main directory
that contains the files you want to count. Hold down the left-hand mouse button and pull
the main directory into the TextCount Count Window. All files in this directory and its
subdirectories, which have the correct text format, will be added to the TextCount list.
Depending on the Options / Program Options you have set, you can now select the file
type that TextCount should use to count the selected files. If these options have not been
marked in Options / Program Options, the files immediately appear in the TextCount
Count Window. This function is especially useful for selecting HTML files that are needed
for Internet sites: they are often stored in folders that contain many subdirectories with
numerous files therein.
17
TextCount
7.3
Select New Files ...
Click on Select Files ... to create a new Selection List containing the files you want to
count. When you click on this menu item, the following message is shown:
To delete all previously selected files in the Selection List , including their count results,
click on the OK button. You can now create a new Selection List. You should only use this
menu option when you want to create a new Selection List.
If you have marked Don't show this dialogue again, you can create the new Selection List
immediately without having to click OK to confirm that you want to delete the previously
selected files and counting results. This setting remains active until the next time you call
up TextCount.
7.4
Print ...
Click on this menu item to start the print dialogue for the currently displayed window (Count
Window or Invoice Window).
7.5
Include Profile Settings
If Include Profile Settings is selected, the settings from Options / Profile Settings will be
included in the printout of the Count Window or Invoice Window. It has proved very useful
in practice to supply a TextCount printout showing these settings along with an official
18
TextCount
invoice. The customer can therefore see how the count and invoice results were
calculated.
See also: 12.
See also: 14.1
7.6
Profile, Page 29
Profile Settings, Page 30
Printer Setup...
Click on this menu item to call up the Printer setup ... dialogue. You can select the printer
here and also set the options to be used for printing TextCount results. TextCount uses
the printer already set up under Windows as its default printer.
19
TextCount
7.7
Calculator
Calls up the Windows calculator.
You can use this calculator in exactly the same way as a pocket or desk calculator. Instead
of typing each value and function with your fingers, you can also use the mouse. Press
Ctrl + C to copy the displayed result to the clipboard, and then press Ctrl + V to paste it into
your word-processing program or to another program.
If you want to toggle from the standard display to the scientific display, click on the View
menu item and then on Scientific.
To close the Windows calculator, click on the
button in the top left-hand corner of the
menu bar in the Windows calculator and then click on X Close.
For more information about the Windows calculator, please refer to your Windows
documentation.
7.8
Close
This closes TextCount. All counting results carried out up to this point are lost unless you
have saved them with Table / To File....
If you changed a setting in one of the Options / Profile Settings functions when using
TextCount, the following message is shown:
If you click on Yes to confirm this message, the setting you changed will be available in the
selected profile the next time you use TextCount.
Tip:
You can also press Alt+F4 or click on x in the top right corner to close
TextCount .
20
TextCount
8. Count
You can only select the Count menu from the Count Window.
To display the Count Window, click
or press F2.
The Count menu contains the following functions: Count All Files, Count Selected Files, Count
Uncounted Files, Update Count Results, Remove Selected Files From List and Change
Document Format.
8.1
Count All Files
To count all the files in the Selection List, click on Count / Count All Files or
Alternatively, press function key F5 to count all the files in the Selection List.
8.2
Count Selected Files
To count all the selected files in the Selection List, click on Count / Count Selected Files
or
To select several consecutive files in the Selection List, Count or Invoice Windows, hold
down the Shift + Ctrl keys and click with the left-hand mouse button on the first and then
the last file you want to select.
Alternatively, press function key F6 to count all the marked files in the Selection List.
8.3
Count Uncounted Files
To count all the files in the Selection List that have not yet been counted, click on Count /
Count Uncounted Files or .
This is a useful function if one or more files have been added to the Selection List after a
count process has already been carried out. The entire list need not therefore be counted
again.
Alternatively, you can press function key F7 to count all as yet uncounted files in the
Selection List.
21
TextCount
8.4
Update Count Results
To update the result of files that have already been counted, click on Count / Update Count
Results or
..
This may be necessary if, for example, the counted files were changed after they had been
counted.
Alternatively, you can press function key F8 to update the result of files that have already
been counted.
Note:
8.5
If changes affecting the count result, for example those in Options / Profile
Settings / Chars. per Line or Price Basis / Lines, were made after counting files,
the counting result is automatically adjusted. This may be especially useful for
making a cost estimate when different prices are involved.
However, some changes in the Profile Settings will mean that already counted
files must be recounted using the new settings. For example, this would be
necessary when different Document Sections are selected in RTF and Word
documents because the Delimiters or Comment Filter must be adjusted
accordingly. In these cases, the counting results of the files involved are reset.
Remove Selected Files From List
To remove selected files from the Selection List, Count or Invoice Window, click Count /
Remove Selected Files From List or
.
Alternatively, you can press the Delete key to remove selected files from the Selection List,
the Count Window or the Invoice Window.
8.6
Note:
The files are simply removed from the Selection List and are not changed or
deleted from the hard disk/diskette.
Note:
If selected files are removed from the Count or Invoice Window, the counting
result is automatically adjusted.
Change Document Format
To change the document format of the selected files, click on Count / Change Document
Format . This resets the counting results of files that have already been selected and
counted. You will then need to carry out a new count process for these files.
If Autoselect (*.*) is selected as the document format, TextCount automatically recognises
the File type or the file format of the selected file(s) it is counting, except ASCII and ANSI
formats.
Note:
To prevent TextCount from counting files in the wrong format and therefore
giving an incorrect result, you should always use Autoselect (*.*) as the
document format because this setting automatically recognises all file formats
apart from the ASCII and ANSI formats.
22
TextCount
9. Invoice
To toggle from the Count Window to the Invoice Window after counting, click on
in the tool bar
or press Shift + F2, or select Invoice Window in the View menu. You can only activate the Invoice
menu from the Invoice Window.
To return to the Count Window, click on
the View menu.
or press function key F2 or select Count Window in
The Invoice menu contains the following functions: Additional Costs, Percentage Costs, Valueadded tax and Remove Selected Files From List.
9.1
Additional Costs
If the Additional Costs option is activated ( ), the net additional costs you entered in
Options / Profile Settings / Invoice Options / Charge Additional Costs are added and
displayed both in the Invoice Window and on the printout. The result in the Totals row is
automatically adjusted accordingly.
If the Additional Costs option is deactivated, the Additional Costs are not shown and the
result in the Totals row is automatically adjusted accordingly.
See also: 14.3
9.2
Invoice Options / Charge Additional Costs, Page 34
Percentage Costs
If the Percentage Costs option is activated ( ), the net Percentage Costs which you
entered in Options / Profile Settings / Invoice Options / Charge Additional Costs are added
and displayed both in the Invoice Window and on the printout. The result in the Totals row
is automatically adjusted to match.
If the Percentage Costs option is deactivated, the Percentage Costs are not shown and the
result in the Totals row is automatically adjusted accordingly.
See also: 14.3
Invoice Options / Charge Percentage Costs, Page 34
23
TextCount
9.3
Value-added tax
If the Value-added tax option is selected ( ), the VAT amount at the percentage rate you
entered in Options / Profile Settings / Invoice Options / Value-added tax is added to the
final total (gross amount) and is shown in the Invoice Window and on the printout. The
result in the Totals row is automatically adjusted accordingly.
If the Value-added tax option is not selected, the VAT amount is not displayed and the
result in the Totals row is automatically adjusted accordingly.
9.4
Remove Selected Files From List
Mark the files you want to remove from the Invoice Window and click on
Delete key.
or press the
Note:
The files are simply removed from the Count or Invoice Windows and are not
changed or deleted on the hard disk/diskette. TextCount normally only opens
the selected files in read mode.
Note:
If selected files are removed from the Invoice Window, the result in the Totals
row is automatically adjusted accordingly.
10. View
The View menu contains the following functions: Count Window, Invoice Window, Close Window,
Full Path, Filename only, Align to Window and Adjust Columns. To execute the command you
require, simply click on the appropriate menu item. All menu items shown with a bullet point ( ) in
front of them are active.
10.1 Count/Invoice Window
These two menu selection items are used to activate or deactivate the display of the Count
or Invoice Windows.
Alternatively, you can also activate the
on the Tool bar or by pressing function key F2.
To display the Invoice Window, click on
Count
Window
or press the Shift + F2 keys.
by
clicking
on
24
TextCount
10.2 Close Window
This menu item closes the current Display Window. To display the Count Window again,
click on
or press function key F2.
To display the Invoice Window again, click on
or press Shift + F2.
10.3 Full Path / Filename only
You use this menu item to define whether the entire file path (directory/folder path) or only
the file name is shown in the File column. If the File column is not wide enough to display
the entire path, the path is shown in an abbreviated form.
10.4 Align to Window
This menu item aligns the width of the File column so that all columns fill the Display
Window.
Note:
If you change the width of the Program window, the File column is automatically
adjusted.
10.5 Adjust Columns
The Adjust Columns menu item adjusts the width of all the columns except the File column,
so that the field contents are shown clearly. The width of the File column is increased or
reduced to correspond to the window size.
This function is especially useful if you want to optimise the display of very long file names
or entire file paths because the File column is adjusted to be as wide as possible within the
Display Window.
25
TextCount
11. Table
The Table menu contains the following functions: To Clipboard, To File... ..., Add Totals Lines and
Delimiter with the options Tab and Semicolon. Menu items marked with a in front of them are
active. You can decide here how you want to continue processing your TextCount tables.
11.1 To Clipboard
Click on To Clipboard to copy the contents of the Count Window or the Invoice Window to
the Windows clipboard, depending on which window is currently active in TextCount. You
can then paste the clipboard's contents into your word-processing program or into another
Windows program. To do this, toggle to that program by calling it up and then pressing
Ctrl + V.
The output is not formatted for printing. It is simply intended for further processing in a
word-processing or spreadsheet program. Each of the fields in a line is separated by a
specific delimiter (tab or semicolon) and is output in separate lines. You can specify which
delimiter is used here.
See also: 11.4
See also: 11.3
Delimiter, Page 26
Add Totals Lines, Page 26
11.2 To File
Click on To File... ... to output the contents of the Display Window (Selection List, Count
Window or Invoice Window) in ANSI format to a file that you can then process using your
word-processing program or any another Windows program that supports this format.
Enter the name under which this file is to be saved in the displayed dialogue in the line next
to "file names". The folder in which the file is to be saved is shown next to "Save".
See also: 11.3
See also: 11.4
Add Totals Lines, Page 26
Delimiter, Page 26
26
TextCount
11.3 Add Totals Lines
If the Table / Add Totals Lines function is active ( ), the Totals area of the displayed table
is also transferred when the file is output To Clipboard or To File... .... This setting is
recommended if you want to continue processing the table in a word-processing program.
It is not suitable for further processing in a spreadsheet program such as Lotus 1-2-3 or
Excel because these programs use formulae and macros to generate their own totals and
conflicts or errors may arise if totals are already present.
See also: 9.1
See also: 9.2
See also: 9.3
See also: 11.4
Additional Costs, Page 22
Percentage Costs, Page 22
Value-added tax, Page 23
Delimiter, Page 26
To activate ( ) or deactivate this function, click on Table / Add Totals Lines.
11.4 Delimiter
In Table / Delimiter / Tab or Table / Delimiter / Semicolon, you can define the delimiter (tab
or semicolon) used to separate the individual columns of the Count or Invoice Window
when these data are output to To Clipboard, To File... ... or to Print. You can select the
following delimiters:
Tab:
If the Tab option is active ( ), the contents of the Display Window are output in such a way
that each field is separated from the next by a tab. This is especially useful if you want to
continue processing the data in a word-processing program. By optimising the settings of
the tabs, you can create a justified table.
See also: 11.3
See also: 11.5
Add Totals Lines, Page 26
Inserting a TextCount table into a Microsoft Word document, Page 26
Semicolon:
If the semicolon option is active ( ), the contents of the Display Window are output in such
a way that the individual fields are separated from each other by a semicolon. This type of
output is recommended if you want to continue processing the data in a spreadsheet and
therefore need to import the data in csv format. The output includes column headers, the
list of counted files, characters, words, lines and page values as well as the Totals area, if
activated. Since spreadsheet programs such as Lotus 1-2-3 or Excel use formulae and
macros to generate their own totals, conflicts or errors may arise if totals are already
present. To avoid this, the Table / Add Totals Lines option should not be activated if you
want to transfer a TextCount table to a spreadsheet program.
See also: 11.6
Inserting a TextCount table into a Microsoft Excel document, Page 27
11.5 Inserting a TextCount table into a Microsoft Word document
You can insert the contents of the Display Window (Selection List, Count or Invoice
Window) into Microsoft Word in order to use it in a standard invoice where it can be edited
or formatted.
To do this, activate the Tab ( ) option in the TextCount Table / Delimiter menu. Then click
on Table / To Clipboard. The contents of the current TextCount window are then copied to
the clipboard. Now open your standard invoice file in Microsoft Word or create a new file
(New ...) and then press Ctrl + V. This inserts the unformatted TextCount table into
Microsoft Word. Now mark the inserted text. To do this, position the mouse arrow to the left
of the first line until it appears as an arrow pointing to the right. Draw this arrow downwards
to the last line of the inserted text. The inserted and selected text is now shown against a
black background. Select the Convert option in the menu Table and then click on Text in
Table. In the Split Text By option, click on the Tab Stop button and then on OK. The
inserted text is shown in a table which you can format to suit your requirements.
27
TextCount
11.6 Inserting a TextCount table into a Microsoft Excel document
You can insert the contents of the Display Window (Selection List, Count or Invoice
Window) into Microsoft Excel in order to add it to a standard invoice where you can edit or
format it, or carry out further calculations.
The output includes column headers, the list of counted files, characters, words, lines and
page values as well as the Totals area, if activated. Since spreadsheet programs such as
Lotus 1-2-3 or Excel use formulae and macros to generate their own totals, conflicts or
errors may arise if totals are already present. To avoid this, the Table / Add Totals Lines
option should not be activated if you want to transfer a TextCount table to a spreadsheet
program.
Before the contents of the Display Window are output with Table / To File... ..., you should
make the following settings in TextCount:
Table / Add Totals Lines not activated
Table / Delimiter / Semicolon activated ( )
Click on Table / To File... Enter a file name next to file name: and click on Save. The file is
saved in ANSI format with the file extension .txt in the directory shown next to Save. Now
toggle to an empty Excel worksheet. Click on Data / External data / Import text file import ...
and toggle to the directory that contains the file you have just saved. Double-click on the
file name. This window now appears:
Mark the field Separate and click on Continue.
28
TextCount
Select Tab or Semicolon ( ), depending on the Delimiter you activated when you saved
the file in To File... in TextCount. Click on Continue.
In this step, select the Default setting and click on Finish. You now see this window in
which you can select Existing worksheet. Click on OK. This inserts the TextCount table
into the Excel worksheet.
Tip:
If you used TextCount to save the file name of the table using Table / To File...
with the file extension .csv, you need not repeat these steps the next time you
29
TextCount
import the TextCount table. Instead, you can import it quickly and easily using
the drag & drop option.
Tip:
You can also export the TextCount table to Excel via the clipboard. Before you
do this, select tab as the delimiter. Then select a field in Excel and insert the
contents of the clipboard. Excel uses the selected delimiter (tab) to
automatically distribute the imported data to adjoining fields in the worksheet.
See also: 7.2
Selecting files with drag & drop, Page 16
12. Profile
When TextCount is called up, the profile standard.tpf is automatically loaded into the TextCount
program folder. If this profile is not already present, it will be generated and filled with default
values. You can change and save these values to suit your requirements in Options / Profile
Settings.
You can store user- or customer-specific settings and reload them as required. You can therefore
create individual charging profiles for each customer and then store them, for example, under the
customer's name. All the settings you define in Options / Profile Settings are stored in these
profiles. The file name of the currently selected profile is displayed in the Tool bar. To change the
current settings, click on the Profile name in the Tool bar.
If settings for a profile have been changed in Options / Profile Settings but have not yet been
saved, this window is shown before you select a new profile or if you Exit TextCount:
If you want to accept these changes, click on Yes. They will then be available the next time you
call up TextCount. To use the original settings (before you made the changes), click on No.
12.1 Load Profile...
Use Load Profile ... to load one of the profiles that have been stored. The file name of the
currently selected profile is shown in the Tool bar. The default directory used to load or
save the profiles is the TextCount program folder. However, you can also save profiles in
a different directory. Profiles have .tpf as their file extension. This file extension is
automatically assigned by TextCount when Save Profile or Save Profile As... ... is used to
save a profile.
12.2 Save Profile
Use Save Profile to save the active and changed profile under its file name. This menu
option is only active if the current profile settings in Options / Profile Settings have been
changed since the last time they were saved. The file name of the currently selected profile
is shown in the Tool bar. The default directory used to load or save the profiles is the
TextCount program folder. However, you can also save profiles in another directory.
Profiles have .tpf as their file extension. This file extension is automatically assigned by
TextCount when Save Profile or Save Profile As... ... is used to save a profile.
12.3 Save Profile As ...
Use Save Profile As... ... to save the active profile under another file name. The file name
of the currently selected profile is shown in the Tool bar. The default directory used to load
or save the profiles is the TextCount program folder. However, you can also save profiles
30
TextCount
in another directory. Profiles have .tpf as their file extension. This file extension is
automatically assigned by TextCount when Save Profile or Save Profile As... ... is used to
save a profile.
See also: 7.5
Include Profile Settings, Page 17
13. Language
Use this menu item to change the current language setting for the user interface. The currently
selected language is marked ( ).
After you have selected the language, the TextCount user interface appears in this language. All
settings and counting results are retained.
This setting only affects the language of the TextCount user interface, it has no effect
on the language in which the files that are to be counted were created.
Note:
TextCount uses some of Windows' default dialogue windows (for example file select or file save).
These dialogues contain elements that appear in the language in which Windows was installed
and cannot therefore be "overwritten". That is why some windows may appear in a mixture of
languages.
14. Options
The Options menu contains the Profile Settings and Program Options functions.
14.1 Profile Settings
The Profile Settings are subdivided into the Count Options, Invoice Options and RTF and
Word Options menus. All the parameters that are relevant for counting and creating an
invoice are entered here.
14.2 Count Options
In Count Options you can define the following:
Comment:
In the Comment options you can exclude text passages from being counted.
Comment Filter:
Click on the Comment Filter field to exclude specific text passages in the selected files
from being counted. If you have activated the Comment Filter option ( ), the texts between
Comment Start Chars and Comment End Chars are not counted.
31
TextCount
One way in which the Comment Filter function could be used is to prevent counting of text
passages, for example lines of numbers, or text taken from previous translations or text
provided by the customer.
You can also use this function to exclude encapsulated comments from being counted.
Encapsulated comments contain formatting instructions in files that were converted by a
third-party program, e.g. FrameMaker, into RTF or MIF format.
If, for example, you have selected < as Comment Start Chars and > as Comment End
Chars in the following sample text, the entire comment (in this case formatting instructions
in a FrameMaker MIF file, which was processed by the Trados STagger program) is
excluded from counting; only the word "introduction" is counted.
Example: <tr 38> <ps "1Heading" 1><pn "1<:t>" 1><:crmk 1>Introduction "Body" 2>
In this example, "Heading" and "Body" are not translated terms. They are actually part of
the formatting instructions and are therefore not counted.
Comment Start Chars:
Comment characters at the start of the text passage that is to be excluded from counting.
For the characters in Comment Start Chars or Comment End Chars, you can enter a
character string of up to three characters from the ANSI character set. Please note that the
characters or character strings that you enter as the Comment Start Chars and Comment
End Chars must differ from one other and must not be used in any other place in the text to
be counted. If you try to enter the same characters for Comment Start Chars and Comment
End Chars, TextCount will display a warning. Before you enter a comment character in
this field, you should therefore use the Search function in your word-processing package to
check whether the character you have chosen is already present in the file.
Comment End Chars:
Comment characters at the end of the text passage that is to be excluded from counting.
For the characters in Comment Start Chars or Comment End Chars you can enter a
character string of up to three characters from the ASCII character set. Please note that the
characters or character strings that you enter as the Comment Start Chars and Comment
End Chars must differ from one other. Before you enter a comment character in this field,
you should therefore use the Search function in your word-processing package to check
whether the character you have chosen is already present in the file.
Important note:
To exclude text passages from being counted, it is important that the
comment characters for the Comment Start Chars and Comment
End Chars are different and are always placed at the start and end
of the text passages to be excluded from counting. After counting,
the inserted comment characters can be removed from the counted
files again by using the search and replace function in the
appropriate word-processing package, provided they are not
formatting instructions.
Important note:
Inverted commas (") are not permissible Comment Chars for
counting Excel files.
The comment characters themselves are not counted!
Delimiter:
You can use delimiters to influence the counting of lines (Count one blank between words)
and the counting of words (Word Delimiters, Max. Word Length).
Count one blank between words::
This setting option influences the counting of lines, but not the counting of words.
32
TextCount
If the checkbox to the left of Count one blank between words is not selected, then all
characters except blank spaces are included when counting lines and are then divided by
the value specified in Chars. per Line.
If the checkbox to the left of Count one blank between words is selected ( ), all characters
including one blank space are included when counting lines and are then divided by the
value specified in Chars. per Line. If there are several consecutive blank spaces in a text,
only one of these blank spaces is counted. If a left-justified text is formatted as justified text
or several consecutive blank spaces or tabs are inserted in the text, thus increasing the
number of blank spaces between two words, only one blank space is counted because the
space bar was only pressed once to generate these spaces between words.
Normally, lines are counted with the setting Count one blank between words selected ( ).
See also: Chars. per Line in 14.2
Count Options, Page 30
Word Delimiters:
Specifying the Word Delimiters, for example the characters &'-/@\_`´. In this field you enter
all characters that "split" word formations in which these characters occur.
Examples: Co-operate is counted as one word. If the hyphen (-) is entered as a word
delimiter in the Word Delimiters field, the phrase co-operate is counted as two
words.
Uncle Tom's Cabin is counted as three words, but if the apostrophe (') is
entered in the Word Delimiters field, it is counted as four words.
Note:
Numbers are counted as one word, no matter what the setting is for Word
Delimiters and the set Max. Word Length. Please also note the information
below on Max. Word Length, which you can set in this menu in Counting
Parameters.
See also: 14.4
Counting numbers, Page 36
Counting Parameters:
TextCount counts the selected files using the pre-defined values and settings in this
window.
Max. Word Length:
Specifies the maximum number of characters per word. If the value entered here is "0", a
word is only defined by the delimiters specified in Word Delimiters and the blank spaces
between the words. This setting only affects the counting of words and has no influence on
the counting of characters, lines or pages.
For example, if the value 8 has been entered in this field, the word anarchosyndicalist is
counted as 3 words. 18 characters divided by 8 = 2.25. Since there are no quarter- or halfwords in real life, TextCount always rounds up the total after the decimal places when
counting words. Words of this length or longer are not unusual in technical and scientific
texts. Even the word in this example, which is not unusually long, shows how significant
differences can occur when counting words. In practice, this often leads to differences of
opinion and very often legal proceedings since, for example, an English to German
translator
gets
the
same
word
price
for
a
long
word
such
as
Zylinderkopfbefestigungsschraubenanzugs-drehmomentrichtwerte as a German to English
translator gets for or or similar short words. For this reason, we recommend that you
charge on the basis of lines and that you agree the Chars. per Line with the customer
before the job starts. If this is not possible because, for example, the client is in a country
where it is normal practice to charge according to the number of words, we recommend
that you agree a fixed price, in writing, with the customer before the job starts.
If you want word counting to broadly match the word counting in Microsoft Word, enter the
value 0 in the field next to Max. Word Length. The Word Delimiters field must be empty.
However, since Microsoft Word does not count all texts, e.g. it omits texts in text frames,
33
TextCount
the TextCount result will usually always be higher since TextCount also counts texts of
this kind.
See also: 2.3
Differences between TextCount and the Statistics functions in the
different versions of Microsoft Word, Page 7
Number values that are split by a point or comma, e.g. 1,234.56 or 27.02.1998, are
counted as one word by TextCount.
See also: 14.4
Counting numbers, Page 36
Chars. per Line:
In this field, you specify the number of characters per line. The value entered in this field
and the option Count one blank between words are the only parameters that are relevant
for counting lines.
If the checkbox to the left of Count one blank between words is selected ( ), all characters
including one blank space are included in line counting and are then divided by the value
specified in Chars. per Line. If there are several consecutive blank spaces in a text, only
one of these blank spaces is counted. If a left-justified text is formatted as justified text and
the number of blank spaces between two words increases as a result, TextCount also only
counts one blank space each time because the space bar was only pressed once to
generate the spaces between the words.
Normally, lines are counted with the setting Count one blank between words selected ( ).
Lines per Page:
In this field, you specify the number of Lines per Page. You specify the number of
characters per line in Chars. per Line. In Count one blank between words you determine
whether blank spaces between words are to be included in counting lines.
In practice, this charging method is often used by publishing houses.
Totalling Method for Lines and Pages:
Using the options listed below, you can specify the totalling methods for lines and pages.
The setting you specify affects the total count results for lines and pages.
Add Rounded-off Totals for Each File:
If you select this option, the individual results for particular files are rounded up to the next
highest whole number in the Lines or Pages columns. These rounded-up individual results
are then added together to produce the result in the Total row.
Example: An individual result (number of lines in one file) of 378.50 lines is displayed as
379 lines and this value (379 lines) is added to the other results.
This method for calculating totals was a standard feature in earlier versions of TextCount.
Calculate Round-off From Chars:
If you select this option, the total lines or number of pages for the individual files are initially
rounded up to the next highest whole number as described above. However, in the Total
row, the total number of lines or number of pages for all counted files is determined from
the total of all counted characters and not from the rounded-up individual results described
above.
Example: The line count for File01.doc equals 137.60 lines and is rounded up to 138 lines
and displayed as an individual result in the Lines column. The line count for
File02.doc equals 15.40 lines and is rounded up to 16 lines and displayed as an
individual result in the Lines column. With this setting the total for these two files
is 153 lines (137.60 + 15.40 = 153) and not 154 lines (138 + 16 = 154).
Calculate Exactly without Rounding-off:
The number of lines and pages for each file is calculated to two decimal places and added
to the Total row.
34
TextCount
Example: The line count for File01.doc is 137.22 lines and is displayed as an individual
result in the Lines column. The line count for File02.doc is 15.54 lines and is
displayed as an individual result in the Lines column. With this setting the total
for these two files is 153.76 lines (137.22 + 15.54 = 153.76).
The value displayed for the second decimal place is rounded, but internally TextCount
calculates with much higher accuracy.
Note:
We recommend that you agree the charging method for the total with the client
before the job starts. The final total may vary a great deal, especially if a job
includes many files.
Count IBM Graphical Characters:
The company IBM has defined the so-called IBM graphics characters in the extended
ASCII character set to display simple masks and frameworks. These characters are in the
extended ASCII character set between characters 176 and 223. These characters are no
longer used in Windows.
Click on the checkbox next to Count IBM Graphical Characters if you want to count
frameworks, tables and diagrams created in a DOS word-processing package.
14.3 Invoice Options
In Invoice Options you can specify the undermentioned options for creating an invoice:
Price Basis:
You can specify the invoice settings in this dialogue.
Words:
You can specify the price per word in this field. The value must be entered as a decimal
point value (for example 0.28).
See also: Max. Word Length and Delimiter in 14.2
See also: 14.4 Counting numbers, Page 36
Count Options, Page 30
Lines:
You can specify the price per line in this field. The value must be entered as a decimal
point value (for example 1.40). You can specify the characters per line and whether a blank
space should be included in counting in the Count Options fields Chars. per Line and
Count one blank between words.
See also: Count one blank between words and Chars. per Line in 14.2
Page 30
Count
Options,
35
TextCount
See also: 14.4 Counting numbers, Page 36
Pages:
You can specify the price per defined page in this field. The value must be entered as a
decimal point value (for example 42.00). You can specify the number of lines per page and
characters per line, and also select Count one blank between words in the Count Options
in the fields Lines per Page, Chars. per Line and Count one blank between words .
Currency:
You can specify the currency short code in this field. Example: €, $ or £. You can also
naturally use other currency codes such as the internationally defined ISO currency IDs
(USD, GBP, EUR etc.) The currency code must be entered in capital letters in compliance
with the ISO standard.
If you enter a currency short code from the table shown below, TextCount automatically
displays the dialogue Display Amount in Euros below it. If this dialogue is activated ( ), the
amounts are shown in the currency of the entered currency short code together with the
converted Euros amount in brackets in the Invoice Window.
Currency short code
ATS
BEF
DEM
ESP
FIM
FRF
GRD
IEP
ITL
LUF
NLG
PTE
Currency code
Austrian Schillings
Belgian Francs
German Marks
Spanish Pesetas
Finnmark
French Francs
Greek Drachma
Irish Punt
Italian Lire
Luxembourg Francs
Dutch Guilders
Portuguese Escudos
Euro exchange rate
13.7603
40.3399
1.95583
166.386
5.94573
6.55957
340.750
0.787564
1936.27
40.3399
2.20371
200.482
Source: German Bundesbank
Charging Method:
In this dialogue, you can specify which charging method is to be used for counting and
calculating the charges for the selected files. Possible options are calculation based on
Words, Lines or Pages.
Note:
Only one charging method can be activated at once. The Characters, Words,
Lines and Pages columns and their counted values per file are always shown in
the Count Window. In the Invoice Window, however, only the column with the
active charging method is displayed.
See also: 14.2
Count Options, Page 30
Value-added tax:
If you select the Value-added tax checkbox ( ), you can enter a VAT rate in the text field
next to it. This is then used to calculate a VAT amount from the net amount and is added to
the total in the Invoice Window.
The value must be entered as a decimal point value (for example 7.5 or 16.0).
Charges for which no value-added tax is due, for example translations ordered from one
EU member state for delivery to another one, deselect the Value-added tax checkbox.
Charge Additional Costs:
If you select the Charge Additional Costs checkbox ( ), you can enter the type of
additional costs, for example postage and packing or CDs, in the text field below it. You
enter the net price for the additional costs in the field below the additional costs description
36
TextCount
field. The currency unit shown to the right of the net price box is taken from the value
entered in the Currency field under Price Basis.
Charge Percentage Costs:
If you select the Charge Percentage Costs checkbox ( ), you can enter the type of
additional costs and a percentage rate in the text field below it. The percentage costs are
calculated by multiplying the determined total amount for the counted files by the specified
percentage rate. The percentage rate entered is applied to the calculated net value. If the
percentage rate is entered without a prefix operator, TextCount adds this percentage rate
to the net value. If a particular percentage rate is to be deducted from the net value, you
must enter a minus sign with the percentage rate.
Example: If you want to give the customer a discount of 10%, select the Charge
Percentage Costs checkbox, type "Discount" in the text field below it and enter
the value -10 in the percentage field (marked by "%) below that.
Example: If you want to charge a 30% surcharge for fast delivery, select the Charge
Percentage Costs checkbox, type "Surcharge for fast delivery" in the text field
below it and enter the value 30 in the percentage field (marked by "%) below
that.
14.4 Counting numbers
Numbersare counted as one word during word-based counting, regardless of the set Word
Delimiters and the set Max. Word Length. In the case of line-based counting, numbers are
counted as characters.
Equations such as 2*4=8 are also counted as one word, provided the equations contain no
blank spaces.
This special method for counting numbers only affects the number of counted words, not
the counted characters, lines or pages.
This counting method for numbers increases the accuracy of word counts, since otherwise
numbers such as 3.14 would be counted as two words and equations such as 2*4=8 would
be counted as three words.
Number values that are split by a point or comma, e.g. 1,234.56 or 27.02.1998, are
counted as one word by TextCount.
TextCount only counts texts in formulae that have been created with the appropriate field
functions. Texts in formulae created with MS Equation Editor are not counted.
14.5 RTF and Word Options
The settings made in RTF and Word Options only apply to RTF and Word for Windows
documents.
Count hidden text:
In some word-processing programs, text sections can be formatted as hidden text. In
Word, for example, you can select the function Tools/Track Changes/Highlight Changes. If
you select this function, although the text is present in the file, it is handled differently
according to the setting in the Word dialog box: if the Track changes while editing
checkbox is not selected, the hidden text is not displayed or printed, but remains in the
document and is included in counting if Count hidden text is activated ( ) in TextCount.
If the Count hidden text checkbox ( ) is activated, you can also count Trados files and
then determine the line count of source and target texts. If you do not select the Count
hidden text checkbox (not ticked), TextCount only counts the lines in the target text.
If you do not wish to include hidden text in counting, remove the tick.
See also: 16.6
Trados format, Page 42
37
TextCount
Note:
We usually recommend that you deactivate this setting since, in practice,
customers often send files for translation in which the Word Tools/Track
Changes/Highlight Changes function is activated, but Track changes while
editing is not selected. This means that only the current version of changes is
displayed on the screen. However, since this setting is active, earlier changes
are also still present in the file and are included in counting if the Count hidden
text is selected in TextCount ( ).
Earlier versions of TextCount always included hidden text in counting. From version 6
onwards, you can now exclude hidden text from counting for files in Word format (*.doc)
and Rich Text Format (*.rtf).
Count deleted text in review mode:
If you edit a document in review mode (which you select in Word with Tools/Track
Changes/Track changes while editing), deleted text is only removed from the document
when you have accepted changes. Text deleted in the review mode is included in counting
if you activate this option ( ).
If you want to exclude text deleted in the review mode from counting, deselect "Track
changes while editing".
Note:
We usually recommend that you leave this setting deactivated since, in practice,
customers often send files for translation in which the Word Tools/Track
Changes/Highlight Changes function is activated, but Track changes while
editing is not selected and also changes have not been accepted. This means
that only the current version of changes is displayed on the screen. However,
since this setting is active, earlier changes are also still present in the file and
are included in counting if the Count hidden text option is selected in TextCount
( ).
Earlier versions of TextCount always included text deleted in the review mode in counting.
From version 6 onwards, you can now exclude text deleted in the review mode from
counting for files in Word format (*.doc) and Rich Text Format (*.rtf).
Document Sections:
The settings you make in this dialogue window only influence the counting of Word for
Windows or RTF files. If the corresponding checkboxes are selected ( ), the document
sections shown below are included in counting:
Main Text:
The main text is counted.
Footnotes:
Footnotes, including end notes, are counted.
Header/Footer:
Headers and footers are counted. Identical headers/footers used on several pages are only
counted once. If headers/footers change from one particular page to the next, they are
counted again.
Notes:
Any texts created using Microsoft Word's Note or Comment function are counted.
14.6 Program Options
Settings in this window are non-profile-specific and are saved after the program has been
shut down.
Drag & Drop settings:
Activate on files:
If you select this checkbox, you have the option of selecting the text format when you
select files with drag & drop.
38
TextCount
Activate on directories:
If you select this checkbox, you have the option of selecting the text format when you
select folders with drag & drop.
If you do not select these settings, any files and folders placed in the counting list with drag
& drop will be associated with the text format that you last selected in Select files ....
If Autoselect has been selected as the current format in Count / Change Document Format,
TextCount determines the text format itself and displays the format used to count the file.
To prevent TextCount from being "forced" to count files using the wrong text format,
Autoselect should be used as the default setting.
See also: Drag & drop in chapter 7.1
Select Files, Page 15
15. Help
While working with TextCount, you can display help texts in one of the following ways:
Place the mouse pointer arrow on a particular menu item and press the F1 key. The help window
is called up.
Select one of the options in the Help menu on the tool bar:
Contents, Content-Sensitive Help..., Help on Help, About TextCount
and Licence information.
If the TextCount help system cannot answer a question, registered users can send us an e-mail
([email protected]), but please try the RTFM method first!1. We always do our best to
provide detailed answers to all questions concerning TextCount. However, we expect users to
have the necessary basic knowledge of their Windows operating system and Microsoft Word.
Contents:
Displays the first page of the TextCount help system. You can click on the Contents, Index,
Search, Back buttons to move through the help system and display help texts for individual
functions. You can use the Index or Search function to look up information in the help system.
To return to the help index after you have read the required information, click on the Back button.
If you want to return to the initial screen from within the help tool, click on the first button on the
left-hand side of the help window and then on Close.
If you are moving between help topics that are thematically linked, you can scroll through them
using the two << and >> buttons.
If you click on a keyword displayed in green, texts involving that keyword will be shown.
You will find more information about the help system in your Windows documentation.
Content-Sensitive Help...:
If you select this menu item, a dialogue is shown in which you can search for particular topics or
carry out a full text search of all texts used in the help system.
How to use Windows Help:
If you select this menu item, the help system provided by the operating system is shown in which
you can generally familiarise yourself with the functionality of the Microsoft Windows help system.
You will find more information about the help system in your Windows documentation.
About...:
If you select this menu item, a dialogue box containing information about TextCount is shown.
In the top part of the window you will see the TextCount Version number and your Licence
number with your registration data.
If you click on the TextCount Homepage button, you will open the TextCount homepage in your
Internet browser. To do this, you also naturally need a working connection to the Internet.
1
(RTFM = Read The Flaming Manual)
39
TextCount
16. File formats
TextCount supports the following file formats:
•
•
•
•
•
•
ASCII (*.*)
ANSI (*.*)
Word for Windows (*.doc), (Word 2000 or higher required)
HTML (*.htm*)
Rich text format (*.rtf)
Excel (*.xls), (Excel 2000 or higher required)
In the above-mentioned list the character * stands for any character string or any file name.
If you select Autoselect (*.*) as the file type, all the files in the selected directory will be displayed.
With this setting TextCount automatically recognises the File type or the file format of the
selected file(s) during counting, unless they are ASCII or ANSI format. If a particular wordprocessing package has been selected in File type, TextCount only displays files which have the
associated file extension for this word-processing package and are located in the selected folder.
See also: 7.1
See also: 8.6
Select Files, Page 15
Change Document Format, Page 21
By using exchange formats or converting files, it is also possible to count other file formats.
16.1 Rich text format (RTF)
Rich text format (RTF) is a proprietary Microsoft document format that can also be edited
by many other word-processing and DTP programs. For this reason, RTF is also a popular
format for exchanging data between different word-processing and DTP programs. If you
have documents in a format that TextCount does not support, you can use your wordprocessing or DTP program to convert these documents to RTF format and count them in
this format with TextCount.
If you select Autoselect (*.*) as the File type, TextCount automatically recognises Rich text
format.
16.2 HTML format
The file format Hypertext Markup Language (HTML) is the most commonly used format for
displaying Internet pages on the Internet. Just like the Internet itself, the HTML format is
being constant changed and extended. Unfortunately, not all these changes are
implemented via the responsible standardisation committees. Manufacturers of browsers,
in particular, constantly extend their HTML variants, at times deliberately, to make the
pages thus generated more difficult to read for other browsers. For this reason, it cannot
always be guaranteed that an HTML document actually complies with the HTML standard.
TextCount supports and counts HTML documents up to HTML version 4.0.
Note
You should not use TextCount to count HTML documents saved in Word for
Windows since Word for Windows does not conform to the HTML standard and
the counting result may therefore be incorrect.
Note:
If an HTML document contains Java or Perl scripts, calls to database queries
and other dynamically generated document sections, they will not be counted.
Since some formats such as HTML are constantly changing, you will find smaller, current
updates free of charge on our website http://www.TextCount.com. In addition, you can go
to this website to download a free demo version of TextCount, which you are welcome to
pass on to interested colleagues.
Internet sites may involve a very large number of HTML files which are distributed across
many subdirectories. For this reason, you should select HTML files and folders with drag &
drop.
40
TextCount
See also: 7.2
Selecting files with drag & drop, Page 16
16.3 PageMaker format
In the current version of TextCount PageMaker files can only be counted if they are saved
in HTML format. It is only possible to export files to the HTML format in PageMaker version
6.5 and higher.
How to convert PageMaker files to HTML format
1. Open the PageMaker file you want to export to HTML.
2. In the File menu select the Export option. Another menu is displayed in which you select
the HTML option.
3. In the next window called Export HTML, click on Unnamed1. Then click on the
Document button.
4. In the next window Save document as, use the File Name field to enter a file name for
your document. Now click on the OK button.
5. Now return to the HTML export window. If you click on the Export HTML export button in
this window, your file will be exported in HTML format and you will then be able to count
it with TextCount.
See also: 16.2 HTML format, Page 39
Converting PageMaker-files to PDF format and then saving them in RTF format
This method is quicker and easier than the procedure described above for conversion to
HTML format. However, a prerequisite is that you have the full version of the program
Adobe Acrobat (including the Acrobat PDFWriter). The free Acrobat Reader cannot be
used for this purpose since it can only read PDF files. PageMaker files must first be saved
in PDF format (printed) before they can be counted. You will find details of the steps for
converting or printing in the documentation or help for the Adobe Acrobat program. You
can also use another program that reliably converts documents to PDF format and saves
them for this purpose. When you have performed this step, open the generated PDF file in
the full version of Adobe Acrobat and click on File / Save As .... In the Object Name field,
enter a file name and select the File type RTF Rich text format) (*.rtf) in the field below it.
Then click on Save. The RTF file will be saved in the folder specified in Save in: where you
can count it with TextCount.
Note:
If the PDF file contains headers or footnotes that are the same on each page,
you must use the Edit / Replace... command in Word to remove them in the
converted RTF file.
16.4 PowerPoint format
PowerPoint files must first be converted to PDF format (printed) before they can be
counted. The free Acrobat Reader cannot be used for this purpose since it can only read
PDF files. You will find details of the steps for converting or printing in the documentation or
help for the Adobe Acrobat program. You can also use another program that reliably
converts documents to PDF format and saves them for this purpose. You will then need to
edit the generated PDF files as described below in PDF format.
Note:
If the PowerPoint file contains slides with Notes Pages, you must select "File/
Print..." in PowerPoint. The Print menu opens so that you can select the
Acrobat PDFWriter as printer in "Name:". Lower down in this menu you will see
the field "Print what:". Click on the drop-down menu in this field and select
"Notes Pages". The Notes Pages will then be included in the printout.
Note:
If the PDF file contains headers or footnotes that are the same on each page,
you must use the Edit / Replace... command in Word to remove them in the
converted RTF file.
41
TextCount
See also: 16.5 PDF format, Page 41
16.5 PDF format
Before you can count PDF files you must first save them in RTF or Word-for-Windows
format. There are two options in this case:
Converting PDF files to RTF format with the full version of Adobe Acrobat
Provided you own the full version of Adobe Acrobat (including the Acrobat PDFWriter) The free Acrobat Reader cannot be used for this purpose since it can only read PDF files it is really easy to convert PDF files. In the full version of Adobe Acrobat, just open the PDF
file and then select File / Save As.... In the Object Name field, enter a File Name and select
the File type RTF Rich text format (*.rtf) in the File type field below it. Then click on Save.
The RTF file will be saved in the folder specified in Save in: where you can count it with
TextCount.
Note:
If the PDF file contains headers or footnotes that are the same on each page,
you must use the Edit / Replace... command in Word to remove them in the
converted RTF file.
Converting PDF files to the Word-for-Windows-format using the Adobe Acrobat
Reader
If you do not own the full version of Adobe Acrobat but only the Acrobat Reader which is
supplied with many program packages or is available free of charge on the Internet, you
must follow the steps described below to convert PDF files to Word-for-Windows format
before counting them with TextCount:
1. In Acrobat Reader, open the PDF file you want to count.
2. In the View menu, select the Continuous menu item. This step is important as otherwise
Acrobat Reader will only select individual pages. When you select Continuous, the
entire document is selected.
3. To select the entire document, press Ctrl + A. The document is highlighted in colour.
4. Copy the entire document to the Clipboard by pressing Ctrl + C.
5. Open Word and create a new file (if necessary: File / new ...). Then press Ctrl + V. The
document will be "pasted" (inserted) from the Clipboard into your Word file.
Unfortunately, most of the formatting of the PDF document will NOT be transferred if
you use this procedure, but the characters you want to count will be available.
6. Save this Word file using a suitable name and close it. Now you can count this file in
TextCount.
Note:
If the PDF file contains headers or footnotes that are the same on each page,
you must use the Edit / Replace... command in Word to remove them in the
converted RTF file.
42
TextCount
16.6 Trados format
Using version 6.xx of TextCount you can also count "uncleaned" Trados files.
If the Count hidden text checkbox is selected ( ) in Options / Profile Settings / RTF and
Word Options, the source and target text will be counted in "uncleaned" Trados files. If the
Count hidden text checkbox is not selected (no tick set), TextCount only counts the lines in
the target text.
Using these two options, you can find out the number of (already) translated lines without
having to do a clean-up beforehand in Trados Workbench. This is an advantage in the
case of larger projects if you want to find out how the translation is progressing, i.e. how
many lines have been translated so far.
See also: 14.5 RTF and Word Options, Page 36
16.7 FrameMaker format
Before you can count FrameMaker files, they must first be saved to RTF format in
FrameMaker using the File / Save As command.
Note:
Some FrameMaker versions do not automatically assign the file extension RTF.
In this case, you must enter this file extension manually when you save to RTF
format, as well as the file name.
FrameMaker files in MIF format processed with Trados STagger contain formatting
instructions between encapsulated comments that should not be counted. In MIF
filesencapsulated comments or formatting instructions are placed between the characters <
and >. For this reason, you must select the Comment Filter checkbox ( ) before counting
and select the character < as the Comment Start Chars and the character > as the
Comment End Chars in TextCount. In the text example below, this setting is used to
exclude all the comments or formatting instructions in the MIF file from counting: only the
word "Introduction" is counted.
Example: <tr 38> <ps "1Heading" 1><pn "1<:t>" 1><:crmk 1>Introduction "Body" 2>
In this example, "Heading" and "Body" are not translated terms. They are actually part of
the formatting instructions and are therefore not included in counting.
See also: Comment and Comment Filter in 14.2 Count Options, Page 30
16.8 WordPerfect
Before you can count WordPerfect files, they must first be saved to RTF format in
WordPerfect using the File / Save As command.
16.9 Trados TagEditor
Before you can count Trados TagEditor files, they must first be saved to Word format. In
the Trados TagEditor, mark the complete file (Ctrl + A), press Ctrl + C to copy the marked
content to the Windows clipboard, switch to Word and open a new file, then press Ctrl + V
to insert the marked content. Save this Word file and select it for counting in TextCount.
When counting this type of Word files, make sure that the RTF and Word Options are NOT
set (activated) in TextCount. With this setting only the target (translated) text is counted
and the source text is excluded from counting.
In TextCount you must also set (activate) the Comment filter. If you have activated the
Comment Filter option ( ), the texts between Comment Start Chars and Comment End
Chars are not counted. Select < as Comment Start Chars and > as Comment End Chars or
any other character(s) that enclose tags to exclude the tags and control characters from
being counted.
43
TextCount
The comment characters themselves are not counted!
See also: Comment and Comment Filter in 14.2 Count Options, Page 30
See also: Trados format in 16.6 Trados format, Page 42
See also: Trados format in 16.7 FrameMaker format, Page 42
16.10 MIF
The following description appplies to Trados 2011 SP2:
Open the MIF file into Trados 2011 SP2.
Save the project.
Export the file to Trados 2011 SP2 using File / Export for External Review.
This will give you a docx file.
Launch the exported docx file in Word.
Delete the columns Segment ID, Segment status and Source segment.
Save the file in Word.
You can now count the file using TextCount.
16.11 Trados 2011
The following description appplies to Trados 2011 SP2:
Open the MIF file into Trados 2011 SP2.
Save the project.
Export the file to Trados 2011 SP2 using File / Export for External Review.
This will give you a docx file.
Launch the exported docx file in Word.
Delete the columns Segment ID, Segment status and Source segment.
Save the file in Word.
You can now count the file using TextCount.
TextCount
44
45
TextCount
17. Index
A
About
38
Activate on directories
38
Activate on files
37
Add Rounded-off Totals for Each File
33
Add Totals Lines
26
Additional Costs
22
Adjust Columns
24
Align to Window
24
ANSI character set
6
ASCII character set
6
Autoselect
15, 21, 39
B
Blank space
6
C
Calculate Exactly without Rounding-off
Calculate Round-off From Chars
Calculator
Change Document Format
Charge Additional Costs
Charge Percentage Costs
Charging Method
Chars. per Line
Close
Close Window
Comment
Comment End Chars
Comment Filter
Comment Start Chars
Contents
Content-Sensitive Help
Count
Count All Files
Count deleted text in review mode
Count hidden text
Count IBM Graphical Characters
Count one blank between words
Count Options
Count Selected Files
Count Uncounted Files
Count Window
Count/Invoice Window
Counting algorithm
Counting numbers
Counting Parameters
Currency
Currency short code
33
33
19
21
35
36
35
33
19
24
30
31
30
31
38
38
20
20
37
36
34
31
30
20
20
10
23
6
36
32
35
35
D
Delimiter
26, 31
Differences between TextCount and the
Statistics functions in the different versions
of Microsoft Word
7
Display Window
10
Document Sections
37
Drag & drop
16
Drag & Drop settings
37
E
Encapsulated comments
Equations
31, 42
36
F
File
File formats
File type
Filename only
Footnotes
Formulae
FrameMaker
FrameMaker format
Full Path
15
6, 39
15
24
37
36
31
42
24
H
Header/Footer
Help
Hidden text
How to use Windows Help
HTML document
HTML format
37
38
36
38
39
39
I
Include Profile Settings
Inserting a TextCount table into a Microsoft
Excel document
Inserting a TextCount table into Microsoft
Word
Installation
Internet page
Invoice
Invoice Options
Invoice Window
17
27
26
11
39
22
34
10
L
Language
Licence number
Licence terms
Lines
Lines per Page
Load Profile...
30
39
9
34, 35
33
29
46
TextCount
M
Main Text
Max. Word Length
MIF
MIF files
MIF format
37
32
43
42
42
Save Profile As ...
Select Files
Select New Files ...
Selecting files with drag & drop
Selection List
Semicolon
Special characters
Status row
N
Notes
Number values
Numbers
T
37
33, 36
32, 36
O
Options
30
P
PageMaker format
Pages
PDF format
Percentage Costs
PowerPoint format
Price Basis
Print
Printer Setup ...
Profile
Profile Settings
Program Options
40
35
41
22
40
34
17
18
29
30
37
Tab
Table
Tabs
TagEditor
Text in text boxes
Title bar
To Clipboard
To File
Tool bar
Totalling Method for Lines and Pages
Trados 2011
Trados files
Trados format
Trados TagEditor
Transfer of the utilisation right
Typographical conventions
Update Count Results
21
V
39
21, 23
9
9
9
39
39
36
S
Save Profile
26
25
6
42
8
13
25
25
14
33
43
36, 42
42
42
9
10
U
R
Registration data
Remove Selected Files From List
Restriction in use
Restriction on duplication
Restrictions on liability
Rich text format
RTF
RTF and Word Options
29
15
17
16
16, 17
26
6
14
29
Value-added tax
Version number
View
23, 35
39
23
W
Word Delimiters
WordPerfect
Words
Workbench
32
42
7, 34, 35
42

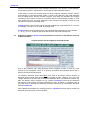
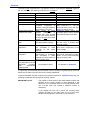

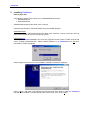
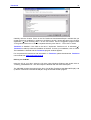

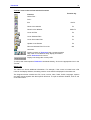
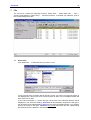
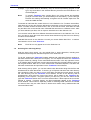
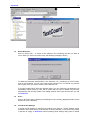

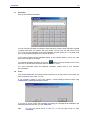
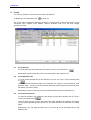
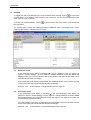

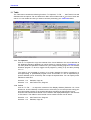
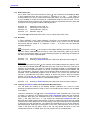

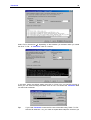


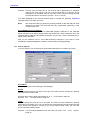


![Indico User Guide - Indico [Home]](http://vs1.manualzilla.com/store/data/006906671_1-144eb090a744237196a75cbdc9f1656c-150x150.png)