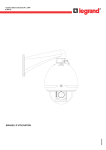
1
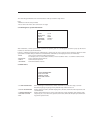
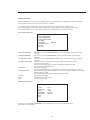
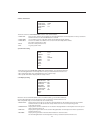
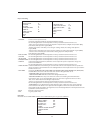
• Outdoor IP SpeedDome 18x 1,3MP 4 306 52
LE04767AB
USER MANUAL
1 Accessories ............................................................................................................................................. 3
2 General Introduction............................................................................................................................... 4
2.1 Features and functions..................................................................................................................... 4
2.2 Specifications...................................................................................................................................... 7
3 Framework ...........................................................................................................................................13
3.1 Dimensions .......................................................................................................................................13
4
Installation ...........................................................................................................................................15
4.1 Install the speed dome....................................................................................................................15
4.2 Install the speed dome in the bracket .........................................................................................16
4.3 Wall mount bracket installation....................................................................................................17
5
Menu ...........................................................................................................................................20
5.1 Screen Menu Index..........................................................................................................................20
5.2 Self-diagnosis system information...............................................................................................21
5.3 Main menu........................................................................................................................................21
5.4 Menu operation................................................................................................................................22
5.5 Dome Abnormal Phenomenon Operation..................................................................................34
6 Connecting to a device and opening the web application............................................................35
6.1IE options confuguration for config tool and IE.........................................................................35
6.2
Connection with Mozilla Firefox or Google Chrome.................................................................36
7
Quick Configuration Tool......................................................................................................................37
7.1 Introduction......................................................................................................................................37
7.2 Searching/Connecting....................................................................................................................37
7.3 Connecting with the configuration tool......................................................................................39
7.4 Main interface of the tool...............................................................................................................41
8 Resetting the camera.............................................................................................................................42
2
1 Accessories
Name
Qty
IP Dome
1
Bracket
1
Accessories bag
1
Quick Start Guide
1
CD
1
Power supply
1
3
2 General Introduction
2.1 Features and functions
User Management
Different user rights for each group, one user belongs to one group.
The user right shall not exceed the group right.
Data Transmission
Support cable network data transmission via Ethernet.
Storage Function
Support central server backup function in accordance with configuration and setup
in alarm or schedule setting.
Support record via Web and the recorded file are stored in the client-end PC.
Alarm Function
Real-time respond to local alarm input and video detection as user pre-defined
activation setup and exert audio prompt(allow user to pre-record audio file).
Realize real-time video detect such as motion detect, camera masking and video
loss.
Network Monitor
Supports one-channel audio/video data transmission to network terminal.
Max supports 10 connections.
Adopts the following audio and video transmission protocol: HTTP, TCP, UDP, RTP/
RTCP and etc.
Support web access.
Network Management
Power
Assistant Function
Configuration and management via Ethernet.
Support device management via web.
Support various network protocols.
External power adapter. Support AC 24V.
Day/Night mode auto switch.
Support system resource information and running status real-time display.
Support log function.
Support video watermark function.
4
This series speed dome has the following features:
- On-Screen Menu
This series product menu supports multiple languages. It is easy for you to view dome information and configure dome,
camera parameters.
- Support multiple protocols
Use various devices (such as matrix, control keyboard and DVR) and protocols to operate speed dome.
- Proportional Pan and Tilt
This function keeps the image from moving too fast when there is a large amount of zoom. The quick-installed high
definition speed dome continually decreases or increases pan and tilt speeds in proportion to depth of zoom.
When zooms speed is increasing, the camera moving speed becomes slow.
When zooms speed is decreasing, the camera moving speed becomes fast.
- On-screen Tips
Dome title and system version (Software and hardware)
Dome system temperature. (Optional. You can disable this function)
Dome pan/tilt coordinates, preset ID.
- Preset Setup and Call
Preset function is to save the address information (such as PTZ pan/tilt, focus and etc) to the memory so that you can
quickly adjust the dome and PTZ to the correct position.
This series quick-installed high definition speed dome supports 255 presets.
- Auto Scan
Camera scans back and forth regularly in a horizontal field.
Here you need to set left and right limit and scan speed. You can set 5 scanning paths.
- Auto Touring
Add addresses into a routine in a desired order and then set time and stop duration for each address.
The dome will begin an auto touring between these addresses. You can set 8 touring paths.
Each touring path can contain max 32 presets.
- Auto Pattern
Memorize dome operation such as pan, tilt, and zoom to repeat. Focus and iris are in auto mode during auto pattern. For
each pattern, the time should be less than 60 seconds.
- Privacy Masking
Privacy masking is a user-defined, four-sided area that can not be viewed by you. The masking area will move with pan
and tilt functions and automatically adjust in size as the lens zooms.
- Auto Flip
As long as you continue to hold the keyboard joystick in the down position, the dome rotates 180 degrees and repositions
itself for uninterrupted viewing of any subjects that passes directly beneath the dome.
- Self-diagnosis
There is a self diagnosis procedure when dome boots up.
. Tilt and vertical engine check
. Camera diagnostics
. Display dome information and diagnosis information such as address, protocol, baud rate, type.
- Day/Night Mode (B/W & Color Mode)
Auto/manual switches in low illumination.
. Auto: camera will automatically adjust CCD light level.
. Manual: use menu or function keys to select day/night mode.
This function needs the speed dome driver (camera) supported.
5
- Auto Focus
Auto focus allows the lens to remain in focus during zoom-in, zoom-out and motion functions to get vivid image. You can
use FAR or NEAR button to adjust focus manually.
- Backlight Compensation
Balance the brightest and darkest sections of a scene to produce a more vivid picture.
- Pan Tilt and Zoom
Supports zoom in and zoom out during tilt and pan movement.
In this period focus and iris are both in auto mode to get vivid image.
- Idle Status
When there is no available order, you can use menu to set dome idle status after specified duration. The idle status includes
turn to specified preset or go to scan, tour or pattern function.
- Image Stabilizer/Flip
Enable image stabilizer function and flip in the menu.
When there is vibration, this IS function can guarantee video stability and when flip, you can view video more clearly.
This function needs speed dome driver (camera) supported.
6
2.2 Specifications
2.2.1 Performance Specifications
Built-in Decode
Built-in PTZ
Built-in zoom lens,
high sensitive, high
resolution integrated
digital process color
camera.
OSD
All digital design. All data are in the connection board. No data loss when power off occurs.
- Integrated design, high stability.
- Quick-installed high definition speed dome max support 255 presets.
Support 8 auto touring. Each touring max has 32 presets.
- Low and medium speed dome max support 80 presets.
- 5 auto scan.
- 5 auto pattern. Each pattern can max support 400 commands and the interval shall be less
than 60s.
- Built-in direction indicator. Support max 24 privacy mask zones (Depends on the camera
type).
- 7 alarm inputs and 2 alarm outputs.
- Fine stepper driver, stable performance, react quickly, precisely positioning.
- Integrated design, tight structure.
- Elegant mechanical driver device. Support 360 degrees continuous rotation, no monitor
blind spot.
- 0.1°/s rotation speed while maintain stable image.
- 180 degrees tilt continuous monitor.
- Auto focus
- Auto BLC
- Auto brightness control
- Auto white balance
- Auto day/night switch (Auto B/W & color switch)(Depends on the camera type)
- Preset title display
- View dome initial setup information
- Modify camera parameter
- Set preset
- Set auto scan
- Set 7-channel alarm inputs and 2-channel alarm outputs.
- Set auto patter
- Set auto day/night switch (Auto B/W & color switch)(Depends on the camera type)
- Set privacy mask zones
7
2.2.2 Technical Specifications
Power
Camera Driver
Consumption
Decoder
AC 24V/3A (±10%) (Includes temperature control circuit)
15W
Built-in
Engine
Stepper motor
Preset
255 (In PELCOD, PELCOP protocol).
80 (In industrial protocol)
Please note the value may vary due to different protocols.
Auto Tour
8
Auto Pattern
5
Auto Scan
5
Privacy Mask
Alarm Input/Output
Information
Lens
Auto Rotation
Auto Pan
Manual Pan Motion
Speed
Preset Maximum
Speed
Manual Tilt Motion
Manual Tilt Scan
Section
PTZ Scan Accuracy
Signal Format
8 zones in one-window.
The different series products support different amount. It depends on the camera type.
7/2
Time, address, dome title, dome coordinates, temperature, alarm and etc.
Adjust speed in accordance with lens
Tilt 92º auto rotates to pan 180 º
0 º -360º continuously
0.1º—200º/S
300º
0.1º—120º/S
0º—180º
0.06 ± 0.015º
PAL
S/N Ratio
> 50dB
Humidity
< 90%
Environment
-40°C—55°C (outdoor)
8
2.2.3 Factory Default Setup
Function configuration type
General Setup
Main stream
Encode Setup
Extra stream
Item Name
Default setup
Date format
D-M-Y
DST
Disable by default
Date separator
‘/’
Time format
24H
Language
English
When HDD is full
Overwrite
Record duration
60 min
Device No.
8
Video type
PAL
Channel
Channel01
Encode mode
Audio/Video
H.264
Enable audio and video
Main stream
Main stream
Resolution
720p
Frame rate
25
Bit stream control
CBR
Bit rate
6144
I frame interval control
50
Extra stream
Main bit stream
Audio/Video
Enable video disable audio
Resolution
CIF
Frame rate
15
Bit stream control
VBR
Quality
High
Bit rate
512
I frame interval control
50
Image color
Disable
Watermark
Enable
Stream type: all
Type: character
Character: DigitalCCTV
Cover area
Never
Time title
Enable.
Channel title
Enable.
Channel
Ch01
Pre-record
5 seconds
Schedule
Time Setup
Start time
0:00:00
End-time
23:59:59
Record
Period 1 : Enable motion detection/
alarm
Snapshot
Week
9
Period 1 : Enable motion detection/
alarm
Sunday
Function configuration type
RS232
Network setup
Alarm setup
Item Name
Default setup
RS232 com
COM01
Function
Console
Data bit
8
Stop bit
1
Baud rate
115200
Parity
None
Ethernet
Port 01
DHCP
Disable
IP address
192.168.1.108
Subnet mask
255.255.0.0
Gateway
192.168.0.1
Device name
Device factory default name
TCP port
37777
HTTP port
80
UDP port
37778
Network user connection amount
10
Network transmission QoS
Disable
Remote host
Multiple broadcast group
IP address
239.255.42.42
Port
36666
Email setup
Disable
Multiple DDNs
Disable
NAS setup
Disable
NTP setup
Disable
IP Filter
Disable
Event type
Local alarm
Alarm input
Input 01, disable
Type
Normal open
Setup
Period: Start time 0:00:00
End time: 23:59:59
Period 1:enable
Week: Sunday
Anti-dither
0 second
Alarm out
Disable
Alarm latch
10 seconds
Record channel
1, enable
Record latch
10 seconds
Send email
Enable
PTZ activation
Disable
Event type: never
Address: 0
Capture
Disable
10
Function configuration type
Detection
PTZ Setup
Default and Backup
Item Name
Default setup
Event type
Motion detection
Channel
Ch01, Disable
Sensitivity
3
Time period setup
Period:
Start time 0:00:00
End time:23:59:59
Period 1:enable
Week: Sunday
Anti-dither
5 seconds
Alarm out
Disable
Alarm latch
10 seconds
Record channel
Disable
Record latch
10 seconds
Send email
Disable
PTZ activation
Event type: Never
Address: 0
Disable
Capture
Disable
Channel
Ch01
Protocol
DH-SD1
Address
1
Baud rate
38400
Data bit
8
Stop bit
1
Parity
None
All
Disable
General
Disable
Encode
Disable
Schedule
Disable
RS232
Disable
Network
Disable
Alarm
Disable
Video detection
Disable
Maintain
Disable
Channel Name
Disable
Camera
Disable
Record control
Auto. Ch1 (This series device does not
support this function.)
Abnormity
Advanced
Even Type
No disk, Disable
Alarm Output
Disable
Alarm Latch
10 seconds
Send email
Disable
admin/admin (reusable)
888888/888888(reusable)
666666/666666(reusable)
default
User account
Snapshot
Channel
11
Ch01
Function configuration type
Item Name
Snapshot
Advanced
Auto maintain
Camera config
Auto Registration
DNS Setup
Default setup
Snapshot mode
Snapshot-timing
Frame rate
1 S/F
Resolution
720p
Quality
60%
Auto reboot
2.00 each day
Auto delete old
files
Never
Channel
1
Exposure Mode
Auto
Day/Night Mode
Disable
Backlight Compensation
Disable
Auto Aperture
N/A
White Balance
N/A
Signal Type
Inside
Mirror
Disable
Rotate
Disable
N°
1
IP
0.0.0.0
Port
7000
DNS
202.101.172.35
Alternative DNS
202.101.172.35
12
3 Framework
3.1 Dimensions
3.1.1 Wall mount bracket
The wall mount bracket dimensions are shown as below.
3.1.2 Corner mount bracket
The corner mount bracket is shown as below.
13
3.1.3 Pole mount bracket
The pole mount bracket is shown as below.
14
4 Installation
4.1 Install the speed dome
Open the transparent cover and take out the packing material around the speed dome driver. Please remove the protective
paster from the driver and take off the camera lens cap.
- Install the quick installation port.
- Twist Teflon tape around the screw thread of the quick installation port and turn it into the screw thread of the wall
mount bracket.
- Use M4 stainless screws to secure firmly.
Install the transparent cover
- Begin the cable connection.
Port Name
Function
Connection
Color
Note
VIDEO OUT
Video output port
BNC
“/”
Output analog video
signal.
AUDIO IN
Audio input port
/
Black/White
Input audio signal.
AUDIO OUT
Audio output port
/
Black/Red
Output audio signal.
+24V AC
Power input port
/
Power port
Connect to standard
Ethernet cable.
LAN
Network port
Ethernet port
“RS485_A
RS 485 -
RS 485 A port
Yellow
“RS485_B”
RS 485 +
RS 485 B port
Orange
15
Note :
The video port is covered the heat shrink tube of high shrinking ratio. After the video connection, please heat the tube to make sure the video port is damp proof and water proof.
4.2 Install the speed dome in the bracket
After you complete the above steps, please pull the integration cable and multiple-function composite cable to the wall
mount bracket.
- Line up the straight edge of the internal enclosure of the quick installation speed dome to the straight edge of the quick
installation port, and then push the speed dome to the bottom of the port slowly.
- Use your hands to turn the three stainless screws of the quick installation port to the groove of the internal enclosure of
the quick installation speed dome.
- Turn the stainless screw of straight edge of the quick installation port to the Ф6.5 hole of the straight edge of the internal
enclosure of the quick installation speed dome.
- Use the inner hex tool to fix these three stainless screws.
Now you have completed the installation.
16
4.3 Wall mount bracket installation
Wall mount bracket is shown as below.
Installation requirements
The wall mount speed dome can be installed in the hard construction wall in the indoor or outdoor environments.
Before the installation, please make sure:
- The wall is thick enough to install the expansion bolt.
- The wall can at least sustain the 4x weight of the speed dome.
Installation steps
- Draw four holes position in the wall according to the hole of the bottom of the wall mount bracket.
- Dig four holes and insert the expansion bolts (not provided).
- Use four hex bolts and flat washer to fix the bracket in the expansion bolts.
Installation
Hole
Install the speed dome in the bracket (refer chapter 4.2)
17
4.4 Corner mount bracket installation
Corner mount bracket and its components are shown as below.
Installation requirements
The corner mount speed dome can be installed in the hard construction wall in the indoor or outdoor environments
where there is a 90 degrees angle.
Before the installation, make sure:
- The wall is thick enough to install the expansion bolt.
- The wall can at least sustain the 4x weight of the speed dome.
Installation steps
- Draw four holes position in the wall according to the holes of the corner installation accessories.
- Dig four holes and insert the M8 expansion bolts.
- Pull the cables through the centre hole of the bottom of the corner bracket, the waterproof adhesive, and the centre of
the bracket.
- Reserve the enough cable connection length and then use the M8 expansion bolt to secure the corer mount bracket
chassis on the wall.
18
- Pull the cable out of the pole accessories and then use clamp to fix the pole accessories to the pole.
- Finally, use glass cement to the output hole to secure waterproof.
- After you installed bracket and external cover, loosen the captive screws and open the panel, pull the power cable
through the hanging bracket and then fix the hanging bracket to the wall.
- Pay attention to the waterproof between the bracket and the wall.
- After you installed bracket and external cover, loosen the captive screws and open the panel, pull the power cable
through the hanging bracket and then fix the hanging bracket to the wall.
- Pay attention to the waterproof between the bracket and the wall.
Refer to chapter 4. 2 for detailed installation information.
19
5 Menu
5.1 Screen Menu Index
Note:
ERR means current setup is invalid.
... means there is submenu.
INITIAL INFORMATION...
ADDR INFORMATION...
SYSTEM TIME SETTING...
SET NORTH
LANGUAGE:ENGLISH
FACTORY DEFAULT
RESTART
BACK
EXIT
SYSTEM INFORMATION
DISPLAY SETTING
PRESET TITLE:
AZIMUTH DISP:
TIME DISP:
POSITION:
ZOOM DISP:
INSIDE TEMP:
BACK:
EXIT
ON (ON/OFF)
ON (ON/OFF)
OFF (ON/OFF)
OFF (ON/OFF)
OFF (ON/OFF)
°C (°C/F/OFF)
ON (ON/OFF)
CAMERA SETTING
WB SETTING
EXPOSURE SETTING
DAY/NIGHT SETTING
FOCUS MODE: AUTO (AUTO/MANUAL°
FOCUS LIMIT: 30 CM
ZOOM SPEED: 08 (01-08)
APERTURE:
06 (01-16)
NEXT PAGE
BACK:
ON (ON/OFF)
EXIT
PRESET
AUTO PAN
AUTO SCAN
CRUISE
PATTERN
IDLE MOTION
AUTO RUN
NEXT PAGE
BACK
EXIT
FUNCTION SETTING
ALARM NO:
01
ACTION:NONE
CONTACT:N/O
PRESET:001
AUTO SCAN:
001
CRUISE:001
RELAY OUT:
OFF (OFF/1->5S/2->5S/1&2->5S
RESET DELAY: 3S
SAVE
BACK
EXIT
ALARM SETTING
EXIT
20
The above diagram illustrates the overall structure of the speed dome setup menu.
Note:
- ERR means current setup is invalid.
- Please make sure all the cable connections are right.
5.2 Self-diagnosis system information
ADDR:001-H
BAUD RATE:
9600
PARITY:NONE
PROTOCOL:PELCO-P
SOFTWARE:V1.04.3
BACK
EXIT
After installation, connect speed dome to power. The system goes on a self-diagnosis, and then il pops up the above
interface to show the system information.
If there is anything wrong during the self-diagnosis, system pops up error code. The above interface disappears after
speed dome received after speed dome received the first commande (or the display time lasts for 4 minutes).
-ADDR: Here you can view dome address information.
For example, 001-H, 1 is the address number, -H is hard address mode. -S is software address mode.
- BAUD RATE: Dome communication baud rate.
- PARITY: Communication protocol.
- SOFTWARE: Dome PTZ software version.
5.3 Main menu
SYSTEM INFORMATION
DISPLAY SETTING
CAMERA SETTING
FUNCTION SETTING
EXIT
- SYSTEM INFORMATION: - DISPLAY INFORMATION: - CAMERA PARAMETERS: - FUNCTION SETTING: - EXIT: Dome self-diagnosis information, address information, system time setup, set north
direction, language, language, factory default setup, reboot and so on.
Display dome preset title, azimuth display, time, direction, dome internal temperature and ect information.
Display dome white balance setup, camera function setup, day/night setup, shutter setup
Set preset, pan, scan, auto cruise, pattern, idle motion, time task and pivacy mask function.
Log out the system menu.
21
5.4 Menu operation
In the speed dome main menu, use the left/right button on the web interface to configure the system menu. Before
setup, move the cursor to the current item you want to configure.
- In main menu, click confirm button to go to the sub menu or use left/right key to configure setup.
- Use up/down button to select back option and then click confirm button to go back to the previous menu.
- Use up/down button to select exit option and then click confirm button to log out system menu.
5.4.1 System Information
INITIAL INFORMATION
ADDR INFORMATION
SYSTEM TIME SETTING
SET NORTH
LANGUAGE
: ENGLISH
FACTORY DEFAULT
RESTART
BACK EXIT
- INITIAL INFORMATION: - ADDR INFORMATION: - SYSTEM TIME SETTING: - SET NORTH DIRECTION: - LANGUAGE: - FACTORY DEFAULT: - RESTART: - BACK: - EXIT: Move the cursor to INITIAL INFORMATION and click confirm button to go to the third submenu.
Move the cursor to SITE INFORMATION and click confirm button to go to the third submenu.
Move the cursor to SYSTEM TIME SETTING and click confirm button to go to the third
submenu.
Set dome benchmark direction to know the angel between the benchmark
and then current location.
Move the cursor to the option and click confirm button until you see O.K.
Now you have set north direction.
Dome menu language.
Use the left/right button on the keyboard or in the speed dome terminal menu to set.
Restore dome factory default setup. Move the cursor to the option and then click confirm
button until you see O.K.
The IP dome begin rebooting to restore factory default setup.
Reboot the speed dome.
Go back to the previous menu.
Log out system menu.
Initialization information
ADDR:001-H
BAUD RATE :
9600
PARITY: NONE
PROTOCOL:PELCO-D
SOFTWARE:vX.XX.XX
BACK
EXIT
- Move the cursor to INITIAL INFORMATION , click confirm button, you can see the above interface.
- View dome basic information.
22
Address Information
ADDR TYPE: ADDR-HARD: ADDR-SOFT: BACK
EXIT
HARD
001
001
-Move the cursor to SITE INFORMATION and then click confirm button.
- ADDR TYPE: There are two options: soft and hard. Use the left/right button on the keyboard or in the speed dome
terminal menu to set. Click the OK button to confirm
- ADDR-HARD: It is an address you set in the dial switch. Not modify it through software.
- ADDR-SOFT: You can set address via software. You can use menu to modify dome address.
The value ranges from 1 to 255.
- BACK: Go back to the previous menu.
- EXIT: Log out system menu.
System Time Setting
YEAR: 2009
MONTH: 001
DATE: 017
WEEK: SUNDAY
HOUR:013
MINU: 052
SAVE
BACK
EXIT
- Move the cursor to SYSTEM TIME SETING click confirm button, go to the third submenu.
- Use the left/right button on the keyboard or in the speed dome terminal menu to set.
- After completed setup, click confirm button to save current setup.
- After speed dome menu displays OK, the setup is valid.
5.4.2 Display Setting
PRESET TITLE: ON
AZIMUTH DISP: ON
TIME DISP: OFF
POSITION:OFF
ZOOM DISP:
OFF
INSIDE TEMP:°C
TITLE DISP:
OFF
BACK
EXIT
Move the cursor to DISPLAY SETUP and click confirm button, go to the third submenu.
Use the left/right button on the keyboard or in the speed dome terminal menu to set.
After completed setup, click save button to save current setup.
- PRESET TITLE: Display dome preset title or not. Use the left/right button on the keyboard or in the speed dome
terminal menu to set. Go to Function Setup->Preset section to set corresponding preset value and preset title.
- AZIMUTH DISP: Display dome current coordinates or not. Use the left/right button on the keyboard or in the speed dome terminal menu to set
- TIME DISP: Display dome system time or not. Use the left/right button on the keyboard or in the speed dome terminal menu to set.
- POSITION: Display the angel between the benchmark and then current location.
Use the left/right button on the keyboard or in the speed dome terminal menu to set.
23
- ZOOM DISP: Display speed dome zoom speed or not.
Use the left/right button on the keyboard or in the speed dome terminal menu to set.
- INSIDE TEMPERATURE: Display dome internal temperature or not. There are three options: °C/F/Off.
Use the left/right button on the keyboard or in the speed dome terminal menu to set.
- TITLE DISPLAY: Set to display speed dome position information and etc.
Use the speed dome control terminal to set the detailed title information.
Use the left/right button to set.
- BACK: Go back to the previous menu.
- EXIT: Log out system menu.
5.4.3 Camera Setting
WB SETTING
EXPOSURE SETTING
DAY/NIGHT SETTING
ZOOM SPEED
: 08
APERTURE
: 09
APERTURE RESTRAIN
NEXT PAGE
BACK
EXIT
: 16
Move the cursor to CAMERA SETTING and click confirm button, you can go to the submenu.
- WHITE BALANCE SETUP: Move the cursor to current option and then click confirm button, you can go to the third menu.
- EXPOSURE SETTING: Move the cursor to current option and then click confirm button, go to the third menu.
- DAY/NIGHT: Set day/night mode. Move the cursor to current option and then click confirm button,
go to the third menu. There are three options: auto/manual/off.
Use the left/right button on the keyboard or in the speed dome terminal menu to set. Makes sure your product supports this function.
- FOCUS MODE: There are two modes: Manual/Auto. Use the left/right button on the keyboard or in the
speed dome terminal menu to set.
- FOCUS LIMIT: It is to set the distance between the camera and the object.
It can prevent the focus distance is too small which may result in focusing on the enclosure.
At the same time, you can change the distance to change the focus speed.
- ZOOM SPEED: The bigger the value, the faster the speed. Use the left/right button on the keyboard or in
the speed dome terminal menu to set.
- APERTURE:It is to adjust the lens to achieve clear video.
Use the left/right button on the keyboard or in the speed dome terminal menu to set.
- NEXT PAGE: It includes the following options: DIGITAL ZOOM, PICTURE FLIP, FREEZE FUNCTION,
CAMERA FACTORY DEFAULT SETUP, CAMERA RESTART. Use the left/right button on the keyboard or in the speed dome terminal menu to set.
- BACK: Go back to previous menu.
- EXIT: Log out system menu.
White Balance Setup
WB MODE:
R GAIN: B GAIN: BACK
EXIT
AUTO
001
001
Move the cursor to WHITE BALANCE MODE and then click confirm button, you can go to the submenu.
- WHITE BALANCE MODE: Set white balance adjustment mode. There are two modes: auto/manual.
Use the left/right button on the keyboard or in the speed dome terminal menu to set.
- R GAIN: Before set R GAIN option, note the mode shall not be auto.
Use the left/right button on the keyboard or in the speed dome terminal menu to set.
- B GAIN: Before set B GAIN option, note the mode shall not be auto. Use the left/right button on the keyboard or in the speed dome terminal menu to set.
- BACK: Go back to previous menu.
- EXIT: Log out system menu.
24
Exposure Setting
AE MODE: GAIN SETTING: SHUTTER: SETTING: EXPOSURE COMP: SLOW AE: SLOW SHUTTER: NEXT PAGE
BACK
EXIT
AUTO
02
1/50
11
08
01
ON
AGC GAIN LIMIT: SLOW SHUTTER LIMIT: NOISE REDUCTION: BLC : WDR SETTING: BACK
EXIT
03
1/25
03
ON
ON
- AE MODE: Set the camera exposure mode.
It includes: auto/manual/AV (iris priority)/TV (shutter priority).
Use the left/right button on the keyboard or in the speed dome terminal menu to set.
- Auto: It becomes valid after you set the exposure compensation, backlight compensation (BLC),
slow shutter, wide dynamic region (WDR).
- Manual: It becomes valid after you set the gain setting, shutter, iris setting, wide dynamic
region (WDR).
- AV: It becomes valid after you set the exposure setting, iris setting, wide dynamic region (WDR).
- TV: It becomes valid after you set the shutter setting, exposure compensation,
wide dynamic region (WDR).
- GAIN SETTING: Use the left/right button on the keyboard or in the speed dome terminal menu to set.
- SHUTTER: Use the left/right button on the keyboard or in the speed dome terminal menu to set.
- IRIS SETTING: Use the left/right button on the keyboard or in the speed dome terminal menu to set.
- EXPOSURE COM: Use the left/right button on the keyboard or in the speed dome terminal menu to set.
- SLOW AE: In the strong light environment, lower the camera exposure speed to capture the image and
enhance the definition.
Use the left/right button on the keyboard or in the speed dome terminal menu to set.
- SLOW SHUTTER: In lower illumination environment, you can lower the cameras auto exposure time to capture the
image and enhance the definition. Use the left/right button on the keyboard or in the speed dome
terminal menu to set.
- NEXT PAGE: It includes: AUTO GAIN LIMIT, AUTO SLOW SHUTTER LOW LIMIT, NOISE CONTROL, BLC, WDR, BACK,
and EXIT. Move the cursor to the item and then click the left/right button to set.
- AUTO GAIN LIMIT: Click the left/right button to set.
- SLOW SHUTTER LOW LIMIT: Please click the left/right button to set.
- NOISE REDUCTION: There may noise when the camera is monitoring the low illumination environments. You can use the digital filter to process the noise to guarantee the clear video.
- BLC: It is an abbreviation for back light compensation.
System can compensate the object in the dark light to achieve a clear video.
Use the left/right button on the keyboard or in the speed dome terminal menu to set.
- WDR ENBALE: It is an abbreviation for wide dynamic region. Make sure your camera supports
current function. This function can adjust the video brightness when the contrast between the
strong light and the dark light is too high. Please use the left/right button on the keyboard or in the
speed dome terminal menu to set.
- BACK: Go back to previous menu.
- EXIT: Log out system menu.
Next Page
Move the cursor to NEXT PAGE and then click confirm button, you can go to the submenu.
APERTURE RESTRAIN 16
DIGITAL ZOOM : ON
DZOOM LIMIT : X4
PICTURE FLIP : OFF
FREEZE FUNC : OFF
STABLE :
OFF
CAMERA FACTORY DEFAULT
CAMERA RESTART
BACK
EXIT
25
- APERTURE RESTRAIN: It can automatically control the aperture in the low illumination environments.
It can reduce the noise.
- DIGITAL ZOOM: You can use the left/right button to enable/disable the digital zoom function.
- PICTURE FLIP: This function allows you to turn the image rotation 180 degrees.
There are two options: on/off.
Use the left/right button on the keyboard or in the speed dome terminal menu to set.
- FREEZE FUNCTION: This function allows the system from one preset to another preset, without showing the video
during the PTZ movement.
There are two options: on/off. Use the left/right button on the keyboard or in the speed dome
terminal menu to set.
- AF SENSITIVITY: You can set the auto focus threshold value here.
- CAMERA FACTORY
- DEFAULT SETTING: Move the cursor to current item and then click confirm button to restore factory default setup.
- CAMERE RESTART: Move the cursor to current item and then click confirm button to reboot the camera.
- BACK: Go back to previous menu.
- EXIT: Log out system menu.
5.4.4 Function Setting
PRESET
AUTO PAN
AUTO SCAN
CRUISE
PATTERN
IDLE MOTION
AUTO RUN
NEXT PAGE
BACK
EXIT
Go back to main menu and move the cursor to FUNCTION SETTING, click confirm button.
- PRESET: Move the cursor to PRESET and then click confirm button to go to the third submenu.
- AUTO PAN: Move the cursor to PAN and then click confirm button to go to the third submenu.
- AUTO SCAN: Move the cursor to SCAN and then click confirm button to go to the third submenu.
- CRUISE: Move the cursor to AUTO CRUISE and then click confirm button to go to the third submenu.
- PATTERN: Move the cursor to PATTERN and then click confirm button to go to the third submenu.
- IDLE MOTION: Move the cursor to IDLE MOTION and then click confirm button to go to the third submenu.
- AUTO RUN: Move the cursor to TIME TASK and then click confirm button to go to the third submenu.
- NEXT PAGE: It includes: PRIVACY MASKING, PTZ SPEED, SET ZERO, POWER UP, MENU PASSWORD, MENU IDEL,
PTZ AUTO STOP, and HEATER. Move the cursor to the item and then click the confirm button to set.
- BACK: Go back to previous menu.
- EXIT: Log out system menu.
26
Preset Setup
PRESET NO:
TITLE: SETTING
CALL
BACK
001
PRESET001
Move the cursor to PRESET button and then click confirm button to go to set interface.
- PRESET NO: - TITLE: - SETTING: - CALL: - BACK: - EXIT: Use left/right key to modify preset number. The different protocols support different preset values. The PELCOD and PELCOP support 1 to 255.
Title text is the label used for you to identify the camera.
System will automatically name a title for the camera.
Input preset number first and then select the monitor zone.
Move the cursor to setting and click confirm button.
The system will pop up a message: PRESET: ***. Here *** means preset number.
And the SETTING column pops up an OK. Now you successfully added a preset.
Note, you need to enable display preset title function first (Main menu->display setting->preset title).
Repeat the above procedures to set more presets.
Once you want to modify a preset, you can input the preset number you want to modify and then follow the above steps to set the preset. You can successfully modify a preset content.
Here is to recall preset. Move the cursor to PRESET NO and then input corresponding preset value. Then move the cursor to CALL and then click confirm button to go to a preset.
Go back to previous menu.
Log out system menu.
For PELCO protocol user, please refer to the following special functions:
- Call preset: Call preset 28 or preset 95 to go to dome menu.
Call preset 29 or preset 99 to go to scan. Call preset 24 or preset 81 to go to pattern.
Call preset 25 or preset 82 to go to cruise (tour). Call preset 30 or preset 96 to stop scan or pattern. Call preset 31 or preset 83 to begin rotation. Call preset 33 to enable PTZ 180 degrees rotation.
Call preset 34 to set dome position as 0.
- Set preset: Set preset 26 or 92 to set scan left limit. Set preset 27 or 93 to set scan right limit.
Set preset 22 or 79 to begin record. Set preset 23 or 80 to stop record.
Pan
PAN SPEED: 181
RUN
STOP
BACK
EXIT
Move the cursor to PAN button and then click confirm button to go to setup interface.
- PAN SPEED: - RUN: - STOP: - BACK: - EXIT: Set dome rotation speed.
Use the left/right button on the keyboard or in the speed dome terminal menu to set.
Move the cursor to call item and then click confirm button.
The dome begins 360 degrees continuous rotation.
Highlight stop item and then click confirm button. The dome stops rotation.
Go back to previous menu.
Log out system menu.
27
Scan
SCAN NO:
001
SET LEFT LIMIT
SET RIGHT LIMIT
SCAN SPEED: 161
RUN
STOP
BACK
EXIT
Move the cursor to SCAN button and then click confirm button.
- SCAN NO: Set auto scan number.
Use the left/right button on the keyboard or in the speed dome terminal menu to set.
- SET LEFT LIMIT: Set camera left address. Click confirm button to save current setup.
- SET RIGHT LIMIT: Set camera right address. Click confirm button to save current setup.
- SCAN SPEED: Use the left/right button on the keyboard or in the speed dome terminal menu to set.
- RUN: Input auto scan number first, and then please move the cursor to RUN and click confirm button to activate auto scan function.
- STOP: Terminate auto scan function.
- BACK: Go back to previous menu.
- EXIT: Log out system menu.
Cruise (Touring)
CRUISE NO : 001
CRUISE SETTING
DELETE CRUISE
RUN
STOP
BACK
EXIT
Move the cursor to highlight CRUISE item and then click confirm button to go to set interface.
- CRUISE NO:
Tour number.
Use the left/right button on the keyboard or in the speed dome terminal menu to set.
- CRUISE SETTING: Move the cursor to cruise setting item and then click confirm button.
Add or remove the preset, and set the corresponding dwell time and call speed.
NO
01
02
03
…
32
PRESET 000
000
000
…
000
DWELL
005
005
005
…
005
SPEED
013
013
013
…
013
DWELL: Set dwell time.
Use the left/right button on the keyboard or in the speed dome terminal menu to set.
SPEED: Set the speed value.
When you move the cursor to one cruise number, you can use left/right button to turn the page.
When you move the cursor to one cruise number, click confirm button to set the cruise.
Use up/down button to set preset number, dwell time and speed. Use the left/right button to go to the next cruise.
28
Click confirm button you can exit the setup. After move the cursor to back button to go to the previous interface.
- DELETE CRUISE:
- CALL: - STOP: - BACK: - EXIT: Delete a cruise.
Input cruise number in CRUISE NO and then move the cursor to DELETE cruise,
click confirm button to delete.
Activate cruise.
Input touring number in touring NO and highlight CALL, click confirm button to activate touring.
Terminate touring.
Go back to previous menu.
Log out system menu.
Pattern
PATTERN NO: PROGRAM START
PROGRAM STOP
RUN
STOP
BACK
EXIT
001
Pattern function can memory PTZ operation and camera focus zoom in and zoom out.
From the start position, dome begins auto movement repeatedly.
This series IP dome supports maximum 5 patterns and one pattern can max support 400 commands.
Move the cursor to PATTERN and click confirm button.
- PATTERN NO: Here is to set pattern number. The value ranges from 1 to 5.
Click left/right key to configure.
- PROGRAM START: Memorize pattern starting point.
An icon OK pops up in screen system begins memory pattern.
- PROGRAM STOP: Set pattern stop point. After all the movement, move the cursor to PROGRAM STOP
and then click confirm button. Now you have set one pattern.
System pops up an icon OK system has memories one pattern.
- RUN: Activate pattern.
Input pattern number, move the cursor to RUN and click confirm button, system begins running pattern.
STOP: Stop current pattern. Input pattern number, move the cursor to STOP and click
confirm button. System stops current pattern.
BACK: Go back to previous menu.
EXIT: Log out system menu.
Note: The dwell time between two orders should be less than one minute, otherwise system will
set to default value as one minute.
After click PROGRAM STOP, do not click CALL button before icon “ ” disappears completely.
Any manual operation during the pattern procedure will terminate current dome pattern operation.
•
29
Idle Motion
IDLE FUNC:
IDLE TIME:
IDLE ACTION:
PARAMETER:
SAVE
BACK
EXIT
OFF
010MIN
NONE
001
When there is no available command for specified time, dome automatically goes on the previous set functions.
- IDLE FUNCTION:
- IDLE TIME: - IDLE ACTION:
- SAVE:
- BACK: - EXIT: There are two modes ON/OFF.
Use left/right key to set.
System idle period.
Use the left/right button on the keyboard or in the speed dome terminal menu to set.
There are several functions you can select: NONE/PRESET/SCAN/TOURING/PATTERN.
Use the left/right button on the keyboard or in the speed dome terminal menu to set.
Move the cursor to SAVE and click confirm button to save current setup.
Go back to previous menu.
Log out system menu.
Auto Run (Schedule task)
TASK NO: TIME TASK:
TASK SETTING:
TASK INFORMATION
DELETE TASK
BACK
EXIT
1
OFF
- TASK NO: Set task number.
Use the left’/right button to set.
- TIME TASK: The schedule task allows the speed dome to implement corresponding setup during the
specified time. There are two options: on/off. Use the left/right button on the keyboard or in the
speed dome terminal menu to set.
- TASK SETTING: Set task time, operation, operation SN and etc.
Click the confirm button to go to the fourth menu to set.
- TASK INFORMATION: View the corresponding task information.
Click the confirm button to go to the fourth menu to set.
- DELETE TASK: Input the task number to be deleted in the TASK NO, and move the cursor to the current
item. Click the confirm button, remove all the setups in the current schedule task.
Now current task is null.
- BACK: Go back to the previous menu.
- EXIT: Log out the system menu.
Task Information
Move the cursor to the TASK INFORMATION and then click the confirm button to go to the following interface.
See the corresponding task information.
Click the confirm button again, exit current interface.
30
NO
1 ALL
2 ALL
3 ALL
4 ALL
5 ALL
6 ALL
7 ALL
TIME
00:00:00:00
00:00:00:00
00:00:00:00
00:00:00:00
00:00:00:00
00:00:00:00
00:00:00:00
ACTION
SC001
SC001
SC001
SC001
SC001
SC001
SC001
OFF
OFF
OFF
OFF
OFF
OFF
OFF
Next Page
Move the cursor to the NEXT PAGE and then click the confirm button, you can go to the third menu to set the PTZ SPEED,
SET ZERO, POWER UP and etc.
PRIVACY MASK:
PTZ SPEED: SET ZERO
POWER UP
MENU PASSWORD
MENU IDLE PTZ AUTO STOP BACK
EXIT
- PRIVACY MASK: - PTZ SPEED: - SET ZERO: - POWER UP:
- MENU PASSWORD: - MENU IDLE: - PTZ AUTO STOP: - BACK: - EXIT: 5
1M
155
Set the privacy mask number and etc.
It includes the third menu. Move the cursor to the current item and then click the
confirm button to go to the next interface.
It is to set PTZ speed. Use the left/right button to set.
It is to set the PTZ initial position. Move the PTZ to the corresponding position and then
click the confirm button to complete the setup.
It is to set the PTZ action when the speed dome boots up.
Click the confirm button to go to the next interface. To set
It is to set the password to go to the PTZ menu.
Click the confirm button to go to the next interface. To set
If current setup is ON, once you open the menu and leave it idle for specified period,
the menu may automatically disappear. If current setup is OFF, the menu is always there
and will not disappear. Use the left/right button to set.
The speed dome will stop all the PTZ operations when there is no command for the
specified time. It includes various setups. Please use the left/right button to set.
Go back to the previous menu.
Log out the system menu.
31
Privacy Mask
Move the cursor to PRIVACY MASK and click confirm button, system goes to privacy mask setup interface.
PRIVACY NO:
ACTIVATE : RESIZE: DELETE
SAVE
BACK
EXIT
001
OFF
Note:
For security reasons, please set privacy zone a little bit larger than the privacy object size.
Each time, after modifications you need to move the cursor to SAVE button and then click confirm button to get all
setup activated. Otherwise, privacy zone may not move correspondingly with the object.
Please enter privacy mask menu, now all the privacy zones are closed.
Move the cursor to PRIVACY NO, please use left/right key to set different privacy zones.
For example, shift to 001 section and then move the cursor to ACTIVATE.
Secondly, use left/right key to select ON mode. Now there is a privacy zone in the screen centre.
Thirdly, use PTZ to move camera so that privacy object fit well with screen centre.
Fourthly, move the cursor to RESIZE and then click left and right key to adjust privacy zone direction and size.
Fifthly, move the cursor to SAVE and then click confirm button to exit.
- PRIVACY NO:
Set privacy mask zones.
Use the left/right button on the keyboard or in the speed dome terminal menu to set.
The value ranges from 1 to 24.
Please note the value here may vary due to different protocols.
- ACTIVATE: - RESIZE:
There are two settings: on and off. When activate function is on, the privacy mask function will be
activated and displays in the screen. When activate function is off, the privacy mask function will be
closed and the blank will not displayed in the screen.
It is to adjust the privacy zone size.
Continue pressing direction button to widen or narrow zone size.
is to narrow the horizontal
- SAVE:
- DELETE: - BACK: - EXIT: width and
is to widen the horizontal width. is to widen vertical height and is to narrow the
vertical height.
Here is to save user setup.
Here is to delete setup and restore default setting.
Go back to previous menu.
Log out system menu.
32
Power Up
Move the cursor to the POWER UP item and then click the confirm button to go to the fourth menu.
POWER UP:NONE
PARAMTER: NONE
BACK
EXIT
- POWER UP: - PARAMTER: - BACK: - EXIT: It is to set the PTZ operation when the speed dome boots up.
The option includes: NONE/AUTO/SCAN/PRESET/PATTERN/TOUR and etc.
Use the left/right button to set.
Set the serial number of the corresponding operation such as the scan,
preset, pattern, tour. Use the left/right button to set.
Go back to the previous menu.
Log out the system menu.
Menu Password
Move the cursor to the MENU PASSWORD and the click the confirm button to go to the fourth menu.
PASSWORD
PASSWORD:
SETTING:
BACK:
EXIT:
- PASSWORD: - SETTING: - BACK: - EXIT: 1
2345
6
7890
SAVE BACK
It is to set the speed dome menu password.
Use the left/right button to set.
Click the confirm button to go to the password setup interface.
Use the left/right button to set the value and then click the confirm button to confirm current option. Move the cursor to the SAVE button and then click the confirm button to
save current setup.
Click the BACK button to go to the previous menu.
Go back to the previous menu.
Log out the system menu.
33
5.5 Dome Abnormal Phenomenon Operation
5.5.1 Restore to Factory Default Setup
From main menu-> SYSTEM INFORMATION, move cursor to FACTORY DEFAULT and click confirm button.
Dome will reboot and all the setups restore to factory default setup.
5.5.2 PTZ Movement is not smooth
From menu to SYSTEM INFORMATION, move cursor to RESTART and click confirm button.
This reboot will not modify all activated setup (such as preset, tour and pattern)
34
6 Connecting to a device and opening the web application
6.1 IE options configuration for config tool and and IE
This device supports web access and management via PC.
System pops up warning information to ask you whether install control “webrec.cab” or not. Click “OK” button, system can
automatically install the control.
If you can’t download the ActiveX file, you can lower the IE security level or disable anti-phishing filter. Be sure you are
logged with administrator rights in your Windows session.
35
6.1.1 Connection with the Search Tool
Refer to chapter “5.2.1 Connecting to the device’s web interface”
6.1.2 Connection with Internet Explorer
IP camera factory default setup: :
- IP address: 192.168.1.108
- User name: admin
- Password: admin
Open Internet Explorer and input IP camera address in the address bar.
For example, if your camera IP is 192.168.1.108, input http://192.168.1.108 in IE address bar.
Entrez l’adresse IP de votre enregistreur vidéo
6.2 Connection with Mozilla Firefox or Google Chrome
Go to Apple web site, download and install QuickTIme (www.apple.com/quicktime/download)
Then open Firefox or Chrome and input the IP DVR address in the browser URL.
!
Remarque : Avec ces navigateurs, l’apparence de l’interface peut être différente et certains boutons peuvent ne pas
apparaître
36
7 Quick Configuration Tool
7.1 Introduction
Quick configuration tool is used to search for current IP address, modify IP address. It can also be used to perform
a software upgrade or to modify settings. This tool only applies to the IP addresses in the same network segment.
Before using the Quick Configuration Tool, please check that this software is in updated version.
7.2 Searching/Connecting
Select and double click the “ConfigTool.exe’” in the application directory.
The version of Config tool should be at least 1.0.5.
7.2.1 Connecting to the device’s web interface
To find connected devices in the same segment network, click the “refresh” button. The tool will search for the
connected devices and display the device IPv4 and IPv6 in the form list.
In the device list interface, you can view device IP addresses (IPv4 and IPv6), port number, subnet mask, default
gateway and MAC address.
1 - Select IPv4 address, the IPv6 addresses disappear and right click on the highlighted line.
37
2- Select “Open Device Web” item to go to the web interface:
2
If you can’t connect, ckeck you internet explorer security settings as described in chapter 6.
38
7.3 Connecting with the configuration tool (to change the IP address or upgrade the device software.
To find devices connected to the network, click the “Refresh” button. The tool will search for devices connected to the
network and display them in the form of the list
1
2
3
7
5
4
9
8
6
10
%"
N
11
!"
Description
1
Number.
2
Device IP address.
3
Device TCP port.
4
Device subnet mask.
5
Device default gateway.
6
Device MAC address.
7
Select “IPv4” or “IPv6” or “All”.
8
“Upgrade” button opens the interface to upgrade the device firmware See below (8).
9
Refresh the list.
10
“Login” button opens the login interface to confirm login, password and port and configure the
device. See below (10).
11
Disconnect.
39
(8) “Upgrade” button opens the interface to upgrade the device firmware:
! 1
2
4
3
N
5
6
Description
1
Select a check box of a device or several devices with same commercial references into this list.
2
Click “Open” button and select the new firmware in the PC directory.
3
Click “Upgrade” button, the devices will be upgraded. Be careful don’t cut off the network connection.
4
Click “Cancel” button to stop the upgrade.
5
“Add” button configures manually s a new device IP and port.
6
“Return” button comes back to the previous interface.
(10) “Login” button opens the login interface.
- Highlight the network information device (single click in the list)
- Click the “Login” button (or double-click the highlighted line)
- The following page opens:
Note: Here any information cannot be modified. Click the “Login” button in login popup window to open the main
interface mode where the network and system settings can be changed
40
7.4 Main interface of the tool
7.4.1 Network settings
Functions
DHCP Enable
IPv4/IPv6
IP Address
Subnet Mask
Gateway
Mac Address
Save
Return
Description
Enables or disables the DHCP
function.
Select IPv4 or IPv6 in the combo list. The IP addresses can be
changed.
IP address of the device.
Subnet mask of the device.
Gateway of the device.
MAC address of the device.
Save the modifications.
Comes back to the previous
interface.
7.4.2 System Information
Before using the camera, please check that its software is in updated version.
Functions
SN
Software Version
Device Name
Synchronization with PC
PC Date
PC Time
Manal Setup
Return
41
Description
Serial number of the device
Software version of the device
User name
Synchronisation of the device’s date and time the PC.
Click on “Sync” to synchronise, then on “save”.
Date on the PC.
Time on the PC.
Manual setting of the device’s
date and time. Enter the
required date and time. Click
“Sync” button to synchronise
and “save”
Return to the previous interface.
7.4.3 System Upgrade
Before using the Camera, please install its updated software version.
Functions
Upgrade File/Open
Current Progress/Upgrade
Return
Description
Click here to select the file
to be upgraded
Click here to start the upgrading procedure
Return to the search interface
Steps to upgrade the intertnal software
- Click the “Open” button.
- Select and add the *.bin internal software file (firmware)
- Click the the “Upgrade” button. Then the file is transmitted to the device and the device
automatically upgrades itself.
- Then, click the “OK “button to end the procedure.
8 Resetting the camera
- Click on the «Reset» button (located inside the camera ) during 10 seconds
- Wait for the auto reboot of the camera
- The camera is now in factory default settings
42