1
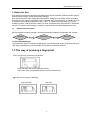
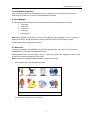
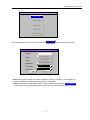
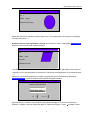
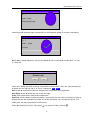
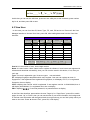
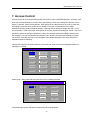
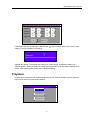
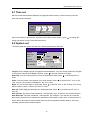
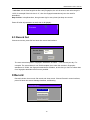
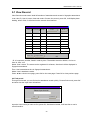
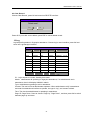
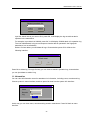
BIOSTREAM User’s Manual
Contents
1.
Notice for use………………………………………………………………………….……2
1.1 Operational Flow Chart……………………………………………....... ……….…… 2
1.2 Recommended finger……………………………………………….…………….……2
1.3 The way of pressing a fingerprint…………………………………..…………. ….... 2
2. Fingerprint Access controller menu……………………………………….……………. 3
3. Fundamental concepts……………………………………………………….……. ………3
3.1 Registration of Users……………………………………………………..……………4
3.2 Verification of user…………………………………………………………..…………4
3.3 User’s ID Number......................................................................... …….…………4
3.4 Door Manage……………………………………………………………………………4
3.5 Initialization Interface……………………………………………………………..……4
4. User Manager……………………………………………………………………….….… 4
4.1 New User……………………………………………………….. ……………….…..…4
4.2 Edit User………………………………………………………………………….…..…8
4.3 View User……………………………………………………………………….………13
4.4 Del User………………………………………………………………………….……. 13
4.5 Del All User……………………………………………………………………….….…14
5 Communication……………………………………………………………. …………...……14
6 USB Disk……………………………………………………………... ………….………..…14
7 Access Control……………………………………………………………. ……………...…16
8 System……………………………………………………………. ………………………… 17
8.1 Time set…………………………………………………………………………..……18
8.2 System set……………………………………………………………………….……18
8.3 Record set…………………………………………………….. ………………..……19
9 Record……………………………………………………………. …………………………19
9.1 View Record……………………………………………………………………………20
9.2 Find Record……………………………………………………………………….……20
9.3 Clear Record………………………………………………………………………..… 21
10.Log……………………………………………………………………………………..…… 21
11. Information…………………………………………………………. ………………..……22
12 Maintenance……………………………………………………………………………..…23
12.1 Clean…………………………………………………………………………………29
12.2 Clean keyboard and LCD screen…………………………………………………29
12.3 Clean Lens……………………………………………………………………....… 29
BIOSTREAM User’s Manual
1. Notice for Use
First, thanks for using the fingerprint time attendance access controller, please read the manual
carefully before using to avoid unnecessary damage.
Don’t put the devices under strong direct light places, strong light can disturb collect fingerprint
obviously, this will result in verification can’t be passed. Don’t use the device on holiday as much
as possible, the working temperature is -10℃~55℃. The device will make heat, if you use it
outside long time, it will influence the device to work, maybe become response slow, verification
rate low. If it must be used outside, it’s better to use sunshade and heat dissipation devices.
1.1
Operational Flow Chart
Set the fingerprint access controller, and then operate the fingerprint registration and contrast.
Installation
Registration
Verification
1.2 Recommended finger
Recommended finger: Forefinger, middle finger or the fourth finger, avoid using the thumb and
little finger (because they are not flexible when press the collecting window).
1.3 The way of pressing a fingerprint
1) The correct way of pressing a fingerprint:
Press the finger flat on the collecting window
The center of the finger should be at the center of the window
2)A few incorrect ways of pressing
Perpendicular
Side way
2
BIOSTREAM User’s Manual
Leaning
Down way
Note: please use the correct method to press. Our company does not bear the result of
reducing identifying ability due to the inappropriate operation of the users. Our company retains
the right to explain and modify this.
2. Fingerprint Access controller menu
3. Fundamental concepts
3.1 Registration of Users
Registration is the process to create an ID number for the customer and then scan their
fingerprint two times to form a characteristic number. This characteristic number will be stored in
the storage chip as a formwork. Through comparing the pre-stored formwork with the scanned
fingerprint, the identity of the user can be confirmed. A pre-registered user can “check in” at certain
attendance recording device locations, the process will take around 2 seconds. The same ID
number can register for up to 10 different fingerprints, so that users can have more selections for
verification. Theoretically each finger of each hand should be registered. Then when a finger of the
user is injured, he/she can use the other healthy fingers to finish checking in. Generally two fingers
are recommended, so that the user can use any of the two fingers to verify. This helps to avoid the
situation when he/she forget which finger was registered.
3.2 Verification of user
When the user presses the fingerprint on the collecting device or types in an ID number and then
types in the password or the fingerprint, this process is called verification. The system will send the
information on whether the verification is successful or not. The successful comparison will be
stored in the device.
3.3 User’s ID Number (Registration Number)
The users will be given an ID number when they start registering. When they verify their
fingerprints, this number will be used to relate the characteristic of the fingerprint formwork or the
password. The ID number is typed in by using the number key board.
3.4 Door Manage
BIOSTREAM fingerprint time attendance has 15 level door manage, users can choose one of
them, the period of time settled by level decides the open door time.
3
BIOSTREAM User’s Manual
3.5 Initialization Interface
After connecting power to the equipment, press on-power to turn on the equipment, the first
interface that we will see on screen is the initialization interface.
4. User Manager
The first chapter will introduce how to manage users in the time attendance, including:
z
New User
z
Edit User
z
View User
z
Del User
z
Del All User
Note: When register a new user, you can choose register to be a manager or a user. In order to
security the device, the fingerprint time access controller offers to set manager to avoid
unauthorized users changing device data.
4.1 New User
If there isn’t registration administrator, anyone can register users, but if there is, it must be the
administrator to verify that can register new users.
Starting register user, you must verify your ID-----press “OK”, press your fingerprint or punch card,
or input user name and password, then verify.
Note: If there isn’t registration administrator, you don’t need verify.
After verified, enter into the following menu:
User
System
Sunday
Communication
Record
USB Disk
Access control
Log
Information
2009-06-07
Choose “User”, press “OK”, it will show:
4
18:08:03
BIOSTREAM User’s Manual
User Manager
New User
Edit User
View User
Del User
Del All User
Then the background of “New User” will become New User , press OK to add new user:
e
New User
User ID
Finger Regist
Finger
Card Regist
Card
Password
User Role
Door Right
OK
Password Regist
User
0
Cancel
User ID: Input user number you want to register in User ID, 6 numbers. (The number is in
between 1-999999, corresponding employee No. in software).
Finger: Input user ID, press ▼and choose “Finger Register” it will display “Finger Register
”, it means that you choose finger register. Press OK, enter into the finger register interface:
5
BIOSTREAM User’s Manual
Fingerprint register
ID
1
Mode
finger
Please press finger
Follow the instruction to press the same finger twice. If the registration is successful, it will display
“Success” and show “√”
ID Card: If choose card registration, press▼ and choose “ID Card”, it will display Card Register,,
press OK, enter into the card register interface:
Card register
ID
1
Mode
Card
Card ID
Please slot card
Put the proximity card on number keyboard of fingerprint, LCD screen will display card number of
proximity card, if the registration is successful, it will prompt card registration is success and show
“√”
Password: If choose the password to register, press▼ and choose ”Password” it will display
Password Register, press OK enter into the password register interface:
Password
Please enter password
Please enter again
OK
Cancel
Input password in “Please enter password” (the password length is 1-6, and the number is in
between 1-999999), enter the password again in “Please enter again”. Press *to delete if press
6
BIOSTREAM User’s Manual
wrong number. Press OK after setting password, if it’s successful it will be back to “Password
Register” interface and write” √”
Note: When adding user, in order to add successfully you must choose one verification type.
User Role: It has two type users: Admin and user. Press▼ and choose one of them, and you will
see the user role change to blue, press * choose admin or user which you want to register.
Door Right: It’s to set the access level for users. It has 0-16 levels, 0 means user can access
anytime, no access control; 16 means the user can’t access anytime, no right to open door. 1-15 is
corresponding with software access level 1-15 level, 1 is to access level 1, the rest can be done in
the same manner.
Press▼ and choose one of level, the door right column will change to blue, press *choose the
door right level.
After finishing press OK and save it, the new user is successful.
After adding successfully, you can verify the registration type for user’ setting.
If the registration type is finger register, press fingerprint on initializing interface, if verify successfully, you
can hear “Thank you”, and the screen will display:
000001
√
If verify fail, the fingerprint will tell you” Try again:, and display:
Try again
Then back to initializing interface in a very long time.
If the registration type is password register, pressing number keys in the initializing interface to
input user ID, screen will display:
7
BIOSTREAM User’s Manual
Password confirm
User
Password
OK
Cancel
Input your user ID and password, press OK, if verify successfully, it will show:
√
Success
If verify fail, the device will tell you fail, and display:
×
Fail
If it’s registered by card, brush card at keyboard area in the initializing interface, it will prompt
“Thank you” if verify successfully, and display:
√
000001
4.2 Edit User
Choose “Edit User” in the user manager interface, press OK, it will display ”Please input User ID”
interface:
Input User Id
Please input User Id!
OK
Cancel
8
BIOSTREAM User’s Manual
Input the user Id you want to edit, enter into the edit user interface.
User Info
1
ID
Name
Regist
PW
Regist
Fingerprint
Del F
Role
User
Creat
2009-6-718:10:10
End Time
0000
Del C
Door Right
Y
Regist
Card
00
M
OK
00
0
D
Enable
Cancel
In the edit user interface, you can register user password, card, fingerprint or change or delete;
edit user role, door right. Press ▲▼ to choose one which you need edit, the choosen one will
display blue backgroud and white letter.
PW: If users set password when registering, it will display “****** ” behind “PW”, press ▼to
choose “******”, press OK to enter into the edit password interface,
Password
Input old password
Input new password
Input again
OK
Cancel
Input old password, and make a new password, then press OK and save. If no password when
registering, you can set password for users. Choose “Register” in “PW”, press OK enter into
password registration interface.
Password
9
BIOSTREAM User’s Manual
Please enter password
Please enter again
OK
Cancel
Input password, press OK to save after setting.
Card: If user register card when registering, it will display the card no. behind the “Card”, if it must
be edited, press ▼choose the card No. behind “ Card”, press OK, then enter into card register
interface:
Card register
ID
Mode
1
Card
Card ID
Please slot card
Put the card to keyboard area to register, if success it will tell you “Card register success”, if not
choosing card register when users registering, you can register card now, the method is with
above.
Fingerprint: A user can register at most 10 fingerprints, if register fingerprint when users
registration, then you can delete it or register other fingerprint. Press ▼choose “Register” behind
“Fingerprint”, press OK enter into fingerprint register interface:
10
BIOSTREAM User’s Manual
Fingerprint register
ID
1
Mode
finger
Please press finger
Press twice with the same finger continuously on the fingerprint reader, if success it will display:,
Fingerprint register
ID
1
Mode
finger
Success
Del F, Del C: Delete fingerprint, card for the registered users. Press ▲/▼ choose “Del F” or “Del
C”, press OK,
DELETE
Delete now?
Yes
No
Press OK to delete, and ESE to cancel. The interface will be back to “User Info” after pressing OK
to delete, and you will see “Del F” or “Del C” changed to Del F Del C.
Role: Press ▼ choose this column to change role of users which were registered.
Door Right: Press ▼choose this one to edit door right.
Creat: It’s the creat time to edit current edited users.
End Time: It’s the validity of users’ information, it sets which time the users’ information is valid, go
beyond this time the information is invalid. The invalid information can’t operate the device. If no
validity time, the users’ information is valid forever.
Press ▼to choose “End Time”, then press * you will see “Enable” is ticked
11
BIOSTREAM User’s Manual
Y
End Time
M
D
Enable
At this time you can set the valid time, press ▲ to set valid year, month and data, press number
key is ok, and then press OK to save.
4.3 View User
In view user you can view User ID, Name, Type, FP, card, PW and so on. Press ▼ in the User
Manager interface to choose View User, press OK, after loading data enter into the View User
interface:
VIEW USER
UserId
1/2
Name
000001
Page Up
Type
User
Page Down
FP
1
Card
PW
0004300046
Up
Down
****
Find
User Id: It’s the number of user, have 6 digit number.
Name: It’s users’ name. Users’ name have to register in software, if users’ name are registered in
software and download successfully, then you can view the name in this device, if not, then you
can’t see.
Type: The users’ registration type, it has two types: user and admin.
FP: It displays fingerprint templates which users register. One user can register at most 10
fingerprints. If the registered user registered 2 fingerprints, it will display 2 in FP; if no registered
fingerprint, then no display.
Card: It displays the card No. which is registered. If user register card No. is 0004300046, then it
will display 0004300046, if no registered card, then no display.
PW: It displays**** if users set password, no password then no display.
In the View User interface, press ▲/▼ to choose “Page Up” or “Page Down”, press OK to switch
pages; choose “Up” or “Down” then you can see the last or next user information, the background
of choosen user information will changed to black; through find way you can find quickly which you
want to view user. Press ▼ choose “Find”, press OK, it will display:
12
BIOSTREAM User’s Manual
Input User Id
Please input User Id
ok
Cancel
Input the user Id that you want to view, the you can view all information about the user:
User Info
5
ID
Name
******
0004300046
PW
Card
Fingerprint
1 template
User
Role
Door Right 0
2009-6-7 18:10:10
Creat
End
ok
Press OK or ESC back to the User Info interface.
4.4 Del User
Choose Del User in the User Manager interface, press OK then you will see:
Del User
Please input User Id!
ok
Cancel
Input the user Id that you want to delete, press OK, and then it will display:
DELETE
Delete now?
Yes
No
Press OK to delete the user.
13
BIOSTREAM User’s Manual
4.5 Del All User
Press ▼to choose “Del All User”, press OK then you can delete all users in the device.
5. Communication
Press ▼in the menu interface to choose ”Communication”, press OK to enter into Net Set
interface:
Net Set
Device ID
001
IP
192
Subnet
255
port
5005
password
1234
baud rate
115200
ok
168
255
001
255
033
000
Cancel
Device ID: It’s the device No., it’s in between 1-255.
IP: It’s the IP of fingerprint time attendance access controller and computer communication, it’s
default is 192.168.001.033, you can changed it according to your requirement.
Subnet: Default subnet is 255.255.255.000, and can be changed.
Port: It’s the port No. which is communicate with computer, default value is 5005, and can be
changed
Password: The password for communication between fingerprint time attendance access
controller and computer, default is 1234, can be changed.
Baud rate: Communicating with computer, has five choices: 9600、19200、38400、57600、115200,
press * to choose.
Press OK to save after setting, press ESE to cancel and back the menu interface.
6. USB Disk
When you need U disk to export, input the U disk to USB slot, choose USB Disk in menu
interface, press OK then enter into USB interface. You can import user, export all users, import
fingerprint, export fingerprint, export new record, export new log, export all log, import door
configuration, export door configuration and do on in this interface, as following:
14
BIOSTREAM User’s Manual
USB
Imp user
Exp all record
Exp user
Exp new log
Imp fingerprint
Exp all log
Exp fingerprint
Imp door Conf
Exp new record
Exp door Conf
Imp user: You should copy the USER.BAK to U disk, insert the U disk to device’s USB slot, enter
into USB manager, choose Imp user, press OK, upload users’ information saved in U disk to
fingerprint device.
Exp user: Insert U disk to USB slot, enter into USB manager, press ▼choose Exp user, press OK
to download users’ information. After finishing, press ESC back to menu interface, take out the U
disk, the USER.BAK will be saved in U disk.(Note: If operate successfully it will prompt export
successfully, if fail, please check whether insert U disk).
Imp fingerprint: Insert U disk to USB slot, enter into USB manager, press ▼to choose Imp
fingerprint, press OK, upload the users’ fingerprint saved in U disk to fingerprint attendance.
Exp fingerprint: Insert U disk to USB slot, enter into USB manager, press OK, download the
fingerprint saved in fingerprint attendance to U disk. After it’s done, press ESC back to menu
interface, take out U disk, the USERF.BAK will be saved in U disk.
Exp new record: Insert U disk to USB slot, enter into USB manager, choose Exp new record,
press OK to download new record. After it’s done, press ESC back to menu interface, take out U
disk, NAR. BAK(new record of attendance and access) will be saved in U disk.
Exp all record: Insert U disk to USB slot, enter into USB manager, choose Exp all record, press
OK to download all record of fingerprint attendance. After it’s done, press ESC back to menu
interface, take out U disk, AAR. BAK (all record of attendance and access) will be saved in U disk.
Exp new log: Insert U disk to USB slot, enter into USB manager, choose Exp new log, press OK
to download new log of fingerprint attendance. After it’s done, press ESC back to menu interface,
take out U disk, NMR. BAK will be saved in U disk.
Exp all log: Insert U disk to USB slot, enter into USB manager, choose Exp all log, press OK to
download all log of fingerprint attendance. After it’s done, press ESC back to menu interface, take
out U disk, AMR. BAK will be saved in U disk.
Imp door conf: First you should copy DOOR.BAK to U disk, insert U disk to USB slot, enter into
USB manager, choose Imp door conf, upload door configuration information saved in U disk to
fingerprint attendance.
Exp door conf: Insert U disk to USB slot, enter into USB manager, choose Exp door conf, press
OK to download the door configuration information of fingerprint attendance. After it’s done, press
ESC back to menu interface, take out U disk, DOOR. bAK will be saved in U disk.
15
BIOSTREAM User’s Manual
7. Access Control
Access Control is to set access time period and level for users. BIOSTREAM offers 15 levels, each
level can set from Monday to Sunday and 5 special days. Each day includes four periods, that is
period 1, period 2, period 3 and period 4. Each period is the valid period of 24 hours in each day.
According to 24 hours each period can be exactly to minutes. If the end time is the begin
time(00:00-00:00) it means forbid whole day, if the end time is above the begin time (00:00-23:
59), it means it’s valid in this time. Valid period for access: access whole day(00:00-23:59) or the
end time in period is above the begin time. Users can set each period according to actual need.
For example: you can set Saturday and Sunday can’t access, work time from Monday to Friday
can access. Let’s take set level 1 as a example, other levels operation is the same with level 1.
Operation steps as following:
Choose Door Right in the menu interface, press OK and enter into the Door Manage interface, it
will display 15 levels:
Door Manage
Level 1
Level2
Level3
Level4
Level5
Level6
Level7
Level8
Level9
Level10
Level11
Level12
Level13
Level14
Level15
Press Level 1 then press OK enter into Door Level 1 setting interface:
Door Level 1
Monday
Tuesday
Wednesday
Thurday
Friday
Saturday
Sunday
Spday1
Spday2
Spday3
Spday4
Spday5
Choose Monday, press OK enter into Monday period set interface:
16
BIOSTREAM User’s Manual
Door Level 1
Monday period set
Period 2
H 00 M TO
00 H 00 M TO
00
Period 3
00
00
Period 1
Period 4
00
00
H 00 M TO
00 H 00 M TO
ok
00
H 00 M
H 00 M
H 00 M
H 00 M
Cancel
Pressing the No. key to input time, delete it with *if input wrongly, press OK to save it after
setting, if set successfully it will prompt:
√
Success
Special day setting. The special day setting has “Date” setting, but Monday setting not.
Choose Spday1, press OK enter into Spday setting interface. Input the date of special day in
“Date”, other period setting is the same with week setting.
8 System
System set includes time set, system set and record set. Choose System in menu interface
press OK to enter into system set interface:
System Set
Time set
System set
Record Set
17
BIOSTREAM User’s Manual
8.1 Time set
Set the current date and time displayed in fingerprint device screen. Chose time set, press OK
enter into set time interface:
System Data Set
Date: 2009 Y
Time: 18 H
06 M
10 M
ok
07 D
10 S
Cancel
Input current date in date column, input the current time in time column, press * to change the
wrong time which is input. Press OK then save it.
8.2 System set
Choose system set, press OK enter into system parameter set interface:
System Param Set
Langue
Chinese
Desk Top
Clock
Voice
Yes
Auto off
No
Auto Exit Time 000
000
Dup confirm
Beep
No
Auto off time 000
S Lock Time 000
M
S
S
ok
Cancel
Langue: Set the display langue in fingerprint time attendance. You can choose Chinese or English.
If you choose Chinese it will display Chinese, press *to choose Chinese or English.
Desk Top: You can choose picture or clock for attendance desk. Press * to choose picture or
clock.
Voice: You can choose voice prompt or no voice prompt. Press * to choose voice “Yes” or “No”.
“Yes” is have voice prompt in attendance, “No” is no voice.
Beep: You can choose open or close beep. Press * to choose “Yes” or “No, choose “Yes”, there
will be a beep in device, choose “No” then no voice.
Auto off: Close fingerprint attendance in designated time. Press * to choose auto off” Yes” or
“No” set.
Auto off time: The auto of time is between 1-255 minutes, input “0” then no auto off time function.
Auto Exit Time: The time is between 1-255 seconds. For example: If you set time is 5 seconds,
after staying 5 seconds in a interface the attendance will be back to main menu. If the set time is 0,
then it will not auto back to menu interface but stay at the operation interface always, and need
manually operate back to menu interface.
18
BIOSTREAM User’s Manual
Lock time: It’s the time length that after verify fingerprint, the unit is second, and value range is
1-255; for example if the lock time is “0”, then the fingerprint attendance just to be used for
attendance.
Dup Confirm: In duplicate time, though users sign in many times just keep one record.
Press OK after all parameter set well, then it will display:
√
Success
8.3 Record Set
Choose record set, press OK and enter into record set interface:
Record Set
Record Alarm
80000
Log Alarm
999
ok
Cancel
The most record template of fingerprint attendance is 80000,1,000 records per day. For
example: The record alarm is set 75000 template, then when the records in fingerprint
attendance is 75000, the fingerprint attendance will alarm, at this time you have to collect data
from fingerprint attendance as soon as possible.
9 Record
Record includes view record, find record and clear record. Choose Record in menu interface,
press OK enter into record manage interface, as following:
Record Manage
View Record
Find Record
Clear Record
19
BIOSTREAM User’s Manual
9.1 View Record
View Record records users’ detail information of attendance and access in fingerprint attendance.
It can view ID, User Id, name, time and mode. Choose view record, press OK, it will display data
loading, after it finish, it will enter into the records view interface:
Records View
ID
UserId
Name
Time
Mode
000001
000001
09/0607 18:10
F
000002
000001
09/06/08 08:30
C
000003
000006
09/06/08 08:30
PW
Page Up
Page Down
1/2
ID: It’s sequence number, listed in order by time. The earliest record is 000001, and so on.
User Id: User’ s ID.
Name: User’s name. The name can be registered in software, after that it will be displayed in
fingerprint attendance.
Time: User’s attendance time in fingerprint attendance.
Mode: User’s attendance mode.
Press ▲/▼ to choose next page, press OK to view next page. Press OK to view previous page.
9.2 Find record
Through Find record you can find user’s attendance record quickly. Choose find record, press OK
and enter into the Input User Id interface:
Input User Id
Please input User Id!
ok
Cancel
Input the User Id that you want to find, press OK, after data is loaded, it will transfer to user’s
record interface.
20
BIOSTREAM User’s Manual
9.3 Clear Record
Choose Clear Record, press OK and enter into DELETE interface:
DELETE
Delete now?
Yes
No
Press OK if you make sure to delete, press ESE to cancel delete record.
10.Log
Log keeps all operation in fingerprint attendance. Choose log in menu interface, press OK and
enter into Log Manager interface:
Log Manager
ID
Admin
0001
999999
Log
0002
999999
New
000002
09/06/04 14:45
0003
999999
New
000003
09/06/04 14:47
0004
999999
New
000004
09/06/04 14:50
0005
000001
New
0006
000001
Delete
000002
09/06/04 14:55
0007
000001
New
000006
09/06/04 14:56
0008
000001
Update
000004
09/06/04 14:57
Page Up
Type
Page Down
Content
Time
09/06/04 14:40
09/06/04 14:52
Find
Clear
1/2
ID:Log’s sequence number, listed by time order.
Admin:Administrator Id operating in fingerprint attendance, if no administrator set in
attendance, then it will display 999999 in admin。
Type: Administrator operating mode in attendance.
Content: The user’s ID that administrator operates. When administrator verify in attendance
and enter into attendance interface to operate, the type is “log”, and content is blank.
Time: The time that administrator is operating in attendance.
Page UP, Page Down: Press to choose “Page Up” “Page Down”, and then press OK to switch
between page up and down.
21
BIOSTREAM User’s Manual
Input Admin ID
Please input admin ID!
ok
Cancel
Input the Admin Id that you want to find, press OK, it will display the log record that admin
operates in the attendance.
For example: Input Admin Id 000008, press OK, it will display 000008 admin Id’s operation log.
The Id is 000008 admin’s log record sequence number that is operated in the fingerprint
attendance, but not all admins.
Delete: Choose delete you will delete all logs. Choose delete press OK it will show the
following interface:
DELETE
Delete now?
Yes
No
Press Ok to delete log. Through find way you can view an admin’s operation log, choose delete
you can just delete an admin’s log.
11. Information
You can view all information saved in attendance in information, including users, records and log.
Choose system in menu interface, and then press Ok enter into the system info interface:
System info
Users
5
Records
7
Log
10
ESC
At this way you can view users, records and log saved in attendance. Press OK back to menu
interface.
22
BIOSTREAM User’s Manual
12 Maintenance
12.1 Clean
Sometimes, lianr, keyboard and display window should be cleaned. Because of different external
environment, we can’t give you a exact clean time, but maybe the following guide will be useful for
you:
Picture 10-1 Maintenance Introduction
Item
Keyboard and
display window
Lianr
Clean
It they are to dirty to see clearly, then
need cleaned. The following introduction
for your reference.
Don’t clean too much, lens can work
better in oil environment.
If lens is covered or affect verify then
need clear. Please refer to the following
introduction.
12.2 Clean keyboard and LCD Screen
In the shutdown state, use wet wipes or other neutral cleaning detergent to clean keyboard
and LCD screen, and then dry them.
12.3 Clean Lianr
Clean lianr, please follow the following advice:
(1) If dusty or gravel, blow up the dirt on lens.
(2) Using self-adhesive plasters to clean the display window.
Warning: Don’t use water and other cleaner to clean, it maybe damage the lens.
(3) Using fine without flocky cloth to clean. Be careful, don’t scratch the lens. If there is flocky on
lens, blow it up after the lens dried.
Chinatek Inc.
Room102,Bld2,Xincun Road1759,Putuo District, Shanghai City,P.R.China 200333
Emal: [email protected]
Tel: 86-21-6260-7986
Fax: 86-21-6260-7928
23