1
leveraging open source
for web services
development
Published on TheServerSide.com
June 24th, 2003
originally published on
hp dev resource central
(devresource.hp.com)
Chris Peltz and Claire Rogers
Hewlett Packard Company
May 2003
©2003 Hewlett-Packard Company
INTRODUCTION................................................................................................................................................. 3
SELECTING A LINUX DISTRIBUTION ......................................................................................................... 3
INSTALLING AN OPEN SOURCE DATABASE............................................................................................. 4
SELECTING A JAVA ENVIRONMENT .......................................................................................................... 6
DEVELOPING THE JAVA COMPONENTS ................................................................................................... 6
CONFIGURING THE WEB SERVICES PLATFORM ................................................................................. 10
INSTALLING THE J2EE WEB CONTAINER............................................................................................................. 10
INSTALLING THE WEB SERVICES CONTAINER ...................................................................................................... 10
DEVELOPING THE WEB SERVICE.............................................................................................................. 12
CREATING THE WEB SERVICES INTERFACE.......................................................................................................... 12
GENERATING THE SERVER-SIDE BINDINGS .......................................................................................................... 13
PACKAGING AND DEPLOYING THE SERVICE ........................................................................................................ 14
BUILDING THE APPLICATION WITH ANT............................................................................................... 15
CONFIGURING THE BUILD ENVIRONMENT ........................................................................................................... 15
CREATING THE BUILD SCRIPT ............................................................................................................................. 16
RUNNING THE ANT BUILD SCRIPT ....................................................................................................................... 16
TESTING THE WEB SERVICE....................................................................................................................... 18
INVOKING THE SERVICE ...................................................................................................................................... 18
MONITORING THE SERVICE ................................................................................................................................. 18
TESTING THE SERVICE ........................................................................................................................................ 19
CONCLUSION.................................................................................................................................................... 22
REFERENCES.................................................................................................................................................... 22
©2003 H EWLETT -P ACK ARD C OMP ANY
2
introduction
Over the past year, web services have been positioned as a key enabler to application integration and
B2B integration. Companies such as Amazon.com and Nordstrom’s have already deployed useful web
services. Many software development vendors have made large investments in supporting the web
services development process. However, for many companies just beginning to investigate the value of
web services, the cost required to get started might pose a huge barrier. How then can development
shops start to explore this new and emerging technology?
If cost is an issue during the investigation stage, high-priced development tools may not be an option,
and teams may often have to look to open source to get started. This paper takes an in-depth look at
the tools that can be used to get started on web services development. It follows a common scenario
for taking an existing software asset written in Java, which is then exposed with a web service interface.
Java was chosen because of the wide variety of open source tools available that supports the creation
of web services from existing Java components.
The reader will be led through the entire development lifecycle, including the development, deploying,
and testing of the web services and related Java components. The entire application described here
was developed, deployed, and tested on an HP laptop running the Debian Linux operating system. Preconfiguration included installation of the MySQL Open Source database and the BEA JRockit Linux JVM.
The Eclipse environment was used in the creation of the Java components, while Apache Axis and
Tomcat were used to develop the web service. Apache Ant and Eclipse were then used to deploy the
web service, and PushToTest TestMaker was used for testing it.
This paper is primarily intended for developers exploring development of web services using open
source tools and platforms. It assumes the reader has some basic knowledge of Java web services and
Linux. The overall objective is that readers will gain valuable knowledge in getting started with web
services in a cost-effective manner. Additionally, this paper points out various best practices learned
during the development exercise.
selecting a Linux distribution
In today’s economy, many companies are looking for ways to cut costs by using Linux as an alternative
to a commercial operating system. Linux is a UNIX-based operating system that has inherited the same
capabilities as UNIX. Developed under the GNU General Public License, the source code for Linux is
freely available to use, distribute and modify. However, the recent popularity of Linux may not be
because of the low cost but because Linux is a new way of developing different types of applications.
The Internet capabilities of Linux are diverse, thoroughly tested, and tightly integrated into the operating
system. Therefore, it makes sense that Linux is being considered for web services development.
While there are many flavors of Linux, the top three Linux distributions are RedHat, SuSE, and Debian. If
you are looking for a distribution that closes the gap between Unix and Windows and you are a novice
Linux developer, RedHat is a good choice. SuSE Linux provides a desktop-like operating system that can
also be used as a high-powered server. It is a good choice for existing Windows users. Debian Linux is the
most vendor-neutral Linux distribution, managed by a community of developers rather than a
company. Debian is typically the distribution used by well-seasoned Linux developers.
Debian Linux was chosen for this example for several reasons [MCC]. Debian has a strict open-sourceonly policy, and does not contain any license-restricted code or utilities. It has a vigorous quality
©2003 H EWLETT -P ACK ARD C OMP ANY
3
program, and avoids the types of issues that have recently plagued certain commercial distributions.
The ability to port applications developed using Debian to other Linux platforms and to non-Linux
versions of Unix is potentially made easier. Finally, Debian has a very easy to use interface for installing
and updating software packages. This is an important consideration if you are not sure what packages
have to be installed and where they go on the system. Debian simplifies this by automatically identifying
dependencies and installing them with only a few clicks.
We found Debian operates very much like HP-UX, other than installation and packaging requirements.
We used most of the same Unix commands while working within the shell. The graphical user interface,
GNOME, closely resembles Windows. The GNOME interface provides a nice environment to navigate,
open shells and run Internet browsers.
There were some key learnings from the installation:
1.
During installation we learned a lot about how software is packaged on Linux. There are RedHat
packages (RPM) and Debian (DEB) packages. RPMs can be loaded with the “rpm” tool, and
Debian packages are loaded with the “dpkg” tool.
2.
In addition to using these tools, we also gained experience with the aptitude tool. This is an
interface that lets you view installed and uninstalled packages on the machine. From the
interface, you can quickly search for new packages and then automatically install a selected
package and all the dependencies. The list of tools presented in aptitude is maintained in a
repository. For example, you can configure aptitude to pull from HP’s Programmer’s Toolkit (PTK)
on Progeny (http://ptk.progeny.com ), which provides a list of tools for doing application
development.
Overall, Linux provides a set of point tools that can be installed onto the machine. It doesn’t provide a
“single” development platform in that you have the flexibility to pick and choose which products to
install. The downside to this is that developers have to do a lot of this work themselves. The good news is
that many Linux distributions provide robust tools to assist in the installation process.
installing an open source database
The demo that we built returned weather forecasts for a specified zip code. While there are many web
sites available for retrieving weather, we wanted to deliver this information as a web service using SOAP.
To develop this service, we needed a data source that could manage the forecast information. We
decided to model the forecast information in an SQL database, which could then be retrieved from a
Java application using JDBC. The next step was to select an appropriate database, and then install and
configure it for this project.
The two most popular open source databases on the market today are MySQL and PostgreSQL [PAV].
PostgreSQL is considered a more robust database engine when it comes to support for database
features like stored procedures and triggers. On the other hand, MySQL was designed from the
beginning to maximize performance for web applications at the expense of not delivering every DBMS
feature [MYS]. Since performance was a concern for us, and we did not require use of some of the
advanced database features, we selected MySQL for this example. For this development, we wanted
something that was simple to install and use so that we could quickly move into the development of the
Java application.
Our first step was downloading the MySQL package. There were two types of Linux packages that are
available for the latest production release of MySQL 4.0: a TAR.GZ compressed version and an RPM
RedHat packaged version. We wanted to be able to download and install the database without
©2003 H EWLETT -P ACK ARD C OMP ANY
4
having to worry about doing any configuration steps manually. With the TAR.GZ option, we would have
had to add the appropriate entry to INIT.D to run the database at startup. RPM files can automatically
start up the database and place the appropriate entries in INIT.D.
Since we were using Debian, we were concerned with using an RPM package type. We discovered
that there are two mechanisms within Debian to install RPM packages. You can install the RPM directly
using the rpm tool, or you can use the alien tool to convert the RPM package to a Debian package.
Because of some required dependencies
on the RPM files, we were not successful at installing or converting the RPM files that we downloaded
from the www.mysql.com website.
We discovered that the main Debian website (http://www.debian.org/) provided Debian packages for
MySQL. However, the MySQL version available on this site was 3.23.49, not the 4.0 production release
available through MySQL.com. We decided to go with the 3.23.49 version because we felt more
comfortable with the fact that it had been tested for Debian. The web page for Debian MySQL
provided a list of dependencies required for the MySQL server. For the laptop we were using, we had to
install mysql-common, libmysqlclient10, libdb-mysql-perl, and mysql-client. After completing the install of
mysql-server, the system automatically started the mysqld and placed the appropriate startup
information in INIT.D. In addition to installing the server, we also downloaded MySQL Connector/J 3.0, a
Type-4 JDBC driver for connecting Java applications to the MySQL database.
After installation, the first step was to create the required database tables for the weather forecast
application. We designed two tables, one to maintain zip code information and another to hold the
weather forecasts. We created both tables under a “weatherdb” database, and then loaded the
tables with sample data. We also created a new user called “hpuser” with password “hppwd” that had
permissions to query from any table under the weatherdb database.
At this point, the MySQL database was fully installed, configured, and loaded. The final step was to
perform some simple tests using the mysql command to test database log on. We noticed during our
testing that when we specified 127.0.0.1 or the actual IP address, it failed to connect. After working on
this, we learned that the “localhost” reference uses local UNIX sockets, while an IP address like 127.0.0.1
uses TCP/IP connections. In looking over the MySQL configuration, we discovered that the database
was configured with the option skip-networking turned on. Disabling this fixed our problem in
connecting to the database and allowed us to make a connection through a remote JDBC call.
The following were some of our key learnings from using open source databases on the project:
1.
MySQL is a very stable relational database for building web-based applications. It was very
easy to install, configure, and use. Other than the change required in turning off the “skipnetworking” option, the database worked out of the box for our application.
2.
There are many different packaging formats for applications (ZIP, TAR, RPM, TAR). Not every
software package is readily available for every Linux distribution, and in some cases, only older
versions of a given package might be available. Choice of package type can impact ease of
installation and configuration. One should carefully consider these installation needs when
evaluating and selecting a Linux distribution.
©2003 H EWLETT -P ACK ARD C OMP ANY
5
selecting a Java environment
One of the first steps required in doing the development is to select an appropriate Linux Java
Development Kit (JDK). The JDK was required to run a number of components in this example, including
Eclipse, Apache Axis, and the application itself. There are a number of JDKs currently available for Linux.
The most popular ones on the market today are the J2SE SDK from Sun, the Blackdown
(www.blackdown.org) JDK, and BEA WebLogic JRockit. The Blackdown JDK is developed by
Blackdown.org, a worldwide community of developers dedicated to the development of Java on the
Linux platform. The project is based on the J2SE source code that is licensed from Sun. The JRockit JVM
was originally developed by Appeal, which was later acquired by BEA.
The JRockit JVM was chosen for this example for performance reasons. JRockit was designed to deliver
superior server-side performance compared to other JVMs. JRockit accomplishes this improved
performance through its threading model [BEA]. JRockit uses an MxN threading model, which uses N
process threads to run M Java threads. This is compared to other JVM implementations that use either a
“green threads” or “native threads” approach. The “thin threads” model used by JRockit has been
shown to take up less memory, in addition to reducing the amount of context switching required by the
JVM. The end result is higher scalability for thread-intensive applications. A number of benchmarks have
shown the performance that can be delivered with JRockit:
The Volano Report [VOL] showed that JRockit could process 2036 messages per
second as compared to 1496 for the Sun VM and 1162 for Blackdown. The benchmark
also showed that JRockit could achieve over 6000 connections per second, compared
to 410 for the Sun VM.
Ammai’s JVM Performance Report [AMM] compared JRockit with the Sun JVM, both
running the JBoss application server on a Windows XP system. For the number of
connections, JRockit performed 89% better than the Sun HotSpot Server JVM. It also
performed 76% better for the number of requests that could be processed.
We downloaded JRockit directly from the BEA web site. Both 32-bit and 64-bit Linux versions are
available for the JRockit 8.1 SDK. After downloading the 32-bit version installation package, the JDK was
installed into /opt/bea and the PATH was updated to include /opt/bea/jrockit81_141_02/bin so that the
Java tools could be located.
From this part of the exercise, we learned that there are a number of Java implementations to choose
from for Linux development. Most of them provide an adequate solution for doing Java development.
The key factors are determining which JDK provides (a) sufficient performance depending on the type
of application being developed, and (b) JVM stability while the application is running.
developing the Java componen ts
The first step in the development was the creation of the Java components. Java programs can be
developed using a text editor such as VI or EMACS. However, aniIntegrated development environment
(IDE) is often useful because it lets you execute many common associated tasks (like compiling and
running), and provides many features like debugging and organizing projects, as well as wizards for
creating certain Java components.
©2003 H EWLETT -P ACK ARD C OMP ANY
6
Linux Java developers have several choices when considering IDEs for creating Java applications. The
most popular open source IDEs are NetBeans
( http://www.netbeans.org/ ) and Eclipse
(
http://www.eclipse.org/ ).
NetBeans is an open source, cross-platform IDE written in Java. Currently it supports
development in Java, but you can add support for other languages. The source code
for NetBeans is available under the Sun Public License, an open source license very
similar to the Mozilla Public License.
Eclipse is an open, extensible IDE. It is extensible in that it is a foundation for constructing
and running integrated software development tools. Source code access and use is
controlled through the Common Public License, which allows individuals to create
derivative works with worldwide re-distribution rights that are royalty free [OBJ].
The main difference between Eclipse and NetBeans is that Eclipse is based on the Standard Widget
Toolkit (SWT) and NetBeans is Swing-based. There is a lot of debate in the industry over the two
approaches. Swing is considered more “cross-platform”, while SWT is considered by some to be faster
and more appealing from a GUI standpoint because the framework uses some of the underlying
operating system graphics capabilities.
Eclipse’s strength lies in its ability to easily develop and integrate third-party tools into the development
environment by the use of plug-ins. While Java is the main development focus, there are tools available
for doing C++ development and web services development. This open framework provides a featurerich development environment that allows the developer to efficiently create tools that integrate
seamlessly into the Eclipse Platform1.
We downloaded Eclipse from the Eclipse (www.eclipse.org) download site. We selected the Linux
(x86/GTK 2) version. After downloading the install package, we unzipped the package under the /opt
directory. We then set up the PATH environment variable to include the eclipse bin directory. At this
point, we were ready to run Eclipse via the eclipse command (/opt/eclipse/bin/eclipse).
For example, HP is developing a number of Eclipse plug-ins to support OpenCall, OpenView, and other
HP software initiatives. See devresource.hp.com for more information.
1
©2003 H EWLETT -P ACK ARD C OMP ANY
7
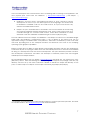
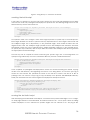
Figure 1. The Eclipse development environment
Eclipse looks very similar to most commercial IDEs, with features for syntax-highlighting editor,
incremental code compilation, a source-level debugger, a class navigator, a file/project manager, and
interfaces to standard source control systems. The biggest difference with Eclipse is the idea of
perspectives. Perspectives consist of views and editors for working with the different resources in your
application. For example, in the Java perspective, there is a source code editor, a package explorer, a
window that provides information about a particular object, as well as a console for standard output.
There are different perspectives for different languages and phases of the software development life
cycle.
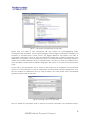
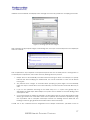
The first step in our development was to create a Java project for the application. We created the
project as a Java perspective so that the appropriate views and editors would be displayed for Java.
We then created our WebService class by using the Eclipse Java class wizard, which automatically
generates skeleton code for the class:
Figure 2. Adding a new class in Eclipse
Next we added the appropriate code to retrieve the forecast information. The application takes a
©2003 H EWLETT -P ACK ARD C OMP ANY
8
given zip code and looks up the weather forecast for that area. Following is a partial listing of the code
that did this.
public class Weather extends Object {public static Forecast getWeather(String zip)
throws Exception {
Connection conn = null;
Forecast f = null;
try {
Class.forName("com.mysql.jdbc.Driver").newInstance();
conn=DriverManager.getConnection("jdbc:mysql://localhost/weatherdb",
"hpuser","hppwd");
String select = “select * from zipcode where zipcode = ?”;
PreparedStatement stmt = conn.prepareStatement(select);
stmt.setString(1,zip);
ResultsSet rs = stmt.executeQuery();
rs.next();
String city = rs.getString("city");
String state = rs.getString("state");
String date = "2003-04-02";
select = "select * from forecast where zipcode = ? and dt = ?”;
stmt = conn.prepareStatement(select);
stmt.setString(1,zip);
stmt.setString(2,date);
rs = stmt.executeQuery();
rs.next();
f = new Forecast(zip,city,state,date, rs.getString("forecast"), rs.getByte("high"),
rs.getByte("low"), rs.getByte("precip") );
return f;
}
}
Next we created the Forecast class. We created this class to act as a Value Object [ALU] to hold the
forecast information so that the web service exposed wasn’t “generic” (i.e., just a single string). This
provided a cleaner and more usable business interface for the web services client.
public class Forecast {
public Forecast(String z, String c, String s, String d, String f, short h, short l,
byte p) {
zip = z;
city = c;
state = s;
date = d;
forecast = f;
hi = h;
low = l;
precip = p;
}
}
After building and running the application, there were several key learnings from this experience:
1.
We encountered an error because we had not set up the Eclipse environment to use the
MySQL JDBC driver. To solve this problem, we added the mysql-connector.jar file into the
Libraries for the Java Build Path in the application project within Eclipse. Once the database
was set up, we were able to build and run a test of the application.
2.
We found Eclipse to be similar to other IDEs. Eclipse brought together all of the tools we needed
to be successful at developing the Java code. If you are doing web application development,
you can also take advantage of plug-ins for communicating with most application servers.
3.
While there are plug-ins available for Eclipse that worked, we also found some that didn’t work
©2003 H EWLETT -P ACK ARD C OMP ANY
9
with our application. The idea behind some of the plug-ins we found was to take them and
change them to fit our requirements.
Overall, Eclipse was a very simple tool to use for creating the Java application, with most of the same
features that are available in other commercial IDEs.
configuring the web services platform
This section explores the runtime environment required for executing the web services components. The
runtime environment consists of a J2EE web container and a web services container. For our example,
we used Jakarta Tomcat 4.0 for the J2EE web container and Apache Axis for the web services
container.
installing the J2EE web container
A J2EE container is an entity that provides life cycle management, security, deployment, and runtime
services to J2EE components. A J2EE web container is a specific type of container that manages JSP
and Servlet processing. There are a number of J2EE web containers available such as Resin, JBoss, and
Jetty, but we chose Tomcat because it is the default container for Apache Axis. In addition, Tomcat is a
widely used open source servlet engine and compares well with commercial grade J2EE web
containers. Benchmarks showed that the scalability of Tomcat was comparable to commercial Servlet
engines [GUI].
The first step in setting up the web services runtime environment was to install the latest version of
Tomcat version 4.1.24, which was downloaded from the Apache Tomcat website
(jakarta.apache.org/tomcat). We then used the TAR command to install the server under /opt/jakartatomcat. Once the installation was complete, we also had to configure the JAVA_HOME and
CATALINA_HOME environment variables for Tomcat. We then started Tomcat by running the startup.sh
script in the $CATALINA_HOME/bin directory. We verified that Tomcat was started successfully by
viewing http://localhost:8080 from a Mozilla web browser.
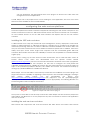
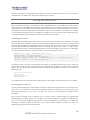
Within Eclipse, we were also able to start and stop Tomcat with the installation of a Tomcat plug-in. This
plug-in also offers the capability of registering a Tomcat process with the Eclipse debugger, creating a
Web
archive
(WAR)
project,
etc.
We
downloaded
this
plug-in
from
http://www.sysdeo.com/eclipse/tomcatPlugin.html and unzipped it into the /opt/eclipse/plugins
directory. We could then start Eclipse and configure Tomcat appropriately. The following illustrates the
Tomcat integration within the Eclipse environment:
Figure 3. Eclipse with the Tomcat plug-in
At this point we were able to start and stop Tomcat from within Eclipse. We also saved this perspective
within Eclipse. This allowed us to use this perspective any time we wanted to create a web application
that runs on Tomcat.
installing the web services container
Web services are components that send and receive XML data across the Internet. Web services
©2003 H EWLETT -P ACK ARD C OMP ANY
10
typically use SOAP to define the XML message format and WSDL to describe the web service interface.
The key benefits of SOAP include vendor, platform, and language independence. What often makes
web services development difficult is encoding and decoding data between the SOAP format and the
underlying business objects. While a SOAP processing engine can be written from scratch, it is better to
invest in a web services container that can manage the SOAP processing activities.
The web services container is the overall platform or container that the web services will execute in.
One of the important requirements for a web services container is that it has to provide a SOAP service
that manages the sending, routing, and receiving of SOAP messages. This usually involves receiving the
SOAP message and mapping it to some back-end components. The other requirement is that the
runtime environment has to be responsible for managing the life cycle of the web services running on
the platform. This might include things such as configuration and lifecycle management.
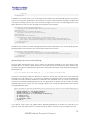
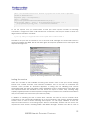
Several toolkits exist to expose existing software components as web services. One of the better known
offerings is Apache Axis, an open source implementation of SOAP [APA]. We downloaded Apache Axis
1.1 RC2 from http://www.apache.org/axis. We then installed Axis using the TAR command. Since Axis is
deployed as a J2EE web application2, we also had to copy the Axis webapps directory to the Tomcat
webapps directory. We restarted Tomcat and tested whether Axis had been deployed successfully by
viewing http://localhost:8080/axis in the browser:
Figure 4. Testing Apache Axis installation
On this page we validated that Apache Axis was properly configured under Tomcat. The key learnings
from setting up the web services platform were:
1.
We found in our research that Apache Axis is the only open source choice that offers a robust
web services platform. It was easy to configure, with Tomcat already configured as the default
J2EE container.
2.
It was easy to integrate the Eclipse IDE with the web services platform by using the Tomcat plugin for starting and stopping Tomcat from within the IDE.
A J2EE web application contains a variety of application components (servlets, JSPs, HTML) organized
in a specific directory structure for deployment purposes.
2
©2003 H EWLETT -P ACK ARD C OMP ANY
11
developing the web service
After installing and configuring the web services container, our next major step was to create the web
services components. This involved creating a web services interface, the associated server-side
bindings, and deploying the necessary components to Apache Axis. For this part of the exercise, we
used the command-line tools available from Apache Axis to generate these web services components.
We could have also used Eclipse to configure each of these commands as “external tools” so that they
could be run with one button click from the development environment. In the section to follow, we
show how we integrated Eclipse and Apache Ant as one solution to simplify this development effort.
creating the web services interface
The web services interface is modeled using Web Services Description Language (WSDL). A WSDL
document is essentially an XML file that describes the data, messages, and operations that are exposed
for a given web service. If you are familiar with CORBA or COM, you can think of WSDL as the IDL for
web services. Within the web services programming world, the WSDL is the key for interoperability
because any client can use this to quickly determine how to interact with a given service.
There are two approaches that can be taken for creating a WSDL interface. A WSDL can be created
from the ground up and then later mapped to the back-end components. Or, a developer can start
with their business logic and have the WSDL automatically created. For complex business services, we
usually recommend developers begin with the WSDL design first. For this simple scenario that involves
only one service request, we will use the automatic WSDL generation approach. Within Apache Axis,
this can be accomplished through the Java2WSDL utility:
$ java org.apache.axis.wsdl.Java2WSDL -o Weather.wsdl
-l"http://localhost:8080/axis/services/weather" -n urn:weather
-p"Weather" urn:weather weather.Weather
The above command specifies the output WSDL file, the service location URL, the target namespace
(urn:weather), package to namespace mappings, and the name of the Java class to use. In this case,
we wanted to generate the WSDL from the Weather class we developed. In our first attempt at running
this tool, we ran into a small problem in reading the Forecast class. Java2WSDL requires all dependent
classes to model a JavaBean, requiring each class to have a default constructor. Since Forecast.java
did not provide this, we had to make the necessary changes in the code. At that point, we were able
to generate a complete WSDL from the original Java components.
The Weather.wsdl file contains a set of data types, messages, operations, and SOAP bindings for the
web service. The following shows the XML complex type that was generated to represent the Forecast
information returned by the service:
<complexType name="Forecast">
<sequence>
<element name="zip" nillable="true" type="xsd:string"/>
<element name="city" nillable="true" type="xsd:string"/>
<element name="state" nillable="true" type="xsd:string"/>
<element name="date" nillable="true" type="xsd:string"/>
<element name="forecast" nillable="true" type="xsd:string"/>
<element name="hi" type="xsd:short"/>
<element name="low" type="xsd:short"/>
<element name="precip" type="xsd:byte"/>
©2003 H EWLETT -P ACK ARD C OMP ANY
12
</sequence>
</complexType>
In addition to the data types, a set of messages and operations are automatically created. Our service
only has one operation, getWeather. This operation is a basic request/response message, modeled with
one request message for the input and a second message for the output. The following portion of the
WSDL document shows how the messages and operations were defined:
<wsdl:message name="getWeatherResponse">
<wsdl:part name="getWeatherReturn" type="tns2:Forecast"/>
</wsdl:message>
<wsdl:message name="getWeatherRequest">
<wsdl:part name="in0" type="xsd:string"/>
</wsdl:message>
<wsdl:portType name="Weather">
<wsdl:operation name="getWeather" parameterOrder="in0">
<wsdl:input name="getWeatherRequest" message="impl:getWeatherRequest"/>
<wsdl:output name="getWeatherResponse" message="impl:getWeatherResponse"/>
</wsdl:operation>
</wsdl:portType>
The WSDL also contains the SOAP binding information and the definition of the service binding. These
bindings indicate the protocol to use and the URL location for the service:
<wsdl:service name="WeatherService">
<wsdl:port name="weather" binding="impl:weatherSoapBinding">
<wsdlsoap:address location="http://localhost:8080/axis/services/weather"/>
</wsdl:port>
</wsdl:service>
generating the server-side bindings
The next major development step was to create the server-side bindings for the web service. These
bindings allow us to map the WSDL interface to the back-end Java components. Within Apache Axis,
this is done through an implementation class and a deployment descriptor, both generated through the
WSDL2Java tool:
$ java org.apache.axis.wsdl.WSDL2Java -o . -s -p weather.ws Weather.wsdl
The above command specifies the directory to place the output files and tells Axis to emit server-side
bindings for the web service. The “-p” option then specifies the package name to use for the generated
Java files. The final parameter indicates the WSDL file that should be used. As a result of running this
command, a WeatherSoapBindingImpl.java file was generated. By default, this file contains an empty
implementation for the service. The only change required was to add the appropriate code to invoke
our original Weather class:
public weather.ws.Forecast getWeather(java.lang.String in) throws java.rmi.RemoteException
{
weather.Weather w = new weather.Weather();
weather.Forecast f = w.getWeather(in0);
weather.ws.Forecast f1 = new weather.ws.Forecast();
f1.setZip(f.zip);
f1.setCity(f.city);
f1.setState(f.state);
return f1;
}
In the above code, notice the original call to Weather.getWeather() to retrieve the forecast for the
given zip code. This method returns a weather.Forecast object. However, when the WSDL2Java tool
©2003 H EWLETT -P ACK ARD C OMP ANY
13
was run, it produced a serializable version of the original Forecast class. The code here simply copies
from the original Forecast object to the serializable version. We then compiled the generated source
files using javac.
packaging and deploying the service
Once done, we were ready to package the code and deploy it into the Apache Axis environment. To
package the service, we used the JAR utility to create a Java archive containing all of the classes
created. Since Apache Axis is a web application (webapp) under Tomcat, we copied this JAR file into
the appropriate lib directory (/opt/Jakarta-tomcat/webapps/axis/WEB-INF/lib). In addition to copying
over the Weather.jar file, we also had to copy over the mysql-connector.jar library because this was a
required dependency for our service.
The final step in the service creation process was to register the web service with Apache Axis. Axis
provides a deployment tool, AdminClient, to do this. The deployment descriptor specifies the service
being deployed, the operations being exposed, and the mapping to the back-end implementation
class. Here is a section of the deploy.wsdd that was generated for the Weather service from the
WSDL2Java run:
<service name="weather" provider="java:RPC" style="rpc" use="encoded">
<parameter name="wsdlTargetNamespace" value="urn:weather"/>
<parameter name="wsdlServiceElement" value="WeatherService"/>
<parameter name="wsdlServicePort" value="weather"/>
<parameter name="className" value="weather.ws.WeatherSoapBindingImpl"/>
<parameter name="wsdlPortType" value="Weather"/>
<operation name="getWeather" qname="operNS:getWeather"
xmlns:operNS="urn:weather" returnQName="getWeatherReturn"
returnType="rtns:Forecast" xmlns:rtns="http://weather" >
<parameter name="in0" type="tns:string"
xmlns:tns="http://www.w3.org/2001/XMLSchema"/>
</operation>
</service>
The following command was then executed to register this deployment descriptor with Axis:
java org.apache.axis.client.AdminClient weather/ws/deploy.wsdd
After running AdminClient with the deploy.wsdd file, we successfully deployed the weather service to
Axis. We then verified that the service was deployed by viewing the list of services in the browser:
Figure 5. Viewing the weather service
Some of the key learnings from the web services development process included:
1.
Existing application code is not necessarily 100% compatible with the available web services
tools. In our case, we were required to modify the Forecast class to model a JavaBean so that
Apache Axis could serialize it.
©2003 H EWLETT -P ACK ARD C OMP ANY
14
2.
While the available Apache Axis tools were not embedded in a robust development
environment, the command-line tools were sufficient.
3.
The hardest part of this step of the process was determining what components of the serverside implementation had to be modified. Manual coding was still required to connect the
server-side implementation code to our existing Java application.
building the application with An t
In the previous section, we walked through the various steps required to create, compile, package, and
deploy the web service. The approach taken was command-line driven, where each step was entered
by hand. This can be very time consuming, especially if the development team is continually rebuilding
their web services for testing purposes. This is where an automated build process can greatly enhance
developer productivity. When designing your build process, it’s important to introduce the build process
as early in the life cycle as possible. This enables the service to be available to the whole developer
community, including developers, testers, and system integrators. This concept of “continual
deployment”, where services are built early and often, follows the XP methodology.
configuring the build environment
One of the more popular open source build tools on the market today is Apache Ant. You can think of
Ant as a next-generation Make utility, with Ant based on Java and XML. Use of Java makes Ant more
portable across operating systems and platforms. Furthermore, because Ant scripts are written using
XML, it is much more component-based, enabling you to add new types of build targets in the build
environment [HAT].
Apache Ant can be used to assist in the generation of a number of application components, including
Java, J2EE, and web services components. In this section, we demonstrate how Apache Ant was used
to simplify the build process for the Weather service.
The first step was to download the Apache Ant tool from http://ant.apache.org. However, since we
were using Eclipse, we decided to take advantage of the built-in integration between Eclipse and Ant.
The integration allows you to take an Ant build file and run selected build targets. In addition to the
built-in integration, we used Planty (http://www.gebit.de), an Eclipse plug-in for Ant. Planty provides a
more robust editing environment for creating Ant build files, with features such as code completion on
the Ant build files:
©2003 H EWLETT -P ACK ARD C OMP ANY
15
Figure 6. Using Planty to create Ant build files
creating the build script
In this paper, we will focus on how Ant was used to create the Java server-side bindings from the WSDL
and how that code was packaged and deployed to Apache Axis. The following listing shows how the
WSDL2Java step can be executed in Ant:
<target name="wsdl2java" depends="java2wsdl" description="Create Java Bindings">
<axis-wsdl2java
output=”${proj.dir}”
serverside=”true”
url=”${proj.dir}/Weather.wsdl”>
</axis-wsdl2java>
</target>
Ant operates under a set of targets, where each target represents a specific step in the build process.
Each target describes the action to perform and any dependencies on other targets. Notice here that
the wsdl2java target has a dependency on the java2wsdl target, which builds the WSDL from the
original source code. The wsdl2java target specifies that the axis-wsdl2java task should be executed.
Axis already comes with a set of prebuilt tasks to simplify integration within Ant. In the example above,
we specify the output directory and the input WSDL file, and the axis-wsdl2java task will then generate
the appropriate server-side bindings.
The next step was to compile the service code using the <javac> tag in Ant. In the listing below, we
specify this tag, followed by the source, destination directory, and the CLASSPATH reference.
<target name="compilews" depends="wsdl2java" description="Compile Web Services">
<javac srcdir="${ws.dir}"
destdir=”${build.classes.dir}”
classpathref="axis.classpath">
</javac>
</target>
Once compiled, we packaged and deployed the service. This involved creating the JAR file, copying
the file to the Axis directory, and registering the service. In the listing below, we used the <jar> tag to
create the Java archive. We specified the name of the JAR file to create, and the list of files to
package. Then, we used the <copy> tag to copy the library to the Apache Axis WEB-INF/lib directory.
Finally, the axis-admin task was used to register the deployment descriptor with Axis.
<target name="deploy" depends="compilews" description="Deploy WS">
<jar destfile="${proj.dir}/Weather.jar">
<fileset dir="${proj.dir}/weather">
<include name="**/*.class"/>
</fileset>
</jar>
<copy file="${proj.dir}/Weather.jar" todir="${axis.web-inf}"/>
<axis-admin xmlfile=”${proj.dir}/weather/ws/deploy.wsdd”/>
</target>
running the Ant build script
After developing the build.xml file within Eclipse, we executed the specific build targets. To run a target,
we simply right-clicked on the build.xml file, and selected the Run Ant… menu option. When the dialog
window displayed, we then selected the specific targets that we wanted to run. The plug-in also
©2003 H EWLETT -P ACK ARD C OMP ANY
16
validates the Ant build file, and displays error messages if it found any problems in compiling the Ant file.
Figure 7. Running specific Ant targets
After checking the appropriate targets, and clicking Run, the output of the build process was displayed
within the console:
Figure 8. Results on running Ant
That completed the steps required to incorporate Apache Ant into the build process. Looking back on
our development experience, there were some key learnings from the process:
1.
Eclipse does not automatically save files before executing an action. For example, we quickly
learned that after modifying the build.xml file, we had to remember to save the file before
running Ant.
2.
Ant performs some “magic” in the build. When specifying a javac target, Ant automatically
builds not only the source files in the current directory, but all source files under that directory as
well.
3.
If you run into problems executing an Ant build script, the “-v” option can greatly help in
debugging the build script. Within Eclipse, this option can be added on the Main dialog panel
when you run Axis.
4.
On our first attempt at writing the build file, we discovered that the server side bindings would
always get rebuilt even if the WSDL hadn’t been updated. We resolved this problem by using
the <uptodate> task to compare timestamps between the bindings and the WSDL file. The
bindings would only get generated if the WSDL had a newer timestamp.
Overall, use of Ant, combined with the integration into the Eclipse environment, provided us with an
©2003 H EWLETT -P ACK ARD C OMP ANY
17
efficient mechanism to quickly build the various web services components. In the end, this can save
valuable time and effort in the web services development process.
testing the web service
When testing web services, it is important to have well-designed tests, especially if the service will be
distributed across organizational boundaries. The challenge with web services testing is that there is no
user interface to test. Unlike web-based applications that contain a presentation layer, web services
typically expose an XML request/response interface. Without a user interface, it is important to consider
an automated testing tool that can simplify the testing process. This section reviews approaches for
invoking, monitoring, and testing the Weather web service we developed.
invoking the service
After creating and deploying the web service, the next step was to contact the web service via a client
proxy. A client proxy is a piece of code that communicates directly with the web service, encapsulating
the SOAP processing logic and shielding the developer from having to write the low-level code directly.
Apache Axis provides the WSDL2Java utility for creating the client proxy code. A helper class,
WeatherServiceLocator, is automatically generated to aid in invoking the web service. The following is
the client code that had to be written to invoke the service using this proxy class:
WeatherService service = new WeatherServiceLocator();
Weather weather = service.getweather();
Forecast forecast = weather.getWeather(args[0]);
System.out.println(“Forecast for “ + forecast.getCity() + “,” + forecast.getState();
System.out.println(“ “ + forecast.getForecast());
…
We inserted code to bind to the getweather method in the WeatherServiceLocator class. Finally, we
communicated with the web service through the public method, getWeather, and got back a Forecast
object with the appropriate information. After compiling and running the client, we received the
following results:
Forecast for Loveland, CO
Partly Cloudy
High of 72, low of 36
%Precipitation: 0
This validated that the web service was running and we were able to communicate with it successfully.
monitoring the service
To help monitor web services, Axis provides the tcpmon utility class. tcpmon listens for connections on a
given port on the localhost, and forwards incoming messages to another port on another server. By
inserting itself between the two ports, tcpmon can show you all incoming and outgoing SOAP
messages.
Since tcpmon operates under a different port, we had to make a small change to the generated
WeatherServiceLocator.java class to use a different port number. While the Locator class hardcodes this
URL, it is a much better programming practice to move this definition to a property file. This allows the
developer to quickly change the location of the server without having to modify the code. The
following listing shows how this can be done:
©2003 H EWLETT -P ACK ARD C OMP ANY
18
public class WeatherServiceLocator extends org.apache.axis.client.Service implements
weather.ws.WeatherService {
…
Properties props = new Properties();
Class c = getClass();
props.load(c.getResourceAsStream(“WeatherService.prop”));
String weather_address = “http://” props.getProperty("soap_host") + “:” +
props.getProperty("soap_port") + “/axis/services/weather";
…
}
To use the tcpmon tool, you should select a local port which tcpmon monitors for incoming
connections, a target host where it will forward such connections, and the port number to which the
target machine should be "tunneled":
$ java -cp axis.jar org.apache.axis.utils.tcpmon 8081 localhost 8080 &
Port 8081 is the port that we wanted to use to send our SOAP messages. The actual web service is
running on localhost port 8080. We ran the client again, and tcpmon updated to show the request and
response messages sent:
Figure 9. Monitoring SOAP traffic with TCPMON
testing the service
There are a number of tools available for testing web services. Some of the open source offerings
include JUnit, Grinder, Anteater, and PushToTest TestMaker. One of the tools we evaluated was
Anteater, which provides an Ant-based approach to writing tests for validating web services
functionality [PRE]. Test scripts are written using a declarative syntax, in which actions to be taken and
their expected results are described. You can check the output in various ways, including string
equality, regular expressions or XPath expression testing. Since it is based on Ant, Anteater is extensible in
that you can define new tasks that fit your needs very easily.
In addition to emulating an HTTP or SOAP client, Anteater can also be used to emulate server
components to test a SOAP client application or to test asynchronous web services. Anteater embeds
Tomcat, which is used to receive incoming HTTP requests. You can apply validation on both the
response received and on an incoming request. With this functionality, Anteater can be used to test
asynchronous web services, including ebXML and BizTalk messages. Anteater can also be used to
©2003 H EWLETT -P ACK ARD C OMP ANY
19
quickly test web applications by deploying them on its internal servlet container.
While Anteater was evaluated, we selected PushToTest TestMaker (www.pushtotest.com) for our web
services testing tool. TestMaker is an open source tool that allows you to test the functionality, scalability
and performance of a web service. Through a graphical environment and scripting language, you can
test the functionality of a web service. For example, you can determine that the right SOAP message is
being sent to the web service. TestMaker scripts are written using Jython (www.jython.org ), an open
source implementation of the Python language integrated with the Java platform. Jython supports
variables, regular expressions, flow controls and multiple-file test agent script capabilities. TestMaker also
comes with the Test Object Oriented Library (TOOL), a library developed by PushToTest to simplify the
creation of web services tests. TOOL provides protocol handlers, datasource handlers and utility objects
to handle the communication with a web service using HTTP, HTTPS, SOAP or XML-RPC.
After downloading, installing, and configuring TestMaker, we developed a test script to communicate
with our web service. This simple test script contacted our web service 100 times, returning a response
from the service and the average response time achieved. TestMaker has a wizard for generating a
generic web services test script. We simply supplied the URL to the web service WSDL file and the test
script was created. The following is a screenshot of the TestMaker GUI showing the test script for our
Weather web service.
Figure 10. Creating test scripts in TestMaker
The first part of our script, shown below, configured both the SOAP protocol and the SOAP message to
send to the web service. The protocol contained the location of the service, consisting of the host,
service path, and port number. The SOAP body specified the service, method name, and the
parameters to pass. In this case, the zip code was passed as an argument to the getWeather service.
# define the location of the web service
protocol.setHost("localhost")
protocol.setPath("axis/servlet/AxisServlet")
protocol.setPort( 8081 )
# Send a request to the getWeather method in the weather web service
body.setTarget("weather")
body.setMethod("getWeather")
body.addParameter( "zip", String, "80538", None )
In our first run of the test script that was generated by TestMaker, we received the following exception
indicating the tool did not know how to read the SOAP response:
©2003 H EWLETT -P ACK ARD C OMP ANY
20
com.pushtotest.tool.ToolException: Error making SOAP RPC call:
No Deserializer found to deserialize a 'urn:ForeCast'
using encoding style 'http://schemas.xmlsoap.org/soap/encoding/'.
After further investigation, we realized we had to add additional logic to serialize the response that was
received. Serialization provides a means to map a component from one type to another. In our case,
we had to map from the XML schema type to a JavaBean representing the Forecast class. The following
code was added to handle this:
# Create a Bean Serializer
beanSer = BeanSerializer()
qName = QName("http://weather", "Forecast")
protocol.setMapTypes( Constants.NS_URI_SOAP_ENC, qName, Forecast, beanSer, beanSer
)
In the above code listing, the setMapTypes method is used to specify the mapping rule. The QName
variable indicates what XML schema type to use. In this case, we are looking for the Forecast type
defined within the “http://weather” namespace. The setMapTypes method then specifies that this XML
type should be mapped to our Forecast class, and further specifies that a basic BeanSerializer should be
used for the serialization. This can be done because the Forecast class was implemented as a
JavaBean.
Finally, we had to add the necessary code to contact the web service. We wanted to send the SOAP
request 100 times using a for loop. The following shows the code used to determine the average
response time after invoking the service 100 times:
totaltime = 0.0
for I in range(100):
response = protocol.connect()
totaltime += response.getTotalTime()
print “Avg. Response Time=”, totaltime/100, “ ms to complete.”
Before running the agent, we had to add the Weather.jar to the testmaker_home/testmaker/lib
directory and restart TestMaker. Successful calls to the weather web service appeared in the Output
window:
Figure 11. The results of the test run
©2003 H EWLETT -P ACK ARD C OMP ANY
21
That’s all we had to do to test our service using TestMaker. Some of our key learnings from testing the
web service included:
1.
The client proxy classes that are generated can greatly simplify the amount of code that has to
be written by a developer to communicate with an existing web service.
2.
We found tcpmon to be a very effective utility when trying to debug a web service. With the
monitor, you can see what SOAP message is being constructed. Especially in cases where you
get an exception or SOAP fault, you can determine whether the client properly constructed the
SOAP message.
3.
The use of complex data types can add a level of complexity to the development. We had to
get TestMaker to understand the complex data type that was returned from service and map it
to a JavaBean representation.
conclusion
This development experience illustrated the complete web services lifecycle, and presented some
open source tools for doing the development. There were a few technical hurdles that had to be
overcome to work in this new development paradigm. Nevertheless, we found these tools worked well
together and were a boost to our web services development productivity. In fact, we were quite
surprised by some of the integration we found between Eclipse, Tomcat, Apache Axis, and Ant. We also
found the process to locate, obtain, install, and use open source development tools straightforward.
Not only did these tools work “out of the box”, but the quality was sufficient for our development
purposes.
Development organizations need to quickly start using web services technology, but can’t always
afford to make significant early investments in tools that ultimately prove critical. However, the open
source model helps these groups by allowing them access to a low-cost solution for web services
development. We were able to demonstrate a complete development process for web services
leveraging only open source tools. This should go a long way to helping customers build, deploy, and
test production-quality web services in their environment.
About the Authors. Chris and Claire are senior software consultants in HP's Developer Resources
Organization (http://devresource.hp.com). They provide software consulting to customers on J2EE and
web services best practices. They can be contacted at [email protected] and [email protected],
respectively.
references
[ALU]
[AMM]
[BEA]
Alur, Deepak, J. Crupi, D. Marks. Core J2EE Patterns: Best Practices and Design Strategies.
Sun Microsystems Press, 2001.
Ammai. JVM Server Performance Comparison. Ammai.com
(http://www.ammai.com/modules.php?op=modload&name=Reviews
&file=index &req =showcontent&id=10), Mar 2003.
BEA Systems. BEA WebLogic JRockit–The Server JVM: Increasing Server-side Performance
and Manageability. BEA Dev2Dev, Aug 2002.
©2003 H EWLETT -P ACK ARD C OMP ANY
22
[GUI]
[HAT]
[APA]
[MCC]
[MYS]
[OBJ]
[PAV]
[PRE]
[VOL]
Guitard, Jeff. Jakarta Tomcat Performance Benchmark. TheServerSide
(http://www.theserverside.com/reviews/thread.jsp?thread_id=18243&article_count=32),
Mar 2003.
Hatcher, Erik, S. Loughran. Java Development With Ant. Manning Publications Company
(http://manning.com/antbook), Aug 2002.
Apache Software Foundation. Axis User’s Guide.
http://cvs.apache.org/viewcvs.cgi/~checkout~/xml-axis/java/docs/user-guide.html.
McCarty, Bill. Learning Debian Gnu/Linux. O’Reilly & Associates, Oct 1999.
MySQL AB. MySQL Benchmarks. MySQL.com
(http://www.mysql.com/information/benchmarks.html).
Object Technology International, Inc. Eclipse Platform Technical Overview. Eclipse.org
(http://www.eclipse.org/whitepapers/eclipse-overview.pdf), Feb 2003.
Pavlicek, Russell. A Database Query. InfoWorld
(http://www.infoworld.com/article/03/03/07/10osource_1.html?s=tc), Mar 2003.
Predescu, Ovidiu, J. Turner. Anteater User Manual. SourceForge (aft.sourceforge.net), Nov
2002.
Volano LLC. The Volano Report. Volano.com (www.volano.com/report) , Dec 2001.
©2003 H EWLETT -P ACK ARD C OMP ANY
23