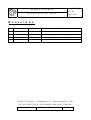
1
Studio Ferraris
Ax2000 System User Manual
Date: 08/07/2002
Rev: 002
Page: 1/78
Ax2000 System User Manual
Revision 002
July 08, 2002
S t u d i o F e r r a r i s – Via Borgonuovo 27 – 10040 Givoletto(To) – Italy
Tel:+39-011-9947752 Fax:+39-011-9948921 Mob:+39(0)335-8061568
Maurizio Ferraris
Ax2000SystemUserManual.doc
1/78
Studio Ferraris
Ax2000 System User Manual
Date: 08/07/2002
Rev: 002
Page: 2/78
S u m m a r y
SUMMARY....................................................................................................................................................................... 2
REVISIONS .................................................................................................................................................................... 12
ABSTRACT .................................................................................................................................................................... 13
REFERENCE DOCUMENTS....................................................................................................................................... 14
AX2000 SYSTEM OVERVIEW ................................................................................................................................... 15
CONVENTIONS USED IN THIS MANUAL......................................................................................................................... 16
SAFETY PROCEDURES ................................................................................................................................................... 16
TECHNICAL SUPPORT.................................................................................................................................................... 16
INSTALLATION ........................................................................................................................................................... 17
REQUIREMENTS ............................................................................................................................................................ 17
INSTALLATION .............................................................................................................................................................. 17
HOW TO REMOVE THE AX2000 SYSTEM ....................................................................................................................... 17
SYSTEM ARCHITECTURE ........................................................................................................................................ 18
SOFTWARE COMPONENTS ............................................................................................................................................. 18
AxCore .................................................................................................................................................................... 18
Plc subsystem .......................................................................................................................................................... 18
Ax2000Deal............................................................................................................................................................. 19
Ax2000DCom .......................................................................................................................................................... 19
SmallCompiler ........................................................................................................................................................ 19
LoadPlc ................................................................................................................................................................... 20
CreateMachine........................................................................................................................................................ 20
WinMotionTest ........................................................................................................................................................ 20
VIRTUAL HARDWARE RESOURCES ................................................................................................................................ 20
VARIABLES ................................................................................................................................................................... 22
Using predefined symbols ....................................................................................................................................... 23
Using user defined symbols..................................................................................................................................... 24
Using SetGroup....................................................................................................................................................... 24
MACHINE DIRECTORY .................................................................................................................................................. 24
S t u d i o F e r r a r i s – Via Borgonuovo 27 – 10040 Givoletto(To) – Italy
Tel:+39-011-9947752 Fax:+39-011-9948921 Mob:+39(0)335-8061568
Maurizio Ferraris
Ax2000SystemUserManual.doc
2/78
Studio Ferraris
Ax2000 System User Manual
Date: 08/07/2002
Rev: 002
Page: 3/78
HARDWARE.................................................................................................................................................................. 26
MODULES ..................................................................................................................................................................... 26
IntPci....................................................................................................................................................................... 26
IntAx........................................................................................................................................................................ 26
IntIn......................................................................................................................................................................... 26
IntOut ...................................................................................................................................................................... 26
IntKey...................................................................................................................................................................... 27
IntGrf ...................................................................................................................................................................... 27
Ax4 .......................................................................................................................................................................... 27
Ax2 .......................................................................................................................................................................... 27
CanOpen modules ................................................................................................................................................... 27
Multiple Serial ........................................................................................................................................................ 27
CONFIGURATION ....................................................................................................................................................... 28
PRE-CONFIGURATION.................................................................................................................................................... 28
AUTO-CONFIGURATION ................................................................................................................................................ 29
CONFIGURATION APPROVAL ......................................................................................................................................... 29
SET CONFIGURATION .................................................................................................................................................... 29
PARAMETER SETTING.................................................................................................................................................... 29
SYSTEM START ............................................................................................................................................................. 30
CONFIGURATION FILES ................................................................................................................................................. 30
AX2000CONFIG.XML .................................................................................................................................................... 31
ActiveSettings section.............................................................................................................................................. 31
Config section ......................................................................................................................................................... 31
Core section ............................................................................................................................................................ 31
DescriptionFiles section ......................................................................................................................................... 32
Extensions section ................................................................................................................................................... 33
Flags section ........................................................................................................................................................... 33
CORECONFIG.XML ........................................................................................................................................................ 33
General section ....................................................................................................................................................... 33
Board(x) sections .................................................................................................................................................... 34
Axis(x) sections ....................................................................................................................................................... 35
S t u d i o F e r r a r i s – Via Borgonuovo 27 – 10040 Givoletto(To) – Italy
Tel:+39-011-9947752 Fax:+39-011-9948921 Mob:+39(0)335-8061568
Maurizio Ferraris
Ax2000SystemUserManual.doc
3/78
Studio Ferraris
Ax2000 System User Manual
Date: 08/07/2002
Rev: 002
Page: 4/78
LANGUAGES.S.XML....................................................................................................................................................... 37
Languages main sections ........................................................................................................................................ 37
OTHER DESCRIPTION FILES ........................................................................................................................................... 37
AXCORE......................................................................................................................................................................... 38
COMMAND LINE FLAGS ................................................................................................................................................. 38
A or a ...................................................................................................................................................................... 38
C or c ...................................................................................................................................................................... 38
F or f ....................................................................................................................................................................... 38
L or l........................................................................................................................................................................ 38
N or n ...................................................................................................................................................................... 38
O or o ...................................................................................................................................................................... 39
P or p ...................................................................................................................................................................... 39
S or s ....................................................................................................................................................................... 39
T or t........................................................................................................................................................................ 39
X or x....................................................................................................................................................................... 39
PLC PROGRAMS.......................................................................................................................................................... 40
PLC default directory.............................................................................................................................................. 40
WRITING PLC PROGRAM ............................................................................................................................................... 40
The first PLC program............................................................................................................................................ 40
USING VARIABLES ........................................................................................................................................................ 41
USING TIMERS .............................................................................................................................................................. 42
USING STRINGS ............................................................................................................................................................. 42
USING FLOATING POINT ................................................................................................................................................ 42
I/O NATIVE FUNCTIONS ............................................................................................................................................... 42
RdInp....................................................................................................................................................................... 42
RdByte ..................................................................................................................................................................... 42
RdOut ...................................................................................................................................................................... 42
SetOut...................................................................................................................................................................... 42
ResOut..................................................................................................................................................................... 42
SetByte..................................................................................................................................................................... 43
RdOutByte ............................................................................................................................................................... 43
S t u d i o F e r r a r i s – Via Borgonuovo 27 – 10040 Givoletto(To) – Italy
Tel:+39-011-9947752 Fax:+39-011-9948921 Mob:+39(0)335-8061568
Maurizio Ferraris
Ax2000SystemUserManual.doc
4/78
Studio Ferraris
Ax2000 System User Manual
Date: 08/07/2002
Rev: 002
Page: 5/78
SetAnalogOut .......................................................................................................................................................... 43
VARIABLES AND TIMER NATIVE FUNCTIONS ................................................................................................................ 43
Var .......................................................................................................................................................................... 43
SetVar...................................................................................................................................................................... 43
Timer ....................................................................................................................................................................... 43
SetTimer .................................................................................................................................................................. 43
RdVarR.................................................................................................................................................................... 44
SetVarR ................................................................................................................................................................... 44
RdVarD ................................................................................................................................................................... 44
SetVarD................................................................................................................................................................... 44
RdVarV.................................................................................................................................................................... 44
SetVarV ................................................................................................................................................................... 44
RdVarM................................................................................................................................................................... 44
SetVarM .................................................................................................................................................................. 45
RdVarRR ................................................................................................................................................................. 45
SetVarRR................................................................................................................................................................. 45
RdVarB.................................................................................................................................................................... 45
SetVarB ................................................................................................................................................................... 45
RdVarS .................................................................................................................................................................... 45
SetVarS.................................................................................................................................................................... 46
SetGroup ................................................................................................................................................................. 46
GetGroup ................................................................................................................................................................ 46
AXIS COMMAND AND STATUS NATIVE FUNCTIONS ....................................................................................................... 46
AxClear ................................................................................................................................................................... 46
SetAxisFeed............................................................................................................................................................. 46
SetCircAxisFeed...................................................................................................................................................... 46
OpenLoop................................................................................................................................................................ 46
CloseLoop ............................................................................................................................................................... 46
SetBrake .................................................................................................................................................................. 47
GetAxisError........................................................................................................................................................... 47
GetAxisActualVel .................................................................................................................................................... 47
S t u d i o F e r r a r i s – Via Borgonuovo 27 – 10040 Givoletto(To) – Italy
Tel:+39-011-9947752 Fax:+39-011-9948921 Mob:+39(0)335-8061568
Maurizio Ferraris
Ax2000SystemUserManual.doc
5/78
Studio Ferraris
Ax2000 System User Manual
Date: 08/07/2002
Rev: 002
Page: 6/78
GetAxisActualPos.................................................................................................................................................... 47
GetAxisStatus .......................................................................................................................................................... 47
GetHomeAxisStatus................................................................................................................................................. 47
Move........................................................................................................................................................................ 47
Home ....................................................................................................................................................................... 47
GetAxisInPosition ................................................................................................................................................... 47
GetAxisEndMove..................................................................................................................................................... 48
WIRE TENSIONER NATIVE FUNCTIONS .......................................................................................................................... 48
SetWireTension ....................................................................................................................................................... 48
SetFrontLed............................................................................................................................................................. 48
GetWireBreak ......................................................................................................................................................... 48
ERROR AND MESSAGE NATIVE FUNCTIONS ................................................................................................................... 48
SetCodErr ............................................................................................................................................................... 48
ResetCodErr............................................................................................................................................................ 48
SetMessage.............................................................................................................................................................. 48
ResetMessage .......................................................................................................................................................... 48
GetGlobalError....................................................................................................................................................... 49
setGlobalError ........................................................................................................................................................ 49
GetVarOutOfBound ................................................................................................................................................ 49
UTILITIES NATIVE FUNCTIONS ..................................................................................................................................... 49
sprintf ...................................................................................................................................................................... 49
printf........................................................................................................................................................................ 49
log ........................................................................................................................................................................... 49
SERIAL LINE NATIVE FUNCTIONS ................................................................................................................................. 49
SerSetMode ............................................................................................................................................................. 49
SerTx ....................................................................................................................................................................... 49
SerRx ....................................................................................................................................................................... 50
SerBufTx.................................................................................................................................................................. 50
SerBufRx ................................................................................................................................................................. 50
SerSetDtr................................................................................................................................................................. 50
SerSetRts ................................................................................................................................................................. 50
S t u d i o F e r r a r i s – Via Borgonuovo 27 – 10040 Givoletto(To) – Italy
Tel:+39-011-9947752 Fax:+39-011-9948921 Mob:+39(0)335-8061568
Maurizio Ferraris
Ax2000SystemUserManual.doc
6/78
Studio Ferraris
Ax2000 System User Manual
Date: 08/07/2002
Rev: 002
Page: 7/78
SerGetRi.................................................................................................................................................................. 50
SerGetDsr ............................................................................................................................................................... 50
SerGetCts ................................................................................................................................................................ 50
SerGetDcd............................................................................................................................................................... 50
CAN APPLICATION MESSAGE NATIVE FUNCTIONS......................................................................................................... 51
SendAppMessage .................................................................................................................................................... 51
AXIS SETUP................................................................................................................................................................... 52
AXIS CONFIGURATION .................................................................................................................................................. 52
AXIS PARAMETERS ....................................................................................................................................................... 52
AXIS TUNING ................................................................................................................................................................ 52
C++ PROGRAM INTERFACE .................................................................................................................................... 53
OBJECT MODEL .......................................................................................................................................................... 54
AXCONFIG OBJECT ....................................................................................................................................................... 54
Abort method........................................................................................................................................................... 54
Restart method ........................................................................................................................................................ 54
AutoConfig method ................................................................................................................................................. 55
GetCoreStatus method ............................................................................................................................................ 55
GetNetworkServers method..................................................................................................................................... 55
GetLastError method .............................................................................................................................................. 55
GetConfigData method ........................................................................................................................................... 55
GetAxisParam method ............................................................................................................................................ 56
GetAnalogInParam method .................................................................................................................................... 56
ClearBackupMemory method.................................................................................................................................. 56
GetMachineDir method........................................................................................................................................... 56
GetPlcSubDir method ............................................................................................................................................. 56
SetMachineDir method ........................................................................................................................................... 57
LoadConfigAndStart method................................................................................................................................... 57
SaveConfig method ................................................................................................................................................. 57
SaveConfigToFile method....................................................................................................................................... 57
GetFixedBuf method ............................................................................................................................................... 57
AXCONFIGDATA .......................................................................................................................................................... 57
S t u d i o F e r r a r i s – Via Borgonuovo 27 – 10040 Givoletto(To) – Italy
Tel:+39-011-9947752 Fax:+39-011-9948921 Mob:+39(0)335-8061568
Maurizio Ferraris
Ax2000SystemUserManual.doc
7/78
Studio Ferraris
Ax2000 System User Manual
Date: 08/07/2002
Rev: 002
Page: 8/78
ServoTime property................................................................................................................................................. 58
PlcTime property..................................................................................................................................................... 58
NumAxes property................................................................................................................................................... 58
NumVarR, NumVarRR, NumVarD, NumVarV, NumVarB, NumVarM, NumVarS, NumVarSV, NumVarSS,
NumVarN, NumVarNV, NumVarT, NumVarNT, NumVarST, NumGrpSS, NumGrpN, NumGrpNT properties...... 58
NumberOfBoards property...................................................................................................................................... 58
GetBoard method .................................................................................................................................................... 58
AppendNewBoard method....................................................................................................................................... 58
AxDefVout property ................................................................................................................................................ 59
AxDefEnc property.................................................................................................................................................. 59
AxDefOEnable property.......................................................................................................................................... 59
AxDefIFault property .............................................................................................................................................. 59
AxDefOBrake property ........................................................................................................................................... 59
AxDefIHome property ............................................................................................................................................. 59
AxDefDisOEnable property .................................................................................................................................... 59
AxDefDisIFault property ........................................................................................................................................ 59
AxDefDisOBrake property ...................................................................................................................................... 60
ActivateConfiguration(void); .................................................................................................................................. 60
GetLastError([out, retval] int * err); ..................................................................................................................... 60
AXBOARD .................................................................................................................................................................... 60
AXAXISPARAM ............................................................................................................................................................ 60
AXANALOGINPARAM ................................................................................................................................................... 60
AXANALOGIO .............................................................................................................................................................. 61
AXDIGITALIO ............................................................................................................................................................... 61
AXDESCRIPTIONS ......................................................................................................................................................... 61
AXVARIABLES .............................................................................................................................................................. 61
AXDESCRITERATOR ..................................................................................................................................................... 61
AXGATHER................................................................................................................................................................... 61
AXMOTION ................................................................................................................................................................... 62
GetAxisVoffset)(int ax, double * v); ........................................................................................................................ 62
GetAxisVout)(int ax, double * v);............................................................................................................................ 62
GetAxisTeoPos)(int ax, double * v); ....................................................................................................................... 62
S t u d i o F e r r a r i s – Via Borgonuovo 27 – 10040 Givoletto(To) – Italy
Tel:+39-011-9947752 Fax:+39-011-9948921 Mob:+39(0)335-8061568
Maurizio Ferraris
Ax2000SystemUserManual.doc
8/78
Studio Ferraris
Ax2000 System User Manual
Date: 08/07/2002
Rev: 002
Page: 9/78
GetAxisActPos)(int ax, double * v);........................................................................................................................ 62
GetAxisHomeZeroDist)(int ax, double * v);............................................................................................................ 62
GetAxisHomeStatus)(int ax, int * st);...................................................................................................................... 62
GetAxisTeoVel)(int ax, double * v);........................................................................................................................ 62
GetAxisActVel)(int ax, double * v);......................................................................................................................... 62
GetMotorActVel)(int ax, double * v); ..................................................................................................................... 62
GetAxisActFE)(int ax, double * v); ......................................................................................................................... 62
GetAxisMinFE)(int ax, double * v);........................................................................................................................ 62
GetAxisMaxFE)(int ax, double * v); ....................................................................................................................... 63
GetAxisFeed)(int ax, double * v); ........................................................................................................................... 63
GetCircAxisFeed)(int ax, double * v); .................................................................................................................... 63
GetAxisInPosition)(int ax, VARIANT_BOOL * v); ................................................................................................. 63
GetAxisEndMove)(int ax, VARIANT_BOOL * v);................................................................................................... 63
GetAxisTeoEndMove)(int ax, VARIANT_BOOL * v);............................................................................................. 63
GetAxisInOpenLoop)(int ax, VARIANT_BOOL * v);.............................................................................................. 63
GetAxisMaster)(int ax, VARIANT_BOOL * v); ...................................................................................................... 63
GetAxisStatus)(int ax, int * v); ................................................................................................................................ 63
GetAxisError)(int ax, int * v);................................................................................................................................. 63
GetLastError)(int * err);......................................................................................................................................... 63
AxClear)(int ax); ..................................................................................................................................................... 63
SetAxisCloseLoop)(int ax, VARIANT_BOOL brake, int time); ............................................................................... 63
SetAxisOpenLoop)(int ax, VARIANT_BOOL brake, int time);................................................................................ 64
ClearAxisMinMaxFE)(int ax); ................................................................................................................................ 64
Home)(int ax);......................................................................................................................................................... 64
SetAxisBrake)(int ax, VARIANT_BOOL brake);..................................................................................................... 64
SetPos)(int ax, double s); ........................................................................................................................................ 64
SetEncPos)(int encoder, long diff);......................................................................................................................... 64
SetAxisJointMode)(int ax, VARIANT_BOOL joint); ............................................................................................... 64
JogStart)(int ax, double vel, double tacc); .............................................................................................................. 64
JogSpeed)(int ax, double vel);................................................................................................................................. 64
JogStop)(int ax); ..................................................................................................................................................... 64
S t u d i o F e r r a r i s – Via Borgonuovo 27 – 10040 Givoletto(To) – Italy
Tel:+39-011-9947752 Fax:+39-011-9948921 Mob:+39(0)335-8061568
Maurizio Ferraris
Ax2000SystemUserManual.doc
9/78
Studio Ferraris
Ax2000 System User Manual
Date: 08/07/2002
Rev: 002
Page: 10/78
JogTo)(int ax, double pos, double vel, double tacc); .............................................................................................. 64
SetTimeSlave)(int axslave, int axmaster, double timecoeff);................................................................................... 64
SetAxisVoffset)(int ax, double val);......................................................................................................................... 64
SetAxisFeed)(int ax, double val); ............................................................................................................................ 65
ForceAxisFeed)(int ax, double val); ....................................................................................................................... 65
SetCircAxisFeed)(int ax, double val); ..................................................................................................................... 65
Move)(int ax, double endpos, double speed, double tacc, VARIANT_BOOL wait); ............................................... 65
Abort)(int ax, double tacc);..................................................................................................................................... 65
AXPLC .......................................................................................................................................................................... 65
AXPLCINFO .................................................................................................................................................................. 65
SPECIAL APPLICATIONS.......................................................................................................................................... 66
TUTORIAL..................................................................................................................................................................... 67
OVERVIEW .................................................................................................................................................................... 67
STEP 1: START .............................................................................................................................................................. 67
STEP 2: WINMOTIONTEST ............................................................................................................................................ 68
STEP 3: FIRST PLC ....................................................................................................................................................... 69
STEP 4: RUN A PLC ...................................................................................................................................................... 71
Plc Compilation ...................................................................................................................................................... 71
Plc Start .................................................................................................................................................................. 71
I/O Forcing ............................................................................................................................................................. 71
Online Mode............................................................................................................................................................ 72
STEP 5: USING VARIABLES ........................................................................................................................................... 72
Section 1: Using Timers .......................................................................................................................................... 73
STEP 4: USING SYMBOLS .............................................................................................................................................. 73
USING THE DEMO VERSION.................................................................................................................................... 75
OVERVIEW .................................................................................................................................................................... 75
INSTALLATION .............................................................................................................................................................. 75
USING CONFIGURATION FILES ....................................................................................................................................... 75
STARTING THE AXCORE ............................................................................................................................................... 75
RUNNING PLC PROGRAMS............................................................................................................................................ 75
RUNNING WINMOTIONTEST ......................................................................................................................................... 76
S t u d i o F e r r a r i s – Via Borgonuovo 27 – 10040 Givoletto(To) – Italy
Tel:+39-011-9947752 Fax:+39-011-9948921 Mob:+39(0)335-8061568
Maurizio Ferraris
Ax2000SystemUserManual.doc
10/78
Studio Ferraris
Ax2000 System User Manual
Date: 08/07/2002
Rev: 002
Page: 11/78
INDEX ............................................................................................................................................................................. 77
S t u d i o F e r r a r i s – Via Borgonuovo 27 – 10040 Givoletto(To) – Italy
Tel:+39-011-9947752 Fax:+39-011-9948921 Mob:+39(0)335-8061568
Maurizio Ferraris
Ax2000SystemUserManual.doc
11/78
Date: 08/07/2002
Studio Ferraris
Rev: 002
Ax2000 System User Manual
Page: 12/78
R e v i s i o n s
Rev.
Author
Date
Description
000
Maurizio Ferraris
06 Sept, 2001
First Release
001
Maurizio Ferraris
21 Jan, 2002
Additions and corrections
002
Maurizio Ferraris
08 Jul, 2002
Added object model and new configuration
S t u d i o F e r r a r i s – Via Borgonuovo 27 – 10040 Givoletto(To) – Italy
Tel:+39-011-9947752 Fax:+39-011-9948921 Mob:+39(0)335-8061568
Maurizio Ferraris
Ax2000SystemUserManual.doc
12/78
Studio Ferraris
Ax2000 System User Manual
Date: 08/07/2002
Rev: 002
Page: 13/78
A b s t r a c t
This document contains the description of the Ax2000 System, how to install and configure the
software, how to use the standard applications and how to write special applications and Plc
programs.
S t u d i o F e r r a r i s – Via Borgonuovo 27 – 10040 Givoletto(To) – Italy
Tel:+39-011-9947752 Fax:+39-011-9948921 Mob:+39(0)335-8061568
Maurizio Ferraris
Ax2000SystemUserManual.doc
13/78
Date: 08/07/2002
Studio Ferraris
Rev: 002
Ax2000 System User Manual
R e f e r e n c e
Author
d o c u m e n t s
Title
CompuPhase
Page: 14/78
Description
The Small C booklet
Small C language reference
Studio Ferraris Ax2000BoardsUserManuals
Hardware and installation manual for hardware
modules
S t u d i o F e r r a r i s – Via Borgonuovo 27 – 10040 Givoletto(To) – Italy
Tel:+39-011-9947752 Fax:+39-011-9948921 Mob:+39(0)335-8061568
Maurizio Ferraris
Ax2000SystemUserManual.doc
14/78
Studio Ferraris - Ax2000 System User Manual
A x 2 0 0 0
S y s t e m
Rev: 002 - Page: 15/78
O v e r v i e w
The Ax2000 System is a high-performance automation system based on standard industrial PC.
Modern PC have reached a great level of robustness, and reliability, and have enough
computational power to completely control an automation system, from motion control, to general
I/O processing, as well as offer a friendly user interface.
The Ax2000 System represents the Hardware and Software foundation on which the system
integrator builds its own user interface and programs.
This foundation offers the following general features:
•
easy and automatic integration with different hardware configurations (Plug & Play)
•
Real time management of the hardware modules
•
Support for User defined Real time code (PLC) in easy and interactive way
•
High level of abstraction of system resources that are uniformly seen by user applications
•
Support for symbolic programming
•
Support for multilingual applications
•
Full set of tools for debugging and deployment
•
Transparent access to machine resources through Local network or the Internet
A Demo version is available, that allows the user to exploit all these functionality in the same way
as the full version in a simulated environment. Complete development and test can be done using
the Demo version and all software and configuration files can be easily ported to the full version.
The Ax2000 system offers a full set of interface boards, as well as complete control software that
allows the system integrator to profit from the latest technologies in building a flexible, highly
modular automation system.
The hardware interface boards can be combined in any configuration to reach the necessary number
of digital and analog input outputs, and servomotors. All the boards are connected to the central PC
through a small cable or an optical fiber. A single short PCI board inside the PC is able to
communicate with a complex system allowing the system integrator to reduce global costs,
increasing flexibility and easing programming and maintenance.
The Ax2000 standard software is able to detect all the attached boards and to automatically
configure the hardware resources. All Ax2000 system boards have a unique serial number that can
also be read back by the PC software for complete system tracking. This allows the software to
detect changes in the configuration useful for diagnostics, maintenance and upgrade.
The standard software allows the system integrator to write real time Plc tasks. These Plc tasks can
take care of all the automation, and motion control, through a powerful set of commands, and using
any logic of choice. Plc tasks can also communicate with the user interface and other standard and
dedicated programs through messages and shared variables. Some of these variables, under user
Maurizio Ferraris
Ax2000SystemUserManual.doc
15/78
Studio Ferraris - Ax2000 System User Manual
Rev: 002 - Page: 16/78
choice can be put into battery backed RAM for permanent storage. In case of shutdown, or power
loss, nothing is required to keep the current values until the next power up.
A system programming interface is also available, through which dedicated programs can send
commands to and get status from the real time system. This allows the system integrator to write
special dedicated programs, personalized user interfaces, and more.
The Ax2000 system is based on Windows 2000. This brings to the machine and operators the
friendly, well known and accepted user interface, and allows the system integrator to take
advantage on all the features available on these modern operating systems. Machines can be easily
networked and operated remotely; diagnostic and upgrade can be done through the Internet.
Dedicated programs or special user interfaces can be written in virtually any language, including C,
C++, Visual basic, visual script, and even DHTML and ASP.
Conventions Used in This Manual
Code
Code samples or configuration text. Generally anything that the user may type.
Note
Important note about actions that may cause malfunctions.
NOTE
Very important note about actions that may cause damage or injury.
Safety Procedures
The system integrator has to assure a high level of safety of his equipment. Automation systems
usually present big challenges to reach this goal. In general additional devices and interlocking is
required to operate the equipment safely. The software or electronics alone should never be the only
active security system. Additional precautions should be observed during machine setup and
maintenance, where interlocking and protection devices may be turned off. Only trained and
specialized personnel should operate the machines in these conditions
Do not replace components or make adjustments inside equipment with power applied. Under
certain conditions, dangerous potentials may exist even when power has been turned off due to
charges retained by capacitors. To avoid casualties, always remove power and discharge and ground
a circuit before touching it.
Electronic board and components are classified as Electrostatic Discharge (ESD) sensitive devices.
Handling all such components should be done in electrostatic controlled areas with grounded
personnel. FAILURE TO DO SO MAY VOID YOUR WARRANTY.
Technical Support
Through the Internet for manual updates, FAQ and more at www.studioferraris.it or by e-mail at
[email protected]
Additional support may be given in the form of courses, technical advice, partial or full
development upon request.
Maurizio Ferraris
Ax2000SystemUserManual.doc
16/78
Studio Ferraris - Ax2000 System User Manual
Rev: 002 - Page: 17/78
I n s t a l l a t i o n
Requirements
Any PC with a minimum frequency of 333Mhz, 32Mb Ram and 20Mb of Hard Disk free space or
better, and running Windows 2000 SP2 operating system can run the Ax2000 system. In this
environment it is possible to run any program written in C or C++ using the Ax2000Deal.dll, or
programs written in any language using the Ax2000DCom server.
Installation
1. Before installing the Ax2000 System, the real time extension to the Windows 2000
operating system must be installed. Please follow the relevant instructions and install the
appropriate real time package before continuing.
2. Since during installation some COM components will be registered you should be
administrator to do this installation.
3. Place the CD into the CD drive and Run Ax2000.exe.
IMPORTANT! It is strongly suggested to install the software in the C:\Ax2000 folder. If
installed in a different directory, some configuration files must be manually changed.
How to remove the Ax2000 System
1.
Run the UNWISE.EXE file present in the Ax2000 system root directory. Follow the
instructions
2.
If during operation you have changed some file or compiled some Plc in the Demo
directory. The installation directory will not be automatically removed. You should remove
the added files and directories by hand to complete the uninstall.
Note: The software is based on XML technology and requires MSXML version 3.0 installed.
This component is installed by default with MS Internet Explorer 6.0 and higher, and it is
possible to freely download this component from Microsoft's site. As a convenience for the
user the installation file "msxml3sp2Setup.exe" is included in the Ax2000 root directory. If
you don't have this component installed, or if you experience errors related to XML during
start up, then you can run this executable and follow the instructions.
Maurizio Ferraris
Ax2000SystemUserManual.doc
17/78
Studio Ferraris - Ax2000 System User Manual
S y s t e m
Rev: 002 - Page: 18/78
A r c h i t e c t u r e
The Ax2000 system is composed by several modules that cooperate and work at different priority
levels in order to accomplish all tasks in timely manner. The following picture shows the different
modules and the timing requirement associated with each.
Non Real Time
Real Time
Plc Files
Plc
Fast Real Time
UI Applications
Deal
HARDWARE
AxCore
Ax2000DCom
Remote
applications
Virtualized
Resources
local or wide
area Network
UI Applications
Software Components
AxCore
AxCore is the highest priority module; all tasks in this module have higher priority than every other
user task. All real time tasks are done in this module. Different tasks are assigned to different levels
of priority, according to the real time requirements. The motion control and trajectory planning
computations are at the top priority. At a lower level we find the Plc interpreter, and at the lowest
there are the command executor, status response and communication tasks.
Plc subsystem
The Plc subsystem is a real time execution environment into which the user can run dedicated
programs. These programs are written in "Small C", a C language subset, and have native
instruction to operate on the motion, I/O and shared variables.
Maurizio Ferraris
Ax2000SystemUserManual.doc
18/78
Studio Ferraris - Ax2000 System User Manual
Rev: 002 - Page: 19/78
Ax2000Deal
Ax2000Deal is a complete user callable library that hides the complexity of the communication
with the real time module (AxCore). It represents the bridge between the real time and the non real
time worlds. Dedicated functions and interfaces are available to operate on the various subsystems
with higher level commands. The Ax2000Deal offer to the applications functions to manage the
configuration, the Plc subsystem, the axes parameters, and a great number of functions to get
system information. The Ax2000Deal library is optimized to offer an efficient and direct
communication to user programs written in C or C++. Other languages can use the Ax2000DCom
server instead.
Ax2000DCom
The Ax2000DCom subsystem offers a group of standard COM objects and interfaces that can be
used from any language able to call COM objects, including Visual Basic, and script languages like
VbScript, JavaSript, and even HTML or ASP pages. This COM server is also able to transparently
relay the application requests via local or wide are networks to other systems running the real time
processes, seamlessly accessing a single machine from different computers. This allows the system
integrator to take advantage of a great number of possible architectural structures and many
different scenarios for his or her machines. It is possible, for example, to debug different parts of
the same machine at the same time allowing more than one developer to work together, or to show
the machine status on one computer while another, possibly installed in a centralized location,
shows the statistics or the production progress.
The Ax2000DCom server offers also a full set of objects and methods to operate on description
strings. These strings can be associated with all system objects like axes, single IO points and can
be retrieved by the user application to improve user readability. The advantage of this approach is
that even different application can, without effort, show the same descriptions, and that multilingual
support is already included.
Additionally, symbols can be attached to various elements and it is possible to automatically
generate include files used by PLC. This way even PLC program can use the very same definitions
even if written by different programmers.
All these descriptions are easily imported or exported from/to text format, to easy translations into
different languages, or to read the descriptions directly from Electric CAD systems.
SmallCompiler
The SmallCompiler program is used to compile the PLC programs into a compact form suitable to
be sent and executed in the Real time environment. It is not a Real Time application, and can run
even if the Real Time modules (AxCore) are not running.
Every change in the source of a PLC program must be compiled before sending to the Ax2000
system. This compilation also checks for syntax errors and other kind of logic errors. This compiler
is started from the command line and does not offer graphical user interface. This way it is easy, for
example, to start it from batch files. The WinMotionTest program offers an integrated environment
to interactively to compile and activate Plc programs in a friendlier way.
Maurizio Ferraris
Ax2000SystemUserManual.doc
19/78
Studio Ferraris - Ax2000 System User Manual
Rev: 002 - Page: 20/78
LoadPlc
The LoadPlc program is used to send new versions of PLC programs to the Ax2000 system for
execution. This same application can be used to check the status of the running PLC programs, to
stop or remove one. This application, like the SmallCompiler is started from the command line and
can be used in batch files. The WinMotionTest offers a graphical interface to show the status, to
edit, compile and activate Plc programs.
CreateMachine
The CreateMachine application is used to create a new machine directory, and all the necessary
configuration files. All the files are empty or with default contents and can be used as a starting
point to build new machines. The chosen directory must be non existing, and will be created. This
avoids overwriting existing configurations with default files.
WinMotionTest
WinMotionTest is a general purpose diagnostic tool. With this application it is possible to see the
machine status, force I/O, move motors, perform axes tuning and record motor trajectories. It offers
a graphical user interface to set up and test new machines and new programs. It offers also an
integrated environment to develop and test Plc programs.
Through this program is also possible to set or change the axes parameters and to store and retrieve
these settings to and from files.
Additionally WinMotionTest let the user to define names and descriptions for internal resources
like I/O and timers. It is possible to define descriptions in several languages. These names and
descriptions can be used writing PLC programs, or displaying the status information in the language
of choice.
Virtual hardware resources
The system, particularly the AxCore module, virtualizes the hardware resources it have found into
logical resources that can be accessed by the software in a common and uniform way independently
of the underlying hardware combinations. These logical resources are uniformly numbered from
zero to the maximum value. Each access to the resource made from a user or PLC program must
reflect this numbering.
Each type of logical resource is essentially seen as a vector of those resources, and any reference to
that resource is made using the index. As an example in a configuration with two IntOut boards
there will be a total of 64 digital outputs, numbered from 0 to 63. The user or PLC program can
evenly access all 64 bits using the index, without caring that the first 32 bits will be mapped into the
first physical board, and the other 32 bits to the second.
The available logical resources types are:
•
Digital inputs
•
Digital outputs
•
Analog inputs
Maurizio Ferraris
Ax2000SystemUserManual.doc
20/78
Studio Ferraris - Ax2000 System User Manual
•
Analog outputs
•
Encoder counters
•
Axes
Rev: 002 - Page: 21/78
During the configuration phase, portions of these logical resources are assigned to physical boards.
This assignment is done automatically during Auto-configuration phase, but the user may change
the assignment if so desired and set the new modified configuration back. Care should be taken not
to map the same logical resource into more than one physical board, or strange behavior may be
experienced.
On the contrary, it is possible to have logical resources not mapped to any physical board. In this
case the software (User or PLC) can still access the resource, but no direct effect should be
expected on the real hardware. Nevertheless sometimes this can be useful in order to have virtual
resources. Virtual digital outputs, for example, can be used as internal flags, that applications and
PLC programs can set and test. A virtual axis can be combined with a real one in a circular
interpolation, and this results in having the real one perform a sinusoidal trajectory.
Each physical board descriptor have room for one offset value per each of the logical resource
tables. The mapping from real to virtual resources is done by assigning those offsets.
Taking the same example of two IntOut boards, with the same assignment as described, then the
offset zero in the digital output table would be assigned to the first board. The first board would
thus map its four output bytes into bytes 0, 1, 2 and 3 of the digital output resource table. The next
board would be assigned the offset 4, making it map its physical four bytes into the logical
resources bytes 4, 5, 6 and 7. Any following board with digital output resources, would be assigned
offset 8, and so on.
O ut0..31
0
4
8
4 bytes
4 bytes
IntO ut0
O ut32..63
IntO ut1
N ot
m apped
IntO ut0: offs:0
IntO ut1: offs:4
...
0
1
...
Logical O utput
Table
B oard D escriptors
Maurizio Ferraris
Ax2000SystemUserManual.doc
21/78
Studio Ferraris - Ax2000 System User Manual
Rev: 002 - Page: 22/78
Variables
In addition to the hardware resources there are a number of variables, that can be used to store
statuses and computations results. There are different types of variables, and in different total
number. All variables are visible in a uniform way from applications and PLC programs, and can
also be used to share data between the two worlds. Some type of these variable is also automatically
stored in a battery backed up memory area that is able to keep the values even with the main power
turned off.
The following table summarizes the different variables types and the main characteristics for each
type:
Name Type
Backed
Group Netw.
Description
R
Int32
No
No
No
General purpose integer variable
RR
Int32
Yes
No
No
Battery backed integer variable
D
Float64
Yes
No
No
Battery backed double precision floating point
variable
V
Float32
Yes
No
No
Battery backed single precision floating point
variable
M
Int16
Yes
No
No
Battery backed short integer variable
B
Int8
Yes
No
No
Battery backed byte variable
S
Int32
No
Yes
No
Grouped integer variable system variable
SV
Float32
No
Yes
No
Grouped single precision floating point system
variable
SS
Int32
Yes
Yes
No
Battery backed, grouped integer system variable
N
Int32
No
Yes
Yes
Networked and grouped integer variable
NV
Float32
No
Yes
Yes
Networked and grouped single precision floating
point variable
T
Uint32
No
No
No
Timer variable, automatically decremented each
millisecond by the system down to zero
NT
Int32
No
Yes
Yes
Networked and grouped integer variable
ST
Char[]
No
No
No
Null terminated Ascii string variables
These variables are shared between PLC programs and UI applications, and can be used as a
temporary storage for computations, or to share data and commands. The networked types can be
even used to share data between different PC that cooperate to run a complex automation system.
Generally, to access each variable the user must supply a type and an index. This is similar to how
hardware virtual resources are accessed. Each variable is stored in a separate table with an index
starting from zero.
Maurizio Ferraris
Ax2000SystemUserManual.doc
22/78
Studio Ferraris - Ax2000 System User Manual
Rev: 002 - Page: 23/78
Additionally, and to easy internal computation and transfer to and from the real time subsystem,
there is an uniform way to see all variables, as if they were all into the same logical table, and using
the index only to identify all of them.
In order to obtain this, the index must be scaled for each type and group as follows.
There is a base step for each type of variable type currently set to 10000. In the global variable
table, thus the first type of variables start at index 10000, the second type of variables start at index
20000 and so on. This method allows a maximum of 10000 different variables for each type.
Group variables are then scaled within their type index range with a base of 500, allowing up to 20
groups of 500 variables each.
Finally to access bit variables a further index multiplication by 100 is done adding to the index the
required bit number (0..31).
Assuming the following definition valid for the variable types steps
VAR_R
VAR_RR
VAR_D
VAR_V
VAR_B
VAR_M
VAR_S
VAR_SV
VAR_SS
VAR_N
VAR_NV
VAR_T
VAR_NT
VAR_ST
10000
20000
30000
40000
50000
60000
70000
80000
90000
100000
110000
120000
130000
140000
offset
offset
offset
offset
offset
offset
offset
offset
offset
offset
offset
offset
offset
offset
for
for
for
for
for
for
for
for
for
for
for
for
for
for
R Variables
RR Variables
D Variables
V Variables
B Variables
M Variables
S Variables
SV Variables
SV Variables
S Variables
NV Variables
T Variables (Timers)
NT Variables
ST Variables
Here are few examples to clarify this methodology.
Index used
Variable accessed
10001
Second R variable (variables start from zero)
80504
Fourth SV variables of the second group
2001014
Fifteenth bit (bit 14) of the eleventh RR variable
Normally the user or the Plc programmer do not need to remember this numbering, because there
are easier ways to create these indexes.
Using predefined symbols
In the standard include file Ax2000.inc that must be included in most Plc programs there are
already defined few constants and few helper functions.
The symbols just shown are already defined and allow the user to generate as in the first example,
the correct index using VAR_R+1.
Maurizio Ferraris
Ax2000SystemUserManual.doc
23/78
Studio Ferraris - Ax2000 System User Manual
Rev: 002 - Page: 24/78
Additionally the helper routines VarGroup and VarBit are useful to generate the required index.
Repeating the previous examples, and using this method, gives:
Index generated Variable accessed
Formula used in Plc
10001
Second R variable (variables start from zero)
VAR_R+1
80504
Fourth SV variables of the second group
VarGroup(VAR_SV+4, 1)
2001014
Fifteenth bit (bit 14) of the eleventh RR variable VarBit(VAR_RR+10, 14)
This method makes it easier to read Plc programs and understand what they do on variables.
Using user defined symbols
Symbols are constants that is possible to define together with a text description for almost anything
in the system. In is then possible to automatically generate include files for Plc programs that can
simply used the symbol where needed. The compiler will automatically substitute the correct index
value for symbol. Using this method it is possible to make Plc programs even more readable, giving
each symbol an exact process meaning like EMERGENCY_PRESSED, or CYCLE_START, or
DOOR_CLOSED and so on.
Using SetGroup
Group variables are normally used when the same logic must be applied to different machines. The
Plc programmer can write and debug a single piece of code, that can be run more than one time and
operated at different stages on different parts of the machine. To achieve this is possible to pass a
parameter to the code. This parameter can be used to offset the IO, and to choose a different set
(group) of variables. In this way, the same code can work on different machine without
interference.
Using the SetGroup, it is possible to redirect all base group variable accessed from a code segment
to the specified group, even if the code is unaware of this.
This method must be used only with the direct variable type access routines like RdVarS and the
others.
Machine Directory
The Ax2000 System is by default installed in a directory called Ax2000 in the root of your C drive,
but in order to give to the user the maximum flexibility, there should be a user defined "Machine
Directory" in which all configuration files for a particular machine are placed.
This method allows the designer also to have more than one "Machine Directories" in the same PC,
with a single Ax2000 System installation. The developer may switch from one "Machine" to
another effectively being able to develop or test different machines using only one development PC.
This working structure also simplifies backups and upgrades of individual "Machines".
Maurizio Ferraris
Ax2000SystemUserManual.doc
24/78
Studio Ferraris - Ax2000 System User Manual
Rev: 002 - Page: 25/78
The machine directory can be anywhere in the file system, and it is identified by containing the file
Ax2000Config.xml.
This file contains the main configuration file for the system. All other configuration files and Plc
files are contained into sub directories of this "Machine Directory". Essentially anything related to a
particular instance of a machine should be placed into or under its "Machine Directory".
The AxCore module, when started, is told where the machine directory is, and all other tools will
use automatically the same directory for their operation. While the AxCore module is running the
current Machine directory is defined and cannot be changed. To change Machine directory you
have to terminate the AxCore module and restart it with a different configuration.
This is done to improve safety, because each configuration contain specific hardware resources
definition, parameters and programs. If used with a different and incompatible physical machine
damage may occur. It is advisable that on the real machine, only the correct "Machine Directory" is
installed, leaving the multiple configuration only on the developer's PC.
Inside the machine directory there is room for user defined sub directories that may contain any
user defined configuration file or application specific for that machine. The system integrator is free
to improve the directory structure, as long as the Ax2000Config.xml reflects his decisions.
The Real time module and the Ax2000 System use only the Ax2000Config.xml file, and the other
files pointed to by this main configuration file. Any additional file or sub directory is ignored by the
Ax2000 System, and can be used by the system integrator at will.
In order to easy the user learning curve, a Demo "Machine Directory" with all needed sample
configuration files is installed in the Ax2000\Demo directory. Thus this directory can be selected as
the first "Machine Directory" to run through the samples and practicing the various tools and
languages.
Note: The installation on the Demo Machine directory is done under the main Ax2000
installation directory only to easy the installation and removal of the software. It is advisable
to put the normal "Machine Directories" that the user will eventually create into a separate
directory tree or under the root directory. Having a separate directory for each machine and
the Axc2000 installation, will simplify "Machine" backup, copy and modifications. The
CreateMachine tool can be use to create new directories.
Maurizio Ferraris
Ax2000SystemUserManual.doc
25/78
Studio Ferraris - Ax2000 System User Manual
Rev: 002 - Page: 26/78
H a r d w a r e
The hardware units are highly modular elements that can be combined to reach the required
configuration. The Ax2000 system, can support any combination of hardware units, and
automatically detects the configuration. Each hardware unit adds a number of resources like digital
inputs or encoder counter, and so on, to the configuration depending on unit type. These resources
are managed by the Ax2000 system, which offer a uniform way to access these resources
independently of where they are physically located. As an example a PLC or application program
can set an output with a common command, without caring if the physical output is located on the
CAN bus, or on the fiber loop, or wherever. The Ax2000 system deals with the different protocols
and timings carrying on the user command to the appropriate interface without further user
intervention.
Modules
IntPci
The IntPci board is the central communication board of the system. It can be placed into any PCI
slot, and is used to communicate to all slaves, whether through the two CAN busses, as well as
through an optical fiber loop. More that one IntPci board can be placed inside a PC.
IntAx
The IntAx board is an optical fiber slave that supports up to four axes. Four differential encoder
interfaces, and four differential analog output, as well as sixteen digital inputs, sixteen digital
outputs and eight analog inputs are present on board. The board is DIN bar mountable and it is
powered by a single industrial 24Vcc. All connections are made through removable connectors.
IntIn
The IntIn board is a CAN bus slave that supports up to 40 digital inputs. All inputs are optoisolated,
and up to four different and isolated grounds can be used. All inputs are ready to be connected to
standard industrial 24V devices. The board is DIN bar mountable and it is powered by a single
industrial 24Vcc. All connections are made through removable connectors.
IntOut
The IntOut board is a CAN bus slave that supports up to 32 digital outputs. All outputs are
protected against over current and over temperature. Up to four different power supplies can be
used to implement active machine safety measures. All outputs are ready to be connected to
standard industrial 24V devices up to 0.5Amps. The board is DIN bar mountable and is powered by
a single industrial 24Vcc. All connections are made through removable connectors.
Maurizio Ferraris
Ax2000SystemUserManual.doc
26/78
Studio Ferraris - Ax2000 System User Manual
Rev: 002 - Page: 27/78
IntKey
The IntKey board is a CAN bus slave that supports up to eight three color buttons, as well as four
digital inputs and four digital outputs. The IntKey can be used to implement manual functions and
operational panels. Two slots allow for keys description labels. The board is mounted on an
anodized aluminum plate ready for panel mount and it is powered by a single industrial 24Vcc. All
connections are made through removable connectors.
IntGrf
The IntGrf board is a CAN bus slave that supports a graphical display and a keyboard of up to 32
keys buttons, as well as four digital inputs and four digital outputs. The display can be backlit and
contrast regulated and have a resolution of 128x64 pixels. It is possible to display up to four rows of
21 characters each. The board is mounted on an anodized aluminum plate ready for panel mount
and it is powered by a single industrial 24Vcc. All connections are made through removable
connectors.
Ax4
The Ax4 is a four axes interface board that can be places into any ISA slot. Four differential
encoder interfaces, and four differential analog output, as well as 48 digital inputs, 24 digital
outputs, eight analog inputs, 2Kbyted of battery backed RAM, and a keyboard/display interface are
present on board. This is not a plug & play board and must be manually set up during configuration.
Ax2
The Ax2 is a subset of the Ax4 board. Only two axes with differential encoder interfaces, and
differential analog output, as well as 24 digital inputs, 16 digital outputs, 2Kbyted of battery backed
RAM, and a keyboard/display interface, are present on board. This is not a plug & play board and
must be manually set up during configuration.
CanOpen modules
Any commercial or third party CanOpen module responding to profile 401 can be detected and used
by the Ax2000System. A great number of Digital I/O, or pneumatic valves, as well as analog I/O
are available to expand the Ax2000 possibilities.
Multiple Serial
A dedicated real time driver for up to four serial lines, can be present, allowing PLC programs to
connect to instruments, industrial pallet memories, or any other device that can be connected to the
system through an RS232 or RS485 serial line. Any commercial board based on the Oxford
semiconductor OX16PCI954 chip can be used in the system.
Maurizio Ferraris
Ax2000SystemUserManual.doc
27/78
Studio Ferraris - Ax2000 System User Manual
Rev: 002 - Page: 28/78
C o n f i g u r a t i o n
The Ax2000 system, particularly the AxCore module, is able to detect the actual hardware
configuration. This is done scanning the various links, and collecting information about attached
boards. Additionally, the application can define further configuration details like axes
configurations and operating modes as well as add any non Plug & Play boards.
The configuration procedure can be interactive or can be completely automatic, and it goes through
these different steps or phases:
•
Pre-configuration
•
Auto-configuration
•
Configuration approval
•
Configuration set
•
Parameter set
After these steps are executed, the system is operational. All these phases are accomplished
automatically, or by calling appropriate functions by one or more User Interface applications. Some
of these phases may be optional or skipped, depending on the application and desired behavior. At
any time a User Interface application can restart the complete procedure by calling the RT_Restart
function.
Using the Ax2000DCom server it is possible to automate most of these configuration phases
through special configuration files.
Pre-configuration
In order to do the hardware scan properly, the AxCore needs some a priori configuration
information. The AxCore needs to know, for example, which channel is really active and at what
bus speed perform the scanning, and so on. This information is used to avoid trying to scan missing
channels, or scan them not at the proper speed. These Pre-Configuration settings can be sent to the
AxCore module in two ways:
•
Using command line options (see description of the AxCore Module)
•
Using an application that calls the RT_SetPreConfigData function call with appropriate data.
This function accepts one parameter TPreConfig that must be initialized to the required settings.
typedef struct TPreConfig
{
unsigned int DebugFlags;
//
unsigned int FixBuffDelayTimerVal;//
unsigned int ConfigFlags;
//
TCanOptions Can1Speed;
//
TCanOptions Can2Speed;
//
bool UseSerial;
//
} TPreConfig;
Maurizio Ferraris
Bit Flags from TDebugFlags
Timer for FixBuff debug
Bit Flags from TConfigFlags
Force Can speed from command line
Force Can speed from command line
Enable direct access to Serial lines board
Ax2000SystemUserManual.doc
28/78
Studio Ferraris - Ax2000 System User Manual
Rev: 002 - Page: 29/78
Auto-configuration
When instructed to do so, the AxCore module starts the resource scanning. During this phase a table
of found boards is build. This table contains all the information retrieved from each board, and
depending on the type, this may include serial number, hardware and software version, capabilities,
and so on. This table is then made available to the applications. This Auto-Configuration phase can
be activated in two ways:
•
Using command line options (see description of the AxCore Module)
•
Using an application that calls the RT_AutoConfig function.
Configuration approval
For diagnostic or maintenance purposes, it may be necessary to check if the found configuration
matches with a stored one. An appropriate application can be written in order make this check, and
approve the configuration. This additional phase is optional, but may improve the reliability of the
system by adding the configuration approval before starting the system. In case of a broken wire, or
a damaged board, the detected configuration may differ from the stored one, and the user
intervention may be requested to fix the exact problem or, at least, the user can be made aware of
the situation before continuing. This phase can also be automated and invisible from the user unless
a problem is detected. An application can read the configuration found by the AxCore module by
calling the RT_GetConfiguration function passing an appropriate memory area to store the
configuration data.
Set configuration
After approval, or acceptance of the configuration, and possibly after modifications, the
configuration is sent back again to the AxCore module and will be used in place of the found one.
In this phase it is also possible to add any non Plug & Play board that could not be found during the
previous phases. An application can send back the edited configuration to the AxCore module by
calling the RT_SetConfiguration function and passing an appropriate data. In this step the
application must also set the axes configuration and other details in order to completely define the
system behavior.
Parameter setting
After the hardware configuration is finally verified and loaded, the axes dynamic parameters must
be sent to the AxCore module before it can operate on the axes. Various settings like gains, limits,
and I/O association with the axes, are set in this phase. In case of machines without axes, this phase
is automatically skipped. An application can read and write any single axis parameters, later during
operations, but it must send the complete set of axis parameters during this phase, before the
systems is started. This parameter setting phase can be activated in two ways:
•
Using command line options (see description of the AxCore Module)
•
Using an application that calls the RT_SetParam function.
The same or other application can read and write single axis parameters calling the functions
RT_SetParam and RT_GetParam.
Maurizio Ferraris
Ax2000SystemUserManual.doc
29/78
Studio Ferraris - Ax2000 System User Manual
Rev: 002 - Page: 30/78
System start
After the AxCore module have correctly received the hardware configuration and the axis
parameters, it starts the system. This operation is completely automatic and consists of the
following steps:
•
Completes the initialization of hardware modules as configured
•
Loads and runs the PLC Programs listed in the configuration specified PLC programs directory
After this phase the AxCore module is completely operational.
Configuration files
To easy the startup of a complete application, without making necessary to write a complete set of
user applications, the CreateMachine application can generate all necessary files with default
contents. The system integrators can then modify at will these files and add their own. The AxCore
and the Ax2000DCom modules, are able to read and write the configuration to and from these file,
as well as export and import some of them in a more human readable format.
All the files are in xml format, and based on a two level keyword hierarchy. The structure of these
files is very simple, yet rigorous, and is a subset of the xml standard. These files should be "well
formed" with respect to that standard1.
Normally access to these files is done through the Ax2000DCom server and its objects and
methods. Nevertheless it is possible to create, read and generally manipulate these files with
standard tools for xml files, including common text editors, and dedicated user tools.
In any case it is most important to maintain a correct syntactic format, otherwise this may prevent
the correct working of all Ax2000 System.
In all files can be recognized a structure as follows:
<?xml version="1.0" encoding="ISO-8859-1"?>
<root>
<section1>
<keyword1>content1</keyword1>
<keyword2>content2</keyword2>
…
</section1>
<section2>
<keyword1>content1</keyword1>
<keyword2>content2</keyword2>
…
</section2>
…
</root>
where the first line is the standard declaration. The root can be named after the file, and giving
some indication about the contents. The root contains several sections that contain several
keywords.
1
Additional information about the xml standard and the meaning of "well formed" can be found at http://www.w3c.org
Maurizio Ferraris
Ax2000SystemUserManual.doc
30/78
Studio Ferraris - Ax2000 System User Manual
Rev: 002 - Page: 31/78
There are two types of configuration files: the first where the sections are related to different
subsystems and the keyword are the different parameters, and the second where the sections
identify the different languages and the keyword are simple numeric indexes preceded by the letter
'N'. Additional information about these file structure will be given in the following sections, when
specifically describing each file.
Some sample files are given in the standard installation, under the Demo directory, and different
alas default files can be generated with the CreateMachine utility.
Note: The structure of these files should not be changed by the system integrator. The only
allowed modifications are in the content part, and possibly by adding keywords and only
when these keywords are the number form.
Ax2000Config.xml
The principal file is always named Ax2000Config.xml and must be present, or will be created in the
"Machine directory" of choice. The configuration file contains system definition and references to
other configuration files that complete the machine configuration.
The root name is always "Ax2000", and the sections are "ActiveSettings", "Config", "Core",
"DescriptionFiles", "Extensions" and "Flags".
ActiveSettings section
This section is used to store particular settings that must be preserved from one session to the next,
like the language of choice.
Hardware
Reserved for future use
Language
Selected language. This number is used as an index during access to the
languages specification file (See the section DescriptionFiles for more
information)
Param
Reserved for future use
Config section
This section specifies the names of the sub directories where to find further configuration files.
ParDir
Reserved for future use
PlcDir
Sub directory where the Plc program source and executable are located. A text
file PlcList.txt can be present in this directory also. This file specify the names
of the plc programs to be started automatically.
StrDir
Sub directory where all the description files are located. Further details about
these files are to be found in the "DescriptionFiles" section.
Core section
This section contains settings used by the AxCore module.
Maurizio Ferraris
Ax2000SystemUserManual.doc
31/78
Studio Ferraris - Ax2000 System User Manual
Rev: 002 - Page: 32/78
AbortOnExit
If set to 1 terminates the real time subsystem when the last application that uses
the COM objects closes. If set to 0, the Real time subsystem remains active.
AutoConfig
If set to 1 automatically loads the configuration and starts the real time
subsystem. If set to 0, waits for a user application to confirm and send the
configuration and parameters.
AutoStartExe
If set to 1 automatically start the real time in executable form. This must be
used only for debugging purposes and with no real machine connected. This
must be normally set to 0.
AutoStartRtss
If set to 1 automatically start the real time subsystem. This flag, in connection
with the AutoConfig flag allows an application that connects to the first
AxConfig COM object to automatically load and start the real time (AxCore)
module, by a simple call to SetMachineDir.
CfgFile
This is the name of the configuration file for the AxCore module. This file is
under the sub directory specified with the CoreDir keyword (see later). This file
is read only if the AutoConfig flag is set to one, otherwise a user application
must load the configuration. This file is written to by the Ax2000DCom when
the method SaveConfig is called on a AxConfig object
CmdLine
This is the command line parameters used when starting the AxCore module.
These settings are used only if the AutoStartExe or AutoStartRtss flags are set
to one and the AxCore is started automatically. Otherwise the user must supply
the necessary line parameters when starting the AxCore module.
CoreDir
Sub directory where the AxCore configuration file is to be found. The file name
is specified with the CfgFile keyword.
DescriptionFiles section
This section contains the names of the description files. These files are to be found under the sub
directory specified in the StrDir keyword, under the Config section
AnInput
Name of file containing multilingual description of analog inputs
AnOutput
Name of file containing multilingual description of analog outputs
Axis
Name of file containing multilingual description of axis
Board
Name of file containing multilingual description of boards
Error
Name of file containing multilingual description of system errors
Input
Name of file containing multilingual description of digital inputs
Languages
Name of file containing used languages description
Output
Name of file containing multilingual description of digital outputs
Variable
Name of file containing multilingual description of variables
Maurizio Ferraris
Ax2000SystemUserManual.doc
32/78
Studio Ferraris - Ax2000 System User Manual
Rev: 002 - Page: 33/78
Extensions section
This section contains the file name extensions to be used to build the complete file name of
different configuration files. The file name is build combining the relevant sub directory, the file
name, and the extension. Additionally, since all the configuration files are in xml format, the final
extension will be ".xml".
The final format is:
<machine directory>\<subdir>\<filename>.<ext>.xml
ParExt
Reserved for future use
PlcExt
Reserved for future use
StrExt
Extension used for description files
Flags section
This section contains miscellaneous flags and settings.
Debug
If set to 1 causes the Ax2000DCom to open a text window, displaying
diagnostic messages and information. This must be normally set to 0.
CoreConfig.xml
This file contains the configuration and settings for the AxCore module. Hardware description and
axis definitions are present in this file. Note that the actual file name and directory can be changed
through the Ax2000Config configuration file.
The root name is always "CoreConfig", and contains a principal section named "General", followed
by one section for each board named from "Board0", and one section for each axis definition named
from "Axis0".
General section
This section contains general settings and specify the number of following Board and Axis sections.
ServoTime
Time in microseconds of the required servo loop (1000=1mS)
PlcTime
Time in microseconds of the required Plc repetition rate (10000=10mS)
NumBoards
Number of defined boards. Board sections from 0 to NumBoards-1 must follow
NumAxes
Number of defined axes. Axis sections from 0 to NumAxes-1 must follow
NumVarR
Number of required variables of type R
NumVarRR
Number of required variables of type RR
NumVarD
Number of required variables of type D
NumVarV
Number of required variables of type V
Maurizio Ferraris
Ax2000SystemUserManual.doc
33/78
Studio Ferraris - Ax2000 System User Manual
NumVarB
Number of required variables of type B
NumVarM
Number of required variables of type M
NumVarS
Number of required variables of type S
NumVarSV
Number of required variables of type SV
NumVarSS
Number of required variables of type SS
NumVarN
Number of required variables of type N
NumVarNV
Number of required variables of type NV
NumVarT
Number of required variables of type T
NumVarNT
Number of required variables of type NT
NumGrpSS
Number of required groups of variables of type SS
NumGrpN
Number of required groups of variables of type N
NumGrpNT
Number of required groups of variables of type NT
Rev: 002 - Page: 34/78
Board(x) sections
This section contains settings related to a specific board. Since the Ax2000 System supports several
different boards, it is possible that the parameters required for each board is different according to
the board type.
Type
This setting specify the board type, and is always present in each section.
According to this value, other parameters are used, as indicated later with a
single letter for each board type.
-1:
1:
2:
4:
5:
6:
7:
8:
13:
14:
128:
(S)Software simulated single axis board
(4)ax4Smd 48I 24°
(2)ax2Smd 24I 16°
(P)IntPci Max 2Mb RAM
(A)IntAx 4Assi 8In 8Out
(W)IntWt Wire tensioner
(I)IntIn 40 Digital Input
(O)IntOut 32 Digital Output
(K)IntKey 8 illuminated keys keyboard
(G)IntGrf Graphic display and 32 keys
(C)CanOpen slaves
InOffset
Byte offset into the logical digital input table for this board (42AIKGC)
OutOffset
Byte offset into the logical digital output table for this board (42AOKGC)
AnInOffset
Byte offset into the logical analog input table for this board (4AC)
AnOutOffset
Byte offset into the logical analog output table for this board (S42AC)
EncOffset
Byte offset into the logical encoder table for this board (S42A)
IOBaseAddress
PC IO address for this board (42)
MemBaseAddress PC Memory address for this board (42)
Maurizio Ferraris
Ax2000SystemUserManual.doc
34/78
Studio Ferraris - Ax2000 System User Manual
Rev: 002 - Page: 35/78
UseIO
Flag to enable the use of digital IO for this board (42)
UseEnc
Flag to enable the use of encoders for this board (42)
UseLcdKey
Flag to enable the use of LCD and keyboard for this board (42)
UseBkupMem
Flag to enable the use of Backup memory for this board (S42)
UseAnalogIan
Number of analog input required for this board (4)
Group
CAN protocol group number for this board (WIOKG)
Index
CAN protocol index number for this board (WIOKG)
Can1Speed
CAN bus speed for this board (P)
Can2Speed
CAN bus speed for this board (P)
Axis(x) sections
This section contains settings related to a specific axis. All axes support the same set of parameters,
even if connected to different hardware.
VoutNum
Index into the logical analog output table to be used for torque or speed
command.
EncNum
Index into the logical encoder table to be used for position feedback
OEnable
Index into the logical digital output table to be used for amplifier enable
IFault
Index into the logical digital input table to be used for amplifier fault
OBrake
Index into the logical digital output table to be used for motor brake
IHome
Index into the logical digital input table to be used for home sensor
DisOEnable
Flag to disable the automatic use of the amplifier enable [0/1]
DisIFault
Flag to disable the automatic use of the amplifier fault [0/1]
DisOBrake
Flag to disable the automatic use of the motor brake [0/1]
KProp
Proportional gain
KDer
Derivative gain
KInt
Integral gain
KFf
Velocity feed forward
KAff
Acceleration feed forward
VOffs
Output voltage offset [-1..+1 where 1 means full scale]
VOutScale
Output voltage scale [-1..+1]. Normally it is used to change direction of
command, but can be used to adapt to different output ranges.
EncScale
Input position scale [-1..+1]. Normally it is used to change counting direction,
Maurizio Ferraris
Ax2000SystemUserManual.doc
35/78
Studio Ferraris - Ax2000 System User Manual
Rev: 002 - Page: 36/78
but can be used also to change the counting ratio.
MaxFE
Maximum following error in user units, after which the axis will stop in error. If
zero this feature is disabled. NOTE: Leaving this parameter at zero on the
real machine can cause dangerous situations.
UpLimit
Maximum upward direction limit in user units, after which the axis will stop in
error. If zero this feature is disabled.
DwLimit
Maximum downward direction limit in user units, after which the axis will stop
in error. If zero this feature is disabled.
MaxVel
Maximum allowed axis speed in user units. All commanded moves are
saturated to this speed.
MaxAcc
Maximum allowed axis acceleration in user units. All commanded moves are
saturated to this speed.
MaxDec
Maximum allowed axis deceleration in user units. All commanded moves are
saturated to this speed.
InPosWnd
Maximum following error in user units to set the "In Position" flag at the end of
the move.
FeedStep
Maximum variation of the actual feed per each servo
HomeType
Bit mask used to define the home methodology for this axis. One or more bits
can be set (summing the constants below) to achieve the desired behavior, with
the following meaning:
1
Use sensor as defined with IHome keyword (may be combined with 2)
2
Use encoder index pulse (may be combined with 1)
4
Use rising edge of home event (mutually exclusive with 8)
8
Use falling edge of home event (mutually exclusive with 4)
16 After home move the axis to a specified position
32 After home set the axis to a specified position (must be used with 16)
64 Exit sensor before looking for index (used with both 1 and 2)
SetZeroPos
Position to be used during home procedure (see HomeType)
VelSenHome
Axis speed during home sensor search
VelIdxHome
Axis speed during index search
AccHome
Axis acceleration and deceleration during home procedure
VelJog
Maximum axis speed allowed during jog
AccJog
Maximum axis acceleration and deceleration allowed during jog
SpaceUnit
Number of encoder pulses to complete one user unit
Maurizio Ferraris
Ax2000SystemUserManual.doc
36/78
Studio Ferraris - Ax2000 System User Manual
Rev: 002 - Page: 37/78
VelUnit
Number of seconds to complete one user time unit. This parameters together
with the SpaceUnit allows the user definition for speed
AccUnit
Number of seconds to complete one user time unit of speed variation. This
parameters together with the SpaceUnit and VelUnit allows the user definition
for acceleration. This parameter is usually left to 1.
PulsesPerTurn
Number of encoder pulses per motor turn. This allows the system to display the
current motor speed
Languages.s.xml
This file contains the configuration and settings for the languages used in the other description files.
Note that the actual file name and directory can be changed through the Ax2000Config
configuration file.
The root name is always "Languages", that contains three major sections named "LangDescr",
"LangExt", and "LangKey". Inside each section, the keywords are always numbers preceded by the
letter 'N' and starting from zero up to the number of defined languages minus one.
Programmatically, the language is the numerical value of its keyword, and with this index an
application can retrieve descriptions and keywords to be used with other description files.
Languages main sections
This section contains general settings and specify the number of following Board and Axis sections.
LangDescr
In this section, for each language, a general description is given. The
description can be shown to the user for language selection and can be given in
LangExt
Reserved for future use
LangKey
In This section, for each language, the keyword used throughout the description
system to identify the language in other description files
Other description files
All other description files found under the sub directory specifies by the StrDir keyword on the
main Ax2000Config.xml file, share a common format. All files have a root named after the file
content type, and main sections one for each defined language (in Languages.s.xml) plus one
section for symbols named "SYMBOL". Under each section there is a series of numbered keyword
(number preceded by the letter 'N').
For each logical resource or element type there is one description file. Inside this file for each
language and for symbols there is one section containing the description for each index.
A user application normally accesses these descriptions using methods on the various objects of the
Ax2000DCom server, and can easily show symbols and descriptions to the final user.
Maurizio Ferraris
Ax2000SystemUserManual.doc
37/78
Studio Ferraris - Ax2000 System User Manual
Rev: 002 - Page: 38/78
A x C o r e
To Be Completed
Command line flags
All command line flags are single letters, possibly immediately followed by a parameter. Letters
can be grouped or separated by blanks and may be preceded by a dash or a slash. What really
mattes is the letter itself. If a letter is followed by a parameter no blanks should be placed in
between. If the parameter is a variable length string (like a file name) a blank should follow.
The following description is in alphabetical order, but the various flags can appear in any order on
the command line.
A or a
This flag enables the AxCore module to search for slaves on the fiber optical ring.
C or c
This flag must be immediately followed by a single digit specifying the speed of the Can I/O bus.
The digit assumes the following meanings: 0=no, 1=20K, 2=62_5K, 3=125K, 4=250K, 5=500K,
6=800K, 7=1M. If the digit is zero, the scanning is not performed on the I/O can bus.
F or f
This flag enables Fixed Buffer debug option. With this option in case of error and after a
programmable delay a complete snapshot of the Fixed Buffer is copied into a temporary buffer ad
immediately after into a file named Ax2000Debug.fix. Any application can read the file for
advanced diagnostics.
L or l
This flag enable PLC programs debugging, allowing UI programs to show Plc lines execution. This
may slow down all Plc due to the additional computation, thus it is advised to turn this option on
only if required.
N or n
This flag enables the AxCore system to run without boards attached. It can still receive a complete
configuration, but runs without that hardware present. This is an all or nothing option: if set the
AxCore module will not access any hardware even if present. This can be useful to test applications
or configurations on office or portable PC, before getting to the machine.
Maurizio Ferraris
Ax2000SystemUserManual.doc
38/78
Studio Ferraris - Ax2000 System User Manual
Rev: 002 - Page: 39/78
O or o
A single digit specifying the speed of the CanOpen bus must immediately follow this flag. The digit
assumes the following meanings: 0=no, 1=20K, 2=62_5K, 3=125K, 4=250K, 5=500K, 6=800K,
7=1M. If the digit is zero, the scanning is not performed on the CanOpen can bus.
P or p
This flag enables parallel port debugging. The first parallel port in the system is used as a general
purpose eight bits output. Instructions in the AxCore module are present to set and reset these bits at
particular points. Using an oscilloscope tied to those pins it is possible to evaluate the system
performance and the Real Time behavior of the Ax2000 system. This flag may conflict with a
printer or other device attached to the port.
S or s
This flag enables the AxCore module to search for the serial line board. If found, the board will be
used by the AxCore system. During installation of the board no standard operating system driver
should be installed, and the four serial lines are completely under real time control for Plc and
applications.
T or t
This flag disable the command time-out. Normally each command sent to the AxCore module is
expected to return very soon. In case the AxCore is not responding, after a five seconds period, the
command will return with an error. This prevents the application from hanging in case of AxCore
crash. This normal behavior may cause unwanted application errors if the AxCore module is being
debugged, and thus responding in far more than the time-out limit. With this flag set, each
command will wait forever for the answer, making easier to debug the AxCore.
X or x
This flag causes the AxCore module to perform an auto configuration and proceed using that
configuration without waiting for an UI program to send a confirmed configuration. If used as the
only flag, should be used for debug only. It can be dangerous if used on the machine because only
default motor parameters are loaded and these values may not work with actual motors.
NOTE: using this flag no configuration file is actually used, even if present.
Maurizio Ferraris
Ax2000SystemUserManual.doc
39/78
Studio Ferraris - Ax2000 System User Manual
P l c
Rev: 002 - Page: 40/78
P r o g r a m s
Plc programs are written in "Small C" language. This language is very similar to the "C" language,
but it designed to be compiled into bytecode and interpreted. For the complete language reference,
please refer to the Small C language manual.
The Ax2000 Plc subsystem is able to interpret several compiled programs that are able to run in
parallel. Actually all Plc programs are executed one after the other, giving the user the impression
of parallel execution. For this reason it is important that the Plc code is designed to be executed as
quickly as possible, avoiding long loops waiting for external events, in order to let other Plc to run.
If it is necessary to write a Plc that follows a sequence of machine events, it is possible to
implement it as a state machine with a status variable. The Plc upon entering reads its status from
the variable, check for machine conditions, and possibly update the variable for the next scan.
Alternatively, it is possible to use the sleep instruction that effectively suspends the execution of the
Plc making possible to run the others. The execution will continue from the instruction following
the sleep the next time Plc programs are executed.
Writing language extensions that can be used as native instructions by the Plc programs can
enhance the Small C language. The Ax2000 system offers a complete set of functions that make the
Plc programs to interact with the various aspects of the system.
PLC default directory
Since Plc programs can do almost anything in the system, the AxCore module will load Plc
programs only from the directory that was originally specified during the configuration. The
LoadPlc utility, or the RT_LoadPlc function call accept only a filename without path and extension.
The AxCore module will load a file with the indicated name, and extension .amx present in the PLC
directory. It is not possible to load any other file in any other directory.
Writing Plc program
The PLC programs are normal text files and can be written with any editor of choice. The text must
follow the rules of the small language and must be saved with .sma extension. Next the .sma file
must be compiled using the SmallCompiler into the compressed binary image with the .amx
extension. Finally the PLC program can be loaded using the LoadPlc utility into a running AxCore
system.
To Be Completed
The first PLC program
The smallest working program is a program that does nothing, and is as simple as:
// Min
main()
{
}
Maurizio Ferraris
Ax2000SystemUserManual.doc
40/78
Studio Ferraris - Ax2000 System User Manual
Rev: 002 - Page: 41/78
Write this text into a text file and save it under the name min.sma in the Plc default directory for
your project. Open a command prompt, change directory into the same directory (assume for this
example that the Plc default directory is c:\machine\plc). Assure that an AxCore module is running
and active and issue the following commands:
c:\machine\plc>smallcompiler min
c:\machine\plc>loadplc min
The first command will compile the fine min.sma into a binary format in the file min.amx, and the
second command will load the min Plc and run it. Obviously nothing should be expected in the
system since this Plc does nothing, but we can then check if this is really the case giving the
command:
c:\machine\plc>loadplc
an output similar to the following is expected:
List of running plcs (N=Number K=Skip count S=Status:
N ( K ) S
Name
Duration[mS] Max[mS]
plc 1:( 5) *Demo.amx
0.099
0.178
plc 2:( 1) *min.amx
0.005
0.644
End of list
In this case the Demo Plc was already running in this system and the min Plc was effectively added
to the list. We can tell that it is running by the “*” in the Status column, and that it’s skip count is 1,
which means that it will be executed each time the Plc are executed.
The leftmost two columns indicate the current execution time and the maximum execution time
ever. Since the Plc programs run at a lower priority that the axis real time system, the maximum
execution time will take into account that sometimes the axis computations interrupt the execution
of this or other Plc programs.
You can now try the following command:
c:\machine\plc>loadplc 2 10
that means to set the skip count of Plc number 2 to 10. The output will be:
List of running plcs (N=Number K=Skip count S=Status:
N ( K ) S
Name
Duration[mS] Max[mS]
plc 1:( 5) *Demo.amx
0.005
0.178
plc 2:( 10) *min.amx
0.021
0.644
End of list
Indicating that the skip count has changed. Now you can stop and kill the Plc giving the following
commands:
c:\machine\plc>loadplc –h 2
c:\machine\plc>loadplc -k 2
Again an updated list of Plc will be given as a result of each of these commands
Using variables
To Be Completed
Maurizio Ferraris
Ax2000SystemUserManual.doc
41/78
Studio Ferraris - Ax2000 System User Manual
Rev: 002 - Page: 42/78
Using timers
To Be Completed
Using strings
To Be Completed
Using floating point
To Be Completed
I/O Native Functions
RdInp
Usage: RdInp (idx);
Read the requested input bit (idx) from the input table. If the input is forced, this routine returns the
forced status.
RdByte
Usage: RdByte (idx);
Read the requested input byte (idx) from the input table. Input bytes start at zero, and each byte
represents eight bits also starting from zero. Thus byte 0 is bits 0 to 7; byte 1 is bits 8 to 15, and so
on. If any of the input bits is forced, this routine returns the forced status for those bits and the real
input status for unforced bits.
RdOut
Usage: RdOut (idx);
Reads the requested output bit (idx) from the output table. If the output is forced, this routine
returns the original status, even if different from the physical output status.
SetOut
Usage: SetOut (idx);
Turns on the requested output bit (idx) in the output table. If the output is forced, this routine does
not change the physical output status.
ResOut
Usage: ResOut (idx);
Turns off the requested output bit (idx) in the output table. If the output is forced, this routine does
not change the physical output status.
Maurizio Ferraris
Ax2000SystemUserManual.doc
42/78
Studio Ferraris - Ax2000 System User Manual
Rev: 002 - Page: 43/78
SetByte
Usage: SetByte (idx, val);
Sets the requested output byte (idx) in the output table to the passed value (val). Output bytes start
at zero, and each byte represents eight bits also starting from zero. Thus byte 0 is bits 0 to 7; byte 1
is bits 8 to 15, and so on. If some of the output bits is forced, this routine does not change the
corresponding physical output status.
RdOutByte
Usage: RdOutByte (idx);
Read the requested output byte (idx) from the output table. Output bytes start at zero, and each byte
represents eight bits also starting from zero. Thus byte 0 is bits 0 to 7; byte 1 is bits 8 to 15, and so
on. If any of the output bits is forced, this routine returns the original status for those bits and the
real output status for unforced bits.
SetAnalogOut
Usage: SetAnalogOut (chan, val);
To Be Completed
Variables and timer Native Functions
Var
Usage: Var(idx);
Read the requested variable (idx) from the global variables table.
SetVar
Usage: SetVar (idx, val);
Write the passed value (val) into the requested variable (idx) of the global variables table.
Timer
Usage: Timer (idx);
Read the requested variable (idx) from the Timer variables table. This routine returns true if the
timer is expired. The Timer variables are 32 bits unsigned integers non battery backed, that
automatically count toward zero, when set to a value.
SetTimer
Usage: SetTimer (idx, val);
Set the requested timer to the number of milliseconds. The timer will automatically count to zero.
Maurizio Ferraris
Ax2000SystemUserManual.doc
43/78
Studio Ferraris - Ax2000 System User Manual
Rev: 002 - Page: 44/78
RdVarR
Usage: RdVarR (idx);
Read the requested variable (idx) from the R variables table. The R variables are 32 bits integer non
battery backed. The total number of R variables is defined during configuration.
SetVarR
Usage: SetVarR (idx, val);
Write the passed value (val) into the requested variable (idx) of the R variables table. The R
variables are 32 bits integer non battery backed. The total number of R variables is defined during
configuration.
RdVarD
Usage: RdVarD (idx);
Read the requested variable (idx) from the D variables table. The D variables are 64 bits floating
point battery backed. The total number of D variables is defined during configuration. Since Plc
programs deals only with 32 bit variables the value returned to the Plc will be rounded in order to
fit a 32 bit floating point variable.
SetVarD
Usage: SetVarD (idx, val);
Write the passed value (val) into the requested variable (idx) of the D variables table. The D
variables are 64 bits floating point battery backed. The total number of D variables is defined
during configuration. Since Plc programs deals only with 32 bit variables the value used to set the
variable will be extended to a 64 bit floating point value.
RdVarV
Usage: RdVarV (idx);
Read the requested variable (idx) from the V variables table. The V variables are 32 bits floating
point battery backed. The total number of V variables is defined during configuration.
SetVarV
Usage: SetVarV (idx, val);
Write the passed value (val) into the requested variable (idx) of the V variables table. The V
variables are 32 bits floating point battery backed. The total number of V variables is defined
during configuration.
RdVarM
Usage: RdVarM (idx);
Maurizio Ferraris
Ax2000SystemUserManual.doc
44/78
Studio Ferraris - Ax2000 System User Manual
Rev: 002 - Page: 45/78
Read the requested variable (idx) from the M variables table. The M variables are 16 bits integer
battery backed. The total number of M variables is defined during configuration.
SetVarM
Usage: SetVarM (idx, val);
Write the passed value (val) into the requested variable (idx) of the M variables table. The M
variables are 16 bits integer battery backed. The total number of M variables is defined during
configuration.
RdVarRR
Usage: RdVarRR (idx);
Read the requested variable (idx) from the RR variables table. The RR variables are 32 bits integer
battery backed. The total number of RR variables is defined during configuration.
SetVarRR
Usage: SetVarRR (idx, val);
Write the passed value (val) into the requested variable (idx) of the RR variables table. The RR
variables are 32 bits integer battery backed. The total number of RR variables is defined during
configuration.
RdVarB
Usage: RdVarB (idx);
Read the requested variable (idx) from the B variables table. The B variables are 8 bits integer
battery backed. The total number of B variables is defined during configuration.
SetVarB
Usage: SetVarB (idx, val);
Write the passed value (val) into the requested variable (idx) of the B variables table. The B
variables are 8 bits integer battery backed. The total number of B variables is defined during
configuration.
RdVarS
Usage: RdVarS (grp, idx);
Read the requested variable (idx) from the group (grp) of S variables table. The S variables are 32
bits integer non battery backed. The total number of S variables and the number of S groups is
defined during configuration.
Maurizio Ferraris
Ax2000SystemUserManual.doc
45/78
Studio Ferraris - Ax2000 System User Manual
Rev: 002 - Page: 46/78
SetVarS
Usage: SetVarS (grp, idx, val);
Write the passed value (val) into the requested variable (idx) in the group (grp) of S variables table.
The S variables are 32 bits integer non battery backed. The total number of S variables and the
number of S groups is defined during configuration.
SetGroup
Usage: SetGroup (val);
Predefines the group from which group variables will be read or written using Var and SetVar
functions. Direct reading or writing functions, like RdVarS do not use this group number, but the
parameter.
GetGroup
Usage: GetGroup ();
Returns the group number from which group variables will be read or written using Var and SetVar
functions.
Axis command and status Native Functions
AxClear
Usage: AxClear (ax);
To Be Completed
SetAxisFeed
Usage: SetAxisFeed (ax, val);
To Be Completed
SetCircAxisFeed
Usage: SetCircAxisFeed (ax, val);
To Be Completed
OpenLoop
Usage: OpenLoop (ax, val, time);
To Be Completed
CloseLoop
Usage: CloseLoop (ax, val, time);
Maurizio Ferraris
Ax2000SystemUserManual.doc
46/78
Studio Ferraris - Ax2000 System User Manual
Rev: 002 - Page: 47/78
To Be Completed
SetBrake
Usage: SetBrake (ax, val);
To Be Completed
GetAxisError
Usage: GetAxisError (ax);
To Be Completed
GetAxisActualVel
Usage: GetAxisActualVel (ax);
To Be Completed
GetAxisActualPos
Usage: GetAxisActualPos (ax);
To Be Completed
GetAxisStatus
Usage: GetAxisStatus (ax);
To Be Completed
GetHomeAxisStatus
Usage: GetHomeAxisStatus (ax);
To Be Completed
Move
Usage: Move (endpos, tacc, vel, ax);
To Be Completed
Home
Usage: Home (ax);
To Be Completed
GetAxisInPosition
Usage: GetAxisInPosition (ax);
Maurizio Ferraris
Ax2000SystemUserManual.doc
47/78
Studio Ferraris - Ax2000 System User Manual
Rev: 002 - Page: 48/78
To Be Completed
GetAxisEndMove
Usage: GetAxisEndMove (ax);
To Be Completed
Wire tensioner Native Functions
SetWireTension
Usage: SetWireTension (group, wireno, perc);
To Be Completed
SetFrontLed
Usage: SetFrontLed (group, wireno, val);
To Be Completed
GetWireBreak
Usage: GetWireBreak (group);
To Be Completed
Error and message Native Functions
SetCodErr
Usage: SetCodErr (group, coderr);
To Be Completed
ResetCodErr
Usage: ResetCodErr (group, coderr);
To Be Completed
SetMessage
Usage: SetMessage (group, nmsg, textcolor, backgroundcolor, icon, bold, size, blink);
To Be Completed
ResetMessage
Usage: ResetMessage (group, nmsg);
To Be Completed
Maurizio Ferraris
Ax2000SystemUserManual.doc
48/78
Studio Ferraris - Ax2000 System User Manual
Rev: 002 - Page: 49/78
GetGlobalError
Usage: GetGlobalError ();
To Be Completed
setGlobalError
Usage: setGlobalError (coderr);
To Be Completed
GetVarOutOfBound
Usage: GetVarOutOfBound ();
To Be Completed
Utilities Native Functions
sprintf
Usage: sprintf (buf[], fmt[], ...);
To Be Completed
printf
Usage: printf (fmt[], ...);
To Be Completed
log
Usage: log (string[]);
To Be Completed
Serial line Native Functions
SerSetMode
Usage: SerSetMode (uart, baud, bits, parity, stop);
To Be Completed
SerTx
Usage: SerTx (uart, chr, rdf);
To Be Completed
Maurizio Ferraris
Ax2000SystemUserManual.doc
49/78
Studio Ferraris - Ax2000 System User Manual
Rev: 002 - Page: 50/78
SerRx
Usage: SerRx (uart);
To Be Completed
SerBufTx
Usage: SerBufTx (uart, buffer[], rdf);
To Be Completed
SerBufRx
Usage: SerBufRx (uart, buffer[], endchar);
To Be Completed
SerSetDtr
Usage: SerSetDtr (uart, val);
To Be Completed
SerSetRts
Usage: SerSetRts (uart, val);
To Be Completed
SerGetRi
Usage: SerGetRi (uart);
To Be Completed
SerGetDsr
Usage: SerGetDsr (uart);
To Be Completed
SerGetCts
Usage: SerGetCts (uart);
To Be Completed
SerGetDcd
Usage: SerGetDcd (uart);
To Be Completed
Maurizio Ferraris
Ax2000SystemUserManual.doc
50/78
Studio Ferraris - Ax2000 System User Manual
Rev: 002 - Page: 51/78
Can application message Native Functions
SendAppMessage
Usage: SendAppMessage (group, slaveno, len, ...);
To Be Completed
Maurizio Ferraris
Ax2000SystemUserManual.doc
51/78
Studio Ferraris - Ax2000 System User Manual
A x i s
Rev: 002 - Page: 52/78
s e t u p
This chapter describes the different parameters and procedures that must be understood to setup and
operate the closed loop axes.
Axis configuration
To Be Completed
Axis parameters
To Be Completed
Axis tuning
To Be Completed
Maurizio Ferraris
Ax2000SystemUserManual.doc
52/78
Studio Ferraris - Ax2000 System User Manual
C + +
P r o g r a m
Rev: 002 - Page: 53/78
i n t e r f a c e
To Be Completed
Maurizio Ferraris
Ax2000SystemUserManual.doc
53/78
Studio Ferraris - Ax2000 System User Manual
O b j e c t
Rev: 002 - Page: 54/78
m o d e l
The Ax2000DCom server offers a rich object model that is compatible with any language including
script languages like VBScript a Jscript.
Each object is related to a specific aspect of the Ax2000 System programming. This way, dedicated
or specific utilities and tools may acquire only few objects and related interfaces.
There is also some relations between objects, and few objects are returned as the result of calling
methods on other objects.
To be compatible with script languages each object have only one interface, and thus in the
following explanation the concept of object and interface can be intermixed.
All examples will be given in Visual Basic, but any language capable of connecting to COM object
can be used. In the Demo directory there are few examples in VBScript and HTML. Refer to their
respective documentation for further details.
AxConfig object
This object contains the IAxConfig interface, and it is used to operate on the system configuration.
This is the only object kind that can be acquired even if there is no AxCore running, and through
this object it is possible to start the AxCore real time module and send to it the configuration and
parameters. Later, during operations this object can be used to change parameters, and to read the
configuration. When the AxCore module is fully running it is not possible to change the
configuration.
The IAxConfig interface supports the following methods:
Abort method
C Language : Abort();
Visual Basic: Abort
This method terminates the real time subsystem. The application that calls this method, must be the
last running and with only a single AxConfig object still hold. This last object must be released and
the application terminated without any other method call after this one. NOTE: No further control
is possible after this call. The user with the help of the UI application is responsible to place
the machine in a safe state before calling Abort().
Restart method
C Language : Restart();
Visual Basic: Restart
This method is equivalent to the Abort method, it terminates any activity in the real time subsystem
(see note above). The difference is that it does not discards the real time module from memory, but
brings it back to the first stages on the configuration.
Maurizio Ferraris
Ax2000SystemUserManual.doc
54/78
Studio Ferraris - Ax2000 System User Manual
Rev: 002 - Page: 55/78
AutoConfig method
C Language : AutoConfig();
Visual Basic: AutoConfig
This method causes the AxCore to perform a complete scan of the hardware, building its internal
hardware map. This function returns immediately, but the auto scan process may take several
seconds, depending on the configuration. The next call may thus hold until the process is complete.
GetCoreStatus method
C Language : AutoConfig(axCoreStatus * st);
Visual Basic: st = AutoConfig
This method returns the status of the configuration process and the real time module. The returned
status is defined as:
axCORE_NOTRUNNING,
axCORE_WAIT_AUTOCONF,
axCORE_WAITCONFIG,
axCORE_WAITPARAM,
axCORE_RUNNING,
//
//
//
//
//
Not yet started
Just begun, waits for Autoconfig command
Waiting for configuration
Waiting for parameters
Core Running
Using this status information, the user application can coordinate the configuration process.
GetNetworkServers method
C Language : GetNetworkServers(BSTR * names);
Visual Basic: str = GetNetworkServers
This method sends a broadcast message to the local area network and waits for responses from
other machines running the Ax2000DCom server. Then builds a string containing several lines of
text separated by carriage return and line feed. Each line contains the network name of the machine
found and its IP address. The user application can use this information to select a machine and to
connect to that machine. To do this the application must create an AxConfig object on the local
machine (this is always possible even if the real time module is not installed), ask for the network
servers and then release the local object and create all needed objects on the other machine.
GetLastError method
C Language : GetLastError(int * err);
Visual Basic: err = GetLastError
This method returns the last error found when any other method of this object fails. The error code
may be one of the specific Ax2000 errors, or a normal Windows or COM error. It is possible to tell
the two cases apart using the following table
0
>0
<0
No errors were found
Specific Ax2000 Error (Use AxDescriptions object to get a description)
Windows or COM error
GetConfigData method
C Language : GetConfigData(VARIANT * cfgdata);
Visual Basic: cfg = GetConfigData
This method returns an object of type AxConfigData that may be used by the application to inspect
or change the system configuration. This possibly modified object is then used to activate the
configuration.
Maurizio Ferraris
Ax2000SystemUserManual.doc
55/78
Studio Ferraris - Ax2000 System User Manual
Rev: 002 - Page: 56/78
GetAxisParam method
C Language : GetAxisParam(int ax, VARIANT * par);
Visual Basic: par = GetAxisParam
This method returns an object of type AxAxisParam that may be used by the application to inspect
or change a single axis parameter set. This possibly modified object is then used to activate the axis
parameters.
GetAnalogInParam method
C Language : GetAnalogInParam(int ch, VARIANT * apar);
Visual Basic: apar = GetAxisParam
This method returns an object of type AxAnalogInParam that may be used by the application to
inspect or change a single analog input parameter set. This possibly modified object is then used to
activate the analog input parameters.
ClearBackupMemory method
C Language : ClearBackupMemory();
Visual Basic: ClearBackupMemory
This method erases the contents of the backup memory, setting every cell to zero. This should be
used when the user is not sure about the memory contents and want to start from a clean situation.
Note: The entire content of the backup memory is lost. If some previous content must be
preserved the user application can read and save the required variable contents before calling
this method.
GetMachineDir method
C Language : GetMachineDir(BSTR * dir);
Visual Basic: mdir = GetMachineDir
This method returns a string with the absolute path of the machine directory. This will be always
the absolute path with respect to the local file system. When connected to a remote machine, the
user application must be aware that the returned directory is not located on the local machine. If the
application must access files on this directory a suitable network share should be set by the user,
and suitable path modification will be necessary. As an example is a connection is made to a
machine called "M023" and there is a share on that machine called "C" that shared the "C" drive,
then if the returned path is:
c:\mac01
Then it is possible to access files from the remote machine using:
\\M023\C\mac01
GetPlcSubDir method
C Language : GetPlcSubDir (BSTR * dir);
Visual Basic: pdir = GetPlcSubDir
This method returns a string with the relative path of the PLC sub directory. This will be always the
relative path with respect to the machine directory. Same considerations as GetMachineDir holds in
case of remote connection.
Maurizio Ferraris
Ax2000SystemUserManual.doc
56/78
Studio Ferraris - Ax2000 System User Manual
Rev: 002 - Page: 57/78
SetMachineDir method
C Language : SetMachineDir(BSTR dir);
Visual Basic: SetMachineDir dir
This method is used to set the absolute path of the machine directory. This causes also the loading
of configuration files taken from the specified directory. If the configuration files in that directory
are set up to do so, this command automatically loads the real time, configure and run it.
LoadConfigAndStart method
C Language : LoadConfigAndStart();
Visual Basic: LoadConfigAndStart
This method is used to load the configuration files and start the real time, if those configuration files
are not set up to load automatically after the call to SetMachineDir. The configuration loaded will
be exactly what specified in the files. If an application wants to modify the configuration before
activating, it should get an AxConfigData object and operate through it.
SaveConfig method
C Language : SaveConfig();
Visual Basic: SaveConfig
This method causes the update of the configuration file with the current configuration data. This
should be called after changing axis parameters to have those changes permanent. The file saved is
the standard Ax2000Config.xml file in the machine directory.
SaveConfigToFile method
C Language : SaveConfigToFile(file);
Visual Basic: SaveConfigToFile file
This method is similar to SaveConfig, but is saves to the specified file. This method should be used
only for backup purposes, since the only file used by the system will always be the
Ax2000Config.xml in the machine directory.
GetFixedBuf method
C Language : GetFixedBuf(arr);
Visual Basic: GetFixedBuf arr
This method is used for internal debugging only. It returns a safearray of bytes with a snapshot of
the current content of a special internal data structure. It is possible to see a more readable format in
the WinMotionTest program (which actually uses this function).
AxConfigData
This object contains the IAxConfigData interface, and it is used to operate on the actual data of the
system configuration. It is only possible to create an object of this kind using the GetConfigData
method of the AxConfig object. At any time it is possible to get one of this objects to inspect the
configuration, but only once it is possible to use its method ActivateConfiguration and only if the
real time module is in axCORE_WAITCONFIG or axCORE_WAITPARAM status.
Maurizio Ferraris
Ax2000SystemUserManual.doc
57/78
Studio Ferraris - Ax2000 System User Manual
Rev: 002 - Page: 58/78
Note: It is always possible to change properties of this object, even if the real time module is
running, but the user must be aware that those changes are only made locally to the object,
and do not affect the system behavior.
Only the ActivateConfiguration method sends the configuration data to the real time module and
run it, and it is only possible to call this method once, and only if the AxCore module is in a
compatible status.
The IAxConfigData interface supports the following methods:
ServoTime property
This property specify the servo loop interval time. It is expressed in microseconds, and the normal
value is 1000 which stands for 1mS. This is the time between successive axis control points.
PlcTime property
This property specify the Plc programs interval time. It is expressed in microseconds, and the
normal value is 10000 which stands for 10mS. This is the time between successive complete scans
of Plc programs. It should be set reasonably higher than the maximum total scan time of Plc
programs (use the LoadPlc tool to have the indication of the current and maximum scan time). The
Plc programs have higher priority than the user interface programs and if the interval time is set
below the scan time, the Plc execution will take all available time hanging the user interface.
NumAxes property
This property specify the number of axes defined in the configuration.
NumVarR, NumVarRR, NumVarD, NumVarV, NumVarB, NumVarM, NumVarS,
NumVarSV, NumVarSS, NumVarN, NumVarNV, NumVarT, NumVarNT, NumVarST,
NumGrpSS, NumGrpN, NumGrpNT properties
These properties specify the total number of variables and groups of the various type.
NumberOfBoards property
This property specify the number of boards defined in the configuration.
GetBoard method
C Language : brd = GetBoard(n);
Visual Basic: set brd = GetBoard(n)
This method is used to retrieve an object representing a board. This object may then be used to read
or set properties of that board. This method can be used to enumerate the board recently found
during a hardware auto scan.
AppendNewBoard method
C Language : brd = AddNewBoard(ty);
Visual Basic: set brd = AddNewBoard(ty)
Maurizio Ferraris
Ax2000SystemUserManual.doc
58/78
Studio Ferraris - Ax2000 System User Manual
Rev: 002 - Page: 59/78
This method is used to add a specific board to the current configuration and to retrieve its
representing object. This method is used to add non Plug and Play board to a configuration after the
auto scan process. The returned object must the be used by the application to set addresses and
other parameters necessary for proper working on the newly added board.
AxDefVout property
This property is used to indicate which analog output should be used for output command of the
specified axis.
AxDefEnc property
This property is used to indicate which encoder counter should be used for position feedback of the
specified axis.
AxDefOEnable property
This property is used to indicate which digital output should be used for amplifier enable of the
specified axis.
AxDefIFault property
This property is used to indicate which digital input should be used for amplifier fault of the
specified axis.
AxDefOBrake property
This property is used to indicate which digital output should be used for motor brake of the
specified axis.
AxDefIHome property
This property is used to indicate which digital input should be used for home flag of the specified
axis.
AxDefDisOEnable property
This property is used to indicate if the output specified with the AxDefOEnable property should be
automatically used for the specified axis. If true this output is automatically set upon closing the
motor loop, and reset upon opening the motor loop.
AxDefDisIFault property
This property is used to indicate if the output specified with the AxDefIFault property should be
automatically used for the specified axis. If true this input is active, the motor trajectory will be
automatically stopped and the loop opened.
Maurizio Ferraris
Ax2000SystemUserManual.doc
59/78
Studio Ferraris - Ax2000 System User Manual
Rev: 002 - Page: 60/78
AxDefDisOBrake property
This property is used to indicate if the output specified with the AxDefOBrake property should be
automatically used for the specified axis. If true this output is automatically set upon closing the
motor loop, and reset upon opening the motor loop. Optionally it is possible to specify a delay from
the loop closing to the brake releasing in order to give time to the amplifier to build up the motor
current. It is also possible to specify a similar time when braking the motor, before opening the
loop.
ActivateConfiguration(void);
C Language : ActivateConfiguration();
Visual Basic: ActivateConfiguration
This method is used to activate the configuration. This method can be called only if the AxCore is
in axCORE_WAITCONFIG or axCORE_WAITPARAM status. If the AxCore is running it is not
possible to change the configuration.
GetLastError([out, retval] int * err);
C Language : GetLastError(int * err);
Visual Basic: err = GetLastError
This method returns the last error found when any other method of this object fails. The error code
may be one of the specific Ax2000 errors, or a normal Windows or COM error. It is possible to tell
the two cases apart using the following table
0
>0
<0
No errors were found
Specific Ax2000 Error (Use AxDescriptions object to get a description)
Windows or COM error
AxBoard
This object contains the IAxBoard interface, and it is used to operate on a single board data.
The IAxBoard interface supports the following methods:
To Be Completed
AxAxisParam
This object contains the IAxAxisParam interface, and it is used to operate on a single axis
parameters data.
The IAxAxisParam interface supports the following methods:
To Be Completed
AxAnalogInParam
This object contains the IAxAnalogInParam interface, and it is used to operate on a single analog
input parameters data.
The IAxAnalogInParam interface supports the following methods:
To Be Completed
Maurizio Ferraris
Ax2000SystemUserManual.doc
60/78
Studio Ferraris - Ax2000 System User Manual
Rev: 002 - Page: 61/78
AxAnalogIo
This object contains the IAxAnalogIo interface, and it is used to operate on analog input and output
data.
The IAxAnalogIo interface supports the following methods:
To Be Completed
AxDigitalIo
This object contains the IAxDigitalIo interface, and it is used to operate on digital input and output
data.
The IAxDigitalIo interface supports the following methods:
To Be Completed
AxDescriptions
This object contains the IAxDescriptions interface, and it is used to operate on multilingual
descriptions data.
The IAxDescriptions interface supports the following methods:
To Be Completed
AxVariables
This object contains the IAxVariables interface, and it is used to operate on Plc variables data.
The IAxVariables interface supports the following methods:
To Be Completed
AxDescrIterator
This object contains the IAxDescrIterator interface, and it is used to operate on multilingual
descriptions allowing the caller to enumerate the description data.
The IAxDescrIterator interface supports the following methods:
To Be Completed
AxGather
This object contains the IAxGather interface, and it is used to operate on real time data allowing the
caller to collect historical information about internal subsystems.
The IAxGather interface supports the following methods:
To Be Completed
Maurizio Ferraris
Ax2000SystemUserManual.doc
61/78
Studio Ferraris - Ax2000 System User Manual
Rev: 002 - Page: 62/78
AxMotion
This object contains the IAxMotion interface, and it is used to operate on motors allowing the caller
to retrieve status and real time information, and also to command movements.
The IAxGather interface supports the following methods:
GetAxisVoffset)(int ax, double * v);
GetAxisVout)(int ax, double * v);
GetAxisTeoPos)(int ax, double * v);
GetAxisActPos)(int ax, double * v);
GetAxisHomeZeroDist)(int ax, double * v);
GetAxisHomeStatus)(int ax, int * st);
GetAxisTeoVel)(int ax, double * v);
GetAxisActVel)(int ax, double * v);
GetMotorActVel)(int ax, double * v);
GetAxisActFE)(int ax, double * v);
GetAxisMinFE)(int ax, double * v);
Maurizio Ferraris
Ax2000SystemUserManual.doc
62/78
Studio Ferraris - Ax2000 System User Manual
Rev: 002 - Page: 63/78
GetAxisMaxFE)(int ax, double * v);
GetAxisFeed)(int ax, double * v);
GetCircAxisFeed)(int ax, double * v);
GetAxisInPosition)(int ax, VARIANT_BOOL * v);
GetAxisEndMove)(int ax, VARIANT_BOOL * v);
GetAxisTeoEndMove)(int ax, VARIANT_BOOL * v);
GetAxisInOpenLoop)(int ax, VARIANT_BOOL * v);
GetAxisMaster)(int ax, VARIANT_BOOL * v);
GetAxisStatus)(int ax, int * v);
GetAxisError)(int ax, int * v);
GetLastError)(int * err);
AxClear)(int ax);
SetAxisCloseLoop)(int ax, VARIANT_BOOL brake, int time);
Maurizio Ferraris
Ax2000SystemUserManual.doc
63/78
Studio Ferraris - Ax2000 System User Manual
Rev: 002 - Page: 64/78
SetAxisOpenLoop)(int ax, VARIANT_BOOL brake, int time);
ClearAxisMinMaxFE)(int ax);
Home)(int ax);
SetAxisBrake)(int ax, VARIANT_BOOL brake);
SetPos)(int ax, double s);
SetEncPos)(int encoder, long diff);
SetAxisJointMode)(int ax, VARIANT_BOOL joint);
JogStart)(int ax, double vel, double tacc);
JogSpeed)(int ax, double vel);
JogStop)(int ax);
JogTo)(int ax, double pos, double vel, double tacc);
SetTimeSlave)(int axslave, int axmaster, double timecoeff);
SetAxisVoffset)(int ax, double val);
Maurizio Ferraris
Ax2000SystemUserManual.doc
64/78
Studio Ferraris - Ax2000 System User Manual
Rev: 002 - Page: 65/78
SetAxisFeed)(int ax, double val);
ForceAxisFeed)(int ax, double val);
SetCircAxisFeed)(int ax, double val);
Move)(int ax, double endpos, double speed, double tacc, VARIANT_BOOL wait);
Abort)(int ax, double tacc);
AxPlc
AxPlcInfo
Maurizio Ferraris
Ax2000SystemUserManual.doc
65/78
Studio Ferraris - Ax2000 System User Manual
S p e c i a l
Rev: 002 - Page: 66/78
A p p l i c a t i o n s
To Be Completed
Maurizio Ferraris
Ax2000SystemUserManual.doc
66/78
Studio Ferraris - Ax2000 System User Manual
Rev: 002 - Page: 67/78
T u t o r i a l
Overview
This section is organized in steps, and during each step some exercises are shown and explained.
The user either of the Demo or the complete version may follow the examples. Any difference
between the two versions will be indicated.
Step 1: Start
After installation there will be a directory Ax2000 under which all software components is
installed. A new Start Menu group will be found under the Programs selection.
From the start menu find and start the WinMotionTest program.
This is a general purpose development and debugging tool, and can be used to connect to the Real
time environment. This program is designed to look for a suitable Real time module running on this
computer or on the network. If it does not find its Real time counterpart, it will ask the user where
to connect to.
This is what will happen after you launch this program the first time, or any time when there is no
Real time module is running. The following dialog appears:
Through this dialog you may select a local directory where to start a new "Machine", or a remote
machine to connect to. In this case there are no remote machines available, so press the "Choose
Local" button, navigate to the \Ax2000\Demo directory and press OK.
At this point two text mode windows will appear and after a little the GUI of WinMotionTest will
show up. The two text mode windows are debugging output from the Real time module AxCore
Maurizio Ferraris
Ax2000SystemUserManual.doc
67/78
Studio Ferraris - Ax2000 System User Manual
Rev: 002 - Page: 68/78
and the Ax2000DCom server respectively. They are configured as visible by default in the Demo
machine, but they will be not visible in production machine.
The following should appear:
This is the main window of the WinMotionTest program.
Step 2: WinMotionTest
From the main window of WinMotionTest, or from the picture above, you can identify the
following UI elements, that may be used later:
•
Main Menu: Located just below the title contains all generally available commands
•
Main Toolbar: Located just below the Main Menu, on the left. It contains general file and edit
commands like New, Open, Save, …
•
Recording Toolbar: Located on the right of the Main Toolbar, contains recording commands
available only when the main window shows the recorder, now they are grayed
•
Plc Toolbar: Located on the right of the Recording Toolbar, contains Plc commands. The are
now active because the main window shows the Plc editor.
•
Description Toolbar: Located on the right of the Plc Toolbar, contains Description commands
available only when the main window shows the description editor, now they are grayed
Maurizio Ferraris
Ax2000SystemUserManual.doc
68/78
Studio Ferraris - Ax2000 System User Manual
Rev: 002 - Page: 69/78
•
View Toolbar: Located below the other toolbars, contains the Show/Hide buttons for all the
different resource viewers, and is always available
•
Variables Toolbar: Located on the right of the View Toolbar, contains the Show/Hide buttons
for all the different variable viewers, and is always available
•
Main Window Tabs: Located on the right side of the main window the are used to select the
different operation of the WinMotionTest tool. You can select Plc Editor, Curve viewer
(recorder) or Description editor. The user can freely switch from one operation to the other
freely.
•
Status bar: Located on the bottom edge, shows command help, and specific information about
the current operation. The rightmost pane shows the current "Machine" directory of choice.
You can now try to open some resource viewer using the view toolbar, the one with large, red or
green letters using the following guidelines. Each resource viewer can be left open during any
operation and will show actual resource status at any time.
•
M: View Motor status
•
I: View Digital Input status
•
Ik: View Keyboards Digital Input status
•
O: View Digital Output status
•
Ok: View Keyboards Digital Output status
•
Ev: View Valves Digital Output status
•
Ia: View Analog Input status
•
Oa: View Analog Output status
•
Nt: View NT Variables status
•
T: View Tensioner status
•
L: View AxCore Log messages
•
F: View Fixed Buffer status
•
P: View Plc status
You can also open the viewers for the different types of variables using the variables toolbar, the
one with large Blue letters. Each letter identify a different type of variable.
You can also switch operation by clicking on the right tabs. Other Steps in this manual will show
you how to work in different main views.
Step 3: First PLC
Select the Plc operation using the Plc tab on the right side.
Maurizio Ferraris
Ax2000SystemUserManual.doc
69/78
Studio Ferraris - Ax2000 System User Manual
Rev: 002 - Page: 70/78
Select file open from the Main Menu, or click the button
on the Main toolbar. An Open File
Dialog will open already pointing to the Plc subdir of the current machine directory, and showing
the source plc files. If the open dialog points elsewhere, please navigate to the Ax2000\Demo\Plc
directory.
The source Plc files are text files containing Plc source code and extension .sma. Choose the file
Demo.sma and press Ok.
The following code will appear into the main window:
// Demo
#include <ax2000>
main()
{
if(RdInp(IN_DEMO))
SetOut(5);
else
ResOut(5);
if(!RdOut(5))
SetOut(3);
else
ResOut(3);
}
This is your first Plc program, it is written in a "C" like language called "Small C". For details about
the Small language, please consult the " The Small C booklet".
The program just loaded into the editor is a very simple program. We use it to show some basic Plc
features. Few things must be noted first:
•
Every Plc program starts with a function called "main". This is the entry point of the program,
execution starts there.
•
The first file line is a comment. In general the portion of a line following a double forward slash
(//) is considered a comment. Multiple line comments can be delimited by /* … */ signs.
•
The second line causes the inclusion of a standard definition file. This file is part of the Ax2000
System and contains the definition of all the functions and constants used by the Plc programs
•
Functions used to access the Real time system (like RdInp, SetOut, …) may accept parameters
(within parentheses). This parameters may be numbers or symbolic names as shown in the 6th
row. The symbol IN_DEMO is currently defined to have a value of 5
The program shown above explained is:
1. Check the digital input number 5 (IN_DEMO) and if active turn on digital output 5, otherwise
turn it off.
2. After that, check the status of the digital output 5 and if not active turn the digital output 3 on,
otherwise turn it off.
At this point you have the Demo Plc program loaded into the editor window. This is a syntax
highlighting editor that shows different parts of the line in different colors. This will help modifying
the code, or adding functionality.
Maurizio Ferraris
Ax2000SystemUserManual.doc
70/78
Studio Ferraris - Ax2000 System User Manual
Rev: 002 - Page: 71/78
But before changing the current code let us compile and run it, to see the effects.
Warning: If you are running the complete version of the Ax2000 System and you have also
physical boards attached, remember that this simple Plc program may turn on digital outputs 3 or 5.
Check if this may cause problems, or disconnect any device attached.
Step 4: Run a PLC
To run a Plc, this must be first compiled. Also after any change to the source code, the program
must be recompiled and run again.
Select the Plc operation using the Plc tab on the right side.
Plc Compilation
Press the button
or select Compile from the Plc menu. After the compilation a dialog showing
the compilation results is shown:
If there are errors they would be shown here, and also highlighted in the editor window.
If there are no errors the Done sentence appears as above.
Plc Start
Now press the
button or select Run from the Plc Menu.
The Plc is now running in parallel with the other PC and Real time operations. You can see this by
displaying the Plc status viewer By pressing the red P button or selecting Plc Status from the View
Menu. Opening the Plc tree you can see the status and timings of this and other Plc programs.
Now let's see if the Plc is working: Open the digital output viewer by pressing the O button or
selecting Output Status from the view menu.
You should see the output number 3 selected. If you have a physical input wired to the input
number 5 turn (or force) it on, and you will see the Output number 5 on and the output number 3
off, giving evidence that the Plc is running in the system.
I/O Forcing
In the Demo version it is not possible to turn on a physical input so you are left with the only
possibility to force it on. Forcing is the operation to set digital input or output to a certain level
independently of the Plc logic. It is possible to set the input value as seen by the Plc programs
without having a real input wired, or to set a physical output without disturbing the Plc logic.
Maurizio Ferraris
Ax2000SystemUserManual.doc
71/78
Studio Ferraris - Ax2000 System User Manual
Rev: 002 - Page: 72/78
The purpose of the I/O forcing is to prepare an environment to debug the Plc logic, in situation
where the real machine is not ready yet, incomplete or not working.
To force the input 5, open the input viewer, with the I button or selecting Input status from the view
menu. Right click on the input number 5 (Labeled IN_DEMO) and choose "Force to 1". Now the
Plc logic sees the input as if it is set from the hardware, and immediately you should see the output
changing (in the output status pane), having the proof that the Demo Plc is working.
While the input 5 is selected you can also press the '1', '0' or 'u' keys to force to one, force to zero, or
unforce respectively. The force condition is shown in color with the red indicating a force to one,
and green a force to zero.
Online Mode
Another powerful debugging aid is to put the editor in Online Mode. In this mode the running
instructions are highlighted. It is immediate to see the result of an "if" statement in this mode.
While in Online mode it is not possible to modify or compile the current Plc.
To set the online mode press the
button or select On Line from the Plc menu
Step 5: Using Variables
One of the most powerful features of the Ax2000 System is the possibility to share variables
between the Real Time, Plc and application environments. There are many different types and
number of variables. Each type may have a particular functionality associated, or be general
purpose.
Variables are uniformly accessed by the Plc programs by using the RdVar and, SetVar functions.
To keep into account the different type of variables and the possible grouping, few constants and
helper functions are available.
Variables are indicated by adding the type constant to the desired index, as in the following
examples:
RdVar(VAR_R+27)
returns the value of variable type R number 27
SetVar(VAR_B+3, 1)
sets the variable type B number 3 to the value of 1
SetVar(VAR_M+7, RdVar(VAR_M+7) + 1);
Increments variable type M number 7
Let's see a Plc program that uses variables. Use the File Open menu or corresponding button in the
toolbar and open the Plc file pro.sma. The following should appear:
#include <ax2000>
#include <float>
main()
{
if(!Timer(0))
{
SetTimer(0, 1000);
if(!RdOut(1))
SetOut(1);
Maurizio Ferraris
Ax2000SystemUserManual.doc
72/78
Studio Ferraris - Ax2000 System User Manual
Rev: 002 - Page: 73/78
else
ResOut(1);
if(!RdOut(11))
SetOut(11);
else
ResOut(11);
}
if(Var(VAR_R +
{
SetVar(VAR_V
SetVar(VAR_R
}
else
{
SetVar(VAR_V
}
18) == 0)
+ 1, float:0.0);
+ 18, 1);
+ 1, float:Var(VAR_V + 1) + float:0.001);
if(float:Var(VAR_V + 1) > float:1.0)
SetVar(VAR_V + 1, float:-1.0);
SetAnalogOut(3, RdVarV(VAR_V + 1));
}
There are four sections in this Plc file, to show several aspects on the Plc programming.
Section 1: Using Timers
The timer are special type of variables. They can be read and set using the normal RdVar and
SetVar functions, but to easy their use, two dedicated functions are defined: the SetTimer functions
starts a timer with the specified value in milliseconds, and the Timer function returns if the time is
over. Based on this explanation it's easy to see that the first section of the above program will toggle
output 1 and 11 each second.
Step 4: Using Symbols
Another very useful feature of the Ax2000 System, is the possibility to easily associate a symbolic
name, and a number of descriptions (one for each defined language), to each element of the system.
Every single Input or output, or axis can have symbol and descriptions associated.
Maurizio Ferraris
Ax2000SystemUserManual.doc
73/78
Studio Ferraris - Ax2000 System User Manual
Maurizio Ferraris
Ax2000SystemUserManual.doc
Rev: 002 - Page: 74/78
74/78
Studio Ferraris - Ax2000 System User Manual
U s i n g
t h e
D e m o
Rev: 002 - Page: 75/78
V e r s i o n
Overview
The Demo version is a special release of the complete software package that can be used to make
preliminary tests or evaluations. With the Demo version, it is also possible to test different system
configurations, and to test user PLC programs. The differences between the Demo and the full
versions are:
•
The Demo version does not support any real time, and no real time operating system extension
is required to run it
•
The Demo version does not support any real hardware, but it can emulate all the possible
hardware configurations
As a consequence of the described limitations the AxCore module behaves as if it is run with the
/RTN parameters, even if started without any or with different command line arguments. Additional
arguments can be used if required, except the /P parameter that will be always turned off.
Installation
To Be Completed
Using configuration files
Some configuration files are installed together with the Demo. They are stored using different and
meaningful names. In order to be used the user must rename the file of choice with the name
Ax2000Config.txt, because this is the file name looked for by the AxCore module when run.
If the user want to test starting with an empty configuration, it is sufficient to leave an empty
Ax2000Config.txt file or no file at all.
To Be Completed
Starting the AxCore
From the command line just type:
c:>start AxCore
And adding any required command line argument.
To Be Completed
Running PLC programs
To Be Completed
Maurizio Ferraris
Ax2000SystemUserManual.doc
75/78
Studio Ferraris - Ax2000 System User Manual
Rev: 002 - Page: 76/78
Running WinMotionTest
To Be Completed
Maurizio Ferraris
Ax2000SystemUserManual.doc
76/78
Studio Ferraris - Ax2000 System User Manual
Rev: 002 - Page: 77/78
I n d e x
A
R
Ax2000Deal............................................................... 17
Ax4 ............................................................................ 25
AxClear ..................................................................... 44
AxCore .......................................................... 16; 17; 26
H
RdInp ......................................................................... 40
RdOut......................................................................... 40
RdOutByte ................................................................. 41
RdVarB ...................................................................... 43
RdVarD...................................................................... 42
RdVarM ..................................................................... 42
RdVarR ................................................................ 41; 42
RdVarRR ................................................................... 43
RdVarS ...................................................................... 43
RdVarV...................................................................... 42
ResetCodErr............................................................... 46
ResetMessage............................................................. 46
ResOut ....................................................................... 40
RT_AutoConfig ......................................................... 27
RT_GetConfiguration ................................................ 27
RT_GetParam ............................................................ 27
RT_LoadPlc ............................................................... 38
RT_Restart ................................................................. 26
RT_SetConfiguration................................................. 27
RT_SetParam ............................................................. 27
RT_SetParam ............................................................. 27
RT_SetPreConfigData ............................................... 26
Home ......................................................................... 45
S
I
SendAppMessage....................................................... 49
SerBufRx ................................................................... 48
SerBufTx.................................................................... 48
SerGetCts ................................................................... 48
SerGetDcd.................................................................. 48
SerGetDsr .................................................................. 48
SerGetRi .................................................................... 48
SerRx ......................................................................... 48
SerSetDtr.................................................................... 48
SerSetMode................................................................ 47
SerSetRts.................................................................... 48
SerTx.......................................................................... 47
SetAnalogOut............................................................. 41
SetAxisFeed ............................................................... 44
SetBrake..................................................................... 45
SetByte....................................................................... 41
SetCircAxisFeed ........................................................ 44
SetCodErr .................................................................. 46
SetFrontLed ............................................................... 46
setGlobalError............................................................ 47
SetGroup .................................................................... 44
SetMessage ................................................................ 46
SetOut ........................................................................ 40
C
CloseLoop.................................................................. 44
G
GetAxisActualPos ..................................................... 45
GetAxisActualVel ..................................................... 45
GetAxisEndMove ...................................................... 46
GetAxisError ............................................................. 45
GetAxisInPosition ..................................................... 45
GetAxisStatus ............................................................ 45
GetGlobalError .......................................................... 47
GetGroup ................................................................... 44
GetHomeAxisStatus .................................................. 45
GetVarOutOfBound................................................... 47
GetWireBreak............................................................ 46
IntAx.......................................................................... 24
IntGrf ......................................................................... 25
IntIn ........................................................................... 24
IntKey........................................................................ 25
IntOut......................................................................... 24
IntPci ......................................................................... 24
L
LoadPlc...................................................................... 38
log.............................................................................. 47
M
Move.......................................................................... 45
O
OpenLoop .................................................................. 44
P
Plc subsystem ............................................................ 16
printf .......................................................................... 47
Maurizio Ferraris
Ax2000SystemUserManual.doc
77/78
Studio Ferraris - Ax2000 System User Manual
SetTimer .................................................................... 41
SetVarB ..................................................................... 43
SetVarD ..................................................................... 42
SetVarM .................................................................... 43
SetVarR ............................................................... 41; 42
SetVarRR................................................................... 43
SetVarS...................................................................... 44
SetVarV ..................................................................... 42
SetWireTension ......................................................... 46
Maurizio Ferraris
Rev: 002 - Page: 78/78
sprintf......................................................................... 47
T
Timer.......................................................................... 41
TPreConfig ................................................................ 26
W
WinMotionTest..............................................17; 18; 66
Ax2000SystemUserManual.doc
78/78