1
Professional Invoicing
User Manual
Copyright© 2014 by Samco Software Inc.
PROPRIETARY RIGHTS NOTICE: All rights reserved. No part of this material may be reproduced or transmitted
in any form or by any means, electronic, mechanical, or otherwise, including photocopying and recording or in
connection with any information storage or retrieval system, without the permission in writing from SAMCO Software
Inc.
SAMCO Software Inc. ("SAMCO") has taken reasonable preventative measure to ensure the accuracy of the
information contained in this manual. However, SAMCO makes no warranties or representations with respect to
the information contained herein; and SAMCO shall not be liable for damages resulting from any errors or omissions
herein or from the use of the information contained in this manual.
SAMCO is a registered trademark of SAMCO Software Inc., Unit 61 - Building 6, 7789 - 134th Street, Surrey,
British Columbia V3W 9E9, Canada. Telephone (604) 597-4211. http://www.samco.com
Other product and company names are trademarks of their respective corporations.
Professional Invoicing
User Manual
Table of Contents
1.1
Table of Contents
Understanding Professional Invoicing ...................................................... 1.1
Product Description ............................................................................. 6
Getting Started ................................................................................. 2.1
Setting up P/I .................................................................................... 3
Regular Use ...................................................................................... 4
Using Professional Invoicing ................................................................. 3.1
How to Use this Manual ........................................................................ 2
To Start Professional Invoicing ................................................................ 2
Guide to Daily Operations .................................................................... 4.1
Daily Operations Checklist ..................................................................... 2
Periodic Operations Checklist ................................................................. 3
Control Information ........................................................................... 5.1
New Customer Defaults ........................................................................ 8
Optional Inventory Usage ...................................................................... 9
Checking a Customer's Credit ............................................................... 11
Deliver-to Addresses .......................................................................... 6.1
Entering Deliver-to Addresses ................................................................. 1
Printing a List of Deliver-to Addresses ....................................................... 3
Goods/Services ................................................................................. 7.1
Entering Goods and Services .................................................................. 1
Entering Goods (Items) ......................................................................... 4
Printing a List .................................................................................... 7
Terms ............................................................................................ 8.1
Entering Terms .................................................................................. 2
Printing a List of Terms ........................................................................ 7
Ship-Via .......................................................................................... 9.1
Entering Ship-via Codes ........................................................................ 1
Deleting Ship Via Codes ........................................................................ 2
Printing a List .................................................................................... 2
Sales Reps ..................................................................................... 10.1
Entering Sales Reps ............................................................................. 1
Deleting a Sales Rep ............................................................................ 4
Printing a Sales Rep List ....................................................................... 4
Invoicing Stations ............................................................................ 11.1
Professional Invoicing
User Manual
Table of Contents
1.2
Entering Invoicing Stations .................................................................... 2
Invoices ........................................................................................ 12.1
Entering Invoices ................................................................................ 2
Line Item Screen .............................................................................. 13
Entering "Services" Line Items ............................................................... 27
Customer Credit Check ....................................................................... 33
Entering "Notes" Line Items .................................................................. 34
Entering "Standard Bill" Line Items ......................................................... 35
Totals Screen .................................................................................. 37
Immediate Printing ........................................................................... 45
Back ordered invoices ........................................................................ 47
Printing a List of Invoices .................................................................... 47
Recurring Bills ................................................................................ 13.1
Entering Recurring Bills ........................................................................ 2
Changing Recurrence Information ............................................................ 3
Line Item Screen ................................................................................ 7
Entering "Goods" line items .................................................................... 8
Entering "Services" Line Items ............................................................... 15
Entering "Notes" Line Items .................................................................. 22
Entering "Standard Bill" Line Items ......................................................... 23
Totals Screen .................................................................................. 25
Recurrence Information Screen ............................................................. 30
Printing a List of Recurring Bills ............................................................ 32
Selecting Recurring Bills for Use ............................................................ 35
Using Selected Recurring Bills ............................................................... 39
When I/C and Back Orders Are Used ....................................................... 39
Standard Bills ................................................................................. 14.1
Entering Standard Bills ......................................................................... 1
Entering "Goods" Line Items ................................................................... 4
Entering "Services" Line Items ............................................................... 11
Entering "Notes" Line Items .................................................................. 16
Printing a List of Standard Bills ............................................................. 17
Quotations..................................................................................... 15.1
Entering Quotations............................................................................. 2
Entering "Goods" Line Items ................................................................. 11
Entering "Services" Line Items ............................................................... 19
Entering "Notes" Line Items .................................................................. 24
Entering "Standard Bill" Line Items ......................................................... 26
Totals Screen .................................................................................. 28
Printing a List of Quotations................................................................. 34
Using Quotations as Invoices ................................................................ 36
View ............................................................................................ 16.1
Customers ........................................................................................ 1
Invoices ........................................................................................... 3
View Header Information ...................................................................... 5
View Line Item Information.................................................................... 6
View Line Item Details ......................................................................... 7
View Totals Information........................................................................ 8
Professional Invoicing
User Manual
Table of Contents
1.3
Recurring Bills ................................................................................... 9
View Header, Line Item, and Totals Information ......................................... 11
View Recurrence Information ............................................................... 11
Quotations ..................................................................................... 14
Print Invoices and Quotations ............................................................. 17.1
Printing Invoices ................................................................................. 1
Printing Quotations ............................................................................. 4
Post Invoices .................................................................................. 18.1
Back ordered invoices .......................................................................... 4
Posting of Services .............................................................................. 5
Posting of Goods and Items .................................................................... 5
Posting of Inventory Items ..................................................................... 5
Posting Miscellaneous Inventory Items ....................................................... 6
Back Order Reports .......................................................................... 19.1
By Customer ..................................................................................... 4
Invoice History ............................................................................... 20.1
Viewing Invoice History ........................................................................ 1
Printing the Invoice History Report ........................................................... 5
Invoice Formats .............................................................................. 21.1
Definitions........................................................................................ 2
Entering Forms .................................................................................. 3
Printing a Field Under More Than One Condition ......................................... 12
Printer features ............................................................................... 13
Alphanumeric, Numeric, Date, and Literal Fields ........................................ 14
Printing a Forms List .......................................................................... 20
Printing a Field Location Grid ............................................................... 22
Form Fields..................................................................................... 23
Data Integrity Check......................................................................... 22.1
Initializing Data Files .......................................................................... A.1
File Utilities ..................................................................................... B.1
Corrupted data files ............................................................................ 1
Export a file ...................................................................................... 2
Restore an exported file ....................................................................... 5
Rebuilding Data Files ........................................................................... 7
Professional Invoicing
User Manual
Table of Contents
1.4
Chapter 1
Understanding Professional Invoicing
Definitions
The following are definitions of key words used in this manual.
Orders vs. Invoices
An "order" is a request from a customer for goods. An "invoice" (or a "bill") is a detailed
list of goods or services that have been sold to a customer and also shows the amount of
money due.
Quotation
A "quotation" is similar to an invoice in appearance. The main difference is that the
sale has not been agreed upon yet, so the quotation is a proposed agreement about
what services or goods will be sold and for what price.
Accounts Receivable
"Accounts Receivable" is the accounting area dealing with sales made by a company and
with money it is owed. As used here, "account" means "a record of financial activity"
and "receivable" means "due to be received" or "due you". Accounts Receivable is often
abbreviated "A/R" or "AR".
Inventory Management
Inventory Management records the kinds of items you stock; how many of each is
available (on-hand) at any given time; what items you're running low on and should
restock; and what items are used or sold faster than others. It is often abbreviated
"I/C" or "IC".
Professional Invoicing
User Manual
Understanding Professional Invoicing
1.1
Job Cost
"Job Cost" is the area of accounting dealing with costs and revenues accumulated and
accounted for on an individual job basis. It is often abbreviated as "J/C".
As used here "job" means "an overall, complete piece of work a business agrees to do for
a customer". Jobs are also often referred to as "contracts".
Jobs can be run using the "Completed Job" method of accounting in which profit is
recognized only when a job is completed (or when it is substantially completed).
Alternatively, jobs can be run using the "Percentage-of-Completion" method of
accounting in which profit is recognized each period as the job progresses.
Professional Invoicing
Professional Invoicing is the area of business operation concerned with processing bills
for professional services and printing invoices for these services.
Professional Invoicing is abbreviated as "P/I".
The P/I package does not "stand alone" (run by itself) and must be used with the A/R
package. In addition, it can be used with the Inventory Management package and/or
the Job Cost package.
Integrated
An "integrated" set of accounting software packages is a set of packages in which
information entered or produced in one package is automatically available to other
packages. You don't need to re-enter the data. Customer information from A/R and
inventory item information from I/C are used by P/I. Item quantities in I/C and
customer information in A/R are also automatically updated for each invoice processed.
Point of Sale
"Point of sale" refers to the place and time at which goods are being purchased or
services delivered. An invoice available at that time and place is called a "point of
sale" invoice. This is in contrast to an invoice which is available some time after the
actual sale and which must be mailed to the customer. For example, an invoice
available to a patient at the end of a doctor's office visit is a "point of sale" invoice.
This is also called an "immediate" invoice.
Format
"Format" refers to the exact way that information is arranged on a printed page - for
example, an invoice. P/I allows you to print invoices in nearly any format you wish, or
even in several different formats for the same bill.
Goods
Professional Invoicing
User Manual
Understanding Professional Invoicing
1.2
"Goods" refers to items (objects) sold to a customer.
Services
"Services" refers to work performed for a customer, as distinct from items ("goods") sold
to a customer.
Notes
"Notes" refers to comments or explanations you have entered on an invoice in addition
to the usual descriptions of goods or services. For example, you could enter a note to
say:
"The preceding item is temporarily out of stock. However, it should arrive within 15
days. We will ship it to you as soon as it is received and passed by our quality control
inspectors."
Line Item
A "line item" is a part of an invoice showing a specific service performed or item sold.
There can be several printed lines for each "line item". Typically, a line item contains
such information as a description of the "goods" or service, the quantity, the price per
unit or per hour, and the total price.
In this package, the part of an invoice called a "note" is also referred to as a line item on
the invoice.
Standard Bill
A "standard bill" is a stored set of services or items which a company provides often too
many customers. You can "paste" a standard bill into an invoice for a customer. For
instance, an air conditioning company can store a standard bill for each of several types
of packaged services: Freon check, yearly preventive maintenance, compressor
change, etc.
As you use P/I, the appropriate standard bill for those services and inventory items
(parts and materials) can be pasted into an invoice, instead of entering the whole
invoice from scratch. If any additional, unusual services or inventory items are also
sold, these can be entered on the invoice as additional line items.
Recurring Bill
A "recurring bill" is a set of goods and services which is billed over and over again at
regular intervals to the SAME customer. For example, if a security service provided a
guard to a customer, an invoice for the service can be automatically printed each
month. If the number of hours or the rate per hour varied from month to month, the
new figures can be entered when the current month's invoice is produced.
Professional Invoicing
User Manual
Understanding Professional Invoicing
1.3
Drop Shipped Item
A "drop shipped" item is an item which is shipped directly from your supplier to your
customer. It doesn't go through your inventory. You bill the customer for the item,
but your own inventory is not affected.
General Ledger
General Ledger is the area of accounting where the records from other areas of
accounting are brought together for classification and summarization, thereby creating
a picture of the overall condition of the company's finances. As used here, "general"
means "pertaining to many areas". "Ledger" means a book where accounting records
are kept. (This term evolved from pre-computer times when accounting records were
kept exclusively by hand in large books called "ledgers".) General Ledger is often
abbreviated "G/L" or "GL".
General Ledger Account
A "general ledger account" is a specific category under which all financial activity of a
certain kind is classified. For example, you might have a general ledger account called
"telephone expenses" under which you categorized your telephone bills.
Accountants are experts at defining the various G/L accounts (financial activity
categories) needed by a business. Part of this definition process involves assigning an
"account number" to each G/L account.
Independent businesses usually use a 3- or 4-digit account number. For example, you
can have a G/L account called "100 - Cash in the Bank", and one called "400 - Sales of
Product A", and one called "410 - Sales of Product Line B".
Typically an independent business will have a hundred or more G/L accounts. In
accounting packages, each time any financial activity occurs in any area of accounting,
the dollar amount of the activity is recorded under the appropriate G/L account
numbers.
Profit Centre
A "profit centre" is a part of your company (for instance, a department or a regional
office) for which sales and/or expenses (and sometimes profits) can be calculated
separately from the total sales and expenses of the whole company.
In the Samco's system, the G/L account number can be up to 16 characters long broken
up into a maximum of 5 sections (see the chapter titled Company information in the
System Functions manual for details on defining your G/L account structure). Any one
of the sections of your G/L account can be defined as the profit centre.
For example, your "office supplies" G/L account is number 5200. If you want to track
office supply expenses independently for each of your three major departments (dept.
A, dept. B and dept. C.), you could append "-001", "-002" and "-003" to the "5200" main
Professional Invoicing
User Manual
Understanding Professional Invoicing
1.4
account number, rather than use a different main account number (such as "5201,
"5202", and "5203") for each department, as follows:
5200-001
5200-002
5200-003
Office supplies, dept. A
Office supplies, dept. B
Office supplies, dept. C
Then whenever you're distributing (allocating) office supply expenses to G/L accounts,
you use the above 7-digit numbers. Later, when you're printing reports, you can
specify that you only want to see the data for dept. A, dept. B, or dept. C.
Profit centres also apply to sales. A typical use for tracking sales by profit centre is for
a company which has several sales offices. By making each sales office a profit centre,
you can separately track the sales performance of each office.
Function
"Function" refers to a group of programs that accomplish a specific task. Each selection
on this package's menus is a function. When you select a function from a menu, one or
more programs are then automatically executed, thereby accomplishing the task you
selected.
Data Organization
Most of the information you enter into your computer is stored on your disk. In order
for computer programs to be able to locate specific pieces of data (within large masses
of data), and to be able to process data logically, data must be organized in some
predictable way. Accounting software organizes your data for you automatically as it
stores it on your disk.
There are five terms you should understand about the way the data is organized:
Character: A "character" is any letter, number, or other symbol you can type on your
computer keyboard.
Field: A "field" is one or more characters representing a single piece of data. For
example, a name, a date, and a dollar amount are all fields.
Record: A "record" is a group of one or more related fields. For example, the fields
representing a customer's name, his address, and his account balance might be grouped
together into a record called the "customer record".
Entry: A record in a data file is often referred to as an "entry".
Data file: A "data file" is a group of one or more related records. A data file is often
referred to simply as a "file" (without the word "data").
Professional Invoicing
User Manual
Understanding Professional Invoicing
1.5
The Customer File in Accounts Receivable is an example of a data file. Such a file is
made up of several records, each of which contains the name, address, etc. for one
customer.
Each file is kept separate from other files on the disk.
(There are other types of files in addition to data files. For example, programs are
stored on the disk as "program files". However, references to "file" in this User Manual
mean "data file" unless specifically stated otherwise.)
Multi-Company
"Multi-Company" refers to the capability to do accounting functions for multiple
companies with the same set of software. A user wanting to do accounting functions
for more than one company can select the Multiple companies feature to define each
company ID.
Spool
SPOOL is a computer word meaning "Save Printer Output Off-Line". Spooling is a
technique that allows a report to be printed on a printer at a later time. Instead of
reports going directly to a printer, they are saved as a disk file (which is usually a lot
faster). When a printer is available, all or some saved reports can be printed in one
long run (for example, overnight).
SAM (Samco's Automated Manuals)
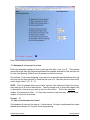
A revised edition of this and all Samco user manuals is available on-line from within any
function of Samco's business applications. Simply press [F10] ([F11] for the Windows
version) and SAM will guide you to whatever information you need. (Refer to the
chapter titled Help SAM !!! in the System Functions manual for details.)
Product Description
The P/I package is designed for use primarily by service type businesses. It contains
these features:
• Allows the user to design their invoice formats. Does not require that the user
adopt some predefined format. The software will match the user's format.
• Allows up to 10 description lines per services line item, plus unlimited notes, on any
invoice.
• Keeps a file of service codes and descriptions for all usual services.
• Keeps a file of inventory items for all usual items (or gets the item information from
I/C if it is interfaced).
• Allows reports to be saved on disk to save computer time, then printed later at your
convenience.
Professional Invoicing
User Manual
Understanding Professional Invoicing
1.6
• Shares information on customers, sales reps, ship-via methods, and payment terms
with the A/R package.
• Automatically feeds invoicing information to the A/R package.
• Automatically adjusts inventory in the I/C package (if used) when invoices are
processed.
• Can be interfaced to General Ledger via A/R and I/C.
• Has full back order retention and prints back order reports.
• Invoices can be printed immediately ("point-of-sale" mode).
• Unlimited notes can be attached to invoices for internal use.
• Keeps a history of invoices.
• Handles credit memos.
• Allows negative quantities ordered for credit.
• Allows you to enter cash received when invoice is prepared.
• Quotations can be printed without affecting A/R or inventory.
• Quotations can be printed immediately to respond to customer requests.
• Quotations can be turned into invoices automatically and the invoices then printed
immediately.
• Recurring invoices can be entered and activated at any time. Groups of recurring
invoices can be quickly selected.
• Standard bills (lists of standard services and/or goods) can be quickly "pasted" into
invoices and quotations.
• New customers can be entered "as you go" and added to the A/R Customer File
automatically.
• Allows user to create and store, virtually, an unlimited number of invoice formats.
• Has three user-defined fields which will print on invoices.
• Allows customer credit checking on both invoices and quotations.
• Allows optional use of sales representatives, commissions, and discounts.
• Allows an invoice to be entered for jobs, with the billing and cost information
automatically updating the jobs when the invoice is posted.
• Allows multiple jobs on one invoice.
• Allows storing of multiple deliver-to addresses per customer.
• Allows shipping labels to be printed at the end of the invoice.
• Flexible invoice and quotation formatting allows printing of work orders for jobs if so
desired.
• Flexible recurring billing can be used for billing on service contracts if so desired.
• Allows items to be drop shipped directly from your supplier to your customer.
Flexible Invoice Formats
You can create and use formats in which to print invoices and quotations. You have
wide design flexibility in what to print, where to print it, and what it should look like.
The same bill can be printed in different formats for different purposes, even for use as
a work order for a job.
Works with A/R, I/C, and J/C
P/I works with Accounts Receivable and, optionally, Inventory Management and/or Job
Cost. P/I uses and updates the Customer, and Sales Rep Files in A/R the Item File in
Professional Invoicing
User Manual
Understanding Professional Invoicing
1.7
I/C, and the Taxes File in System Functions. P/I uses the Job Master and Cost Category
Files and updates the Billing Entry File in J/C.
Takes Advantage of Existing Inventory Management Data
If you choose to interface with I/C, you can enter line items by either item number or
description. The item description, item price, etc. are automatically retrieved from
I/C for printing on the invoice or quotation.
The quantity on hand of the item is automatically adjusted in I/C when the invoice is
fully processed.
If you do not use I/C, you can keep a file of inventory items in P/I.
Back Order Control
All invoices which contain back ordered items remain on file as open orders until the
back orders have either been filled or cancelled. You may print reports showing back
orders by item and back orders by customer to help in back order control.
"Point of Sale" Mode of Operation
You can choose to print invoices immediately after you enter them, so that your
customer has a paper invoice at the time of sale.
Quotations
You can print quotations immediately to respond to customers' requests.
Entering and printing quotations does not affect Accounts Receivable or inventory.
Quotations can be turned into invoices automatically without having to re-enter data.
These invoices can be printed immediately or at a later time.
Supplies Information to Job Cost
If you choose to interface P/I with Job Cost, you can enter invoices for jobs and have all
billing information transferred to Job Cost automatically.
If you are using Inventory Management, inventory item costs for jobs are automatically
transferred to Job Cost.
Billing for Multiple Jobs
You are allowed to bill for multiple jobs on one invoice. Also, the flexible formatting of
invoices and quotations allows you to print work orders for jobs.
Recurring Invoices
Professional Invoicing
User Manual
Understanding Professional Invoicing
1.8
You can enter recurring invoices (recurring bills) and turn them into invoices at any
interval you specify. You can use this feature to do billings against a service contract
or instalment contract.
Standard Bills
You can keep a large number of groups of line items (goods and/or services) which you
invoice over and over again. These "standard bills" can later be "pasted into" any
invoice or quotation, avoiding the need to re-enter the individual items over and over.
Entering New Customers as You Go
You can enter new customers directly from P/I while you are entering an invoice.
These new customers are automatically added to the A/R Customer File.
Multiple Deliver-to Addresses
You can store up to 999 separate deliver-to addresses for the same customer. New
deliver-to addresses can be added while you are entering an invoice.
Commissions and Discounts
You can specify discounts and/or commissions on individual line items, on the entire
invoice, on both, or on neither.
Password Protection
You have the option to specify that passwords are required. A password is a unique
code you assign to each individual using your software. When passwords are required,
each potential user must first enter a valid password.
Data Integrity Checks
A data integrity check compares the actual numbers in the system to the calculated or
projected numbers. If these numbers do not match, you are warned that data might
have been lost due to a machine or power failure. By running this function at the start
or end of the day, you can detect several possible types of data file corruption
(sometimes due to hardware or operating system errors).
Upgrading from Earlier Versions
If you are upgrading from a previous release, we have included the necessary functions
and instructions to do this. Please refer to the Upgrade Guide for more information.
New Features for Version 6.5+
This section describes the features that have been added to Professional Invoicing for
Version 6.5+.
Professional Invoicing
User Manual
Understanding Professional Invoicing
1.9
Users who have upgraded from Release 121593 or earlier will want to read this section
after installing Version 6.5+ in order to obtain an overview of the increased capabilities
of the software. In order to take advantage of the new features, simply read the
relevant chapter(s) of the User Manual.
• Customer names can be set up (in Accounts Receivable) so that they can be searched
by last name, but invoices will show first name followed by last name.
• Commissions for invoices can be based on percentages associated with either
customers or sales representatives in Accounts Receivable.
• Unlimited cash accounts are supported.
• Full warehouse information can be displayed for line items, showing the quantity on
hand, quantity committed, quantity on back order, and quantity on work order for
the item at the warehouse specified.
• Line items for goods can be optionally back ordered. If Professional Invoicing is
interfaced with Inventory Management, quantities on back order will be tracked in
Inventory Management. Back orders are optional in Professional Invoicing.
• When used with Inventory Management, if multiple warehouses are used, the
availability of an item in each stocking warehouse may be displayed when entering a
goods line item.
• When used with Inventory Management, alternate item numbers associated with
items may be displayed when entering a goods line item.
• The Professional Invoicing posting procedure has been modified so that the actual
inventory costs (per valuation method) are stored with each line item in the Invoice
History File in Professional Invoicing.
• Allows cash to optionally be posted to Accounts Receivable. Cash will be posted or
not, as per the setting of a field in the Professional Invoicing Control File.
• When Inventory Management is used, posting inventory will use either a full
inventory register or the brief format register, as specified in the Inventory
Management File.
• Allows automatic selection of recurring invoices.
• Immediate invoicing functions have been expanded. There is now a file of invoicing
stations which allows invoices to be printed concurrently from different
workstations.
• Unlimited notes can be stored with invoices. These notes are not printed on
invoices and can be used internally by the company as needed to assist in the
processing of invoices.
Professional Invoicing
User Manual
Understanding Professional Invoicing
1.10
• Standard bill lines contain only a general ledger main account. This allows the
profit centre for standard bills to be assigned at the time that the standard bill is
used in an invoice, quotation, or recurring bill.
• When Inventory Management and Job Cost are both in use, inventory items invoiced
for jobs will update the ”quantity-used“ field in the Item Status File.
• Quotations, ‘immediate invoicing’ and batch printing of invoices can be done
concurrently.
• Back order reports are available. Back orders by items or by customers may be
printed for all (or selected) items or customers. These reports can optionally show
only those items which can now be shipped due to increased item availability.
• Sales Analysis works with Professional Invoicing.
• Enhanced invoice formatting provides added flexibility and control. Including the
use of printer codes within a form for special font and printer control.
____________________
Professional Invoicing
User Manual
Understanding Professional Invoicing
1.11
Chapter 2
Getting Started
Introduction
We assume at this point that you have installed Professional Invoicing on your computer
according to the Installation Guide. If you have not done so, refer to that manual and
install the P/I package before proceeding.
We also assume that you have familiarized yourself with the main features of this
package by reading the chapter titled Understanding Professional Invoicing. If you
have not done so, read that chapter now, and return to this chapter.
Your Accountant
We advise that you consult with your accountant before using Samco's accounting
packages. He or she is a professional in the accounting area, and should understand
your computer accounting software if he/she is to continue to serve you well.
Moreover, because of his/her expertise, your accountant may have some good advice
for you regarding converting from your old system to your new Samco package(s).
Accounts Receivable, Inventory Management, and Job Cost
First, you must install and set up the A/R package. A/R is required for use with P/I.
If you will use P/I with the I/C package (optional), you must install I/C before starting to
use P/I.
If you will use P/I with the J/C package, you must also install J/C before starting to use
P/I.
Professional Invoicing
User Manual
Getting Started
2.1
The P/I Data Files
NOTE: P/I comes with various predefined invoice formats in an Invoice Format File
(PIFRMF.DAT).
See the section titled Load in the Invoice formats chapter for instructions on loading the
predefined invoice formats.
There are several different data files which you enter before you begin using the
package on a regular basis. Here is a brief explanation of those files:
P/I Control File
You must enter information in the P/I Control File before you can start using other
selections within P/I. This file contains information which defines how you will be
processing your invoices and how P/I will be used with A/R, I/C, and J/C. The P/I
Control File tells P/I whether ship-via's are to be used, whether credit checking is to be
done, etc.
NOTE: The information you enter in the P/I Control File affects the predefined invoice
formats which come with the P/I package. Before you print an invoice or quotation,
you must make specific choices regarding which features you will be using. See the note
below and in the chapter titled Control Information.
Deliver-to File
In this file you enter information about addresses where services are performed or
where customer orders are delivered.
NOTE: If Order Entry Plus (O/E) is being used, this file is the same as the O/E Ship-to
File. Any additions, changes, or deletions made to this Deliver-to File will
automatically update the O/E Ship-to File and vice-versa.
Goods/Services File
In this file you enter the basic information about the services your company performs.
Also, if you are not using the Inventory Management package, you can enter basic
information about the goods (items) that your company sells, if any.
Invoicing Stations File
If you plan to use P/I in "point-of-sale" mode, the description of each invoicing station is
entered into this file.
Invoice Format File
Professional Invoicing
User Manual
Getting Started
2.2
If you choose to use one of the predefined formats supplied with this package, you can
skip entering information in this file at first. Later, if you want to change your invoice
format, you enter information here.
This file can hold, virtually, an unlimited number of different invoice formats.
The information you enter in the P/I Control File affects these predefined invoice
formats. See the note in the chapter titled Control Information.
Accounts Receivable Files
P/I shares the next two files with A/R. If you have already entered all the terms code,
ship-via code, and sales rep information in the A/R package, you can skip entering it in
the P/I package.
A/R Codes File
This file holds all of your terms, and ship-via codes. These codes are normally entered
as a part of setting up the A/R package. You can also enter them from the P/I package.
Sales Rep File
Sales reps are normally entered through the A/R package. You can also enter them
from the P/I package.
Setting up P/I
Perform these steps to start using Professional Invoicing:
1. Set up the various tax groups you will be requiring (see the chapter titled Taxes in
the System Functions manual).
2. Set up Accounts Receivable as described earlier in this chapter. This includes setting
up all ship-via codes, terms codes, and sales reps that will be used with Professional
Invoicing. Refer to the Accounts Receivable User Manual.
3. If you plan to use Inventory Management with P/I, then set up I/C. Refer to the
Inventory Management User Manual.
4. Enter P/I control information, using Control information. The information in the P/I
Control File controls how P/I is used by your company. For instance, you specify
whether or not P/I is used with I/C in the P/I Control File. Refer to the chapter
titled Control Information.
5. Using Goods/Services, enter the services offered by your company. If you are not
using Inventory Management, enter the goods sold by your company here as well.
(If you are using I/C, then inventory items entered using Items in I/C can be invoiced
Professional Invoicing
User Manual
Getting Started
2.3
using P/I. You do not enter goods directly into P/I in this case.) Refer to the
chapter titled Goods/Services.
6. If some of your customers receive shipments at an address which is different from
their billing address (as stored in the Customer File), then enter these addresses
using Deliver-to addresses. Refer to the chapter titled Deliver-to Addresses.
7. If you plan to use immediate invoicing ("point-of-sale" mode), then enter
descriptions of your invoicing stations using Invoicing stations. Refer to the chapter
titled Invoicing Stations.
8. Set up standard bills using Standard bills. Refer to the chapter titled Standard
Bills.
9. If needed, set up recurring bills using Recurring bills. Refer to the chapter titled
Recurring Bills.
10. Set up invoice formats using Invoice formats. Refer to the chapter titled Invoice
Formats.
Regular Use
When you have finished building your data files as above, you will be ready to use P/I on
a regular basis. The remaining chapters in this manual show you how to:
-
Process invoices
Process recurring bills
Process standard bills
Process quotations
Process automatic billing
View customers, invoices, and quotations
Print invoices and quotations
Post invoices to A/R
Print back order reports
Print or view invoice history
Add or change the format of an invoice
Perform a data integrity check
Print reports from disk
Appendix "A" explains how to initialize (create from scratch) your P/I data files. You
may never need this function, but it is included just in case.
Appendix "B" discusses the File utilities function which allows you to export/import your
data files, as well as a rebuild function for repairing damaged files or cleaning up
removed records that are taking up space.
Support
Professional Invoicing
User Manual
Getting Started
2.4
This manual, in combination with your Installation Guide and System Functions manual,
is designed to allow you to use Professional Invoicing without additional help.
However, if you encounter problems you cannot resolve by referring to these manuals,
you may want to get additional assistance. Your supplier may be able to provide such
assistance, or he may be able to recommend an independent source.
If all else fails, contact Samco's Support Department at one of the following locations:
Samco Software Inc.
61 - 7789 - 134th Street
Surrey, BC V3W 9E9
Tel: (604) 597-4211
Fax: (604) 597-7320
There will be a fee for support service from Samco.
____________________
Professional Invoicing
User Manual
Getting Started
2.5
Chapter 3
Using Professional Invoicing
About this Manual
This manual provides the information needed to learn and use Professional Invoicing.
Organization
The next chapter is a guide to daily operations. It explains how you use Professional
Invoicing to perform various daily, weekly, and periodic tasks.
After the guide, the next few chapters give instructions on how to enter the basic
information which will set up your package according to your needs and prepare you for
daily operation.
Following those come chapters which you will use most frequently. They describe how
to use Professional Invoicing on a daily basis.
Additional information can be obtained from the System Functions manual, which
contains chapters that describe features common to all packages.
Topics covered in the System Functions manual include:
Defining multiple companies
Printers
Taxes
Valid G/L accounts
General rules
Using S.A.M. (Samco's on-line user manuals)
Switching companies
Menu styles
Professional Invoicing
User Manual
Using Professional Invoicing
3.1
Passwords
Glossary of terms
How to Use this Manual
When beginning, you will want to keep this manual handy so you can refer to it as often
as you need. Later, you may only need to refer to it occasionally.
Each chapter of this manual provides instructions on how to use a particular selection of
your software.
The instructions include many examples of what to enter where. In fact, you can go
through the manual entering all the examples as you come across them. This will give
you a good demonstration of the capabilities of your new software. Each chapter has
sample printouts of the information entered during the examples for you to compare.
If you enter the examples, you will want to "initialize" the data files before you begin
entering your actual business information. When you "initialize" a file, you mean to
"clear out all information I've entered" for that file. The initialization procedure is
given in one of the appendixes. After initialization, you would restart with this chapter
and enter your actual business information. Initialization is described in an appendix
at the end of this manual.
On-line Version
For your convenience, all of Samco's user manuals are provided in an on-line version.
Simply press [F10] [F11] from anywhere within the Samco system. (Refer to the chapter
titled Help SAM !!! in the System Functions manual for details.
To Start Professional Invoicing
If you are adding Professional Invoicing to an existing installation, you will need to add
it to each company ID you wish to use it under using the Company data option within
System Functions. This must be done prior to continuing. (Refer to the chapter titled
Company Data in the System Functions manuals for details.)
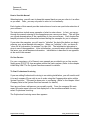
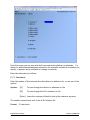
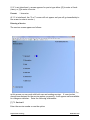
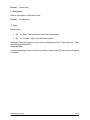
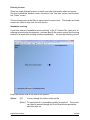
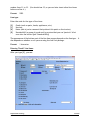
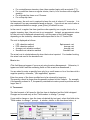
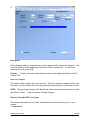
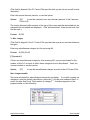
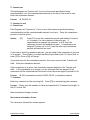
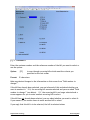
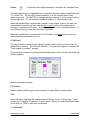
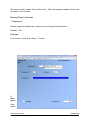
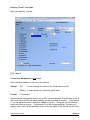
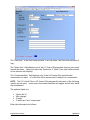
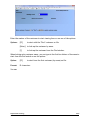
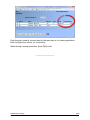
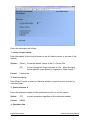
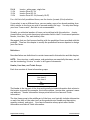
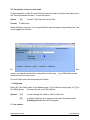
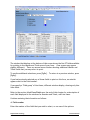
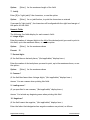
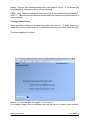
Start up your Samco software as you normally would. From the company ID's main
menu (the main menu is the one that displays all of the modules available for use),
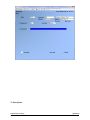
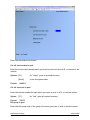
select Professional invoicing.
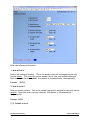
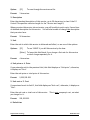
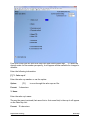
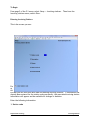
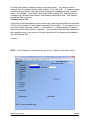
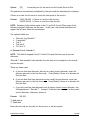
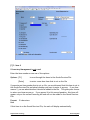
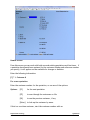
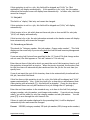
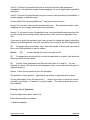
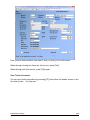
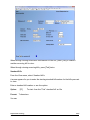
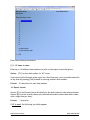
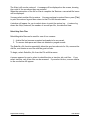
The Professional invoicing menu then appears:
Professional Invoicing
User Manual
Using Professional Invoicing
3.2
NOTE: If you are setting up Professional Invoicing for the first time only a few menu
selections will appear. Once the P/I control information has been set up, the normal
P/I menus will be displayed.
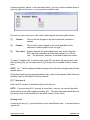
The selections that you will be using most often (such as Invoices) are on the first screen
of the main menu.
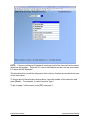
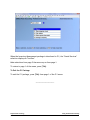
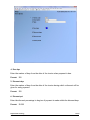
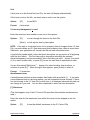
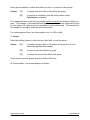
To choose one of the selections shown above, type the number of the selection and
press [Enter]. For example, to select Invoices, type 1
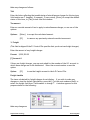
To get to page 2 of the menu, press [F2] from page 1.
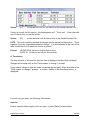
Professional Invoicing
User Manual
Using Professional Invoicing
3.3
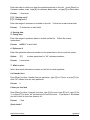
When the Inventory Management package is interfaced to P/I, the "Goods/Services"
selection displays as "Services".
Make selections from page 2 the same way as from page 1.
To return to page 1 of the menu, press [Tab].
To Exit the P/I Package
To exit the P/I package, press [Tab] from page 1 of the P/I menu.
____________________
Professional Invoicing
User Manual
Using Professional Invoicing
3.4
Chapter 4
Guide to Daily Operations
Introduction
The following checklists are provided as examples of how you might use Professional
Invoicing to perform various daily and periodic tasks.
While we attempt to present the tasks in a logical order, you should adjust the checklist
as necessary to meet your own needs. You may wish to consult with your accountant
for advice on organizing your own checklists to ensure the efficiency and security of
your business operations.
Professional Invoicing
User Manual
Guide to Daily Operations
4.1
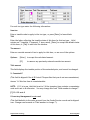
Daily Operations Checklist
EACH DAY
EACH DAY, AS NEEDED
___ Enter invoices and credit memos using Invoices.
NOTE: Invoices may be printed immediately upon
entry if you have selected to do so in the P/I Control
File.
___ Enter quotations using Quotations. Print quotations
using Print quotations.
NOTE: Quotations may also be printed immediately
upon entry if you have selected to do so in the P/I
Control File.
___ Turn quotations into invoices using Use as invoice.
These invoices may be printed immediately if you have
selected to do so in the P/I Control File.
___ Enter new delivery locations for your customers using
Deliver-to-addresses.
___ Enter new recurring bills using Recurring bills.
___ Select recurring bills for use using Select for use.
___ Copy selected recurring bills to the Invoice File using
Use selected.
___ View invoices using Invoices from the View selection.
___ View recurring bills using Recurring bills from the
View selection.
___ View standard bills using Standard bills from the
View selection.
___ View quotations using Quotations from the View
selection.
___ View invoices which have been processed previously
using the View function on the Invoice history menu.
___ Print reports about invoices which have been
processed previously using Print on the Invoice
history menu.
Professional Invoicing
User Manual
Guide to Daily Operations
4.2
___ If you are using back orders in P/I, and P/I is
interfaced to I/C, then print back order reports to
determine those line items on orders which can now
be shipped due to increased item availability in I/C.
Use these reports as worksheets to specify quantities
to ship for each line item. Then use Invoices to
enter the quantity to ship for each line.
___ If you are using back orders in P/I, and P/I is not
interfaced to I/C, then print back order reports to
determine those line items on orders which are back
ordered. Use these reports as worksheets to specify
quantities to ship for each line item. Then use
Invoices to enter the quantity to ship for each line.
___ Print the Invoice List. Invoices may be printed on
separate pages on this report. These printed copies of
invoices can be used as an order acknowledgement for
customers, as well as for internal purposes within your
company.
___ Print invoices using Print invoices. If all invoices were
printed at the time of entry (or when created from a
quotation), then you would only have to print invoices
for any recurring bills which have been copied to the
Invoice File using Use selected.
___ Post invoices using Post invoices.
Periodic Operations Checklist
Professional Invoicing
User Manual
Guide to Daily Operations
4.3
EACH PERIOD
EACH PERIOD, AS NEEDED
___ If you are using Sales Analysis, print sales analysis
reports which are based on the Invoice History File.
Print the Sales Rep, Actual (detailed version),
Customers for an Item, Items for a Customer,
Customers for a Service, and Services for a Customer
reports.
Be sure to print these reports prior to closing the
current period in A/R (using Close a period in A/R).
If you are using I/C, then be sure to print these
reports prior to closing the current period in I/C
(using Close a period in I/C).
___ Purge invoice history. Once you purge an invoice, it
will no longer be available for viewing or printing. Print
the purge report to retain a permanent printed record of
invoices purged. Only purge invoices if you no longer
need to refer to them using P/I. For example, you
might choose to keep a few months' worth of history on
the computer for reference. Each month, you would
purge the oldest month's invoices and file the purge
report for future reference.
___ Print the Tax Collected report from within A/R for
regional tax remittance.
____________________
Professional Invoicing
User Manual
Guide to Daily Operations
4.4
Chapter 5
Control Information
Introduction
The P/I Control File contains information about the way you handle invoices. The
information you enter in the P/I Control File "controls" how certain functions work in
other parts of this package.
To help you see how the P/I package works, we have provided a sample invoice format
file for you to use to print invoices in a variety of invoice formats without having to
enter all the information.
If you wish to use this file, see the instructions in the chapter titled Invoice Formats on
loading the predefined forms. If the Control File entries for the predefined data are
different than what you will use, make any changes as explained in this chapter.
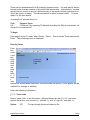
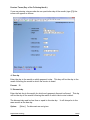
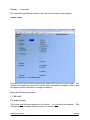
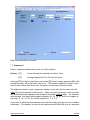
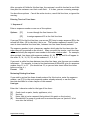
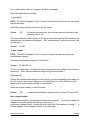
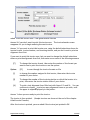
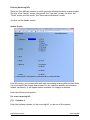
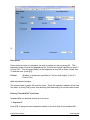
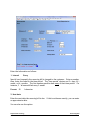
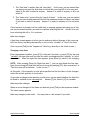
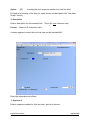
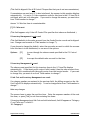
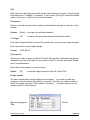
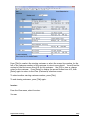
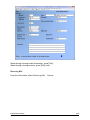
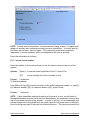
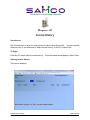
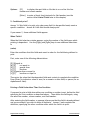
To Begin
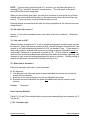
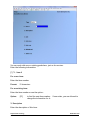
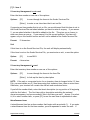
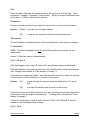
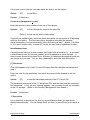
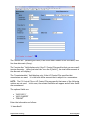
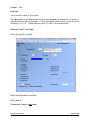
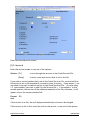
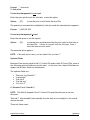
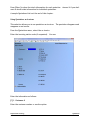
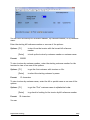
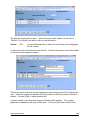
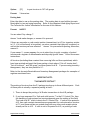
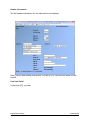
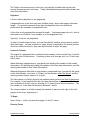
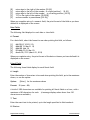
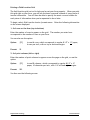
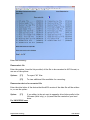
From page 2 of the P/I menu, select Control information.
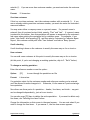
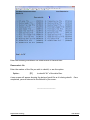
This is the screen you see:
Professional Invoicing
User Manual
Control Information
5.1
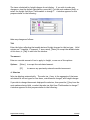
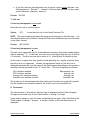
Enter the following information:
1. Next bill ref #
Enter a bill reference number. This is the number that will be assigned to the next
invoice added. This is not the invoice number, but is your own internal reference.
Each time a new invoice is added, this number is incremented by 1 automatically.
Format:
999999
2. Next invoice #
Enter an invoice number. This is the number that will be assigned to the next invoice
printed. Each time a new invoice is printed, this number is incremented by 1
automatically.
Format: 999999
[?] 3. Default invoice
Professional Invoicing
User Manual
Control Information
5.2
This invoice format code specifies the usual format to use to print invoices and
quotations. You can override this at the time that you actually print invoices.
Enter the code or use the option:
Option:
Format:
5 characters
To scan through the invoice formats on file
4. Print immediately ?
Answer to have the option of printing invoices and quotations immediately after you
enter them ("point-of-sale" mode). This also allows you to immediately print invoices
created from quotations. If you print your invoices in batches, answer .
5. Service text length
Enter the maximum length for each line (up to 50 characters) of service description to
print on an invoice. (See "Entering 'Services' line items" in the chapter titled Invoices.)
The length you specify here also sets the maximum length of each line of notes printed
on invoices. (See "Entering 'Notes' line items" in the chapter titled Invoices.)
Format:
99
6. Comment text length
Enter the maximum length (up to 50 characters) of the comment line to be printed in
the "totals" section of invoices.
Format:
99
Optional Fields
The next three fields are completely optional, so they are entirely up to you to define.
These "user-defined fields" can be printed in the "header" section of invoices.
If the usual information about invoices called for in this package is not enough for your
business needs, you have here up to three additional pieces of information that you can
enter for any invoice. What this information is, is totally up to you.
Use these fields to tailor the P/I package to your particular business. For example, you
can use these fields for F.O.B. location, contract number, ship date, etc.
Each of the three fields is alphanumeric, so whatever you enter will appear exactly like
that if you choose to print it on the invoice later. This means that, if you enter a date
as "031599", it will appear as "031599", not as "03/15/99".
Professional Invoicing
User Manual
Control Information
5.3
For example, suppose you wanted to print each customer's account balance in the
header of his invoice. You could name an optional field "ACCT BAL". It would appear
on the header screen each time you entered an invoice or quotation, and you could
enter the amount of his account balance then. Later, you could choose to print the
account balance on the customer's invoice when you specify the layout (format) of the
invoice.
7. 1st optional field
Enter the description that you want to appear on the header screen to identify this
field.
You may press [Enter] to skip optional field 1.
Format:
10 characters
Length
Enter the maximum length (up to 15 characters) which you allow for information
entered in this field.
Format: 99
8. 2nd optional field
Enter the description that you want to appear on the header screen to identify this
field.
You may press [Enter] to skip optional field 2.
Format:
10 characters
Length
Enter the maximum length (up to 15 characters) which you allow for information
entered in this field.
Format:
99
9. 3rd optional field
Enter the description that you want to appear on the header screen to identify this
field.
You may press [Enter] to skip optional field 3.
Format:
10 characters
Length
Professional Invoicing
User Manual
Control Information
5.4
Enter the maximum length (up to 30 characters) which you allow for information
entered in this field.
Format:
99
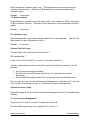
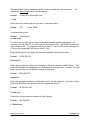
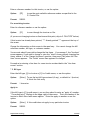
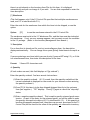
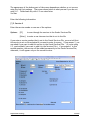
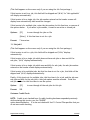
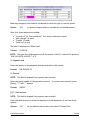
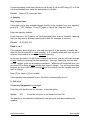
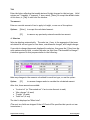
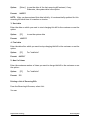
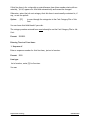
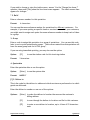
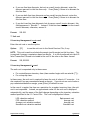
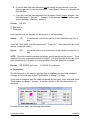
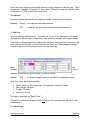
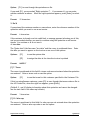
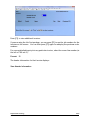
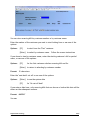
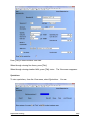
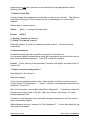
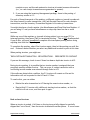
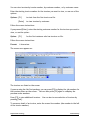
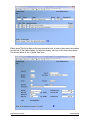
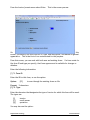
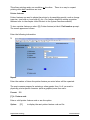
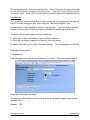
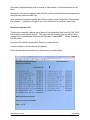
The second screen appears:
NOTE: Fields 28 through 32 will appear if you answer Y to 27. "Use Inventory
Management ?", and are discussed later on in this chapter.
NOTE: P/I comes with various formats in which to print invoices and quotations.
Before you print an invoice or quotation, or even view the formats, you must specify
which of the options below (and one from A/R) are used.
Format #1, 2, and 3, which can be used to print goods and services items on a
pre-printed form, includes specifications for printing information with all of the
following options used (turned on):
Professional Invoicing
User Manual
Control Information
5.5
Ship-vias (field 10),
Miscellaneous charges (field 11),
Freight charges (field 12),
Back orders (field 13)
Invoice discounts and line item discounts (field 23);
and sales reps (from A/R).
At this time, specify to use (or not) these options. For any options which you specify
are not used, the printing specifications are not changed. You must manually remove
them using Invoice Formats.
However, if you left some of these options "on" at this point and entered information in
the related fields in Invoices, etc., then turned off the options later, such information
would remain in the files as "hidden" information and might show up later unexpectedly
on your invoices.
Enter the information as follows:
10. Use ship-vias ?
If you don't ship any goods in your business, answer N. Otherwise, answer Y, and the
Ship-via codes selection will appear on the P/I menu.
11. Use misc charges ?
If you don't use miscellaneous charges in your business, answer N. Otherwise, answer
Y.
12. Use freight charges ?
If you don't ship goods in your business, answer N. Otherwise, if you ship goods and bill
for freight, answer Y.
13. Use back orders ?
If a customer orders an item that is not currently in stock, you often "back order" it.
This means that you record it on the invoice and ship it when it becomes available.
Answer Y if you wish to use back orders in P/I, or N otherwise.
14. Do credit checking ?
Answer Y if you wish to have the P/I package check whether a customer is over his
pre-established credit limit when an invoice is being processed. Otherwise, answer N.
(Credit limits are set in the A/R package.)
NOTE: A full description of how credit checking is performed in P/I appears at the end
of this chapter.
15. Keep invoice history ?
Professional Invoicing
User Manual
Control Information
5.6
Answer Y to keep a history of invoices that are fully processed. Otherwise, answer N.
If you answer N, the Print or view invoice history selection will not appear on the P/I
menu.
There is only one reason not to keep invoice history: to save disk space. (The Invoice
History File can get very large if you have many invoices.)
16. Default commis method
(This field appears only if the A/R Control File specifies that commissions are used.)
Type [P] if commissions are usually calculated based on the Price of a product or
service, or [M] if commissions are usually calculated based on Margin (profit margin).
Format:
1 character
17. Multiple profit ctrs ?
Answer Y if you group your invoices by profit centre. Otherwise, answer N. You can
enter information in this field only if you specified in Company information that you are
using profit centres (i.e., you set your G/L account structure to multiple sections). An
answer of Y here means that you want to assign invoices to different profit centres.
[?] 18. Default profit ctr
You are not asked to enter a profit centre here unless you specified in Company
information that you have multi-section G/L accounts.
If you use profit centres, the significance of this field depends on your answer in field 17
above:
If you are not using multiple profit centres in P/I, each invoice you enter will
automatically and always be assigned to the profit centre entered here. That is, the
profit centre of the sales account of the invoice will always be the profit centre entered
here. The exception to this rule applies to goods / services that have already been
assigned a profit centre. In this case the entire G/L account for the goods / services
will be used.
If you are using multiple profit centres in P/I, you will be asked to enter a profit centre
while entering each invoice. The profit centre entered here will then be the default.
[?] 19. Default sales accounts
If you have chosen to distribute sales in A/R (by answering Y to "Distribute sales ?") in the
A/R Control File, then every line item for goods or services may be assigned to a G/L
sales account. Here, you can set up between 1 and 4 default sales accounts.
Professional Invoicing
User Manual
Control Information
5.7
NOTE: If you are using a multi-section G/L account, you will have the option of
pressing [F1] to "wildcard" the profit centre section. This will result in the profit
centre from the invoice being used.
When you are entering line items, you will have a chance to pick which one of these
default sales accounts should be used, or the sales account from the Goods/Services
record. Or you can enter a totally different sales account.
Entering default accounts here can save you many keystrokes at the time invoices are
being entered.
20. Ask cash with invoice ?
Answer Y if you will sometimes receive cash when an invoice is entered. Otherwise,
answer N.
21. Post cash to A/R ?
When an invoice is entered in P/I, a full or partial cash payment for the invoice may also
be entered. When the invoice is posted to A/R, the cash payment is handled as a cash
receipt in A/R and automatically posted in A/R if you answer Y here. If you answer N,
then cash payments entered with invoices are treated as memo information only; no
cash receipt transaction is generated or posted in A/R. (This is useful if you receive
cash into your accounting department and then pass memo information regarding cash
received to your order processing department for entry on invoices. Double posting of
cash in this situation is prevented by setting this flag to N.)
22. What kind of discounts ?
Enter how you apply discounts to your customers:
N No discounts
L Line discount only (discount given on some individual line items, but not on the
overall invoice amount).
I Discount on the overall invoice, but not on individual line items.
B Discounts on some individual line items and additionally on the overall invoice
amount.
Format:
1 character
New Customer Defaults
Fields 23, 24, and 25 are defaults which you can use when adding a new customer in P/I
"on the fly".
[?] 23. Customer type
Professional Invoicing
User Manual
Control Information
5.8
Enter the default customer type to use. This should be the most common type of
customer that you have. (See the A/R User Manual for more information about
customer types.)
Format: 5 characters
24. Balance method
Enter the balance method you use for most or all of your customers: [O] for open item,
or [B] for balance forward. (See the A/R User Manual for more information on these
types.)
Format:
1 character
25. Statement cycle
Enter the statement cycle code to use as a default for a new customer. (See the A/R
User Manual for more information on this.)
Format:
1 character
Optional Job Cost Usage
The next field is for interfacing Job Cost with P/I.
26. Use Job Cost ?
If you will use Job Cost with P/I, answer Y; otherwise, answer N.
Certain requirements have to be met before you will be allowed to answer Y to this
question:
Job Cost must already be installed.
The Job Cost Control File must specify that J/C interfaces to Accounts
Receivable.
The Accounts Receivable Control File must specify that you distribute sales.
Also, in order for both Job Cost and Inventory Management to interface to P/I, the Job
Cost Control File must specify that J/C interfaces to Inventory Management.
Optional Inventory Usage
Fields 28 through 31 are for interfacing Inventory Management with P/I and establishing
defaults.
27. Use Inventory Management ?
If you will use I/C with P/I, answer Y; otherwise, answer N.
The next fields appear only if you answered Y to "Use I/C ?".
Professional Invoicing
User Manual
Control Information
5.9
[?] 28. Inventory scrap acct
Enter the number of the G/L account to use as the default "scrap" account.
A scrap account is used for a credit transaction when the quantity of goods being
returned to inventory is smaller than the quantity being credited (for example, when
faulty merchandise is credited but not returned). The dollar value of the quantity
"scrapped" (not returned to inventory) is put into the scrap account.
NOTE: If profit centres are used, you will have the option of pressing [F1] to "wildcard"
the profit centre section. This will result in the profit centre for the invoice header
being inserted into the scrap account.
[?] 29. Drop ship clear acct
Enter the number of the G/L account to be used as the drop ship clearing account.
A drop shipped item is an item which is shipped directly to the customer from your
supplier.
When you don't drop ship, but do sell goods from inventory, the item's expense account
is debited and the balance sheet inventory account is credited. However, drop shipped
items do not come out of your inventory. For drop shipped items, the item's expense
account is still debited, but the credit goes to the drop ship clearing account.
If you are using Accounts Payable, you must enter a voucher for your cost for the drop
shipped items when you receive an invoice from the vendor for the drop shipped items.
When distributing the "expense" in the Payables selection in the A/P package, be sure to
use the same drop ship clearing account that you enter here. This will result in a debit
to the drop ship clearing account, thus clearing the account balance to zero.
When you are using A/P, the balance in the drop ship clearing account should be zero at
the end of each accounting period. If it is not zero, vouchers have not been entered for
one or more drop shipped items. In this case, consult with your accountant regarding
G/L adjustments needed to reflect merchandise which you have drop shipped for which
you have not yet received an invoice from the vendors concerned.
30. Multiple warehouses ?
(This question appears only if you use multiple warehouses in Inventory Management.)
Answer Y if you want to be able to choose which warehouse an item is to be shipped
from. If items are always to be shipped from one warehouse, answer N.
[?] 31. Default warehouse
(This question appears only if you use multiple warehouses in Inventory Management.)
Professional Invoicing
User Manual
Control Information
5.10
Enter the code for the warehouse from which items are usually shipped.
Format:
2 characters
IMPORTANT NOTE: If you have been using the P/I package for a while with P/I Control
File options set in a certain way, and you need to change these options, it is best to do
this with no regular invoices or quotations on file. You should first print and post all
invoices that you possibly can, then, make the change.
If you are changing the P/I Control File to eliminate fields from the invoice, make sure
that, before you eliminate them, you change the information that you are eliminating to
either zero (numeric) or blanks (alphanumeric) on every regular invoice, recurring bill,
standard bill, and quotation. If you don't do this, you might get "hidden" information
showing up unexpectedly.
For example, suppose you have been using miscellaneous charges on your invoices, and
you decide to eliminate them. Before changing the P/I Control File to eliminate the
"MISCELLANEOUS CHARGES" field, set that field to zero in all invoices on file in which it
is not zero. Otherwise, the amount of the miscellaneous charges will still be added to
the invoice total, but it will be hidden and you will not be able to change it or eliminate
it later.
Checking a Customer's Credit
Professional Invoicing (P/I) can be set up to automatically check whether the invoice
being processed will cause the customer to exceed his credit limit established in A/R.
In addition, when you select the customer for an invoice, a check is made to see if he is
already over his credit limit. In either case, a warning message displays and you must
choose what to do about it.
If the P/I Control File specifies that credit checking is to be done, the customer's credit
is checked by totalling his account balance, plus the un-posted balance of any invoices
entered but not yet processed, and checking this against his credit limit.
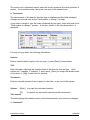
The warning message is:
Customer is over credit limit of $____ by $____.
Last payment of $____ was on (date)
If there is no payment on file, "No last payment on file" will display in place of "Last
payment of $___ was on (date)." In P/I, credit is checked at various points when
entering invoices, quotations, and recurring bills.
____________________
Professional Invoicing
User Manual
Control Information
5.11
Chapter 6
Deliver-to Addresses
Introduction
Use this selection to enter deliver-to addresses for customers that are in the Customer
File in Accounts Receivable.
A deliver-to address is an address at which a service is performed or to which customer
orders are delivered, different from the customer's billing address.
NOTE: If Billing is being used, this file is the same as the O/E Ship-to File. Any
additions, changes, or deletions made to this Deliver-to File will automatically update
the O/E Ship-to File and vice versa.
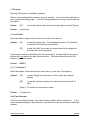
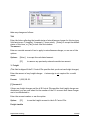
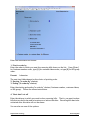
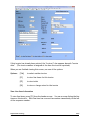
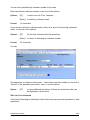
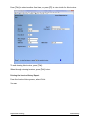
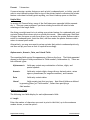
To Begin
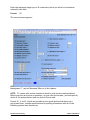
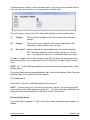
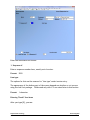
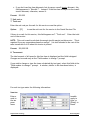
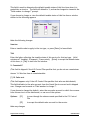
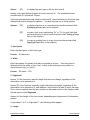
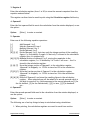
Go to Billing (OE) [F2] Setup Ship-to Addresses
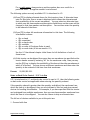
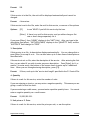
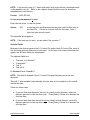
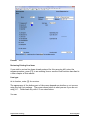
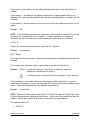
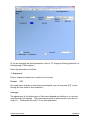
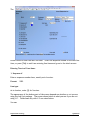
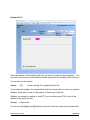
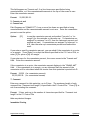
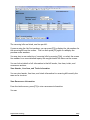
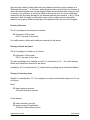
Entering Deliver-to Addresses
After you have completed the screen to enter a ship-to address, it appears similar to
this:
Professional Invoicing
User Manual
Deliver-to Addresses
6.1
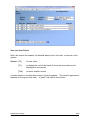
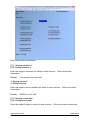
From this screen you can work with both new and existing deliver-to addresses. If a
deliver-to address has already been entered for the customer and deliver-to number you
specify, it appears and is available for changes or deletion.
Enter the information as follows:
[?] *1. Customer #
Enter the number of the customer that this deliver-to address is for, or use one of the
options:
Options:
[F1]
To scan through the deliver-to addresses on file
[F2]
To scan through the A/R customers on file
[Enter] Leave the customer # blank to look up the customer by name
The number entered must exist in the A/R Customer file.
Format: 12 characters
Professional Invoicing
User Manual
Deliver-to Addresses
6.2
For a specific, existing deliver-to address, you can enter the customer number and the
deliver-to number (next field).
*2. Deliver-to #
Enter a deliver-to number to identify this deliver-to address.
Format: 999
3. Deliver-to name
Enter the deliver-to name, or use the option:
Option:
[F1]
to use the customer name as the deliver-to name
Format: 25 characters
4. Deliver-to addr-1
Enter the first line of the address.
Format: 25 characters
5. Deliver-to addr-2
Enter the second line of the address.
Format: 25 characters
6. Deliver-to addr-3
Enter the third line of the address.
Format: 30 characters
[?] 7. Tax group
Enter the tax group for the deliver-to address, or use the option:
Option:
[F1]
To use the tax group entered for this customer in the A/R
Customer file
The tax group entered must exist in the Tax Codes file.
Printing a List of Deliver-to Addresses
Select Print from the Deliver-to addresses menu.
Professional Invoicing
User Manual
Deliver-to Addresses
6.3
On the screen that appears, you are asked to enter:
[?] 1. Starting customer #
[?] 2. Ending customer #
Enter the range of customer numbers to be included on the list. Follow the screen
instructions.
Format: 12 characters
____________________
Professional Invoicing
User Manual
Deliver-to Addresses
6.4
Chapter 7
Goods/Services
Introduction
If you are using the Inventory Management package, this selection will have a different
name: Services. This is because all item information will come from the Item File in
the I/C package. For the remainder of this chapter, the selection will be referred to as
Goods/Services.
Use this selection to enter the standard services and goods (items) that your business
provides. You can assign a 3-character code to each of your services, and a
15-character code to each of your items. (If you are using I/C, you must enter your
items there.)
You can number your services with a number from 1 to 999, or you can give each of your
services a 3-character code such as "CPY" for "Copying", "TEL" for "telephone", "MNT" for
"Maintenance", etc.
To Begin
From page 2 of the P/I menu, select Set up Goods/Services, then select Enter from
the menu which appears.
Entering Goods and Services
Professional Invoicing
User Manual
Goods/Services
7.1
If I/C is not interfaced, a screen appears for you to type either [G] to enter a Goods
(item), or [S]to enter a Service.
Format:
1 character
(If I/C is interfaced, the "G or S" screen will not appear and you will go immediately to
the screen to enter a service.)
Entering a Service
The services screen appears as follows:
Fro
m this screen you can work with both new and existing services. If a service has
already been entered for the service number you specify, it will appear and be available
for changes or deletion. Enter the following information:
[?] *1. Service #
Enter the service number or use the option:
Professional Invoicing
User Manual
Goods/Services
7.2
Option:
[F1]
To scan through the services on file
Format:
3 characters
2. Description
Enter the standard description of this service, up to 50 characters (or less if the P/I
Control File specifies a shorter length for the "Service text length").
When you enter this service into an invoice, you will be able to put in up to 9 more lines
of detailed description for this service. You will also be able to change this description
that you enter here.
Format:
50 characters
3. Unit
Enter the unit in which this service is delivered and billed, or use one of the options:
Options:
[F1]
To use "HOUR" if you bill this service by the hour
[Enter] To leave this field blank if you charge a flat rate for this service
or don't charge separately for it
Format:
4 characters
4. Unit price or 4. Price
If you entered a unit in the previous field, this field displays as "Unit price"; otherwise,
it displays as "Price".
Enter the unit price or total price of this service.
Format:
9,999,999.999
5. Unit cost or 5. Cost
If you entered a unit in field 3, this field displays as "Unit cost"; otherwise, it displays as
"Cost".
Enter the unit cost or total cost of this service. This is your company's cost, not what
you charge for it.
Format:
999,999.999
6. Default tax
Professional Invoicing
User Manual
Goods/Services
7.3
A window appears, similar to the one shown below, for you to set the taxable status of
each tax type for this service, or to incorporate a taxable code:
For each tax type, enter one of the codes reflecting this services taxable status:
[T]
Taxable...
This tax will be charged on the service unless the customer is
exempt.
[X]
Exempt...
This tax will not be charged on the service regardless of the
customer's taxable status for this tax type.
[Z]
Zero-rated... Usually reserved for value added taxes, such as the Canadian
GST, this status identifies a service that is subject to a 0% tax
rate. The purchaser, however, is entitled to input tax credits.
To apply a "taxable code" to the tax type, press [F2] and enter the appropriate code.
After pressing [F2] you can then enter a [?] to bring a list of taxable codes to choose
from.
NOTE: An "*" will be displayed beside tax types who have had changes made to their
default status.
For further details on tax types and taxable codes, refer to the chapters titled Taxes and
Handling Taxes in the System Functions manual.
[?] 7. Sales acct #
Enter the G/L account to distribute sales of this service to.
NOTE: If you are using a G/L account of more than 1 section, you can set the profit
center section to be wild-carded by pressing [F1]. This allows the sales distribution for
the service item to be distributed to the profit center for the ticket.
Entering Goods (Items)
If you enter [G] in response to "Type" on the first screen, the goods screen appears as
follows:
Professional Invoicing
User Manual
Goods/Services
7.4
You can work with new or existing goods here, just as for services.
Enter the following information:
[?] * 1. Item #
For a new item:
Enter the item number.
Format:
15 characters
For an existing item:
Enter the item number or use the option:
Option:
[F1]
to find the next item number. If one exists, you are allowed to
change the information for it.
2. Description
Enter the description of this item.
Professional Invoicing
User Manual
Goods/Services
7.5
This description can be changed when this item is actually put into an invoice. You
must enter something here for the description.
Format:
3 lines of 25 characters each
3. Unit
Enter the unit in which you sell this item, or use the option:
Option:
[F1]
to use "EACH"
You must enter a unit.
Format: 4 characters
4. Unit price
P/I allows you to enter up to 2 price levels based on the quantity purchased. For
example, you sell item "X" at $1.50 each for unit price level 1, and $1.00 for each unit
over and above 25. If a customer buys 30 of item "X", the first 25 will be charged at $
1.50 and the remaining 5 will be priced at $ 1.00.
Enter the first price you charge per the unit entered in the previous field.
Format:
9,999,999.999
Unit price 2
Enter the second level of price you charge per the unit entered in field 3 above. This
price will be based on the quantity cut-off entered in the next field. All units over and
above the quantity cut-off will be charged at this price.
Format: 9,999,999.999
Quantity 1
Enter the maximum quantity at which unit price 1 is to be charged. Any units of this
item over and above this quantity will be charged unit price 2.
Format:
99,999,999.999
5. Unit cost
Enter your cost per the unit entered in field 3 above.
Format:
999,999.999
6. Default tax
Professional Invoicing
User Manual
Goods/Services
7.6
A window appears, similar to the one shown below, for you to set the taxable status of
each tax type for this item, or to incorporate a taxable code:
For each tax type, enter one of the codes reflecting this services taxable status:
[T]
Taxable...
This tax will be charged on the item unless the customer is
exempt.
[X]
Exempt...
This tax will not be charged on the item regardless of the
customer's taxable status for this tax type.
[Z]
Zero-rated... Usually reserved for value added taxes, such as the Canadian
GST, this status identifies an item that is subject to a 0% tax
rate. The purchaser, however, is entitled to input tax credits.
To apply a "taxable code" to the tax type, press [F2] and enter the appropriate code.
After pressing [F2] you can then enter a [?] to bring a list of taxable codes to choose
from.
NOTE: An "*" will be displayed beside tax types which have had changes made to their
default status.
For further details on tax types and taxable codes, refer to the chapters titled Taxes and
Handling Taxes in the System Functions manual.
[?] 7. Sales acct #
Enter the G/L account to distribute sales of this item to.
NOTE: If you are using a G/L account of more than 1 section, you can set the profit
center section to be wild-carded by pressing [F1]. This allows the sales distribution for
the service item to be distributed to the profit centre for the ticket.
Printing a List
If you are not using I/C, you will be able to print two different lists: a services list and
a goods list.
Professional Invoicing
User Manual
Goods/Services
7.7
If you are using I/C, you can print only a services list here. To print an inventory item
list, use the Items selection in the I/C package.
From the Goods/Services menu, select Print.
If you are not using I/C, you are asked to enter
Services list.
to print a Goods list or
to print a
Services List
[?] 1. Starting service #
[?] 2. Ending service #
Enter the range of services to include on the list. Follow the screen instructions.
Print tax detail ?
Answer Y if you want the taxable status information printed for each service.
Goods List
[?] 1. Starting item #
[?] 2. Ending item #
Enter the range of items to include on the list. Follow the screen instructions.
Print tax detail ?
Answer Y if you want the taxable status information printed for each item.
___________________
Professional Invoicing
User Manual
Goods/Services
7.8
Chapter 8
Terms
Introduction
Use this selection to enter terms codes. These codes are normally entered as part of
setting up the Accounts Receivable package. For your convenience, you can also enter
them here.
Terms codes are part of the A/R Codes File. if you entered terms codes when you set
up A/R, you do not have to re-enter them here unless you now have additional codes for
P/I.
Each terms code represents a type of payment terms you give to at least one of your
customers.
Payment terms specify features such as how many days after a sale the payment is due;
whether there is a discount for early payment; and, if there is, how much is the discount
and how early must payment be made to get the discount.
Here are some examples of terms:
Code
210
N30
COD
Payment Terms
2% 10 days, net 30 days
Net 30 days
Cash on delivery
Professional Invoicing
User Manual
Terms
8.1
There are two methods used in A/R to specify payment terms. You may specify that an
invoice is due a certain number of days after the invoice date. Alternatively, you may
specify that an invoice is due on a particular day in the month following the month in
which the invoice is dated. This second method is called "proximo terms". Proximo
means "of the next month".
An example of "proximo terms" is:
Code
Payment Terms
210
2/10th net 31st, meaning "2% discount if paid by the 10th of next month, net
due on 31st of next month"
To Begin
From page 2 of the P/I menu, select Setup ->Terms. Then from the Terms menu select
Enter. The following screen is displayed:
Entering Terms
From
this
scree
n you
can
work
with
both
new
and
exist
ing
term
s. If
term
s
infor
mation has already been entered for the terms code you specify, it will appear and be
available for changes or deletion.
Enter the following information:
[?] * 1. Terms code
Enter a terms code, or use the option. (Allowed characters are 0-9, A-Z, and some
special characters, such as colon (:), asterisk (*), and "at" sign (@), and slash (/).
Option:
[F1]
Professional Invoicing
User Manual
To scan through the terms codes on file
Terms
8.2
Format: 3 characters
2. Description
Enter a description of the terms code.
Format: 15 characters
3. Type
Enter either:
[D] for "Days" (how many days from the invoice date)
[P] for "Proximo" (day of the following month)
Additional fields now appear on your screen, depending on the "Type" selected. Enter
the following information:
Terms by Days
If you are entering a terms code due by number of days (type [D]) the screen will appear
as follows:
Professional Invoicing
User Manual
Terms
8.3
4. Due days
Enter the number of days from the date of the invoice when payment is due.
Format: 999
5. Discount days
Enter the number of days from the date of the invoice during which a discount will be
given for early payment.
Format: 999
6. Discount pct
Enter the discount percentage to be given if payment is made within the discount days.
Format: 99.999
Professional Invoicing
User Manual
Terms
8.4
Proximo Terms (Day of the Following Month)
If you are entering a terms code due on a particular day of the month (type [P]) the
screen will appear as follows:
4. Due day
Enter the day in the month on which payment is due. This day will be the day in the
month following the month in which the invoice is dated.
Format: 99
5. Discount day
Enter the last day in the month for which early payment discount is allowed. This day
will be the day in the month following the month in which the invoice is dated.
The discount day must be less than or equal to the due day. It will always be in the
same month as the due day.
Option:
[Enter] For discounts are not given
Professional Invoicing
User Manual
Terms
8.5
Format: 99
6. Discount pct
(This field is skipped if discounts are not given as specified in
Field 5.)
Enter the discount percent to be given if payment is made on or before the discount
day.
Format: 99.999
7. Cut off day
The "cut-off day" is the last day of a month on which the terms on an invoice apply to the
next month. After the cut-off day, the terms apply to the month after the next one.
For instance, suppose that the terms were"210": (2% discount if paid by the 10th of next
month, net due on 31st of next month), and the cut-off day is the end of the month. An
invoice dated on 30 June or before would receive a discount if paid by the 10th of July,
and would be due on 31 July.
The cut-off day is normally the end of the month. You may press [Enter] to set the
cut-off day to "End of current month".
However, you may instead enter a positive or a negative number.
Enter a positive number, up to 27, to specify the last day of the month on which the
terms of an invoice apply to the following month. After the cut-off day, the terms
apply to the month after the next one.
Suppose the terms were "210": (2% discount if paid by the 10th of next month, net due
on 31st of next month), and that the cut-off day was entered as "25". Then an invoice
dated on or before 25 July would receive a discount if paid by the 10th of August and be
due on the 31st of August. An invoice dated 26 July would receive a discount if paid by
the 10th of September and be due on the 30th of September.
Enter a negative number, up to 27, to specify how many days before the end of the
month an invoice can be dated and still apply to the following month.
With the same terms as above, and the cut-off day entered as "-2", an invoice dated on
or before 29 July (31 July minus 2 days) would receive a discount if paid by the 10th of
August and be due on the 31st of August. An invoice dated 30 July would receive a
discount if paid by the 10th of September and be due on the 30th of September.
Format: 99Deleting Terms Codes
Professional Invoicing
User Manual
Terms
8.6
To delete a terms code from the file, bring up the code you want to delete and press
[F3].
Printing a List of Terms
From the Terms menu choose Print.
____________________
Professional Invoicing
User Manual
Terms
8.7
Chapter 9
Ship-Via
Introduction
(If you do not use "ship-via" information in your business, skip this chapter.)
Use this selection to enter ship-via codes. A ship-via code is a 3-character code used to
specify the shipping method for a customer's order. For example, you could use the
code "A/F" for shipping Air Freight.
You normally enter ship-via codes in A/R. This function is also provided in P/I so that
you don't have to leave the P/I package to enter ship-via information.
When you enter customers in the Customers selection, you can assign one of these
ship-via codes to show which shipping method the customer prefers.
Ship-via codes are part of the A/R Codes File. If you entered ship-via codes when you
set up A/R, you do not have to re-enter them here unless you now have additional
ship-via information for P/I.
To Begin
From page 2 of the P/I menu select Setup -> Ship-via. Next, choose Enter from the
menu displayed.
Entering Ship-via Codes
From the screen which appears, you can work with both new and existing ship-via's. If
a ship-via has already been entered for the ship-via you specify, it will appear and be
available for changes or deletion.
Professional Invoicing
User Manual
Ship-Via
9.1
Enter the following information:
[?] * 1. Ship-via code
Enter the ship-via code or use the option:
Option:
[F1]
To browse through the ship-via codes
Format: 3 characters
2. Description
Enter a description of the shipping method.
Format: 15 characters
Deleting Ship Via Codes
To delete a ship-via code from the file, bring up the code you want to delete and press
[F3].
Printing a List
From the second page of the A/R menu select Setup. Select Ship-via from the menu
displayed, and then choose Print.
____________________
Professional Invoicing
User Manual
Ship-Via
9.2
Chapter 10
Sales Reps
Introduction
(If you answered to "Are sales reps used ?" in the Accounts Receivable Control
information function, skip this chapter.)
Although sales reps are usually entered through A/R, this selection is included in P/I for
your convenience.
The Sales Rep File is the same file used in A/R. If you entered sales rep information
when you set up A/R, you do not have to re-enter it here unless you now have additional
sales rep information for P/I.
To Begin
From the second page of the P/I menu, select Set up -> Sales reps. Then from the Sales
reps menu, select Enter.
Entering Sales Reps
This is the screen you see:
Professional Invoicing
User Manual
Sales Reps
10.1
From this screen you can work with both new and existing sales reps. If a sales rep
already exists for the number you specify, it will appear and be available for changes or
deletion.
Enter the following information:
[?] *1. Sales rep #
Enter the sales rep number or use the option:
Option:
[F1]
to scan through the sales reps on file.
Format: 3 characters
2. Name
Enter the sales rep's name.
The way the name is entered (last name first or first name first) is the way it will appear
on the Sales Rep List.
Format: 25 characters
Professional Invoicing
User Manual
Sales Reps
10.2
3. Commis percent
Enter the commission percent for this sales rep, or use the option:
Option:
[F1]
To use the default commission percent from the A/R Control File
Format: 99.999
4. Commis method
If, per the A/R Control File, commissions are used and commissions on margin are not
allowed, this field automatically displays "on price" and cannot be changed.
If commissions on margin are allowed, you may select a commission method of [P] (on
price) or [M] (on margin) or use the option:
Option:
[Enter] to use the displayed default commission method from the
Control File
Format: 1 character
PTD and YTD Fields
Fields 5 through 10 are updated by other functions in this package. If you select one of
these fields, you will see "CHANGE NOT ALLOWED".
When setting up P/I, if a sales rep has no sales history yet, press [F1] to set fields 5
through 10 to zero.
Otherwise, when setting up P/I, enter information as follows:
5. Sales PTD
If appropriate, enter the amount for this sales rep's period-to-date sales.
Format: 999,999,999,999.996. Sales YTD
If appropriate, enter the sales rep's year-to-date sales.
Format: 999,999,999,999.997. Cost PTD
If appropriate, enter the period-to-date cost of sales for the sales rep.
Format: 999,999,999,999.99-
Professional Invoicing
User Manual
Sales Reps
10.3
8. Cost YTD
If appropriate, enter the year-to-date cost of sales for the sales rep.
Format: 999,999,999,999.999. Commissions PTD
If appropriate, enter the period-to-date commissions for the sales rep.
Format: 99,999,999,999.9910. Commissions YTD
If appropriate, enter the year-to-date commissions for the sales rep.
Format: 99,999,999,999.99Deleting a Sales Rep
To delete a sales rep from the file, bring up the code you want to delete and press [F3].
Printing a Sales Rep List
From the Sales reps menu select Print.
[?] 1. Starting sales rep #
[?] 2. Ending sales rep #
On the screen that appears, enter the range of sales reps to include on the list. Follow
the screen instructions.
Format: 3 characters
____________________
Professional Invoicing
User Manual
Sales Reps
10.4
Chapter 11
Invoicing Stations
Introduction
Professional Invoicing provides for a "point-of-sale" mode of operation. In this mode,
you can choose to print invoices immediately after you enter them, so that your
customer has a paper invoice at the time of sale. Quotations can also be printed
immediately, if needed.
In order to use P/I in "point-of-sale" mode, you must answer Y to "Print immediately ?" in
the P/I Control File. If you do not plan to use P/I in this way, answer N and skip this
chapter.
Use this selection to define the invoicing stations which will be used to print invoices
immediately for customers. In a single-user system, you would have one such invoicing
station. In a multi-user system, you would have several invoicing stations. Using this
selection, you may define a station code for each station, the next invoice number to be
used for that station, the printer to be used for that station (as set up in Prtinters in
System Functions) and the invoice format to be used when printing invoices from that
station. When you run the Invoices or Quotations selections, you will be asked to
identify your invoicing station by its station code, so that P/I will know which printer,
invoice format, and invoicing sequence to use when you print invoices immediately.
NOTE: In a multi-user system, two users can enter the same station code when running
Invoices. However, only one user will be able to print invoices at a time if the station
code is shared. This practice is allowed in P/I, but not recommended.
Professional Invoicing
User Manual
Invoicing Stations
11.1
To Begin
From page 2 of the P/I menu, select Setup -> Invoicing stations. Then from the
Invoicing stations menu, select Enter.
Entering Invoicing Stations
This is the screen you see:
Fro
m
thi
s screen you can work with both new and existing invoicing stations. If information has
already been entered for the station code you specify, the associated invoicing station
information will appear and be available for changes or deletion.
Enter the following information.
1. Station code
Professional Invoicing
User Manual
Invoicing Stations
11.2
For a new invoicing station:
Enter the code to be used to refer to this invoicing station.
Format: 3 characters
For an existing invoicing station:
Enter the station code or use the option:
Option:
[F1]
to scan through the invoicing stations on file
2. Description
Enter the description for this invoicing station.
Format: 15 characters
3. Printer
Select the printer which is to be used when printing invoices for this invoicing station.
If only one printer is defined in Printers that will be the default and no changes can be
made.
Format: 15 characters
4. Next invoice #
The number entered here is the number that will be assigned to the next invoice printed
using this invoicing station. Each time an invoice is printed using this invoicing station,
this number is incremented by 1 automatically.
Format: 999999
NOTE: If multiple invoicing stations are set up, then the "next invoice #" for each
station should be set up so that no overlap of invoice numbers will occur. For example,
if four stations are set up, the starting invoice numbers could be:
100000
200000
300000
400000
Additionally, the numbers entered here should not overlap with the "Next invoice #"
which is used by the Print invoices selection for printing batches of invoices. This
number is entered in the P/I Control File using Control information.
[?] 5. Invoice format
Professional Invoicing
User Manual
Invoicing Stations
11.3
Enter the invoice format to use when printing invoices from this invoicing station. The
format number entered here must have already been defined using Invoice formats.
You may also use the option:
Option:
[F1]
to scan through the invoice formats on file
Format: 5 characters
Printing a List
From the Invoicing stations menu, select Print.
____________________
Professional Invoicing
User Manual
Invoicing Stations
11.4
Chapter 12
Invoices
Introduction
Use this selection to enter invoices and credit memos.
This selection includes credit checking. For each invoice and each line item you enter,
a credit check is done for the customer you are working with. The credit is checked by
totalling the customer's account balance and comparing it against their credit limit.
If the customer is over their credit limit, or if this invoice or line item will put them over
their limit, you will be given a message about this with options to either continue with
the invoice or line item or cancel it. Once they exceed their credit limit and you
choose to continue with the invoice or line item, credit checking is suspended for the
invoice. See the end of the Control Information chapter for additional information on
credit checking.
NOTE: For a cash-with-sale transaction for a one-time customer, we recommend that
you use a specially designated customer, with a customer number such as "CASH". In
this way, all such transactions will be saved in the Invoice History File.
To Begin
From the P/I menu, select Invoices, then select Enter from the menu which appears.
Professional Invoicing
User Manual
Invoices
12.1
Entering Invoices
There are three different screens on which you enter information about an invoice.
The first is called the "Header" screen; the second, the "Line item" screen, and the third,
the "Totals" screen.
The line item screen can be filled in many times for one invoice. The header and totals
screens are filled in only once for each invoice.
Immediate invoicing
If you have selected "immediate invoice printing" in the P/I Control File, then prior to
entering invoices using this selection, you must specify the station code of the invoicing
station to be used when printing invoices immediately. You see the following screen:
Enter the station code or use one of the options:
Option:
[F1]
to scan through the station codes on file
[Enter] To leave blank if no immediate printing is required. The invoice
can then be printed through the Print invoices and quotations
selection later on.
Professional Invoicing
User Manual
Invoices
12.2
Format:
3 characters
Once you have specified the station code, the invoice header screen appears.
Header screen
From this screen you can work with both new and existing invoices and line items. If an
invoice has already been entered for the bill reference number you specify, that invoice
will appear and be available for changes or deletion.
Enter the following information:
* 1. Bill ref #
For a new invoice:
This is your own reference number for the invoice. It is not the invoice number. (The
invoice number is assigned when the invoice is posted.)
Professional Invoicing
User Manual
Invoices
12.3
Enter a reference number for this invoice, or use the option:
Option:
[F2]
Format:
999999
to use the next available reference number as specified in the
P/I Control File
For an existing invoice:
Enter its reference number or use the option:
Option:
[F1]
to scan through the invoices on file.
(If you are not changing invoices or line items at this point, skip to 2. "BILL TYPE" below.)
If this invoice has already been printed, "*** Already printed ***" appears at the top of
the screen
Change the information on this screen in the usual way. You cannot change the bill
reference number, bill type, or customer number.
You are next asked if you wish to change the line items. If you answer Y, the "line item"
screen appears. If you wish to change or view the "totals" screen without changing line
items, answer Y to the "change line items" question, then press [Tab] when the "line
item" screen appears. The "totals" screen then appears for changes.
Proceed as in entering a line item for a new invoice as described in the "Line item
screen" section.
* 2. Bill type
Enter the bill type, [I] for Invoice or [C] for Credit memo, or use the option:
Option:
[Enter] To use the last bill type entered (if any), or default to I (Invoice)
if this is the first entry
Format:
1 character
Apply-to
If the bill type is [C] (credit memo), you are then asked to enter an "apply-to" number.
"*Correcting entry*" displays in the upper right of the screen. This is the number of the
invoice to which this credit memo applies. Enter the apply-to number or use the
option:
Option:
[Enter] If this credit does not apply to any particular invoice
Format:
999999
Professional Invoicing
User Manual
Invoices
12.4
3. Bill group
Entering a bill group is completely optional.
Enter a code to assign this invoice to a group of invoices. You can use this code later to
sort or print invoices by groups. If you are using immediate invoicing, you may also use
the option:
Option:
[F1]
to use the station code for this invoicing station as the bill group
Format:
3 characters
4. Invoice date
Enter the date to assign to this invoice or use one of the options:
Options:
[F1]
to use the system date. For subsequent invoices, [F1] defaults
to the date of the last invoice entered.
[F2]
to skip this field if you want the invoice date to be assigned at
the time the invoice is printed
If you enter a date here and then print the invoice later, the date that the invoice is
printed will not replace the date you enter here. The date entered here will still
remain as the invoice date.
Format:
MMDDYY
[?] * 5. Customer #
Enter the number of the customer for this invoice, or use one of the options:
Options:
[F1]
to scan through the customers on file in order by customer
number
[F6]
to use the customer number from the last invoice entered (if
any)
[Enter] To look up the customer by name
Format:
12 characters
One Time Customer
If this is a one-time customer, start the customer number with an asterisk (*). If you
use an already existing one time customer, you must also enter the customer's name and
address.
Professional Invoicing
User Manual
Invoices
12.5
You may enter either a company name or a person's name. If a person's name is
entered, then it is entered as two fields, namely, "First" and "Last". If a person's name
is entered in this fashion, then this invoice will appear in sequence by the customer
name. For example, if you enter "John Smith" after pressing [F2], and then print a
Customers by Customer Name report, this customer would print after "Sara Samuels"
and before "Barry Spencer".
Customer Not on File
If you enter a customer number and it is not on file, you are informed that this customer
is not in the Customer File and asked if you would like to add it. If you answer N, you
can enter another customer number. If you answer Y, a window appears for you to
enter information about this new customer. Once you enter the customer information
and complete entry of this invoice, this new customer will be automatically added to
the A/R Customer File.
You see:
NOTE: If the customer is already on file, go on to 6. "Deliver-to location" below.
Professional Invoicing
User Manual
Invoices
12.6
Name
Enter the customer's name. The name should be entered with the main company name
first or the customer's last name first, so the Customers by Customer Name list in A/R
will print in the proper order.
Format:
25 characters
Address-1
Enter the first line of the customer's address.
Format:
25 characters
Address-2
Enter the second line of the customer's address.
Format:
25 characters
City
Enter the customer's city.
Format:
15 characters
Prov
Enter the code of the customer's province.
Format:
4 characters
Postal Cd
Enter the customer's postal code.
Format:
10 characters
Stmnt cycle
Enter the statement cycle code which specifies how often statements are to be printed
for this customer, or use the option:
Option:
[Enter] To use the statement cycle specified in the P/I Control File
Later, in the Statements selection in A/R, you can specify which statement cycles to
print statements for.
Professional Invoicing
User Manual
Invoices
12.7
Suggested statement cycle codes are [W] (weekly), [M] (monthly), [Q] (quarterly), etc.,
although any letter or number is allowed, as well as special characters such as "#".
Format:
1 character
Contact-1
Enter the name of the person to contact at the customer's location. The name entered
here becomes "Contact-1" in the Customer record.
Format:
25 characters
[?] Cus type
Entering a customer type is completely optional.
Enter the customer type or use the option:
Option:
[Enter] to use the customer type specified in the P/I Control File
If you plan to use the Sales Analysis (S/A) package, entering a customer type here will
enable you to evaluate sales information for different customer types, to determine
their relative profitability. If you do not intend to use S/A, you might still want to
categorize customers by type for your own information. Some price codes in the
Inventory Managementpackage can use customer type as a basis for assigning prices.
Format:
5 characters
Phone
Enter the phone number of the contact entered above.
Format:
25 characters
Bal method
Enter the code for the method used in handling this customer's account, either [O] for
"Open item" or [B] for "Balance forward", or use the option:
Option:
[Enter] to use the balance method specified in the P/I Control File
One-time customers should be assigned a balance method of [O] so that specific items
can be selected for payment.
Format:
1 character
A/R account
Professional Invoicing
User Manual
Invoices
12.8
Enter the number of the A/R account to which documents for this customer are to be
posted, or use one of the options:
Options:
[F1]
for the default A/R account from the A/R Control File
[F2]
To scan through the other A/R accounts on file
Comment
Enter any comment pertaining to this customer.
Format:
25 characters
Answer Y or N to the "Any change ?" question.
[?] 6. Deliver to
Enter the code for the deliver-to address at which services are performed or to which
goods are delivered or use one of the options:
Options:
[Enter] to make the deliver-to address the same as the customer's billing
address
[F1]
to scan through the deliver-to addresses on file for this customer
[F2]
to enter a new deliver-to address, up to 4 lines of 25 characters
each
If you enter a new address for a customer who is on file in A/R (not added on-the-fly for
this invoice), you are asked whether you want to save this deliver-to address.
If you answer Y, the address just entered will be put on the permanent Deliver-to
Addresses File, automatically identified by the next deliver-to number available for this
customer.
If you answer N, this new deliver-to will be only for this one invoice and will not be
saved.
Format:
999
NOTE: For a miscellaneous customer (customer number starting with an asterisk [*]),
you are not asked for a separate deliver-to address. Instead, the deliver-to address is
automatically set to be the same as the address just entered for this customer.
7. P.O. #
If there is a customer purchase order, enter the P.O. number.
Professional Invoicing
User Manual
Invoices
12.9
If the customer's required is set to require a P.O. number, the invoice cannot be entered
without one. Should you attempt to continue on the system will display "Customer
P.O. number required" and will not allow you to continue without one (see the chapter
titled Customers in the A/R user manual).
Format:
15 characters
[?] 8. Terms
For a balance forward customer, the customer's usual terms code displays and cannot be
changed.
For an open item customer, enter a terms code, or use the option:
Option:
[F1]
to use the customer's usual terms code
If the customer is a one-time customer (name starts with an asterisk) or if you are
entering the customer as you go, use [F1] to scan through the available terms codes.
When the desired terms code appears, press [Enter].
Format:
3 characters
NOTE: Because of the choices made in the P/I and A/R Control Files, some of the
following optional fields may not be used. In this case, the related field does not
appear on the screen and all later fields on the screen are renumbered.
The optional fields are:
"SHIP VIA"
"SALES REP"
"PROFIT CTR"
"JOB #"
"SUB-JOB #"
1st user-defined field
2nd user-defined field
3rd user-defined field
[?] 9. Ship via
(This field appears only if the P/I Control File specifies that ship-via's are used.)
Enter a ship-via code or use the option:
Option:
[F1]
To use the customer's normal ship-via code
If the customer is a one-time customer (name starts with an asterisk) or if you are
entering the customer as you go, you can press [F1] to scan through the available
ship-via codes. When the desired ship-via code appears, press [Enter].
Professional Invoicing
User Manual
Invoices
12.10
Format:
3 characters
[?] 10. Tax group
The tax group entered for this order must exist in the Taxes file. Enter a tax group or use
the option:
Option:
[F1]
to use the tax group entered for the deliver-to address (if an
address from the Deliver-to File is being used)
[F1]
to use the tax group entered for this customer in the Customer
File
[F2]
to change the default taxable status for the tax group for the
customer or deliver-to address.
If the customer is a one-time customer or if you are entering the customer as you go,
you can press [F1] to scan through the available tax codes. When the desired tax code
appears, press [Enter].
Format:
3 characters
[?] 11. Sales rep
(This field appears only if the A/R Control File specifies that sales representatives are
used.)
Enter a sales rep code or use the option:
Option:
[F1]
To use the customer's usual sales rep
If the customer is a one-time customer or if you are entering the customer as you go,
you can press [F1] to scan through the valid sales reps. When the desired sales rep
appears, press [Enter].
Format:
3 characters
[?] 12. Profit ctr
(This field appears only if the P/I Control File specifies that multiple profit centres are
used.)
Enter the profit centre to which this invoice is assigned, or use one of the options:
Options:
[F1]
Professional Invoicing
User Manual
to use the profit centre specified in the P/I Control File. (For
subsequent invoices, [F1] defaults to the profit centre on the last
invoice entered.)
Invoices
12.11
(If Job Cost is interfaced, field 13 becomes "Job #", field 14 becomes "Sub-job #", and
the subsequent fields are renumbered.)
13. 1st user-defined field
(This field appears only if it is defined in the P/I Control File.)
The name of the first optional field defined in the P/I Control File displays here. Enter
the information appropriate to the field.
Format:
(Number of characters specified in the P/I Control File)
(Note that the user-defined fields are alphanumeric, not date or numeric fields.
Whatever you enter here will appear exactly that way on the invoice.)
14. 2nd user-defined field
(This field appears only if it is defined in the P/I Control File.)
The name of the second optional field in the P/I Control File displays here. Enter the
information appropriate to the field
Format:
(Number of characters specified in the P/I Control File)
15. 3rd user-defined field
(This field appears only if it is defined in the P/I Control File.)
The name of the third optional field in the P/I Control File displays here. Enter the
information appropriate to the field.
Format:
(Number of characters specified in the P/I Control File)
Make any changes as usual.
If you are interfaced to General Ledger and are using correcting entries, indicate
whether this is a correcting entry by pressing [F5]. Refer to the G/L User Manual
chapter titled Control Information.
If Job Cost is interfaced, fields 13 and 14 appear as shown below and the user-defined
fields are renumbered.
[?] 13. Job #
This is the number of the job that this invoice is for. The job must be an active or
closed job already on file in the Job Cost package.
Enter the job number or use the one of the options:
Professional Invoicing
User Manual
Invoices
12.12
Options:
[F1]
to scan through the jobs on file in the Job Cost package
[F2]
if this invoice is for multiple jobs, you will be asked for a job
number for each line item.
[Enter] if this invoice is not for jobs
Format:
7 characters
14. Sub-job #
If you have entered a job number in the previous field, and that job is broken down into
sub-jobs, and you bill for the sub-jobs, you are asked for the sub-job number that this
invoice is for. Otherwise, you are not asked for the sub-job number.
Enter the number of the sub-job that this invoice is for, or use the option:
Option:
[F1]
Format:
999
to scan through the sub-jobs for this job
The next screen is the line item screen.
Line Item Screen
The line item screen displays to enter the first line item on this invoice:
Professional Invoicing
User Manual
Invoices
12.13
Enter the information as follows:
* 1. Sequence #
Enter a sequence number here or use one of the options:
Options: [F1]
[F2]
to scan through the existing line items, if any
to assign sequence #10 to the first line item
If you use [F2] for the first line item, you can use [F2] later to assign sequence #20 to the
second line item, #30 to the third, and so on. This number sequence is useful if you
want to insert other line items later, between two line items already entered.
The sequence number is just a temporary number which puts the line items into the
order they will be printed on the invoice. When you print the invoice, each line item
will automatically be assigned a new number in the same relative order. For example,
when printed, line items with sequence numbers 10, 20, 14, 30, and 16 will appear in
the order 10, 14, 16, 20, 30, and be numbered 1, 2, 3, 4, 5.
If you want to add a line item between two other line items, give the new one a number
in between. For example, to insert a line item between #10 and #20, give it a sequence
Professional Invoicing
User Manual
Invoices
12.14
number from 11 to 19. (You should use 15, so you can later insert other line items
before or after it.)
Format:
9999
Line type
Enter the code for the type of line item:
[G]
[S]
[N]
[B]
Goods (such as parts, books, appliances, etc.)
Services
Notes (this is just a comment that prints at this point on the invoice)
Standard bill (a group of goods and/or services that you can "paste in" all at
once into the invoice [see Standard Bills])
The appearance of the bottom part of the line item screen depends on the line type. It
also depends on whether or not you are using the Job Cost package.
Format:
1 character
Entering "Goods" Line Items
After you type [G], you see:
Professional Invoicing
User Manual
Invoices
12.15
[?] 2. Item #
If Inventory Management is not used:
Enter the item number or use one of the options:
Options:
[F1]
to scan through the items in the Goods/ Services File
[Enter] to enter a one-time item that is not on file
If you enter an item number that is not on file, you are informed that this item is not in
the Goods/Services File and asked whether you want to enter it anyway. If you answer
Y, you are asked whether it should be added to the file. This gives you a chance to
enter new items as you go. If you answer N to this second question, this item will
appear only on this current invoice and will not be added to the Goods/Services File.
Format:
15 characters
Unit
If this item is on the Goods/Services File, the unit will display automatically.
If the item is not on the Goods/Services File, you must enter a unit, or use the option:
Option:
[F1]
to use EACH
Format:
4 characters
If Inventory Management is used:
Enter the inventory item number or use one of the options:
Options:
[F1]
to scan through the items in the Item File
[Enter] to look up the item by description
NOTE: If the unit or conversion factor for an inventory item is changed in the I/C Item
File, you must delete any P/I line items using that inventory item, then re-enter them.
Otherwise, your invoices will contain the old unit and conversion factor.
If you left the number blank, enter the item's description (or any portion of it beginning
with the first letter). The first item with a description matching the entered
characters appears, and you are asked if this is the item you want. Answer Y to select
it, N to enter another item, or press [F1] to see the next item in alphabetical order.
Miscellaneous items
A miscellaneous item has an item number that begins with an asterisk (*). If you enter
a miscellaneous item for the item number, you are requested to enter the unit. If
Professional Invoicing
User Manual
Invoices
12.16
there is a unit already on the Inventory Item File for this item, it is displayed
automatically and you can change it if you wish. You are then requested to enter the
item description.
[?] Warehouse
(This field appears only if the P/I Control File specifies that multiple warehouses are
used, and I/C is interfaced with P/I.)
Enter the code for the warehouse from which the item is to be shipped, or use the
option:
Option:
[F1]
to use the warehouse entered in the P/I Control File
The warehouse must exist in the I/C Warehouse File, and the item must be stocked at
this warehouse. If not, an error message appears, and you must correct the condition
in the I/C package. (Refer to the Inventory Management User Manual.)
3. Description
For an item that is already on file, and not a miscellaneous item, the description
displays automatically. You can change this or press [Enter] three times to accept it as
is.
If you are entering a new item (which you can do only if you are NOT using I/C), or if this
is a miscellaneous item, then enter the description of the item.
Format:
3 lines of 25 characters each
4. Quantity
(If back orders are used, this field displays as "Qty ordered".)
Enter the quantity ordered. You have several choices here:
(1) Enter the quantity ordered. (If I/C is used, then the quantity available at the
current warehouse is displayed on the screen for your reference when entering
the quantity ordered.)
(2) Press [F1] if this item is to be drop shipped (shipped directly to the customer
from your supplier.) "*DS*" displays. Press [F1] again to cancel the "drop ship"
status.
(3) Enter a negative quantity ordered. This is used to specify returned goods on an
invoice. As part of the entry for the returned goods, you will be asked to enter
the quantity returned to inventory (if P/I is interfaced to I/C). If this quantity is
less than the quantity entered here, then the scrap account (as entered in the P/I
Control File) will be used for the value of the quantity not returned to inventory.
Professional Invoicing
User Manual
Invoices
12.17
For a credit memo, always enter a positive number here as a credit for a
particular item. A negative number is not allowed.
The following options are only available if P/I is interfaced to I/C:
(4) Press [F2] to display alternate items for this inventory item. If alternate items
exist for this item, then a screen is displayed which shows the alternates and
their availability at the current warehouse. You may select an alternate item,
in which case the item number and description fields shown on the screen will be
changed to that item number and description. You can then enter the quantity
to be ordered of that item.
(5) Press [F5] to show full warehouse information for this item. The following
information is shown.
Qty on hand
Qty committed
Qty on back order
Qty available
Qty on order (if Purchase Order is used)
Qty on work order (if kits are used in I/C)
See the I/C User Manual chapter titled Items for full definitions of each of
these terms.
(6) If this invoice can be shipped from more than one warehouse (as specified on the
invoice header screen by entering "All" for the warehouse code), then you may
use the [F6] key to display the availability of the item at the other warehouses at
which it is stocked. You may choose a different warehouse and then enter the
quantity to be ordered of the item from that warehouse.
Format:
99,999,999.999-
Notes on Back Order Control - If I/C Is in Use
If P/I is interfaced to I/C, and back order control is used in I/C, then the following notes
on back order control are applicable when entering the quantity ordered.
If the quantity ordered is greater than the quantity available at the warehouse from
which the item is to be shipped, then you are informed of this fact and given several
choices for handling this situation. For example, if you have specified that the invoice
can be shipped from multiple warehouses, then you can choose another warehouse from
which the item is to be shipped. You can also choose to ship an alternate item.
The full set of choices available to you at this point are:
1 - Proceed with line
Professional Invoicing
User Manual
Invoices
12.18
If you choose to proceed with entering the line item, you must specify how to handle the
fact that the quantity to be shipped is greater than the quantity available at the
warehouse. You are given the following options:
1 - Back order balance
The quantity to ship will be set to the quantity available for the item, and the
balance will be back ordered.
2 - Back order all
The quantity to ship will be set to zero and the entire quantity will be back ordered.
3 - Override
The quantity to ship will be set to the full quantity ordered. This will result in a
negative quantity available of the item. Only make this selection if you expect to
receive the item into inventory prior to shipping this order.
4 - Ship in stock
The quantity to ship will be set equal to the available quantity and the balance of
the quantity will be designated on the invoice as being out of stock.
NOTE: If the item is back-orderable, then options 1, 2 and 3 appear first, and
option 4 will only appear when you press [F1] for "other options". If the item is not
back-orderable, then options 3 and 4 will appear first, and options 1 and 2 will only
appear when you press [F1] for "other options".
2 - Cancel line
If you choose to cancel the line, the line item is deleted and the screen is redisplayed so
that you can enter another line item.
3 - Alt items
If you choose "Alt items", the alternatives for this item are displayed, along with their
availability at the warehouse from which this line is being shipped. You may choose an
alternate item to ship for this line, in which case the alternate item number and
description are displayed and you can enter the quantity ordered for the alternate.
4 - Other warehouses
If you choose "other warehouses", the other stocking warehouses for this item are
displayed. You may choose a different warehouse, in which case the full information
about the item at that warehouse is displayed and you can enter the quantity ordered at
the new warehouse.
Professional Invoicing
User Manual
Invoices
12.19
NOTE: This option is only available if this invoice can be shipped from multiple
warehouses.
Notes on Back Order Control - if I/C Is Not Used
If I/C is not used, then the quantity to ship (described below) will always be set equal to
the quantity ordered. However, from "Field number to change ?", you may enter a
quantity to ship which is less than the quantity ordered. In this case, a back order will
occur. Since I/C is not used, no back order information can be tracked in inventory.
However, you may still print back order information on invoices and print back order
reports using Back order reports.
Qty to ship
This field is only displayed if back orders are used, as specified in the P/I Control File.
If this field is displayed, the numbering of the remaining fields on the screen changes
accordingly.
This field displays automatically, based on the entry for the quantity ordered as
described above.
Notes on Back Order Control if I/C is used
If the quantity ordered is positive and the quantity to ship is changed (from "Field
number to change ?") to a quantity which is less than the quantity ordered, then you
must specify how to handle the quantity which is not shipped. The options are:
1 - Back order balance
The difference between the quantity ordered and the quantity shipped will be back
ordered.
2 - Ship in stock
The difference between the quantity ordered and the quantity shipped will be regarded
as out of stock and will not be back ordered.
NOTE: The back order code for the item is also displayed, showing that it is either
back-orderable, not back-orderable, or that there is no back order control for the item.
If there is no back order control for the item, you can still back order the balance;
however, no overall quantity on back order will be tracked within the Inventory
Management package for the item.
Notes on Back Order Control if I/C is not used
If the quantity ordered is positive and the quantity to ship is changed (from "Field
number to change ?") to a quantity which is less than the quantity ordered, then you
must specify how to handle the quantity which is not shipped. The options are:
1 - Back order balance
Professional Invoicing
User Manual
Invoices
12.20
The difference between the quantity ordered and the quantity shipped will be back
ordered.
2 - Ship in stock
The difference between the quantity ordered and the quantity shipped will be regarded
as out of stock and will not be back ordered.
NOTE: Since I/C is not in use, no back order information can be tracked in inventory.
However, you may still print back order information on invoices and print back order
reports using Back order reports.
5. Unit price
If Inventory Management is not used:
Enter the price per the unit for this item or use the option:
Option:
[F1]
to use the price for the item in the Goods/Services File
The quantity is automatically multiplied by this price and the extended price appears.
Format:
9,999,999.999
NOTE: If you are not using I/C, items with multi-level prices will be calculated based
on the quantity cut-off. Refer to the chapter titled Goods/Services for details on
extended price calculations.
If Inventory Management is used:
Enter the unit price or use the option:
Option:
[F1]
to use the price as determined by the price code for this item in
the Item File. If there is no price code for this item, Price-1
from the Item record is used.
The extended price appears.
NOTE: If the unit price is zero, you are asked "Are you sure ?".
Optional Fields
Because of the choices made in the P/I Control File and in the A/R Control File, some of
the following optional fields may not be used. In this case, the related field does not
appear and all later fields are renumbered.
The optional fields are:
Professional Invoicing
User Manual
Invoices
12.21
"Discount% or Discntbl ?"
"Rtrn to inv"
"Commisnbl ?"
"Job #"
"Sub-job #"
"Cat-sub-cng" or "cat-sub"
"G/L acct #"
6. Discount % or 6. Discntbl ?
NOTE: This field is skipped if the P/I Control File specifies that you do not use
discounts.
"Discntbl ?" (discountable?) asks whether the line item is to be subject to the overall
invoice discount.
There are three cases:
a. If you use line item discounts, but not an overall invoice discount, enter the
discount percent for this line item only. Press [Enter] if there is no discount for
this line item.
b. If you use both line item discounts and an overall invoice discount, enter the
discount percent for this line item only. Press [Enter] if there is no discount for
this line item.
c. If you don't use line item discounts, but do use an overall invoice discount, this
field appears as 6. "Discntbl ?". Answer Y if this line item is subject to the overall
invoice discount; otherwise, answer N.
Format:
999.999
7. Unit cost
If Inventory Management is not used:
Enter the unit cost or use the option:
Option:
[F1]
To use the unit cost in the Goods/Services File
NOTE: This cost is used to calculate the margin (profit margin) on this line item. This
is required if you pay commissions based on margin. It is also transferred into the A/R
Sales Transaction File and is included in the cost of the sale on the Sales Journal.
Format:
999,999.999
If Inventory Management is used:
The unit cost is requested only in the following cases:
Professional Invoicing
User Manual
Invoices
12.22
For a miscellaneous inventory item (item number begins with an asterisk ["*"]).
For a credit line item on a regular invoice; that is, for a line item with a negative
quantity.
For all goods line items on a CR memo.
For a drop ship item.
In these cases, the unit cost is required to keep the cost of sales in I/C accurate. It is
also required if you pay commissions based on margin. If you do not use cost of sales or
pay commissions based on margin, press [Enter] to default to zero.
In the case of a regular line item (positive order quantity) on a regular invoice for a
regular inventory item, the unit cost is not requested. Instead, an approximate value
for the unit cost is displayed automatically, and the name of the field changes
depending on the inventory valuation method specified in the I/C Control File.
The cost is displayed as follows:
LIFO valuation method
FIFO valuation method
Average cost valuation method
Standard cost valuation method
Replacement cost
Average cost
Average cost
Standard cost
The actual cost is calculated exactly when the invoice is posted. For standard costing,
the actual cost used is the standard cost.
Rtrn to inv
(This field does not appear if you are not using Inventory Management. Otherwise, it
appears as field 8 and the remaining fields on this screen are renumbered.)
You are asked to enter a quantity here only for a credit memo or for a line item with a
negative quantity; otherwise, "(Not applicable)" appears.
Enter how many of the items credited are to be returned to inventory.
The quantity cannot be larger than the quantity ordered in field 3 above. For example,
if the quantity ordered is -5, the quantity returned to inventory must be positive and not
larger than 5.
8. Tax amount
The total amount of all taxes for this line item is displayed and the field is skipped.
Changes can be made only at the "Field number to change ?" prompt.
If you wish to change or view the taxes calculated (by tax type), select this field at the
"Field number to change ?" prompt. A window, similar to the one shown below, is
Professional Invoicing
User Manual
Invoices
12.23
displayed:
For each tax type enter the following information:
Item-tax
Enter a taxable code to apply to the tax type, or press [Enter] to leave blank.
Txbl
Enter the letter reflecting the taxable status of this item for this tax type. Valid
entries are T (taxable), X (exempt), Z (zero rated), [Enter] to accept the default status
of this item, or [Tab] to exit from the window.
Tax-amount
Enter an override amount of tax to apply for this item, or use one of the options:
Options:
[Enter] to accept the calculated amount.
[F1]
to remove any previously entered override tax amount.
Txbl-amount
This field displays the taxable portion of the extended price, and cannot be changed.
9. Commisnbl ?
NOTE: This field is skipped if the A/R Control File specifies that you do not use
commissions.
If commissions are used and I/C is also interfaced, the answer to this question displays
automatically. It is set to Y if the commission code for this item in the I/C Item File is
not blank, and is set to N otherwise. If you want to change this answer, you must do so
from "Field number to change ?".
Answer Y if this line item is commissionable.
[?] 10. G/L acct #
This field appears on the screen only if the A/R Control File specifies that sales are
distributed.
If Inventory Management is not used:
(This field defaults to the sales account from the Goods/Service record and is skipped
over. Changes can be made at "Field number to change ?".)
Professional Invoicing
User Manual
Invoices
12.24
If you choose to change the default, enter the new sales account to which the revenue
from this item is to be distributed, or use one of the options:
Options:
[F1]
to scan through the sales accounts specified in the P/I Control
File
[F2]
to accept the default sales account for the item
If Inventory Management is used:
The sales account specified for this inventory item in the I/C Item File displays
automatically. If the item's profit centre is wild carded, then the sales account from
the Item File is combined with the profit centre from the invoice header. If you want
to change this, you must do so from "Field number to change ?".
If Job Cost is used:
If this line item is for a job, the billing account for the job displays automatically. If
you want to change this, you must do so from "field number to change ?".
[?] 10. Job #
If this invoice is not for a job, this field will be skipped and "(N/A)" for "(Not applicable)"
will display automatically.
If this invoice is for a single job, the job number entered on the header screen will
display here automatically and cannot be changed.
If this invoice is for multiple jobs, enter the job number for this line item or use one of
the options below. If you enter a job number, it must be an active or closed job.
Options:
[F1]
[Enter]
Format:
to scan through the jobs on file
if this line item is not for a job
7 characters
11. Sub-job #
If this invoice is not for a job, this field will be skipped and "(N/A)" displays
automatically.
If this invoice is for a single job which does not have sub-jobs or does not bill for
sub-jobs, "(N/A)" displays automatically.
If this invoice is for a single job which uses and bills for sub-jobs, the sub-job number
you entered on the header screen displays automatically.
Professional Invoicing
User Manual
Invoices
12.25
If this invoice is for multiple jobs, but this line item is not for a job, this field will be
skipped and "(N/A)" displays automatically.
Finally, if this invoice is for multiple jobs, this line item is for a job, and the job uses
sub-jobs and bills for the sub-jobs, a sub-job number must be entered. Enter the
sub-job number for this line item or use the option.
Option:
[F1]
Format:
999
to scan through the sub-jobs for this job
12. Cat-sub-cng or Cat-sub
"Cat-sub-cng" stands for Category number, Sub-job number, Change order number.
This field displays on the screen only if you are using both the Job Cost and Inventory
Management packages.
If you are using Job Cost and have specified in the J/C Control File that change orders
are not used, the field appears as "Cat-sub" instead of "Cat-sub-cng".
Enter the cost item of the job to which you want the cost of this inventory item to go.
When this invoice is posted, the inventory cost for this line item will automatically be
transferred into the job, for the cost item you specify here.
If you do not want the cost of this inventory item to be automatically transferred into
the job, leave this field blank.
If this line item or this invoice is not for a job, this field will be skipped and "(N/A)"
appears automatically. Also, if this line item is for a drop ship or miscellaneous item
(item starting with an asterisk [*]), this field will be skipped. (Costs for drop ship or
miscellaneous items can only be transferred to a job through the A/P package.)
Enter the cost item number in the standard way, as is done in the Job Cost package:
category number, sub-job number, and change order number. If you do not use change
orders, you will be asked for only the category number and sub-job number. You can
press [F1] to scan through the cost items on file.
If there is a sub-job number displayed in the preceding field, this sub-job number will be
displayed automatically here and cannot be changed.
Format: 9999999 (category number) / 999 (sub-job number) / 999 (change order
number)
Customer Credit Check
NOTE: Credit is not checked here if credit checking has been suspended previously
while entering this invoice, per the "IGNORE" option described below. It is also not
checked if the P/I Control File specifies that you do not use credit checking.
Professional Invoicing
User Manual
Invoices
12.26
After you enter all fields for this line item, the customer's credit is checked to see if this
item puts the customer over their credit limit. If it does, you see a warning message.
You have three options: Cancel the entire invoice, cancel this line item, or ignore the
warning.
Entering "Services" Line Items
1. Sequence #
Enter a sequence number or use one of the options:
Options:
[F1]
to scan through the line items on file
[F2]
to assign sequence #10 to the first line item
If you use [F2] for the first line item, you can use [F2] later to assign sequence #20 to the
second line item, #30 to the third, and so on. This number sequence is useful if you
want to insert another line item later, between two line items already entered.
The sequence number is just a temporary number which puts the line items into the
order they will be printed on the invoice. When you print the invoice, each line item
will automatically be assigned a new number in the same relative order. For example,
when printed, line items with sequence numbers 10, 20, 14, 30, and 16 will appear in
the order 10, 14, 16, 20, 30, and be numbered 1, 2, 3, 4, 5.
If you want to add a line item between two other line items, give the new one a number
in between. For example, to insert a line item between #10 and #20, give it a sequence
number from 11 to 19. (You should use 15, so you can later insert other line items
before or after it.)
Format: 9999
Reviewing Existing Line Items
If you wish to review line items already entered for this invoice, enter the sequence
number, use [F1] for the next sequence number already entered, or use the View
function described in a later chapter of this manual.
Line type
Enter the 1-character code for the type of line item:
[G]
[S]
N
[B]
Goods (such as parts, books, appliances, etc.)
Services
Notes (this is just a comment that prints at this point on the invoice)
Standard bill (a group of goods and/or services that you can "paste in" all at
once into the invoice)
Professional Invoicing
User Manual
Invoices
12.27
The appearance of the bottom part of the screen depends on whether or not you are
using the Job Cost package. The screen shown below is what you see if you are not
using J/C. Fields used only with J/C are noted later.
You see:
Enter the following information:
[?] 2. Service #
Enter the service number or use one of the options:
Options:
[F1]
to scan through the services in the Goods/ Services File
[Enter] to enter a one-time service that is not in the file
If you enter a service number that is not in the Goods/Services File, you are told that
this service is not on file and asked if you want to enter it anyway. If you answer Y, you
are asked if you want to add this service to the Goods/Services File. (If you're using
I/C, you're asked if you want to add it to the Services File.) If you answer Y to this
second question, the service will be added permanently to the Goods/Services File;
otherwise, it will appear only on the current invoice.
Professional Invoicing
User Manual
Invoices
12.28
Format:
999
Unit
If this service is in the file, the unit will be displayed automatically and cannot be
changed.
Format:
4 characters
If this service is not in the file, enter the unit for this service, or use one of the options:
Options:
[F1]
to use "HOUR" if you bill this service by the hour
[Enter] if there is no unit for this service, and you either charge a flat
rate or don't charge separately for it
If you press [Enter], then "(NONE)" displays in the "UNIT" field. After you type in the
description (see below), "(NOT APPLICABLE)" displays in the "QUANTITY" field, and the
"UNIT PRICE" field changes to "PRICE".
3. Description
If this service is on file, its description displays automatically. You can change this or
press [Enter] to accept it as is. You can also enter up to 9 more lines of description as
described next.
If the service is not on file, enter the description of the service. After entering the first
line, you are asked if you wish to enter any more description. Press [Enter] for N, or
answer Y to enter more; the bottom of the screen clears to enter up to 9 additional
lines. When you are through entering description, press [F2].
Format:
10 lines, each up to the "service text length" specified in the P/I Control File
4. Quantity
If there is a unit for this service, enter the number of units.
If you are entering an invoice, you may enter a negative quantity. This means you are
giving a credit for this line item.
If you are entering a credit memo, you must enter a positive quantity here. You cannot
enter a negative quantity on a credit memo.
Format:
99,999,999.999-
5. Unit price or 5. Price
If there is a unit for this service, enter the price per unit, or use the option:
Professional Invoicing
User Manual
Invoices
12.29
Option:
[F1]
to use the price for the service in the Goods/Services File
The quantity is automatically multiplied by this price and the extended price displays.
If there is no unit for this service, enter the total price of the service.
Format:
9,999,999.999 (if there is a unit for this service)
99,999,999.99 (if there is no unit for this service)
NOTE: Because of the choices made in the P/I and A/R Control Files, some of the
following optional fields may not be used. In this case, the related field does not
appear and all later fields are renumbered.
The optional fields are:
"Discount % or Discntbl ?"
"Commisnbl ?"
"Job #"
"Sub-job #"
"G/L acct #"
6. Discount % or 6. Discntbl ?
NOTE: This field is skipped if the P/I Control File specifies that you do not use
discounts.
"Discntbl ?" (discountable?) asks whether the line item is to be subject to the overall
invoice discount.
There are three cases:
a. If you use line item discounts, but not an overall invoice discount, enter the
discount percent for this line item only. Press [Enter] if there is no discount for
this line item.
b. If you use both line item discounts and an overall invoice discount, enter the
discount percent for this line item only. Press [Enter] if there is no discount for
this line item.
c. If you don't use line item discounts, but do use an overall invoice discount, this
field appears as 6. "Discntbl ?". Answer Y if this line item is subject to the overall
invoice discount; otherwise, answer N.
Format:
999.999
7. Unit cost or
7. Total cost
Enter the unit cost per the unit for this service, or use the option:
Professional Invoicing
User Manual
Invoices
12.30
Option:
[F1]
to use the unit cost for the service in the Goods/Services File
If there is no unit for this service, this field appears as 7. "Total cost". Enter the total
cost of the service, or use the option:
Option:
[F1]
to use the total cost for the service in the Goods/Services File
NOTE: This cost is used to calculate the margin (profit margin) on this service. This is
required if you pay commissions based on margin. It is also included in the cost of the
sales transaction in A/R when this invoice is posted.
Format:
999,999.999(if there is a unit for this service)
99,999.99 (if there is no unit for this service)
8. Tax amount
The total amount of all taxes for this line item is displayed and the field is skipped.
Changes can be made only at the "Field number to change ?" prompt.
If you wish to change or view the taxes calculated (by tax type), select this field at the
"Field number to change ?" prompt. A window, similar to the one shown below, is
displayed:
For each tax type enter the following information:
Item-tax
Enter a taxable code to apply to the tax type, or press [Enter] to leave blank.
Professional Invoicing
User Manual
Invoices
12.31
Txbl
Enter the letter reflecting the taxable status of this service for this tax type. Valid
entries are T (taxable), X (exempt), Z (zero rated), [Enter] to accept the default status
of this item, or [Tab] to exit from the window.
Tax-amount
Enter an override amount of tax to apply for this service, or use one of the options:
Options:
[Enter] to accept the calculated amount.
[F1]
to remove any previously entered override tax amount.
Txbl-amount
This field displays the taxable portion of the extended price, and cannot be changed.
9. Commisnbl ?
NOTE: This field is skipped if the A/R Control File specifies that you do not use
commissions.
Answer Y if this line item is commissionable.
[?] 10. G/L acct #
(This field appears only if the A/R Control File specifies that sales are distributed.)
(This field defaults to the sales account from the Goods/Service record and is skipped
over. Changes can be made at "Field number to change ?".)
If you choose to change the default, enter the new sales account to which the revenue
from this item is to be distributed, or use one of the options:
Options:
[F1]
to scan through the sales accounts specified in the P/I Control
File
[F2]
to accept the default sales account for the service
If Job Cost is used, and if this line item is for a job, the billing account specified on the
job header for this job displays automatically. To change this, you must use "Field
number to change ?".
If Job Cost is interfaced, fields 10 and 11 become "JOB #" and "SUB-JOB #" and the
numbers of the subsequent fields change.
[?] 10. Job #
Professional Invoicing
User Manual
Invoices
12.32
(This field appears on the screen only if you are using the Job Cost package.)
If this invoice is not for a job, this field will be skipped and "(N/A)" for "Not applicable"
will display automatically.
If this invoice is for a single job, the job number entered on the header screen will
display here automatically and cannot be changed.
If this invoice is for multiple jobs, enter the job number for this line item, or use one of
the options below. If you enter a job number, it must be an active or closed job.
Options:
[F1]
to scan through the jobs on file
[Enter] if this line item is not for a job
Format:
7 characters
11. Sub-job #
(This field appears on the screen only if you are using the Job Cost package.)
If this invoice is not for a job, this field will be skipped and "(N/A)" displays
automatically.
If this invoice is for a single job which does not have sub-jobs or does not bill for
sub-jobs, "(N/A)" displays automatically.
If this invoice is for a single job which uses and bills for sub-jobs, the sub-job number
entered on the header screen displays automatically.
If this invoice is for multiple jobs, but this line item is not for a job, this field will be
skipped and "(N/A)" displays automatically.
Finally, if this invoice is for multiple jobs, this line item is for a job, and the job uses
sub-jobs and bills for the sub-jobs, a sub-job number must be entered. Enter the
sub-job number for this line item or use the option.
Option:
[F1]
Format:
999
to scan through all the sub-jobs for this job
Customer Credit Check
NOTE: Credit is not checked here if credit checking has been suspended previously
while entering this invoice, per the "IGNORE"
option described below. It is also not checked if the P/I Control File specifies that you
do not use credit checking.
Professional Invoicing
User Manual
Invoices
12.33
After you enter all fields for this line item, the customer's credit is checked to see if this
service puts the customer over his credit limit. If it does, you see a warning message.
You have three options: 1-Cancel this entire invoice, 2-Cancel this line item, or
3-Ignore the warning.
If you select option 2, the line item just entered is cancelled and the screen clears to
enter the next line item. Enter the sequence number of the next line item, or press
[Tab] to exit from entering line items and go on to the totals screen.
If you select option 3, you may continue with the invoice, and credit checking will be
suspended for the remainder of the invoice.
Entering "Notes" Line Items
1. Sequence #
Enter a sequence number here, exactly as in entering "Goods" or "Services" line items.
Format:
9999
Line type
Enter N for "Notes". You see:
Professional Invoicing
User Manual
Invoices
12.34
2.
Description
Enter whatever notes or comments you wish to appear on the invoice at this point. You
can press [Enter] at the beginning of any line to leave a blank line. To exit from
entering the note, press [F2].
Format: 10 lines, each up to the maximum service text length specified in the P/I
Control File
Make any changes.
The screen clears to enter the next line item. Enter the sequence number of the next
line item, or press [Tab] to exit from entering line items and go on to the totals screen.
NOTE: When printing invoices with "Notes" line items, be sure to use an invoice format
that allows "Notes". (See the Invoice Formats chapter)
Entering "Standard Bill" Line Items
This section describes how to "paste" standard bills into the line item part of your
invoice.
1. Sequence #
Professional Invoicing
User Manual
Invoices
12.35
Press [F2] to assign the next sequence number to the first line of the standard bill.
Line type
Type B for standard bill.
NOTE: If you are using Job Cost and this invoice is for multiple jobs, you cannot enter
a standard bill on this invoice.
You see:
[?]
Stand
ard
bill #
Enter the number of the standard bill that you want to "paste into" this invoice. You
can enter any portion of a standard bill number assigned in the Standard bills selection.
You can also use the option:
Option:
[F1]
Professional Invoicing
User Manual
to scan through the standard bills on file
Invoices
12.36
If you entered a number, the standard bill with the closest match to what you entered
displays, along with a count of the number of line items in this bill.
Whether you entered a number or used [F1], you can then press [F2] to look at the
details of any particular bill.
Format:
6 characters
You can use the [PgUp] and [PgDn] keys to see all of the line items in the standard bill.
When the correct standard bill is displayed, press [Enter] in response to "Right standard
bill ?".
You are then asked "Use this standard bill ?". If N, you can enter a new standard bill
number as above. If Y, the standard bill you selected is transferred to this invoice.
If you are using J/C
If you are using Job Cost and I/C, and if this invoice is for a job, and the job uses but
does not bill for sub-jobs, you will be asked to enter the sub-job number.
If you are using Job Cost and I/C, and change orders are used in Job Cost, and this
invoice is for a job, you will be asked for the change order for this standard bill. Press
if this standard bill is not for a change order, or enter the change order number. The
change order must already be defined for the job.
You are informed when the standard bill has been transferred (pasted into this invoice).
Customer Credit Check
A customer credit check is then performed, just as in entering Goods or Services line
items.
When through with entering line items, press [Tab] for the sequence number. The
"totals" screen then appears.
Totals Screen
The "totals" screen appears as:
Professional Invoicing
User Manual
Invoices
12.37
The
"Invoice tot" is the total dollar amount of all line items, less line item discounts (if any),
plus all calculated taxes.
The "Invoice disc" field displays only if the P/I Control File specifies that you use overall
invoice discounts. (After you enter the "Invc disc %" [field 1] the total dollar amount of
the discount will display.)The "Sales tax" field shows the sum of all line item taxes.
(After you enter the "Invc disc %" [field 1], the sales tax total will be reduced by the
amount of the discount.)
The "Commissionable" field displays only if the A/R Control File specifies that
commissions are used. It is the total dollar amount that is subject to a commission.
NOTE: The P/I Control File or A/R Control File may specify that some of the following
options are not used. In this case, the related field does not appear and all later fields
are renumbered.
The optional fields are:
"INVC DISC %"
"MISC CHARGES"
"FREIGHT"
"PAYMENT RECD", "CHECK #", "CASH account", AND "BANK RTE #" "COMMIS PCT"
and "COMMIS AMT"
Professional Invoicing
User Manual
Invoices
12.38
For a credit memo, the four "payment" fields do not appear.
Enter the information as follows:
1. Invc disc %
NOTE: This field is skipped if the P/I Control File specifies that you do not use overall
invoice discounts.
Enter the invoice discount percent or use the option:
Option:
[F1]
to use the customer's non-zero discount percent specified in the
Customer File in A/R
The invoice discount dollar amount at the top of the screen and the discounted net are
automatically calculated and displayed. (The "discounted net" is the invoice total, less
the discount.)
Format:
99.999
2. Misc charges
NOTE: This field is skipped if the P/I Control File specifies that you do not use
miscellaneous charges.
Enter any miscellaneous charges for this invoice.
Format:
99,999,999.99-
(If this is a credit memo, and miscellaneous charges are being credited, do not enter a
minus sign. Enter the miscellaneous charges as a positive amount.)
[?] Account #
If there are miscellaneous charges for this invoice, you are next asked for the number of
the G/L account that these charges are to be distributed to, if the A/R Control File
specifies that miscellaneous charges are distributed.
Enter the account number or use the option:
Option:
[F1]
to use the miscellaneous charges account in the A/R Control File
Misc charges taxable
The taxes calculated for miscellaneous charges do not display. If you wish to make any
changes or view the default calculations, press the [↑]
at the next numbered field, or select the misc field from "Field number to change ?". A
window appears for this purpose similar to the following:
Professional Invoicing
User Manual
Invoices
12.39
Make any changes as follows:
Txbl
Enter the letter reflecting the taxable status of miscellaneous charges for this tax type.
Valid entries are T (taxable), X (exempt), Z (zero rated), [Enter] to accept the default
status of this item, or [Tab] to exit from the window.
Tax-amount
Enter an override amount of tax to apply to miscellaneous charges, or use one of the
options:
Options:
[Enter] to accept the calculated amount.
[F1]
to remove any previously entered override tax amount.
3. Freight
(This field is skipped if the P/I Control File specifies that you do not use freight charges.)
Enter the amount of any freight charges. A minus sign is not required for a credit
memo.
Format:
9,999,999.99-
[?] Account #
If there are freight charges and the A/R Control File specifies that freight charges are
distributed, you are next asked for the number of the G/L account that these charges
are to be distributed to.
Enter the account number or use the option:
Option:
[F1]
to use the freight account in the A/R Control File
Freight taxable
Professional Invoicing
User Manual
Invoices
12.40
The taxes calculated for freight charges do not display. If you wish to make any
changes or view the default calculations, press the [↑] at the next numbered field, or
select the freight field from "Field number to change ?". A window appears for this
purpose similar to the following:
Make any changes as follows:
Txbl
Enter the letter reflecting the taxable status of freight charges for this tax type. Valid
entries are T (taxable), E (exempt), Z (zero rated), [Enter] to accept the default status
of this item, or [Tab] to exit from the window.
Tax-amount
Enter an override amount of tax to apply to freight, or use one of the options:
Options:
[Enter] to accept the calculated amount.
[F1]
to remove any previously entered override tax amount.
4. Sales tax
Sales tax displays automatically. The sales tax, if any, is the aggregate of the taxes
calculated for all tax types for line items, miscellaneous charges, and freight charges.
If you wish to change the amount displayed for sales tax, then press the [↑] key from the
next numbered entry field, or select the sales tax field from "Field number to change ?".
A window appears for this purpose similar to the following:
Professional Invoicing
User Manual
Invoices
12.41
Make any changes to the amounts calculated for each tax type, or use the option:
Option:
[F1]
to reverse changes made to override the calculated amount.
After this, these amounts are added:
"Invoice tot" (or "Discounted net", if an invoice discount is used)
"Misc charges" (if used)
"Freight" (if used)
"Sales tax" (if any)
The total is displayed as "Billed total".
Format:
99,999.99
NOTE: The next four fields appear only if the answer to the P/I Control File question,
"ASK CASH WITH INVOICE ?", is Y.
5. Payment recd
Enter the amount of any payment already received for this invoice.
Format:
999,999,999.99
6. Check #
NOTE: This field is skipped if no payment was received.
Enter the check number of the payment received. If currency was received, press
[Enter]; "** CASH **" displays.
Format:
999999
[?] 7. Cash account
NOTE: This field is skipped if no payment was received.
Enter the cash account to which this payment is to be deposited, or use one of the
options:
Options:
[F1]
Professional Invoicing
User Manual
for the default cash account from the A/R Control File
Invoices
12.42
[F2]
to scan through the other cash accounts on file
8. Bank rte #
Enter the "routing number" that is on the check. This is usually in the upper right-hand
portion of the check and looks something like 99 999.
This field is skipped if you received cash instead of a check.
Format:
15 characters
(The next two fields are skipped if the A/R Control File specifies that you do not use
commissions.)
9. Commis amt
This field appears as "Commis amt" if no line items were specified as being
commissionable, or if the commissionable amount at the top of the screen is zero.
Enter the commission amount. (A minus sign is not required for a credit memo.)
Format:
99,999,999.99-
9. Commis pct and
10. Commis amt
Field 9 appears as "Commis pct" if one or more line items are specified as being
commissionable and the commissionable amount is not zero. Enter the commission
percent or use the option:
Option:
[F1]
to use the commission percent and method ("on price" or "on
margin") for the customer or the sales rep. (If commissions are
assigned "by customer" in A/R, then the customer's percent and
method are used. If commissions are assigned "by sales rep" in
A/R, then the sales rep's commission percent and method are
used.)
If you enter a specific commission percent, you are asked if the commission is on price
or on margin. Press [Enter] to accept the default specified in the P/I Control File, or
enter [P] for price or [M] for margin.
If you enter zero for the commission percent, the cursor moves to the "Commis amt"
field. Enter the commission amount.
If the commission is on price, the commission amount displays in the "COMMIS AMT"
field. If the commission is on margin, you are informed that the amount of the
commission will be calculated when the invoice is posted to A/R.
Format:
99.999 (for commission percent)
Professional Invoicing
User Manual
Invoices
12.43
99,999,999.99- (for commission amount)
11. Comment
Enter any comment for this invoice. Press [F2] to exit from entering the comment.
Format: 5 lines, each up to the number of characters specified in "Comment text
length" in the P/I Control File
Using Notes
You can enter an unlimited number of notes about this invoice by pressing [F6] at "Field
number to change ?". Each note is given a date/time stamp so that you can browse
through the notes in time sequence later. (These notes are never printed on
statements, so the customer will never see them.)
A menu at the bottom of the "Notes" area shows three selections:
Menu
Pressing [F1] brings up a number of selections. Each selection is described below:
Save
After entering a note, this selection permanently saves the note
New
Start a new note. If you have made any changes to the current
note, those changes are lost.
Delete
Permanently deletes the note
Jump
Allows you to enter a specific date for viewing notes.
Change date
Change the date and time this note was entered.
Abandon
Abandon any changes to the current note and exit the notes
function.
Exit
Exit the notes function.
[PgUp]
View an earlier dated note.
[PgDn]
View a later dated note.
[Home]
View the earliest dated note (oldest).
[End]
Text entry
View the newest note on file.
When you select to enter a note, the cursor is positioned for you to enter the first line of
the text of the note.
Professional Invoicing
User Manual
Invoices
12.44
While entering a note the following keys and rules apply:
[Enter]
Completes the entry of a line of text and moves the cursor to the next
line.
AutoWrap The text editor will automatically wrap the typed text to the next line
once you reach the end of the line. For example if you were typing
"superb" and only had enough room left on the line for "sup" the entire
word would be automatically moved to the next line.
[F1]
Access the menu selections described in the previous section.
[Esc]
Exit the note function without saving the changes to the current note.
[Tab]
Exit the note function and save the changes to the current note.
[F2]
Begin entering a new note.
[F3]
Edit the next note on file.
[F4]
Edit the previous note on file.
Format: 10 lines of 77 characters each
Customer Credit Check
NOTE: Credit is not checked here if credit checking was suspended at an earlier point
while entering this invoice.
If miscellaneous charges, freight, or sales tax caused the customer to exceed his credit
limit, you see a warning message as in the other credit checks. Handle it the same
way.
Immediate Printing
If the P/I Control File specifies that you do not print invoices immediately, the invoice
header screen appears for you to begin entering another invoice.
If the P/I Control File specifies that you print invoices immediately, a window appears:
Professional Invoicing
User Manual
Invoices
12.45
You
are
asked "Print this invoice now ?" and given several choices:
Answer N if you don't want to print this invoice now. The invoice header screen
reappears for you to begin entering the next invoice.
Answer Y if you want to print this invoice now, using the default selections shown for
invoice format, invoice number, and invoicing station, and you don't want to print an
alignment form first.
If you want to print this invoice now, but you want to change the default selections
shown or print an alignment form first, then enter one or more of the following answers:
[F]
Option:
To change the invoice format, then enter the number of the format you
want to use to print the invoice or use the option:
[F1]
to scan through the invoice formats on file
[I]
to change the number assigned to this invoice, then enter the invoice
number of your choice.
[S]
To change the number of the invoicing station on which the invoice is to
print, then enter the invoice station code of your choice.
[A]
To print a test alignment form filled out with lines of X's and 9's. You can
continue to choose to print as many alignment forms as you wish, until
the paper is adjusted properly in the printer.
Answer Y when you are ready to print the invoice.
The invoice is then printed. (Sample invoices are shown at the end of the chapter
titled Invoice Formats.)
After the invoice is printed, you are asked if the invoice just printed is OK.
Professional Invoicing
User Manual
Invoices
12.46
If you answer Y, the Enter screen reappears, ready for you to begin entering the next
invoice.
If you answer N, you are returned to the immediate printing window. Answer N again
to return to the Enter screen and make corrections. Or answer Y to print the invoice
again. The choices shown above are also available.
When through entering and printing invoices, press [Tab] at the first field.
Back ordered invoices
When an invoice is posted, if all lines on the invoice are fully shipped or partially
shipped but "out of stock", then the invoice is deleted from the system. If one or more
lines are back ordered, then these lines are retained and the invoice is marked as a
"Back ordered invoice". In this case, when the back orders can be filled, use Invoices to
enter the quantities that can now be shipped. When you reach the totals screen for such
an invoice, you will have to enter the fields on the screen as if the invoice had been
entered for the first time (except for the discount percent and comment, if any). This is
required so that the fields on the totals screen (such as sales tax and commission
amount) are properly filled in, based upon the quantities that are now to be shipped.
Printing a List of Invoices
From the Invoices menu, select List.
Professional Invoicing
User Manual
Invoices
12.47
Enter the information as follows:
1. Print in order by
Enter the order in which you want the invoices shown on the list: press [Enter] for bill
reference number order; or type [C] for Customer number order, [N] for customer Name
order, or [G] for bill Group order.
Format:
1 character
What you enter in the next two fields depends on the choice of order in which they are
shown on the list.
2. Starting ("in order by" choice)
3. Ending ("in order by" choice)
Enter the starting and ending "in order by" choices (Customer number, customer Name,
or Bill group). Follow the screen instructions.
Example: Press [F1] in each field.
4. Starting invoice date
5. Ending invoice date
Professional Invoicing
User Manual
Invoices
12.48
Enter the range of invoice dates. Follow the screen instructions.
Format:
MMDDYY for each field
6. What to print:
Select how much information to show for each invoice:
# of header lines
Press [Enter] to show 1 header line per invoice, type 2 for 2 lines, or press [F1] to show
"All" header lines for each invoice.
# lines per line item
Press [Enter] to show 1 line per line item, type 0 for none, type 2 for 2, type 3 for 3 or
press [F1] to show "All" information for each line item. If you enter 0, this means you
don't want to show line items at all.
Bill totals ?
Press [Enter] to show the totals information for each invoice. Answer N if you don't
want to print totals information for individual invoices.
Invoice notes ?
Answer Y to have invoice notes printed for each invoice, or N otherwise. These notes
are the internal notes about the invoice which are entered using the [F6] key on the
header and totals screen. This field does not refer to Notes line items, which are printed
as per your answer to "# lines per line item".
Report totals ?
Press [Enter] to show the grand total information for all invoices on this report;
otherwise, answer N.
7. B/O invoices only ?
This field only appears if back orders are specified in P/I Control File.
Press [Enter] to show back order invoices only. Answer N if you don't want to print back
order invoices only.
____________________
Professional Invoicing
User Manual
Invoices
12.49
Chapter 13
Recurring Bills
Introduction
A "recurring bill" is an invoice which is billed over and over for a sale made at regular
intervals to the same customer. For example, if a pest control service sprayed a
building every month, an invoice for the service would be printed each month. This
would be a recurring bill or recurring invoice.
Use this selection to enter recurring bills. You can also select the recurring bills that
you want to use as invoices during each billing cycle. (The recurring bills remain on file
for use in later billing cycles.)
If you are using the Job Cost package, you can set up a recurring bill for a job.
NOTE: The Enter option of this selection works similarly to Invoices. However, credit
checking is done only when a recurring bill is selected to be turned into an invoice
(option 3 on the menu). If the customer is already over his credit limit, a warning
message displays. However, no warning appears if selecting this recurring bill would
now put him over his limit.
To Begin
From the P/I menu, select Recurring bills, then select Enter from the menu which
appears.
Professional Invoicing
User Manual
Recurring Bills
13.1
Entering Recurring Bills
There are four different screens on which you enter information about a recurring bill.
The first is the "Header" screen; the second, the "Line item" screen; the third, the
"Totals" screen; and the fourth, the "Recurrence information" screen.
You first see the header screen:
Header Screen
From this screen, you can work with both new and existing recurring bills and line items.
If a recurring bill has already been entered for the customer number and reference
number you specify, it will appear and be available for changes or deletion.
Enter the following information:
For a new recurring bill:
[?] 1. Customer #
Enter the customer number for the recurring bill, or use one of the options:
Professional Invoicing
User Manual
Recurring Bills
13.2
Options:
[F2]
to scan through the customers on file
[Enter] to look up the customer by name
[F4]
Format:
to copy an existing recurring bill
12 characters
2. Ref #
Enter a reference number for this recurring bill. You may use this reference number
later to locate this particular recurring bill for this customer.
Format: 6 characters
NOTE: You can use the same reference number for recurring bills for different
customers.
For an existing recurring bill:
[?] 1. Customer #
Enter the customer number for the recurring bill, or use one of the options:
Options:
2. Ref #
[F1]
to scan through the recurring bills on file. (Once you have found
the correct recurring bill, you may then make any needed
changes.)
[Enter] to look up the customer by name
Once a customer is displayed in the field above, you may enter the reference number
for one of the customer's recurring bills. The recurring bill will then be displayed and
you can make any needed changes. (You may use the [F3] key if you wish to delete the
recurring bill.)
Changing Line Items and Totals
Once the recurring bill header is displayed, you may make any needed changes. Then
press [Enter] at "Field number to change ?". You are asked "Do you wish to change line
items ?". Answer Y to change line items, or N to return to the top of the screen to enter
another recurring bill. When the line item screen is displayed, you may press [Tab] to
go directly to the totals screen.
Changing Recurrence Information
Professional Invoicing
User Manual
Recurring Bills
13.3
When you are asked, "Do you wish to change the line items ?" as described above, you
may also press [F1] to view the recurrence information for the recurring bill. The
recurrence information is described later in this chapter.
3. Group
Entering a group is completely optional.
Enter a code to assign this recurring bill to a group of bills. You can use this code later
to sort or print recurring bills by groups.
Automatic Selection
Groups are also used for automatic selection of recurring bills. In automatic selection,
a range of groups (i.e., starting and ending group codes) are entered and then all
recurring bills in these groups are selected for use. By suitably choosing your group
codes on entry, you can greatly speed up the selection of recurring bills through the use
of automatic selection. Alternatively, you may select recurring bills for use on an
individual basis.
Format: 3 characters
[?] 4. Deliver to
Enter the code for the deliver-to address at which services are performed or to which
goods are delivered.
Enter the deliver-to number or use one of the options:
Options:
[Enter] to make the deliver-to address the same as the customer's billing
address
[F1]
to scan through the deliver-to addresses on file for this customer
[F2]
to enter a new deliver-to address, up to 4 lines of 25 characters
each
If you enter a new address, you are asked whether you want to save it.
If you answer Y, the address just entered will be put in the permanent Deliver-to
Addresses File, automatically identified by the next available deliver-to number for this
customer.
If you answer N, this new deliver-to will be only for this bill and will not be saved.
Format:
999
5. P.O. #
Professional Invoicing
User Manual
Recurring Bills
13.4
If there is a customer purchase order, enter the P.O. number.
NOTE: If the customer record in A/R specifies that a P.O. number is required, you will
not be allowed to continue on until a P.O. number is entered.
Format: 15 characters
[?] 6. Terms
For a balance forward customer, the customer's usual terms code displays and cannot be
changed.
For an open item customer, enter a terms code or use the option:
Option:
[F1]
to use the customer's usual terms code
Format:
3 characters
NOTE: Because of the choices made in the P/I and A/R Control Files, some of the
following optional fields may not be used. In this case, the related field does not
appear on the screen and all later fields on the screen are renumbered.
The optional fields are:
"SHIP VIA"
"SALES REP" (use is specified in the A/R Control File)
"PROFIT CTR"
"JOB #"
"SUB-JOB #"
1st user-defined field
2nd user-defined field
3rd user-defined field
[?] 7. Ship via
(This field appears only if the P/I Control File specifies that ship-via's are used.)
Enter a ship-via code or use the option:
Option:
[F1]
to use the customer's usual ship-via code
Format:
3 characters
[?] 8. Tax group
The tax group entered for this order must exist in the Taxes file. Enter a tax group or use
the option:
Option:
[F1]
Professional Invoicing
User Manual
to use the tax group entered for the deliver-to address (if an
address from the Deliver-to File is being used)
Recurring Bills
13.5
[F1]
to use the tax group entered for this customer in the Customer
File
[F2]
to modify the taxable status for the customer or deliver to
address
If the customer is a one-time customer or if you are entering the customer as you go,
you can press [F1] to scan through the available tax codes. When the desired tax code
appears, press [Enter].
Format:
3 characters
[?] 9. Sales rep
(This field appears only if the A/R Control File specifies that sales representatives are
used.)
Enter a sales rep code or use the option:
Option:
[F1]
To use the customer's usual sales rep
Format: 3 characters
[?] 10. Profit ctr
(This field appears only if the P/I Control File specifies that multiple profit centres are
used.)
Enter the profit centre to which this recurring bill is assigned or use the option:
Options:
[F1]
to use the profit centre specified in the P/I Control File
11. 1st user-defined field
(This field appears only if it is defined in the P/I Control File.)
The name of the first optional field defined in the P/I Control File displays here. Enter
the information appropriate to the field.
Format: (Number of characters specified in the P/I Control File)
12. 2nd user-defined field
(This field appears only if it is defined in the P/I Control File.)
The name of the second optional field in the P/I Control File displays here. Enter the
information appropriate to the field.
Format: (Number of characters specified in the P/I Control File)
Professional Invoicing
User Manual
Recurring Bills
13.6
13. 3rd user-defined field
(This field appears only if it is defined in the P/I Control File.)
The name of the third optional field in the P/I Control File displays here. Enter the
information appropriate to the field.
Format: (Number of characters specified in the P/I Control File)
Make any changes.
Fields 11 and 12 appear as shown below if you have specified in the P/I Control File that
P/I is interfaced to Job Cost. The user-defined fields are renumbered.
[?] 11. Job #
A recurring bill can be entered only for a single job, not for multiple jobs.
Enter the number of the job for which this is the recurring bill. The job must be an
active or closed job already on file in the Job Cost package.
Enter the job number or use one of the options:
Options:
[F1]
to scan through the jobs on file in the Job Cost package
[Enter] If this recurring bill is not for a job
Format: 7 characters
12. Sub-job #
If you entered a job number in the previous field, and that job is broken down into
sub-jobs, and you bill for the sub-jobs, you are asked for the sub-job number for which
this is the recurring bill. Otherwise, you are not asked for the sub-job number.
Enter the number of the sub-job or use the option:
Option:
[F1]
to scan through the sub-jobs for this job
Format: 999
You are now finished with the header screen. The next screen is the line item screen.
Line Item Screen
A screen appears to enter the first line item on this recurring bill:
Professional Invoicing
User Manual
Recurring Bills
13.7
Enter the information as follows:
1. Sequence #
Enter a sequence number here, exactly as in Invoices.
Format: 9999
Line type
The options for this are the same as for "Line type" under invoice entry.
The appearance of the bottom part of the screen depends on whether or not you are
using the Job Cost package. Fields used only with J/C are noted later in this section.
Format: 1 character
Entering "Goods" line items
After you type [G], you see:
Professional Invoicing
User Manual
Recurring Bills
13.8
[?] 2. Item #
If Inventory Management is not used:
Enter the item number or use one of the options:
Options: [F1]
[Enter]
to scan through the items in the Goods/Services File
to enter a one-time item that is not on the file
If you enter an item number that is not on file, you are informed that this item is not in
the Goods/Services File and asked whether you want to enter it anyway. If you then
answer Y, you are asked whether it should be added to the file. This gives you a chance
to enter new items as you go. If you answer N to this second question, this item will
appear only on the current recurring bill and will not be added to the Goods/Services
File.
Format: 15 characters
Unit
If this item is on the Goods/Services File, the unit will display automatically.
Professional Invoicing
User Manual
Recurring Bills
13.9
If the item is not in the file, you must enter the unit or use the option:
Option:
[F1]
to use EACH
Format: 4 characters
If Inventory Management is used:
Enter the inventory item number or use one of the options:
Options:
[F1]
to scan through the items in the Item File
[Enter] to look up the item by description
If you left the number blank, enter the item's description (or any portion of it beginning
with the first letter). The first item with a description matching the entered
characters appears, and you are asked if this is the item you want. Answer Y to select
it, N to enter another item, or press [F1] to see the next item in alphabetical order.
Miscellaneous items
A miscellaneous item has an item number that begins with an asterisk (*). If you enter
a miscellaneous item for the item number, you are requested to enter the unit. If
there is a unit already in the Item File for this item, it is displayed automatically and you
can change it if you wish. You are then requested to enter the item description.
[?] Warehouse
(This field appears only if the P/I Control File specifies that multiple warehouses are
used.)
Enter the code for the warehouse from which the item is to be shipped or use the
option:
Option:
[F1]
to use the warehouse entered in the P/I Control File
The warehouse must exist in the I/C Warehouse File, and the item must be stocked at
this warehouse. If not, an error message appears, and you must correct the condition
in the I/C package. (Refer to the Inventory Management User Manual.)
Format: 2 characters
3. Description
For an item that is already on file, and not a miscellaneous item, the description
displays automatically. You can change this if you wish, or press [Enter] to accept it as
is.
Professional Invoicing
User Manual
Recurring Bills
13.10
If you are entering a new item (which you can do only if you are NOT using I/C) or if this
is a miscellaneous item, enter the description of the item.
Format: 3 lines of 25 characters each
4. Quantity
Drop shipped items
If this item is to be drop shipped (shipped directly to the customer from your supplier),
press [F1]. "*DS*" displays. Press [F1] again to cancel the "drop ship" status.
Enter the quantity ordered.
If you enter zero, the "Fixed or var" field described below is set to "Variable", meaning
that you may enter a different quantity each time the customer is invoiced.
Format:
99,999,999.999
Fixed or var ?
If the quantity above is not zero, you must next specify if the quantity is usually the
same for this recurring bill (a fixed quantity), or if it usually varies each time the bill is
selected to be used as an invoice (a variable quantity).
At the time you select this bill to be turned into an invoice, you can still make changes
to both fixed and recurring line item quantities. However, specifying this line item
now as "variable" gives you an added convenience: When the bill is selected later, you
can press [F2] to bring up only variable line items to change. You will save time then
because you won't have to sort through all the line items to find the variable ones you
want to change.
Enter [F] for fixed or [V] for variable.
If the quantity entered above is zero, this field is automatically set to V.
5. Unit price
If Inventory Management is not used:
Enter the price per the unit for this item, or use the option:
Option:
[F1]
to use the unit price in the Goods/Services File
The quantity is automatically multiplied by this unit price and the extended price
appears.
Professional Invoicing
User Manual
Recurring Bills
13.11
NOTE: If you are not using I/C, items with multi-level prices will be calculated based
on the quantity cut-off. Refer to the chapter titled Goods/Services for details on
extended price calculations.
Format: 9,999,999.999
If Inventory Management is used:
Enter the unit price, or use the option:
Option:
[F1]
to use the price as determined by the price code for this item in
the Item File. If there is no price code for this item, Price-1
from the Item record is used.
The extended price appears.
NOTE: If the unit price is zero, you are asked "Are you sure ?".
Optional Fields
Because of the choices made in the P/I Control File and in the A/R Control File, some of
the following optional fields may not be used. In this case, the related field does not
appear and all later fields are renumbered.
The optional fields are:
"Discount % or Discntbl ?"
"Commisnbl ?"
"Job #"
"Sub-job #"
6. Discount % or 6. Discntbl ?
NOTE: This field is skipped if the P/I Control File specifies that you do not use
discounts.
"Discntbl ?" (discountable?) asks whether the line item is to be subject to the overall
invoice discount.
There are three cases:
a. If you use line item discounts, but not an overall invoice discount, enter the
discount percent for this line item only. Press [Enter] if there is no discount for
this line item.
b. If you use both line item discounts and an overall invoice discount, enter the
discount percent for this line item only. Press [Enter] if there is no discount for
this line item.
Professional Invoicing
User Manual
Recurring Bills
13.12
c. If you don't use line item discounts, but do use an overall invoice discount, this
field appears as 6. "Discntbl ?". Answer Y if this line item is subject to the overall
invoice discount; otherwise, answer N.
Format: 999.999
7. Unit cost
If Inventory Management is not used:
Enter the unit cost or use the option:
Option:
[F1]
to use the unit cost in the Goods/Services File
NOTE: This cost is used to calculate the margin (profit margin) on this line item. It is
also transferred into the A/R Sales Transaction File and is included in the cost of the sale
on the Sales Journal.
Format:
999,999.999
If Inventory Management is used:
The unit cost is requested only for a miscellaneous inventory item (item number begins
with an asterisk ["*"]). In this case, the unit cost is required to keep the cost of sales in
I/C accurate. If you do not use cost of sales in I/C, press [Enter] to default to zero.
In the case of a regular line item (positive order quantity) for a regular inventory item,
the unit cost is not requested. Instead, an approximate value for the unit cost is
displayed automatically, and the name of the field changes depending on the inventory
valuation method specified in the I/C Control File. The cost is displayed as follows:
LIFO valuation method
FIFO valuation method
Average cost valuation method
Standard cost valuation method
Replacement cost
Average cost
Average cost
Standard cost
The actual cost is calculated exactly when the invoice from this recurring bill is posted.
For the standard cost valuation method, the actual cost is the standard cost.
8. Tax amount
The total amount of all taxes for this line item is displayed and the field is skipped.
Changes can be made only at the "Field number to change ?" prompt.
If you wish to change or view the taxes calculated (by tax type), select this field at the
"Field number to change ?" prompt. A window, similar to the one shown below, is
displayed:
Professional Invoicing
User Manual
Recurring Bills
13.13
For each tax type enter the following information:
Item-tax
Enter a taxable code to apply to the tax type, or press [Enter] to leave blank.
Txbl
Enter the letter reflecting the taxable status of this item for this tax type. Valid
entries are T (taxable), E (exempt), Z (zero rated), [Enter] to accept the default status
of this item, or [Tab] to exit from the window.
Tax-amount
Enter an override amount of tax to apply for this item, or use one of the options:
Options:
[Enter] to accept the calculated amount.
[F1]
to remove any previously entered override tax amount.
Txbl-amount
This field displays the taxable portion of the extended price, and cannot be changed.
9. Commisnbl ?
(This field is skipped if the A/R Control File specifies that you do not use commissions.)
Answer Y if this line item is commissionable.
NOTE: If I/C is in use, this field is set to Y if the inventory item contains a commission
code and is set to N otherwise. You may change this from "Field number to change ?".
[?] 10. G/L acct #
If Inventory Management is not used:
(This field defaults to the sales account from the Goods/Service record and is skipped
over. Changes can be made at "Field number to change ?".)
Professional Invoicing
User Manual
Recurring Bills
13.14
If you choose to change the default, enter the new sales account to which the revenue
from this item is to be distributed, or use one of the options:
Options:
[F1]
to scan through the sales accounts specified in the P/I Control
File
[F2]
to accept the default sales account for the item
If Inventory Management is used:
The sales account specified for this inventory item in the I/C Item File displays
automatically. If the item's profit centre is wild-carded, then the sales account from
the Item File is combined with the profit centre from either the invoice header. If you
want to change this, you must do so from "Field number to change ?".
If Job Cost is used:
If this recurring bill is for a job, enter the sales account to which revenue from this item
is to be distributed, or press [F1] to default to the billing account for the job.
If Job Cost is interfaced, fields 10 and 11 appear as follows and "G/L acct #" becomes
field 12.
[?] 10. Job #
If this recurring bill is not for a job, "(N/A)" displays in this field.
If this recurring bill is for a job, the job number that you entered on the header screen
displays automatically.
In either case, this field cannot be changed.
11. Sub-job #
If this recurring bill is not for a job, "(N/A)" displays in this field.
If this recurring bill is for a job, the sub-job number that you entered on the header
screen (if any) displays automatically.
In either case, this field cannot be changed.
NOTE: If you are using I/C and J/C, you will be asked to enter the cost item for the job
as well.
Entering "Services" Line Items
1. Sequence #
Enter a sequence number here, exactly as in Invoices.
Professional Invoicing
User Manual
Recurring Bills
13.15
Format: 9999
Reviewing Existing Line Items
If you wish to review line items already entered for this recurring bill, enter the
sequence number, press [F1] to see existing lines or use the View function described in
a later chapter of this manual.
Line type
As in Invoices, enter [S] for services.
The appearance of the bottom part of the screen depends on whether or not you are
using the Job Cost package. The screen shown below is what you see if you are not
using J/C. Fields used only with J/C are noted below.
You see:
Professional Invoicing
User Manual
Recurring Bills
13.16
Enter the information as follows:
[?] 2. Service #
Enter the service number or use one of the options:
Options: [F1]
to scan through the services in the Goods/Services File
[Enter]
to enter a one-time service that is not in the file
If you enter a service number that is not in the Goods/Services File, you are told that
this service is not on file and asked if you want to enter it anyway. If you answer Y, you
are asked if you want to add this service to the Goods/Services File. (If you're using
I/C, you're asked if you want to add it to the Services File.) If you answer Y to this
second question, the service will be added permanently to the file; otherwise, it will
appear only on the current recurring bill.
Format: 999
Unit
If this service is on file, the unit will be displayed automatically and cannot be changed.
Format: 4 characters
If this service is not on file, enter the unit for this service, or use one of the options:
Options:
[F1]
Professional Invoicing
User Manual
to use "HOUR" if you bill this service by the hour
Recurring Bills
13.17
[Enter] If there is no unit for this service, and you either charge a flat
rate or don't charge separately for it, "(NONE)" displays.
3. Description
If this service is on file, its description displays automatically. You can change this or
press [Enter] to accept it as is. You can also enter up to 9 more lines of description as
described next.
If the service is not on file, enter the description of the service. After entering the first
line, you are asked if you wish to enter any additional description. Press [Enter] for N,
or answer Y to enter more description; the bottom of the screen clears to enter up to 9
additional lines. When you are through entering description, press [F2].
Format: 10 lines, each up to the "Service text length" specified in the P/I Control File
4. Quantity
If you entered a unit above, enter the number of units.
If you left "UNIT" blank, "(NOT APPLICABLE)" displays and you cannot enter anything.
As with Goods line items, if you enter zero, the "Fixed or var ?" field (described below)
is set to V.
Format: 99,999,999.999
Fixed or var ?
If the quantity above is not zero, you must next specify whether the quantity is usually
the same for this recurring bill (a fixed quantity), or whether it usually varies each time
the bill is selected to be used as an invoice (a variable quantity).
At the time you select this bill to be used as an invoice, you can still make changes to
both the fixed and recurring line item quantities. However, specifying this line item
now as "variable" gives you an added convenience: When the bill is selected later, you
can press [F2] to bring up only variable line items to change. You will save time then
because you won't have to sort through all the line items to find the variable ones you
want to change.
Enter [F] for fixed or [V] for variable.
If the quantity entered above is zero, this field is automatically set to V.
Format: 1 character
5. Unit price or
5. Price
Professional Invoicing
User Manual
Recurring Bills
13.18
If you entered a unit above, enter the price per unit or use the option:
Option:
[F1]
to use the unit price in the Goods/Services File
The quantity is automatically multiplied by this price and the extended price displays.
If you left "Unit" blank above, this field changes to 5, "Price". Enter the total price of
the service.
If there is no quantity for this service and you are entering the total price here, you are
next asked if this price is fixed or variable, as described above for 4. "QUANTITY". If
the price you entered is zero, this line item is automatically set to [V] for variable.
Format: 9,999,999.999 (price per unit) 99,999,999.99 (total price)
NOTE: If the unit price is zero, you are asked "Are you sure ?".
Optional Fields
Because of the choices made in the P/I and A/R Control files, some of the following
optional fields may not be used. In this case, the related field does not appear and all
later fields are renumbered.
The optional fields are:
"Discount % or Discntbl ?"
"Commisnbl ?"
"Job #"
"Sub-job #"
6. Discount % or 6. Discntbl ?
NOTE: This field is skipped if the P/I Control File specifies that you do not use
discounts.
"Discntbl ?" (discountable?) asks whether the line item is to be subject to the overall
invoice discount.
There are three cases:
a. If you use line item discounts, but not an overall invoice discount, enter the
discount percent for this line item only. Press [Enter] if there is no discount for
this line item.
b. If you use both line item discounts and an overall invoice discount, enter the
discount percent for this line item only. Press [Enter] if there is no discount for
this line item.
Professional Invoicing
User Manual
Recurring Bills
13.19
c. If you don't use line item discounts, but do use an overall invoice discount, this
field appears as 6. "Discntbl ?". Answer Y if this line item is subject to the overall
invoice discount; otherwise, answer N.
Format: 999.999
7. Unit cost or
7. Total cost
Enter the unit cost per the unit for this service or use the option:
Option:
[F1]
to use the unit cost for the service in the Goods/Services File
If there is no unit for this service, this field appears as 7. "Total cost". Enter the total
cost of the service.
NOTE: This cost is used to calculate the margin (profit margin) on this service. This is
required if you pay commissions based on margin. It is also included in the cost of the
sales transaction in A/R when this invoice is posted.
Format: 999,999.999
8. Tax amount
The total amount of all taxes for this line item is displayed and the field is skipped.
Changes can be made only at the "Field number to change ?" prompt.
If you wish to change or view the taxes calculated (by tax type), select this field at the
"Field number to change ?" prompt. A window, similar to the one shown below, is
displayed:
For each tax type enter the following information:
Item-tax
Enter a
code to
the tax
press
leave
Professional Invoicing
User Manual
taxable
apply to
type, or
[Enter] to
blank.
Recurring Bills
13.20
Txbl
Enter the letter reflecting the taxable status of this service for this tax type. Valid
entries are T (taxable), X (exempt), Z (zero rated), [Enter] to accept the default status
of this item, or [Tab] to exit from the window.
Tax-amount
Enter an override amount of tax to apply for this service, or use one of the options:
Options:
[Enter] to accept the calculated amount.
[F1]
to remove any previously entered override tax amount.
Txbl-amount
This field displays the taxable portion of the extended price, and cannot be changed.
9. Commisnbl ?
NOTE: This field is skipped if the A/R Control File specifies that you do not use
commissions.
Answer Y if this line item is commissionable.
10. G/L acct #
(This field is skipped if the A/R Control File specifies that you do not distribute sales.)
This field defaults to the sales account from the Goods/Service record and is skipped
over. Changes can be made at "Field number to change ?".
If you choose to change the default, enter the new sales account to which the revenue
from this service is to be distributed, or use one of the options:
Options:
[F1]
to scan through the sales accounts specified in the P/I Control File
[F2]
to accept the default sales account for the service
If Job Cost is used, and if this line item is for a job, enter the sales account to which
revenue from this item is to be distributed, or use the option:
Option:
[F1]
to use the billing account in the job header for this job
If Job Cost is interfaced, fields 10 and 11 appear as shown below and "G/L ACCT #"
becomes field 12.
10. Job #
Professional Invoicing
User Manual
Recurring Bills
13.21
This is a "display" field only and cannot be changed.
If this recurring bill is not for a job, this field will be skipped and "(N/A)" for "Not
applicable" displays automatically.
If this recurring bill is for a job, the job number entered on the header screen displays
here automatically and cannot be changed.
11. Sub-job #
This field is also a "display" field only and cannot be changed.
If this recurring bill is not for a job, this field will be skipped and "(N/A)" will display
automatically.
If this recurring bill is for a job which does not have sub-jobs or does not bill for
sub-jobs, "(N/A)" will display automatically.
If this recurring bill is for a job, the sub-job number entered on the header screen will
display here automatically and cannot be changed.
Entering "Notes" Line Items
Notes are entered exactly as in Invoices.
1. Sequence #
Enter a sequence number here, exactly as in entering Goods or Services line items.
Format: 9999
Line type
As in Invoices, enter [N] for notes. You see:
Professional Invoicing
User Manual
Recurring Bills
13.22
2.
Description
Enter whatever notes or comments you wish to appear on the recurring bill. The
maximum length of each line depends on the "Service text length" specified in the P/I
Control File. You can press [Enter] at the beginning of any line to leave a blank line.
To end the note, press [F2].
Format:
(Number of characters specified for "Service text length" in the P/I
Control File)
Make any desired changes.
The screen clears to enter the next line item. Enter the sequence number of the next
line item, or press [Tab] to exit from entering line items and go on to the totals screen.
Entering "Standard Bill" Line Items
Standard bills are entered exactly as in Invoices.
1. Sequence #
Press [F2] to assign the next sequence number to the first line of the standard bill.
Professional Invoicing
User Manual
Recurring Bills
13.23
Format: 9999
Line type
As in Invoices, enter [B] for standard bill. You see:
Standard bill #
Enter the number of the standard bill that you want to "paste into" this recurring bill.
You can enter any portion of a standard bill number assigned in the Standard bills
selection.
Enter the number or use the option:
Option:
[F1]
to scan through the standard bills on file
Format:
6 characters
If you entered a number, the standard bill with the closest match to what you entered
displays, along with a count of the number of line items in this bill.
Professional Invoicing
User Manual
Recurring Bills
13.24
Whether you entered a number or used [F1], you can then press [F2] to look at the
details of any particular bill.
You can use the [PgUp] and [PgDn] keys to see all of the line items in the standard bill.
When the correct standard bill is displayed, press [Enter] in response to "Right standard
bill ?".
You are then asked "Use this standard bill ?". If N, you can enter a new standard bill
number as above. If Y, the standard bill you selected is transferred to this recurring
bill.
If you are using profit centres
When standard bills are copied, the main accounts entered for Goods line items in the
standard bill are combined with the profit centre from either the quotation header or
the Item File file). For Service lines, the main accounts on the standard bill line items
are combined with the profit centre entered on the recurring bill header.
If you are using I/C and J/C
If you are using Job Cost and also using change orders, and if this recurring bill is for a
job, and you are also using the Inventory Management package, you will be asked for the
change order number for this standard bill. Press [Enter] if this standard bill is not for
a change order, or enter the change order number. The change order must already be
defined for the job.
You are informed when the standard bill has been transferred (pasted into this recurring
bill).
NOTE: Each line item from the standard bill is originally designated here as a "fixed"
line item if "Qty" or "Price" is not zero. If the "Qty" or the "Price" is zero, it is designated
as a "variable" line item. If you wish to change this designation, do so as described
under the section titled "Changing Line Items and Totals" in the first part of this chapter.
See field 4. "Quantity" above for more explanation of "fixed" and "variable" line items.
The screen clears to enter the next item. When through with entering line items, press
[Tab] for the sequence number. The totals screen then appears.
Totals Screen
Professional Invoicing
User Manual
Recurring Bills
13.25
The "Invoice tot:" (recurring bill total) is the total dollar amount of all line items, less
line item discounts (if any).
The "Invoice disc:" field displays only if the P/I Control File specifies that you use overall
invoice discounts. (After you enter the "Invc disc % [field 1], the total dollar amount of
the discount will display.)
The "Commissionable:" field displays only if the A/R Control File specifies that
commissions are used. It is the total dollar amount that is subject to a commission.
NOTE: The P/I Control File or A/R Control File may specify that some of the following
options are not used. In this case, the related field does not appear and all later fields
are renumbered.
The optional fields are:
"INVC DISC %"
"MISC CHARGES"
"FREIGHT"
Enter the information as follows:
1. Invc disc %
Professional Invoicing
User Manual
Recurring Bills
13.26
(This field is skipped if the P/I Control File specifies that you do not use overall invoice
discounts.)
Enter the invoice discount percent, or use the option:
Option:
[F1]
to use the customer's non-zero discount percent in the Customer
File in A/R.
The invoice discount dollar amount at the top of the screen and the discounted net are
automatically calculated and displayed. (The "discounted net" is the invoice total, less
the discount.)
Format: 99.999
2. Misc charges
(This field is skipped if the P/I Control File specifies that you do not use miscellaneous
charges.)
Enter any miscellaneous charges for this recurring bill.
Format: 99,999,999.99
[?] Account #
If there are miscellaneous charges for this recurring bill, you are next asked for the
number of the G/L account to which these charges are to be distributed. Enter the
account number or use the option:
Option:
[F1]
to use the miscellaneous charges account in the A/R Control File
Misc charges taxable
The taxes calculated for miscellaneous charges do not display. If you wish to make any
changes or view the default calculations, press the [↑] at the next numbered field, or
select the misc field from "Field number to change ?". A window appears for this
purpose similar to the following:
Professional Invoicing
User Manual
Recurring Bills
13.27
Make any changes as follows:
Txbl
Enter the letter reflecting the taxable status of miscellaneous charges for this tax type.
Valid entries are T (taxable), X (exempt), Z (zero rated), [Enter] to accept the default
status of this item, or [Tab] to exit from the window.
Tax-amount
Enter an override amount of tax to apply to miscellaneous charges, or use one of the
options:
Options:
[Enter] to accept the calculated amount.
[F1]
to remove any previously entered override tax amount.
3. Freight
(This field is skipped if the P/I Control File specifies that you do not use freight charges.)
Enter the amount of any freight charges.
Format: 9,999,999.99
[?] Account #
If there are freight charges, you are next asked for the number of the G/L account to
which these charges are to be distributed. Enter the account number or use the
option:
Option:
[F1]
to use the freight account in the A/R Control File
Freight taxable
The taxes calculated for freight charges do not display. If you wish to make any
changes or view the default calculations, press the [↑] at the next numbered field, or
select the freight field from "Field number to change ?". A window appears for this
purpose similar to the following:
Make any changes as
Professional Invoicing
User Manual
follows:
Recurring Bills
13.28
Txbl
Enter the letter reflecting the taxable status of freight charges for this tax type. Valid
entries are T (taxable), X (exempt), Z (zero rated), [Enter] to accept the default status
of this item, or [Tab] to exit from the window.
Tax-amount
Enter an override amount of tax to apply to freight, or use one of the options:
Options:
[Enter] to accept the calculated amount.
[F1]
to remove any previously entered override tax amount.
4. Sales tax
Sales tax displays automatically. The sales tax, if any, is the aggregate of the taxes
calculated for all tax types for line items, miscellaneous charges, and freight charges.
If you wish to change the amount displayed for sales tax, then press the [↑] key from the
next numbered entry field, or select the sales tax field from "Field number to change ?".
A window appears for this purpose similar to the following:
Make any changes to the amounts calculated for each tax type, or use the option:
Option:
[F1]
to reverse changes made to override the calculated amount.
After this, these amounts are added:
"Invoice tot" (or "Discounted net" if an invoice discount is used)
"Misc charges" (if used)
"Freight" (if used)
"Sales tax" (if any)
The total is displayed as "Billed total".
(The next two fields are skipped if the A/R Control File specifies that you do not use
commissions.)
Professional Invoicing
User Manual
Recurring Bills
13.29
5. Commis amt
This field appears as "Commis amt" if no line items were specified as being
commissionable, or if the commissionable amount at the top of the screen is zero.
Enter the commission amount.
Format:
99,999,999.99-
5. Commis pct and
6. Commis amt
Field 5 appears as "Commis pct" if one or more line items are specified as being
commissionable and the commissionable amount is not zero. Enter the commission
percent or use the option:
Option:
[F1]
Press [F1] to use the commission percent and method ("on price"
or "on margin") for the customer or the sales rep. If
commissions are assigned "by customer" in A/R, then the
customer's percent and method are used. If commissions are
assigned "by sales rep" in A/R, then the sales rep's commission
percent and method are used.
If you enter a specific commission percent, you are asked if the commission is on price
or on margin. Press [Enter] to accept the default specified in the P/I Control File, or
enter [P] for Price or [M] for Margin.
If you enter zero for the commission percent, the cursor moves to the "Commis amt"
field. Enter the commission amount.
If the commission is on price, the commission amount displays in the "Commis amt"
field. If the commission is on margin, you are informed that the amount of the
commission will be calculated when the invoice from this recurring bill is posted to A/R.
Format: 99.999 (commission percent) 99,999,999.99- (commission amount)
7. Comment
Enter any comment for this recurring bill. Press [F2] to end entering the comment.
Format: 5 lines, each the number of characters specified for "Comment text length" in
the P/I Control File
Make any desired changes as usual.
Recurrence Information Screen
The recurrence information screen appears:
Professional Invoicing
User Manual
Recurring Bills
13.30
Enter the information as follows:
1. Interval
Every
Specify how frequently the recurring bill is charged to the customer. Enter a number,
then, enter the code for the time period. The "time period" choices are D = days, W =
weeks, or M = months. The first number specifies how many of that time period. For
instance, 3 W means billed every 3 weeks.
Format: 99
1 character
2. Next date
Enter the next date the recurring bill is due. If this is not known exactly, you can enter
an approximate date.
You can also use the option:
Professional Invoicing
User Manual
Recurring Bills
13.31
Option:
[Enter] to use the date of the last recurring bill entered, if any.
Otherwise, the system date is the option.
Format:
MMDDYY
NOTE: After you have entered this date initially, it is automatically updated for this
recurring bill each time it is used as an invoice.
3. Start date
Enter the date on which you want to start charging this bill to the customer or use the
option:
Option:
[F1]
Format:
MMDDYY
to use the system date
4. Final date
Enter the date after which you want to stop charging this bill to the customer or use the
option:
Option:
[F1]
For "Indefinite"
Format: MMDDYY
5. Max # of times
Enter the maximum number of times you want to charge this bill to the customer or use
the option:
Option:
[F1]
For "Indefinite"
Format: 999
Printing a List of Recurring Bills
From the Recurring bills menu, select List.
You see:
Professional Invoicing
User Manual
Recurring Bills
13.32
Enter the information as follows:
1. Print in order by
Enter the order in which you want the recurring bills shown on the list: Press [Enter]
for Customer number order, type [N] for customer Name order, or type [B] for Bill group
order.
Format: 1 character
The next two fields depend on the choice of printing order.
2. Starting ("in order by" choice)
3. Ending ("in order by" choice)
Enter the starting and ending "in order by" choices (Customer number, customer Name,
or Bill group). Follow the screen instructions.
4. "Next date" cut-off
Enter the date up to which you want to show recurring bills. That is, you want to show
bills that are due to be used as invoices on or before this date. Recurring bills due to be
activated after this date will not be shown.
You can also use one of the options:
Professional Invoicing
User Manual
Recurring Bills
13.33
Options:
[Enter] to use the system date
[F1]
Format:
to use the "Latest" date (show recurring bills regardless of when
they are next due)
MMDDYY
5. Show which entries
You have three choices for this field, as follows:
[A] - All entries
All recurring bills for the range and cut-off date above are shown on the list.
[E] - Expired entries only
Only expired entries are shown.
"Expired" entries are those recurring bills which either:
(1) Have been selected more than the maximum number of times
(2) Have a "final date" which is before the "next date" (as displayed on the recurrence
data screen).
When an entry has expired, it should be reviewed for deletion from the Recurring Bills
File. Alternatively, by resetting either the maximum number of times to be used or the
"final date", the recurring bill can continue to be used to generate invoices.
[S] - Selected entries only
Only selected entries are shown.
An entry is selected using Select for use, as described below. Selected entries are
copied to the Invoice File using Use selected, which is discussed at the end of this
chapter.
6. What to print:
Select how much information to show for each recurring bill:
# of header lines
Press [Enter] to show 1 header line per recurring bill, type [2] for 2 lines, or press [F1] to
show "All" header lines for each recurring bill.
# lines per line item
Professional Invoicing
User Manual
Recurring Bills
13.34
Press [Enter] to show 1 line per line item, type [0] for none, type [2] for 2, type [3] for
3 or press [F1] to show "All" information for each line item. If you enter [0], this means
you don't want to print line items at all.
Bill totals ?
Press [Enter] to show the totals information for each recurring bill. Answer N if you
don't want to show totals information for individual recurring bills.
Recurrence information ?
To show the information on how this bill recurs (interval, next date, start date, final
date, maximum number of times, etc.), press [Enter].
Selecting Recurring Bills for Use
Here you select which recurring bills are to be used as invoices in the current billing
cycle.
In order to use a recurring bill as an invoice, first select the bill for use here. Then use
the next function, Use selected, to actually use the selected bill as an invoice.
From the Recurring bills menu, choose Select for use. Then enter the following
information:
1. Select by
Specify whether to select recurring bills in order by [C] (Customer number), [N]
(customer Name) or [G] (Group).
Then follow the screen instructions.
2. Next date cut-off
If you want to select only recurring bills with a "next due date" on or before a specific
date, enter that date here. Or use the option:
Option:
[F1]
for no cut-off date
Format: MMDDYY
3. Selection method
If you are using variable recurring bills, see the discussion in field 4, "Quantities" in the
section "Entering Goods Line Items", earlier in this chapter.
Choose [A] (Automatic) or [M] (Manual) selection of recurring bills.
Format: 1 character
Professional Invoicing
User Manual
Recurring Bills
13.35
Automatic selection
If you choose automatic selection, recurring bills will be selected automatically based
on the criteria entered above.
Manual selection
If you choose manual selection, the recurring bills meeting the criteria above will be
displayed, one by one, for you to manually select which ones to turn into invoices.
4. Format for selection list
(This field is skipped for manual selection.)
For automatic selection, a list is printed of the recurring bills that are selected
automatically. Enter [B] for the brief format selection list or [F] to print the full
format selection list.
Format: 1 character
Automatic Selection
When you press [Enter] at "Field number to change ?", a period of processing occurs
while the recurring bills that you have specified are selected automatically by the
computer. The Recurring Bills Automatic Selection List will be printed to show you
which recurring bills have been selected. The recurring bills that are selected will be
turned into invoices when you run Use selected (described later in this chapter).
Manual Selection
When you press [Enter] at "Field Number to change ?", a screen then appears for you to
select recurring bills manually. Bills which are selected here will be turned into
invoices when you run Use selected.
The criteria above (cut-off date and range of customer names, customer numbers, or
bill groups) narrow down the bills that will be displayed to you for selection using the
[F1] key. However, you can still select bills not meeting these criteria by entering the
customer number and reference number on the screen shown below.
Professional Invoicing
User Manual
Recurring Bills
13.36
[?] *1. Customer #
Enter the customer number and the reference number of the bill you want to select or
use the option:
Option:
[F1]
to scan through recurring bills which meet the criteria you
specified on the last screen
Format: 12 characters
Make any desired changes to the information on this screen from "Field number to
change ?".
If the bill has already been selected, you are informed of this and asked whether you
want to unselect it. If N, the recurring bill remains selected and you are asked "Field
number to change ?" (see below). If Y, the recurring bill is no longer selected and a
screen appears for you to enter another recurring bill to select.
If the bill has not already been selected, you are asked whether you want to select it.
If you answer N, the screen clears to enter another bill to select.
If you reply that this bill is to be selected, the bill is selected unless:
Professional Invoicing
User Manual
Recurring Bills
13.37
1. The "final date" is earlier than the "next date". In this case, you are warned that
you have gone past the final date on which this recurring bill is to be sent and
asked if you wish to select it anyway. Answer Y to select it anyway, or N to not
select it.
2. The "times so far" is more than the "max # of times". In this case, you are warned
that you have already selected this bill the maximum number of times, and asked
if you wish to select it anyway. Answer Y to select it anyway or N to not select
it.
If the customer is already over his credit limit, a message appears informing you of this,
and you are asked whether you want to continue selecting this bill. Answer N to exit
from selecting this bill or Y to continue.
Make any changes.
A line item screen appears to allow you to make any desired changes to the recurring
bill's line items, including the quantity or price of any "variable" or "fixed" line item.
(You can press [Tab] at the "Sequence #" field to go directly to the totals screen.)
Changing a Line Item
Enter the sequence number, press [F1] for the next line item, or press [F2] for the next
"variable" line item (the next line item for which you designated the "quantity" or "price"
as variable). When the right line item appears, press [Enter] to select it for changing.
NOTE: After pressing [Enter] at "Right line item ?", you can also delete the line item
from the recurring bill (and thus the new invoice) by pressing [F3], then answering Y to
"This line item will be deleted. Is this correct ?".
At this point, if the quantity or total price specified on the line item is to be changed,
enter the current quantity or total price.
If you make a change to the quantity or total price, you are asked whether the field is to
be fixed or variable in the recurring bill. Answer [F] for fixed or [V] for variable.
Make any other changes.
When no more changes to line items are desired, press [Tab] at the sequence number.
The totals screen appears.
Make any changes to the totals. You may enter a cash amount if you wish.
Professional Invoicing
User Manual
Recurring Bills
13.38
Using Selected Recurring Bills
Before you use this option, you should always print a list showing only the recurring bills
that have been selected. Use List (described earlier in this chapter) and choose only
selected bills.
When you have verified that your selection of recurring bills is correct and complete,
you are ready to use them as invoices. (The recurring bills still remain on file.)
From the Recurring bills menu, choose Use selected.
You are asked to enter the invoice date that is to appear on these new invoices.
Enter a date or use the option:
Option:
[Enter] to use the system date
(You can press [Tab] here if you decide not to proceed with using recurring bills as
invoices.)
Format: MMDDYY
You are asked "Any change ?". Answer Y and make any desired change to the date.
When it is correct, answer N.
After you answer N, one invoice is created from each selected recurring bill. Follow
the screen instructions.
You can change the new invoices or print a list of them through the Invoices or Print
invoices and quotations selections. You may post them to A/R through the Post
selection.
When I/C and Back Orders Are Used
When a Goods line item from a recurring bill is copied into an invoice, it is possible that
there is insufficient quantity available to fully ship the item. If this occurs, then an
exception report is printed which lists each line which cannot be fully shipped. For
each of these lines (as copied to the Invoice File), the quantity shipped has been set to
the quantity ordered. However, before printing and posting an invoice which contains
a line which appears on the exception report, you should take one of the following
actions:
1. Obtain sufficient quantity of the item to fully ship the line, and then enter a
receivings in I/C for the amount received. At this point, the line can be shipped
in full.
2. Use Invoices to display the line item. Then change the quantity shipped so that
the amount that cannot be shipped is back ordered. (Other options are also
available, such as shipping in stock, or back ordering the entire line item until the
Professional Invoicing
User Manual
Recurring Bills
13.39
full amount ordered is available. See the chapter titled Invoices for a full
discussion of your options.)
____________________
Professional Invoicing
User Manual
Recurring Bills
13.40
Chapter 14
Standard Bills
Introduction
Use this selection to enter standard bills. It works like Invoices, except that the
standard bill consists only of line items.
A "standard bill" is a packaged set of services or items which your company often
provides. You can "paste" one or more standard bills into any invoice for a customer.
For instance, an air conditioning company might have a standard bill for each of several
packages of usual services: Freon check, yearly preventive maintenance, compressor
change, etc. When a packaged set of services was delivered, the appropriate services,
parts, and materials could be pasted into the invoice for that customer, rather than
creating the whole invoice from scratch. If any additional, unusual services were
performed, these could be entered in the invoice as additional line items.
To Begin
From the P/I menu, select Standard bills. Then select Enter.
Entering Standard Bills
A screen appears for you to enter a standard bill number and description.
Professional Invoicing
User Manual
Standard Bills
14.1
From this screen you can work with both new and existing standard bills. If a standard
bill has already been entered for the standard bill number you specify, it will appear
and be available for changes or deletion.
[?] 1. Standard bill #
For a new standard bill:
Enter a number for this standard bill.
(If an existing standard bill appears and this is not what you want, press [Tab] and enter
a new standard bill number.)
Format: 6 characters
For an existing standard bill:
Enter the standard bill number or use the option:
Option:
[F1]
to scan through the standard bills on file in bill number order
(You can also press [F3] to delete this standard bill entirely. If you want to delete only
line items, see "Deleting Line Items" below.)
Changing line items for an existing standard bill is explained here for your reference.
This works the same as for an invoice or recurring bill.
(At this point, if you are not making changes to line items, skip to "Description".)
Changing Line Items
Enter the sequence number of the line item you want to change, or use the option:
Option:
[F1]
to scan through the line items on this standard bill. When the
correct line item is displayed, press [Enter], then make any
desired changes.
You cannot change the sequence number or line item type.
Deleting Line Items
You can delete the line item selected by pressing [F3]. If you press [F3], you are
notified that this line item will be deleted and asked "Is this correct ?". If you change
your mind, press [Enter] to not delete this line item. Otherwise, answer Y to delete it.
Adding Line Items
From the first line item screen, you can either enter a new sequence number or use the
option:
Professional Invoicing
User Manual
Standard Bills
14.2
Option:
[F2]
to assign the next sequence number to a new line item
Proceed as in entering a line item for a new invoice as described in the "Line Item
Screen" section.
2. Description
Enter a description for this standard bill. This is for your reference only.
Format: 2 lines of 25 characters each
A screen appears to enter the first line item on this standard bill:
Enter the information as follows:
1. Sequence #
Enter a sequence number for this line item, just as in Invoices.
Professional Invoicing
User Manual
Standard Bills
14.3
Format: 9999
Line type
As in Invoices, enter [G] for goods.
The appearance of the bottom part of the screen depends on whether or not you are
using the Job Cost and I/C packages. The screen shown below is what you see if you are
not using J/C or I/C. Fields used only with J/C and I/C are noted below.
Entering "Goods" Line Items
After you type [G], you see:
Enter the information as follows:
[?] 2. Item #
If Inventory Control is not used:
Professional Invoicing
User Manual
Standard Bills
14.4
Enter the item number or use one of the options:
Options: [F1]
to scan through the items in the Goods/Services File
[Enter]
to enter a one-time item that is not on file
If you enter an item number that is not on file, you are informed that this item is not in
the Goods/Services File and asked whether you want to enter it anyway. If you then
answer Y, you are asked whether it should be added to the file. This gives you a chance
to enter new items as you go. If you answer N to this second question, this item will
appear only on the current standard bill and will not be added to the Goods/Services
File.
Format: 15 characters
Unit
If this item is in the Goods/Services File, the unit will display automatically.
If the item is not in the file, you must enter a unit or use the option:
Option:
[F1]
To use EACH
Format: 4 characters
If Inventory Control is used:
Enter the inventory item number or use one of the options:
Option:
[F1]
to scan through the items in the Item File
[Enter] to look up the item by description
NOTE: If the unit or conversion factor for an inventory item is changed in the I/C Item
File, you must delete any P/I line items using that inventory item, then re-enter them.
Otherwise, your invoices will contain the old unit and conversion factor.
If you left the number blank, enter the item's description (or any portion of it beginning
with the first letter). The first item with a description matching the entered
characters appears, and you are asked if this is the item you want. Answer Y to select
it, N to enter another item, or press [F1] to see the next item in alphabetical order.
You are then asked "Right item ?". Answer N to select another item as above, or
continue to press [F1]. When the right item appears, press [Enter] to select it.
Miscellaneous items
A miscellaneous item has an item number that begins with an asterisk (*). If you enter
a miscellaneous item for the item number, you are requested to enter the unit. If
Professional Invoicing
User Manual
Standard Bills
14.5
there is a unit already in the Item File for this item, it is displayed automatically and you
can change it if you wish. You are then requested to enter the item description.
Format: 15 characters
[?] Warehouse
(This field appears only if the P/I Control File specifies that multiple warehouses are
used.)
Enter the code for the warehouse from which the item is to be shipped or use the
option:
Option:
[F1]
to use the default warehouse in the P/I Control File
Format: 2 characters
The warehouse must exist in the I/C Warehouse File, and the item must be stocked at
this warehouse. If not, an error message appears, and you must correct the condition
in the I/C package. (Refer to the Inventory Management User Manual.)
3. Description
For an item that is already on file, and not a miscellaneous item, the description
displays automatically. You can change this if you wish, or press [Enter] to accept it as
is.
If you are entering a new item (which you can do only if you are NOT using I/C), or if this
is a miscellaneous item, then enter the description of the item.
Format: 2 lines of 25 characters each
4. Quantity
Drop shipped items
If this item is to be drop shipped (shipped directly to the customer from your supplier),
press [F1]. "*DS*" displays. Press [F1] again to cancel the "drop ship" status.
Enter the quantity ordered.
Format:
99,999,999.999
B/O instruction
This field is entered if the following conditions are true:
(1) Back orders are used in P/I, and
(2) P/I is interfaced to I/C, and
Professional Invoicing
User Manual
Standard Bills
14.6
(3) I/C is set up for back order control, and
(4) The item entered is not a miscellaneous item and itself has back order
control as entered in the Item record in I/C.
When a Goods line item from a standard bill is copied into an invoice, it is possible that
there is insufficient quantity available to fully ship the item. If the item has back order
control, you must specify how to handle the fact that there is insufficient quantity
available.
The choices are:
[B]
[A]
[V]
[S]
B/O balance
B/O all
Override
Ship in stock
For a full discussion of these choices, see the chapter titled Invoices.
Format: 1 character
5. Unit price
If Inventory Management is not used:
Enter the price per the unit for this item, or use the option:
Option:
[F1]
to use the unit price in the Goods/Services File
The quantity is automatically multiplied by this unit price and the extended price
appears.
Format: 9,999,999.999
If Inventory Management is used:
Enter the unit price or use the option:
Option:
[F1]
to use the unit price as determined by the price code for this
item in the Item File. If there is no price code for this item,
Price-1 from the Item record is used.
The extended price appears.
NOTE: Because of the choices made in the P/I Control File and in the A/R Control File,
some of the following optional fields may not be used. In this case, the related field
does not appear and all later fields are renumbered.
The optional fields are:
"Discount % or Discntbl ?"
Professional Invoicing
User Manual
Standard Bills
14.7
"Commisnbl ?"
"Category #"
"G/L acct #"
6. Discount % or 6. Discntbl ?
NOTE: This field is skipped if the P/I Control File specifies that you do not use
discounts.
"Discntbl ?" (discountable?) asks whether the line item is to be subject to the overall
invoice discount.
There are three cases:
a. If you use line item discounts, but not an overall invoice discount, enter the
discount percent for this line item only. Press [Enter] if there is no discount for
this line item.
b. If you use both line item discounts and an overall invoice discount, enter the
discount percent for this line item only. Press [Enter] if there is no discount for
this line item.
c. If you don't use line item discounts, but do use an overall invoice discount, this
field appears as 6. "DISCNTBL ?". Answer Y if this line item is subject to the
overall invoice discount; otherwise, answer N.
Format: 999.999
7. Unit cost
If Inventory Management is not used:
Enter the unit cost or use the option:
Option:
[F1]
to use the unit cost in the Goods/Services File
NOTE: This cost is used to calculate the margin (profit margin) on this line item. It is
also transferred into the A/R Sales Transaction File and is included in the cost of the sale
on the Sales Journal.
Format: 999,999.999
If Inventory Management is used:
You are always requested to enter the unit cost for a Goods line item here. This is
different from entering a Goods line item on a regular invoice where the unit cost is
requested only in certain special cases.
Enter the approximate unit cost of this line item, or use the option:
Professional Invoicing
User Manual
Standard Bills
14.8
Option:
[F1]
I/C
to use the current approximation of the unit cost, obtained from
This approximate unit cost depends on the inventory valuation method specified in the
I/C Control File. For the LIFO valuation method, it is the current value of the
replacement cost. For the FIFO or Average valuation method, it is the current value of
the average cost. For the Standard valuation method, it is the standard cost.
When this standard bill is transferred ("pasted") into a regular invoice, the unit cost
entered here is actually ignored, and the then-current value of the replacement,
average, or standard cost is used. At that point, the unit cost is still approximate. It
is calculated exactly at the time the invoice is posted.
When this standard bill is transferred into a CR memo, only then will the unit cost
entered here be used exactly as it is.
8. Deflt tax ?
This field is used to determine the default taxable status of this line item when it is
pasted into an invoice. The field will default to Y, and can be changed or viewed at the
"Field number to change ?" prompt.
If you choose to change or view the default taxable status of this line item the following
window appears:
Make the following changes:
[?] Item-tax
Enter a taxable code to apply to the tax type, or press [Enter] to leave blank.
Txbl
Enter the letter reflecting the taxable status of this service for this tax type. Valid
entries are T (taxable), X (exempt), Z (zero rated), [Enter] to accept the default status
of this item, or [Tab] to exit from the window.
9. Commisnbl ?
Professional Invoicing
User Manual
Standard Bills
14.9
(This field is skipped if the A/R Control File specifies that you do not use commissions.)
If commissions are used and I/C is also interfaced, the answer to this question displays
automatically. It is set to Y if the commission code for this item in the I/C Item File is
not blank, and is set to N otherwise. If you want to change this answer, you must do so
from "Field number to change ?".
Answer Y if this line item is commissionable.
[?] 10. Sales acct
(This field appears only if the A/R Control File specifies that sales are distributed.)
If Inventory Management is not used:
(This field defaults to the sales account from the Goods/Service record and is skipped
over. Changes can be made at "Field number to change ?".)
If you choose to change the default, enter the new sales account to which the revenue
from this item is to be distributed, or use one of the options:
Options:
[F1]
to scan through the sales accounts specified in the P/I Control
File
[F2]
to accept the default sales account for the item
If Inventory Management is used:
The sales account specified for this inventory item in the I/C Item File displays
automatically. If the item's profit centre is wild carded, then the sales account from
the Item File is combined with the profit centre from the invoice header. If you want
to change this, you must do so from "Field number to change ?".
If Job Cost and Inventory Management are used:
If a category number was entered in the previous field, the billing account on the Job
Cost Control File displays automatically. It can be changed later from "Field number to
change ?".
Make any changes.
The screen clears to enter the next line item. Enter the sequence number of the next
line item, or press [Tab] to exit from entering line items.
If Inventory Management and Job Cost are both interfaced, field 10 appears as "Category
#" and "Sales acct" is field 11.
10. Category #
Professional Invoicing
User Manual
Standard Bills
14.10
If this line item is for a drop ship or miscellaneous item (item number starts with an
asterisk), "(N/A)" appears for this field automatically and cannot be changed.
Otherwise, enter the job cost category that this item is most usually contained in, if
any, or use the option:
Option:
[F1]
to scan through the categories in the Cost Category File of Job
Cost
You can leave this field blank if you wish.
The category number entered here must already be on the Cost Category File in Job
Cost.
Format: 9999999
Entering "Services" Line Items
1. Sequence #
Enter a sequence number for this line item, just as in Invoices.
Format: 9999
Line type
As in Invoices, enter [S] for Services.
You see:
Professional Invoicing
User Manual
Standard Bills
14.11
Enter the information as follows:
[?] 2. Service #
Enter the service number or use one of the options:
Options: [F1]
[Enter]
to scan through the services in the Goods/Services File
to enter a one-time service that is not on the file
If you enter a service number that is not in the Goods/Services File, you are told that
this service is not on file and asked if you want to enter it anyway. If you answer Y, you
are asked if you want to add this service to the Goods/Services File. (If you're using
I/C, you're asked if you want to add it to the Services File.) If you answer Y to this
second question, the service will be added permanently to the file; otherwise, it will
appear only on the current standard bill.
Format: 999
Unit
If this service is on file, the unit displays automatically and cannot be changed.
If this service is not on file, enter the unit for this service, or use one of the options:
Professional Invoicing
User Manual
Standard Bills
14.12
Option:
[F1]
to use "HOUR" if you bill this service by the hour
[Enter] if there is no unit for this service and you charge a flat rate, or
you don't charge separately for it. "(None)" displays.
Format: 4 characters
3. Description
If this service is on file, its description displays automatically. You can change this or
press [Enter] to accept it as is. You can also enter up to 9 more lines of description as
described next.
If the service is not on file, enter the description of the service. After entering the first
line, you are asked if you wish to enter any additional description. Press [Enter] for N,
or answer Y to enter more description; the bottom of the screen clears to enter up to 9
additional lines. When you are through entering description, press [F2].
Format: 10 lines, each the number of characters specified for "Service text length" in
the P/I Control File
4. Quantity
If you entered a unit above, enter the number of units.
If you left "UNIT blank, "(NOT APPLICABLE)" displays and you cannot enter anything.
Format: 99,999,999.999
5. Unit price or
5. Price
If you entered a unit above, enter the price per unit or use the option:
Option:
[F1]
to use the unit price in the Goods/Services File
The quantity is automatically multiplied by this unit price and the extended price
displays.
If you left "Unit" blank, this field changes to 5. "Price". Enter the total price of the
service.
Format: 9,999,999.999 (price per unit)
99,999,999.99 (total price)
NOTE: Because of the choices made in the P/I and A/R Control files, some of the
following optional fields may not be used. In this case, the related field does not
appear and all later fields are renumbered.
Professional Invoicing
User Manual
Standard Bills
14.13
The optional fields are:
"Discount % or Discntbl ?"
"Commisnbl ?"
"G/L acct #"
6. "Discount % or 6. Discntbl ?
NOTE: This field is skipped if the P/I Control File specifies that you do not use
discounts.
"Discntbl ?" (discountable?) asks whether the line item is to be subject to the overall
invoice discount.
There are three cases:
a. If you use line item discounts, but not an overall invoice discount, enter the
discount percent for this line item only. Press [Enter] if there is no discount for
this line item.
b. If you use both line item discounts and an overall invoice discount, enter the
discount percent for this line item only. Press [Enter] if there is no discount for
this line item.
c. If you don't use line item discounts, but do use an overall invoice discount, this
field appears as 6. "Discntbl ?". Answer Y if this line item is subject to the overall
invoice discount; otherwise, answer N.
Format: 999.999
7. Unit cost or
7. Total cost
Enter the unit cost per the unit for this service or use the option:
Option:
[F1]
to use the unit cost for the service in the Goods/Services File
If you left "Unit" blank, this field appears as 7. "Total cost". Enter the total cost of the
service, or use the option:
Option:
[F1]
to use the total cost for this service in the Goods/Services File
NOTE: This cost is used to calculate the margin (profit margin) on this service. This is
required if you pay commissions based on margin. It is also included in the cost of the
sales transaction in A/R when this invoice is posted.
Format: 999,999.999 (cost per unit)
8. Deflt tax ?
Professional Invoicing
User Manual
9,999,999.99 (total cost)
Standard Bills
14.14
This field is used to determine the default taxable status of this line item when it is
pasted into an invoice. The field will default to Y, and can be changed or viewed at the
"Field number to change ?" prompt.
If you choose to change or view the default taxable status of this line item a window
similar to the following appears:
Make the following changes:
Item-tax
Enter a taxable code to apply to the tax type, or press [Enter] to leave blank.
Txbl
Enter the letter reflecting the taxable status of this service for this tax type. Valid
entries are T (taxable), E (exempt), Z (zero rated), [Enter] to accept the default status
of this item, or [Tab] to exit from the window.
9. Commisnbl ?
(This field is skipped if the A/R Control File specifies that you do not use commissions.
Answer Y if this line item is commissionable.
[?] 10. Sales acct
(This field appears only if the A/R Control file specifies that sales are distributed.)
This field defaults to the sales account from the Goods/Service record and is skipped
over. Changes can be made at "Field number to change ?".
If you choose to change the default, enter the new sales account to which the revenue
from this service is to be distributed, or use one of the options:
Options:
[F1]
to scan through the sales accounts specified in the P/I Control
File
[F2]
to accept the default sales account for the service
Make any changes.
Professional Invoicing
User Manual
Standard Bills
14.15
The screen clears to enter the next line item. Enter the sequence number of the next
line item or exit as usual.
Entering "Notes" Line Items
1. Sequence #
Enter a sequence number here, exactly as in entering Goods line items.
Format: 999
Line type
As in Invoices, enter N for Notes. You see:
2.
Descr
iption
Enter
whate
Professional Invoicing
User Manual
Standard Bills
14.16
ver notes or comments you wish to appear on the standard bill at this point. You can
press [Enter] at the beginning of any line to leave a blank line. To end the note, press
[F2].
Format: 10 lines, each the number of characters specified for "Services text length" in
the P/I Control File
Printing a List of Standard Bills
From the Standard bills menu, select List.
A screen appears for you to specify the starting and ending standard bill numbers and
what to include on the list.
Enter the information as follows:
[?] 1. Starting standard bill #
[?] 2. Ending standard bill #
Enter the range of standard bills to include. Follow the screen instructions.
Format: 6 characters
3. What to print:
Select how much information to include for each standard bill on the list:
# of lines per line item
Press [Enter] to show 1 line per line item, type [0] for none, type [2] for 2, type [3] for
3, or press [F1] to show "All" line item information. If you enter [0], this means you
don't want to show line items at all.
Format: 9
Start each bill on new page ?
Press [Enter] to start each bill on a new page, or answer N to show them consecutively.
If you answered 0 to the question above, this is automatically set to N.
____________________
Professional Invoicing
User Manual
Standard Bills
14.17
Chapter 15
Quotations
Introduction
Use this selection to enter quotations. You can also use them as invoices (turn them
into invoices).
A "quotation" is similar to an invoice in appearance. The difference is that with a
quotation, the sale has not been agreed upon yet. So the quotation is a proposed
agreement about what services or goods will be sold and for what price.
NOTE: The Enter option of this selection is similar to Invoices.
Work Orders for Jobs
Using this selection, you can easily handle "job work orders" if this is a requirement of
your business.
To do so, set up an "invoice" format matching the format of your job work orders. Use
the Invoice formats selection to do this. (See the chapter titled Invoice Formats.)
Then enter job work orders here in the Quotations selection and print them using the
job work order format you have set up.
When the work called for in the job work order is finished, you can then convert the job
work order into an invoice through the Use as invoice function in this Quotations
selection. At this point, print the resulting invoice in your standard invoice format.
Professional Invoicing
User Manual
Quotations
15.1
To Begin
From the P/I menu, select Quotations. Then select Enter from the Quotations menu.
If you set up multiple invoicing stations in the P/I Control File, a screen now appears.
Enter the following information:
Invoicing Station
If you have selected "immediate printing" in the P/I Control File, then prior to entering
quotations using this selection, you must specify the station code of the invoicing
station to be used when printing quotations immediately.
Enter the station code on the screen which appears, or use the option:
Option:
[F1]
to scan through the station codes on file
Once you have specified the station code, the quotation header screen appears.
Format:
3 characters
Entering Quotations
There are three different screens on which you enter information about a quotation.
The first is the "Header" screen; the second, the "Line item" screen; and the third, the
"Totals" screen.
You first see the header screen:
Professional Invoicing
User Manual
Quotations
15.2
Header Screen
From this screen you can work with both new and existing quotations and line items. If
a quotation has already been entered for the customer number and reference number
you specify, it will appear and be available for changes or deletion.
Enter the following information:
[?] * 1. Customer #
For a new quotation:
Enter the customer number for the quotation, or use one of the options:
Options:
[F1]
for the next quotation
[F2]
to scan through the customers on file
[F6]
to use the previous customer, if any
[Enter] to look up the customer by name
If this is a one-time customer, start the customer number with an
Professional Invoicing
User Manual
Quotations
15.3
asterisk (*). If you use a one-time customer number, you must next enter the customer
name.
Format:
12 characters
One time customers
If this is a one-time customer, start the customer number with an asterisk (*). If you
use an already existing one-time customer number, you must also enter the customer's
name and address.
You may enter either a company name or a person's name. If a person's name is
entered, then it is entered as two fields, namely, "First" and "Last". If a person's name
is entered in this fashion, then this quotation will appear in sequence by the customer's
last name when printing the quotation list by customer name. For example, if you
enter "John Smith" after pressing [F2], and then print a Customers by Customer Name
Report, this customer would print after "Sara Samuels" and before "Barry Spencer".
Credit checking
Credit checking is done on the customer in exactly the same way as for an invoice.
New customer
You can add a new customer at this point in exactly the same way as for an invoice.
(At this point, if you're not changing an existing quotation, skip to 2. "Ref #" below.)
To change an existing quotation:
Enter the reference number or use the option:
Option:
[F1]
to scan through the quotations on file
Format:
6 characters
If a quotation exists for the customer number and reference number you've entered,
you'll be allowed to make changes to it. Otherwise, it's the same as if you're entering a
new quotation.
Since there are three parts of a quotation -- header, line items, and totals -- any part
can be changed independently, just as for an invoice.
You can also press [F3] here to delete the entire quotation. If you want to delete only
line items, see "Deleting Line Items" below.
Change the information on this screen in the usual manner. You are next asked if you
wish to change the line items. If you answer Y, the line item screen appears.
Professional Invoicing
User Manual
Quotations
15.4
If you wish to change or view the totals screen, answer Y to the "Change line items ?"
question, then press [Tab] when the line item screen appears. The totals screen then
appears for changes.
* 2. Ref #
Enter a reference number for this quotation.
Format:
6 characters
You can use the same reference number for quotations for different customers. For
example, if you were quoting on specific items or services to several of your customers,
you might want to assign each quote the same reference number to keep track of them
as a group.
3. Group
Enter a code to assign this quotation to a group of quotations. You can use this code
later to sort or print quotations by groups. The invoice created from this quotation will
have the same group code for its "bill group".
If you are using immediate printing, you may also use the option:
Option:
[F1]
to use the station code for this invoicing station
Format:
3 characters
4. Quote date
Enter the quotation date or use the option:
Option:
[Enter] to use the system date
Format:
MMDDYY
[?] 5. Deliver to
This is the code for the deliver-to address at which services are performed or to which
goods are delivered.
Enter the deliver-to number or use one of the options:
Options:
[Enter] to make the deliver-to location the same as the customer's
billing address
[F1]
to scan through the deliver-to locations on file for this customer
[F2]
to enter a new deliver-to location, up to 4 lines of 25 characters
each
Professional Invoicing
User Manual
Quotations
15.5
If you enter a new address, you are asked whether you want to save this deliver-to
address.
If you answer Y, the address just entered will be put on the permanent Deliver-to
Addresses File, automatically identified by the next available deliver-to number for this
customer.
If you answer N, this new deliver-to will be only for this one quotation and will not be
saved.
Format:
999
NOTE: For a miscellaneous customer (customer # starting with an asterisk [*]), you are
not asked for a separate deliver-to address. Instead, the deliver-to address is
automatically set to be the same as the address just entered for this customer.
6. P.O. #
If there is a customer purchase order, enter the P.O. number.
Format:
15 characters
[?] 7. Terms
For a balance forward customer, the customer's usual terms code displays and cannot be
changed.
For an open item customer, enter a terms code or use one of the options:
Options:
[Enter] to skip this field now, then enter a code later when the
quotation is turned into an invoice
[F1]
File
to use the terms code entered for this customer in the Customer
If the customer is a one-time customer (name starts with an asterisk) or if you are
entering the customer as you go, you can press [F1] to scan through the available terms
codes. When the desired terms code appears, press [Enter].
Format:
3 characters
NOTE: Because of the choices made in the P/I Control File and A/R Control File, some
of the following optional fields may not be used. In this case, the related field does not
appear on the screen and all later fields on the screen are renumbered.
The optional fields are:
"SHIP VIA"
Professional Invoicing
User Manual
Quotations
15.6
"SALES REP" (use is specified in the A/R Control File)
"PROFIT CTR"
"JOB #"
"SUB-JOB #"
1st user-defined field
2nd user-defined field
3rd user-defined field
[?] 8. Ship via
(This field appears only if the P/I Control File specifies that ship-via's are used.)
Enter a ship-via code or use the option:
Option:
[F1]
to use the ship-via code entered for this customer in the
Customer File
If the customer is a one-time customer (name starts with an asterisk) or if you are
entering the customer as you go, you can press [F1] to scan through the available
ship-via codes. When the desired code appears, press [Enter].
Format:
3 characters
[?] 9. Tax group
The tax group entered for this quote must exist in the Taxes file. Enter a tax group or
use the option:
Option:
[F1]
to use the tax group entered for the deliver-to address (if an
address from the Deliver-to File is being used)
[F1]
to use the tax group entered for this customer in the Customer
File
[F2]
to change the default taxable status for the tax group for the
customer or deliver-to address.
If the customer is a one-time customer or if you are entering the customer as you go,
you can press [F1] to scan through the available tax codes. When the desired tax code
appears, press [Enter].
Format:
3 characters
[?] 10. Sales rep
(This field appears only if the A/R Control File specifies that sales reps are used.)
Enter a sales rep code, or use one of the options:
Professional Invoicing
User Manual
Quotations
15.7
Options:
[Enter] to skip this field now, then, enter a sales rep code later when
this quotation is turned into an invoice
[F1]
Format:
to use the sales rep entered for this customer in the Customer
File
3 characters
If the customer is a one-time customer or if you are entering the customer as you go,
you can press [F1] to scan through the valid sales reps. When the desired sales rep
appears, press [Enter].
[?] 11. Profit ctr
(This field appears only if the P/I Control File specifies that multiple profit centres are
used.)
Enter the profit centre to which this quotation is assigned, or use the option:
Option:
[F1]
to use the default profit centre in the P/I Control File. (For
subsequent quotations, [F1] defaults to the profit centre on the
last quotation entered.)
12. 1st user-defined field
(This field appears only if it is defined in the P/I Control File.)
The name of the first optional field defined in the P/I Control File displays here. Enter
the information appropriate to the field.
Format:
(Number of characters specified in the P/I Control File)
13. 2nd user-defined field
(This field appears only if it is defined in the P/I Control File.)
The name of the second optional field in the P/I Control File displays here. Enter the
information appropriate to the field.
Format:
(Number of characters specified in the P/I Control File)
14. 3rd user-defined field
(This field appears only if it is defined in the P/I Control File.)
The name of the third optional field in the P/I Control File displays here. Enter the
information appropriate to the field.
Format:
(Number of characters specified in the P/I Control file)
Professional Invoicing
User Manual
Quotations
15.8
Make any changes as usual.
If Job Cost is interfaced, fields 12 and 13 appear as shown below and the user-defined
fields are renumbered.
[?] 12. Job #
Enter the number of the job for which this is the quotation. The job must be an active
or closed job already on file in the Job Cost package.
You can also use one of the options:
Options:
[F1]
to scan through the jobs on file in the Job Cost package
[Enter] if this quotation is not for a job
Format:
7 characters
13. Sub-job #
If you have entered a job number in the previous field, and that job is broken down into
sub-jobs, and you bill for the sub-jobs, you are asked for the sub-job number that this
quotation is for. Otherwise, you are not asked for the sub-job number.
Enter the number of the sub-job that this quotation is for, or use the option:
Option:
[F1]
Format:
999
to scan through the sub-jobs for this job
The next screen is the line item screen.
Line item screen
A screen displays to enter the first line item for this quotation:
Professional Invoicing
User Manual
Quotations
15.9
(If you are changing line item information, refer to "To Change an Existing Quotation" at
the beginning of this chapter.)
Enter the information as follows:
1. Sequence #
Enter a sequence number here, exactly as in Invoices.
Format:
9999
(As noted where changes to line items are explained, you can also press [F1] to scan
through the line items on this quotation.)
Line type
The appearance of the bottom part of the screen depends on whether or not you are
using the Job Cost package. The screen shown below is what you see if you are not
using J/C. Fields used only with J/C are described below.
Professional Invoicing
User Manual
Quotations
15.10
Entering "Goods" Line Items
After you type [G], you see:
[?] 2. Item #
If Inventory Management is not used:
Enter the item number or use one of the options:
Options:
[F1]
to scan through the items in the Goods/Services File
[Enter] to leave blank for a one-time goods item
Format:
15 characters
If you enter an item number that is not on file, you are informed that this item is not in
the Goods/Services File and asked whether you want to enter it anyway. If you answer
Y, you are asked whether it should be added to the file. This gives you a chance to
enter new items as you go. If you answer N to this second question, this item will
appear only on the current quotation and will not be added to the Goods/Services File.
Professional Invoicing
User Manual
Quotations
15.11
Unit
If this item is on the Goods/Services File, the unit will display automatically.
If the item is not on the file, you must enter a unit or use the option:
Option:
[F1]
to use EACH
Format:
4 characters
If Inventory Management is used:
Enter the inventory item number or use one of the options:
Options:
[F1]
to scan through the items in the Item File
[Enter] to look up the item by description
NOTE: If the unit or conversion factor for an inventory item is changed in the I/C Item
File, you must delete any P/I line items using that inventory item, then re-enter them.
Otherwise, your quotations will contain the old unit and conversion factor.
If you left the number blank, enter the item's description (or any portion of it beginning
with the first letter). The first item with a description matching the entered
characters appears, and you are asked if this is the item you want. Answer Y to select
it, N to enter another item, or press [F1] to see the next item in alphabetical order.
You are then asked "Right item ?". Answer N to select another item as above, or
continue to press [F1]. When the right item appears, press [Enter] to select it.
Format: 15 characters
Miscellaneous items
A miscellaneous item has an item number that begins with an asterisk (*). If you enter
a miscellaneous item for the item number, you are requested to enter the unit. If there
is a unit already in the I/C Item File for this item, it is displayed automatically and you
can change it if you wish. You are then requested to enter the item description.
[?] Warehouse
(This field appears only if the P/I Control File specifies that multiple warehouses are
used.)
Enter the code for the warehouse from which the item is to be shipped or use the
option:
Option:
[F1]
Professional Invoicing
User Manual
to use the default warehouse in the P/I Control File
Quotations
15.12
Format:
2 characters
The warehouse must exist in the I/C Warehouse File, and the item must be stocked at
this warehouse. If not, an error message appears, and you must correct the condition
in the I/C package. (Refer to the Inventory Management User Manual.)
3. Description
For an item that is already on file, and not a miscellaneous item, the description
displays automatically. You can change this if you wish, or press [Enter] to accept it as
is.
If you are entering a new item (which you can do only if you are NOT using I/C), or if this
is a miscellaneous item, then enter the description of the item.
Format: 3 lines of 25 characters each
4. Quantity
Enter the quantity ordered.
If this item is to be drop shipped (shipped directly to the customer from your supplier),
press [F1]. "*DS*" displays. Press [F1] again to cancel the "drop ship" status.
Format:
99,999,999.999
B/O instruction
This field is entered if the following conditions are true:
(1)
(2)
(3)
(4)
Back orders are used in P/I, and
P/I is interfaced to I/C, and
I/C is set up for back order control, and
The item entered is not a miscellaneous item and itself has back order
control as entered in the Item record in I/C.
When a Goods line item from a quotation is copied into an invoice, it is possible that
there is insufficient quantity available to fully ship the item. If the item has back order
control, you must specify how to handle the fact that there is insufficient quantity
available.
The choices are:
[B]
[A]
[V]
[S]
B/O balance
B/O all
Override
Ship in stock
For a full discussion of these choices, see the chapter titled Invoices.
Professional Invoicing
User Manual
Quotations
15.13
Format: 1 character
5. Unit price
If Inventory Management is not used:
Enter the price per the unit for this item, or use the option:
Option:
[F1]
to use the price in the Goods/Services File
The quantity is automatically multiplied by this price and the extended price appears.
Format:
9,999,999.999
If Inventory Management is used:
Enter the unit price or use the option:
Option:
[F1]
to use the price as determined by the price code for this item in
the Item File. If there is no price code for this item, Price-1
from the Item record is used.
The extended price appears.
NOTE: If the unit price is zero, you are asked "Are you sure ?".
Optional Fields
Because of the choices made in the P/I Control File and in the A/R Control File, some of
the following optional fields may not be used. In this case, the related field does not
appear and all later fields are renumbered.
The optional fields are:
"Discount % or Discntbl ?"
"Commisnbl ?"
"Sub-job #"
"Cat-sub-cng"
"G/L acct #"
6. Discount % or 6. Discntbl ?
NOTE: This field is skipped if the P/I Control File specifies that you do not use
discounts.
"Discntbl ?" (discountable?) asks whether the line item is to be subject to the overall
invoice discount.
There are three cases:
Professional Invoicing
User Manual
Quotations
15.14
a. If you use line item discounts, but not an overall invoice discount, enter the
discount percent for this line item only. Press [Enter] if there is no discount for
this line item.
b. If you use both line item discounts and an overall invoice discount, enter the
discount percent for this line item only. Press [Enter] if there is no discount for
this line item.
c. If you don't use line item discounts, but do use an overall invoice discount, this
field appears as 6. "Discntbl ?". Answer Y if this line item is subject to the overall
invoice discount; otherwise, answer N.
Format:
999.999
7. Unit cost
If Inventory Management is not used:
Enter the unit cost or use the option:
Option:
[F1]
to use the unit cost in the Goods/Services File, if any
NOTE: This cost is used to calculate the margin (profit margin) on this line item. This
is required if you pay commissions based on margin. It is also transferred into the A/R
Sales Transaction File and is included in the cost of the sale on the Sales Journal.
Format:
999,999.999
If Inventory Management is used:
The unit cost is requested only in these cases:
For a miscellaneous inventory item (item number begins with an asterisk ["*"]).
For a drop ship item.
In these cases, the unit cost is required to keep the cost of sales in I/C accurate. It is
also required if you pay commissions based on margin. If you do not use cost of sales or
pay commissions based on margin, press [Enter] to default to zero.
In the case of a regular line item on a quotation for a regular inventory item, the unit
cost is not requested. Instead, an approximate value for the unit cost is displayed
automatically, and the name of the field changes depending on the inventory valuation
method specified in the I/C Control File. The cost is displayed as follows:
LIFO valuation method
FIFO valuation method
Average cost valuation method
Standard cost valuation method
Professional Invoicing
User Manual
Replacement cost
Average cost
Average cost
Standard cost
Quotations
15.15
The actual cost is calculated exactly when the invoice produced from this quotation is
posted. For standard costing, the actual cost used is the standard cost.
8. Tax amount
The total amount of all taxes for this line item is displayed and the field is skipped.
Changes can be made only at the "Field number to change ?" prompt.
If you wish to change or view the taxes calculated (by tax type), select this field at the
"Field number to change ?" prompt. A window, similar to the one shown below, is
displayed:
For each tax type enter the following information:
Item-tax
Enter a taxable code to apply to the tax type, or press [Enter] to leave blank.
Txbl
Enter the letter reflecting the taxable status of this item for this tax type. Valid
entries are T (taxable), X (exempt), Z (zero rated), [Enter] to accept the default status
of this item, or [Tab] to exit from the window.
Tax-amount
Enter an override amount of tax to apply for this item, or use one of the options:
Options:
[Enter] to accept the calculated amount.
[F1]
Txbl-amount
to remove any previously entered override tax amount.
This field displays the taxable portion of the extended price, and cannot be changed.
9. Commisnbl ?
Professional Invoicing
User Manual
Quotations
15.16
NOTE: This field is skipped if the A/R Control File specifies that you do not use
commissions.
If commissions are used and I/C is also interfaced, the answer to this question displays
automatically. It is set to Y if the commission code for this item in the I/C Item File is
not blank, and is set to N otherwise. If you want to change this answer, you must do so
from "Field number to change ?".
Answer Y if this line item is commissionable.
[?] 10. G/L acct #
This field appears only if the A/R Control File specifies that sales are distributed.
If Inventory Management is not used:
(This field defaults to the sales account from the Goods/Service record and is skipped
over. Changes can be made at "Field number to change ?".)
If you choose to change the default, enter the new sales account to which the revenue
from this item is to be distributed, or use one of the options:
Options:
[F1]
to scan through the sales accounts specified in the P/I Control
File
[F2]
To accept the default sales account for the item
If Inventory Management is used:
The sales account specified for this inventory item in the I/C Item File displays
automatically. If the item's profit centre is wild carded, then the sales account from
the Item File is combined with the profit centre from the invoice header. If you want
to change this, you must do so from "Field number to change ?".
If Job Cost is used:
If this line item is for a job, the billing account for the job displays automatically. If
you want to change this, you must do so from "Field number to change ?".
Make any changes as usual.
If Job Cost is interfaced, fields 10, 11, and 12 appear as shown below. "G/L ACCT #"
appears as field 13.
[?] 10. Job #
This field is a "display" field only and cannot be changed.
Professional Invoicing
User Manual
Quotations
15.17
If this quotation is not for a job, this field will be skipped and "(N/A)" for "(Not
applicable)" will display automatically. If this quotation is for a job, the job number
entered on the header screen will display here automatically. In either case, this field
cannot be changed.
11. Sub-job #
This field is a "display" field only and cannot be changed.
If this quotation is not for a job, this field will be skipped and "(N/A)" will display
automatically.
If this invoice is for a job which does not have sub-jobs or does not bill for sub-jobs,
"(N/A)" will display automatically.
If this invoice is for a job, the sub-job number entered on the header screen will display
here automatically and cannot be changed.
12. Cat-sub-cng or Cat-sub
This stands for "Category number, Sub-job number, Change order number". This field
displays on the screen only if you are using both the Job Cost and Inventory Management
packages.
If you are using Job Cost and have specified in the J/C Control File that change orders
are not used, the field appears as "Cat-sub" instead of "Cat-sub-cng".
Enter the cost item of the job to which you want the cost of this inventory item to go if
the quotation is turned into an invoice. When the invoice is posted, the inventory cost
for this line item will automatically be transferred into the job for the cost item you
specify here.
If you do not want the cost of this inventory item to be automatically transferred into
the job, leave this field blank.
If this line item or this quotation is not for a job, this field will be skipped and "(N/A)"
appears automatically. Also, if this line item is for a drop ship or miscellaneous item
(item starting with an asterisk [*]), this field will be skipped. (Costs for drop ship or
miscellaneous items can only be transferred to a job through the A/P package.)
Enter the cost item number in the standard way, as is done in the Job Cost package:
category number, sub-job number, and change order number. If you do not use change
orders, you will be asked for only the category number and sub-job number. You can
press [F1] to scan through the cost items on file.
If there is a sub-job number displayed in the preceding field, it will be displayed
automatically here and cannot be changed.
Format: 9999999 (category number) 999 (sub-job number) 999 (change order number)
Professional Invoicing
User Manual
Quotations
15.18
The
screen clears to enter the next line item. Enter the sequence number of the next line
item, or press [Tab] to exit from entering line items and go on to the totals screen.
Entering "Services" Line Items
1. Sequence #
Enter a sequence number here, exactly as in Invoices.
Format:
9999
Line type
As in Invoices, enter [S] for Services.
The appearance of the bottom part of the screen depends on whether or not you are
using the Job Cost package. The screen shown below is what you see if you are not
using J/C. Fields used only with J/C are noted below.
You see:
Professional Invoicing
User Manual
Quotations
15.19
Enter the information as follows:
[?] 2. Service #
Enter the service number or use one of the options:
Options:
[F1]
to scan through the services in the Goods/ Services File
[Enter] to leave blank for a one-time service
If you enter a service number that is not in the Goods/Services File, you are told that
this service is not on file and asked if you want to enter it anyway. If you answer Y, you
are asked if you want to add this service to the Goods/Services File. (If you're using
I/C, you're asked if you want to add it to the Services File.) If you answer Y to this
second question, the service will be added permanently to the file; otherwise, it will
appear only on the current quotation.
Format:
999
Unit
If this service is on file, the unit will be displayed automatically and cannot be changed.
If this service is not on file, enter the unit for this service or use one of the options:
Options:
[F1]
to use "HOUR"
[Enter] if there is no unit for this service and you charge a flat rate, or
you do not charge separately for this service. "(NONE)" displays
Format:
4 characters
3. Description
If this service is on file, its description displays automatically. You can change this, or
press [Enter] to accept it as is. You can also enter up to 9 more lines of description, as
described next.
If the service is not on file, enter the description of the service. You can enter up to 10
lines, each up to the maximum text length ("Service text length") specified in the P/I
Control File. After entering the first line, you are asked if you wish to enter any
additional description. Press [Enter] for N, or answer Y to enter more description; the
bottom of the screen clears to enter up to 9 additional lines. When you are through
entering description, press [F2].
Format: 10 lines, each up to the number of characters specified for "Service text
length" in the P/I Control File
Professional Invoicing
User Manual
Quotations
15.20
4. Quantity
If you entered a unit for this service, enter the number of units.
Format:
99,999,999.999
5. Unit price or
5. Price
If you entered a unit above, enter the price per unit, or use the option:
Option:
[F1]
to use the unit price in the Goods/Services File
The quantity is automatically multiplied by this price, and the extended price displays.
If you left "Unit" blank, this field changes to 5. "Price". Enter the total price of the
service.
Format:
9,999,999.999 (unit price)
99,999,999.99 (total price)
NOTE: If the unit price is zero, you are asked "Are you sure ?".
Optional Fields
Because of the choices made in the P/I Control File and A/R Control File, some of the
following optional fields may not be used. In this case, the related field does not
appear and all later fields are renumbered.
The optional fields are:
"Discount % or Discntbl ?"
"Commisnbl ?"
"Job #"
"Sub-job #"
"G/L acct #"
6. Discount % or 6. Discntbl ?
(This field is skipped if the P/I Control File specifies that you do not use discounts.)
"Discntbl ?" (discountable?) asks whether the line item is to be subject to the overall
invoice discount.
There are three cases:
a. If you use line item discounts, but not an overall invoice discount, enter the
discount percent for this line item only. Press [Enter] if there is no discount for
this line item.
Professional Invoicing
User Manual
Quotations
15.21
b. If you use both line item discounts and an overall invoice discount, enter the
discount percent for this line item only. Press [Enter] if there is no discount for
this line item.
c. If you don't use line item discounts, but do use an overall invoice discount, this
field appears as 6." Discntbl ?". Answer Y if this line item is subject to the overall
invoice discount; otherwise, answer N.
Format:
999.999
7. Unit cost or
7. Total cost
Enter the unit cost per the unit for this service, or use the option:
Option:
[F1]
to use the unit cost for the service in the Goods/Services File, if
any
If you left "Unit" blank, this field appears as 7. "Total cost". Enter the total cost of the
service, or use the option:
Option:
[F1]
to use the total cost for the service in the Goods/Services File, if
any
NOTE: This cost is used to calculate the margin (profit margin) on this service. This is
required if you pay commissions based on margin. It is also included in the cost of the
sales transaction in A/R when an invoice produced from this quotation is posted.
Format:
999,999.999 (unit cost)
9,999,999.99 (total cost)
8. Tax amount
The total amount of all taxes for this line item is displayed and the field is skipped.
Changes can be made only at the "Field number to change ?" prompt.
If you wish to change or view the taxes calculated (by tax type), select this field at the
"Field number to change ?" prompt. A window, similar to the one shown below, is
displayed:
For each tax type enter the following information:
Professional Invoicing
User Manual
Quotations
15.22
Item-tax
Enter a taxable code to apply to the tax type, or press [Enter] to leave blank.
Txbl
Enter the letter reflecting the taxable status of this service for this tax type. Valid
entries are T (taxable), X (exempt), Z (zero rated), [Enter] to accept the default status
of this item, or [Tab] to exit from the window.
Tax-amount
Enter an override amount of tax to apply for this service, or use one of the options:
Options:
[Enter] to accept the calculated amount.
[F1]
to remove any previously entered override tax amount.
Txbl-amount
This field displays the taxable portion of the extended price, and cannot be changed.
9. Commisnbl ?
(This field is skipped if the A/R Control File specifies that you do not use commissions.)
Answer Y if this line item is commissionable.
[?] 10. G/L acct #
(This field appears only if the A/R Control File specifies that sales are distributed.)
(This field defaults to the sales account from the Goods/Service record and is skipped
over. Changes can be made at "Field number to change ?".)
If you choose to change the default, enter the new sales account to which the revenue
from this item is to be distributed, or use one of the options:
Options:
[F1]
to scan through the sales accounts specified in the P/I Control
File
[F2]
to accept the default sales account for the service
If Job Cost is used:
If Job Cost is used, and if this line item is for a job, the billing account specified on the
job header for this job displays automatically.
Professional Invoicing
User Manual
Quotations
15.23
To change this, you must do so from "Field number to change ?".
Make any desired changes as usual.
If Job Cost is interfaced, fields 10 and 11 appear as shown below. "G/L acct #" becomes
field 12.
[?] 10. Job #
This field is a "display" field only and cannot be changed.
If this quotation is not for a job, this field will be skipped and "(N/A)" for "(Not
applicable)" will display automatically.
If this quotation is for a job, the job number entered on the header screen will display
here automatically and cannot be changed.
11. Sub-job #
This field is a "display" field only and cannot be changed.
If this quotation is not for a job, this field will be skipped and "(N/A)" will display
automatically.
If this quotation is for a job which does not have sub-jobs or does not bill for sub-jobs,
"(N/A)" will display automatically.
If this quotation is for a job, the sub-job number entered on the header screen will
display here automatically and cannot be changed.
The screen clears to enter the next line item. Enter the sequence number of the next
line item, or press [Tab] to exit from entering line items and go on to the totals screen.
Entering "Notes" Line Items
1. Sequence #
Enter a sequence number here, exactly as in Invoices.
Format:
9999
Line type
As in Invoices, enter N for Notes. You see:
Professional Invoicing
User Manual
Quotations
15.24
2. Description
Professional Invoicing
User Manual
Quotations
15.25
Enter whatever notes or comments you wish to appear on the quotation at this point.
You can press [Enter] at the beginning of any line to leave a blank line. To exit from
entering the note, press [F2].
Format: 10 lines of text, each up to the number of characters specified for "Service
text length" in the P/I Control File
Make any changes as usual.
The screen clears for entering the next line item. Enter the sequence number of the
next line item, or press [Tab] to exit from entering line items and go on to the totals
screen.
Entering "Standard Bill" Line Items
1. Sequence #
Press [F2] to assign the next sequence number to the first line of the standard bill.
Format:
9999
Line type
Enter [B] for standard Bill. You see:
Professional Invoicing
User Manual
Quotations
15.26
Standard bill #
Enter the number of the standard bill that you want to paste into this quotation. You
can enter any portion of a standard bill number assigned in the Standard bills selection.
You can also use the option:
Option:
[F1]
to scan through the standard bills on file
If you entered a number, the standard bill with the closest match to what you entered
displays, along with a count of the number of line items in this bill.
Whether you entered a number or used [F1], you can then press [F2] to look at the
details of any particular bill.
Format:
6 characters
You can use the [PgUp] and [PgDn] keys to see all of the line items in the standard bill.
Professional Invoicing
User Manual
Quotations
15.27
When the correct standard bill is displayed, press [Enter] in response to "Right standard
bill ?".
You are then asked "Use this standard bill ?". If N, you can enter a new standard bill
number as above. If Y, the standard bill you selected is transferred to this quotation.
If you are using profit centres
When standard bills are copied, the main accounts entered for Goods line items in the
standard bill are combined with the profit centre from the quotation header if the profit
centre is wild carded. For Service lines, the main accounts on the standard bill line
items are combined with the profit centre entered on the quotation header if the profit
centre is wild carded.
If you are using I/C and J/C
If you are using Job Cost and I/C, and if this quotation is for a job, and the job uses but
does not bill for sub-jobs, you will be asked to enter the sub-job number.
If you are using Job Cost and I/C, and change orders are used in J/C, and this quotation
is for a job, you will be asked for the change order number for this standard bill. Press
[Enter] if this standard bill is not for a change order, or enter the change order number.
The change order must already be defined for the job.
You are informed when the standard bill has been transferred (pasted into this
quotation).
To see line items which have been copied into this quotation, press [F1] and the first
line from the standard bill appears. Make any desired changes. (These changes are
for this quotation only.) Then press [F1] for the next line from this standard bill.
When through entering line items, press [Tab] for the sequence number. The totals
screen then appears.
Totals Screen
You see:
Professional Invoicing
User Manual
Quotations
15.28
The "Line total:" is the total dollar amount of all line items, less line item discounts (if
any).
The "Quote disc:" field displays only if the P/I Control File specifies that you use overall
invoice discounts. (After you enter the "Quote disc %" [field 1] the total dollar amount
of the discount will display.)
The "Commissionable:" field displays only if the A/R Control File specifies that
commissions are used. It is the total dollar amount that is subject to a commission.
NOTE: The P/I Control File or A/R Control File may specify that some of the following
options are not used. In this case, the related field does not appear and all later fields
are renumbered.
The optional fields are:
"Quote disc %"
"Misc charges"
"Freight"
"Commis pct "and "commis amt"
Enter the information as follows:
Professional Invoicing
User Manual
Quotations
15.29
1. Quote disc %
(This field is skipped if the P/I Control File specifies that you do not use overall invoice
discounts.)
Enter the quote discount percent, or use the option:
Option:
[F1]
to use the customer's non-zero discount percent in the Customer
File in A/R
The quotation discount dollar amount at the top of the screen and the discounted net
are automatically calculated and displayed. (The "discounted net" is the quotation
total, less the discount.)
Format:
99.999
2. Misc charges
NOTE: This field is skipped if the P/I Control File specifies that you do not use
miscellaneous charges.
Enter any miscellaneous charges for this quotation.
Format:
99,999,999.99-
[?] Account #
If there are miscellaneous charges for this quotation, you are next asked for the number
of the G/L account that these charges are to be distributed to, if the A/R Control File
specifies that miscellaneous charges are distributed.
Enter the account number or use the option:
Option:
[F1]
to use the miscellaneous charges account in the A/R Control File
Misc charges taxable
The taxes calculated for miscellaneous charges do not display. If you wish to make any
changes or view the default calculations, press the [↑] at the next numbered field, or
select the misc field from "Field number to change ?". A window appears for this
purpose similar to the following:
Make any changes as
Professional Invoicing
User Manual
follows:
Quotations
15.30
Txbl
Enter the letter reflecting the taxable status of miscellaneous charges for this tax type.
Valid entries are T (taxable), X (exempt), Z (zero rated), [Enter] to accept the default
status of this item, or [Tab] to exit from the window.
Tax-amount
Enter an override amount of tax to apply to miscellaneous charges, or use one of the
options:
Options:
3. Freight
[Enter] to accept the calculated amount.
[F1]
to remove any previously entered override tax amount.
(This field is skipped if the P/I Control File specifies that you do not use freight charges.)
Enter the amount of any freight charges.
Format:
9,999,999.99-
[?] Account #
If there are freight charges and the A/R Control File specifies that freight charges are
distributed, you are next asked for the number of the G/L account that these charges
are to be distributed to.
Enter the account number or use the option:
Option:
[F1]
to use the freight account in the A/R Control File
Freight taxable
The taxes calculated for freight charges do not display. If you wish to make any
changes or view the default calculations, press the [↑] at the next numbered field, or
select the freight field from "Field number to change ?". A window appears for this
purpose similar to the following:
Make any changes as
Txbl
Professional Invoicing
User Manual
follows:
Quotations
15.31
Enter the letter reflecting the taxable status of freight charges for this tax type. Valid
entries are T (taxable), X (exempt), Z (zero rated), [Enter] to accept the default status
of this item, or [Tab] to exit from the window.
Tax-amount
Enter an override amount of tax to apply to freight, or use one of the options:
Options:
[Enter] to accept the calculated amount.
[F1]
to remove any previously entered override tax amount.
4. Sales tax
Sales tax displays automatically. The sales tax, if any, is the aggregate of the taxes
calculated for all tax types for line items, miscellaneous charges, and freight charges.
If you wish to change the amount displayed for sales tax, then press the [↑] key from the
next numbered entry field, or select the sales tax field from "Field number to change ?".
A window appears for this purpose similar to the following:
Make
changes
any
to the
amounts calculated for each tax type, or use the option:
Option:
[F1]
to reverse changes made to override the calculated amount.
After this, these amounts are added:
"Quote total" (or "Discounted net", if a quotation discount is used)
"Misc charges" (if used)
"Freight" (if used)
"Sales tax" (if any)
The total is displayed as "Quote Total".
(The next two fields are skipped if the A/R Control File specifies that you do not use
commissions.)
5. Commis amt
Professional Invoicing
User Manual
Quotations
15.32
This field appears as "Commis amt" if no line items were specified as being
commissionable, or if the commissionable amount at the top of the screen is zero.
Enter the commission amount.
Format:
99,999,999.99-
5. Commis pct and
6. Commis amt
Field 5 appears as "COMMIS PCT" if one or more line items are specified as being
commissionable and the commissionable amount is not zero. Enter the commission
percent or use the option.
Option:
[F1]
to use the commission percent and method ("on price" or "on
margin") for the customer or the sales rep. If commissions are
assigned "by customer" in A/R, then the customer's percent and
method are used. If commissions are assigned "by sales rep" in
A/R, then the sales rep's commission percent and method are
used.
If you enter a specific commission percent, you are asked if the commission is on price
or on margin. Press [Enter] to accept the default specified in the P/I Control File, or
enter [P] for price or [M] for margin.
If you enter zero for the commission percent, the cursor moves to the "Commis amt"
field. Enter the commission amount.
If the commission is on price, the commission amount displays in the "COMMIS AMT"
field. If the commission is on margin, you are informed that the amount of the
commission will be calculated when the invoice from this quotation is posted to A/R.
Format: 99.999 (for commission percent)
99,999,999.99- (for commission amount)
7. Comment
Enter any comment for this quotation, up to 5 lines. The maximum length of each
comment line ("Comment text length") is specified in the P/I Control File. Press [F2] to
exit from entering the comment.
Format: 5 lines, each up to the number of characters specified for "Comment text
length" in the P/I Control File
Make any desired changes.
Immediate Printing
Professional Invoicing
User Manual
Quotations
15.33
If the P/I Control File specifies that you do not print invoices (and quotations)
immediately, the quotation header screen reappears for you to begin entering another
quotation.
If the P/I Control File specifies that you print invoices (and quotations) immediately, a
window appears as described next.
You are asked "Print this quotation now ?" and given several choices:
Answer N if you don't want to print this quotation now. The quotation header screen
reappears for you to begin entering the next quotation.
Answer Y if you want to print this quotation now, using the default selections shown for
invoice format and invoicing station, and you don't want to print an alignment form
first.
If you want to print this quotation now, but you want to change the default selections
shown or print an alignment form first, then enter one or more of the following answers:
[F]
To change the invoice format, then, enter the number of the format you want to
use to print the quotation or use the option:
Option:
[F1]
to scan through the invoice formats on file
[S]
To change the invoicing station on which the quotation is to print, then enter the
invoicing station of your choice.
[A]
To print a test alignment form filled out with lines of X's and 9's. You can
continue to choose [A] to print as many alignment forms as you wish until the paper is
adjusted properly.
Answer Y when you are ready to print the quotation.
The quotation is then printed. (Quotations are similar in appearance to invoices.
You are asked again "Print this quote now ?". Answer N to return to the Enter screen
and make corrections. Or answer Y to print it again. The choices shown above are
also available.
Printing a List of Quotations
From the Quotations menu, select List.
Enter the information as follows:
1. Print in order by
Professional Invoicing
User Manual
Quotations
15.34
Enter the order in which you want the quotations shown on the list: press [Enter] for
Customer number order, type [N] for customer Name order, or type [D] for Date order.
Format:
1 character
[?] 2. Starting cust #
[?] 3. Ending cust #
Enter the range of customers to include on the list. Follow the screen instructions.
Format:
12 characters at each field
4. Starting date
5. Ending date
Enter the range of quotation dates to include on the list. Follow the screen
instructions.
Format:
MMDDYY at each field
6. Reference #
Enter the quotation reference number of the quotations to show or use the option:
Option:
[F1]
to show quotations for "All" reference numbers
Format:
6 characters
7. What to print:
Select how much information to show on the list for each quotation:
# of header lines
Press [Enter] to show 1 header line per quotation, type [2] for 2 lines, or press [F1] to
show "All" header lines for each quotation.
Format:
9
# lines per line item
Press [Enter] to show 1 line per line item, type [0] for none, type [2] for 2, type [3] for
3, or press [F1] to show "All" information for each line item. If you enter 0, this means
you don't want to show line items at all.
Format:
1 line
Quote totals ?
Professional Invoicing
User Manual
Quotations
15.35
Press [Enter] to show the totals information for each quotation. Answer N if you don't
want to show totals information for individual quotations.
A sample Quotations List is at the end of this chapter.
Using Quotations as Invoices
This selection allows you to use quotations as invoices. The quotation disappears and
reappears as an invoice.
From the Quotations menu, select Use as invoice.
Enter the invoicing station code (if requested). You see:
Enter the information as follows:
[?] 1. Customer #
Enter the customer number or use the option:
Professional Invoicing
User Manual
Quotations
15.36
Option: [F1] to scan through the quotations on file
If you used [F1], you are asked "Right quotation ?". If you answer N, you can enter
another customer as above. When the right quotation appears, press [Enter] to select
it.
Format:
12 characters
2. Ref #
If you entered the customer number or name above, enter the reference number of the
quotation which you want to use as an invoice.
Format:
6 characters
If the customer is already over his credit limit, a message appears informing you of this,
and you are asked whether you want to continue using this quotation as an invoice.
Answer Y to continue or N to not use it.
4. Invc date
The "Quote date" field becomes "Invc date" and the cursor is positioned there. Enter
the date you want to appear on the invoice or use one of the options:
Options:
Format:
[F1]
to use the system date
[F2]
to assign the date at the time the invoice is printed
MMDDYY
[?] 7. Terms
The cursor is positioned at this field if a terms code was not entered when the quotation
was entered. Enter a terms code or use the option:
Option:
[F1]
to use the terms for this customer specified in the Customer File
If this is a miscellaneous customer, press [F1] to scan through the terms codes on file in
the A/R Codes File; when the right one appears, press [Enter].
(Fields 8, 9, and 10 display information about this quotation and cannot be changed.
See the next field if the sales rep is blank.)
Format:
3 characters
[?] 10. Sales rep
The cursor is positioned at this field if a sales rep was not entered when the quotation
was entered. Enter a sales rep code or use the option:
Professional Invoicing
User Manual
Quotations
15.37
Option:
[F1]
to use the usual sales rep for this customer
If this is a miscellaneous customer, press [F1] to scan through the sales reps on file;
when the right sales rep appears, press [Enter].
Format:
3 characters
Make any changes.
The totals screen appears. Make any changes.
You may enter cash received at this point.
You are informed that an invoice will now be made from this quotation and asked if it is
OK to proceed.
Answer N to return to the first screen to select another quotation. You can also press
[Tab] to exit without using this quotation as an invoice.
Answer Y to make an invoice from this quotation. The next available bill reference
number is automatically assigned to the new invoice. You are informed that this
quotation is being changed into an invoice, and the bill reference number for the new
invoice is shown.
When I/C and Back Orders Are Used
When a Goods line item from a quotation is copied into an invoice, it is possible that
there is insufficient quantity available to fully ship the item. If the item has back order
control, then "back order instructions" were entered for the line item. If there is
insufficient quantity available to fully ship such a line item, then you will receive a
warning when the quotation is made into an invoice that your back order instructions
were carried out. In this case, you may wish to review the invoice at this time, using
Invoices to determine which lines are back ordered. If you are using "immediate
printing" then you may wish to defer printing the invoice until you have had a chance to
review the invoice.
Immediate Printing
If the P/I Control File specified to print invoices immediately, a window appears and you
are asked "Print this invoice now ?".
From this point onward, proceed as in Enter invoices.
____________________________
Professional Invoicing
User Manual
Quotations
15.38
Chapter 16
View
Introduction
Use this selection to quickly look at your customers, invoices, recurring bills, standard
bills, and quotations.
You can find the information you want rapidly. However, you cannot make changes to
the information in this selection. To make changes, use the Enter function within
Invoices, Recurring bills, Standard bills, or Quotations. Customer information can be
changed only from the Accounts Receivable package.
To Begin
From the P/I menu, select View.
Customers
Use this selection for a quick view of customers in the A/R Customer File, including any
you have added from P/I.
From the View menu, select Customers.
This screen appears:
Professional Invoicing
User Manual
View
16.1
Enter the number of the customer to start viewing from or use one of the options:
Options:
[F1]
to start with the "First" customer on file
[Enter] to look up the customer by name
[?]
to look up the customer from the Find window.
When looking up by customer name, you can type in the first few letters of the name to
start from the first match or use the option:
Option:
[F1]
to start from the first customer (by name) on file
Format:
12 characters
You see:
Professional Invoicing
User Manual
View
16.2
Press [Tab] to reselect the starting customer or select the screen line number (to the
left of the customer number) of the customer to view in more detail. You will see the
content of the first screen from A/R for this customer. Use [F6] to view or change
notes for the customer. Press [Enter] to display the second screen from A/R, then
[Enter] again to return to the View (Customers) selection screen.
To select another starting customer number, press [Tab].
To end viewing customers, press [Tab] again.
Invoices
From the View menu, select Invoices.
You see:
Professional Invoicing
User Manual
View
16.3
You can view invoices by bill reference number, by customer number, or by customer
name.
Enter the starting bill reference number or use one of the options:
Options: [F1]
[Enter]
Format:
to start from the invoice with the lowest bill reference
number
to look up the invoice by customer number or customer name
999999
To view invoices by customer number, enter the starting customer number for the
invoices to view or use one of the options:
Options: [F1]
[Enter]
Format:
to get the first customer with invoices on file.
to select the starting customer by name
12 characters
To view invoices by customer name, enter the full or partial name or use one of the
options:
Options: [F1]
[Enter]
Format:
to get the "First" customer name in alphabetical order
to go back to looking for the invoice by bill reference number
25 characters
You see:
Professional Invoicing
User Manual
View
16.4
Press [F1] to view additional invoices.
If you are using the Job Cost package, you can press [F2] to see the job numbers for the
invoices on the screen. You can then press [F2] again to redisplay the purchase order
numbers.
For a more detailed inquiry into any particular invoice, select its screen line number (to
the left of "Bill-ref-#").
Format: 99
The header information for that invoice displays:
View Header Information
Professional Invoicing
User Manual
View
16.5
If this invoice has already been printed, the "Invoice #" also appears beneath "Invoice
date". (The invoice number is assigned at the time the invoice is printed.)
When you are finished viewing this screen, use one of the options:
Options:
[Tab]
to select another invoice
[F1]
to view line items for this invoice
[F2]
to view totals
[F6]
to view or change notes for the invoice
View Line Item Information
To view line items, press [F1] from the header screen. You see a screen listing the line
items on this invoice. Each line item has a screen line number immediately to the left
of the sequence number.
Professional Invoicing
User Manual
View
16.6
View Line Item Details
Select the screen line number for detailed inquiry into a line item, or use one of the
options:
Options: [F2]
to view totals
[F1]
to display the rest of the items (if there are more than can be
displayed on one screen)
[Tab]
to select another invoice
A screen similar to the line item screen in Invoices appears. The screen's appearance
depends on the type of line item. A "goods" line item is shown here:
Professional Invoicing
User Manual
View
16.7
Press [Tab] to select another line item to view, or press [F2] to view totals.
When through viewing line items for this invoice, press [Tab].
When through with this invoice, press [Tab] again.
View Totals Information
You can view totals information by pressing [F2] from either the header screen or the
line item screen. You then see:
Professional Invoicing
User Manual
View
16.8
When through viewing totals information, press [Tab].
When through viewing invoices, press [Tab] twice.
Recurring Bills
From the View menu, select Recurring bills. You see:
Professional Invoicing
User Manual
View
16.9
You can view recurring bills by customer number or by customer name.
Enter the number of the customer you want to start looking from or use one of the
options:
Options:
[F1]
to start from the "First" customer
[Enter] to select by customer name. Follow the screen instructions
If you chose to view by customer name, enter the starting customer's full or partial
name, or use one of the options:
Options:
[F1]
for the first customer who has recurring bills on file
[Enter] to return to selecting by customer number
Format: 12 characters
Enter the "next date" cut-off or use one of the options:
Options:
[Enter] to use the system date
[F1]
for "No cut-off date"
If you enter a date here, only recurring bills that are due on or before this date will be
shown on the subsequent screens.
Format: MMDDYY
You see:
Professional Invoicing
User Manual
View
16.10
The recurring bills are listed, one line per bill.
If you are using the Job Cost package, you can press [F2] to display the job numbers for
the recurring bills on the screen. You can then press [F2] again to redisplay the
purchase order numbers.
You may start a new selection of recurring bills by pressing [Tab], or select the screen
line number for a more detailed inquiry into any particular bill shown on the screen.
You can look at details of all information in the bill header, line item, totals, and
recurrence sections.
View Header, Line Item, and Totals Information
You can view header, line item, and totals information for recurring bills exactly the
same as for invoices.
View Recurrence Information
From the totals screen, press [F2] to view recurrence information.
You see:
Professional Invoicing
User Manual
View
16.11
When through viewing recurrence information for this bill, press [Tab] to reselect
another recurring bill to view.
When through viewing recurring bills, press [Tab] twice.
Standard Bills
From the View menu, select Standard bills.
A screen appears for you to enter the starting standard bill number for the bills you want
to view.
Enter a standard bill number or use the option:
Option:
[F1]
To start from the "First" standard bill on file
Format: 7 characters
You see:
Professional Invoicing
User Manual
View
16.12
The bills are listed on the screen. Select the screen line number (to the left of
"Std-bill-#") of the bill you wish to view or use the option:
Option:
[F1]
to view additional bills (if there are more than can be displayed
on one screen)
You then see a list of the line items on this bill. Each line item has a screen line number
to the left of the sequence number.
If there are more lines than can be displayed on one screen, press [F1] to display the
rest. Enter the screen line number of the line item for which you want to see more
details. Or press [Tab] to select another bill.
A screen similar to the line item screen in Standard bills appears. The screen's
appearance depends on the type of line item. A Services line item is shown here:
Professional Invoicing
User Manual
View
16.13
Press [Tab] to select another line item.
When through viewing line items, press [Tab].
When through viewing standard bills, press [Tab] twice. The View menu reappears.
Quotations
To view quotations, from the View menu, select Quotations. You see:
Professional Invoicing
User Manual
View
16.14
You can view quotations by customer number or by name.
Enter the starting customer number or use one of the options:
Options:
[F1]
to start from the "First" customer
[Enter] to select by customer name
Format:
12 characters
If you chose to select by customer name, enter all or part of the starting customer's
name, or use one of the options:
Options:
[F1]
for the first customer that has quotations
[Enter] to return to selecting by customer number
Format:
25 characters
You see:
The quotations are listed on the screen. Select the screen line number (to the left of
"Cust-#") of the quotation you wish to view, or use the option:
Option:
[F1]
to view additional quotations (if there are more than what can
be displayed on one screen)
With Job Cost Interfaced
If the Job Cost package is interfaced, this is the screen you see when you select to view
quotations:
Professional Invoicing
User Manual
View
16.15
From this point onward, proceed exactly the same way as for viewing quotations.
Refer to Quotations, above, for instructions.
When through viewing quotations, press [Tab] twice.
____________________
Professional Invoicing
User Manual
View
16.16
Chapter 17
Print Invoices and Quotations
Introduction
Even if you normally print invoices and quotations immediately after they are entered
(as specified in the P/I Control File), you can still print them using this selection.
NOTE: If you are using back orders, separate formats should be set up for invoices and
quotations.
The invoice format should show both quantity ordered and quantity shipped.
The quotation format should show only quantity ordered (since the concept of "quantity
shipped" does not exist for a quotation).
To Begin
From the P/I menu, select Print invoices and quotations. Then select Print invoices.
Printing Invoices
This screen displays:
Professional Invoicing
User Manual
Print Invoices and Quotations
17.1
NOTE: In multi-user environments, "Invoices currently being printed - try again later"
appears if another user is already printing invoices or quotations. You must wait for
the other user to finish, then try again. This restriction prevents the duplicate
assignment of invoice numbers, which are assigned at the time of printing.
Enter the information as follows:
[?] 1. Invoice format number
Enter the number of the invoice format to use for these invoices or use one of the
options:
Options:
[Enter] to use the format specified in the P/I Control File
[F1]
to scan through the invoice formats on file
Format: 5 characters
2. Print in order by
Press [Enter] or type [B] to print invoices in order by Bill reference number; or type[C],
by Customer number; [N], by customer Name; or[G], by bill Group.
Format:
1 character
NOTE: If both immediate and batch printing of invoices is in use, you will need to
distinguish between invoices which are to be printed here, as compared to invoices that
are to be printed using invoicing stations. In order to do this, it is recommended that
invoices which are to be printed here are given a specific bill group which is different
from the bill groups used (if any) by the invoicing stations. Then print invoices by bill
Professional Invoicing
User Manual
Print Invoices and Quotations
17.2
group here and just print invoices for the specific bill group designated for batch
printing of invoices.
3. Default invoice date
You may already have assigned an invoice date to some of your invoices. The date you
enter here will be given to all invoices that do not already have an invoice date
assigned.
Enter a date or use the option:
Option:
[Enter] to assign the system date
Format:
MMDDYY
4. Starting ("in order by" choice)
5. Ending ("in order by" choice)
Enter the range of "in order by" numbers or names to print. Follow the screen
instructions.
6. Default comments
Comments already entered on specific invoices will be printed as is.
You can enter default comments here which will be printed on any invoice that does not
have its own individual comments. Press [F2] to end the comment.
Format: 5 lines, each up to the maximum "Comment text length" specified in the P/I
Control File.
7. Reprint invoices already printed ?
Press [Enter] for N or answer Y.
Make any changes.
If you are using multiple printers, select which printer to which to send the invoice.
You are asked: "Print alignment ?". Answer Y to print a test alignment form filled out
with lines of X's and 9's.
After the form prints, you are again asked "Print alignment ?". If necessary, adjust the
invoice forms in the printer to the left, right, up, or down, then answer Y to print
another alignment form.
Continue to print alignment forms and make necessary adjustments until the invoice
forms are properly aligned.
When alignment is correct, answer N to "Print alignment ?". You are then asked for the
starting invoice number.
Professional Invoicing
User Manual
Print Invoices and Quotations
17.3
Starting invoice #
Enter the starting invoice number for the first invoice to print or use the option:
Option:
[Enter] to use the next available invoice number
If you enter a number lower than the next available number in the P/I Control File, you
will get a warning message.
NOTE: An invoice is assigned an invoice number when it is printed. Until that time, it
is identified only by the bill reference number.
Format:
999999
The invoices are then printed. (Sample printed invoices are shown at the end of the
appendix titled Format Design Kit.)
When the invoices have printed, you are asked "Are invoices just printed OK ?".
Answer N if they are not.
If you answer Y, the invoices are marked as OK to post, and the screen to enter the print
range reappears.
When through printing invoices, press [Tab].
Printing Quotations
From the Print invoices and quotations menu, select Print quotations.
This screen appears:
Professional Invoicing
User Manual
Print Invoices and Quotations
17.4
Enter the information as follows:
1. Invoice format number
Enter the number of the invoice format to use for these invoices, or use one of the
options:
Options:
[Enter] to use the default format in the P/I Control File
[F1]
Format:
to scan through the invoice formats on file. When the right
format appears, press [Enter] in response to "Right format ?".
5 characters
2. Print in order by
Press [Enter] to print in order by Customer number or type N to print in order by
customer Name.
3. Quote reference #
Enter the reference number of the quotations to print, or use the option:
Option:
[F1]
Format:
999999
to print quotations regardless of the reference number
4. Quotation date
Professional Invoicing
User Manual
Print Invoices and Quotations
17.5
Enter the date of the quotations to print, or use the option:
Option:
[F1]
to print quotations regardless of date
Format: MMDDYY
5. Bill group
Enter the bill group of the quotations to print, or use the option:
Option:
[F1]
to print quotations for "All" bill groups
Format:
3 characters
6. Starting cust (# or name)
7. Ending cust (# or name)
(What you enter here depends on what category you selected to print in order by, in
field 2 above: customer number or customer name.)
Enter the range of customers to print invoices for. Follow the screen instructions.
8. Default comments
You can enter default comments here which will be printed on any quotation that does
not already have its own individual comments. Press [F2] to end entering the
comments.
Format: 5 lines, each up to the maximum "Comment text length" specified in the P/I
Control File.
From this point on, printing quotations proceeds exactly as in Printing invoices.
____________________
Professional Invoicing
User Manual
Print Invoices and Quotations
17.6
Chapter 18
Post Invoices
Introduction
This selection posts invoices to the A/R package. When you post, all financial data on
the invoices is transferred into the A/R package.
If you are using I/C, inventory is also fully updated.
If you are also using the Job Cost package, the billing information is posted to the Job
Cost package. Inventory item costs are posted to the Job Cost package if you are also
using I/C.
You must have already printed an invoice before you can post it. A register of posted
invoices is printed at the time the invoice is posted.
To Begin
From the P/I menu, select Post invoices.
This screen displays:
Professional Invoicing
User Manual
Post Invoices
18.1
Enter the information as follows:
Cut-off invoice date to post
Enter the invoice date through which you want to post invoices to A/R, or use one of the
options:
Options: [F1]
[Enter]
Format:
for "Latest" (post all printed invoices)
to use the system date
MMDDYY
Cut-off invoice # to post
Enter the invoice number through which you want to post to A/R, or use the option:
Option: [F1]
for "Last" (post all printed invoices)
Format: 999999
Bill group to post
Enter the bill group code of the group of invoices you want to post or use the option:
Professional Invoicing
User Manual
Post Invoices
18.2
Option:
[F1]
to post invoices in "All" bill groups
Format:
3 characters
Posting date
Enter the date to use as the posting date. The posting date is used within Accounts
Receivable for tax and aging reporting. Refer to the chapters titled Aging Report and
Tax Collected for further information on the use of this feature.
Format:
MMDDYY
You are asked "Any change ?".
Answer Y and make changes, or answer N to proceed.
If there are any sales or cash receipt entries (transactions) in A/R (or inventory entries
in I/C, if it is interfaced) to be posted, you see a reminder that they will be posted, as
well as the invoices you have selected. Answer Y to proceed with posting; otherwise,
answer N.
If you answer Y, a menu appears for you to select how to print a register of posted
invoices and a register of miscellaneous and drop ship "goods" items. Follow the screen
instructions.
All invoices (including those created from recurring bills and from quotations) which
have been printed and meet the three posting criteria above ("Cut-off invoice date",
"Cut-off invoice #", and "Bill group") are then posted to A/R. If you are using Inventory
Management, they are also posted to I/C.
Refer to the Accounts Receivable and Inventory Management packages for examples of
registers mentioned here.
IMPORTANT NOTE:
**INCOMPLETE POSTING**
The posting of invoices from the P/I package involves up to three different parts. Each
of these parts is actually a separate posting in itself:
1. There is always the posting of A/R sales transactions in the A/R package.
2. If you have answered Y to "Ask cash with invoice ?" in the P/I Control File, then
the handling of cash entered on invoices depends upon the setting of the field
"Post cash to A/R ?" which is also in the P/I Control File. If cash is to be posted to
A/R, then cash receipts transactions are generated for cash entered on invoices
in P/I, and these entries are posted along with any other cash receipt entries
already on file in A/R. If cash is not to be posted to A/R, no posting of cash
Professional Invoicing
User Manual
Post Invoices
18.3
receipts occurs, and the cash entered on invoices is treated as memo information
(i.e., no cash receipt transactions are generated or posted).
3. If you are using the Inventory Management package, there is the posting of
inventory entries in I/C.
For each of these three parts of the posting, a different register or journal is produced:
the Sales Journal for sales transactions, the Cash Receipts Journal for cash receipts
transactions, and the Inventory Transaction Register for inventory transactions.
You might also have a fourth register--the Miscellaneous and Drop-Ship Item Register--if
you are using I/C and you have miscellaneous or drop-ship items on one or more
invoices.
While any one of the registers or journals is being printed, you can press [F1] to
interrupt printing, then press [Tab] to terminate printing. This is NOT recommended.
If you do this, you must immediately complete the interrupted posting before doing
anything else with the P/I package.
To complete the posting, select Post invoices again, then let the posting run until the
end. It doesn't matter whether you select any additional invoices to post at this time.
When posting invoices, you might see:
"DUPLICATE SALES TRANSACTION - SEE INSTRUCTIONS. PRESS ENTER TO CONTINUE"
If you see this message, check to see if there has been a duplicate invoice in A/R.
During invoice posting, it is possible that an invoice number is assigned that was
previously used by another invoice. This can occur if a sales transaction with a
conflicting invoice number was entered through Sales in A/R.
If the software detects this condition, the P/I invoice will remain on file and its
information will not be posted to the A/R and I/C files.
To resolve this, you can either:
Delete the sales transaction in A/R having the same invoice number, or
Reprint this P/I invoice with a different starting invoice number, so that the
conflict will not occur, and then post it again.
Back ordered invoices
When an invoice is posted, if all lines on the invoice are fully shipped or partially
shipped but "out of stock", then the invoice is deleted from the system. If one or more
Professional Invoicing
User Manual
Post Invoices
18.4
lines are back ordered, then these lines are retained and the invoice is marked as a
"Backordered invoice". In this case, when the back orders can be filled, use Invoices to
enter the quantities that can now be shipped. When you reach the totals screen for such
an invoice, you will have to enter the fields on the screen as if the invoice had been
entered for the first time (except for the discount percent and comment, if any). This is
required so that the fields on the totals screen (such as sales tax and commission
amount) are properly filled in based upon the quantities that are now to be shipped.
Posting of Services
The G/L postings for Services are as follows:
DR Customer's A/R account
CR G/L Account in line item
For credit memos, debits and credits are reversed in the above.
Posting of Goods and Items
The G/L postings for Goods are as follows:
DR Customer's A/R account
CR G/L Account in line item
The above postings occur whether or not P/I is interfaced to I/C. For credit memos,
debits and credits are reversed in the above.
In addition, if P/I is interfaced to I/C, then inventory postings occur as described below.
Posting of Inventory Items
When P/I is interfaced to I/C, G/L postings for inventory items (with respect to I/C) are
as follows:
Sales:
DR Item's expense account
CR Item's inventory account
Credit memos:
DR Item's inventory account
DR scrap account (if applicable)
CR Item's credit memo account
Professional Invoicing
User Manual
Post Invoices
18.5
Posting Miscellaneous Inventory Items
G/L postings for miscellaneous items (with respect to I/C) are as follows:
Sales:
DR Item's expense account
CR Item's inventory account
Credit memos:
DR Item's inventory account
CR Item's credit memo account
As shown above, the item's inventory account (as specified in the Item File in Inventory
Management) is used for posting of both sales and credit memos.
When a miscellaneous item is entered using Items in Inventory Management, the
inventory account entered for the item in I/C must be of type "misc costs applied" in the
Inventory Accounts File in I/C. By choosing the correct "misc costs applied" account
for each miscellaneous item, you can avoid having to make after-the-fact journal
adjustments for miscellaneous item sales and credit memos posted from P/I.
If the miscellaneous item sold is not merchandise (e.g. labour charges, service charges,
etc.), the "misc costs applied" account would usually be a contra-expense account.
The exact account to use would depend upon your particular business situation, based
upon the advice of your accountant.
If the miscellaneous item sold is merchandise, then the set-up of the "misc costs
applied" account would depend upon how these items are being handled with respect to
General Ledger. For example, if the purchase of the miscellaneous merchandise is
entered through Accounts Payable, then the "misc costs applied" account should be the
account used in Accounts Payable as the expense distribution for the purchase. Again,
the exact account to use would depend upon your particular business situation, based
upon the advice of your accountant.
For drop-shipped miscellaneous items, the G/L postings are as follows:
Sales:
DR Drop-ship clearing acct in the P/I Control File
CR Item's expense account
Credit memos:
Not-applicable - line items for credit memos may not be drop-shipped.
Professional Invoicing
User Manual
Post Invoices
18.6
Sales of miscellaneous items are handled like sales of regular inventory items with
respect to the drop-ship clearing account.
For a drop shipped miscellaneous item credit memo, retain your hand-written
documents of the transaction for any adjustments you might wish to make through
General Ledger. (General Ledger dollar amounts for miscellaneous item drop shipped
credit memos cannot be tracked in Professional Invoicing.)
____________________
Professional Invoicing
User Manual
Post Invoices
18.7
Chapter 19
Back Order Reports
Introduction
Back order reports are used to obtain a listing of those line items on orders which have
back ordered amounts. Using this selection, you can print two types of back order
reports:
If Inventory Management is used
1. Back Orders by Item Report
This report may be printed either for all inventory items or for selected inventory items.
For each inventory item reported on, the report shows all line items which contain a
back ordered amount for the inventory item.
You may restrict this report so that an inventory item (and its associated line items) are
only printed if the item is now available in inventory. This allows you to use this report
to determine which back ordered line items can now be filled.
2. Back Orders by Customer Report
Professional Invoicing
User Manual
Back Order Reports
19.1
This report may be printed either for all customers or for selected customers. For each
customer reported on, the report shows all line items for that customer which contain a
back ordered amount for some inventory item.
You may restrict this report so that an inventory item is only printed if the item is now
available in inventory. This allows you to use this report to determine which back
ordered line items (for specified customers) can now be filled.
If Inventory Management is not used
1. Back Orders by Item Report
This report may be printed either for all items (goods) or for selected items. For each
item reported on, the report shows all line items which contain a back ordered amount
for the item.
2. Back Orders by Customer Report
This report may be printed either for all customers or for selected customers. For each
customer reported on, the report shows all line items for that customer which contain a
back ordered amount for some item.
To Begin
From the P/I menu, select Back order reports, then select a back order report by item
or by customer.
By Item
This screen appears:
Professional Invoicing
User Manual
Back Order Reports
19.2
Enter the following information:
[?] 1-13. Items to show
Enter up to 13 different item numbers to print on the report or use the option:
Option: [F1] to show back orders for "All" items
If you want to print the back order report for a few items only, you can end the selection
at any time by pressing [Tab] instead of entering another item number.
Format: 15 characters for each item number
14. Report format
Answer [F] for full format (shows all details for the back orders for the selected items).
Answer [B] for brief format (shows only selected information about these back orders,
with a single line per item).
Format:
1 character
If I/C is used, the following two fields appear:
Professional Invoicing
User Manual
Back Order Reports
19.3
15. Print avail items only ?
If you answer Y, then a line item will only appear on the report if it contains a back
ordered amount and the inventory item back ordered is now available in inventory. If
you answer N, then line items will appear on the report whether or not the item is
available in inventory.
[?] 16. Warehouse
If you are using the multi-warehousing feature of the Inventory Management package,
enter a warehouse code to print back orders for that warehouse only, or use the option:
Option:
[F1]
to print back orders for "All" warehouses
Format:
2 characters
By Customer
From the Back order reports menu, select By customer.
[?] 1-13. Customers to show
You can press [F1] to show "All" customers, or enter up to 13 different customer
numbers. If you decide to print the back order report for a few customers only, you
can end the selection at any time by pressing [Tab] instead of entering another
customer number.
Format:
12 characters for each customer
14. Report format
Answer [F] for Full format (shows all details for the back orders for the selected
customers). Answer [B] for Brief format (shows only selected information about these
back orders, with a single line per customer).
Format:
1 character
If I/C is in use, the following field appears:
15. Print avail items only ?
If you answer Y, then a line item will only appear on the report if
it contains a back ordered amount and the inventory item back ordered is now available
in inventory. If you answer N, then line items will appear on the report whether or not
the item is available in inventory.
____________________
Professional Invoicing
User Manual
Back Order Reports
19.4
Chapter 20
Invoice History
Introduction
Use this selection to print or view invoices in the Invoice History File. You can use this
selection only if you selected to "Keep invoice history" in the P/I Control File.
To Begin
From the P/I menu, select Invoice history. From the menu which appears, select View.
Viewing Invoice History
This screen displays:
Professional Invoicing
User Manual
Invoice History
20.1
You can view invoices by invoice number, by customer number, or by customer name.
Enter the starting invoice number for the invoices you want to view, or use one of the
options:
Options: [F1]
[Enter]
to start from the first invoice on file
to view invoices by customer.
Follow the screen instructions.
If you pressed [Enter], enter the starting customer number for the invoices you want to
view, or use the option:
Option: [F1]
for the first customer who has invoices on file.
Follow the screen instructions.
Format:
6 characters
The screen now appears as:
The invoices are listed on the screen.
If you are using the Job Cost package, you can press [F2] to display the job numbers for
the invoices shown on the screen. You can then press [F2] again to redisplay the
purchase order numbers.
Press [F1] to view additional invoices. You can start a new selection of invoices by
pressing [Tab].
To see more detail of an invoice, enter the screen line number (the number to the left
of the invoice number).
Professional Invoicing
User Manual
Invoice History
20.2
Header Information
The full header information for the selected invoice displays:
Press [Tab] to end viewing this invoice, or press [F1] to view the line items for this
invoice.
Line Item Detail
If you press [F1], you see:
Professional Invoicing
User Manual
Invoice History
20.3
Either press [Tab] to go back to the previous selections, or select the screen line number
(to the left of the line number) for detailed inquiry into one of the line items shown.
The screen below is for a "goods" line item.
Professional Invoicing
User Manual
Invoice History
20.4
Press [Tab] to select another line item; or press [F2] to view totals for this invoice.
To end viewing this invoice, press [Tab].
When through viewing invoices, press [Tab] twice.
Printing the Invoice History Report
From the Invoice history menu, select Print.
You see:
Professional Invoicing
User Manual
Invoice History
20.5
Enter the following information:
[?] 1. Starting customer #
[?] 2. Ending customer #
Enter the range of customers for whom to show invoices. Follow the screen
instructions.
Format:
12 characters for each field
3. Starting invoice #
4. Ending invoice #
Enter the range of invoice numbers for which to show invoices. Follow the screen
instructions.
Format:
999999 for each field
[?] 5. Starting invoice date
[?] 6. Ending invoice date
Enter the range of dates for which to show invoices. Follow the screen instructions.
Professional Invoicing
User Manual
Invoice History
20.6
Format: MMDDYY for each field
7. Starting bill group
8. Ending bill group
Enter the range of bill groups for which to show invoices. Follow the screen
instructions.
Format:
3 characters for each field
9. Recurrence ref #
Enter the recurrence reference number (if any) of the invoices you want to show, or use
one of the options:
Options:
[F1]
to show invoices for "All" recurrence reference numbers
[Enter] for "None"
Selecting a recurrence reference number here allows you to show all invoices that were
the result of a specific recurring bill.
Format:
6 characters
NOTE: The next two fields display only if you use sales reps in your business, as
specified in the A/R Control File.
[?] 10. Starting sales rep
[?] 11. Ending sales rep
Enter the range of sales rep for which to show invoices. Follow the screen instructions.
Format:
3 characters for each field
12. Print in order by
Enter the order in which to show the invoices
[C]
[I]
[B]
[S]
[J]
Customer number
Invoice number
Bill group
Sales rep (if sales reps are used)
Job (if you are using the Job Cost package)
If you selected in a previous field to print invoices for only one customer, the "print in
order by customer number" option does not appear; similarly for invoice number, bill
group, and sales rep. If there is only one choice left, it displays automatically and the
cursor moves to the next field.
Professional Invoicing
User Manual
Invoice History
20.7
NOTE: If you select to print in order by invoice number, grand totals will not appear on
the report.
Format:
1 character
13. # of header lines
Enter the number of header lines to show per invoice: [1] or [2].
Format:
9
14. # of line item lines
Type [1] to show 1 line per line item, [0] for zero lines per line item, [2] for 2, or [3] for
3. Or use the option:
Option:
[F1]
to show "All" information for each line item
If you enter [0], no line item information will be shown and "N/A" appears in the
"INVOICE TOTALS ?" field.
Format:
9
15. Invoice totals ?
Type Y to show the dollar total information for each invoice and for all invoices
selected; otherwise, type N. If you have an invoice with no line items, totals for that
invoice will not be shown.
16. Purge this history ?
Type Y to purge the selected invoices from the Invoice History File, or press [Enter] to
leave them on file.
If you select all of the invoices currently in this file for purging, the file is "cleared" and
its size is reduced to zero. Selecting to purge only some of the invoices does not
reduce the size of the file; the invoices selected only become inaccessible.
If you want to purge some invoices to recover disk space, then after you purge here, use
Rebuild a file on the Invoice History File to regain the disk space. Refer to the
appendix titled File Utilities at the end of this manual for details.
17. Each (customer, invoice, bill group, sales rep) on a new page ?
Do you want each item you are showing "in order by" to begin on a new page? Answer Y
to begin each item on a new page, or answer N to show the items consecutively, one
after another.
If you selected "zero lines per line item" in 14 above, this field does not appear.
Professional Invoicing
User Manual
Invoice History
20.8
NOTE: Only invoices that have line items will begin on a new page.
If you are using the Job Cost package, and you have selected to show invoices in order by
Job number, the last selections on the screen are:
[?] 18. Starting job
[?] 19. Ending job
Enter the range of jobs to show. Follow the screen instructions.
Format:
7 characters for each field
Make any desired changes as usual.
____________________
Professional Invoicing
User Manual
Invoice History
20.9
Chapter 21
Invoice Formats
Introduction
This selection allows you to tailor Professional Invoicing to work with your invoice
forms. You don't have to change to an unfamiliar or undesirable invoice form in order
to use this package, you can make P/I print on your current invoice form or on any other
invoice form you wish; including letterhead or plain paper.
You can even arrange it so that you can print the same invoice in two or more different
formats, to be used for different purposes -- for instance, one format to send to the
customer and another format to use internally.
P/I comes with several predefined invoice forms, as listed below. These predefined
forms are in the Form file (PIFRMF). When you install P/I, the Form file is also
automatically installed, if there is not already one present.
If any of the predefined forms supplied with P/I are sufficient for your needs, you need
not continue with this chapter.
When you print invoices, either immediately or using the Print invoices and quotations
selection, you can specify a form ID to be used. The form must exist in the Form file.
Some of the predefined forms supplied with P/I include:
Form ID
Description
Professional Invoicing
User Manual
Invoice Formats
21.1
PLAIN
11-34
12-34
13-34
Invoice
Invoice
Invoice
Invoice
- plain paper, single line
Form #11-34
Form #12-34
Form #13-34 (formerly 10-07)
For a full list of all predefined forms, use the Invoice formats (Print) selection.
If you select to use a different form, you can make a copy of an already existing form
that is similar to the form you wish to use and modify the copy. You may also design
your form "from scratch", but this is not recommended.
Virtually, an unlimited number of forms can be defined with this selection. Invoice
formats allow you to print almost any information field in the P/I invoice and quotation
Header, Line Item, Tax, and Auxiliary files.
We suggest that you first become familiar with the predefined forms provided with this
package. Then use this chapter to modify the predefined forms as required or design
your own forms.
Definitions
Described below are definitions for certain terms used in this selection and this chapter.
NOTE: Since invoices, credit memos, and quotations are essentially the same, we will
use the terminology "invoice" to refer to all types of documents.
Header, Line Item, and Totals Groups
Each form consists of three information groups:
Header
Line item 1
Line item 2
Line item 3
Etc.
Totals
The Header is the top part of the form and typically includes information that relates to
the invoice in general (for example, the invoice number, invoice date, customer's name
and address). Header information always prints before Line Item and Totals
information.
The Line Items group is the middle part of the form, and typically includes information
on each line item on the order (such as the goods/service number and description,
quantity ordered, and price). Line Item information always prints after Header
information and before Totals information.
Professional Invoicing
User Manual
Invoice Formats
21.2
The Totals is the bottom part of the form, and typically includes the invoice total,
invoice discount percent, and taxes. Totals information always prints after Header and
Line Item information.
Paginated
A form is either paginated or not paginated.
A paginated form is one that may have multiple pages, where each page is the same
length. Pre-printed forms and forms that are separated from one another by
perforations are examples of paginated forms.
A form that is not paginated has no specific length. Continuous paper on a roll, such as
that used on a calculator, is an example of a non-paginated form.
Typically, "invoices" are paginated.
In order to handle laser printers, you can also identify whether a form feed is needed
after each page. As laser printers are "page" driven (compared to dot matrix printers
which are character driven), they must be told when to eject the page.
Lines and Columns
The length of a paginated form is defined by the number of lines on the form, from the
top of the form to the bottom. If printing is done at 6 lines per inch, an 11-inch form
has 66 lines.
When defining a paginated form, you specify the starting line number of the Header
information, the starting and ending line numbers of the Line Item information, and the
starting line number of the Totals information.
When defining each data field to be printed on a paginated form, you specify the group
of the field (Header, Line Item, or Totals), its line number within the group, and the
starting column number where it is to print.
The line number of a field is its print line number starting at the first line of that group.
For example, if you specified that the Line Item information starts on line 10 of your
form and ends on line 40, you are allowing for 31 lines of Line Item information. The
line number of a Line Item field must be between 1 and 31.
The column number of a field is simply the number of spaces to the right of the left
margin of the form, beginning at 1.
To Begin
Select Setup -> Invoice formats from page 2 of the P/I menu.
Entering Forms
Professional Invoicing
User Manual
Invoice Formats
21.3
From the Invoice formats menu select Enter. This is the screen you see:
On
this
screen, you identify the form with an ID, type, and description, and define its general
appearance. This is the first of two screens used for this purpose.
From this screen, you can work with both new and existing forms. If a form exists for
the form ID and type you specify, that form appears and is available for changes or
deletion.
Enter the following information:
[?] *1. Form ID
Enter the ID for this form, or use the option:
Option:
[F1]
to scan through the existing forms on file
Format: 5 characters
[?] *2. Type
Enter the character that designates the type of invoice for which this form will be used.
The types are:
[I]
[C]
[Q]
invoice
credit memo
quotation
You may also use the option:
Professional Invoicing
User Manual
Invoice Formats
21.4
Option:
[F1]
to display the next type on file for this form ID
Usually, you would define all types for each new form ID. The predefined forms
provided with P/I include all 3 types.
If the type you specify already exists for the form ID, the information for that form type
displays and may be changed or deleted. You also may use one of these options:
Options:
[F2]
to display the form as it currently exists (see the section titled
Displaying a Form later in this chapter)
[F5]
to print a test form, substituting "X's" or "9's" for each field that
you have selected to print (see the section titled Testing a Form
later in this chapter)
[F6]
to copy an existing form to a new form (see the section titled
Copying a Form later in this chapter)
3. Description
Enter the description of this form type.
Format: 30 characters
4. Width
Enter the number of columns that may be printed on a form. Your entry here is
determined by the width of your form, as well as the setting on your printer for
characters per inch (or "pitch").
Format: 999 (max = 132)
5. Paginated ?
Answer Y if the form has a specific length that does not change, regardless of the
information to be printed on it.
Answer [F] if the form has a specific length that does not change, regardless of the
information to be printed on it, and requires a form feed to be sent to eject the page.
This is most commonly used by laser printers as discussed earlier in this chapter under
the sub-section titled Paginated.
Answer N if the length of the form varies, depending upon the amount of information
printed.
If you answer Y or F to "Paginated ?", the following fields appear:
6. Length
Professional Invoicing
User Manual
Invoice Formats
21.5
Enter the number of lines on each form. Your entry here should represent the entire
length of one form, including any area at the top and bottom of the form that you wish
to leave blank.
Besides the length of the form, the number of lines you enter here is determined by the
setting on your printer for the number of lines per inch.
Format: 999
7. First line for headers
Enter the first line number on which header information is to print.
Format: 999
8. Headers 1st page only ?
Answer Y to print header information on only the first page of the form. Answer N to
print it at the top of every page of the form.
9. First line for line items
Enter the line number on which the first line item is to print. Your entry must be higher
than the line number specified for "First line for headers" (field number 7).
Format: 999
10. Last line for line items
Enter the line number on which the last line item is to print. Your entry must be higher
than the line number specified for "First line for line items" (field number 9).
Format: 999
11. First line for totals
Enter the first line number on which totals information is to print. Your entry must be
higher than the line number specified for "Last line for line items" (field number 10), and
less than the number of lines specified for "Length" (field number 6).
Make changes as usual. For an existing form, you are then asked "View/change form
layout ?". Answer Y if you wish to review or work with any of the fields to be printed on
the form.
After making any changes, the second screen appears as follows:
Professional Invoicing
User Manual
Invoice Formats
21.6
Enter the following information:
13. Maximum # of rows per line item
Enter the maximum number of rows to print per line item, from 1 to 12. This number
cannot be larger than the difference between the numbers entered for first and last row
for line item printing (fields 9 and 10) entered on the first screen.
For instance, if you were designing a very short form and had specified above that the
first row for line item printing is 9 and the last row is 15, the rows per line item could
not be larger than 7 (15 - 9 + 1).
NOTE: The P/I package allows you to have "services" line items and "notes" line items,
each with up to 10 lines of description. Specify enough rows to print the longest note
or description of services you want to show on the invoice. This is the maximum
number of rows per line item. If a line item consists of less than this, only the lesser
number of rows will be printed.
Format: 99
14. Skip a row between line items ?
If the number of rows per line item is 1, either answer Y to skip a row between line items
(double-space them) or N to print them single-spaced.
Professional Invoicing
User Manual
Invoice Formats
21.7
If the number of rows per line item is 2 or more, this is automatically set to Y and cannot
be changed.
15. Split line items between pages ?
If the number of rows per line item is 2 or more, answer Y to allow line items to be split
between pages. Or answer N to keep all information for one line item on the same
page. If the number of rows per line item is 1, "(Not applicable)" displays.
16. Use pre-printed forms ?
If this invoice format is to be used with pre-printed forms, answer Y; otherwise, answer
N. If you answer Y, you will be prompted to mount pre-printed forms on the printer
during the Print invoices and quotations selection.
17. Order of printing of line items
Press [Enter] to print the line items in sequence number order, or enter [L] to print
them in order by line type (goods, services, and notes).
Enter the information as follows:
18. First type of line item to print
Select the type of line item you want to print first on the invoice: [G] (Goods), [S]
(Services), or N (Notes).
19. Second type of line item to print
Select the type of line item you want to print next on the invoice (either of the 2
remaining line types from above).
20. Print line type sub-totals ?
Each line item has a "line item net amount" which is the amount you are billing the
customer for that line item. Answer Y to print a sub-total of the net amounts for all
Goods after the Goods line items, and a sub-total for the net amounts of all Services
after the Services line items.
If you answer N in this field, "Not applicable" appears in the next two fields.
21. Description of goods sub-totals
If you answered Y to the previous prompt, enter the title which you want to print on the
same row as the "Goods Subtotal Amount", or use the option:
Option:
[F1]
to print "Total Goods" as the title
Format: 12 characters
Professional Invoicing
User Manual
Invoice Formats
21.8
22. Description of services sub-totals
If you answered Y to field 20, enter the title which you want to print on the same row as
the "Services Subtotal Amount", or use the option:
Option:
[F1]
to print "Total Services" as the title
Format: 12 characters
When defining a new form, or if you specified to view the layout of an existing form, the
screen appears as follows:
On
this
screen, you describe each field to be printed on the form. Up to 200 fields may be
selected to print on each form.
For each field, enter the information as follows:
1. Field group
Enter [H] if the field is part of the Header group, [L] for the Line Item group, or [T] for
the Totals group. You may also use one of the options:
Options:
[F1]
to scan through the fields on file for this form
[F2]
to display the form as it appears so far (see the section titled
Displaying a Form later in this chapter)
2. Line number
Professional Invoicing
User Manual
Invoice Formats
21.9
Enter the line number on which this field is to print, or use one of the options:
Options:
[F1]
to display the next field on file within this group
[F2]
to perform a calculation (see the section below titled
Calculations for details)
For a paginated form, enter the line number within the group on which this field is to
print. For example, if you specified that the first line for headers is 4 and the first line
for line items is 10, there are 6 lines available for the header group. This means that
line numbers 1 through 6 would be valid entries here.
For a non-paginated form, any line number from 1 to 999 is valid.
3. Column
Enter the starting column in which to print this field, or use the option:
Option:
[F1]
to display the next field on file within this group that is on or
above the specified line number
[F2]
to insert a new line within this group
[F3]
to delete the current line within this group
Your entry may not be greater than the width of the form.
At "Field number", the screen displays as follows:
Professional Invoicing
User Manual
Invoice Formats
21.10
The window that displays at the bottom of this screen shows the first 27 fields available
for printing in the Header and Totals area of your form. (Your screen may appear
slightly different.) There are several more windows showing additional Header and
Totals fields that you may select to print.
To see the additional selections, press [PgDn]. To return to a previous window, press
[PgUp].
If you had previously selected any of these fields to print on this form, an asterisk
appears next to the field number.
If you specify a "Field group" of Line Items, different windows display, showing only Line
Item fields.
Refer to the section titled Form Fields near the end of this chapter for a description of
each field displayed in the windows for Headers and Totals, and Line Items.
Continue entering the information as follows:
4. Field number
Enter the number of the field that you wish to select, or use one of the options:
Professional Invoicing
User Manual
Invoice Formats
21.11
Options:
[F1]
to display the next field on file that is on or after this line
number and column number
[Enter] to enter a literal (text) instead of a field number (see the
section titled Literal Fields later in this chapter)
5. Conditional print ?
Answer Y if this field is to print only when some field (to be specified next) meets a
specific condition. Answer N if this field should always print.
If you answer Y, these additional fields appear:
When Field-#
When the field selection window appears, enter the number of the field upon which
printing is dependent. Use the [PgUp] and [PgDn] keys to see additional selections.
is
(value)
Enter the conditions that this field must meet in order for the field being defined to
print.
First, enter one of the following abbreviations:
[E] [Q]equal to
[N] [E]
not equal to
[G] [T]
greater than
[L] [T]
less than
[G] [E]greater than or equal to
[L] [E]
less than or equal to
Then enter the value that the dependent field must contain to complete the condition.
Press [Enter] to indicate a value of zero (for a numeric or date field) or spaces (for an
alphanumeric field).
Printing a Field Under More Than One Condition
If you need to print a field when either one condition or another is met, define the field
specifying the first condition as described above. Then define the field again, using
the same line number, column number, and field number.
After entering the field number, a message informs you that the field is already defined
and you are asked if you wish to define a duplicate. Answer Y and complete the
definition, specifying the other condition under which the field is to print.
Professional Invoicing
User Manual
Invoice Formats
21.12
This allows printing under one condition or the other. There is no way to request
printing when both conditions are true.
Printer features
Printer features are used to advise the printer to do something special; such as change
type size, turn bold on, turn bold off, etc. (For further details on setting up printer
features refer to the chapter titled Printers in the System Functions manual.)
To turn a printer feature on select [2] (Printer feature) at the 4. Field number prompt.
The screen appears as follows:
Enter the following information:
5.
Repeat
Enter the number of times the printer feature you enter below will be repeated.
The most common purpose for entering a value greater than 1 is if you want to
physically print a special character (such as graphics) more than once.
Format: 999
[?] 6. Feature code
Enter a valid printer feature code or use the option:
Option:
[F1]
Professional Invoicing
User Manual
to display the next printer feature code on file.
Invoice Formats
21.13
Format:
5 characters
If you are turning a printer feature on such as bold, condensed print, or italics, you will
want to start the next printed field on top of the printer feature code since the printer
feature code doesn't actually print anything, nor does it take up space on the form.
Helpful Hint
In version 6.5 Plus and later, many of the field sizes were expanded (dollar amounts
etc.). This can cause problems if you have existing forms but still want to take
advantage of the longer fields.
One thing you might want to try is setting up a printer feature for condensed print, and
a printer feature that returns you to a normal print mode. When setting up a field that
is longer than the space on your form allows, you can enter the printer feature code to
switch to condensed print, print the field, and then enter the printer feature code to
return to normal print mode.
Alternatively, you may even want to set up a printer that prints in condensed print only,
and then set up your form so that it is spaced accordingly.
Alphanumeric, Numeric, Date, and Literal Fields
The remaining fields control the appearance of data on the form. The fields requested
depend on the type of field you selected in "Field number" (field number 4). There are
four different types:
Alphanumeric
fields may contain any combination of letters, digits, and
special symbols.
Numeric
fields only contain digits, along with any decimal points, minus
signs or parentheses (for negative numbers), and commas.
Date
fields only contain dates.
Literal
fields contain text that you type. Most literal fields are defined
by pressing [Enter] at "Field number", rather than specifying a
field number.
Alphanumeric Fields
The following two fields display for each alphanumeric field:
6. Length
Enter the number of characters you want to print in this field, up to the maximum
number shown, or use the option:
Professional Invoicing
User Manual
Invoice Formats
21.14
Option:
[Enter] for the maximum length of the field
7. Justify
Enter [R] to "right-justify" the characters, or use the option:
Option:
[Enter] for no justification, to print the characters as entered
If you specify "right-justify", the characters will be aligned with the right-hand margin of
the space for this field.
Numeric Fields
The following five fields display for each numeric field:
6. Integer digits
Enter the number of integers (digits to the left of the decimal point) you want to print in
this field, up to the maximum shown, or use the option:
Option:
[Enter] for the maximum shown
Format: 99
7. Decimal digits
(If the field has no decimal places, "(Not applicable)" displays here.)
Enter the number of decimal places you want to print, up to the maximum shown, or use
the option:
Option:
[Enter] for the maximum shown
8. Commas ?
(If the field has fewer than 4 integer digits, "(Not applicable)" displays here.)
Answer Y to use commas when printing this field.
9. Leading zeros ?
(If you specified to use commas, "(Not applicable)" displays here.)
Answer Y to include any beginning zeros when printing this field.
10. Negatives ?
(If the field cannot be negative, "(Not applicable)" displays here.)
Enter the letter that designates how negative numbers are printed, as follows:
Professional Invoicing
User Manual
Invoice Formats
21.15
[R]
[L]
[F]
[C]
[P]
minus sign to the right of the number [99.99-]
minus sign to the left of the number, in a fixed position [- 99.99]
minus sign to the left of the number, in a floating position [-99.99]
"CR" to the right of the number [99.99CR]
enclose number in parentheses [(99.99)]
When you complete entry of a numeric field, the print format of the field as you have
defined it is displayed on the screen.
Date Fields
The following field displays for each date or time field:
6. Format
For a date field, select the format to use when printing this field, as follows:
[1]
[2]
[3]
[4]
[5]
MM/DD/YY (03/31/13)
MMM DD YY (Mar 31 13)
MMM DD (Mar 31)
DD-MMM-YY (31-Mar-13)
Month DD, YYYY (March 31, 2013)
When you complete entry, the print format of the date or time as you have defined it is
displayed on the screen.
Literal Fields
The following three fields display for each literal field:
6. Length
Enter the number of characters to be used when printing this field, up to the maximum
shown, or use the option:
Option:
[Enter] for the maximum shown
Format: 99 (max = 80)
A total of 1000 characters are available for printing all literal fields on a form, with a
maximum of 80 characters for each. (A message displays when fewer than 150
characters are available.)
7. Text
Enter the exact text to be printed, up to the length specified in field number 6.
8. Print on
Professional Invoicing
User Manual
Invoice Formats
21.16
This field applies only if you are using Kits Plus. Enter [L] to print the literal text only
for line items that are not component items of kits. Enter [C] to print the text only for
component items. Enter [B] to print the text for both line items and component items.
Calculations
The calculations functionality built into forms, allows you to compute and store up to 20
figures for later printing on your forms using the "Calculation register" field.
Calculations are rarely needed for normal forms printing. If you are using a standard
format or find no need to make any special calculations, please skip this section.
There are basically two steps to doing a calculation:
1. Enter one or more calculations to gain a desired figure(s).
2. Enter the calculation register(s) to print in your form layout.
To make a calculation, press [F2] at the Line ? prompt. The screen appears as follows:
Enter the following data:
2. Sequence #
Enter the sequence in which this calculation is to occur. This is the logical order in
which the calculations are made.
The purpose of this field is to allow you to re-use a calculation register once you are
finished with it.
Format:
999
Professional Invoicing
User Manual
Invoice Formats
21.17
3. Register #
Enter the calculation register (from 1 to 20) to store the amount computed from the
equation entered below.
This register can then later be used to print using the Calculation register field entry.
4. Operand 1
Enter the first operand field to use in the calculation from the window displayed, or use
the option:
Option:
[Enter] to enter a constant
5. Operator
Enter one of the following equation operators:
[+]
[-]
[*]
[/]
[D] [I] [V]
Add Operand 1 to 2
Subtract Operand 2 from 1
Multiply Operand 1 by 2
Divide Operand 1 by 2
Divide Operand 1 by 2, but store only the integer portion of the resulting
figure; i.e. 8 divided by 5 equals 1.6 but only 1 is stored in the calculation
register (the .6 is stripped off).
[M] [O] [D] Modulus division of operand 1 by 2, storing the remainder in the
calculation register; i.e. 10 divided by 3 is 3 with 1 left over -- the 1 is
stored in the calculation register.
[I] [N] [T] Store the integer portion of Operand 1 in the calculation register
(Operand 2 is skipped); i.e. 123.54 is stored as 123 in the calculation
register.
[F] [R] [C] Store the fraction portion of Operand 1 in the calculation register
(Operand 2 is skipped); i.e. 123.54 is stored as .54 in the calculation
register.
[R] [N] [D] Round off Operand 1 and store the resulting figure in the calculation
register. When selected you will be asked for a second operand which is
the digit to round off to; valid responses to the second operand are[1] for
the 1st decimal, [2] for the 2nd decimal, [-][1] to tens, [-][2] to hundreds
etc..
6. Operand 2
Enter the second operand field used in the calculation from the window displayed, or
use the option:
Option:
[Enter] to enter a constant
The following are a few key things to keep in mind about using calculations:
1. When printing, the calculation registers are reset for each form section.
Professional Invoicing
User Manual
Invoice Formats
21.18
2. The sequence number is used to determine the order in which the calculations
occur.
3. Calculations from headers, lines, and totals cannot be used interactively.
4. Calculation registers are not actually printed until you enter them in the
header, line, or totals sections using the Calculation register field.
Displaying a Form
While entering a form, you can press [F2] to see what the form looks like so far. Follow
the screen instructions.
If one field overlaps another field, either question marks or asterisks appear in the area
of overlap.
Question marks display if none of the overlapping fields are conditionally printed, in
which case you probably need to change the position of a field.
Asterisks display if at least one of the overlapping fields is conditionally printed. In this
case, you may wish to review the definitions of the overlapping fields to ensure that
they do not print under the same conditions.
Testing a Form
A test form can be printed that substitutes "X's" or "9's" for each field that you have
selected to print. You can print the test on the actual form you intend to use, or on
plain paper. (When using printing an invoice, you can also print a test alignment form.)
To test your form, at the first Forms screen, display the form you wish to test and press
[F5]. When the printers list displays, select the printer on which this form is to be
printed.
Copying a Form
You can rapidly produce a new form by copying an existing form that is similar to the
new one. After copying the form, tailor the new form by changing the form and field
information as necessary.
To copy a form, at the first Forms screen, display the existing form that you wish to copy
and press [F6].
A window displays for you to enter the following information:
Copy to form ID
Enter the ID of the new form. The form ID will be automatically created during the
copy process if it does not already exist.
Professional Invoicing
User Manual
Invoice Formats
21.19
Format: 5 characters
Copy to type
Enter the character that designates the type of invoice for which this new form will be
used. The types are:
[I]
[C]
[Q]
invoice
credit memo
quote
You may also use the option:
Option:
[F1]
to copy "All" types of the existing form ID to the same types for
the new form ID. If the type you specify already exists for the
new form ID, the form cannot be copied and an error message is
displayed.
After the copy process is complete, you may change the new form as needed.
Printing a Forms List
This selection prints a report that lists the forms you have defined. You may select to
print a specific form type or all form types for the forms.
For each form type on the list, you are shown general information (description, form
width, if form is paginated, etc.). The field definitions for each form type may also be
optionally printed.
To print the list, select Print from the Forms menu.
On the screen that appears, enter the following:
[?] 1. Starting form ID
[?] 2. Ending form ID
Enter the range of form ID's for which to print the list. Follow the screen instructions.
Format: 5 characters
3. Type to print
Enter the form type to print for the forms, as shown on the screen, or use the option:
Option:
[F1]
to print "All" form types
4. Print fields ?
Professional Invoicing
User Manual
Invoice Formats
21.20
Answer Y to print the information defined for each field on a form. If you answer [N],
only the general information about a form is printed.
NOTE: Many fields are defined for each form type of the predefined forms supplied
with P/I. Selecting to print fields for several types may require a significant amount of
time and paper.
Loading Standard Forms
Samco provides a number of standard forms which you can use. To make these forms
available for use you must first run the Load function from the Invoice formats menu.
The screen displays as follows:
Answer Y to continue with the import, or N to cancel.
For a sample listing of the pre-defined forms use the Invoice formats (Print) function.
Professional Invoicing
User Manual
Invoice Formats
21.21
Printing a Field Location Grid
The field location grid is a tool to help you lay out your form properly. When you print
this grid right on your form, you will see the exact rows and columns of every piece of
invoice information. You will then be able to specify the exact row and column for
each piece of information when you're requested to do so later.
To begin, select Grid from the Invoice formats menu. Enter the following information
on the screen displayed:
1. # of rows on the form (top to bottom)
Enter the number of rows to appear on the grid. The number you enter here
corresponds to the number of rows on your form.
You can also use the option:
Option:
[F1]
Format:
99
to use 66 rows, which corresponds to regular 8 1/2" x 11" paper,
6 rows per inch, with no top or bottom margins.
2. # of print columns (left or right)
Enter the number of print columns to appear across the page on the grid, or use the
option:
Option:
[F1]
Format:
999
to use 80 columns, which corresponds to regular 8 1/2" x 11"
paper, 10 character per inch, with 1/4" left and right margins.
You then see the following screen:
Professional Invoicing
User Manual
Invoice Formats
21.22
The printer should always be ready to print in location 1,1 (that is row 1, column 1).
Type [D][O][N][E] and the grid prints.
After the grid is printed, you are asked whether you want to print it again. If you
answer Y, another grid prints; if N, you are asked to mount regular paper.
Form Fields
The following is a description of the various fields available when designing forms.
The field descriptions are arranged in two groups: Header/Total fields, and Line Item
fields.
Header fields are those which print at the top part of the form, while Total fields print
at the bottom part. Header and Total fields are fields that relate to the invoice in
general, such as reference number, date, customer name, tax amounts, and payment
information.
Line Item fields print in the middle part of the form, between the Header and Total
fields. Line Item fields relate to each line on the invoice, such as item number,
description, quantity, and price.
Header/Total Fields
Field name
Description / Notes
Blank line
When this field is selected, no other data is printed on the
line, even if it is defined.
Professional Invoicing
User Manual
Invoice Formats
21.23
Printer feature
Turns a printer feature on or off
Suppress line
Used to suppress the printing of an entire line when a
specified criteria(s) is met.
Register
Used to access register values stored during calculation
routines.
Apply-to number
Apply to number for credit memos
Balance due
Amount that remains due on invoice
Bank route number
Bank route number from totals screen for cash received.
Bill reference #
Reference number for invoice or credit memo (does not
apply to quotes -- see Quote ID)
Bill group
Group ID from invoice header
Bill-to name
Customer name. Entered as line 1 for miscellaneous
customer.
Bill-to address 1
bill to address line 1. Entered as line 2 for miscellaneous
customer.
Bill-to address 2
Bill to address line 2. Entered as line 3 for miscellaneous
customer.
Bill-to address 3
Bill to address line 3. Entered as line 4 for miscellaneous
customer.
Cash amount rcvd
Amount of cash (or check) received with invoice.
Check number
Zero = cash
Comment line 1 - 5
Entered when invoice is entered
Commis amount
Invoice commission amount, net after discount
Commis percent
Invoice commission percent
Commis percent type
For customer or sales rep default: P = price, M = margin.
For percent override: D = directly entered.
Company display name
Company display name
Company report name
Company report name
Company address 1 - 3
Company address lines 1 through 3
Professional Invoicing
User Manual
Invoice Formats
21.24
Header/Total Fields (continued)
Field name
Description / Notes
Company phone number
Company phone number
Current user ID
User ID of the person printing the invoice
Cust backorder flag
Y = customer allows back orders
Cust balance
Customer balance, including unposted balance
Cust comment
Comment from Customer file
Cust credit rating
Credit rating from Customer file
Cust number
Customer number
Cust part ship flag
Customer accepts partial shipments
Cust type
Customer type from Customer file
Cust contact (1 - 2)
Contact 1 or 2 from Customer file
Cust phone (1 - 2)
Phone 1or 2 from Customer file
Cust PO number
Customers purchase order number
Deliv-to number
Ship to address number / code.
Deliv-to name
Ship to address name. Entered as line 1.
Deliv-to address 1
Ship to address line 1. Entered as line 2.
Deliv-to address 2
Ship to address line 2. Entered as line 3.
Deliv-to address 3
Ship to address line 3. Entered as line 4.
Discount amount
Invoice discount amount
Discount percent
Invoice discount percent
Doc. type (spelled)
I = Invoice, C = Credit Memo, Q = Quotation
Entry user ID
User ID of the person who entered the invoice
Freight amount
Freight amount
Professional Invoicing
User Manual
Invoice Formats
21.25
Header/Total Fields (continued)
Field name
Description / Notes
Freight taxable flag (1 - 15)
type
Taxable status of freight charges for specified tax
Freight tax amount (1 - 15)
Tax charged on freight for specified tax type
Invoice date
Date assigned to invoice when printed. System date
used if blank.
Invoice number
Number assigned to invoice when printed. Blank if
invoice not printed.
Line total gross amt
Total of all line items before discount.
Line total less disc.
Total of all line items after discount
Misc customer flag
Y = miscellaneous customer
Misc amount
Miscellaneous charges amount
Misc taxable flag (1 - 15)
Taxable status of miscellaneous charges for specified
tax type
Misc tax amount (1 - 15)
Tax charged on miscellaneous charges for specified
tax type
Number of line items
Number of line items on invoice, including notes
Page number
Form page number
Profit centre
Profit centre applied to invoice.
Sale amount
Undiscounted invoice amount
Sales rep
Sales rep for invoice
Sales rep name
Invoice sales rep name
Ship-via code
Ship via code
Ship-via description
Ship via description
Sub-total goods
Total of all "goods" type line items on invoice
Sub-total services
Total of all "services" type line items on invoice
Professional Invoicing
User Manual
Invoice Formats
21.26
Header/Total Fields (continued)
Field name
Description / Notes
System date
System date
System time
System time
Terms code
Invoice A/R terms code
Terms description
Invoice A/R terms code description
Terms discount
Estimated early payment discount amount based on invoice
A/R terms code
Terms discount date
Date on which early payment discount will be given;
Zero = invoice not printed
Terms discount pct
Early payment discount percent from invoice A/R terms
code
Terms due date
Date on which invoice payment is due; Zero = invoice not
printed
Terms type
D = days, P = proximo
Tax amount (1 - 15)
Invoice tax amount for specified tax type
Tax group
Customer's tax group
Tax group description
Description of customer's tax group
Tax included total
Aggregate of all tax type amounts for taxes included
Tax included amount (1 - 15)
Invoice tax amount included in selling price for
specified tax type
Tax number (1 - 15)
Customer's tax number for the specified tax type
Tax total
Aggregate of all tax type amounts
Taxable total (1 - 15)
Invoice taxable total for the specified tax type
Total already billed
This is the amount already billed to the custom on all
invoices that have come from the same recurring bill.
Total billed
(with this bill) This is the "Total already billed" from above,
plus the amount of this invoice.
Professional Invoicing
User Manual
Invoice Formats
21.27
Header/Total Fields (continued)
Field name
Description / Notes
Quote date
Date assigned to quote when printed. System date used if
blank.
Quote ID
Reference number assigned to quote
Job number
Job number the entire invoice is for.
Job description
Description of the job for this entire invoice.
Sub-job number
Number of the sub-job for this invoice, if any.
Sub-job description
Description of the sub-job for this invoice, if any.
User defined field 1
1st optional field specified in Control information.
User defined field 2 2nd optional field specified in Control information.
User defined field 3 3rd optional field specified in Control information.
Line Item Fields
These are the fields available to you to print in the Line Item area of your invoice or
quotation.
Field name
Description / Notes
Blank line
When this field is selected, no other data is printed on the
line, even if it is defined.
Blank line descr.
Blank line that follows additional description
Printer feature
Turns a printer feature on or off
Suppress line
Used to suppress the printing of an entire line when a
specified criteria(s) is met.
Register
Used to access register values stored during calculation
routines.
Ext. price - no disc
Extended line item price before discount
Ext. price - w/disc
Extended line item price after discount
Extended price
Undiscounted line extended price
Professional Invoicing
User Manual
Invoice Formats
21.28
Line Item Fields (continued)
Field name
Description / Notes
Job category desc.
Cost category description
Job category number
Cost category number
Job number
Job line item is applied to
Job description
Description of job line is applied to
Line number
Number automatically assigned to line item at time invoice
is printed. This is not the sequence number.
Line type
G = goods, S = services, N = notes
Line type sub-total
Sub-total for line type (if used)
Line discount pct.
Discount percent given to line item.
Line discount amount
Amount of discount given on the line item.
Item description (1-3)
Item description
Item pricing unit
Pricing unit from Item file
Item number
Line item number.
Item/Service price
Price charged per unit.
Item/Service unit
For a "Goods" line item, this is the unit in which you price
the item. Not used for "Services" and "Note" type line
items.
Not full ship short
Blank if full quantity ordered shipped. "B/O" if a quantity is
backordered. "O/S" if item is shipped in stock.
Not full ship long
Blank if full quantity ordered shipped. "Backordered" if a
quantity is backordered. "Out of stock" if item is shipped
in stock.
Quantity ordered
Quantity ordered
Quantity shipped
Quantity shipped
Quantity backordered
Quantity backordered
Service number
Number of the service from the Goods/Service file.
Professional Invoicing
User Manual
Invoice Formats
21.29
Line Item Fields (continued)
Field name
Description / Notes
Service/note line (1 - 10) Line of description for "Service" and "Note" items
Sub-job number
Sub-job number line is applied to, if any
Sub-job description
Description of sub-job line is applied to, if any
Sub-total desc.
Line type total description (see second screen of invoice
form header)
Taxable code (1 - 15)
Tax type's associated taxable code
Tax in price flag (1 - 15)
Y = tax included in selling price for associated tax type
(applies to inventory items only)
Tax amount (1 - 15)
Tax amount for associated tax type 1 - 15
Tax in price amount (1 -15)
Warehouse
Amount of tax included in selling price for the
associated tax type (applies to inventory items only)
Line item warehouse
___________________
Professional Invoicing
User Manual
Invoice Formats
21.30
Chapter 22
Data Integrity Check
Introduction
This selection verifies the accuracy of the information in your files.
It should be run after initial set up of your P/I system. This will set up the initial
integrity values. You may also run this report at any time.
You should be sure that no one else is using P/I when you run this check, so that the
results will be valid.
While transactions are being processed, their amounts are added together and the
totals are saved. These totals represent the "calculated" balance of the information that
should be in the data files.
When Data integrity check is run, the "actual" amount of information in the data files is
totalled, and the "actual" and "calculated" amounts are compared on a data integrity
report.
The "actual" and "calculated" amounts should always be equal. A difference between
the two indicates that an unexpected error has occurred.
Such errors could include:
Hardware failures
Professional Invoicing
User Manual
Data Integrity Check
22.1
Turning off or rebooting the machine while processing is still going on. (Never do
this intentionally.)
Power surges due to electrical storms or other causes.
Because this report shows differences between the actual and calculated amounts, you
can locate errors by referring to edit lists and registers run since the data integrity
check was last run.
If a difference is noted between the actual and calculated amounts, you will be asked if
you want to reset the calculated amount to match the actual amount. If you answer Y,
the calculated amount will then be set equal to the actual amount. This does not mean
the problem is fixed, only that the amounts are now equal.
To Begin
Select Data integrity check from page 2 of the P/I menu.
If any of the calculated values do not match the actual, you see a message saying so and
are asked if you want to reset the calculated values.
____________________
Professional Invoicing
User Manual
Data Integrity Check
22.2
Appendix "A"
Initializing Data Files
Introduction
"Initialize" means to create a new data file. When you initialize a data file which
already exists, any information in it is completely erased, and the file is newly created.
This function allows you to initialize one or more data files. You probably won't need
to initialize data files very often, if ever. But this function is included just in case.
If you suspect you have a "corrupted" (fouled up) data file, don't initialize it without first
checking with your supplier and attempting other recovery actions (see the next
appendix titled File Utilities for information on rebuilding corrupted data files).
CAUTION
DON'T USE THIS FUNCTION UNLESS YOU REALLY WANT TO INITIALIZE A DATA FILE. ANY DATA FILE
INITIALIZED WILL HAVE ITS INFORMATION COMPLETELY ERASED.
To Begin
Log into your Samco top-level directory and type PIINIT.
NOTE: If you are running under Xenix/Unix/HPUX/AIX or a similar operating system
and are logged on as root / super user, replace the above command with ./PIINIT
Enter the company ID you wish to initialize P/I data files for.
Answer Y for each file you want to initialize, N to not initialize a file.
1. P/I Control File
Professional Invoicing
User Manual
Initializing Data Files
A.1
This file contains a number of package parameters and default values.
2. P/I Notes File
This file contains any notes which you have entered in the various selections.
3. Deliver-To File
This file contains one record for each deliver-to address to which goods are delivered or
at which services are performed. If you are using the Order Entry Plus package, this is
the same file: the Ship-to File.
4. Goods/Services File
This file contains one record for each item or service entered through Goods/Services.
5. Goods/Service Aux File
This is an auxilliary file, which contains additional information for Goods/Services
records.
6. Invoice Format File
This file contains the complete descriptions of your invoice formats.
7. Invoice Header File
This file contains one record for each regular invoice.
8. Invoice Line Item File
This file contains one record for each line item for each regular invoice.
9. Invoice Auxiliary File
This file contains any additional description entered for line items on regular invoices,
plus comments and miscellaneous deliver-to addresses.
10. Invoice Lock File
This file is used to protect the Invoice File.
11. Quote Header File
This file contains one record for the header for each quotation.
12. Quote Line Item File
Professional Invoicing
User Manual
Initializing Data Files
A.2
This file contains one record for each line item for each quotation.
13. Quote Auxiliary File
This file contains additional description for quotation line items, plus comments and
miscellaneous deliver-to addresses for quotations.
14. Recurring Bill Header File
This file contains one record for the header for each recurring bill.
15. Recurring Bill Line Item File
This file contains one record for each line item on each recurring bill.
16. Recurring Bill Auxiliary File
This file contains additional description for recurring bill line items, plus comments and
miscellaneous deliver-to addresses for recurring bills.
17. Standard Bill File
This file contains one record for each standard bill line item, plus a single record for
each standard bill header.
18. Standard Bill Auxiliary File
This file contains the additional description for standard bill line items.
19. P/I History Header File
This file contains one record for the header for each historical invoice.
20. P/I History Line File
This file contains one record for each line item for each historical invoice.
21. P/I History Auxiliary File
This file contains additional description for historical invoice line items, plus comments
and miscellaneous deliver-to addresses for historical invoices.
22. Invoice Stations File
This file contains one record for each invoicing station.
23. Format Lock File
This file is used to protect the Invoice Format File.
Professional Invoicing
User Manual
Initializing Data Files
A.3
24. Transaction Tax File
This file stores all invoice tax information. Since there can be up to 15 tax types
applied to any one line item, a separate file has been allocated to handle this.
25. Taxable Codes File
This file is used in System Functions for setting up taxable codes which can be applied to
I/C items, or P/I goods and services.
To Exit
When initialization is complete, the operating prompt reappears.
_____________________
Professional Invoicing
User Manual
Initializing Data Files
A.4
Appendix "B"
File Utilities
Introduction
This function will allow you to:
• "Recover" the data files that have become corrupted (fouled up).
• Recover disk space by rebuilding data files with purged or deleted records
that are still taking up space.
• Export your data into a format that can be used by many popular spreadsheet,
word processing and data base programs.
Corrupted data files
Data file corruption does not occur very often, but you do need to be aware of it just in
case one of your data files does become corrupted. This can occur for only a handful of
reasons. The most common being:
1. The power to your computer gets turned off when you are using your Samco
applications.
2. Your hard disk has developed a defect.
Corrupted data files can't be used reliably afterward, and any attempt to use them
causes unusual error messages and you are removed from running the Samco
applications.
Professional Invoicing
User Manual
File Utilities
B.1
If this occurs, or if you begin to get unusual results while using your software and
suspect that there may be a corrupted data file, you should get technical support.
Your supplier or an independent professional may be able to provide this support. If
not, contact Samco Software Inc.'s support department directly (there may be a fee).
Handling
Data file corruption does not mean that all of the data in the file is no longer usable.
Usually, just a few of the records in the file have become corrupted.
In File utilities, the function Rebuild a file will take out the good records in the data
file, place these in a temporary file, and then replace the old file with the good records.
In addition to this, any deleted or purged records which are taking up disk space will
also be permanently removed and the file compressed to its physical size.
To Begin
Select File utilities from the second page of the P/I main menu.
Export a file
This function is used to export data files from the internal format to a "flat" ASCII file.
The data file(s) is read in and an output file is created in the Samco root directory with
the name "xxxxxxnn.EXP". Where 'xxxxxx' is the file name, and where 'nn' is the
company number the file came from. (If you are running under Unix you will also have
the option of appending a drive designation to the front of the file.)
To begin, select Export a file from the File utilities sub-menu.
A screen appears for you to select a file to export:
Professional Invoicing
User Manual
File Utilities
B.2
Enter the following:
Please select file
Enter the number, from the list provided, of the file to be converted to ASCII format, or
use one of the options:
Options:
[F1]
To export "All" files.
[F2]
To view additional files available for converting.
Please enter device for converted file
Enter the drive letter of the device that the ASCII version of the data file will be written
to, or use the option:
Option:
[F1]
If you either (a) do not want to append a drive letter prefix to the
file name (Unix only), or (b) want the file created on your hard
drive.
For UNIX/XENIX users
Professional Invoicing
User Manual
File Utilities
B.3
The drive letter entered here will be attached to the front of the file name. The letter
A is recommended for consistency. The ASCII backup file name in the Samco root
directory will read A:xxxxxxnn.EXP.
Alternatively, if you do not want to add a drive letter, press [F1] for "none".
Please enter the device size in kilobytes
Enter the size of the disk the ASCII files are to be written to.
The following table shows some of the more common device sizes in kilobytes:
[F1]
Unlimited, Hard disk drive
If you enter a specific device size, once the disk is filled you will then be asked for
another disk. This process will be repeated until all the data is written to the disk.
The screen will then prompt you "Any change ?". Enter Y and all the entries that you
have made will be cleared and you will be returned to the "Please select file" prompt.
Press [Enter] to accept the default of N.
NOTE: If you choose to convert "All" files, the screen will move immediately into
displaying the file and record being backed up. It skips past the "(C) CREATE NEW
CONVERTED FILE OR (A) ADD RECORDS TO EXISTING CONVERTED FILE", "STARTING FILE
KEY", and "ENDING FILE KEY" prompts
Enter the following data:
[?] 1. Starting file key
[?] 2. Ending file key
Enter the starting and ending file keys for the data file selected for conversion, or press
[F1] for "First" and "Last". Up to 37 alphanumeric characters may be entered. Unless
you know the exact key for the records in the data file it is recommended that you press
[F1].
When you have completed all entries the following prompt will appear:
(C) create new export file or (A) add records to existing export file
Enter C to create a new export file and over-write any pre-existing ASCII export for this
data file, or enter A to add the records selected for conversion to any pre-existing ASCII
export file on the device specified.
After selecting which type of file to create the screen then clears and the ASCII file
name is displayed along with a counter of the number of records exported.
If you had selected "All" at the "Please select file", it is assumed that you wish to create
a new converted file. After the "Any change ?" prompt, the screen clears and the ASCII
Professional Invoicing
User Manual
File Utilities
B.4
file name is displayed along with a counter of the number of records exported for all
files.
The Export a file menu reappears after the file, or files, selected have been exported so
that you may choose another file.
After you have completed running the convert routine, press [Tab] at the "Please select
file" prompt. A window will appear for you to select how to print the export log.
Restore an exported file
This function is used to restore one of more of the listed data files from the "flat" ASCII
file format to the internal format. The exported file is read in and an output file is
created in the company sub-directory with the name "xxxxxx.DAT". Where "xxxxxx" is
the file name.
From the File utilities menu select Restore an exported file.
A screen similar to the one below will appear:
Enter the following information for either active or inactive files:
Professional Invoicing
User Manual
File Utilities
B.5
Please select file
Enter the file number, from the list provided, of the file to be restored from an ASCII
export format, or use the option:
Option:
[F1]
to restore "All" exported files.
Please enter device for exported file
Enter the drive letter of the device that the ASCII version of the data file will be read
from, or use the option:
Option:
[F1]
If you either (a) did not append a drive letter prefix to the file
name (Unix only), or (b) the file(s) reside on your computer's
default hard drive.
For UNIX/XENIX users
This is the drive letter attached to the front of the file name. For example, if the file
to restore is A:xxxxxxnn.EXP, you would enter A here. If no designation is at the
beginning of the file press [F1] for "none".
Please enter the device size in kilobytes
Enter the size of the disk the ASCII export files are on.
The following table shows some of the more common device sizes in kilobytes:
[F1]
Unlimited, Hard disk drive
(C) Create New Data File Or (A) Add Records To existing Data File
If you answer [C] (Create new file), all of the existing data records in the original file
will be destroyed, and the data records contained in the converted file will be
transferred to the original file.
If you answer [A] (Add records to file), all of the existing records in the original file will
remain, and the data records contained in the converted file will be added to the
original file.
The following message will display:
"This function will now initialize the data file used in production. Its contents will
be fully replaced with data from the converted file. Please make sure you want to
do this. Are you sure?"
Answer Y or N, as appropriate.
Professional Invoicing
User Manual
File Utilities
B.6
The file(s) will now be restored. A message will be displayed on the screen, showing
the count of the records as they are restored.
When the restoration of the file or files is complete the 'Restore a converted file' menu
will be displayed.
You may select another file to restore. You may continue to restore files or press [Tab]
to print the restore log and then return to the File Utilities sub-menu.
A window will appear for you to select where to print the restore log. A restore log
shows the file(s) restored, the number of records per file, the date and time.
Rebuilding Data Files
Rebuilding data files can be used for one of two reasons:
1. A data file has become corrupted and needs to be recovered.
2. To recover disk space and clean out deleted or purged records.
The Rebuild a file function essentially takes the good records out of a file, removes the
old file, and creates a new file with the good records.
To begin, select Rebuild a file from the File utilities menu.
A screen appears for you to select to rebuild active or inactive job cost files. If you
select inactive, only a few files can be accessed. If you select active, a screen similar
to the one below will appear:
Professional Invoicing
User Manual
File Utilities
B.7
Enter the following information for either active or inactive files:
Please select file
Enter the number of the file you wish to rebuild, or use the option:
Option:
[F1]
to rebuild "All" of the data files.
A new screen will appear showing the status of each file as it is being rebuilt. Once
completed, you are returned to the Rebuild a file screen.
____________________
Professional Invoicing
User Manual
File Utilities
B.8