1
i
DzongkhaLinux
Beta
User Manual
Department of Information Technology, MoIC.
Copyright (c) 2006, PAN Localization Project
Permission is granted to copy, distribute and/or modify this document under the
terms of the GNU Free Documentation License, Version 1.2 or any later version
published by the Free Software Foundation; with no Invariant Sections, no FrontCover Texts, and no Back-Cover Texts.
About The Manual
This document is released under GNU Free Documentation License (GNU FDL) . Please
refer the Appendix section for the details.
Design & Logo Concept :
Bhutan Media Services
Norzin Lam,
Thimphu
Bhutan
Phone : 328450
ii
Table of Contents
Page
About This Manual............................................................................................................... ii
Getting started .........................................................................................................................
History of computers .............................................................................................................
Operating systems..................................................................................................................
GNU, Free/Open Source Software & Linux ....................................................................
GNU/Linux Distributions ......................................................................................................
Debian GNU/Linux..................................................................................................................
Debian Derivatives..................................................................................................................
Localization ...............................................................................................................................
DzongkhaLinux........................................................................................................................
What is DzongkhaLinux? .......................................................................................
Minimum Hardware Requirements ...................................................................
Getting DzongkhaLinux.........................................................................................
License ..........................................................................................................................
Using DzongkhaLinux ...........................................................................................................
Booting from Live CD..............................................................................................
Installing into hard disk .........................................................................................
Gnome Desktop
Xwindow Systems ....................................................................................................
Window Managers ...................................................................................................
Gnome Desktop Environment.............................................................................
Main Components of Gnome Desktop ............................................................
Using Dzongkha Gnome Desktop......................................................................
Language Selection .................................................................................................
Starting, Logging in and Logging out ..............................................................
Date and Time............................................................................................................
Workspaces.................................................................................................................
Nautilus file manager..............................................................................................
Running Applications .............................................................................................
Using Common Mass Storage Devices.............................................................
Desktop ........................................................................................................................
Preferences .................................................................................................................
Taskbar .........................................................................................................................
iii
Gnome applet ............................................................................................................
Adding icons in Gnome panel .............................................................................
Screen Resolution.....................................................................................................
Desktop Themes .......................................................................................................
Gnome Login Screen...............................................................................................
Fonts..............................................................................................................................
Working with Files & Folders ..............................................................................................
Using Dzongkha Keyboard..................................................................................................
Dzongkha Keyboard Layout................................................................................................
Mozilla Web Browser .............................................................................................................
Mail Clients ................................................................................................................................
Mozilla Mail................................................................................................................................
OpenOffice.org.........................................................................................................................
Dzongkha OpenOffice.org...................................................................................................
Using OpenOffice.org............................................................................................................
Gaim ..........................................................................................................................................
Multimedia -- Using Totem..................................................................................................
CD/DVD Writing.......................................................................................................................
Erasing CD/DVD.........................................................................................................
Burning files/folders into CD/DVD .....................................................................
Burning Image (ISO) files into CD/DVD ............................................................
Duplicating CD/DVD ...............................................................................................
Creating image from folders ................................................................................
Running k3b ...............................................................................................................
Printers ........................................................................................................................................
Networking................................................................................................................................
Network Configuration ..........................................................................................
Modem and Internet account Configuration ................................................
File and Print Sharing with Samba.....................................................................
Package Management...........................................................................................................
Debian Package Management System ............................................................
Package Management in DzongkhaLinux ......................................................
Basic Linux Administration..................................................................................................
Basic Commands.......................................................................................................
GNU/Linux System Administration....................................................................
User Administration (Graphical) .........................................................................
iv
Upgrading..................................................................................................................................
DzongkhaLinux
Packages ......................................................................................................................
Using Repositories ..................................................................................................................
Kernel Upgrading....................................................................................................................
Getting Help..............................................................................................................................
Troubleshooting......................................................................................................................
References..................................................................................................................................
Appendix....................................................................................................................................
NOTE: * means not Complete
v
Acknowledgement
This work has been supported through PAN Localization Project (www.PANL10n.net)
grant from the International Development Research Center, Ottawa, Canada,
administered through Center for Research in Urdu Language Processing, National
University of Computer and Emerging Sciences, Pakistan.
vi
Getting started
This Manual “DzongkhaLinux User Manual Version 1.0” has the help and guidelines
for using DzongkhaLinux. DzongkhaLinux is a GNU/Linux distribution developed and
released by Department of Information Technology. The target audiences of
DzongkhaLinux are desktop users at government sectors, education sectors,
corporate houses, home users etc. DzongkhaLinux comes with localized open source
software which can be used and modified freely as per the General Public License
(GPL). Please refer to the section GNU General Public License in the appendix of this
document for the details of the license.
vii
History of Computers
The word “computer” is derived from the word 'compute' which means to calculate.
The computers that we use today are the result of our long search for a device to help
in performing computations. The search dates as back as to the 17th century. A series
of scientific breakthroughs by many people have contributed to produce this
electronic machine, the computer.
Listed below are some of the important dates in the evolution of computer:
1. In 3000 BC, a device called Abacus was developed by the Chinese. This is said
to be the first mechanical computing device.
2. In 1617, John Napier, a Scottish mathematician developed a device which is
called Napier bones. With the help of this device, multiplication and addition
were possible.
3. In 1642, Blaise Pascal, a French mathematician invented the first mechanical
calculator
4. In 1673, Gottried Wilhelm Leibniz, a German invented the Leibniz calculator
which was used for addition, subtraction and multiplication.
5. In 1804, Joseph Marie Jacquard, a French made yet another significant
contribution. He developed a plate with multiple holes to control the weaving
patterns. This idea was later used to develop the Punch Card to store data.
6. Around 1822, Charles Babbage, a professor of mathematics at the Cambridge
University devised an automatic calculating machine called the Difference
Engine.
7. The next significant invention came from Dr. Herman Hollerith, an American.
Hollerith built a computer to analyze the Census data of the United States in
1890. This computer was electro-mechanical and was named Census machine.
Herman Hollerith founded a company named" The Computing Tabulating
Recording Company" which today is the IBM corporation.
8. Howard Aiken, built the first fully electro-mechanical computer named
MARK-1.
1
9. In 1945, a significant contribution was made by John Von Neumann, a
Frenchman working for IBM. He designed the basic structure of a computer
that had the capacity to :
a) Perform Logical functions.
b) Perform Repetitive functions.
c) Store data and instructions (Memory)
In 1945, a fully electronic computer named ENIAC was built by Presper Eckert and
John W Mauchly. ENIAC stands for Electronic Numerical Integrator and Calculator.
After 1945, as special components began to be added, the capacity of computer
increased drastically. Depending on the technology used, computers got categorized
into different generations.
I Generation computers (1945 – 1955):
In computers of this generation, the main components in use were the vacuum
tubes. The first computer used 17000 vacuum tubes, weighed 30 tons and occupied
an area of a big hall. Vacuum tubes took a lot of time to warm up and consumed
massive amount of electricity. Typical examples of the computers of this generation
are ENIAC, UNIVAC-1
II Generation Computer ( 1955 - 1965 ):
The real breakthrough in computers started with the discovery of the transistors.
Transistor, though a tiny semi-conductor device gave the following significant
benefits to computer.
1. Reduced the size of computer
2. Reduced manufacturing and running costs.
3. Improved reliability and processing power of the computer
Computers which were built using transistors became the second generation
computers. Some of the computers of this generation are IBM 7000 SERIES, IBM 1620,
and IBM 1401.
Second generation computers were significantly faster than the first generation
computers.
2
III Generation computers (1965 – 1970):
Computers of this generation started using the Integrated Circuit (IC). IC is a
combination of transistors put together on a single chip (wafer) of silicon. ICs are very
small. A small chip about the size of a finger nail is equivalent to 2000 transistors. The
use of chip technology reduced the size of computer enormously. Some of the
computers of this generation are IBM 360, IBM 370
IV Generation Computers ( 1970 onwards ):
From 1970 onwards we enter into the era of Fourth Generation Computers, in which
the electronic components got further miniaturized. Large Scale Integration (LSI) and
Very Large Scale Integration (VLSI) of circuits got replaced by a few silicon chips.
Millions of transistors are packed in a single VLSI chip. The size of the chip is further
shrinking. Manufacture of very small and light weighted laptops has become
possible. Along with the reduction in size, there is significant reduction in prices too.
V Generation Computers:
From 1982 onwards research is continuously taking place to develop a Fifth
Generation computer that will have the thinking power
just like that of the human brain. These computers will be based on Artificial
Intelligence (AI).
3
Operating Systems
Operating system is the first layer of software which is loaded into the computer
memory when the computer starts up. All other software that gets loaded afterwards
depend on the preloaded software (operating system) in providing the various
common core services.
These common core services include, but are not limited to: disk access, memory
management, task scheduling, and user interfacing. The user interface provides
means of input - allowing the users to control the system, output - allowing the
system to inform the users. The portion of code that performs these core services is
called the "kernel" of the operating system. So, in other words, an operating system
(OS) is the system software responsible for the direct control and management of
hardware and basic system operations. Additionally, it provides a foundation for
running application software such as word processing programs and web browsers.
Some Examples of Operating Systems are:
* UNIX
* Linux
* Mac OS
* Microsoft Windows
* Solaris
* MS-DOS
4
GNU, Free/Open Source Software & Linux
The GNU (GNU's Not Unix) project was started by Richard Stallman, also known as
RMS, in the year 1984 to create a free Unix-like operating system. The Free Software
Foundation (FSF) was created a year later to promote free software and the GNU
project. Here, the term 'free' refers to freedom as in speech, not price.
Till 1991, it had created all the software and utilities required for a complete
operating system except the kernel, which is the core of an operating system. That
year, a Finnish college student, Linus Torvalds, created a UNIX-like kernel called Linux
and combined it with the required software and utilities from GNU project to form a
Unix-like operating system.
In 1998, a group of developers came together to label a new term called 'Open
Source Software' in response to the release of Netscape source code. The Open
Source Initiative (OSI) was formed along with the Open Source Definition. Among
them was Eric Raymond whose famous book 'The Cathedral and The Bazaar' was one
of the factors which led Netscape to open the source code.
Free/Open source software allows people to read, redistribute, and modify the source
code for a piece of software. People improve it, adapt it, and fix bugs and all this can
happen at an astonishing speed in the distributed development model as compared
to the conventional one.
GNU/Linux Distributions
GNU/Linux distribution is a Unix-like operating system comprising software
components such as the GNU/Linux kernel and assorted free, open source, and
possibly proprietary software. There are currently over three hundred Linux
distribution projects in active development, their respective distributions being
revised and improved. A Linux Distribution can be derived from another
Linux distributions (also popularly known as Distros or Flavors) are those where the
necessary customizations are done to the original ones. The most popular Linux
Distributions are:
* Debian GNU/Linux
* Red Hat Linux
* Fedora Core
* SuSe Linux
* Knoppix
* Mandrake Linux
* More....
5
Distributions are developed and supported by communities or commercial
companies. Debian GNU/Linux for example is supported by the Debian community.
On the other hand, Gentoo Linux OR is developed and supported by commercial
companies like Red Hat and Novell. It is up to the user, which one to use, either
commercial or the other.
Debian GNU/Linux
Debian is a widely used distribution of free software developed by the joint efforts of
volunteers from around the world. It consists of a lot of basic tools of the operating
system from the GNU project and supports the common computer architectures like:
x86Power PC etc. Debian GNU/Linux is the basis for several other distributions,
including Knoppix, Ubuntu Linux and DzongkhaLinux.
Debian is supported by donations made available by the Software in the Public
Interest, a non-profit umbrella organization for free software projects.
Debian Derivatives
Debian Derivatives are subsets of Debian which are configured to support a particular
target group out-of-the-box. For example: Debian aimed for science, Debian aimed
for schools etc. In our case, DzongkhaLinux, which is also a Debian Based Linux
Distribution, is targeted specially for Desktop users in the Dzongkha Language. The
popular Debian Derivatives are:
* DebianGIS: a CDD for Geographical Information and Earth Observation
Systems (includes OpenGIS and GPSTk).
* Debian Junior: For children
* Debian Med: For Medical
* DebianNeo: Debian Stable for newbie
* Skolelinux (built by the DebianEdu project): aimed for schools.
* Knoppix
* Mepis
* Linspire
* Gnoppix
* Morphix
6
Localization
Localization is the adaptation of an object to a locality. An example is in software
localization, where the messages which a program presents to a user need to be
translated into various languages.
Basic Localization involves the following procedures:
* Creating the Locales
* Font Development
* Choosing the input method and creating keyboard mappings
* Updating the rendering engine to support native language
* Translation of strings of the software to be localized
* Localization of the applications to support the language
7
DzongkhaLinux
What is DzongkhaLinux?
DzongkhaLinux is a Debian, Knoppix and Morphix based GNU/Linux Distribution
focused for Desktop users in Dzongkha language. It contains applications for Desktop
users like: OpenOffice.org, Dzongkha Gnome Desktop, Dzongkha input systems etc.
The development and distribution of DzongkhaLinux is done by Department of
Information Technology, MoIC (http://www.dit.gov.bt). The official site for
DzongkhaLinux is http://dzongkha.sourceforge.net.
Minimum Hardware Requirements
* Intel Pentium I or equivalent Processor
* 64 MB of RAM
* 2.0 GB of Hard disk space
* CD-ROM Drive
Getting DzongkhaLinux
DzongkhaLinux can be collected from Department of Information Technology or can
be downloaded directly from
http://www.sourceforge.net/projects/dzongkha/.
License
DzongkhaLinux, a Bhutanese GNU/Linux distribution, is distributed under the GNU
GPL license. The GNU General Public License (GNU GPL or simply GPL) is a free
software license, originally written by Richard Stallman for the GNU project. It has
since become the most popular license for free/open source software. The latest
version of the license, version 2, was released in 1991.
8
The GPL grants the recipients of a computer program the following rights, or
"freedoms":
* The freedom to run the program, for any purpose.
* The freedom to study how the program works, and modify it. (Access to the
source code is a precondition for this)
* The freedom to redistribute copies.
* The freedom to improve the program, and release the improvements to the
public. (Access to the source code is a precondition for this)
9
Booting from Live CD
DzongkhaLinux is a Live-CD distribution that can be run directly from the CD. In this
regard, one can actually get a independently working complete Linux distribution
without even having a hard disk. This is done by loading the operating system
completely into the memory.
To use DzongkhaLinux through CD, just insert the CD into the CD ROM drive and
restart the computer. The BIOS must be configured
so that CD-ROM is your first boot device. The default root password for
DzongkhaLinux liveCD is bhutan.
Some commonly occurring problems:
1. When the computer boots up completely, you might see desktop area bigger
than the actual screen size with the hidden and larger icons.
To solve this problem you need to reboot the computer and press F4 in the grub
splash screen and select 800x600 as resolution.
2. Fails to enter into GUI mode and falls back to terminal saying "Operation
failed".
To solve this problem reboot the computer, select "Submenu" and enter - try
vesa or fbdev.
With Live CD you can do almost all including using word-processor, listening to music,
connecting to networks and Internet etc.
10
Installing DzongkhaLinux to Hard disk
DzongkhaLinux can also be installed into the hard disk. DzongkhaLinux can also coexist with other operating systems like MS-Windows.
To install DzongkhaLinux, you need at least one Linux native partition and a swap
partition in your hard disk. Size of the swap partition is usually kept double of the ram
size. Linux native partition should be at least 2 GB.
For DzongkhaLinux installation, you need to insert the DzongkhaLinux CD into the
CD/DVD drive and reboot the computer. When the computer boots up completely
you are supposed to follow the following steps.
1. Click 'Desktop Î Preferences Î Install to Hard disk' or double click on the
'Install on Hard disk' icon on the desktop.
Fig. Starting DzongkhaLinux installation
11
2. In the DzongkhaLinux Installer dialog box, click 'Forward'.
Fig. DzongkhaLinux Installer dialog box
3. In the dialog box that appears after step 2, select the hard disk where you
want to install DzongkhaLinux (it will be selected by default if you have
only one hard disk), click 'Forward'.
Fig. Selecting the Hard disk
4. Partition Morpher - Graphical Partitioner will appear. (Note: You are about
to make partitions. Be careful while working on this)
12
5. Select free space and click on 'Create' to create a new partition, select
'Primary' as the Partition Type and enter partition size, select ext3 as the
File system Type. Make the Linux native partition as 'Bootable' (Note: This
partition doesn't have to be primary, but making it so, will ease recovery
in case of disaster). Click 'OK'
6. Create one more partition, keep the size at least double the size of RAM
and choose its type as swap (For Linux swap partition). Then click 'OK'.
Fig. Example of how the partition should look
7. Select 'Quit' in the Partition Morpher dialog box.
13
8. In the next dialog box, after selecting the swap partition. click on 'Forward'
Fig. Selecting the swap partition.
9. In the next dialog box, select the partition that you created in step no. 5.
The 'Root ( / )' file system will be installed in this partition.
Fig. Selecting the root partition
14
10. Click 'Forward'. The installation will start and take around 15 – 25 minutes.
Fig. Installation in progress
11. Enter the desired 'Host Name' in the next dialog box and click 'Forward'
Fig. Entering the Hostname
12. Enter password for 'root' user.
Fig. Setting the root password
15
13. After that in the next screen, type in a username of your choice. The
default username is ‘bhutan’. This username will be used to login to the
system. 'root' login is disabled by default. It can be enabled through the
main menu. To do so, go to 'ApplicationsÎ System ToolsÎ Login Screen
SetupÎ Security'.
Fig. Creating default user
14. In the next screen select 'Install GRUB on the MBR' option. Grub is an
excellent boot loader which can recognize and list other operating
systems that are already installed in the hard disk. Then click 'Forward'.
The congratulations dialog box appears. Click 'Quit'.
Fig. Installing GRUB bootloader
16
Fig. Finishing the installation
15. After completing the installation, restart the computer.
16. The system will start and at the GRUB menu select Dzongkha GNU/Linux.
Some necessary updates/installation will take place.
17. After the necessary updates, you will be presented with a Login screen.
Login as the user you created in step 13 above and you are ready to
explore and use DzongkhaLinux.
17
Gnome Desktop
X Window System
The X Window System (also referred to as "X" or X11) is the foundation for the
graphical user interface on most Linux systems.
X does not define how anything should look or behave, instead, X focuses on
providing a standard way in which applications (the X clients), can display on the
screen.
XFree86 is a freely redistributable open-source implementation of the X Window
System. The XFree86 project adds hardware drivers for a variety of video cards and
releases it as XFree86. Originally, XFree86 was only for Intel compatible chips, but
now it also runs on PowerPC, Sparc, and Alpha Systems.
Window Manager
A window manager is the piece of software responsible for managing different
windows that appear on your screen. The window manager controls the placement
of windows, draws the borders and scrollbars. There are number of window
managers available for X.
Metacity is the default window manager in the GNOME desktop. It is implemented
with the GTK+ 2.x toolkit, and so integrates well with the GNOME 2.x platform.
Some other window managers are: Twm, Kwm, WindowMaker.
18
Gnome Desktop Environment:
GNOME Desktop environment provides a graphical interface for Linux system. It
includes a wide range of applications, including programs for email, Internet,
messaging, word processing, financial accounting, conferencing, and more.
Apart from providing very easy-to-use desktop, gnome also provides gnome
development platform for building applications that integrate into the rest of the
desktop.
One nice thing with Linux is that, you’re not limited to a GUI provided by your OS
manufacturer. You can in fact, have multiple desktop environments in a single
system.
GNOME and KDE are the two mostly used desktop environments used with Linux.
Main Components of Gnome Desktop
Panels and Menus:
Panels are areas in the GNOME Desktop from where you can access all of
your system applications and menus. The gnome panel holds icons and
other small applications which ease using your system.
Fig. The Upper panel on a Gnome desktop
Fig. The lower panel on a Gnome Desktop
The top level panel in DzongkhaLinux includes menu bar. The menu bar contains 3
special menus
19
Applications menu:
Gives access to all standard applications.
Fig. Applications menu
Places menu:
Lists your home folder, networked servers, and the search feature etc.
Fig. Places menu
20
Desktop menu:
Contains Preferences and Administration control panels, Log Out, and
Help.
Fig. Desktop menu
21
Using Dzongkha Gnome Desktop
Language Selection
With Live CD:
By Default the Live CD will boot into Dzongkha. For using DzongkhaLinux in English,
select DzongkhaLinux (en) before booting of the CD at the GRUB Menu.
With Hard Disk installation:
Fig. The Login Screen.
Start the computer from hard disk. At the login screen, Click Language and Select
Dzongkha (Bhutan) and Press OK button.
Fig. Selecting Dzongkha at the login screen
22
It will display the following information:
"You have chosen Dzongkha (Bhutan) for this session, but your default setting is system
default. Do you wish to make Dzongkha (Bhutan) the default for future sessions?"
Click Make Default Button to make Dzongkha as default.
With the same procedure you can choose English if required later.
Starting, Logging in and Logging out:
At the login screen after the language selection or using default language, use the
username and password that is created at the time of installation.
You cannot login as 'root' by default. If you want to login as user 'root', go to
Actions ÎConfigure to configure the login Manager.
It will ask the 'root' password that is created at the time of installation. Then go to
Security and check "Allow root to Login with GDM". Click the close button and login
with root. Remember, 'root' is the super user and unless required do not login with
user 'root'.
23
Fig. Configuring the Login Manager to allow root login with GDM
In order to logout, go to DesktopÎLog Out in the top menu panel. Check "Save
current setup" to save the currently active applications to be run by default at the
next login and select "Log out". Finally press "OK" button to log out.
Fig. Logging out.
Alternatively you can press CTRL+ALT+BACKSPACE together to log out easily.
24
Date and Time
Date and Time are displayed on the top right corner of the gnome panel. Left clicking
over the Date and Time area displays the calendar view of the current month. Clock
type can be changed between 12 hours system and 24 hours system.
Fig. Date and Time and Calendar view of the month
Right click over the Date and Time area and select preferences. Date and time can be
adjusted in the similar manner.
Fig. Clock preferences and Time and Date settings
25
Workspaces
You can subdivide the GNOME Desktop into separate workspaces. A workspace is a
discrete area where you can work. You can specify the number of workspaces in the
GNOME Desktop. You can switch to a different workspace, but you can only display
one workspace at a time.
Nautilus file manager
Fig. The Nautilus File Manager
Nautilus is the default file manager in gnome. With Nautilus you can:
View your files and folders as icons or as a list.
Create, move, copy, rename, and remove files and folders. You can move files
between folders by opening up two or more file manager windows. Just open a
different folder in each window, and then drag the files from one window to the
other.
26
Execute program, run scripts or associate program through which to open a specific
file type.
Set emblems to a particular file or folder to show its states such as personal, urgent,
special, shared etc.
Nautilus provides a special location where you can copy files and folders that you
want to write to the CD. You can write the contents of this location to a CD.
Running Applications
The Run Application dialog lets you specify the exact program to run. When you run a
command in the Run Application dialog, you cannot receive output from the
command. The Run Application dialog lets you specify the exact program to run.
When you run a command in the Run Application dialog, you cannot receive output
from the command.
To run a command from the Run Application,
either:
Go to ApplicationsÎ Run Application or
Use shortcut keys: The default shortcut keys
to display the Run Application dialog are Alt
+ F2. (You can change the shortcut keys that
display the Run Application dialog in the
Keyboard Shortcuts preference tool).
Fig. Starting Run Application from the Applications menu
Then, perform the following steps:
Enter the command that you want to run in the blank field.
Fig. Running gimp from the Run Application
Dialog
27
Alternatively, to choose a command that you ran previously, click the down arrow
button beside the command field, then choose the command to run.
Fig. Choosing previous commands at the Run Application Dialog
Alternatively, select the Show list of known applications option to display a list of
available applications. Finally click on the Run button on the Run Application dialog.
Fig. List of known applications to run at the Run Application Dialog
28
Desktop
Fig. A typical Gnome desktop
The desktop is behind all of the other components. The desktop is an active
component of the user interface. You can place objects on the desktop to quickly
access your files and folders, or to start applications that you use often. User can alter
desktop backgrounds by simply right clicking over the desktop area and selecting
'Change desktop background'. New desktop backgrounds can be downloaded from
"http://art.gnome.org/backgrounds". Just download the background that you like,
save it to some location and browse through that location and select that particular
background.
29
Preferences
To customize the GNOME Desktop, click “Desktop”Î “Preferences”.
Fig. Gnome preferences
30
Task bar
The task bar is an applet which shows you the titles of running
applications on any desktop.
Fig. Gnome task bar showing list of currently running applications
Gnome Applet
An applet is a small application, designed to sit in the Gnome panel,
providing quick and easy access to a control, such as clock, a volume
control or a network status display etc.
Adding icons in Gnome panel
Gnome applets, applications that are already in gnome main menu and
other custom applications can be added very easily to panel. Simply rightclick over the panel and select “Add to Panel”. Some of the useful controls
that can be added in the gnome panel are show-desktop, logout,
dictionary lookup. Terminal, file manager etc. The width and background
of the panel can be altered. The panel can also be made to auto hide to
have a bigger desktop area.
Fig. Adding Geyes applet to the panel
31
Screen Resolution
Screen resolution can be changed form “Desktop”Î “Preferences”Î
“Screen Resolution”. Refresh rate can also be adjusted. Flicking of the
screen can be minimized by adjusting the refresh rate higher. But the
refresh rate shouldn't be selected too high as it might damage your
monitor if the particular refresh rate is not supported by your monitor.
Fig. Screen resolution settings dialog
32
Desktop Themes
Desktop themes can be changed from “Desktop”ΓPreferences”Î
“Themes”. You can switch between different icons-sets and border style.
New themes can be downloaded at http://art.gnome.org/themes.
Fig. Gnome Themes selection
Fonts
Through “Desktop”Î “Preferences”Î “Fonts”, you can change font size and fontface displayed almost anywhere in gnome. The default Dzongkha font is Jomolhari. A
Joyig font named Wangdi is also available.
Fig. Gnome Fonts Preference
33
Using Common Mass Storage Devices
Floppy Disk Drives:
Double click to Computer icon on the desktop, insert the floppy and
Double click the Floppy Disk Icon. Before removing the floppy disk from
the disk drive, unmount it first by right clicking the Floppy icon and
clicking Unmount volume.
Fig. Floppy mounted and un-mounting a floppy drive
CDROM/DVD Drives:
Double click to Computer icon on the Desktop, insert the CD/DVD discs
and Double click the CD-ROM Icon. In order to eject the CD/DVD discs,
right click the CD-ROM icon and click Eject.
Fig. CD-ROM mounted and Ejecting a CD-ROM
34
Flash Disk/ USB Drives:
DzongkhaLinux will auto detect the flash disk/USB drive. If not follow the
manual procedures given below:
1. Insert the disk into the USB port
2. Click the Terminal icon at the top panel.
3. Do ‘su –‘to change the user to ‘root’
4. Usually Flash/USB disks use sda1 or sdb1. So does either ‘mount
/dev/sda1
/flash’ or ‘mount /dev/sdb1 /flash'.
5. Before removing the disk run the ‘umount /flash' command.
While booting from LiveCD, Double click on the computer icon and
double click either sda1 or sda to use the flash/USB disks.
35
Working with Files and Folders
Copying a File/Folder
1. Right click on the file/folder you want to copy.
2. Click on 'Copy File' (See Fig. below).
3. Go to the folder into which you want to copy the file/folder.
4. Right click on an empty space and click 'Paste Files'.
Fig. Pasting a file.....and ....'report.odt' file pasted/copied to 'documents' folder.
36
Moving a File/Folder
1. Right click on the file/folder you want to move
2. Click on 'Cut File' (See Fig. Below).
3. Go to the folder into which you want to past the file/folder.
4. Right click on an empty space and click 'Paste Files'.
Fig. Pasting a file.....and ....'report.odt' file pasted to 'manual' folder.
37
Deleting a File/Folder
1. Right click on the file/folder you want to delete. Click on 'Move to Trash'
(See Fig below).
2. To delete the file completely, right click on the 'Trash' icon on the desktop
and click 'Empty Trash'.
38
Creating a new Folder
1. Right click on an empty space in the folder where you want to create
the new folder. Click on 'Create Folder' (See Fig below).
2. A new folder with the default name 'untitled folder' is created. Type the
new name for the folder and hit 'Enter' key.
Fig. New folder named 'songs' created
39
Renaming a File/Folder
1. Right click on the file/folder you want to rename. Click on 'Rename' (See
Fig. below).
2. Type the new name and hit 'Enter' key.
Fig. 'budget.ods' renamed to 'budget_2006.ods'
40
Viewing and Modifying the Permissions of a File or Folder
1. To view the owner and group of a file/folder and/or to modify its permission
settings, right click on the file/folder and click on 'Properties'.
2. Click on the Permissions tab. The owner and group of the file/folder are
displayed as well as the associated permissions.
41
Using Dzongkha keyboard
Use Gnome keyboard utility to access it
1. Right click on the panel
2. Go to "Add to Panel”, select "keyboard indicator" and click the “Add”
button. Default keyboard will be shown on the panel (e.g. USA).
42
3. Right Click on the indicated Keyboard type (e.g. USA)
4. Select "Open Keyboard Preferences"
43
5. Click "Layouts” tab and click “Add” button. Then select "Dzongkha
Keyboard" from "Available Layouts" and click the "Ok" button.
44
6. Now you are ready to select keys to change/toggle between two
keyboard system namely "USA" and "dz".
7. Click "LayoutOptions"
8. Select your choice of toggle keys from "Available Options"
For instance click "Group shift/lock behavior" and select "Alt+Shift
changes group" and click "Add". You can press Alt and Shift keys
simultaneously, to change between USA keyboard type and Dzongkha
keyboard type.
9. Just clicking on the “USA” displayed on the panel will be enough to use
Dzongkha keyboard.
45
Dzongkha Keyboard Layout
There are 4 levels in accessing different keys in Dzongkha. They are
mainly
1.
2.
3.
4.
Normal State
SHIFT State
Right ALT State
SHIFT + Right ALT State
The normal and shift level are as follows:
46
The Right Alt and Shift + Right Alt level are shown below:
47
48
Mozilla
The Mozilla-Suite is an 'All-In-One' Internet Application Suite which consists of a Web
Browser, an advanced e-mail and newsgroup client, an IRC chat client, a HTML editor
and an Address Book. To start Mozilla browser in Dzongkha Linux go to
'ApplicationÎInternet MozillaÎWeb Browser'.
'ApplicationsÎInternetÎMozilla Web Browser (dz)' is capable of rendering
Dzongkha font properly.
Fig. The Mozilla web browser
49
Accessing a web page
You access a web page by typing its URL—its location (address) on the Web. URLs
normally begin with http://, followed by one or more names that identify the address.
For instance, http://www.mozilla.org.
1. Click the Location Bar to select the URL that is already there.
Fig. Location bar
2. Type the URL of the page you want to visit. The URL you type replaces
any text already in the Location Bar.
3. Press Return/Enter.
Clicking a Link
Most web pages contain links you can click to move to other pages.
1. Move the pointer until it changes to a pointing finger. This happens
whenever the pointer is over a link. Most links are underlined text, but
buttons and images can also be links.
2. Click the link once. While the network locates the page that the link
points to, status messages appear at the bottom of the window.
Retracing Your Steps
There are several ways to re-visit pages:
Fig. Back and Forward buttons
1. To go back or forward one page, click the Back or Forward arrow.
2. To go back or forward more than one page, click the small triangles on
the Back and Forward buttons. You'll see a list of pages you've
visited; to return to a page, choose it from the list.
50
Stopping and Reloading
Fig. Reload and Stop buttons
If a page is taking too long to appear or you change your mind and don't want to
view it, click the Stop button. To refresh the current page, or get the most up-to-date
version, click the Reload button.
Using Tabbed Browsing
When you visit more then one web page at a time, you can use Tabbed Browsing
to navigate the Web faster and easier. Tabbed Browsing lets you open tabs, each
displaying a web page, within a single Navigator window. You don't have to have
several windows open to visit several different web pages. This frees up space on
your desktop. You can open, close, and reload web pages conveniently in one place
without having to switch to another window.
To start a new tab, go to 'FileÎNewÎNavigator Tab'.
Fig. Starting a new tab
51
Fig. Browsing two web pages (mozilla.org and DrukNet Mail) using tabs
To close a tab, Right-click on the tab and click on 'Close Tab'.
Fig. Closing a Tab
52
Using Bookmark
A bookmark is a stored web page address (URL) that you can go to easily by choosing
the bookmark's name from the Bookmarks menu.
To bookmark a page that you are currently viewing, go to 'Bookmarks' menu and click
on 'Bookmark This Page'. Your bookmark will be then listed in the 'Bookmarks' menu.
Fig. Book marking a web page
To go to a bookmarked page, go to 'Bookmarks' menu and click on the name of your
bookmark in the list.
Fig. Opening a bookmarked page
53
Saving a web page
To save a web page, go to 'FileÎSave Page As'. A dialog will appear asking for the
name and location for saving the web page. Type in the name and click 'Save'.
Printing a web page
To print a web page, go to 'FileÎPrint'.
Applying Themes
Themes are used to customize the look and feel of the Mozilla suite. To change the
theme go to 'ViewÎApply Theme' and click on the theme that you want to use. Two
themes, Classic and Modern, come pre-installed with Mozilla. You can get new
themes by going to 'ViewÎApplyThemeÎGet New Themes'
Fig. Applying new theme
Searching the Web
To search the web, enter the text that you want to search in the 'Location Bar' and
click on 'Search' button next to the 'Location Bar'.
Fig. Searching the Web for 'incas'.
54
Language and Content Packs
Language and Content Packs are used to change the browser user interface to
localized languages. By installing a language pack for a particular language, one can
use the Mozilla suite in that language. To change the Language and Content Packs go
to 'EditÎPreferences'. In the 'Preferences'
dialog box, double click on the
'Appearance' category to expand the list
and then click on 'Languages/Content'.
The Language and Content Packs
preferences panel allows you to select a
content pack and/or language pack to use
within Mozilla.
Fig. Mozilla Preferences dialog box showing
the Language and Content Packs Panel
Dzongkha Linux contains the two
Language Packs English (US) and
Dzongkha (BT). You can select the
language that you want to use and click
'OK'. You must restart Mozilla for a new
content of language pack to take effect.
55
Mozilla Mail
Mozilla Mail comes with Mozilla suite. To open the Mozilla mail from Mozilla, click on
the mail icon near the lower left corner of the Mozilla Navigator screen or go to
'WindowÎMail & Newsgroups'.
Fig. Starting Mail and Newsgroup from the
Window menu
Fig. The Mail icon (second from left) near the
lower left corner of the navigator screen.
Account Setup with Mozilla Mail
The first time you open Mozilla mail, the 'New Account Setup' dialog box will appear.
Select 'Email Account' as account type
and click on 'Next'.
56
On the 'Identity' dialog box, type your name and email address then click on 'Next'.
On the 'Server Information' dialog box, choose POP or IMAP, whichever is more
appropriate for you. Fill in the Incoming Server name (POP) and Outgoing Server
name (SMTP) then click on 'Next'. If you don't know the POP and SMTP address,
please consult your network administrator.
(Note: Selecting POP will download all your mails from mail server to your local
computer. Whereas selecting IMAP will leave the mail in your mail server and mail
client acts like a navigator for mails in the mail server.)
Next, in the 'User Name' dialog box, fill in the Incoming User Name. You may have to
type in your full email address also. So, consult your network administrator or related
party. Type in outgoing user name and click on 'Next'.
57
On the 'Account Name' dialog box, type a name to refer to this account.
On the next dialog box, verify that all the information is correct and click on 'Finish'.
58
Type the password. The mail configuration is now complete.
More accounts can be added from 'Edit Mail & Newsgroups Account Settings'. Click
on 'Add accounts', Account Wizard appears, follow the dialog box to complete the
setup (Same as outlined above).
59
OpenOffice.org
Dzongkha OpenOffice.org
Dzongkha OpenOffice.org (OOo) is a complete office suite in Dzongkha, featuring a
word processor (Writer), a spreadsheet application (Calc), and presentation software
(Impress). Besides these fundamental office applications OOo also includes a vector
drawing tool (Draw), database access program, publication of documents in the
Portable Document Format (PDF) and presentations in the Flash (SWF) format! The
OOo package is fully inter-operable with the Microsoft Office suite.
Using OpenOffice.org
As a first step for information, it is important to know how the Help system works. To
get help:
HelpÎOpenOffice.org Help
The search function is very useful, pay attention to the Options (where you can get
help for the individual components in OpenOffice.org).
60
Setting up OpenOffice.org preferences make it work the way you want it. The entire
controls for this are available at:
ToolsÎOptions
WRITER
This is a powerful tool for creating professional documents, reports, newsletters and
so on – it is a word processor that allows easy integration of charts and pictures, as
well as other OpenOffice.org-compatible documents. It can create anything from a
simple letter to books, with professional layouts, with the use of styles.
61
Start it from the Main Menu by,
ApplicationsÎOfficeÎOpenOffice.org Writer
Common Functions
Functions of the word processor can be controlled via the toolbars located at the top
of the screen. On the first row, file actions like opening and saving files can be
performed, while on the second row, changing the font, size, and style (bold,
underline, or italics) are located there.
They can also be controlled by the menus that are common through packages:
* FileÎNew ÎText Document
Creates a new empty, untitled document for you to work on.
* FileÎOpen
Opens the file.
62
* FileÎClose
Closes the document you are working on. If changes have been made since
your last save, you will be prompted to save or discard those changes.
* FileÎSave
Saves the document you are currently working on.
* FileÎSave As...
Saves an updated version of a document in a different location, with a
different name, from the previously saved Version.
Common Operations
•
•
•
•
To copy text:
Select the text with the mouse, and then select EditÎCopy. The
selected text is kept in memory for use elsewhere.
To paste text:
Find the spot where the text needs to be placed, place the cursor
there, and then select EditÎPaste.
To cut text:
This means that the selected text will be removed from the current
location and kept in memory, to be placed elsewhere. Doing this is
exactly like how a copy should be performed, except selecting Edit
ÎCut instead.
To undo an action:
Select EditÎUndo. It will display the command that it is undoing at
the moment. By browsing the menu, there are also keyboard shortcuts
located next to it. Once more proficient use of the package occurs, it is
much quicker to use keyboard shortcuts like Control+C for Copy, and
so on.
63
Formatting
Some of the quick formatting options are bold, italics and underline. These options
are available at the tool bar at the top of the screen.
Text alignment plays a large role in controlling how portions of the document will
look. For example, an address field at the top of your letter will have such details
right-aligned, while the body and rest of the base text will be left-aligned.
There are four-icons that are located next to the bold/italics/underline icons,
providing options such as: right-align, centre-align, left-align and justified.
You can also highlight text and/or its background (like you would with a highlighter
and paper!), and change the font and/or background colors all with the icons there.
Fonts
Changing the font, size, and style (bold, underline, or italics) are located in the second
row. This can be done by highlighting the desired text and clicking the appropriate
button.
Others
Writer has a built-in spell checker. This can be accessed via:
ToolsÎSpellcheck
The option to auto-spellcheck means that while typing, Writer will automatically
check your spelling, and if it detects an error, it will output a red-line at the bottom of
the misspelled word. Keep in mind that the spell checking is based on the current
language that is in use. This can be changed via:
64
ToolsÎOptions ÎLanguage SettingsÎLanguages
Accessing word counts in the document is different to most other packages on a
default installation of OpenOffice.org (this can differ with several Linux distributions'
offerings)
FileÎPropertiesÎStatistics
It is under the Statistics tab that the word counts and other relevant document
counts are based. On certain vendor modified distributions of OpenOffice.org, going
to the ToolsÎWord Count menu will allow the Statistics dialogue box to be
displayed automatically.
65
CALC
This is the spreadsheet component of the OpenOffice.org package, and contains
many useful features, including an array of functions and plenty of charting options.
It is fully inter-operable with Microsoft Excel, though the function separators differ in
the two packages.
CALC may be run opting for ApplicationsÎOfficeÎOpenOffice.org Calc
or if you already have an existing window of OpenOffice.org open,
FileÎNewÎSpreadsheet.
Spreadsheets contain many rows and columns, and each row and column
combination is called a cell (like A1, B1, and so on).
Upon inputting text into a cell, you might realize that the text is wider than the cell
allows – this can be re-sized via right-clicking the cell, and selecting the Format
Cells option. Then under the Alignment tab, selecting Wrap Text automatically is
what is required.
66
Formatting
If there is some information that has already been created, and the area should be
formatted, one particular quick and easy option would be to use the AutoFormats
available in Calc. This is done after selecting the area and then opting for:
FormatÎAutoFormat
These are pre-defined styles that are available in Calc, and if you have created your
own particular style, you can add them into your new AutoFormats.
In the object toolbar, there is an option to set the font color within the cell. There are
also options to increase/decrease the indents within a cell, and in the image below,
controls for enabling:
• Currency
• Percentage
• Add/Remove significant decimal places
67
These are quick controls, and accessing them is as simple as clicking the icons that
represent them, and automatically the cell will be formatted as stated. Not only can
the borders be set easily, and cell backgrounds too, but the alignment of text within a
cell can also be set. This can be either as a top aligned, centre aligned, or bottom
aligned.
Sorting
A big part of dealing with spreadsheets involves a lot of sorting and filtering of data.
To sort a dataset, selecting the active cells, then on clicking
DataÎSort
will call a pop-up dialogue that has options for sorting the data based on the columns
present, as well as if the data should be ascending or descending.
68
IMPRESS
No office suite is complete without a presentation piece, and OpenOffice.org shows
its colors with Impress, the presentation piece in the suite. To get started with
IMPRESS you need to opt the following:
ApplicationÎOfficeÎOpenOffice.org Impress
69
or if you already have an OpenOffice.org window open, its available at
FileÎNewÎPresentation
Unlike other components of OpenOffice.org, when you start Impress, you are
presented with an AutoPilot, to start creating your presentation! This gives you
options to start a presentation with an empty template, or even with one of the predefined
templates.
A preview
dialogue is
available, and
once all options
are selected (and
Next is clicked, to
move on), you get
a basic
presentation.
70
Views
There are several views in Impress, and some have overlapping names, but with
different functionality! Just above the scroll bars, you'll notice five buttons that look
like what you see below.
The five options for workspace views are:
* Normal view – normal look of the presentation
* Outline view – overlook of the presentation.
* Notes view – add speaker notes.
* Handout view – how handouts get printed.
* Slide Sorter – birds eye view to add, change, and switch slides around.
71
72
Gaim
Gaim is a multi-protocol instant messaging (IM) client for Linux, BSD, MacOS X, and
Windows. It is compatible with AIM and ICQ (Oscar protocol), MSN Messenger,
Yahoo!, IRC, Jabber, Gadu-Gadu, SILC, Novell GroupWise Messenger, Lotus Sametime,
and Zephyr networks.
Gaim users can log in to multiple accounts on multiple IM networks simultaneously.
This means that you can be chatting with friends on AOL Instant Messenger, talking
to a friend on Yahoo Messenger, and sitting in an IRC channel all at the same time.
To start Gaim in Dzongkha Linux go to 'ApplicationsÎInternetÎGaim Internet
Messenger'
Fig. Gaim Login Window
73
Configuring your accounts
1. To configure your various accounts, click on the 'Accounts' button in the Gaim
Login Window. A window titled 'Accounts' pops up.
2. Click 'Add' to add your accounts. A new window titled 'Add Account' pops up.
3. In the 'Add Account' window, select the appropriate protocol from the drop
down list. Type in your screen name, which is your e-mail ID.
74
4. Typing in your password is optional as you can do that later. If you want Gaim
to remember your password (so that you do not need to type in your
password every time), type in your password in the 'Password' field and check
the 'Remember Password' checkbox.
5. Checking the 'Auto-login' and 'New mail notifications' checkboxes enables
Gaim to login automatically into your account and notify you of new mails
respectively.
Fig. An example MSN account configuration
6. Click 'Save' to save your account configuration. Your account will now be
listed in the 'Accounts' window. Click 'Close' on the 'Accounts' window.
75
Fig. The Login window after configuring the account.
7. Click 'Sign on' to start signing into your account.
Fig. Sign-on in progress
8. Once you sign-in successfully, a new window titled 'Buddy List' appears, listing
all your on-line friends.
76
Adding a Friend
1. Add a friend to your friends (buddy) list go to 'Buddies Add Buddy' in the
'Buddy List' window.
77
2. In the 'Add Buddy' Dialog fill in the screen name (email-id) of your friend
whom you wish to add, choose appropriate group and click 'Add'.
Fig. Add Buddy dialog
Starting chat session with a friend
Double click on your buddy's icon in the 'Buddy List' window to start chatting.
78
Fig. Chatting with a friend
If your friend is also using DzongkhaLinux or any other Linux systems with Dzongkha
support installed in it, you can use Gaim to chat in Dzongkha.
Fig. Chat in Dzongkha
79
Setting Away Status
You can set your away status to let your friends know that you are busy, out to lunch,
on the phone etc. Click on the 'Away' button in the 'Buddy List' window and set your
away status accordingly.
Fig. Setting Away Status to Busy
Once you have set your status to, say, busy, you can set your status back to on-line by
clicking on 'Away' and then 'Available'.
80
Setting your friendly name
You can set a name that you can use while chatting with your friends. Go to
'ToolsÎAccountÎActions Set Friendly Name' to set your name.
Fig. Setting friendly name
81
Signing off from chat
Go to 'BuddiesÎSignoff' to sign off from the current chat session.
Fig. Signing off
82
Multimedia – Using Totem
Most modern PCs come with CD-ROM, sound card and speaker. There are many
applications through which you can listen to audio CDs, play audio digital files (mp3)
and view VCDs.
Totem Movie Player
The Totem Movie Player application is a movie player for the GNOME desktop based
on xine library, it enables you to play movies or songs.
Totem Movie Player provides the following features:
•
•
•
•
•
Support a variety of video and audio files.
Provide a variety of zoom levels and aspect ratios, and a full screen view.
Seek and Volume controls.
A playlist.
Complete keyboard navigation.
Go to ApplicationsÎSound & VideoÎTotem Movie Player to start Totem Movie
Player. When you start Totem Movie Player, the following window is displayed.
Fig. Totem Movie Player Start Up
Window
83
The Totem Movie Player window contains the following elements:
Menubar.
The menus on the menu bar contain all of the commands you need to use in Totem
Movie Player.
Display area.
The display area displays movie or visualization of song.
Time elapsed slider.
The time elapsed slider displays the elapsed time of movie or song that is playing. It
also enables you to skip forward or backward a movie or song.
84
Seek control buttons.
The seek control buttons enables you to move to next or previous track, to pause or
play a movie or song.
Volume Slider.
The volume slider enables you to adjust volume.
Status Bar.
The status bar displays status information about movie or song that is playing.
85
Using Totem Movie Player
To Open a File:
To open a video or an audio file, choose 'MovieÎOpen'. The 'Select files' dialog is
displayed. Select the file you want to open, and then click 'OK'.
You can drag a file from another application such as a file manager to the Totem
Movie Player window. The Totem Movie Player application will open the file and play
the movie or song. Totem Movie Player displays the title of the movie or song
beneath the display area and in the title bar of the window.
If you try to open a file format that Totem Movie Player does not recognize, the
application displays an error message.
You can double-click on a video or an audio file in the Nautilus file manager to open it
on the Totem Movie Player window.
86
To Open a Location:
To open a file by URI location, choose 'MovieÎOpen Location'. The Open from URI
dialog is displayed. Use the drop-down combination box to specify the URI location
of file you would like to open, then click on the Open button.
To Play a DVD, VCD or CD
Insert a DVD or a VCD or a CD in the DVD/VCD/CD device of your computer, and then
choose 'MovieÎPlay DVD' or 'MovieÎPlay VCD' or 'MovieÎPlay CD'.
To Eject a DVD, VCD or CD
To eject a DVD, VCD, or CD, choose 'MovieÎEject'.
87
To Pause a Movie or Song
To pause a movie or song that is playing, click on the button, or choose 'MovieÎPlay
ÎPause'. When you pause a movie or song, the status bar displays 'Paused' and the
time elapsed on the current movie or song stops.
To resume playing a movie or song, click on the button, or choose 'MovieÎPlay
ÎPause'.
88
To View Properties of a Movie or Song
To view properties of a movie or song, choose 'MovieÎProperties'. The 'Properties'
dialog is displayed. The dialog contains the following information:
89
General
Title, artist, year and duration of movie or song.
Video
Video dimensions, codec and frame rate.
Audio
Audio bit rate and codec.
90
To Seek Through Movies or Songs
To seek through movies or songs, you can use the following methods:
To skip forward:
To skip forward a movie or song, choose 'GoÎSkip Forward'.
To skip backward:
91
To skip backward a movie or song, choose 'GoÎSkip Backward'.
To skip to time:
To skip to a specific elapsed time, choose 'GoÎSkip to'. The 'Skip to' dialog is
displayed. Use the spin box to specify the elapsed time (in second) to skip to, then
click 'OK'.
To move to next movie or song:
92
To move to next movie or song, choose 'GoÎNext ChapterÎMovie' or click on the
button.
To move to previous movie or song:
To move to previous movie or song, choose 'GoÎPrevious ChapterÎMovie', or
click on the button.
93
To View in Full Screen
To zoom to full screen mode, choose 'ViewÎFullscreen'. To exit fullscreen mode, click
on the 'Exit Fullscreen' button or press 'Esc' key.
To Adjust the Volume
To increase the volume, choose 'SoundÎVolume Up' or move the volume slider to
the right. To decrease the volume, choose 'Sound/Volume Down' or move the
volume slider to the left.
To turn the volume down to minimum, click on the button. To turn the volume up to
maximum, click on the button.
94
To Make Window Always On Top
To make the Totem Movie Player window always on top of other application
windows, choose 'ViewÎAlways on Top'.
To Show or Hide Controls
To hide the Totem Movie Player window controls, choose 'ViewÎShow Controls' to
unselect the 'Show Controls' option. To show the controls on the Totem Movie Player
window, right-click on the window, then choose 'Show Controls' from the popup
menu.
If the 'Show Controls' option is selected, Totem Movie Player will show the menu bar,
time elapsed slider, seek control buttons, volume slider and status bar on the
window. If the 'Show Controls' option is unselected, the application will hide these
controls and show only display area.
95
To Manage Playlist
To Show or Hide Play list:
To show play list, choose 'ViewÎShow/Hide Playlist', or click on the button. The 'Play
list' dialog is displayed. To hide Play list, choose 'ViewÎShow/Hide Play list' or click
on the button again.
96
Manage a Play List:
You can use the 'Play list' dialog to do the following:
To add a track or movie:
To add a track or movie to the play list, click on the 'Add' button. The 'Select
files' dialog is displayed. Select the file that you want to add to playlist, then
click 'OK'.
To remove a track or movie:
To remove track or movie from the playlist, select the filenames from the
'filename' list box, then click on the 'Remove' button.
To move track or movie up the playlist:
To move track or movie up the playlist, select the filenames from the 'filename'
list box, then click on the 'Up' button.
To move track or movie down the playlist:
To move track or movie down the playlist, select the filenames from the
'filename' list box, then click on the 'Down' button.
To set repeat mode:
Select the 'Repeat mode' option to play the movies or songs repeatedly.
To set shuffle mode:
Select the 'Shuffle mode' option to play the movies or songs randomly.
97
To Take Screenshot
To take screenshot of movie or visualization of song that is playing, choose
'EditÎTake Screenshot'. The 'Save Screenshot' dialog is displayed, click the 'Save'
button to save the screenshot.
You can save a screenshot to
•
•
File: select the 'Save screenshot to file' option, then click on the 'Browse'
button to specify a file to save the screenshot.
The desktop: select the 'Save screenshot to the desktop' option.
98
To Quit Totem Movie Player
To quit Totem Movie Player, choose 'MovieÎQuit'.
99
CD/DVD writing
Introduction to Gnome Baker
Gnome Baker is a GTK based application to burn CD/DVD.
Running Gnome Baker
•
Go to ApplicationsÎSound & VideoÎGnome Baker
100
When you start GnomeBaker, the following window is displayed.
The GnomeBaker window contains the following elements:
Menu bar:
The menus in the menu bar contain all the commands needed to work with the
GnomeBaker.
Toolbar:
The toolbar contains a subset of the commands that you can access from the menu
bar.
File Browser:
The File browser contains the files on your system which you can write on your CD.
101
Compilation Browser:
The Compilation Browser shows the files and directories to be written on the CD.
Media Size:
The Media Size drop down menu let's you adjust the CD capacity.
102
Using GnomeBaker to burn CD/DVD.
Create a Data CD
To create a Data CD choose Data CD from the Compilation Browser. Then drag the
files you want to burn on the CD from the File system Browser to the Compilation
Browser. Then press the Create Data CD button in the lower right corner. After
clicking it, you will see the following dialog:
Use the Writer dropdown menu to select your writer.
Select the speed that you want to burn the CD.
Select the Eject CD option so GnomeBaker would eject the CD-RW discs after
finishing the writing.
Select the Dummy Write option to simulate CD writing.
Select the Burn Free option turn on the BurnFree protection.
Create an Audio CD
To create an Audio CD, choose Audio CD from the Compilation Browser. Then drag
the music files you want to burn on the CD from the File system Browser to the
Compilation Browser. Then press the Create Audio CD button in the lower right
corner. After clicking it, you will see the following dialog:
Use the Writer drop down menu to select your writer.
Select the speed that you want to burn the CD.
Select the Eject CD option so GnomeBaker would eject the CD-RW dick after finishing
the writing.
Select the Dummy Write option to simulate CD writing.
Select the Burn Free option turn on the BurnFree protection.
103
Copy a Data CD
To copy a Data CD, choose ActionsÎCopy Data CD. The application will show the
following dialog:
Use the Reader drop down menu to select the reader from which the data will be
copied.
Use the Writer drop down menu to select your writer.
Select the speed that you want to burn the CD.
Select the Eject CD option so GnomeBaker would eject the CD dick after finishing the
writing.
Select the Dummy Write option to simulate CD writing.
Select the Burn Free option turn on the BurnFree protection.
Copy an Audio CD
To copy an Audio CD, choose ActionsÎCopy Audio CD. The application will show
the following dialog:
Use the Reader drop down menu to select the reader from which the data will be
copied.
Use the Writer drop down menu to select your writer.
Select the speed that you want to burn the CD.
Select the Eject CD option so GnomeBaker would eject the CD dick after finishing the
writing.
Select the Dummy Write option to simulate CD writing.
Select the Burn Free option turn on the BurnFree protection.
104
Blank a CD-RW
To erase a CD-RW, choose ActionsÎBlank CDRW. The application will show the
following dialog:
Use the Writer drop down menu to select your writer.
Select the speed that you want to burn the CD.
Select the Eject CD option so GnomeBaker would eject the CD-RW dick after finishing
erasing it.
Select the Fast blank option to activate this method of blanking.
Burn an ISO Image
To burn an ISO image, choose ActionsÎBurn CD Image. The application will show
the following dialog:
Navigate through the directories and after selecting the ISO file which you want to
burn, press OK.
105
Printers
To add a new printer:
Go to DesktopÎAdministrationÎPrinting
106
Click PrinterÎAdd Printer
To configure a local printer:
** Choose Printer Type: Local Printer
** Click forward to move to the next step
** Choose Manufacturer from the
list of manufacturers
** Then choose the model and click
Apply
107
To configure a network
printer:
** Choose Printer Type:
Network Printer
** Then either choose
CUPS Printer (IPP) or
Windows Printer (SMB) as
required
** Give the required
information like URI/Host,
Printer, username,
password, etc.
** Click Forward to move to the next step
** Choose manufacturers from the list of manufacturers
** Then choose the model and click Apply
108
Networking
Network Configuration
Simple Network configuration can be done using GUI network configuration tool.
1) Go to DesktopÎAdministrationÎNetworking menu from the top menu
panel.
2) If you are running DzongkhaLinux from Hard disk, type the root password
When prompted. If you are using DzongkhaLinux from Live CD, you have to
Set the root password first and enter it after the setting the password
3) Select 'Ethernet Connection'
109
4) Click Properties
5) Check 'Enable this connection'
110
6) Whether using DHCP or Static IP address consult your Network
Administrator for the right one.
7) If your network uses static IP address select 'Static IP address' item and
type IP addresses, Subnet Mask and Gateway Address.
Ask your network administrator for the network information. If your network
uses DHCP addressing just click DHCP and click OK.
111
8) In order for IP to name resolution you need a DNS server. Click DNSÎADD
and type the DNS server of your ISP or INTRANET and Click OK.
9) Set the host name by clicking General tab and typing your desired Host Name
under host name
10) After the configuration click 'Activate' and finally the OK button.
112
Modem and internet account Configuration
External Modems
1. Connect the modem to serial port of your computer
2. Run Applications Internet GNOME PPP
Fig. Starting Gnome PPP
113
Fig. Gnome PPP setup window
3. Click SetupÎDetect
Fig. Detecting your modem
114
4. If your modem is not detected, select the appropriate one at Device. If
your modem is connected to com2 of your computer select /dev/ttyS1.
5. Click Close
6. Type username, password and phone number of you ISP and click
connect.
Fig. Connecting to the ISP
115
Debian Package Management System
Debian is very popular for its package management system, the Advanced Packaging
Tool (APT), for its strict policies regarding the quality of its packages and releases, and
for its open development and testing process. Advanced Packaging Tool is a package
management system used by Debian Linux and its derivatives including
DzongkhaLinux.
Advance Packaging Tool greatly simplifies the process of installing and removing
software on Unix/Linux systems by using the number of apt sources listed in
/etc/apt/sources.list.
For example, installation of php4 can be accomplished with a simple: apt-get install
php4.
Advance Packaging Tool is designed to work with .deb packages on Debian systems.
You can install .deb package directly by not using APT tools as well.
For example: Download php-4.x.x.deb file from any debian mirror (
http://www.debian.net ) and do: dpkg -i php-4.x.x.deb.
Package Management in DzongkhaLinux
As with Debian and Debian Derivatives, DzongkhaLinux also use apt/dpkg for
package management. DzongkhaLinux is based on Debian etch/testing, so the
packages it has are are mostly based on Debian etch. Package management in
DzongkhaLinux can be done by two ways.
Using Synaptic GUI based package manager
You can easily install programs from Debian Repositories using synaptic.
Steps for installing packages:
1) Run ApplicationsÎSystem ToolsÎSynaptic Package Manager
2) Go to SettingsÎRepositories and Check "deb ftp://ftp.debian.org/debian/
etch main contrib" and Press OK
3) Click Reload at the top menu bar to update the list of software from
Debian repositories
116
4) On the left side you will see the packages list categorized.
5) Click any section that you wish to install.
6) After clicking you will see the packages at the right side that can be
Installed online. Select the one you need.
7) Right click it and select 'Mark for Installation'
8) Then at the top menu bar, Click Apply.
9) Then it will automatically try to install the dependencies. Just Click Apply.
10) It will download and install the package notifying that "Changed applied'
11) After that the shortcut will be automatically added to the related
117
Applications/Debian menus.
Remember, sometimes the install process requires user's input. So, while the
Installing and Removing screen appears, click the terminal link and answer the
questions. Default option is recommended. Click ' Automatically close after the
changes have been successfully applied' option to close the active window after
installation.
Using command line (Terminal)
1) Edit /etc/apt/sources.list, Uncomment "deb ftp://ftp.debian.org/debian/ etch
main contrib", Save and Exit.
2) Open Terminal and type
2) apt-get update
3) apt-get install php4
4) Then it will automatically try to install the dependencies if needed. Just
Press Y
5) It will download and install the package adding the shortcut to the related
Applications/Debian menus.
118
Some useful commands and tools for package management
Working with repositories
* apt-get updateÎupdate the list of software from Debian repositories that can be
installed.
* apt-get install packagenameÎinstall or upgrade the package. upgrade if not
installed previously or new version available.
* apt-get remove packagenameÎremove the package
* apt-get -d install packagenameÎDownload the package . Check
/var/cache/apt/archives
* apt-get cleanÎRemoves the .deb files that are downloaded and installed
while using apt-get install packagename
* apt-get dist-upgradeÎUpgrades every single packages to newer version if
available
* apt-cache search searchkeyÎSearch the repositories using search key.
119
Working with debian packages
* dpkg -i packagename-versionÎinstalls/upgrade the package, upgrade if not
installed previously or the package is newer
than the installed one.
* dpkg -r packagenameÎremoves the package
* dpkg -lÎLists the installed packages
* dpkg -L packagenameÎShows the files and directories created by package
* dpkg -s packagenameÎShows the information of the package
* dpkg -S filenameÎFinds package owing the file
*dpkg-reconfigure packagenameÎreconfigures the package's configuration
120
Basic Linux Administration
Basic Commands
Following are some of the useful commands used in the Linux Administration:
ls (list)
It is used to list files, directories or the contents of the current directory if no option is
specified. Some of the most commonly used
options:
* -l (long list): used to show a detailed list of all files like permissions, size, etc.
* -a : used to display hidden files as well
cd (change directory)
It is used to change between directories. The following options can be used to
change directories:
* cd /etc: to change to /etc directory
* cd newdir: to change to subdirectory newdir
* cd : to change to home directory from any directory
* cd - : to change to the last valid directory
* cd .. : to move one directory level higher
* cd ../.. : to move two directory levels higher
pwd (print working directory)
It is used to show the path of the current directory.
mkdir (make directory)
It is used to create new directories. The -p option allows to create a complete path.
121
Example:
* mkdir newdir
* mkdir -p test/newdir
rmdir (remove directory)
It is used to delete directory or directories. The directory or directories must be
empty.
Example:
* rmdir newdir
touch
It is used to create a new file with a size of 0 bytes or change the time stamp of a file.
rm (remove)
It is used to delete files. The -i option asks for comfirmation before deleting while the
-r option allows full directories to be deleted.
Example:
* rm test*
* will delete all files in the current directory that begin with test
mv (move)
It is used to move one or more files to another directory. It is also used to rename a
file.
Examples:
* mv *.txt /tmp will move all the files with .txt extension to /tmp
* mv old_name new_name will rename old_name file to new_name file
cp (copy)
It is used to copy files and directories. The -r option used for copying directories.
* cp source destination
Examples:
* cp -r newdir /tmp/testdir will copy the directory newdir with all its subdirectories to
the directory /tmp/testdir and there will be a directory /tmp/testdir/newdir/
122
ln
It is used to create a link, which is a reference to a file. Two types of links are possible hard links and soft links.
Soft links are used more widely and they are also known as symbolic links or symlinks
in short. They are created with the -s option.
Example:
9. ln -s target linkname
10.
Some of these actions can also be achieved graphically:
Accessing Files and Programs
To access files and programs, go to PlacesÎHome Folder. Then from the view pane
of the File Manager, you can open files as well as run (launch) executable programs
by double clicking on the icon representing them.
Creating New Folders
To create a new folder under the folder you are currently in, move the mouse to the
menu bar at the top (just beneath the title bar of the window) and click on File and
then click on Create Folder. A new folder will appear on the view pane and you will
have to type in the name of the new folder.
Copy Files and Folders
To copy a file, click on the file in the view pane to select it. Then select from the menu
bar at the top,
EditÎCopy File
Next open up the folder in which you want to copy the file to and then select from
the menu bar at the top,
EditÎPaste Files
Another way to copy a file is to right click on the file icon and then select “Copy File”.
Then navigate to the icon of the folder where you want the copy to be placed in and
then right click on the folder icon and select “Paste Files into Folder”.
123
The procedures above can be done with folders too. To copy more than one file or
folder at a time, select multiple files/folders by holding down the CTRL key while
clicking on the files or folders.
Moving Files and Folders
Moving a file or folder is different from copying as while moving, a copy of the
file/folder is not made, i.e. only one copy of the file/folder exists, and the file/folder is
transferred from one folder to another.
To move a file, click on the file in the view pane to select it. Then select from the
menu bar at the top,
EditÎCut File
Next open up the folder in which you want to move the file to and then select from
the menu bar at the top,
EditÎPaste Files
Another way of moving a file is to drag and drop the file into the destination folder.
The procedures above can be done with folders too. To move more than one file or
folder at a time, select multiple files/folders by holding down the CTRL key while
clicking on the files or folders.
Renaming Files and Folders
To rename a file, click on the file in the view pane to select it. Then select from the
menu bar at the top,
EditÎRename
and then type in the new name. Alternately you can also right-click on the file and
then select “Rename” . The procedures above can be done with folders too.
Deleting Files and Folders
To delete a file, click on the file in the view pane to select it. Then select from the
menu bar at the top,
EditÎMove to Trash
124
Alternately you can select the file and then use the DELETE key on the keyboard to
delete the file. This has the same effect as moving the file to the Trash folder. It is still
possible to salvage a temporarily deleted file which is existing in the Trash. To do this,
double-click on the Trash icon on the desktop to open up the Trash folder. Then you
can move the file you want to salvage to the desired folder. Note that if you delete
the file from the Trash then it cannot be recovered anymore.
The procedures above can be done with folders too. To delete more than one file or
folder at a time, select multiple files/folders by holding down the CTRL key while
clicking on the files or folders.
Viewing and Modifying the Permissions of a File or Folder
To view the owner and group of a file/folder and/or to modify its permission settings,
select the file/folder and select from the menu bar at the top,
FileÎProperties
Click on the Permissions tab. The owner and group of the file/folder are displayed as
well as the associated permissions.
Searching for Files or File Contents
find
It is used to search for files in real time.
* find path criterion action
* Eg. find . -name '*.txt'
grep
It is used to search through one or many files for a specific string and have the
matching lines displayed. Some of the common
options are:
* -r: searches entire directory trees recursively
* -i: ignores case
* -v: gives all lines that do not contain the search string
Example: grep dzo /etc/testfile.conf
125
locate
It is used to find files by searching through its database located at /var/lib/locatedb.
It is much faster than find command as locate
searches through a database (/var/lib/locatedb), which is updated automatically. The
changes after the update of database are not taken into account when locating files.
Cat
It is used to display the contents of files. It can be used to redirect the output of files
to another file. Examples:
* cat file
* cat file1 file2 >file
less
It is used to display contents of a file page by page.
Example:
* less filename
GNU/Linux System Administration
Following are some of the useful tools used in system administration:
Archiving Files:
tar can be used to create an archive, which is also called a tarball. Some of the
commonly used options:
* c is used to create an archive
* v is used for verbose output
* f is used to specify the archive file
Examples:
# to create an archive,
* tar cvf files.tar *.txt
#to extract files from an archive,
* tar xvf files.tar
Compressing and Decompressing Files:
gzip can be used to compress the tarball and gunzip to decompress it. bzip2 can
also be used to compress the tarball and bunzip2 to
decompress it.
126
#Examples to compress files
* gzip files.tar
* bzip2 files.tar
#Examples to decompress them
* gunzip files.tar.gz
* bunzip2 files.tar.bz2
Backing up with tar and gz or bz2
tar and gz or bz2 can be used together in one step to create a compressed tarball for
backing up. the z option is used to create the
gzipped archive. the j option is used to create the bz2-ed archive.
# Examples to make a compressed tarball
* tar zcvf files.tar.gz *.txt
* tar jcvf files.tar.bz2
# Examples to decompress them
* tar zxvf files.tar.gz
* tar jxvf files.tar.bz2
Task Automation
Two facilities can be used to automate tasks.
* at: It is used to execute a task at a specific time.
* cron: It is used to execute tasks at scheduled intervals.
Using “at”:
It is useful for scheduling a single future event. The command “atq” is used to list
defined jobs while “atrm” used to delete a defined job.
Example:
* at 21:00
* at > mail ram < ram.msg
* Note: Input can be ended with Ctrl + D
The /etc/at.allow and /etc/at.deny files can be used to allow or deny users to use “at”.
The users listed in /etc/at.deny are not allowed to use “cron” and all other users are
allowed. If file /etc/cron.allow exists, this supersedes cron.deny (ie, cron.deny is
ignored) and allows only those listed in it to use “cron”.
127
Using cron:
It is useful for scheduling regularly happening events. The crontab command can be
used to edit, install and view the job schedules. The /etc/at.allow and /etc/at.deny
files can be used in the same way as 'at' to allow or deny users to use cron.
Syntax
* crontab [-u user] file
* crontab [-l | -r | -e]
* -u user to install crontab for user, who must be privileged to use
* -e to create or edit the current crontab
* -l to list the contents of the current crontab
* -r to delete the current crontab
Each line of the file, consisting of six fields, is used for definition of one job. The first
five fields define the time while the sixth field contains the command to run. This can
contain any command or the full path of the shell script.
Format for the first five fields:
Field: Range
Minutes:0-59
Hours: 0-23
Day of Month: 1-31
Month: 0-12
Weekday: 0-7
A field may be an asterisk (*), which stands for every value in the corresponding field.
In the weekday field, 0 or 7 is Sunday.
Example:
*/5 8-17 * * 1-5 fetchmail mailserver
Fom Monday to Friday every five minutes between 8:00 to 17:00, the command
fetchmail is run to fetch incoming emails from the computer mailserver.
cron.hourly, cron.daily and cron.monthly for system jobs:
Most GNU/Linux distributions have three directories in /etc called cron.hourly,
cron.daily and cron.monthly. These let the system administrator to run jobs on an
hourly, daily or monthly basis. Simply by placing a shell script here, jobs can be
carried out at those intervals. There is no need to have a crontab entry for these jobs.
128
User Administration
User administration can be done with the following commands. Please note that the
user administration can only be done by the root account.
adduser
It is used to add users to the system.
Example:
* adduser pema
* Here, pema will have its home directory as /home/pema
usermod
It is used to modify an already existing user account.
Example:
* usermod -d /pemahome -m pema
Here, the home directory of pema is changed to /pemahome and the -m option
copies all the contents of user nepali to its new home directory
userdel
It is used to delete users from the system.
Example:
* userdel -r pema
Here, -r option is used to delete the users home directory as well
passwd
It is used to change a user's password. Only root can change others password
Example:
* passwd pema
A normal user can only change his/her own password and it can be changed if the
passwd command is run without a username as an argument
Example:
* passwd
groupadd
It is used to add groups to the system.
Example:
* groupadd pema
129
groupmod
It is used to modify an already existing group.
Example:
* groupmod -n pemageyleg pema
Here, the name of the group pema is modified to pemageyleg
groupdel
It is used to delete groups from the system.
Example:
* groupdel pema
130
User Administration (Graphically)
To add user:
1. Go to DesktopÎAdministrationÎUsers and Groups
2. On the Users tab, click Add User
3. Provide the appropriate information like username and password
131
To modify user:
1. Go to DesktopÎAdministrationÎUsers and Groups
2. On the Users tab, select the user to modify and click Properties
132
3. Modify as required like changing password etc.
133
To delete user:
1. Go to DesktopÎAdministrationÎUsers and Groups
2. On the Users tab, select the user to delete and click Delete
3. Press Delete when asked for confirmation
134
To add group:
1. Go to DesktopÎAdministrationÎUsers and Groups
2. On the Groups tab, click Add Group
3. Provide the appropriate information like group name
135
4. Select the user and click Add to make any user a member of this group
136
To modify group:
1. Go to DesktopÎAdministrationÎUsers and Groups
2. On the Groups tab, select the group to modify and click Properties
3. Modify as required like changing the group name, adding new members to the
group, etc.
137
To delete group:
1. Go to DesktopÎAdministrationÎUsers and Groups
2. On the Groups tab, select the group to delete and click delete
3. Press Delete when asked for confirmation
138


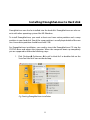
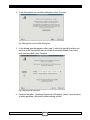
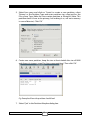
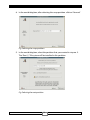
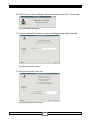
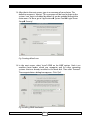
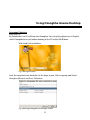
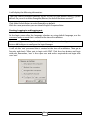
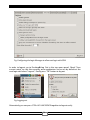
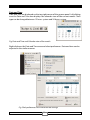
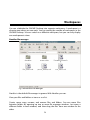
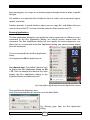
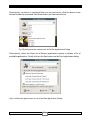
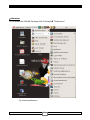
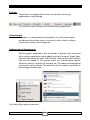
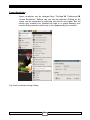
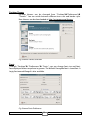
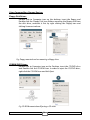
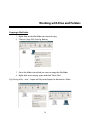
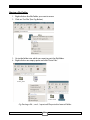
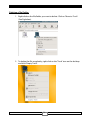
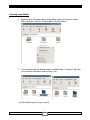
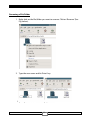

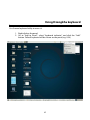
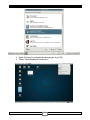
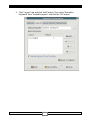
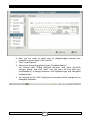
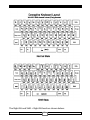
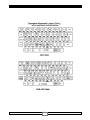
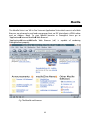
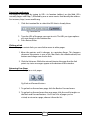
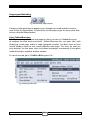
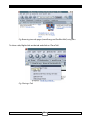
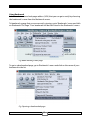
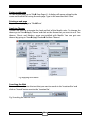
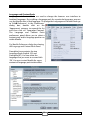
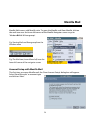

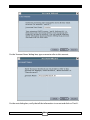
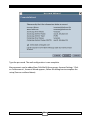
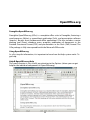
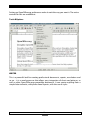

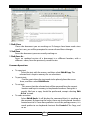

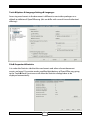
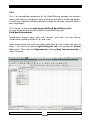
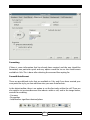
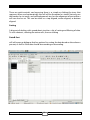

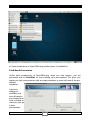
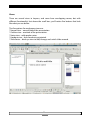
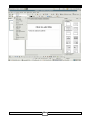
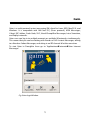
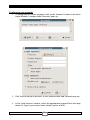

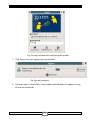
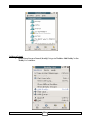
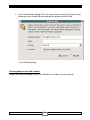

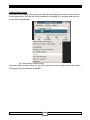
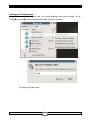
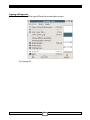
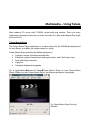
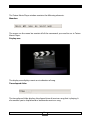
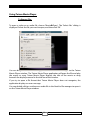
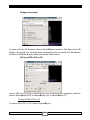
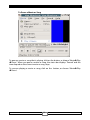
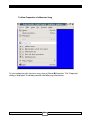
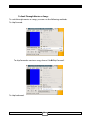
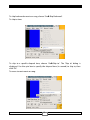
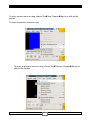
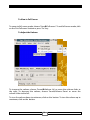
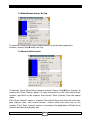
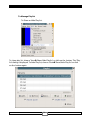
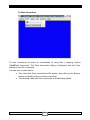
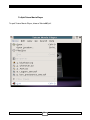
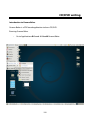
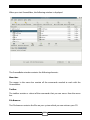

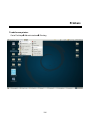
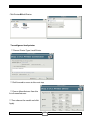
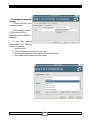

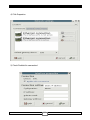
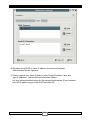
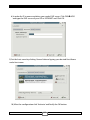

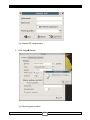
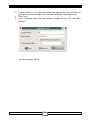
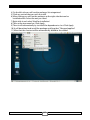
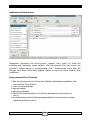
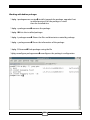
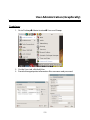
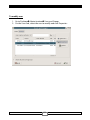
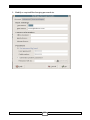
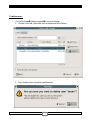
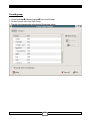
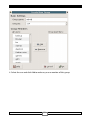
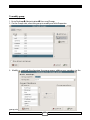
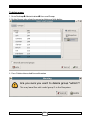
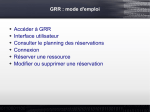
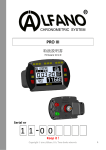


![marché PASSAGE DEMI PENSION[1]](http://vs1.manualzilla.com/store/data/006362679_1-8cf47c2b55a2b8cad40a64b68afe359d-150x150.png)