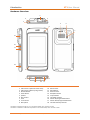
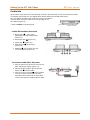
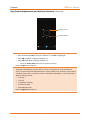
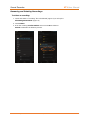
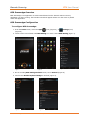
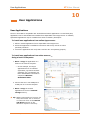
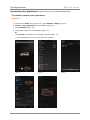
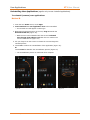
1
XT1 User Manual Version 1 March 2015 Technology at Work ®. © 2015 Janam Technologies LLC. All rights reserved. XT1 User Manual Copyright 2014 Janam Technologies LLC. All rights reserved. XT1 Rugged Mini-Tablet, Janam and the Janam logo are trademarks of Janam Technologies LLC. Other product and brand names may be trademarks or registered trademarks of their respective owners. Janam Technologies LLC assumes no responsibility for any damage or loss resulting from the use of this guide. Janam Technologies LLC assumes no responsibility for any loss or claims by third parties which may arise through the use of this product. Janam Technologies LLC assumes no responsibility for any damage or loss caused by deletion of data as a result of malfunction, dead battery or repairs. To protect against data loss, be sure to make backup copies (on other media) of all important data. Follow all usage, charging and maintenance guidelines in the Product User Guide. If you have questions, contact Janam. Important: Please read the End User License Agreement for this product before using the device or the accompanying software program(s). Using the device or any part of the software indicates that you accept the terms of the End User License Agreement. Janam Technologies LLC ii XT1 User Manual Contents 1 2 Introduction CH–PG Wireless Network Connection CH–PG Introduction 1–1 Introduction 4–1 Key Features 1–1 Hardware Overview 1–2 Connecting the XT1 Mini-Tablet to a WLAN (Wireless Local Area Network) 4–2 Getting Started CH–PG Unpack Your Rugged XT1 Mini-Tablet 3 4 5 2–1 Bluetooth CH–PG Overview 5–1 Bluetooth Partnerships 5–1 5–2 Recommended Host Computer Requirements 2–1 Bluetooth Settings Janam XT1 SDK 2–1 Bluetooth Partnership Setup 5–2 Charging the XT1 Mini-Tablet 2–2 Bluetooth Beam 5–5 XT1 Battery Charging Information 2–3 USB Port Notes 2–3 Run Time 2–3 6 Camera CH–PG XT1 Battery Condition Information 2–4 Introduction 6–1 Turn the XT1 On 2–5 Camera Function 6–1 Turn the XT1 Off 2–5 Camera Controls Overview 6–2 Touch Screen Navigation 2–5 6–3 Screen Rotation 2–6 Key Camera Adjustments and Options Overview Home Screen 2–6 Alterative Camera Control 6–6 6–7 Touch Screen Navigation Fundamentals 2–6 Taking Pictures and Recording Video Home Screen Panels 2–6 Viewing Camera Pictures and Video 6–7 Shortcuts 2–7 Editing Pictures 6–8 Widgets 2–8 Key Camera Specifications 6–9 Key Status Icons 2–8 Setting Up the XT1 CH–PG 7 Messaging⎯Email & SMS Text CH–PG Email 7–1 Removable Memory 3–1 XT1 Email Setup 7–1 microSD Card 3–1 Removing an XT1 Email Account 7–3 Port Cover and Tether Information 3–2 SMS Text Messaging 7–4 SIM Card 3–2 Sound Recorder CH–PG USB Port 3–2 Backup and Reset 3–3 Cradle Kits 3–5 Recording 8–1 Security Preferences 3–7 Playback 8–3 3–7 Renaming and Deleting Recordings 8–4 Screen Lock Options Forgotten Unlock Credentials 3–11 Key User Options and Preferences 3–12 Display 3–12 Sound 3–15 Disabling Connectivity 3–17 Airplane Mode 3–17 Owner Information 3–18 Opening Applications 3–18 Janam Technologies LLC 8 Version 1, March 2015 Contents―1 XT1 User Manual Contents 9 Barcode Scanning Barcode Scanning Overview Barcode Scanning Fundamentals Barcode Scanner Demonstration Application BCR Scanwedge Overview BCR Scanwedge Configuration BCR Scanwedge Configuration Symbology BCR Scanwedge Configuration Scanwedge Indication BCR Scanwedge Configuration Scanwedge Prefix/Suffix Barcode Scanning Solutions 10 11 12 User Applications CH–PG 9–1 9–1 9–2 9–3 9–3 9–4 9–5 9–6 9–6 CH–PG Installing User Applications 10–1 Updating User Installed Applications 10–4 Uninstalling User Applications 10–5 GPS CH–PG GPS Overview 11–1 GPS Location Access 11–1 GPS Application Example 11–2 GPS Application Installation 11–2 Regulatory and Maintenance CH–PG XT1 Regulatory Information 12–1 Regulatory and Safety Approvals 12–1 CE Mark 12–1 FCC and Canadian Compliance 12–1 XT1 with WWAN, WLAN and Bluetooth 12–2 XT1 with WLAN and Bluetooth 12–2 Class B digital apparatus complies with the Canadian ICES-003 12–4 Care and Cleaning of Terminals 12–4 Waste Electrical and Electronic Equipment (WEEE) Information 12–4 Battery Warning 12–5 Janam Technologies LLC Version 1, March 2015 Contents―2 Introduction XT1 User Manual 1 Introduction XT1 Rugged Mini-Tablet An Industry Game Changer — Janam’s XT1 Rugged Mini-Tablet combines cutting-edge smartphone technologies with mission-critical enterprise features. Purpose-built to meet the diverse needs of business environments, the XT1 Rugged Mini-Tablet is a next-generation mobile solution. Engineered for reliability, the XT1 design includes IP54 sealing and hardened touch screen glass to help ensure resistance to damage. Equipped with integrated 2D barcode scanning technology—the XT1 eliminates the challenges often associated with camera scanning applications. Available with optional 3G WWAN technology, mobile workforces can be armed with high-quality, dependable wireless communication with exceptional versatility. Key Features ― Android™ 4.2 operating system ― Brilliant 5.9 inch WVGA TFT capacitive touch screen ― High performance 1D and 2D barcode scanning ― Dual-core ARM® Cortex®-A9 CPU @1.5GHz ― Multiple 3’/1m drops to concrete ― Sealed to IP54 standards ― Embedded RFID/NFC reading capability ― 16GB of built-in memory with expansion capability ― 802.11a/b/g/n dual-band Wi-Fi and Bluetooth 4.0 (BLE) ― High sensitivity GPS and Assisted GPS ― Optional 3G WWAN technology (UMTS/HSDPA/HSUPA/GSM) Android is a trademark of Google Inc. ARM and Cortex are registered trademarks of ARM Limited (or its subsidiaries) in the EU and/or elsewhere. All rights reserved. Janam Technologies LLC Version 1, March 2015 1―1 Introduction XT1 User Manual Hardware Overview 3 2 4 1 5 6 8 7 15 16 17 18 9 10 14 11 1. 2. 3. 4. 5. 6. 7. 8. 9. 12 13 LED Indicator 1 (barcode reader status) LED Indicator 2 (battery charge status) Barcode Reader Power Button Speaker Rear Camera Flash Front Camera Microphone 10. 11. 12. 13. 14. 15. 16. 17. 18. HD Connector Mini-USB Port Dock Connector Headphone Socket Lanyard Holder microSIM® Card Slot Volume UP/Programmable Button Volume Down/Programmable Button microSD™ Memory Card Slot microSD is a trademark of SD-3C, LLC in the United States, other countries or both. microSIM is a trademark of MicroSim Corporation in the United States, other countries or both. Janam Technologies LLC Version 1, March 2015 1―2 Getting Started XT1 User Manual 2 Getting Started Unpack Your XT1 Rugged Mini-Tablet Make sure you have the following: ― Janam XT1 Rugged Mini-Tablet ― Documentation (Quick Start Guide, License Agreement and Regulatory Guide) ― Charging accessory (one or more of the following power/connection kits ordered/packaged separately): ― Janam mini-USB cable with AC wall mount adapter ― Janam Single-Slot Ethernet/USB cradle kit ― Janam Six-Slot Ethernet/USB cradle kit Recommended Host Computer Requirements ― Microsoft® Windows®-compatible host computer ― Microsoft Windows 8, Windows 7, Windows XP or Windows 2000 operating system ― 100 MB of available hard disk space and 1GB if installing the Android™ SDK ― One available USB port Janam XT1 SDK The Janam XT1 Software Development Kit enables programmers to develop applications for Janam XT1 rugged mini-tablets running the Android™ operating system. It contains details and instructions for developing applications that access the XT1 embedded scanner. The development kit, which can be downloaded from Janam’s Product Zone (login required), is designed for use with the publicly available Android SDK. Products or services mentioned may be trademarks or registered trademarks of their respective companies. Microsoft and Windows are either registered trademarks or trademarks of Microsoft Corporation in the United States and/or other countries. Janam Technologies LLC Version 1, March 2015 2―1 Getting Started XT1 User Manual Charging the XT1 Mini-Tablet IMPORTANT BATTERY INFORMATION! The XT1 rechargeable battery is NOT user accessible. Should replacement of the XT1 battery be required, it must be changed by Janam or Janam-authorized technicians and be replaced only with a Janam-approved battery. There is the risk of explosion if battery is replaced by an incorrect type. For more information on battery replacement, contact JanamCare at 866-915-5311. Charging with the Janam mini-USB cable with AC wall charger mount adapter kit: 1. Locate and carefully open the port cover marked HD/USB at the lower left-hand edge of the mini-tablet (Figure 1). With the mini-tablet’s back facing up and using the HD/USB port cover’s thumbnail cutaway, apply gentle outward pressure in a straight line away from the device body. APPLY ONLY ENOUGH PRESSURE TO RELEASE THE PORT COVER, ALLOWING IT TO REMAIN TETHERED TO THE MINITABLET BODY! Mini-USB Port Figure 1 2. Slide the AC plug prong adapter onto the AC power supply housing (Figure 1) until it clicks. 3. Insert the mini-USB plug of the AC power supply into the mini-USB port on the XT1 mini-tablet. 4. Plug in the AC adapter. Use only easily accessible wall outlets that are well within reach of the length of supplied cable. The tablet’s Power Indicator LEDs will lluminate to confirm connection. Red indicates charging in progress. Green indicates a fully charged state. IMPORTANT PORT COVER AND TETHER INFORMATION Janam mini-tablet connection port covers incorporate important seals against common operating environment hazards and are tethered to the mini-tablet body with a short flexible hinge connector. To maintain tether hinge integrity, never pull or apply excessive force, causing the tether hinge to separate from the mini-tablet. Charging via a host PC’s USB Port (Figure 2) 1. Using a USB-to-mini-USB cable (not supplied), insert the mini-USB plug end of the cable into the mini-USB port on the XT1. Mini-USB Port 2. Connect the USB end of the cable to a USB-IF compliant USB port on the host PC. Figure 2 Janam Technologies LLC Version 1, March 2015 2―2 Getting Started XT1 User Manual Charging the XT1 Mini-Tablet (continued) Charging with a Janam XT1 Ethernet/USB cradle kit: Note: The following applies to the Janam singleslot Ethernet/USB and six-slot cradle kits. 1. Insert the female mini-barrel plug (Figure 3) of the cradle kit’s AC power supply into the cradle’s mating male receptacle (Figure 4). 2. Plug the female end of the AC line cord Figure 3 into 2-pin receptacle on the (brick style) power supply (Figure 3.) 3. Plug in the power supply . Use only easily accessible wall outlets that are well within reach of the length of supplied power cable. 4. Place the XT1 mini-tablet in the cradle. The mini-tablet’s Power Indicator LED will illuminate to confirm connection. Red indicates charging. Green indicates fully charged. ― Figure 4 Refer to Chapter 3 for more information on Janam XT1 MiniTablet cradle kits. Battery Charging Information Battery Charging Information Charging Method Janam mini-USB cable with AC wall mount adapter kit Host PC’s USB Port Janam Single Slot or Six Slot XT1 Ethernet/USB cradle kit Approximate Charging Time 2 hrs, 27 min. 5 hrs, 42 min. 2 hrs, 41 min. USB Port Notes USB Port Notes XT1 Mini USB Port connected to AC wall mount adapter kit XT1 Mini USB Port connected to a PC’s USB port • • • (refer to Figure 2 on page 2) • • Full operational power is provided to the device Full battery charging power is provided to the device • XT1 will be recognized by the host PC as an external storage device, enabling data interchange Low operational power is provided to the XT1 Slow battery charging power is provided to the device • • Slow charging is insufficient to maintain the battery level while the XT1 is powered on. To charge the XT1 battery from a PC, power the XT1 off. The XT1 battery meter will NOT indicate Charging when the XT1 is (1) powered on and (2) connected to a PC’s USB port via the XT1’s mini USB Port. In this instance, the USB trickle charge is insufficient to power the device AND charge simultaneously. However, with the XT1 connected to a PC’s USB port via the XT1’s mini USB Port AND the XT1 powered OFF, the XT1 LED battery indicator will turn RED, indicating a state of slow charging. Janam Technologies LLC Version 1, March 2015 2―3 Getting Started XT1 User Manual Run Time A fully charged XT1 mini-tablet will operate for approximately 6 hours. Please note, however, that a variety of usage profile variables and mini-tablet settings can affect run time. Tip:Whenever practical, you can conserve battery run time by: 1. 2. 3. 4. Using the AC adapter to plug the XT1 into an external power source. Manually or auto-suspend device operation as often as is practical. Reduce screen brightness. Turn off wireless functionality (Wi-Fi, Bluetooth or GPS) when not in use. XT1 Battery Condition Information The approximate amount of battery charge remaining, along with estimates of how much power is being used by various device functions can be verified by: ― From the Home screen (Figure 5), touch the Settings icon. ― Select (touch) Battery (Figure 6). The remaining Battery condition is shown as a percentage of charge remaining, along with the approximate time that the device can be operated before recharging (Figure 7). Figure 5 Janam Technologies LLC Figure 6 Version 1, March 2015 Figure 7 2―4 Getting Started XT1 User Manual Turn the XT1 Mini-Tablet On With the tablet fully charged: 1. Press and hold the Power Key mini-tablet (Figure 8). at the top right-hand edge of the ⎯ If the mini-tablet is being powered on for the first time, follow the on-screen setup instructions. ⎯ Pressing the power button briefly will suspend operation. Power Key 2. An unsecured XT1 is Unlocked by swiping the Lock icon (Figure 9) in any direction toward the outer edge of the screen until the Lock icon changes to the Unlock icon (Figure 10) and release. For more about securing the XT1 Mini-Tablet, refer to Chapter 3. Figure 8 Figure 9 Figure 10 Turning the XT1 Off 1. To power off, press and hold the Power Key. 2. From the resulting menu, select Power Off. ⎯ Simply holding the Power Key for an extended time will also shut down the mini-tablet completely. The tablet will be re-booted (a cold start) the next time the power button is pressed. Touch Screen Navigation 1. Before using the XT1 Mini-Tablet, remove the screen’s protective packaging film. 2. Tap the touch screen with your fingertip to activate. ⎯ Tap the screen once to select or open a menu, option or application. ⎯ Tap an item and drag with your finger to move to a new location. IMPORTANT TOUCH SCREEN INFORMATION Objects such as pens or a stylus should never contact the touch screen and as such, should never be used for touch screen navigation. Janam Technologies LLC Version 1, March 2015 2―5 Getting Started XT1 User Manual Screen Rotation By default, the XT1 mini-tablet’s Auto-rotate screen function will automatically present a Landscape (horizontal) or Portrait (vertical) view in sync with the physical orientation of the device. Refer to Chapter 3 for more on screen rotation control. Home Screen When first activated, the XT1 begins by displaying the Home screen, providing quick access to key functions, device setup tools and easy navigation to additional functions and applications. Once activated, the screen last in use will be displayed at startup. Home Screen Notifications & Status Indicators Status Bar • • • • • Google Search Input Time Battery condition Wi-Fi signal Sound Bluetooth Touch the Home icon to return to the Home screen. Touch Screen Apps & Widgets E-mail Settings Barcode Scanner Web Browser Recent Apps Previous Screen / Menu Return to Home Screen Touch Screen Navigation Fundamentals Familiar touch screen gestures are used to navigate XT1 menus, activate shortcuts, select option settings and direct device and application functions. There may be instances where select touch screen gestures are incorporated into 3rd party or custom applications. Home Screen Panels Swiping the Home screen laterally to the left or right exposes additional Home screen space for general use as needed or to create alternative Home screens. Shortcuts and Widgets can be located on Home screen panels as preferred. An inset panel outline will appear when the right or left limit of Home screen lateral movement has been reached. Janam Technologies LLC Version 1, March 2015 2―6 Getting Started XT1 User Manual Shortcuts Shortcuts are Application-related icons that can be optionally placed on the Home screen to serve as convenient one-touch access to an Application’s functionality. To add a Shortcut to the Home screen: 1. Touch Applications on the Home screen. 2. Select (touch) Apps from the upper menu options (Figure 11). 3. Touch and hold the desired Application Shortcut Icon. ⎯ Touching and holding the icon will (a) seize the icon and (b) bring up the Home screen with individual outlines defining Home screen panels onto which the Application Shortcut can be placed. ⎯ Placement is achieved by maintaining gentle pressure on the screen while moving the selected Application Shortcut Icon with your finger to the preferred location. 4. Finish the Application Shortcut Icon placement by lifting your finger from the touch screen. Figure 11 To remove a Shortcut from the Home screen: 1. Touch and hold the desired Application’s Shortcut Icon on the Home screen. ⎯ Touching and holding the icon will (a) seize the icon and (b) bring up the Home screen Remove function. ⎯ Removal is achieved by maintaining gentle pressure on the screen while moving the selected Application Shortcut Icon with you finger (Figure 12) to the located at the top of the Home screen (Figure 13). ⎯ X Remove area The X Remove area (Figure 13) will turn red when the Application Shortcut icon has reached the correct screen area. 2. Complete the removal by lifting your finger from the touch screen. Figure 12 Janam Technologies LLC Figure 13 Version 1, March 2015 2―7 Getting Started XT1 User Manual Widgets Widgets are self-contained applications optionally placed on the Home screen and may function as a stand-alone application or serve as convenient access to a Widget’s underlying functionality. To add a Widget to the Home screen: 1. Touch the Applications icon on the Home screen. 2. Select (touch) Widgets (Figure 14) from the upper menu options. 3. Follow Add a Shortcut instructions 3 and 4 on the previous page, substituting Widget for Application Shortcut. To remove a Widget from the Home screen: 1. Follow remove a Shortcut instructions 1 and 2 on the previous page, substituting Widget for Application Shortcut. Figure 14 Key Status Icons Icon Indication Icon Indication Icon Indication Fully charged battery Bluetooth is enabled New email message arrived Low battery level Cellular signal strength (maximum) * BCR Service is running Battery is charging Connected to a Wi-Fi network * Applies only to WWAN cellular signal-enabled version Janam Technologies LLC Version 1, March 2015 2―8 Setting Up the XT1 Mini-Tablet XT1 User Manual 3 Setting Up the XT1 Mini-tablet Removable Memory IMPORTANT NOTE! To avoid possible damage to microSD and/or SIM cards or the XT1, ESD (electrostatic discharge) precautions are recommended when installing or removing microSD and/or SIM cards. At a minimum before handling, discharge any personal static electric buildup to a point of discharge other than the device. microSD Card About microSD Cards The XT1 mini-tablet features a microSD flash memory card slot that is compatible with microSD memory cards with a storage capacity of up to (but not more than) 64GB (FAT32 file format). When inserted, a microSD card provides additional memory storage that is designated by the XT1’s File Manager tool as “MicroSD card” and by its nature is external storage. Removable microSD memory is useful for general file storage, uploading and downloading of user data and more. The use of high quality microSD cards supplied by a reputable manufacturer is recommended. To access the microSD card slot: 1. Locate and carefully open the slot cover marked with a microSD memory card icon at the lower left-hand edge of the mini-tablet (Figure 1). With the mini-tablet’s back facing up and using the microSD card slot cover’s thumbnail cutaway, apply gentle outward pressure in a straight line away from the mini-tablet body. APPLY ONLY ENOUGH PRESSURE TO RELEASE THE PORT COVER, ALLOWING IT TO REMAIN TETHERED TO THE MINI-TABLET BODY! microSD card card slot cover microSD card slot Figure 1 To install a microSD card: 2. With the mini-tablet’s back still facing up (toward you), orientate a compatible microSD card with its straight edge down (towards the bottom edge of the mini-tablet) and its brand and capacity markings facing toward you (Figure 2). Figure 2 3. Insert the microSD memory card fully until it locks in the slot. DO NOT attempt to insert the microSD card in any other orientation. 4. Replace the tethered microSD slot cover. Straight edge Janam Technologies LLC Version 1, March 2015 3―1 Setting Up the XT1 Mini-Tablet XT1 User Manual microSD Cards (continued) To remove a microSD card: 1. Open the microSD card slot cover as instructed on the previous page. 2. Gently press the microSD memory card inward to release it from its locked position and remove the card. 3. Replace the tethered microSD slot cover. IMPORTANT PORT COVER AND TETHER INFORMATION Janam mini-tablet connection port covers incorporate important seals against common operating environment hazards and are tethered to the mini-tablet body with a short flexible hinge connector. To maintain tether hinge integrity, never pull or apply excessive force, causing the tether hinge to separate from the mini-tablet. SIM Card (Applies only to WWAN cellular signal-enabled version) XT1 mini-tablets equipped with optional WWAN cellular signal functionality include a removable SIM (Subscriber Identity Module) card slot. Neither cellular signal connectivity for internet access nor optional 3rd party voice telephone applications can function without a SIM card installed. Contact Janam or your local GSM/GPRS based carrier for more information about SIM cards and wireless service. To access the SIM card slot: 1. Locate and carefully open the slot cover marked with a SIM card icon at the upper left-hand edge of the device (Figure 3). With the mini-tablet’s back facing up and using the SIM card slot cover’s thumbnail cutaway, apply gentle outward pressure in a straight line away from the device body. APPLY ONLY ENOUGH PRESSURE TO RELEASE THE PORT COVER, ALLOWING THE COVER TO REMAIN TETHERED TO THE MINI-TABLET BODY! SIM card slot cover SIM card slot To install a SIM card: 2. With the mini-tablet’s back still facing up (toward you), orientate the SIM card with its clipped corner (towards the bottom edge of the mini-tablet). Insert the SIM card fully until it seats in the slot. DO NOT attempt to insert the microSD card in any other orientation (Figure 4). 3. Replace the tethered SIM slot cover. USB Port Clipped corner Figure 4 The mini-USB port located at the lower left-hand edge of the XT1 (Figure 5) provides data transfer capability to and from the mini-tablet and another device, such as a host PC. The USB port also delivers DC power to the mini-tablet for normal operation and slow charging. Janam Technologies LLC Figure 3 Version 1, March 2015 Figure 5 3―2 Setting Up the XT1 Mini-Tablet XT1 User Manual Backup and Reset Use Backup and Reset for device recovery and as a convenient means of rapidly deploying additional similarly configured XT1 mini-tablets. Once a microSD card-equipped XT1 mini-tablet has been configured as preferred, its settings and other important data are easily backed up to the microSD card with the Backup function. The Reset function uses the backup information (data and settings) to restore a damaged or corrupted XT1 to a previous state. The Reset function is also a means of quickly and accurately cloning a custom-configured XT1 mini-tablet. After being cloned with the Reset function, each cloned XT1 will be configured identically to the host device whose settings were backed up on its microSD card. Thus, it is easy to configure multiple matching devices for deployment. IMPORTANT NOTE! XT1 Backup and Reset functions require the installation of a microSD card. Refer to page 1 of this chapter for more about microSD cards. To Backup the XT1: 1. Connect the XT1 to an AC power source and confirm that the XT1 battery is charged to at least 60%. 2. From the Home screen, touch the Settings (icon) (Figure 6). 3. Touch Settings screen to scroll down until Backup & reset is in view (Figure 7). 4. Touch Back up system (Figure 8). ⎯ The System Backup Fail message will appear unless a microSD card is installed. Figure 6 Figure 7 Figure 8 5. Agree to begin (or cancel) the Backup procedure. ⎯ The Backup will begin and the device will be restarted, during which time, the backup process will be confirmed visually. Janam Technologies LLC Version 1, March 2015 3―3 Setting Up the XT1 Mini-Tablet XT1 User Manual Backup and Reset (continued) To Restore the XT1: 1. Connect the XT1 to an AC power source and confirm that the XT1 battery is charged to at least 60%. 2. From the Home screen, touch the Settings (Figure 6). (icon) 3. Touch Settings screen to scroll down until Backup & reset is in view (Figure 7). 4. Touch Restore system (Figure 9). 5. Agree to begin (or cancel) the Restore procedure. ⎯ Restoration will begin and the device will be restarted, during which time, the backup process will be confirmed visually. Figure 9 To Clone the XT1: 1. Configure the master XT1 mini-tablet as preferred. It is this master XT1 whose settings, preferences and data will be replicated onto one or more target (cloned) XT1(s). 2. Confirm that the master XT1 mini-tablet has a microSD card installed. 3. Backup the master XT1. 4. Remove the microSD card from the master XT1. 5. Install the microSD card removed from the master XT1 into the target XT1, i.e. the XT1 to be cloned. 6. With the microSD card from the master installed in the target (clone) XT1, Restore the target XT1. ⎯ When the Restore procedure and accompanying restart are complete, the target XT1 will be a replication of the master. This process can be repeated as many times as necessary to deploy duplicate XT1 configurations. Janam Technologies LLC Version 1, March 2015 3―4 Setting Up the XT1 Mini-Tablet XT1 User Manual Cradle kits Janam offers single-slot and six-slot docking cradle kits which provide a quick and convenient means of charging and storing XT1 mini-tablets. Both feature Ethernet and USB connectivity*. XT1 mini-tablets interface with cradle kits via the mini-tablet’s multi-pin dock connector centered on the top edge of the mini-tablet (Figure 10). Figure 10 * Refer to Notes on following page. XT1 dock connector Cradle Kit Hardware Overview 1. Device slots ⎯ One or Six, depending on cradle configuration (Figure 11). (Figure 12). (Figure 12). 4. Ethernet port (RJ-45-type) 2. Kensington lock Figure 11 3. Power jack (Figure 12). 5. USB port (for left front slot only of six-slot cradle) (Figure 12). Figure 12 To connect cradle kit to AC power 1. Plug the female end of the AC cord into the brick-type power supply (Figure 13). 2. Plug the power supply’s right-angle minibarrel plug into the cradle. 3. Plug the 3-prong AC plug into a suitable 110-120-volt AC outlet. Use only easily accessible wall outlets that are well within reach of the length of supplied power cable. Janam Technologies LLC Version 1, March 2015 Figure 13 3―5 Setting Up the XT1 Mini-Tablet XT1 User Manual Cradle kit Docking: 1. Lower the mini-tablet partially into the cradle kit slot with the dock connector facing down and the minitablet tilted slightly forward (Figure 14). 2. Tilting the mini-tablet back towards vertical, lower the mini-tablet completely into the cradle slot (Figure 15). Figure 14 3. To remove the mini-tablet, pull straight up from the cradle. Figure 15 To connect cradle kit to a network: Using an RJ-45 cable (not supplied), connect the cradle to a suitable Internetready network connection (Figure 16). Figure 16 Once connected, LED lights on the cradle’s Ethernet port will confirm network connection status. To connect a USB device: The USB port on the cradle (Figure 17) provides connection to an external USB storage device (e.g. a USB flash drive, serving as additional storage for the system). Figure 17 * NOTES: • The six-slot cradle kit limits Ethernet and USB connectivity to only the left-front cradle slot (Figure 18). • Cradle kit USB connectivity is limited to providing a means of connecting a USB flash memory storage device. Figure 18 Janam Technologies LLC Version 1, March 2015 3―6 Setting Up the XT1 Mini-Tablet XT1 User Manual Security Preferences The Janam XT1 can be customized in many ways to suit task requirements, security and/or individual user preferences. The following is an overview of key XT1 mini-tablet settings with instructions on how to make changes. The general navigations and actions used to affect these changes are instructive to other similarly controlled options and settings. Screen Lock Options Screen Lock options (Figure 19), located in Settings > Security, provide a variety of ways in which the XT1 may be configured from a user security standpoint, including: ⎯ None ⎯ provides no means of security. When powered on, the mini-tablet will be ready to operate. ⎯ Slide ⎯ is the factory default setting. When powered on, the screen will be Locked. To operate the mini-tablet, the screen must be Unlocked by sliding the Lock icon to an outer edge of the screen. This level of security is largely a means of preventing the mini-tablet from entering an operational state unintentionally. Refer to Chapter 2, Page 5 for more about Slide unlocking. ⎯ Pattern ⎯ security requires the user to establish a specific pattern that must be duplicated by the user on the touch screen in order for the screen to be unlocked and enable mini-tablet operation. ⎯ PIN ⎯ (Personal Identification Number) provides a means of setting a user-defined numeric sequence of no less than 4 digits and as many as 17 that must be entered to unlock the screen and enable mini-tablet operation. ⎯ Password ⎯ provides a means of setting a user-defined alpha, numeric or alpha-numeric string that must be entered to unlock the screen and enable mini-tablet operation. Figure 19 IMPORTANT NOTE! You must remember your security Pattern, PIN, and/or Password! There is no way to recover any of these security elements. If you forget your Pattern, PIN, and/or Password, you must perform a factory reset over the USB connection using a host PC and special software. Janam Technologies LLC Version 1, March 2015 3―7 Setting Up the XT1 Mini-Tablet XT1 User Manual Setting Up Pattern Unlocking: 1. From the Home screen touch Settings > Security > Screen Lock. 2. Touch Pattern. ⎯ A 9-dot matrix will appear (Figure 20). 3. With gentle finger pressure maintained on the screen, draw the desired pattern along the matrix of dots and in a continuous motion, connect at least 4 dots in a pattern (Figure 21). ⎯ The pattern shown below is for illustration purposes only. 4. With the continuous motion pattern completed, lift your finger from the touch screen. “Pattern recorded” confirms that your pattern was entered successfully. End Begin Unlock pattern creation example Figure 20 Figure 21 5. Touch Continue and Re-draw the same Pattern. 6. Touch Confirm, which returns the mini-tablet to the Security menu. “Pattern” will be displayed underneath Screen lock, confirming that Pattern Screen lock has been established. 7. Touch Continue. ⎯ The created pattern will now be required to unlock the mini-tablet. When the pattern is entered correctly, the mini-tablet unlocks. If the pattern is entered incorrectly, the incorrect pattern will be momentarily displayed in red, followed by a cleared pattern entry matrix, allowing re-entry of the correct pattern. IMPORTANT NOTE! Be sure to remember the security pattern entered! When entering the pattern to unlock the mini-tablet, the pattern must match the user-defined shape AND the direction in which the security pattern was created, e.g. the pattern sequence. If you forget your Pattern, PIN, and/or Password, you must perform a factory reset over the USB connection using a host PC and special software. Janam Technologies LLC Version 1, March 2015 3―8 Setting Up the XT1 Mini-Tablet XT1 User Manual Removing Pattern unlocking: 1. From the Home screen touch Settings > Security > Screen Lock. 2. Touch Pattern. 3. Unlock the mini-tablet with the correct unlock Pattern. 4. Touch None to disable established Unlock security options. Setting up PIN unlocking: 1. From the Home screen touch Settings > Security > Screen Lock. 2. Touch PIN. 3. Using the touch screen keypad, enter a numeric PIN consisting of at least 4 digits and no more than 18 (Figure 22). 4. Touch Next. Figure 22 Figure 23 5. Re-enter (confirm) the identical numeric PIN (Figure 23). 6. Touch Next to complete the PIN set. The created PIN will now be required to unlock the mini-tablet. Unlocking with created PIN: 1. When presented with the 10-key PIN security screen, enter the established PIN number. 2. Touch the Return ⎯ ↵ key. When the PIN is entered correctly, the mini-tablet unlocks. ⎯ If a PIN other than the PIN created is entered, the mini-tablet will remain locked and the PIN keypad will accept corrected input. Janam Technologies LLC Version 1, March 2015 3―9 Setting Up the XT1 Mini-Tablet XT1 User Manual Removing PIN unlocking: 1. From the Home screen touch Settings > Security > Screen Lock. 2. Touch Pattern. 3. Unlock the mini-tablet with the correct unlock PIN. 4. Touch None to disable established Unlock security options. Tip: PIN numbers contain only numeric characters and must be at least 4 characters in length and not more than 17. Overly simplistic sequences such as “1234 or “1111” should be avoided. IMPORTANT NOTE! You must remember your security PIN! There is no way to recover it. If you forget your PIN, you must perform a factory reset over the USB connection using a host PC and special software. Setting up Password unlocking: 1. From the Home screen touch Settings > Security > Screen Lock. 2. Touch Password. 3. Using the touch screen keypad, enter a Password (Figure 24) consisting of alpha and/or numeric characters or a combination of the two. Passwords must consist of at least 4 characters and no more than 17. Password characters are not case sensitive. 4. Touch Continue or Next. Enter Figure 24 Figure 25 Figure 26 5. Re-enter (confirm) the identical Password (Figure 25). 7. Touch OK or Next to complete the Password creation. The created password will now be required to unlock the mini-tablet (Figure 26). Janam Technologies LLC Version 1, March 2015 3―10 Setting Up the XT1 Mini-Tablet XT1 User Manual Unlocking with created Password: 1. When presented with Password Entry screen, enter the Password. 2. Touch Done. ⎯ When the Password is entered correctly, the mini-tablet unlocks. ⎯ If a Password other than the Password set is entered or the Password is entered incorrectly, the mini-tablet will remain locked and Wrong Password will be displayed. The Password keyboard will then accept corrected password input. IMPORTANT NOTE! You must remember your security Password! There is no way to recover it. If you forget your password, you must perform a factory reset over the USB connection using a host PC and special software. Removing Password unlocking: 1. From the Home screen touch Settings > Security > Screen Lock. 2. Touch Password. 3. Unlock the mini-tablet with the correct unlock password. 4. Touch None to disable established Unlock security options. Changing PIN or password: Passwords or PINs may be changed by following the same procedure used to create the initial password or PIN. However, the process will be interrupted with the password or PIN entry screen. Entering the current password or PIN will enable completion of the change procedure. IMPORTANT NOTE! Be sure to remember Pins or Passwords created! If Pin or Password reference records are kept, store them in a safe place, separately from the mini-tablet. Forgotten Unlock Credentials If Unlock credentials for a locked XT1 are forgotten or unknown, contact JanamCare at 866-915-5311. Janam Technologies LLC Version 1, March 2015 3―11 Setting Up the XT1 Mini-Tablet XT1 User Manual Key User Options and Preferences Display The Display menu subset of the Settings menu provides user control over: ― Screen brightness ― Sleep mode timing ― Wallpaper ― Daydream ― Automatic screen rotation ― Font size To select and set Display preferences: Touch Settings > Display to select and set display preferences. To adjust screen Brightness: 1. From the Home screen, touch Settings > Display > Brightness. 2. Using the on-screen slider, adjust screen Brightness as preferred (Figure 27). 3. Touch OK when adjustment is complete. Tip: Reducing screen brightness can improve battery run time. To set Wallpaper: Figure 27 1. From the Home screen, touch Settings > Display > Wallpaper. 2. Select from (Figure 28): ― Set to default wallpaper—The Janam logo wallpaper. ― Gallery—A wallpaper derived from an image in the mini-tablet’s picture gallery. ― Live Wallpapers—An assortment of pre-installed animated wallpapers. ― Wallpapers—Other user-installed wallpapers. Tip: Live (animated) wallpapers can shorten battery run time. To modify auto-rotate screen: Figure 28 By default, the mini-tablet’s Auto-rotate Screen function will automatically present a Landscape (horizontal) or Portrait (vertical) view in sync with the physical orientation of the device. This function can be turned off. Janam Technologies LLC Version 1, March 2015 3―12 Setting Up the XT1 Mini-Tablet XT1 User Manual Turning off Auto-rotate Screen: 1. From the Home Screen (Figure 29), touch Settings > Display (Figure 30). 2. On the Display menu, touching Auto-rotate screen toggles between Auto-rotate Off and On. A checkmark at the right indicates that the function is on. Figure 29 Figure 30 Figure 31 3. Touch the Home icon (Figure 31). Janam Technologies LLC Version 1, March 2015 3―13 Setting Up the XT1 Mini-Tablet XT1 User Manual To set and adjust Sleep (inactivity) mode: 1. From the Home screen, touch Settings > Display > Sleep. 2. From the Sleep settings menu (Figure 32), touch one of the eight choices, ranging from Never to 15 seconds. 3. Touch the Home icon when the selection has been made. Tip: It is recommended that the Sleep delay strike a practical balance between security, battery power conservation and convenience. Selecting a delay of 15 seconds for example will result in a condition requiring security input very frequently. Figure 32 To set Daydream: 1. From the Home screen, touch Settings > Display > Daydream. 2. Select from the following actions during Daydream menu (Figure 33): ― Clock — Displays a digital clock. ― Colors — Displays a slowly changing palate of colors. ― Photo Frame — Displays a user-selected picture from the mini-tablet’s Gallery. ― Photo Table — Displays a user-selected assortment of pictures from the mini-tablet’s Gallery. 3. Select when Daydream will run—during charging, when docked or either. 4. Touch the Home icon when selections have been made. ― To exit the Daydream mode when running, tap the screen. Tip: Live (animated) wallpapers can shorten battery run time. Janam Technologies LLC Version 1, March 2015 Figure 33 3―14 Setting Up the XT1 Mini-Tablet XT1 User Manual To adjust Font size 1. From the Home screen, touch Settings > Display > Font size. 2. Select from Small, Normal (default), Large and Huge (Figure 34). 3. Touch the Home icon when selection is made. Figure 34 Sound The Sound menu allows users to set preferences for base Volumes and System Notifications. Alternative access to volume control is also provided on the left edge of the mini-tablet body as Volume Up and Volume Down keys. Volume and Alert Adjustments To adjust volume with exterior mini-tablet keys 1. Press either the Volume Up or Volume Down button to open the Volume control screen (Figure 35). 2. Pressing the Volume Up or Volume Down button increases or decreases the selected volume in preset increments. ― Pressing the Volume Down button to its lowest position toggles the control to the On Vibrate and Sound Off modes, enabling the choice of these functions without the need to access the Volume menu. Volume Up ― Pressing the Volume Up button defeats both On Vibrate and Sound Off modes while increasing sound volume. Volume Down Figure 35 Janam Technologies LLC Version 1, March 2015 3―15 Setting Up the XT1 Mini-Tablet XT1 User Manual To adjust Volume and Notification options: 1. From the Home screen, touch the Settings icon > Sound. 2. Touch Volumes (Figure 36) to adjust Music, video, games & other media, Notifications and Alarms. 3. Make adjustments as preferred. 4. Touch OK. 5. Touch Default notification sound to select from a variety of sounds. 6. Make adjustments as preferred. 7. Touch OK. 8. Touch Touch sounds to toggle between Touch sounds ON and Touch sounds Off (Figure 37.) Touch Screen lock sound to toggle between Screen lock sound ON and Screen lock sound Off. 9. Touch Vibrate on touch to toggle between Vibrate on touch ON and Vibrate on touch Off. ― A checkmark () in the right column indicates that the toggled option is on. Figure 36 10. Touch the Home icon when adjustments and/or selections have been made. Figure 37 Janam Technologies LLC Version 1, March 2015 3―16 Setting Up the XT1 Mini-Tablet XT1 User Manual Disabling Connectivity In conditions where it is not necessary to maintain Bluetooth, Wi-Fi or cellular wireless* connectivity, battery power can be conserved and battery life extended by disabling any or all of these connectivity functions. * Applies only to WWAN cellular signal-enabled version To disable connectivity functions: 1. From the Home screen, touch the Settings icon. 2. Touch the ON or Off buttons of Wi-Fi and/or Bluetooth to enable or disable either or both functions (Figure 38). 3. Touch the Home icon when preferred settings have been made. Figure 38 Airplane Mode Airplane mode disables all RF (radio frequency) functionality. To activate or deactivate Airplane mode: 1. Press and HOLD the Power key until the Power Off options menu is displayed (Figure 39). 2. Touch Airplane mode. ― If the Airplane mode was Off, this will activate it, changing it to On and return to the screen last in use. ― If the Airplane mode was On, this will activate it, changing it to Off and return to the screen last in use. Figure 39 Janam Technologies LLC Version 1, March 2015 3―17 Setting Up the XT1 Mini-Tablet XT1 User Manual Owner Information Entering owner information: 1. From the Home screen, touch Settings > Users (Figure 40). 2. Touch You. 3. Enter the User information (Figure 41). 4. If preferred, touch Nickname to assign a name to the mini-tablet itself. Figure 40 5. Touch Owner info. 6. Touch Show owner info on lock screen to toggle between enabling and disabling the owner info being displayed on the mini-tablet Lock screen. 7. Touch Home to complete the procedure. Figure 41 Opening Applications To open an application: Touch the desired application icon from the Home screen or: 1. Touch Applications. 2. Touch the desired application icon from the Apps screen. Janam Technologies LLC Version 1, March 2015 3―18 Wireless Network Configuration XT1 User Manual 4 Wireless Network Configuration Introduction Wireless local area networks (WLANs) allow XT1 mini-tablets to send and receive information wirelessly within the range of the connected wireless network. Wireless network connectivity may or may not include access to the Internet, depending on the network’s mission and configuration. A given physical area may have multiple wireless local area networks (WLANs), sometimes referred to as Wi-Fi hot spots, which the XT1 can see as it scans for available networks. Typically, wireless local area networks are configured with a security scheme. Wireless devices connected to a wireless network must: A. Be configured for compatibility with the host wireless network’s security requirements. B. Be granted access to the host wireless network through the use of a security code (password) established by host wireless network’s administrator to protect the network from unauthorized use. Note: Some wireless networks, especially those in public areas, are unsecured, i.e. they do not require a password in order to establish a network connection. Janam Technologies LLC Version 1, March 2015 4―1 Wireless Network Configuration XT1 User Manual Connecting the XT1 to a Wireless Local Area Network (WLAN) To scan and connect to a wireless network: 1. From the Home screen, touch Settings. 2. Confirm that Wi-Fi is ON. ― If Wi-Fi is Off (Figure 1), Touch the gray Wi-Fi OFF button to the right of the Wi-Fi heading which will change the Wi-Fi ON button to blue (Figure 2), indicating that Wi-Fi is on. Figure 2 Figure 1 Figure 3 3. Touch the Wi-Fi heading on the left (Figure 3). ― The XT1 will scan for signals and the Wi-Fi networks within range will be displayed, along with approximate signal strength, connection status and the network’s security type. Figure 4 Janam Technologies LLC Version 1, March 2015 4―2 Wireless Network Configuration XT1 User Manual To scan and connect to a wireless network: (continued) 4. Touch the preferred Network with which to connect (Figure 4). ― The selected Wi-Fi network will be presented (Figure 5). 5. Touch Connect. ― If the network’s security requirements, i.e. the password has been previously provided and a connection was made and saved, the wireless network connection chosen will be made automatically. ― If the network is (1) secured and (2) new to the XT1, a security screen will be presented and the network’s password can be entered (Figure 6). ― If necessary, see the system administrator for more on the network’s security. 6. Enter the network’s required password. ― The XT1 will complete the connection and save the connection details for future connections. ― If necessary, touch Show advanced options for additional manual connection settings, which may require the assistance of the network’s administrator. Figure 5 Janam Technologies LLC Figure 6 Version 1, March 2015 4―3 Bluetooth XT1 User Manual 5 Bluetooth Overview Bluetooth is an effective short-range wireless communications technology. Devices with Bluetooth capabilities can send and/or receive information over distances of approximately 10 meters (30 feet). Unlike infrared technology, Bluetooth does not rely upon uninterrupted line-of-sight positioning of the devices between which information is being exchanged. Thus, you can send information to or receive information from another Bluetooth-capable device, even if the two devices are located in different rooms, as long as they are within range. Bluetooth can be used to: ― Enjoy the convenience and productivity of a wireless headset. ― Send or receive information such as files, appointments, tasks and contact cards between Bluetooth-capable devices. ― Bluetooth connectivity provides XT1 users with the ability to print from the handled device to Bluetooth-enabled printers. ― Use a Bluetooth service. Once you connect to another device or computer using Bluetooth, you can locate and use any of the services available on that device. There are several ways to set up your computer for wireless access and the following section details the general instructions needed to set up Bluetooth on your Janam XT1 mini-tablet. Please note that complex or custom installations may require additional expertise from Janam’s technical support team and/or the manufacturer of the device to be paired. Bluetooth Partnerships A Bluetooth partnership (often referred to as a pairing) is, as it relates to this chapter, a relationship created between the XT1 and another Bluetooth-capable device to securely exchange information or provide a Bluetooth function. Creating a partnership involves (A) one Bluetooth device being instructed to discover other Bluetooth devices that have been authorized to be visible and within its range and (B) entering the same Bluetooth Passcode on both devices. Once a partnership is created, the then partnered (or paired) devices need only have Bluetooth turned on and be within range to function. Already partnered Bluetooth devices do not need to be made visible. Once partnered, the devices can exchange information without re-entering the Passcode. Janam Technologies LLC Version 1, March 2015 5―1 Bluetooth XT1 User Manual Bluetooth Settings Turning Bluetooth On/Off: Note: By default, XT1 Bluetooth is initially turned off. 1. From the Home screen, touch Settings. 2. Touch the gray Bluetooth OFF button to the right of the Bluetooth heading (Figure 1) which will change the Bluetooth ON button to blue (Figure 2), indicating that Bluetooth is now on. Figure 1 Figure 2 Bluetooth Partnership Setup Creating a Bluetooth partnership: 1. Ensure that the Bluetooth device to be partnered (paired) with the XT1 is (1) turned on, (2) made visible and (3) is within Bluetooth range of the XT1 Series tablet. Note: Refer to the instructions of the Bluetooth device to be paired with the XT1 for information about making the device visible to other Bluetooth devices, i.e. the XT1. Janam Technologies LLC Version 1, March 2015 5―2 Bluetooth XT1 User Manual Creating a Bluetooth partnership: (continued) 1. Touch the Bluetooth heading (Figure 3). ⎯ Scanning for available (visible) Bluetooth devices within range will begin automatically (Figure 4). ⎯ Available Bluetooth devices found will be displayed (Figure 5). If multiple devices are within range and have been made visible, multiple devices will be shown. Figure 3 Figure 4 Figure 5 2. Touch the device to be paired with the XT1 to begin the pairing sequence (Figure 5) which will be confirmed (Figure 6). 3. When the Bluetooth pairing request dialogue box appears, asking for pairing confirmation and displaying the assigned Bluetooth Passkey, touch Pair to proceed or Cancel to end the process (Figure 7). Note: The device to which the XT1 is being paired may present prompts to be executed during the pairing. Follow the instructions offered on that device. Figure 6 Janam Technologies LLC Version 1, March 2015 Figure 7 5―3 Bluetooth XT1 User Manual Creating a Bluetooth partnership: (continued) IMPORTANT BLUETOOTH PASSKEY INFORMATION! For security purposes, the XT1 requires that the device to be paired have a Passkey number assigned by the XT1. This 6-digit Bluetooth Passkey number is shown in the Bluetooth pairing request dialogue box (Figure 7). Carefully note this number. ⎯ Successfully Paired Devices will be shown on the Bluetooth status screen (Figure 8). To rename a Bluetooth partnership: 1. From the Home screen, touch Settings (icon) > Bluetooth. 2. Touch the Settings icon associated to the partnership to be renamed (Figure 8). 3. Touch Rename (Figure 9). 4. Enter the new partnership Name (Figure 10). 5. Touch OK. Figure 8 Figure 9 Figure 10 To delete a Bluetooth partnership: 6. From the Home screen, touch Settings (icon) > Bluetooth. 7. Touch the Settings icon associated to the partnership to be renamed (Figure 8). 8. Touch Unpair (Figure 9). Janam Technologies LLC Version 1, March 2015 5―4 Bluetooth XT1 User Manual Bluetooth Beam The XT1 enables the exchange of photo and video files between compatible Bluetooth devices via Bluetooth Beam. To send photo or video files via Bluetooth: 1. From the Home screen, touch Apps > Gallery. 2. Navigate to the photo and video file to be beamed via Bluetooth. 3. Open the file to be beamed. 4. Touch Image Tools (Figure 11). 5. Touch Share (Figure 12). 6. From the two first-use options (Bluetooth and Email), touch Bluetooth. ⎯ Once the Share function has been used for the first time, the default method will be the sharing method last used (e.g. Bluetooth, Figure 13). ⎯ To switch the Sharing method, touch Sharing > the alternate sharing method. 7. From the available Bluetooth devices, touch the Bluetooth device name to which the file will be beamed (Figure 14). Figure 11 Figure 12 Figure 13 Note: The Bluetooth device to which the file is beamed may require user input, authorizing receipt of the file. Figure 14 Janam Technologies LLC Version 1, March 2015 5―5 Bluetooth XT1 User Manual To receive a Bluetooth beam: 1. Ensure that the XT1 is turned on, visible to Bluetooth devices and within range of the device that is beaming the file. 2. Once the sending device has sent the file, an XT1 alert will prompt you to authorize receipt of a Bluetooth file. 3. Swipe down the Notifications bar to access the authorization message (Figure 15). 4. To accept the file, touch the Bluetooth share incoming file notification. 5. Touch Accept from the File transfer screen (Figure 16). ⎯ If the origin of the file is unknown or if the file is unwanted for any reason, touch Decline. Figure 15 Janam Technologies LLC Figure 16 Version 1, March 2015 5―6 Camera XT1User Manual 6 Camera Introduction The XT1 mini-tablet features a primary integrated 5 megapixel CMOS, 8x zoom, rear-facing autofocus camera with user-controllable LED flash for capturing crisp still pictures and video clip recording. Both functions are useful for documentation of inventory locations, product damage, procedures and more. In addition, the XT1 incorporates a 1.2 megapixel front-facing still picture camera. Note: Only the rear-facing camera records video. Camera Function To activate the Camera: 1. From the Home screen, touch Apps. 2. Touch Camera icon. Still Camera Home/Ready ⎯ The touch screen will convert to the Camera Viewfinder immediately upon activation of the Camera function, returning to the last mode used. ⎯ Touching the lowest part of the touch screen activates the basic Navigation controls (Figure 1). Tip: For fast access to the Camera function, the Camera shortcut can be copied to a Home screen panel. Figure 1 Janam Technologies LLC Version 1, March 2015 6―1 Camera XT1User Manual Camera Controls Overview 5. Shooting Viewfinder Area 1. Still Picture Panorama 6. Shutter Release & Video recording Stop/Start 2. Video Camera Mode 3. Still Picture Camera Mode 7. Options Controls 4. Return to Previous 8. Recent 9. Tablet Home 1. Activates the Still Picture Panorama mode. Panorama capture begins when Shutter Release is touched. Panning progress (left-to-right or right-to-left) is shown while shooting with the special Panorama direction/progress display. 2. Touch to switch from Still Picture Camera to Video Camera mode. 3. Touch to switch from Video Camera to Still Picture Camera mode. 4. Return to previous tablet operation. 5. Shooting viewfinder. 6. Shutter Release and Video Recording Start/Stop. 7. Options control. Activates Options menu. 8. Display recent tablet screens. 9. Return to Home screen. Janam Technologies LLC Version 1, March 2015 6―2 Camera XT1User Manual Key Camera Adjustments and Options Overview A variety of still picture and video recording options are available. To make key camera adjustments and set options: ― From an active camera screen, touch Options Control icon. Still Camera Home/Ready Figure 2 Figure 3 ― The default camera start mode will be still picture capture. ― The Options menu will appear (Figure 3). Janam Technologies LLC Version 1, March 2015 6―3 Camera XT1User Manual Key Camera Adjustments and Options Overview (continued) 1. Front /Rear Camera toggle 2. Exposure Compensation 3. Sub-settings Menu 1. Toggles between the higher resolution front-facing still picture camera and the lower resolution rear-facing still picture camera. 2. Activates the Exposure Compensation menu which provides the ability to automatically over or under expose still pictures by plus or minus 3 f/stops to compensate for unusually backlit or front-lit conditions. ― Touch the preferred Exposure Compensation value. Refer to Figure 4 on page 6-6. 3. Activates the Sub-settings menu (refer to Figure 5 on the following page), providing access to: • Scene mode(s) (refer to Figure 5 page 6-6.): ― Auto (default) ⎯ Best for everyday picture taking. ― Night ⎯ Compensates for low light and scenes with large dark areas. ― Sunset ⎯ Compensates for the extremely bright area of setting sun against a much more dimly lit foreground. ― Party ⎯ Take photos in dimly lit conditions; exposure and shutter speed are automatically adjusted for room brightness. Captures indoor background lighting or candlelight. Hold the device very steadily when using this mode. • Store location (ON or OFF) ― Stores the location (longitude and latitude) of where the picture is taken • Picture size (refer to Figure 6 page 6-6.) ― Touch the menu item and touch the preferred setting. Janam Technologies LLC Version 1, March 2015 6―4 Camera XT1User Manual Key Camera Adjustments and Options Overview (continued) 4. Flash Control 5. White Balance 4. Activates the Flash settings sub-menu, providing access to: • Flash automatically ON in low-light conditions • Flash ON regardless of lighting conditions and OFF in bright light. . • Flash OFF regardless of lighting conditions . ― Touch the menu item and touch the preferred setting. Refer to Figure 7 on page 6-6. 5. Activates the White Balance settings sub-menu. By default the camera is set to automatic white balance, wherein the XT1 camera recognizes the color temperature value of a scene and makes adjustments to render optimal color. However, some lighting conditions may require a manual override of automatic white balance. The manual white balance settings include: • • • • • Cloudy Sunny Automatic (default) Florescent bulb Incandescent bulb Refer to Figure 8 on page 6-6. Janam Technologies LLC Version 1, March 2015 6―5 Camera XT1User Manual Key Camera Adjustments and Options Overview (continued) Figure 4 Figure 6 Figure 5 Figure 7 Figure 8 Figure 9 Alternative Camera Control Alternate access to picture taking controls and options is available. Some controls apply only to still picture capture. 1. Double-tapping the viewfinder will illuminate the still camera focus point, be dragged to a preferred area of the picture. which can 2. Touch and hold the viewfinder to illuminate the basic picture options control circle (Figure 3 on page 6-3). ⎯ While maintaining finger pressure on the screen, slide your finger to the desired control point on the outer edge of the options circle and lift your finger. 3. Touch and hold the viewfinder with your thumb and index finger to illuminate the zoom control. Expanding the distance between the thumb and index finger increases the zoom (telephoto) view. Pinching the distance reduces the zoom view. Janam Technologies LLC Version 1, March 2015 6―6 Camera XT1User Manual Alternative Camera Control (continued) 4. Store location (Figure 9). Stores the location (longitude and latitude) of where the picture is taken. Taking Pictures and Recording Video To take a still picture: 1. With the still Camera function activated, compose the picture as preferred. 2. Touch the Shutter Release button to capture the picture. To record video clips: 1. With the Camera function activated, touch the Video Camera Mode icon. ⎯ The Shutter Release button turns from blue to red and becomes the Video Start/Stop button. 2. Touch the Video Start/Stop button to begin video recording. ⎯ A white square will appear within the Video Start/Stop button, confirming that recording has begun. ⎯ The video time counter at the top left-hand corner of the screen will begin counting up, also confirming that video recording has begun and will display the length of the video clip. 3. Touch the Video Start/Stop button again to stop video recording. ⎯ The white square within the Video Start/Stop button will disappear, confirming that recording has stopped. Viewing Pictures and Video To view camera pictures or video clips: Still picture and video recording files are stored in the Gallery. When captured, still picture and video recording files are stored in the Album titled Camera. To organize files, XT1 users can create and name additional Albums, into which files can be moved. Apps > File Manager can be used to move, copy or delete files. 1. From the Home screen, touch Apps > Gallery. 2. Touch an Album, e.g. Camera. 3. From the individual picture thumbnails view, touch the picture or video recording to be opened. ⎯ Picture file thumbnails can be viewed in a grid or as a filmstrip. To change the picture thumbnail view: 1. With a picture Album open, touch [album name] at the upper left-hand corner of the touch screen. 2. From the resulting pull-down menu, touch the preferred view (Filmstrip view or Grid view.) Janam Technologies LLC Version 1, March 2015 6―7 Camera XT1User Manual Editing Pictures The XT1 features a variety of onboard picture editing tools. Editing tools include the ability to: • Straighten • Adjust brightness • Crop • Adjust contrast • Rotate • Enhance sharpness • Create mirror images • Convert to black & White • Apply filter effects • Alter color hue • Apply picture edge/border effects • Alter color saturation • Enhance overall exposure To edit pictures: 1. With a picture open, touch the Edit tools icon (Figure 10). 2. From the Edit tools menu (Figure 11), touch the desired editing function(s) and follow the instructions edits to apply. 3. Touch Save (Figure 11.) Figure 10 Janam Technologies LLC Figure 11 Version 1, March 2015 6―8 Camera XT1User Manual Key Camera Specifications • • – – – – • • – – Still pictures (default setting) Resolution (still mode) • Brightness (+- 3 f-stops) Flash (Auto, On, Off) • 320x240, 640x480, 1280x960 1MP 1600x1200 2MP 2048x1536 3MP 2592x1944 5MP Modes Video recording QVGA 320x280 or VGA 640x480 Janam Technologies LLC Version 1, March 2015 6―9 Messaging—Email and Text XT1 User Manual 7 Messaging—Email and SMS Text Email The XT1 mini-tablet includes an email setup tool, making it easy to configure email accounts. Note: Like a smartphone or a PC, the XT1’s email interface acts as a portal to an already-existing email account with one of the commonly available email service providers such as Google Gmail, MSN, Yahoo, AOL or a private enterprise (corporate) network. Before setting up an XT1 email account, be sure that a core email address is active with an email service provider or within a private enterprise (corporate) network to which the XT1 user has access and authorization. XT1 Email Setup To setup an XT1 email account: 1. From the Home screen, touch the Email icon (Hotseat) Shortcuts bar (Figure 1). in the lower Or 2. From the Home screen, touch Apps > Email. ⎯ If the XT1 does not yet have an email account established, the Account setup screen will appear (Figure 2). 3. Enter the new account’s Email address > Next and password > Next (Figure 3). ⎯ Manual setup of email accounts often requires the assistance of a network administrator. Figure 1 Janam Technologies LLC Figure 2 Version 1, March 2015 Figure 3 7―1 Messaging—Email and Text XT1 User Manual To setup an XT1 email account: (continued) 4. Select Account settings preferences. 5. Typing over the default email address, assign an optional name to the account (Figure 4). 6. Apply your name (to be displayed on outgoing messages (Figure 5) ⎯ This field cannot be left blank. Figure 4 Figure 5 7. Wait for new email account synchronization. Account will be populated with email account contents from email address assigned to this XT1 email account (Figures 6 and 7). Figure 6 Figure 7 Email account setup is complete. Janam Technologies LLC Version 1, March 2015 7―2 Messaging—Email and Text XT1 User Manual Removing an XT1 Email Account Removing an XT1 email account affects only the ability for the XT1 to serve as an email address portal. Removal of an XT1 email account in no way affects the core email address account with an email service provider or a private enterprise (corporate) network. To remove an XT1 email account: 1. From the Home screen, touch the Email icon in the lower (Hotseat) Shortcuts bar (Figure 8.) 2. Touch the menu button in the upper right-hand corner of the Email inbox (Figure 9.) 3. From the email pull-down menu, touch Settings (Figure 10.) Figure 8 Janam Technologies LLC Figure 9 Version 1, March 2015 Figure 10 7―3 Messaging—Email and Text XT1 User Manual To remove an XT1 email account: (continued) 4. Touch email account name (Figure 11). 5. From the resulting Settings menu, scroll down to REMOVE ACCOUNT (Figure 12). 6. Touch Remove Account (Figure 12). 7. Touch OK to confirm account removal or Cancel to abandon the email account removal process. Or Figure 12 Figure 11 8. From the Home screen, touch Apps Figure 13 > Email. 9. Follow instructions 4 thru 7 above. SMS Text Messaging SMS text messaging functionality requires: a) XT1 mini-tablets equipped with optional WWAN cellular signal functionality b) A SIM card installed. ⎯ Refer to Chapter 3 for more information on SIM cards. c) A third-party wireless phone application that supports SMS text messaging. d) Active wireless cellular service provided by a wireless carrier. Janam Technologies LLC Version 1, March 2015 7―4 Sound Recorder XT1 User Manual 8 Sound Recorder Sound Recorder The Sound Recorder provides an audio recording function to capture voice notes, record meetings and more. Recording To record audio: 1. From the XT1 Home screen, touch Applications (Figure 1). 2. Touch Sound Recorder (Figure 2). 3. Touch the round Record icon to begin recording (Figure 3). Figure 1 Janam Technologies LLC Figure 2 Version 1, March 2015 Figure 3 8―1 Sound Recorder XT1 User Manual Recording (continued) To stop recording: 1. Touch the square Stop icon to stop recording (Figure 4). 2. Optional – Touch the triangular Play icon to review the last recording (Figure 4). 3. Select (touch) Done or Discard. Done will save the recoding file. ― Touching Done or Discard returns the XT1 to the Home screen. Figure 4 Janam Technologies LLC Figure 5 Version 1, March 2015 8―2 Sound Recorder XT1 User Manual Playback To playback a recording: 1. From the XT1 Home screen, touch Applications (Figure 6). 2. Touch File Manger (Figure 7). Figure 6 Figure 7 Figure 8 3. Select a “recording” file to be played back (Figure 8). ― Touching the blank screen during playback briefly calls up the playback screen, providing Play and Pause controls and showing playback time and progress. 4. Touch the Home icon to end playback. Janam Technologies LLC Version 1, March 2015 8―3 Sound Recorder XT1 User Manual Renaming and Deleting Recordings To delete a recording: 1. Touch and HOLD a “recording” file to be deleted (Figure 8) to call up the File Management Menu (Figure 9). 2. Touch Delete. 3. From the resulting Confirm Delete screen touch OK to delete or Cancel to abandon the deletion process. Figure 9 Janam Technologies LLC Figure 10 Version 1, March 2015 8―4 Sound Recorder XT1 User Manual Renaming and Deleting Recordings (continued) To rename a recording: 1. From the File Management Menu (Figure 9), touch Rename to call up the Rename screen (Figure 11). 2. Enter the new PREFIX name for the recording (Figure 11), leaving the dot (.) and the file name characters following it intact. Refer to Filename Schematic below. ― You cannot overwrite an existing file name. IMPORTANT FILE RENAMING INFORMATION DO NOT ALTER OR DELETE THE FILE SUFFIX SEPARATOR OR THE SUFFIX CHARACTERS FOLLOWING IT. Tips: • To make retrieval for playback and general file organizing easier, recording files can be renamed to make them more readily identifiable. Figure 11 • You can create new folders for organizing user files, including audio recordings. Filename Schematic for file: recording-383114016.3gpp Filename, aka Prefix Suffix Filename Part 1 Filename Separator Filename Part 2 File Type Separator File Type Suffix recording ― 383114016 . 3gpp OK to rename these filename components Janam Technologies LLC Version 1, March 2015 Must remain intact 8―5 Barcode Scanning XT1 User Manual 9 Barcode Scanning Barcode Scanning Overview The XT1 is equipped with integrated 1D/2D barcode scanning technology to eliminate the challenges often associated with camera scanners or bulky sled attachments. Leveraging the advanced Honeywell N5600 with 2D Adaptus® Imaging Technology, the XT1 is well suited for scan intensive applications in field sales, field service, healthcare, hospitality and retail. Barcode Scanning Fundamentals The XT1 integrated barcode scan window is located on the top edge of the tablet (Figure 1). When triggered, the barcode scanner emits a soft-edged red light that serves as a confirmation of scan triggering and as a general targeting guide. Barcode Imager Window A green horizontal barcode beam projects across center of the red area. Aiming the green light at the barcode initiates barcode recognition, which is quickly confirmed by an audible beep and the recording of the target barcode data. CAUTION! Never stare directly into the barcode scan beam emitted from the barcode imager window! Never point the barcode beam emitted from the barcode imager window into the sightline of others! Damage to eyesight can result as a result of failure to adhere to these precautions. Janam Technologies LLC Figure 1 Version 1, March 2015 9―1 Barcode Scanning XT1 User Manual Barcode Scanner Demonstration Application 1. From the Home screen, touch the BCR (Bar Code Reader) icon (Figure 2). 2. Locate the red scan trigger button (Figure 3). 3. Aim the barcode imager beam at the target barcode. 4. Touch the red scan trigger button. ⎯ The captured barcode data will be displayed (Figure 4). Figure 2 Janam Technologies LLC Figure 3 Version 1, March 2015 Figure 4 9―2 Barcode Scanning XT1 User Manual BCR Scanwedge Overview BCR Scanwedge is an application to send scanned data from the barcode scanner into any application you have running. The barcode scanned will appear where ever the cursor is placed within the application. BCR Scanwedge Configuration To configure BCR Scanwedge: 1. From the Home screen, touch the Apps (Figure 6). (icon) (Figure 5), > Settings (icon) 2. Touch screen to scroll down until BCR Setting is in view > touch BCR Setting (Figure 7). Figure 5 Figure 6 Figure 7 3. On the resulting BCR Settings Default screen, touch General (Figure 8). 4. Confirm that Enable keyboard wedge is checked (Figure 9). Figure 8 Janam Technologies LLC Figure 9 Version 1, March 2015 9―3 Barcode Scanning XT1 User Manual BCR Scanwedge Configuration ⎯ Symbology The Symbology menu provides the ability to select the types of barcodes available for scanning. To select Symbology: ― From the Home screen, touch Settings Symbology (Figure 11). Figure 10 Janam Technologies LLC (icon) > BCR Setting (Figure 10) > Figure 11 Version 1, March 2015 9―4 Barcode Scanning XT1 User Manual BCR Scanwedge Configuration ⎯ Scanwedge Indication The indication menu allows you to select and adjust the manner in which the XT1 provides the user with feedback, indicating the success or failure of a scan. Feedback indicator options include: • Duration of the LED for good and bad scan • An audible beep • Vibration To select and/or adjust ScanWedge Indication: 1. From the Home screen, touch Settings (Figure 13). (icon) > BCR Setting (Figure 12) > Indication 2. From the resulting screen, select the preferred indication. Figure 12 Janam Technologies LLC Figure 13 Version 1, March 2015 9―5 Barcode Scanning XT1 User Manual BCR Scanwedge Configuration ⎯ Scanwedge Prefix/Suffix BCR Scanwedge allows you to enter a Suffix and/or Prefix. The BCR Scanner Keyboard Wedge uses a Unicode format for the Prefix and Suffix values. For example: \u000d is CR (Carriage Return) and \u000a is LF (Line Feed). You can add any special characters using the format exampled at: http://unicode-table.com/en/ To apply ScanWedge Prefix or Suffix: 1. From the Home screen, touch Settings (Figure 15). 2. (icon) > BCR Setting (Figure 14) > General Touch Prefix or Suffix and enter the desired character in Unicode format (Figure 16). Figure 14 Figure 15 Figure 16 Barcode Scanning Solutions The XT1 mini-tablet’s platform is ideally suited to accept and run specialized commercial applications, as well as those proprietary or customized solutions designed for the Android operating system. For more information about barcode scanning solutions, contact Janam or your authorized Janam reseller. Janam Technologies LLC Version 1, March 2015 9―6 User Applications XT1 User Manual 10 User Applications User Applications The XT1 mini-tablet is compatible with Android-based mobile applications. Trusted third party applications can be downloaded and installed from dependable online App sources. In addition, specialized applications may be available from other trustworthy developers. To install user applications from online App sources: 1. Select a trusted application from a dependable online App source. 2. Follow the application’s installation instructions which may include an online purchase procedure. 3. Launch the application and verify that it and the XT1 are operating properly. To install user applications from other sources ⎯ Using a host PC computer: 1. Move or Copy the application to a folder on the host PC computer. ⎯ In this example, the target application file to be installed (Speedtest_org.zwanoo.android. speedtest_3.2.6_2180.apk) has been downloaded to the host PC computer’s Windows Downloads folder. 2. Connect the XT1’s mini-USB port to a USB port of a host PC computer. 3. Move or Copy the trusted application to the XT1’s Internal storage memory. Tip: When connected to a host PC via USB, the Janam XT1 is listed as an external drive in the Devices and Drives section of the Windows Explorer directory. Janam Technologies LLC Version 1, March 2015 10―1 User Applications XT1 User Manual To install user applications from other sources: (continued) 4. From the XT1 Home screen, touch Applications. 5. Touch the File Manager icon (Figure 1). Figure 1 Figure 2 Figure 3 6. From the File Manager screen, touch Internal storage (Figure 2). 7. Touch the application to be installed (Figure 2). ⎯ In this example, the application file name is: Speedtest_org.zwanoo.android.speedtest_3.2.6_2180 8. Review the resulting Installation Approval screen (Figure 3). If you agree with the proposed actions and device access requirements, touch Install. Otherwise, touch Cancel. ⎯ An intermediate screen will display and verify installation progress, followed by the App installed confirmation (Figure 4). 9. Touch Done to return to File Manager or Open to launch the application. Tip: It is recommended that the newly installed application be launched to verify that the new app and the XT1 are functioning properly after the installation. Figure 4 Janam Technologies LLC Version 1, March 2015 10―2 User Applications XT1 User Manual To install user applications from other sources ⎯ Downloaded directly to the XT1: 1. Download the application to the XT1 from a reliable source. 2. Move or Copy the trusted application to the XT1’s Internal storage memory. 3. From the XT1 Home screen, touch Applications. 4. Touch the File Manager icon (Figure 5). Figure 5 Figure 6 Figure 7 5. From the File Manager screen, touch Internal storage (Figure 6). 6. Touch the application to be installed (Figure 6). ⎯ In this example, the application file name is: Speedtest_org.zwanoo.android.speedtest_3.2.6_2180 7. Review the resulting Installation Approval screen (Figure 7). If you agree with the proposed actions and device access requirements, touch Install. Otherwise, touch Cancel. ⎯ An intermediate screen will display and verify installation progress, followed by the App installed confirmation (Figure 8). 8. Touch Done to return to File Manager or Open to launch the application. Tip: It is recommended that the newly installed application be launched to verify that the new app and the XT1 are functioning properly after the installation. Figure 8 Janam Technologies LLC Version 1, March 2015 10―3 User Applications XT1 User Manual Updating User Installed Applications 1. Following the instructions for To install user applications from other sources, move the target application’s update file to the XT1. NOTE: Updating of many applications is an automated process in which update notifications are pushed out to the mobile device by the developer. Users need only approve the update installation. In some instances, application updates will replace the existing application in its entirety. In other instances, the update process may only apply incremental updates to the existing installation. 2. From the XT1 Home screen, touch Applications. Figure 9 Figure 10 Figure 11 3. Touch the File Manager icon (Figure 9.) 4. From the File Manager screen, touch Internal Storage (Figure 10). 5. Touch the installed application to be updated (Figure 10). ⎯ In this example, the application file name is: Speedtest_org.zwanoo.android.speedtest_3.2.6_2180 9. Review the resulting Update Approval screen (Figure 11). If you agree with the proposed actions and device access requirements, touch Install. Otherwise, touch Cancel. ⎯ An intermediate screen will display and verify installation progress, followed by the confirmation of App installation (Figure 12). 10. Touch Done to return to File Manager or Open to launch the updated application. Janam Technologies LLC Version 1, March 2015 Figure 12 10―4 User Applications XT1 User Manual Uninstalling User Applications (applies only to user-installed applications) To uninstall (remove) user applications: Method A 1. From the XT1 Home screen (Figure 13), touch Settings > Apps (Figure 14). 2. Touch the user application to be uninstalled (Figure 15). 3. Touch Uninstall (Figure 16). 4. Touch OK to confirm the uninstallation (Figure 17). Or Touch Cancel to abandon the uninstallation process (Figure 17). ⎯ The uninstallation process is confirmed when complete. Figure 13 Figure 14 Figure 16 Figure 17 Janam Technologies LLC Version 1, March 2015 Figure 15 10―5 User Applications XT1 User Manual Uninstalling User Applications (applies only to user-installed applications) To uninstall (remove) user applications: Method B 1. From the XT1 Home screen, touch Apps. 2. Touch and hold the user application icon to be uninstalled. ⎯ An Uninstall area will appear in white type. 3. Maintaining fingertip pressure on the icon, drag it towards the Uninstall trash can (Figure 18). ⎯ Both the icon to be uninstalled and the screen’s Uninstall area change from white to red when the icon reaches the correct Uninstall area (Figure 19). 4. Lift your finger from the screen to release the icon and begin the uninstall process. 5. Touch OK to confirm the uninstallation of the application (Figure 20). Or Touch Cancel to abandon the uninstallation process (Figure 20) ⎯ The uninstallation process is confirmed when complete. Figure 18 Janam Technologies LLC Figure 19 Version 1, March 2015 Figure 20 10―6 GPS XT1 User Manual 11 GPS GPS Overview The XT1 mini-tablet incorporates a u-blox 7 MAX-7 Series GNSS GPS module which is ready to function with a variety of GPS and GPS-reliant applications, ranging from everyday GPS navigation to location tagging. Depending on the XT1 user’s requirements, third party applications are necessary to enable GPS functionality. These applications are widely available in the APK format from open sources1 and from custom developers and are generally easy to install. It is, however strongly recommended that any third party applications be deemed trustworthy before installing them. GPS Location Access Specific Settings permissions are key to GPS functionality. To enable GPS location access: 1. From the Home screen, touch Settings. 2. From the Location access menu: a. Touch Off to switch Access to my location to ON (Figure 1). ⎯ This allows applications that have (1) asked for permission and (2) as part of their functionality need the XT1’s location use GPS-based location information. ⎯ No action is necessary if Access to my location is already ON. b. Touch the GPS satellites checkbox and confirm that a blue checkmark is shown. ⎯ This also permits applications to use the XT1 GPS system to pinpoint the XT1’s location. ⎯ No action is necessary if GPS satellites is checked. Figure 1 Note: Satellite reception is often restricted when indoors. As a result, up-to-date GPS location information may not be available. 1 This typically refers to sources other than App Stores, e.g. Google Play™ store. Janam Technologies LLC Version 1, March 2015 11―1 GPS XT1 User Manual GPS Application Example The following depicts one of many GPS navigation examples. This is neither an endorsement nor a recommendation of the example application. GPS Application Installation To install a third party GPS application: 1. Download or transfer a suitable and trustworthy third party GPS application onto the XT1. 2. From the Home screen, touch Apps (Figure 2). 3. From the Home screen, touch Downloads (Figure 3). 4. Touch the downloaded app to be installed (Figure 4). Figure 2 Figure 3 Figure 4 5. Follow the instructions provided by the application. If prompted, give the application permission to use XT1 location information (Figure 6 – example only). 6. Use the GPS application in accordance with the developer’s instructions. Figure 6 Janam Technologies LLC Version 1, March 2015 11―2 Regulatory and Maintenance XT1 User Manual 12 Regulatory and Maintenance XT1 Rugged Mini-Tablet Regulatory Information Copyright 2014 Janam Technologies LLC. All rights reserved. XT1 Rugged Mini-Tablet, Janam and the Janam logo are trademarks of Janam Technologies LLC. Other product and brand names may be trademarks or registered trademarks of their respective owners. Janam Technologies LLC assumes no responsibility for any damage or loss resulting from the use of this guide. Janam Technologies LLC assumes no responsibility for any loss or claims by third parties which may arise through the use of this product. Janam Technologies LLC assumes no responsibility for any damage or loss caused by deletion of data as a result of malfunction, dead battery or repairs. Be sure to make backup copies of all important data on other media to protect against data loss. Follow all usage, charging and maintenance guidelines in the Product User Guide. If you have questions, contact Janam. For a copy of the Product User Guide, visit the online Resource Center at www.janam.com. Important: Please read the End User License Agreement with this product before using the device or accompanying software program(s). Using the device or any part of the software indicates that you accept the terms of the End User License Agreement. For additional product information, visit www.janam.com or call +1.877.JANAM.99 Regulatory and Safety Approvals The CE Mark on the product indicates that the system has been tested to and conforms with the provisions noted within the 2004/108/EEC Electromagnetic Compatibility Directive. For further information, please contact: For further information, please contact: Janam Technologies 100 Crossways Park West, Suite 105 Woodbury, NY 11797 Janam Technologies shall not be liable for use of our product with equipment (i.e., power supplies, personal computers, etc.) that is not CE marked and does not comply with the Low Voltage Directive. Only use Janam approved and UL listed batteries and charging accessories. FCC and Canadian Compliance This device meets or exceeds all applicable standards and has been manufactured to the highest level of quality. To see the specific labels associated with RF terminals configurations, visit www.janam.com. Warning: Changes or modifications to this unit not expressly approved by the party responsible for compliance could void the user authority to operate the equipment. Janam Technologies LLC Version 1, March 2015 12―1 Regulatory and Maintenance XT1 User Manual RF, regulatory and safety approvals XT1 with WWAN, WLAN and Bluetooth Parameter Specification USA 47 CFR FCC Part 15, Subpart B, Class B; FCC Part 22, Subpart H; FCC Part 24, Subpart E; FCC Part 27, Subpart C, L; FCC Part 2; FCC Part 15, Subpart C; FCC Part 15, Subpart E; FCC 06-96; FCC 47 CFR Part 2 Canada ICES-003:2012 Issue5, Class B; RSS-132, Issue 3, January 2013; RSSGen Issue 3 December 2010; RSS-133, Issue 6, January 2013; RSS139, Issue 2, February 2009; RSS 210 Issue 8 (2010-12); ANSI C63.102009; IC RSS-102 Issue 4:2010; IEEE1528:2013; IEC 62209-2:2010; KDB 248227 D01 v01r02; KDB 447498 D01 v05r02; KDB941225 D01 v02; KDB941225 D02 v02r02; KDB941225 D03 v01; KDB941225 D07 v01r01 Europe EN 301 489-1; EN 301 489-3; EN 301 489-7; EN 301 489-17; EN 301 489-24; EN 300328; EN 301 893; EN 300 440; EN 301 908-1; EN 301 908-2; EN 301 511; EN 302 291-1; EN302291-2; EN 50566,; EN 622092; EN 62479; EN 50332; EN 55022; EN 55024; EN61000-3-2; EN 61000-3-3; IEC 60950-1/A1:2009 Australia AS/NZS CISPR 22:2008, Class B; AS/NZS CISPR 22:2009 +A1:2010, Class B; AS/NZS 4268:2012 +A1:2013; ARPANSA Radiation Protection Standard (Maximum Exposure Levels to Radiofrequency Fields -3 KHz to 300 GHz; ACA Radio communications(Electromagnetic Radiation – Human Exposure) Standard 2003; IEC 62209-2:2010 XT1 with WLAN and Bluetooth Parameter Specification USA 47 CFR FCC Part 15, Subpart B, Class B; FCC Part 15, Subpart C; FCC Part 15, Subpart E; FCC 47 CFR Part 2 Canada ICES-003:2012 Issue5, Class B; RSS-210 Issue 8 (2010-12); RSS-Gen Issue 3 (2010-12); ANSI C63.10-2009; IC RSS-102 Issue 4:2010; IEEE1528:2013; IEC 62209-2:2010; KDB 248227 D01 v01r02; KDB 447498 D01 v05r02; KDB941225 D07v01r01 Europe EN 301 489-1; EN 301 489-3; EN 301 489-17; EN 300 328; EN 301 893; EN 300 440; EN 302 291-1; EN 302 291-2; EN 50566; EN 622092; EN 62479; EN 50332; EN55022;EN55024; EN 61000-3-2; EN 610003-3; IEC 60950-1/A1:2009 Australia AS/NZS CISPR 22:2008, Class B; AS/NZS 4268:2012 +A1:2013; ARPANSA Radiation Protection Standard (Maximum Exposure Levels to Radiofrequency Fields -3 KHz to 300 GHz); ACA Radio communications(Electromagnetic Radiation – Human Exposure) Standard 2003; IEC 62209-2:2010 Janam Technologies LLC Version 1, March 2015 12―2 Regulatory and Maintenance XT1 User Manual This device complies with Part 15 of the FCC Rules. Operation is subject to the following two conditions: (1) this device may not cause harmful interference, and (2) this device must accept any interference received, including interference that may cause undesired operation. This equipment has been tested and found to comply with the limits for a Class B digital device, pursuant to Part 15 of the FCC Rules. These limits are designed to provide reasonable protection against harmful interference in a residential installation. This equipment generates, uses and can radiate radio frequency energy and, if not installed and used in accordance with the instructions, may cause harmful interference to radio communications. However, there is no guarantee that interference will not occur in a particular installation. If this equipment does cause harmful interference to radio or television reception, which can be determined by turning the equipment off and on, the user is encouraged to try to correct the interference by one or more of the following measures: • Reorient or relocate the receiving antenna. • Increase the separation between the equipment and receiver. • Connect the equipment into an outlet on a circuit different from that to which the receiver is connected. Consult the dealer or an experienced radio/TV technician for help. If necessary, the user should consult the dealer or an experienced radio/television technician for additional suggestions. The user may find the following booklet helpful: “Something about Interference.” This is available at FCC local regional offices. Our company is not responsible for any radio or television interference caused by unauthorized modifications of this equipment or the substitution or attachment of connective cables and equipment other than those specified by our company. The correction is the responsibility of the user. Use only shielded data cables with this system. This device and its antenna must not be co-located or operating in conjunction with any other antenna or transmitter. To maintain compliance with the FCC RF exposure guidelines for body-worn operation, do not use accessories that contain metallic components other than specified by the manufacturer. Janam Technologies LLC Version 1, March 2015 12―3 Regulatory and Maintenance XT1 User Manual This Class B digital apparatus complies with the Canadian ICES-003. Cet appareil numerique de la Class B est conforme a la norm NMB-003 du Canada. Operation is subject to the following two conditions: (1) this device may not cause interference, and (2) this device must accept any interference, including interference that may cause undesired operation of the device. L’utilisation de ce dispositif est autorisée seulement aux deux conditions suivantes : (1) il ne doit pas produire de brouillage, et (2) l’utilisateur du dispositif doit être prêt à accepter tout brouillage radioélectrique reçu, même si ce brouillage est susceptible de compromettre le fonctionnement du dispositif. To prevent radio interference to the licensed service, this device is intended to be operated indoors and away from windows to provide maximum shielding. Equipment (or its transmit antenna) that is installed outdoors is subject to licensing. Hereby, Janam Technologies LLC declares that this product is in compliance with the essential requirements and other relevant provisions of Directive, 1999/5/EC. The equipment is intended for use throughout the European Community. Care and Cleaning of Terminals When needed, clean the screen with a clean, non-abrasive, lint-free cloth. The terminal can be cleaned with a damp cloth. Waste Electrical and Electronic Equipment Information This product has required the extraction and use of natural resources for its production. It may contain hazardous substances that could impact health and the environment, if not properly disposed. In order to avoid the dissemination of those substances in our environment and to diminish the pressure on the natural resources, we encourage you to use the appropriate take-back systems for product disposal. Those systems will reuse or recycle most of the materials of the product in a sound way. The crossed-out wheeled bin symbol informs you that the product should not be disposed of along with municipal waste and indicates that you should use the appropriate separate takeback systems for product disposal. If you need more information on the collection, reuse and recycling systems, please contact your local region waste administration. You may also contact your supplier for more information on the environmental performances of this product. Janam Technologies LLC Version 1, March 2015 12―4 Regulatory and Maintenance XT1 User Manual Battery Warning CAUTION: Unit contains a non-replaceable internal Lithium Ion battery. The battery can burst or explode, releasing hazardous chemicals. To reduce the risk of fire or burns, do not dissemble, crush, puncture or dispose of in fire or water. Battery Safety Guidelines Important instructions for service personnel only: • Caution: Risk of explosion if battery is replaced by an incorrect type. Dispose of used batteries according to the instructions. • Replace only with the same or equivalent type recommended by the manufacturer. • The battery must be recycled or disposed of properly. • Use the battery only in the specified equipment. Battery Charger Safety Guidelines • Use only the charger supplied with your device. Use of another type of charger will result in malfunction and/or danger. • WARNING! To avoid the risk of electric shock, this device must only be connected to supply mains with protective earth. • Do not use the charger in a high moisture environment. Never touch the charger when your hands or feet are wet. • Allow adequate ventilation around the charger when using it to operate the device or charge the battery. Do not cover the charger with paper or other objects that will reduce cooling. Do not use the charger while it is inside a carrying case. • Connect the charger to a proper power source. The voltage requirements are found on the product case and/or packaging. • Do not use the charger if the cord becomes damaged. • Do not attempt to service the unit. There are no serviceable parts inside. Replace the unit if it is damaged or exposed to excess moisture. • To fully disengage the power to the unit, please disconnect the power cord from the AC inlet. Janam Technologies LLC Version 1, March 2015 12―5