1
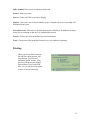
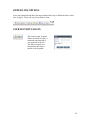
USER’S MANUAL
Version 2.0
December 1, 2010
Applied Data Consultants
2985 58th Street
Eau Claire, WI 54701
(715) 874-4397
www.applieddataconsultants.com
WGX User’s Manual
WGX Overview...………..………………………………………………………. ……3
General Map……………………………………………………………………..3
Dept Maps……………………………………………………………………......3
Property Search………………………………………………………………….3
Using the Maps………………………………………………………………………4
General Map………………………...……………………………………………4
Tools….…….…………………………………………………………..….4
Parcel Feature Information….…………………………………………..6
Parcel Report…….……………………………………………………….6
Aerial Photography………………………………………………………7
Scale……………………………………………………………………….7
Department Maps…..……………………………………………………………7
Layers……………………………………………………………………..8
Map Themes……………………………………………………………...8
Toolbar……………………………………………………………………9
Markup Pallet…………………………………………………………...10
Quick Print……………………………………………………………...11
Map Search Options………………………………………………………..……….12
Property Search..………………………………………………………………13
Owner Information…………………………………………….13
Property Address………………………………………………13
Tax Information……….………………………………………..13
Property Information…………………………………………..13
Acres Range…………………………………………………….13
Land Value Range……………………………………………...13
Improvement Value Range….…………………………………13
Fair Market Value Range….…………………………………..13
Total Value Range………………………………………………14
Feature Search……..……………….………………………………………….14
Doing a Property Search……………………………………………………………14
Parcel Results List………………………………………………………………15
Record Select…..……………………………………………………..…16
Zoom To………………………...……………………………………….16
Mailing Labels…………………………………………………………..16
Print Table………….………..……………………………………….…16
Export Data to CSV……….………………………...………………….16
View Statistics……..……….………………………...………………….16
1
Select by SQL Query…….………………………...………………….16
Bookmark Query..……….………………………...………………….16
Doing a Feature Search……………………………………………………………17
Feature Results List……….……………………………………………………17
Additional Tools………………………………………………………..17
Buffer……………………………………………………………17
Doing an Advanced Search………………………………………………………..18
Select Features From….………………………………………………………18
The Selected Layers Of….………………………………………………………19
Query Types …….………………………………………………………………..19
Doing multiple layer queries……………………………………………………20
Advanced Print Options…………………………………………………………….20
Manipulating the print window………………………………………………20
Title………………………………………………………………20
Office Title………..……………………………………………..20
Office Symbol……....……………………………....……...........21
Author..………………………………………………………….. 21
Sources...………………………………………………………...21
Auto-adjust scale………………………………………………...21
Layout....………………………………………………………… 21
Scale….…………………………………………………………..21
Printing…………………………………………………………………………21
Property Search Tab…………………………………………………………………22
Search Anything Option…………………………………………………………….22
Other Link Options………………………………………………………………......24
User Security/Login………………………………………………………………….24
2
WGXtreme User’s Manual
WGXtreme (WGX) is an online mapping program that allows users to search for
property information and display associated information, maps and images.
WGX OVERVIEW
Based on the complexity of your search, there are three separate tabs that are
displayed with different search and display options: The General Map, Dept Maps,
and Property Search.
General Map
•
The General Map Screen is intended for those users who just want to do a basic
property information search and view an associated map of the area. The map
layers that are included are static (you cannot turn them on or off) except for a
single aerial photo background that can be on or off. The layers will turn on and
off as you zoom in and out based on their settings.
Dept Maps
•
The Dept Maps Screen is intended for those users who wish to view different
layers of GIS map data. The users have the option to toggle the associated layers
on and off. A set of tools is included to allow the users to query and manipulate
the data displayed.
Property Search
•
The Property Search Screen is intended for those users who just want to do a
property information search and don’t necessarily need the map.
3
USING THE MAPS
General Map
Features of the General Map tab include:
TOOLS:
Zoom In: Click on the area you want to zoom in on to zoom one level. Click and
hold down to continue zooming in.
Zoom Out: Click on the area you want to zoom out from to zoom one level. Click
and hold down to continue zooming out.
Zoom In/Out: Use the slider bar to zoom in (up) or out (down).
Zoom to Full Extent: Zooms map to full extent.
4
Aerial View: Slide the bar from street to aerial to
display orthophoto background with adjustable transparency.
Quick Print: Allows the user to produce a pdf document of existing screen for
printing.
Mouse Options:
If you have a mouse with a scroll wheel you can zoom in by rolling your mouse
wheel up and zoom out by rolling it down.
You can also hold down the shift key while using your left mouse button to draw a
box in the area you wish to zoom to.
Pan: Panning can be accomplished by either using the arrow tool to pan in the
direction you want or by holding down your left mouse button while dragging the map in
the direction you want in either the icon or on the map.
Map Window Sizing: The map window can be expanded and collapsed by clicking on
the pink tabs at the bottom or left side of the map window to allow the user to have more
control over size.
5
PARCEL FEATURE INFORMATION:
By single clicking on a parcel polygon a Feature Information box will come up that
lists the information that is stored in the database for that polygon.
If you click on the report tool in the lower left of the box, you can get
a complete tax and assessment report, called the Parcel Report, for the parcel.
PARCEL REPORT:
The parcel report includes
detailed tax and assessment
information about the parcel.
By hovering over the
highlighted codes a description
box of the categories will
appear:
Depending on what information
the county is maintaining in the
data base there may be tax
payment history information in
addition to assessment
6
information
AERIAL PHOTOGRAPHY:
By sliding the bar towards or
away from
Aerial or Street you can fade the aerial photo in and out. You have the option to show the
full aerial with no layer lines or the layers with no aerial.
SCALE:
You can choose the scale you wish to
zoom into by choosing one of the predefined scale selections from the bar at
the bottom of the map
Department Maps
7
Features of the Dept Maps tab include:
LAYERS:
The Layers option of the Dept Maps tab shows all of the map layers available for
viewing on the site. Layers can be toggled on or off according to user
preference.
Layers that are grayed out are not visible at the scale
you are currently viewing the map at. To view those
layers you need to either zoom in or zoom out.
Folder can be expanded and collapsed by clicking on
the arrow next to the yellow folder.
The active layer is the one that is highlighted. This is
the layer the identify tool will return results for.
If the layer name has a blue arrow next to it
that means the layer has a downloadable file
associated with it. When doing an identify on
that layer, the information box will show a
button to download the file.
MAP THEMES:
Some sites will have the option to pick different themes which will allow various
departments to display different layers for the user to view.
8
Example: When choosing the Surveyor theme the toolbar includes layers that are
specific to surveyors.
Other searches
such as the tiesheet search may
be available with
the department
themes.
TOOLBAR:
The toolbar can be found at the top of the view window in the Dept Maps Tab.
Tool tips can be viewed by hovering
over the tools
Tool functions:
Full Extent: Zooms user to maximum map extent
Zoom In: Click on the map with the mouse or hold down the left mouse button to
draw a rectangle around the area you wish to zoom in on.
Zoom Out: Click on the map with the mouse or hold down the left mouse button to
draw a rectangle around the area you wish to zoom out on.
Zoom To Active Layer: Clicking on the tool will automatically zoom the user to the
extents of the active (highlighted) layer in the list.
Pan/Zoom: Keep the left mouse button pressed and drag the map. Use the mouse
wheel or double click to zoom. Shift+click to draw a zoom box.
Previous View: See previous extent viewed on the map.
Next View: See next extent viewed on the map.
Draw Mode: Opens the drawing toolbar to markup the map.
9
Identify: Get feature information for the current active layer by clicking on the map.
A feature information box will appear in the map view.
Parcel Information: Get tax parcel information by clicking on the map.
Select by Polygon: Draw a polygon by clicking on the map and clicking around or
through the area you wish to select. Double click to close polygon.
Select by SQL Query: Enter queries to run against the active layer.
Advanced Search: Deep query the data by various methods.
Import Data: Import shape data into the map.
Measure Distance: Get distance by clicking the map to draw a line; double click to
end. Hold Shift key and left click to draw freehand. Lines and measurements do not stay
on the map once you pan or zoom.
Measure Area: Get area by clicking the map to draw a polygon; double click to end.
Hold Shift key and left click to draw freehand. Lines and measurements do not stay on
the map once you pan or zoom.
XY Coordinate: Get native xy and latitude/longitude by clicking the map.
Map Link: Get a link to this map position to bookmark and share with others. Link
will always open in General Map tab.
Quick Print: Print the current view of the map. The default print format is 8.5”x11”
with a landscape orientation and a legend.
MARKUP PALLET:
Draw Mode: Opens the drawing toolbar to markup the map. The markup will stay
on the map screen until you remove it.
Tool functions:
Draw Point: Draws a point on the map by clicking the mouse.
Draw Line: Draw a line on the map by clicking the mouse; double click the mouse
to end line; hold shift key and left mouse button down to draw freehand.
10
Draw Polygon: Draw a polygon on the map by clicking the mouse; double click
mouse to end line; hold shift key and left mouse button down to draw freehand.
Insert Label: Place a label in the map by clicking on the map and entering text.
Modify Feature: Modify a drawn feature on the map by clicking on the feature and
adjusting the nodes.
Delete Feature: Delete a drawn feature on the map by clicking on the feature.
Clear Markup: Clears all markup drawn on the map.
Stroke Tool: Allows user to modify the lines drawn with markup by
choosing dash type, opacity, color and width.
Fill Tool: Allows users to modify the display of polygons drawn with
markup by choosing fill, opacity and color.
Point Tool: Allows users to modify the points drawn with markup by
choosing radius and shape.
Label Tool: Allows users to modify the style of the labels drawn with the
Label tool in markup by choosing font size, opacity, and color.
QUICK PRINT:
The quick print tool allows the user to generate a PDF print preview of the map on
the screen and the user is given the option to either open or save the file.
11
If you choose to open the file it will open up in your default PDF viewer program.
MAP SEARCH OPTIONS
PROPERTY SEARCH
Information will vary some from client to client. Typically, data can be searched
by:
Note: Owner information is not available for all clients
Note: Property address searches on tax/assessment roll data, not GIS address points
12
13
FEATURE SEARCHES
Other types of searches will vary from client to client based on the data they have
available to search on. One example is the address search.
The Address Search option of the General Map searches the address point GIS data
layer in the map. (For searching assessment data by address, please use the Address
search fields in the Property Search.)
Other common feature searches
are tie sheets, utility information,
and permits.
DOING A PROPERTY SEARCH
EXAMPLE:
Type a name in the Owner
Information search. (The search
is not case-sensitive.) Hit the
Submit button at the bottom. If
there is a match to the database
results will show in a Parcel
Results list on the bottom of the
screen.
Multiple criteria can be searched
to narrow down your results. The
example to the left shows a search
with a specified municipality and
land value range. Only results
meeting those criteria will be
returned.
14
Parcel Results – Single Feature
If the results of your search return a single feature, you will see the feature information
box appear in the map window.
Tools found in the feature information box:
Map: The map tool generates a pdf print preview that includes the current map view
on one page along with the feature information that is shown in the display box on the
second page.
Data: The data tool generates a printable information sheet of the data in the feature
information box.
Report: If the layer name has a blue arrow next to it that means the layer has a
downloadable file associated with it. When doing an identify on that layer, the
information box will show the download button. Click the button to open or save the file.
Edit: If the layer allows basic edits to be made, the edit tool will be visible. When
clicking on it a window will appear with fields that can be edited and changes saved.
Buffer: The buffer tool allows you to select features with a specified distance of the
selected feature. You can choose the desired target layer for which the results will return.
Download: Downloads the file associated with this feature for viewing.
Permits: If scanned permit information is available or other database information that
is linked to the parcel this tool can be used to view it.
Parcel Results List
If a search you do returns multiple results you will see a parcel results list appear at the
bottom of the page. If you double click on one of the results in the list a Parcel Report
sheet showing property information will appear in a separate window. You will also see
some different tools in the results window.
15
Parcel Results Tool Functions: (not all tools will be present on every site)
Record Select: Pick individual lines or choose all. None clears
selection.
Zoom To: Shows the selected records on the map.
Mail Labels: Generate print labels from selection. You will be given the option then
to print or export the selected information.
Print Table: Print table from selected records.
Export Data to CSV: Download a CSV of the selected data in this grid to use with a
spreadsheet software such as Microsoft Excel.
View Statistics: Do statistical analysis against selected records.
Select by SQL Query: Select queries to run against active layer.
Bookmark Query: Bookmark this query to run again later.
16
DOING A FEATURE SEARCH
Note: Not all clients will have feature information such as addresses or the same
fields to search on.
EXAMPLE:
Using an Address Feature Search, type
information about an address you want to
search in the address search window.
The search is not case-sensitive and you
can search partial words or numbers.
EX: 1725 80th St. You can just type in
80 in the street name and it will bring up
all matches.
Feature Results List
The address results that come up show information from the address GIS file. The tools
are the same as for the Parcel Results, with the addition of the buffer tool
Additional Tool Functions:
Buffer Tool: Buffers the selected
features. User can select the
Distance, Units and Target layer
that you want to buffer.
17
DOING AN ADVANCED SEARCH
EXAMPLE:
The Advanced Search option allows you to query your desired layers data based on
specified query types, and distances. Selections are made by holding your CTRL key
and clicking. You can make multiple selections from different layers without them
having to be active. You can still scroll and pan using your mouse.
Different Query Types are:
SELECT FEATURES FROM:
The target layer will be the layer that you want results displayed for. This will vary based
on what layers are being displayed in the map. The source and target layer lists will be
the same.
18
THE SELECTED FEATURES OF:
Choose the layer or layers which you want the search to be queried against. These will
vary based on what layers are being displayed in the map. Multiple selections are
allowed.
EX: If you want to show how many address points fall within a municipality you would
select features from Addresses with the selected features of Municipality (select with
CTRL button).
To select the features choose the layer and then use one of the following methods:
1. holding the CTRL key and clicking on the feature on the map
2.
Execute SQL: execute an SQL WHERE clause against the layer
3.
Query by Poly: draw a polygon on the map to select included features
QUERY TYPES:
* Note the queries are often limited by the accuracy of the spatial data. If lines cross
or there are gaps, you often may not get the results you expect or incomplete results.
Are Within Dist. Of (Buffer): This query returns results based upon all of the target
features within a certain distance of the selected item. Fill in the Distance and the Units
fields to specify how far and what units you want the program to search in.
Touch: This query returns results based upon all of the target features that touch a
selected feature. *note: query is very sensitive and may not return all expected results
Are Within: This query returns results based upon all of the target features that fall
completely within a selected feature. *note: if even a small portion of a feature falls
outside of the selection, it will not be returned as a result.
Overlap: This query returns results based upon all of the target features that overlap the
exterior boundary of the selected feature.
Cross: This query returns results based upon all of the target features that cross over the
exterior boundary of the selected feature.
Intersect: This query returns results based upon all of the target features that intersect
with the selected feature – either the boundary or the interior of the feature.
Nearest To: This query returns results based upon all of the target features that are
nearest to the selected. The program may choose up to five results within a certain
distance.
Farthest From: This query returns results based upon all of the target features that are
farthest from the selected. The program may choose up to five results within a certain
distance.
19
DOING MULTIPLE LAYER QUERIES
The advanced search can be used with the above tools to query on multiple features
found on multiple layers. To make the selection, make the source layer one of the desired
layers and select the features from that layer to query on. After you have that selection
made, change the source layer to another layer and make that selection, keeping the
feature(s) from the first choice selected as well. Then choose your query type and target
layer. The results will display based upon all of your selected data.
ADVANCED PRINT OPTIONS
The Advanced Print option of the Dept Maps tab allows you to select a specific area, as
defined by the box boundaries, to be your map’s printing extents.
Manipulating the Print Window
Title: This will display at the top of the print page.
Office Title: Enter department if desired
20
Office Symbol: Enter text to be displayed under title
Author: Name of creator
Sources: Enter any URLs you wish to display
Options: Allows the user to choose whether or not a Legend and/or Overview Map will
be displayed on layout
Auto-adjust scale: When this is checked the print box will always fit inside the viewport
when you are zooming in and out. It is automatically resized.
Layout: Choose one of the predefined sizes and orientation.
Scale: Choose one of the predefined scales to set view window for printing.
Printing
When you hit the Print button on
the side bar a print preview will
be generated. Previews are
generated in PDF format. Your
preview will open in the default
browser that is set of open PDF
files. Or you may have the option
to save or cancel at that time.
21
PROPERTY SEARCH TAB
The property search tab allows users who don’t need to see a map to utilize all of the
search capabilities and display the results on the screen. By clicking on the results
line once, a preview of the property report will come up below for users to view and
print quickly.
SEARCH ANYTHING OPTION
The search anything tool is found in the upper right hand corner above the map.
This tool allows the user to do a key word search of any feature in any of the GIS
data layers.
EX: Type in the word Cedar.
22
The program searches and returns all
results of features that have the word
Cedar in them. (left)
Expansion of the result lines shows
what items are listed in that layer.
(below)
Double clicking on the line zooms the user to the feature.
23
OTHER LINK OPTIONS
At the top right hand side above the map window there may be different links to other
sites or pages. These will vary from client to client.
USER SECURITY/LOGIN
.
The security login in option
allows the client to require a
username and password to
view portions of the site.
This allows control over
internal data and what is
passed on to the public.
24