Download STATIM 2000E
Transcript
Statim_2000E_manual_rev2_Statim_2000E_manual_rev2 3/10/11 11:23 AM Page 1
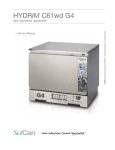
STATIM 2000E
• Operator’s Manual
• Manual del Operador
• 用户使用说明
STATIM 2000E Operator’s Manual 95-108628 Rev 4.0. Copyright 2011 SciCan Ltd . All rights reserved
CASSETTE AUTOCLAVE ™
Statim_2000E_manual_rev2_Statim_2000E_manual_rev2 3/10/11 11:23 AM Page 1
Table of Contents
1. Introduction . . . . . . . . . . . . . . . . . . . . . . . 2
5. Maintenance . . . . . . . . . . . . . . . . . . . . . 16
2. Important Information . . . . . . . . . . . . . . . 3
5.1 Cleaning the Cassette
5.2 Cleaning the Water Reservoir Filter
5.3 Cleaning the Reservoir
5.4 Cleaning the Exterior Surfaces
5.5 Replacing the Cassette Seal
5.6 Maintaining Fluid Levels
5.7 Reading Water Quality
5.8 Preventative Maintenance Schedule
2.1 Disclaimers
2.2 STATim 2000E – Unit Overview
3. Installation . . . . . . . . . . . . . . . . . . . . . . . . 5
3.1 Environmental Considerations
3.2 Unit Placement
3.3 Connecting the Waste Bottle
3.4 Filling the Reservoir
3.5 Priming the Statim Pump
3.6 Setting the Time and Date
3.7 Language Selection
3.8 Assigning Unit Identifier Number
3.9 Preparing the Unit for Use
3.10 Shipping the Unit
6. Troubleshooting . . . . . . . . . . . . . . . . . . 19
7. Spare Parts List . . . . . . . . . . . . . . . . . . . 22
8. Warranty . . . . . . . . . . . . . . . . . . . . . . . . 23
9. Specifications . . . . . . . . . . . . . . . . . . . . 24
9.1 Specifications
4. Instructions for Use . . . . . . . . . . . . . . . . . 9
4.1 Using the Cassette
4.2 Preparing and Loading Instruments
4.3 Using Biological/Chemical Indicators
4.4 Instrument Weight Table
4.5 Selecting a Cycle
4.6 Operating a Cycle
4.7 Stopping a Cycle
EU Representative
SciCan GmbH
Wangener Straße 78
88299 Leutkirch
Germany
Tel.: +49 (0)7561 98343 - 0
Fax: +49 (0)7561 98343 - 699
STATIM Cassette Autoclave and Statim are registered trademarks and
STAT-DRI and Your Infection Control Specialist are trademarks of
SciCan Ltd. All other trademarks referred to in this manual are the property
of their respective owners.
For all service and repair inquiries:
In Canada
1-800-870-7777
United States: 1-800-572-1211
Germany:
+49 (0) 7561-98343-620
International:
(416) 446-4500
Email:
[email protected]
SciCan Inc.
701 Technology Drive
Canonsburg, PA 15317
USA
Phone: +1 724 820 1600
Fax: +1 724 820 1479
Toll free: 1-888-632-6031
Manufactured by:
SciCan Ltd.
SciCan Medtech
Alpenstrasse
166300 Zug
SWITZERLAND
Phone: +41 (0) 41 727 7027
Fax: +41 (0) 41 727 702
1440 Don Mills Road,
Toronto ON M3B 3P9
CANADA
Phone:
(416) 445-1600
Fax:
(416) 445-2727
Toll free:
1-800-667-7733
1
Statim_2000E_manual_rev2_Statim_2000E_manual_rev2 3/10/11 11:23 AM Page 2
1. Introduction
Congratulations on your selection of the STATim Cassette Autoclave®. We are confident
that you have purchased the finest equipment of its type. The STATim is a compact,
counter-top unit that features a number of sterilizing cycles designed to meet your needs
and suitability for steam sterilization.
The details of installing, operating and servicing your STATim ® are all contained within
this operator’s manual. To ensure years of safe, trouble-free service please read these
instructions before operating this unit and keep them for future reference. Operational,
maintenance and replacement instructions should be followed for the product to
perform as designed. Contents of this manual are subject to change without notice
to reflect changes and improvements to the Statim product.
The STATim 2000E cassette autoclave has been designed expressly for the rapid
sterilization of instruments intended for immediate use. This allows you to sterilize
instruments between patients. To decrease instrument turn-around time, the STATim
2000E does not have a post-sterilization drying cycle. Quick drying and cooling of the
load at the end of the cycle is achieved through evaporation when the cassette is
removed and opened immediately following the sterilization cycle. Because of the
unique operation of the STATim 2000E, once the instruments are exposed to ambient
conditions, their continued sterility cannot be assured. It is recommended to use these
instruments immediately after they are comfortable to the touch.
The Statim is suitable for the sterilization of dental and medical instruments designed
to withstand steam sterilization. The STATim is not designed to sterilize liquids, cloth
loads, biomedical waste or materials not compatible with steam sterilization.
The processing of such loads may result in incomplete sterilization and / or damage to
the autoclave. For more information about instrument suitability for steam sterilization,
consult the manufacturers’ reprocessing instructions.
2
Statim_2000E_manual_rev2_Statim_2000E_manual_rev2 3/10/11 11:23 AM Page 3
2. Important Information
2.1 Disclaimers
Use only steam-process distilled water in your STATim. Deionized, demineralized, or
specially filtered water should not be used. Never use tap water.
Do not permit any person other than certified personnel to supply parts for, service or
maintain your STATim. SciCan shall not be liable for incidental, special or consequential
damages caused by any maintenance or services performed on the STATim by a third
party, or for the use of equipment or parts manufactured by a third party, including lost
profits, any commercial loss, economic loss, or loss arising from personal injury.
Never remove the cover of the unit and never insert objects through holes or openings in
the cabinetry. Doing so may damage the unit and / or pose a hazard to the operator.
IMPORTANT:
Follow local guidelines governing verification of the sterilization procedure.
3
Statim_2000E_manual_rev2_Statim_2000E_manual_rev2 3/10/11 11:23 AM Page 4
2. Important Information
2.2 Unit overview
1 level indicator
■
■2 keypad
3 reservoir cap/
■
■
5
■
6
■
7
■
8
■
■9
10
■
4
water filter
LCD
power indicator
active indicator
power switch
power cable port
leveler feet
exhaust tube port
3
■
4
■
Figure 1
■2
■1
11
■
6
■
■5
9
■
11 cassette
■
The following symbols
appear in the margins
of this book.
A situation which
may lead to a
mechanical failure.
A potential hazard
to the operator.
UNWRAPPED
cycles
STOP
button
Power
Indicator LED
Important
information
Caution: Hot Surface
and/or Hot Steam
The following symbols appear on the unit:
START
button
7
■
8
■
10
■
RUBBER /
PLASTIC
cycles
Caution: Risk of electrical
shock. Disconnect supply
before servicing
Active
Indicator LED
Caution: Refer to
manual for details
When you receive your STATim 2000E packing carton, the items listed below will be included.
If any of the items are missing, contact your dealer immediately so that the situation can be corrected.
Cassette Tray and Lid
Power Cord
Unwrapped Instrument
Rack
Operator’s Manual
Waste Bottle
Exhaust Tube
Bottle Lid Fitting
Stat-Dri
Tube Mounting Hardware
4
Statim_2000E_manual_rev2_Statim_2000E_manual_rev2 3/10/11 11:23 AM Page 5
3. Installation
3.1 Environmental Considerations
There are several factors that may affect the performance of your STATim.
Please review these factors, and select a suitable location in which to install the unit.
• Temperature and Humidity
Avoid installing your STATim in direct sunlight or close to a heat source
(e.g. vents or radiators). The recommended operating temperatures are
15-25˚C (59˚F to 77˚F) with humidity of 25-70%.
• Spacing
The vents and openings on the STATim should remain uncovered and unobstructed.
Leave a minimum of 50 mm/2˝ between the top, sides and back of the unit and
any wall or partition.
• Venting
The STATim should be operated in a clean, dust free environment.
• Work Surface
The STATim should be placed on a flat, level, water-resistant surface.
Never install and operate the unit on a sloped surface.
• Electromagnetic Environment
The STATim has been tested and meets applicable standards for electromagnetic
emissions. While the unit does not emit any radiation, it may itself be affected by other
equipment which does. We recommend that the unit be kept away from potential
sources of interference.
• Electrical Requirements
Use properly grounded and fused power sources with the same voltage rating as
indicated on the label at the back of your STATim. Avoid multiple outlet receptacles. If
using a surge suppressor power bar, plug in one STATim only.
3.2 Unit Placement
When placing the unit on a counter top, ensure the following:
•
1 on the front panel should be
The level indicator bubble ■
balanced in the front right quadrant of the target. This
will ensure that the unit drains properly. Adjusting the
three leveler feet will help you move the bubble if
necessary.
•
The unit should be stable and all four feet should be
securely in contact with the counter surface.
This will prevent the unit from moving freely.
5
■1
Figure 3
Statim_2000E_manual_rev2_Statim_2000E_manual_rev2 3/10/11 11:23 AM Page 6
3. Installation
3.3 Connecting the Waste Bottle
2 is used to collect the wastewater after it has been converted
The waste bottle ■
to steam and then drained from the cassette. To connect the waste bottle to the
STATim, follow these steps (see Figure 4):
3 tube into the
1. Insert the exhaust ■
4 on the back of the unit and
fitting ■
connect tightly.
■5
2. Cut the tube to length and slide the waste
5 into place.
bottle fitting ■
3. Place the free end of the tube into
the hole in the lid of the waste bottle and
hand-tighten the fitting. Do not
coil the exhaust tube.
4. Unscrew the lid and copper condenser
6 assembly from the waste bottle.
coil ■
The lid and coil should come out together.
■4
■3
■6
■2
5. Fill the waste bottle with water to the MIN
line and replace the lid and copper
Figure 4
condenser assembly. Empty the waste
bottle often to avoid unpleasant odors
and discoloration of the contents. (A low-level disinfectant, prepared according to
the manufacturer’s instructions, may be added to the waste bottle to remedy this
situation). As a minimum, empty the waste bottle each time you refill the reservoir.
6. Place the waste bottle near the unit. Store the bottle below the unit. The tube can be
routed through a hole, (8 mm/0.3˝ in diameter) in the counter-top and secured with
the provided nylon clamps.
3.4 Filling the STATIM Reservoir
When filling the reservoir, ensure you only use steam processed distilled water
containing less than 5 ppm total dissolved solids (having conductivity of less than
10 µS / cm). The impurities and additives in other water sources will cause an error
reading on the LCD. If you have a water conductivity meter (available from SciCan,
order number 01-103139S) check each new water container before filling the reservoir.
If your unit is equipped with a Rev 7 PCB or higher (software SxxxR6xx), you can read
the water conductivity by refering to Section 5.9 Reading Water Quality.
6
Statim_2000E_manual_rev2_Statim_2000E_manual_rev2 3/10/11 11:23 AM Page 7
3. Installation
To fill the reservoir, follow these steps
(see Figure 5):
■2
2
1. Remove the reservoir cap ■
2. Pour steam-process distilled water into the
reservoir until almost full (a maximum of
4L/1 U.S. gal). Use a funnel to avoid
spillage.
3. Replace and secure the cap.
Figure 5
3.5 Priming the STATIM Pump
To prime the STATim pump, follow these steps (see Figure 6):
1. Move the unit to the edge of the work surface. The front leveler feet should be
approximately 12 mm/0.5˝ from the edge.
3 from
2. Lift the front left corner of the unit upward and remove the drain tube ■
the clip located on the underside of the unit.
3. Pull the drain tube outward so the free end can be positioned over a water container.
4. Fill the reservoir with steam-process distilled water.
4 from the end of the drain tube and allow water to drain from the
5. Remove the plug ■
tube into a container for 30 seconds. When the
■4
water flows in a steady stream, replace the stopper.
6. Lift the front left corner of the unit upward and
reinsert the tube into the clip on the underside of
the unit. Push the excess length of tubing back
into the space provided.
■3
Figure 6
Make sure the plug in the drain tube is secured.
After installation, and before sterilizing any instruments, run two RUBBER / PLASTIC
cycles. For further instructions, see Section 3.9 Preparing the Unit for Use.
3.6 Setting the Time and Date
To set the time and date, follow these steps and watch the blinking cursor on the LCD:
1. Power the STATim OFF.
2. Power up unit while pressing the STOP
button to access the User Setup menu.
18:00
HH:MM
20/09/2005
DD/MM/YYYY
Display when setting the Date / Time
3. Use the UNWRAPPED cycle button to scroll
to TIME/DATE setup and press the RUBBER / PLASTIC cycle button to select it.
4. Use the cycle buttons to select and change the selected field’s value. To increase a field’s
value, press the UNWRAPPED cycle button. Hold the button down to increase the value.
7
Statim_2000E_manual_rev2_Statim_2000E_manual_rev2 3/10/11 11:23 AM Page 8
3. Installation
5. To select the next field, press the RUBBER / PLASTIC cycle button.
6. To save changes and return to the regular operating mode, press the STOP button.
7. To quit without making changes, power the STATim OFF.
3.7 Language Selection
The messages displayed on the LCD can be changed to a number of different languages.
To change the current language selections, follow these steps:
1. Turn the power switch at the back of the unit OFF.
N.A. ENGLISH
2. Power up unit while pressing the STOP button
to access the User Setup menu.
3. Use the UNWRAPPED cycle button to scroll
Display when scrolling through languages
to LANGUAGE setup and press the
RUBBER / PLASTIC cycle button to select it.
4. Press the UNWRAPPED cycle button to scroll to the next language selection.
5. When the desired language is displayed, press the STOP button to save the selection
and return to the regular operating mode.
3.8 Assigning Unit Identifier Number
STATIM 2000E S2S2R601
1. Power the STATim OFF.
#323
2. Power up unit while pressing the STOP button
to access the User Setup menu.
Display when assigning unit number
3. Use the UNWRAPPED cycle button to scroll to ID
SETUP setup and press the RUBBER / PLASTIC cycle button to select it.
4. Using the cycle buttons, select a maximum of 3 digits to be used as the unit’s identifier.
The UNWRAPPED button will increase the selected value. Use the RUBBER /
PLASTIC to move to the next digit.
5. To save changes and return to the regular operating mode, press the STOP button.
3.9 Preparing Unit for Use
Once the unit is installed and before any instruments are sterilized, run two RUBBER /
PLASTIC cycles (see Section 4.6 Operating a Cycle). Remove the cassette once it has
cooled. Clean the top (lid) and bottom (tray) sections using a soft cloth to wipe the inside
surfaces and then rinse thoroughly with tap water. Once the cassette is clean and dry, coat
the inside surfaces with STAT-DRI.
3.10 Shipping the Unit
Before you move the unit, you will need to drain the reservoir. To do so, follow these steps:
1. Place a water container below the unit.
2. Using the drain tube (see Section 3.5 Priming the STATim Pump, Figure 6) empty the
contents of the reservoir into the water container.
3. Remove any remaining water from the reservoir with a non-linting, absorbant towel.
4. Screw-in the three leveler feet found underneath the unit.
5. Repack the unit in the original packing materials and include all accessories originally
included with the unit.
6. Specify heated and insured shipping.
8
Statim_2000E_manual_rev2_Statim_2000E_manual_rev2 3/10/11 11:23 AM Page 9
4. Instructions For Use
4.1 Using the Cassette
When removing the cassette after a cycle, exercise caution as the metal areas will be
hot and the cassette may contain hot steam.
• To open the cassette:
1. Hold the cassette handle with your thumbs facing inward on the cassette latch.
2. Push downward on the cassette latch.
cassette latch
3. Raise the cassette lid upwards and disengage
the hinge.
4. Rest the lid on its outer surface.
• To close the cassette:
1. Align the hinge tab on the cassette lid with
the hinge slot on the rear of the bottom tray.
Figure 7
2. As you begin to close the lid, the hinge tab and slot will engage.
• Inserting the cassette into the STATIM 2000E:
1. Place the end of the cassette into the unit.
2. Gently push inward until you hear a “click” sound.
Never push the cassette into the STATim with force as the interior components could
be damaged.
• Removing the cassette:
1. Grasp the handle with two hands and pull away from the unit.
2. Pull the cassette clear of the unit and set down on a firm surface.
• Disengaging the cassette
When not in use, the cassette should be disengaged. To disengage the cassette, grasp
the handle and pull the cassette out until there is a 15 mm to 20 mm (1/2 to 3/4") gap
between the front of the STATim 2000E and the cassette handle.
• STAT-DRI
Treatment of the interior surfaces of the cassette with the STAT-DRI drying agent,
provided with your unit, will minimize spotting. The water in contact with the hot cassette
surfaces also evaporates much more efficiently. (Replacement bottles are available
from SciCan, order number 2OZPLUS, 8OZPLUST, 32OZPLUS).
9
Statim_2000E_manual_rev2_Statim_2000E_manual_rev2 3/10/11 11:23 AM Page 10
4. Instructions For Use
4.2 Preparing and Loading Instruments
Before loading any instruments into the STATim, consult the manufacturer’s
reprocessing instructions.
• Clean Instruments
Clean and rinse all instruments before loading them into the cassette. Disinfectant
residues and solid debris may inhibit sterilization and damage the instruments, the
cassette, and the STATim. Lubricated instruments must be wiped thoroughly and any
excess lubricant should be removed before loading.
• Unwrapped Instruments
Arrange unwrapped instruments on the instrument rack in the tray so that they do not
touch one another. This ensures that steam reaches all surfaces.
Instruments must not be stacked or piled in the cassettes.
• Rubber and Plastic Instruments
The following materials can be sterilized in the STATim:
Nylon, polycarbonate (Lexan™), polypropylene, PTFE (Teflon™), acetal (Delrin™),
polysulfone (Udel™), polyetherimide (Ultem™), silicone rubber, and polyester.
When loading rubber and plastic instruments in the tray, leave a space between the
instruments and the cassette walls. This ensures that steam reaches all surfaces.
The following materials cannot be sterilized in the STATim:
Polyethylene, ABS, styrene, cellulosics, PVC, Acrylic (Plexiglas™), PPO (Noryl™),
latex, neoprene, and similar materials.
Use of these materials may lead to instrument or equipment damage. If you are unsure
of your instrument’s material or construction, do not load into your STATim until you have
checked with the instrument manufacturer.
• All Instruments
The STATim is NOT intended for sterilizing textiles, liquids or biomedical waste.
Instruments will remain sterile after a successful cycle until the cassette is disengaged
from the unit. Unwrapped instruments, once exposed to ambient or external conditions,
cannot be maintained in a sterile state.
SciCan recommends the final user carefully choose the most appropriate sterilization
cycle according to the recommendations of their leading infection control authorities
and local regulatory guidelines / recommendations.
• Routine Monitoring
Chemical process indicators suitable for steam sterilizers should be included in or on
each package or load being sterilized. In addition, the weekly use of biological
indicators, which allow you to ascertain whether the instruments have been exposed
to sterilization conditions, is recommended.
10
Statim_2000E_manual_rev2_Statim_2000E_manual_rev2 3/10/11 11:23 AM Page 11
4. Instructions For Use
4.3 Using Biological/Chemical Indicators
For detailed instructions on how to handle, use and dispose of both the biological
and chemical indicators, please consult the product literature accompanying the
biological indicators or contact the manufacturer directly.
To use the indicators with the STATim, follow these steps:
1. Place the appropriate biological indicator in the STATim chamber.
2. Process the load in the sterilizer according to your usual practice.
3. Ensure that the message “Cycle Complete” is displayed on the LCD after the
cycle is finished.
4. Recover the biological and / or chemical indicator and process further according to
the literature that accompanied the indicator.
At the first indication of a potential sterilization failure:
1. Do not process any more instruments until favourable test results have been
returned.
2. Ensure the correct indicator type was chosen.
3. Ensure the cassette was not overloaded. Consult the earlier portion of this section for
proper loading instructions.
4. If the results do not change, do not process any more instruments within the STATim
and contact your SciCan dealer for further assistance.
Because the turnaround time for the biological indicator is up to 48 hours, it is
recommended that the tests be conducted so that the incubation period occurs
during a period of planned downtime such a the last cycle before a weekend.
11
Statim_2000E_manual_rev2_Statim_2000E_manual_rev2 3/10/11 11:23 AM Page 12
4. Instructions For Use
4.4 Instrument Weight Guide
Instrument
Typical Instrument Weight
Scissors
Dental scalers
Forceps
Dental handpiece
Unwrapped instrument rack
Suction cannula
Plastic mouth mirror
Impression tray
Plastic x-ray positioning ring
30 g / 0.96 oz
20 g / 0.64 oz
15 g / 0.48 oz
40 to 60 g / 1.29 to 1.92 oz
225 g / 7.23 oz
10 g / 0.32 oz
8 g / 0.25 oz
15 to 45 g / 0.48 to 1.45 oz
20 g / 0.64 oz
NOTE: The above weights are to be used as reference only. For exact weights of your
instruments, consult the manufacturer’s specifications.
4.5 Selecting a Cycle
The STATim 2000E has two sterilization cycles, each designed to sterilize a specific
type of instrument. The instruments will remain sterile after a successful cycle until
the cassette is removed from the autoclave.
Unwrapped instruments, once exposed to ambient or external conditions, cannot be
maintained in a sterile state and must be used immediately after they are comfortable
to the touch.
The types of instruments, sterilization requirements, and a graph depicting each cycle
are described over the next few pages. Consult the Instrument Weight Guide in Section
4.4 for information on how to make up an appropriate load for the masses specified for
individual cycles.
12
Statim_2000E_manual_rev2_Statim_2000E_manual_rev2 3/10/11 11:23 AM Page 13
4. Instructions For Use
1. Unwrapped Cycle
The Unwrapped Cycle is a general
purpose sterilization cycle used to
sterilize up to 1.0 kg (2.2 lbs) of solid
metal instruments such as pliers, burrs,
scalers and forceps. Dental handpieces
may be sterilized in this cycle.
To select the Unwrapped Cycle, press
the Unwrapped Cycle button, then press
the START button.
A
D
3.5 MIN.*
C
B
A
B
Conditioning
C
Pressurizing
E
D
E
F
Warming up
F
Sterilizing
Venting
Air Drying
The sterilization temperature in the cassette is 134 ˚C (273 ˚F) and the holding time
is 3.5 minutes. See Section 4.1 Using the Cassette, and Section 4.2 Preparing and
Loading Instruments before running this cycle.
2. Rubber and Plastics Cycle
The Rubber and Plastics Cycle is used to
sterilize up to 0.4 kg (0.9 lbs) of solid
unwrapped instruments constructed of
metal or the materials listed in Section
4.2 Preparing and Loading Instruments.
To select the Rubber and Plastics Cycle,
press the Rubber and Plastics Cycle
button, then press the START button.
B
A
C
A
B
Conditioning
C
Pressurizing
Warming up
D
E
D
E
F
Sterilizing
Venting
Air Drying
The sterilization temperature in the cassette is 121˚C / 250˚F and the holding time is
15 minutes.
13
F
Statim_2000E_manual_rev2_Statim_2000E_manual_rev2 3/10/11 11:23 AM Page 14
4. Instructions For Use
4.6 STATIM 2000E — Operating a Cycle
To operate each cycle, follow these steps and watch the LCD:
Turn the power switch at the
back of the unit to ON.
The LCD Display reads:
14:23 3/11/2010
SELECT A CYCLE
Press the appropriate cycle
button on the keypad.
The display will read either:
or
UNWRAPPED
135˚C for 3.5min.
RUBBER AND PLASTICS
121˚C for 15 min.
As the button is released the
display appears similar to:
Cycle you selected
PRESS START
Press the START button to begin the cycle you selected. The amber
indicator light comes on and two lines of messages are alternately
displayed at 2 second intervals on the LCD. The top line alternates
between the cycle name and the cycle stage in progress. The
second line provides temperature readings, pressure values and,
during the sterilizing stage, the time remaining in the cycle.
Cycle you selected
65˚C
WARMING UP
CONDITIONING
110˚C
PRESSURIZING
125˚C
STERILIZING
135˚C
212 kPa
3:30
VENTING
105˚C
14
Statim_2000E_manual_rev2_Statim_2000E_manual_rev2 3/10/11 11:23 AM Page 15
4. Instructions For Use
As a cycle is running, you will hear an intermittent buzzing sound as the pump injects
water into the steam generator, and a click at random intervals as the exhaust valve
opens and closes.
If a sterilization cycle is successful, the reminder tone sounds, the amber light flashes
and the cycle name is displayed on the top line of the LCD until the operator presses the
STOP button or the cassette is removed from the unit.
UNWRAPPED
CYCLE COMPLETE
When removing the cassette be careful. The metal parts will be hot, and the cassette
will contain hot steam.
After the cassette is removed from the unit, it should be opened to hasten water
evaporation from the unwrapped instruments.
4.7 Stopping a Cycle
To stop a cycle press the STOP button. If the STOP button is pushed, the cassette is
removed, or the unit detects a problem while operating, the cycle will stop and the
amber active light will flash. Once a cycle has been stopped, the STOP button must
be pressed before another cycle can be started. The display reads any of the
following messages:
CYCLE FAULT xxx
NOT STERILE
or
CASSETTE REMOVED
NOT STERILE
If the display shows the message, CYCLE FAULT or NOT STERILE, the cassette
contents are not sterile! See Troubleshooting for more information.
15
Statim_2000E_manual_rev2_Statim_2000E_manual_rev2 3/10/11 11:23 AM Page 16
5. Maintenance
5.1 Cleaning the Cassette
Keeping the STATim cassette clean is good clinical practice and assists in the function
of the unit. SciCan recommends that the interior surface be cleaned at least once a
week. Use dishwashing soap or a mild detergent that does not contain chlorine. Scrub
the inside of the cassette with a cleaning pad designed for use with Teflon™ coated
surfaces. After scouring, rinse thoroughly with water to remove all traces of the
detergent. Cleaning the inside of your cassette is very important if you regularly sterilize
lubricated instruments. Coating the entire inside surface with STAT-DRI/STAT-DRI
PLUS drying agent induces water to form an even coat on the inside surface, without
beading. The water in contact with the hot cassette surfaces also evaporates much
more efficiently. Spotting is minimized and instruments dry much better. STAT-DRI/
STAT-DRI PLUS should be applied every 10 cycles, and after every cassette cleaning.
5.2 Cleaning the Water Reservoir Filter
The water reservoir filter should be cleaned at least once a week or when required. The
filter can easily be removed and cleaned by placing the filter upside down under running
water to wash away the particles until clean, and then placed back into the reservoir
opening. If a replacement water reservoir filter is required, order part number 01-109300S.
5.3 Cleaning the Reservoir
Check the reservoir for dirt or particles. The reservoir may be cleaned by draining
followed by cleaning and rinsing with steam process distilled water ONLY. Use of
chemicals or cleaning agents is not reccommended and could cause the unit damage.
5.4 Cleaning the Exterior Surfaces
Use a soft cloth moistened with soap and water to clean all exterior surfaces.
Do not use harsh cleaning chemicals or disinfectants.
5.5 Replacing the Cassette Seal
To ensure optimum performance of your STATim cassette autoclave, change the
cassette seal every 500 cycles or every six months, whichever comes first.
Replacement seals are available from SciCan (order number 01-100028S).
To change the cassette seal, follow these steps:
Place the cassette lid and the new seal on a clean work surface. Examine the position
of the old seal in the cassette lid and arrange the new seal in the same orientation,
next to the lid.
16
Statim_2000E_manual_rev2_Statim_2000E_manual_rev2 3/10/11 11:23 AM Page 17
5. Maintenance
Remove the old seal and discard. Clean any residue out of the
seal channel and flush out the channel with distilled water.
Lubricate the new seal with the liquid seal lubricant provided.
Insert the rounded edge of the seal under the round lip of
the lid. Align the holes in the new seal with the holes in the lid.
NOTE: At every corner and at the holes in the lid, two square nibs
should be visible. The nibs should fit flush with the lid’s outer surface.
Ensure the seal is completely inserted. Feel around
the periphery to ensure the seal is securely in place.
NOTE: During a cycle, steam may appear between the lid
and the tray. If this persists, remove the cassette and check
that the seal is correctly installed.
Figure 13
Be careful. The metal parts will be hot, and the cassette may contain hot steam.
5.6 Maintaining Fluid Levels
Use only steam-process distilled water containing less than 5 ppm total dissolved
solids (having conductivity of less than 10 µS / cm) in the STATim. To fill the reservoir,
remove the cap from the top of the unit and fill the reservoir. We recommend using
a funnel to minimize spills. Each time you refill the reservoir, empty the waste bottle
and refill with water to the MIN line. Empty the waste bottle often to avoid unpleasant
odors and discoloration of the contents. (A low-level chlorine-free disinfectant,
prepared according to the manufacturer’s instructions, may be added to the waste
bottle to remedy this situation).
5.7 Reading Water Quality
(units equipped with Rev7 PCB (software SxxxR6xx) or higher)
1. Power up unit while pressing the STOP button to access the User Setup menu.
2. Using the UNWRAPPED button, scroll to Water Quality and select it by pressing the
RUBBER AND PLASTIC button.
>Water Quality
CD=XXuS
l / yyy / z.z ppm
CD=conductivity
yyy= engineering value
17
XX= micro S. value
z.z= parts per million value
Statim_2000E_manual_rev2_Statim_2000E_manual_rev2 3/10/11 11:23 AM Page 18
5. Maintenance
5.8 Preventative Maintenance Schedule
To ensure trouble-free performance, both the operator and the dealer must follow
a preventative maintenance schedule. NOTE: Please refer to your National, Regional,
State or Safety laws for any additional reoccurring user testing that may be required.
The schedules below describe the necessary actions.
Water Reservoir
• Replace water as needed.
Waste Bottle
• Empty the waste bottle every time you refill the water reservoir.
• Fill the bottle with water, up to the MIN line marking. You may also add some
chlorine-free disinfectant.
Cassette
• Wash the interior of the cassette with dishwashing soap or a mild detergent that does not
contain chlorine.
• Scrub the inside with a cleaning pad designed for use with Teflon™-coated surfaces.
• After removing all traces of the detergent, treat interior surfaces of the cassette with
the STAT-DRI™ Plus drying agent. Order more STAT-DRI™ Plus from your dealer quoting
2OZPLUS, 8OZPLUST, or 32OZPLUS.
Water Filter
necessary.
• Check the water reservoir filter every week and clean if necessary. Replace only if
Cassette Seal
• Replace every 500 cycles or six months (whichever is first), or whenever necessary.
Every
6 months
Weekly
Daily
Operator
Once a year
Technician
Cassette
• Check the tray, lid and seal for damage. Replace if necessary.
Solenoid Valve
• Inspect the valve and clean if dirty. Replace the plunger if defective.
Pump
• Clean the filters, replace if dirty.
Water Reservoir
• Check the reservoir for dirt. Clean and rinse with steam process distilled water if necessary.
Calibration
• Calibrate the unit.
18
Statim_2000E_manual_rev2_Statim_2000E_manual_rev2 3/10/11 11:23 AM Page 19
6. Troubleshooting
Problem
Solution
Unit does not power ON.
Check that the unit is plugged into a properly
grounded outlet and that the power cord is firmly
seated at the rear of the machine.
Try another circuit. Power unit OFF for 10 seconds
and then power ON again.
Check the condition of the line circuit
breaker or fuse.
There is water under the machine.
Check that water has not spilled when refilling the
reservoir. Make sure the plug in the exhaust tube is
secured. Remove and reinsert the cassette .
Attempt another cycle.
Be careful. The metal parts will be hot, and the cassette
will contain hot steam.
The cassette is leaking. If water drips from the
underside of the unit during operation, check the
cassette seal for misalignment or damage and replace
the seal if required.
Be careful. The metal parts will be hot, and the cassette
will contain hot steam.
Attempt another cycle. If it still leaks attempt another
cycle using a different cassette if possible.
If the leak persists, turn the unit OFF, remove and unload
the cassette, unplug the unit, and call
your dealer.
19
Statim_2000E_manual_rev2_Statim_2000E_manual_rev2 3/10/11 11:23 AM Page 20
6. Troubleshooting
Problem
Solution
Cycle interrupted — NOT STERILE,
Cycle aborted — NOT STERILE and
CYCLE FAULT messages.
Record the CYCLE FAULT number. Wait a few minutes
and attempt another cycle before proceeding to the next
solution. Remove the cassette. Be careful. The metal
parts will be hot and the cassette will contain hot steam.
Inspect the cassette to ensure that the holes in the back
of the seal are perfectly aligned, and that the flexible lip
of the seal is completely free. Check the exhaust tube
for kinks or obstructions. If kinked, straighten the tube.
If the tube can not be straightened, remove it from the
push-in fitting attached to the STATim. Depress the
collar on the fitting and, with the other hand pull firmly
on the tube. Once the tube is free of the fitting, cut
the damaged section of tubing away using a sharp
instrument. Be sure that you leave enough tube to
reach the unit when you re-attach the tube to the
exhaust fitting. If the tube is too short to remove a
section, contact your SciCan dealer for a replacement.
Check that the STATim has not inadvertently been
exposed to any electrical interference.
Refer to the Installation section dealing with
Environmental Considerations. (Section 3.1)
Try running another cycle. If the problem persists,
record the cycle fault message number and contact
your dealer.
Excessive steam issuing from the front
of the machine.
Remove and reinsert the cassette. Attempt another
cycle. Remove and check the cassette seal for
misalignment or damage. Replace the seal if required.
Be careful as the metal parts will be hot and the
cassette will contain hot steam.
If the leak persists, turn the unit OFF, remove and
unload the cassette and contact your SciCan dealer.
20
Statim_2000E_manual_rev2_Statim_2000E_manual_rev2 3/10/11 11:23 AM Page 21
6. Troubleshooting
Problem
Message WATER QUALITY IS NOT
ACCEPTABLE. Machine will not start.
Solution
You have used water which is not steam-process
distilled or is improperly distilled.
Empty the reservoir and refill with steam-process
distilled water containing less than 5 ppm total disolved
solids (having conductivity of less than 10 µS / cm).
If you have the water conductivity meter, check the
quality of the water before refilling the reservoir.
Refer to the steps described in Shipping the Unit to
empty the reservoir.
Message REFILL RESERVOIR,
Machine will not start.
The level of the water in the reservoir is low. Refill the
reservoir. Refer to the steps described in Filling the
Reservoir.
Time and date are incorrect.
The time and date have not been set. See Setting the
Time and Date.
21
Statim_2000E_manual_rev2_Statim_2000E_manual_rev2 3/10/11 11:23 AM Page 22
7. Spare Parts List
ACCESSORIES
01-100780S
Bumper
01-103139S
Conductivity Meter
01-100782S
Push-in Fitting
01-103923
Condenser Additional Bottle
01-106030S
Cassette Lid Handle
01-103945S
Rack-Tray Unwrapped Instrument Kit
01-100008A
Kit Cassette Final
2OZPLUS
STAT-DRI Plus 2 oz. Bottle w/sprayer
01-100028S
Cassette Seal
32OZPLUS
STAT-DRI Plus 32 oz. Bottle w/sprayer
01-100204S
Exhaust Tube
8OZPLUS
STAT-DRI Plus 8 oz. Bottle w/cap
01-100271A
Kit Tray Cassette w/Mesh, Box Stat1
99-108332
Chemical Emulator 134˚C, 3.5 min.
01-100724S
Condenser Bottle w/o Condenser
01-100735S
Waste Water Bottle Fitting
01-100612S
Tubing & mounting hardware
01-100812S
Condenser Bottle
01-100834S
Cassette Lid
01-101553S
Leveler
01-106653
Mesh Tray
01-108628
Operator’s Manual ST-2000E
01-101647S
Power Cord NA
01-101766S
Power Cord UK
01-101768S
Power Cord Switzerland
01-101769S
Power Cord Italy
01-101779S
Power Cord Europe
01-101783S
Reservoir Cap
01-101787S
Water Reservoir Cap and Filter
01-109300S
Water Reservoir Filter
01-103475S
Tray
01-103865S
Seal Lubricant
01-104093S
Exhaust Tube 3m Long
01-104343S
Plug - Drain Tubing
22
Statim_2000E_manual_rev2_Statim_2000E_manual_rev2 3/10/11 11:23 AM Page 23
8. Warranty
Limited Warranty
For a period of one year, SciCan guarantees that the STATIM 2000E, when
manufactured by SciCan in new and unused condition, will not fail during normal
service due to defects in material and workmanship that are not due to apparent
abuse, misuse, or accident.
The one year warranty will cover the performance of all components of the unit except
consumables such as the cassette seal, the compressor filter and the microbiological
filter, provided that the product is being used and maintained according to the
description in the user’s manual.
In the event of failure due to such defects during this period of time, the exclusive
remedies shall be repair or replacement, at SciCan’s option and without charge, of any
defected part(s) (except gasket), provided SciCan is notified in writing within thirty (30)
days of the date of such a failure and further provided that the defective part(s) are
returned to SciCan prepaid.
This warranty shall be considered to be validated, if the product is accompanied by the
original purchase invoice from the authorized SciCan dealer, and such invoice identifies
the item by serial number and clearly states the date of purchase. No other validation is
acceptable. After one year, all SciCan’s warranties and other duties with respect to the
quality of the product shall be conclusively presumed to have been satisfied, all liability
therefore shall terminate, and no action or breach of any such warranty or duty may
thereafter be commenced against SciCan.
Any express warranty not provided hereon and any implied warranty or representation
as to performance, and any remedy for breach of contract which, but for this provision,
might arise by implication, operation of law, custom of trade or course of dealing ,
including any implied warranty of merchantability or of fitness for particular purpose with
respect to all and any products manufactured by SciCan is excluded and disclaimed by
SciCan. If you would like to learn more about SciCan products and features, visit our
website at www.scican.com.
23
Statim_2000E_manual_rev2_Statim_2000E_manual_rev2 3/10/11 11:23 AM Page 24
9. Specifications
9.1 STATIM 2000E — Specifications
Machine Dimensions:
Cassette Size (External):
Cassette Size (Internal):
Length:
485 mm (19")
Width:
415 mm (16.3")
Height:
150 mm (5.9")
Length:
410 mm (16") includes handles
Width:
195 mm (7.67")
Height:
40 mm (1.6")
Length:
280 mm (11")
Width:
180 mm (7.1")
Height:
35 mm (1.4")
Sterilization Chamber Volume:
1.8 L (61 fl. oz.) U.S.
Reservoir Volume:
4.0 L (140 fl. oz.) U.S.
Weight (Without water):
21 kg (46 lbs)
Clearance required:
Top:
50 mm (1.9”)
Sides:
50 mm (1.9”)
Back:
50 mm (1.9”)
Front:
480 mm (18.9”)
Maximum Steam Temperature:
138 °C (280 °F)
Maximum Operating Pressure:
341 kPa abs (49.5 psia)
Electrical Rating* (+ / - 10 %):
110 V, 50 / 60 Hz, 11 A
220-240 V, 50 / 60 Hz, 6 A
*see serial number label for requirements specific to your unit.
Protection Class:
I
Protection:
covered (indoor use only)
Ambient Operating Temperatures and Humidity:
15 °C to 25 °C (59 °F to 77 °F)
and 25 % to 70 %
Altitude:
Up to 2000 meters (6600 ft)
Installation Category:
1
24


