1
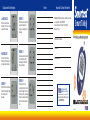
Display and Error Messages
Lo MESSAGE
If the test result is below
20mg/dL (1.1mmol/L), Lo will
appear on the display.
Notes
ERROR 2
When the meter temperature
is above the operating
range, it will display an E_2
message.
Important Contact Information
Smartest TM Technical Support is available to answer
your questions: 1-888-88PHSSC
Hours of operation, 9:00am~5:00pm (EST)
Monday~Friday
Healthcare Professional
Smart Talk
Blood Glucose Monitoring System
Pharmacist
Hi MESSAGE
If the test result is above
600mg/dL (33.3 mmol/L), HI
will appear on the display.
ERROR 1
When the meter temperature
is below the operating range,
it will display an E_1
message.
ERROR 3
Indicates low battery and the
meter will display an E_3
message. No further tests
can be performed.
Diabetes Educator
Other
ERROR 4
When the meter is not
working properly or the test
strip is damaged, the meter
will display an E_4 message.
Please use the check strip to
perform a meter inspection
test.
Progressive Health
Supply & Source Corp.
119 Avenue at the Common, Suite 1, Shrewsbury, NJ 07702
www.progressivehealthsupply.com
TEL:1-888-88PHSSC
QUICK REFERENCE GUIDE
PR8888-M02A1
Important User's Information
This guide offers at-a-glance information about
how to use your Smartest TM Blood Glucose
Monitoring System. It is recommended that you
read the entire Smartest TM User's Manual
before using the system.
Important Safety Information
When using the Smartest TM Blood Glucose
Monitoring System, these safety rules must be
followed to prevent injury or infection.
1.Before and after getting blood samples or
using the system, wash your hands and the
intended sample site with soap and warm
water. Rinse and dry thoroughly.
2.Use only fresh capillary whole blood sample
for testing.
3.A lancet should be used only one time. DO
NOT reuse lancets.
4.Always use a new sterile lancet and keep
the lancing device clean.
Coding Your Meter
To code the meter by inserting the
code key to set the meter to match
the test strip. Remember to change
the code key every time you open
a new box of test strip.
STEP 1
Make sure the meter is off.
(Remove the old code key, if there
is one in the Meter, and discard it.)
STEP 2
Insert the code key into the meter
(as picture).
Insert a new strip into the meter;
the code number of the code key
will be displayed on the screen.
(Make sure that the code number on
the meter display matches the code
number on the test strip vial. Failure
to code the meter correctly will cause
inaccurate test results.)
STEP 3
Leave the code key in the meter
until you open the next new box of
test strip. Once the code is set, the
meter is ready for testing.
(Note :For Smart-talk, if you see a code
“
“ with date and time on the
display, you will hear “No self-coding
chip detected”. Please insert a code
key into the meter.)
Fill Confirmation Window
CORRECT
Confirmation window is FULL.
Note: Be sure the confirmation
window is full. If the
confirmation window is not full
before meter begins countdown,
repeat test with new test strip.
NOT CORRECT
Confirmation window is NOT
FULL.
Blood Glucose Testing
Before testing, wash your hands
and the intended sample site
with soap and warm water.
Rinse and dry thoroughly.
STEP 1
Insert a test strip. The meter will
turn on automatically. (Make sure
the code key is inserted, and the code
number of code key is the same as the
code number on the strip vial.)
(Note: For Smart-Talk, you will hear “Hello,
I will be happy to help you. The strip code
is “XX”. The meter is ready to test your
blood sample.)
STEP 2
When the symbol appears on
the display, apply the blood
sample to the front edge of the
test strip, and the blood should
completely fill the confirmation
window before the meter begins
to count down.
STEP 3
After 15 seconds, and the meter
will display the result with two
beeps.
(Note: For Smart-talk, you will hear your
test result message-- “The reading is
(number) (unit)” after the used test
strip is removed.)
Recalling Memory
STEP 1
Press M button to turn on the
meter. After a brief full display,
the last test result is displayed.
If there is no memoried result,
“nUL” is displayed and the meter
will turn off after 5 seconds.
(Note:For Smart-talk, you will hear
“Recalling the memory”.)
STEP 2
Press M and C button to review
your test results backwards and
forwards.
STEP 3
To turn off the meter, press M
button for two seconds, or the
meter will turn off automatically
after 20 seconds.
(Note: For Smart-talk, you will hear
“Have a healthy day.” when the
meter is off.)