1
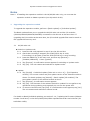
Expansion Module Firmware Upgrade Procedure Expansion Module Firmware Upgrade Procedure These are instructions for upgrading the SMARTDAC+ expansion module firmware. Please read this document before proceeding with the upgrade. Applicable Products GX90EX (standard models only): *Excludes special specifications (with suffixes of /S1–999 or /Z). Note that in-factory maintenance is required for those models. Versions after Upgrade GX90EX R1.02.01 Items to Prepare GX/GP main unit GX/GP (version R2.01.01 or later) with the GX90EX installed SD memory card Be sure to use the GX/GP main unit or SD card formatter software available from the SD Association to format the SD memory card. Other formats are not supported by the firmware upgrade. GX10/GX20/GP10/GP20 Paperless Recorder First Step Guide (IM 04L51B01-02EN) GX10/GX20/GP10/GP20 Paperless Recorder User's Manual (IM 04L51B01-01EN) GM GM unit (GM10/GM90PS/GM90MB) with the GX90EX installed SD memory card Format the SD memory card using the SD card formatter distributed by the SD Association. Other formats are not supported by the firmware upgrade. Data Acquisition System GM First Step Guide (IM 04L55B01-02EN) Data Acquisition System GM User's Manual (IM 04L55B01-01EN) Notes Note 1: This document applies to the free expansion module firmware upgrade. Note 2: If in-factory maintenance or repair is ever required, be sure to inform the factory that the unit has been upgraded. 1 | Expansion Module Firmware Upgrade Procedure Upgrade Procedure The expansion module firmware upgrade is performed by using main unit screen operations in the case of the GX/GP main unit, or through a web application in the case of the GM. Note that if the GX/GP main unit version is earlier than R2.01.01, you must upgrade to R2.01.01 or later before proceeding with expansion module upgrade described below. 1 Checking the version of the expansion module Follow the steps below to check the version of the expansion module before performing the upgrade. 1.1 GX/GP main unit 1.1.1 On the main unit, press the MENU key. Tap [Browse] > [System information] > [Module information] to display the module information screen. 1.1.2 Tap the desired module to view its details. 1.1.3 Look for the version under "Version information". If the version matches the post-upgrade version, you do not need to perform the upgrade. 1.2 GM 1.2.1 Connect to the GM web application from a PC web browser. For instructions on viewing or setting the GM's IP address, see " Configuring the GM via Ethernet Communication" in the Data Acquisition System GM First Step Guide (IM 04L55B01-02EN). 1.2.2 On the [Data] tab, click [System information] to display the structure of connected modules. 1.2.3 Look under "Version". If the version matches the post-upgrade version, you do not need to perform the upgrade. 2 Preparing the SD memory card for the upgrade 2.1 Download the upgrade file from our website and save it to your PC. 2.2 Double-click the file and unzip it to a folder of your choice. 2.3 Save the unzipped file (see table 1) in the root directory of the SD memory card. Confirm that no other files having the same extension are saved on the SD memory card. 2.4 Confirm the presence of the file in table 1. Table 1: Firmware used for upgrades Files/Folder Name File ex_r10201.iom 2 | Expansion Module Firmware Upgrade Procedure Notes Note 1: If installing the expansion module in the GX/GP/GM main unit, you must set the expansion module to Master operation (turn dip switch 8 ON). 3 Upgrading the expansion module To upgrade the expansion module, perform a [Batch update] or [Individual update]. The Batch update allows you to upgrade the GX/GP main unit and the I/O modules (GX90XA/GX90XD/GX90YD/GX90WD) connected to the GM unit at the same time. If upgrading the I/O modules at the same time, the I/O module upgrade files must be saved on the upgrade SD memory card. 3.1 GX/GP main unit ■ Switch to Update mode 3.1.1 Insert the SD card prepared in step 2 into the SD card slot. 3.1.2 Check that recording is stopped (the START/STOP key is unlit). If recording is in progress, press the START/STOP key to stop recording. 3.1.3 Press the MENU key on the main unit, and then tap [Browse] > [Initialize/calibration] > Menu [Update]. 3.1.4 Tap [Execute]. A confirmation screen appears for switching to Update mode. 3.1.5 Tap [OK]. The unit restarts and switches to Update mode. ■ Update 3.1.6 Tap [Module] > Individual update [Main unit or unit 1–6] > [I/O Expansion module]. The current version and post-update version of the selected module is shown. For batch updates, tap [Module] > Batch update [All modules]. The post-update version of the selected module is shown. 3.1.7 Tap [Execute]. A confirmation screen appears. 3.1.8 Tap [OK]. The firmware of the selected module is updated. Do not perform any operations during updating, and especially do not turn the power OFF. 3.1.9 To return to Normal mode, tap [Exit]. If a confirmation screen appears, tap [Yes]. The unit restarts and switches to Normal mode. For details on Batch/Individual updating, see section 5.1.6, "Updating the Firmware (Release number 2 and later)" in the GX10/GX20/GP10/GP20 Paperless Recorder User's Manual (IM 04L51B01-01EN). 3 | Expansion Module Firmware Upgrade Procedure 3.2 GM ■ Switch to Update mode 3.2.1 Insert the SD card prepared in step 2 into the SD card slot. 3.2.2 Confirm that recording is in progress (that the REC status LED is lit). If recording is in progress, stop recording by holding down the STOP key for at least 3 seconds. 3.2.3 Connect to the GM web application from a PC web browser. 3.2.4 On the [Calib] tab, click [Update]. A confirmation screen appears for switching to Update mode. 3.2.5 Click the [Next] button. The [Mode Switching] dialog box appears. 3.2.6 Click [OK]. The unit restarts and switches to Update mode. ■ Update 3.2.7 In the Contents area under [Update Mode], select [Module]. 3.2.8 Click the expansion module to update (GX90EX). If performing a batch update, click [All modules]. 3.2.9 Click the [Next] button. The [Update] dialog box appears. The current version and post-update version are shown. If performing a batch update, the post-update version of the selected module is shown. 3.2.10 Click [Update]. The firmware of the expansion module is updated. When finished, the [Update] dialog box appears. Do not perform any operations during updating, and especially do not turn the power OFF. 3.2.11 Click [OK]. 3.2.12 To return to Normal mode, click the [End] button. If the [Mode Switching] dialog box appears, click [OK]. The unit restarts and switches to Normal mode. Before performing a batch update, first update the GM unit expansion modules to R1.02.01 or later. For details on Batch/Individual updating, see section 5.1.5, "Updating the Firmware" in the Data Acquisition System GM User's Manual (IM 04L55B01-01EN). 4 | Expansion Module Firmware Upgrade Procedure 4 Checking the version of the expansion module Check whether the upgrade was successful. 4.1 Follow the instructions in step 1 to confirm that the version is the latest. 4.2 If not the latest version, return to step 3 and retry the upgrade. 5 | Expansion Module Firmware Upgrade Procedure Yokogawa Electric Corporation [email protected] www.yokogawa.com/ns/ Issued in December, 2014 ©copyright Yokogawa Electric Corporation 6 |