1
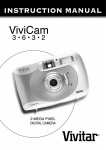
ViviCam 2750
Digital Still Camera
User Manual
And Technical Support Guide
Rev. April 13, 1999
Contents
Getting Started
What’s Inside
PC System Requirements
Getting to Know the Camera
Using the Camera
Power Supply
Installing Batteries
Flash Memory
Extended Flash Memory
Using The Optional AC Power Adapter
Power Management - Auto Power Off
Taking Pictures (Images)
Using the LCD Display
Adjusting LCD Brightness
Viewing Your Images on the LCD – Three Steps
Viewing Multiple Images (Thumbnails)
Menu Mode
Erasing Images from Memory
Defining Image Quality
Using the Built-in Flash
Using the Self-Timer
Memory Full
Connecting to Your Computer/Installing Capture Software
Video Interface
Appendix 1: LCD Icons
Appendix 2: Record Mode Icons
Appendix 3: ViviCam 2750 Specifications
Warranty Policy
FCC Notice
Caution
Warning
V2750 “Out-of-Box” Guide –
Warranty Card
Quick Start Guide
Getting Started
Congratulations on purchasing the ViviCam 2750 Digital Camera. This camera
brings to you the ease-of-use of a traditional camera, combined with high-tech
functionality. It includes a full-color image LCD (Liquid Crystal Display) for
image previewing which allows you to immediately see the images you have just
taken. It also includes a built-in multi-mode flash with an auto-flash sensor,
which automatically detects whether the flash should be engaged or not. There
is 2 MB (megabytes) of internal digital storage memory for storing your images.
You may use additional Compact Flash memory cards (up to a maximum of 32 MB in
capacity) for storing additional images.
Once you have finished taking your images, you may view them on a TV/monitor, or
you may uploaded them to your personal computer. From there, you can use the
included image editing software to enhance your images before you print or email
them.
What's Inside:
Included with your camera are –
•
•
•
•
•
•
•
•
•
•
•
•
ViviCam 2750 Digital Still Camera with 2 MB internal memory.
Quick Start Guide.
Owner’s Manual.
Twain driver (on diskettes or CD).
Image editing software, on CD-ROM.
Hand Strap.
Carrying Pouch.
Serial Data cable which connects the camera to your PC.
Video cable which allows you to connect your camera to a TV/Monitor.
4 x AA batteries.
Warranty Card.
Various promotional items and special offers for camera accessories.
Please note that the basic inclusions do vary somewhat depending upon special
manufacturing circumstances, and promotional programs in which your dealer or
supplier may have specified unique or special package contents.
Optional Items:
Vivitar Corporation has been developing and marketing Digital Still Cameras
since 1996. In that time we have learned a great deal from our customers about
their needs and concerns with consumer digital imaging. The two most common
concerns, or issues are 1) PC connectivity, and 2) Battery life.
The following accessories are strongly suggested to address those issues, and
further enhance your ownership experience. We suggest the use of the following
optional accessories –
1. Rechargeable batteries and chargers. Digital cameras are notorious for
battery consumption. It is highly recommended that digital camera users use
rechargeable NiMH (Nickel-Metal Hydride) AA batteries. Ideally, you would
have two sets of these batteries and one charger. One set of batteries can
be on-charge, while the second set would be in the camera. As the batteries
deplete you would rotate the battery sets between charger and camera.
2. Compact Flash cards for additional image storage. These are available in
various sizes from 2 MB to 32MB. Please note that the ViviCam 2750 has an
upper memory limit of 32 MB. Do not attempt to use CF cards greater than 32
MB in capacity.
3. A Compact Flash card reader that allows you to download your images directly
from a CF card to your PC via parallel port, or USB port. This method is
much faster and easier than using a serial-data cable connection. This
allows you to by-pass the serial data download process altogether. The CF
reader is much faster and circumvents serial communications conflicts.
4. A PCMCIA CF adapter that allows mobile computers (laptops and notebooks) to
read CF memory cards directly into a PCMCIA slot on your notebook computer.
This allows notebook computer users to by-pass the serial data download
process altogether. The CF adapter is much faster and circumvents serial
communications conflicts.
5. AC Adapter. The optional 6.0 VDC power adaptor that allows you to use
household AC power to operate your camera. This is generally useful while
downloading your images.
These items are available through your dealer, most computer stores, on-line
sources, or from the telephone ordering and fulfillment centers listed on the
promotional coupons.
CD-ROM or Diskette Contents
There are two pieces of software required to connect your digital camera to your
PC. The most fundamental component of software is called a “driver”. A driver
is a software module that tells your computer, and its applications, about the
specific nature of your camera (hardware) device. In the case of a digital
camera, the driver has a User Interface (DUI) that helps you to download images
from your camera, and also make adjustments and changes to the camera itself.
Furthermore, the driver included with the ViviCam is a “Twain” driver. Twain is
an industry communication standard (protocol) by which hardware developers
(camera companies, like Vivitar Corporation) and software application developers
have agreed to in order to ensure universal hardware/software compatibility and
inter-operability. What this means to the user is that the ViviCam 2750, being
Twain-compliant, will “talk” to any virtually any software application (an image
editing application, for example) which is also Twain compliant.
To determine if your favorite imaging software is Twain-compliant consult the
manual, the software developer, or review the help files and look for keywords
such as Twain, and acquire.
The second piece of software you will need to download your images is an image
editing application. This must be a Twain-compliant application, of course.
Depending upon the manufacturing circumstances of your particular ViviCam 2750
camera the Twain drivers will be either on a diskette, or on a CD-ROM together
with an image editing software.
Summary –
•
•
TWAIN driver. Lets you download pictures from a Twain-compliant device
straight into your computer.
Twain-compliant photo/image editing software. A software application that
allows you to quickly and easily download, save, and edit (touch-up) an image
captured with your camera.
PC System Requirements
•
•
•
•
•
•
•
A IBM compatible PC with minimum 486/66 Mhz processor, or higher.
Microsoft Windows 95, or Windows 98. Windows 3.X is not supported.
8MB or more of RAM. (16 MB is preferred)
30MB of hard disk space for Twain driver and image application
An available serial port for downloading your images. (Unless you prefer to
use a CF reader).
A CD-ROM drive to load the application software.
A color display/monitor capable of displaying 800 x 600 x 24-bit color. If
your display is only capable of 640 x 480, you way not be able to see the
entire Twain driver interface. If your monitor is set to less than 24 bit
(256 color, or 16 bit) your images will appear dull and colorless.
Note: The ViviCam 2750 Twain driver works only under Windows 95/98, and not
Windows 3.1 or 3.11. However, the ViviCam 2750 images (JPG files) are readable
under Windows 3.x applications. Therefore Windows 3.x users may be able to find
a CF reader that runs under Windows 3.x.
Getting to know the camera
1 Macro/Normal Mode switch
2 Icon Display mode
3 Multiple Image Display
4 Shutter Button
5 Erase
6 Menu (advanced functions)
7 Play/Record
8 Power (On/Off)
9 Optical View Finder
10 LCD Image Display On/Off
11 Forward/Self-Timer
12 Backward/Flash
13 LCD Display
14 Green LED (Power/Processing)
Using the camera
Power Supply
The ViviCam 2750 camera uses standard AA Alkaline, NiCD, NiMH, or renewable
alkaline batteries. You may also use an optional AC power supply that lets you
use household AC current.
Installing Batteries
1. Invert the camera and place your thumb on the battery door.
2. Slide the battery door away from the camera as indicated by the directional
arrow.
3. Insert the batteries as indicated on the inner side of the battery door. When
you close the battery door, the “+” signs should fall in contact with top of the
batteries, and the “-” signs should contact the bottom of their respective AA
cells.
Notes:
• If you are not going to be using the camera for an extended length of time,
remove the batteries to prevent leaks or corrosion.
• Never use manganese batteries.
• Do not mix old and new batteries.
• Low temperatures (below 32 F) may reduce the output efficiency of batteries,
shortening their operational life.
• The recommended battery types are AA Alkaline, Nickel-Metal Hydride (NiMH)
rechargeable batteries, or rechargeable/renewable alkaline.
• Note: When you remove alkaline batteries from a digital camera, do not
dispose of them hastily. Digital cameras deplete AA batteries quickly, but
not completely. Studies have shown that batteries, which appear “dead” to a
digital camera, are still more than adequate for most other consumer
electronic devices. Try it and see!
• If you must dispose of your old batteries, please exercise environmentally
correct means of disposing, or recycling them.
Battery Life Indicator
When the camera has sufficient power, the Low-Power icon (LCD display) will
remain dark. When the battery power becomes low, the Low Power icon will
illuminate to indicate that the batteries are depleting and need to be replaced.
When battery power is low, avoid using the Flash (or Auto-Flash) feature.
Generally, once the Low Power icon comes on, you will have ten more minutes of
operation time. When the batteries are extremely low, the image LCD will appear
only briefly when you attempt to turn it on, and then it will go dark almost
immediately. Ultimately, the batteries will deplete to the point where the
camera will not turn on.
Note: If the batteries are very low, and the camera does a total shutdown
during the image processing and storage function (while saving am image), that
image will most likely be lost.
Flash Memory
The camera features 2 MB (Megabytes) of internal memory for storing images.
This memory, called “Flash Memory”, in non-volatile. This means that the memory
does not require electrical power to retain images. Therefore, you will not
loose your images when the camera is turned off, if you change batteries, or if
you remove batteries for a period of extended storage. If the batteries go
dead, simply insert a new set of batteries, or connect the optional AC power
supply and you will be able to retrieve and view the previously captured images.
The only exception is if the power actually goes off as an image is being saved.
In that case, only the “image in process” will be lost.
Extended Flash Memory
You may extend the memory capability of your camera by adding a Compact Flash
Memory card. This card is a removable “ATA-compatible” memory device that gives
your camera additional memory. For each additional 2MB you can take 32 extra
images in Normal-Quality mode, or 16 pictures in High-Quality mode. Think of CF
cards as simply “digital film.” (Reusable, no less.)
To insert a Compact Flash Memory card, invert the camera, and open the long,
narrow card slot door on the bottom of the camera by sliding the door in the
direction of the arrow. Now, look at your CF card and locate the one edge with
about fifty tiny holes. This edge will go into the CF slot to engage the pins
inside the camera. Position the card so that the face of the CF card faces
opposite the front face of the camera itself. Insert the CF card until it makes
a gentle snap. Notice how the CF eject-button appears, and rises to a level inline with the top of the properly inserted and seated CF card. Have no fear. If
you have the card upside down it will simply not insert due to the protective
guardrails. Of course, never use excessive force with the CF card. Finally,
close the card slot cover and the camera memory is adjusted automatically. As
soon as a CF card is inserted, the camera will use the CF memory for storage and
playback functions.
To remove the card, open the CF door and push the eject button. You may wish to
use the tip of a key, or similar object to help press the small eject-button.
One word of caution, however. Do not insert or remove a CF card while the
camera is On or in the process of storing an image. You may potentially
destruct the CF card or camera. Always power off before adding or removing a CF
card.
Using the Optional AC Power Adapter
To operate the camera using standard AC power, use the optional 6.0 VDC/2.5 Amp
AC Adapter.
•
•
•
Always be sure to use the correct AC adaptor. This power supply provides 2.5
Amps of regulated 6 VDC. Any other adaptor may cause damage to the camera
that is not covered under the warranty.
Grasp the plug, not the cord, when unplugging the adapter from a wall socket.
If the power cord is damaged (exposed wires, etc.), replace it immediately.
Use of a damaged cord may cause fire or electrical shock.
Power Management - Auto Power Off
Your camera is designed to automatically power-down (turn-off) after a specific
time interval after which no camera operations have been invoked. The factory
setting will typically be set in the range of 90 to 120 seconds. This is a
power-saving feature. If you are using rechargeable batteries, and you wish to
extend the automatic power-down interval, you may adjust the power-down interval
up to 99 minutes by pressing the Menu button (button 6) as described later in
this manual.
Note: If you are using an AC power adapter, the camera will sense the presence
of the adapter and the automatic power-off feature will be temporarily disabled
and the camera will stay on indefinitely.
Note: Auto power-off is an automatic power saving feature. You need not wait
for the camera to turn itself off, however. If you are done using the camera you
may manually turn off the camera (button 8) and further increase the life of
your batteries.
Taking Pictures (Images) 1. Turn the camera on by pressing the Power button (button 8) for at least one
second. When the camera is powering-up, you will see a small green LED light
(item 14) just to the right of the optical viewfinder. This green LED will flash
five to seven times. When this LED turns to a steady, solid green the camera is
On, and ready. Note that the image LCD does not come on. This is another
component of the power management system. The LCD image display is the singlemost consumer of battery power. If you would like to use the LCD display, you
can turn it on by pressing the Display button, (button 10).
2. Adjust the lens. Set the lens (slide switch 1) to “Normal” (The icon with
the person & mountain) if your subject is 15 inches, or more, from the camera.
For shooting close ups (5 to 15 inches) switch the lens (slide switch 1), to the
Macro setting (flower icon). If you are unsure as to which setting is ideal for
your shot, turn on the LCD image display and use the live preview feature and
try both settings.
3. Take a picture, simply by pressing the shutter button (button 4), just like a
traditional camera. As the camera processes and stores the image the green LED
will flash for approximately ten seconds. When the LED returns to solid green
you are ready to take the next image. You may use either the optical viewfinder
of LCD image display to frame and compose your images.
4. If you are using the LCD display while capturing images, you will see the
image you just captured during the storage interval. The LCD screen pauses, and
presents a static copy of your image while the camera saves it to memory. As
soon as the image is stored, the LCD will return to live-preview.
5. At this point you may take another image, or you can switch to playback mode
(button 7) to review your images. When memory is full, the green LED will flash
quickly (once per second) and continually.
Using the LCD Display
Using the built-in image Liquid Crystal Display (LCD – feature 13), you can view
pictures immediately after capturing them. The following section describes how
to use the LCD and its various functions.
Note: You need not activate the LCD to capture images. Using the LCD
continually will dramatically shorten the life of your batteries.
Note: You will notice a number of “info icons” on your images. In order to
review your images without all the informational detail, you may turn-off the
info icons from the LCD display, by pressing the Icon mode button (button 2) on
top of the camera. Pressing button 2 again will return the info icons.
Adjusting LCD Brightness
The brightness of the image LCD display is adjustable. To adjust the brightness
of the LCD, invert so that the bottom side is facing up. Notice a small wheel
(dial) in the center of the camera’s bottom panel. Turning the dial with a small
coin will adjust the brightness up and/or down.
Note:
Increasing the LCD brightness uses more battery power.
Viewing Your Images on the LCD – Three steps
To review your stored images, follow these three steps.
1. Turn on the camera (button 8), turn on the LCD (button 10), and press the
Play/Record button (button 7) to switch to Play mode. The LCD display warms up
and then displays the last image taken. If there are no pictures in the camera,
the camera will simply display the message “No picture”.
2. You may scroll through pictures in memory by pressing the Forward (button 11)
or Backward button (button 12).
3. To turn off the LCD image Display, press button 10 again, or allow the
camera’s auto power-down feature to automatically power-down the camera after
the specified time interval.
Viewing Multiple Images (Thumbnails) In addition to previewing single frames on the LCD screen, you may view a mosaic
of nine small “thumbnail” images of the pictures in storage memory. This gives
you the opportunity to quickly navigate the images you have stored, rather than
having to scroll through each image individually in sequential order.
To view thumbnail images (nine at a time):
1. Turn on the camera (button 8), turn on the LCD (button 10), switch to Play
mode (button 7), then press the multiple image display button (button 3).
2. Now you are in the Thumbnail mode. If there are more than nine images in
memory, use may scroll through the thumbnails by pressing Forward (button 11) or
Backward (button 12). When you reach the first or last thumbnail in a set of
nine, and press Forward or Backward again you will go to the next “page” of
thumbnails.
3. To return to single image review, press the Multiple Image Display button
(button 3) again. Whichever image was currently highlighted (bracketed) in
thumbnail mode will be the first image to appear in the LCD display as you
return to single image review.
Menu Mode
To enter the Menu Mode, turn on the camera (button 8), turn on the LCD (button
10), and then press the Menu button (button 6). The LCD image will now display
the built-in function menus containing more options and camera features. To use
these functions select the one you want to engage by using the Forward or
Backward buttons (buttons 11 and 12) and then press the Shutter button (button
4). Details of each feature are discussed below.
The seven functions available in Menu Mode are:
•
•
•
Move To Card - Copy the images in the internal memory to the Compact Flash
Card. (Assumes a CF card is inserted into the card slot.) Note: This
function is actually “Copy to Card”. After you move the images from internal
memory to a CF card, the “originals” are still in the internal memory. In
the sense, this is a copy function.
Erase All - Erases all the images from both internal Flash Memory and the CF
Memory Card. Before the erasure is completed, you will be prompted for
confirmation.
Set Date/Time - Allows you to set the time and date that appear on your
images. Use the Shutter button to increase the entry in a selected field.
Use the Forward or the Backward buttons for navigation, to select a field.
After entering year, month, day, hour, minute, and second, use the Forward
button to advance to “OK”. Finally, select OK by pressing the shutter
button; or Forward to the “Exit” icon to return to the main menu without
saving changes.
Note: After you adjust the time and press OK (Shutter button), and the
batteries are getting low, the camera may power-off. When you turn the
camera on again, it should display the newly set time and date.
Note: The ViviCam 2750 date display is Y2K compliant.
“99” to “00”.
•
•
•
It will change from
Auto Power Off - Allows you to specify the interval for automatic shut off.
Press the Shutter button to adjust the auto power-down time interval. Select
the OK icon to accept the setting or select the Exit icon to return to the
main menu without making changes. You may adjust the interval up to 99
minutes.
Auto Play - Defines the interval between images when sequentially viewing
them on the LCD screen. Press the Shutter button to increase the auto-play
interval. Select OK to accept the setting or Exit to return to the main
menu. If no value is set you must manually scroll images in Play mode using
either the Forward or Backward buttons.
Image Quality - Toggles between Normal- and High- image quality modes. With
2-MB internal memory, Normal allows you to capture at least 32 images, while
High (also known as Fine) allows you to capture at least 16 images. Note the
difference between resolution and image quality. All ViviCam 2750 images are
captured at a resolution of 640x480 pixels. The difference between Normal
•
and High is image quality. The Normal Quality images are compressed more
than the High Quality images. As such, the Normal Quality images require
less image storage space per image, whereas the High Quality images will have
a better image quality.
Lock/Unlock - Allows you to lock the currently displayed image so that it can
not be erased. You can unlock images that are currently locked.
Note: Using the Twain driver User Interface, you may make these same changes
with your mouse and keyboard, while the camera is connected to your PC.
Erasing Images from Memory
The Erase button (button 5) allows you to remove an unwanted image from memory.
You may erase images from either internal memory or from a CF card that is in
the camera. To remove images, the LCD image display must be on.
1. Turn on the camera, turn on the LCD display, then press the Play/Record
button and go to the Play mode.
2. To remove images individually, scroll to the picture then press the erase
button (button 5). A small dialog box will appear and ask you to confirm the
deletion. Press the Forward button (button 11) to acknowledge “Yes”, or the
Backward button (button 12) to decline (No). You will then be prompted to
delete the next image. When you are done erasing, exit to the LCD preview
screen by pressing the Backward button (No).
3. To erase all images in memory at once (as opposed to each, individually),
press the Menu button (button 6). When the Menu-options screen appears, advance
to the Erase-All icon, which is the second icon, in the top row. Press the
shutter button. You will be presented a small dialog box that asks you to
confirm your choice to delete all images. Select “+” to erase all, or “-” to
exit without erasing. Erasing all images will erase images from both internal
and CF card memory.
Note: Once your images have been erased, they are gone.
service or factory repair can retrieve them.
Not even our customer
Defining Image Quality
The ViviCam 2750 can capture images in two different quality modes: Normal
(compressed) and High (less compressed). Both modes capture images at 640 x 480
resolution. With 2-MB internal memory, Normal Quality allows you to capture at
least 32 images, while High Quality allows you to capture at least 16 images.
Note the difference between resolution and image quality. In either mode the
resolution (pixel count) is 640x480 pixels. The difference between Normal and
High is image quality. The Normal Quality images are compressed more than the
High Quality images. As such, the Normal images require less image storage
space per image, whereas the fine images will have a higher image quality.
To select image quality:
1. Power on the camera, turn on the LCD, and press the Menu button (button 6) to
display the menu options in the LCD display.
2. Use the Forward button (button 11) to cycle through the options to the second
icon, in the bottom row, which is the Quality icon.
3. Press the Shutter button to change the Quality setting. The shutter button
“toggles” back and forth between “High Quality” and “Normal Quality”.
Using the Built-in Flash
The ViviCam 2750 has three different flash modes: Auto (the default mode), On
(Fill), and Off. Each of these modes can be accessed via the Flash button
(button 12) on the back panel of the camera.
•
•
•
Auto - The camera automatically determines if it must fire the flash when the
brightness of the subject, or scene, is too low.
On (Fill) - Fires the flash regardless of the brightness levels. However,
the intensity of the flash varies according to the ambient brightness, so the
more light in the area, the lower level of the flash. This essentially forces
the flash to fire each time to press the shutter.
Off - The flash is disengaged regardless of ambient brightness.
Note: Sometimes Flash On is called Fill. It can be useful to have the flash
bulb fire in situations of high contrast or heavy shadows in order to “fill-in”
light in those portions of the scene.
Using the Self-Timer
The Self-Timer is useful for creating a delay between the time you press the
shutter and the time the picture is taken. You can activate the self-timer by
pressing the Forward button (button 11) at anytime in capture mode. If timermode has been selected, each time you press the shutter button there will be a
ten second delay. This delay is marked by flashing the Red Self-Timer LED once
per second for seven seconds, then twice per second for the last three seconds.
This Red LED is on the front face of the camera near the lens.
Memory Full
Once you have filled image memory with images, you must erase some before
capturing new ones. To save your images permanently, transfer them from the
camera to your PC. When the camera memory is full, the green LED (item 14) will
flash once per second. Also, the image LCD screen displays a “STORAGE FULL”
message.
Connecting to Your Computer/Installing Capture Software In order to connect your ViviCam 2750 to your PC you must connect the hardware
and install the software (driver and image application). PC system requirements
are discussed earlier in this manual in the section entitled “System
Requirements”, and the software content is discussed in the section entitled
“CD-ROM or Diskette Contents”.
Software Installation –
1. Install the Twain driver. Insert the first driver disk, number one, into your
floppy disk drive. From Windows 95/98 select Start, Run, type a:\setup, Enter
(or OK). Then follow the screen instructions and insert disk two (if
applicable) when prompted.
2. Install the application software.
From Windows 95/98 select Start, Run,
drive is identified by a drive letter
the d) Follow the screen instructions
Insert the CD-ROM into your CD-ROM drive.
type d:\setup, Enter (or OK). (If your CD
other than d:, use that letter in place of
to complete the installation.
Hardware/Physical Installation 1. If you plan to connect to your PC by serial connection, plug the included
serial data cable into an available 9 pin COM port on the back of your PC. These
ports are located at the back of your computer. Look for a connector that is Dshaped, has two rows of (male) pins, with a total of nine pins. Most desktop
computers have two COM ports, whereas most notebook computers have one COM
connector. While most desktops have two serial ports, many times your mouse, or
possibly an external modem will occupy one of them. It is further possible that
your computer may have a 25 pin male serial connector. If this is the case, you
may purchase a 25F to 9M at a local electronics or computer store.
Note:
Do not purchase a “null modem” to use as a 25 to 9 adapter.
2. Open the data port door on your ViviCam 2750, and connect the molded-green
stereo mini-jack plug into the camera. Plug it into the port marked “digital”.
Making the Connection Now that your driver, application, and cables are installed, the final step is
to make the camera-to-PC connection.
1. Turn on your camera.
2. Launch (Start) your image editing application software. (Start, Programs,
MGI…)
3. After your application is up and running, perform the following steps. (In
the following case MGI PhotoSuite SE is used as an example. Other Twain
programs are similar but not exactly the same.)
Connecting for the first time – Selecting the Source a. From within MGI PhotoSuite, select File, Get Photos From, Select Source.
b. A dialog box will appear which lists all Twain hardware installed on your
PC.
c. Select either “Digital Camera 640 x 480 driver”, or “ViviCam 2750”
d. Note: this step only needs to be performed once. If however, you return
to MGI and use it with some other Twain device, you must tell MGI which
device you are currently using. If you do not own or use multiple Twain
devices then this step only needs to be done once.
Downloading your Images – Routine Downloading –
a. From within MGI PhotoSuite, select File, Get Photos From, Camera/Scanner.
b. The ViviCam 2750 Twain driver interface will now appear.
c. The ViviCam 2750 Twain Driver User Interface is designed to be intuitive
and self-explanatory. For additional help or detailed explanation, refer to
the help files available from the driver screen. You may also print
sections of the help files for later reference.
d. Downloaded images will be stored to your computer’s hard drive, where you
can later print them out, edit them in imaging software, and even email
them.
e. The camera’s digital output connector will automatically transmit data at
varying baud rates, depending upon the capabilities of your computer. If the
camera, while attached to your computer, remains inactive for a given length
of time, it shuts down automatically.
Note: When downloading your images, make note of where they are being saved.
Record the “path” to the directory or folder where your images are being saved.
This is an essential key to finding your images again.
Connecting a digital camera to a PC is perhaps the most challenging (sometimesfrustrating) aspects of consumer digital imaging today. If your camera and PC
will not connect then your serial ports must be examined. You can inspect your
computers ports using the device Manager Tab of the Windows (Start, Settings,
Control Panel, System, Device Manager.) For assistance in enabling or setting
your ports, consult your PC system manual or manufacturer. In some cases,
changes may need to be made to your System BIOS. Please consult a knowledgeable
PC expert before attempting any such changes or modifications.
Video Interface –
The ViviCam 2750 is capable
connection described above,
the left side of the camera
digital data output, and DC
of two types of output. In addition to the PC
you may also connect to a TV/monitor with NTSC. On
you will find three ports: NTSC video output, serial
IN (6 VDC input).
The video output connector allows you play stored images (640x480), or live
video to a standard television monitor. Note, however, when the LCD monitor is
off, the camera will not output video via this port. To transmit stored images
to your television or VCR attach the yellow-moulded end of the video cable to
the video port of the digital camera, attach the other end to the “Video In”
port on your television or VCR, and power on the camera and turn the on the LCD.
Refer to your TV or VCR manuals for specific details on making a video
connection to your video-ready device.
Appendix 1: LCD Icons
The following is a summary definition of the information icons that may appear
on the LCD image display.
Fill Flash (Always on)
No Flash
Auto Flash
Self-Timer on
Full battery power
Half battery power
Low battery power
Locked file (cannot be erased)
Fine/High Quality mode
Normal Quality mode
Copy images to memory card
Erase all images in camera memory
Erase one image from camera memory
Set time and date
Set auto power-off time interval
Set auto play
Exit
Confirm
Images are being stored to internal memory
Images are being stored to Compact Flash Card
Appendix 2: Record Mode Icons
The following is a summary definition of the icons found in the LCD display
screen while in record mode:
Number of Pictures remaining (estimate)
Current date
Battery warning
Quality Mode (
-is Normal;
-is High/Fine)
Self-timer
Flash (Auto/Fill/Off)
Appendix 3: ViviCam 2750 Specifications
Image Sensor: 1/4" CCD, 350,000 pixels
LCD Display: 1.8" color display with 15 fps live display
Image Resolution: 640 x 480 pixels
Color: 24-bit (16.7 million colors)
Memory: 2MB internal flash memory
Storage (Internal memory): 16 images High, 32 images Normal
Data compression: JPEG
File format: JPG
Lens: Normal: 15 inches to infinity, Macro: 5 to 15 inches
Flash Modes: Automatic, Fill/On, Off
Shutter Speed: 1/30-1/10000 sec (Auto)
Connectors: AC adaptor, RS232 serial port, NTSC video output port
Weight: 0.67 lbs (with batteries)
Dimensions: (W) 1.9" x (L) 5.1" x (H) 2.7”
Additional Memory Capability: Compact Flash card slot for up to 32 MB CF card
Design and specifications are subject to change without notice.
Warranty Policy
This camera is under warranty for a period of one year from the date of
purchase, by the original purchaser. In case of defects in materials or
workmanship, Vivitar Corporation will repair or replace the camera free of
charge within the warranty period. This warranty applies to the camera only.
This warranty does not include batteries, or other accessories that have not
been manufactured by Vivitar Corporation. This warranty will not be honored if
the camera has been mishandled or tampered with, or altered by anyone other than
the manufacturer. Other than for the warranty herein, Vivitar Corporation is not
responsible for loss, damage, or inconvenience of any kind.
Prior to returning a camera, you must first obtain an RMA number from Vivitar
Technical Support or Customer Service Operations. The RMA number, a brief
description of the difficulties encountered, and proof-of-purchase with the date
of purchase clearly indicated, must accompany a defective camera being returned
under warranty. Prior to returning any product you must call Technical Support
or Customer Service to attempt to diagnose the problem and receive an RMA
number. All related shipping and transportation costs and insurances are at the
owner's expense. Any alteration of this warranty cannot be made without Vivitar
Corporation’s written approval.
FCC Notice
This equipment has been tested and found to comply with the limits for a Class B
digital device, pursuant to part 15 of the FCC Rules. These limits are designed
to provide reasonable protection against harmful interference in commercial
installation. This equipment generates, uses and can radiate radio frequency
energy and if not installed and used in accordance with the instructions, may
cause harmful interference to radio communications. However, there is no
guarantee that interference will not occur in a particular installation. If this
equipment does cause harmful interference to radio or television reception,
detectable by turning the equipment in question off and on, the user is
encouraged to try to correct the interference by one or more of the following
measures. 1) Re-orient, or relocate, the receiving antenna. 2) Increase the
distance between the equipment and the receiver. 3) Connect the equipment to an
outlet on a different circuit than that which the receiver is connected to. 4)
Consult your dealer or an experienced radio/TV technician for help.
CAUTION
Do not place this camera in a damp or dusty location.
electric shock.
This may cause a fire or
Do not place this camera in a location affected by oil fumes or steam, such as
near a cooking stove or humidifier. This may cause a fire or electric shock.
Do not leave this camera in places subject to extremely high temperatures, such
as in a sealed vehicle, or in direct sunlight. Exposure to high temperatures
may adversely affect the camera case and internal components and cause a fire.
Do not cover or wrap the camera or the optional AC power adapter with a cloth or
quilt. This may cause heat to build up and distort the case, or cause a fire.
Always use the camera and its accessories in well-ventilated locations.
Take care that the camera is not dropped, or exposed to severe mechanical shock
when it is being moved. This may cause the camera to malfunction.
If you are using the optional AC power adapter, do not move the camera while it
is switched on. Unplug the adapter from the AC power outlet after you have
switched off the camera. Then ensure that connector cords or cables are
disconnected before moving the camera. Failure to do so may damage the cords or
cables and cause a fire or electric shock.
When handling the camera, always unplug it from the AC power adapter for safety.
If you are using an AC power adapter, unplug the adapter from the AC power
outlet after you have disconnected the camera. Failure to do so could result in
an electric shock.
When leaving the camera unused for long periods always unplug the camera from
the AC power adapter for safety. If you are using an AC power adapter, unplug
the adapter from the AC power outlet after you have disconnected the camera.
Failure to do so could result in a fire.
Do not use batteries other than those specified for use with your camera.
The use of unsuitable batteries may result in the batteries splitting or leaking
and causing a fire, injury, or soiling of the battery compartment.
When fitting a battery into the camera, check the polarity markings on the
battery to ensure that you insert the batteries correctly. Incorrect battery
polarity may result in the batteries splitting or leaking and causing a fire,
injury, or soiling of the battery compartment.
Remove the batteries if the camera will not be used for an extended period of
time. The batteries may leak and cause a fire, injury, or soiling of the battery
compartment. If the batteries leak, clean and wipe the battery compartment
carefully and install new batteries. Wash your hands carefully if you touch the
battery fluid.
WARNING
Do not use this camera if it is emitting smoke, is unusually hot to the touch,
is emitting any unusual odor or noise, or is in any other abnormal state. Use of
the camera in any of these situations may cause a fire or electric shock. Stop
using the camera immediately, turn the camera off, and then disconnect the power
source (batteries or AC power adapter). (If you are using the AC power adapter,
unplug the adapter from the AC power outlet after you have disconnected the
camera.) After checking that smoke is no longer being emitted, contact your
dealer or your local authorized service facility and request repairs. Never
attempt to repair this camera yourself, as this is dangerous.
Do not use the camera if any water has entered the camera. Switch the camera
off, and then disconnect the power source (batteries or AC power adapter). (If
you are using the AC power adapter, unplug the adapter from the AC power outlet
after you have disconnected the camera.) Then contact your dealer or your local
authorized service facility. Do not continue to use the camera as this may cause
a fire or electric shock.
Do not use the camera if any foreign objects have entered the camera. Turn the
camera off, and then disconnect the power source (batteries or AC power
adapter). (If you are using the AC power adapter, unplug the adapter from the AC
power outlet after you have disconnected the camera.) Then contact your dealer
or your local authorized service facility. Do not continue to use the camera as
this may cause a fire or electric shock.
If the camera has been dropped or the camera case has been damaged, switch the
camera off, and then disconnect the power source (batteries or AC power
adapter). (If you are using the AC power adapter, unplug the adapter from the AC
power outlet after you have disconnected the camera.) Then contact your dealer
or your local authorized service facility. Do not continue to use the camera as
this may cause a fire or electric shock.
Do not place the camera in unstable locations such as on a wobbly table or
sloping surface where the camera may fall or tip over and cause injury.
Take care that the camera is not exposed to moisture, and that water does not
get into the camera. Take particular care when it is raining or snowing or when
you are using the camera at the beach or near water. Water in the camera may
cause a fire or electric shock.
Do not insert or drop metallic or inflammable foreign objects into the camera
through access points such as the Compact Flash card slot. This may cause a fire
or electric shock.
Do not attempt to modify this camera. This may cause a fire or electric shock.
Do not remove the camera casing. This may cause an electric shock. Your dealer
or local authorized service facility should carry out internal inspection,
maintenance and repairs.
Do not use this camera in the bathroom or near water, especially with the AC
adapter. This may cause a fire or electric shock.
Do not touch the power plug during a thunderstorm if you are using the AC power
adapter. This may cause an electric shock.
Never use this camera, look through the viewfinder, or watch the LCD (liquid
crystal display) while you are operating a moving car, motorcycle, or bicycle.
This may cause a traffic accident.
Do not attempt to charge standard alkaline batteries. This may cause the battery
to split or leak causing fire or injury.
Do not carry or store a battery with objects such as metal pens, necklaces,
coins or hairpins. This could short-circuit the positive and negative poles of
the battery. This could cause the battery to split or leak, resulting in fire
or injury.
Do not heat, or attempt to disassemble a battery, and do not place a battery in
water or in a fire. Any of these situations may cause the battery to split or
leak, cause fire or injury.
Do not subject a battery to strong impacts, such as hitting it with a hammer,
stepping on it, or dropping it. Any of these may cause the battery to split or
leak causing fire or injury.
Use only the specified batteries or AC power adapter specified for use with this
camera. The use of other power sources may cause a fire.
V2750 “Out-of-Box” Guide –
ViviCam 2750 – Helpful hints
1) First. Charge your batteries. Your new ViviCam 2750 is supplied with 4 AA NickelMetal Hydride (NiMH) rechargeable batteries. Charge them overnight for best
performance. These NiMH rechargeable batteries should last for many charge
cycles. If you would like to get started right away you can use four standard AA
alkaline batteries.
2) Read the Quick Start and Owners Manual. These were carefully written to help you
get the most out of your new camera. Advanced users can get started with the
Quick Start. Newer users may prefer to read the Owner’s Manual. You can read
these while the batteries are charging.
If You are Having Difficulties. If your ViviCam 2750 does not appear to work properly, please….
DO NOT RETURN IT TO THE STORE - for technical assistance.
For technical assistance consult our website at www.vivitar.com.
You may also call our technical support line for assistance. (See other side)
Before you call, please…
1) Review the Owner’s Manual and Quick Start guide.
2) Determine if your problem is related to your camera, or your computer connection.
• Check the camera for basic operations.
• Does it turn-on?
• Can you take a picture, and review it on the LCD display?
If the camera operates, captures images, and displays images on the LCD, the camera is functioning correctly.
•
If you cannot get your camera and PC to connect, please consult your PC manufacturer, or consult a local
PC technician and have your serial (COM) ports checked. Our technical support staff can help you with
your camera, but are not able to give expert advice regarding the configuration
of your PC.
We offer toll-free technical support for thirty days. Technical Support is
available 24 hours a day, 7 days a week. We offer free support for a period
of 30 days, limited to three calls. You may reach technical support at (800)-532-3286. After
thirty days, or three calls, you may obtain assistance by calling (949)-595-2199.
You may also obtain support via our website at www.vivitar.com. On our website we post driver updates, frequently
asked questions, and other helpful information. There is also a knowledge-based help system to guide you through
any problems and questions you may have.
DIGITAL PRODUCTS
Original Purchaser's
Name:______________________________________________________
Address:_____________________________________________________________________
City: __________________________ State: _______________Zip Code: ________________
Telephone: (
)____________________________________________________________
Occupation: _________________ Age: oUnder 18; o18 - 30; oOver 30_________
Serial Number: _______________________________________________________________
Date of Purchase: ________________Purchase Price: _____________________________
Invoice Number: ______________________________________________________________
Purchased From: _________________Telephone: __________________________________
Address: _____________________________________________________________________
City: __________________________ State: _______________Zip Code:
_________________
How did you hear about Vivitar? oSalesperson
oOther: ____________________
Advertising/Editorial (Name of Publications)___________________________________
Warranty Card must be filled in completely and returned to Vivitar Corporation within 14 days to
validate warranty.
-----------------------------------------------------------------------------------------------------------------------
Warranty Claims
All claims under warranty must be made promptly after occurrence of problem, and received
within the applicable warranty period by Vivitar. Before you can return any equipment for repair,
you must obtain a return authorization number (RMA#) and instructions as to how and where
said equipment should be shipped. RMA numbers are only valid for 14 days from the date of
issuance. Any merchandise received after this time or without the RMA # will be refused. Vivitar
reserves the right to reject any non-acceptable means of transportation. When equipment is
returned for any reason, the sender shall be responsible for all damage resulting from improper
packing or handling, and for loss in transit, not withstanding any defect or nonconformity in the
equipment. In all cases, Vivitar has sole responsibility to determine the cause and nature of said
problem, and said determination with regard thereto shall be final.
To contact us:
Instructions for a return:
Vivitar Corporation
1280 Rancho Conejo Blvd.
Newbury Park, California 91320
purchase
(800) 532-3286 Technical Support
(949) 595-2199 Technical Support
(805) 498-7008 x109 Customer Service
call us for a RMA#
Put RMA# outside of packaging box
Enclose copy of proof of
Enclose product description
Ship package prepaid and insured
(We do not accept C.O.D. shipments)
Call Technical Support for any technical questions - If you wish to obtain an RMA# for product service,
Call customer service for warranty or non-warranty repairs, and spare or replacement parts.
Place
Stamp
Here
Vivitar Corporation
1280 Rancho Conejo Blvd.
Newbury Park, California 91320
Attn: Customer Service Department
-----------------------------------------------------------------------------------------------------------------------
Limited One Year Warranty
Vivitar warrants each product sold to be free from defects in material and workmanship in accordance with
the terms outlined below. Vivitar's obligation under said warranty continues for a period of twelve (12)
months from the date of purchase, by the original purchaser. The warranty period shall begin upon
acceptance of the Product. Upon acceptance of product the provisions stated in this warranty shall govern
all Customers’ remedies.
Replacement or repair of defective parts or products shall be at the sole and exclusive discretion of Vivitar
and performed only at Vivitar or by an authorized repair facility. Defective products being returned to Vivitar
for warranty must arrive freight prepaid and said freight shall be non-refundable, unless otherwise agreed
upon by Vivitar and authorized in writing. In-warranty period, replacement parts are warranted only to the
remaining, unexpired portion of the original warranty period applicable to the repaired or replaced parts.
This warranty only applies to parts and labor provided by the Seller under valid warranty claims, and is
contingent upon proper use of the Product. Vivitar shall not be liable for any damage to products resulting
in whole or in part from use of components, accessories, parts or supplies not furnished by Seller or which
do not meet Vivitar's specifications. This warranty does not apply to any computer hardware product, which
does not bear a serial number.
All obligations of seller under this warranty shall cease, if any of the following occur: (1) Products are subject
to accident, abuse, alteration, unusual physical and electric stress, neglect, misuse, or any other
uncontrollable causes; (2) Adjustment, repair or parts replacement not within Vivitar's specifications; (3)
Repair or replacement of any parts, by any party other than Vivitar or its authorized service centers.
This warranty supersedes any and all previous warranties, expressed or implied. Non-company
representatives are not authorized or permitted, at any time, to make any warranty claims or assume any
additional liability not in strict accordance with the above outlined warranty.
Quick Start Guide –