1
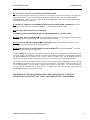
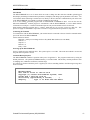
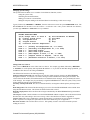
WEATHERPAK® -2000
User Manual
November 1, 1999
COASTAL ENVIRONMENTAL SYSTEMS
820 First Avenue South • Seattle, WA 98134
(206) 682-6048 (800) 488-8291 Fax: (206) 682-5658
www.coastalenvironmental.com
WEATHERPAK®-2000
USER MANUAL
TABLE OF CONTENTS
IMPORTANT NOTES................................................................................................................................................ 1
INSTALLATION........................................................................................................................................................ 2
Erecting a Tower ..................................................................................................................................................... 2
Quick Release Mount .............................................................................................................................................. 2
Cables and Connectors ............................................................................................................................................ 2
Compass .................................................................................................................................................................. 2
COMMUNICATION SETUP ..................................................................................................................................... 3
Introduction ............................................................................................................................................................. 3
Connecting the Terminal ......................................................................................................................................... 3
Powering up the WEATHERPAK .......................................................................................................................... 3
Automatic Bootup Sequence ................................................................................................................................... 3
WEATHERPAK®-2000 USER MODE ...................................................................................................................... 4
Introduction ............................................................................................................................................................. 4
Changing and saving settings .................................................................................................................................. 4
Help facilities .......................................................................................................................................................... 4
Communications settings......................................................................................................................................... 4
Changing System settings........................................................................................................................................ 5
Change Item n to Value m....................................................................................................................................... 5
System date and time............................................................................................................................................... 6
Internal Temperature Calibration ............................................................................................................................ 6
Other commands...................................................................................................................................................... 6
Changing the data collection schedule .................................................................................................................... 7
Inspecting Raw Data ............................................................................................................................................... 8
Exiting the User Interface Mode. ............................................................................................................................ 8
GLOSSARY.............................................................................................................................................................. 10
MATHEMATICS OF WIND MEASUREMENTS .................................................................................................. 11
WEATHERPAK-2000 for HAZMAT RESPONSE ................................................................................................. 13
Installation ............................................................................................................................................................. 13
Tripod Mount Setup .............................................................................................................................................. 16
Van Mount Setup .................................................................................................................................................. 17
Receiver Display Box............................................................................................................................................ 18
Low Power Indicators ........................................................................................................................................... 19
Plume Modeling Software..................................................................................................................................... 20
TROUBLESHOOTING ............................................................................................................................................ 23
MAINTENANCE...................................................................................................................................................... 24
SYSTEM DESCRIPTION, SCHEMATICS and CONFIGURATION..................................................................... 24
Coastal Environmental Systems (206) 682-6048
- ii -
WEATHERPAK®-2000
USER MANUAL
IMPORTANT NOTES
DO CALL/FAX US IF YOU HAVE QUESTIONS OR PROBLEMS
Call Coastal Environmental Systems if any troubles arise or if you have any questions pertaining to the equipment.
Our telephone number is 206-682-6048 and the FAX number is 206-682-5658. Refer to the model number
(WEATHERPAK® -2000) and the serial number of the WEATHERPAK® which can be found by looking under
the radiation shield on top of the unit.
DO WASH OFF CHEMICALS OR DEBRIS WHILE THE WEATHERPAK® IS ASSEMBLED to prevent
getting water in the connectors. The WEATHERPAK® is water-resistant when assembled.
DO FOLLOW THE MAINTENANCE SCHEDULE.
INCORRECT WIND SPEED WILL RESULT IF THE PROPELLER NUT IS NOT TIGHT.
DO NOT OPEN THE WEATHERPAK®. It is purged with desiccant bags to seal out all the moisture. Opening
it may allow moisture to foul the electronics and will invalidate the warranty.
DO NOT PICK UP THE WEATHERPAK® BY THE WIND VANE. This is a durable but sensitive wind
sensor and it can be broken if it is used to lift the entire unit.
DO NOT REMOVE THE ANTENNA FROM THE WEATHERPAK®. If the WEATHERPAK® is activated
without the antenna, the radio can be damaged.
The WEATHERPAK is designed to be completely automatic. When power is applied, if no terminal intervention
occurs, the system will automatically initialize itself and begin sampling according to its predetermined schedule.
The WEATHERPAK has a hardware clock accurate to about 5 seconds per day and an EEPROM portion of
memory where sampling variables and system parameters are stored. Data are time marked with date/time.
All transient protection sensor signals and power lines are protected from transients and EMI by circuitry inside the
WEATHERPAK. EMI filters are single pole RC filters (100 ohm and 0.1 microfarads). Transient protection is by
18 volt tranzorb diodes. If for any reason -- lightning, RF interference, power surge -- the computer program is
corrupted and the sampling loop is broken, then a watchdog timer will reset the entire system and the
WEATHERPAK will go into its autoboot routine.
DEPENDING ON YOUR CONFIGURATION THIS USER MANUAL CONTAINS
INFORMATION THAT MAY NOT APPLY TO YOUR SPECIFIC WEATHERPAK.
Coastal Environmental Systems (206) 682-6048
-1-
WEATHERPAK®-2000
USER MANUAL
INSTALLATION
This section will offer generalized advice on the siting and installation of a WEATHERPAK and its associated
sensors. All installations are unique with their own set of problems, so care and attention are required. Coastal
Environmental Systems will be happy to provide special advice for your application.
Select an exposed site, removed from obstructions and more than 3 meters above the ground or the prevailing
terrain. The wind pattern around a building or other obstacle is highly disturbed for a considerable distance, so the
site should be as. A rule of thumb is that the sensors should be placed at a height 1½ times the nearby obstacles or
that they are placed at a distance away of ten times the height.
Erecting a Tower
The WEATHERPAK mounts on the quick release mount which is threaded on the bottom with a 1½ inch NPT
male pipe thread. The quick release mount must be securely mounted to withstand wind loading and vibration at
the installation site. Standard 1½ inch NPT pipe fittings can be used. We recommend that fittings be assembled
with an anti-seizing compound to facilitate disassembly. If you use a free standing tower we recommend that you
also use guy wires to support the WEATHERPAK in high winds. The guy wires attach just below the quick
release mount.
Quick Release Mount
The quick release mount can be threaded into the tower and fully secured before the tower is erected. Keep the
protective PVC cap in the quick release whenever the WEATHERPAK is not connected. This prevents sand or
water from getting onto electrical contacts. Keep the cap in a safe place and always replace it if the
WEATHERPAK is removed for maintenance. When removing the PVC cap, be sure the quick release is clean and
dry. During the removal, any water or dirt that has collected on top of the cap can fall into the mount.
Cables and Connectors
Problems with cables and connectors cause at least 40% of all system failures. Our recommendation is “do it right
the first time.” Take special care of external cables and connectors. Air pressure differences from wind or
differential heating of instruments can cause cables to vent air into sensors and connectors; wind can force sand or
moisture into the most insignificant interstices; and solar radiation is destructive to plastics and paint.
Below is a list of considerations:
1. Protect external connectors. Molded neoprene oceanographic connectors are probably the only connectors
that do not need extra protection. Any other types, including MS-style environmental connectors, must be
protected. We recommend that you wrap them in self-vulcanizing rubber tape followed by an outer wrap of
black electrical tape (environmental grade). Use only the highest quality wrapping tape -- tape is cheap
insurance.
2. Consider conduit. Conduit is good insurance. It protects cables from sunlight and abrasion. Animals love to
chew on cables. Human beings may also harm cables.
3. Dorn fittings. Dorn fittings (also called compression fittings) are cable pass-through fittings, which use a
rubber stopper to squeeze the cable. The Dorn fitting should be the proper size to snugly squeeze the cable -when it is tight, you cannot pull the cable through the fitting. A small bit of silicone grease on the cable in the
stopper is added protection. Dorn fittings are an excellent means of getting watertight security at a reasonable
price, but they are not perfect. As we said earlier, cables “breathe”, so a Dorn fitting is no more than a straw
into your electronic enclosure unless care is taken to block the cable. Alternatively, breather holes are often
provided to allow the pressure difference to equilibrate.
4. Oceanographic connectors. For the best and most reliable system, use molded oceanographic connectors.
With these expensive connectors, you will have perfect seals for indefinite periods.
Compass
Observe the following cautions:
• Make sure there is no disturbing metal or other magnetic material around.
• Re-check the site routinely for new magnetic contamination. On a buoy, ice, or other remote site this is rare,
but at an industrial or urban site you can expect problems.
In a semi-permanent or permanent fixed site, we advise that you do not use the compass, but instead survey in the
WEATHERPAK to the proper alignment. In doing so, bear in mind that the alignment pin on the quick release and
the alignment box on the wind sensor are at relative South.
Coastal Environmental Systems (206) 682-6048
-2-
WEATHERPAK®-2000
USER MANUAL
COMMUNICATION SETUP
Introduction
The WEATHERPAK has a set of menus which are used to change the data collection schedule, upload logged
data, display and change communications parameters, and display and change system parameters and values. You
can reach the menus connecting a terminal (test set) directly to the user interface communications port on the front
of the WEATHERPAK; any terminal or computer with RS232 input will do.
A PC or AT running a terminal program such as CROSSTALK or MIRROR is ideal. You can also use the
Microsoft WINDOWS® terminal program to communicate with the WEATHERPAK; or even a dumb terminal
with an RS-232 serial port. Coastal Environmental Systems can provide terminal software for this task.
Most terminal emulation programs have a “capture” mode that lets you save the session on a disk file. This
practice is highly recommended as it provides a reference if any questions about operation or setup arise.
Connecting the Terminal
To communicate with the WEATHERPAK, your terminal must be connected to the user interface communications
port on the front of the WEATHERPAK.
Set the terminal as follows:
Baud rate = 9600 (you can change and save this) (Radio Base Stations use 1200 Baud)
Start bits = 1
Stop bits = 1
Data bits = 8
Parity = none
Powering up the WEATHERPAK
Power is supplied via the umbilical cable. The system requires 11-18 VDC. The mean current drain is 20 mA and
the peak current required is 80 mA.
Automatic Bootup Sequence
The WEATHERPAK commences operation when power is applied to it. The program commences by setting all
default parameters. The parameter EEPROM memory is read into RAM. This memory contains parameters such
as sampling rates, calibration coefficients, and state flags.
If a terminal is connected while the power is applied you will see something similar to the following message after
about 5 seconds:
Watchdog Reset
Zeno 3200 V1.50 Nov 27 1994 14:36:30
Copyright (C) Coastal Environmental Systems, 1994.
System Time = 94/11/28 12:26:50
Initializing (approximately 8 seconds) . . ./
Sampling . . . Type 'U' To Enter The User Menus.
Coastal Environmental Systems (206) 682-6048
-3-
WEATHERPAK®-2000
USER MANUAL
WEATHERPAK®-2000 USER MODE
Introduction
The WEATHERPAK®-2000 User Mode lets you:
• change communications settings;
• change system settings such as the clock time;
• change the data collection schedule;
• upload logged data.
Type U to enter the User Menu. The WEATHERPAK will display the following menu structure.
USER MENU
(C) Communications Menu
(F) System Functions Menu
(S) Sample Period Menu
(D) Data Retrieval Menu
(T)
(Z)
(H)
(Q)
Test Menu
Zeno Program Menus
Help
Quit
Changing and saving settings
The configuration of your WEATHERPAK is held in EEPROM. This means that the settings are retained, even
when the system powered down. When you power up the WEATHERPAK, the settings are read from EEPROM
into RAM; the WEATHERPAK operates according to the configuration in its RAM.
When you change any settings in the User Mode, the new configuration is held in RAM, and takes effect
immediately. However, if the system is powered down, the settings in RAM will be lost -- the old configuration
will take effect the next time the system boots. To save settings to EEPROM -- making them permanent until the
next change -- you need to enter E from any of the sub-menus.
Type E within any sub-menu to save all settings to EEPROM.
You will lose any unsaved settings when the system powers down.
The WEATHERPAK continues data collection while you are in the User Mode. If there is no terminal activity for
approximately three minutes, the WEATHERPAK will exit the User Mode. You should save any settings you
wish to keep to EEPROM before quitting the User Mode -- you will lose any unsaved settings when the system
powers down.
Help facilities
Context-sensitive on-line help is available through two commands. By entering Hn, where n is a number, you
obtain help on line item n. For example, in the System Functions Menu, H5 gives you help on line item 5 -- Add
Compass To Vane. Remember to type <RETURN> or <ENTER> after any command.
By entering HX, where X is a command, you obtain help on that command. For example, entering HQ in the User
Menu gives you information on the Quit option.
Communications settings
The communications parameters for your WEATHERPAK have been factory set. We do not recommend that they
be changed. If you do wish to alter these settings (through the Communications Menu), you should be aware that
the WEATHERPAK COM3 port is the one connected to your terminal.
Coastal Environmental Systems (206) 682-6048
-4-
WEATHERPAK®-2000
USER MANUAL
Changing System settings
The System Functions Menu covers a number of miscellaneous functions, such as:
setting the system clock;
calibrating the internal thermistor;
finding your software version number;
adding the compass reading to the measured direction when doing a wind vector average.
Type F, followed by <RETURN> or <ENTER>, from the main menu to enter the system FUNCTIONS menu. The
WEATHERPAK user interface is not case sensitive -- f will also work. Once you are within the user interface,
you must type <Enter> or <Return> at every command
SYSTEM FUNCTIONS MENU
(Cn/m) Change Item n to Value m
(E)
(D) Display System Clock
(U)
(S) Set System Clock
(Q)
(V) Program Version
(H)
(T) Calibrate Internal Temperature
Item
Item
Item
Item
Item
Item
Item
1:
2:
3:
4:
5:
6:
7:
0
0
1
1
0
0
0
Save Parameters To EEPROM
User Menu
Quit
Help
(Primary Unit/Experiment ID, 0 to 9999)
(Secondary Unit/Experiment ID, 0 to 9999)
(Data Dump Format)
(Real Time Output Format)
(Add Compass to Vane, 0 = NO, 1 = YES)
(Compass Offset in degrees, -180 to 180)
(Barometer Elevation in meters, 0 to 5000)
Change Item n to Value m
Enter Cn/m to CHANGE the value of line item n to value m. For example, type C1/3, followed by <RETURN>
or <ENTER>, to set the primary unit/experiment ID number to 3. If you wish to make this change permanent, you
should then enter E to save the setting to EEPROM.
The different line items have the following meaning.
Primary Unit/Experiment ID: This item affects the real time output messages output by the WEATHERPAK
during data collection. You may have seen these messages on the terminal before entering the User Menu. The
values of this unit ID number, and unit ID number 2 are attached to these messages, to let you identify the source
of the message. For example, they let you identify a single WEATHERPAK in a multi-site system; or they can be
used to define the current system configuration.
Secondary Unit/Experiment ID: This is a second unit identifier, used together with the primary unit/experiment
ID.
Data dump format: The format of the data messages you receive from the WEATHERPAK at the terminal when
using the Data Retrieval menu. The formats are defined in the table overleaf.
Real time output format: This item affects the messages transmitted by the WEATHERPAK during normal data
collection.
Add compass to vane: Controls whether or not the WEATHERPAK adds the compass value to the measured wind
direction (the vane) when doing a wind vector average. This is described in more detail in Appendix 0.
Compass offset: This value is added to the compass measurement, to compensate for local variations in magnetic
North. If you have no compass, this option has no effect. More details are given in Appendix 0.
Barometer elevation: The elevation above sea level. This quantity is used to correct the barometric pressure
reading to sea level.
Coastal Environmental Systems (206) 682-6048
-5-
WEATHERPAK®-2000
USER MANUAL
System settings
Line
Quantity
Values available
1
Primary Unit/Experiment ID
0 to 9999
2
Secondary Unit/Experiment ID
0 to 9999
3
Data dump format
1
2
3
Space delimited
Comma delimited
Match the real time output format
4
Real time output format
0
1
None (output message suppressed)
ASCII characters, width dependent on data
values, comma separated
ASCII characters, width as factory
configured, no automatic separators
2
5
Add compass to vane
0
1
No
Yes
6
Compass offset (degrees)
-180 to +180
7
Barometer elevation (meters)
0 to 5000
System date and time
Options D and S respectively let you DISPLAY and SET the current date (format YY/MM/DD) and time (format
HH:MM:SS) on the system clock to the nearest second. If you set the clock, the new setting is saved immediately:
you do not have to type E to save the new setting, since it is not held in EEPROM. Be sure to use the “/” format
for dates, and “:” for time.
Internal Temperature Calibration
Option T lets you calibrate the internal Temperature. You will be prompted to enter the current ambient air
temperature -- measured with an accurate temperature probe placed near the WEATHERPAK electronics. If you
move the WEATHERPAK to the probe, rather than the probe to the WEATHERPAK, you must give the internal
thermistor time to equilibrate at the new temperature -- 15 minutes is usually adequate for this. The temperature
can be specified in units of FAHRENHEIT (example input: 72.5F), CENTIGRADE (23.2C), or KELVIN
(295.6K). If you recalibrate the thermistor, the new calibration is saved immediately to EEPROM: you do not
have to type E to save the new calibration.
Changes to the system clock and internal thermistor are
saved immediately -- without typing E
Other commands
Option V gives you the current software VERSION number.
Please note the software version before calling Coastal’s
customer service
Option E, as already described, saves changes to EEPROM.
Option U returns you to the USER Menu.
Option Q lets you QUIT directly from the current menu. Any changes made will remain in RAM, but will not be
saved to EEPROM. You can return to the previous configuration by powering down and then re-powering your
WEATHERPAK.
Coastal Environmental Systems (206) 682-6048
-6-
WEATHERPAK®-2000
USER MANUAL
Changing the data collection schedule
A wide range of sensor sampling schemes are available from the Weatherpak. Examples are:
A. the sensors can be sampled continuously, with no gaps;
B. the Weatherpak can take samples from ten past until half past each hour.
The following time line illustrates these schemes -- a period of 3 hours is shown. The light grey areas indicate that
sensors are being sampled.
0:00
1:00
Time line
2:00
3:00
A
B
The Weatherpak uses the same data collection schedule for all of the sensors. For the two cases listed above, you
would set up the following schemes within the Sample Period Menu:
A. start a sampling period each hour, minute or second, and let that period last one hour, minute or second;
B. start a sampling period each hour, at 10 minutes past the hour, and let that period last 20 minutes.
Enter S from the User Menu to enter the SAMPLE Period Menu.
SAMPLE
(Cn/m)
(E)
(U)
Item
Item
Item
PERIOD MENU
Change Item n To Value m
Save Settings To EEPROM
User Menu
1:
2:
3:
3600
1200
600
(Q) Quit
(H) Help
(Sample Interval Time in seconds)
(Sample Duration Time in seconds)
(Sample Time Offset in seconds)
The three variables are as follows:
• the sample interval time is the time elapsing between the start of successive sampling periods (i.e., one hour or
3600 seconds in case B above);
•
the sample duration time is the time for which the sampling actually takes place within each sample interval
(i.e., 20 minutes or 1200 seconds in case B above);
• the sample time offset defines the time at which the sampling begins, relative to a round number of sampling
periods -- 10 minutes in case B above.
Sample period settings
Line
Quantity
Values available
1
Sample interval Tint (seconds)
1 to 86400 (24 hours)
2
Sample duration time Tdur (seconds)
1 to Tint
3
Sample time offset Toff
0 to Tint -Tdur
Coastal Environmental Systems (206) 682-6048
-7-
WEATHERPAK®-2000
USER MANUAL
The following time line illustrates the three variables, with case B in mind. Sampling takes place within the time
periods marked gray.
Time line
Sample interval time
Sample interval time
Sample offset
time
Sample duration
time
Samples taken at
these points
The sample interval always starts, as far as possible, at an even time -- for example, if the sample interval time is
one hour then the sample intervals start on the hour. The sensor outputs are sampled throughout the sample
duration time.
A wide range of sensor sampling schemes are available from the WEATHERPAK. Examples are:
the sensors can be sampled continuously, with no gaps; the WEATHERPAK can take samples from ten past until
half past each hour.
Inspecting Raw Data
The Test Menu lets you inspect raw data as it is measured -- without any averaging or other processing. The data
can be inspected either before or after conversion to engineering units. Enter T from the user menu to reach the
TEST Menu.
TEST MENU
(R) Display Raw Sensor Data
(S) Display Scaled Sensor Data
(Q) Quit
(H) Help
(U) User Menu
You cannot change anything from the Test Menu.
R
Display RAW sensor data. The terminal will display, as it is measured, raw data from each sensor. The
values are displayed before conversion to engineering units -- for example, volts for analog sensor inputs.
S
Display SCALED sensor data. The terminal will display, as it is measured, scaled data from each sensor -in engineering units.
Exiting the User Interface Mode.
The WEATHERPAK continues to collect data while you are in the User Interface mode. If there is no terminal
activity for approximately five minutes, the WEATHERPAK will time-out, exit the User Interface mode, and
resume displaying the data sample lines. To manually exit the User Interface Mode, select Q to QUIT from any
menu.
Coastal Environmental Systems (206) 682-6048
-8-
WEATHERPAK®-2000
USER MANUAL
Uploading logged data from the WEATHERPAK
The Data Retrieval Menu lets you upload and inspect data being collected by the WEATHERPAK. Type D from
the user menu to enter the DATA retrieval menu. The WEATHERPAK stores sensor data as a set of data records:
each data record consists of a time stamp and one or more processed sensor data values. You may have seen the
processed sensor data values being output to the terminal before entering the User Menu.
DATA
(A)
(B)
(Ln)
(*)
(@n)
(M)
RETRIEVAL MENU
Show Records AFTER Specified Time
Show Records BETWEEN TimeSpan
Show Last n Records
Show All Data Records
Show n Unmarked Records
Mark Recently Shown Data
(C)
(D)
(N)
(U)
(Q)
(H)
Compute Data Logging Capacity
Delete All Data Records
Show Number of Records Logged
User Menu
Quit
Help
You cannot change anything from the data retrieval menu. The following data retrieval commands are available.
A
Show records AFTER specified time. This option lets you examine a fixed number of records, starting at a
given time. For example, you may wish to examine the next 3 records logged after 3 p.m. You will be
prompted to enter the start time, and the number of records to be displayed. Be sure to enter the start and
end times in the format “YY/MM/DD HH:MM:SS”; for example, 94/11/28 14:45:00. Hit the space bar to
halt the display; you will be prompted for confirmation.
B
Show all records BETWEEN timespan. This option lets you examine all records logged between a defined
start and end time -- you will be prompted for the start and end time if you make this choice. Be sure to
enter the start and end times in the format “YY/MM/DD HH:MM:SS”; for example, 94/11/28 14:45:00. Hit
the space bar to halt the display; you will be prompted for confirmation.
C
Compute data logging CAPACITY. The terminal will show the total memory available for data storage, the
total number of data records that can be stored, and the total time taken to fill the data logging memory.
N
Show NUMBER of records logged. The terminal will show the number of data records that have been
collected and stored in memory. This value must be less than or equal to the data logging capacity.
D
DELETE all data records from the data logging memory. You will be prompted for confirmation.
Ln
Show the LAST n data records. For each data record, the terminal will show the date and time stamp,
followed by the logged, processed, sensor data values. The display will look something like this (assuming
relative humidity and air temperature are being measured). The detailed format of the display (e.g., whether
commas or spaces separate the data values) can be changed from the System Functions menu (choose S
from the user menu). Hit the space bar to halt the display; you will be prompted for confirmation.
> L3
Hit The Space Bar To Halt The Log Data Output.
DATE TIME RH AT
94/04/15 4:43:38 86.4 78.6
94/04/15 4:43:40 86.4 78.6
94/04/15 4:43:42 86.4 78.6
@n
M
*
Show n unmarked records. The data retrieval menu lets you “mark” logged records as already having been
read. The first time you enter @n , the WEATHERPAK will display the oldest n records. If you
subsequently enter M, these records will be marked as read. You will no longer be able to access these
records using the @n command, although they will be accessible using the L (show last records), J (show
records between specified times), and K (show records after a specified time) commands. The next time
you enter @n , the WEATHERPAK will display the oldest unmarked n records.
MARK recently shown data. This command marks as read the last set of records displayed using the @n
command. This command will work irrespective of when the last @n command was used -- even if you have
left and re-entered the user interface in the mean time.
Show all data records. You will see all the records logged to date sequentially, in the same format as the
above. Hit the space bar to halt the display; you will be prompted for confirmation.
Coastal Environmental Systems (206) 682-6048
-9-
WEATHERPAK®-2000
USER MANUAL
GLOSSARY
ALOHA: Aerial Location of Hazardous Atmospheres
ASCII: American Standard Code for Information Interchange.
Autoboot: Automatic bootup.
Base Mount: A shortened name for the “quick-release base mount”, the device which holds the WEATHERPAK
and provides electrical interface.
Boot or Bootup: When a computer initializes itself and automatically starts operation of a program when the
power is turned on or after a warm reset.
Byte: A group of eight bits of computer information.
CAMEO: Computer Aided Management of Emergency Operations
Declination: See Variation.
Dorn Fittings: Compression fittings that allow an electronic cable to penetrate a casing wall and maintain a
hermetic seal.
EEPROM: Electronically Erasable Programmable Read-Only Memory--- allow programmable setting of system
parameters that is preserved when all power is removed.
Magnetic declination: See Variation.
Magnetic variation: See Variation.
RAM: Random Access Memory -- memory for data storage and program operation. RAM can be written to and read
by addressing from the microprocessor.
RC Filter: An analog low-pass filter made of resistors and capacitors.
Resolution: The smallest amount of change in a measured quantity that can be discerned in a measurement.
Unless stated otherwise, resolution implies the “exported resolution” which is the least resolvable change in the
final datum. As an example, temperature might be reported to 0.1 C but the actual measurement and internal
processing might maintain 0.01 C resolution. In this case, the resolution would be 0.1 C. (sometimes written
±0.1 C).
RFI: Radio Frequency Interference -- any noise that enters into a system from external sources.
RS232: The most common computer serial interface standard.
Tranzorb: A special diode semiconductor device that will acts as a short to high-voltage transients. It is installed
on electrical input or output connections to protect a device from corona or electrical transients such as lightning.
Variation: Also magnetic variation and deviation. At most points on the Earth, the direction to true north varies
from the direction to magnetic north by some number of degrees. This difference is called the magnetic
declination. When the local magnetic anomalies are added to the declination, the result is called the magnetic
variation or simply the variation. Either term, declination or variation, is correct although surveyors generally
prefer the term declination and navigators the term variation.
Aeronautical and marine charts give variation as isogonic lines, or lines of constant magnetic variation. Variation
changes with time, and the charts usually give the rate of change. In some areas, such as the Arctic, the charts note
that compass measurements are unreliable. For the highest accuracy, it is important to use up-to-date charts. When
a compass needle points east of true north it is due to easterly variation. This is the case for most of the
continental U.S.A. The correction from magnetic to true direction for an easterly variation is a positive correction.
As an example, in Seattle WA the variation is approximately 22° and a compass reading of 0° Magnetic
corresponds to a true direction of 22° True. Alternatively, a western variation results in a negative correction.
Vector Averaging: The technique for averaging a wind or ocean current by converting each measured speed and
direction pair to a corresponding pair of x-y coordinates for averaging. The coordinates are summed over an
averaging interval and their final average is computed at the end of the averaging time. Vector averaging removes
the errors that occur when direction cycles from 359° to 0°.
Warm Reset: A system reset whereby the computer is reset and restarted but all peripherals remain powered.
Watchdog Timer: A special countdown timer whose function is to cold or warm reset a system if its computer
program stops operating. Often during lightning or intense RFI a computer RAM will be corrupted and the
program will “crash”.
Coastal Environmental Systems (206) 682-6048
- 10 -
WEATHERPAK®-2000
USER MANUAL
MATHEMATICS OF WIND MEASUREMENTS
Wind direction is the compass angle from which
the wind is blowing
Many different wind statistics are in common use. Vector averaging of some sort is necessary for reliable wind
direction estimates. You cannot simply average the vane measurement directly without risking grave errors. As an
example if the wind blew half the time from 359° and the other half from 1°, the simple vane average would yield a
mean direction of 180°!
The compass bearing can be added to the vane measurement for each sample. If the vane direction measurement
relative to the sensor is θs and the measured corrected compass angle is α, the instantaneous wind direction
relative to true north is θt = θs + α . If you know the magnetic declination δ at your site, you should input it to the
WEATHERPAK, using the System Functions Menu (section 0). However, if there are contaminating magnetic
objects in the vicinity of your WEATHERPAK, or if the compass is not installed, then the wind monitor must be
aligned as closely as possible to true north. The flag Add Compass To Vane, also set in the System Functions
Menu, should be set to 0 (false) in this case.
The different wind statistics available are described below. They are all based upon the same measurements: the
wind speed s and direction θ (including the compass bearing) are measured typically once per second (the rate can
be factory set). From these, the WEATHERPAK calculates the following quantities for each measurement i:
xi = sin θ i ;
yi = cosθ i ;
ui = s i x i ;
v i = si y i ;
giving xi and yi, the unit vector components corresponding to east and north respectively, and ui and vi, the wind
speed vector components. The vector components are summed over the averaging period, and the vector averages
are computed at the end of the averaging interval:
X=
Y=
U=
V=
N
1
N
∑ xi ;
1
N
∑ yi ;
1
N
∑ ui ;
1
N
∑ vi .
i =1
N
i =1
N
i =1
N
i =1
Vector Average Wind Speed and Direction
The U and V terms are used to compute the vector average wind speed SV and direction θV:
SV = U 2 + V 2 ;
θ V = arctan(U ,V ).
The arctangent notation (U,V) means that the signs of U and V are used to determine the exact angle in the range
of 0-360°.
Coastal Environmental Systems (206) 682-6048
- 11 -
WEATHERPAK®-2000
USER MANUAL
Scalar Average Wind Speed
The mean speed SS is computed from the speed measurements alone:
1
SS =
N
N
∑ si .
i =1
Scalar wind is a measure of the wind regardless of its direction. Yamartino showed1 that wind gustiness and
direction fluctuation will lead to a scalar wind that is always larger than the vector average wind. SS is usually
only a few percent greater than SV and it serves as a backup measurement if the compass or vane fails and SV is
invalidated.
Standard Deviation of Wind Direction, Sigma-Theta
The standard deviation σθ of the wind direction is based on the time series of wind direction measurements, θi. and
the average wind direction, θV. A formal definition of σθ is:
1
σθ =
N
2
N
∑
i =1
∆2i
⎡1
−⎢
⎢⎣ N
2
⎤
∑ ∆ i ⎥⎥ ,
i =1
⎦
N
where all measurements are in radians: ∆i is defined such that each |∆i| is the smaller of |θi-θV| and 2π-|θi-θV|.
Calculating this exactly requires two passes over the data: first to calculate θV, and then to find σθ.
Coastal Environmental Systems uses a single pass method because data can be processed in real time without
storing all the wind samples in memory. Yamartino compared several single pass computations and showed that
the most accurate equation -- used in Coastal Environmental System analysis -- is:
[
]
σ θ = arcsin ε 1 + bε 3 ,
where:
(
)
ε 3 = 1− X 2 − Y2 ;
b=
2
= 0.1547.
3
Maximum Wind Speed
Maximum winds (gusts) are determined during each individual averaging period. Gust information is important
for risk studies of damage to constructions and buildings. The duration of the gust is an important consideration
and is often related to the intended application. Some applications require information about extreme values of the
shortest gusts (1 second duration), while in other cases, the damaging gusts are those that engulf the entire structure
(5-10 seconds duration). Fortunately, with little error, there is a technique for relating extreme gust measurements
taken for one duration to extreme gusts of other durations2. The gust duration D in the WEATHERPAK can be
factory set to values between 1 and 5 seconds.
In the Coastal Environmental Systems wind algorithm, a D-second running average of the speed measurements is
applied to the data as it is collected. At the time of each measurement the average of the circular buffer is computed
and compared against the maximum value up to that time. When the current “gust” measurement exceeds the
stored maximum, the maximum value is updated.
1
Yamartino, R.J. (1984) A Comparison of Several “Single-Pass” Estimators of the Standard Deviation of Wind Direction. Journal of Climate
and Applied Meteorology, 23, 1362-1366.
2
Beljaars, A.C.M. (1987) The Influence of Sampling and Filtering on Measured Wind Gusts. Journal of Atmospheric and Oceanic
Technology, 6, 613-626.
Coastal Environmental Systems (206) 682-6048
- 12 -
WEATHERPAK®-2000
USER MANUAL
WEATHERPAK-2000 FOR HAZMAT RESPONSE
The WEATHERPAK® -2000 can be configured for HazMat Spill Response. In this configuration the system
measures the air temperature and the speed, direction and stability class of the wind. As an option, it can measure
barometric pressure and relative humidity. Information is sampled every 2 seconds and then computed into a 5minute running average. The data is then transmitted to you every 30 seconds for an updated line of data.
A WEATHERPAK® -2000 is suitable for extremely portable use when mounted on a van or a portable tower. It
can also be mounted at a fixed site, such as an industrial plant.
The WEATHERPAK® was designed with the following unique features for use in hazardous materials response:
•
•
•
•
•
•
A built-in electronic compass allows the WEATHERPAK® to be set up in any orientation – it will
automatically determine true North and give you true wind direction. 1
Set-up time is under two minutes.
When the unit is assembled, there are no electrical connections that can spark.
The housing is constructed of 6061-T6 aluminum that is non-corrosive and will not spark if dropped or struck.
The housing is sealed and dried with desiccant to protect the electronics against moisture. This means that the
WEATHERPAK® can easily withstand decontamination procedures.
A beeper in the tower sounds when battery replacement is required because of low voltage in the battery pack.
2
All of the electronics are grounded at a single point to protect the WEATHERPAK® against unexpected large
voltages and radio interference.
1
The variation of true North from magnetic North is entered into your WEATHERPAK® for your location. It is
easily changed, but should not be done so without first consulting Coastal Environmental Systems.
2
The WEATHERPAK® must be installed for the beeper to function.
•
Installation
Siting Considerations
a) Compass Measurements – Remember that the WEATHERPAK® contains an electronic fluxgate compass for
automatic North alignment. Like any compass, it can make an error if located too close (laterally) to large
amounts of steel or other magnetic material. (In other words, on top of a van is OK, but next to it is not an
ideal location.) Try to place the WEATHERPAK® at least 30 meters from large vans, busses, cranes, etc.
b) Wind Measurements – Select as exposed a site as is possible. The wind pattern around a building or other
obstacle is disturbed for a considerable distance. If the WEATHERPAK® is placed immediately North of your
vehicle and the wind is coming from the South, an erroneous wind direction and speed reading will result.
c) Radio Transmissions – Locate the WEATHERPAK® as close as safety permits within 2miles of the
receiving unit. Do not attempt to transmit through structures containing steel, or through hills. Reception
range will vary depending on radio signal path.
Coastal Environmental Systems (206) 682-6048
- 13 -
WEATHERPAK®-2000
USER MANUAL
Placement on top of vehicles is okay
Coastal Environmental Systems (206) 682-6048
- 14 -
WEATHERPAK®-2000
USER MANUAL
Tripod Mount
The WEATHERPAK® –2000TRx with tower
Coastal Environmental Systems (206) 682-6048
- 15 -
WEATHERPAK®-2000
USER MANUAL
Tripod Mount Setup
1) Lock the legs on to the bottom section
of the tower forming the tower tripod
base.
2) Remove the wind vane from the case.
Place the propeller on the front shaft
screw the nut into place on
the propeller shaft to secure the propeller.
3)
Plug the wind vane into the top of the
WEATHERPAK®. There is an alignment pin
and slot inside the connector to assure a
proper and aligned fit.
Be certain that the wind vane is plugged all the way
in.
DO NOT rotate the wind vane when installing or
removing.
4) Align the slot on the WEATHERPAK® with the
guide pin on the quick release and push straight in.
(DO NOT “screw” the WEATHERPAK® onto the
quick release.) This is a good sealed fit and may
require an extra push - then push the arms of the
clamp down to assure a tight fit.
DO NOT rotate the WEATHERPAK® or tower
when installing or removing.
5) Place the entire unit -- tower top and
WEATHERPAK® – onto the tripod and securely
tighten the tower locking knob.
6) The WEATHERPAK® is now running and is
sampling. When the WEATHERPAK® is
removed from the Quick Release, it will stop
sampling and shut itself off.
Coastal Environmental Systems (206) 682-6048
- 16 -
WEATHERPAK®-2000
USER MANUAL
Van Mount Setup
1) Remove the wind vane from the case. Place the propeller on the front shaft screw the nut into place on the
propeller shaft to secure the propeller.
2) Plug the wind vane into the top of the WEATHERPAK®. There is an alignment pin and slot inside the
connector to assure a proper and aligned fit. Be certain that the wind vane is plugged all the way in. DO
NOT rotate the wind vane when installing or removing.
3) Align the slot on the WEATHERPAK® with the guide pin on the quick release and push straight in. (DO
NOT “screw” the WEATHERPAK® onto the quick release.) This is a good sealed fit and may require an extra
push - then push the arms of the clamp down to assure a tight fit. DO NOT rotate the WEATHERPAK® or
tower when installing or removing.
4) The WEATHERPAK® is now running and is sampling. When the WEATHERPAK® is removed from the
Quick Release, it will stop sampling and shut itself off.
5) The Van Mount Quick Release is permanently mounted on a vehicle. Coastal supplies a 1-½” female SPT.
Van Mount Quick Release
Coastal Environmental Systems (206) 682-6048
- 17 -
WEATHERPAK®-2000
USER MANUAL
Receiver Display Box
Receiver box rear panel connections.
Internal Switches
The following internal switches change the functions of the RX Box Display only. Serial data will not be affected
by switch settings. IMPORTANT NOTE: DO NOT open the receiver/display box without permission from
Coastal Environmental Systems Customer Service, as doing so may void your warranty. Always disconnect the
A/C power cord before opening the box. The receiver box contains many static sensitive parts which can be
inadvertently damaged by improper handling. DS1 Unused (remains off); DS2 Standard = off / Metric = on, DS3
Degrees = off / Ordinal points = on, DS4 Unused (remains off), DS5 English = off / French = on
EXAMPLE Receiver front panel
The example is interpreted as follows: The five minute average wind (WS) is 2.7 miles per hour and is coming
from 310 degrees. The instantaneous – one second wind speed (IW) is 2.7 miles per hour. The stability (ST) will
range from –1 to 100. The –1 is a default reading for the first 5 minutes. After that it will range from 1 to 100.
The higher the ST number, the more unstable the wind is with a corresponding wider area of concern. The air
temperature (TEMP) is 96.6 degrees Fahrenheit. The relative humidity (RH) is an option. The ID# is unique to
your WEATHERPAK®. The barometric pressure (BP) in inches is an option.
Coastal Environmental Systems (206) 682-6048
- 18 -
WEATHERPAK®-2000
USER MANUAL
Low Power Indicators
1. A beeper will sound in the tower. The WEATHERPAK® must be installed.
Dead batteries will not activate the beeper.
2. A “T” will flash on the Receiver front panel
3. The battery voltage reads below 11.0 on the “Processed Sam Data: screen
There are low power warning indicators which will flash in the lower right corner of the display. A flashing “R”
indicates that the Receiver batteries are low. R warning flash starts ≅ 11.5 VDC. Receiver lights go out ≅ 10.5
VDC. If the receiver lights go out, plug the receiver into a wall outlet, then reset the receiver by flipping the power
switch off then back on. This will recharge the batteries. Batteries last = approximately 2 hours. Recharge time =
approximately 1 hour. A flashing “T” indicates that the batteries in the tower are low and need replacing.
Replacing tower batteries and fuse
The WEATHERPAK® has nine alkaline D cell batteries which are located in the top section of the tower, as shown
in the figure below. The batteries can be replaced with standard alkaline batteries. Make sure that the replacement
batteries are of the same type. There is an in-line fuse located in the tower junction box (see figure below.)
Replacing the batteries
Figure 11. Replacing the batteries (2)
You will need a large screwdriver to replace the batteries. The battery “plug” is slotted. With the screwdriver,
PUSH (the plug is held in place by a spring) and rotate the plug clockwise. The plug will come out followed by a
spring and the batteries. Slide the new batteries in (positive end first) and replace the spring and plug.
To check the new voltage, set up the WEATHERPAK® and get the ALOHA plume model running. Then pull
down the [MISC] menu to “Processed Sam data”. One of the items shown is battery voltage (see figure 10 on page
14.) It should read about 13 to 15 volts. The tower low voltage beeper will go off when the battery voltage
reaches 11 volts.
Coastal Environmental Systems (206) 682-6048
- 19 -
WEATHERPAK®-2000
USER MANUAL
Plume Modeling Software
With the WEATHERPAK set-up and operational and the Receiver/Display box connected to your computer, realtime data is available to run air dispersion plume modeling software.
IMPORTANT NOTE: Some versions of ALOHA (including 5.2.1) need to be upgraded in order to work with a
Station for Atmospheric Measurement (SAM); the WEATHERPAK is a SAM. The US EPA provides
CAMEO/ALOHA
software
support
and
information
at
their
website
http://www.epa.gov/ceppo/cameo/support.htm. To upgrade, go to Updates and Utilities which exits to
http://www.nsc.org/ehc/cam/fixitlib.cfm scroll down to ALOHA UPDATES 5.2.2. These addresses change
periodically – we’d appreciate knowing any changes you encounter.
The following is a brief outline on using the system to produce an ALOHA plume model on a PC operating
Windows 95. There is a general assumption that the user is familiar with ALOHA and that the program is properly
loaded on the user’s computer. Please consult the ALOHA user’s manual for additional details and program
limitations.
1.
Open ALOHA by clicking on its desktop icon, or selecting it from the Programs menu
2.
A series of dialogue boxes will appear including important notes on program limitations.
3.
A Text Summary window will appear with information summarizing the event.
4.
Confirm that your Site Data information is correct. If required, use the SiteData pull-down menu to change it.
5.
Using the pull-down menu SetUp/Chemical select the chemical (chlorine, for example).
6.
Using the pull-down menu SetUp/Atmospheric/SAM Station a series of dialogue boxes will appear requiring
user observations or assumptions. Relative humidity data is not captured automatically and can be handentered using data from the Receiver/Display box.
7.
Using the pull-down menu SAMOptions select Processed Data. The WEATHERPAK delivers data in the
proper format for ALOHA to use. A Processed SAM Data window will appear. If the WEATHERPAK has
been collecting data for less than five minutes a warning message will be displayed in both the Text Summary
and Processed SAM Data windows.
8.
Before allowing selection of the source of the leak (tank, pipe, direct etc.), ALOHA requires the SAM station
to record five minutes worth of data. Using the pull-down menu SetUp/Source select the source of the leak
(tank, for example); a series of dialogue boxes will appear requiring user observations or assumptions.
9.
Use the Display/Footprint pull-down menu to show the plume footprint. A footprint is required before plotting
the plume onto a street map. Refer to the ALOHA manual for interpretations and explanations on selecting
locations within the plume footprint.
10. Optional graphs: Use the Display pull-down menu to produce graphs for source strength release rate,
concentration, and dose.
11. Use the Display/Tile Windows to show multiple windows on the same screen; reposition and re-size as
needed. Display/Stack will organize and stack the windows for quick access.
12. To plot the plume onto a street map, use the Sharing pull-down menu. As weather conditions change the
plume size and position will change shortly after the WEATHERPAK provides updated data. Note: some
software versions require that the ALOHA window overlay the map window in order for the map-plume to
update automatically.
Coastal Environmental Systems (206) 682-6048
- 20 -
WEATHERPAK®-2000
USER MANUAL
The WEATHERPAK takes a sensor sample approximately every 1-2 seconds and calculates a five minute running
average and sends updated data approximately every thirty seconds. “INSTANTANEOUS” data is captured just
prior to the thirty-second update.
By comparing the “5 MINUTE RUNNING AVERAGE” and
“INSTANTANEOUS” data, the user can get a good idea of changing conditions. The WEATHERPAK calculates
“Sigma Theta”, or air mixing, and produces a Stability Class value used by the plume model. The battery voltage
is also transmitted. Note: If voltage is below 11.0 the batteries in the WEATHERPAK tower should be replaced.
Coastal Environmental Systems (206) 682-6048
- 21 -
WEATHERPAK®-2000
USER MANUAL
Aloha Operation
If you pull down the “SAM Options” from the Main menu and select “Raw data”, something like the following line
of data will appear:
421, 0.9, 225, 1.0, 23.9, 1.0. 226, 23.9, 14,0, 1917, 999, 46, 2536
This is showing you exactly what the WEATHERPAK® is sending. Notice that most of these numbers are present
in the “Processed Sam Data” on the previous page. The difference is that there are no labels and there are some
additional numbers. Also, this raw data is in metric units (millibars, m/s, C), whereas the processed data is in
standard English units (inches, m.p.h., F.)
The first number is the unique ID number (Serial #) of your WEATHERPAK®. If you do not have a
WEATHERPAK® display screen, then this is how to identify your WEATHERPAK®. If you have a
WEATHERPAK® display screen, the ID number appears on it.
Two “checksums” are performed to ensure that the message sent was correct. The computer adds up the “ASCII
value” of the data line (each letter and number and comma, etc., has a numerical value universal to all computers)
to make sure that the computer got the same number that the WEATHERPAK® transmitted.
Data line interpretation
The data line fields are as follows:
ID, MW, MD, ST, AT, SI, DI, TI, BV, CKSUM1, BP, RH CKSUM2
ID – WEATHERPAK® identification number
MW – 5 minute averaged wind speed in meters per second
MD – 5 minute averaged wind direction in degrees
ST – Stability class in degrees
AT – 5 minute averaged air temperature in degrees Centigrade
SI – Instantaneous wind speed in meters per second
DI – Instantaneous wind direction in degrees
TI – Instantaneous air temperature in degrees Centigrade
BV – Battery voltage in volts
CKSUM1 – First checksum
BP – Barometric pressure in millibars
RH – Relative humidity in percent
CKSUM2 – Second checksum
Coastal Environmental Systems (206) 682-6048
- 22 -
WEATHERPAK®-2000
USER MANUAL
TROUBLESHOOTING
Do not take the WEATHERPAK® or the Receiver box apart; this will void the warranty. If the procedures
below do not solve the problem, call Coastal Environmental Systems.
Is the WEATHERPAK® on?
Once the WEATHERPAK® is set up, it turns itself on, and starts sampling and transmits data every 30 seconds. If
it does not:
• Check that the WEATHERPAK® is properly secured in the quick release – reseat firmly.
• Check the power connection to the WEATHERPAK®, or
• Check the tower batteries and fuse.
Is the Receiver/Display Box on?
The display light should be on and the display characters visible. If this does not occur, do the following:
• Be sure the receiver unit is plugged in and turned on.
• Check the power light on the front panel. It should be lit.
• If it is not lit, check for power at the outlet the RX Box is plugged into.
• Check the cable connections from the WEATHERPAK® to the receiver,
Receiver/Display Box Data light not flashing?
Every 30 seconds (approximately), the data light will flash signifying that the WEATHERPAK® is updating the
display. If the light does not flash, then do the following:
• Be sure the receiver unit is plugged in and turned on.
• Check the power light on the front panel, it should be lit.
• Check to see if the WEATHERPAK® is “line of sight” (less than 2 miles, and not transmitting hrough
hills, or steel walls, etc.)
• Be sure you are not trying to transmit through structures containing lots of steel.
• Check to see if both antennas are connected (WEATHERPAK® and receiver.)
• Unclamp, remove, wait 10 seconds, then replace the WEATHERPAK® on the tower (this resets it.)
• Check to see if the low battery beeper in the tower is beeping.
• Check that the batteries in the tower are properly aligned and are the correct voltage.
• Check the power connection to the WEATHERPAK®.
• Check the cable connections from the WEATHERPAK® to the receiver
Wind speed off?
• Check that the propeller is turning. There is a minimum threshold of about 2.5 MPH.
Propeller is turning, wind speed reads zero?
• Make sure that the wind monitor has been pushed down all the way on to the WEATHERPAK®.
Wind direction off?
For this job you need a partner. Have your partner go to the wind monitor and hold the vane so the propeller points
in a known direction. Does the display read correctly? If not:
• Make sure that the wind monitor has been pushed down all the way on to the WEATHERPAK®. There is
an alignment pin and slot inside the connector to assure a proper and aligned fit; make sure that the pin is in
the slot. See Tower Mount Setup.
Other sensor readings off?
• Contact Coastal Environmental Systems. The WEATHERPAK® may be broken or require maintenance.
There is data at the display but there is either no data or erroneous data at the computer?
• Check all the connections from the receiver to the computer.
Error messages while running plume modeling?
Typically, these are not related to the WEATHERPAK®; they are coming from the plume modeling software.
• ALOHA version 5.2.1 will not work with weather stations, free upgrades are available
• Consult your CAMEO/ALOHA manual.
• Contact the US EPA for help with CAMEO/ALOHA software.
• Coastal is NOT an authorized CAMEO/ALOHA representative; however, we may be able to help.
Coastal Environmental Systems (206) 682-6048
- 23 -
WEATHERPAK®-2000
USER MANUAL
MAINTENANCE
Routine maintenance is required on the WEATHERPAK® every 12 months. This maintenance is to ensure that the
overall system and its sensors are working and performing to specifications. The actual service varies, based on
the sensors installed in your model of WEATHERPAK®. For example, a WEATHERPAK® –2000 should have
the wind, compass, air temperature (and, optionally, the barometric pressure and relative humidity) sensors tested
to their stated specifications. In addition, the entire WEATHERPAK® should be examined for any wear, damage
or other non-conforming variances.
SYSTEM DESCRIPTION, SCHEMATICS AND CONFIGURATION
Your WEATHERPAK®-2000 Weather Station is made up of the following major components:
WIND MONITOR
S1104W
S1145W
RM Young 05103
RM Young AQ
Handar Sonic
AIR TEMPERATURE
S1074W
YSI 44203
YSI 44304
RELATIVE HUMIDITY
VAISALA 50U – 3%
Hygrometrics – 4%
VAISALA Hmm20D – 2%
BAROMETER
S1081W
IC Sensor 1220A
Setra 270
PYRANOMETER
S1114
Licor 200 SZ
Eppley 8-40
Eppley PIR
DATA STORAGE MEMORY
OPERATING SOFTWARE
DATA COLLECTION SOFTWARE
TOWER
S1288
S1329
S1341
S1137
S1140
S1125W
S1118W
Coastal Environmental Systems (206) 682-6048
1 MB
ZENOSOFT version 1.966
MET EXPERT
INTERCEPT Network 3.34B
INTERCEPT 3.34B
INTERCEPT Format Editor 2
3 Meter Tripod Tower
3 Meter Universal Tower
10 Meter Universal Tower
- 24 -
WEATHERPAK®-2000
RADIO
RADIO RECEIVER
RADIO RECEIVER/DISPLAY BOX
RECEIVER/DISPLAY BOX
CABLE LENGTH
Coastal Environmental Systems (206) 682-6048
USER MANUAL
S1064W
2 Watt 467.8
S1016
S1011
- 25 -