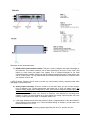
1
T/Guard-Link TGL-FL™
Fiber Optic Thermometer Systems
For Industrial & Power Transformer Applications
Fluorescence Technology
1- to 8- Channel Systems
OptiLink-II (version 1.40+)
With Modbus
Neoptix Canada LP / Qualitrol Company LLC
1415, rue Frank-Carrel, Suite 220
Québec, QC, G1N 4N7
Canada
Tel: 418-687-2500
Fax: 418-687-2524
[email protected]
Proprietary notice:
Details of design and engineering are the exclusive property of Neoptix Canada LP and are strictly
confidential. The information given herein is subject to change, at any time and without notice.
All rights are reserved. The information in this document may not be reproduced or passed on in any manner
without prior written consent of Neoptix Canada LP.
Neoptix, Inc. shall not be liable for technical or editorial errors or omissions contained herein; nor for
incidental or consequential damages resulting from the furnishing, performance, or use of this material.
All trademarks are the property of their respective owners.
Part number: G1041R03 (November 2014)
Document no. G1041r03
Copyright Neoptix Canada LP
1
TABLE OF CONTENTS
1
END USER LICENSE & SOFTWARE WARRANTY AGREEMENT ...............................................................4
1.1
T/GUARD FAMILY AND NEOPTIX PROBE WARRANTY NOTICE ..................................................................................7
2
INTRODUCTION........................................................................................................................................................8
2.1
T/GUARD-LINK FL (FLUORESCENCE TECHNOLOGY) PRODUCT SPECIFICATIONS..................................................... 10
2.2
CALIBRATION........................................................................................................................................................... 12
2.3
TRANSFORMER APPLICATIONS ................................................................................................................................. 12
3
UNPACKING ............................................................................................................................................................ 13
4
T/GUARD-TGL™ HARDWARE REFERENCE................................................................................................. 14
5
SERIAL COMMAND PROTOCOL DESCRIPTION ......................................................................................... 17
5.1
USING HYPERTERMINAL IN WINDOWS.................................................................................................................... 17
5.2
SERIAL COMMAND HELP MENU ................................................................................................................................ 17
5.3
DETAILED DESCRIPTION OF THE ASCII COMMANDS .............................................................................................. 18
5.3.1
Recommended configuration, for transformer applications........................................................................... 20
5.3.2
Interpretation of “y” command results .......................................................................................................... 21
5.4
TYPICAL TEMPERATURE READING SEQUENCE.......................................................................................................... 21
5.5
ERROR CODES .......................................................................................................................................................... 22
6
OPTILINK-II SOFTWARE DESCRIPTION (FOR THE TGL-FL) ................................................................. 23
6.1
INSTALLATION AND INITIAL OPERATION .................................................................................................................. 23
6.2
ACQUIRE AND DISPLAY TEMPERATURE DATA ........................................................................................................ 24
6.2.1
Data Acquisition, Logging and Graphing Rates ............................................................................................ 25
6.2.2
Graphs............................................................................................................................................................. 26
6.3
OPTICAL CHANNEL SETTINGS TOOL ......................................................................................................................... 26
6.4
SERIAL PROTOCOL PARAMETERS ............................................................................................................................. 27
6.5
FIRMWARE UPDATE TOOL ........................................................................................................................................ 27
6.6
TROUBLESHOOTING ................................................................................................................................................. 27
7
THE MODBUS PROTOCOL ................................................................................................................................. 29
7.1
CONFIGURING THE MODBUS OPTION ....................................................................................................................... 29
7.2
SUPPORTED SERIAL TRANSMISSION MODE ............................................................................................................... 29
7.3
RTU TRANSMISSION MODE ...................................................................................................................................... 30
7.4
MODBUS FUNCTION CODE AND REGISTER ADDRESSES ............................................................................................ 30
7.4.1
Register content details ................................................................................................................................... 30
7.5
MODSCAN EXAMPLES .............................................................................................................................................. 33
7.5.1
Monitoring multiple T/Guard ......................................................................................................................... 34
7.5.2
Writing parameters ......................................................................................................................................... 35
7.5.3
Data logging ................................................................................................................................................... 35
7.6
USING OPTO-ISOLATORS, TO DEAL WITH GROUNDING PROBLEMS ........................................................................... 36
8
RS-485 CONVERTERS ........................................................................................................................................... 37
8.1
RS-485 TO USB CONVERTER................................................................................................................................... 37
9
USING THE TEMPERATURE PROBES ............................................................................................................. 38
9.1
CAUTION .................................................................................................................................................................. 38
9.2
DESCRIPTION ........................................................................................................................................................... 38
9.3
WARNING................................................................................................................................................................. 39
9.4
WORKING WITH LONG PROBES................................................................................................................................. 39
9.5
WORKING WITH CRYOGENIC PROBES....................................................................................................................... 39
9.6
INSTALLING PROBES IN POWER TRANSFORMERS ...................................................................................................... 39
10
INDEX .................................................................................................................................................................... 40
Document no. G1041r03
Copyright Neoptix Canada LP
2
Warning
Permanent damage may be done to the thermometer if the power supply connections are not done correctly. In
particular, do not connect the power input (18-24 VDC) to any of the analog output connectors. Note that the 20 mA
analog output options are self-powered interfaces (by opposition to loop-powered interfaces), and thus do not require any
external supply. Maximum loop impedance should be kept at 400 Ω; internal impedance is approximately 0.7 Ω.
Fiber optic probes are fragile, and will break if the bending radius becomes less than 1cm,
even temporarily. Furthermore, as probe tips are fragile, exercise care to:
•
Make sure the last ~1 cm of probes is free standing, and not pressurized by any
glue, or by the spacers
•
Avoid bending the last 1cm of probes.
Furthermore, due to the unique construction of the Neoptix probes, it is important that you
avoid applying glue to the last 1 cm of the probes during their installation in transformer
windings.
Probe breakages are not covered under the standard Neoptix warranty.
To assure cleanliness of optical connectors, keep caps on unused connectors at all time. This is also required during
operation, as parasitic light entering via unused connectors into the T/Guard module may cause false temperature
readings, even on other channels.
The Neoptix T/Guard products are CE marking certified.
This device complies with Part 15 of the FCC Rules. Operation is subject to the following two conditions:
(1) this device may not cause harmful interference, and (2) this device must accept any interference received,
including interference that may cause undesired operation.
Document no. G1041r03
Copyright Neoptix Canada LP
3
1 END USER LICENSE & SOFTWARE WARRANTY AGREEMENT
PLEASE READ THIS SOFTWARE LICENSE CAREFULLY BEFORE DOWNLOADING, INSTALLING OR
USING ANY QUALITROL OR QUALITROL-SUPPLIED SOFTWARE.
BY DOWNLOADING OR
INSTALLING THE SOFTWARE, OR USING THE EQUIPMENT THAT CONTAINS THIS SOFTWARE, YOU
ARE CONSENTING TO BE BOUND BY THIS LICENSE.
The following terms govern your use of the Software except to the extent a particular program (a) is the
subject of a separate written agreement with Qualitrol or (b) includes a separate “clickwrap” license
agreement as part of the installation and/or download process. To the extent of a conflict between the
provisions of the foregoing documents, the order of precedence shall be (1) the written agreement, (2) the
clickwrap agreement, and (3) this Software License.
License. Subject to the terms and conditions of and except as otherwise provided in this Agreement,
Qualitrol Systems, Inc. or the Qualitrol Systems, Inc. subsidiary licensing the Software, if sale is not directly
by Qualitrol Systems, Inc. (“Qualitrol”), and its suppliers grant to Customer (“Customer”) a nonexclusive and
non-transferable license to use the specific Qualitrol program modules, feature set(s) or feature(s) for which
Customer has paid the required license fees (the “Software”), in object code form only. In addition, the
foregoing license shall also be subject to the following limitations, as applicable:
•
Unless otherwise expressly provided in the documentation, Customer shall use the Software
solely as embedded in, for execution on, or (where the applicable documentation permits
installation on non-Qualitrol equipment) for communication with Qualitrol equipment owned or
leased by Customer
•
Customer’s use of the Software shall be limited to use on a single hardware chassis, on a single
central processing unit, as applicable, or use on such greater number of chasses or central
processing units as Customer may have paid Qualitrol the required license fee; and
•
Customer’s use of the Software shall also be limited, as applicable and set forth in Customer’s
purchase order or in Qualitrol’s product catalog, user documentation, or web site, to a maximum
number of (a) seats (i.e. users with access to the installed Software), (b) concurrent users,
sessions, ports, and/or issued and outstanding IP addresses, and/or (c) central processing unit
cycles or instructions per second. Customer’s use of the Software shall also be limited by any
other restrictions set forth in Customer’s purchase order or in Qualitrol’s product catalog, user
documentation or web site for the Software.
NOTE: For evaluation or beta copies for which Qualitrol does not charge a license fee, the above
requirement to pay a license fee does not apply.
General Limitations. Except as otherwise expressly provided under this Agreement, Customer shall have no
right and Customer specifically agrees not to:
(i) transfer, assign or sublicense its license rights to any other person, or use the Software on
unauthorized or second-hand Qualitrol equipment, and any such attempted transfer, assignment
or sublicense shall be void;
(ii) make error corrections to or otherwise modify or adapt the Software or create derivative works
based upon the Software, or to permit third parties to do the same; or (iii) decompile, decrypt,
reverse engineer, disassemble or otherwise reduce the Software to human readable form to gain
access to trade secrets or confidential information in the Software. To the extent required by
law, at Customer's request, Qualitrol shall provide Customer with the interface information
needed to achieve interoperability between the Software and another independently created
Document no. G1041r03
Copyright Neoptix Canada LP
4
program, on payment of Qualitrol’s applicable fee. Customer shall observe strict obligations of
confidentiality with respect to such information.
Upgrades and Additional Copies. For purposes of this Agreement, “Software” shall include (and the terms
and conditions of this Agreement shall apply to) any upgrades, updates, bug fixes or modified versions
(collectively, “Upgrades”) or backup copies of the Software licensed or provided to Customer by Qualitrol or
an authorized distributor for which Customer has paid the applicable license fees.
NOTWITHSTANDING ANY OTHER PROVISION OF THIS AGREEMENT: (1) CUSTOMER HAS NO
LICENSE OR RIGHT TO USE ANY SUCH ADDITIONAL COPIES OR UPGRADES UNLESS CUSTOMER,
AT THE TIME OF ACQUIRING SUCH COPY OR UPGRADE, ALREADY HOLDS A VALID LICENSE TO
THE ORIGINAL SOFTWARE AND HAS PAID THE APPLICABLE FEE FOR THE UPGRADE; (2) USE OF
UPGRADES IS LIMITED TO QUALITROL EQUIPMENT FOR WHICH CUSTOMER IS THE ORIGINAL
END USER PURCHASER OR LESSEE OR WHO OTHERWISE HOLDS A VALID LICENSE TO USE THE
SOFTWARE WHICH IS BEING UPGRADED; AND (3) USE OF ADDITIONAL COPIES IS LIMITED TO
BACKUP PURPOSES ONLY.
Proprietary Notices. Customer agrees to maintain and reproduce all copyright and other proprietary notices
on all copies, in any form, of the Software in the same form and manner that such copyright and other
proprietary notices are included on the Software. Except as expressly authorized in this Agreement,
Customer shall not make any copies or duplicates or any Software without the prior written permission of
Qualitrol. Customer may make such backup copies of the Software as may be necessary for Customer’s
lawful use, provided Customer affixes to such copies all copyright, confidentiality, and proprietary notices that
appear on the original.
Protection of Information. Customer agrees that aspects of the Software and associated documentation,
including the specific design and structure of individual programs, constitute trade secrets and/or copyrighted
material of Qualitrol. Customer shall not disclose, provide, or otherwise make available such trade secrets or
copyrighted material in any form to any third party without the prior written consent of Qualitrol. Customer
shall implement reasonable security measures to protect such trade secrets and copyrighted material. Title
to Software and documentation shall remain solely with Qualitrol.
Term and Termination. This License is effective until terminated. Customer may terminate this License at
any time by destroying all copies of Software including any documentation. Customer’s rights under this
License will terminate immediately without notice from Qualitrol if Customer fails to comply with any provision
of this License. Upon termination, Customer must destroy all copies of Software in its possession or control.
Customer Records. Customer grants to Qualitrol and its independent accountants the right to examine
Customer’s books, records and accounts during Customer’s normal business hours to verify compliance with
this Agreement. In the event such audit discloses non-compliance with this Agreement, Customer shall
promptly pay to Qualitrol the appropriate licensee fees.
Export. Software, including technical data, may be subject to U.S. export control laws, including the U.S.
Export Administration Act and its associated regulations, and may be subject to export or import regulations
in other countries. Customer agrees to comply strictly with all such regulations and acknowledges that it has
the responsibility to obtain licenses to export, re-export, or import Software.
U.S. Government End Users. The Software and associated software documentation qualify as “commercial
items,” as that term is defined at 48 C.F.R. 2.101, consisting of “commercial computer software” and
“commercial computer software documentation” as such terms are used in 48 C.F.R. 12.212. Consistent with
48 C.F.R.12.212 and 48 C.F.R. 227.7202-1 through 227.7202-4, Licensee will provide to Government end
user, or, if this Agreement is direct Government end user will acquire, the Software and software
documentation with only those rights set forth herein that apply to nongovernmental customers. Use of this
Software and software documentation constitutes agreement by the government entity that the computer
software and computer software documentation is commercial, and constitutes acceptance of the rights and
restrictions herein.
Document no. G1041r03
Copyright Neoptix Canada LP
5
Limited Warranty. Qualitrol Systems, Inc. or the Qualitrol Systems, Inc. subsidiary licensing the Software, if
sale is not directly by Qualitrol Systems, Inc. (“Qualitrol”) warrants that commencing from the date of delivery
to Customer and continuing for a period of the longer of (a) ninety (90) days or (b) the period set forth in the
Warranty Card accompanying the Product (if any): (a) the media on which the Software is furnished will be
free of defects in materials and workmanship under normal use; and (b) the Software substantially conforms
to its published specifications. The date of shipment of a Product by Qualitrol is set forth on the packaging
material in which the Product is shipped. Except for the foregoing, the Software is provided “AS IS”. This
limited warranty extends only to the Customer who is the original licensee. Customer's sole and exclusive
remedy and the entire liability of Qualitrol and its suppliers under this limited warranty will be, at Qualitrol or its
service center's option, repair, replacement, or refund of the Software if reported (or, upon request, returned)
to the party supplying the Software to Customer, if different than Qualitrol. In no event does Qualitrol warrant
that the Software is error free or that Customer will be able to operate the Software without problems or
interruptions. In addition, due to the continual development of new techniques for intruding upon and
attacking networks, Qualitrol does not warrant that the Software or any equipment, system or network on
which the Software is used will be free of vulnerability to intrusion or attack.
Restrictions. This warranty does not apply if the Product (a) has been altered, except by Qualitrol, (b) has not
been installed, operated, repaired, or maintained in accordance with instructions supplied by Qualitrol, (c) has
been subjected to abnormal physical or electrical stress, misuse, negligence, or accident; or (d) is licensed,
for beta, evaluation, testing or demonstration purposes for which Qualitrol does not receive a payment of
purchase price or license fee.
DISCLAIMER OF WARRANTY. EXCEPT AS SPECIFIED IN THIS WARRANTY, ALL EXPRESS OR
IMPLIED CONDITIONS, REPRESENTATIONS, AND WARRANTIES INCLUDING, WITHOUT LIMITATION,
ANY IMPLIED WARRANTY OR CONDITION OF MERCHANTABILITY, FITNESS FOR A PARTICULAR
PURPOSE, NONINFRINGEMENT, SATISFACTORY QUALITY OR ARISING FROM A COURSE OF
DEALING, LAW, USAGE, OR TRADE PRACTICE, ARE HEREBY EXCLUDED TO THE EXTENT
ALLOWED BY APPLICABLE LAW. TO THE EXTENT AN IMPLIED WARRANTY CANNOT BE
EXCLUDED, SUCH WARRANTY IS LIMITED IN DURATION TO THE WARRANTY PERIOD. BECAUSE
SOME STATES OR JURISDICTIONS DO NOT ALLOW LIMITATIONS ON HOW LONG AN IMPLIED
WARRANTY LASTS, THE ABOVE LIMITATION MAY NOT APPLY TO YOU. THIS WARRANTY GIVES
YOU SPECIFIC LEGAL RIGHTS, AND YOU MAY ALSO HAVE OTHER RIGHTS WHICH VARY FROM
JURISDICTION TO JURISDICTION.
This disclaimer and exclusion shall apply even if the express warranty set forth above fails of its essential
purpose.
Disclaimer of Liabilities. IN NO EVENT WILL QUALITROL OR ITS SUPPLIERS BE LIABLE FOR ANY LOST
REVENUE, PROFIT, OR DATA, OR FOR SPECIAL, INDIRECT, CONSEQUENTIAL, INCIDENTAL, OR
PUNITIVE DAMAGES HOWEVER CAUSED AND REGARDLESS OF THE THEORY OF LIABILITY
ARISING OUT OF THE USE OF OR INABILITY TO USE SOFTWARE EVEN IF QUALITROL OR ITS
SUPPLIERS HAVE BEEN ADVISED OF THE POSSIBILITY OF SUCH DAMAGES.
In no event shall Qualitrol’s or its suppliers’ liability to Customer, whether in contract, tort (including
negligence), or otherwise, exceed the price paid by Customer. The foregoing limitations shall apply even if
the above-stated warranty fails of its essential purpose.
BECAUSE SOME STATES OR JURISDICTIONS DO NOT ALLOW LIMITATION OR EXCLUSION OF
CONSEQUENTIAL OR INCIDENTAL DAMAGES, THE ABOVE LIMITATION MAY NOT APPLY TO YOU.
Document no. G1041r03
Copyright Neoptix Canada LP
6
The Warranty and the Software License shall be governed by and construed in accordance with the laws of
the State of New York, without reference to principles of conflict of laws, provided that for Customers located
in a member state of the European Union, Norway or Switzerland, English law shall apply. The United
Nations Convention on the International Sale of Goods shall not apply. If any portion hereof is found to be
void or unenforceable, the remaining provisions of the Warranty and the Software License shall remain in full
force and effect. Except as expressly provided herein, the Software License constitutes the entire agreement
between the parties with respect to the license of the Software and supersedes any conflicting or additional
terms contained in the purchase order.
If Customer has entered into a contract directly with Qualitrol for supply of the Products subject to this
warranty, the terms of that contract shall supersede any terms of this Warranty or the Warranty Card, or the
Software License, which are inconsistent with that contract. Customer acknowledges that the Internet URL
address and the web pages referred to in this document may be updated by Qualitrol from time to time and
the version in effect at the date of delivery of the Products to the Customer shall apply.
1.1
T/Guard Family and Neoptix Probe Warranty Notice
Your T/Guard unit (model TGL-FL) is guaranteed (Parts and Workmanship) for one full year from the date of
purchase. Upon written notification of any defect, Neoptix will either repair or replace any faulty product or
components thereof. A Return Authorization Number (RMA) must be obtained from Neoptix Canada LP or
authorized distributor prior to any merchandise return.
Due to the unique nature of the fiber optic probes that are used with the Neoptix Conditioner system, probes
are not warranted.
When using any electrical appliance, basic safety precautions should be followed, including the following:
• Do not operate in wet / damp environments
• Do not operate in explosive atmospheres
• Keep product surface dry and clean.
Always make sure all electrical installations are made in accordance with local authorities’ regulations and
laws.
Document no. G1041r03
Copyright Neoptix Canada LP
7
2 INTRODUCTION
The Qualitrol® T/Guard Link-FL™ (TGL-FL) is a multichannel fiber optic temperature monitoring system for
power transformer hot spot measurements and other similar industrial applications. It has been developed
with long-term performance and stability in mind. This fiber-optic temperature monitoring system offers
accuracy, toughness, ease of use and long-term resistance to failure.
Coupled with this T/Guard system, the Qualitrol® fiber-optic temperature probes provide accurate and direct
temperature monitoring of transformer windings. This solution provides a realistic, real-time view of winding
conditions that is quicker and more accurate than WTI (Winding Temperature Indicator) top oil thermocouple
measurements, and greatly complements indirect measurements based on thermal models. However, the
first intend of this system is to interface to existing fluorescence probes that are already installed in power
transformers.
Since its inception, Neoptix, a member of the Qualitrol family, has developed expertise in monitoring
temperatures of hot spots in power transformers, and is considered a world leader in this field. Our user guide
called, “Probe Installation Guide, inside power transformers” (part number G1009rXX) should be used by
transformer manufacturers as a guide to safely install the probes inside windings of a power transformer.
Make sure you instruct all of your employees that fiber optic components, contrary to conventional copper
wires, are fragile. Generally speaking, fiber optics, contrary to copper wires, cannot be repaired once broken!
This Qualitrol® T/Guard gives the exact temperature of optical probes in as little as 250 milliseconds per
channel. Peak loads or emergency overloads are thus detected almost instantaneously. The T/Guard system
is specifically designed to meet power transformer industry requirements: extended intervals between
servicing, low maintenance, rugged components and the ability to withstand the harshest conditions. All
components have been specifically selected for long term performance, including the LED source that has an
MTBF estimated at a minimum of 10 years.
The fiber-optic probes compatible with this system must be fabricated with fluorescing material (rare earth
based); this T/Guard cannot read probes fabricated with the semiconductor GaAs technology; both
technologies offer probes that are made only with dielectric materials. They are designed to withstand initial
1
manufacturing conditions, including kerosene desorption and heat runs , as well as long term oil immersion
and vibration.
This T/Guard system is available with 1 to 8 optical channels. As this system is intended to be used as an
OEM system, it does not have any temperature display. LED indicators give immediate information about,
power on status, mode (Neoptix or Modbus) and communication activity. Signal conditioner power
consumption of the system is 15 watts.
This T/Guard can be mounted in the back of a control cabinet using 4 screws or mounted directly on the
cabinet swing door using the four bolt anchors.
The T/Guard TGL-FL system provides an easy to use interface to an existing SCADA or substation system
through its 4-20 mA analog outputs or through its RS-485 serial port using either the Modbus protocol or the
Neoptix native communication mode.
With its small footprint, this TGL is a space-efficient and versatile instrument. All connections are made
through detachable terminal blocks for easy and seamless installation and after-sales service.
This T/Guard-Link system has been designed to monitor temperatures only; it cannot control cooling or
generate alarms; thus, it does not have any relay.
1
Also called “Temperature Rise Test”.
Document no. G1041r03
Copyright Neoptix Canada LP
8
The system’s configuration is made through its industrial grade front panel keypad, serial terminal or PC
software (OptiLink for Windows).
Document no. G1041r03
Copyright Neoptix Canada LP
9
2.1 T/Guard-Link FL (fluorescence technology) product specifications
Resolution
Accuracy
Calibrated Temperature
Range
Supported probes
Usable Temperature
Range
Number of channels*
Probe length
Response time
Unit
Operating temperature
Storage temperature
Display
Power
Size
Weight
Standard interface
Optional interface
Sensor
0.1 °C
+/- 2 °C
-40° to 200 °C
Neoptix fluorescence probes and competitive probes
-80° to 250°C
1 to 8
Multiple modules can be linked together, up to 256 channels (Modbus)
1 to 30 meters
Typically 0.8 second per channel
(probe configuration dependent)
User selection of °C or °F
-40° to 72 °C, non-condensing
-50° to +80 °C
LED indicators for power on, communication protocol and activities
20 to 28 VDC, 0.3 A (nominal 24 VDC)
190L x 117W x 42D mm
0.7 kg
RS-485 (2W or 4W, user configurable)
Modbus and Neoptix (ASCII) protocols
Analog output 4-20mA
TCP-IP (Ethernet). External serial bridge module
Dielectric epoxy or silicone tipped optical fiber
*: Selection must be specified at time of order.
The following figure gives a description of some probe configurations and options that are available from
Neoptix.
Transformer Probe (shown with feedthrough):
Document no. G1041r03
Copyright Neoptix Canada LP
10
General Purpose Fluorescence Probe:
~1 cm
OFT Coupling (Feedthrough) (may be different for fluorescence technology):
(for transformer wall application, and other similar applications)
ST Coupling (also called ST-ST Mating
(for other general-purpose applications)
ST-ST Extension Cable
Other options and configurations are also possible; contact Neoptix for more information.
Document no. G1041r03
Copyright Neoptix Canada LP
11
2.2 Calibration
Your T/Guard thermometer comes factory-calibrated. Experience has shown that re-calibration is not
required over the whole product life; however, if your ISO rules state that an annual re-calibration is required,
then it is your responsibility to comply with those rules. For laboratory applications, a new calibration is
standard every 12 months or whenever performance verification indicates that calibration is necessary; NIST
traceable calibration certificates are available. All calibrations are performed at the factory. Contact your
Neoptix Representative for further information.
2.3 Transformer applications
One of the main applications for the T/Guard product is monitoring temperature of hot spots in power
transformers. Since its inception, Neoptix has developed expertise in this application, and is considered as a
world leader in this field. Sister products of the T/Guard, the T/Guard2, T/Guard-Link, T/Guard-408, are fully
dedicated to the power transformer industry. Neoptix publishes a User Guide, called “Probe Installation
Guide”, totally dedicated to the power transformer industry; do not hesitate to ask for your copy if you are
working in this field (Neoptix document # g1009). Please note that this guide discussed the application of T2
probes based on the GaAs technology, however, the techniques used to handle both type of probes are very
similar.
Document no. G1041r03
Copyright Neoptix Canada LP
12
3 UNPACKING
Before using your T/Guard thermometer, check the box content to be sure all items have been included. Your
package should normally contain:
•
•
•
•
•
•
T/Guard-TGL-FL signal conditioner unit
Mating connectors for the power input, RS-485 and for the analog outputs (total 3)
User manual (this manual) (paper copy not included, supplied as a PDF document on CD)
Neoptix OptiLink™ Pro software on CD (supplied with an unlocking key to transformer OEMs only)
Neoptix OptiLink-II software on CD
Calibration Certificate.
Warning: NO AC power supply is included with this T/Guard unit; a power supply must be ordered
separately, or supplied by the user.
Options:
• Fiber optic temperature sensor probes
• Fiber optic extension cables
• Fiber optic coupling and feedthroughs
• USB to RS-485 communication interface (NXP-349)
• Power supply module (universal input: 90-265 VAC, 47-63 Hz or 110-370 VDC). Table top and DIN
mounted models are available. Required output is 24 VDC, ~0.5 Amp
• Carrying case & accessories.
Make sure all listed items have been received and are in good condition. Note any evidence of rough
handling in transit; immediately report any damage to the shipping agent. Should a part be missing or
damaged, please contact your distributor immediately. Returns must be made with the original packaging,
accompanied by an return authorization number (RMA). Your distributor will provide you with information
concerning the return of merchandise.
The carrier will not honor damage claims unless all shipping material is saved for inspection. After examining
and removing contents, save packing material and carton in the event reshipment becomes necessary.
Document no. G1041r03
Copyright Neoptix Canada LP
13
4 T/GUARD-TGL™ HARDWARE REFERENCE
The following figure shows the T/Guard thermometer mechanical layout, including dimensions and mounting
hole positions (4 x 6-32 screws required):
6
4
5
2
3
1
The following drawing gives more details on the electrical connectors, as well as pin-out information.
Document no. G1041r03
Copyright Neoptix Canada LP
14
Description of each pointed elements:
1) RS-485 serial communication interface: This port is used to configure and extract information for
2
the instrument. This modular connector can be wired externally by the user in 2-wire mode (half
duplex) or 4-wire mode (full duplex). See Chapter 5 for a complete description of the serial
commands that are available. Please note that all software packages that can be used with the 405
can be in either mode. It is very important that your outside wiring and interface to computer match
your selection of 2W or 4W.
2 LEDs (Transmit, Receive) can be used to monitor any communication activity, especially useful when
debugging a communication link.
2) Analog output connectors: There are a total of 16 connection pairs, one pair for each channel.
Prior to shipment, your T/Guard thermometer was factory set to 4-20 mA analog output. The
minimum analog output value corresponds to minus 100°C and the maximum analog output value
corresponds to 300°C. The thermometer normal range is from minus 80°C to 250°C, so a minimum
value indicates an under-range error; likewise, a maximum value indicates an over-range error
condition. If there is a sensor problem for a given channel, the analog output may take one of the
following 3 states (refer to the serial “o” command, Section 5.3):
a) It will toggle between the minimum and maximum values, at approximately 0.5 Hz; this indicates a
sensor problem for that channel (“o0”). This is the default setting; to change it, you will need to use
the serial command “o1” or “o2”.
2
2-wire configuration can be done by shorting together respectively RX- and TX-, and RX+ and TX+.
Document no. G1041r03
Copyright Neoptix Canada LP
15
b) The analog output is forced to its maximum value (“o1”); this would indicate a “too-hot” situation.
c) The analog output is forced to its minimum value (“o2”); this would indicate a “too-cold” situation.
Warning: 1- Do not connect any external voltages to these outputs; this may cause permanent
damage to the thermometer unit. 2- Avoid shorting output leads together, as this may destroy the
electronic drivers inside the unit.
16-position mating connectors are supplied with the T/Guard system. When using long wires to the analog
outputs (4-20 mA), it is recommended to use shielded twisted pairs, size AWG 24 or 22. The shield should be
grounded at one end only, preferably the T/Guard end.
3) 20-28 Volt DC power connector: You must use an external DC power supply. Internal electronic is
protected against wrong polarity wiring. This model has an internal fuse (not user replaceable), but
does not have a power switch.
A 2-position mating connector is supplied with this T/Guard system. The provided Phoenix Contact
connections are made to accept wire gauges ranging from 24 to 14 AWG. Optimal torque is 0.22 to 0.25 N.
4) 1-button keypad: This button can be used to switch operating mode: from Modbus mode, or
Neoptix mode which can be useful to configure this T/Guard; serial commands or OptiLink can be
used. Push down for at least 3 seconds to toggle mode.
The operating mode (Modbus or Neoptix-ASCII) is confirmed by the LED located near the push-button. This
LED will give the following information:
Solid green:
Solid yellow:
Green blinking 5x:
Yellow blinking 5x:
Yellow blinking:
Modbus mode is currently active
Neoptix mode (ASCII serial terminal)
Temporary blinking 5 times at power on = Neoptix calibration enabled
Temporary blinking 5 times at power on = Competition calibration enabled
Continuous blinking = fatal error (contact factory).
5) Sensor connector(s): These are ST type connectors, mating to each of the 8 optical temperature
sensors. If you need to extend a sensor fiber, you should use optional extension cables that are
available from your Neoptix supplier.
Warning: It is mandatory to keep dust caps (black) on unused channels, as light that might exist from the
unused connectors can trigger false temperature readings on other channels. It is very important that these
caps be black (keep the caps supplied with the instrument by Neoptix).
Warning: The fiber type that is used with your T/Guard thermometer is of a special type, and it is
recommended that you get ALL of your extension cables from Neoptix or a Neoptix authorized distributor.
6) Ground connection screw: For best performance and immunity to local electrical noise, it is
mandatory to hard-wire the T/Guard enclosure to the control cabinet local ground.
Document no. G1041r03
Copyright Neoptix Canada LP
16
5 SERIAL COMMAND PROTOCOL DESCRIPTION
You can communicate with your T/Guard thermometer via its standard RS-485 port. A description of the
cable requirements is given above, under front panel item # 1.
Recommendation: The use of OptiLink-II software is highly recommended as an alternative to the serial
command protocol described in this chapter; for more information on OptiLink-II, see chapter 6 below.
Serial functions (or commands) can be accessed or simply with a computer and communication software
(such as Windows HyperTerminal or Tera-Term) or with OptiLink’ Console software package. Your software
should be set at 9600 Baud, 1 Stop-Bit and No-Parity. Furthermore, the new OptiLink-II software can also be
sued to upload most parameters.
5.1 Using HyperTerminal in Windows
3
Hyper Terminal is a standard Windows program (XP and previous versions ) that can be easily used to
exercise your T/Guard thermometer. To use Hyper Terminal you first set its properties as follows:
1- In the “Connection Description” window, enter a name that suits you, such as “Neoptix-TGuard”.
Click OK.
2- In the next window, “Connect To”, select COM1 (or another COM port, if you are planning to use
another port than COM1) in the box called “Connect using”. Click OK.
3- Then the COM1 Properties window will come up. As indicated above and as shown in the figure at
right, set the port parameters to 9600 Baud, 1 Stop-Bit and No-Parity; Flow control must be set to
None. Click OK.
4- You are ready to go. Type “h E ” to test your setup (see below). Warning: the characters that you
enter are not echoed to you!
5.2 Serial command help menu
To use the following commands, you will need a properly configured serial port client such as HyperTerminal
or Tera-Term on the Windows platform, or the like.
3
Vista, Win-7 and Win-8 users: HyperTerminal is not included with Vista and subsequent Windows versions.
However, an equivalent program (HTPE) can be downloaded (for a fee) at the following website:
http://www.hilgraeve.com/htpe/download.html. Tera-Term (freeware) has also given good results; see
http://ttssh2.sourceforge.jp/ .
Document no. G1041r03
Copyright Neoptix Canada LP
17
We recommend HyperTerminal as it was used extensively during the development of the T/Guard TGL-FL,
and it provides file transfer functionalities that are not found in all such software tools.
However it should be noted that Tera-Term is a newer program, is friendlier for resizing windows, copying
and pasting, as well as changing font and background color on the terminal’s command prompt, and is free
and Open Source (http://ttssh2.sourceforge.jp/ ).
b
e[1;2;...;n]
f[i;j]
h
i
mb
Return enclosure temperature
Enable channels to scan; if no argument scan all;
To disable, use e-[channel number]
Set point adjustment on channel [i] to [j] (this will create an offset)
Help menu (this screen)
Get factory and status Information
Modbus configuration tool (mb:? For help). Usage:
mb:t,b,p,a
b (baud) : 0=9600, 1=19200, 2=38400, 3=57600, 4=115200
p (parity) : 0=even (default), 1=odd, 2=none
a (addr) : 1 to 247 (dec)
Example : mb:0,1,0,21
For RTU mode at 19200, even parity, Modbus address 21
n+[i]
o[i]
resetoff
s[i;j]
t[i]
u[i]
y
z[i;j]
Set calibration (0 = Neoptix probes, 1 = Competition)
Analog out if error (0:Max-Min 1Hz, 1:Max level, 2:Min level)
Reset all offsets to 0.0, for all optical channels
Specify analog output Span [j] for channel [i]
Get Temperature reading, channel [i]
Unit(c=øCelcius, f=øFahrenheit)
Signal strength
Temperature [j] for analog output Zero on channel [i]
All commands must be terminated by a carriage return E
or lower case can be used for letter characters).
and are case insensitive (i.e. either upper case
5.3 Detailed Description of the ASCII Commands
•
•
•
b ...... ...... Return enclosure temperature
Gives the temperature inside the T/Guard TGL enclosure, in units as specified by the “u” command.
e[1;2;...;n] .. Enable channels to scan
By default all channels are enabled, but a specific channel can be disabled. A disabled channel will
show “----“on its red LED display. See the “verbose prompt” paragraph below to learn how to
differentiate between a defective and disabled channel on the command line.
Set point adjustment
This command forces an actual temperature reading (j) for channel # i; any resulting offset will be
applied to all future measurements for that channel. This is useful to compensate for small
temperature deviations that may occur between sensors, such as forcing older Nortech-Fibronic, Inc.
probes to read similar temperatures as the newer Neoptix probes. A maximum offset of +/-5 degrees
C is recommended; if it is required for you to force a larger offset, your thermometer probably
requires a new factory calibration; In that case, please consult your distributor or Qualitrol Support for
more information. This procedure can also be called a one-point calibration. If the “j” parameter is not
used, the command will clear any previously entered offset for channel “i”.
f[i;j] ........
Remember that this command alters the internal calibration of the instrument. Always follow the
following recommended procedure:
I.
Apply a stable and known temperature to the sensor tip;
II.
Check the display reading for abnormal deviation from the known temperature;
Document no. G1041r03
Copyright Neoptix Canada LP
18
III.
IV.
V.
Send the “f” command followed by channel number, a blank character and the
reference temperature value (example “f2;27.0” followed by [ENTER]).
Temperatures must be entered in units as specified by the “u” command;
Wait a few seconds;
Confirm that the readings correspond to the known temperature.
You can revert at any time to the factory calibration using the “resetoff” command. This will in effect
clear any offset that you may have entered, for all channels.
Important: always make sure you are reading a valid temperature value before using the “f“
command; otherwise, your thermometer may display a random value for a channel where the “f”
command has been used.
•
h ............. Help menu
This will list the first half of all available commands. To see the second half, as indicated, enter the
letter “p”. The listing will fit inside a HyperTerminal prompt window without cropping.
•
i ............. Get factory and status Information
Returns general information regarding the instrument, including:
o Model number
o Unique serial number
o Number of Channels on device
o Calibration Type (Neoptix probe or Nortech-Fibronic, Inc. probe)
o Internal Software version
o Factory Calibration Date
o Temperature unit (degrees Celsius or Fahrenheit)
o Analog out, if error
o Analog Zero per channel
o Analog Span per channel
o Enabled or Disabled status per channel
o Temperature offset per channel
•
mb .........Modbus configuration tool
Modbus configuration tool. mb:t,b,p,a
Where t (type) : 0=RTU (default), 1=ASCII
b (baud) : 0=9600, 1=19200, 2=38,400, 3=57,600, 4=115,200
p (parity) : 0=even (default), 1=odd, 2=none
a (addr) : 1 to 247 (dec)
Example: mb:0,1,0,21 For RTU mode at 19200, even parity, Modbus address 21 (15hex)
•
Toggle calibration (n+0 for Neoptix, n+1 for non-Neoptix probes)
“n+0” or “n+1” This command can be used to change the calibration type that is active at any given
time. “n+1” should be used to enable the non-Neoptix calibration, while “n+0” should be used for
Neoptix probes. Warning: It is possible that new calibration tables will be introduced in the future; in
this case, calibration #”n+2”, #”n+3”, and so forth, may become acceptable also.
•
Analog out if error (0:Max-Min 1Hz, 1:Max level, 2:Min level)
This command can be used to change the behavior of the analog output(s) in a situation when the
T/Guard-FL thermometer cannot read a temperature for this channel. “i” can take one of three
values:
o i=0. This is the default value, to assure compatibility with older Nortech Fibronic inc. probes.
With this setting, the analog output will oscillate between its maximum and its minimum
value at a rate of approximately 1Hz.
o i=1. In case of a probe problem, the analog output for this channel will be forced to its
maximum possible value (e.g., 10V or 20mA).
n+[i] .........
o[i] ..........
Document no. G1041r03
Copyright Neoptix Canada LP
19
o
i=2. In case of a probe problem, the analog output will be forced to its minimum possible
value (e.g., 0V or 4mA).
•
resetoff ...... Reset all offsets to 0.0, for all optical channels
Please refer to command “f”, described above. This will reset the offset for all channels, using a
single command
•
Specify analog output Span [j] for channel [i]
This command will set the analog output span for the analog channel # i, the “i” parameter specifies
the channel to which the command is addressed. The “j” parameter specifies the span that can range
from 1.0 to 1000.0, in temperature units (Celsius or Fahrenheit) that are defined by the “u” command.
•
Get Temperature reading, channel [i]
Without parameters, the “t” command will display temperatures for all available channels in the
temperature unit currently defined on the system. If one provides a valid channel number, only the
temperature for that channel will be displayed. An unavailable temperature will be displayed as “----“.
Refer to the verbose prompt command to obtain more information on an unavailable temperature.
•
Unit(c= degrees Celsius, f= degrees Fahrenheit)
Set units of measurements to either Celsius (i=c) or Fahrenheit (i=f). Note that this unit selection is
the same as the temperature unit selection made from the keypad (if the display option is installed).
s[i;j] ........
t[i] ..........
u[i] ..........
Ex: “uc“ followed by a carriage return, to select ºC (Celsius).
•
Signal Strength
The “y” command can be used to confirm the “signal strength” of a probe and/or its connection. It can
be used as a diagnostic tool to confirm the good operation of a probe and its extension cable (if
applicable) connected to a channel. The “Light” parameter returned value should be around 3000
and the “LED” parameter should be less than 4000; a lower value is better. A minimum of 2000 (LED
parameter) is required for a channel to return a temperature.
For a more complete discussion regarding this parameter, please refer to Appendix 5.3.2.
•
Temperature [j] for analog output Zero on channel [i]
This command is used in conjunction with the “s” command, as it sets the temperature that
corresponds to the analog zero (minimum value of analog output). The “i” parameter specifies the
channel to which the command is addressed; valid values are 1, 2, 3 and 4. The “j” parameter
specifies the zero temperature value, and can range from -100.0 to 1000.0, in units that are defined
by the “u” command. Factory default is -100.0.
y .............
z[i;j] ........
5.3.1 Recommended configuration, for transformer applications
For transformer applications, it is recommended that the following parameters be set as follows:
Feature
Analog output zero
Analog output span
Analog output, if no
probes
Benefit description
Adjust the analog output zero setting, for each channel.
Warning: this command must be sent individually for each
channel.
Adjust the analog output span setting, for each channel.
Warning: this command must be sent individually for each
channel.
Adjust the analog output behavior, when no probe is detected.
Command
z1 -50
z2 –50, etc.
s1 200
s2 200, etc.
See “o” command
description, above
Most of these command settings can be confirmed with the “i” command.
Document no. G1041r03
Copyright Neoptix Canada LP
20
5.3.2 Interpretation of “y” command results
The Neoptix T/Guard-FL systems are fitted with a function that gives an evaluation about probe signal
strength or signal power; in Neoptix jargon, this is called the “y” command. The easiest method to access this
command is to use Windows’ HyperTerminal.
Typically, the “y” command will return the following information:
CH1: 85%, Light:3012, LED:840, status:1, +24.5 Tdecay:1460
CH1 indicates the channel number (typically 1 to 8, for an 8-channel T/Guard system)
The percent value (85%) is an evaluation of the probe signal strength, based on calculations involving both
parameters Light and LED.
LED parameter: gives an indication about the light source intensity for this channel. It ranges from 500 (weak
LED) to 4000 (intense LED). A weaker source is usually preferred and indicates a “healthy” probe.
Status: this is a code which value depends on the previous 2 parameters (light and LED).
1 Probe connected, no fault conditions
2 Probe disconnected, Probe recovery mode
3 Probe connected, Max LED current
4 Probe connected, low light level
5 Subtle convergence problem or EEPROM Write
6 No signal, possible LED Failure
Light parameter: 3012 is a signal strength detected by the T/Guard internal sensor, going from a range of
about 100 (noise level) to 4000. You can interpret it approximately as follows:
• 0 to ~300: no probe is detected. Temperature reading is rejected
• ~300 to 1000: a probe is present, but exhibits a weak signal. This corresponds to a % power level
ranging from 0 to 10%.Temperature reading is rejected
• 1000 to 3100: a good probe is present (the higher the power the more healthy the probe). The %
power will be more than 10% here.
• 3100 to 4000: probe saturation. Electronic problems?
Tdecay parameter: This is given for information only. It gives no information regarding the performance of the
probe.
To summarize, a very good probe is characterized by a good power indicator (>2500) and by a small LED
intensity (<3000). Also, dirty connectors will contribute to lower probe strength; always insure that all fiber
connections are clean before evaluating probe performance.
Warning: After a power-on or after changing (or exchanging) probes or extension cords, allow sufficient time
for the T/Guard optimization process to complete before invoking the y command; it most cases, it may take
as much as 1 minute for this optimization to complete.
5.4 Typical temperature reading sequence
Once all parameters have been set, the following sequence should normally be followed to extract
temperature information from your Neoptix thermometer. 2 procedures can be used for this purpose. The first
method consists in using the “ta” command (preferred), while the second sequence would be:
character.
a)
The host computer should send the “t” (or “t[i]”) command, followed by an E
b)
The thermometer responds by echoing the requested temperature values, as indicated
above; the transmission is terminated by a “*” character.
c)
When the “*” character is received, it is suggested to immediately terminate the dialog
character.
session by having the host computer issue the “r” command followed by a E
Document no. G1041r03
Copyright Neoptix Canada LP
21
5.5 Error Codes
The following error messages are displayed under certain error conditions:
ASCII
comment
Err2
Display
Err5
Err6
Analog Out
Description
Internal memory checksum error. Memory corruption. When a
channel has its calibration table corrupted, the corresponding front
panel LED will continuously flash to indicate the corruption problem.
Contact Neoptix.
Argument out of range
Unrecognized command
*: The exact analog output behavior is a function of the command “o”; see previous Chapter.
Note that these error codes are not applicable when using the OptiLink software package. This high-level
software package is programmed to automatically handle all types of errors, as outlined in the next section.
Document no. G1041r03
Copyright Neoptix Canada LP
22
6 OPTILINK-II SOFTWARE DESCRIPTION (FOR THE TGL-FL)
OptiLink-II is a software tool that can be used to configure the TGL-FL, upload a new firmware version, etc. It
offers a medium that is friendlier than other tools such as HyperTerminal. Furthermore, it allows to produce
real time graphic, and to store the resulting acquired data into an Excel compatible file. The goals and
purposes of this software packages are as follows:
• Display temperature information, for up to 8 channels
• Initialize and manage TGL-FL optical channel and associated control parameters
• Upload new TGL-FL firmware (software upgrade).
Information: At the time of this writing, the TGL-FL module is not compatible with the older OptiLink (or
NeoLink) software.
This software is still in development; contact Neoptix for the latest version (January 2013). Version 1.37 is
described below.
OptiLink-II can simultaneously support up to 4 Neoptix T/Guard instruments, either through their serial COM
port or through their Ethernet port (if available). Currently, this tool supports the T/Guard models 408, 405 and
T/Guard-Link-FL; it is expected that compatibility to more instruments will be developed in the future.
6.1 Installation and initial operation
The Neoptix OptiLink-II tool is installed using a standard Microsoft Windows setup.exe package. Double-click
on setup.exe to launch and accept the usual Windows Security warning to proceed.
OptiLink-II requires the Microsoft .NET Framework version 4.5. If this dependency is not present on the target
computer, then it will be automatically installed first and a reboot will probably be required before resuming
the installation.
On the T/Guard TGL-FL, make sure you have set the protocol to “Neoptix” (this is an easy thing to overlook).
Make sure your serial port parameters are correct and that your cable matches your port duplex settings!
Neoptix protocol serial settings are baud 9600, Parity None and Stop bits 1. The LED on the unit will confirm
which mode is currently enabled (yellow for Neoptix, green for Modbus).
Warning: To reinstall the software, or install a new version, you will need to first uninstall the older version.
This must be done by using the “Program and Features”, found in Windows Control Panel.
After installing all the required software, a master application window will open as follows:
All applications will require that you know which serial com port will be used by OptiLink-II. So each
application has a COM port selector and a Connect button. The COM port selector will only list the currently
available ports on your Windows. This is the same list of available ports you would view in your Windows
Hardware Device Manager:
Document no. G1041r03
Copyright Neoptix Canada LP
23
Select the COM port connected to your TGL-FL and click the “Connect” button.
Information confirms you have indeed communicated with the T/Guard and you will be provided with
additional menu items.
6.2 Acquire and Display Temperature Data
The “Acquire Temperatures” application will display up to 64 temperatures (16 temperatures for up to 4
instruments), as follows:
This window also includes a “Graph” button, which will open an additional window that will show a trend
graphic for all previously selected channels (channel selection should be made prior to opening this second
window). See section 6.2.2 for more information.
The main window also includes a feature whereby the user can save the data acquired since this window
was open; this data file has the default extension .tem, and is a .CSV type file that can be directly read by
Excel. Direct saving to an .xls file is also possible. Please note that data is being acquired ONLY when the
“Acquire temperatures” window is active; however, the data will be saved only after the “Save log” button is
clicked; this will open the following window:
Document no. G1041r03
Copyright Neoptix Canada LP
24
If you have more than one instruments connected, then instead, this window will look like this, where more
options are available to conditionally save specific channels:
Then, you will need to enter a file name and select if you want to save your data as a text .csv file, or as a
genuine Excel file already acquired in kept in memory, and can be saved as any time using the menu item
“Log” and then “Save log”, or by using the “Save Log” button found in the lower right corner of the main
window. It is also possible to save data directly to Excel, if the file you select to save it is an .xls file, as
illustrated here:
Then, all future data will be logged on your hard disk.
The latest version of OptiLink-II now supports data transfers to an Excel file; this transfer can be punctual or
can proceed as temperature data is being acquired. Make sure you download the latest version from the
Neoptix web site (www.neoptix.com).
Warning: this current implementation is weak in term of supporting user interaction with the Excel file during
temperature acquisition; make sure you do not write or handle anything in the Excel application while an
acquisition is active.
Information: This PC data logging never interferes with the instrument on-board logging. If the data logging
is enabled on your 408 instrument, this logging will continue uninterrupted whenever OptiLink-II is running.
6.2.1
Data Acquisition, Logging and Graphing Rates
Logging and graphing rates (or frequencies) in OptiLink-II is very flexible, but could be also a bit confusing.
This section explains the acquisition rate philosophy that is implemented in the software.
When the “Display Temperature” window is active, the software will continuously acquire and temporarily
store the data in a very large software buffer; this buffer is being filled at a rate that is called “Acquisition Rate”
(now fixed at 1 per second; averaging is possible, and this will show down the acquisition rate to one per
minute. This buffer will keep filling as long as the “Acquire temperatures” window is active.
Document no. G1041r03
Copyright Neoptix Canada LP
25
6.2.2
Graphs
This window allows presenting in graphical form both data 1) that is now being acquired, and 2) data
previously acquired and that is saved in the instrument log memory (not implemented at the time of this
writing). Similar to the previous windows whereby one can display up to 64 channels from 4 instruments, this
window can also display up to 64 channels.
The example below shows a graph while data is being acquired.
The code behind this window is quite heavy, so this window may sometime appear non-responsive; please
be patient!
Description of some options that are offered to you:
•
•
•
•
•
You can adjust the colors of the window background, marker style, etc. With the 3D option, more
variances are available, such as graph rotation, etc.
The graphic can be zoomed, by first right-clicking anywhere in the graphic area, and select “Zoom”;
then select an area that you would like to zoom with your mouse. The zoom is cancelled either after
one minute, or by clicking the “Zoom out” button.
The graphic can be panned, by first right-clicking anywhere in the graphic area, and select “Pan”;
then use your mouse to move the graphic area.
The window can be saved as an image (jpeg, png or gif), and can be printed.
A “Pause Graph” option is useful if one want to examine in details some parts of the graphic. The
graphic can be later resumed, without loss of data.
6.3 Optical channel settings tool
This tool is useful to set up parameters that are related to the optical channel of your T/Guard system. You
need to connect (only if you are not already connected) and then “Get Config” to download the current
information, which will be displayed as follow (for an 8-channel system):
Document no. G1041r03
Copyright Neoptix Canada LP
26
Once you have made the required changes to the displayed matrix of parameters, you must upload these
changes by clicking “Apply Changes”.
6.4 Serial protocol parameters
This tool is used to set other parameters, such as parameters that are linked to the Modbus interface (party,
baud rate, etc.).
6.5 Firmware update tool
This tool provides a simple way to upgrade the TGL-FL internal software code. Please note that such
upgrade can take 10 to 15 minutes or more when using the OptiLink-II software.
To get an upgrade file, you must contact Neoptix support, at [email protected].
6.6 Troubleshooting
The serial port is a wonderful thing but if you use it long enough, you will soon start using a “lucky cable” and
your working serial port settings will be saved in at least two separate safe places in case of fire. Sometimes
for seemingly no reason at all, there are basic communication issues with the serial port. Here are some
things you can try to fix those issues:
1- Make sure the serial protocol on the T/Guard is set to “Neoptix”. The Modbus mode is not supported
by OptiLink-II.
2- Make sure the COM port is listed correctly in the Windows Device Manager. Check the port
properties.
3- Use the appropriate cables:
During the development of the tool, the serial cabling we used was a USB to RS-485
converter:
Document no. G1041r03
Copyright Neoptix Canada LP
27
The standard interface on the T/Guard is a RS-485 port, not a RS-232 port. You will probably
need a converter, either a RS-232 to RS-485 converter or a USB to RS-485 converter; the
latter is recommended (Neoptix part number NXP-349).
Make sure your wiring matches your computer interface. For example, if your wiring is for 4wires, make sure the whole cabling and software setting are set for full-duplex.
If part of your wiring follows the RS-232 protocol, make sure its cable is kept to a maximum
length of 2 meter [6 feet], as the baud rate can be as high as 115,200 (RS-485 cables can be
as long as 1 km at these high baud rates).
4- Make sure your duplex settings match.
5- Try connecting to the port with a HyperTerminal client to see if it is responsive.
6- Try rebooting Windows.
7- Try re-installing your USB to serial port drivers on Windows.
8- When reinstalling OptiLink-II, make sure you use the Programs and Features facility in Control Panel
of Windows.
Document no. G1041r03
Copyright Neoptix Canada LP
28
7 THE MODBUS PROTOCOL
The MODBUS protocol is a messaging structure developed by Modicon in 1979, used to establish masterslave / client-server communication between intelligent devices. It is a de-facto standard, truly open and the
most widely used network protocol in the industrial manufacturing environment. The Modbus protocol
provides an industry standard method that Modbus devices use for parsing messages. The Neoptix Modbus
option has been developed to support Modbus over a Serial Line protocol.
A master-slave type system has one node (the master node) that issues explicit commands to one of the
“slave” nodes and processes responses. Slave nodes (such as the T/Guard system) will not transmit data
without a request from the master node, and do not communicate with other slaves.
At the physical level, Modbus over Serial Line systems may use different physical interface (RS-485, RS232). RS-485 two-wire interface is the most common. As an add-on option (contact Neoptix), RS-485 fourwire interface may also be implemented. Furthermore, the Neoptix Modbus option has been successfully
tested over a TCP/IP network, using a Lantronix device server.
Neoptix has experienced some communication problems when configuring multiple Modbus-RS-485 systems
together. This is usually caused by unstable grounding problems, such as what can be encountered when
dealing with power transformers. To solve these problems, your RS-485 lines should be opto-isolated before
connecting them to the master Modbus bus. Refer to Section 7.6 for more information.
7.1 Configuring the Modbus option
Enabling and configuring the Modbus option must be done when the T/Guard system is not in Modbus
communication mode. When the Modbus option has been purchased, the help menu (see Section 5.2) is
slightly modified, as the following line is added:
mb:
Modbus configuration tool, type: 'mb:?' for help;
Typing “mb:?” gives:
Modbus configuration tool
mb:t,b,p,a<CR>
Where t (type)
b (baud)
p (parity)
a (addr)
: 0=RTU (default), 1=ASCII
: 0=9600, 1=19200
: 0=even (default), 1=odd, 2=none
: 1 to 247 (dec)
Example: mb:0,1,0,21
For RTU mode at 19200, even parity, Modbus address 21 (15hex)
Note for OptiLink-II software users: The Modbus parameters can also be set up using OptiLink-II. See
Section 6.4.
7.2 Supported serial transmission mode
The transmission mode defines the bit contents of the message bytes transmitted along the network, and
how the message information is to be packed into the message stream and decoded. The current
implementation of Neoptix-Modbus supports only the RTU mode; ASCII mode is a future option.
Document no. G1041r03
Copyright Neoptix Canada LP
29
7.3 RTU transmission mode
Coding system
Number of data bits per character
8 bit binary
10 bits
Parity
Bit transfer rate
Duplex
Error checking
Polynomial
Bit transfer order
End of message
start bits –1
data bits – 8
parity bits – 0 or 1(even or odd)
stop bits – 1 (2 if no parity bit used)
Not used or even or odd parity
9600 or 19200 Baud
Full or Half
CRC (cyclic redundancy check)
(CRC-16 101000000000001
LSBit first, MSByte first
Idle line for 3.5 or more characters.
The link layer includes the following properties /behaviours:
• Slave address recognition
• Start / End of Frame detection
• CRC-16 generation / checking
• Transmit / receive message time-out
• Buffer overflow detection
• Framing error detection
• Idle line detection.
7.4 Modbus function code and register addresses
Warnings:
• Registers can only be read in groups of up to 16 registers.
• Multiple write to more than one register is not supported.
Temperature if no signal: -9996 (-999.6)
Temperature if channel is disabled: -9995 (-999.5)
7.4.1 Register content details
Function
code:
Type:
Address
00001
00002
00003
00004
00005
00006
00007
00008
00009
00010
00011
00012
00013
0x01, 0x05, 0x0F
R/W, Bit access
Reg
Name
0x00
Channel 1 enable
0x01
Channel 2 enable
0x02
Channel 3 enable
0x03
Channel 4 enable
0x04
Channel 5 enable
0x05
Channel 6 enable
0x06
Channel 7 enable
0x07
Channel 8 enable
Reserved
0x08
0x09
Calibration type
0x0A
Unit
Reserved
0x0B
Reserved
0x0C
Document no. G1041r03
“0” meaning
disable
disable
disable
disable
disable
disable
disable
disable
valid
Neoptix
C
valid
valid
Copyright Neoptix Canada LP
“1” meaning
enable
enable
enable
enable
enable
enable
enable
enable
invalid
Other
F
invalid
invalid
Note
Not implemented
Not implemented
Not implemented
Not implemented
Not implemented
Not implemented
Not implemented
Not implemented
30
00014
00015
00016
0x0D
0x0E
0x0F
Reserved
Reserved
Reserved
Function 0x02
code:
Type:
Read only, Bit access
Address
Name
10017
0x10
Channel 1 status
10018
0x11
Channel 2 status
10019
0x12
Channel 3 status
10020
0x13
Channel 4 status
10021
0x14
Channel 5 status
10022
0x15
Channel 6 status
10023
0x16
Channel 7 status
10024
0x17
Channel 8 status
Reserved
10025
0x18
Reserved
10026
0x19
Reserved
10027
0x1A
Reserved
10028
0x1B
Reserved
10029
0x1C
Reserved
10030
0x1D
Reserved
10031
0x1E
Reserved
10032
0x1F
* No probe or broken probe
Function
code:
Type:
Address
40033
40034
40035
40036
40037
40038
40039
40040
0x03
40041
40042
40043
40044
40045
40046
40047
40048
40049
40050
40051
0x28
0x29
0x2A
0x2B
0x2C
0x2D
0x2E
0x2F
0x30
0x31
0x32
Read only, 16 bits access
Name
0x20
Channel 1 temperature
0x21
Channel 2 temperature
0x22
Channel 3 temperature
0x23
Channel 4 temperature
0x24
Channel 5 temperature
0x25
Channel 6 temperature
0x26
Channel 7 temperature
0x27
Channel 8 temperature
Internal temperature
Number of channels
Soft version
Soft revision
Device type
Reserved
Reserved
Reserved
Channel 1 status
Channel 2 status
Channel 3 status
Document no. G1041r03
valid
valid
valid
invalid
invalid
invalid
0 meaning
No signal *
No signal *
No signal *
No signal *
No signal *
No signal *
No signal *
No signal *
valid
valid
valid
valid
valid
valid
valid
valid
1 meaning
Probe detected
Probe detected
Probe detected
Probe detected
Probe detected
Probe detected
Probe detected
Probe detected
invalid
invalid
invalid
invalid
invalid
invalid
invalid
invalid
Value
Signed 16 bit integer (temperature 1 * 10)
Signed 16 bit integer (temperature 2 * 10)
Signed 16 bit integer (temperature 3 * 10)
Signed 16 bit integer (temperature 4 * 10)
Signed 16 bit integer (temperature 5 * 10)
Signed 16 bit integer (temperature 6 * 10)
Signed 16 bit integer (temperature 7 * 10)
Signed 16 bit integer (temperature 8 * 10)
Signed 16 bit integer (device internal
temperature * 10)
Signed 16 bit integer
Signed 16 bit integer
Signed 16 bit integer
Signed 16 bit integer
0x0000
0x0000
0x0000
Signed 16 bit integer
Signed 16 bit integer
Signed 16 bit integer
Copyright Neoptix Canada LP
Note
Note
31
40052
40053
40054
40055
40056
40057
40058
40059
40060
40061
40062
40063
40064
40065
40066
40067
40068
40069
40070
40071
40072
40073
40074
40075
40076
40077
40078
40079
40080
40081
40082
40083
40084
40085
40086
40087
40088
40089
40090
40091
40092
40093
40094
40095
40096
0x33
0x34
0x35
0x36
0x37
0x38
0x39
0x3A
0x3B
0x3C
0x3D
0x3E
0x3F
0x40
0x41
0x42
0x43
0x44
0x45
0x46
0x47
0x48
0x49
0x4A
0x4B
0x4C
0x4D
0x4E
0x4F
0x50
0x51
0x52
0x53
0x54
0x55
0x56
0x57
0x58
0x59
0x5A
0x5B
0x5C
0x5D
0x5E
0x5F
Channel 4 status
Channel 5 status
Channel 6 status
Channel 7 status
Channel 8 status
Channel 1 light level
Channel 2 light level
Channel 3 light level
Channel 4 light level
Channel 5 light level
Channel 6 light level
Channel 7 light level
Channel 8 light level
Channel 1 LED current
Channel 2 LED current
Channel 3 LED current
Channel 4 LED current
Channel 5 LED current
Channel 6 LED current
Channel 7 LED current
Channel 8 LED current
Reserved
Reserved
Reserved
Reserved
Reserved
Reserved
Reserved
Reserved
Channel 1 analog zero
Channel 2 analog zero
Channel 3 analog zero
Channel 4 analog zero
Channel 5 analog zero
Channel 6 analog zero
Channel 7 analog zero
Channel 8 analog zero
Channel 1 analog span
Channel 2 analog span
Channel 3 analog span
Channel 4 analog span
Channel 5 analog span
Channel 6 analog span
Channel 7 analog span
Channel 8 analog span
Temperature if no signal:
Temperature if channel disabled:
Document no. G1041r03
Signed 16 bit integer
Signed 16 bit integer
Signed 16 bit integer
Signed 16 bit integer
Signed 16 bit integer
Signed 16 bit integer
Signed 16 bit integer
Signed 16 bit integer
Signed 16 bit integer
Signed 16 bit integer
Signed 16 bit integer
Signed 16 bit integer
Signed 16 bit integer
Signed 16 bit integer
Signed 16 bit integer
Signed 16 bit integer
Signed 16 bit integer
Signed 16 bit integer
Signed 16 bit integer
Signed 16 bit integer
Signed 16 bit integer
0x0000
0x0000
0x0000
0x0000
0x0000
0x0000
0x0000
0x0000
Signed 16 bit integer (temperature 1 * 10)
Signed 16 bit integer (temperature 2 * 10)
Signed 16 bit integer (temperature 3 * 10)
Signed 16 bit integer (temperature 4 * 10)
Signed 16 bit integer (temperature 5 * 10)
Signed 16 bit integer (temperature 6 * 10)
Signed 16 bit integer (temperature 7 * 10)
Signed 16 bit integer (temperature 8 * 10)
-9996 (-999.6)
-9995 (-999.5)
Copyright Neoptix Canada LP
32
Function
code:
Type:
Address
40081
40082
40083
40084
40085
40086
40087
40088
40089
40090
40091
40092
40093
40094
40095
40096
0x06
Write single register, 16 bits access
Name
Value
0x50
Channel 1 analog zero
Signed 16 bit integer (temperature 1 * 10)
0x51
Channel 2 analog zero
Signed 16 bit integer (temperature 2 * 10)
0x52
Channel 3 analog zero
Signed 16 bit integer (temperature 3 * 10)
0x53
Channel 4 analog zero
Signed 16 bit integer (temperature 4 * 10)
0x54
Channel 5 analog zero
Signed 16 bit integer (temperature 5 * 10)
0x55
Channel 6 analog zero
Signed 16 bit integer (temperature 6 * 10)
0x56
Channel 7 analog zero
Signed 16 bit integer (temperature 7 * 10)
0x57
Channel 8 analog zero
Signed 16 bit integer (temperature 8 * 10)
0x58
Channel 1 analog span
Signed 16 bit integer (temperature 1 * 10)
0x59
Channel 2 analog span
Signed 16 bit integer (temperature 2 * 10)
0x5A
Channel 3 analog span
Signed 16 bit integer (temperature 3 * 10)
0x5B
Channel 4 analog span
Signed 16 bit integer (temperature 4 * 10)
0x5C
Channel 5 analog span
Signed 16 bit integer (temperature 5 * 10)
0x5D
Channel 6 analog span
Signed 16 bit integer (temperature 6 * 10)
0x5E
Channel 7 analog span
Signed 16 bit integer (temperature 7 * 10)
0x5F
Channel 8 analog span
Signed 16 bit integer (temperature 8 * 10)
Function code
02 (02h)
Name
Read Discrete Input
03 (03h)
Read Holding Register
04 (04h)
Read Input Register
Exception code
01
02
Note
Usage
Optical signal present
Device configuration and
temperatures
Measured temperature values
Description
Function not supported
Register number out of range
7.5 ModScan examples
ModScan be purchased from http://www.win-tech.com/html/modscan32.htm. ModScan is a good and simple
program that can be used to exercise Modbus links. Furthermore, it can also be used to perform some simple
data logging. Please note that this program must be purchased separately, it is not supplied as a standard
item with the T/Guard system.
When started, the following screen will appear:
Document no. G1041r03
Copyright Neoptix Canada LP
33
Make sure your T/Guard systems are connected to your PC computer. Usually, as a PC computer does not
have a RS-485 port, you will normally need a RS-232 to RS-485 adapter or a USB to RS-485 converter
(available as option from Neoptix). You must first connect to your PC, by selecting Connection from the main
menu, and then Connect. The following window will open:
Make sure the Com port, baud rate and parity are set correctly (Word length should always be 8). Click OK.
Next, make sure “Device Id:” is set to the proper Modbus address. You should now be connected and ready
to monitor data. For example, the following figure shows values for all 101 input registers; you can see that
o
temperature on channel # 1 is 23.6 C, and so forth. Temperature values are multiplied by 10, and are given
as integers, not floating point numbers.
7.5.1 Monitoring multiple T/Guard
ModScan can be used to monitor either multiple T/Guard systems (as shown below), or multiple type of
variables, for example, the input registers and coil status. To do this, simply open multiple windows within
ModScan (from the main menu bar, select File and then New).
Warning: if you are opening many windows at once, it may be a good idea to slow down the data refresh rate.
This can be done by selecting Setup from the main menu, then Data Definition, and then by entering
something like 5 seconds in the Scan rate box; please remember than you will need to perform this setting for
each opened window.
Document no. G1041r03
Copyright Neoptix Canada LP
34
7.5.2 Writing parameters
To write data, you must select either Holding Register, or Coil Status. Then, from the main menu bar, select
Setup, then Extended, then Preset Regs. Make sure the value of “Number of Points” is 1 (you cannot write to
multiple registers at once). Make sure the Slave Device is corrected set (node number), and that the Address
points to the register address you want to modify. For example, to change a temperature value, say from 200
to 150, you will enter (remember to multiply the temperature value by 10):
Click update to “write” your new value.
7.5.3 Data logging
ModScan allows you to log either in a text file (.txt) or a database file (.mdb, Microsoft Access format). Both
are similar. Here is a quick example, saving to a text file.
Select Setup from the main menu, and then Text Capture. In the Save As box, enter a proper file name (if
using Windows Vista or Windows 7, make sure your file is not saved in the Program File directory). In the
next window, enter the frequency at which you want to log data:
Document no. G1041r03
Copyright Neoptix Canada LP
35
Data logging will automatically start. To end logging, select Setup and then Capture Off. The saved file can
then be open using WordPad (do not use Notepad). Typically, the saved data should look like this:
It is then easy to read this file as an Excel file.
Warning: If you have multiple ModScan windows open, then you will have to start multiple logging sessions.
7.6 Using opto-isolators, to deal with grounding problems
When experiencing communication problems with multiple Modbus-RS-485 systems, it is recommended to
add opto-isolators to your RS-485 lines. One opto-isolator module is required per T/Guard system. Neoptix
part number NXP-349 is a complete opto-isolator kit.
The installation instructions are summarized using the following two drawings. The first one is applicable
when you have a 2-wire RS-485 configuration, while the second one is for 4-wire installations.
Refer to information given in Section 8 for more information regarding converters that have ground insulation.
Document no. G1041r03
Copyright Neoptix Canada LP
36
8 RS-485 CONVERTERS
8.1 RS-485 to USB converter
As most PC computers today don’t have serial ports, Neoptix recommends using a RS-485 to USB converter
(also called adapter). It works great with all TGL-FL, T/Guard, T/Guard2, T/Guard-405 and T/Guard-408
systems. This converter works for both 2W and 4W RS-485 installations; no external power supply is
required. It also offers 2000V RMS optical isolation, which is great for electrically noisy applications or when
grounding may be a problem. The following figure shows this adapter (when purchased form Neoptix, the
adapter will be fitted with a DB9 connector suitable for use for both 2W and 4W applications, part number
NXP-349):
Note that this converter requires a special software driver that needs to be installed before you use the
device; you will find all details on the CD that comes with the unit.
Furthermore, the converter has 4 dip switches that need to be configured depending on your exact
installation: there are 2 possibilities, as follows:
a) If you have a 2W (2-wire, also called “half-duplex”) installation, then the four dip switches must be set
as follows:
a. Switch 1 must be on (RS-485 mode)
b. Switch 2 must be on (Echo Off)
c. Switch 3 must be on (2 Wire mode)
d. Switch 4 must be on (2 Wire mode).
b) If you have a 4W (4-wire, also called “full-duplex”) installation, then the four dip switches must be set
as follows:
a. Switch 1 must be on (RS-485 mode)
b. Switch 2 must be off (Echo On)
c. Switch 3 must be off (4 Wire mode)
d. Switch 4 must be off (4 Wire mode).
Warning: When dealing with very long cables (e.g., more than 300 meters), your RS-485 network might need
a termination resistor (typically 120Ω). Consult Neoptix for more details.
Document no. G1041r03
Copyright Neoptix Canada LP
37
9 USING THE TEMPERATURE PROBES
9.1 Caution
Each time you connect a temperature probe to the unit, the probe optical connector should be cleaned
beforehand. Otherwise, particles of grease or dirt may obstruct the device internal connector and affect the
measurements by completely blocking the signal or by generating too much attenuation when using a long
fiber length.
Never use a cloth other than the type recommended for fiber optic cleaning. Dampening the cloth with pure
isopropyl alcohol ensures good cleaning.
Occasionally, clean the inside of the bulkhead connector (attached to the thermometer) with a wipe or cotton
swab dipped in alcohol (2.5 mm mini foam swabs work best).
Locking nut
Ferrule key
Ferrule
For very dirty connectors, acetone can also be used, but should be used very carefully, as it is a very strong
solvent. Care should be exercised so you do not apply any on plastic materials, etc.
9.2 Description
The optical connector used is a standard ST type connector.
Device connector
Insert the Ferrule key here
Pins BNC type
To install the connector,
Slide the ferrule key gently into the above key.
Then, turning, insert the two BNC pins into
The appropriate slots on the ST connector
Document no. G1041r03
Copyright Neoptix Canada LP
38
9.3 Warning
The T1 probe is quite fragile and it must be handled carefully. Please note that any probe damages are not
covered by the standard warranty.
The probe tip is made of silicone rubber. Although silicone is resistant to a large number of chemical
aggressors, strong acids or alkali may damage it, especially at high temperature and/or if used for extended
periods of time. Warning: Solvents and fuel oils can cause problems for silicone rubber.
Neoptix also manufactures probes that have their tips made of epoxy. Just like silicone, epoxy resin is
resistant to a large number of chemical aggressors, strong acids or alkali may damage it, especially at high
temperature and/or if used for extended periods of time.
Contact your distributor for additional chemical compatibility information.
Do not expose your probes to temperatures that are higher than specified. Permanent damage can be
caused to probes that have been exposed to temperatures that are higher than their limits.
9.4 Working with long probes
This note is important when using probes or extension cables that have a combined length of 100 meters or
more. Working with long probes or extension cables may present special problems. To limit the amount of
back reflection caused by the fiber optic connector located on the thermometer unit, you may have to use a
matching gel optical couplant in the connector. This gel is a grease-like compound with high clarity, good
resolution properties and a refractive index close to quartz. Apply the gel onto connector end faces.
Avoid disconnecting the connectors for which gel has been used. In other words, it is recommended to use
the gel only for permanent installations. If the connectors are disconnected many times, you may have to
clean entirely the connector assemblies that have had the gel; this may require opening the instrument
enclosure to remove the excess gel.
Note that it is not required to use this gel with connectors that are far away from the thermometer electronic
unit.
9.5 Working with cryogenic probes
The use of a cryogenic probe required special attention. In particular, the probes become more brittle at very
low temperatures. Avoid cycling the probes quickly between cryogenic temp and ambient temperatures, as
this may cause material fatigue at the probe tips.
Warning
Always wear protective gloves and clothing when working with cryogenic material.
Never use general purpose probes at cryogenic temperatures. Neoptix sells special probes that can be used
at cryogenic temperatures.
Please note that your T/Guard thermometer will require a special factory calibration to be used at cryogenic
o
temperatures (below -80 C). Consult Neoptix for more information.
9.6 Installing probes in power transformers
Neoptix offers a complete line of T2 type probes that are specifically designed to be installed inside
transformer windings, to monitor temperatures of hot spots. Please refer to the Neoptix’ “Probe Installation
Guide Inside Power Transformers” (document G1009rxx) for recommendations and instructions on how to
install and handle these probes, to maximize your success rate for this application.
Document no. G1041r03
Copyright Neoptix Canada LP
39
10 INDEX
20-48 volt DC connector
16
Acquisition rate in OptiLink-II
25
Agreement, warranty
4
Analog output
Setting value if error, using serial commands
19
Span setting, using serial commands
20
Zero setting, using serial commands
20
Analog outputs
Connector description
15
How to adjust zero and span
15
How to control behavior when no probe detected? 15
Specifications, 4-20mA
3
Bulkhead connector cleaning
38
Calibration
Annual re-calibration
12
Memory corruption
22
NIST traceable
12
Periodicity recommendation
12
Requirements and description
12
Calibration statement
12
One-point calibration, using serial command
18
Toggling, using serial commands
19
Cleaning connectors
38
Client programs, Modbus
33
Configuration
Recommendations for transformer applications
20
Connector cleaning, how to
38
Converters, from RS-485 to USB
37
Coupling, ST-ST
11
Data logging
Using Modscan (Modbus)
35
Description of RS-485 serial port
15
Description, ST connector
38
Dielectric materials
8
Dust caps
16
Extension cables
11, 16
External power supply for T/Guard
13
Factory and status information
19
Ferrule, connector cleaning
38
Fiber optic probe care
3
Fiber optic probe repair issues
8
Fluo, Transformer probe
10, 11
Front panel description
Blinking LED, memory corruption
22
Front panel description, T/Guard
14
G1009 probe installation guide
8
GaAs technology
8
Graphing rate is OptiLink-II
25
Graphing, using OptiLink-II software
26
Grounding problems, opto-isolator use
29, 36
Hardware reference
10, 14
Heat run tests
8
Help menu
19
Modbus protocol
29
Hyper Terminal, serial communication
17
HyperTerminal
Tera Term alternative
17
Vista users, HyperTerminal Private Edition
17
Document no. G1041r03
Win7 and Vista users, HyperTerminal Private Edition
17
Illustration
Electrical connectors
14
11
Extension cable
Feedthrough
11
OFT coupling
11
T/Guard outline
14
Transformer Fluo probe
11
Transformer probe
10
Installation
Dealing with grounding applications
36
Modscan
33
OptiLink-II
23
Performance verification, probes
21
Windows HyperTerminal
17
Isopropyl alcohol, for connector cleaning
38
Kerosene desorption
8
LED intensity verification
21
Logging rate in OptiLink-II
25
Logging temperatures to a file,with ModScan
35
Mating sleeve, ST-ST
11
Memory corruption
22
Modbus option
Modscan application
33
Modbus protocol
8
Configuration from OptiLink-II
27, 29
How is it implemented in the T/Guard
29
How to configure
29
ModScan,monitoring multiple T/Guards
34
MTBF of light source
8
NIST traceable calibration
12
Offset, on an optical channel
How to reset on all channels, serial command
20
Oil immersion
8
One-point calibration, using serial command
18
OptiLink-II software pacakge
Acquisition vs. Graphing rates
25
OptiLink-II software package
Acquisition vs. Logging rates
25
Com port selection
23
Graphing
26
Logging to an Excel file
25
Option setting
26
Troubleshooting
27
Viewing temperature data
24
Options
13
OptiLink-II graphing
26
Opto-isolators, what and when
36
Part 15 of the FCC rules
3
Patch cords
See Extension cables
Performance verification, probes
21
Power connector description
16
Power consumption
8
Power input requirement
16
Power supply, 100-240VAC, for T/Guard
13
Probe installation guide, g1009
8, 12, 39
Copyright Neoptix Canada LP
40
Probe signal strength, how to get using serial
commands
20
Probes
Connector cleaning
38
Performance verification
21
Testing, using y command
21
Using cryogenic probes
39
Using long probes
39
Product specifications
10
Recommendations for transformer applications
20
Return authorization number, RMA
7, 13
RS-232, cable length limitations
28
RS-485 protocol
15
Cable length limitations
28
Dealing with grounding problems
36
RS-485 to USB converter
37
Sensor connectors, ST type
16
Sensors
See Probes
Serial commands
y command results
21
Serial communication
HyperTerminal use
17
Set Point Adjustment
18
Signal intensity verification, probe
21
Signal Strength, how to get using serial commands 20
Software
Modscan application
33
OptiLink-II
17
Serial communication protocol
17
Tera-Term
18
Software upgrade statement
5
Specifications
10
ST connector cleaning, how to
38
ST coupling or mating
11
ST-ST mating sleeve or coupling
11
Document no. G1041r03
T2 probes, working with long probes
Temperature acquisition rate in OptiLink-II
Temperature Channel
Enabling
Reading, using serial commands
Set Point Adjustment
Temperature Unit
Setting, using serial commands
Tera Term software
Tera-Term software
Transformer application documentation
Transformer probe Fluo
Troubleshooting
OptiLink-II
Typical temperature reading sequence
Universal power supply for T/Guard
Unpacking
USB converters, to serial port
Vibration resistance
Vista users
HyperTerminal Private Edition
Warranty
Agreement
Limitations on probes
Warranty statement
Probe not guaranteed
What is in the box
Win7 and Vista users
HyperTerminal Private Edition
Windows Device Manager
Windows-7 users
HyperTerminal Private Edition
Working with cryogenic probes
Working with long probes
Copyright Neoptix Canada LP
39
25
18
20
18
20
17
18
12, 39
10, 11
27
21
13
13
37
8
17
7
7
4
3
13
17
27
17
39
39
41
Neoptix Canada LP
1415, rue Frank-Carrel, Suite 220
Québec City, QC
CANADA G1N 4N7
Tel: 418-687-2500
Fax: 418-687-2524
www.neoptix.com
www.qualitrolcorp.com
[email protected]
Printed in Canada
Document no. G1041r03
Copyright Neoptix Canada LP
42