1
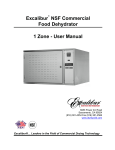
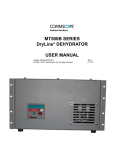
Excalibur® NSF Commercial Food Dehydrator 2 Zone - User Manual 8250 Ferguson Avenue Sacramento, CA 95828 (916) 381-4254 Fax (916) 381-2566 www.drying123.com Excalibur®… Leaders in the Field of Commercial Drying Technology Set Up Instructions READ THIS FIRST 1) Unpack the dehydrator by cutting the steel bands and removing the cardboard, tape and foam padding. 2) Unbolt dehydrator from the pallet. Keep the bolts, flat washers, and locking washers in a safe place. 3) Open the box containing the stainless steel trays and polyscreens. Remove the back stop and the casters. 4) Lay the dehydrator on its hinge side. Attach the back stop and the casters using the 16 -‐ 5/16 X 1 bolts, the smaller flat washers, and lock washers provided. The swivel casters should be attached to the front of the dehydrator. 5) Stand the dehydrator upright on a flat level surface. 6) Have a qualified electrician connect your dehydrator to your electrical system. 2 Note: Electrical requirements are the following: 120/208-‐240V, 60Hz Single Phase 4 Wire, 30 Amp Dedicated Branch Circuit, You can have the electrician wire the unit to 30 amp 4 prong drier pigtail plug or the unit may be hard wired. 220-‐240V, 50Hz Single Phase 3 Wire, 30 Amp Dedicated Branch Circuit. 7) Program your drying profile into the controller exactly as described in the provided quick start procedure. 8) Direct all questions or problems to the Excalibur Commercial Service Department at (916) 381-‐4254. IMPORTANT! The Excalibur® Commercial Dehydrator is an innovative, state of the art dehydration unit equipped with a powerful Computer Controller. Please take time to read this User Manual before you attempt to set the computer profiles. There are several steps to setting the sophisticated controls and operating this unit. Failure to Follow the instructions EXACTLY as outlined in the User Manual will cause your Unit to not work properly or will cause your unit to not work at all. Theory of Operation Unlike an oven which maintains heat at a constant temperature, the Excalibur® Commercial Dehydrator is a state-of-the-art dehydration unit, which utilizes the innovative technology of temperature cycling. After you set the time/temperature profile on the computer controller and when a profile is started, the fans begin to run and the heating elements are switched on. The fans will continue to run throughout the whole drying process until the profile is stopped. The “AIR” temperature rises until the set point (temperature) you entered in the profile is reached. When the set point is reached, the heating elements will switch off. The “AIR” temperature will continue to rise a few degrees due to residual heat in the unit. This is normal and there is minimal effect on the internal food temperature by this rise in “AIR” temperature. The heating elements remain off until the “AIR” temperature drops several degrees below the set point, at which time, the heating element will turn back on. The temperature will again begin to rise to the set point of the profile. This cycling is called Hyperwave and is an important part of the drying process. Note: The temperature shown on the controller is the temperature of the air in the unit. If the internal temperature of the food/product is of concern, a separate sensor can be used. Warranty Info- Commercial Dehydrators 1 Year Limited Warranty Excalibur® Products warrants to the ORIGINAL RETAIL PURCHASER of this product that if it is purchased through an AUTHORIZED EXCALIBUR RETAILER, or Directly from the Factory and operated in accordance with the printed instruction accompanying it, then for a period of 1 year from the date of purchase, the product shall be free from defects in material and workmanship. The Excalibur® Digital Controller is backed by a one year warranty to the first purchaser for use, providing that the units have not been misapplied. This warranty does not apply to damage resulting from transportation, alteration, misuse or abuse. Products sold through online auctions, by unauthorized dealers or discount retailers are not eligible for warranty services from Excalibur. To obtain warranty service an original or copy of the sales receipt from the original authorized retailer is required. THEREFORE, YOU SHOULD RETAIN YOUR SALES SLIP OR INVOICE. If your commercial Dehydrator needs warranty service, please contact our Technical Support Department. In most cases, technical problems can be corrected over the phone. Tech support can be reached at one of the following numbers:Tel 916-381-4254; Fax 916-381-4256 Terms and Limitations The company will repair (or at its discretion, replace) the defective parts free of charge if in the judgment of the company, it has been proved to be defective as to seller's labor and material, within the warranty period. New or rebuilt replacements for factory defective parts will be supplied for ninety days from date of purchase. This warranty does not cover the cost of installing the parts. Replacement parts are warranted for the remaining period of the original warranty. Limitations The warranty is void if the product is used for any purpose other than which it is designed and has not been subjected to abuse, negligence, accident, alteration, or failure to follow operating instructions or the product has been exposed to abnormal or extreme conditions. The product must not have been previously altered, repaired, or serviced by anyone other than factory service personnel. The serial number must not have been altered or removed. The product must not have been subjected to accident in transit or while in the customer’s possession, misused, or operated contrary to the instructions contained in the instructions manual. This includes failure caused by neglect of reasonable and necessary maintenance, improper line voltage and acts of God. This warranty is not transferable. Except to the extent prohibited by applicable law, no other warranties whether expressed or implied, including warranty merchantability and fitness for a particular purpose shall apply to this product. Under no circumstances shall Excalibur Products be liable for consequential damaged sustained in connection with said product and Excalibur Products neither assumes nor authorizes any representative or other person to assume for it any obligation or liability other than such as it expressly set forth herein. Any applicable implied warranties are also limited to ninety day period of the limited warranty. This warranty is subject to the Laws of the State of California and covers only the product and its specific parts, not the food or other products processed in it. Operation of the Unit The unit is equipped with a computer controller that is divided up into two sections – a Top Zone Section and a Bottom Zone Section. You can run only one zone if you wish, both zones at the same time, or stagger their operation to suit your production needs. Many users will use one zone (for example the top zone) for a certain type of product and use the other zone for a different type of product. Programming Programming the controller is a systematic procedure. The illustrated programming procedures on pages 58 are designed to direct the programmer to the next screen once a step is completed. If, at any time, the step(s) listed in the programming instructions do not coincide with the illustrated display screen(s), return to the Main Menu Screen by pressing the “X” on the Home Page Screen. Or, for further assistance call (954) 202-7419 ext. 417. Note: Temperature and time values listed in the illustrated programming procedures on pages 5-8 are for display purposes only. The values may or may not match the values listed on the actual controller. Programming the Controller Step 1: Load product into top and/or bottom zones Step 2: Turn Power Switch to the ON Position § Main Menu Screen After several seconds the Main Menu Screen appears. Step 3: Program the “Top Zone” by pressing one of the top OFF buttons from the Main Menu Screen § Press up or down icon on the Home Page Screen to set time and temperature. § Press check mark icon when finished. Home Page Screen Step 4: Running the Program for the “Top Zone” § There are two choices: OR Add/Start Screen § Press the icon to begin running a “Single Cycle” time and temperature. The screen will return to the Main Menu to display the program. OR To add a “Second Cycle” time and temperature: § Press the plus icon to program a “Second Cycle” time and temperature. Repeat the programming procedures outlined in Step 3. Press the icon when finished programming the “Second Cycle”. The program is now running a “First and Second Cycle” time and temperature. o o o NOTE: When a Second-Cycle time and temperature is running, a “1” appears in the furthest box to the right. The 1 indicates that the program is running in its first cycle. When the first cycle is complete, the number will change from 1 to 2. When a Single-Cycle time and temperature is running, the box will display an “S”. If a program is not entered, the box will display an “*”. Step 5: Program the “Bottom Zone” by pressing one of the bottom OFF buttons on the main menu screen § Repeat Steps 3-4. Step 6: Stop running or cancel a current cycle (example) § From the Main Menu screen, press the temperature icon or time icon. § Choose the stop icon to cancel the current cycle. Note: If no choice is made within 5 seconds, the screen will revert to the Main Menu with no changes. Saving and Naming a Program Step 1: Follow Steps 3-4 in the previous programming procedures § After all cycle times and temperatures are set, press the diskette icon from the Start Screen. Step 2: Type the name of your profile on the keyboard screen (example: TOMATO) § Press the check mark icon when profile is complete § Press the § Notice the profile named “TOMATO” is saved. An arrow is pointing to it. Use the arrow icons to select your programmed profile. § To initiate the selected profile, and begin running the program, press the § file icon check icon. To delete a profile, press the recycle icon