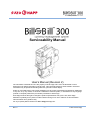
1
Serviceability Manual
Serviceability Manual
User’s Manual (Revision 2)
The information contained here-in is the property of Suzo-Happ and is not to be disclosed or used
without the prior written permission of Suzo-Happ. This copyright extends to all the media in which this
information may be preserved including electronic, printout or visual display.
Under no circumstances any part of this publication may be copied, transmitted, transcribed or distributed
in any form or by any means, or stored in a database or retrieval system, or translated into any language
(natural or computer) without the prior written permission of Suzo-Happ.
Suzo-Happ reserves the right to change the product specifications at any time. Also, Suzo-Happ
disclaims any liability for any direct or indirect losses arising out of use or reliance on this information.
This information is for guidance only.
For any inquiries please contact us at [email protected].
Rev. 2
-1-
© 2014 Suzo-Happ
Serviceability Manual
Disclaimer
-
Unplug power from unit before performing any of the procedures described in this manual
(with the exception of using the validator head cleaning card)
-
Ensure all work is performed with an anti-static grounding hand strap to ensure no damage is
done to the electronic components inside
-
Do not scratch any of the lenses in the unit
-
Do not apply excessive force when cleaning the lenses
-
Do not apply any liquids directly on unit, apply onto micro-fiber cloth instead
-
All operations must be performed by a trained and qualified operator
-
Any disassembly not performed according to this manual voids manufacturers warranty
- A side note pertaining to the particular module or operation
- A warning, steps that must be taken to avoid injury to the operator and/or damage to the
unit
Rev. 2
-2-
© 2014 Suzo-Happ
Serviceability Manual
Table of Contents:
1. SCOPE
5 2. INTRODUCTION
6 3. DEFINITIONS
7 3.1. Definitions of Dust and Debris
7 4. LEVEL 1 MAINTENANCE
8 4.1. Bill Validator (MFLV-9013, MFLV-2110)
4.1.1. Upper Compartment
11 4.1.2. Lower Compartment
11 4.2. Chassis (BBC-0110)
12 4.3. Recycling Cassettes (BBR-011X)
15 4.4. Path Switch (BBS-0110)
17 4.5. Dispenser (BBD-0X10)
21 5. LEVEL 2 MAINTENANCE
24 5.1. Bill Validator (MFLV-9013, MFLV-2110)
26 5.2. Chassis (BBC-0110)
28 5.3. Recycling Cassettes (BBR-011X)
31 5.4. Path Switch (BBS-0110)
33 5.5. Dispenser (BBD-0X10)
35 5.6. Cashbox (FLC-603)
39 5.7. MFL Power Interface (FLP-571X)
43 6. LEVEL 3 MAINTENANCE
Rev. 2
9 46 -3-
© 2014 Suzo-Happ
Serviceability Manual
6.1. Bill Validator (MFLV-9013, MFLV-2110)
49 6.2. Chassis (BBC-0110)
52 6.3. Path Switch (BBS-0110)
53 6.4. Recycling Cassettes (BBR-011X)
54 6.5. Dispenser (BBD-0X10)
55 6.6. Cashbox (FLC-603)
57 6.7. MFL Power Interface (FLP-571X)
57 6.8. B2B Power Interface (BBP-5710)
57 6.9. Final Money Test
57 7. MAINTENANCE CHART
58 8. SPARE PARTS LIST
59 9. CONTACT INFORMATION
60 9.1. Technical Support Department
60 9.2. Training
60 9.3. Service Centers
60 9.4. Customer Service
60 10.
APPENDICES
61 10.1. SENSE-A-CLICK MODULE IDENTIFICATION
10.2. Bill-to-Bill™ 300 Field Report
Rev. 2
61 65 -4-
© 2014 Suzo-Happ
Serviceability Manual
1. Scope
This document strictly pertains to the service and maintenance of the Bill-to-Bill™ 300 (MBB-01XX)
units. If in doubt whether this manual is applicable to your device, or any steps require clarification,
please contact a certified technician before beginning the service process.
Any hardware qualification involves the same three criteria. These criteria are as follows:
a) Reliability – This includes such parameters as Mean Cycle Before Jam (MCBJ)
and Mean Cycle Before Failure (MCBF)
b) Availability – The percent of the uptime the unit will experience in the field as well as downtime
during maintenance
c) Serviceability – This defines the ease with which a component, device or system can be
maintained and/or repaired. Also, the discussion of steps one may take in order to detect a
potential issue early, before it significantly influences the performance of the component, device or
system.
Rev. 2
-5-
© 2014 Suzo-Happ
Serviceability Manual
2. Introduction
The Bill-to-Bill™ 300 unit is a high-tech device that relies on its many sensors and mechanical
components in order to excel in its field of fare collection and bill exchange. It is designed to withstand
a multitude of environments ranging from northern to tropical to desert climates. It can operate in a
wide range of humidity levels and dusty air conditions. However, in order to ensure that the
Bill-to-Bill™ 300 unit continues to function properly, it must be cleaned and preventative maintenance
must be performed regularly as outlined in this manual.
This document contains the recommended steps that should be taken to keep the Bill-to-Bill™ 300
unit running properly. It also includes a breakdown of all the required tools and detailed diagrams of
the procedures.
Rev. 2
-6-
© 2014 Suzo-Happ
Serviceability Manual
3. Definitions
3.1. Definitions of Dust and Debris
Mild – Mild dust is being held loosely on the surface and can be removed simply by either using a
can of compressed air or by cleaning it lightly using a lint-free microfiber cloth
Moderate – The moderate level includes dust and debris that has been mixed with oily residue and
requires additional effort in order to remove it from the surface (this can be seen mainly
on rollers which place the dirt under pressure causing it to compact on its surface)
Extreme – Extreme dirt and debris cannot be removed without damaging the part. It has fused with
the part or is located in an area that cannot be reached and therefore the part must be
replaced in order for the Bill-to-Bill™ unit to function properly.
Rev. 2
-7-
© 2014 Suzo-Happ
Serviceability Manual
4. Level 1 Maintenance
This is the most basic level and it is designed to remove mild dust and debris along the various bill
paths in the Bill-to-Bill™ unit. It includes light cleaning of the sensors and rollers inside the bill
validator, chassis, recycling cassettes and dispenser. For recommended frequency of the
performance of this service level please refer to the Maintenance Chart in section 7.
Level
Location
Responsibility
Service Time (per unit)
1
On-Site
Operator
7-10min
The tools required for this level are:
1) Can of compressed air (found in local office supply stores, a compressed gas dust remover)
2) Alcohol-free LCD cleaner (found in local office supply stores)
3) Anti-static microfiber cloth
4) A set of cotton swabs
5) A pair of gloves
6) Cleaning card for bank note acceptor
(2)
(5)
(1)
(4)
(3)
(6)
Recommended replacement parts for this level
Rev. 2
Part Number
Name
Quantity
OPT-CLEAN-KIT-1
Level 1 Kit
1
Level 1 cleaning kit
(Cleans up to 10 units)
5106018
Cam
1
Dispenser Housing Cam
-8-
Notes
© 2014 Suzo-Happ
Serviceability Manual
4.1. Bill Validator (MFLV-9013, MFLV-2110)
Two methods exist for cleaning the bill validator. The first is using a special bill validator cleaning card
designed specifically for the Bill-to-Bill 300 bill validator, and the second is by manually cleaning the
sensors and internal surfaces of the bill validator.
Method 1:
When using the cleaning card, the unit is not unplugged. This step is taken while the unit is in its
normal operating mode. The card can simply be inserted into the bill entrance, it will clean the
sensors, aligning mechanism and path on the way into the bill validator and once again on its way out
after the “bill” has been rejected. The card can be inserted several times for better results.
The cleaning card may replace only one service period before the bill validator must be
cleaned manually as outlined in Method 2
Method 2:
When manually cleaning the bill validating head, the following steps must be followed:
First, remove the Bill Validator from the Bill-to-Bill™ 300 unit by depressing the latch under the Bill
Validator Head and puling it out.
Rev. 2
-9-
© 2014 Suzo-Happ
Serviceability Manual
After the bill validator has been removed, open the lower and upper compartments.
1.
2.
When trying to open the upper compartment, the motion is being restricted by a latch on the right side
of the validator head (in a position where the front is facing the operator). The latch should be
pressed inwards to allow the upper compartment to open up fully for easy access to the sensors.
Rev. 2
- 10 -
© 2014 Suzo-Happ
Serviceability Manual
4.1.1. Upper Compartment
The upper compartment consists of a set of 3 o-ring rollers (bottom), bill aligning mechanism
(bottom), 3 plastic rollers (top) and 4 sets of sensors (2 on the bottom and 2 on top).
First, clean all the sensors (light guides) using a cotton-swab. Using the can of compressed air, spray
all rollers, aligning mechanism and other areas where dust has noticeably accumulated. Ensure the
can is pointing outwards when sprayed to prevent dust from entering deeper into the bill validator.
The rest of the surfaces should be wiped using the microfiber cloth and LCD cleaner.
Do not spray LCD cleaner directly on the unit. Spray on the micro-fiber cloth only.
Do not over saturate the micro-fiber cloth with LCD cleaner, apply sparingly.
Bottom section of Upper compartment:
Top section of Upper compartment:
Extra care should be taken as to not dislodge the sensors out of their place by applying
excessive force!
4.1.2. Lower Compartment
The lower compartment consists of a set of 6 o-ring rollers (bottom), 6 plastic rollers (top) and 2
Sense-A-Click modules (one on the top and the second is on the bottom). The Sense-A-Click
sensors and other hard to reach sensors should be cleaned using a cotton swab. All rollers and
sensors then have to be cleaned using a can of compressed air following by cleaning the rest of the
surface using a microfiber cloth and LCD cleaner.
Rev. 2
- 11 -
© 2014 Suzo-Happ
Serviceability Manual
Bottom section of Lower compartment:
Top section of Lower compartment:
4.2. Chassis (BBC-0110)
First, remove the chassis out of the Bill-to-Bill™ unit by pressing the two blue buttons inwards and
pulling the handlebar out.
Rev. 2
- 12 -
© 2014 Suzo-Happ
Serviceability Manual
Next, remove the recycling cassettes and dispenser by pressing the release button of each module
and pull it away from the chassis. Set the module aside.
Open the chassis to reveal the bill path by pressing down the two latch buttons at the top face
Rev. 2
- 13 -
© 2014 Suzo-Happ
Serviceability Manual
Each half of the chassis consists of 6 sets of bill position sensors distributed along the bill path. The
sensors on one half can be distinguished by their clear rectangular appearance, and the sensors on
the other half are clear circular lenses embedded in the body. These 12 sets of sensors have to be
cleaned using a new cotton swab.
Rev. 2
- 14 -
© 2014 Suzo-Happ
Serviceability Manual
Then, using a can of compressed air, spray the bill path (sensors and rollers) on the two halves of the
chassis.
Extra care should be taken when cleaning the area under the belts since this area is prone
to dust accumulation.
4.3. Recycling Cassettes (BBR-011X)
After the recycling cassettes have been removed from the chassis in previous step, open the cover
Rev. 2
- 15 -
© 2014 Suzo-Happ
Serviceability Manual
This reveals two sets of sensors, one at the edge of the cover, and the other at the edge of the
recycling cassette. The two sets of sensors have to be cleaned using a cotton swab and then sprayed
with compressed air to remove leftover loose dirt.
The sensors on the lockable cassettes can be cleaned using a cotton swab without
opening the cover. However, do not use the compressed air can in this case.
Ensure the air is sprayed outward to prevent dirt from being blown into the recycling
cassette itself.
Rev. 2
- 16 -
© 2014 Suzo-Happ
Serviceability Manual
4.4. Path Switch (BBS-0110)
While the chassis is in the “open” position, remove the path switch from the chassis by disconnecting
the two bearings holding it in place and turning them until the bearing snap piece is pointing away
from the chassis.
In some cases, the switch lock might interfere in the removal of the switch and has to be
depressed as the switch is taken out of the chassis.
Rev. 2
- 17 -
© 2014 Suzo-Happ
Serviceability Manual
After the switch has been removed, using a can of compressed air, spray each slit thoroughly. Also
spray all other surfaces including the gears end and the stepping end (index disk) of the switch. This
will prevent the dust from wearing the surface of the teeth on the gears and that of the index disk.
Finally, find the location sensor on the index disk and clean it using a new cotton swab.
Do no clean the gears using cleaners or the micro-fiber cloth. This will remove the lubricant
and will dramatically shorten the lifespan of the path switch.
It is paramount to install the switch properly back into the chassis to avoid serious damage to the
switch and Bill-to-Bill™ 300 unit.
Rev. 2
- 18 -
© 2014 Suzo-Happ
Serviceability Manual
In order to ensure it is properly installed, first, insert the switch back into the housing while holding the
bearings with the snap pieces pointing upwards (match the gears on the switch to the side with the
gears on the chassis).
The groove on the bearings should be placed onto the body of the chassis.
Ensure the switch itself is inserted into the chassis by the bearings to allow the free rotation of the
switch. This will allow the switch to self-adjust in order to mesh with the gears properly and ensure no
gap remains between the bearing and the groove in the chassis.
Rev. 2
- 19 -
© 2014 Suzo-Happ
Serviceability Manual
After the switch has been inspected to sit tightly inside the chassis with no gaps, the switch can be
secured by rotating the bearing snaps 90 degrees on both sides towards the securing slot.
Rev. 2
- 20 -
© 2014 Suzo-Happ
Serviceability Manual
4.5. Dispenser (BBD-0X10)
The dispenser must be thoroughly cleaned since it interfaces with the environment and is susceptible
to a substantial amount of dust and debris. There are three sets of sensors in the dispenser that must
be taken care of. The first two can be found by carefully opening the top cover. They are located at
the bottom floor of the dispenser. These sensors must be cleaned using a cotton swab.
Older models of dispenser may only have one sensor at the bottom.
Rev. 2
- 21 -
© 2014 Suzo-Happ
Serviceability Manual
The third sensor is located at the bill entrance (entrance of the bill from the path switch). It should be
cleaned using a new cotton swab
The head of the cotton swab may beslightly flattened for easier access to the sensor.
Top Sensor
Bottom Sensor
After the three sensors were cleaned, use a can of compressed air to spray around the sensors and
spray any loose debris out of the dispenser. Ensure the dispenser cover is opened to allow excess
debris be evacuated.
Rev. 2
- 22 -
© 2014 Suzo-Happ
Serviceability Manual
Additionally, special care should be taken when examining the cam lock mechanism on the
dispenser. In many cases it may be bent or misshapen. This could compromise the security of the
unit. Ensure that it is replaced as soon as any damage has been detected.
Rev. 2
- 23 -
© 2014 Suzo-Happ
Serviceability Manual
5. Level 2 maintenance
Although a basic level of cleaning has been performed in the Level 1 maintenance, over time,
additional effort is required to get tougher dirt off the bill path. As more moderate dust and oils will
start accumulating deeper along the bill path and in tighter and harder to reach areas, Level 2
maintenance should be performed to ensure these factors do no hamper the performance of your
unit. For recommended period of service please refer to the Maintenance Chart in section 6.This level
should be performed in parallel with Level 1 maintenance for all modules unless otherwise specified.
Additionally, for each of the modules maintenance is performed, visually inspect the part for any dents
or scratches on the surface of the module. Ensure there are no broken and/or damaged parts and no
broken wires due to the mishandling of the unit or possible vandalism attempts. More specific items
that should be watched out for are included under each module and if any such damage in its extreme
form is noticed, please contact a Suzo-Happ certified technician.
This level requires only basic level of manual disassembly and can be performed without
the need for any special tools.
Level
Location
Responsibility
Service time (per unit)
B
On-Site*
Field Technician
30min – 1h
The tools required for this level are:
1) Can of compressed air
2) Alcohol-free LCD cleaner
3) Anti-static microfiber cloth
4) A set of cotton swabs
5) Crane Payment Solutions dummy
(2)
(1)
card
6) Tweezers
7) Philips screwdriver (PH1 x 60)
8) Flathead screwdriver (3,0 x 60)
9) Cleaning card for
bank note acceptor
10) A pair of glove
(10)
(5)
(4)
(8)
(6)
(3)
(9)
(7)
* It is highly recommended to perform the above steps in the back office due to the sensitivity of the
internal component on the product. However, if the unit must be serviced in the field, ensure the it is
being handled with care and no foreign debris enters the unit.
Rev. 2
- 24 -
© 2014 Suzo-Happ
Serviceability Manual
Recommended replacement parts for this level
Part Number
Name
Quantity
Notes
OPT-CLEAN-KIT-2
Level 2 Kit
1
Level 2 cleaning kit
(Cleans up to 10 units)
5101157
Bracket
1
Dispenser Cam
5110049-01
Cam
1
Dispenser Housing Cam
5106025
Bracket
1
Cashbox Cam
5106018
Cam
1
Cashbox Housing Cam
0200111
Guide Assembly
2
0200111V3
Guide Assembly
2
Chassis Guide Assembly
(Optional)
Old model Chassis Guide Assembly
(Optional)
Recommended consumable parts for this level
Rev. 2
Part Number
Name
Quantity
Notes
8102003
Plastic Push Rivets
25
-
8203960
Retaining Ring 2.3
10
-
8203920
Retaining Ring 3.2
10
-
8201933
M2.5x25 Screw
10
-
8201934
M3x6 Screw
10
-
8201000
M3x6 Screw
25
-
5204025-01
Bearing
5
-
- 25 -
© 2014 Suzo-Happ
Serviceability Manual
5.1. Bill Validator (MFLV-9013, MFLV-2110)
After removing the bill validator from the chassis it should be visually inspected to ensure no physical
damage is present. If any excessive damage is found such as dents or cracks, it should be reported
to a Suzo-Happ technician for further analysis.
After the all-round visual inspection has been done, follow the following steps to clean and further
inspect both the upper and lower compartments of the bill validator.
All sensor sets should be first cleaned according to Level 1, however, as they are being cleaned,
ensure that none of the rectangular prism lenses are protruding due to a potential of validator being
dropped. If a protruding lenses are found on the surface of the bill validator’s compartments (by
passing a piece of paper or a card over them and having it hit the lens), simply press it down lightly in
order to place it back into its original position.
Properly installed lens (sunken)
Rev. 2
Improperly installed lens (raised)
- 26 -
© 2014 Suzo-Happ
Serviceability Manual
The rollers however should be cleaned more thoroughly in order to remove the oily residue and
debris that is stuck to its surface. Each roller, at its turn, should be held in place by a pair of tweezers
and using the Suzo-Happ dummy card, all the black and/or green dirt should be removed.
Ensure the dirt removed does not fall through the voids on the surface into the machine.
The o-rings are then cleaned using the alcohol-free LCD cleaner. Spray the antistatic microfiber cloth
sparingly and wipe the o-rings. For best result, move the cloth in a direction perpendicular to that of
the direction of rotation, turn the wheel and repeat.
Do not spray LCD cleaner directly on the unit. Spray on the micro-fiber cloth only.
Do not over saturate the micro-fiber cloth with LCD cleaner, apply sparingly.
Next, using a can of compressed air, spray away the remaining loose debris away from the machine
and finally, using a lint-free microfiber cloth, wipe the remaining surfaces to remove the rest of the
dust.
After cleaning the validating head, set it aside and let it dry before it is put back into its
regular operating mode.
Rev. 2
- 27 -
© 2014 Suzo-Happ
Serviceability Manual
5.2. Chassis (BBC-0110)
First the chassis should be inspected for any dents, scratches or any other damage that might have
occurred due to the mishandling of the unit. If any such excessive damage found, it should be
reported to a Suzo-Happ technician for further analysis.
Next, alongside Level 1 maintenance, the following steps should be performed:
On the opposite side of the belts, 12 guide wheels are embedded in the bill path and should
be cleaned using a pair of tweezers and a Suzo-Happ dummy card as previously mentioned.
Press on each of the 12 rollers to ensure the resistance felt in all rollers is approximately
the same. The middle rollers in both the top and bottom half of the chassis should be paid
closer attention to and if they are looser than the other rollers, the entire guide assembly
must be replaced (0200111 or 0200111V3 – see note below for more details)
Older model guide assemblies, part number 0200111V3 that use push rivets should be
ordered if B2B manufacturing date is before May 1, 2010. Otherwise, newer model guide
assemblies, part number 0200111 that use screws should be ordered.
Ensure that all lenses are flushed with the body of the chassis to reduce the probability of a
jam occurring. If any lens is found to be raised, follow the same process as mentioned
above.
Additionally, it is recommended to remove the guide assembly and clean the sensors located below
the lenses using a cotton swab followed by a can of compressed air. The guide assembly can be
lifted after removing the four screws holding each assembly in place.
Rev. 2
- 28 -
© 2014 Suzo-Happ
Serviceability Manual
Some models may have plastic push rivets holding the guide assembly instead of screws as
mentioned above. In order to remove the push rivets, several additional steps must be taken as
follows:
The four belts on the opposite side of the rollers should be cleaned using the LCD cleaner. Once
again, do not spray the LCD cleaner directly on the unit. Spray on the anti-static microfiber cloth
instead. The belt can be rotated manually to gain access to the other side of the bet for cleaning.
Also, inspect all the connectors on the chassis and ensure the connectors are neither bent nor
damaged. Report any damaged connectors to a technician in order to replace the part.
Rev. 2
- 29 -
© 2014 Suzo-Happ
Serviceability Manual
Once the maintenance has been completed for the Bill-to-Bill™ 300 chassis, re-insert the recycling
cassettes and dispenser, and slide it back into the housing and ensure the locks holding the chassis
inside are locked properly. If the lock does not fully engage, contact a certified technician for further
analysis
Rev. 2
- 30 -
© 2014 Suzo-Happ
Serviceability Manual
5.3. Recycling Cassettes (BBR-011X)
After an all round inspection is done to ensure no dents, scratches or cracks are present, the
recycling cassettes are first cleaned by following the same steps as in Level 1 maintenance.
Next, inside each cassette two white, parallel tapes are found. Using a soft blunt object, or ones
finger pad press down each tape in a location where no wheels or drums are present, press it up 1”
down. Some resistance should be felt. Then, by quickly removing the object or ones finger, one
should observe a spring-back effect of the tape (it should not remain loose)
Do not unwind the tape and ensure no oily residue is left on the tape to maintain proper
functioning of the recycling cassette (use of gloves is highly recommended)
If cuts or tears are found, contact a service center for replacement immediately
Observe the two sensors located at the edge of the cover and edge of the opening on the
cassette. In order to ensure proper bill detection, ensure the sensors are flushed with the
surface as mentioned before.
Additionally, remove the side covers of the dispenser and remove the two plastic push rivets on the
two sides of the cassette as shown below to unlock the sensor array from its position.
Rev. 2
- 31 -
© 2014 Suzo-Happ
Serviceability Manual
After removing the sensor array, remove the plastic push rivet securing the PCB and using a cotton
swab, clean the two white light sensors and their respective lenses.
Turning around the PCB board would reveal two additional sensors which must be cleaned using a
cotton swab. Use a can of compressed air to remove dust from the rest of the part.
Rev. 2
- 32 -
© 2014 Suzo-Happ
Serviceability Manual
5.4. Path Switch (BBS-0110)
Inspect the path switch for damage. Some possible issues may include broken and chipped teeth on
the switch.
Also ensure that the switch lock works properly by first depressing it and then releasing it. The lock
should snap back into its original position..
If any damage is found, or if the lock remains depressed, contact a technician for further instructions
as the switch or locking mechanism have to be serviced.
Do no apply any additional lubricant to the switch as it will hinder its performance. If there are
any concerns with respect to the performance of the switch, please contact a certified
technician.
Rev. 2
- 33 -
© 2014 Suzo-Happ
Serviceability Manual
After the inspection, the switch can be cleaned using a cleaning card for bank note acceptor. First,
open up the cleaning card pouch and ensure it is moist. Insert the card into the first slit and turn the
gears on the side of the switch to slide the card halfway into the switch (as seen in the figure below).
1.
2.
3.
4.
5.
Once the card is inside, fix the switch so it will not move and using one hand on each side of the card,
slide it sideways back and forth to properly clean the belts. Repeat the above steps for all 5 slits.
Next, using the compressed air can, blow through each of the 10 slits for several seconds while
moving it sideways along the slit. Then, rotate the gear located on the central shaft approximately two
revolutions and repeat the above step.
Ensure there is no excessive friction experienced as the gears are turned and the motion is
fairly uniform.
2X
The switch can be then sprayed on the remaining surfaces to remove all the left over dust
Ensure the dust from the outer surface of the switch does not enter the slits, nor lands on
the lubricated gears
Rev. 2
- 34 -
© 2014 Suzo-Happ
Serviceability Manual
5.5. Dispenser (BBD-0X10)
As before, ensure no physical damage is observed on the dispenser and report any excessive
damage if found to a certified technician for further analysis. Special care should be taken when
examining the cam lock mechanism on the dispenser. In many cases it may be bent or misshapen
due to the mishandling of the unit which will compromise its security. Ensure that it is replaced as
soon as any damage has been detected.
The dispenser is first cleaned by following the same steps as in Level 1 maintenance.
Next, while the dispenser is outside the chassis and the cover is opened, three belts can be seen
connected to the cover. Each belt passes through two geared pulleys and behind a drum. There must
be constant tension maintained in the three belts to ensure proper banknote dispensing. The tension
can be verified by pressing down on the section of the belt between the two white pulleys and
ensuring that resistance is felt.
The same should be done to the three belts running inside the dispenser. They run through a set of
three pulleys, one pulley per belt, and are located towards the back of the dispenser.
Use of gloves is recommended when performing above steps in order to prevent oily
residue being left on the belts
Rev. 2
- 35 -
© 2014 Suzo-Happ
Serviceability Manual
Next, using the Phillips screwdriver, unscrew the 4 bolts on each side of the dispenser.
Remove the cover slowly to ensure no internal components are moved and connectors unplugged
inside the dispenser.
There are two bearings holding the dispenser cover in place, one on each side. The latch on each
bearing should be moved away from the body of the dispenser and turned to point upwards. Then the
cover is lifter up and removed from the dispenser.
Use of excessive force will permanently damage the bearing and the latch mechanism. Only
lift the latch as far as needed to be able to freely turn the bearing (2cm off the surface).
Rev. 2
- 36 -
© 2014 Suzo-Happ
Serviceability Manual
Once the dispenser cover is removed, there is an easy access to the six belts and two sets of
sensors inside the dispenser. The same sensors that were cleaned using the cotton swabs in level 1
can now be cleaned more thoroughly.
More importantly, the belts are cleaned using the LCD cleaner and an anti-static microfiber cloth. The
belts can be manually rotated and cleaned all round.
Ensure no oily residue is left on the belt after it comes in contact with the operator as this will
cause the bill to slip as it is being dispensed (use of gloves is highly recommended)
The drum has two light guides embedded in its body, one on each side. Turn the drum around to find
each of the light guides and clean it using a cotton swab. Using a can of compressed air, spray the
drum and remove any dust and debris that has accumulated inside the grooves of the drum.
Rev. 2
- 37 -
© 2014 Suzo-Happ
Serviceability Manual
The three arms keeping the belts in tension are located above the drum. They can be
depressed to allow the drum to move more freely when servicing it.
If the dispenser has a metal bezel, ensure the grounding pin is properly interfaced with the connector
on the chassis as it is installed back into place and that it is firmly connected to the dispenser.
Finally, using a can of compressed air, clear the inside of the dispenser from any dust, ensure this is
done diligently since the dispenser is prone to more dust accumulation than most other modules in
the Bill-to-Bill™ 300 unit.
Rev. 2
- 38 -
© 2014 Suzo-Happ
Serviceability Manual
5.6. Cashbox (FLC-603)
At this maintenance level, the cashbox should be removed from the Bill-to-Bill™ 300 unit by pulling
the handles of the cashbox outwards and pressing the release button simultaneously.
First, inspect the box for any dents and other possible damage and contact a technician if serious
damage is found.
Open the cashbox compartment to reveal the internal stacking mechanism by first unlocking the
cover.
The lock type will vary based on the customer requirements and suppliers. Additionally,
some cashboxes may have one lock while other may have two.
Rev. 2
- 39 -
© 2014 Suzo-Happ
Serviceability Manual
Next, inspect the inside of the cashbox for any damaged surfaces. Ensure the plate stacking the bills
moves freely and that the pins used by the plate for sliding are not bent or damaged. The stacking
plate supported by the springs must be straight. If any damage is found, please contact a technician
for further analysis.
Using a can of compressed air, clear out any dust that might have accumulated at the back of the
cashbox along the tracks of the bill stacking mechanism to ensure the cashbox reaches its maximum
bill capacity.
Additionally, flipping the cashbox reveals the stacker drive mechanism. This is the mechanism that
drives an internal plate that pushes the bills into the cashbox as they come from the Bill-to-Bill™ 300
chassis. The mechanism can be checked to be free of any damage by inserting a Philips screw driver
or tweezers and rotating it 2-3 revolutions.
Rev. 2
- 40 -
© 2014 Suzo-Happ
Serviceability Manual
Visually inspect the cashbox cam used to lock the cashbox and ensure it is straight. Bend cams will
compromise the security of the cashbox and must be checked often and replaced immediately if
damage is detected (5106025).
Additionally, inspect the housing cashbox cam located in the lock mechanism below the cashbox in
the chassis for damage. If the cam is found to be bent or misaligned, a new housing cashbox cam
must be ordered.
Rev. 2
- 41 -
© 2014 Suzo-Happ
Serviceability Manual
After the mechanical system has been verified, using a can of compressed air, the inside and outside
of the cashbox as well as the compartment it is placed in inside in the Bill-to-Bill™ 300 housing
should be thoroughly sprayed. Ensure there is no dust accumulation occurring anywhere on the
bottom of the cashbox.
Closer attention should be paid to the corners of the cashbox where dust may reduce the
capacity of the cashbox.
Next, use a lint-free microfiber cloth to wipe all surfaces and to ensure all oily residue and tough
debris has been removed.
Rev. 2
- 42 -
© 2014 Suzo-Happ
Serviceability Manual
5.7. MFL Power Interface (FLP-571X)
The power interface is the module connecting the Bill-to-Bill™ 300 housing to the cashbox. It can be
removed from the Bill-to-Bill™ 300 unit by pulling the lever of the power interface down and then
pulling it outwards.
Rev. 2
- 43 -
© 2014 Suzo-Happ
Serviceability Manual
After the interface has been removed, check to ensure the two touch sensors are working properly by
pressing them and ensuring they go back to their original position after they have been released.
Rev. 2
- 44 -
© 2014 Suzo-Happ
Serviceability Manual
Also, ensure that the connector is not damaged and that all the pins are straight to ensure proper
communication between the housing and the cashbox.
After the inspection has been performed, using a can of compressed air, spray the motor area, the
connector and the rest of the surfaces to remove any excess dust. Then replace the power interface
module back into the housing, completing Level 2 maintenance.
Rev. 2
- 45 -
© 2014 Suzo-Happ
Serviceability Manual
6. Level 3 maintenance
This level of preventative maintenance restores the Bill-to-Bill™ 300 unit from the effects of
temperature cycling through the day and thought out the year as well as from extensive wear due to
normal operating mode. In this level it is recommended to replace the transport belts, o-rings and
rollers within the unit as well as several sensors, security features and motors. For recommended
period of service please refer to the Maintenance Chart in section 6. Additionally, this level is
performed in parallel with the steps in level 1 and level 2 maintenances for that maintenance period.
It is essential to perform all steps in this level in a sterile and anti-static environment as outlined in the
Suzo-Happ Maintenance Guidelines document. Additionally, all torque values applied when reassembling the modules must also be applied with accordance to the Suzo-Happ Bill-to-Bill™
Assembly Guidelines document.
Level
Location
Responsibility
Service time (per unit)
3
Workshop
Service Center Technician
2-3h
The tools required for this level are:
1) Can of compressed air
2) Alcohol-free LCD cleaner
3) Anti-static microfiber cloth
4) A set of cotton swabs
5) Crane Payment Solutions dummy
(2)
(1)
card
6) Tweezers
7) Philips screwdriver (PH1 x 60)
8) Flathead screwdriver (3,0 x 60)
9) Cleaning card for
bank note acceptor
10) A pair of gloves
- Sense-A-Click Extractor
(purchased separately)
(10)
(5)
(4)
(8)
(6)
(3)
Rev. 2
- 46 -
(9)
(7)
© 2014 Suzo-Happ
Serviceability Manual
Recommended replacement parts and tools for this level
Part Number
Name
Quantity
OPT-CLEAN-KIT-2
Level 3 Kit
1
Level 3 cleaning kit
(Cleans up to 10 units)
8211335
EPDM O-Rings
3
From Upper compartment
8211335
EPDM O-Rings
4
From Lower compartment
0200050
Guide Assembly
1
Rollers assembly in validating head
(upper compartment)
0200053.01
Guide Assembly
1
Rollers assembly in validating head –
Coated
(lower compartment)
5101157
Bracket
1
Dispenser Cam
5110049-01
Cam
1
Dispenser Housing Cam
5106025
Bracket
1
Cashbox Cam
5106018
Cam
1
Cashbox Housing Cam
0200111
Guide Assembly
2
Roller Guide Assembly in Chassis
0200111V3
Guide Assembly
2
Old model Roller Guide Assembly in
Chassis
8215004
Chassis Belt
4
Chassis Belt
(on opposite side of above guide
assembly with rollers)
BBS-0110
Path Switch
1
Path Switch
8215002
Dispenser Cover Belt
3
Dispenser timing belt installed on
cover
8215003
Dispenser Body Belt
3
Dispenser timing belt installed in body
8601001
Spring Arm
1
Spring arm for chassis
OPT-HW-FT01
Extractor
1
Sense-A-Click™ Extractor
1
Module is currency dependant
(See chart in appendix A)
FLS-1XXXL
FLS-1XXXU
Rev. 2
Sense-A-Click™
1
- 47 -
Notes
© 2014 Suzo-Happ
Serviceability Manual
Optional Accessories to be replaced depends upon conditions
Part Number
Name
Quantity
0300052-02
Shutter Motor
2
Dispenser drive and shutter Motors
0100325
Power Interface
1
Chassis Power Interface
8102003
Plastic Push Rivets
25
-
8203960
Retaining Ring 2.3
10
-
8203920
Retaining Ring 3.2
10
-
8201933
M2.5x25 Screw
10
-
8201934
M3x6 Screw
10
-
8201000
M3x6 Screw
25
-
5204025-01
Bearing
5
-
Rev. 2
- 48 -
Notes
© 2014 Suzo-Happ
Serviceability Manual
6.1. Bill Validator (MFLV-9013, MFLV-2110)
Overtime, the Sense-A-Click module has been affected by the ambient temperature fluctuations as
well as humidity and possible smoke filled environment. After several years, due to these factors the
unit can no longer rely on the signal it receives optically and it require either replacement all lenses
and recalibration (this option is available for Suzo-Happ certified service centers only), or
simply be replaced by a new set to ensure a high acceptance rate.
When extracting the lower Sense-A-Click module, in order to avoid damage, the use of the
Sense-A-Click extraction tool is mandatory (OPT-HW-FT01)
First, insert the extractor into the two channels on the two sides of the lower Sense-A-Click module.
The small teeth on the extractor should be pointing away from the bezel. Next, move the extractor
away from the bezel as to flush it with the Sense-A-Click module and put it at 90 degrees to the
surface of the bill validating head.
If manual cleaning and recalibration option is selected, the Sense-A-Click must be
recalibrated as outlined in the Suzo-Happ Sensor Maintenance Guidelines document
(for Suzo-Happ certified service centers only)
Rev. 2
- 49 -
© 2014 Suzo-Happ
Serviceability Manual
The o-rings (8211335) as well as the rollers (0200050 and 0200053.01) should be replaced at this
stage to ensure proper traction along the bill path. A high level of disassembly is required to
accomplish this step. The o-rings outlined below must be replaced.
Upper compartment
Lower Compartment
As the o-rings are being replaced, ensure the aligning mechanism worm gears are not damaged and
clean them using a can of compressed air.
Do no damage the sensors located on the printed board while replacing the o-rings and
cleaning the aligning mechanism in order to maintain the proper functioning of the unit. If
sensors were damaged, ensure board is replaced.
Rev. 2
- 50 -
© 2014 Suzo-Happ
Serviceability Manual
The sensors on the sensor board must be cleaned to ensure the bill is properly detected once it
enters the validating head to maintain a high acceptance rate. Use a cotton swab to clean the
sensors.
Next, replace the 4 o-rings and 4 rollers in the lower compartment similarly to the way it was done in
the upper compartment.
The maintenance done on the rest of the components is the same as discussed in level 1 and 2
maintenance levels. Such items include cleaning all surfaces using the micro-fiber cloth.
Rev. 2
- 51 -
© 2014 Suzo-Happ
Serviceability Manual
6.2. Chassis (BBC-0110)
On one side of the chassis all four sets of belts (8215004) are replaced with a new set. On the
opposite side of the chassis all 12 rollers are to be replaced along with the roller panel (0200111 or
0200111V3 - see note below for more details) to ensure proper traction and transport of the bill. This
step requires an intermediate level of disassembly in order to perform the replacement.
The roller and belt assemblies in unit above are secured using screws, older models
however may use black snap-in clips. The clips can be popped out using a flat-head
screwdriver. While the rollers and belts are replaced, ensure the sensor board as well as
the sensors on the board underneath are cleaned using cotton swabs and then sprayed using a can
of compressed air.
Rev. 2
- 52 -
© 2014 Suzo-Happ
Serviceability Manual
Older model guide assemblies, part number 0200111V3 that use push rivets should be
ordered if B2B manufacturing date is before May 1, 2010. Otherwise, newer model guide
assemblies, part number 0200111 that use screws should be ordered.
The spring arm (8601001) can also be replaced at this point to ensure a smooth opening and closing of
the cassis and to avoid damage to the connectors between the two halves of the chassis.
Before completing the level 3 maintenance, ensure none of the connectors for the dispenser and
recycling cassettes are loose or damaged due to misuse and repetitive insertion cycles.
Finally, for the rest of the components perform the same maintenance steps as in Level 2
maintenance.
After all steps have been performed and the chassis has been put together, place the
chassis on the P2258 fixture in order to verify all other components are working properly. If
any issues are detected, change parts and required.
6.3. Path Switch (BBS-0110)
Due to the high traffic of bills the switch has undergone at this point, it must be replaced by a new unit
at this point.
For steps on how to properly replace the path switch module please go to section 4.4.
Rev. 2
- 53 -
© 2014 Suzo-Happ
Serviceability Manual
6.4. Recycling Cassettes (BBR-011X)
After performing the Level 2 maintenance, an additional step required is to ensure the interface
connectors are intact on all recycling cassettes and do not show excessive signs of wear.
If any damage is detected, replace the connected along with the connector wire (0500109) by
removing the two side covers of the cassette and unclipping the wire.
Rev. 2
- 54 -
© 2014 Suzo-Happ
Serviceability Manual
6.5. Dispenser (BBD-0X10)
The dispenser maintenance requires a high level of disassembly in order to replace all worn out and
fatigued parts. The preventative maintenance would replace all belts (belts on the cover: 8215002,
belts on the body: 8215003) in the dispenser as well as a thorough cleaning of all sensors inside. The
replacement of the motor controlling the gate and the motor controlling the stacking is also
recommended every second level 3 maintenance, or 540,000 bills as it will be discussed below.
The disassembly begins by removing the two side covers (being held by 4 screws on each side) and
then turning the two bearings holding the cover. The bearing snap should point upwards.
Two types of dispensers have been produced which has a similar outer structure,
however, the internal components are slightly in modified in the new model for
improved performance. This section includes the images from the older model. For new
models schematics please contact Suzo-Happ technical support department as
outlined in section 9. The boundary between the older and newer models is week of
June 25, 2010 or s/n: XX1026XXXXXX.
Rev. 2
- 55 -
© 2014 Suzo-Happ
Serviceability Manual
Then lifting up the cover will reveal all sensors and belts.
Optional: Turning the dispenser over would reveal the shutter and drive motors. It is recommended to
replace these motors during Level 3 maintenance at 540,000 cycles (0300052-02).
Additional steps of disassembly are available through training on the Suzo-Happ e-learning
website at: http://na.suzohapp.com/Bill-to-Bill/e-Learning.html. Also, a fixture for dispenser
calibration and verification (P1987) is required after the dispenser has been reassembled.
Rev. 2
- 56 -
© 2014 Suzo-Happ
Serviceability Manual
6.6. Cashbox (FLC-603)
Same steps as in Level 2 maintenance should be performed as well ensuring the cam is properly
fucntioning.
6.7. MFL Power Interface (FLP-571X)
Same steps as in Level 2 maintenance should be performed.
6.8. B2B Power Interface (BBP-5710)
The power interface is an essential life-line for the Bill-to-Bill™ 300 unit. Ensure that the connector is
not loose and has no play about its location. Also, ensure the pins inside each of the 10 slots on the
connector are straight. If any damage is detected, the power interface must be replaced.
6.9. Final Money Test
After the unit has been completely reassembled and all individual modules been tested the final test
stage may begin. This stage includes the money test which will verify al modules are working
correctly together. For the outline of the money test procedures please contact a Suzo-happ
technical support department (See section 9)
Rev. 2
- 57 -
© 2014 Suzo-Happ
Serviceability Manual
7. Maintenance Chart
The following table is a guideline for the periods when each level of maintenance should be employed
based on the average number of bills inserted into the unit per day (24h):
Bill per Day (BPD)
Level 1
Level 2
Level 3
≤ 250
3 Months
9 Months
2 Years and
9 months
≤ 325
3 Months
9 Months
2 Years and
3 months
≤ 500
2 Months
6 Months
1 Year and
6 months
≤ 750
1 Month
4 Months
1 Year
Period
(Whichever is First)
30,000 or
3 months
90,000 or
9 months
270,000 or
3 Years
Location
On-site
On-site
Workshop
Responsibility
Operator*
Field Technician*
Service Center
Technician*
Service time (Per Unit)
7-10min
30min-1h
2h-3h
* Trained and certified personnel only. Contact nearby Service Center or Crane Payment Solutions Tech support to schedule your training
Level 3
Level 2
Level 1
1 Month 2 Months 3 Months 6 Months
9 Months 12 Months
24 Months
36 Months
**BPD: Bills per 24 hours on average
***Based on operating conditions – Ambient Temperature: 18°C ~ 25°C, Humidity: 40% ~ 60%
Rev. 2
- 58 -
© 2014 Suzo-Happ
Serviceability Manual
8. Spare Parts List
List of spare parts for levels 1, 2 and 3 can be found in their respective sections in this document. For
additional spare parts which might require replacement, please see Spare_Parts_Bill_to_Bill_300.xls.
To obtain this file please contact Suzo-Happ sales representative. All spare parts
are RoHS Compliant.
Rev. 2
- 59 -
© 2014 Suzo-Happ
Serviceability Manual
9. Contact Information
9.1. Technical Support Department
Suzo-Happ
587 Hanlan Dr. Woodbridge ON L4L 4R8, Canada
Phone:1-800-239-7017 (+1-905-303-8874)
Fax:
1-800-593- 263 (1-905-851-7663)
E-mail:
[email protected]
Website:
suzohapp.com/Bill-to-Bill/
9.2. Training
All training modules are available on the e-learning website which can be found at
http://na.suzohapp.com/Bill-to-Bill/e-Learning.html as well as provided by service centers.
Level 2 maintenance is performed by trained and certified field technicians. For training and
certification please contact the distributor or service centre.
Level 3 maintenance is performed by trained and certified service center technicians. For training and
certification please contact Crane Payment Solutions™ technical support department as listed above.
9.3. Service Centers
The main Bill-to-Bill service center is located at 587 Hanlan Dr. Woodbridge ON L4L 4R8, Canada
9.4. Customer Service
For any inquiries dealing with orders of spare parts, as well as other service inquiries please contact the
Suzo-Happ Bill-to-Bill™ service department at: [email protected].
Please be advised that RMA requests must be processed through the customer service department
and require the the part number, unique serial number and reason for return in order to be
processed: [email protected]
Rev. 2
- 60 -
© 2014 Suzo-Happ
Serviceability Manual
10. Appendices
10.1.
Sense-A-Click Module identification
Part Number for Sense-a-Click™ Sensor
Currency
Uncoated
Coated
South Africa
ZA
FLS-1704
FLS-1706
Albania
AL
FLS-1704
FLS-1706
Argentina
AR
FLS-1704
FLS-1706
Armenia
AM
FLS-1704
FLS-1706
Aruba
AW
FLS-1704
FLS-1706
Australia
AU
FLS-1704
FLS-1706
Azerbaijan
AZ
FLS-1704
FLS-1706
Bahamas
BS
FLS-1704
FLS-1706
Barbados
BB
FLS-1704
FLS-1706
Belarus
BY
FLS-1704
FLS-1706
Bolivia
BO
FLS-1705
FLS-1707
Botswana
BW
FLS-1704
FLS-1706
Brazil
BR
FLS-1704
FLS-1706
Bulgaria
BG
FLS-1704
FLS-1706
Canada
CA
FLS-1801
FLS-1802
Cayman Islands
KY
FLS-1704
FLS-1706
Chile
CL
FLS-1705
FLS-1707
China
CN
FLS-1705
FLS-1707
China + Hong Kong
CNHK
FLS-1705
FLS-1707
Colombia
CO
FLS-1704
FLS-1706
Costa Rica
CR
FLS-1705
FLS-1707
Czech Rep.
CZ
FLS-1704
FLS-1706
Dominican Republic
DO
FLS-1704
FLS-1706
Eastern Caribbean*
XCD
FLS-1704
FLS-1706
Egypt
EG
FLS-1704
FLS-1706
Estonia
EE
FLS-1704
FLS-1706
* Antigua and Barbuda, Dominica, Grenada, Saint Kitts and Nevis, Saint Lucia, and Saint Vincent and the
Grenadines.
Rev. 2
- 61 -
© 2014 Suzo-Happ
Serviceability Manual
Part Number for Sense-a-Click™ Sensor
Currency
Rev. 2
Uncoated
Coated
European Union
EU
FLS-1704
FLS-1706
Georgia
GE
FLS-1704
FLS-1706
Gibraltar
GI
FLS-1704
FLS-1706
Guatemala
GT
FLS-1705
FLS-1707
Honduras
HN
FLS-1705
FLS-1707
Hong Kong
HK
FLS-1705
FLS-1707
Hungary
HU
FLS-1704
FLS-1706
India
IN
FLS-1705
FLS-1707
Indonesia
ID
FLS-1704
FLS-1706
Israel
IL
FLS-1704
FLS-1706
Japan
JP
FLS-1704
FLS-1706
Kazakhstan
KZ
FLS-1704
FLS-1706
Kenya
KE
FLS-1704
FLS-1706
North and South
Korea
KP/KR
FLS-1705
FLS-1707
Kuwait
KW
FLS-1704
FLS-1706
Kyrgyzstan
KG
FLS-1704
FLS-1706
Latvia
LV
FLS-1704
FLS-1706
Lithuania
LT
FLS-1704
FLS-1706
Macao
MO
FLS-1705
FLS-1707
Macedonia
MK
FLS-1704
FLS-1706
Macedonia
MK
FLS-1705
FLS-1707
Malawi
MW
FLS-1705
FLS-1707
Malaysia
MY
FLS-1705
FLS-1707
Malta
MT
FLS-1704
FLS-1706
Mauritius
MU
FLS-1704
FLS-1706
Mexico
MX
FLS-1705
FLS-1707
Moldova
MD
FLS-1704
FLS-1706
Mongolia
MN
FLS-1704
FLS-1706
Morocco
MA
FLS-1704
FLS-1706
Namibia
NA
FLS-1704
FLS-1706
- 62 -
© 2014 Suzo-Happ
Serviceability Manual
Part Number for Sense-a-Click™ Sensor
Currency
Coated
New Zealand
NZ
FLS-1704
FLS-1706
Nigeria
NG
FLS-1705
FLS-1707
Northern Ireland
IE
FLS-1704
FLS-1706
Norway
NO
FLS-1705
FLS-1707
Peru
PE
FLS-1704
FLS-1706
Philippines
PH
FLS-1704
FLS-1706
Poland
PL
FLS-1704
FLS-1706
Romania
RO
FLS-1705
FLS-1707
Russia
RU
FLS-1704
FLS-1706
Scotland
??
FLS-1704
FLS-1706
Serbia
RS
FLS-1704
FLS-1706
Singapore
SG
FLS-1705
FLS-1707
Slovakia
SK
FLS-1704
FLS-1706
Slovenia
SI
FLS-1704
FLS-1706
Swaziland
SZ
FLS-1704
FLS-1706
Sweden
SE
FLS-1705
FLS-1707
Switzerland
CH
FLS-1704
FLS-1706
Taiwan
TW
FLS-1705
FLS-1707
Tajikistan
TJ
FLS-1704
FLS-1706
Tanzania
TZ
FLS-1704
FLS-1706
Thailand
TH
FLS-1705
FLS-1707
Turkey
TR
FLS-1705
FLS-1707
Turkmenistan
TM
FLS-1704
FLS-1706
Uganda
UG
FLS-1704
FLS-1706
Ukraine
UA
FLS-1704
FLS-1706
United Arab Emirates
AE
FLS-1704
FLS-1706
United Kingdom
GB
FLS-1704
FLS-1706
USA
US
FLS-1704
FLS-1706
USA + Canada
US
FLS-1901
FLS-1902
USA + Great Britain
USGB
FLS-1704
FLS-1706
Currency
Rev. 2
Uncoated
Part Number for Sense-a-Click Sensor
- 63 -
© 2014 Suzo-Happ
Serviceability Manual
Uncoated
Coated
USA + Mexico
USMX
FLS-1704
FLS-1706
Uzbekistan
UZ
FLS-1704
FLS-1706
Venezuela
VE
FLS-1705
FLS-1707
Vietnam
VN
FLS-1705
FLS-1707
Yugoslavia, Former*
??
FLS-1704
FLS-1706
Zambia
ZM
FLS-1704
FLS-1706
* Monte Negro, Croatia, Serbia (inducing Kosovo), Macedonia, Bosnia and Herzegovina
Rev. 2
- 64 -
© 2014 Suzo-Happ
Serviceability Manual
10.2. Bill-to-Bill™ 300 Field Report
Customer Information:
Company Name: _____________________________________________________
Contact Person: ______________________________________________________
Phone Number: ______________________________________________________
Preferred Time:
Before:
At:
After:
____ : ____ AM/PM
E-Mail: _____________________________________________________________
Service Center Info (If applicable): ______________________________________
____________________________________________________________________
Unit Information:
Part Number: _______________________ (Example: BBD-0110)
Serial Number: _____________________ (Example: 14KA19VH0902)
How long have
product been used:
0 to 6 month:
31 to 48 Months:
7 to 30 Months:
More than 48 Months:
Problem information:
Specify location
A (Bezel)
E (Switch – Cassette 2)
(see diagram on next
page):
B (Validating Head)
F (Switch – Cassette 3)
C (Validating Head - Switch)
G (Switch – Dispenser)
D (Switch – Cassette 1)
H (Switch – Cashbox)
I (Dispenser)
Other (please circle on diagram): _______________________
__________________________________________________
Problem occurred
During:
Initialization
Dispensing
Accepting
Unloading to Cashbox
Other (plase specify):
____________________________
__________________________________________________
Bill to Bill error code *: _______________________________________________
Is the specific issue related to:
Software:
Function:
Hardware:
Currency:
*Check manual or website at suzohapp.com/Bill-to-Bill/e-Learning.html
Rev. 2
- 65 -
© 2014 Suzo-Happ
Serviceability Manual
Description of Problem (attach picture if possible):
_____________________________________________________________________
_____________________________________________________________________
_____________________________________________________________________
_____________________________________________________________________
Anny additional comments or feedback:
_____________________________________________________________________
_____________________________________________________________________
_____________________________________________________________________
_____________________________________________________________________
I agree to participate for Internal Customer Satisfaction survey:
A
Yes
No
B
C
I
D
E
G
F
H
For Suzo-Happ Use Only
Date Received
Navision Corrective Action #
Date CAR Closed
Date Customer Notified
Rev. 2
- 66 -
© 2014 Suzo-Happ