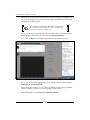
1
www.allitebooks.com
BuddyPress Theme
Development
A hands-on guide to customize and embellish your
BuddyPress website
Tammie Lister
BIRMINGHAM - MUMBAI
www.allitebooks.com
BuddyPress Theme Development
Copyright © 2013 Packt Publishing
All rights reserved. No part of this book may be reproduced, stored in a retrieval
system, or transmitted in any form or by any means, without the prior written
permission of the publisher, except in the case of brief quotations embedded in
critical articles or reviews.
Every effort has been made in the preparation of this book to ensure the accuracy
of the information presented. However, the information contained in this book is
sold without warranty, either express or implied. Neither the author, nor Packt
Publishing, and its dealers and distributors will be held liable for any damages
caused or alleged to be caused directly or indirectly by this book.
Packt Publishing has endeavored to provide trademark information about all of the
companies and products mentioned in this book by the appropriate use of capitals.
However, Packt Publishing cannot guarantee the accuracy of this information.
First published: October 2013
Production Reference: 1151013
Published by Packt Publishing Ltd.
Livery Place
35 Livery Street
Birmingham B3 2PB, UK.
ISBN 978-1-78328-161-9
www.packtpub.com
Cover Image by Sandeep Babu ([email protected])
www.allitebooks.com
Credits
Author
Project Coordinator
Tammie Lister
Michelle Quadros
Reviewers
Proofreaders
Alison Barrett
Mario Cecere
Paul Gibbs
Faye Coulman
Brian Messenlehner
Indexer
Acquisition Editor
Mariammal Chettiyar
James Jones
Graphics
Commissioning Editor
Yuvraj Mannari
Neha Nagwekar
Production Coordinator
Technical Editors
Shantanu Zagade
Monica John
Sonali S. Vernekar
Cover Work
Shantanu Zagade
www.allitebooks.com
About the Author
Tammie Lister is a designer and theme developer. She's passionate about
community design and mixing in psychology with design and development to create
these communities. She is lucky enough to create a wide range of communities with
her clients. Her background is both in design and development. She has worked as a
freelancer for over 10 years from her own company called logicalbinary.com.
She has spoken about BuddyPress and communities at WordCamps, BuddyCamps,
and other conferences. Her contributions to BuddyPress include being part of
the community theme for BuddyPress, UI, and a new template pack. She also
has a sketchbook where she explores and experiments with BuddyPress at
buddydesignlabs.com.
Special thanks goes to the editorial team that made this book happen. A large thank
you goes out to Alison Barrett, Brian Messenlehner, and Paul Gibbs, who gave their
time as technical reviewers.
This book is dedicated to the core team behind BuddyPress for all their work. A
huge thanks also goes out to everyone that contributed in any way in the project.
BuddyPress is made up of the people involved so thank you. I'd also like to thank
my editors and reviewers for helping make this book the best it could be. Last but
not least a thank you goes to my husband Simon for understanding my passion for
writing this book and open source projects.
Special thanks go to the editorial team that made this book happen.
A large thank you goes out to Alison Barrett, Brian Messenlehner,
and Paul Gibbs, who gave their time as technical reviewers.
This book is dedicated to the core team behind BuddyPress for all
your work. A huge thanks also goes out to everyone that contributes
in any way in the project. BuddyPress is made up of the people
involved so thank you. I’d also like to thank my editors and reviewers
for helping to make this book the best it could be. Last but not the
least, a thank you goes to my husband Simon for understanding my
passion for writing this book and open source projects.
www.allitebooks.com
About the Reviewers
Alison Barrett has been using WordPress for most of her career as a web
developer, building customized sites for clients and creating open-source plugins.
She is now a Code Wrangler at Automattic, the company behind WordPress.com.
Alison graduated from the Art Institutes International Minnesota with a degree in
Interactive Media Design.
Paul Gibbs lives in the south of the UK, not far from Brighton. He’s proud to
be British and was brought up on a diet of digestive biscuits, crumpets, and tea.
Paul likes spending his spare time building WordPress plugins, and is a Lead
Developer of BuddyPress. Away from the screen, he enjoys reading, photography,
and travelling.
Paul works for Automattic on the WordPress.com VIP team.
Thanks to all contributors to BuddyPress, of which without their
efforts, this book wouldn’t exist; you are all amazing people! Special
praise goes to Boone B. Gorges, Raymond Hoh, John James Jacoby,
Mercime, and Tammie Lister.
To my parents and family; thanks for all of your support and
guidance on this adventure! I Couldn’t have done this without you.
www.allitebooks.com
Brian Messenlehner, a former software developer for the United States Marine
Corps, has an extensive background in building custom web applications from the
ground up with mostly Microsoft and Oracle based technologies. In 2001, Brian
co-founded WebDevStudios.com, a freelance web development shop, with
another US Marine, Brad Williams.
In early 2008, Brian and Brad took on WebDevStudios full time. They shifted focus to
open source web platforms built with PHP and MySQL such as WordPress, Joomla
and Drupal.
By 2013, WebDevStudios.com has become a fully distributed development and
design shop with three partners, Brian, Brad, and Lisa Sabin-Wilson. WDS has
13 employees and works exclusively with WordPress building custom plugins,
themes, multisite networks, BuddyPress social networks, web applications, and
hybrid mobile applications. Brian and the team at WDS have more than a few very
customized BuddyPress builds, themes and plugins under their belt and have been
working with BuddyPress since Version 1.0.
Brian is the co-author of "Building Web Apps with WordPress" along with Jason
Coleman of StrangerStudios.com. His book is about using WordPress as an
Application Framework.
I would like to thank Tammie Lister for giving me the opportunity
to review this book and Rahul Nair for reaching out to me about
reviewing "BuddyPress Theme Development" and Michelle Quadros
for staying on top of things for Packt Publishing. I am thankful of my
wife and best friend, Robin Messenlehner and my children Dalya,
Brian Jr. and Nina Messenlehner for supporting me and my efforts
to review "BuddyPress Theme Development". I would also like to
acknowledge my business partners and friends Brad Williams, Lisa
Sabin-Wilson, and the entire WebDevStudios.com team for building
the best WordPress development & design shop on earth!
www.allitebooks.com
www.PacktPub.com
Support files, eBooks, discount offers and more
You might want to visit www.PacktPub.com for support files and downloads related
to your book.
Did you know that Packt offers eBook versions of every book published, with PDF
and ePub files available? You can upgrade to the eBook version at www.PacktPub.
com and as a print book customer, you are entitled to a discount on the eBook copy.
Get in touch with us at [email protected] for more details.
At www.PacktPub.com, you can also read a collection of free technical articles, sign
up for a range of free newsletters and receive exclusive discounts and offers on Packt
books and eBooks.
http://PacktLib.PacktPub.com
Do you need instant solutions to your IT questions? PacktLib is Packt’s online
digital book library. Here, you can access, read and search across Packt’s entire
library of books. Why Subscribe?
• Fully searchable across every book published by Packt
• Copy and paste, print and bookmark content
• On demand and accessible via web browser
Free Access for Packt account holders
If you have an account with Packt at www.PacktPub.com, you can use this to access
PacktLib today and view nine entirely free books. Simply use your login credentials
for immediate access.
www.allitebooks.com
www.allitebooks.com
Table of Contents
Preface1
Chapter 1: State of Play of BuddyPress Themes
7
What is BuddyPress?
7
What is a theme?
8
How BuddyPress themes used to work
9
The trouble with default
10
Theme compatibility
10
Do you still need a BuddyPress theme?
11
Communities11
Niche communities
12
Techniques12
Responsive design
12
What about adaptive design?
13
Mobile first
13
Do you need an app?
13
In the wild – BuddyPress custom themes
14
What are the options while creating a theme?
14
WordPress themes
15
BuddyPress themes
15
Free themes
Themes to buy
15
16
Summary
Chapter 2: Going Default – Installing BuddyPress
Steps for installing BuddyPress
Installing WordPress
The famous five-minute WordPress install
Installing BuddyPress
Autoinstalling by plugin activation
www.allitebooks.com
17
19
19
20
20
22
23
Table of Contents
Configuring BuddyPress
24
A look at BuddyPress features
26
Default features
26
Optional features
26
Forums27
Using BuddyPress with a WordPress theme
27
Summary28
Chapter 3: Beyond Default – What Can You Do?
Existing themes designed for BuddyPress
Child themes
How to create a child theme
Using a child theme with BuddyPress
The CSS and JavaScript file order
Customizing your theme using just CSS
Introducing buddypress.css
The default selector
Customizing CSS in a child theme
Template hierarchy in BuddyPress
Creating a generic BuddyPress template
Using a generic Buddypress template to have a full page layout
BuddyPress feature templates
Adding a custom BuddyPress component customization to a child theme
Summary
Chapter 4: BuddyPress File Structure, Templates, and Loops
Working with WordPress
Getting it right
WordPress template structure
WordPress template hierarchy
WordPress template tags
Anatomy of a WordPress theme
Scripts in the theme
Extras and custom functions
Languages
Stylesheets contained in theme
Template files
29
29
30
30
32
32
33
33
33
33
35
36
36
37
38
39
41
41
42
42
43
43
44
45
45
45
45
45
The wp_template_part function
46
Post formats
48
The functions.php file
Theme setup function
The screenshot.php file
Additional files
47
48
48
48
[ ii ]
Table of Contents
Enqueue all the things
Custom backgrounds
Custom headers
49
50
50
Widgets50
Navigation51
How BuddyPress themes work
BuddyPress loops
Template tags
Anatomy of a BuddyPress theme
51
52
53
54
Summary
56
Feature folder contents
55
CSS55
Script files
55
The bp-custom.php and functions.php file
56
Chapter 5: Let's Get Building
Building the site
The process we're going to follow
Things to consider before we start building
Sketch
Wireframe
Style guide
Getting the site built
Setting up
57
57
58
58
59
59
61
62
62
Enqueue fonts
Page layouts
Removing the admin bar
63
63
64
Template
Adding a custom background
The header
64
65
65
Custom header image
Variable header heights
67
67
The logged-out user view
68
Navigation70
The front page
71
The sidebar
75
Random members
76
Random groups
77
The member profile
78
Add the About profile field
79
Directories81
Summary82
[ iii ]
Table of Contents
Chapter 6: Beyond the Look – Hooks, Functions,
and Afterwards
Adding functionality
Hooks
BuddyPress specific hooks
Using hooks
Changing the content using filters
83
83
84
85
85
86
Advanced component loops
Custom post types
Customizing template tags
87
88
88
Custom templates
Functions
bp-custom modifications
Demonstrating the statistics function
Widgets
After the theme
Testing
Browser testing
The device-free version
Theme check
89
90
90
90
92
93
93
94
94
97
A customized comment form
Recommended by theme check
Adding a screenshot
Adding in post thumbnails
Editor style
88
99
99
100
100
Beyond theme check
100
Making your theme translatable
101
Accessibility102
Plugins102
Beyond the launch
103
Summary103
Appendix: Folder Contents
105
Index
109
Activity folder contents
Blogs folder contents
Groups folder contents
Forums folder contents
Members folder contents
105
106
106
107
107
[ iv ]
Preface
BuddyPress has grown so much in the past few years that it feels now is the right
time for a book about theme development for it. At the time of writing this book,
there have been 1,588,230 downloads of BuddyPress. It's now at version 1.8.1 with
version 1.9 due soon. The past year has seen the second conference devoted to
BuddyPress called a BuddyCamp, theme compatibility, and a growth in people
creating communities. BuddyPress has truly come of age.
BuddyPress is open source and as such, relies on contributions. As you learn more
about BuddyPress and get more involved, I'd encourage you to contribute to the
project. You don't have to be a developer to do this; there are many ways you can
contribute. BuddyPress is free, but remember that people invest time to make this
amazing project.
Communities are powerful; they allow people to unite and create a digital home.
The spectrum of communities is vast and so are their requirements. BuddyPress is
social Lego – a toolbox of components, you can pick and choose what are used to
create your community. That's its power, to be able to adapt to whatever community
you want to create. Just like the variety in communities, the theme you use for that
community should be tailored to it. Being able to create a custom theme will always
benefit the community, increase user engagement, and have an experience that is just
right for the members.
I've spent years working with BuddyPress and creating themes, and I will be honest,
in the past BuddyPress didn't make things easy. The learning curve was so high that
most were put off. The good news though is that now this has changed. To just get
started is as easy as turning on BuddyPress – it works with your WordPress theme.
However, that shouldn't be where the story ends. Being able to create your
own theme that fits your community like a tailored suit, that's when things
get really exciting.
Preface
BuddyPress theme development is designed to give you an insight into creating
themes. Before you dive into creating themes though, I'll go through some of the
things you need to know when creating themes. I will briefly touch on some of the
things you should consider from designing for different devices through to what is a
community. After that, I will guide you through each of the options for BuddyPress
themes and lead up to going through the custom theme creation process. It's going
to be quite a journey and one that should see you at the end able to create your own
BuddyPress theme.
What this book covers
Chapter 1, State of Play of BuddyPress Themes, explains the start of the journey into
BuddyPress themes. It will include an overview of the past, the current situation,
and some important considerations in theme development, such as responsive
design. Included will be theme compatibility and options when you create a
BuddyPress theme.
Chapter 2, Going Default – Installing BuddyPress, will head further into BuddyPress
themes and include tutorial on installing WordPress and BuddyPress. After
the installation, we will look at how you can use theme compatibility to get
BuddyPress working with a WordPress theme. It will also include a look
at the BuddyPress components.
Chapter 3, Beyond Default – What Can You Do?, goes beyond simply using theme
compatibility and shows how to use custom styles for BuddyPress. It will show
how you can use a child theme and create custom templates.
Chapter 4, BuddyPress File Structure, Templates, and Loops, dives deeper into
BuddyPress themes and looks at the nuts and bolts. The anatomy of a WordPress
and BuddyPress theme will be examined along with template tags and hierarchy.
Chapter 5, Let's Get Building, takes you through how to develop a BuddyPress theme.
It will start with the concept, then move into wireframes, and actually build the
theme. There will be practical tutorials and code examples as it builds up to create
a fully functional BuddyPress theme.
Chapter 6, Beyond the Look – Hooks, Functions, and Afterwards, builds on the theme
built. It looks at what happens once you've got the basic theme and how to add
functionality using hooks, loops, and template tags. It also covers creating your
own widgets and making your site responsive. Finally, it will look at what happens
once the theme is complete by looking at testing, theme checks, and launching
your community.
[2]
Preface
Appendix, Folder Contents, includes a breakdown of the folder contents in a
BuddyPress theme.
What you need for this book
You will need the following for this book:
• Text or code editor
• FTP client
• Hosting or running a local installation such as MAMP or WAMP
Who this book is for
This book is great for designers and developers new to BuddyPress, and who are
looking to get a good foundation in developing BuddyPress themes. It's assumed
that you know what WordPress is, but you do not have to create a WordPress theme
to use this book. A brief foundation in WordPress themes will be included. Readers
are expected to know at least what CSS and HTML are and follow the code examples
with the book. You do not have to be a developer to understand this book.
Conventions
In this book, you will find a number of styles of text that distinguish between
different kinds of information. Here are some examples of these styles, and an
explanation of their meaning.
Code words in text are shown as follows: "Unzip your downloaded files and upload
the entire folder to your remote server's wp-content/themes folder."
A block of code is set as follows:
wp_enqueue_style('googleFonts', 'http://fonts.googleapis.com/css?famil
y=PT+Sans:400,700,400italic,700italic');
New terms and important words are shown in bold. Words that you see on the
screen, in menus or dialog boxes for example, appear in the text like this: "clicking
the Next button moves you to the next screen".
[3]
Preface
Warnings or important notes appear in a box like this.
Tips and tricks appear like this.
Reader feedback
Feedback from our readers is always welcome. Let us know what you think about
this book—what you liked or may have disliked. Reader feedback is important for
us to develop titles that you really get the most out of.
To send us general feedback, simply send an e-mail to [email protected],
and mention the book title via the subject of your message.
If there is a topic that you have expertise in and you are interested in either writing
or contributing to a book, see our author guide on www.packtpub.com/authors.
Customer support
Now that you are the proud owner of a Packt book, we have a number of things to
help you to get the most from your purchase.
Downloading the example code
You can download the example code files for all Packt books you have purchased
from your account at http://www.packtpub.com. If you purchased this book
elsewhere, you can visit http://www.packtpub.com/support and register to
have the files e-mailed directly to you.
[4]
Preface
Errata
Although we have taken every care to ensure the accuracy of our content, mistakes
do happen. If you find a mistake in one of our books—maybe a mistake in the text or
the code—we would be grateful if you would report this to us. By doing so, you can
save other readers from frustration and help us improve subsequent versions of this
book. If you find any errata, please report them by visiting http://www.packtpub.
com/submit-errata, selecting your book, clicking on the errata submission form link,
and entering the details of your errata. Once your errata are verified, your submission
will be accepted and the errata will be uploaded on our website, or added to any list of
existing errata, under the Errata section of that title. Any existing errata can be viewed
by selecting your title from http://www.packtpub.com/support.
Piracy
Piracy of copyright material on the Internet is an ongoing problem across all media.
At Packt, we take the protection of our copyright and licenses very seriously. If you
come across any illegal copies of our works, in any form, on the Internet, please
provide us with the location address or website name immediately so that we can
pursue a remedy.
Please contact us at [email protected] with a link to the suspected
pirated material.
We appreciate your help in protecting our authors, and our ability to bring you
valuable content.
Questions
You can contact us at [email protected] if you are having a problem with
any aspect of the book, and we will do our best to address it.
[5]
State of Play of
BuddyPress Themes
We're going to start our journey with BuddyPress themes. This is going to be a
foundation chapter, setting the scene for the road ahead.
In this chapter, we're going to cover the following:
• What is BuddyPress?
• What is a theme?
• Theme compatibility
• What is a community?
• A brief look at responsive design, adaptive design, and mobile first
• A look at some existing BuddyPress sites and existing themes
• What are your options when creating a theme?
At the end of this chapter you will have an overview of the past and present state of
BuddyPress themes along with a grasp of some of the topics anyone creating a theme
should know about.
What is BuddyPress?
BuddyPress had its first release in April 2009 and is a plugin that you use with
WordPress to bring community features to your site.
www.allitebooks.com
State of Play of BuddyPress Themes
BuddyPress is capable of so much, from connecting and bringing together an existing
community through to building new communities. A few things you can create are:
• A community for your town or village
• An intranet for a company
• A safe community for students of a school to interact with each other
• A community around a product or event
• A support network for people with the same illness
BuddyPress has a lot of different features; you can choose which you want to use.
These include groups, streams, messaging, and member profiles. In the next chapter
we'll look at these in more detail.
BuddyPress and WordPress are open source projects released under the GPL license.
You can find out more about GPL here: http://codex.wordpress.org/License.
A team of developers work on the project and anyone can get involved and
contribute. As you use BuddyPress, you may want to get more involved in the
project itself or find out more. There are a number of ways you can do this:
• The main site http://buddypress.org/ and the development blog at
http://bpdevel.wordpress.com.
• For support and information there is http://buddypress.org/support/
and http://codex.buddypress.org.
• If you use IRC, you can use the dedicated channels on irc.freenode.net
#buddypress or #buddypress-dev. The developer meeting is every
Wednesday at 19:00 UTC in #buddypress-dev.
IRC (Internet Relay Chat) is a form of real-time Internet
text messaging (chat). You can find out more here:
http://codex.wordpress.org/IRC.
What is a theme?
Your site theme can be thought of as the site design, but it's more than colors and
fonts. Themes work by defining templates, which are then used for each section of
your site (for instance, a front page or a single blog post). In the case of a BuddyPress
theme, it brings BuddyPress templates and functionality on top of the normal
WordPress theme.
[8]
Chapter 1
At the heart of any BuddyPress theme are the same files a WordPress theme needs;
here are some useful WordPress theme resources:
• Wordpress.org theme handbook:
http://make.wordpress.org/docs/theme-developer-handbook/
• WordPress CSS coding standards:
http://make.wordpress.org/core/handbook/coding-standards/css/
• Theme check plugin (make sure you're using the WordPress standards):
http://wordpress.org/extend/plugins/theme-check/
• There is a great section in the WordPress codex on design and layout:
http://codex.wordpress.org/Blog_Design_and_Layout
How BuddyPress themes used to work
BuddyPress in the past needed a theme to work. This theme had several variations;
the latest of these was BP-Default, which is shown in the following screenshot:
This is the default theme before BuddyPress 1.7
This theme was a workhorse solution giving everything a style, making sure you
could be up and running with BuddyPress on your site. For a long time, the best
way was to use this theme and create a child theme to then do what you wanted
for your site.
[9]
State of Play of BuddyPress Themes
A child theme inherits the functionality of the parent theme. You can add,
edit, and modify in the child theme without affecting the parent. This is a
great way to build on the foundation of an existing theme and still be able
to do updates and not affect the parent. For more information about a
child theme see: http://codex.wordpress.org/Child_Themes.
The trouble with default
The BuddyPress default theme allowed people without much knowledge to set up
BuddyPress, but it wasn't ideal. Fairly quickly, everything started to look the same
and the learning curve to create your own theme was steep. People made child
themes that often just looked more like clones.
The fundamental issue above all was that it was a plugin that needed a theme and
this wasn't the right way to do things. A plugin should work as best it can in any
theme. There had been work done on bbPress to make the change in the theme
compatibility and the time was right for BuddyPress to follow suit.
bbPress is a plugin that allows you to easily create forums in your
WordPress site and also integrate into BuddyPress. You can learn more
about bbPress here: http://bbpress.org.
Theme compatibility
Theme compatibility in simple terms means that BuddyPress works with any theme.
Everything that is required to make it work is included in the plugin. You can now
go and get any theme from wordpress.org or other sites and be up and running in
no time.
Should you want to use your own custom template, it's really easy thanks to theme
compatibility. So long as you give it the right name and place it in the right location
in your theme, BuddyPress when loading will use your file instead of its own.
Theme compatibility is always active as this allows BuddyPress to add new features
in future versions. You can see this in the following screenshot:
[ 10 ]
Chapter 1
Here you see BuddyPress 1.7 in the Twenty Twelve theme
Do you still need a BuddyPress theme?
Probably by now you're asking yourself if you even need a theme for BuddyPress.
With theme compatibility while, you don't have to, there are many reasons why
you'd want to. A custom theme allows you to tailor the experience for your
community. Different communities have different needs, one size doesn't fit all.
Theme compatibility is great, but there is still a need for themes that focus on
community and the other features of BuddyPress. A default experience will always
be default and not tailored to your site or for BuddyPress. There are many things
when creating a community theme that a normal WordPress theme won't have taken
into account. This is what we mean when we nowadays refer to BuddyPress themes.
There is still a need for these and a need to understand how to create them.
Communities
A community is a place for people to belong. Creating a community isn't something
you should do lightly. The best advice when creating a community is to start small
and build up functionality over time.
[ 11 ]
State of Play of BuddyPress Themes
Social networking on the other hand is purely about connections. Social networking
is only part of a community. Most communities have far more than just social
networking. When you are creating a community you want to focus on enabling
your members to make strong connections.
Niche communities
BuddyPress is perfect for creating niche communities. These are pockets of people
united by a cause, by a hobby, or by something else. However, don't think niche
means small. Niche communities can be of any size.
Having a home online for a community, a place where people of the same mindset,
same experiences can unite, that's powerful. Niche communities can be forces for
change, a place of comfort, give people a chance to be heard, or sometimes a place
just to be.
Techniques
A community should encourage engagement and provide paths for users to easily
accomplish tasks. You may provide areas, such as for user promotion, for user
generated content, set achievements for completing tasks or allow users to collect
points and have leaderboards. The idea of points and achievements comes from
something called Gamification and is a powerful technique.
Gamification techniques leverage people's natural desires for competition,
achievement, status, self-expression, altruism and closure
—Wikipedia (http://en.wikipedia.org/wiki/Gamification)
Community is something you experience offline and online. When you are creating a
community it's great to look at both. Think how groups of people interact, how they
get tasks done together, and what hurdles they experience. Knowing a little bit about
psychology will help you create a design that works for the community.
Responsive design
Responsive web design (RWD) is a web design approach aimed at crafting sites
to provide an optimal viewing experience—easy reading and navigation with a
minimum of resizing, panning, and scrolling—across a wide range of devices
(from desktop computer monitors to mobile phones)
—Wikipedia
[ 12 ]
Chapter 1
When you create your theme, you need to be careful to design it not only for one
device. The world is multi-device and your theme should adapt to the device it's
being used on without causing any issues. There are several options open to you
when looking to create a theme that works across all devices.
What about adaptive design?
Responsive designs worked initially a lot by using media queries in CSS to create
designs that adapted to CSS media queries. From this emerged the term adaptive
design. There are many definitions of what responsive and adaptive mean. Adaptive
loosely means progressive enhancement and responsive web design is part of this.
You could say that responsive web design is the technique and adaptive design is
the movement.
A media query consists of a media type and zero or more
expressions that check for the conditions of particular media
features: http://www.w3.org/TR/css3-mediaqueries/.
Mobile first
Mobile first makes sure that the site works first for the smallest screen size. As you
move up, styles are added using media queries to use the extra screen real estate.
This was a phrase coined by Luke Wroblewski. This is a lighter approach and often
preferred as it loads just what the device needs.
Do you need an app?
In the WordPress world, mobile themes tend to come in the form of plugins or apps.
Historically, most WordPress themes had a mobile theme and this theme showed
only to those accessing a mobile device. You were presented with a default theme
that looked the same regardless of the site and there was often no way to see a
non-mobile experience (a point of frustration on larger mobile devices).
When thinking about mobile apps or plugins, a good rule of thumb is to ask if it's
bringing something extra to your site. This could be focusing on one aspect, or
making something mobile so devices have access to integrate. If they are simply
changing the look of your site you can deal with that in your theme. You shouldn't
need an app or plugin to get your site working on a mobile device.
[ 13 ]
State of Play of BuddyPress Themes
In the wild – BuddyPress custom themes
There is a whole world out there of great BuddyPress examples, so let's take a little
bit of time to get inspired and see what others have done. The following list shows
some of the custom themes:
• Cuny Academic Commons: http://commons.gc.cuny.edu/. This is run
by the City University of New York and is for supporting faculty initiatives
along with building community.
• Enterprise Nation: http://enterprisenation.com. This site is a business
club encouraging connections and sharing of information.
• Goed en wel.nl: http://goedenwel.nl. This is a community for 50-65 year
olds and built around five areas of interest.
• Shift.ms: http://shift.ms. This is a community run by and for young
people with multiple sclerosis.
• Teen Summer Challenge: http://teensummerchallenge.org. This site is
part of an annual reading program for teens run by Pierce County Library.
• Trainerspace: http://www.trainerspace.com. This site is a place to go to
find a trainer and those trainers can also have their own website.
If you want to discover more great BuddyPress sites, BP Inspire is a great showcase
site at http://www.bpinspire.com/.
What are the options while creating a
theme?
There are several options available to you when creating a BuddyPress theme:
• Use an existing WordPress theme with theme compatibility
• Use an existing BuddyPress theme
• Create custom CSS with another theme
• Create custom templates – use in child theme or existing theme
• Create everything from custom
Later, we will take a look at each of these and how each works.
[ 14 ]
Chapter 1
WordPress themes
You can get free WordPress themes from the WordPress theme repository
http://wordpress.org/extend/themes/ and also buy from many great theme
shops. You can also use a theme framework. A framework goes beyond a theme and
has a lot of extra tools to help you build your theme rolled in. You can learn more
about theme frameworks here: http://codex.wordpress.org/Theme_Frameworks.
BuddyPress themes
You can get both free and paid BuddyPress themes if you want something a little bit
more than theme compatibility. A BuddyPress theme, as we discussed earlier, brings
something extra and it may bring that to all the features or just some. It is a theme
designed to take your site beyond what theme compatibility brings.
Free themes
If you are looking for free themes your first place should be the theme repository on
WordPress.org http://wordpress.org/extend/themes/. The theme repository
page will look like the following screenshot:
This is the WordPress.org theme repository where you can find BuddyPress themes
You can find BuddyPress themes by searching for the word buddypress. Here you
can see a range of themes.
[ 15 ]
State of Play of BuddyPress Themes
A few free themes you may want to consider are:
• Custom Community by svenl77:
http://wordpress.org/extend/themes/custom-community.
• Fanwood by tungdo http://wordpress.org/extend/themes/fanwood.
• Frisco by David Carson:
http://wordpress.org/extend/themes/frisco-for-buddypress.
• Status by buddypressthemers:
http://wordpress.org/extend/themes/status.
• 3oneseven: http://3oneseven.com/buddypress-themes/.
• Infinity Theme Engine: http://infinity.presscrew.com.
• Commons in a box: http://commonsinabox.org. All the power of the
CUNY site (mentioned earlier) with a theme engine.
Themes to buy
Buying a theme is a good way to get a lot of features from custom themes without
the cost or learning involved in custom development. The downside of course is that
you will not have a custom look, but if your budget and time is limited this may be a
good option.
When you buy a theme, be careful and as like with anything online, make sure you
buy from a reputable source. There are a number of theme shops selling BuddyPress
themes including (not extensive list):
• BuddyBoss: http://www.buddyboss.com
• Mojo Themes: http://www.mojo-themes.com
• Press Crew: http://shop.presscrew.com
• Theme Loom: http://themeloom.com/themes/pure-theme/
• Theme Forest:
http://themeforest.net/category/wordpress/buddypress
• Themekraft: http://themekraft.com
• WPMU DEV: http://premium.wpmudev.org
[ 16 ]
Chapter 1
Summary
As you can see from this chapter, the way things are done now since the release of
BuddyPress 1.7 are a little bit different to before, thanks to theme compatibility.
This is great and means there is no better time than now to start developing
BuddyPress themes.
In this chapter we skimmed over a lot of important issues that anyone making a
theme has to consider. These are important, just like knowing how to build. You
should have in mind the users you are creating for and what their experience will be.
We all view sites on different devices, we all need to have a similar experience and
not one where we're penalized.
Starting with the next chapter, we will start to create our own themes. So, let's get on
with this journey into BuddyPress theme development!
[ 17 ]
www.allitebooks.com
Going Default – Installing
BuddyPress
This chapter is all about getting started with BuddyPress. We're going to head
further on our journey and do the installation. It's a chance to get hands on as
we go through some tutorials.
Here are some of the things we are going to cover in this chapter:
• Installing WordPress
• Installing BuddyPress
• Installing a WordPress theme and using it with BuddyPress
• Looking at the BuddyPress features
At the end of this chapter, we will have BuddyPress installed and got it working on
a WordPress theme using theme compatibility.
Steps for installing BuddyPress
There are several ways you can install a BuddyPress site:
• Local installation is usually used for testing purposes
• Install it yourself onto remote hosting
For this chapter, we're going to assume you're installing BuddyPress on remote
hosting. To find out more about hosting visit http://wordpress.org/hosting/.
Going Default – Installing BuddyPress
Installing WordPress
BuddyPress is a plugin for WordPress and as such it needs to have WordPress
installed before it can be used. First, we're going to do exactly that and
install WordPress.
We need to have the following to install:
• Access to your remote server so you can set up a database and user
• FTP (File transfer protocol) client that lets you put files on your server
• A browser that you can view your site in
The famous five-minute WordPress install
WordPress is known for the speed of its installation, so let's go through that now:
1. Download and unzip a ZIP file of the latest WordPress version from:
http://wordpress.org/download/.
2. Create a database on your server and a MySQL user who can access and
modify that database. Consult your hosting provider for more details on this.
3. Upload the downloaded and unzipped WordPress files to your server if
using a remote installation. For this example, we're going to put WordPress
at the root.
4. Visit in your web browser your site's root (for example, http://example.
com/). Next we are going to create the configuration file. For more
information visit: http://codex.wordpress.org/Editing_wp-config.
php. We are going to automatically create our file. Click on Create a
Configuration File.
[ 20 ]
Chapter 2
5. On this screen, you will see a list of all the information you need. Click on
Let's go! The following screenshot shows the information you need to create
your configuration file:
This shows the information you need to create your configuration file.
6. On the next screen add in your configuration file details. Click on Submit
creates your file.
7. Next, we are going to run the installation so click on Run the install.
[ 21 ]
Going Default – Installing BuddyPress
8. This screen is where you enter your setup information, including username
for administrator and password. Add in those details now and click on
Install WordPress. The following screenshot shows the details you enter
when setting up WordPress:
9. The final step is to install WordPress. You do this by clicking on Submit.
10. Congratulations! WordPress is now installed.
You can learn more about installing WordPress here:
http://codex.wordpress.org/Installing_WordPress.
Installing BuddyPress
Next, we're going to install BuddyPress. We're going to assume you've just installed
or have an installed version of the latest WordPress release.
There are 2 ways you can install BuddyPress:
• Manual installing by download
• Autoinstalling by plugin activation
[ 22 ]
Chapter 2
The recommended way is to use the auto installer that comes with WordPress.
However, as you can do both ways let's look at them both.
Manual installing by download
Manual installation requires you to use an FTP client. The main difference is how
you get the files onto the server:
1. Unzip the downloaded file of BuddyPress.
2. Upload the files in the folder to your server. You want to put the files in
wp-content/plugins/. To do this you need an FTP client.
3. On your website visit your admin dashboard. Enter into your browser this
link http://example.com/wp-admin/:
4. Once in your admin dashboard go to Plugins and under BuddyPress click on
Activate as shown in the following screenshot:
This shows the Activate link
5. A welcome message will be shown when you have successfully
downloaded BuddyPress.
6. Congratulations! BuddyPress is now ready to configure.
Autoinstalling by plugin activation
The following steps explain autoinstalling by plugin activation:
1. Visit your admin dashboard and plugins. Click on Add New and search
for Buddypress.
2. Once you find BuddyPress click on Install Now.
3. Once it's installed you'll have the option to activate or go back to the plugin
list. Click on Activate.
4. Once this is activated you will be redirected to the welcome screen.
5. That's BuddyPress installed!
[ 23 ]
Going Default – Installing BuddyPress
Here are some useful resources for installing BuddyPress:
http://codex.buddypress.org/user/setting-up-a-new
installation/
http://codex.buddypress.org/installation-wizard/
Configuring BuddyPress
Whichever way you installed BuddyPress, you now need to do some configuration.
These will set up BuddyPress for you:
1. Set your permalinks to anything apart from the default as shown in the
following screenshot:
This shows the permalink settings
2. Choose what components you want to use as shown in the following
screenshot. These are the features of BuddyPress. When you load
BuddyPress first, it's best to just accept the default. We'll learn more
about components later in this chapter.
[ 24 ]
Chapter 2
This shows the components for BuddyPress.
3. Click on Save settings.
4. Associate pages with your components. You can accept the default and click
on Save Settings.
Whenever you activate new components, make sure you go
back to this page and associate a page for that component.
5. If you want to allow anyone to register, you'll want to turn on registration if
you want to have it open on your site:
Turn on registration under Settings.
6. That's it; we're all set up to start enjoying BuddyPress.
[ 25 ]
Going Default – Installing BuddyPress
A look at BuddyPress features
The features of BuddyPress are often called components in tutorials and
documentation. There are two types:
• Default: These are the heart of BuddyPress and what you need to get a basic
installation working
• Optional: These cover a range of functionality and can be picked from to
create exactly the site you want
Default features
When you install BuddyPress for the first time, there are 2 features every install has,
these are also referred to as the core components. They are:
• Core: This is the heart of BuddyPress and what makes it work
• Community Members: Members make up your community, so this is crucial
Optional features
These are extra functionalities that you can choose whether to have on or off.
Different communities will require different components on. For now, we're going
to briefly go over each of these to get an understanding of what BuddyPress can do.
Later in this book we will explore further by using some features in our theme.
• Extended Profiles: These give fully editable profile fields that allow users to
add more information to their profile. An example of this would be a favorite
color or their job title.
• Account Settings: This allows users to modify their account and notification
settings from within their profiles.
• Friend Connections: Lets users make connections so they can track the
activity of others and focus on the people they want to.
• Private Messaging: This allows users to talk to each other directly and
in private. This is a common feature of most communities allowing
conversations beyond forums and stream comments.
• Activity Streams: These are global, personal, and group activity streams.
They have threaded commenting, direct posting, ability to favorite, and @
mentions (way to mention a member by name). All streams have a full RSS
feed and an e-mail notification support.
[ 26 ]
Chapter 2
• User Groups: Groups allow organization of users either by themselves or
admins. They can be public, private, or hidden with separate activity streams
and member listings.
• Site Tracking: BuddyPress can be aware of new posts and new comments.
If you run a network using WordPress multisite then BuddyPress can
track those sites. You can find more about WordPress multisite here:
http://codex.wordpress.org/Create_A_Network.
Forums
BuddyPress uses bbPress for its forums. Forums can be linked to groups or used
separately along with BuddyPress as a community feature.
Using BuddyPress with a WordPress
theme
The theme we are going to use is Twenty Thirteen. This is a theme from the
WordPress core team and is the standard theme for WordPress version 3.6.
It's a great theme focusing on blogging and post formats.
Want to try out Twenty Thirteen? You can see the demo here:
http://twentythirteendemo.wordpress.com.
Remember theme compatibility? Thanks to this we only have a few steps:
1. Select the theme from your admin dashboard by visiting Appearance and
then Themes.
2. Install BuddyPress using either manual or auto installation.
3. Next, visit your site root in a browser, for example, http://example.com/.
[ 27 ]
www.allitebooks.com
Going Default – Installing BuddyPress
4. You now have a fully functioning BuddyPress site using the Twenty Thirteen
theme. Yes it's that simple!
The Twenty Thirteen WordPress theme with BuddyPress activity stream.
The data in this screenshot and the others in this book come from a great
plugin called BP Default data: http://wordpress.org/extend/
plugins/bp-default-data/. This allows you to prefill your site and
is great for testing.
Summary
This was an action packed chapter. You should now be the proud owner of a fresh
BuddyPress installation. We have also looked at the various ways you can install
and options available to you.
Features are really the pick and mix of BuddyPress. As you learned, they are the
means by which you can create the almost limitless variations of communities using
BuddyPress. Each community needs something different, that's the beauty of it.
As you discovered, theme compatibility works really well for just using any
WordPress theme. We're not going to stop there though. We want to go beyond
just using something that exists already. We want to go beyond default. In the next
chapter we're going to start looking at what options lie beyond and how we can start
customizing themes.
[ 28 ]
Beyond Default – What Can
You Do?
In this chapter we're going to cover some more ways to customize BuddyPress.
As we saw in Chapter 1, State of Play of BuddyPress Themes, there are several options
to you if you want to have a theme for your BuddyPress site. So far we've looked
at the first one using an existing WordPress theme with theme compatibility.
We're going to take a look at three more options to create a theme:
• Use an existing theme designed for BuddyPress
• Create a custom CSS using a child theme
• Create a custom templates
At the end of this chapter you will have a child theme that has custom buddypress.
css, a template for BuddyPress and a template for the BuddyPress activity page.
Existing themes designed for
BuddyPress
We're going to get an existing free theme that is designed for BuddyPress.
We are going to get the theme from WordPress.org and activate it. The theme
we're going to use is Status, which is a community created theme by members
of the BuddyPress community.
1. Go to http://wordpress.org/extend/themes/status and download the
Status theme. You can also browse under the WordPress admin panel to get
the theme if you want.
Beyond Default – What Can You Do?
2. You can now either upload via an FTP client or you can upload through the
admin interface. We're going to upload via an FTP client for this example.
3. Unzip your downloaded files and upload the entire folder to your remote
server's wp-content/themes folder.
4. Then in your browser, visit your admin for WordPress and go to Appearance
and then to Themes.
5. Find your theme you just uploaded, it should be listed as Status.
6. Click on Activate.
7. Congratulations, you now can enjoy the Status theme.
Child themes
In Chapter 1, State of Play of BuddyPress Themes, we touched on what child themes
were. We're now going to create one.
How to create a child theme
For the purpose of the next few sections we're going to use the Twenty Twelve
theme from WordPress. This theme should already be in your WordPress install,
but if it's not, you can download it here: http://wordpress.org/extend/themes/
twentytwelve.
Let's create our child theme:
1. Create a directory in your wp-content/themes directory. This is what will
contain your child theme. Make sure you give it a name to identify the
theme, we're going to call the directory mychild.
2. In the child directory create a file called style.css. You can use any text
editor for this.
There are lots of editors you can use for creating code. Here are just a few:
•
Sublime Text: http://www.sublimetext.com for Mac OS X
and Windows
•
Notepad++: http://notepad-plus-plus.org for Windows
•
Emacs: http://www.gnu.org/software/emacs/ for Linux,
Max OS X, and Windows
•
Vim: http://www.vim.org for Linux
[ 30 ]
Chapter 3
3. Add the following code to the file:
/*
Theme Name:
Theme URI:
Description:
Author:
Author URI:
Template:
Version:
My Child
http://www.example.com
A child theme from the Twenty Twelve theme
Your name
http://www.example.com
twentytwelve
1
*/
Downloading the example code
You can download the example code files for all Packt books you
have purchased from your account at http://www.packtpub.
com. If you purchased this book elsewhere, you can visit
http://www.packtpub.com/support and register to
have the files e-mailed directly to you.
4. Save the file.
Next, visit your site admin panel in your browser and click on Appearance, then
click on Themes.
1. Find your new theme called My Child and click on Activate.
2. If you view your theme now, you'll notice one major issue, there is no CSS.
This is because the theme is not loading the parent's CSS.
3. To load the parent CSS and ours we are going to enqueue the scripts as this is
the recommended way to load.
You can find out more about adding using enqueue here:
http://codex.wordpress.org/Function_Reference/
wp_enqueue_style.
Create a new file called functions.php in your theme folder and add
the following:
<?php
function mychild_load_scripts() {
wp_enqueue_style( 'parent-style',
get_template_directory_uri() . '/style.css' );
wp_enqueue_style( 'child-style', get_stylesheet_uri()
[ 31 ]
Beyond Default – What Can You Do?
);
}
add_action( 'wp_enqueue_scripts', 'mychild_load_scripts' );
?>
4. Save functions.php in your theme folder.
5. Refresh your theme and you should now have a child theme that has all the
styling of the parent.
Using a child theme with BuddyPress
We have our child theme called My Child. That's all great, but let's start looking at
how we can dive into some customization by activating it with BuddyPress.
1. Make sure we activate our theme called My Child. Go to your WordPress
admin panel and click on Plugins and look in the list there. If BuddyPress
is activated you are good to go, otherwise please activate it.
2. Now view the front of your site and you'll see it works. Just by being on your
theme works with BuddyPress thanks to theme compatibility.
That's easy, but it's only the start of the story. We're not doing anything different
from the parent. There is so much we can do customization-wise, let's take a look
at how we can get a little less default.
The CSS and JavaScript file order
BuddyPress looks in several places in your theme for its JavaScript and CSS files.
There are three places you can store JavaScript and CSS files:
• Under your theme folder in css/ or js/
• Under your theme folder in community/css or community/js
• Under your theme folder in buddypress/css or buddypress/js
As an extra check, if you are using language specific CSS such as RTL (right to
left) it will look for a file called buddypress-rtl.css, before the default CSS file
buddypress.css.
If BuddyPress doesn't find a JavaScript or CSS file, it will use the default ones that it
comes with.
As you can see, this can be used to place a file in your theme and ensure it gets read,
rather than the default JavaScript or CSS.
[ 32 ]
Chapter 3
Customizing your theme using just CSS
As we've covered in Chapter 1, State of Play of BuddyPress Themes, there are many
ways you can customize your theme. The easiest of these is just by using CSS. You
can change anything from fonts, styles, through to the layout without touching
any templates.
Introducing buddypress.css
You can find buddypress.css here. Let's open up the file and take a look. Firstly, go
back to your BuddyPress downloaded folder. Open it up and visit bp-templates/
bp-legacy/css/buddypress.css. This is the main CSS file for BuddyPress and
contains everything related to BuddyPress styling.
The default selector
Every style that BuddyPress uses has a selector of #buddypress. For example:
#buddypress .activity-list li .activity-content
This selector is in the templates that BuddyPress uses and makes sure that every
style is unique and doesn't conflict with anything the theme may need.
Customizing CSS in a child theme
We're going to do some simple changes in our child theme. We're going to add a box
around our list items for the activity stream.
When you are going to add CSS, you have to decide if it's going to be existing styles
you're going to edit or if you are going to create new styles. If you are not touching
any of the default ones, then leaving buddypress.css in the templates probably is a
good idea.
For this example, we're going to create our own version of buddypress.css, and add
a customization section; this would be something you'd do if you plan on changing a
lot of buddypress.css.
So, let's get started:
1. Firstly, open up a file browser and locate the BuddyPress ZIP folder we used
to install in Chapter 2, Going Default – Installing BuddyPress.
2. Then open your child theme in another file browser window.
3. Copy over css/buddypress.css, making sure you copy over the folder
and file.
[ 33 ]
Beyond Default – What Can You Do?
4. Most browsers come with web inspectors that you can use to locate the CSS
you want to change. We're going to do just that using Firefox and the Page
Inspector that comes with it.
You can find out more about the Firefox Page Inspector
here: https://developer.mozilla.org/en-US/
docs/Tools/Page_Inspector.
5. Let's go to the activity stream and look to find the style we want to change.
We're going to click on the element and select Inspect element.
6. Now, click on Style at the bottom-right and let's see what the style is:
Using the Page Inspector in Firefox
7. So, we can see by following the arrows, we want to find the following line:
#buddypress ul.activity-list li.
Let's look at the buddypress.css file to see where we are going to add this.
There is already a style for it, so we're going to add to that.
8. The existing style is at line 163 under Activity Listing.
[ 34 ]
Chapter 3
9. Add some new styling to the existing and we get:
#buddypress ul.activity-list li{
background: #f3f3f3;
border: 1px solid #eee;
list-style: none;
overflow: hidden;
}
10. This style is also influenced by another:
ul.item-list li
This style doesn't have padding and margins. We need to create a new style
under this to make sure we have padding and margins:
#buddypress ul.activity-list.item-list li{
margin-bottom: 5px;
padding: 10px;
}
11. Save your buddypress.css file and then refresh the front of our site to see
the following:
CSS changes to the activity entry
12. This is just a small change, but as you can see, adding your own styles is a
really easy way to customize your BuddyPress site without having to create
a new theme.
Template hierarchy in BuddyPress
BuddyPress allows you to specify templates not just for the entire layout of its
features, but per feature. This is great as it allows you to customize each one.
Template hierarchy is something that existed in WordPress and in BuddyPress
also it works in the same way. What template hierarchy does is, enable you to style
different features of BuddyPress to look differently. For example, you could have
your own template for group activities or a different group template layout just for
one particular group.
[ 35 ]
Beyond Default – What Can You Do?
You can learn more about template hierarchy here: http://
codex.buddypress.org/theme-development/themecompatibility-1-7/template-hierarchy/.
Let's take a look at how we can create a BuddyPress template and then we will see
how to create feature-specific templates.
Creating a generic BuddyPress template
When loading its content, BuddyPress looks at a series of pages to see which one
exists and if it does, uses that. They are the following:
• plugin-buddypress.php
• buddypress.php
• community.php
• generic.php
• page.php
• single.php
• index.php
So, for example, if there was a buddypress.php file in your theme, it would use
that. If there was none and no community.php, no generic.php, but there was a
page.php – it would use page.php. This is a global way of changing the wrapper
that BuddyPress uses. You can load a new header or footer using this.
Using a generic Buddypress template to have a full
page layout
We're going to create a file called buddypress.php and use that to load all our
BuddyPress components in our child theme:
1. In the child theme My Child, create a new empty file called buddypress.php
and save it.
2. Add the following code to your new file buddypress.php:
<?php
/**
* Template Name: Full-width Page Template, For BuddyPress
*/
get_header(); ?>
<div id="primary" class="site-content">
[ 36 ]
Chapter 3
<div id="content" role="main">
<?php while ( have_posts() ) : the_post(); ?>
<header class="entry-header">
<h1 class="entry-title"><?php the_title(); ?>
</h1>
</header>
<?php the_content(); ?>
<?php endwhile; // end of the loop. ?>
</div><!-- #content -->
</div><!-- #primary -->
<?php get_footer(); ?>
3. Save buddypress.php.
4. Refresh the front of your site and you now have a full width template for
your BuddyPress theme.
BuddyPress feature templates
If you want to customize any feature of BuddyPress you can do this easily by
copying the file into your theme and then doing any changes there. If you use
template hierarchy ensure that you don't get issues on upgrades by overwriting files.
By copying the file into your theme it will look there first and if it finds component
files, just use those. The key to this is keeping a very specific order. Remember the
order for CSS and JavaScript files? For templates, BuddyPress will first try and find
the sub folder then under that look for the feature folders. The sub folders it looks
for are:
• A sub folder under your theme called buddypress/
• A sub folder under your theme called community/
For example, if you want to use a custom activity index template you would need
either of the following in your theme:
buddypress/activity/index.php
community/activity/index.php
For the rest of the examples in this book we're going to use the sub folder
buddypress/ for ease of description.
[ 37 ]
www.allitebooks.com
Beyond Default – What Can You Do?
Adding a custom BuddyPress component
customization to a child theme
We're going to do some changes to the activity main page. For our customization,
we're going to add a "look at me" block above the main activity area. There are two
things we need to do this:
• We need to create the "look at me" section in the template file
• We need to add some CSS to make the look at me section stand out
Let's get started:
1. Open your file browser on your machine.
2. Locate your BuddyPress files, this could be from the ZIP files you installed
on your server earlier.
3. Open up a second file browser and locate your child theme.
4. Copy over buddypress/activity/index.php file into your child theme
keeping the directory structure. Create the folders buddypress and then in
that folder, activity in your theme. Finally, copy over the file index.php.
5. In your newly copied file index.php find the following line:
<?php do_action('bp_before_directory_activity_content');?>
After this line, at line number 7 insert the following:
<div id="lookatme-box">
<?php _e( 'Hey look at me!', 'twentytwelve' ); ?>
</div>
6. Save index.php.
7. In your child theme's style.css add the following:
#lookatme-box{
background: #ffee00;
font-weight: 700;
margin: 10px 0;
padding: 10px;
}
[ 38 ]
Chapter 3
8. Save the file and refresh your site. You should now see the following:
Additional content to the activity loop
9. That's only a small template change, but as you can see it's easy using
templates in your theme to customize your BuddyPress site.
Summary
We've covered a lot in this chapter. You should now have a child theme and some
insight into the power of customization options available to you. By repeating the
steps you can work on other areas you want to take beyond default.
One of the things you can use time and time again is learning how to inspect
elements and customize CSS. You can easily change things and try things
before adding into your files. It's a great way to see how things work and
pick through code.
Join me in the next chapters as we move on from these light changes into creating
our own theme and learning more of the power of BuddyPress themes.
[ 39 ]
BuddyPress File Structure,
Templates, and Loops
In this chapter we're going to explore further on our journey into BuddyPress
theme development. We'll take a look at what makes a theme tick, from the
anatomy through the functions and tags.
Some of the things we'll cover are:
• How WordPress does things
• WordPress templates
• Anatomy of a WordPress theme
• WordPress template tags
• How BuddyPress does things
• Anatomy of a BuddyPress theme
Our focus for most of the chapter will be looking at an example theme and each part
in context.
Working with WordPress
As BuddyPress is a plugin for WordPress, when we're diving a little deeper into
things, we need to also look at how WordPress does things. BuddyPress is developed
with WordPress standards, so once we have an understanding of those we can apply
them to BuddyPress. Let's look at how WordPress does things.
BuddyPress File Structure, Templates, and Loops
Getting it right
Coding standards tell developers how their code should be written. They are a key to
creating robust, reusable, and elegant code. When you are creating your own theme
there are a range of things you need to consider to make sure you adhere to both
coding standards best practices and WordPress code standards.
A lot of information on standards can be found in the Core Contributor handbook:
http://make.wordpress.org/core/handbook/coding-standards. This covers a
range of topics such as:
• What are coding standards and why you should use them:
http://make.wordpress.org/core/handbook/coding-standards
• CSS coding standards:
http://make.wordpress.org/core/handbook/coding-standards/css/
• PHP coding standards:
http://make.wordpress.org/core/handbook/coding-standards/php/
• HTML coding standards:
http://make.wordpress.org/core/handbook/coding-standards/html/
• JavaScript coding standards: http://make.wordpress.org/core/
handbook/coding-standards/javascript/
WordPress template structure
An HTML page has a particular structure to it. A simple way to look at an HTML
page is like this:
<header>
<content>
<footer>
You can think of this as the top, middle, and bottom. Just like a person has a head,
body, and feet, so does an HTML page. Theme templates use this structure.
Let's take a look at a typical theme template. Some may of course vary, but we're
thinking of a typical page such as a single post or page. Most themes have the
following structure:
<header> = header.php : your html head content and reusable header
code
<content> = content.php/the loop/content-postformat.php
<footer> = footer.php : your html footer content and resusable
footer code.
[ 42 ]
Chapter 4
WordPress template hierarchy
We looked at what template hierarchy is in Chapter 3, Beyond Default – What You
Can Do?, and we're now going to look at how this works in a WordPress theme.
WordPress looks for templates of a particular name in your theme to produce a
particular output. It will look for a first match, then move down the hierarchy to a
file you have in your theme. The exception to this is index.php, this is the default
at the bottom of the hierarchy.
An example of this would be the author page:
1. Is there a file for the author's nice name, such as author-authorname.php?
If the nice name were bob, we'd be looking for author-bob.php.
2. If no, then is there a file for the author's ID, such as author-id.php?
3. If no, is there a file called author.php?
4. If no, is there an archive.php?
5. Use index.php.
Another example would be the home page. This looks for a static front page, then for
home.php then index.php. It moves down to the file you have in your theme.
You can find out more about template hierarchy here:
http://codex.wordpress.org/Template_Hierarchy.
WordPress template tags
Template tags are PHP functions that tell WordPress to do or get something. This
could be things like showing the:
• Site name: <?php bloginfo('name');?>
• Site description: <?php bloginfo('description');?>
• Post title: <?php the_title();?>
They can also do things like output entire blocks of content, such as:
• List all categories: <?phpwp_list_categories($args);?>
It's also not just content, it can output templates such as:
• Get the header: <?phpget_header($name);?>
You can specify a name for the header to have multiple headers, for example,
header-front.php:
<?phpget_header('front');?>
[ 43 ]
BuddyPress File Structure, Templates, and Loops
Anatomy of a WordPress theme
In order to understand better what is going on, we're going to look at the anatomy
of a typical WordPress theme. BuddyPress themes use these files either as a child
theme, through theme compatibility or by having them in their theme themselves.
The theme we're going to look at is underscores: http://underscores.me — it's
known as _s. What is this theme? Well, it's a great starting point, it's a barebones
theme with just enough to get you going and allow you to add any customization
you want.
"Hi. I'm a starter theme called _s, or underscores, if you like. I'm a theme meant
for hacking so don't use me as a Parent Theme. Instead try turning me into the
next, most awesome, WordPress theme out there. That's what I'm here for."
–from the Underscores.me theme page
A theme is made up of different components. You can think of it in terms of a
human body. The bones are the template files, the stylesheets are the make up,
and the scripts are the muscles. If you use this analogy a bit further then you
could think of functions.php as the brains.
You can split the file structure of underscores into the following sections:
• Scripts.
• Extras and custom functions.
• Languages.
• Stylesheets.
• Template files, these generate the site pages. For example, the header, single
post view, or search results page.
• Loops.
• functions.php.
• screenshot.png.
Let's look at each of these, analyzing what we find in underscores for each of those
sections and dive a bit into explanations for each section as we discover them in
the theme.
[ 44 ]
Chapter 4
Scripts in the theme
There are ranges of custom scripts in the theme found in the folder js/. They cover a
wide range of additional JavaScripts from mobile menus to keyboard navigation and
an HTML5 shiv.
A synonym for Shim (computing), an application compatibility workaround, e.g.,
HTML5_Shiv
–Wikipedia
Extras and custom functions
The inc/ folder in underscores is where you can find the additional scripts.
These bring extra functionality ranging from custom headers to custom
template tag functions.
Languages
This folder contains your language files.
Stylesheets contained in theme
The following table shows the stylesheets present in the theme and what they
exactly do:
File or directory
layouts/
What it does
rtl.css
RTL CSS for languages that use that layout
style.css
Stylesheet for the theme
CSS for various layouts
Template files
Now, we're going to take a look at the template files for the theme.
Comment template
Comments are great and easy to style in WordPress using the comments.php
template. The comment template is used in single post and page displays.
This is the call for it:
<?phpcomments_template($file,$separate_comments);?>
[ 45 ]
BuddyPress File Structure, Templates, and Loops
The following table describes the file/directory and their functions:
File or directory
404.php
What it does
archive.php
Template to display archive pages
comments.php
Template to display comments
footer.php
Footer template
functions.php
Functions file
header.php
Header for theme
image.php
Template to display image attachments
index.php
The main template file
no-results.php
Template to show when no post results
page.php
Template to display pages
search.php
Template to display search results
searchform.php
Template to display search forms
sidebar.php
The sidebar – this has a main widget area
single.php
Template to display single posts
Error template
Loops and template parts
At the heart of WordPress is the loop; this is used to display dynamic content.
How it does this and what the output is depends on the criteria within the loop.
In the loop you can have HTML or PHP and this is repeated with each run of the
loop. Loops are placed in templates to display post information.
A loop starts with this:
<?php if ( have_posts() ): while ( have_posts() ): the_post();?>
And ends with:
<?php endwhile; else:?>
<p><?php _e('Sorry, no posts matched your criteria.');?></p>
<?php endif;?>
The wp_template_part function
This function makes it easy to reuse sections of code. If you are using a child theme
you can override them in the parent's code.
You use it like this:
<?php get_template_part( 'content', 'page' );?>
[ 46 ]
Chapter 4
It will then look in this order for that template part:
• themenamechild/content-page.php
• themename/content-page.php
• themenamechild/content.php
• themename/content.php
If you want to use the function with a folder you can use it like this:
<?php get_template_part( 'partials/content', 'page' );`?>
You can learn more about it here: http://codex.wordpress.org/
Function_Reference/get_template_part.
Let's take a look back into _s. There are three template parts:
• content.php: Default loop output
• content-page.php: Page loop output
• content-single.php: Single loop output
The functions.php file
The functions.php file can have a range of contents all designed to change the
default behaviors of WordPress. It acts similar to a plugin allowing you to add
features and functionality. In the file you can call functions and define your
own. However, it's not a plugin so it's ideal to keep the contents relevant to
the theme functionality.
A functions.php file can contain:
• WordPress hooks, actions, and filter interactions
• A theme setup function
• Additional support for features such as post formats, post thumbnails, and
navigation menus
• Setup for widgets
A simple rule of thumb when deciding if it should go in a plugin or functions.php
would be:
• Is it going to be reused in more than one theme?
[ 47 ]
www.allitebooks.com
BuddyPress File Structure, Templates, and Loops
If yes, then build it as a plugin so themes can use the function. Discover more about
plugins here: http://codex.wordpress.org/Plugin_Resources.
Theme setup function
One of the things you can use your functions.php file for is to have a theme setup
function that allows you to set out what your theme will have from the start. This
is a really useful way to also allow child themes to override this function using the
method explained previously.
The screenshot.php file
The file screenshot.php is your theme's identity image and is used when viewing
your theme under Appearance and Themes.
Additional files
While underscores doesn't have them you may also have the following extra sections
in a theme:
• Custom page templates, which you can learn more about here: http://
codex.wordpress.org/Theme_Development#Custom_Page_Templates
• Query-based template files, which you can learn more about here: http://
codex.wordpress.org/Theme_Development#Query-based_Template_
Files
Post formats
This is a theme feature and is meta information that can allow a theme to customize
the post appearance. It provides a list of formats that are available to all themes that
declare support for them. Themes are not required to support post formats.
The following are the supported formats:
• Aside
• Audio
• Gallery
• Link
• Image
• Quote
[ 48 ]
Chapter 4
• Status
• Video
• Chat
If you want to support something besides image, video, quote, and link, you can add
this to your theme:
add_theme_support( 'post-formats', array( 'aside', 'image', 'video',
'quote', 'link' ) );
The best place for this is in your functions.php and your theme setup function.
Enqueue all the things
Should you want to add CSS or JavaScript to your theme, you will want to use
enqueue to add them rather than putting directly in a header. This ensures safe
loading and that any dependencies are met before the script is called, such as:
wp_enqueue_script($handle, $src, $deps, $ver, $in_footer): For
script files
wp_enqueue_style($handle, $src, $deps, $ver, $media): For CSS
styles
A simple example would be the following from the starter theme underscores:
wp_enqueue_script( 'demo-navigation', get_template_directory_uri()
. '/js/navigation.js', array(), '20120206', true );
Or the way it calls the default style:
wp_enqueue_style( 'demo-style', get_stylesheet_uri() );
If you look in functions.php in underscores, you will notice that it has a function
for enqueuing. This is a handy way to call everything together:
function demo_scripts() {
…loads all the enqueues
}
add_action( 'wp_enqueue_scripts', 'demo_scripts' );
You can learn more about both of these in the WordPress Codex here:
http://codex.wordpress.org/Function_Reference/wp_
enqueue_style and http://codex.wordpress.org/Function_
Reference/wp_enqueue_script.
[ 49 ]
BuddyPress File Structure, Templates, and Loops
Custom backgrounds
A great way to customize a theme without changing code is to use a custom
background. This functionality can easily be added to any theme like this:
add_theme_support( 'custom-background', $args );
If we look at the way underscores does this, we can see in functions.php that it
uses a function to pass arguments for defaults.
You can learn more about that in the WordPress codex:
http://codex.wordpress.org/Custom_Backgrounds.
Custom headers
Just like custom backgrounds, you can add custom headers. These are a great way to
bring some individuality to the theme.
To add custom header support you simply add this to your theme:
add_theme_support('custom-header');
You can learn more about custom headers in the WordPress Codex here:
http://codex.wordpress.org/Custom_Headers.
Widgets
Traditionally widgets appear in sidebars, but you can place widgets anywhere
you want on your theme. They allow anyone to add content and features without
touching the template files. Some examples of widgets are:
•
•
•
•
•
Category lists
Latest comments
Tag clouds
Navigation
Search forms
To activate widgets in your theme you have to do two things. Firstly, you place the
following code where you want in your template, the widget to appear:
<?php if ( is_active_sidebar( 'sidebar-demo' ) ) : ?>
<?php dynamic_sidebar( 'sidebar-demo' ); ?>
<?php endif; ?>
[ 50 ]
Chapter 4
Then in your functions.php file you would declare that your theme has this widget
and the defaults for it:
function demo_widgets_init() {
register_sidebar( array(
'name'
=> __( 'Sidebar, 'demo' ),
'id'
=> 'sidebar-demo',
'before_widget' => '<aside id="%1$s" class="widget %2$s">',
'after_widget' => '</aside>',
'before_title' => '<h1 class="widget-title">',
'after_title'
=> '</h1>',
) );
}
add_action( 'widgets_init', 'demo_widgets_init' );
There is a lot more, you can learn about widgets here:
http://codex.wordpress.org/WordPress_Widgets.
Navigation
You can also place navigation anywhere in your theme and use the built-in
WordPress custom menus. To do this you need to do two things. Firstly, in your
theme you place the following code where you want the navigation to appear:
<?php wp_nav_menu( array( 'theme_location' => 'primary' ) ); ?>
Then in your functions.php you add support for the following menu:
register_nav_menus( array(
'primary' => __( 'Primary Menu', 'demo' ),
) );
How BuddyPress themes work
What about BuddyPress? We've now got a good understanding of how WordPress
themes are structured. Let's take a look into BuddyPress themes.
We're going to first take a journey into some of the core things BuddyPress has that
we saw in WordPress.
[ 51 ]
BuddyPress File Structure, Templates, and Loops
BuddyPress loops
Remember the WordPress loop? BuddyPress also has loops for each content type.
BuddyPress template files make use of these loops.
A typical BuddyPress loop takes the following format:
<?php if ( bp_has_activities( bp_ajax_querystring( 'activity' ) ) ) :
?>
<?php while ( bp_members() ) : bp_the_member(); ?>
Show entries in an unordered list
<?php endwhile; ?>
<?php else : ?>
//Show no entry message
<?php endif; ?>
The loops are found in:
• Activity loop: The loop to show all activity on the community:
<?php if ( bp_has_activities( bp_ajax_querystring(
'activity' ) ) ) : ?>
…
<?php while ( bp_activities() ) : bp_the_activity(); ?>
• Members loop: The loop to show members:
<?php if ( bp_has_members( bp_ajax_querystring( 'members' )
) ) : ?>
…
<?php while ( bp_activities() ) : bp_the_members(); ?>
• Groups loop: The loop to show all groups:
<?php if ( bp_has_groups( bp_ajax_querystring( 'groups' ) )
) : ?>
…
<?php while ( bp_groups() ) : bp_the_group(); ?>
• Blogs loop: The loop to show blogs (if multisite is enabled):
<?php if ( bp_has_blogs( bp_ajax_querystring( 'blogs' ) ) )
: ?>
…
<?php while ( bp_blogs() ) : bp_the_blog(); ?>
[ 52 ]
Chapter 4
• Group members loop: The loop to show a group's members:
<?php if ( bp_group_has_members( 'exclude_admins_mods=0' )
) : ?>
…
<?php while ( bp_group_members() ) : bp_group_the_member();
?>
• Private messages loop: The loop to show private messages:
<?php if ( bp_has_message_threads( bp_ajax_querystring(
'messages' ) ) ) : ?>
…
<?php while ( bp_message_threads() ) : bp_message_thread();
?>
• Profile fields: The loop to show a member's profile fields:
<?php if (bp_has_profile()) : ?>
…
<?php while ( bp_profile_groups() ) :
bp_the_profile_group(); ?>
<?php if ( bp_profile_group_has_fields() ) : ?>
You can learn more about the BuddyPress loop here:
http://codex.buddypress.org/developer/
developer-docs/loops-reference/.
Template tags
Remember how WordPress has template tags to output things like site name or
description? BuddyPress also comes with a range of template tags. These break
down into the following groups:
• General template tags, for example:
°°
bp_get_options_nav()
°°
bp_site_name()
°°
bp_user_link()
• Avatar template tags, for example:
°°
°°
bp_get_options_avatar()
bp_get_displayed_user_avatar()
[ 53 ]
BuddyPress File Structure, Templates, and Loops
• Signup template tags, for example:
°°
bp_signup_username_value()
You also have a custom loop template class and is_functions, such as:
• bp_is_user_profile()
• bp_is_friends()
• bp_is_single_item()
You can find out more about the BuddyPress template tags here:
http://codex.buddypress.org/developer/developer-docs/
template-tag-reference/.
Anatomy of a BuddyPress theme
We looked at underscores, but what about BuddyPress? What is the anatomy of
a BuddyPress theme? Let's take a look at the bp-legacy templates included with
BuddyPress 1.8 and that theme compatibility uses.
To view bp-legacy's files, simply open up your BuddyPress folder in a file browser
again. Then go to bp-templates/bp-legacy. You should see something like this:
[ 54 ]
Chapter 4
The main directory that holds everything is buddypress/. Legacy splits into the
following sections:
• Activity
• Blogs
• Forums
• Groups
• Members
• CSS
• JS
Feature folder contents
In the Appendix, you will find the contents of the folders walked through
and described.
CSS
Styling wise everything is controlled by css/buddypress.css. This contains all
the styles. We saw in Chapter 3, Beyond Default – What Can You Do?, how you can do
changes to this file to easily change the look of BuddyPress without touching any
templates. Along with buddypress.css is buddypress-rtl.css, which contains the
RTL styling for languages that use this. If you are creating your own theme, always
consider these languages with any styling you do. As you can't say which language
someone will view your site in, it's good to make sure any changes you do still work
for RTL.
Script files
Before BuddyPress 1.7, themes had two more files: global.js and ajax.php,
and also had a lot of custom functions you needed to include. Thanks to theme
compatibility this is no longer the case. There is now only one file buddypress.js.
Typically, you will just want to inherit the JavaScript file buddypress.js, so won't
customize in your theme. However, thanks to the way BuddyPress works, should
you want to customize it, you can simply copy it into your theme directory (creating
a directory js/ to keep the correct path). BuddyPress will then use your version over
the one in bp-legacy.
[ 55 ]
BuddyPress File Structure, Templates, and Loops
The bp-custom.php and functions.php file
There are two files that you can use in BuddyPress to add functions and features
outside of plugins:
• bp-custom.php: This resides in your WordPress plugins folder and where
you can place code and modifications to BuddyPress. This is independent
from your theme so it is useful for BuddyPress specific code as it loads early
in the process.
• functions.php: We have already met this file as it's your theme functions.
php file and is a similar file to bp-custom.php. This relates just to the theme
it's in.
Summary
We've only really touched the tip of the iceberg that is a WordPress and BuddyPress
theme. However, you should now have a basic understanding of how a theme looks,
what the files do, and some of the functionality. It's a lot to take in one chapter so
we have glossed over some contents. I'd encourage you to read through the links
provided in this chapter for further exploration.
WordPress templates are a powerful way to create unique themes. It means that
nothing is fixed and you can customize whatever you want. This is a really cool
aspect of WordPress. Combining this with the hooks and template tags means
you have an amazing toolbox you can dip into when developing a theme.
BuddyPress also provides some extra tools on top of WordPress. It has its own
template tags and hooks. It also brings a lot of new templates to the table.
We've learnt in this chapter the power of the loop both for WordPress and
BuddyPress. This is one of the foundations of theme development. Once you
understand this you can do a lot of neat things.
As you have seen, a BuddyPress theme contains a lot more files than a WordPress
theme. This is, of course, because it does more. However, when we create a theme,
we have to consider this. In our next chapter we're going to make our own theme.
We're going to dive right in and take everything we've learnt into our own
BuddyPress theme.
[ 56 ]
Let's Get Building
In this chapter we're going to follow the process of building a theme as we create
one. The aim is to gain an insight into the development process and some useful
techniques along the way.
Some of the things we'll cover will be:
• The process of creating a theme
• Creating a custom front page
• Creating a custom layout for your site
As you can follow along with code, it's recommended you use a text editor and
browser for this chapter.
Building the site
The site we're going to create is called Run Chums, and is a community for runners
that has grown from a running club.
When we start thinking about what our site will need, it's a good idea to think of
the users and what paths they will follow through the site. What do people need to
get done? What is important to our users? By doing this we can work out what they
need and what they don't need from the site. Rather than turning all of the functions
in BuddyPress on at the start it's always best to build up functionality over time.
After thinking about paths there are a few things this site needs:
• A sign in/sign up box for users and a section about the community to
encourage sign up
• Show random members and groups to encourage people to follow and
join groups
www.allitebooks.com
Let's Get Building
The process we're going to follow
Every site should follow a process of creation and our process will look like this:
• Preparation
°°
Sketch: This allows us to explore ideas without the design
°°
Wireframe: This will become the blueprint for the site
°°
Style guide: This is the design blueprint
• Building
• Testing
We are going to design this community in the browser. This is a great way of getting
a prototype done fast.
A few useful links about processes are:
Sketching in code: http://alistapart.com/article/
sketchingincode.
Sketching the visual thinking power tool: http://alistapart.com/
article/sketching-the-visual-thinking-power-tool.
Building a better user experience by designing in the browser: http://
uxmag.com/articles/building-a-better-user-experienceby-designing-in-the-browser.
Things to consider before we start building
We are going to use underscores as this gives us a great starter theme. You can create
your own custom version using the following steps:
1. Visit http://underscores.me in your browser and enter a name for your
theme, in our case runchums.
2. Click on Generate and the theme will download.
[ 58 ]
Chapter 5
Next, we want to change the style.css file in the runchums folder to have our
theme name and details. So open it up in your text editor and change the theme
name, URI, and other details:
Theme Name: runchums
Theme URI: http://example.com/
Author: Runchums
Author URI: http://example.com/
Description: Run Chums community theme
Sketch
Sketches allow you to explore without any design and get ideas out of your head fast
so they can be understood. They are a great starting point.
Here are two sketches of the log out and log in page. When logged in, it will show
you the site and a sign up form. When logged in you'll see a more minimal header
and the activity stream as shown in the following screenshot:
Wireframe
The next step after sketching is wireframing. This is where the ideas become reality
and you start thinking about all the elements towards a blueprint. At this stage we're
concerned with where and how the blocks fit and not the look of them.
[ 59 ]
Let's Get Building
The sections we're going to focus on are the front page and the activity stream. These
are arguably the two most important areas of most communities. They are the key
places for interactions and both require different approaches when designing:
Some items are consistent throughout the community, such as:
• The site name
• The user avatar and log out link
• Navigation bar with a search form
• Footer and links
The frontpage has some unique elements, such as:
• A sidebar with community information widgets, such as members
and groups
• The activity stream on the front page
The profile also has a unique element:
• A profile field to show about section
[ 60 ]
Chapter 5
Style guide
A style guide is our design blueprint. It provides all the information we need to
create the design elements. A style guide builds up to be a collection of every
design element on the site. For a starting point our style guide is going to have
the following sections:
• Colors: The running club has its own colors so we're going to use those
• Font: We are going to use the Google font, PT Sans
• Headers: This includes our typographical scale
• Form: A simple input and submit styling
We're going to use a skeleton style guide so we can easily drop in, this is just made
from HTML. To create the style guide we first copy over the entire styles.css
sheet from underscores into our style guide directory. Then we're going to add
each section's new styles.
The style guide is included in the code available with this book along
with all other code examples used in this and other chapters. You can find
it under styleguide/. There you will find all the colors, fonts, form, and
header styling we're going to use.
[ 61 ]
Let's Get Building
Getting the site built
Now, we've got the foundation worked out, so let's get building. The first stage in the
process is to set up all the basic styles.
While you can follow along each code example in this chapter, all of the
code is provided in the book's code examples for Chapter 5. This means
you do not have to type out every line of code unless you want to.
Setting up
To bring over the styles from our style guide we need to copy them from the code
examples provided with this chapter:
1. Move style.css from the style guide directory styleguide/ to the
runchums/ directory style.css.
2. Either download a new copy of BuddyPress or use the one from
previous chapters. Using a file browser, locate bp-templates/, then
under that locate bp-legacy/. Copy into the runchums folder the css/
and buddypress/ directories.
3. Finally, we are going to add content so adding a table of contents listing all
the sections is a good idea. This is what your index in style.css should
look like:
/* Table of contents
1.0 Reset
2.0 Global:
- Headings
- Text Elements
– Links
Alignment
Text meant only for screen readers
Clearing
Colors
3.0 Menu
4.0 Content:
- Footer
– Header
- Layout
- Output
5.0 Asides
6.0 Media
7.0 Navigation
8.0 Comments*/
[ 62 ]
Chapter 5
Enqueue fonts
We're going to use a Google font for our project so we need to enqueue this font
to safely load into and use. To do that, we are going to use the existing script
loading function.
1. Open up your functions.php in the runchums/ folder. And find:
function runchums_scripts() {
2. After this line:
wp_enqueue_script( 'runchums-skip-link-focus-fix', get_template_
directory_uri() . '/js/skip-link-focus-fix.js', array(),
'20130115', true );
3. Add the following line:
wp_enqueue_style('runfonts', 'http://fonts.googleapis.com/css?fami
ly=PT+Sans:400,700,400italic,700italic', array(), null);
Page layouts
Next, let's add some CSS for the layout into our runchums theme. Open up the
theme's style.css. The site's page width is going to be 1120 pixels wide with
margins to center the display. The CSS for this is:
.site{
margin: 0 auto;
max-width: 1120px;
}
All this CSS is in your code examples provided if you want to see what
style.css should look like.
As we have a two-column layout for our front page and full width for our
community pages let's also add some styling for those:
.content-area {
float: right;
margin: 0 0 0 -25%;
width: 100%;
}
.site-content {
margin: 0 0 0 25%;
}
.full-width .site-content{
margin: 0;
[ 63 ]
Let's Get Building
}
.site-main .widget-area {
float: left;
overflow: hidden;
width: 25%;
}
.site-footer {
clear: both;
width: 100%;
}
.site-main{
clear: both;
padding: 30px;
}
.site-info{
padding: 20px;
}
Removing the admin bar
We want to remove the WordPress admin bar from showing, unless you are an
admin. Placing the following code in functions.php does just that:
add_action('init', 'runchums_remove_admin_bar');
function runchums_remove_admin_bar() {
if ( !current_user_can('administrator') && !is_admin() ) {
show_admin_bar(false);
}
}
We now have the start of our theme, but it's pretty minimal. Next, we're going to add
some design to this theme.
Template
We are going to create a template to use for all BuddyPress components. To do this
we create an empty file in our theme using our text editor and call it buddypress.
php. In that file we set up an empty loop:
<?php
/**
* The Template for displaying buddypress components
*
* @package runchums
[ 64 ]
Chapter 5
*/
get_header(); ?>
<div id="primary" class="full-width content-area">
<div id="content" class="site-content">
<?php while ( have_posts() ) : the_post(); ?>
<?php the_content(); ?>
<?php endwhile; // end of the loop. ?>
</div><!-- #content -->
</div><!-- #primary -->
<?php get_footer(); ?>
Adding a custom background
We're going to add the ability to have a custom background and set a default color:
1. Go to your runchums theme in a file browser and load functions.php into a
text editor.
2. At line number 63 add the following:
add_theme_support( 'custom-background', apply_filters(
'runchums_custom_background_args', array(
'default-color' => 'f5f5f5',
) ) );
The header
Our header section is going to have a logo, custom header, the user avatar, and the
log out button. Let's create our header right now:
1. Go to your runchums theme folder.
2. Delete everything in header.php below the <body> section. Then, add in the
following:
<div id="page" class="hfeed site">
<?php do_action( 'before' ); ?>
<header id="masthead" class="site-header" role="banner">
</header><!-- #masthead -->
<div id="main" class="site-main">
3. Let's start building the sections. First up, let's create the header.
4. After line number 21 add the following code:
<div id="branding" class="clear">
<div class="site-title">
<h1><a href="<?php echo home_url( '/' ); ?>"
rel="home"><?php bloginfo( 'name' ); ?></a></h1>
</div>
[ 65 ]
Let's Get Building
5. Next, we're going to check if someone is logged in, if they are, we're going
to show their avatar and a log out link. Add the following after the
preceding code:
<?php if ( is_user_logged_in()) : ?>
<div class="user-avatar">
<a href="<?php echo bp_loggedin_user_domain(); ?>">
<?php bp_loggedin_user_avatar(
'type=thumb&width=64&height=64' ); ?>
</a>
<h4><?php echo bp_core_get_userlink( bp_loggedin_user_id()
); ?></h4>
<a class="button logout" href="<?php echo
wp_logout_url( wp_guess_url() ); ?>"><?php _e( 'Log
Out', 'runchums' ); ?></a>
</div>
6. To end, we close the preceding code as follows:
<?php endif; ?>
</div>
7. Once we've got the header.php structure, we need to add a bit of styling to
styles.css under the header section:
#branding{
padding: 30px 20px;
}
.site-title{
float: left;
padding: 20px 0 0 0;
width: 50%;
}
.site-title h1{
line-height: 0.6;
}
.site-title h1 a{
font-size: 48px;
font-size: 4.8rem;
font-weight: 700;
padding: 10px 0 0 0;
text-decoration: none;
}
.user-avatar{
float: right;
}
[ 66 ]
Chapter 5
Custom header images
To create our custom header we're going to change and add some arguments to the
_inc/custom-header.php file in our theme:
1. From your runchums folder open up _inc/custom-header.php in a text
editor, and find the following code:
'width' => 1000,
'height' => 250,
'flex-height' => true,
'wp-head-callback' => 'runchums_header_style',
2. Replace with new width and height numbers:
'width'
'height'
=> 1120,
=> 300,
3. Then remove the following line:
'wp-head-callback'
=> 'runchums_header_style',
4. Save the file.
5. Open up runchums/functions.php and find the commented out customheader.php file load. It should be on line 110. Remove the comments at the
start so that you have the following:
require get_template_directory() . '/inc/customheader.php';
Congratulations, you've now set up your custom header. You can now set your own
image by going to the WordPress admin panel link Appearance and then Header.
The photograph (headerimage.jpg) used in the theme screenshots is
included in the code examples. You can use it without license issues if
you want to.
Variable header heights
We want different heights of headers depending on whether you are on the front page
or inside. We'll do that using CSS by adding the following code into style.css:
.home-page #headimg{
height: 400px;
}
.logged-in.home-page #headimg{
height: 200px;
}
[ 67 ]
Let's Get Building
The logged-out user view
We want to create a special section for logged-out members. In our header we
already set up the template call for this at line 37, after the code we added earlier,
add the following:
<?php if (is_front_page()) :?>
<?php if (is_user_logged_in()) :
$header_image = get_header_image(); ?>
<div id="headimg" style="background: #111111 url('<?php echo
esc_url( $header_image ); ?>') center bottom norepeat;"></div>
<?php else :
get_template_part( 'parts/member', 'join' );
endif; ?>
<?php endif; ?>
What the preceding code does is checks if it's the front page and if it is, and the
user is logged in, it outputs the header image. If it's the front page and the user
isn't logged in we show the member-join.php template. This will be located
under a directory called parts. Let's do that now:
1. Make a new directory under runchums/ called parts.
2. Create a new file and add the following code to it:
<?php
/**
* The logged out user header template.
* This is the logged out user header template.
*
* @package runchums
*/
$header_image = get_header_image(); ?>
<div id="headimg" style="background: #111111 url('<?php
echo esc_url( $header_image ); ?>') center center norepeat;" class="clearfix">
3. Next, we want to create an about section, which appears when someone is
logged-out. To do this after the preceding code add the following:
<div id="about-section">
<h2><?php _e( 'Welcome to Run Chums', 'runchums' );
?></h2>
<p><?php _e( 'Run Chums is a community for runners. This
community started out when a group of friends got
together and created a casual running club. As time
passed more and more people joined us on our running
[ 68 ]
Chapter 5
journey. From there we have grown to the community you
see today. Run Chums is for everyone. No matter what type
of running you do or what level you are at, there is
something for everyone here. The thing that unites us all
is our passion for running. From barefoot running to
trail running – we cover it all. Join us now and become a
runchum!', 'runchums' ); ?></p>
</div>
4. After the about section we are going to create a sign up section. Add the
following code:
<div id="signup-section">
<?php if ( bp_get_signup_allowed() ) : ?>
<p id="login-text">
<?php printf( __( 'Please <a href="%s" title="Create
an account">create an account</a> to get started.',
'runchums' ), bp_get_signup_page() ); ?>
</p>
<?php endif; ?>
<h2><?php _e( 'Already a member? Sign in', 'runchums' );
?></h2>
<?php wp_login_form(); ?>
</div>
With our last bit of code we're going to close the div for
the header:
</div>
5. Now, we're going to add some CSS to get the output in style.css.
#about-section{
background-color: rgba(1, 1, 1, 0.5);
color: #fff;
float: left;
margin: 60px 0 0 20px;
padding: 20px;
width: 50%;
}
#signup-section{
background-color: rgba(1, 1, 1, 0.8);
color: #fff;
float: right;
margin: 60px 20px 0 0;
padding: 20px;
width: 30%;
}
[ 69 ]
Let's Get Building
Once that's all saved, you should see the following screen when not logged in:
Navigation
Our next step is to create navigation using the menu already in underscores:
1. To start, we're going to add the navigation to header.php in our theme
runchums. Add the following at line 44:
<nav id="site-navigation" class="navigation-main clear"
role="navigation">
<h1 class="menu-toggle"><?php _e( 'Menu', 'runchums' ); ?>
</h1>
<div class="screen-reader-text skip-link"><a
href="#content" title="<?php esc_attr_e( 'Skip to
content', 'runchums' ); ?>"><?php _e( 'Skip to content',
'runchums' ); ?></a></div>
<?php wp_nav_menu( array( 'theme_location' => 'primary' )
); ?>
</nav><!-- #site-navigation -->
2. Then we want to add some CSS to style.css for our navigation:
.navigation-main {
background: #333;
clear: both;
display: block;
}
.navigation-main a {
[ 70 ]
Chapter 5
color: #fff;
display: block;
text-decoration: none;
padding: 15px 30px;
}
3. Next, we want to add in some CSS for our search form:
#search-wrapper{
float: left;
width: 25%;
padding: 12px 0 0 20px;
}
4. Then in header.php again we add our search form to the navigation block
beneath this:
<nav id="site-navigation" class="navigation-main clear"
role="navigation">
5. So, we add:
<div id="search-wrapper">
<?php get_search_form(); ?>
</div>
We're really getting there now with our theme. In the next stage, we are going to add
some functionality for our front page.
The front page
The community site is going to have a home page that shows the activity and also
custom sidebar content. If we wanted to show the activity stream on the front
we could do this easily by setting activity to the front using the reading settings.
However, we want to have other customization for this page so we're going to
create a template file.
Open up a new file and copy the following section of code:
<?php
/**
* The front template file.
* This is the front page template. It shows latest activity.
*
* Template Name: Front Hub
*
* @package runchums
[ 71 ]
Let's Get Building
*/
get_header(); ?>
<div id="primary" class="content-area">
<div id="content" class="site-content" role="main">
<div id="buddypress">
</div><!-- #buddypress -->
</div><!-- #content -->
</div><!-- #primary -->
<?php get_sidebar(); ?>
<?php get_footer(); ?>
Save the file as template-frontpage.php. Now under pages create a new page
called front. Assign the page template "front page" to the front page. To do this, go
to your WordPress admin area and visit Settings then Reading and set front hub to
be your home page.
Our home page is going to have a few customizations beyond the usual output of
the activity pages. We are going to only show the posting form and the activity loop.
We're going to customize the activity stream by creating a new loop.
In your text editor open up activity/activity-loop.php and save that file with
a new name called activity-loopfront.php. We can now customize this new file.
We're going to use a custom loop to show seven items per page:
<?php if ( bp_has_activities( bp_ajax_querystring( 'activity' ) )
) : ?>
Will become:
if ( bp_has_activities( bp_ajax_querystring( 'activity' ) . '&per_
page=7') ) :
Once, that is done we need to link to the posting form to allow people to update and
also the activity loop. Our front page becomes:
get_header(); ?>
<div id="primary" class="content-area">
<div id="content" class="site-content" role="main">
<div id="buddypress">
<div class="activity" role="main">
<?php if ( is_user_logged_in() ) : ?>
<?php bp_get_template_part( 'activity/post-form' ); ?>
<?php endif; ?>
<?php bp_get_template_part( 'activity/activity-loop' );
?>
</div><!-- .activity -->
</div><!-- #buddypress -->
[ 72 ]
Chapter 5
</div><!-- #content -->
</div><!-- #primary -->
<?php get_sidebar(); ?>
<?php get_footer(); ?>
We have all the code, but the problem is it doesn't really look great. Let's
add in some styling to float the avatars and style the content in our version
of css/buddypress.css, that we copied over earlier into our theme.
We will be using buddypress.css, and adding and editing styles in
it as this means we can have our own unique style away from theme
independence. You can find all the following code in the book examples
or you can find and replace them yourself.
#buddypress .activity-list .activity-avatar {
float: right;
}
#buddypress ul.item-list li img.avatar {
float: right;
margin: 0;
}
#buddypress .activity-list .activity-content {
margin: 0 70px 0 0;
}
#buddypress .activity-list .activity-content .activity-header,
#buddypress .activity-list .activity-content .comment-header {
color: #888;
font-size: 90%;
}
#buddypress div.activity-meta a {
padding: 4px 8px;
}
#buddypress div.activity-comments div.acomment-meta {
color: #888;
font-size: 80%;
margin: 0 40px 0 0;
}
#buddypress div.activity-comments div.acomment-content {
font-size: 80%;
margin: 5px 40px 0 0px;
}
#buddypress div.activity-comments {
margin: 0 0 0 20px;
[ 73 ]
Let's Get Building
overflow: hidden; /* IE fix */
position: relative;
width: auto;
clear: both;
}
We're going to add a primary color to the primary button to make it stand out and
then add a style to the other buttons. This is in buddypress.css:
#buddypress button,
#buddypress a.button,
#buddypress input[type=submit],
#buddypress input[type=button],
#buddypress input[type=reset],
#buddypress ul.button-nav li a,
#buddypress div.generic-button a,
#buddypress .comment-reply-link,
a.bp-title-button {
background: #a3a3a3;
border: none;
-moz-border-radius: 3px;
-webkit-border-radius: 3px;
border-radius: 3px;
color: #fff;
cursor: pointer;
outline: none;
padding: 4px 10px;
text-align: center;
text-decoration: none;
}
#buddypress button:hover,
#buddypress a.button:hover,
#buddypress a.button:focus,
#buddypress input[type=submit]:hover,
#buddypress input[type=button]:hover,
#buddypress input[type=reset]:hover,
#buddypress ul.button-nav li a:hover,
#buddypress ul.button-nav li.current a,
#buddypress div.generic-button a:hover,
#buddypress .comment-reply-link:hover {
background: #777;
color: #fff;
outline: none;
text-decoration: none;
}
#buddypress a.button.bp-primary-action{
background: #e67e22;
}
[ 74 ]
Chapter 5
.entry-title a.button{
font-size: 2.2rem;
}
.entry-title a.button:visited,
.entry-title a.button:hover{
color: #fff;
}
Once we've done all that we now have a styled activity stream on the front page.
We also have the activity stream styled for the activity page as it uses the same
styles, as shown in the following screenshot:
The sidebar
In our sidebar we are going to keep the existing widget area that underscores gives
us and we are also going to create some of our own blocks. We need some small
tidying CSS first in the theme's style.css. At line number 586 find the widget
styles and change them to look like this:
.widget {
margin: 0 0.5em 1.5em;
}
.widget h1{
font-size: 22px;
font-size: 2.2rem;
}
Now you should have a simple style for your sidebar widgets.
[ 75 ]
Let's Get Building
Random members
In sidebar.php we want to add a new block. This would be before the
following code:
<?php if ( ! dynamic_sidebar( 'sidebar-1' ) ) : ?>
Our member block is going to have a simple loop that outputs no more than
14 random members. We are using the bp_has_members function to do this:
<?php if ( bp_has_members( bp_ajax_querystring( 'members' ) .
'max=14&type=random' ) ) : ?>
First up, let's create the wrapper for the widget block; we're going to follow the same
output that the widgets do in the theme:
<aside id="member-widget">
<h1><?php _e( 'Members', 'runchums' ); ?></h1>
…. our output will go here
</aside>
Then let's add the following in our custom loop:
<aside id="member-widget">
<h1><?php _e( 'Members', 'runchums' ); ?></h1>
<ul>
<?php if ( bp_has_members( bp_ajax_querystring( 'members' ) .
'max=14&type=random' ) ) : ?>
<?php while ( bp_members() ) : bp_the_member(); ?>
<li><a href="<?php bp_member_permalink(); ?>"><?php
bp_member_avatar('type=thumb&width=50&height=50');
?></a></li>
<?php endwhile; ?>
<?php endif; ?>
</ul>
</aside>
There you have it, we now have a simple function to show members. Let's move and
create one for groups.
[ 76 ]
Chapter 5
Random groups
Just like the random members, we're going to use the same styling as the widget and
add a custom function. Here we're using the groups equivalent:
<?php if ( bp_has_groups( bp_ajax_querystring( 'groups' ) .
'max=7&type=random' ) ) : ?>
This time, we're going to place this below the following code:
<?php do_action( 'before_sidebar' ); ?>
Let's put that together in the format we used before:
<aside id="groups-widget">
<h1><?php _e( 'Groups', 'runchums' ); ?></h1>
<ul>
<?php if ( bp_has_groups( bp_ajax_querystring( 'groups' ) .
'max=7&type=random' ) ) : ?>
<?php while ( bp_groups() ) : bp_the_group(); ?>
<li class="item-title"><a href="<?php
bp_group_permalink(); ?>"><?php bp_group_name();
?></a></li>
<?php endwhile; ?>
<?php endif; ?>
</ul>
</aside>
Now, we're going to add some CSS in style.css widget section to format
these blocks:
#groups-widget ul, #groups-widget li,
#member-widget ul, #member-widget li{
list-style: none;
margin: 0;
padding: 0;
}
#member-widget li{
float: left;
margin: 0 5px 5px 0;
}
[ 77 ]
Let's Get Building
Assuming you already have groups and members, you should now have two blocks
that show random groups and random members. They should pick up the styling
already in use for widgets:
The member profile
Our member profile has a slightly different layout from the site. We also need to
style the navigation bars. So let's add some CSS to do this in buddypress.css:
#buddypress div.item-list-tabs {
background: #e67e22;
clear: left;
overflow: hidden;
}
#buddypress div.item-list-tabs#subnav {
background:#a3a3a3;
color: #fff;
margin: 10px 0 10px;
overflow: hidden;
}
#buddypress div.item-list-tabs ul li a,
#buddypress div.item-list-tabs ul li span {
display: block;
padding: 5px 10px;
text-decoration: none;
color: #fff;
}
#buddypress div#item-content{
float: right;
width: 72%;
}
[ 78 ]
Chapter 5
.bp-user #buddypress div#item-header {
float: left;
overflow: hidden;
width: 25%;
}
The page will look like the following screenshot:
Add the About profile field
We're going to add a profile field that outputs information about the person on their
profile. This is going to be easily done using the built-in functionality of BuddyPress.
Make sure you've turned on extended profiles by going to Settings and BuddyPress
and checking the components list. If you also want users to update their settings then
turn on Account Settings:
1. Once that is done, go to Users and Profile Fields.
2. Let's set up a profile field group called Information. Click on Add new
profile group and add a title and description before saving.
3. We're now going to set up our profile field called About in the new
profile group.
4. Click on Add new field.
5. Add the name and description.
6. We're not going to have this required, but you can if you want set it
to required.
7. Select the field type. For our example, we're going to select Multi-line
Text Box.
[ 79 ]
Let's Get Building
8. On Default Visibility set it to Anyone.
9. On Per-Member Visibility set it to Let members change this
field's visibility.
10. Save your profile field.
We need to add the output in the theme for this new profile field. In your text editor
open buddypress/members/single/member-header.php. If you scroll that page
you will see the following:
/***
* If you'd like to show specific profile fields here use:
* bp_member_profile_data( 'field=About Me' ); -- Pass the name of the
field
*/
Just following that add the output for your profile field:
<?php
/***
* If you'd like to show specific profile fields here use:
* bp_member_profile_data( 'field=About Me' ); -- Pass the name
of the field
*/
bp_member_profile_data( 'field=About' );
do_action( 'bp_profile_header_meta' );
?>
It will look a bit jumbled together so let's add some padding after the latest
update, add this in buddypress.css in the Directories - Members, Groups,
Blogs, Forums section.
#buddypress #latest-update{
padding: 20px 0;
}
You now should have it displayed under your profile when you visit your profile
and edit from your member profile page on the front of the site.
[ 80 ]
Chapter 5
The following screenshot shows what you added in your profile sidebar:
Directories
For the member directory and group directory we are using theme compatibility,
but going to add in some of our own CSS changes. Add the following to
buddypress.css:
#buddypress #members-list .item-avatar{
float: right;
}
#buddypress #groups-list .item-avatar{
float: left;
margin: 0 10px 0 0;
}
#buddypress div.dir-search {
float: right;
margin: 10px 0 20px 0;
}
[ 81 ]
Let's Get Building
Summary
This chapter was a bit of a whirlwind of code. We've stepped through the entire
process of developing a theme. We've seen how the process starts with sketches,
style guides, and wireframes, then moves into reality as it is built. Our journey has
taken us through quite a lot of code and custom functionality to build a simple but
custom theme.
The code in this chapter is quite a lot to take in one sitting, you're encouraged to
check out the source code that comes with this book and explore the code. Most start
developing themes by experimenting with small changes in a theme, you can do that
with the theme we've created.
What we have explored here is only the start. There are so many things you can do
with themes and so many ways you can create a unique look. In the next chapter we
will see what lies beyond these simple themes, and what happens in the next steps
once you go beyond the look.
[ 82 ]
Beyond the Look – Hooks,
Functions, and Afterwards
In this chapter we are going to move beyond the templates and CSS. We'll look at
what happens once you've got your theme.
Topics we're going to cover are:
• Hooks
• Advanced loops
• Customizing template tags
• Making our theme responsive
• Theme Check
As we look at each area of customization we're going to create examples and add to
our theme from the previous chapter for the Run Chums community. If you want
to follow the code examples in this chapter you can use the code provided with
this chapter.
Adding functionality
We've got a theme and that's a great start. Now, we want to add some more
functionality to our site. This is where we start thinking about additional things
that our users want other than the styling.
Just like with the theme design, we want to boil down our functionality to the
minimum required at the start. Over time the community will tell us what
they need.
Beyond the Look – Hooks, Functions, and Afterwards
A note before we add functionality. We are creating a theme that will
always work on BuddyPress. If you are creating a theme that may be
used without BuddyPress you need to check before doing anything that
requires the plugin.
To do this you need to check like this:
function_Exists('bp_is_active');
You can use this to check for an exact functionality of BuddyPress or that
it is active.
We also need to be careful and consider what the theme functionality is
and what goes beyond into plugins. You can find out more about action
and filters here: http://codex.wordpress.org/Glossary#Action and
http://codex.wordpress.org/Glossary#Filter
If you wish to do everything for yourself then you can remove theme compatibility
by adding this to your theme functions.php:
add_theme_support( 'buddypress' );
A word of caution though, this is not recommended and will mean you have to be
careful to update everything yourself. In most cases you will not need to do this.
Hooks
In a theme's WordPress template you will find hooks. Hooks are provided by
WordPress to allow plugins to call functions from the plugin at a specific time.
There are two kinds of hooks:
1. Actions: These happen at specific points or when specific things happen.
2. Filters: These are what WordPress uses to modify text of various types
before outputting to the screen or inserting into the database.
There are two hooks we need to be aware of right at the start of our journey into
theme development and these are wp_head() and wp_footer().
• wp_head() and wp_footer() are the two functions all themes should have
in the header and footer files.
• wp_head() should be put within the <head> section of the template. This
is one of the most essential theme hooks and used by a lot of plugins, so it
should always be included.
[ 84 ]
Chapter 6
• wp_footer() (location should be a footer file).
• Unlike wp_head(), wp_footer() should always be before the closing
</body> tag of your theme otherwise a lot of plugins won't work.
BuddyPress specific hooks
BuddyPress also has hooks. There are hundreds of actions and filters within
BuddyPress. When we create our own templates we should always look at
what bp-legacy has for these to make sure we include them in our theme.
Using hooks
Hooks are a great way of adding in content without templates or changing the
default templates. To show this, let us output a message before the groups loop.
First, we need to use the hook before the loop:
<?php do_action( 'bp_before_groups_loop' ); ?>
We are going to have some theme related functions in our theme. So let us create a
new file under _inc and call it theme-functions.php. Open up that file in your text
editor and we'll create the function to output at our chosen hook.
/**
* Outputs a message before the group directory
*/
add_action( 'bp_before_groups_loop', 'runchums_groupmessage' );
function runchums_groupmessage(){
?>
<div id="message"><p><?php _e( 'Join a group and get involved in the
Run Chums community', 'runchums' ); ?></p></div>
<?php
}
Our final step is linking up in functions.php the file we want to use for our
theme functions.
/**
* Load theme functions file.
*/
require get_template_directory() . '/inc/theme-functions.php';
[ 85 ]
Beyond the Look – Hooks, Functions, and Afterwards
We now have the following display on the Group directory – a custom message
using the message style BuddyPress uses.
Changing the content using filters
There are many other things you can do with filters. You can add content, remove,
or even change the format.
Let's see an example of this by adding a phrase before our activity stream
entry is output. To do this, you simply add the following function into
theme-functions.php.
/**
* Function to add a phrase before the activity stream entry
*/
function runchums_filter_activityaction($content){
return 'The following occurred:'.$content;
}
add_filter( 'bp_get_activity_action', 'runchums_filter_
activityaction');
[ 86 ]
Chapter 6
This will output the following screenshot (The following occurred:) before the
activity stream item.
Advanced component loops
We looked into our theme example at a custom activity loop where we showed seven
items per page. That's just the start of the customization available though. You can
do lots of really cool things using custom loops. Let's take a look at few things that
you can do with loops.
• You can show all the activity that mentions the word BuddyPress:
<?php if ( bp_has_activities( bp_ajax_querystring
( 'activity' ) . 'search_terms=buddypress') ) : ?>
• You could exclude a group with an ID (its number) of 2 from the group list:
<?php if ( bp_has_groups( bp_ajax_querystring
( 'groups' ) . 'exclude=2') ) : ?>
• You can just show mentions for a user who has logged in using:
<?php if ( bp_has_activities( bp_ajax_querystring( 'activity' ) .
'&scope=mentions') ) : ?>
You can find out more about all the loops and customizations here:
http://codex.buddypress.org/developer/developer-docs/
loops-reference/
[ 87 ]
Beyond the Look – Hooks, Functions, and Afterwards
Custom post types
Custom post types are a great way to add functionality to your theme. If you'd like
to know more about custom post types you can find a lot of good information in the
WordPress Codex: http://codex.wordpress.org/Post_Types
Customizing template tags
WordPress and BuddyPress do a lot of great things for us but sometimes we need
to customize template tags. You can customize the default output of many template
tags such as the comment form.
A customized comment form
A great yet simple change is to customize the comment form found in comments.php.
Did you know you could have different comment form templates? This is
great when you are using things like custom post types or want different
comments depending on different sections of your site.
In comment.php there is just one function output for the comment form:
<?php comment_form(); ?>
To customize this form we need to pass some arguments to the function. We can do
a whole range of things but for now let us do some custom text and remove some
elements from the form.
You can find out more about the options for comment forms here:
http://codex.wordpress.org/Function_Reference/
comment_form
The custom array we want is this:
$args = array(
'id_form'
'id_submit'
'title_reply'
'title_reply_to'
'cancel_reply_link'
'label_submit'
=>
=>
=>
=>
=>
=>
'commentform',
'submit',
__( 'Add your voice', 'runchums'),
__( 'Add your voice to %s', ''runchums'),
__( 'Cancel your comment'. 'runchums'),
__( 'Post your Comment', 'runchums'),
[ 88 ]
Chapter 6
Let's add a comment before the comment form:
'comment_notes_before' => '<p class="comment-notes">' .
__( 'Your email address will not be
published.' ) . ( $req ? $required
_text : '' ) .
'</p>',
'comment_notes_after' => '',
);
comment_form($args); ?>
Then we should have the following form:
Custom templates
One of the easiest customizations you can do is to create a custom template for a
page. A prime example of this is the 404 page.
A 404 page is a good opportunity to show the personality of your site, maybe you
have a character pointing to a search form. Maybe you want to show the recent
activity on the community or a page of suggested search results.
It's really up to you what you add but it's a great chance to go beyond a simple page
not found header.
[ 89 ]
Beyond the Look – Hooks, Functions, and Afterwards
Functions
There are times when you want your theme to do more. Maybe you want it to output
custom content, perform extra functionality or even call other services. You can do
all of these using functions. Let's create a simple function to output the number of
users of the community.
bp-custom modifications
A simple way to change things with BuddyPress is to add to bp-custom.php a
hack or customization. It could be something simple like changing a custom slug
or something more complex like filtering the output of a BuddyPress function.
These changes are not linked to your theme and allow you to powerfully change
your BuddyPress installation without touching the core files.
Demonstrating the statistics function
Showing the community statistics on your site is a great way to show off your
community and encourages engagement as well. You can do this using a simple
function and placing the output in your template.
This is a function related to the theme, so let's put it in our theme-functions.php
file. We want two functions for this: one to output the statistics and another to create
the total format.
This function is our output one. We are going to simply create a styled block with a
header, then our first statistic.
/**
* Output for member statistics
*/
function runchums_members_statistics() {
?>
<div id="runchums-stats">
<h3><?php _e( 'Community stats:', 'runchums' ); ?></h3>
<?php
echo runchums_show_members_statistics();
?>
</div>
<?php
}
[ 90 ]
Chapter 6
Next, we are going to use the built in function bp_core_get_total_member_count
and depending on its total, we create different strings.
/**
* Function to format the member total
*/
function runchums_show_members_statistics() {
$total_count = bp_core_get_total_member_count();
if ( $total_count > 1 )
$content = sprintf(
count, 'number of members',
count ) );
}
else{
$content = sprintf(
}
{
_nx( '%s member', '%s members', $total_
'run chums' ), number_format_i18n( $total_
_( '0 members', 'runchums' ); )
return apply_filters( 'runchums_show_members_statistics',
$content, $total_count);
}
Now let's show this just on the front page sidebar. To do this, we are going to use our
template-front.php and where we have this:
<?php get_sidebar(); ?>
Change, so we have a custom sidebar for the front page:
<?php get_sidebar('front'); ?>
Next, open up sidebar.php and save it as sidebar-front.php, this will be our new
front sidebar. In sidebar-front.php find the following:
<?php do_action( 'before_sidebar' ); ?>
Add the function to show our statistics after that:
<?php runchums_members_statistics(); ?>
That's going to be fairly minimally styled so let us add into style.css some simple
CSS for our statistics block:
#runchums-stats{
background: #f3f3f3;
padding: 20px;
margin: 0 20px 20px 0;
border: 1px solid #ddd;
}
[ 91 ]
Beyond the Look – Hooks, Functions, and Afterwards
Now we have a statistics block for our community. As we made a function it's easy
to add other statistics to this, as we want. We can just append any extra functions to
our output function like the following:
function runchums_members_statistics() {
?>
<div id="runchums-stats">
<h3><?php _e( 'Community stats:', 'runchums' ); ?></h3>
<?php
echo runchums_show_members_statistics();
// add a groups total
echo runchums_show_groups_statistics();
// add a forum posts total
echo runchums_show_discussion_statistics();
?>
</div>
<?php
}
Widgets
Widgets are a great way to personalize your site and add extra functionality to your
theme. You can bundle your theme with your own widgets to allow users to choose
whether to include functionality or not.
[ 92 ]
Chapter 6
Widget creation can be a simple few functions or an in depth
process. If you want to dive deeper the following is a useful
template: https://github.com/tommcfarlin/WordPressWidget-Boilerplate
You can find out more about the Widget API in the WordPress
Codex here: http://codex.wordpress.org/Widgets_API
After the theme
We now have the theme with some extra functionality. Next, we have to test our
theme and also make sure it works across different devices.
Testing
Checking our theme on different browsers and different devices is really an
important part of the process. A basic checklist would run through common
actions of a community along with testing the way a site looks.
It's recommended to have a staged approach that involves testing as you go through
each and every stage. If you are setting testing milestones then the following is a
simple path to follow:
1. Alpha check: Functionality and design is there and you run your checklist
and testing.
2. Internal beta: Those people who worked on the project if more than one then
are allowed to run through the checklist.
3. Invite beta: A small selection of people is allowed into the community.
4. Beta: A larger group or an open selection of people is allowed into
the community.
5. Launch.
[ 93 ]
Beyond the Look – Hooks, Functions, and Afterwards
Browser testing
It's important to make sure that your theme works on different browsers and also
different devices. Your first step in testing is going to be testing your theme in a
range of browsers. Remember that not everyone uses the browser you use when
you test. The WordPress Codex has some great resources you can use:
• Viewing the site in different browsers: http://make.wordpress.org/
support/user-manual/web-publishing/browser-issues/when-viewingthe-site-in-different-browsers/
• Browser issues for site owners and authors: http://make.wordpress.org/
support/user-manual/web-publishing/browser-issues/for-siteowners-and-authors/
The device-free version
The term device free means that your theme works not just on a range of browsers
but also on as many devices as possible. We need to remember that not everyone
uses a computer to access the Web.
Device labs are a great way to test different devices. You can see if you
have a local one here: http://opendevicelab.com.
To assess what needs doing, we first need to test our theme on a range of devices.
If we live near a device lab or have lots of devices then this may be easy, but what
if we don't? That's where some great testing sites come into play.
There are lots of options for device testing but we're going to use this one:
http://mattkersley.com/responsive/ where you just enter your site's
Web address and run the test.
In underscores the media query of max-width: 600px is already used and we'll
continue to use that for our changes. Let us step through the CSS we're going to
add to style.
Our first task is to tidy up the menus. We're going to style the toggle menu and the
navigation which it shows. Our theme is going to load a special menu for mobile
devices that shows when you click on the word Menu.
@media screen and (max-width: 600px) {
.menu-toggle,
.main-small-navigation ul.nav-menu.toggled-on {
background: #333;
[ 94 ]
Chapter 6
display: block;
list-style: none;
margin: 0;
padding: 0 10px 10px;
}
.main-small-navigation li a{
color: #fff;
padding: 5px 10px;
}
.navigation-main ul {
display: none;
}
}
Next, we're going to deal with the layout. There are many different approaches when
creating a responsive design. We're going to take the simplest of those and move our
sidebar to the bottom of our site. We simply remove the float and styling from our
content area to create two columns.
@media screen and (max-width: 600px) {
.site-main .widget-area {
float: none;
overflow: hidden;
width: 100%;
}
.site-content {
margin: 0;
}
Our search wrapper and navigation is floated, so on our smaller devices we want to
remove that and set a background to focus on the search.
#search-wrapper{
background: #111;
float: none;
width: auto;
padding: 10px;
}
#search-wrapper .field{
width: 50%;
}
[ 95 ]
Beyond the Look – Hooks, Functions, and Afterwards
As our site title and logged in user section float left and right, we want to make sure
they don't on smaller devices. We also want to use a smaller font on the title when
using a smaller device.
.site-title{
float: none;
padding: 10px 0 20px 0;
width: 100%;
}
.user-avatar{
float: none;
}
.user-avatar img{
float: left;
margin: 0 20px 0 0;
}
.user-avatar h4{
clear: none;
}
.site-title h1 a{
font-size: 24px;
font-size: 2.4rem;
font-weight: 700;
padding: 10px 0 0 0;
text-decoration: none;
}
}
Once we've saved all that, we can run the test again and now see the
responsive theme.
[ 96 ]
Chapter 6
Theme check
In the last chapter we created our theme for the Run Chums site. Even if you are
not going to submit your theme to the WordPress.org theme repository, it's good
practice to check your theme before you release it.
You can find out more about the theme check and theme standards
here: http://make.wordpress.org/themes/ and here:
http://wordpress.org/plugins/theme-check/.
We're now going to run our theme through the theme check process:
1. In your browser visit: http://wordpress.org/plugins/theme-check/ and
download the theme check plugin. Alternatively, you can add this through
your WordPress admin.
2. Upload to the directory for your plugins wp-content/plugins.
3. In your Dashboard, click on Plugins and find Theme-Check. Then click
on Activate.
You now have the Theme Check plugin installed.
4. To enable debug open up your wp-config file (from your WordPress root
files) in a text editor. Look for the following line:
define('WP_DEBUG', false);
Change that to this:
define('WP_DEBUG', true);
Save the file.
5. In your Dashboard, go to Appearance | Theme-Check.
[ 97 ]
Beyond the Look – Hooks, Functions, and Afterwards
6. Make sure that you have your theme you want to check (in this case
runchums) selected. Run the theme check.
If you ran the theme check on the runchums theme you will see there are a few
errors. We're going to now deal with those errors and get it to pass the theme check.
First our attention should go to anything in red, which are fails for the theme check.
We have one item that is a wrong tag in style.css. There is a list of all tags, which
are allowed here: http://wordpress.org/themes/tag-filter/. Let's add some to
our theme in style.css where it says tags:
Tags: two-columns, flexible-width, buddypress, custom-header, custommenu, custom-background
[ 98 ]
Chapter 6
Now save style.css and run the theme check again. You should see the following
screenshot as it has now passed the theme check.
Recommended by theme check
You will notice when you run the theme check there are a number of things labeled
recommended. Anything that is recommended isn't required but is a good thing
to have. We're going to take a look at some of the recommendations from our
theme check.
Adding a screenshot
The first thing we're going to deal with is the theme screenshot. In the theme check
output we see the following:
RECOMMENDED: Screenshot size should be 600x450, to account for HiDPI
displays. Any 4:3 image size is acceptable, but 600x450 is preferred.
1. Take a screenshot of the homepage of your site with your theme
enabled – make sure that it has as much resemblance to the screenshot
as possible.
2. Using an image editor of your choice open up your screenshot. Crop or resize
your image to 600 x 450px wide and save it as screenshot.png at the root
of your theme (under runchums/).
[ 99 ]
Beyond the Look – Hooks, Functions, and Afterwards
Adding in post thumbnails
One of our recommended errors is to add in post thumbnails. We have the following
suggestions from our theme check plugin:
RECOMMENDED: No reference to post-thumbnails was found in the theme.
If the theme has a thumbnail like functionality, it should be implemented with
add_theme_support( 'post-thumbnails' )in the functions.php file.
RECOMMENDED: No reference to the_post_thumbnail() was found in the theme.
It is recommended that the theme implement this functionality instead of using
custom fields for thumbnails.
Post thumbnails are a great way of adding images to posts. You can easily activate
them in your theme by adding to your functions.php (usually in your theme
setup function):
add_theme_support( 'post-thumbnails');
You can find out more about post thumbnails here: https://codex.
wordpress.org/Function_Reference/the_post_thumbnail
Editor style
Our next comment is about editor styles:
RECOMMENDED: No reference to add_editor_style() was found in the theme. It
is recommended that the theme implement editor styling, so as to make the editor
content match the resulting post output in the theme, for a better user experience.
An editor style allows a theme developer to link a custom stylesheet to be used when
the editor is used in WordPress, for example, when you write a post or a page. This
is a really useful way of people being able to create content just like it's going to
appear on the frontend of the site.
It's a good practice to create one of these for your theme using at least the styles you
use in your theme for headers, fonts, and text formatting.
Beyond theme check
The theme check plugin is a great way to check whether you're on the right track
with your theme. It allows you to easily identify any issues with your theme and
quickly fix them. As you've seen it also recommends extra things you can support
in your theme.
[ 100 ]
Chapter 6
It's also a great idea to familiarize yourself with the WordPress.org theme team
process. Even trying to get your theme on the wordpress.org is great. If you follow
the process and submit a theme it's a really great way to share your theme with other
people and give back to the community.
You can find out more about submitting your theme here:
http://codex.wordpress.org/Theme_Review
Making your theme translatable
Not everyone speaks the same language so making sure your theme is translatable is
important. You do this by not hard coding any text strings such as:
<?php _e( 'Load More', 'buddypress' ); ?>
You also need to declare a text domain for your theme like this in the runchums
theme functions.php:
load_theme_textdomain( 'runchums', get_template_
directory() . '/languages' );
Translations are a vast subject. You can discover more about it here:
http://codex.wordpress.org/Translating_WordPress.
Our foundation's Underscores come with a rtl.css version which we would need to
update. If you want to do this you can test your theme using the RTL tester available
at: http://wordpress.org/plugins/rtl-tester/. RTL is for languages that use
those directions.
You can also change the labels and messages in BuddyPress using
language files. The BuddyPress codex has more information which
is available at: http://codex.buddypress.org/developer/
customizing/customizing-labels-messages-and-urls/
[ 101 ]
Beyond the Look – Hooks, Functions, and Afterwards
Accessibility
It's important to consider not only the devices or browser but also the people who
are going to use your theme. You should be aware and implement accessibility. This
is a vast subject but the WordPress Codex has a few links that are worth pointing out
for you to get started with:
• The main Codex page: http://codex.wordpress.org/Accessibility
• The accesiblity WordPress contribution team section: http://make.
wordpress.org/accessibility/
Plugins
We've focused on themes, but as we close up it's worth noting some plugins that can
bring in extra functionality and allow our themes to do more. This is not an extensive
list but a small selection of plugins.
First and foremost, getting familiar with bbPress is a must, after all if you have
group forums you will be using it in BuddyPress.
Some useful plugins to add extra functionality:
• Group docs: http://wordpress.org/plugins/buddypress-docs/
• Followers: http://wordpress.org/plugins/buddypress-followers/
• Group hierarchy: http://wordpress.org/plugins/bp-group-hierarchy/
Links, social streams, and content generation:
• BuddyStrem: http://wordpress.org/plugins/buddystream/
• Checkins: http://wordpress.org/plugins/bp-checkins/
User engagement plugins:
• Achievements: http://wordpress.org/plugins/achievements/
• Badges OS: http://wordpress.org/plugins/badgeos/
• Invite anyone: http://wordpress.org/plugins/invite-anyone/
[ 102 ]
Chapter 6
Beyond the launch
We now have a theme and the potential to build a really exciting community.
With a BuddyPress site though, that's only half the story. What happens to the
community and how users are engaged goes beyond just the theme and some
plugins. A community takes time to nurture and develop. But, that's a subject for
another book. What we have done here is, taken the first step by learning how to
develop a theme for BuddyPress.
Summary
This Chapter has included a lot of different things beyond just the look of the theme.
We've learned about the power of hooks, template tags, and customization you can
do beyond templates.
BuddyPress loops allow us to create customized streams and output community
specific content easily. They are a really powerful part of any BuddyPress theme.
We've also covered the importance of testing both in browsers and different
devices. Also, we discovered the theme check plugin and how it should be a
part of any theme development process.
Our theme in this chapter has grown to do more than it did in the previous chapter.
It now has custom hook outputs, a modified stream output, and works across a
range of devices. We looked at how you can go beyond the theme and what
plugins can add to your community.
You should now have a good understanding of a lot of the parts that make up a
BuddyPress theme, also how you can add extra functionality and even create your
own widgets. It has been a whirlwind trip with so many of our chapters, but a
journey that has given you insight into a lot of potential additions to a BuddyPress
theme. These things take your community beyond just a simple site; they bring user
engagement, pride in belonging to the community, and really make a community
come alive.
[ 103 ]
Folder Contents
Activity folder contents
The activity component lives in the activity folder. Following are the files in
this directory:
File or directory
What it does
activity/
Contains the activity templates
activity/single/
Contains the single activity templates
activity/single/home.php
Single activity home page
activity/activity-loop.php
Activity loop
activity/comment.php
Activity stream comments
activity/entry.php
Activity stream single entry
activity/index.php
Activity stream layout
activity/post-form.php
Activity post form
Folder Contents
Blogs folder contents
The blog component lives in the blog folder. Following are the files in this directory:
File or directory
What it does
blogs/
Contains the blog templates that are used when
WordPress is in multisite mode
blogs/blogs-loop.php
Blogs loop to output the blogs
blogs/create.php
Create a blog part for registration
blogs/index.php
Blog directory layout
Groups folder contents
The groups component lives in the groups folder. Following are the files in
this directory:
File or directory
What it does
groups/
Contains the group templates
groups/single/
Contains the single group templates
groups/single/forum/
Contains the single group forum templates
groups/single/forum/edit.php
Editing forum
groups/single/forum/topic.php
Editing topic
groups/single/activity.php
Single group activity
groups/single/admin.php
Single group admin
groups/single/forum.php
Single group forum
groups/single/group-header.php
Single group header
groups/single/home.php
Single group home page
groups/single/members.php
Single group members
groups/single/plugins.php
Single group template for plugins
groups/single/requestmembership.php
Request membership for single group
groups/single/send-invites.php
Send invites to single group
groups/create.php
Create a group
groups/groups-loop.php
Groups directory loop
groups/index.php
Groups directory layout
[ 106 ]
Appendix
Forums folder contents
The forums component lives in the forums folder. Following are the files in this
directory. You can find the contents of this in the previous section, Groups folder
content. Following are the files in this directory:
File or directory
What it does
forums/
Contains the forum templates that are used if
bbPress is activated
forums/forums-loop.php
Loop to output forum posts
forums/index.php
Forum directory layout
Members folder contents
The members component lives in the members folder. Following are the files in
this directory:
File or directory
members/
What it does
members/single/
Single members templates
members/single/forums
Single members forum directory
members/single/forums/topics.php
Single members forum topics
members/single/friends/
Single member friends directory
members/single/friends/requests.php
Member’s friend requests
members/single/groups/
Member’s groups directory
members/single/groups/invites.php
Member’s groups invites
members/single/messages/
Member’s messages directory
members/single/messages/compose.php
Member’s compose message
members/single/messages/messages.
loops.php
members/single/messages/notices-loop.
php
members/single/messages/single.php
Member’s loop for messages
members/single/profile/
Member’s profile directory
members/single/profile/change-avatar.
php
members/single/profile/edit.php
Member’s change avatar
Member’s template directory
[ 107 ]
Member’s notices loop
Member’s single message
Member’s edit profile
Folder Contents
File or directory
members/single/profile/profile-loop.
php
members/single/profile/profile-wp.php
What it does
members/single/settings/
Member’s settings directory
members/single/settings/capabilities.
php
members/single/settings/deleteaccount.php
members/single/settings/general.php
Member’s capabilities
members/single/settings/notifications.
php
members/single/activity.php
Member’s notification settings
members/single/blogs.php
Member’s blogs
members/single/forums.php
Member’s forums
members/single/friends.php
Member’s friends
members/single/groups.php
Member’s groups
members/single/home.php
Member’s home
members/single/member-header.php
Member’s member header
members/single/messages.php
Member’s messages
members/single/plugins.php
Member’s plugins template
members/single/profile.php
Member’s profile
members/single/settings.php
Member’s settings
members/activate.php
Activate member’s account
members/index.php
Member directory layout
members/members-loop.php
Member directory loop
members/register.php
Register member
[ 108 ]
Member’s profile loop
Member’s profile
Delete a members account
Member’s general settings
Member’s activity
Index
Symbols
404 page 89
A
about profile field
adding 79, 80
accessibility, BuddyPress theme 102
account settings 26
Achievements
URL 102
activity folder content 105
activity loop 52
activity streams 26
adaptive design 13
admin bar
removing 64
autoinstallation, BuddyPress 23
B
Badges OS
URL 102
bbPress
about 10
URL 10
blogs folder content 106
blogs loop 52
bp-custom
modification 90
bp-custom.php file 56
BP Default data
URL 28
BP Inspire
URL 14
browser
testing 94
BuddyBoss
URL 16
BuddyPress
about 7, 8
autoinstalling 23
child theme, using with 32
configuring 24, 25
features 26
forums 27
hooks 85
installing 22
installing, steps 19
loops 52, 53
manual installing 23
template hierarchy 35
template tags 53, 54
URL 8, 24
using, with WordPress theme 27, 28
buddypress.css 33
BuddyPress theme 7
about 9, 15
accessibility 102
anatomy 54, 55
beyond launching 103
bp-custom.php file 56
browser, testing 94
buying 16
child theme 10
creating, options 14
CSS 55
customizing, CSS file used 33
customizing, default selector used 33
default theme 10
folder content 55
free themes 15
functions.php file 56
making, translatable 101
parent theme 10
plugins 102
requisite 11
running, through theme check 97, 98
script files 55
testing, checklist 93
testing, on device free version 94-96
theme compatibility 10
working 9, 10, 51
BuddyStrem
URL 102
C
Checkins
URL 102
child theme
about 10
creating 30, 31
CSS file, customizing in 33-35
custom BuddyPress component
customization, adding to 38, 39
URL, for more info 10
using, with BuddyPress 32
coding standards, WordPress
about 42
reference links 42
comment form
customising 88
URL 88
comment template 45, 46
community
about 11, 12
Gamification 12
niche communities 12
configuration, BuddyPress 24-26
content
changing, filters used 86
Core Contributor handbook
URL 42
CSS, BuddyPress theme 55
CSS file
customizing, in child theme 33-35
storing 32
used, for customizing BuddyPress theme
33
Cuny Academic Commons
URL 14
custom background
about 50
adding 65
custom BuddyPress component
customization
adding, to child theme 38, 39
Custom Community
URL 16
custom functions, WordPress theme 45
custom header image 67
custom headers
about 50
navigation 51
URL 50
widgets 50, 51
custom page templates
URL 48
custom post types
about 88
URL 88
custom template 89
D
default features, BuddyPress
about 26
community members 26
core 26
default selector
about 33
used, for customizing BuddyPress theme
33
default theme, BuddyPress theme 10
device-free version
about 94-96
BuddyPress theme, testing 94-96
device labs
about 94
URL 94
directories, Run Chums 81
[ 110 ]
E
editor style 100
Emacs
URL 30
enqueuing 49
Enterprise Nation
URL 14
extended profiles 26
F
Fanwood
URL 16
filters
used, for changing content 86
Followers
URL 102
fonts, Run Chums
enqueuing 63
forums 27
forums folder content 107
free themes, BuddyPress theme 15
getting, from WordPress 29, 30
list 16
friend connections 26
Frisco
URL 16
front page, Run Chums 71-75
functionality
adding 83, 84
functions
bp-custom, modification 90
using 90
functions.php file 47, 48, 51, 56, 64
G
Gamification
about 12
URL 12
generic BuddyPress template
creating 36
used, for having full page layout 36, 37
Goed en wel
URL 14
group directory 81
Group docs
URL 102
Group hierarchy
URL 102
group members loop 53
groups folder content 106
groups loop 52
H
header
about 65, 66
custom header image 67
variable header heights 67
hooks
about 84
types 84
using 85
hooks, types
wp_footer() 84
wp_head() 84
I
inc/ folder 45
installation, BuddyPress 19, 22
installation, WordPress 20-22
Internet Relay Chat. See IRC
Invite anyone
URL 102
IRC
about 8
URL 8
is_functions () 54
J
JavaScript file
storing 32
L
languages, WordPress theme 45
logged-out user view
creating 68, 69
loops
about 46, 87
custom post types 88
[ 111 ]
custom templates 89
template tags, customising 88
loops, BuddyPress
about 52, 53
activity loop 52
blogs loop 52
group members loop 53
groups loop 52
members loop 52
private messages loop 53
profile fields 53
URL 53
M
manual installation, BuddyPress 23
media query
about 13
URL 13
member directory 81
member profile, Run Chums 78
members folder content 107, 108
members loop 52
mobile theme 13
Mojo Themes
URL 16
N
navigation
about 51
creating 70, 71
niche communities 12
Notepad++
URL 30
O
optional features, BuddyPress
about 26
account settings 26
activity streams 26
extended profiles 26
friend connections 26
private messaging 26
site tracking 27
user groups 27
P
page layout, Run Chums 63
parent theme 10
plugins 102
post formats 48, 49
post thumbnails
about 100
adding 100
URL 100
Press Crew
URL 16
private messages loop 53
private messaging 26
profile fields 53
Q
query-based template files
URL 48
R
random groups, Run Chums 77
random members, Run Chums 76
responsive web design. See RWD
Run Chums
about profile field, adding 79, 80
admin bar, removing 64
building 57, 62
creation process 58
custom background, adding 65
directories 81
fonts, enqueuing 63
front page 71-75
functionality, adding 83, 84
header 65, 66
logged-out user view, creating 68, 69
member profile 78
navigation, creating 70, 71
page layout 63
random groups 77
random members 76
setting up 62
sidebar 75
template, creating 64
[ 112 ]
Run Chums, building
requisites 58
sketches 59
style guide 61
wireframe 59, 60
RWD
about 12, 13
mobile first 13
S
screenshot
adding 99
screenshot.php file 48
script files, BuddyPress theme 55
scripts, WordPress theme 45
Shift
URL 14
sidebar, Run Chums 75
site tracking 27
sketches 59
social networking 12
statistics function
demonstration 90, 91
Status theme
URL 16, 29
style guide 61
stylesheets, WordPress theme 45
Sublime Text
URL 30
T
Teen Summer Challenge
about 14
URL 14
template
creating 64
template files, WordPress theme 45
comment template 45, 46
loops 46
template parts 46
template hierarchy
about 35, 36
URL, for more info 36
template hierarchy, WordPress 43
template parts 46
template structure, WordPress 42
URL 43
template tags
comment form, customising 88
customising 88
template tags, BuddyPress 53
avatar template tags 53
general template tags 53
signup template tags 54
URL 54
template tags, WordPress 43
theme 8, 9
theme check
about 97, 98
benefits 100, 101
editor style 100
post thumbnails, adding 100
recommendations 99
screenshot, adding 99
URL 9, 97
theme compatibility 10
Theme Forest
URL 16
theme framework
about 15
URL 15
theme-functions.php file 90
Themekraft
URL 16
Theme Loom
URL 16
theme setup function 48
theme standards
URL 97
Trainerspace
URL 14
Twenty Thirteen theme
URL 27
Twenty Twelve theme
URL, for downloading 30
U
underscores
about 44
file structure 44
user groups 27
[ 113 ]
V
variable header heights 67
Vim
URL 30
W
Widget API
URL 93
widgets
about 50, 51, 92
URL 51
wireframe 59, 60
WordPress
about 8
coding standards 42
custom background 50
custom headers 50
enqueuing 49
free themes, getting from 29, 30
hooks 84
installing 20-22
post formats 48, 49
template hierarchy 43
template structure 42
template tags 43
URL 8
URL, for CSS coding standards 9
URL, for downloading 20
URL, for free themes 15
URL, for hosting 19
URL, for theme handbook 9
working with 41
wp_template_part() function 46, 47
WordPress codex
URL 49, 50
URL, for design and layout 9
WordPress multisite
URL 27
WordPress theme
about 15
anatomy 44
BuddyPress, using with 27, 28
custom functions 45
languages 45
scripts 45
stylesheets 45
template files 45
URL 15
WordPress version 3.6 27
wp_footer() 84
wp_head() 84
WPMU DEV
URL 16
wp_template_part() function 46, 47
[ 114 ]
Thank you for buying
BuddyPress Theme Development
About Packt Publishing
Packt, pronounced 'packed', published its first book "Mastering phpMyAdmin for Effective
MySQL Management" in April 2004 and subsequently continued to specialize in publishing
highly focused books on specific technologies and solutions.
Our books and publications share the experiences of your fellow IT professionals in adapting
and customizing today's systems, applications, and frameworks. Our solution based books
give you the knowledge and power to customize the software and technologies you're using
to get the job done. Packt books are more specific and less general than the IT books you have
seen in the past. Our unique business model allows us to bring you more focused information,
giving you more of what you need to know, and less of what you don't.
Packt is a modern, yet unique publishing company, which focuses on producing quality,
cutting-edge books for communities of developers, administrators, and newbies alike. For
more information, please visit our website: www.packtpub.com.
About Packt Open Source
In 2010, Packt launched two new brands, Packt Open Source and Packt Enterprise, in order to
continue its focus on specialization. This book is part of the Packt Open Source brand, home
to books published on software built around Open Source licences, and offering information
to anybody from advanced developers to budding web designers. The Open Source brand
also runs Packt's Open Source Royalty Scheme, by which Packt gives a royalty to each Open
Source project about whose software a book is sold.
Writing for Packt
We welcome all inquiries from people who are interested in authoring. Book proposals
should be sent to [email protected]. If your book idea is still at an early stage and you
would like to discuss it first before writing a formal book proposal, contact us; one of our
commissioning editors will get in touch with you.
We're not just looking for published authors; if you have strong technical skills but no writing
experience, our experienced editors can help you develop a writing career, or simply get some
additional reward for your expertise.
Social Media for Wordpress:
Build Communities, Engage
Members and Promote Your Site
ISBN: 978-1-84719-980-5
Paperback: 166 pages
A quicker way to build communities, engage
members, and promote your site
1.
Integrate automated key marketing techniques
2.
Examine analytical data to measure social
engagement
3.
Understand the core principles of establishing
meaningful social connections
WordPress Top Plugins
ISBN: 978-1-84951-140-7
Paperback: 252 pages
Find and install the best plugins for generating
and sharing content, building communities, and
generating revenue
1.
Learn WordPress plugin basics for both Macs
and PCs
2.
Focuses exclusively on 100% free and open
plugins
3.
Screenshots for each plugin
4.
Organized by complexity to install and manage
Please check www.PacktPub.com for information on our titles
WordPress MU 2.8: Beginner's
Guide
ISBN: 978-1-84719-654-5
Paperback: 268 pages
Build your own blog network with unlimited users
and blogs, forums, photo galleries, and more!
1.
Design, develop, secure, and optimize a blog
network with a single installation of WordPress
2.
Add unlimited users and blogs, and give
different permissions on different blogs
3.
Add social networking features to your blogs
using BuddyPress
4.
Create a bbPress forum for your users to
communicate with each other
WordPress 3 Site Blueprints
ISBN: 978-1-84719-936-2
Paperback: 300 pages
Ready-made plans for 9 different professional
WordPress sites
1.
Everything you need to build a varied
collection of feature-rich customized WordPress
websites for yourself
2.
Transform a static website into a dynamic
WordPress blog
4.
In-depth coverage of several WordPress themes
and plugins
Please check www.PacktPub.com for information on our titles