1
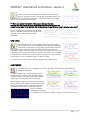
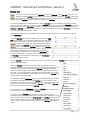
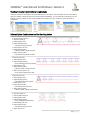
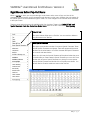
User Manual
for Windows™ Version
Copyright © 2010, StartWrite, Inc. All Rights Reserved.
StartWrite® User Manual for Windows™ Version 6
Table of Contents
Welcome to StartWrite .................................................................................................................................. 5
Thanks........................................................................................................................................................... 6
What’s New in StartWrite Version 6? ........................................................................................................... 7
Teach Honesty .............................................................................................................................................. 8
About This Manual ....................................................................................................................................... 9
Help for Windows ..................................................................................................................................... 9
Chapter 1 - Installation .............................................................................................................................. 10
Minimum Requirements ........................................................................................................................ 10
Installing StartWrite ................................................................................................................................. 10
Chapter 2 - Using StartWrite ...................................................................................................................... 11
Setting the Page Orientation .................................................................................................................. 11
Working with Text Boxes ........................................................................................................................ 11
Menu, Tool and Property Bars ............................................................................................................... 12
Make a Text Box or Art Box Active ........................................................................................................ 12
Insert a new Text Box ............................................................................................................................. 12
Select a Font ........................................................................................................................................... 13
Change the Font ..................................................................................................................................... 13
Change the Default Font ........................................................................................................................ 13
Set the Font Default ................................................................................................................................ 14
Change the Font Size ............................................................................................................................. 14
Enter Text into a Text Box ....................................................................................................................... 14
Highlight Text for Copying or Deleting .................................................................................................. 15
Resize a Text Box ................................................................................................................................... 15
Create Blank Lines .................................................................................................................................. 15
Copy a Text Box or Art Box .................................................................................................................... 16
Move a Text Box or Art Box ................................................................................................................... 16
Delete a Text Box or Art Box .................................................................................................................. 16
Create an Art Box ................................................................................................................................... 16
Change the Image inside an Art Box ................................................................................................... 17
Resize an Art Box ................................................................................................................................... 17
Redraw Text and Art Boxes ................................................................................................................... 18
Insert a New Page ................................................................................................................................. 18
2|Page
StartWrite® User Manual for Windows™ Version 6
Save the Worksheet................................................................................................................................ 18
Print the Worksheet................................................................................................................................. 18
Using Lesson Files .................................................................................................................................. 19
Chapter 3 - Features and Buttons ............................................................................................................. 20
Toolbar Features and Buttons ................................................................................................................ 20
New File .............................................................................................................................................. 20
Open File............................................................................................................................................. 20
Save File .............................................................................................................................................. 20
Print Worksheet ................................................................................................................................... 20
Cut Selection ....................................................................................................................................... 20
Copy Selection .................................................................................................................................... 20
Paste Selection ................................................................................................................................... 20
Art Box ................................................................................................................................................. 20
Text Box............................................................................................................................................... 21
Spell Check ......................................................................................................................................... 21
Zoom................................................................................................................................................... 21
Font...................................................................................................................................................... 21
Portrait/Landscape ............................................................................................................................. 21
Grid ...................................................................................................................................................... 21
Property Bar Buttons ............................................................................................................................... 22
Font Type ............................................................................................................................................. 22
Special StartWrite features on the Property Bar ..................................................................................... 23
Letter Shading ..................................................................................................................................... 23
Letter Dot Density ................................................................................................................................ 24
Changing Colors and Grays .............................................................................................................. 25
Guidelines ........................................................................................................................................... 26
Stroke Arrow ........................................................................................................................................ 27
Start Dot ............................................................................................................................................... 28
Letter Outline ....................................................................................................................................... 28
Decision Dots ...................................................................................................................................... 28
Color Letters ........................................................................................................................................ 29
Area Highlight..................................................................................................................................... 29
3|Page
StartWrite® User Manual for Windows™ Version 6
Story ..................................................................................................................................................... 30
Border Art ............................................................................................................................................ 31
Shading / Density / Arrow Options Combinations ........................................................................... 32
Right Mouse Button Pop-Out Menu ...................................................................................................... 33
Right Mouse Button Pop-Out Menu (continued)................................................................................... 34
Chapter 4 - StartWrite Support Services ..................................................................................................... 35
Technical Support ................................................................................................................................... 35
Online Videos ......................................................................................................................................... 35
Ordering StartWrite .................................................................................................................................. 35
Index ........................................................................................................................................................... 36
Notes: .......................................................................................................................................................... 37
4|Page
StartWrite® User Manual for Windows™ Version 6
Welcome to StartWrite
Let’s begin with what StartWrite is not. StartWrite is not a system or method for teaching handwriting. It is not a
series of lessons (although some are included) designed by leading educators for improving handwriting skills.
So what exactly is StartWrite? StartWrite is a fun, enjoyable, versatile, tool for creating handwriting worksheet so
compliment whatever hand writing method or system you are using. No system has your child’s name in their
work book. No system lets you write a letter to grandpa or create a diary page in your child’s own handwriting.
But with StartWrite you can.
Actually StartWrite was the first software program that used the computer to teach handwriting.
This user's manual contains information, tips and insights, and instructions on how to get up and running
quickly and easily.
With a quick explanation you will immediately see the purpose for StartWrite. Those to whom I have described
StartWrite, especially those with children in elementary school, usually don't let me finish my description. Their
response is, "I know exactly what you are going to say and I think it would be great." I'll bet you do the same
thing.
When our children were in elementary school, they would bring home handwriting assignments consisting of
letters in dot/dash form printed on pages with a line at the top of the letter, one at the bottom and a dashed
line in the middle. The pages looked like they had been recopied numerous times. My children would trace
over the dot/dash letters to practice their handwriting skills: the shape of the letter, the direction of the stroke,
and the spacing between letters, etc.
As a way to personalize my daughter, Emily’s, practice sheets, I decided to create a few lines of words with dots
for her to trace. That effort lasted just a few minutes. Try writing a couple of lines in doted letters and you'll see
it's not an easy task. I thought, “There has to be some software what would let me do this on the computer”,
but I found none. Thus was born the idea for a simple program that would form letters in dots which I could
print for my children to trace. Later I asked several friends who were teachers about my idea. Their response
was interesting, it wasn’t, “That’s a great idea”, it was “Do you have the software, I’ll buy one right now”.
I hope you enjoy StartWrite for creating fun, meaningful handwriting practice sheets, letters to grandparents, to
friends, journals for your children to record their thoughts in their own handwriting, or whatever else you can
think of. Let StartWrite help you help your child get ahead in school. StartWrite actually makes the computer a
tool to teach handwriting. The only real worry we have is that you will have so much fun making worksheets
you might forget just who the worksheets are really for.
We have now introduced our StartWrite Version 6. It has a lot of the features that I envisioned when idea for
StartWrite was first born, but were not included in earlier versions. Now StartWrite Version 6 is the software I
always wanted. I don’t get letters created with StartWrite from my daughter, now I get letters from my beautiful
granddaughter, Allie. I hope you like the new StartWrite and have fun making all kinds of worksheets.
Let us know how it works for you.
David Sharp
President,
StartWrite, Inc.
5|Page
StartWrite® User Manual for Windows™ Version 6
Thanks
Maria I. Garcia created the wonderful artwork for our new icons. We (Dave and Wayne) greatly appreciate her
amazing talents. Maria worked so hard on the icons even though she was suffering with terminal cancer and
all the complications and treatments that are associated with cancer. We hope and pray the best for Maria.
Nicole Vjaters is the programmer who has added most of the wonderful new features. We are so grateful to
Nicole for her amazing programming talents and we would recommend her to anyone who needs a very
capable programmer. She has magically turned our ideas and suggestions into reality. It has been fun and
exciting to receive programming updates from Nicole. With each one we were always in awe and so excited.
Thanks Nicole. StartWrite is an A grade program because of you.
Wayne Wylie, my partner and the brains behind programming StartWrite since the beginning. Wayne is the
logical thinker of StartWrite. When I propose crazy ideas, Wayne looks at them and then in a logical,
programmer kind of way tells me that it won’t work or what changes need to be made to make it work. And
he’s usually right. But he lets me throw my ideas at him anyway and he is willing to put up with my constant
changes and tweaks here and there. StartWrite is the program it is because of Wayne’s hard work and
professional expertise. Thanks.
6|Page
StartWrite® User Manual for Windows™ Version 6
What’s New in StartWrite Version 6?
We are very excited about StartWrite Version 6. We’ve added a lot of features that we have thought about for a
long time. We’ve listened to our users and most of those things are now in Version 6. We’ve also changed to
some cool looking icons.
Below is a list of the new things in Version 6. We have made some videos on the website to show you how
the new features work. We hope the videos will make learning and using StartWrite, Version 6 a fun experience.
New Icons: Beautiful New Icons with shading and color.
Letter Outline: This option lets the youngest pre-school children write letters inside an outline of the letter. You
can add lines for them to trace or just have what we call Decision Dots. This way the new student has more
visual support while writing the letters.
Decision Dots and Connect Dots Lines: The Decision Dots are dots at the critical points of a letter such as where
each stroke of the letter begins and ends, where the stroke begins to curve or bend or head off in a different
direction. The Connect Dots lets you add a very small solid line to show how the dots follow the letter.
Story: Lets text flow from Text Box to Text Box by using the Story option.
Border Art: Add fun and colorful borders around the box. You can also put a picture of the letter or word to
reinforce what the child is learning to write.
Grid: Add a non-printing grid to your worksheet to help align Text and Art Boxes.
Color Letters: Each different stroke can be shown in a different color or shade of gray. For example, you can
designate the 1st stroke as Red, the 2nd Blue, the 3rd Green and the 4th Black or whatever combination you like.
Each stoke can be different shades of gray. Color Letters is a tool to help you create fun and interesting
worksheets.
Area Highlight: We have expanded the highlighted writing area from just the middle and bottom to the top,
middle and bottom and now you can highlight any or all three at the same time and in any color or shade of
gray you like.
Color everywhere: You can now change the color or shade of gray on just about everything. You can have
green arrows, and red, blue and black guidelines. You can have whatever colors or shades of gray you like on
your worksheets.
Description Balloons: When you hold the mouse pointer over a button for a couple of seconds, a description
balloon will open telling you what that option is. They’re just to help you remember where that feature you want
is located.
Dotted Shapes: We’ve added dotted shapes in with the fonts (found in the special characters section). Now you
can add a shape on the same line as the word. The student can trace the dotted outline of that shape and
then write the word.
Spanish Fonts: We’ve added Spanish Fonts (also found in the special characters section) so that those learning
or teaching Spanish can use StartWrite. We will be adding the special characters of other languages in the
future.
Clean up some Bugs: We’ve cleaned up a lot of little bugs that always bugged us. One example is when you
moved a Text or Art box, the graphics under the box would not display, so you weren’t sure what was where.
Now, when you move a Box you only move an outline of that box so you can still see everything else on the
page. When you place the box outline in the position you want, then the box actually moves.
Subscription Program: We will soon launch our new Subscription Program. For only $49.95 per YEAR (not per
month) you can subscribe to a special part of the StartWrite website. We will be adding worksheets, new fonts,
new border art, new clip art and software upgrades throughout the year. This will allow you to download up to
20 worksheets per month. Also new software upgrades will be made available in the Subscription section so
you won’t have to wait for major releases to use and enjoy them.
7|Page
StartWrite® User Manual for Windows™ Version 6
Teach Honesty
A message to those who have or have not yet purchased this StartWrite
software.
Our children and students become what we teach them by the example we set for them. We cannot expect
them to become any greater in character than we are. Honesty is one of the most basic and fundamental
principles and should govern all human action. If we set an example by telling even a small falsehood, then
we teach a mindset for future justification of larger falsehoods. There is NO justification for dishonesty.
Don't set a bad example of dishonesty by stealing this software program-either by making another copy for you
to be used on another computer, or for use on someone else's computer. It is illegal and can be punishable
by up to 5 years in prison and a $100,000 fine.
Copying software dishonestly and illegally is no different than shoplifting. It is no different than if someone took
money from your wallet.
So we ask for complete honestly. If you do not own this software, please order it for yourself. We have priced
the software so that everyone can afford it and the income allows us to continue to make improvements on
StartWrite so everyone can benefit.
When you purchase and register your copy, you are entitled to receive free, by email, important update
information, customer support, and the peace of mind you get from knowing that you have a legal copy of our
software and that your example can be followed by others.
Thank you for purchasing StartWrite! We know you are going to enjoy it.
8|Page
StartWrite® User Manual for Windows™ Version 6
About This Manual
The StartWrite User's Manual provides detailed information about the StartWrite program, tools, and commands.
It is designed to be used as a reference tool when using StartWrite.
This manual assumes you have a working knowledge of your operating system, particularly techniques such as
using a mouse, opening files, saving files, and closing files. For help with any of these techniques, please see
your Windows.
Help for Windows
When you click on Help you will be able to download the User Manual PDF or Link to the User Manual on our
Website. We have also loaded a bunch of short videos on to YouTube that show how to use the different
features of StartWrite Version 6 for Windows. These are accessible through our website and our StartWrite
account on Facebook.
At the end of most sections there is a link to a video on Facebook. They are each about 2 minutes long and
show in detail how to access and use each feature. You must have your Internet connection on. Just hold the
Ctrl key down on your key board and click on the link and the YouTube video will open on your web browser.
9|Page
StartWrite® User Manual for Windows™ Version 6
Chapter 1 - Installation
Minimum Requirements
StartWrite for Windows Version 6 requires the following minimum hardware and software.
Microsoft Windows®
• 16 MB of RAM
• 30 MB of available hard disk space
• Windows Version 2000/XP/Vista or later
Installing StartWrite
Before you begin the installation process, you must close all currently running programs.
Insert the StartWrite CD into your drive.
Follow the instructions on your screen to complete the installation process.
If you would like a StartWrite icon added to your desktop for easy access, click Yes when prompted.
When the installation finishes, click the StartWrite icon on your desktop to start the program.
StartWrite Installation automatically installs the program to c:\Program Files\Startwrite unless you specify
otherwise.
If Auto
-
Run does not work properly on your computer, you can install StartWrite manually:
Insert the StartWrite CD into your drive
Select Start, then Browse
Find the CD location and double click on it to open it. This should list the files on the CD.
Then double-click on the file: setup.exe.
10 | P a g e
StartWrite® User Manual for Windows™ Version 6
Chapter 2 - Using StartWrite
StartWrite is easy to use. There are no complicated commands. Everything is straight forward. Let's begin using
StartWrite so you can see how much fun and exciting it is to use the computer to teach handwriting.
If you haven't already started the program, do so by double-clicking the StartWrite icon on your screen.
Setting the Page Orientation
The first thing you need to do is decide if you want your page in a Portrait or Landscape layout.
Portrait prints a page that looks like this:
Landscape prints a page that looks like this:
When the program starts, the default layout is Portrait. Use the Orientation button to switch the page layout
from Portrait to Landscape or from Landscape to Portrait.
Click
on the toolbar to select either Portrait or Landscape.
To see how your page will look when it is printed, Click File and then Print Preview
Working with Text Boxes
Unlike a word processor, StartWrite uses Text Boxes to enter text. Every time you open a new StartWrite
worksheet, a default Text Box is created for you. You can add multiple Text Boxes to the worksheet. The Font
attributes are Text Box specific and not Letter specific. So an attribute you select, such as Font Shading or Dot
Density will affect all the letters in that Text Box.
A StartWrite worksheet can contain several Text Boxes, but the boxes should not overlap. An overlapping Text
Box will hide the text in the box underneath it, which may not print properly.
Before entering text in a Text Box, you can move the Text Box to a different spot on the page, or you can make
the Text Box bigger or smaller horizontally to fit your needs (see Grid for help in aligning and placing your Text
or Art Box). The vertical size of a Text Box is determined by the font size and the number of times you have
pressed the Return or Enter key
If you would like to add blank lines just press the Return and a new, blank line will be added.
11 | P a g e
StartWrite® User Manual for Windows™ Version 6
Menu, Tool and Property Bars
The top row is called the Menu Bar. By clicking on each word, a pop-down menu will open. You can then
select from the options shown there.
The second row we call the Tool Bar. These options relate to the entire page or are standard Windows
programs features (except for the Grid, that a new feature on StartWrite).
The third row we call the Property Bar. These options apply to each Text Box. The first two options of the Font
and the Font size are also standard Windows program options. After those two you will see all the options and
features that are unique to StartWrite. The Down Arrow to the right of many of the feature buttons will open an
options window for you to select various options such as colors, defaults, option on/off, etc.
Make a Text Box or Art Box Active
The Text Box or Art Box must be in the Active mode
before you can enter or edit text into a Text Box or
make changes to an Art Box. The box must also be
Active before you can move it or resize it or do
anything with the box.
To make a box Active, simply click inside the box with
the mouse pointer. When a Text Box is active it will
have black square handles (
) on the corners and in
the middle of each side.
Only one box can be Active at a time. This will be the box you are working with. Boxes that are not Active will
not have the black squares in the corners and on the sides.
Insert a new Text Box
Click Insert, then Text or press on
the toolbar. A new Text Box opens at the top of your document.
A new Text Box will include the default font of Manuscript (unless you set another font as the default) and
Guidelines. This allows you to begin entering text without having to do anything else. Type away.
You can also add a new Text Box by Copying an existing Text Box and then Pasting it on the page. The
advantage of using Copy / Paste is that you will maintain most of the attributes of the Text Box you copied.
Moving a Text Box
The Text Box must be active before it can be moved.
Place the mouse point near one of the dashed side lines of the box until a "four way" arrow opens.
12 | P a g e
StartWrite® User Manual for Windows™ Version 6
Hold down the left mouse button and drag the Text Box or Art Box to the desired location on the worksheet
page. Also see Center Box in the Right Mouse Pop-out Menu below.
You cannot move a Text Box off the bottom of the white page. If you try, as soon as you release the box it will
bounce back on to the white page. If you resize the Text Box so that the bottom of the box would be off the
page, the system will relocate the box back onto the page.
Select a Font
StartWrite provides you with several different handwriting fonts: Manuscript (ball and stick or
similar to Zaner-Bloser), Manuscript 2 and Manuscript Simple (the latter two include some
modifications of Manuscript, Modern Manuscript (similar to D'Nealian), Italic (similar to
Getty/Dubay, Portland Italic), PLMR (similar to Palmer) and HWOT (similar to Handwriting
without Tears).
There are also Cursive versions of each of the fonts.
In addition, StartWrite gives you 3 print and 3 cursive fonts that were developed for the
handwriting styles in Australia: Victoria, Queensland and New South Wales.
StartWrite has also added some other fun fonts. They include Clocks for teaching time,
Money for teaching how to count (US$) money, and 2 fonts for teaching Math. These fonts
do not utilize the dotted and other features of StartWrite, but include the numbers and math
function characters (add, subtract, etc.) for Manuscript, Modern Manuscript and Italic. One
option would be to make a Text Box with the math, clock or money characters and to the
right of it a different Text Box with the dotted letters of the word being taught.
StartWrite accepts Windows fonts installed on the computer. These can be selected for any
Text Box, but they will not be in the dotted format and utilize all the fun features of
StartWrite. An example of their use would be for a heading or instructions for use by
teachers or parents. The special functions apply only to StartWrite special fonts.
The Default Font (or the font that is used if no other default has been set) is Manuscript. The
font used in the Active Text Box is shown in the Font list located on the toolbar.
Change the Font
To change the font from the default font of Manuscript:
Click inside the Text Box so that it is Active with the black square handles.
Click the down arrow to the right of the Font drop-down list.
Scroll down the list until you find the font you want.
Click the font name once with the left mouse button.
Change the Default Font
To change the font from the default font of Manuscript:
Click on Format on the Menu Bar, then click on the first option Font… and the font window will open. Select the
font you would like to use as the default for all future uses of StartWrite and then check the box next to Set as
Default. The current Text Box will change to your new default font and each time you open StartWrite in the
future.
13 | P a g e
StartWrite® User Manual for Windows™ Version 6
Set the Default Font
You can change the font default setting by clicking on Tools, select Default Fonts. Scroll down the list until you
find the font you would like to set as the default font for each time you use StartWrite. Click on the font and you
will see an example of it at the bottom of the Font window. Make sure the box “Set as default” is checked and
then press OK.
Change the Font Size
StartWrite allows font point sizes from a very small 8 point (you can’t see the fonts very well) to the very large
192 point. A 100 point size is about 1" high letters, and 192 point size is about 2" high. Most kindergarten and
first grade students learn with a 72 to 100 point font size. Second graders most often use a 48 point font size.
However, for beginning writers in pre-school and earlier, you may want to use even larger letters.
You can also create headings and titles of pages using larger font sizes. The default font size is 48
points.
You can use the Font Size drop-down list on the toolbar to change the size of the font in any of your
Text Boxes.
-
Make sure the Text Box is Active with the square black handles.
Click the down arrow to the right of the Font Size drop-down list button on the toolbar.
Click on the Point Size you want and the font size will change.
To make really big letters, even up to the size of the page:
- Place the mouse pointer over the Font Size box. The Cursor will change to
the insert cursor ( I ).
- Click once on the font size. This will highlight the Font Size number in blue.
- Type in a large number using the number keys on the top of the keyboard and press Enter.
***The numeric key pad will not work for this option.*** In Manuscript a
letter sized to about 475 will fill the page. This way you can print full page
letters for the very youngest learner to start practicing letters. It may take a
little experimenting with the Font Size and your printer, but you can create full page large
letters for your very youngest learner to Start Writing. It is best to Zoom out so you can see
the entire page before making the letters so large. Otherwise you will not see what font sizes are too
large for the page.
Enter Text into a Text Box
After you have created a Text Box, you can type text in it. Before you begin typing, however, the Text Box must
be “Active” with small black squares (handles) in each corner and one square along each dotted line sides.
There is a one page size limit for Text Boxes meaning that a Text Box will not wrap from one page to another.
You can however have text wrap between two or more Text Boxes on the same page or on different pages
using the Include in Story Option explained below.
If the box is not Active, click
the Text Box once with the
mouse pointer to make it
Active. You will see the black
square handles in the
corners and on the sides.
Type the text you want
inside the Text Box.
14 | P a g e
StartWrite® User Manual for Windows™ Version 6
Highlight Text for Copying or Deleting
After you have typed text into the box, you may decide to copy some of the text to a different place in the Text
Box or you may want to Delete a specific section of text. First you must Select the text. This is done by placing
the cursor at the beginning or end of the text to be Selected. Then, while holding down the left mouse button,
drag the cursor over the text you want to highlight. The text will stay Black as you highlight it, but turn RED as
soon as you let go of the mouse.
Be aware that when the letters are lightly shaded or have small dots the Red can be a little difficult to see, but it
is visible.
Once the text is highlighted you can Copy or Delete the selected text.
To Copy, select the text, then click Edit and then Copy or select the text and then press the Copy
button.
Next, place the cursor where you want the text to be copied to and click Edit and then Paste or
press the Paste button.
To delete text, highlight the text and then select Edit and then Cut or after you have selected the
text, press the Cut button.
Resize a Text Box
A Text Box will automatically resize vertically as you type additional text. But you may want to resize it
horizontally to fit with other Text and Art Boxes. You can use your mouse pointer to resize a box.
Make sure your Text Box is active with the black handles around the box.
Place the mouse pointer on one of the corners or side handles and the pointer will turn into one of the
re-size cursors:
- Cursor for horizon top or bottom sides
-
Cursor for vertical sides
-
Cursor for corners
Hold down the left mouse button and drag the corner or side until the box is the size you want.
To make a Text Box larger by extending the bottom lower, you must enter additional lines by either adding
more text (see above) or by entering blank lines (see below).
Create Blank Lines
After creating a Text Box, you may want to add some guidelines
without any text. You can do this by pressing the Enter key. Each
return will create a blank line. You can select the same style of
guidelines for the entire page, or you can have several Text Boxes
in your document that have different guidelines. However, you
cannot have different guidelines within the same Text Box.
15 | P a g e
StartWrite® User Manual for Windows™ Version 6
Copy a Text Box or Art Box
You can copy a Text Box or Art Box and move it to a different place on your worksheet.
Make sure the box is Active.
Press the Copy button.
Press the Paste button
Then move the box to the desired position on the worksheet.
This will save time duplicating a Text Box. For example you could type the word “Apple”. Then copy it several
times and then change the features of each box. This will save time in creating and typing the words each
time.
Move a Text Box or Art Box
-
Make sure the box is Active with the square handles in the corners and on the sides
Place the mouse arrow near one of the sides of the box until a "four way" arrow opens.
Hold down the left mouse button and drag the box to the desired location on the
worksheet page.
Delete a Text Box or Art Box
-
Make sure the box you want to delete is Active.
Press the Cut button.
A second way to delete the Box is to click Edit on the Menu Bar, then Delete Box.
A third way is to press down the Ctrl key and press the letter X.
If you deleted a box inadvertently you can restore the box by clicking on Edit and then Undo.
Create an Art Box
You may want to include clip art in your worksheet to make it more meaningful for the student. Pictures can
also reinforce the letters or words being taught. StartWrite comes with a number of original color and black &
white JPG and Bitmapped images.
The black & white pictures have less detail and are included to let children color the pictures. The color images
can be used if you have a color printer. You can also import and use any other bitmapped (.bmp) image files
with StartWrite
To insert an Art Box, click on the Art Box button on
the toolbar
A second way is to click Insert on the Menu Bar and then Art.
In the Select Art box, click the folder with the type of image you want to insert into your Art Box.
Double Click the folder BW Clip Art to select a black and white image or Click the folder Color Clip Art to select
a color image in the Art Box.
16 | P a g e
StartWrite® User Manual for Windows™ Version 6
Place your mouse pointer on the image you want to insert in
your Art Box, then double click with the left mouse button.
Another way is to click once on the clip art you want to
include and then click Open. The image is automatically
placed in the Art Box.
Change the Image inside an Art Box
You can use the Art features on the Format menu to replace
your current image with another image of your choice.
Click the inside of the Art Box you want to modify so that it is
Active.
There are 3 ways to change the image inside an Art Box.
1. The easiest way is to double click on the Art Box and the Select Art window will open, then double
click on the name of the clip art file you want in your Art Box.
2. Click Format, then Art, then Replace and select the new clip art you would like to insert in the Art Box
and press Open or double click on the file name.
3. The third way is with the mouse pointer over the Art Box, click the right mouse button and a menu will
open. Click on Replace Art. The Select Art menu will open, double click on the clip art you would like
and the clip art will be replaced.
Resize an Art Box
After you create an Art Box, you may need to change the size. You can use your mouse pointer to make a box
any size you want.
Make sure the box is Active with the square handles in the corners and on the sides
Place the mouse pointer on one of the corner or side handles and the pointer will turn into the resize cursor
(shown above in Resize a Text Box). Hold down the left mouse button and drag the corner or side until the box
is the size you want then release the mouse button.
An Art Box can be made larger by dragging the corners in any direction.
StartWrite’s default automatically maintains the same proportions when the size of the Art Box is changed. This
option is found by clicking Format, Art, and Maintain Proportions. If you remove the Maintain Portions option,
then you can distort the picture by increasing or decreasing any side of the box. Make sure this option is
checked if you want to maintain the proportions of the Art Box.
When “Maintain Portions” is On
When “Maintain Portions” is Off
17 | P a g e
StartWrite® User Manual for Windows™ Version 6
Redraw Text and Art Boxes
Sometimes when you are working with many Text and Art boxes, the computer doesn’t redraw the screen
completely after each modification. You can manually redraw the screen to see how it will actually display. This
doesn’t happen very often, but if it does just Redraw or Refresh the Text Boxes and Art Boxes on your screen.
Click View, then click Redraw All.
Insert a New Page
You can add a new page to your current document at any
time.
Click Insert, then Page. The Insert Page window will open and
give you the options to insert the page. When you have selected
where to insert the new page, click OK
To move from page to page easily use the page arrows
at the bottom of the StartWrite screen.
You can also select Edit, Go To . . . and enter the page number you
would like to move to, then click OK.
Save the Worksheet
To save your worksheet, click the Save button. The first time you save a file the Save As window will
open. Enter a name for your worksheet in the space at the bottom of the window next to File name.
Then click Save. After you have saved the file the first time, you will not be asked to enter a file name again.
Each time you click on Save, the system will just save the current worksheet and replace the older worksheet.
You can also click File on the Menu Bar and then Save.
If you make changes to a worksheet and would like to save that worksheet with a different name so that it will
not replace your previous worksheet, click File and then Save As. This will allow you to enter a new name for
your current modified worksheet and the system will not replace your previous worksheet.
Print the Worksheet
After you have finished a worksheet you will want to print it so your student can trace the letters on the
worksheet. Click the Print button. Or you can click File and Print on the Menu Bar.
The Windows Print screen will open and allow you to select the printer, the number of copies or change the
properties of the printer. When you are ready to print, click OK.
Before you print you can see how the worksheet will look on the printed page. Click on File, Print and then
select Print Preview. From this window you can select Print or Close to return to the worksheet to make any
modification you desire.
You can also select Print Setup. This allows you to select the paper size and the page orientation: Portrait or
Landscape.
18 | P a g e
StartWrite® User Manual for Windows™ Version 6
Using Lesson Files
StartWrite comes with several lesson files you can use. They will give some ideas on how to use StartWrite to
teach phonics, spelling, math and so on. You can also adapt them to fit your own needs.
Click File on the Menu Bar, then Open Lesson.
Select the lesson you want from the list of available lessons (StartWrite’s® lesson files have an .swl extension),
then click OK.
You can modify the lessons to meet your student’s needs. It is recommended that you save the modified lesson
with a different name so you preserve the original for future use. To save the file with a different name, click on
File on the Menu Bar, then select Save As. Then you can enter a new file name.
19 | P a g e
StartWrite® User Manual for Windows™ Version 6
Chapter 3 - Features and Buttons
Toolbar Features and Buttons
StartWrite has put the options related to the total page on the Tool Bar for easy access.
New File
Pressing the New file button will open a new file with a Text Box ready for entering text.
Open File
This button opens a previously saved file. Click this button once and a box opens that lists the
names of files you have previously created and saved. Select the file you want to open by placing
the mouse arrow on the name of the file and clicking once. Then click the Open button.
Save File
This button saves the worksheet you are currently working on. Click once on this icon the first time
and a box will open that asks you for a file name. After the file is saved, clicking on this button will
save your current worksheet and replace the older version. To save the worksheet with a different
name click File on the menu bar and then Save As.
Print Worksheet
This button will open the Print options page.
Cut Selection
Use this option to delete selected text or Active Text Box or Art Box.
Copy Selection
Use this button to create a copy of a Text or Art box. Place your mouse pointer inside the Active box
you wish to copy, the click the Copy button on the toolbar. You can use the Paste button (explained
below) to insert a copy of the box into your document.
Paste Selection
This option places the contents of the Cut or Copy option into the document you are creating. Use
this option in conjunction with the Copy option when you want to duplicate a Text or Art Box.
Art Box
This button opens an Art or graphic image box. Use this icon to create an Art Box, with an image
inside of it. There are many graphic images included with the software and you can add your own
BMP and JPG clipart. Art Boxes should not overlap or they may not print properly.
20 | P a g e
StartWrite® User Manual for Windows™ Version 6
Text Box
This button creates a new Text Box. You must use a Text Box to enter words and letters. Text Boxes
should not overlap. If they do, the text underneath may not print properly.
Spell Check
Use this button to check your spelling. Spell Check contains 100,000 commonly used elementary
school words, which allows you to correct most of your misspelled words. The Spell Check will work
only on the Text Box that is Active.
Click the Spell Check button. A window opens showing the first word Spell Check identifies as misspelled,
along with a list of suggestions. Select the correct word in the Suggestions list box, then click Replace. The
misspelled word will be replaced with the word you selected. Spell Check will continue on to the next
misspelled word. The last word that you correct will not show as corrected in your document until you exit Spell
Check. You must do Spell Check on each Text Box unless they are linked by the Include in Story feature. VERIFY
THAT THE SPELL CHECK WORKS ON THE STORY OPTION
Zoom
This button opens the Zoom option window. You can set what level of Zoom you would like. You can
also select Other and set a number different than the preset percentages. You can also set the default
level of Zoom. Zooming does not change the actual size of text or graphics that will print.
You can also Zoom incrementally by using the Zoom options at the bottom right hand corner of the StartWrite
window. This option
increases or decreases the zoom in 10% increments.
Font
Use these buttons to select a different font or font size for the text in a Text Box.
Portrait/Landscape
These buttons let you select the page format of your choice.
Portrait
Landscape
Click either the Portrait or Landscape button to change your page orientation.
Grid
Press the grid option button to turn on a non-printing grid to assist in aligning Text and Art Boxes.
The Grid is spaced in 1/4 inch increments, with a darker blue line at each 1 inch increment. You
can move the box to any of the lines or just close to them. Be aware that if the Text Box is as wide
as the page, it will not move to the left or right. You cannot move a portion of a box off the page. So you will
need to shorten the width of the box before you try to move it.
If you would like to have StartWrite automatically align the boxes to
the Grid, you can select the option “Snap to Grid”. This option is
activated by clicking on the small black down
arrow to the right of the Grid button. Then select
“Snap to Grid”.
With Snap to Grid turned on, when you move a box close to an
intersection of a horizontal and vertical grid line and release the box,
the box will move (or Snap) to the intersection nearest the upper left hand corner of the box.
Video: The Grid http://www.youtube.com/watch?v=7PEr7CosHy8
21 | P a g e
StartWrite® User Manual for Windows™ Version 6
Property Bar Buttons
The Property Bar in StartWrite includes additional buttons to help you manage the look of the text in your
StartWrite documents.
Font Type
This box shows the Font style for the Text Box that is Active. To change the font
style, click on the down arrow and then click on the desired font.
Changing the Default Font Type
Manuscript is the default font when you first
open StartWrite. To change the default font to a
different font, select Tools from the Menu Bar,
then Default Fonts and the Fonts window will
open.
Select the Font and the point Size of the Font you would like. Then make sure
the box is checked next to Set as Default.
These setting will be the new default each time you open StartWrite.
If you choose to use the Manuscript font, there are also two modified Manuscript fonts.
Differences between Manuscript, Manuscript Simple and ManScript2:
Differences between Manuscript and Manuscript Simple:
1. A - horizontal line is up to the middle guideline
2. E - arrows are different with 2nd stroke on top
3. J - horizontal line on top of J
4. R - leg starts where vertical line and circle meet
5. T - arrows are different with 1st stroke on vertical line
6. t - top of vertical line goes up to top guideline
Differences between ManScript 2 and Manuscript Simple (all
letter changes from Manuscript to Manuscript Simple
remain, but there are additional changes in ManScript2):
1. 8 - figure 8 is made with 2 circles instead of a “figure 8”
2. M - arrows change to all down strokes
3. N - arrows change to all down strokes
4. V - arrows change to all down strokes
5. W - arrows change to all down strokes
6. d - arrows change to 1st stoke on vertical line
7. v - arrows change to all down strokes
8. w - arrows change to all down strokes
Font Size
This box shows the Font size for the Text Box that is Active. To change the Font size, click on the
down arrow then click on the desired font size. You can also click once in the Font size box to make
it turn blue, then type the desired number using the numbers along the top of the key board. The
numbers on the numeric key pad will not work. The font size of 475 will create a letter about the size of the
page. Typing in the font size is the only way to make font sizes larger than 192.
To set a new default Font Size, see the description in Changing the Default Font Type in the section Font Type
above
22 | P a g e
StartWrite® User Manual for Windows™ Version 6
Special StartWrite features on the Property Bar
Letter Shading
This button sets the shade level for all the letters in the Text Box. You can shade
your text very lightly to solid black. When the Text Box is Active this feature is
automatically turned on. To change the shading, click the down arrow and then
click on the percent of Shading you would like.
Shading set at 25%
Shading set at 100%
There are also Options for Letter Shading in addition to having all the
letters the same shade. These are accessed by clicking the
down arrow on the Letter Shading button and then select
Options.
The first option is Set by shading property bar button. This
sets the letter shading according to the percents.
The other Options include:
First letter of every line is black
First letter of every word is black
First letter of every-other world is black.
First word of every line is black
23 | P a g e
StartWrite® User Manual for Windows™ Version 6
Letter Dot Density
This feature displays the letters, words, and sentences in a Text Box in different dot
densities.
The Dot Density can be set at various levels. “No Dots” makes the text invisible and 100% makes
the text solid.
Set the level to “No Dots” if you are going to use the Connect Dot lines. Otherwise the two options
will both try to write the same letter and the letters will display incorrectly.
There are Options for dot density in addition to having all the
letters the same. These are accessed through Letter Dot
Density, then Options.
The first option is Set by density property bar button. This sets
the letter shading according to the percents.
The other Options include:
First letter of every line is solid
First letter of every word is solid
First letter of every other word is solid
First word of every line is solid
24 | P a g e
StartWrite® User Manual for Windows™ Version 6
Changing Colors and Grays
Now you can change colors or varying shades of gray to just about everything in StartWrite. The only option that
does not have the color change option is the shading of the dotted letters. But there is another way to make the
letters any color or shade of gray you like. It’s called Color Letters described below.
The options where the colors or shade of gray can be changed are:
Guidelines
Stroke Arrows
Start Dot
Outline Font
Decision Dot
Connect the Decision Dots
Color Letters
Area Highlight
To select a Color or shade of Gray:
Click on the down arrow to the right of the option you want to
change and the Color Selection window will open.
Click the down arrow to the right of the color box and the Color window will open.
Click on the color or shade of gray desired.
Click OK at the bottom of the Color window.
An example of what the feature will look like with the new color will display in the
Example box.
You can set this color as the default for all Text Boxes by checking the box to the left of
Set as Default.
Click OK at the bottom of the box and the color of that feature will have changed.
If the color or shade of gray desired is not found in the color palette,
you can select any color and intensity you would like. Click on
Define Custom Colors>> button and a Custom Color palette will
open to the Right.
Click on the color you desire. You can also change the intensity of
that color by moving up or down the pointer arrow on the right side
of the window or you can just click anywhere on the vertical color
bar on the right side of the window.
25 | P a g e
StartWrite® User Manual for Windows™ Version 6
Guidelines
Guidelines are the lines printed on paper which make
it easier for a beginning writer to keep his or her letters
the correct height and level.
The Guideline button toggles On / Off the original default settings
or the settings you have selected for the Active Text Box.
To access the options, click on the down arrow next to
the Guideline button.
In the Guideline Styles options, you can set the whether the
Guideline will be On or Off when you press the Guideline button,
the type of Guideline (Solid or Dashed), the Color of the Guideline
and the thickness of the Guideline.
To set the Guideline features:
- Make sure the Text Box is Active
- Click on the down arrow to the right of the Guideline
button and the Guideline Styles window will open.
- Click on the options for any or all of the four Guideline
settings include On/Off, Solid or Dashed, the desired color
or shade of gray and the thickness of the guideline
- To change the color of the Guidelines refer to Changing Colors above.
- In the Example area you will see what your selection will look like on the worksheet.
You can set your selections as the default by clicking on the box next to Set as Default.
The Guideline Styles pop-up window can also be opened by selecting Format and then Guidelines or from the
Right Mouse Pop-out window.
Example with all Guidelines on:
Example of Top and Baseline guidelines on:
Example of Middle and baseline guidelines on:
Baseline and bottom guidelines on:
Below are examples of the Guideline Thicknesses:
Normal
Thick
Thicker
Thickest
26 | P a g e
StartWrite® User Manual for Windows™ Version 6
Stroke Arrow
This button turns the Stroke Arrows On or Off.
You can also change the color of the Stroke Arrows and
select from the Options by clicking on the down arrow to the right of
the Arrows button.
To change the color or shading of gray of the Stroke Arrows,
select Arrow Color and then follow the instructions in the
Changing Color section above.
The Options for the Stroke Arrows are activated when you change
the option. When you press the Arrow button arrows will appear
on all letters.
The other options include the following:
First letter of every line arrowed
First letter of every word arrowed
First letter of every other word arrowed
First word of every line arrowed
27 | P a g e
StartWrite® User Manual for Windows™ Version 6
Start Dot
This button turns on the Start Dot at the point where each
letter begins.
Make sure the Text Box is Active.
Click on the Start Dot button. All the letters in the Text Box will have a
Start Dot at the point where each letter begins.
You also have the option to show just the Start Dot without any of the letter displayed. To do this, after you have
turned the Start Dot on, select the Letter Dot Density button
and select No Dots. You will still be able to type in text,
but it will be invisible, showing only the Start Dot. You can
use Start Dot in combination with the other features to
create meaningful and helpful customized work sheets.
You can also change the Color of the Start Dot to any
color you choose. See Changing Colors above.
Video: Start Dot http://www.youtube.com/watch?v=WfLCsJaUgJw&feature=related
Letter Outline
The Letter Outline feature lets you create letters where the student
can write the letter inside the outline. This gives the student visual
support of what the letter looks like, but without the necessity of
exactly tracing the letter.
Turn the Letter Dot Density to 0%, add the Start
Dots and you’ve created a very useful
worksheet.
You could also add the Decision Dots (see
below) and Connect Dots line and make the shade of the Connect Dots line
very light to give another useful worksheet.
Video: Letter Outline http://www.youtube.com/watch?v=yaXdp5z_k74&feature=related
Decision Dots
This feature lets you turn on pre-defined dots at the important points
in a letter. The Decision Dots indicate where a line starts and stops,
where it starts to bend or curve, where it continues to curve or goes off
in some other direction. The Decision Dots can help the student know where to
start, stop and change the direction of their writing stroke.
You can change the color of the Decision Dots by referring to Changing Colors
above. Use the Decision Dots and Connect Dots in combination with all the
other features of StartWrite to create fun, interesting and useful worksheets.
Connect Dots
28 | P a g e
StartWrite® User Manual for Windows™ Version 6
Decisions Dots can be connected by turning on the Connect Dots
button or using the normal Dot Density and Dot Shading buttons. The
difference with the Connect Dots line is that it is not dotted, but it is very narrow
and the color of the line can be changed.
*** Make sure you don’t have both of the Connect Dots and the Letter
Shading/Letter Dot Density options on at the same time. The letters or words will
appear incorrect when in fact the Letter Dot Density and the Connect Dots are trying to write the same letter***
You can combine the Connect Dots with the other
options in StartWrite such as the Letter Outline, Start
Dots and Decision Dot to create very useful
worksheets.
Color Letters
This feature allows you to set a different color for each stroke of the
letter. A specific stroke can be emphasized while teaching handwriting.
For example the First Stroke on all the letters could be Red, the second
Blue, the third Green and fourth Purple. Also different shades of gray can be
substituted if a black and white printer is to be used. You can also set all the colors
to the same color to make more exciting and colorful worksheet. This is very useful
if the student has a favorite color, or the worksheet is going to be used for writing
special pages such as a scrapbook page or a letter to a friend.
To change the colors of the strokes, see the Changing Colors section above.
Area Highlight
This feature allows you to highlight with colors or gray any or all of the three writing areas: top,
middle and descender.
The Area Highlight button acts as a toggle switch to
turn the option on or off the colors which have been
assigned to each of the areas. Select different shades
of gray if you are using a black and white printer.
Lighter shades are better to show the letters, unless you
want to get fancy and make the shading dark and the
letter a light shade of gray. In the example below, the
Guidelines have been set to the thickest level (See
Format / Guideline
Thickness for this option).
To change the colors refer to the section Changing Colors and Grays above.
29 | P a g e
StartWrite® User Manual for Windows™ Version 6
Flowing Text
Text can be made to flow from one Text Box to a second Text Box, a third Text Box and so on. The
attributes of each Text Box can be different. This means that if you change one Text Box to solid, light
gray letters, font size 72, but leave the second box in black, dotted letters, font size 48, when the text
flows from the first Text Box display he attributes of the second Text Box.
It is recommended that you set the attributes of the first Text Box such as Dot Shading, Dot Density, Starting
Dots, Font style and Font size etc. Then Copy the first Text Box and Paste it as the second Text Box and the Third,
depending on how many Text Boxes you intend to use. This will insure that the attributes are consistent from
Text Box to Text Box. If at a later time you decide to modify the attributes of one of the Text Boxes, you will need
to specifically change the attributes of each.
StartWrite was designed as a worksheet creator and not as a word processor so it is best not to include too
many Text Boxes.
To give a Text Box the attribute of Flowing Text, first make the Text
Box active by clicking on it. The black handles in the corners and in
the middle of each side of the box will turn black. Then press the
“Flowing Text” button. This will turn the black handles to
yellow. The Text Box now has the Flowing Text attribute.
Next, create a second Text Box. Make sure the Text Box
is still Active with the black handles, then click on the right mouse
button. A window will open, select Copy, then click the Right
Mouse Button and select Paste. The additional Text Boxes can
be on the same page or on another page. The text flows from
one Text Box to the next based on the order of the Text Boxes on
the page from top to bottom.
The last Text Box will continue to enlarge as more text is entered. The previous Text Boxes will remain the same
unless manually enlarged.
When the Text Box reaches the end of the page it will enlarge upward to
include the letters you are adding. Once it has reached the top of the page, the
next letter or word you type will cause the Text Box to enlarge beyond the
bottom of the white page. When it does you will no long be able to add any
more text. You must backspace to remove the line off the bottom of the page.
Then you must either reduce the size of the font or make another Text Box with
Flowing Text on a following page.
You can add additional Text Boxes and once you designate them as included
in the Story, the text will flow to the next Text Box. You can move the cursor
forward to the next text box using the right arrow key, but you will need to use
the mouse to move the cursor to a previous Text Box. If you delete a Text Box
the text will flow into the subsequent Text Box.
If you have three or more Text Boxes, deleting a Text Box will cause the text in
the second box to flow to the following Text Box.
The option to give a Text Box that attribute of Flowing Text can also be
accessed by clicking the right button on the mouse. A menu window will open
and one of the options is “Include in Flowing Text. The Text Box must be Active
with the black handles showing in the corners and middle of border lines. Then
click on Include in Flowing Text and the handles of the Text Box will change to
Yellow.
30 | P a g e
StartWrite® User Manual for Windows™ Version 6
Border Art
The Border Art option allows you to add graphics around the border of a Text Box. You can also add
lines around a Text Box using the Border Lines option under Format on the Menu Bar and by using
the Right Mouse Pop-out window described below. An Art Box can only have Border Lines and not
Border Art.
To select a Border Art, click on the Border Art Button
and the Border Art option window will open. You
next can select color or black/white Border Art or
turn the Border Art off. If you have a black and white
printer you can use the color borders and the colors
will show as shades of gray. However some colors
may print in shade of gray that may be difficult to
distinguish so the Black and White Border Art has
been designed for black and white printers.
Select the Color by clicking in the circle to the left of
Color. Then scroll down the Border Art descriptions and click on Checkerboard
Blue-White. You will see what the Border Art will look like in the Preview
window below. Next click on the size 50 and then press OK. You will
return to the Text Box with the Border Art surrounding it.
Because the Border Art occupies a certain amount of the Text Box, it
reduces the amount of space for writing text. It is best to select the Border
Art and size before you begin typing any text. In addition, the graphic
shapes around the Border Art will make the Text Box large because there
needs to be space for each complete graphical shape.
You will note in the Checkerboard Blue-White that there is a large amount
of space between the Descender Line and the bottom Checkerboard
border around the Text Box. This space is required to display the complete
checkerboard graphic. To reduce this space you will need to reduce the
Size of the Checkerboard Blue-White border.
Border Art also includes clip art.
Video: Border Art http://www.youtube.com/watch?v=sSthYsdhxQs&feature=related
31 | P a g e
StartWrite® User Manual for Windows™ Version 6
Shading / Density / Arrow Options Combinations
There are numerous combinations of all the features you can explore. The worksheets can be customized to
give your student a variety of options for practicing their handwriting. You can make about anything you can
imagine. Have fun. Below are just some samples of the options you can combine to create all kinds of
worksheets.
Selected Option Combinations and the Resulting Letters
• Decision Dots turned on
• Start Dot turned on
• Letter Shading: 25%
• Letter Shading Option:
- First letter of every line black
• Letter Density: No Dots
• Letter Density Option:
- Entire first word of every line solid
• Stroke Arrows Option:
- First letter of every word arrowed
• Start Dot turned on
• Letter Shading: 25%
• Letter Shading Options:
- Set by shading property bar button
• Letter Density: 25%
• Letter Density Options:
- Entire first word of every line solid
• Stroke Arrows Options: On
- Set by arrow property bar button
• Start Dot turned on
• Letter Shading: 25%
• Letter Shading Option:
- First letter of every line is black
• Letter Density: 25%
• Letter Density Option:
- First letter of every line solid
• Stroke Arrows Option:
- Entire first word of every line arrowed
• Start Dot turned On
• Outline letter turned On
• Letter Shading: 25%
• Letter Shading Option:
- Set by Shading property button
• Letter Density: No Dots
• Letter Density Option:
- First letter of every line solid
• Stroke Arrows: On
32 | P a g e
StartWrite® User Manual for Windows™ Version 6
Right Mouse Button Pop-Out Menu
When a Text Box is Active, you can press the right mouse button and a menu will pop-out. Most of the
standard and special options can be accessed through the items on this menu. However, the color settings for
the special options are not available through this menu. You must change the color with the down arrow next
to the option button
There are some options that are only available at this Pop-Out Menu. These include Select All Text, Insert
Special Characters, Center Box, Border Lines, Border Frame (when an Art Box is active) and Word Spacing.
Select All Text
This option selects all the text in a Text Box. You can use this to delete or
copy all the text in the Text Box.
Insert Special Characters
This option opens another window of numerous Special Characters. These
include Spanish Characters and shapes. These will appear with the same
attributes as the other letters in a Text Box. However the Special Characters
do not work with Letter Outline.
When you click Insert, the Special Character will be placed where the cursor
is located. After you have Inserted a Special Character you must click Close.
Another way to insert a Special Character is to place your mouse pointer
over the Special Character and double click on the left mouse button. You
will still need to Close the window to return to the Text Box.
33 | P a g e
StartWrite® User Manual for Windows™ Version 6
Right Mouse Button Pop-Out Menu (continued)
The Center Box option allows you to center
an Active Text Box on the page.
This Borders options allows you to add Border Art
which is the same as the Border Art button on the
Tool Bar.
This Borders option also allows you to add a
single and a double line around each Text Box
and a similar option called Border Frame lets you
add a single or a double line around an Art Box
The Word Spacing option Wide makes the distance between two
words about 50% greater than the Regular spacing
34 | P a g e
StartWrite® User Manual for Windows™ Version 6
Chapter 4 - StartWrite Support Services
Technical Support
Technical Support is available via e-mail, fax, video and telephone. If you have questions, need technical
support regarding the software or have a suggestion, please e-mail or fax us (24 hours a day), or call us during
business hours (Monday-Friday, 9:00 am - 4:00 pm MST) at the following numbers.
E-mail Address:
[email protected]
Fax Line:
1-801-770-2009
Phone/Technical Assistance:
1-801-359-2173
If you are transferred to voice mail, leave a short message including your name, the serial number of your
product, the phone number where you can be reached, and the best time for a technical support representative
to return your call.
Online Videos
Online videos have been prepared to explain all the features of StartWrite and many of the techniques of using
those features. Please check our website for the links or if you have a current Internet connection you can hold
the Ctrl key on your keyboard and click on the following links.
The Grid: http://www.youtube.com/watch?v=7PEr7CosHy8
Border Art: http://www.youtube.com/watch?v=sSthYsdhxQs&feature=related
Letter Outline: http://www.youtube.com/watch?v=yaXdp5z_k74&feature=related
Start Dot: http://www.youtube.com/watch?v=WfLCsJaUgJw&feature=related
Ordering StartWrite
Ordering StartWrite Software
Our order takers cannot give technical support. Please call the number listed above for technical support only.
To place orders only, call us during business hours (Monday - Friday, 9:00 am - 4:00 pm MST) at:
Phone Order Line ONLY:
1-888-974-8322 (1-888-WRITE ABC) or 1-801-359-2173
Online Ordering:
You can also order StartWrite directly at http://www.startwrite.com
35 | P a g e
StartWrite® User Manual for Windows™ Version 6
Index
Active, 2, 11, 12, 13, 14, 15, 16, 19, 20, 21, 23,
24, 27, 30
Area Highlight, 3, 6, 26
Art Box, 2, 3, 11, 14, 15, 16, 18, 19, 28
Border Art, 3, 6, 28, 31
Border Lines, 28, 30
Center Box, 30
Changing Colors, 3, 22, 23, 24, 25, 26
Color Letters, 3, 6, 26
Connect Dots, 3, 6, 25, 26
Copy, 2, 3, 13, 14, 18, 27
Cursive, 11
Cut, 2, 14, 15, 18
Decision Dots, 3, 6, 22, 25
Descender Line, 28
D'Nealian, 11
Font, 19
Font size, 12, 20, 27
Font Type, 3, 20
Getty/Dubey, 11
Grid, 3, 6, 11, 19, 20, 31
Guideline Thickness, 23, 26
Guidelines, 3, 11, 22, 23, 26
Handwriting without Tears, 11
Italic, 11, 12
Landscape, 3, 10, 17, 19
Letter Dot Density, 3, 21, 22, 25
Letter Outline, 3, 6, 24, 25, 26, 31
Letter Shading, 3, 21, 25
Manuscript, 11, 12, 13
Modern Manuscript, 11, 12
New File, 2, 18
Open File, 2, 18
Palmer, 11
Paste, 3, 13, 14, 18, 27
Portrait, 10
Print, 2, 10, 17, 18
Right Mouse Pop-Out Menu, 30
Right Mouse Pop-out window, 28
Save File, 2, 18
Select All Text, 30
Snap to Grid, 20
Spell Check, 3, 19
Start Dot, 3, 22, 24, 31
Story, 3, 6, 13, 19, 26, 27
Stroke Arrows, 22, 24
Text Box, 2, 3, 6, 10, 11, 12, 13, 14, 15, 18, 19,
20, 21, 23, 24, 26, 27, 28, 30
Word Spacing, 30
Zaner-Bloser, 11
Zoom, 3, 19
36 | P a g e
StartWrite® User Manual for Windows™ Version 6
Notes:
37 | P a g e