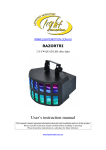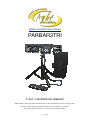
1
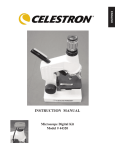
WWW.LIGHTEMOTION.COM.AU
PARBAR3TRI
User’s instruction manual
This manual contains important information about the safe installation and use of this product
Please read this instruction manual carefully before installing or operating
Please keep these instructions in a safe place for future reference
1 of 9 pages
Congratulations on the purchase of your PARBAR3TRI by Light Emotion. The PARBAR3TRI consists
of 4 x LED RGB heads mounted on a T-Bar, with sturdy lighting stand, foot controller and compact
carry case included. There’s full DMX control and sound active microphone built in.
CONTENTS
SECTION
WHAT IS INCLUDED, SAFETY INSTRUCIONTS
POWER, FUSE, OPERATION MODE, OPERATION
SPECIFICATIONS
Page
2
3
9
Please note that as part of out ongoing commitment to continuous improvement and product
development, the specifications in this manual are subject to change without notice. Whilst every care
has been taken in the preparation of this manual we reserve the right to change specifications in the
course of product improvement.
WHAT IS INCLUDED:
•
1x PARBAR3TRI with the carry bag
•
•
•
•
•
1x Stand include the lock pin with the carry bag
1x Foot controller & 10 meter 5 pin XLR cable
1x Power Cord
1x Warranty Card
1x User Manual
SAFETY INSTRUCTIONS:
Please read these instructions carefully. It includes important information about the installation usage
and maintenance of this product.
•
Please keep this User Manual for future consultation. If you sell the unit to another user, be sure
that they also receive this instruction booklet.
•
Always make sure that you are connecting to the proper voltage and that the line voltage you are
connecting to is not higher than that stated on the rear panel of the fixture.
•
This product is intended for indoor use only! To prevent risk of fire or shock, do not expose
fixture to rain or moisture.
•
•
Make sure there are no flammable materials close to the unit while operating.
The unit must be installed in a location with adequate ventilation, at least 50cm from adjacent
surface. Be sure that no ventilation slots are blocked.
•
Always disconnect from power source before servicing or replacing fuse and be sure to replace
with same fuse source.
•
Secure fixture to fastening device using a safety chain.
•
Maximum ambient temperature is 40˚C. Do not operate fixture at temperatures higher than this.
2 of 9 pages
•
In the event of serious operating problem, stop using the unit immediately. Never try to repair
the unit by yourself. Repairs carried out by unskilled people can lead to damage or malfunction.
Please contact the nearest authorized technical assistance center.
•
•
•
•
•
Never connect the device to dimmer pack.
Make sure power cord is never crimped or damaged.
Never disconnect power cord by pulling or tugging on the cord.
Never carry the fixture directly from the cord. Always use the hanging/mounting bracket.
Avoid direct eye exposure to the light source while it is on.
POWER:
CAUTION: This lighting effect is designed to operate on 240VAC
Power Consumption: 100W
Fuse: M205 2A fast blow
FUSE:
CAUTION: Only use the correct fuse as specified on the rear panel of the lighting effect.
Disconnect the lighting effect from the mains before attempting to replace the fuse.
NOTE:
This lighting effect has a position for a spare fuse located in the fuse holder
toward the outside of the fixture.
To replace the fuse please follow the following steps
1. Remove the fuse holder by levering the holder out with a screwdriver
2. Remove existing fuse
3. Fit new fuse
4. Refit the fuse holder
OPERATION MODE:
•
•
•
•
•
•
14 built-in programs mode
Auto run mode
Sound-active mode
Master/slave mode
3 DMX mode (6CH, 9CH, 15CH optional)
Foot controller
OPERATION:
You can choose the desired mode via the buttons MODE, ENTER, UP and DOWN:
3 of 9 pages
Built-in programs (P01-P14)
01. STATIC
Col:XXX
FlashXX
- Blackout (BLA), Red(R) Yellow (RG) Green (G) Cyan (GB) Blue (B)
Purple (BR) White (RGB)
- Flash speed adjustable (00 to 99)
02. DREAM
SpeedXX
FlashXX
- Seven color dream mode
- Speed & Flash adjustable (00 to 99)
03. METEOR
SpeedXX FlashXX
- Seven color chase mode
- Speed & Flash adjustable (00 to 99)
04. FADE
SpeedXX FlashXX
- Seven color dimming mode
- Speed & Flash adjustable (00 to 99)
05. CHANGE
SpeedXX FlashXX
- Seven color auto run mode
- Speed & Flash adjustable (00 to 99)
06. FLOW 1
SpeedXX FlashXX
- Seven color chase in 1 way
- Speed & Flash adjustable (00 to 99)
07. FLOW 2
SpeedXX FlashXX
- Seven color chase in 2 ways
- Speed & Flash adjustable (00 to 99)
08. FLOW 3
SpeedXX FlashXX
- Seven color chase in 1 relay way
- Speed & Flash adjustable (00 to 99)
09. FLOW 4
SpeedXX FlashXX
- Seven color chase in 2 relay ways
- Speed & Flash adjustable (00 to 99)
10. FLOW 5
SpeedXX FlashXX
- Seven color chase from two sides to middle
- Speed & Flash adjustable (00 to 99)
11. FLOW 6
SpeedXX FlashXX
- Seven color chase from middle to two sides
- Speed & Flash adjustable (00 to 99)
12. FLOW 7
SpeedXX FlashXX
- Seven color chase
- Speed & Flash adjustable (00 to 99)
13. FLOW 8
SpeedXX FlashXX
C1: XXX C2: XXX
- Two color chase in 1 way
- Speed & Flash adjustable (00 to 99)
- After set the speed and flash function, use the ENTER button to choose the
color, Blackout (BLA), Red(R) Yellow (RG) Green (G) Cyan (GB) Blue (B)
Purple (BR) White (RGB)
14. FLOW 9
SpeedXX FlashXX
C1: XXX C2: XXX
- Two color chase in 2 ways
- Speed & Flash adjustable (00 to 99)
- After set the speed and flash function, use the ENTER button to choose the
color, Blackout (BLA), Red(R) Yellow (RG) Green (G) Cyan (GB) Blue (B)
Purple (BR) White (RGB)
Auto Run mode (13 built-in modes together)
Frequency adjustable
FQN: XX (00 to 99)
4 of 9 pages
DMX Mode
The unit has 6CH, 9CH and 15CH DMX channel modes.
6CH mode DMX chart:
CH 1
CH 2
CH3
0-10
CH4
CH5
CH6
Red
(0-255)
Green
(0-255)
Blue
(0-255)
N/L
N/L
blackout
11-21
Master dimmer
(0-255)
22-32
Red
33-43
Yellow
44-54
Green
55-65
Cyan
66-76
Blue
Flash
(0-255)
N/L
77-87 Purple
88-98 White
99-109
Dream
110-120
Meteor
121-131
Fade
132-142
Change
143-153
Flow 1
154-164
Flow 2
165-175
Flow 3
176-186
Flow 4
187-197
Flow 5
198-208
Flow 6
209-219
Flow 7
N/L
Flash(0-255)
Speed (0-255)
220-230 one color Flow 8
Color select
231-241 one color Flow 9
Color select
242-255
Sound active
N/L
5 of 9 pages
9CH mode DMX chart:
CH 1
CH 2
CH3
CH4
CH5
CH6
CH7
CH8
CH9
Green
(0-255)
Spot 1&
2
Blue
(0-255)
Spot 1&
2
Red
(0-255)
Spot 3&
4
Green
(0-255)
Spot 3&
4
Blue
(0-255)
Spot 3&
4
N/L
N/L
N/L
N/L
N/L
0-10
blackout
11-21
Master
dimmer
(0-255)
22-32
Red
33-43
Yellow
44-54
Green
55-65
Cyan
66-76
Blue
Flash
(0-255)
Red
(0-255)
Spot 1&
2
N/L
77-87 Purple
88-98 White
99-109
Dream
110-120
Meteor
121-131
N/L
Fade
132-142
Change
Flash(0-255)
143-153
Flow 1
154-164
Flow 2
165-175
Flow 3
176-186
Flow 4
187-197
Flow 5
198-208
Flow 6
209-219
Flow 7
Speed
(0-255)
220-230
one
color Flow 8
Color
select
231-241
one
color Flow 9
Color
select
242-255
active
Sound
N/L
6 of 9 pages
15CH mode DMX chart: You can control the spots individually via your DMX controller.
CH 1
CH 2
CH3
CH4
CH5
CH6
CH7
0-10
11-21
CH8
CH9
CH10
CH11
CH12
CH13
CH14
CH15
blackout
Master
dimmer
(0-255)
Flash
(0-255)
Red
(0-255)
Spot 1
Green
(0-255)
Spot 1
Blue
(0-255)
Spot 1
Red
(0-255)
Spot 2
Green
(0-255)
Spot 2
Blue
(0-255)
Spot 2
Red
(0-255)
Spot 3
Green
(0-255)
Spot 3
Blue
(0-255)
Spot 3
Red
(0-255)
Spot 4
Green
(0-255)
Spot 4
Blue
(0-255)
Spot 4
N/L
N/L
N/L
N/L
N/L
N/L
N/L
N/L
N/L
N/L
N/L
22-32 Red
33-43 Yellow
44-54 Green
55-65 Cyan
N/L
66-76 Blue
77-87 Purple
88-98 White
99-109 Dream
110-120 Meteor
121-131 Fade
Flash(0-2
55)
132-142 Change
N/L
143-153 Flow 1
154-164 Flow 2
165-175 Flow 3
176-186 Flow 4
Speed
(0-255)
187-197 Flow 5
198-208 Flow 6
209-219 Flow 7
220-230 one color Flow 8
Color select
231-241 one color Flow 9
Color select
242-255 Sound active
N/L
7 of 9 pages
SLAVE Mode:
Link the units and press MODE button of the Slave units to SLAVE mode. Then the slave units will follow
running in accordance with the Master unit.
Sound Active Mode
Press MODE button into SOUND controlling mode, then the fixture will run via the sound.
Press UP & DOWN to adjust the sound sensitivity levels (SENS00-31) & frequency (FQN01-99).
Operation via the foot controller
NOTE: Before operate the foot controller to control the PARBAR; you must set the display of the PAR
BAR to SLAVE MODE.
UP
MODE
DOWN
BLACK OUT
R
G
Y
1. Press MODE switch for first time, the R LED indicator light up, PARBAR goes to static color selection
mode.
Via UP/DOWN switches to select the desired color.
2. Press MODE for the second time, the G LED indicator light up, PARBAR goes to sound active mode.
You can adjust sensitivity on the foot controller.
3. Press MODE for the third time, the Y LED indicator light up, PARBAR goes to built-in programs
selection mode.
Press UP/DOWN switches to select the desired program.
4. Blackout mode
When press BLACKOUT anytime, R, G, Y LED indicator will all be on, the unit will go to blackout mode.
You have to press blackout switch again to quit the blackout mode.
5. When the unit is in static color mode, sound active mode and built-in program mode, press and hold
one of the 4 switches for 3 seconds, PARBAR would be FULL ON.
8 of 9 pages
SPECIFICATION:
•
•
•
•
•
•
•
•
•
•
•
Power supply: AC240V. 50Hz
Power consumption: Max. 100W
LED: 28x 3W TRI
DMX: 6CH, 9CH &15CH mode
DMX-512 connection: 3-pin XLR
Foot controller connection: 5-pin XLR
Power: IEC IN & OUT
Beam angle: 25º
Fuse: F2A
Dimensions (LxWxH): 1030x 100 x 290mm
Weight: 7.0 kgs
9 of 9 pages