1
Océ User Manual
Océ PRISMAsatellite for Office
Installation & Configuration Manual
Océ-Technologies B.V.
© 2007 Océ
All rights reserved. No part of this work may be reproduced, copied, adapted, or transmitted
in any form or by any means without written permission from Océ.
Océ makes no representation or warranties with respect to the contents hereof and specifically disclaims any implied warranties of merchantability or fitness for any particular purpose.
Further, Océ reserves the right to revise this publication and to make changes from time
to time in the content hereof without obligation to notify any person of such revision or
changes.
Edition: 2007-07
Contents
Contents
Chapter 1
Overview..............................................................................................................7
What is Océ PRISMAsatellite for Office....................................................8
Chapter 2
Server and clients.............................................................................................11
Server Requirements...............................................................................12
Client Requirements.................................................................................13
Chapter 3
Site planning.....................................................................................................15
Overview...................................................................................................16
Small Company Example........................................................................17
Large Company Example........................................................................23
Limiting Device Utilization.......................................................................26
Intelligent routing.....................................................................................27
Chapter 4
Server preparation and installation................................................................35
Overview...................................................................................................36
Remotely Control the Server...................................................................38
Prepare the server....................................................................................39
Installing Required Components.......................................................39
Installation checklist...........................................................................41
Creating and Configure the PSAT4office User.................................43
Install the Windows 2003 fax and FTP service.................................44
Install and configure the server software...............................................48
Installing Océ PRISMAsatellite for Office on the Server.................48
Configure server properties...............................................................54
Configuring Océ PRISMAsatellite for Office Items..........................55
Uninstalling Océ PRISMAsatellite for Office from the Server........56
Upgrading Océ PRISMAsatellite for Office on the Server...............57
Install the Océ PRISMAsatellite for Office OCR Module..................58
Install the Océ PRISMAsatellite for Office Job template editor......60
Configure Email services.........................................................................61
Specify the Email settings.................................................................61
Configure Fax services.............................................................................62
Native Fax Support on the Océ PRISMAsatellite for Office Server.62
Configure Scan services..........................................................................63
Configure Scan Support....................................................................63
Assign Scan codes to registered users.............................................65
3
Contents
Use the Océ PRISMAsatellite for Office Scan-to-file features.........68
Chapter 5
Server Configuration........................................................................................69
Overview...................................................................................................70
Configure server system properties.......................................................71
Configure the personal document space.........................................71
Configuring Archiving........................................................................72
Create and populate device locations....................................................73
Configuring and Testing Locations and Printers.............................73
Configure advanced features..................................................................74
Creating a Link to Océ Doc Works.....................................................74
The Océ PRISMAsatellite for Office template editor console.........84
Create additional Input Channels......................................................86
Specific Hot Folders Issues..........................................................86
User Management....................................................................................87
Suggested Approach..........................................................................87
Users....................................................................................................88
Linking Windows Users and Groups (local).....................................89
Accounting................................................................................................90
Configuring Océ PRISMAsatellite for Office Accounting................90
Using the Océ PRISMAsatellite for Office Accounting Report Wizard........................................................................................................92
Chapter 6
Windows client installation.............................................................................95
Installing the Océ PRISMAsatellite for Office Driver Manually............96
Configure the Océ PRISMAsatellite for Office driver..........................101
Uninstalling the Océ PRISMAsatellite for Office Driver......................102
Upgrading the Océ PRISMAsatellite for Office Driver.........................103
Using the Océ PRISMAsatellite for Office Driver for Remote Job Submission..........................................................................................................104
Chapter 7
Maintenance....................................................................................................105
Reports....................................................................................................106
Backing Up and Restoring the Server Configuration..........................107
Chapter 8
Customization.................................................................................................109
Customized Fields for Clients................................................................110
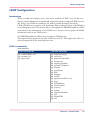
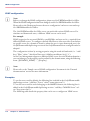
LDAP Configuration...............................................................................111
Chapter 9
Functional overview.......................................................................................115
Server properties....................................................................................116
Configure server properties.............................................................116
4
Contents
General Settings...............................................................................117
License settings................................................................................118
Specifying the Job Settings.............................................................119
Specifying the Document Settings.................................................120
Specify the Email settings...............................................................121
Specify the Synchronize settings....................................................122
Specify the Services settings...........................................................123
Specifying the Client Settings.........................................................125
Export the complete configuration.................................................135
Print and Fax Services...........................................................................136
Media.................................................................................................136
Media...........................................................................................136
Add Media...................................................................................137
Modify Media..............................................................................139
Deleting Media............................................................................140
Export the media configuration.................................................141
Import the media configuration................................................142
Printers..............................................................................................143
Export devices configuration.....................................................143
Printers........................................................................................144
Adding and Configuring a Printer.............................................145
Modifying a Printer.....................................................................150
Copying a Printer........................................................................156
Deleting a Printer........................................................................157
Pausing and Resuming a Printer...............................................158
Locations...........................................................................................159
Locations.....................................................................................159
Adding a Location.......................................................................160
Modifying a Location..................................................................161
Synchronize locations................................................................162
Deleting a Location.....................................................................163
Passthrough printers........................................................................164
How to enable printing via passthrough..................................164
Passthrough Devices..................................................................165
Add Passthrough device............................................................166
Pausing a Passthrough Device..................................................169
Resuming a Passthrough Device...............................................170
Deleting a Passthrough Device..................................................171
Create a passthrough proxy......................................................172
Input Channels........................................................................................175
Ports...................................................................................................175
Hot folders.........................................................................................176
Hot Folders..................................................................................176
Adding a Hot Folder...................................................................177
5
Contents
Enabling a Hot Folder.................................................................178
Disabling a Hot Folder................................................................179
Deleting a Hot Folder..................................................................180
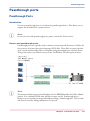
Passthrough ports............................................................................181
Passthrough Ports......................................................................181
Adding a Passthrough Port........................................................182
Enabling a Passthrough Port.....................................................184
Disabling a Passthrough Port....................................................185
Deleting a Passthrough Port......................................................186
Office scanning.................................................................................187
Office Scanning...........................................................................187
Adding an Office Scan Folder....................................................188
Enable an Office scan folder......................................................189
Disable an Office scan folder.....................................................190
Delete an Office scan folder.......................................................191
User Management..................................................................................192
Exporting the User Configuration...................................................192
Users..................................................................................................193
Users............................................................................................193
Add an Océ PRISMAsatellite for Office user............................194
Importing Windows Users.........................................................197
Editing a User..............................................................................198
Deleting a User...........................................................................199
Unlocking a User........................................................................200
Groups...............................................................................................201
Groups.........................................................................................201
Adding a PRISMAsatellite Group..............................................202
Importing Windows Groups......................................................205
Editing a Group...........................................................................206
Deleting a Group.........................................................................207
Synchronization of Windows groups members......................208
Jobs.........................................................................................................209
Jobs...................................................................................................209
Viewing the Job Details...................................................................211
Editing the Job Details.....................................................................212
Canceling a Job................................................................................213
Restarting a Job................................................................................214
Delete a job.......................................................................................215
Showing / Hiding Completed Jobs.................................................216
6
Chapter 1
Overview
What is Océ PRISMAsatellite for Office
What is Océ PRISMAsatellite for Office
Introduction
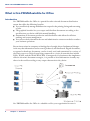
Océ PRISMAsatellite for Office is a powerful results-oriented document distribution
system that offers the following benefits:
■ You can effectively manage multifunction output for the printing, faxing and converting
of jobs.
■ The graphical interface lets you output and distribute documents according to the
specifications you desire with little manual handling.
■ Automation of document production and distribution tasks allows for efficient
tracking and system management.
■ You can accurately determine the cost and administrative resources needed to conduct
your business operations.
Recent innovations in computer technology have brought about fundamental changes
in the way that information can be created, produced, and distributed. Digital documents,
as opposed to hardcopy documents, can be viewed, used, and transmitted in a variety of
electronic ways as a result of users being connected to a series of networks that include
LANs, WANs, and the World Wide Web. Consequently, for businesses that implement
effective electronic document strategies, it is possible to send information virtually anywhere in the world according to any output characteristics they desire.
Océ PRISMAsatellite for Office is a valuable tool for your organization because it:
8
Chapter 1 - Overview
What is Océ PRISMAsatellite for Office
■
■
■
■
■
Integrates key technology components that are necessary to implement an effective
electronic document strategy.
Provides support for Océ printers and non-Océ printers, while accommodating current
and future software and hardware system changes.
Resolves the problems of output complexity and control that are often associated with
other electronic document strategies.
Promotes a unified corporate document output strategy.
Makes previously unavailable printing costs visible.
Business Environments for Océ PRISMAsatellite for Office
Océ PRISMAsatellite for Office provides guaranteed cost savings because of its smarter
way of printing and its universal printing approach. This approach to printing allows
access to both Océ and non-Océ devices, and to color and black-and-white devices.
Departmental networks within a large organization or a complete network in a small organization have varied printing needs that make it difficult to justify the purchase of
multifunction copier / printers or durable high-speed printers. Océ PRISMAsatellite for
Office provides the routing capability to direct large and small jobs to appropriate devices,
tracks job activity for cost accounting and supplies management needs, and offers a simple
user interface for faxing and printing.
Large sites often have combinations of departmental networks and in-house print production facilities that require a lot of technical management oversight. Such organizations
have large numbers of users and benefit from streamlining their print operations by
adopting results-oriented output strategies that automate job routing and distribution.
Océ PRISMAsatellite for Office can improve your printing operations in the following
ways:
- Bring multifunction capability, distribution, and printing to the desktop
- Simplify installation and maintenance of network printers
- Minimize user education required to submit jobs to a variety of devices
- Route jobs to low-cost or high-end printers as needed
- Provide capability to create custom reports for cost accounting and resource management
- Increase utilization of investment in equipment
- Save shipping and inventory costs through one interface for distribute-then-print jobs
- Manage multiple server installations
Chapter 1 - Overview
9
What is Océ PRISMAsatellite for Office
10
Chapter 1 - Overview
Chapter 2
Server and clients
Server Requirements
Server Requirements
Introduction
Océ PRISMAsatellite for Office is designed to run on a Windows® 2003 Server and
support job submissions from network and remote client workstations consisting of IBMcompatible PCs and Macintosh computers.
Windows 2003 Server
For optimum system performance, Océ PRISMAsatellite for Office should be installed
on a dedicated Microsoft Windows 2003 Server or Advanced Server. Before installing
Océ PRISMAsatellite for Office, the server must meet the following (minimum) hardware
and software specifications:
■ - Internet Information Services (IIS)
■ - Internet Explorer version 6 (or later)
■ Fax server
■ FTP server (for scanning support)
■ MS TCP/IP printing service
■ - TCP/IP network connection
■ Requirements for Email services: MS Outlook or MS Exchange Client
■ Adobe Acrobat Reader 6.0 (or later)
■ Intel Pentium 4 2.5 GHz
■ Memory: minimal 1 GB
■ Hard disk: minimal 120 GB, UDMA or U3 SCSI/10000 RPM
■ CD-ROM player for installation
■ - Minimum recommended screen resolution: 1024x768
12
Chapter 2 - Server and clients
Client Requirements
Client Requirements
Introduction
This topic describes the requirements for the available Océ PRISMAsatellite for Office
clients.
Océ PRISMAsatellite for Office driver
■
E-mail: MS Outlook or MS Exchange Client
MS Windows:
■ MS Windows 2000 (SP2 or higher, MS IE 6.0 or higher)
■ MS Windows 2003
■ MS Windows XP
■ MS Windows Vista
■ Adobe Acrobat Reader 5 or higher
■ MS Internet Explorer 6 or higher
Note:
When you use MS Internet Explorer 7.0, you must use Acrobat Reader 7.0.5 or higher.
Apple Macintosh:
■ Mac OS 10.2 - 10.3 - 10.4
Terminal Services:
■ MS Windows Terminal Services
■ Citrix
Note:
Screen resolution: at least 800*600 (1024*748 or more is preferred)
Chapter 2 - Server and clients
13
Client Requirements
14
Chapter 2 - Server and clients
Chapter 3
Site planning
Overview
Overview
Introduction
This chapter provides information to help you plan a successful installation of a Océ
PRISMAsatellite for Office server.
This chapter contains:
■ An example of a small company installation
■ An example of a large corporate installation.
Note:
The actual installation steps are presented later in this documentation.
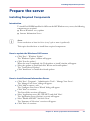
Plan the installation
Océ PRISMAsatellite for Office is designed to support departmental/workgroup printing
at the office level. This environment is characterized as follows:
Environments#
Environment
Description
Multiple workgroups
Each workgroup has its own set of printers.
No operator
The Océ PRISMAsatellite for Office server is responsible
for intelligently auto-routing jobs to the best-fit printer.
Multiple locations
To prevent print jobs from being auto-routed an unreasonable distance from the end-user, the printers for each
workgroup are organized into centrally-located 'Areas'.
An office environment usually consists of some sort of physical space, such as an office
building or a floor of an office building. This physical space is occupied by one or more
logical groups of users. Each group of users utilizes a small group of printers.
As it turns out, it doesn't matter whether your company consists of 100 or 20,000 employees, or whether your company occupies a single floor of an office building or 10 office
buildings - the employees can always be broken down into small groups of users, that use
small groups of printers.
16
Chapter 3 - Site planning
Small Company Example
Small Company Example
Introduction
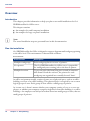
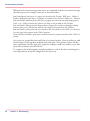
Let's look at a small company with 100 employees occupying an entire floor of an office
building. Physically, the office space is divided into four areas, one for each department:
■ Administration
■ Sales
■ Marketing
■ Engineering
Small company
Each department consists of approximately 25 individuals, 4 small printers and 1 midrange
printer in each department. There is also a high-volume printer and a large color printer
centrally located on the office floor, used by all departments, as shown in the following
drawings.
Chapter 3 - Site planning
17
Small Company Example
18
Chapter 3 - Site planning
Small Company Example
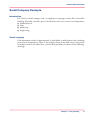
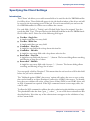
For this small company, it makes the most sense to define the printer groups based upon
departmental boundaries. On the Océ PRISMAsatellite for Office server, printers are
organized into groups using 'locations'. In this example, four locations would be required,
and each location would consist of 7 printers.
Locations#
Location
Description
Administration
HP 4000 - Admin01
HP 4000 - Admin02
HP 4000 - Admin03
HP 4000 - Admin04
Océ 3140 - Admin
Océ 3165
Océ CPS 700
Chapter 3 - Site planning
19
Small Company Example
Location
Description
Sales
HP 4000 - Sales01
HP 4000 - Sales02
HP 4000 - Sales03
HP 4000 - Sales04
Océ 3140 - Sales
Océ 3165
Océ CPS 700
Marketing
HP 4000 - Mktg01
HP 4000 - Mktg02
HP 4000 - Mktg03
HP 4000 - Mktg04
Océ 3140 - Mktg
Océ 3165
Océ CPS 700
Engineering
HP 4000 - Eng01
HP 4000 - Eng02
HP 4000 - Eng03
HP 4000 - Eng04
Océ 3140 - Eng
Océ 3165
Océ CPS 700
The locations listed above are well designed, because:
they each contain a wide variety of printers with a variety of capabilities (stapling, 2-sided,
etc.).
they each contain a mixture of small, medium and large black & white printers.
they each contain a color printer
One of the most powerful features of Océ PRISMAsatellite for Office is its ability to automatically route print jobs to the best-fit printer within a location. For example, a small
print job would be routed to the HP 4000 nearest to the user, while medium print jobs
would be routed to an Océ 3140 mid-range printer. Large print jobs and color print jobs
would be automatically routed to the printers located in the center of the building.
To accomplish this auto-routing, three main Océ PRISMAsatellite for Office settings are
utilized. One of these settings resides on the Océ PRISMAsatellite for Office server, while
the other two settings reside within the Océ PRISMAsatellite for Office driver on the
user's workstation
20
Chapter 3 - Site planning
Small Company Example
Auto-routing Settings#
Setting
Description
Page threshold
This device setting on the server is used to limit the size of
print jobs that a given printer can process. It is used to
guarantee that large print jobs are not sent to small printers.
In general, small printers have low thresholds and large
printers have high thresholds.
Location
This Océ PRISMAsatellite for Office client setting is used
to select the user's location. For example, a user sitting in
the sales department would select 'Sales' as their location.
Printer
This Océ PRISMAsatellite for Office client setting is used
to select the nearest printer to an individual. In our example, this would be the nearest HP 4000.
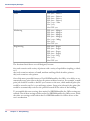
Let's look at the printers within the 'Sales' location, and their recommended server-based
settings
Sales Location#
Printer
Page threshold
HP 4000 - Sales01
1-25 pages
HP 4000 - Sales02
1-25 pages
HP 4000 - Sales03
1-25 pages
HP 4000 - Sales04
1-25 pages
Océ 3140 Sales
1-50 pages
Océ 3165
Unlimited
Océ CPS 700
Unlimited
Note:
If you specify the 'Page threshold' make sure that the 'Minimum pages' option is set to
'1'.
Let's look at the 'Location' and 'Printer' settings for two of the users in the 'Sales' department. Again, these settings are found in the user's Océ PRISMAsatellite for Office driver:
Sales Location#
User
Location
Printer
Jim
Sales
HP 4000 - Sales01
Linda
Sales
HP 4000 - Sales02
Chapter 3 - Site planning
21
Small Company Example
When the driver-based settings listed above are combined with the server-based settings,
the desired print job routing is achieved, as described below:
Jim's small print jobs (up to 25 pages) are routed to his 'Printer' (HP 4000 - Sales01).
Linda's small print jobs (up to 25 pages) are routed to her 'Printer' (HP 4000 - Sales02)
Jim and Linda's medium print jobs (26-50 pages) are routed to the mid-range printer
(Océ 3140 - Sales), because the jobs are too large to be printed on the 'Printer'.
Jim and Linda's large print jobs (larger than 50 pages) are routed to the high-volume
printer (Océ 3165), because the jobs are two large to be printed on the 'Printer'.
Jim and Linda's color print jobs are routed to the color printer (Océ CPS 700) because
it is the only color printer in the 'Sales' location.
None of Jim and Linda's print jobs would be routed to printers outside of the 'Sales' location.
As it turns out, people like their small jobs to be printed nearby. Users are willing to walk
a little farther to pick up their medium-sized print jobs, if the printer is faster and has
more capabilities. And for large jobs, people are willing to walk even farther to get their
print jobs in minutes instead of hours.
To complete the small company example installation, each of the three remaining locations/departments would be configured in the same way.
22
Chapter 3 - Site planning
Large Company Example
Large Company Example
Introduction
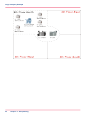
Large companies are handled in the same way as small companies. Let's say the accounting
department of a company occupies the 4th floor of an office building. The accounting
department consists of 100 employees and 27 physical printers. Just as in the small company example, you might divide the workspace into four areas (locations):
■ 4th Floor - North
■ 4th Floor - East
■ 4th Floor - South
■ 4th Floor - West
Chapter 3 - Site planning
23
Large Company Example
24
Chapter 3 - Site planning
Large Company Example
Large company
Other than the actual names of the locations and devices, the Océ PRISMAsatellite for
Office server would be set up identically to the small business example.
A single Océ PRISMAsatellite for Office server is designed to manage up to 500 users
and up to 100 physical printers. Multiple Océ PRISMAsatellite for Office servers can be
used in parallel to manage companies with more employees and/or more printers. For
example, Server A could manage floors 1 - 5, while Server B manages floors 6-10. Treat
each server installation as if it is a separate company. At the end of the month, merge the
accounting information from the two servers into a single database.
Chapter 3 - Site planning
25
Limiting Device Utilization
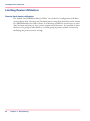
Limiting Device Utilization
How to limit device utilization
The default Océ PRISMAsatellite for Office 'out-of-the-box' configuration will allow
users to choose their 'Location' and 'Preferred printer' using drop-down lists on the various
Océ PRISMAsatellite for Office clients. It is therefore possible for an end-user to select
'Any' location and print on 'Any' printer supported by the server. It is possible to limit
the access of a group of individuals to a certain group of printers within a location by
modifying the printer security settings.
26
Chapter 3 - Site planning
Intelligent routing
Intelligent routing
Introduction
You can enable or disable 'Intelligent routing' via the Server properties.
When you enable 'Intelligent routing', the device that processes the job will be selected
dynamically. You can specify a 'Location' and a 'Printer' within the Océ PRISMAsatellite
for Office driver. When you select 'Any' for location, all available devices will be considered
by the 'Intelligent routing' mechanism.
The way a device is selected depends on:
■ A device capability check
This step checks if a device has the required capabilities to process the job. This capability check is done for each device that belongs to the specified location or for all devices location is specified as 'Any'. Devices that are currently paused will not be checked.
■ A device affinity check
For all devices that have 'passed' the capability check, a device affinity check is performed. An affinity is a specified 'feature' within the job settings that is not really
necessary but that would be appreciated if supported. The affinity checklist is used to
check all devices one by one. The 'best' suitable device will then be used to process
the job.
Chapter 3 - Site planning
27
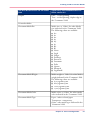
Intelligent routing
Dynamic device selection
Intelligent routing#
Stage
Device capability
check
28
Chapter 3 - Site planning
Description
Intelligent routing
Stage
Description
■
■
■
■
■
■
■
■
■
Enable Intelligent Routing (*)
The device must be configured as 'Enable intelligent routing'
so that a job can be routed to it.
Color (*)
The device must support the job specified color
(Monochrome/CMYK).
Duplex
The device must support the job specified side features (1Sided Front / 1-Sided Back ShortEdge (for Covers) / 1-Sided
Back Long Edge (for Covers) / 2-Sided ShortEdge / 2-Sided
LongEdge).
Side Switching enabled
The device must be able to change the side feature (i.e. from
OneSidedFront to TwoSidedFlip) if requested by the job.
Allowed user (*)
The device must be accessible by the end-user ('Access' tab
of the printer properties).
Page threshold (*)
The device may be configured with a 'Page threshold' feature.
This defines the page number range (x-y) for which the device may be selected. If a document has n pages and must
be printed t times, the device will be selected if (n*t) is between x and y.
Media (*)
The device must support all requested Media, except for the
media used for unprinted back or front covers, or for inserts.
Advanced Paper Handling (APH) enabled
The device must enable the 'APH' if Media changes or
printed covers are requested by the job. Please note that a
list of printers that support APH is available.
Océ Mailbox
The device must support the 'Océ Mailbox' feature if it is
requested by the job. If a password is specified for the job,
a check is made to verify whether the device supports it.
After the capability check, one of the following situations is
possible:
* There are no devices in the resulting list. In this case the job
is reported as unassignable.
The reason for which the device may not be selected for the job
is displayed for each device. The reason may be one of the following:
Chapter 3 - Site planning
29
Intelligent routing
Stage
Description
- The device is not accessible by the job submitter
- This device does not support one of the selected Media
- This device does not support the specified color
- The number of pages does not match the device page threshold
- The device does not support AutoRouting
- The device does not support Advanced paper handling
- The device does not support Duplex mode switching
- 2-sided Mode is not supported by the device or incompatible
with some specified Media.
* If only one device remains after the capability check, this device is used for the job.
* If more devices are capable of handling the job, affinity check
will determine the most suitable device.
Note:
Capabilities marked with (*) can be specified using the
device configuration. The other capabilities are internally set by the device itself. Please note that there is no
specific order in which the capabilities are checked.
30
Chapter 3 - Site planning
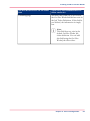
Intelligent routing
Stage
Description
Device affinity
check
Chapter 3 - Site planning
31
Intelligent routing
Stage
Description
■
■
■
■
■
■
■
■
■
32
Chapter 3 - Site planning
APH inserts/unprinted covers
The number of inserts and unprinted covers that the device
supports is determined. The devices with the higher number
are selected.
Finishing
The number of finishing features that the device supports
is checked. The devices with the higher number are selected.
The following is checked for each finishing feature:
- Stapling: the stapling type (Booklet, Side). In case of Side
Stapling, the number of supported stitches is also checked
against the request.
- Binding the binding type (Wire / Glue / Tape) is checked.
- Collating: a check is made to ensure the device supports
the requested Collating value.
- HoleMaking: a check is made to ensure the device supports
the requested Collating value.
- Folding a check is made to ensure the device supports the
requested Collating value.
Preferred device
if the preferred device is still in the list, it will be used.
Location
If 'local' and 'remote' (i.e. Proxy devices) devices are available, 'local' devices are preferred.
Device availability
An 'Idle' device is preferred. If no device is idle, a device in
'running' status is used.
Device priority
For each device within a location you can specify the 'priority' (for that device within the selected location). The 'priority' setting is checked at this stage. The device that has the
highest 'priority' will be used.
MimeType
The device which supports the MimeType of the job will
be used.
Speed
The device that has the highest speed will be used.
Least recently used
If multiple devices are still available, the device that was least
recently selected is used. This check makes sure that if several
devices are able to process the job, an 'implicit load balancing' will be performed.
Intelligent routing
Stage
Description
Note:
The order of the 'device affinity check' is important. It
is performed in the order above. Each affinity check
will keep the best devices from the device list. When
only one device is left this device will be used and the
remaining affinity checks are not performed.
Chapter 3 - Site planning
33
Intelligent routing
34
Chapter 3 - Site planning
Chapter 4
Server preparation and installation
Overview
Overview
Introduction
This chapter describes how to install and configure the Océ PRISMAsatellite for Office
server.
Before you begin
Before you install the Océ PRISMAsatellite for Office software on your server, please
check if the following items and information is available:
The Océ PRISMAsatellite for Office CD-ROM.
A domain user account with sufficient privileges in order to have access via this account
to network shared resources (printers, shared directories). Your Network Administrator
can designate a special domain user account, for example 'Psat4office', with sufficient
privileges.
This user account should have access to user account definitions for the Océ PRISMAsatellite for Office user management (should be a member of the local admin group).
A name, phone number and email address of the Océ PRISMAsatellite for Office Administrator.
A destination folder for the 'Program files' and for 'Data' (jobs, temps, …).
Network addresses and queue names of the printers that will be controlled by the Océ
PRISMAsatellite for Office server.
The Océ PRISMAsatellite for Office server has to be a member of the domain.
The Océ PRISMAsatellite for Office License file.
The 'Release notes', available on the Océ PRISMAsatellite for Office CD-ROM.
Installation and configuration
To install Océ PRISMAsatellite for Office software and configure the main features of
the server, follow these general steps. Some will not be necessary, depending on your site:
Install Windows 2003 Server
Install Internet Explorer 6 (or higher)
Apply any other Windows 2003 updates and security patches
Install Océ PRISMAsatellite for Office
License the server
Configure the server for Remote Clients
Configure the server for Macintosh Clients
Configure Fax services
Configure Scan services
36
Chapter 4 - Server preparation and installation
Overview
After completing the steps for installation and general configuration, you can use to following steps in the next chapters to implement a site strategy.
Chapter 4 - Server preparation and installation
37
Remotely Control the Server
Remotely Control the Server
Introduction
To manage the server remotely, the 'Remote Desktop' component of the Windows 2003
Server operating system will provide remote administration. Remote Desktop gives System
administrators a method of remotely administering member of the Windows 2003 Server
family from any client device over a LAN, WAN, or dial-up connection.
Remote Desktop
Please refer to the Microsoft Windows 2003 documentation for configuring the 'Remote
Desktop'.
38
Chapter 4 - Server preparation and installation
Installing Required Components
Prepare the server
Installing Required Components
Introduction
To install Océ PRISMAsatellite for Office on the MS Windows 2003 server, the following
components are required:
■ Recent Windows 2003 updates
■ Internet Information Server
Note:
Screen resolution: at least 800*600 (1024*748 or more is preferred)
This topics describes how to install these required components.
How to update the Windows 2003 server
1. Click 'Start' - 'Windows Update'.
The 'Windows Update' window will appear.
2. Click 'Scan for updates'.
When the scan is completed, the 'Pick updates to install' window will appear.
3. Select the updates to install and click 'Review and install updates'.
The 'Total Selected Updates'
4. Click 'Install now' to install the selected updates.
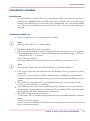
How to install Internet Information Server
1. Click 'Start'- 'Programs' - 'Administrative Tools' - 'Manage Your Server'.
The 'Manage Your Server' dialog will appear.
2. Click 'Add or remove a role'.
The 'Configure Your Server Wizard' dialog will appear.
3. Click 'Next' to continue.
The Server Role overview will appear.
4. Select 'Application server (IIS, ASP.NET) and click 'Next'.
The 'Application Server Options' overview will appear.
5. Select 'Enable ASP.NET' and click 'Next'.
The 'Summary of Selections' overview will appear.
6. Click 'Next' to continue.
Chapter 4 - Server preparation and installation
39
Installing Required Components
To install the selected options, the MS Windows 2003 CD-ROM may be required.
When the installation is completed, the 'This Server is Now an Application Server' dialog
appears.
7. Click 'Finish' to complete the installation.
40
Chapter 4 - Server preparation and installation
Installation checklist
Installation checklist
Introduction
Use this checklist to validate the server environment and the server that you will use to
install the Océ PRISMAsatellite for Office software on. This list cannot cover all requirements but should help you prevent some of the problems that may occur during installation. The current installation procedure will not be able to detect all requirements automatically.
Installation check List
1. The recent Windows 2003 updates must be installed.
Note:
Make sure that .NET V2.0 is not installed.
2. IIS, FAX and ASP.NET must be installed.
3. If IIS was already installed, it may be possible that the 'anonymous' user is not allowed.
Click 'Administrative Tools' in 'Internet Information Service (IIS) Manager' - 'Web Sites'
- 'Default Web Site' - ' Properties'.
Select 'Directory Security'.
Edit the 'Authentication and access control' and enable the 'anonymous' access.
Note:
Note that the default value after IIS installation is: 'Anonymous allowed'.
4. It may occur (in secured environments) that the Windows 'Guest' group has no permissions at all.
In this case, the two IIS users (IUSR_<machinename> and IWAM_<machinename>)
should be included in the Windows 'users' group and removed from the Windows 'Guest'
group.
5. The 'COM+ system application' service should not have the start-up type 'Disable'.
It must be either 'Manual' or 'Automatic'.
6. The installation procedure must be performed using a 'Domain user' account that has
'Administrator' permissions on the local system. The user which will be used at the installation window also needs 'Administrator' permissions.
7. The DNS configuration must be correct.
To check that, start a command prompt and execute the command 'nslookup <machinename>'.
The result is the IP address.
Execute the same command with the IP address instead of the machine name, the result
must be the machine name.
Chapter 4 - Server preparation and installation
41
Installation checklist
Try again with the command PING.
In each case, the correct IP address or machine name must be returned.
Contact the Network Administrator in case of other results.
8. The Port 80 (IIS) and 445 (SOAP) must be available and should not be blocked by a
firewall.
9. Since it is not possible yet to 'upgrade' the server installation, after a Océ PRISMAsatellite
for Office un-install, it may be good to clean the path '<InstallPSAT_Program_Dir>/PRISMAsatellite'.
In the same way, on IIS, the Océ PRISMAsatellite for Office folder must be suppressed
too on the 'Default Web Site' folder .
10. On the 'Local area network LAN settings' ('Internet Explorer' - 'Tools' - 'Internet options'
- 'Connection' - 'LAN Settings'), the property 'Bypass Proxy server for local address' must
be set to allow Reports from the Administrator Console.
42
Chapter 4 - Server preparation and installation
Creating and Configure the PSAT4office User
Creating and Configure the PSAT4office User
Introduction
Before you install Océ PRISMAsatellite for Office on the server you are advised to create
a Domain User called 'PSAT4office'. This user should be able to access resources on the
Windows Domain.
Use this 'PSAT4office' user while you install the Océ PRISMAsatellite for Office software
on the server when the 'Windows Domain' and 'Windows user name' is required.
The 'PSAT4office' user will be used to:
■ Start the 'Océ JDF Framework service'.
■ Perform User Management for importing users from directory service (via LDAP).
■ Use existing Windows print services.
Create and configure the PSAT4office user
1. Add the 'PSAT4office' user to the local admin group of the Océ PRISMAsatellite for
Office server.
2. Add it to the security list at the root of the domain with read access.
[6] PSAT4office User
Chapter 4 - Server preparation and installation
43
Install the Windows 2003 fax and FTP service
Install the Windows 2003 fax and FTP service
Introduction
Fax devices are any devices used to send a document to another location via a phone line
or dial-up modem connection. Fax devices typically print a document once it is received,
although fax cards in computers store received faxes as files. When fax devices are selected
as output devices, files are sent through the system to another fax machine or computer
with a fax card.
Fax Distribution is included in Océ PRISMAsatellite for Office. It allows the client
workstation to access fax output functions from the Océ PRISMAsatellite for Office
driver interface and allows fax modems to be defined as fax output devices on the Océ
PRISMAsatellite for Office server.
Fax distribution provides the following features:
■ Single and broadcast faxing
■ Fax transmissions in normal and fine modes
■ Time and date scheduling
■ Supports a wide range of fax modems (including 1.0, 2, and 2.0 Class modems) and
various multifunction devices
■ Automatic generation of fax cover pages
To be able to receive scanned images from your Océ printers you need to configure the
FTP service.
How to install the Windows 2003 fax service
1. Click 'Start' - 'Settings' - Control Panel'.
2. Click 'Add or remove programs'.
44
Chapter 4 - Server preparation and installation
Install the Windows 2003 fax and FTP service
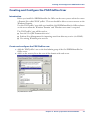
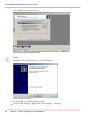
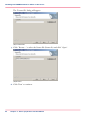
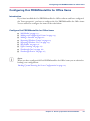
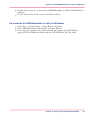
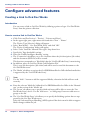
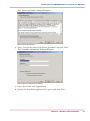
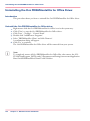
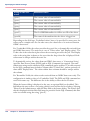
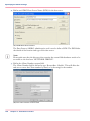
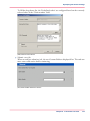
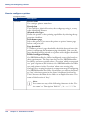
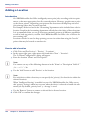
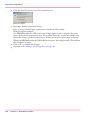
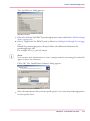
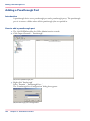
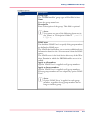
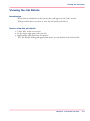
3. Click 'Add/remove Windows components'.
[7] Add/remove Windows components
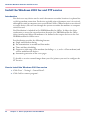
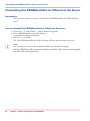
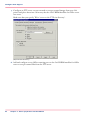
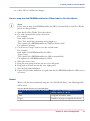
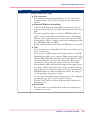
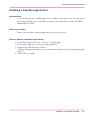
The 'Windows components wizard' dialog will appear.
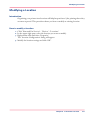
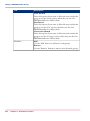
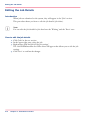
[8] Windows components wizard
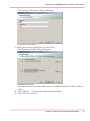
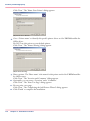
4. Select 'Fax services' and 'FTP service' (Application server - IIS).
5. Click 'Next'.
6. Select 'Do not share the fax printer' and click 'Next'.
Chapter 4 - Server preparation and installation
45
Install the Windows 2003 fax and FTP service
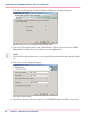
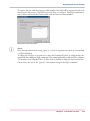
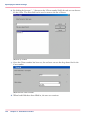
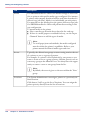
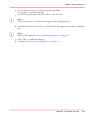
The installation process will start.
[9] Insert the Windows 2003 CD-ROM
Note:
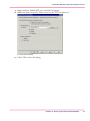
You may need your Windows 2003 CD-ROM here.
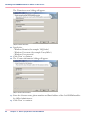
[10] Finish the procedure
7. Click 'Finish' to complete this procedure.
8. Start the 'IIS Manager' (Right-click 'My computer' - 'Manage').
46
Chapter 4 - Server preparation and installation
Install the Windows 2003 fax and FTP service
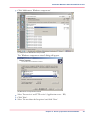
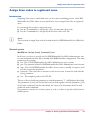
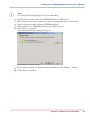
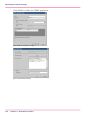
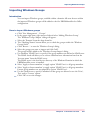
9. Right-click the 'Default FTP site' and click 'Properties'.
10. Make sure that you specify 'Write' access to the 'FTP site directory'.
[11] FTP site directory
11. Click 'OK' to close the dialog.
Chapter 4 - Server preparation and installation
47
Installing Océ PRISMAsatellite for Office on the Server
Install and configure the server software
Installing Océ PRISMAsatellite for Office on the Server
Introduction
Wherever possible, Océ PRISMAsatellite for Office should be installed on a dedicated
Windows 2003 server. It is recommended that you perform a fresh installation of Windows
2003 Server to guarantee that the required services and options have been correctly installed. If you need to prepare your Server for installation, see the previous section.
Before you begin
Before you install the Océ PRISMAsatellite for Office software on your server you should
have the following items and information available:
■ The Océ PRISMAsatellite for Office CD-ROM.
■ A user account with administrator privileges (if needed, your Network Administrator
can designate a special user account with administrator privileges.
■ Network addresses and queue names of the printers that will be controlled by the
server.
■ A domain user account with sufficient privileges to access resources, for example
''Psat4office'. This user account should have access to user account definitions for the
Océ PRISMAsatellite for Office user management (should be a member of the local
admin group).
■ The Océ PRISMAsatellite for Office license file.
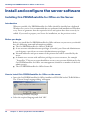
How to install Océ PRISMAsatellite for Office on the server
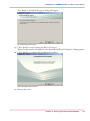
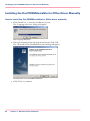
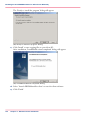
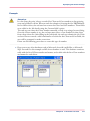
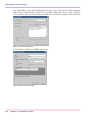
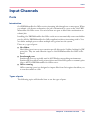
1. Insert the Océ PRISMAsatellite for Office installation CD-ROM in the CD-ROM drive.
The 'Choose Setup Language dialog' will appear
[12] Choosing the Setup Language
2. Select the required language and click 'OK'.
48
Chapter 4 - Server preparation and installation
Installing Océ PRISMAsatellite for Office on the Server
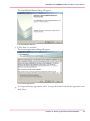
The InstallShield Wizard dialog will appear.
[13] InstallShield Wizard
3. Click 'Next' to continue.
The License Agreement dialog will appear.
[14] License Agreement
4. To accept the license agreement, select 'I accept the terms in the license agreement' and
click 'Next'.
Chapter 4 - Server preparation and installation
49
Installing Océ PRISMAsatellite for Office on the Server
The 'License file' dialog will appear
[15] License File
5. Click ' Browse...' to select the license file (license.lic) and click ' Open'.
[16] Screen
6. Click 'Next' to continue.
50
Chapter 4 - Server preparation and installation
Installing Océ PRISMAsatellite for Office on the Server
The 'Customer Information' dialog will appear
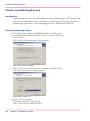
[17] Customer Information
7. Fill in the customer information and click 'Next'.
The 'Destination Folder' dialog will appear.
[18] Destination Folder
The destination location is the folder where Océ PRISMAsatellite for Office will be installed.
8. Click 'Change....' to change the default installation folder.
9. Click 'Next' to continue.
Chapter 4 - Server preparation and installation
51
Installing Océ PRISMAsatellite for Office on the Server
The 'Domain account' dialog will appear.
[19] Domain Account
10. Specify the:
- Windows Domain (for example ' HQVenlo')
- Windows User name (for example 'Psat4Office' )
- Windows User password
11. Click 'Next' to continue.
12. The 'Contact information' dialog will appear.
[20] Contact Information
13. Enter the Contact name, phone number and Email address of the Océ PRISMAsatellite
for Office Administrator.
14. Click 'Next' to continue.
52
Chapter 4 - Server preparation and installation
Installing Océ PRISMAsatellite for Office on the Server
The 'Ready to Install the Program' dialog will appear.
[21] Installing the Program
15. Click 'Install' to start copying the files to the server.
When the file transfer is completed, the 'InstallShield Wizard Complete' dialog appears.
16. Click 'Finish' to complete the installation procedure.
[22] Finishing the Procedure
17. Restart the server.
Chapter 4 - Server preparation and installation
53
Configure server properties
Configure server properties
Introduction
The 'General' tab shows information about your Océ PRISMAsatellite for Office configuration, such as product name, version and language. It also shows you more information
about the type and expiration date of your license.
The 'Reports' dialog allows you to specify general server settings.
Right mouse-click the Océ PRISMAsatellite for Office server in the tree section.
Click 'Properties' to start the 'Reports' dialog.
Note:
You are advised to install the (optional) OCR software before you create the link between
the Océ PRISMAsatellite for Office server and the OCR software. When you create this
link, all end-users will be able to click the 'OCR Conversion' button from their 'Personal
Document Space'.
Server properties
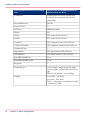
The following server properties are available:
■ General
■ Licensing
■ Jobs
■ Documents
■ Email
■ Services
■ Clients
54
Chapter 4 - Server preparation and installation
Configuring Océ PRISMAsatellite for Office Items
Configuring Océ PRISMAsatellite for Office Items
Introduction
If you have installed the Océ PRISMAsatellite for Office software and have configured
the 'Server properties', you have to configure the Océ PRISMAsatellite for Office items.
You are advised to configure the items in the order below:
Configure Océ PRISMAsatellite for Office items
■
■
■
■
■
■
■
■
■
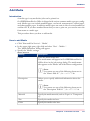
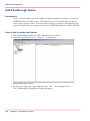
‘Add Media’ on page 137
‘Adding and Configuring a Printer’ on page 145
‘Adding a Location’ on page 160
‘Importing Windows Groups’ on page 205
‘Importing Windows Users’ on page 197
‘Hot Folders’ on page 176
‘Office Scanning’ on page 187
‘Passthrough Ports’ on page 181
‘Passthrough Devices’ on page 165
Note:
When you have configured all Océ PRISMAsatellite for Office items you are advised to
backup your configuration:
‘Backing Up and Restoring the Server Configuration’ on page 107
Chapter 4 - Server preparation and installation
55
Uninstalling Océ PRISMAsatellite for Office from the Server
Uninstalling Océ PRISMAsatellite for Office from the Server
Introduction
This procedure shows you how to uninstall Océ PRISMAsatellite for Office from the
server.
How to uninstall Océ PRISMAsatellite for Office from the server
1. Click 'Start' - 'Control Panel' - 'Add or Remove Programs'.
2. Select 'PRISMAsatellite' and click 'Remove'.
A confirmation dialog will appear.
3. Click 'Yes' to continue.
The Océ PRISMAsatellite for Office software will be removed from your server.
Note:
You are advised to remove the installation folder (by default C:\Program
Files\Oce\PRISMAsatellite) and the data folder (by default C:\Documents and Settings\All
users\Start Menu\Programs\Oce).
56
Chapter 4 - Server preparation and installation
Upgrading Océ PRISMAsatellite for Office on the Server
Upgrading Océ PRISMAsatellite for Office on the Server
Introduction
The procedure shows you how to upgrade an Océ PRISMAsatellite for Office server.
First you have to uninstall the prior version. After that you have to install the new version
using the same paths.
Note:
Please don't manually remove any files from the server.
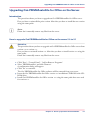
How to upgrade Océ PRISMAsatellite for Office on the server 2.0 to 2.1
Attention:
The procedure shows you how to upgrade an Océ PRISMAsatellite for Office server from
version 2.0 to version 2.1.
First you have to uninstall version 2.0. After that you have to install version 2.1 using the
same paths.
Please don't manually remove any files from the server.
1. Click 'Start' - 'Control Panel' - 'Add or Remove Programs'.
2. Select 'PRISMAsatellite' and click 'Remove'.
A confirmation dialog will appear.
3. Click 'Yes' to continue.
The Océ PRISMAsatellite for Office software will be removed from your server.
4. Insert the Océ PRISMAsatellite for Office version 2.1 installation CD-ROM in the CDROM drive.
5. Install Océ PRISMAsatellite for Office version 2.1 using the same paths that were used
for version 2.0.
Chapter 4 - Server preparation and installation
57
Install the Océ PRISMAsatellite for Office OCR Module
Install the Océ PRISMAsatellite for Office OCR Module
Introduction
You are advised to install the OCR module on another computer (MS Windows XP or
MS Windows 2003 server). The OCR conversion is a time and resources consuming
process that can affect the overall performance of the Océ PRISMAsatellite for Office
server (when installed on the same server).
The Océ PRISMAsatellite for Office OCR Module installation is available on the Océ
PRISMAsatellite for Office CD-ROM.
Note:
You are advised to install the OCR software before you create the link between the Océ
PRISMAsatellite for Office server and the OCR software. When you create this link, all
end-users will be able to click the 'OCR Conversion' button from their 'Personal Document Space'.
Before you begin
Prerequisites
■ MS Windows 2003 server / MS Windows XP service pack 2.
■ ASP .NET support.
■ .NET Framework 1.1.
■ IIS on MS Windows 2003 server or MS Windows XP.
■ Please make sure that the Océ PRISMAsatellite for Office server (with which the OCR
module is interacting) has been started.
■ Port '80' has to be opened manually in the firewall.
Note
For MS Windows XP SP2, the port '80' must be open in order to prevent a Firewall
access denied. Use the Firewall configuration to configure this.
■ The system must be clean of any previous installation of the Océ PRISMAsatellite for
Office OCR Module.
■ When you install the OCR Module you need the following information:
- A destination folder for the Program Files <INSTALLProgram_PATH> and
- For transient processed files <INSTALLData_PATH
Install the Océ PRISMAsatellite for Office OCR Module
1. Enter the Océ PRISMAsatellite for Office CD-ROM.
2. Cancel the installation of the server.
3. Browse the CD-ROM and open the “PRISMAsatellite OCR Module” folder.
58
Chapter 4 - Server preparation and installation
Install the Océ PRISMAsatellite for Office OCR Module
4. Double-click 'Setup.exe' to start the Océ PRISMAsatellite for Office OCR Module installation.
5. Use the instructions on the screen to install the software.
Un-install the Océ PRISMAsatellite for Office OCR Module
1. Click 'Start' - 'Control Panel' - 'Add or Remove Programs'.
2. Select 'PRISMAsatellite OCR Module' and click 'Remove'.
3. If you want your machine for a clean re-install, also remove the <INSTALLProgram_PATH>\OCRModule folder and the <INSTALLData_PATH> folder.
Chapter 4 - Server preparation and installation
59
Install the Océ PRISMAsatellite for Office Job template editor
Install the Océ PRISMAsatellite for Office Job template editor
Introduction
The Océ PRISMAsatellite for Office Job template editor installation is available on the
Océ PRISMAsatellite for Office CD-ROM.
Note:
You are advised to install the Océ PRISMAsatellite for Office Job template editor software
after you have installed the Océ PRISMAsatellite for Office server software.
Before you begin
■
■
The system must be clean of any previous installation of the Océ PRISMAsatellite for
Office Job template editor.
When you install the Océ PRISMAsatellite for Office Job template editor you need
the following information:
- A destination folder for the Program Files <INSTALLProgram_PATH>.
Install the Océ PRISMAsatellite for Office Job template editor
Enter the Océ PRISMAsatellite for Office CD-ROM.
Cancel the installation of the server.
Browse the CD-ROM and open the “PRISMAsatellite Template Editor” folder.
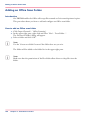
Double-click 'Setup.exe' to start the Océ PRISMAsatellite for Office Job template editor
installation.
5. Use the instructions on the screen to install the software.
1.
2.
3.
4.
Un-install the Océ PRISMAsatellite for Office Job template editor
1. Click 'Start' - 'Control Panel' - 'Add or Remove Programs'.
2. Select 'PRISMAsatellite Template Editor' and click 'Remove'.
3. If you want your machine for a clean re-install, also remove the '<INSTALLProgram_PATH>\TemplateEditor' folder.
Note:
You are advised to un-install the Océ PRISMAsatellite for Office Job template editor
software before you un-install the Océ PRISMAsatellite for Office server software.
60
Chapter 4 - Server preparation and installation
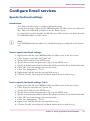
Specify the Email settings
Configure Email services
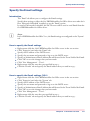
Specify the Email settings
Introduction
The 'Email' tab allows you to configure the Email settings.
Specify these settings to allow the Océ PRISMAsatellite for Office driver users who don't
have 'Microsoft Outlook®' installed, to use the 'Email' option.
In stead of 'Microsoft Outlook®' the SMTP server will be used to send Email from the
Océ PRISMAsatellite for Office driver.
Note:
In Océ PRISMAsatellite for Office V2.0, the Email settings are configured on the 'System'
tab.
How to specify the Email settings
1.
2.
3.
4.
5.
6.
7.
8.
9.
Right mouse-click the Océ PRISMAsatellite for Office server in the tree section.
Click 'Properties' and select the 'Email' tab.
Specify the IP address of the SMTP server.
Specify the user name and password to log on to the SMTP server.
Specify an 'Administrator Email' address that will be used in the 'From' field of the Email.
Click 'OK' to save the changes that you have made.
Click 'User Management' - 'Users'.
Right mouse-click the user that you specified in step 5.
Click the 'Details' tab and specify the Email address that you used in step 5.
How to specify the Email settings (V2.0)
1.
2.
3.
4.
5.
6.
7.
8.
9.
Right mouse-click the Océ PRISMAsatellite for Office server in the tree section.
Click 'Properties' and select the 'System' tab.
Specify the IP address of the SMTP server.
Specify the user name and password to log on to the SMTP server.
Specify an 'Administrator Email' address that will be used in the 'From' field of the Email.
Click 'OK' to save the changes that you have made.
Click 'User Management' - 'Users'.
Right mouse-click the user that you specified in step 5.
Click the 'Details' tab and specify the Email address that you used in step 5.
Chapter 4 - Server preparation and installation
61
Native Fax Support on the Océ PRISMAsatellite for Office Server
Configure Fax services
Native Fax Support on the Océ PRISMAsatellite for Office
Server
Fax support
Océ PRISMAsatellite for Office is supporting Océ MFD devices with Fax options. To
add and configure a fax device, please use the same procedure as for printing devices
within the Administration console. For fax devices, the fax capabilities need to be set
along with the print capabilities in the device specific tab of the 'Device Configuration'
dialog.
Note:
Please note that, by default, groups of users are not allowed to fax. To allow them to
fax, click 'Océ PRISMAsatellite for Office Administration' - 'User Management' 'Groups'. Right click the group that you want to allow faxing and click 'Properties'. Select
the 'Enable Fax Section' option.
62
Chapter 4 - Server preparation and installation
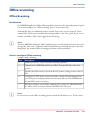
Configure Scan Support
Configure Scan services
Configure Scan Support
Introduction
Océ PRISMAsatellite for Office will accept files scanned on Océ network printers/copiers.
Create and configure an 'Office scanning' port to receive these files.
Scanned files that are submitted with an invalid 'Scan code' are not accepted. These
scanned files will be removed from the Office scanning folder.
Note:
When files are removed from an Office scanning folder, this is logged in the Event log.
How to configure scanning support
1. Make sure that the Océ printer has scanning capability.
2. Create an Océ PRISMAsatellite for Office 'Scan profile' file.
Use the following settings for the 'Scan profile':
- Name : PRISMAsatellite on <servername>
- Format: PDF
- Resolution: 600dpi or 300dpi
- Application: PSATSCAN
- Max Digits: 8
- Min Digits: 1
- Instruction: Enter your scan code
- Confirm: Yes
Note:
Please refer to the engine's documentation on how to create a 'Scan profile'.
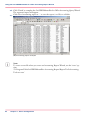
3. Identify the folder on the server that the Océ printer is using to store scanned files.
4. Specify the 'Server' settings:
- The Host name or IP address of the Océ PRISMAsatellite for Office server.
- The user name used to log on to the Océ PRISMAsatellite for Office server. Use the
'PSAT4office' user for this.
- The Destination folder is the location where the scan files will be stored.
- The Password for the 'PSAT4office' account.
Chapter 4 - Server preparation and installation
63
Configure Scan Support
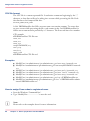
5. Configure an FTP server on your network to accept scanned images from your Océ
printer and place them into a directory that the Océ PRISMAsatellite for Office server
can access.
Make sure that you specify 'Write' access to the 'FTP site directory'.
[23] FTP Site Directory
6. Add and configure a new Office scanning port on the Océ PRISMAsatellite for Office
server to accept scanned files from the FTP server.
64
Chapter 4 - Server preparation and installation
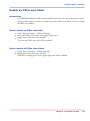
Assign Scan codes to registered users
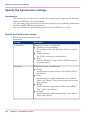
Assign Scan codes to registered users
Introduction
Assigning Scan codes to individual users can be a time-consuming process. Océ PRISMAsatellite for Office offers an easy (batchwise) way to assign Scan codes to registered
users.
You can assign Scan codes to registered users:
■ Use the 'Command line' and specify a User account and a Scan code.
■ Use the 'Command line' and specify the location of the CSV file.
Note:
The tool used to assign Scan codes is located in the Océ PRISMAsatellite for Office\bin
folder.
General syntax
ModifyUser /un /pw [/user] [/scancode] [/csv]
In all cases, you have to provide an Océ PRISMAsatellite for Office Administrator user
account and password to be able to modify the PRISMAsatellite configuration. The other
parameters are optional.
■ /un : The Océ PRISMAsatellite for Office Administrator user account.
■ /pw : The password of the Océ PRISMAsatellite for Office Administrator user account.
■ /user : The Océ PRISMAsatellite for Office user account to modify. It must be used
with the [/scancode] parameter.
■ /scancode : The scan code to associate to the user account. It must be used with the
[/user] parameter.
■ /csv : The complete path to the CSV file.
The use of the tool without parameter or with the parameter “/?” will display a short help.
The parameters [/user] and [/scancode] can’t be used together with the parameter [/csv]
in the same command. On the other hand, the [/user] and [/scancode] must be used
within the same command.
If a parameter contains one or more spaces or a ‘&’, you have to put the value between
double quotes.
Chapter 4 - Server preparation and installation
65
Assign Scan codes to registered users
CSV file format
The CSV file is a comma separated file. It authorizes comments beginning by the “;”
character so these lines will not be taking into account while processing the file. Each
data line has to be formatted like this:
account_name,scan_code
A Océ PRISMAsatellite for Office account name can contain commas. To ensure that
no error occurs while processing the file, each comma in the Océ PRISMAsatellite for
Office user account must be preceded by a ‘\’ character. The Scan code has to be a number.
CSV example
#PRISMAsatellite CSV file start
user1,100
user2,101
user3,102
user4@DOMAIN,103
user'5,104
user 6,105
user\,7,106
#PRISMAsatellite CSV file end
Examples
■
■
■
■
■
■
■
ModifyUser /un administrator /pw administrator_pw /user user1 /scancode 100
ModifyUser /un administrator /pw administrator_pw /user user4@DOMAIN /scancode
103
ModifyUser /un administrator /pw administrator_pw /user user’5 /scancode 104
ModifyUser /un administrator /pw administrator_pw /user “user 6” /scancode 105
ModifyUser /un administrator /pw administrator_pw /user user,7 /scancode 106
ModifyUser /un administrator /pw administrator_pw /csv c:\PRISMAsatellite.csv
ModifyUser /un administrator /pw administrator_pw /csv “c:\PRISMAsatellite administrator\PRISMAsatellite.csv”
How to assign Scan codes to registered users
1. Start the Windows 'Command line'.
2. Type 'ModifyUser ....................' to start the tool.
Note:
Please refer to the examples above for more information.
66
Chapter 4 - Server preparation and installation
Assign Scan codes to registered users
Result
Possible errors
■ Logon error due to a wrong Océ PRISMAsatellite for Office Administrator user account
/ password.
■ The logged user on is not a Océ PRISMAsatellite for Office Administrator.
■ The user account to modify does not exist.
■ The CSV file does not exist.
■ There is an encoding error in the CSV file.
Chapter 4 - Server preparation and installation
67
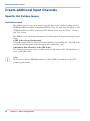
Use the Océ PRISMAsatellite for Office Scan-to-file features
Use the Océ PRISMAsatellite for Office Scan-to-file features
Introduction
Océ PRISMAsatellite for Office will accept files scanned on Océ network printers/copiers.
Create and configure an 'Office scanning' port to receive these files.
Scanned files that are submitted with an invalid 'Scan code' are not accepted. These
scanned files will be removed from the Office scanning folder.
Note:
When files are removed from an Office scanning folder, this is logged in the Event log.
Before you begin
In order to use the 'Office scanning' function with Océ PRISMAsatellite for Office, each
end-user should request a 'Scan Code' from the Océ PRISMAsatellite for Office administrator.
This code is displayed, if available, by the Océ PRISMAsatellite for Office client, in the
'Personal Document Space' title bar.
How to use Océ PRISMAsatellite for Office Scan-to-file features
1. Scan a document on an Océ PRISMAsatellite for Office printer/scanner and use the Océ
PRISMAsatellite for Office 'scan profile'.
2. Use the assigned 'Scan Code' when asked for by the Océ PRISMAsatellite for Office
printer/scanner.
The scanned document (PDF file) will become available on your 'Personal Document
Space'.
68
Chapter 4 - Server preparation and installation
Chapter 5
Server Configuration
Overview
Overview
Introduction
This chapter explains on a component level how to implement your plan. To properly
implement your site strategy, follow these general steps:
■ Configure the server system properties.
■ Create and test print devices.
■ Create and populate locations.
■ Establish relationships between devices within the location and test relationships.
■ Special preparations for using Océ PRISMAsatellite for Office clients.
Configuration
After completing the steps for implementing a site strategy, Océ PRISMAsatellite for
Office software should be set up for the users for detailed information and procedures.
The following procedures provide instructions for the tasks listed above.
70
Chapter 5 - Server Configuration
Configure the personal document space
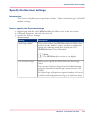
Configure server system properties
Configure the personal document space
Introduction
The 'Documents' tab allows you to specify the default documents location. You can also
set the maximum number and total size of documents on an Océ PRISMAsatellite for
Office end-user's 'Personal Document Space'.
How to configure the Personal document space
1. Right mouse-click the Océ PRISMAsatellite for Office server in the tree section.
2. Click 'Properties' and select the 'Documents' tab.
3. Use the 'Documents Folder' option to specify the default location of the documents.
Note:
Please note that changing this location afterwards will not copy existing documents to
the new location. The new location will be used for new converted documents.
4. Specify the 'Maximum number of documents'.
5. Specify the 'Maximum allowed disk space' for all documents on a Océ PRISMAsatellite
for Office end-user's 'Personal Document Space'.
6. Click 'OK' to save the changes that you have made.
Chapter 5 - Server Configuration
71
Configuring Archiving
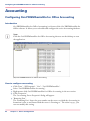
Configuring Archiving
Introduction
The 'Services' tab allows you to specify the Archive settings.
When you configure the 'Archive' option on the Océ PRISMAsatellite for Officeserver,
Océ PRISMAsatellite for Office users can archive documents from their 'Personal document space'. The 'Archive' option will start 'PRISMAarchive'. Before the documents are
archived, end-users have to specify the index attributes.
Note:
Please note that Océ PRISMAsatellite for Office does not provide any options to search
or retrieve archived documents. Use the 'PRISMAarchive' web interface for these actions.
How to configure archiving
1. Right mouse-click the Océ PRISMAsatellite for Office server in the tree section.
2. Click 'Properties' and select the 'Services' tab.
3. Enable option 'Archiving enabled' and define the 'Océ PRISMAarchive' server name
here.
72
Chapter 5 - Server Configuration
Configuring and Testing Locations and Printers
Create and populate device locations
Configuring and Testing Locations and Printers
Introduction
When end users print to Océ PRISMAsatellite for Office, they want to print to convenient
printers most of the time, until they have a job with special requirements. Then they
want this job completed quickly and on the most effective printer. Carefully planned
'locations' allow Océ PRISMAsatellite for Office not only to auto-route jobs and balance
workloads, but also to print jobs at a location convenient to end users.
Locations should contain printers with different capabilities as well as back-up printers
to handle work overflow. In order to best utilize all existing equipment, the back-up
printers may be the primary printers in a different location by making copies of the
printers.
Locations group a specific set of printers together for Océ PRISMAsatellite for Office to
use when auto-routing jobs. These printers should be conveniently located to end users.
Locations are chosen in the client’s 'Location' field, and their 'Printer' must in turn be
one of the printers in their locations.
How to configure and test locations and printers
1. Create devices.
For more information refer to the 'Printers' section.
2. Create a location.
3. Use the 'Devices in this location' section to add devices to that location.
4. Use the Océ PRISMAsatellite for Office driver and select the specific location.
5. Submit some jobs with multiple job settings and check whether the printers within that
location can process your jobs.
Chapter 5 - Server Configuration
73
Creating a Link to Océ Doc Works
Configure advanced features
Creating a Link to Océ Doc Works
Introduction
You can create a link to Océ Doc Works by defining a printer of type 'Océ DocWorks
Proxy' from the printer collection.
How to create a link to Océ Doc Works
1. Click 'Print and Fax Services' - 'Devices' - 'Printers and Faxes'.
2. In the upper-right pane, right mouse-click and select 'New' - 'Printer'.
The 'Device Type Selection' dialog will appear.
3. Select 'Base Model' - 'Oce DocWorks Proxy' and click 'OK'.
The 'Device Configuration' dialog will appear.
4. Select 'Color' from the 'Allowed color types' drop-down box.
5. Specify the 'Page thresholds' settings.
6. Select the 'Enable Intelligent Routing' setting.
7. The 'Connection' tab allows you to set a location where the job description (Job ticket)
and the document (PDF file) will be created.
This location corresponds to a 'Hot folder' that the 'Océ DocWorks Proxy' is monitoring.
8. In addition, select an Océ Doc Works 'Job Definition File'.
This is your Job description (Job ticket) and will be used to send the document to the
Océ DocWorks server.
9. The 'Media' tab allows to register the Océ PRISMAsatellite for Office defined media that
is supported by the 'Océ DocWorks Proxy'.
Note:
Use the 'Add...' button to add the supported Media, otherwise the link will not work
correctly.
10. Enter the relevant 'Media list' defined in Océ PRISMAsatellite for Office in the 'Manual
tray' on the section of the 'Media' tab.
11. The 'Access' tab allows you to specify which end-users will be able to access the 'Oce
DocWorks Proxy' device. Use the 'Add users...' or 'Add groups' button to add users or
groups to the list.
12. The 'Océ DocWorks Proxy' tab allows you to specify the finishing options that are supported by the Océ Doc Works server.
Select the 'Advanced Paper Handling' (APH) option if the device must be able to support
Media changes within the job.
74
Chapter 5 - Server Configuration
Creating a Link to Océ Doc Works
13. Click 'OK' to confirm the changes.
How to map the Océ PRISMAsatellite for Office ticket to Océ Doc Works
Note:
If you want to map Océ PRISMAsatellite for Office Custom fields to Océ Doc Works,
please use this procedure
1. Start the Océ Doc Works 'Job ticket editor'.
2. For each Custom field, create a new item.
For example:
Item name: Custom1
Type: Text, multi line, maximum string length 255
Tree caption: Océ PRISMAsatellite for Office Custom1 field
List caption: Custom1
3. Create a new 'Group' item to store the created items.
For example:
Item name: Océ PRISMAsatellite for Office
Type: Group
Tree caption: Océ PRISMAsatellite for Office custom fields
List caption: Océ PRISMAsatellite for Office
4. Select the correct view.
5. Drag the new group item into the tree view (left pane).
6. Drag each new item into the list view (right pane).
7. Save the Job ticket definition.
8. Export the Job ticket definition to a path that the Océ PRISMAsatellite for Office server
can access.
Result
When a job has been submitted using the 'Oce DocWorks Proxy', the following fields
will be used:
Océ Doc Works version 3.5 Job ticket fields#
Océ Doc Works version 3.5 Job ticket
field
Value set by Océ PRISMAsatellite for
Office version 2.1 & 2.2
Title
Original document name
Pages
Number of pages in original document
Chapter 5 - Server Configuration
75
Creating a Link to Océ Doc Works
76
Océ Doc Works version 3.5 Job ticket
field
Value set by Océ PRISMAsatellite for
Office version 2.1 & 2.2
Comments
A description of various options that
could not be completely specified by
other fields.
ExternalReference
Job ID
ClientVersion
1.2
JobSource
PRISMAsatellite
Model
EC
Owner
The name of the end user
Author
The name of the end user
Company
The company name of the end user
TelephoneNumber
The telephone number of the end user
ComputerName
?
Department
The department of the end user
EmailAddress
The Email address of the end user
EmailWhenJobReady
True
EmailWhenJobReceived
True
Recipient
?
FinishingType
one032staple - single upper left staple
two032staples - upper and lower left staples
Wire045O045Bind - wire binding
Drilling
2032holes - two holes
4032hole - four holes
Other - other hole count indicated in the
' Comments' field
Chapter 5 - Server Configuration
Creating a Link to Océ Doc Works
Océ Doc Works version 3.5 Job ticket
field
Value set by Océ PRISMAsatellite for
Office version 2.1 & 2.2
PageProgram
A description of the media changes, unprinted inserts and printed covers.
Note:
This field does not exist in the
default Océ Doc Works Job
ticket definition. You can add
this field using the Océ Doc
Works Job ticket editor.
Copies
Number of copies
Duplex
False - 1-sided printing
True - 2-sided printing, duplex edge in
the 'Comments' field
DocumentMediaSize
Media size, or 'Other' for other Media
size indicated in the 'Comments' field.
The following values are available:
■ A0
■ A1
■ A2
■ A3
■ A4
■ A5
■ B4
■ B5
■ Letter
■ Legal
■ Ledger
■ Foolscap
■ Executive
■ Statement
■ Folio
■ Quarto
■ Monarch
■ LegalSmall
Chapter 5 - Server Configuration
77
Creating a Link to Océ Doc Works
78
Océ Doc Works version 3.5 Job ticket
field
Value set by Océ PRISMAsatellite for
Office version 2.1 & 2.2
DocumentMediaWeight
Media weight or 'Other' for other Media
weight indicated in the 'Comments' field.
The following values are available:
■ 65032gram047m2
■ 80032gram047m2
■ 120032gram047m2
■ 170032gram047m2
DocumentMediaColor
Media color, or 'Other' for other media
color indicated in the 'Comments' field.
DocumentMediaType
Paper - index or bond paper
Transparent - transparency
Other - other media type indicated in the
'Comments' field
CoverMediaSize
Media size or 'Other' for other Media size
indicated in the 'Comments' field.
The following values are available:
■ A0
■ A1
■ A2
■ A3
■ A4
■ A5
■ B4
■ B5
■ Letter
■ Legal
■ Ledger
■ Foolscap
■ Executive
■ Statement
■ Folio
■ Quarto
■ Monarch
■ LegalSmall
Chapter 5 - Server Configuration
Creating a Link to Océ Doc Works
Océ Doc Works version 3.5 Job ticket
field
Value set by Océ PRISMAsatellite for
Office version 2.1 & 2.2
CoverMediaWeight
Media weight or 'Other' for other Media
weight indicated in the 'Comments' field.
The following values are available:
■ 65032gram047m2
■ 80032gram047m2
■ 120032gram047m2
■ 170032gram047m2
CoverMediaColor
Media color, or 'Other' for other media
color indicated in the 'Comments' field.
CoverMediaType
Paper - index or bond paper
Transparent - transparency
Other - other media type indicated in the
'Comments' field
FailedMappings
All values that could not be set because
the Océ Doc Works field did not exist in
the Job Ticket Definition. If this field is
not defined, the information is simply
lost.
Note:
This field does not exist in the
default Océ Doc Works Job
ticket definition. You can add
this field using the Océ Doc
Works Job ticket editor.
Océ Doc Works version 3.6 Job ticket fields#
Océ Doc Works version 3.6 Job ticket
field
Value set by Océ PRISMAsatellite for
Office version 2.2
Title
Original document name
Pages
Number of pages in original document
Comments
A description of various options that
could not be completely specified by
other fields.
ExternalReference
Job ID
ClientVersion
1.2
Chapter 5 - Server Configuration
79
Creating a Link to Océ Doc Works
Océ Doc Works version 3.6 Job ticket
field
Value set by Océ PRISMAsatellite for
Office version 2.2
JobSource
PRISMAsatellite
Model
EC
First name
The first name of the end user
Owner
The last name of the end user
Author
The first and last names of the end user
Company
The company name of the end user
TelephoneNumber
The telephone number of the end user
ComputerName
?
Department
The department of the end user
EmailAddress
The Email address of the end user
EmailWhenJobReady
True
EmailWhenJobReceived
True
Recipient
?
FinishingType
one032staple - single upper left staple
two032staples - upper and lower left staples
Wire045O045Bind - wire binding
Drilling
2032holes - two holes
4032hole - four holes
Other - other hole count indicated in the
' Comments' field
PageProgram
A description of the media changes, unprinted inserts and printed covers.
Note:
This field does not exist in the
default Océ Doc Works Job
ticket definition. You can add
this field using the Océ Doc
Works Job ticket editor.
Copies
80
Chapter 5 - Server Configuration
Number of copies
Creating a Link to Océ Doc Works
Océ Doc Works version 3.6 Job ticket
field
Value set by Océ PRISMAsatellite for
Office version 2.2
Duplex
False - 1-sided printing
True - 2-sided printing, duplex edge in
the 'Comments' field
Printonbothsides
DocumentMediaSize
Media size, or 'Other' for other Media
size indicated in the 'Comments' field.
The following values are available:
■ A0
■ A1
■ A2
■ A3
■ A4
■ A5
■ B4
■ B5
■ Letter
■ Legal
■ Ledger
■ Foolscap
■ Executive
■ Statement
■ Folio
■ Quarto
■ Monarch
■ LegalSmall
DocumentMediaWeight
Media weight or 'Other' for other Media
weight indicated in the 'Comments' field.
The following values are available:
■ 65032gram047m2
■ 80032gram047m2
■ 120032gram047m2
■ 170032gram047m2
DocumentMediaColor
Media color, or 'Other' for other media
color indicated in the 'Comments' field.
DocumentMediaType
Paper - index or bond paper
Transparent - transparency
Other - other media type indicated in the
'Comments' field
Chapter 5 - Server Configuration
81
Creating a Link to Océ Doc Works
82
Océ Doc Works version 3.6 Job ticket
field
Value set by Océ PRISMAsatellite for
Office version 2.2
CoverMediaSize
Media size or 'Other' for other Media size
indicated in the 'Comments' field.
The following values are available:
■ A0
■ A1
■ A2
■ A3
■ A4
■ A5
■ B4
■ B5
■ Letter
■ Legal
■ Ledger
■ Foolscap
■ Executive
■ Statement
■ Folio
■ Quarto
■ Monarch
■ LegalSmall
CoverMediaWeight
Media weight or 'Other' for other Media
weight indicated in the 'Comments' field.
The following values are available:
■ 65032gram047m2
■ 80032gram047m2
■ 120032gram047m2
■ 170032gram047m2
CoverMediaColor
Media color, or 'Other' for other media
color indicated in the 'Comments' field.
CoverMediaType
Paper - index or bond paper
Transparent - transparency
Other - other media type indicated in the
'Comments' field
Chapter 5 - Server Configuration
Creating a Link to Océ Doc Works
Océ Doc Works version 3.6 Job ticket
field
Value set by Océ PRISMAsatellite for
Office version 2.2
FailedMappings
All values that could not be set because
the Océ Doc Works field did not exist in
the Job Ticket Definition. If this field is
not defined, the information is simply
lost.
Note:
This field does not exist in the
default Océ Doc Works Job
ticket definition. You can add
this field using the Océ Doc
Works Job ticket editor.
Chapter 5 - Server Configuration
83
The Océ PRISMAsatellite for Office template editor console
The Océ PRISMAsatellite for Office template editor console
Introduction
The Océ PRISMAsatellite for Office template editor is an application that allows you to
manage Job templates for users and groups.
This topic gives you an overview of the Océ PRISMAsatellite for Office template editor
console.
The Océ PRISMAsatellite for Office template editor console
Panes
The Océ PRISMAsatellite for Office template editor console contains two major panes.
The left-hand pane allows you to select the main elements like 'User management' and
'Work templates'. The right-hand pane contains the element details.
If you select Océ PRISMAsatellite for Office in the left-hand pane, the right-hand pane
will show the main actions:
■ User management
Allows you to configure templates for 'Users' and 'Groups'.
■ Work templates
Allows you to create and configure the work templates.
■ Edit factory template
At the very first use of Océ PRISMAsatellite for Office, users do not have a default
template. When users submit a job, the Job settings are retrieved from the factory
template (a kind of default template for all users). The Océ PRISMAsatellite for Office
Administrator can configure this factory template.
You can use the Océ PRISMAsatellite for Office template editor to apply the factory
template to the default template for a group of users This will remove the users' current
default template. For the selected group, the current default template will be replaced
by the factory template.
■ Apply the factory template to all users
Allows you to apply the factory template to the default template for all users This will
remove the users' current default template, the current default template will be replaced
by the factory template.
■ Apply a work template as specialized template to all users
Allows you to add a work template to the list of specialized templates for all users.
■ Delete all specialized templates of all users
Allows you to delete all specialized templates of all users.
Menu bar
The 'File' menu bar allows you to add, open and configure a work template, open the
'Configuration' dialog, select a 'Point of Services' and exit the application.
Click the 'Help' menu to open the help file or open the 'About' dialog.
84
Chapter 5 - Server Configuration
The Océ PRISMAsatellite for Office template editor console
Status bar
The status bar shows the current status of the Océ PRISMAsatellite for Office template
editor
It also shows the server that you are connected to
Chapter 5 - Server Configuration
85
Specific Hot Folders Issues
Create additional Input Channels
Specific Hot Folders Issues
Hot folders issues
Hot folders (ports) are set up to monitor specific directories / folders, looking for Océ
PRISMAsatellite for Office compatible JDF files. They are used when the input to Océ
PRISMAsatellite for Office is file-based. Hot folders can be used for 'Print', 'Convert'
and 'Fax' actions.
Hot folders receive two kind of documents for each request with special naming conventions:
A JDF ticket of type Product node
It should comply with the 'Océ JDF Product Node Intent specification'. The JDF ticket
must have the same name as the document data, suffixed by “.jdf”.
A document data referred to in the JDF ticket
The naming convention is free but must match the file name in the 'FileSpecification
node' of the JDF ticket.
Note:
Please refer to the Océ PRISMAsatellite for Office PDK for details about the JDF
product specifications.
86
Chapter 5 - Server Configuration
Suggested Approach
User Management
Suggested Approach
Windows domain
If a windows Domain' is available in which the relevant user groups have been defined
(by department), you are advised to import these groups (and domain users) into Océ
PRISMAsatellite for Office.
Chapter 5 - Server Configuration
87
Users
Users
Introduction
The 'User accounts' section allows you to specify which users can use the Océ PRISMAsatellite for Office driver to send jobs to the Océ PRISMAsatellite for Office server.
'User accounts' allow you to:
■ Track jobs send by users and send feedback to the user about the (status of the) job.
■ Store and generate accounting information about specific users.
■ Print the user information on banner pages.
■ Configure access permissions on resources.
User accounts
The User account authenticates the end-user to the Océ PRISMAsatellite for Office
server for submission and tracking purposes. The User account is also used to complete
'job settings information', for accounting records and banner page contents.
The User account is used to determine the access to the 'Personal Document Space', user
intent templates and modifications of the user preferences.
The Administrator's User account allows system configuration.
User accounts can used to restrict the offered type of services (Print, Fax, PDF conversion),
but you are advised to use 'Groups' for this.
User accounts can also used to restrict specific devices and features. For instance, a user
account may restrict users from using certain high-quality color printers.
The following types of users can be defined:
1- Imported MS Windows groups / users (local).
2- Océ PRISMAsatellite for Office / local users (mandatory Océ PRISMAsatellite for
Office driver users).
3- Domain users (advised).
88
Chapter 5 - Server Configuration
Linking Windows Users and Groups (local)
Linking Windows Users and Groups (local)
Introduction
The User account authenticates the end-user to the Océ PRISMAsatellite for Office
server for submission and tracking purposes. The User account is also used to complete
'job intent information', for accounting records and banner page contents.
The User account is used to determine the access to the 'Document space management',
user intent templates and modifications of the user preferences.
The Administrator's User account allows system configuration.
User accounts are used to restrict the offered type of services (Print, Fax, PDF conversion).
User accounts are also used to restrict specific devices and features. For instance, a user
account may restrict users from using certain high-quality color printers.
Océ PRISMAsatellite for Office allows you to organize the user accounts in groups. You
can configure services, for example Print, Fax or PDF, to groups. This allows you to offer
these services for a big number of users at the same time.
How to link Windows users and groups
1. Click 'User management' - 'Groups'.
2. In the upper-right pane, select the group.
The 'group configuration' dialog will appear.
3. Select the 'Members' tab.
4. Use the 'Add' button to add users to the group.
5. Click 'OK' to save the changes.
How to import Windows users
1. Click 'User Management' - 'Users'.
2. In the upper-right pane, right mouse-click and select 'Import Windows users'.
The 'Import Windows' dialog will appear.
3. Select the 'Domain' from the drop-down list.
4. The 'Check names' button allows you to check the end-user accounts within the 'Windows
users' field.
5. Click 'Browse...' open the 'Windows users' dialog.
6. Select the users you want to import and click 'Add'.
The windows users will be added to the 'Windows users import' dialog.
7. Click 'OK' to save the changes.
Chapter 5 - Server Configuration
89
Configuring Océ PRISMAsatellite for Office Accounting
Accounting
Configuring Océ PRISMAsatellite for Office Accounting
Introduction
Océ PRISMAsatellite for Office Accounting is a feature of the Océ PRISMAsatellite for
Office software. It allows you to schedule and configure the active Accounting database.
Note:
Click the Océ PRISMAsatellite for Office Accounting shortcut on the desktop to start
the application.
[24] Océ PRISMAsatellite for Office Accounting
How to configure accounting
Click 'Start' - 'All Programs' - 'Océ' - 'Océ PRISMAsatellite'.
Select 'Océ PRISMAsatellite Accounting'.
Right mouse-click Océ PRISMAsatellite for Office Accounting in the tree section.
Click 'Properties'.
The 'Accounting Server Properties' dialog will appear.
5. 'Remoting Port'.
The 'Remoting Port' shows the port number on the server to which the Accounting information is sent to and from which the server is 'listening to'. The value is 9347, you
can not modify this setting.
1.
2.
3.
4.
90
Chapter 5 - Server Configuration
Configuring Océ PRISMAsatellite for Office Accounting
6. Select the 'Database Exchange'.
The 'Database Exchange' field specifies the period after which an automatic database exchange will be processed. Possible values are 'Daily', 'Weekly' (default) and 'Monthly'.
After a database exchange, the old database will still be available on the server.
Note:
To force a database exchange, use the 'Database Exchange' option from the Océ PRISMAsatellite for Office Accounting server menu.
7. To enable tracing on the Océ PRISMAsatellite for Office Accounting server, select 'Record
in Trace File'.
Note:
All Océ PRISMAsatellite for Office Accounting files will be located in the 'OceAccounting' folder of the Océ PRISMAsatellite for Office installation path.
Chapter 5 - Server Configuration
91
Using the Océ PRISMAsatellite for Office Accounting Report Wizard
Using the Océ PRISMAsatellite for Office Accounting Report
Wizard
Introduction
Océ PRISMAsatellite for Office Accounting is a feature of the Océ PRISMAsatellite for
Office software. It offers general queries to generate Accounting reports
You can use the information stored on the Océ PRISMAsatellite for Office server to create
Accounting reports. The 'Océ PRISMAsatellite for Office Accounting report' offers a
step by step possibility to create a customized report.
How to use the Océ PRISMAsatellite for Office Accounting Report Wizard
1. Click 'Start' - 'Programs' - 'Océ' - 'PRISMAsatellite'.
2. Select 'PRISMAsatellite Accounting Report' start the Océ PRISMAsatellite for Office
Accounting Report Wizard.
Note:
'AccountingTool.exe' is also located in the 'PRISMAsatellite Accounting Report' folder
of the Océ PRISMAsatellite for Office installation folder.
3. Click 'Next' .
The `Select the server and Accounting data' dialog will appear.
4. Select the 'Server name' for which you want to create the report.
You can use the server name, as well as its IP address. The default server is the local one.
For remote access to the Accounting server database(s), refer to the 'Remote access to
Accounting database(s)' section. The server name that you have selected during the previous session is selected automatically but can be changed.
5. Select the 'Report Type' from the drop-down list.
6. Specify a 'From' and 'To' date.
7. In case of an 'Export for CountLogic' you have to select the path where the .csv files will
be stored.
8. Click the 'Browse...' button to specify the folder where you want to store the Accounting
report(s).
9. Click 'Next' to continue.
The 'Specify selection criteria' dialog will appear.
10. Select, depending on the report type, the 'Costs File' using the 'Browse...' button.
Note:
The last used 'Costs File' will be used by default. The drop-down list will show the last
8 used Costs files and offers easy selection.
92
Chapter 5 - Server Configuration
Using the Océ PRISMAsatellite for Office Accounting Report Wizard
Select the 'Device name' from the drop-down list ('Export for CountLogic' only).
Select the 'Userid' and the 'Department'.
You can specify one or more of the specified 'Custom fields'.
Click 'Next' to continue.
The 'Select the resources and prices' dialog will appear.
15. Select the 'Resource' options (Finishing, Printer and/or Media costs) for which you want
to add/modify or suppress the costs and prices values.
11.
12.
13.
14.
Note:
Use the 'Import printer/media names from PRISMAsatellite server' option to make sure
that the printer and media names are used correctly within the Accounting system.
16. Click 'Next' to continue.
The 'Edit Finishing costs and prices' dialog will appear.
17. If necessary, change the current Finishing costs and prices.
Note:
Please make sure that you use the 'Next' button to continue when you make changes to
the Finishing costs and prices.
18. Click 'Next' to continue.
The 'Edit Media costs and prices' dialog will appear.
19. If necessary, change the current Media costs and prices.
Note:
Please make sure that you use the 'Next' button to continue when you make changes to
the Media costs and prices.
20. Click 'Next' to continue.
The 'Edit Printer costs and prices' dialog will appear.
21. If necessary, change the current Printer costs and prices.
Note:
Please make sure that you use the 'Next' button to continue when you make changes to
the Printer costs and prices.
22. Click 'Next' to continue.
The 'Save Costs File' dialog will appear.
23. You can save the configured 'costs and pricing' settings in the same file as the Accounting
information, or save it using a separated file. Use the 'Save Costs File as...' to save the
'costs and pricing' settings in a separated file.
24. Click 'Next' to continue.
The 'Completing' dialog will appear and shows the general report settings.
25. Click 'Details' to get an overview of the report details.
Chapter 5 - Server Configuration
93
Using the Océ PRISMAsatellite for Office Accounting Report Wizard
26. Click 'Finish' to complete the Océ PRISMAsatellite for Office Accounting Query Wizard.
The requested report will appear.
27. Click 'Save Accounting report as...' to save the report (.csv file) to a folder.
[25] Accounting report example
Note:
To create a trace file when you create an Accounting Report Wizard, use the 'trace' option:
'C:\Program Files\Oce\PRISMAsatellite Accounting Report\ReportTool\AccountingTool.exe trace'
94
Chapter 5 - Server Configuration
Chapter 6
Windows client installation
Installing the Océ PRISMAsatellite for Office Driver Manually
Installing the Océ PRISMAsatellite for Office Driver Manually
How to install the Océ PRISMAsatellite for Office driver manually
1. Click 'Install.exe' to start the installation process.
The 'Language selection' dialog will appear.
[26] Language Selection
2. Select the language from the drop-down list and click 'OK'.
The 'Welcome to the InstallShield wizard' dialog will appear.
[27] Welcome to the InstallShield Wizard
3. Click 'Next' to continue.
96
Chapter 6 - Windows client installation
Installing the Océ PRISMAsatellite for Office Driver Manually
The 'License agreement' dialog will appear.
[28] License Agreement
4. Select 'I accept the terms in the license agreement' and click 'Next'.
The 'Customer information' dialog will appear.
[29] 'Customer information' Dialog
5. Enter 'User name' and 'Organization'.
6. Specify the 'Install this application for' option and click 'Next'.
Chapter 6 - Windows client installation
97
Installing the Océ PRISMAsatellite for Office Driver Manually
The 'Microsoft Outlook and Adobe Reader configuration' dialog will appear
[30] Microsoft Outlook and Adobe Reader Configuration
7. Select the 'Microsoft Outlook' and 'Adobe Reader' option if you want the Océ PRISMAsatellite for Office driver to be able to start the applications.
Note:
If you deselect these options now, you can specify them afterwards using 'Internet Explorer'.
8. The 'Server name' dialog will appear.
[31] 'Server name' Dialog
9. Specify the 'Point(s) of Service name(s)' (Océ PRISMAsatellite for Office server) here.
98
Chapter 6 - Windows client installation
Installing the Océ PRISMAsatellite for Office Driver Manually
Note:
You can specify multiple points of service names here.
10.
11.
12.
13.
14.
Specify the host name of the Océ PRISMAsatellite for Office server.
Select whether you want to allow local users to manage their server connections.
Specify the printer name (default is PRISMAsatellite).
Select whether to set PRISMAsatellite as the default printer.
Click 'Next' to continue.
The 'Destination folder' dialog will appear.
[32] 'Destination folder' Dialog
15. If you want to change the default destination folder use the 'Change...' button.
16. Click 'Next' to continue.
Chapter 6 - Windows client installation
99
Installing the Océ PRISMAsatellite for Office Driver Manually
The 'Ready to install the program' dialog will appear.
[33] 'Ready to install the program' Dialog
17. Click 'Install' to start copying files to your client PC.
After installation, 'InstallShield wizard completed' dialog will appear.
[34] 'InstallShield Wizard Completed' Dialog
18. Select 'Launch PRISMAsatellite client' to start the client software.
19. Click 'Finish'.
100
Chapter 6 - Windows client installation
Configure the Océ PRISMAsatellite for Office driver
Configure the Océ PRISMAsatellite for Office driver
Introduction
The Océ PRISMAsatellite for Office driver is an easy-to-use interface for distributing
documents. With the Océ PRISMAsatellite for Office driver, you install a single driver
to access all network printers and other output devices. The operating system treats the
Océ PRISMAsatellite for Office driver as a printer driver. However, the driver also gives
you access to a host of other devices via the job settings interface.
When the Océ PRISMAsatellite for Office driver was installed successfully, the Windows
system tray will contain an Océ PRISMAsatellite for Office icon. This icon shows you
status information about your Océ PRISMAsatellite for Office jobs. It also allows you to
specify your personal 'User preferences'.
How to configure the Océ PRISMAsatellite for Office driver
1. Right mouse-click the Océ PRISMAsatellite for Office icon in the system tray.
2. Click 'Preferences...'.
The 'User preferences' dialog will appear.
3. Specify the user preferences.
For more information, please refer to the 'Specify the User preferences' topic of the Océ
PRISMAsatellite for Office driver help file.
Chapter 6 - Windows client installation
101
Uninstalling the Océ PRISMAsatellite for Office Driver
Uninstalling the Océ PRISMAsatellite for Office Driver
Introduction
This procedure shows you how to uninstall the Océ PRISMAsatellite for Office driver.
Uninstall the Océ PRISMAsatellite for Office driver
Right mouse-click the Océ PRISMAsatellite for Office icon in the system-tray.
Click 'Close' to stop the Océ PRISMAsatellite for Office driver.
Click 'Start' - 'Settings' - 'Control Panel'.
Double-click 'Add/Remove Programs'.
Select 'PRISMAsatellite Client' and click 'Remove'.
A confirmation dialog will appear.
6. Click 'Yes' to continue.
The Océ PRISMAsatellite for Office driver will be removed from your system.
1.
2.
3.
4.
5.
Note:
To completely remove all Océ PRISMAsatellite for Office files, also remove the <INSTALLClientProgram_PATH> and C:\Documents and Settings\useraccount\Application
Data\Oce\PRISMAsatellite\Client\ToolsUI folders.
102
Chapter 6 - Windows client installation
Upgrading the Océ PRISMAsatellite for Office Driver
Upgrading the Océ PRISMAsatellite for Office Driver
Introduction
This procedure shows you how to upgrade the Océ PRISMAsatellite for Office driver
from version 1.2.x to version 2.0.0.
How to upgrade the Océ PRISMAsatellite for Office driver
1. Click 'Install.exe' to start the installation process.
A dialog will appear that indicates that a version of the Océ PRISMAsatellite for Office
driver was already installed on the system.
When you continue the install process, the current version of the Océ PRISMAsatellite
for Office driver will be removed first.
2. Click 'OK' to continue the installation process.
‘Installing the Océ PRISMAsatellite for Office Driver Manually’ on page 96
Chapter 6 - Windows client installation
103
Using the Océ PRISMAsatellite for Office Driver for Remote Job Submission
Using the Océ PRISMAsatellite for Office Driver for Remote
Job Submission
Introduction
Océ PRISMAsatellite for Office is a set of integrated output management modules supporting acceptance, presentation, distribution and production on Océ and non-Océ
printers.
Océ PRISMAsatellite for Office allows you to submit and control your print orders.
You can start Océ PRISMAsatellite for Office from any application using the 'Print' option
and select the Océ PRISMAsatellite for Office driver.
How to use the Océ PRISMAsatellite for Office driver for remote job submission
1. Create a document in a word processor and select 'Print'.
The word processor’s initial print dialog box displays, allowing you to choose the printer.
2. Make sure the Océ PRISMAsatellite for Office driver is selected.
3. When you continue with your print job, the Océ PRISMAsatellite for Office job settings
dialog opens and takes over processing your print job.
4. The job settings dialog allows you to print, fax and convert jobs.
Note:
There is a check-box in the top left corner of each section. To select an option such as
printing or faxing, check one or more of these boxes. When a box is checked, you can
use the link within that section to specify the options.
5. Once you have specified the job settings, click 'Submit' to process your document.
104
Chapter 6 - Windows client installation
Chapter 7
Maintenance
Reports
Reports
Introduction
The 'Reports' section allows you to generate and save Océ PRISMAsatellite for Office
reports.
[35] Reports
■
■
■
■
You can use the reports to:
Backup your Océ PRISMAsatellite for Office system configuration on paper or file.
Diagnose the Océ PRISMAsatellite for Office system in case of problems.
Send it to Océ for product support.
Types of reports
The following reports are available:
- Media
- Devices
- User management
- Full report
106
Chapter 7 - Maintenance
Backing Up and Restoring the Server Configuration
Backing Up and Restoring the Server Configuration
Introduction
Océ PRISMAsatellite for Office allows you to backup and restore the server configuration.
This backup will include the job system, devices, media settings, locations and user accounts.
How to backup the server configuration
1. Click 'Start' - 'All Programs' - 'Océ' - 'Océ PRISMAsatellite' - 'Océ PRISMAsatellite
Backup Restore'.
2. Select what options you want to backup:
■ Configuration
■ Jobs
■ Additional external files
This option is typically interesting to backup, for example, the paths where the 'Personal document spaces' are located. This can be defined by adding entries in the
'BackupRestoreGui.exe.config' config file. 'BackupRestoreGUI.exe' is located in the
'JDF Framework\bin' folder of the Océ PRISMAsatellite for Office install folder.
3. Click 'Execute' in the 'Backup' section.
A dialog will appear that allows you to specify the name and location of the backup file.
4. Click 'OK' to start the backup process.
5. Restart the Océ PRISMAsatellite for Office server after completing the backup process.
How to restore the server configuration
1. Click 'Start' - 'All Programs' - 'Océ' - 'Océ PRISMAsatellite' - 'Océ PRISMAsatellite
Backup Restore'.
2. Click 'Execute' in the 'Restore' section.
A dialog will appear that allows you to select the Océ PRISMAsatellite for Office backup
file.
3. Select the Océ PRISMAsatellite for Office backup file to use for the restore process.
4. Click 'OK' to start the restore process.
5. Restart the Océ PRISMAsatellite for Office server after completing the restore process.
Backup and restore using the Command line
1. To start the backup procedure, type 'BackupRestoreCli.exe -b [fileName] [-c][-j][-e]'.
2. To start the restore procedure, type 'BackupRestoreCli.exe -r fileName.zip'.
Chapter 7 - Maintenance
107
Backing Up and Restoring the Server Configuration
By default, the backup includes all files (config, jobs and external files).
'fileName' is a pathname. If 'fileName' is not specified, then 'fileName' is located in
<PRISMAsatellite install path>\JDF Framework\bin.
Options:
-b: backup
-c: include config files in backup
-j: include job files in backup
-e: include external files in backup
-r: restore
108
Chapter 7 - Maintenance
Chapter 8
Customization
Customized Fields for Clients
Customized Fields for Clients
Clients settings
Right mouse-click the Océ PRISMAsatellite for Office server in the tree section and click
'Properties'.
The 'Clients' tab allows you to add custom fields to be used for the Océ PRISMAsatellite
for Office client. For each custom field you can have the Océ PRISMAsatellite for Office
server validate the content.
Please refer to the 'Specify the Clients settings' procedure for details about how to customize fields for clients.
110
Chapter 8 - Customization
LDAP Configuration
LDAP Configuration
Introduction
When you add and configure users, users can be marked as 'LDAP' users. In this case,
the user-related information is dynamically imported from the configured LDAP server(s).
All 'String' type LDAP user attributes are made accessible through a dictionary.
LDAP information can only be read. Updating LDAP attributes is done at the Windows
User Management level. This means that you can update Océ PRISMAsatellite for Office
users based on the information on the LDAP server, but you can not update the LDAP
information itself on the LDAP server.
Océ PRISMAsatellite for Office does not support LDAP groups.
The imported keys depend on the class of the user node (i.e. InetOrgPerson). Here are
the keys supported by the inetOrgPerson class:
LDAP connectivity
LDAP Attributes#
Required attributes
■
■
■
commonName (cn)
surname (sn)
objectClass
Optional attributes
■
■
■
■
■
■
■
■
■
■
■
■
■
■
■
■
■
■
■
■
■
businessCategory
carLicense
departmentNumber
description
employeeNumber
facsimileTelephone
Number
givenName
mail
manager
mobile
organizationalUnit (ou)
pager
postalAddress
roomNumber
secretary
seeAlso
telephoneNumber
title
labeledURI
uid
Chapter 8 - Customization
111
LDAP Configuration
LDAP configuration
Note:
Before you change the LDAP configuration, please stop Océ PRISMAsatellite for Office.
When the LDAP configuration has been changed, restart Océ PRISMAsatellite for Office.
Please refer to the 'Backup and restore the server configuration' on how to start and stop
Océ PRISMAsatellite for Office.
The Océ PRISMAsatellite for Office server can work with various LDAP servers. For
windows and framework users, a different LDAP servers can be used.
For example
LDAP properties for user user@DOM1, user@DOM2 and user can be 5 acquired from
different LDAP servers. To configure a default LDAP server (the server that is used when
no specific server for a domain is found or when the user is a pure framework user), the
OceJdfFrameworkLdapSettings section of the OceJdfFramework.exe config-file must be
adapted.
The configuration is done by setting properties using the usual add xml node (i.e. '<add
key=”Filter” value=” (&(objectClass=user) (sAMAccountName=%u))” />').
As the User Management supports a different LDAP server for each Windows domain a
user can belong to, each property can be prefixed by the domain name, using the following
form: [{DOMAIN_NAME} “.”] {Property}.
Note:
Please refer to the 'Sample cases of LDAP configuration' document in the 'External
documentation' section for more information.
Examples
To set the server used by default, the following line is added in the OceJdfFrameworkLdapSettings section: '<add key=”Server” value=”nemo.pixar.com”/>'
To set the server used for users belonging to the MARIN domain, the following line is
added in the OceJdfFrameworkLdapSettings section: '<add key=”MARIN.Server” value=”dory.pixar.com”/>'
The following table details the property that can be set to configure an LDAP server:
112
Chapter 8 - Customization
LDAP Configuration
LDAP Server Attributes#
Attribute
Description
Server
The host name or IP address of the LDAP server. In multidomain configuration, this property has to be set when the
DNS server of the Océ PRISMAsatellite for Office server
does not know about all available domains.
Root
The root node of the LDAP tree on which the query is
performed. For active directories, this is the domain name
in its LDAP form (i.e. dc=pixar,dc=com).
Note:
Note that if not provided, the Root node of the
default domain (the domain to which the server
belongs) is automatically set.
Filter
The LDAP filter that has to be used to find a user node.
The value supports the %u macro that will be expanded to
the user name of the searched user (but without the
@DOMAIN specification).
Examples:
For user rfr, the %u macro expands to rfr
For user rfr@PIXAR, the %u macro also expands to rfr
The default filter value is set to a suitable value to LDAP
support in a single domain configuration:
(&(objectClass=user) (sAMAccountName=%u))
Note:
the & entity replaces the & characters in XML files))
The format of a filter is defined by RFC2254
(http://www.cse.ohio-state.edu/cgi-bin/rfc/rfc2254.html
Note:
Note that when defining a filter, it must be ensured
that an LDAP query using that filter will only return on result.
User
The user used to log on to the LDAP server. Must be set
if the Windows account that the Framework uses is not
authorized to access the LDAP (AD) server.
Password
The password used to log on to the LDAP server. Must be
set if the Windows account that the Framework uses is not
authorized to access the LDAP (AD) server.
Chapter 8 - Customization
113
LDAP Configuration
114
Chapter 8 - Customization
Chapter 9
Functional overview
Configure server properties
Server properties
Configure server properties
Introduction
The 'General' tab shows information about your Océ PRISMAsatellite for Office configuration, such as product name, version and language. It also shows you more information
about the type and expiration date of your license.
The 'Reports' dialog allows you to specify general server settings.
Right mouse-click the Océ PRISMAsatellite for Office server in the tree section.
Click 'Properties' to start the 'Reports' dialog.
Note:
You are advised to install the (optional) OCR software before you create the link between
the Océ PRISMAsatellite for Office server and the OCR software. When you create this
link, all end-users will be able to click the 'OCR Conversion' button from their 'Personal
Document Space'.
Server properties
The following server properties are available:
■ General
■ Licensing
■ Jobs
■ Documents
■ Email
■ Services
■ Clients
116
Chapter 9 - Functional overview
General Settings
General Settings
General
The 'General' tab shows information about your Océ PRISMAsatellite for Office configuration, such as product name, version and language. It also lists the installed patches.
Chapter 9 - Functional overview
117
License settings
License settings
License settings
The 'Licenses' tab shows information about your Océ PRISMAsatellite for Office configuration with respect to license issues.
It shows the Server name and Company name.
The Serial number (if available) and License type are displayed, including the expiration
date.
Allowed number of active users
Océ PRISMAsatellite for Office controls the number of connected and active users (client
seats). The number of connected users that are allowed to interact with the server is
specified within the acquired license. When the maximum number of connected and active
users has been exceeded, an error message will be send to the Océ PRISMAsatellite for
Office driver user that tries to connect. The end-user could try to connect to another Océ
PRISMAsatellite for Office server of wait until the number of active Océ PRISMAsatellite
for Office users has dropped.
A user is 'active' when the user is connected successfully to the Océ PRISMAsatellite for
Office server using the Océ PRISMAsatellite for Office driver. A user is 'inactive' when
he/she exits the Océ PRISMAsatellite for Office driver.
An active user is disconnected from the server by Océ PRISMAsatellite for Office when
the end-user has not submitted a job for 12 hours.
118
Chapter 9 - Functional overview
Specifying the Job Settings
Specifying the Job Settings
Introduction
The 'Jobs' tab allows you to specify which options are available for Océ PRISMAsatellite
for Office client users. The available options are 'Print', 'Fax', 'Conversion' and 'Intelligent
routing'. You can also specify the amount of business days that you want completed jobs
to be saved on the Océ PRISMAsatellite for Office server.
Note:
Please note that changing this option will not affect existing jobs, but will be used for
new jobs.
How to specify the Jobs settings
1. Right mouse-click the Océ PRISMAsatellite for Office server in the tree section.
2. Click and 'Properties' select the 'Jobs' tab.
3. Select the checkboxes of the options you want to be available for Océ PRISMAsatellite
for Office client users.
4. The 'Allow intelligent routing' option allows you to enable or disable intelligent routing.
Note:
When you select this option, Océ PRISMAsatellite for Office will determine what the
best printer is to process the job. This option will add the 'Best fit' option to the 'Printer'
setting of the Océ PRISMAsatellite for Office driver. When you de-select this option,
you will force Océ PRISMAsatellite for Office to use the printer and location specified
within the Océ PRISMAsatellite for Office driver.
5. Specify the amount of business days that you want to keep completed jobs on the server.
6. Click 'OK' to save the changes that you have made.
Chapter 9 - Functional overview
119
Specifying the Document Settings
Specifying the Document Settings
Introduction
The 'Documents' tab allows you to specify the default documents location. You can also
set the maximum number and total size of documents on an Océ PRISMAsatellite for
Office end-user's 'Personal Document Space'.
How to specify the Documents settings
1. Right mouse-click the Océ PRISMAsatellite for Office server in the tree section.
2. Click and 'Properties' select the 'Documents' tab.
3. Use the 'Documents Folder' option to specify the default location of the end-users' documents. The 'Documents Folder' name can be defined in UNC format:
\\servername\sharename\path\filename.
Note:
Please note that when you change the 'Documents Folder' option afterwards, the existing
Océ PRISMAsatellite for Office folders will not be copied automatically to the new location.
Note:
You can not use one of the following characters in the name of the 'Documents Folder':
" : < > | ? *.
4. Specify the 'Maximum number of documents' on the end-user's 'Personal Document
Space'.
5. Specify the 'Maximum allowed disk space' for all documents on a Océ PRISMAsatellite
for Office end-user's 'Personal Document Space'.
6. Click 'OK' to save the changes that you have made.
120
Chapter 9 - Functional overview
Specify the Email settings
Specify the Email settings
Introduction
The 'Email' tab allows you to configure the Email settings.
Specify these settings to allow the Océ PRISMAsatellite for Office driver users who don't
have 'Microsoft Outlook®' installed, to use the 'Email' option.
In stead of 'Microsoft Outlook®' the SMTP server will be used to send Email from the
Océ PRISMAsatellite for Office driver.
Note:
In Océ PRISMAsatellite for Office V2.0, the Email settings are configured on the 'System'
tab.
How to specify the Email settings
1.
2.
3.
4.
5.
6.
7.
8.
9.
Right mouse-click the Océ PRISMAsatellite for Office server in the tree section.
Click 'Properties' and select the 'Email' tab.
Specify the IP address of the SMTP server.
Specify the user name and password to log on to the SMTP server.
Specify an 'Administrator Email' address that will be used in the 'From' field of the Email.
Click 'OK' to save the changes that you have made.
Click 'User Management' - 'Users'.
Right mouse-click the user that you specified in step 5.
Click the 'Details' tab and specify the Email address that you used in step 5.
How to specify the Email settings (V2.0)
1.
2.
3.
4.
5.
6.
7.
8.
9.
Right mouse-click the Océ PRISMAsatellite for Office server in the tree section.
Click 'Properties' and select the 'System' tab.
Specify the IP address of the SMTP server.
Specify the user name and password to log on to the SMTP server.
Specify an 'Administrator Email' address that will be used in the 'From' field of the Email.
Click 'OK' to save the changes that you have made.
Click 'User Management' - 'Users'.
Right mouse-click the user that you specified in step 5.
Click the 'Details' tab and specify the Email address that you used in step 5.
Chapter 9 - Functional overview
121
Specify the Synchronize settings
Specify the Synchronize settings
Introduction
The Synchronize tab allows you to define the synchronization frequency for LDAP attributes and Windows Groups members.
The users and groups imported from Windows domains are periodically synchronized
with the available Windows information.
The user attributes are periodically synchronized if an LDAP server is used.
Specify the Synchronize settings
1. Define the synchronization settings
Synchronize#
122
Setting
Description
Synchronize
Define if you want to synchronize:
■ 'Windows Groups members'
The configuration of the Windows Groups is synchronized.
■ 'LDAP attributes'
The LDAP attributes are synchronized.
■ 'Both'
Both the Windows Groups and the LDAP attributes
are synchronized.
Frequency
Define if you want to synchronize:
■ Hourly
Synchronization is done hourly at the defined 'Hour'
and 'Minute'.
■ Daily
Synchronization is performed hourly at the defined
'Hour' and 'Minute'. The synchronization starts on the
'Day' defined.
■ Weekly
Synchronization is performed weekly at the defined
'Day', 'Hour' and 'Minute'.
■ Monthly
Synchronization is performed monthly at the defined
'Hour' and 'Minute'.
Chapter 9 - Functional overview
Specify the Services settings
Specify the Services settings
Introduction
The 'Services' tab allows you to specify the 'Archive', 'Link to Océ Intra Logic' and 'OCR
module' settings.
How to specify the Services settings
1. Right mouse-click the Océ PRISMAsatellite for Office server in the tree section.
2. Click and 'Properties' select the 'Services' tab.
3. Specify the 'Services' settings:
System settings#
Setting
Description
Archiving enabled
If you want to allow Océ PRISMAsatellite for Office client
users to use the 'Archive' option, you have to enable and
specify the archiving setting here. Specify the 'Océ
PRIMSMAarchive' server name here.
Note:
Use PRISMAarchive version 2.4 or higher.
Use Océ Intra Logic
Allows you to specify the URL of the Océ Intra Logic
server.
You can start Océ Intra Logic from Océ Administration
using the ‘Launch Océ Intra Logic’ menu item (use 'All
Tasks').
Océ Intra Logic will open in a separate window. You need
a valid account and password to log on to Océ Intra Logic.
Chapter 9 - Functional overview
123
Specify the Services settings
Setting
Description
Use Océ PRISMAsatellite OCR module (OPTIONAL)
Allows you to specify the Océ PRISMAsatellite for Office
OCR Module.
The Océ PRISMAsatellite for Office driver user will then
be able to convert PDF files from the Personal Document
Space to Microsoft Office® documents or (Full text)
searchable PDF documents.
Specify the server name where the OCR Module was installed. This module has to installed separately. The Océ
PRISMAsatellite for Office OCR Module uses FineReader
Engine® 7.1
Note:
You are strongly advised to install the Océ PRISMAsatellite for Office OCR Module on a separate
server.
4. Click 'OK' to save the changes that you have made.
124
Chapter 9 - Functional overview
Specifying the Client Settings
Specifying the Client Settings
Introduction
The 'Clients' tab allows you to add custom fields to be used for the Océ PRISMAsatellite
for Office driver. These fields will appear in the job details window of the driver and will
be stored in the Accounting record of the job. For each custom field you can have the
Océ PRISMAsatellite for Office server validate the content.
For each field a 'Label', a 'Tooltip' and a 'Default Value' has to be assigned. You also
specify the field 'Type'. This specifies how the field will look like in the Océ PRISMAsatellite for Office driver. Select one of the following field types:
■
■
■
■
■
■
TextBox - Single-line
A simple single line text entry field.
TextBox - Multi-line
A simple multi-line text entry field.
ComboBox - Fixed list
A single line text field with a drop-down selection list.
ComboBox - Editable
A single line text entry field with a drop-down selection list.
BrowseBox - Fixed list
A single line text field with a browse ('…') button. The browse dialog allows searching
and filtering of large list of values.
BrowseBox - Editable
A single line text entry field with a browse ('…') button. The browse dialog allows
searching and filtering of large list of values.
You can specify a field as 'Required'. This means that the end user has to fill in this field
before the job can be submitted.
The 'Validated against ODBC data source' option will enforce the user to enter a value
that can be found in an Open Database Connectivity (ODBC) data source. To identify
how the server validates the value, a Data Source Name (DSN) or an ODBC driver and
an SQL Command are required. If the SQL command returns a non-empty table, the
value is valid.
To allow the SQL command to validate the value, substitution placeholders are provided.
The placeholders take the form '{psat _}', where '_' is one of the letters substitution IDs
described below. Note that any of the substitutions can appear in the validation of any
of the Custom fields.
Chapter 9 - Functional overview
125
Specifying the Client Settings
SQL substitution#
String in SQL command
Substituted value
{psat 1}
The current value of custom field 1
{psat 2}
The current value of custom field 2
{psat 3}
The current value of custom field 3
{psat 4}
The current value of custom field 4
{psat 5}
The current value of custom field 5
{psat U}
The Océ PRISMAsatellite for Office user ID of the driver
{psat M}
The name of the machine that the driver is logged-on.
Depending on the field type, 'Predefined values' have to be specified. In some cases, the
values can be a simple static list. In other cases, the values have to be retrieved from an
ODBC data source.
For 'ComboBox' fields, the values can either be a static list, or dynamically retrieved from
an ODBC data source. The static list is a set of 'Ticket values' and 'Display values'. The
Ticket value is the value that is placed into the accounting record for the job. The Display
value is the string that is shown to the user when the drop-down list is displayed. Both
values must be unique within the static list.
To dynamically retrieve the values from an ODBC data source, a 'Connection String'
(specifies Data Source Name (DSN)) and an SQL Command are required. The same
substitution string used in validation SQL commands can be used here. The table returned
by the SQL command must include a column called 'TicketValue', and an optional column called 'DisplayValue'. The values within these columns should be unique within
the column.
For 'BrowseBox' fields, the values can be retrieved from an ODBC data source only. The
configuration is similar to that of a 'ComboBox' field. The DSN and SQL command are
used in the same way. The difference lies in the ability to filter the list of values.
When the browse dialog is displayed to the user, an optional field can be added. This
field allows the user to enter a text string, which is used to filter the list of values. Selecting
'Filtered' in the Administrator, adds the filter field to the browse dialog. The Filter Label,
which is displayed with the filter field, must be provided. In the SQL command, this filter
value is accessible using the string '{psat F}'.
126
Chapter 9 - Functional overview
Specifying the Client Settings
Example
Attention:
In a law firm, the print jobs are recorded by Client and Case numbers so that printing
costs can be billed to clients. When an end-user submits a job using the Océ PRISMAsatellite for Office driver, the end-user has to enter the Client and Case numbers. These fields
were added to the Job details using the Custom fields' option.
The end user can enter the Client number manually or look it up using a browse dialog.
Once the Client number is set, the end user must select a Case number for that client
from a drop-down list. After filling in the Job details, the end user submits the job. If the
end user has not entered a valid combination of values for the Client and Case fields, the
user will be prompted to make corrections.
Please use the following procedure to create this type of number:
1. Data sources are often databases such as Microsoft Access® (.mdb) files or Microsoft
SQL Servers®. In this example an MS Access database is used. The database contains a
table with the list of Client number and names, and a table with the list of Case numbers
and names for each client.
[36] Relationships
Chapter 9 - Functional overview
127
Specifying the Client Settings
2. Define an ODBC Data Source Name (DSN) for the data source.
[37] ODBC Data Source Name
The Data Sources (ODBC) administrative tool is used to define a DSN. The DSN hides
the details of the location and type of the data source.
Note:
Please make sure that the directory that contains the custom fields databases needs to be
accessible to the local user 'NETWORK SERVICE'.
3. Define the Client Number custom field.
The Client Number field is defined as type 'BrowseBox - Editable'. This will allow the
end user to enter the Client number by hand, or by browsing for the number.
[38] The Client number custom field
128
Chapter 9 - Functional overview
Specifying the Client Settings
To ensure that the end user enters a valid number, the field will be required and be validated by the data source. The DSN created in Step 2 is selected. The SQL command retrieves all records from the Clients table with the selected Client number.
[39] Custom field validation
Note:
Note that the substitution string '{psat 1}' is used to represent the value of custom field
1 (Client Number).
To allow the end user to browse for a value, the Predefined Values is configured by the
same DSN but a different SQL command. This command builds a table with two columns,
'TicketValue' and 'DisplayValue'. A filter field is enabled to help the end user find the
Client. Note the use of the '{psat F}' substitution string in the SQL command.
Chapter 9 - Functional overview
129
Specifying the Client Settings
Click 'Build' to define the ODBC parameters.
[40] ODBC Connection string
[41] Custom field values
130
Chapter 9 - Functional overview
Specifying the Client Settings
Click 'Build' to define the ODBC parameters.
[42] ODBC Connection string
4. Define the 'Case number' custom field.
The 'Case number' field is defined as 'ComboBox – Fixed List'. This will force the user
to select a value from a drop-down list.
[43] Custom field 'Case number''
Chapter 9 - Functional overview
131
Specifying the Client Settings
The field will be required and validated by the data source. This time the SQL command
will take the 'Client number' and the 'Case number' field values into account. Only the
'Case numbers' that are valid for the previously selected 'Client number' will be allowed.
[44] Custom field validation
Click 'Build' to define the ODBC parameters.
[45] ODBC Connection string
132
Chapter 9 - Functional overview
Specifying the Client Settings
To fill the drop-down list, the 'Predefined values' are configured based on the currently
selected value of the 'Client number' field.
[46] Custom field values
5. Submit a test job.
When an end user submits a job, the two Custom fields are displayed first. The end user
must enter valid entries before continuing.
[47] Client fields within the driver
Chapter 9 - Functional overview
133
Specifying the Client Settings
6. By clicking the browse ('…') button on the 'Client number' field, the end user can browse
for the client. The filter field can be used to narrow the list of clients.
[48] Pick up a value
7. Once the Client number has been set, the end user can use the drop-down list for the
Case number.
[49] Select the 'Case number'
8. When both fields have been filled in, the user can continue.
134
Chapter 9 - Functional overview
Export the complete configuration
Export the complete configuration
Introduction
The 'Export configuration' option allows you to export theOcé PRISMAsatellite for Office
Administration properties into an XML-format file.
How to export the configuration
1. Right-click Océ PRISMAsatellite for Office Administration.
2. Click 'All tasks' - 'Export configuration...'.
The Océ PRISMAsatellite for Office Administration properties will be exported to a file.
Chapter 9 - Functional overview
135
Media
Print and Fax Services
Media
Media
Introduction
A media type is any media that jobs can be printed on.
Océ PRISMAsatellite for Office is shipped with various common media types pre-configured. Media types can include standard paper, card stock, transparencies, colored paper,
and photographic paper. In addition media types can come in one of several standard or
custom sizes. If you have standard forms that you use to print on, you can also enter the
form name as a media type.
Media types
Media types are entered into Océ PRISMAsatellite for Office by name and characteristics.
Media configured in Océ PRISMAsatellite for Office must match what is really in the
printers, or the jobs will not print correctly. After you enter a media type, it appears on
the 'Media' tab of the Printer configuration dialog, and can be assigned to a printer. The
media types also appear on the Océ PRISMAsatellite for Office driver and can be selected
by users.
136
Chapter 9 - Functional overview
Add Media
Add Media
Introduction
A media type is any media that jobs can be printed on.
Océ PRISMAsatellite for Office is shipped with various common media types pre-configured. Media types can include standard paper, card stock, transparencies, colored paper,
and photographic paper. In addition media types can come in one of several standard or
custom sizes. If you have standard forms that you use to print on, you can also enter the
form name as a media type.
This procedure shows you how to add media.
How to add Media
1. Click 'Print and Fax Services' - 'Media'.
2. In the upper-right pane, right click and select 'New' - 'Media...'.
The 'Media Definition' dialog will appear.
3. Specify the 'Media' settings:
Media definition#
Setting
Description
Name
Enter the media name here.
The media name will appear in Océ PRISMAsatellite for
Office driver in the job settings dialog. The media name
also appears on the 'Media' tab of the Printer configuration.
Note:
You cannot use any of the following characters in
the 'Name' field: @ " ; % : < > | ? / \ * &
Description
Allows you to specify additional information about the
media.
Note:
You cannot use any of the following characters in
the 'Description' field: @ " ; % : < > | ? / \ * &
Material
Specify the media material, such as 'Paper' or 'Transparency'.
Size
Specify the media size here.
Color
Specify the media color here.
Chapter 9 - Functional overview
137
Add Media
Setting
Description
Weight
Define the Media weight in grams/m2 for European metrics
or in pounds for US metrics.
Note:
Please note that when you change the metric system, the Weight will not be changed automatically.
138
Pre-printed
Allows you to specify whether it is a pre-designed form, or
has a pre-printed image, such as a letterhead, for example.
Tabbed media
Select this option if the Media is a tab set and specify the
number of tabs per set.
Punching
Select this option if the media is hole-punched and specify
the types of holes.
Chapter 9 - Functional overview
Modify Media
Modify Media
Introduction
A media type is any media that jobs can be printed on.
Océ PRISMAsatellite for Office is shipped with various common media types pre-configured. Media types can include standard paper, card stock, transparencies, colored paper,
and photographic paper. In addition, media types can come in one of several standard
or custom sizes. If you have standard forms that you use to print on, you can also enter
the form name as a media type.
This procedure shows you how to modify 'Media' settings.
How to modify Media
1. Click 'Print and Fax Services' - 'Media'.
2. In the upper-right pane, select the Media.
3. Right mouse-click and select 'Properties'.
The 'Media Definition' dialog will appear.
4. Modify the 'Media' settings and click 'OK'.
Chapter 9 - Functional overview
139
Deleting Media
Deleting Media
Introduction
A media type is any media that jobs can be printed on.
Océ PRISMAsatellite for Office is shipped with various common media types pre-configured. Media types can include standard paper, card stock, transparencies, colored paper,
and photographic paper. In addition, media types can come in one of several standard
or custom sizes. If you have standard forms that you use to print on, you can also enter
the form name as a media type.
This procedure shows you how to delete media.
How to delete Media
1. Click 'Print and Fax Services' - 'Media'.
2. In the upper-right pane, select the Media.
3. Right mouse-click and select 'Delete'.
A dialog will appear that allows you to confirm the removal of the selected Media.
4. Click 'OK' to confirm.
140
Chapter 9 - Functional overview
Export the media configuration
Export the media configuration
Introduction
The 'Export configuration' option allows you to export the 'Media' configuration into
an XML-format file.
How to export the configuration
1. Click 'Print and Fax Services'.
2. Right click 'Media'.
3. Click 'All tasks' - 'Export configuration...'.
A dialog will appear that allows you to select a location in which to store the XML file.
4. Select a location and click 'Open'.
The specified 'Media' configuration will be exported to a file.
Chapter 9 - Functional overview
141
Import the media configuration
Import the media configuration
Introduction
The 'Import configuration' option allows you to import 'Media' definitions from an
XML-file. Only new media is imported.
The XML-file format for import must be equal to an XML-file generated with an 'Export
configuration' action.
How to import the configuration
1. Click 'Print and Fax Services'.
2. Right click 'Media'.
3. Click 'All tasks' - 'Export configuration...'.
A dialog appears that allows you to browse to the XML-file.
4. Select the XML-file and click 'Open'.
Only new 'Media' is imported in Océ PRISMAsatellite for Office.
142
Chapter 9 - Functional overview
Export devices configuration
Printers
Export devices configuration
Introduction
The 'Export configuration' option allows you to export the 'Devices' configuration into
an XML-format file.
How to export the devices configuration
1. Click 'Print and Fax Services'.
2. Right click 'Devices'.
3. Click 'All tasks' - 'Export configuration...'.
A dialog will appear that allows you to select a location in which to store the XML file.
4. Select a location and click 'Open'.
The specified 'Devices' configuration will be exported to a file.
Chapter 9 - Functional overview
143
Printers
Printers
Introduction
Printers are defined as any peripheral that can accept output and distribute a document.
Examples of distribution are printing, and faxing. Thus, printers and fax machines are
considered Océ PRISMAsatellite for Office printers.
Printers
Printers are displayed in the system tree under the 'Devices' icon. Printer types are distinguished by their icon. The steps for adding printers vary depending upon the type of
printer you wish to add. Certain printers, such as multi-functional printers are used in
special circumstances.
Printer states
The indicated printer status depends on the:
■ Physical printer state.
■ Physical printer activity.
■ Logical (Océ PRISMAsatellite for Office) printer state.
■ Logical (Océ PRISMAsatellite for Office) printer availability (based on a Pause/Resume
action).
144
Chapter 9 - Functional overview
Adding and Configuring a Printer
Adding and Configuring a Printer
Introduction
A printer is a device that can print a document on media, such as paper or transparency.
Some printers are complex with almost unlimited capabilities. Others have limited capabilities print speed, number of bins and staple options.
Before you can use printers in Océ PRISMAsatellite for Office you have to add the
printers. This topic shows you how to add and configure a printer
How to add a printer
1. Click 'Print and Fax Services' - 'Devices' - 'Printers and Faxes'.
2. In the upper-right pane, right mouse-click and select 'New' - 'Printer'.
The 'Device Type Selection' dialog will appear.
3. Select the 'Manufacturer', the 'Model' and click 'OK'.
Note:
The list shows print and fax devices currently available for enhanced device support.
The 'Device Configuration' dialog will appear.
Note:
Use the 'How to configure' procedure to configure the printer.
Chapter 9 - Functional overview
145
Adding and Configuring a Printer
How to configure a printer
Configure printer#
Tab
Description
General
Device name
Use a unique printer name here.
Description
This could be a physical location, the workgroup using it, or any
other identifying features.
Allowed color types
Define the printer's color printing capabilities by selecting the appropriate checkbox.
Print banner page
Select this option if you want the printer to print a banner page
before each print job.
Page thresholds
To define a printer's page thresholds, check the box and enter the
printer's minimum and maximum page thresholds. Jobs over the
page threshold will be printed on a printer with a higher threshold.
Enable Intelligent Routing
Océ PRISMAsatellite for Office intelligently routes jobs based on
their requirements. The first time they use Océ PRISMAsatellite
for Office, end users typically select a 'Location' which corresponds
to a 'pool' of printers (the location). Océ PRISMAsatellite for Office
uses only printers in that 'Location' when auto-routing jobs.
On large sites, creating locations is an important step in configuring
Océ PRISMAsatellite for Office. Even before you add any locations,
an 'Any' selection appears in the clients’ dropdown location list.
This is because the main device folder is an implied location. The
name of this location is 'Any'.
Note:
You cannot use any of the following characters in the 'Device name' or 'Description' field: @ " ; % : < > | ? / \ * &
146
Chapter 9 - Functional overview
Adding and Configuring a Printer
Tab
Description
Connection
Printer Connection Type
■ File connection
File connections are formatted paths to a server. Specify the
Output file path. This is a file to which the document data is
written.
■ Microsoft Windows Networking
A Microsoft Windows Networking® connection is a printer
path on the network. You can browse the network for the correct
path.
You must install the printer on the Océ PRISMAsatellite for
Office server with the Microsoft Windows 2003 'Add Printer
Wizard'. Then, add the printer as a new printer in Océ PRISMAsatellite for Office. Complete the printer configuration with
Océ PRISMAsatellite for Office.
Finally, add the printer to the Microsoft Windows 2003 system.
■ LPR
Enter the name or network address of the server, and the queue
name on that server.
If you want to 'Enable queue monitoring' from the Océ PRISMAsatellite for Office server, enter an 'Empty queue name' string
that Océ PRISMAsatellite for Office can check. Define the interval for checking the queue for this string in the 'Retry timer'.
For instance, if you enter the string 'no entries', Océ PRISMAsatellite for Office will write the string into the empty Queue.
As jobs are added to the Queue, the string is pushed to the bottom. If there are no jobs, the string is at the top, and when Océ
PRISMAsatellite for Office monitors the Queue, the string is
found, signifying the Queue is empty.
You can check the Queue monitoring string. Use the command
prompt and type: lpq -S (ip @ of device) -P print
Use the 'Proof' button to check if the specified connection is
valid and active.
■ Raw Socket
Enter the name or network address of the server and the port
number on the server.
Chapter 9 - Functional overview
147
Adding and Configuring a Printer
Tab
Description
Media
Océ PRISMAsatellite for Office uses Media settings to auto-route
jobs to printers with specific media types configured. For instance,
a printer with company letterhead will be used when letterhead is
selected on a job ticket. Media is set individually on each printer.
You must fill out the Media tab or the printer will not accept jobs.
Océ PRISMAsatellite for Office will pull media according to this
tray configuration.
To mount media in the printer
■ Select a media type from the drop-down list for each tray.
■ If there is a multi-purpose or manual feed tray, use the 'Input
Channels' button to add the types of media.
Note:
To avoid paper jams and misfeeds, the media configured
must be within the printer’s capabilities. Refer to your
printer manual for allowed media types and sizes.
Access
Typically, the allowed user groups or users setting restricts the use
of a printer to one or a group of persons.
For example, if a printer is used exclusively by one person or you
want to secure access to a group of users, add that person's user account resp. group as the Allowed Users. You always have the opportunity to remove a user or user group from the list.
Note:
By default, the access is given to the users within the 'Users'
group.
Locations
148
The System Administrator can assign a printer to a previously-defined location.
Click button 'Add' to get the list of locations. You can assign the
printer priority directly from the list of locations.
Chapter 9 - Functional overview
Adding and Configuring a Printer
Tab
Description
Printer specific
This printer specific tab allows additional configuration options for
the printer.
SNMP
Océ PRISMAsatellite for Office uses the SNMP protocol to gather
specific printer information. If the printer supports this SNMP
protocol, the 'SNMP...' button will appear on this tab.
Click the 'SNMP...' button to specify the SNMP settings. A new
dialog will appear that allows you to select the SNMP Protocol:
■ SNMP V1/V2c
Specify the 'Read Community' setting. By default 'public' is
used.
The ‘Read Community’ specified here must match the ‘Read
Community’ of the physical printer. This enables the communication. If they don't match, printer and job monitoring will not
be possible. Please refer to the printer specifications for more
information about the ‘Read community’.
■ SNMP V3
SNMP V3 introduces a user-based security model for authentication and privacy services.
'Context' refers to the collection of management information
accessible by the SNMP entity (optional)
The 'Authentication password' is the password required for the
authentication service.
The 'Privacy password' is the password required for the privacy
(encryption) service (optional).
Please refer to the printer specifications to know how to obtain
the SNMP v3 parameters.
Note:
Please note that after adding a new printer, the printer status may indicate 'Idle [Pausing]'.
Refresh the list to change the printer status to 'Idle'.
Chapter 9 - Functional overview
149
Modifying a Printer
Modifying a Printer
Introduction
A printer is configured by answering a series of questions about the printer. You can
change most of the settings of a device after it has been added. This procedure shows you
how to modify the printer settings.
How to modify a printer
Attention:
Right click the printer and select 'Properties'.
150
Chapter 9 - Functional overview
Modifying a Printer
Configure printer#
Tab
Description
General
Device name
Use a unique printer name here.
Description
This could be a physical location, the workgroup using it, or any
other identifying features.
Allowed color types
Define the printer's color printing capabilities by selecting the appropriate checkbox.
Print banner page
Select this option if you want the printer to print a banner page
before each print job.
Page thresholds
To define a printer's page thresholds, check the box and enter the
printer's minimum and maximum page thresholds. Jobs over the
page threshold will be printed on a printer with a higher threshold.
Enable Intelligent Routing
Océ PRISMAsatellite for Office intelligently routes jobs based on
their requirements. The first time they use Océ PRISMAsatellite
for Office, end users typically select a 'Location' which corresponds
to a 'pool' of printers (the location). Océ PRISMAsatellite for Office
uses only printers in that 'Location' when auto-routing jobs.
On large sites, creating locations is an important step in configuring
Océ PRISMAsatellite for Office. Even before you add any locations,
an 'Any' selection appears in the clients’ dropdown location list.
This is because the main device folder is an implied location. The
name of this location is 'Any'.
Note:
You cannot use any of the following characters in the 'Device name' or 'Description' field: @ " ; % : < > | ? / \ * &
Chapter 9 - Functional overview
151
Modifying a Printer
152
Tab
Description
Connection
Printer Connection Type
■ File connection
File connections are formatted paths to a server. Specify the
Output file path. This is a file to which the document data is
written.
■ Microsoft Windows Networking
A Microsoft Windows Networking® connection is a printer
path on the network. You can browse the network for the correct
path.
You must install the printer on the Océ PRISMAsatellite for
Office server with the Microsoft Windows 2003 'Add Printer
Wizard'. Then, add the printer as a new printer in Océ PRISMAsatellite for Office. Complete the printer configuration with
Océ PRISMAsatellite for Office.
Finally, add the printer to the Microsoft Windows 2003 system.
■ LPR
Enter the name or network address of the server, and the queue
name on that server.
If you want to 'Enable queue monitoring' from the Océ PRISMAsatellite for Office server, enter an 'Empty queue name' string
that Océ PRISMAsatellite for Office can check. Define the interval for checking the queue for this string in the 'Retry timer'.
For instance, if you enter the string 'no entries', Océ PRISMAsatellite for Office will write the string into the empty Queue.
As jobs are added to the Queue, the string is pushed to the bottom. If there are no jobs, the string is at the top, and when Océ
PRISMAsatellite for Office monitors the Queue, the string is
found, signifying the Queue is empty.
You can check the Queue monitoring string. Use the command
prompt and type: lpq -S (ip @ of device) -P print
Use the 'Proof' button to check if the specified connection is
valid and active.
■ Raw Socket
Enter the name or network address of the server and the port
number on the server.
Chapter 9 - Functional overview
Modifying a Printer
Tab
Description
Media
Océ PRISMAsatellite for Office uses Media settings to auto-route
jobs to printers with specific media types configured. For instance,
a printer with company letterhead will be used when letterhead is
selected on a job ticket. Media is set individually on each printer.
You must fill out the Media tab or the printer will not accept jobs.
Océ PRISMAsatellite for Office will pull media according to this
tray configuration.
To mount media in the printer
■ Select a media type from the drop-down list for each tray.
■ If there is a multi-purpose or manual feed tray, use the 'Input
Channels' button to add the types of media.
Note:
To avoid paper jams and misfeeds, the media configured
must be within the printer’s capabilities. Refer to your
printer manual for allowed media types and sizes.
Access
Typically, the allowed user groups or users setting restricts the use
of a printer to one or a group of persons.
For example, if a printer is used exclusively by one person or you
want to secure access to a group of users, add that person's user account resp. group as the Allowed Users. You always have the opportunity to remove a user or user group from the list.
Note:
By default, the access is given to the users within the 'Users'
group.
Locations
The System Administrator can assign a printer to a previously-defined location.
Click button 'Add' to get the list of locations. You can assign the
printer priority directly from the list of locations.
Chapter 9 - Functional overview
153
Modifying a Printer
Tab
Description
Printer specific
This printer specific tab allows additional configuration options for
the printer.
SNMP
Océ PRISMAsatellite for Office uses the SNMP protocol to gather
specific printer information. If the printer supports this SNMP
protocol, the 'SNMP...' button will appear on this tab.
Click the 'SNMP...' button to specify the SNMP settings. A new
dialog will appear that allows you to select the SNMP Protocol:
■ SNMP V1/V2c
Specify the 'Read Community' setting. By default 'public' is
used.
The ‘Read Community’ specified here must match the ‘Read
Community’ of the physical printer. This enables the communication. If they don't match, printer and job monitoring will not
be possible. Please refer to the printer specifications for more
information about the ‘Read community’.
■ SNMP V3
SNMP V3 introduces a user-based security model for authentication and privacy services.
'Context' refers to the collection of management information
accessible by the SNMP entity (optional)
The 'Authentication password' is the password required for the
authentication service.
The 'Privacy password' is the password required for the privacy
(encryption) service (optional).
Please refer to the printer specifications to know how to obtain
the SNMP v3 parameters.
Specify the default group policy for the Windows 2003 print spooler
Attention:
By default, the group policy for the Windows 2003 print spooler does not allows remote
connections. This procedure shows you how to enable remote connections for the Windows 2003 print spooler.
1. Click 'Start' - 'Run...'.
2. Enter: 'Gpedit.msc' and click 'OK'.
The 'Group policy' window will appear.
154
Chapter 9 - Functional overview
Modifying a Printer
Click 'Administrative Templates' - 'Printers.
Right mouse-click 'Allow Print Spooler to accept client connections' in the right frame.
Click 'Properties'.
Click 'Enabled' and click 'OK'.
Open the Command prompt and enter 'Gpupdate.exe /Force'.
This will refresh the group policies.
8. Restart the 'Printer Spooler' service.
9. Share a printer.
3.
4.
5.
6.
7.
Chapter 9 - Functional overview
155
Copying a Printer
Copying a Printer
Introduction
Once you have created a printer, you can copy the printer and give it a new name. This
way, you can create a template for a printer and save it for more than one printer.
How to copy a printer
1. Click 'Print and Fax Services' - 'Devices' - 'Printers and Faxes'.
2. In the upper-right pane, select a printer.
3. Right mouse-click and select 'Copy'.
The 'Device Configuration' dialog will appear.
4. Modify the printer settings and click 'OK'.
156
Chapter 9 - Functional overview
Deleting a Printer
Deleting a Printer
Introduction
If you no longer need a printer, or if the printer has been physically removed from the
network, you should delete it from Océ PRISMAsatellite for Office. Deleting a printer
automatically removes it from the default device list. If users use the default device list,
it will be automatically removed from their lists.
Before you begin
Before you can delete a printer, you must pause it.
How to delete a printer
1. Click 'Print and Fax Services' - 'Devices' - 'Printers and Faxes'.
2. In the upper-right pane, select a printer.
3. Right click and select 'Delete'.
A dialog will appear that allows you to confirm the removal of the selected printer.
4. Click 'OK' to confirm.
Chapter 9 - Functional overview
157
Pausing and Resuming a Printer
Pausing and Resuming a Printer
Introduction
Pause the printer before you delete it.
Pausing printers will change the status to 'Idle/Paused'. If the printer contains an active
job, the job will be printed while the printer status will be 'Pausing....'. When you pause
a printer, the 'Intelligent routing' process will not be able to select the printer.
How to pause a printer
1. Click 'Print and Fax Services' - 'Devices' - 'Printers and Faxes'.
2. In the upper-right pane, select a printer.
3. Right mouse-click and select 'Pause'.
The printer is paused.
How to resume a printer
1. Click 'Print and Fax Services' - 'Devices' - 'Printers and Faxes'.
2. In the upper-right pane, select a printer.
3. Right mouse-click and select 'Resume'.
The printer resumes.
158
Chapter 9 - Functional overview
Locations
Locations
Locations
Introduction
When end users print to Océ PRISMAsatellite for Office, they want to print to convenient
printers most of the time, until they have a job with special requirements. Then they
want this job completed quickly and on the most effective printer. Carefully planned
'locations' allow Océ PRISMAsatellite for Office not only to auto-route jobs and balance
workloads, but also to print jobs at a location convenient to end users.
Planning locations
Locations should contain printers with different capabilities as well as back-up printers
to handle work overflow. In order to best utilize all existing equipment, the back-up
printers may be the primary printers in a different location by making copies of the
printers.
Locations group a specific set of printers together for Océ PRISMAsatellite for Office to
use when auto-routing jobs. These printers should be conveniently located to end users.
Locations are chosen in the client’s 'Location' field, and their 'Printer' must in turn be
one of the printers in their locations.
Chapter 9 - Functional overview
159
Adding a Location
Adding a Location
Introduction
Océ PRISMAsatellite for Office intelligently routes print jobs, according to their requirements, to the most appropriate, best-fit, network printers. However, people want to print
to the closest printer. Organizing your printers into locations will help keep end users'
jobs printing where they are most expected.
For example, all devices used in the 'Accounting' department can be included into a device
location. People in the Accounting department will only have the choice of these locations.
It is recommended that you set up locations containing printers of different capabilities
as well as back-up printers, to allow Océ PRISMAsatellite for Office a lot of choices for
auto-routing jobs.
Locations can also be used to keep printing on one site rather than using the 'best-fit'
printer that may be located on another site.
How to add a location
1. Click 'Print and Fax Services' - 'Devices' - 'Locations' .
2. In the upper-right pane, right mouse-click and select 'New' - 'Location'.
The 'Location Configuration' dialog will appear.
3. Enter the location 'Name' and 'Description'.
Note:
You cannot use any of the following characters in the 'Name' or 'Description' field: @ "
;%:<>|?/\*&
4. Use the 'Add' button to add 'Devices' to the location.
Note:
For each device within a location you can specify the 'priority' (for that device within the
selected location).
When 'Intelligent Routing' is enabled on your Océ PRISMAsatellite for Office server,
this 'priority' setting is taken into account when the device is selected to handle the submitted job. By default, priority level '4 - Average' is used.
5. Use the 'Remove' button to remove a selected device from a location.
6. Click 'OK' to confirm the changes.
160
Chapter 9 - Functional overview
Modifying a Location
Modifying a Location
Introduction
Organizing your printers into locations will help keep end users' jobs printing where they
are most expected. This procedure shows you how to modify an existing location.
How to modify a location
1. Click 'Print and Fax Services' - 'Devices' - 'Locations'.
2. In the upper-right pane, select the location you want to modify.
3. Right mouse-click and select 'Properties'.
The 'Location Configuration' dialog will appear.
4. Modify the location settings and click 'OK'.
Chapter 9 - Functional overview
161
Synchronize locations
Synchronize locations
Introduction
You can define a department for every user on page 194. Then, you can create locations
based on these user departments. In this manner, your locations are well-organized and
intuitively to use.
Then you must add the correct printers to the locations. End users are added to locations.
Synchronize locations with the defined user departments
1. Click 'Print and Fax Services' - 'Devices' - 'Locations'.
2. Right-click 'Locations' and select 'All Tasks' - 'Synchronize'.
The 'Location synchronization' dialog appears.
3. Field 'Locations to be added' contains user departments that are not yet added as Océ
PRISMAsatellite for Office locations.
Field 'Locations to be removed' contains Océ PRISMAsatellite for Office locations that
do not exist as user department.
Select the locations that you want to add and remove.
4. Click 'OK'.
Note:
The new locations do no have printers added to them.
5. Add printers on page 145 to the new locations via tab 'Locations' of each printer.
162
Chapter 9 - Functional overview
Deleting a Location
Deleting a Location
Introduction
Organizing your printers into locations will help keep end users' jobs printing where they
are most expected. This procedure shows you how to delete an existing location.
How to delete a location
1. Click 'Print and Fax Services' - 'Devices' - 'Locations'.
2. In the upper-right pane, select the location you want to delete.
3. Right mouse-click and select 'Delete'.
A dialog will appear that allows you to confirm the removal of the selected location.
4. Click 'OK' to confirm.
Chapter 9 - Functional overview
163
How to enable printing via passthrough
Passthrough printers
How to enable printing via passthrough
Question
How can the passthrough functionality be used.
Answer
Setup of the passthrough functionality requires three steps:
Setup of the passthrough functionality#
164
Stage
Description
1. ‘Add Passthrough device’ on page 166
Add a passthrough device on Océ PRISMAsatellite for Office
server.
2. ‘Adding a
Passthrough Port’ on
page 182
Setup the passthrough port. This port is actually a spool
folder. The spool folder receives all print data from the
passthrough device.
3. ‘Create a passthrough
proxy’ on page 172
The passthrough proxy is the manufacturer's printer driver.
The passthrough proxy checks the passthrough spool folder
(= the passthrough port) via a dedicated Océ File Port.
Chapter 9 - Functional overview
Passthrough Devices
Passthrough Devices
Introduction
You can create a passthrough device and a matching passthrough port on the Océ PRISMAsatellite for Office server to allow clients to use the 'native' driver with a specific
printer. The native driver may be required to take advantage of a printer's feature that is
not supported by the Océ PRISMAsatellite for Office job ticket.
For example, some color laser printers have very specialized color management systems
that can be accessed only through the native printer driver. The native printer driver
prepares the job information for the specific printer. The passthrough device allows the
data stream to pass transparently through the Océ PRISMAsatellite for Office server to
the printer.
Enable passthrough printing
Enabling passthrough printing requires several steps, but when you use a passthrough
device on Océ PRISMAsatellite for Office you have some accounting information available.
It will not be as complete as jobs sent from the Océ PRISMAsatellite for Office Job
ticket, but the user ID will be tracked. Page counts may not be available from all printers,
but billing information can be extrapolated as necessary.
Passthrough devices are used with passthrough ports (Input channels). Because ports
control routing and accounting, you need to have a separate port for each printer or location that is enabled for passthrough printing. This will provide separate routing and accounting functions for each printer or location. The passthrough port (input channel)
will need a location to watch and a passthrough device to direct requests.
The link between the native printer driver and the passthrough port is possible thanks to
a dedicated Windows port monitor called 'OceFilePort'. The 'OceFilePort' will allow
you to forward the imaging results of the native driver to your Océ PRISMAsatellite for
Office passthrough port watched folder that is responsible to direct your output to the
associated passthrough device, your proxy to the real printer.
Chapter 9 - Functional overview
165
Add Passthrough device
Add Passthrough device
Introduction
Create a passthrough device with a dedicated passthrough port and proxy on the Océ
PRISMAsatellite for Office server. This allows users to use the manufacturer printer
driver with a specific printer. The native driver may be required to take advantage of a
printer's feature that is not supported by the Océ PRISMAsatellite for Office job ticket.
How to add a passthrough device
1. The Océ PRISMAsatellite for Office Administration console
2. Click 'Print and Fax Services' - 'Devices' - 'Passthrough'.
[50] Administration console
3. In the upper-right pane, right click and select 'New' - 'Passthrough Device...'.
The 'Passthrough Configuration' dialog will appear.
166
Chapter 9 - Functional overview
Add Passthrough device
How to configure a passthrough device
1. Enter a 'Name' and 'Description' for the passthrough device in the 'General' tab.
[51] General tab
Note:
Characters: @ " ; % : < > | ? / \ * & can not be used in the 'Name' or 'Description' field.
2. Click the 'Connection' tab.
[52] Connection tab
3. Select 'LPR' for 'Connection' type.
4. Fill in the 'Server name'. Ask the administrator for the correct name.
5. Fill in the 'Queue name'. Ask the administrator for the correct queue.
Chapter 9 - Functional overview
167
Add Passthrough device
6. Click the 'Proof' button to start the connection test.
[53] Proof result
7. Optional: 'Enable queue monitoring'.
Enter a string in field 'Empty queue name' and define 'Retry timer'.
With this option enabled:
Océ PRISMAsatellite for Office writes the 'Empty queue name' string into the print
queue. It checks the print queue every 'Retry timer''Seconds'. As jobs are added to the
queue, the string is pushed to the bottom. If there are no jobs, the string is at the top.
When Océ PRISMAsatellite for Office checks the queue, the string is found. This indicates
that the queue is empty.
8. Click 'OK' to confirm the changes.
9. Continue with ‘Adding a Passthrough Port’ on page 182.
168
Chapter 9 - Functional overview
Pausing a Passthrough Device
Pausing a Passthrough Device
Introduction
If you have added and configured a passthrough device, you can pause and resume the
device. This procedure shows you how to pause a passthrough device.
How to pause a passthrough device
1. Click 'Print and Fax Services' - 'Devices' - 'Passthrough'.
2. In the upper-right pane, select the passthrough device.
3. Right mouse-click and select 'Pause'.
Chapter 9 - Functional overview
169
Resuming a Passthrough Device
Resuming a Passthrough Device
Introduction
If you have added and configured a passthrough device, you can pause and resume the
device. This procedure shows you how to resume a paused passthrough device.
How to resume a passthrough device
1. Click 'Print and Fax Services' - 'Devices' - 'Passthrough'.
2. In the upper-right pane, select the passthrough device.
3. Right mouse-click and select 'Resume'.
170
Chapter 9 - Functional overview
Deleting a Passthrough Device
Deleting a Passthrough Device
Introduction
If you no longer need a passthrough device to display in the system tree, or if the device
has been physically removed from the network, you should delete it from Océ PRISMAsatellite for Office.
Before you begin
Before you can delete a passthrough device, you have to pause it.
How to delete a passthrough device
1. Click 'Print and Fax Services' - 'Devices' - 'Passthrough'.
2. In the upper-right pane, select a passthrough device.
3. Right mouse-click and select 'Delete'.
A dialog will appear that allows you to confirm the removal of the selected passthrough
device.
4. Click 'OK' to confirm.
Chapter 9 - Functional overview
171
Create a passthrough proxy
Create a passthrough proxy
Introduction
A passthrough device uses a passthrough port and a passthrough proxy. The passthrough
proxy is the manufacturer printer driver for the specific printer. The proxy checks the
passthrough spool folder (= the passthrough port) via a dedicated Océ File Port.
Create a passthrough proxy
1. Do the next steps on the Océ PRISMAsatellite for Office server.
2. Start the Windows Printer Wizard via 'Start -> Printers and Faxes'.
Click ''Next''.
The 'Local or Network Printer' dialog appears.
[54] Local or Network Printer
3. Select 'Local printer attached to this computer' and click 'Next'.
The 'Select a Printer Port' dialog appears.
[55] Select a printer port
4. Select 'Create a new port'.
Click drop-down list 'Type of port'.
Select 'Oce File Port' and click 'Next'.
172
Chapter 9 - Functional overview
Create a passthrough proxy
The 'Oce File Port' dialog appears.
[56] Oce File Port
5. Edit in 'Port Name' the EXACT passthrough printer name as defined in ‘Add Passthrough
device’ on page 166.
6. Edit in 'Target Path' the EXACT path as defined in ‘Adding a Passthrough Port’ on page
182.
Behind the passthrough path to the spool folder edit additional information for
passthrough print jobs.
For example: VP2070_job.%J.%#.prn
Note:
You can enter more substitutions to create a unique name for accounting, but mind the
upper or lower case characters.
Click 'OK'. The 'Install Printer Software' dialog appears.
[57] Install the printer software
7. Select the manufacturer driver for the specific printer. You create the passthrough printer
for this specific driver.
Chapter 9 - Functional overview
173
Create a passthrough proxy
Click 'Next'. The 'Name Your Printer' dialog appears.
[58] Name Your Printer
8. Give a 'Printer name' to identify this specific printer driver on Océ PRISMAsatellite for
Office driver.
Do NOT use this printer as your default printer.
Click 'Next'. The 'Printer Sharing' dialog appears.
[59] Printer Sharing
9. Share a printer. The 'Share name' is the name for this printer on the Océ PRISMAsatellite
for Office server.
Click 'Next'. The 'Location and Comment' dialog appears.
10. Optionally, you can enter a 'Location' and a 'Comment'.
Click 'Next'. The 'Print Test Page' dialog appears.
11. Do not print a test page.
Click 'Next'. The 'Completing the Add Printer Wizard' dialog appears.
12. Click 'Finish' to complete the installation.
174
Chapter 9 - Functional overview
Ports
Input Channels
Ports
Introduction
Océ PRISMAsatellite for Office receives incoming jobs through one or more ports. When
you submit a job from a workstation, the job is transmitted to a port on the Océ PRISMAsatellite for Office server. You need at least one port to allow other workstations to
submit jobs.
Installing Océ PRISMAsatellite for Office on the server automatically creates one hidden
port for all Océ PRISMAsatellite for Office application drivers interacting with it. You
can define multiple ports to allow multiple entry points into the system.
There are 3 types of ports:
■ Hot folders
Hot folders (ports) are set up to monitor specific directories / folders, looking for JDF
print jobs. They are used when the input to Océ PRISMAsatellite for Office is filebased.
■ Passthrough ports
Passthrough ports are typically used in MS Windows networking environments.
Passthrough ports allow native printer drivers and Unix LPR queues to transmit print
jobs to the Océ PRISMAsatellite for Office server.
■ Office scanning
Office scanning (ports) are designed to import files from Océ engines that allow you
to scan documents to a file.
Types of ports
The following topics will describe how to use the types of ports.
Chapter 9 - Functional overview
175
Hot Folders
Hot folders
Hot Folders
Introduction
Hot folders (ports) are set up to monitor specific directories / folders, looking for Océ
PRISMAsatellite for Office compatible JDF files. They are used when the input to Océ
PRISMAsatellite for Office is file-based.
Note:
In case of errors with Hot folders, please consult the 'Event viewer'.
How to use Hot folders
Hot folders receive two kind of documents for each request with special naming conventions:
A JDF ticket of type Product node
It should comply with the 'Océ Product Node Intent specification'. The JDF ticket must
have the same name as the document data, suffixed by “.jdf”.
The document data
Note:
You are advised to drop the document first and then the JDF ticket.
Within a certain time (20 sec.), the combination of files should be available in the Hot
folder. If not, the file is removed from the Hot folder. Each Hot folder can handle one
JDF request (ticket and document) at the same time.
Note:
When files are removed from a Hot folder, this is logged in the 'Event log'.
176
Chapter 9 - Functional overview
Adding a Hot Folder
Adding a Hot Folder
Introduction
Hot folders (ports) are set up to monitor specific directories / folders, looking for JDF
print jobs. They are used when the input to Océ PRISMAsatellite for Office is file-based.
How to add a Hot folder
1. Click 'Input Channels' - 'Hot Folders'.
2. In the upper-right pane, right click and select 'New' - 'Hot Folders'.
The 'Browse for folder' dialog will appear.
3. Select a folder and click 'OK'.
Note:
Use the 'Create new folder' button if the folder does not yet exist.
The Hot folder name should not contain one of the following characters: " : < > | ? / \ *
&
The folder will be added to the folder list in the upper-right pane.
Note:
Make sure that the permissions of the Hot folder allow clients to drop files into the
folder.
Chapter 9 - Functional overview
177
Enabling a Hot Folder
Enabling a Hot Folder
Introduction
Hot folders (ports) are set up to monitor specific directories / folders, looking for JDF
print jobs. They are used when the input to Océ PRISMAsatellite for Office is file-based.
You can enable a specific Hot folder or enable all Hot folders.
How to enable a Hot folder
1. Click 'Input Channels' - 'Hot Folders'.
2. Select the Hot folder in the upper-right pane.
3. Right mouse-click and select 'Enable'.
The selected Hot folder will be enabled.
How to enable all Hot folders
1. Click 'Input Channels' - 'Hot Folders'.
2. Right mouse-click and select 'Enable'.
All Hot folders in the upper-right pane will be enabled.
178
Chapter 9 - Functional overview
Disabling a Hot Folder
Disabling a Hot Folder
Introduction
Hot folders (ports) are set up to monitor specific directories / folders, looking for JDF
print jobs. They are used when the input to Océ PRISMAsatellite for Office is file-based.
You can (temporarily) disable a specific Hot folder or disable all Hot folders.
How to disable a Hot folder
1. Click 'Input Channels' - 'Hot Folders'.
2. Select the Hot folder in the upper-right pane.
3. Right mouse-click and select 'Disable'.
The selected Hot folder will be disabled.
How to disable all Hot folders
1. Click 'Input Channels' - 'Hot Folders'.
2. Right mouse-click and select 'Disable'.
All Hot folders in the upper-right pane will be disabled.
Chapter 9 - Functional overview
179
Deleting a Hot Folder
Deleting a Hot Folder
Introduction
Hot folders (ports) are set up to monitor specific directories / folders, looking for JDF
print jobs. They are used when the input to Océ PRISMAsatellite for Office is file-based.
This procedure shows how to remove a Hot folder.
Note:
You can also (temporarily) disable a Hot folder.
How to delete a Hot folder
1. Click 'Input Channels' - 'Hot Folders'.
2. Select the Hot folder in the upper-right pane.
3. Right mouse-click and select 'Delete'.
The selected Hot folder will be deleted.
180
Chapter 9 - Functional overview
Passthrough Ports
Passthrough ports
Passthrough Ports
Introduction
You create passthrough ports to use them for passthrough devices. This allows you to
support the manufacturer's printer drivers.
Note:
In case of errors with passthrough ports, please consult the 'Event viewer'.
How to use passthrough ports
Passthrough ports are typically used to monitor certain network directories / folders for
the presence of printer description language (PDL) files. These files are print jobs that
were created automatically when a user prints using the manufacturer's printer driver.
This printer driver was defined on top of the 'OceFilePort' Windows port monitor.
Note:
The associated ticket may not be defined by the Océ PRISMAsatellite for Office Administrator. It is a default JDF file that will force output via the 'Passthrough device'.
However, a user account can be specified when creating a 'Passthrough port'. This account
will then be used for billing information for the job.
Chapter 9 - Functional overview
181
Adding a Passthrough Port
Adding a Passthrough Port
Introduction
A passthrough device uses a passthrough port and a passthrough proxy. The passthrough
port is in essence a folder where all the passthrough jobs are spooled in.
How to add a passthrough port
1. The Océ PRISMAsatellite for Office Administration console
2. Click 'Input Channels' - 'Passthrough'.
[61] Add a passthrough port
3. Right-click 'Passthrough'.
Select 'Domain' - 'Passthrough Port...'
The 'Passthrough Port Configuration' dialog box appears.
[62] Passthrough port configuration
182
Chapter 9 - Functional overview
Adding a Passthrough Port
4. Use the 'Browse' button to select the passthrough folder.
For example: c:\spool\passthrough
5. Click the drop down box 'Name' to select a 'User Account'.
Note:
This 'User Account' is used for accounting and job tracking purposes.
6. Click the drop-down box 'Printer' to select the passthrough printer for this passthrough
port.
Note:
Add a passthrough printer, see ‘Add Passthrough device’ on page 166.
7. Click 'OK' to confirm the changes.
8. Continue with ‘Create a passthrough proxy’ on page 172.
Chapter 9 - Functional overview
183
Enabling a Passthrough Port
Enabling a Passthrough Port
Introduction
Passthrough ports are used by passthrough devices. This allows you to support the 'native'
printer drivers.
You can enable a specific passthrough port or enable all passthrough ports.
How to enable a passthrough port
1. Click 'Input Channels' - 'Passthrough'
2. Select the passthrough port in the upper-right pane.
3. Right mouse-click and select 'Enable'.
The selected passthrough port will be enabled.
How to enable all passthrough ports
1. Click 'Input Channels' - 'Passthrough'
2. Right mouse-click and select 'Enable'.
All passthrough ports in the upper-right pane will be enabled.
184
Chapter 9 - Functional overview
Disabling a Passthrough Port
Disabling a Passthrough Port
Introduction
Passthrough ports are used by passthrough devices. This allows you to support the manufacturer printer drivers.
You can (temporarily) disable a specific passthrough port or disable all passthrough ports.
How to disable a passthrough port
1. Click 'Input Channels' - 'Passthrough'
2. Select the passthrough port in the upper-right pane.
3. Right mouse-click and select 'Disable'.
The selected passthrough port will be disabled.
How to disable all passthrough ports
1. Click 'Input Channels' - 'Passthrough'
2. Right mouse-click and select 'Disable'.
All passthrough ports in the upper-right pane will be disabled.
Chapter 9 - Functional overview
185
Deleting a Passthrough Port
Deleting a Passthrough Port
Introduction
Passthrough ports are used by passthrough devices. This allows you to support the manufacturer's printer drivers.
This procedure shows how to delete a passthrough port.
Note:
You can also (temporarily) disable a passthrough port.
How to delete a passthrough port
1. Click 'Input Channels' - 'Passthrough'.
2. Select the passthrough port in the upper-right pane.
3. Right mouse-click and select 'Delete'.
The selected passthrough port will be deleted.
186
Chapter 9 - Functional overview
Office Scanning
Office scanning
Office Scanning
Introduction
Océ PRISMAsatellite for Office will accept files scanned on Océ network printers/copiers.
Create and configure an 'Office scanning' port to receive these files.
Scanned files that are submitted with an invalid 'Scan code' are not accepted. These
scanned files will be moved within the Scanning folder to the 'Psat_Scan_Error_<error
scanid> sub folder. This is also logged in the Event log.
Note:
The Océ PRISMAsatellite for Office Administrator can afterwards add a new user with
the specific 'Scan code'. When the failed scanned files are manually moved to the Scanning folder, the normal Office scanning procedure will be performed.
How to configure Office scanning
Configure Office scanning#
Step
Description
1
Make sure that the Océ printer has scanning capability.
2
Upload an Océ PRISMAsatellite for Office 'Scan profile' file to the Océ
printer
3
Identify the folder on the server that the Océ printer is using to store scanned
files.
4
Configure an FTP server on your network to accept scanned images from
your Océ printer and place them into a directory that the Océ PRISMAsatellite for Office server can access.
5
Add and configure a new Office scanning port on the Océ PRISMAsatellite
for Office server to accept scanned files from the FTP server.
Note:
In case of errors with Office scanning, please consult the Windows 2003 'Event viewer'.
Chapter 9 - Functional overview
187
Adding an Office Scan Folder
Adding an Office Scan Folder
Introduction
Océ PRISMAsatellite for Office will accept files scanned on Océ network printers/copiers.
This procedure shows you how to add and configure an Office scan folder.
How to add an Office scan folder
1. Click 'Input Channels' - 'Office Scanning'.
2. In the upper-right pane, right click and select 'New' - 'Scan Folder...'.
The 'Browse for folder' dialog will appear.
3. Select a folder and click 'OK'.
Note:
Use the 'Create new folder' button if the folder does not yet exist.
The folder will be added to the folder list in the upper-right pane.
Note:
Make sure that the permissions of the Hot folder allow clients to drop files into the
folder.
188
Chapter 9 - Functional overview
Enable an Office scan folder
Enable an Office scan folder
Introduction
Océ PRISMAsatellite for Office will accept files scanned on Océ network printers/copiers.
This procedure shows you how to enable an specific Office scan folder or how to enable
all Office scan folders.
How to enable an Office scan folder
1. Click 'Input Channels' - 'Office Scanning'.
2. Select the Office scan folder in the upper-right pane.
3. Right mouse-click and select 'Enable'.
The selected Office scan port will be enabled.
How to enable all Office scan folders
1. Click 'Input Channels' - 'Office Scanning'.
2. Right mouse-click and select 'Enable'.
All Office scanning ports in the upper-right pane will be enabled.
Chapter 9 - Functional overview
189
Disable an Office scan folder
Disable an Office scan folder
Introduction
Océ PRISMAsatellite for Office will accept files scanned on Océ network printers/copiers.
This procedure shows you how to disable an specific Office scan folder or how to disable
all Office scan folders.
How to disable an Office scan folder
1. Click 'Input Channels' - 'Office Scanning'.
2. Select the Office scan folder in the upper-right pane.
3. Right mouse-click and select 'Disable'.
The selected Office scan port will be disabled.
How to disable all Office scan folders
1. Click 'Input Channels' - 'Office Scanning'.
2. Right mouse-click and select 'Disable'.
All Office scanning ports in the upper-right pane will be disabled.
190
Chapter 9 - Functional overview
Delete an Office scan folder
Delete an Office scan folder
Introduction
Océ PRISMAsatellite for Office will accept files scanned on Océ network printers/copiers.
This procedure shows how to delete an Office scan port.
Note:
You can also disable or enable an Office scan folder.
How to delete an Office scan folder
1. Click 'Input Channels' - 'Office Scanning'.
2. Select the Office scan folder in the upper-right pane.
3. Right-click and select 'Delete'.
The selected Office scan port will be deleted.
Chapter 9 - Functional overview
191
Exporting the User Configuration
User Management
Exporting the User Configuration
Introduction
The 'Export configuration' option allows you to export the 'Users' configuration into an
XML-format file.
How to export the user configuration
1. Click 'User Management'.
2. Right click 'Users'.
3. Click 'All tasks' - 'Export configuration...'.
A dialog will appear that allows you to select a location in which to store the XML file.
4. Select a folder and click 'Open'.
The specified 'Users' configuration will be exported to a file.
192
Chapter 9 - Functional overview
Users
Users
Users
Introduction
The 'User accounts' section allows you to specify which users can use the Océ PRISMAsatellite for Office driver to send jobs to the Océ PRISMAsatellite for Office server.
'User accounts' allow you to:
■ Track jobs send by users and send feedback to the user about the (status of the) job.
■ Store and generate accounting information about specific users.
■ Print the user information on banner pages.
■ Configure access permissions on resources.
User accounts
The User account authenticates the end-user to the Océ PRISMAsatellite for Office
server for submission and tracking purposes. The User account is also used to complete
'job settings information', for accounting records and banner page contents.
The User account is used to determine the access to the 'Personal Document Space', user
intent templates and modifications of the user preferences.
The Administrator's User account allows system configuration.
User accounts can used to restrict the offered type of services (Print, Fax, PDF conversion),
but you are advised to use 'Groups' for this.
User accounts can also used to restrict specific devices and features. For instance, a user
account may restrict users from using certain high-quality color printers.
The following types of users can be defined:
1- Imported MS Windows groups / users (local).
2- Océ PRISMAsatellite for Office / local users (mandatory Océ PRISMAsatellite for
Office driver users).
3- Domain users (advised).
Chapter 9 - Functional overview
193
Add an Océ PRISMAsatellite for Office user
Add an Océ PRISMAsatellite for Office user
Introduction
You create 'User accounts' for each user that sends jobs through Océ PRISMAsatellite
for Office.
The following types of users can be defined:
1- Imported MS Windows groups / users (local).
2- Océ PRISMAsatellite for Office / local users (mandatory for Océ PRISMAsatellite for
Office driver users).
3- Domain users (advised).
The procedure shows you how to add an Océ PRISMAsatellite for Office user.
Note:
Océ PRISMAsatellite for Office users will have to log on to the Océ PRISMAsatellite
for Office client. When a user enters an incorrect password 5 times, the account will be
locked.
How to add an Océ PRISMAsatellite for Office user
1. Click 'User Management' - 'Users'.
2. In the upper-right pane, right mouse-click and select 'New' - 'PRISMAsatellite user...'.
The 'User Configuration' dialog will appear.
3. Specify the user settings:
194
Chapter 9 - Functional overview
Add an Océ PRISMAsatellite for Office user
Configure user#
Tab
Description
General
User type
The 'PRISMAsatellite' user type is filled in here.
Account name
Enter the user's name. This is how the system identifies the
user.
Description
Enter a description of the user (optional).
First name
Enter the user's first name here.
Last name
Enter the user's last name here.
LDAP user
The LDAP check will allow you to retrieve additional user
information based on the 'Account name' from the LDAP
server.
The LDAP server is the local Active directory of the Windows Domain in which the PRISMAsatellite server is installed.
Scan code
Enter the 'Scan Code' here that the end-user has to use in
order to receive scanned documents in the 'Personal Document Space'. With the 'Scan Code' the user can also use
public user boxes on KMBT printers.
Apart from numbers you can also use characters for the
'Scan code'. There is no difference between upper-case and
lower-case when you use characters.
Note:
Please note that the 'LDAP User' option will overrule the existing user information if the user information is available on the LDAP server. This allows
you to update your Océ PRISMAsatellite for Office
users after changes on the LDAP server.
Note:
You cannot use any of the following characters in
the 'Account name' or 'Description' fields: @ " ; :
<>|?/\*[]=+,
Chapter 9 - Functional overview
195
Add an Océ PRISMAsatellite for Office user
Tab
Description
Member of
Add
Use the 'Add' button to add the user to a specific user
group.
Remove
Use the 'Remove' button to remove the user from a specific
user group.
Security
For security reasons, an Océ PRISMAsatellite for Office
user needs a password to log on.
Old password
Enter the current password here.
New password
Enter the new password here.
New password (confirm)
Confirm the new password here.
Note:
Please make sure that the new password meets the
following requirements:
- At least one capital
- At least one number
- At least 8 characters
Details
196
Chapter 9 - Functional overview
Use this tab to specify user details like telephone and Email.
Define the Department field for every user. You can use
this option to ‘Synchronize locations’ on page 162 with the
user departments.
Importing Windows Users
Importing Windows Users
Introduction
You create 'User accounts' for each user that sends jobs through Océ PRISMAsatellite
for Office.
The following types of users can be defined:
1- Imported MS Windows groups / users (local).
2- Océ PRISMAsatellite for Office / local users (mandatory for Océ PRISMAsatellite for
Office driver users).
3- Domain users (advised).
The procedure shows you how to import MS Windows users.
Note:
Océ PRISMAsatellite for Office users don't have to log on to the Océ PRISMAsatellite
for Office client manually. The Windows logon is used.
How to import Windows users
1. Click 'User Management' - 'Users'.
2. In the upper-right pane, right mouse-click and select 'Import Windows users'.
The 'Import Windows' dialog will appear.
3. Select the 'Domain' from the drop-down list.
4. The 'Check names' button allows you to check the end-user accounts within the 'Windows
users' field.
5. Click 'Browse...' open the 'Windows users' dialog.
6. Select the users you want to import and click 'Add'.
The windows users will be added to the 'Windows users import' dialog.
7. Click 'OK' to save the changes.
Chapter 9 - Functional overview
197
Editing a User
Editing a User
Introduction
This procedure shows you how to modify a user.
Note:
You cannot change the account name once the user has been added, but you can change
the password afterwards.
How to modify a user
1. Click 'User Management' - 'Users'.
2. In the upper-right pane, select a user.
3. Right mouse-click and select 'Properties'.
The 'User Configuration' dialog will appear.
4. Edit the user settings and click 'OK'.
198
Chapter 9 - Functional overview
Deleting a User
Deleting a User
Introduction
This procedure shows you how to delete a user.
How to delete a user
1. Click 'User Management' - 'Users'.
2. In the upper-right pane, select the user you want to remove.
3. Right click and select 'Delete'.
A dialog will appear that allows you to confirm to delete the selected user.
4. Click 'OK' to confirm.
Note:
The user is also removed from all groups where the user was added as a member.
Chapter 9 - Functional overview
199
Unlocking a User
Unlocking a User
Introduction
When a user enters an incorrect password 5 times, the account will be locked. This procedure shows you how unlock this user.
Note:
Please note that the 'Unlock' option is only available when the user has the 'locked' status.
How to unlock a user
1. Click 'User Management' - 'Users'.
2. In the upper-right pane, select the locked user.
The lock is indicated by a dimmed icon.
3. Right mouse-click and select 'Unlock'.
The selected user will now be able to log on again, using the correct password.
200
Chapter 9 - Functional overview
Groups
Groups
Groups
Introduction
Océ PRISMAsatellite for Office allows you organize the user accounts in groups. You
can configure services, for example Print, Fax or PDF, to groups. This allows you to offer
these services for a big number of users at the same time.
Note:
By default, Océ PRISMAsatellite for Office will contain a group called ‘Users’ and
'System administrators'.
User groups
Similar to the user management, groups can be either Océ PRISMAsatellite for Officedefined groups or imported Windows groups.
Chapter 9 - Functional overview
201
Adding a PRISMAsatellite Group
Adding a PRISMAsatellite Group
Introduction
Océ PRISMAsatellite for Office allows you organize the user accounts in groups. This
procedure shows you how to add an Océ PRISMAsatellite for Office group
How to add a PRISMAsatellite group
1. Click 'User Management' - 'Groups'.
2. In the upper-right pane, right click and select 'New' - 'User Group...'.
The 'Group Configuration' dialog will appear.
3. Specify the group settings:
202
Chapter 9 - Functional overview
Adding a PRISMAsatellite Group
Configure group#
Tab
Description
General
Group type
The 'PRISMAsatellite' group type will be filled in here.
Name
Enter the group name here.
Description
Enter a description of the group. This field is optional.
Note:
You cannot use any of the following characters in
the 'Name' or "Description' fields: @ " ; : < > | ? /
\*[]=+,
LDAP users
Use checkbox 'LDAP Users' to specify if the group members
are defined as LDAP users.
The LDAP check will allow you to retrieve additional user
information based on the 'Account name' from the LDAP
server.
The LDAP server is the local Active directory of the Windows Domain in which the PRISMAsatellite server is installed.
Apply to all members
Option 'LDAP Users' is applied to all group members.
Apply to future members
Option 'LDAP Users' is applied to all group members.
Present group members are not adapted by option 'LDAP
Users'.
Note:
Option 'LDAP Users' is applied on each group
member, regardless if any group member also belongs to another group.
Chapter 9 - Functional overview
203
Adding a PRISMAsatellite Group
Tab
Description
Print allowed
Select this option if you want to allow the users within the
group to use the 'Print' service when they use the Océ
PRISMAsatellite for Office client.
Fax allowed
Select this option if you want to allow the users within the
group to use the 'Fax' service when they use the Océ
PRISMAsatellite for Office client.
Conversion allowed
Select this option if you want to allow the users within the
group to use the 'Convert' service when they use the Océ
PRISMAsatellite for Office client.
Members
204
Chapter 9 - Functional overview
Add
Use the 'Add' button to add users to the group.
Remove
Use the 'Remove' button to remove users from the group.
Importing Windows Groups
Importing Windows Groups
Introduction
You can import Windows groups, available within a domain. All users that are within
the imported Windows groups will be added to the Océ PRISMAsatellite for Office
configuration.
How to import Windows groups
1. Click 'User Management' - 'Groups'.
2. In the upper-right pane, right mouse-click and select 'Adding Windows Group'.
The 'Windows Groups Import' dialog will appear.
3. Select the 'Domain' from the drop-down list.
4. The 'Checking Names' button allows you to check the groups within the 'Windows
Groups' field.
5. Click 'Browse...' to start the 'Windows Groups' dialog.
6. Select the groups you want to import and click 'Add'.
The groups will be added to the 'Windows Groups Import' dialog.
7. Use checkbox 'LDAP Users' to specify if the group members are defined as LDAP users.
The LDAP check will allow you to retrieve additional user information based on the
'Account name' from the LDAP server.
The LDAP server is the local Active directory of the Windows Domain in which the
PRISMAsatellite server is installed.
8. Select 'Apply to future members' to apply option 'LDAP Users' to all group members.
9. Select 'Apply to future members' to apply option 'LDAP Users' to all group members.
Present group members are not adapted by option 'LDAP Users'.
10. Use the check-boxes to specify if members of that group are allowed to use the 'Print',
'Fax' and/or 'Convert' option.
11. Click 'OK' to save the changes.
Chapter 9 - Functional overview
205
Editing a Group
Editing a Group
Introduction
Océ PRISMAsatellite for Office allows you to organize the user accounts in groups. This
procedure shows you how to edit a group.
How to edit a group
1. Click 'User Management' - 'Groups'.
2. In the upper-right pane, select a group.
3. Right mouse-click and select 'Properties'.
The 'Group Configuration' dialog will appear.
4. Edit the user settings and click 'OK'.
206
Chapter 9 - Functional overview
Deleting a Group
Deleting a Group
Introduction
This procedure shows you how to delete a group.
How to remove a group
1. Click 'User Management' - 'Groups'.
2. In the upper-right pane, select a group.
3. Right mouse-click and select 'Delete'.
A dialog will appear that allows you to confirm to delete the selected group.
4. Click 'OK' to confirm.
Chapter 9 - Functional overview
207
Synchronization of Windows groups members
Synchronization of Windows groups members
Introduction
A synchronization mechanism will re-synchronize the imported Windows User groups
on a regular basis. You can also start this synchronization mechanism manually.
Click 'Groups' - 'All Tasks' - 'Synchronize members'.
Refresh
Refresh
During a refresh (on a regular basis or manually), all imported Windows user groups are
updated.
If a new Windows user was added in the Windows domain group, it will be created (if
required). If a Windows user was deleted from the Windows group, it will be deleted
only if it does not belong to any other user groups defined in Océ PRISMAsatellite for
Office.
If the Windows domain group no longer exists, the corresponding imported group will
be removed. The included users will also be removed, if they do not belong to any other
user group defined in Océ PRISMAsatellite for Office.
For users (either Océ PRISMAsatellite for Office or Windows users) that have the 'LDAP
User' option selected, the properties will also be synchronized with the information on
the LDAP server.
208
Chapter 9 - Functional overview
Jobs
Jobs
Jobs
Introduction
When jobs are submitted to the system, they will appear in the 'Jobs' section.
The 'Jobs' section shows the following jobs:
■ Submitted but not yet processed.
■ Currently processed or waiting to be processed.
■ Processed or canceled.
Normally there is no need to edit jobs. In case of troubleshooting or solving specific
problems it could be useful to edit a job.
The following job states can occur:
■ Preparing for processing
The job entered Océ PRISMAsatellite for Office but is not fully defined yet and cannot
be processed. This can occur when a new job is submitted.
■ Processing
The job is prepared or it is converted to PDF and placed on the end-user's 'Personal
document space'. The printer for which the job is prepared is indicated. In case of
PDF conversion, the final document name is indicated.
■ Waiting
This temporarily state indicates that the job is currently waiting to be assigned to a
printer or waiting for PDF conversion, scanning, and so on.
■ Waiting in Printer
The job is within the printer's mailbox. The printer on which the job is stored is indicated.
■ Sending to Printer
The job is 'spooled out' to the printer but the printing has not started yet. The printer
to which the job is send is indicated.
■ Printing
The job is being printed. The printer on which the job is being printed is indicated.
■ Needs attention
The job is within the printer queue and printing can start or continue. There is,
however, a minor issue with the printer (toner low, for example).
■ Error
The job could not be processed or printed by a device and has been removed from
the device queue. The job cannot be processed unless the job ticket is modified or the
problem with the device is solved.
Chapter 9 - Functional overview
209
Jobs
■
■
Completed or canceled
The printer on which the job was completed or canceled is indicated.
Locked for editing
The job is suspended because it is edited by the end-user or by the Administrator.
The following table shows you the actions that are possible with respect to the job states.
Actions#
Job status
Actions
Preparing for processing
Cancel
Processing
Restart, Cancel
Waiting
Restart, Edit, Cancel
Waiting in Printer
None
Sending to Printer
Restart, Cancel
Printing
None
Needs attention
Restart, Cancel
Error
Restart, Edit, Cancel
Completed
None
canceled
None
Locked for editing
Restart, Cancel
The jobs section
Jobs details#
Column
Description
Job name
The job name is displayed here
Submitter
The name of the user that has submitted the job will be
displayed here.
Submit time
The time and date that the user has submitted the job will
be displayed here.
Status
The job status will be displayed here.
Note:
You can change the displayed columns. In the upper-right pane, right mouse-click and
select 'View'- 'Add/remove columns'. You can add columns like 'Destination' and 'Tasks'.
210
Chapter 9 - Functional overview
Viewing the Job Details
Viewing the Job Details
Introduction
When jobs are submitted to the system, they will appear in the 'Jobs' section.
This procedure shows you how to view the job details (job ticket).
How to view the job details
1. Click 'Jobs' in the tree section.
2. In the upper-right pane, select the job.
3. Right mouse-click and select 'Properties'.
The 'Job Details' dialog will appear that shows you the details of the selected job.
Chapter 9 - Functional overview
211
Editing the Job Details
Editing the Job Details
Introduction
When jobs are submitted to the system, they will appear in the 'Jobs' section.
This procedure shows you how to edit the job details (job ticket).
Note:
You can edit the job details for jobs that have the 'Waiting' and the 'Error' state.
How to edit the job details
1. Click 'Jobs' in the tree section.
2. In the upper-right pane, select the job.
3. Right mouse-click and click 'Edit job settings'.
The Océ PRISMAsatellite for Office client will appear that allows you to edit the job
settings.
4. Click 'Save' to confirm the changes.
212
Chapter 9 - Functional overview
Canceling a Job
Canceling a Job
Introduction
When jobs are submitted to the system, they will appear in the 'Jobs' section.
This procedure shows you how to cancel a job.
You can cancel a job that has one of the following states:
■ Preparing for processing
■ Processing
■ Waiting
■ Sending to Printer
■ Needs attention
■ Error
■ Locked for editing
How to cancel a job
1. Click 'Jobs' in the tree section.
2. In the upper-right pane, select the job (that was not completed).
3. Right mouse-click and select 'Cancel'.
The job status will be changed to 'Canceled'.
Chapter 9 - Functional overview
213
Restarting a Job
Restarting a Job
Introduction
When jobs are submitted to the system, they will appear in the 'Jobs' section.
This procedure shows you how to restart a job.
You can restart a job that has one of the following states:
■ Processing
■ Waiting
■ Sending to Printer
■ Needs attention
■ Error
■ Locked for editing
How to restart a job
1. Click 'Jobs' in the tree section.
2. In the upper-right pane, select the job (that has an error).
3. Right mouse-click and select 'Restart'.
The job status will be changed to 'Restart'.
214
Chapter 9 - Functional overview
Delete a job
Delete a job
Introduction
When jobs are submitted to the system, they will appear in the 'Jobs' section.
This procedure shows you how to delete a job.
You can delete a job that has one of the following states:
■ Processing
■ Waiting
■ Sending to Printer
■ Needs attention
■ Error
■ Locked for editing
How to delete a job
1. Click 'Jobs' in the tree section.
2. Select a job in the upper-right pane.
3. Right click and select 'Delete'.
The job is deleted. The job disappears from the list of jobs.
Chapter 9 - Functional overview
215
Showing / Hiding Completed Jobs
Showing / Hiding Completed Jobs
Introduction
When jobs are submitted to the system, they will appear in the 'Jobs' section. This sections
shows those jobs that are 'currently being processed' or that are 'waiting to be processed'.
The 'Jobs' section shows the following jobs:
■ Submitted but not yet processed.
■ Currently processed or waiting to be processed.
■ Processed or canceled.
When you do or don't want to see completed jobs, use this procedure to show or hide
completed (and cancelled) jobs.
How to show / hide completed jobs
1. Click 'Jobs' in the tree section.
2. Right mouse-click and select 'Show Completed Jobs' to show completed jobs.
3. Right mouse-click and select 'Hide Completed Jobs' to hide completed jobs.
216
Chapter 9 - Functional overview
Index
Index
Access
Access ..................................................145, 150
Account name
Account name ..............................................194
Accounting
Accounting .....................................................90
Accounting report
Accounting report ...........................................90
Add Hot folder
Add Hot folder .............................................177
Add location
Add location .................................................160
Add media
Add media ....................................................137
Add Office scan folder
Add Office scan folder ..................................188
Add Passthrough device
Add Passthrough device ................................166
Add passthrough port
Add passthrough port ...................................182
Add printer
Add printer ...................................................145
Add user
Add user .......................................................194
Adobe Acrobat Reader
Adobe Acrobat Reader .............................12, 13
Allowed color types
Allowed color types .............................145, 150
Allowed number of active users
Allowed number of active users ....................118
Apply a work template as specialized template to all
users
Apply a work template as specialized template to
all users ...........................................................84
Apply the factory template to all users
Apply the factory template to all users ............84
Archiving
Archiving ........................................................72
B
Back up
Back up ........................................................107
Back-up
Back-up ........................................................107
Backup
Backup .........................................................107
Business Environments
Business Environments .....................................8
C
Cancel job
Cancel job ....................................................213
canceled
canceled ........................................................209
Check connection
Check connection .......................145, 150, 167
Client requirements
Client requirements ........................................13
Clients settings
Clients settings .............................................125
Completed
Completed ...................................................209
Configure driver
Configure driver ...........................................101
Configure Passthrough device
Configure Passthrough device .......................166
Configure printer
Configure printer ................................145, 150
Connection type
Connection type ..................................145, 150
Conversion allowed
Conversion allowed ......................................202
Copy printer
Copy printer .................................................156
Costs and prices
Costs and prices ..............................................90
CustomFieldId
CustomFieldId .............................................125
Customized Fields
Customized Fields ........................................110
D
Data Source Name
Data Source Name .......................................125
Data Sources (ODBC)
Data Sources (ODBC) .................................125
Database exchange
Database exchange ..........................................90
Delete all specialized templates of all users
Delete all specialized templates of all users ......84
Delete group
Delete group ................................................207
217
Index
Delete Hot folder
Delete Hot folder .........................................180
Delete location
Delete location .............................................163
Delete media
Delete media ................................................140
Delete Office scan folder
Delete Office scan folder ..............................191
Delete passthrough device
Delete passthrough device ............................171
Delete passthrough port
Delete passthrough port ...............................186
Delete printer
Delete printer ...............................................157
Delete user
Delete user ...................................................199
Device configuration
Device configuration ..................145, 150, 156
Device name
Device name ........................................145, 150
Device priority
Device priority .............................................160
Device type selection
Device type selection ...........................145, 150
Disable Hot folder
Disable Hot folder ........................................179
Disable Office scan folder
Disable Office scan folder .............................190
Disable passthrough port
Disable passthrough port ..............................185
Doc Works
Doc Works .....................................................74
Documents settings
Documents settings ......................................120
Driver
Driver ...........................................96, 101, 104
DSN
DSN ............................................................125
E
Edit factory template
Edit factory template ......................................84
Edit group
Edit group ....................................................206
Edit job details
Edit job details .............................................212
Edit user
Edit user .......................................................198
Enable Auto-Routing
218
Enable Auto-Routing ...........................145, 150
Enable Hot folder
Enable Hot folder .........................................178
Enable Office scan folder
Enable Office scan folder ..............................189
Enable passthrough port
Enable passthrough port ...............................184
Error
Error ............................................................209
Event log
Event log ......................................................176
Event viewer
Event viewer .................................................176
Example
Example ...................................................17, 23
Expiration date
Expiration date .............................................118
Export
Export ...............................135, 141, 143, 192
Export complete configuration
Export complete configuration .....................135
Export devices configuration
Export devices configuration ........................143
Export media configuration
Export media configuration ..........................141
Export user configuration
Export user configuration .............................192
F
Fax
Fax .................................................................44
Fax allowed
Fax allowed ..................................................202
Fax distribution
Fax distribution ..............................................44
Fax service
Fax service ......................................................44
Fax support
Fax support .....................................................62
File connection
File connection ....................................145, 150
FineReader
FineReader ...................................................123
FTP server
FTP server ...............................................12, 63
G
Group delete
Index
Group delete ................................................207
Group edit
Group edit ...................................................206
Group name
Group name .................................................202
Group type
Group type ...................................................202
H
Hard disk
Hard disk .......................................................12
Hide completed jobs
Hide completed jobs ....................................216
Hot folder add
Hot folder add ..............................................177
Hot folder delete
Hot folder delete ..........................................180
Hot folder disable
Hot folder disable .........................................179
Hot folder enable
Hot folder enable .........................................178
Hot folders
Hot folders ..........................................175, 176
I
Import media configuration
Import media configuration .........................142
Import Windows groups
Import Windows groups ........................89, 205
Import Windows users
Import Windows users ...........................89, 197
Input channel
Input channel ...............................................177
Install
Install .............................................................48
Install driver
Install driver ...................................................96
Install Internet Information Server
Install Internet Information Server .................39
Install overview
Install overview ...............................................36
Intel Pentium
Intel Pentium .................................................12
J
Job settings
Job settings ...................................................119
Jobs
Jobs ..............................................................209
L
Large company
Large company ...............................................23
LDAP
LDAP ...........................................................111
LDAP Configuration
LDAP Configuration ....................................111
LDAP synchronization
LDAP synchronization .................................122
LDAP user
LDAP user ...................................................194
LDAP users
LDAP users ..................................................205
License
License .........................................................118
License agreement
License agreement ...........................................96
Licenses
Licenses ........................................................118
Location add
Location add ................................................160
Location delete
Location delete .............................................163
Location modify
Location modify ...........................................161
Locations
Locations ......................................................159
Locked for editing
Locked for editing ........................................209
LPR
LPR .....................................................145, 150
M
Mac OS
Mac OS ..........................................................13
Maximum allowed disk space
Maximum allowed disk space .......................120
Maximum disk space
Maximum disk space ......................................71
Maximum documents
Maximum documents .....................................71
Maximum number of documents
Maximum number of documents .................120
Media
Media ...........................................................136
219
Index
Media color
Media color ..................................................137
Media definition
Media definition ...........................................139
Media material
Media material .............................................137
Media name
Media name .................................................137
Media type
Media type ...................................................136
Media weight
Media weight ...............................................137
Memory
Memory ..........................................................12
Menu bar
Menu bar ........................................................84
Microsoft Access
Microsoft Access ...........................................125
Microsoft Windows Networking
Microsoft Windows Networking .........145, 150
Modify location
Modify location ............................................161
Modify media
Modify media ...............................................139
Modify printer
Modify printer ..............................................150
N
Needs attention
Needs attention ............................................209
Network Administrator
Network Administrator ..................................48
New passwords
New passwords .............................................194
O
Océ Doc Works
Océ Doc Works ..............................................74
Océ Intra Logic
Océ Intra Logic ............................................123
OCR
OCR ............................................................123
Office scan folder
Office scan folder ...............188, 189, 190, 191
Office Scanning
Office Scanning ............................................187
Office scanning
Office scanning ............................................175
220
Old password
Old password ...............................................194
P
Page thresholds
Page thresholds ....................................145, 150
Panes
Panes ..............................................................84
Passthrough
Passthrough ..................................................165
Passthrough device
Passthrough device ..............................165, 166
Passthrough port add
Passthrough port add ....................................182
Passthrough ports
Passthrough ports ................................175, 181
Password
Password ......................................................194
Pause Passthrough device
Pause Passthrough device ..............................169
Pause printer
Pause printer ................................................158
Personal document space
Personal document space ................................71
Plan installation
Plan installation ..............................................16
Point of Service
Point of Service ...............................................96
Pre-printed
Pre-printed ...................................................137
Preferences
Preferences ...................................................101
Preparing for processing
Preparing for processing ...............................209
Print allowed
Print allowed ................................................202
Printing
Printing ........................................................209
Priority
Priority .........................................................160
PRISMAarchive
PRISMAarchive .....................................72, 123
Processing
Processing .....................................................209
Punching
Punching ......................................................137
Index
R
Raw socket
Raw socket ..........................................145, 150
Remote control
Remote control ...............................................38
Remote Port
Remote Port ...................................................90
Remote submission
Remote submission ......................................104
Reports
Reports .........................................................106
Resolution
Resolution ................................................12, 63
Restart job
Restart job ....................................................214
Restore
Restore .........................................................107
Resume Passthrough device
Resume Passthrough device ..........................170
Resume printer
Resume printer .............................................158
SMTP
SMTP ..........................................................123
SQL command
SQL command .............................................125
Start server
Start server ...................................................107
Status bar
Status bar ........................................................84
Stop server
Stop server ....................................................107
Synchronize members
Synchronize members ...................................208
System administrators
System administrators ...................................201
T
Tabbed media
Tabbed media ..............................................137
Terminal Services
Terminal Services ...........................................38
U
S
Scan
Scan ................................................................63
Scan code
Scan code ...............................................68, 194
Scan profile
Scan profile .....................................................63
Scan support
Scan support ...................................................63
Scan-to-file
Scan-to-file .....................................................68
Scanning
Scanning .........................................................63
Sending to Printer
Sending to Printer ........................................209
Server requirements
Server requirements ........................................12
Services
Services .........................................................123
Services settings
Services settings ............................................123
Site strategy
Site strategy ....................................................36
Small company
Small company ...............................................17
Unlock
Unlock .........................................................200
Unlock user
Unlock user ..................................................200
Update Windows 2003
Update Windows 2003 ...................................39
User account
User account ................................................182
User accounts
User accounts ........................................88, 193
User delete
User delete ....................................................199
User edit
User edit .......................................................198
User management
User management ...........................................84
User type
User type ......................................................194
Users
Users .............................................88, 193, 201
V
Validation settings
Validation settings ........................................125
View job details
221
Index
View job details ............................................211
W
Waiting
Waiting ........................................................209
Waiting in Printer
Waiting in Printer ........................................209
Windows 2000
Windows 2000 ...............................................13
Windows 2003
Windows 2003 ...............................................13
Windows domain
Windows domain ...........................................87
Windows groups
Windows groups ..........................................205
Windows Groups synchronization
Windows Groups synchronization ................122
Windows users import
Windows users import ..................................197
Windows Vista
Windows Vista ...............................................13
Windows XP
Windows XP ..................................................13
Work templates
Work templates ..............................................84
222