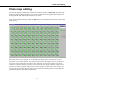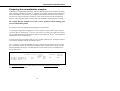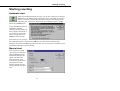
1
1450-920-13
October 2002
User manual
MicroBeta® TriLux & MicroBeta JET
Windows® workstation
For MicroBeta workstation software version 4.0
PerkinElmer Life Sciences, Wallac Oy, P.O. Box 10, FIN-20101 Turku, Finland.
Tel: 358-2-2678111. Fax: 358-2-2678357.Website: www.perkinelmer.com/lifesciences
Contents
1
2
Contents
Normalization/standardization
counting procedure
47
Results
48
Crosstalk correction
49
Introduction
49
Crosstalk CPM normalization
49
Crosstalk DPM standardization
50
Luminescence counting
52
Introduction
52
Creating a luminescence normalization
protocol
52
Preparation of normalization samples
(without JET)
53
JET normalization plate maps
53
Luminescence normalization counting
procedure
54
Counting the actual samples
54
Coding cassettes and filtermats
57
Cassette code system
57
Cassette codes used
57
Stop cassette
58
Cassette operation
58
Filtermat coding
58
Plate ID reader
60
Starting counting
61
Automatic start
61
Manual start
61
Stopping counting
62
Live display
63
Viewing results
69
Introduction
69
Result button
70
System operations
73
System view
73
Settings
74
System information
75
Robotic loader interface
75
Service
75
Contents
Installation
Contents
3
Installation
7
PC and software requirements
7
Installing new or upgrading old
MicroBeta WIW software from CD 9
Overview
13
Enhanced Security mode
13
Order of Operation
14
Preparation
14
Operation
15
Results
15
Using this manual
15
Start-up
16
User interface
17
Main window
17
Injector preparation
23
Setting up the injector(s)
23
Protocol preparation
25
Opening a protocol group
25
Protocol group window
26
Protocol editing
29
Protocol parameter setting
29
Plate map editing
31
Protocol management
32
Manage group
32
Protocol templates
35
Output definition
36
Output dialogue
36
Normalization/standardization
38
What is normalization?
38
When is normalization necessary? 38
Preparing the normalization samples 39
What is standardization?
40
Normalization/standardization
parameters
45
3
Contents
Enable GLP
75
Exiting from Windows Workstation 76
Demo selection
76
GLP Operation
79
GLP plates
79
GLP group and GLP protocol
79
Running GLP
80
GLP View
80
Error messages
87
Appendix – Setting up empty cassette
detection for MicroBeta JET
91
Introduction
91
Principle
91
Procedure
91
Index
95
Trademarks
MicroBeta and MultiCalc are registered
trademarks and ScintiPlate a trademark
of PerkinElmer, Inc.
Windows, Windows NT 4.0 and Excel
are registered trademarks of Microsoft
Corp.
Pentium is a registered trademark of Intel
Corp.
MicroBeta Windows Workstation
contains Formula One from Virtual
Components, copyright 1994-1997. All
rights reserved.
4
Installation
5
6
Installation
Installation
PC and software requirements
The recommended PC system is a Pentium 800 MHz or faster, 256 MB memory, CD or
DVD drive, Windows XP and 4 GB or more hard disk.
MicroBeta workstation can be used with or without Enhanced Security.
With Enhanced Security the supported operating systems are Windows XP, Windows 2000
and Windows NT 4. For each operating system the minimum requirements are:
Microsoft Windows XP
Pentium 233 MHz or faster processor
128 MB RAM
2 GB hard disk space
CD-ROM or DVD drive (for installation)
VGA or higher-resolution monitor
Microsoft mouse or compatible pointing device
Windows 2000 professional
133 MHz or faster Pentium processor
64 MB RAM (128 MB recommended)
2 GB or more hard disk space with 650 MB free space (more free hard disk space
is required if installing over a network)
CD-ROM or DVD drive (for installation)
VGA or higher-resolution monitor
Microsoft mouse or compatible pointing device
Windows NT Workstation 4.0
Service pack 6
Pentium or faster processor
32 MB RAM (128 MB recommended)
110 MB hard disk space
CD-ROM or DVD drive (for installation)
VGA or higher-resolution monitor
Microsoft mouse or compatible pointing device
7
Installation
When using Microbeta Workstation without Enhanced Security the operating systems
Windows 95 and Windows 98 can also be used. The Windows 95 COM has to be upgraded.
For reliable serial communication the buffered communication chip NS16550AF is
required.
In Enhanced Security mode the data processing software MultiCalc cannot be used. In
normal mode if MultiCalc is used, it must be v2.0 or later. The recommended printer is
Lexmark E320.
Note: Check that the serial communication parameters are the same both in MicroBeta and
in the Windows setup (use the Control Panel to check Windows). In MicroBeta the default
setting is 9600 baud, 8 bits, 2 stop bits, no parity and hardware handshake.
The MicroBeta instrument program must be 4.7 or later for MicroBeta TriLux and 5.2 or
later for MicroBeta JET.
8
Installation
Installing new or upgrading old MicroBeta WIW
software from CD
To install MicroBeta WIW insert the installation CD into your CD-ROM drive. The
installation program will start automatically (if this doesn’t happen, run Setup.exe from the
CD). The dialogue shown below will appear.
Click the option button of the Windows version you are going to use.
If you want to install using the Enhanced Security mode, click the Enhanced Security
mode check box. Click Install. The software will guide you through the installation of the
Enhanced Security mode.
9
Installation
If instead you want to install in normal mode, leave the check box unselected. Click Install.
Instructions about installation in normal mode are in the folder called Service Support on
the installation CD.
10
Introduction
11
12
Overview
Overview
MicroBeta is a multi-detector plate counter for liquid scintillation and luminescence
measurements. It can measure samples on microplates (both flexible and rigid), filtermats and
tubes. It also gives excellent performance for Scintillation Proximity Assays. Plates can be
loaded in a stacker or a robot system can be used. As a luminometer with injectors (MicroBeta
JET) it can measure both flash type and glow type luminescence.
To have the possibility to use injectors, you must have an "Injector ready" MicroBeta.
However you may have purchased an "injector ready" MicroBeta with or without an injector
module installed. Or you may want to change or add to your existing configuration. This you
can easily do. See the instrument manual for information about installing an injector module.
Enhanced Security mode
MicroBeta has an Enhanced Security mode intended for facilities that have to comply with
21 CFR Part 11 regulation from the Food and Drug Administration (FDA) of the USA.
During installation you can select if you want to use the Enhanced Security mode. Once you
have enabled this mode you cannot disable it because to do so would not be in compliance
with 21 CFR Part 11.
The regulation (21 CFR Part 11) sets the criteria under which the agency (FDA) considers
Electronic Records and Electronic Signatures (if applied) to be trustworthy, reliable and
generally equivalent to traditional paper records and handwritten signatures executed on
paper. The regulation applies to records in electronic form that are created, modified,
maintained, archived, retrieved, or transmitted, under any records requirements set forth in
agency regulations (i.e. GMP, GLP, GCP…). It also applies to electronic records submitted
to FDA under requirements of the Federal Food, Drug, and Cosmetic Act.
The Enhanced Security mode for MicroBeta provides the technological controls and
features to support full 21 CFR Part 11 compliance. These features can be classified under
three main headings:
improved access control (unique Userid/Password combination) with five user
levels
improved file security covering protocols (versioning) and result files
audit trails of user actions
This manual and the electronic help will tell you how to use MicroBeta with or without the
Enhanced Security mode. All differences in use are noted and explained.
13
Overview
Note: use of the Enhanced Security mode does not alone ensure compliance with 21 CFR
Part 11. Any facility that wants to be compliant with the 21 CFR Part 11 regulation must
also implement the necessary procedures and controls set by the regulation.
Order of Operation
Order of operation of MicroBeta can be divided into three main phases: Preparation, Operation
and Results. There are also a number of miscellaneous functions that help you set up
MicroBeta in the way you want for e.g. communicating with an external computer, backing up
result files etc.; these are described in System operations.
Preparation
You must prepare MicroBeta before using it. There are three types of preparation:
Injector setup
Note: this is necessary only if you are using the injector system. The injector(s) must have first
been installed. See page 23 "Setting up the injectors" for more details.
Assay protocol setting
Counting of samples is controlled by a set of parameters called an assay protocol. Protocol
setting is the process of defining the parameters in a protocol. An assay protocol will also
include normalization or standardization information without or with crosstalk correction, see
below.
Normalization or standardization
Normalization is necessary for multi-detector MicroBetas used for CPM or luminescence
counting. Normalization is the procedure by which the slight variation between detectors is
calculated and correction factors are produced. These factors are used by MicroBeta to ensure
the results obtained from any of the detectors are equivalent.
Standardization is an extended form of normalization and is needed in the case of DPM
counting where, in addition to the detector normalization, it is necessary to correct for the
quenching of samples.
In the case of microtitration plate cassettes that do not provide optical shielding between wells,
it is necessary to correct for the light coming from adjacent wells and contributing to the counts
detected from any particular well. If selected, crosstalk correction is included in the
normalization and standardization procedures.
14
Overview
Luminescence counting requires a special normalization procedure.
When you have finished setting protocols for the types of samples and counting you need, and
have made the normalizations or standardizations you need, you are ready to operate
MicroBeta.
Operation
MicroBeta is very easy to operate: you just fit your plate into a suitable cassette and fix a
barcode on it. The barcode will tell MicroBeta which protocol to use in counting the plate.
You then load the plate(s) into the cassette rack and click the Start button on the screen of
your PC. MicroBeta will count the plate and produce the results according to the instructions
you have given in the assay protocol or the normalization or standardization parameters.
Results
Results are produced as printout and/or files that can be viewed or imported into other
programs. Result handling is described in this part of the manual.
Using this manual
The manual is arranged in the sequence: Preparation, Operation, Results and System
operations. For normal use, once preparation has been done you only need to use the parts
called Operation and Results.
Buttons to be clicked on the screen or pressed on the keyboard, menu titles and menu items are
in bold type.
References to other parts of this manual are underlined.
If you need to use terminal operation then please refer to the Instrument manual for
information about terminal operation and also the non-workstation mode of operation
necessary in terminal operation.
15
Overview
Start-up
1. Switch on the printer.
2. Switch on the PC and start up the MicroBeta Windows Workstation program by clicking the
icon in the Program manager.
3. Insert the MicroBeta program disk into disk drive A, the lower disk drive of the counter and
the protocol disk into disk drive B, the upper disk drive.
4. Switch on MicroBeta with the power switch at the back of the counter. Loading takes some
3 minutes, then the counter is ready for operation.
16
User interface
User interface
The MicroBeta Windows workstation software is a 32 bit application running under Windows
95, Windows 98 or Windows NT 4.0.
Main window
The main window consists of five parts (from top to down): the title bar, menu bar, button
bar, client area and status bar. The client area may be completely filled with any of the child
windows.
17
User interface
Title bar
The main title bar has the program title in it and it allows you to drag the window around on
the screen. Double clicking the title bar toggles the main window between maximized and
restored size. When a child window is maximized, the title bar shows also the title of the child
window.
Menu
The menu allows you to give commands to the program by keyboard or mouse. You seldom
need the menu if you use the mouse. If you prefer to use the keyboard, you have to use the
menu. Some commands are available only in the menu but the main commands are on the
button bar.
To access the menu with the mouse, click on the menu title you want. A "drop down" menu
will appear. Double click the item you want or single click it and then press Enter.
To access the menu without the mouse you must first press the Alt key on your keyboard.
This will highlight the leftmost menu title. Use the cursor keys to move the highlighting to
the menu title you want, then press Enter. A menu will "drop down". Either use the cursor
keys to move down to the menu item you want and then press Enter, or press the letter on
the keyboard corresponding to the underlined letter in the menu item you want to select.
Within a dialogue you can use the Tab key to move from field to field. Shift Tab takes you
in the opposite direction. The Enter key allows you to give a positive response to the
dialogue and the Esc key to cancel it.
The menu titles are:
File, Counter, View, Window and Help
Note - Restrictions in Enhanced Security mode
File menu items
Injector Setup
Communications, Sharing and Service
Reset Run ID
enabled only for WIW User group members
enabled only for WIW System Manager group
members
disabled for all users
Counter menu items
Start, Stop, Next Position
enabled only for WIW User group members
18
User interface
Button bar
The button bar contains buttons for commands that are used frequently. The same commands
are also in the menu. If a button is not operable, the text of the button is grey.
The traffic light on the Start button shows green when the counter is in the Ready state and red
when it is not. The traffic light shows red when: the counter is counting, the program is setting
counter parameters or the counter is off. You can hide or show the button bar by selecting
Button bar from the View menu. Hiding the button bar gives more room for your windows.
The button bar is not required for running the program. You can give the same commands
from the menu.
The following shows a list of button operations:
Button
Start*
Stop*
Live
Menu command
Counter-Start
Counter-Stop
View-Live display
Protocols
File-Protocols
Results
File-Results
JET*
File-Injector setup
System
Print
Help
File-System
File-Print
Help-Contents
Action
Starts counting in automatic mode
Stops counting
Brings live display
(or Window-Live display)to the top
Shows the list of protocol groups for
selecting and opening
Shows a dialogue containing the
latest results
Max. of 100 results shown
Gives access to the injector
system functions
Leads to system settings
Prints the active document
Displays help
* See "Restrictions in Enhanced Security mode" described on the previous page
Status bar
The status bar at the bottom of the main window shows the status of the counter. If the counter
is in the Ready state, it reads READY. If the program is waiting for the counter to go to the
Ready state, the status bar reads WAITING READY. During counting it shows a variety of
status information sent by the counter. You can hide or show the status bar selecting Status bar
from the View menu. Hiding the status bar gives more room for your windows. The Status bar
19
User interface
is not required for running the program, but it may be handy because it lets you see the state of
the counter when counting.
The left area of the status bar describes the actions of menu items as you use the arrow keys to
navigate through menus. This area similarly shows messages that describe the actions of
Button bar buttons as you depress them, before releasing them. If after viewing the description
of the Button bar button command you wish not to execute the command, then release the
mouse button while the pointer is off the Button bar button.
Date and time
The program uses the date and time settings from the Windows control panel. To change the
format of the date and time, run Control Panel (from group Main of Program Manager) and
double-click the International icon. Restart the workstation program to make the changes
visible.
20
Preparation
21
22
Injector preparation
Injector preparation
Note: this information is for those who have the injector system installed. If you do not, then
ignore this part and go on to Protocol groups on page 25.
Setting up the injector(s)
Make sure the injector assembly is moved
away from the counting chamber, either
into the injector chamber on the left of the
instrument, or removed from MicroBeta.
See the Move Out command in the
Injector Setup dialogue.
Note: in robot loading MicroBeta JET
systems, the injector assembly must be
moved to the measuring chamber before
counting starts. See the Move In
command.
Click the Injector button or select Injector Setup from the File menu. These
are disabled if the counter does not support JET features or if the counter is not
in the Ready state.
Note: it may take several seconds after selecting Injector Setup before the counter is ready to
accept JET commands. A waiting dialogue is shown with the text "Please wait while counter
loads the JET interface". If the counter does not respond within a reasonable time (30 s), a
message "Time-out when waiting response from counter. Please check that counter has power
on." is displayed.
When the counter is ready to accept JET commands, the software checks if the injector
assembly is in or out and enables the Injector Assembly buttons accordingly. It also checks
the current module to find out if it is initialized or not.
The Injector Setup dialogue has the following fields in it for setting parameters:
23
Injector preparation
Injector assembly group
Injector module group
Injector maintenance
for moving the injector assembly in and out.
the buttons here control operation of the injector.
these buttons are for operations that are not part of preparation
but are to be performed after use of the injector is finished.
These operations are described in more detail in the Help.
24
Protocol preparation
Protocol preparation
Opening a protocol group
Every assay protocol belongs to a single protocol group. There can be many protocol groups,
each representing a different application or different user.
To open a protocol group, click the Protocols button or select Protocols from
the File menu.
The protocol group
window will open
showing one or more
protocol groups. If you
have installed templates
there will be several
groups each using a
different template. To
create additional groups,
you must go to System
view/ Protocol group
templates.
In addition to the normal protocol groups there are special groups, these include –
Normalization, Standardization. The protocols belonging to these groups have preset plate
maps which show how to place standards. For more details see the chapter called
Normalization/Standardization.
There is a special group that may appear called GLP. This allows you to check the instrument
performance. See the chapter on GLP starting on page 79 for more details.
To open a Protocol group window for a Protocol group, select the group you want from the list
given and click Open.
Note: the Deleted protocols group appears only in 21 CFR Part11 mode. If you select it, the
Deleted protocols dialogue appears.
25
Protocol preparation
This shows the protocols that have been deleted from the Protocol group window. You can
view the History of the protocol and Restore the deleted protocol. See History on page 33
for more details.
Protocol group window
Note: the protocol name is preceded by one of the following code marks:
26
Protocol preparation
"_" - there is no norm./stand. for the protocol, or that the one assigned to it has not been run yet
to get the data
"n" - a norm./stand. has been run
"c" - a norm./stand. with crosstalk has been run
The pane at the bottom left hand corner of the window lists the parameters of the protocol
showing at a glance what type of protocol it is. Use the scroll bar to display the remaining
parameters.
There are four main functions which you can access through the Protocol group window:
Protocol editing - there are three buttons: Protocol, Plate map and Output.
Protocol management - there are five buttons: New, Copy, Delete, History* and Template.
Results management - there are three buttons: Open, Copy and Delete.
Manual start - there is one button: Start.
*History is unabled only in Enhanced Security mode.
Note: In the Enhanced Security mode the Protocol group window has the following
restrictions:
The Start, New, Copy (protocol), Delete (protocol and results) and Template buttons are
enabled only for users belonging to the WIW Editor group.
The Copy (results) button is enabled for users who belong to the WIW User or WIW Editor
groups providing that no protocols are currently being run.
Protocol editing and Protocol management form the next two chapters in this manual. Manual
start is described on page 61 and Results management beginning from page 69.
Note: if all the buttons except Protocol are disabled it means that this group has been defined
as a system group (e.g. a GLP group) in System view.
Printing protocols
If the Print button is clicked when the protocol group window is open, a
contents selection dialogue is shown with the three options shown in the figure.
27
Protocol preparation
Clicking the OK button starts
printing according to the option
button clicked.
Note: The status character (`_', `n'
or `c') of a normalization or
standardization is printed with the
title "Status" when the protocol
listing and list of protocols is
printed.
The fonts for printout can be selected from System view, see System operations.
28
Protocol editing
Protocol editing
In the protocol group window there are three buttons in the Edit group to enable you to edit the
settings of individual protocols:
Protocol - this leads to the counter parameters editor, see Protocol parameter setting.
Plate map - this leads to the plate layout editor, see Plate map.
Output - this leads to the output settings, see Output definition.
Protocol parameter setting
When you have a protocol
group window open, click the
Protocol button to start the
Counter parameters editor.
This editor enables you to
change the parameters of the
assay protocol.
It consists of five tabs:
General
Corrections
Counting Control
JET (if this is installed)
Other
Selecting a tab leads to a page
showing the parameters. The
different parameters are
described in the Help.
After editing is complete, you
can click OK to accept editing or Cancel to discard all editing.
Note: in Enhanced Security mode the OK button is only enabled for users who belongs to the
WIW Editor group.
29
Protocol editing
If OK is clicked, the assay protocol is saved on the disk. If the counter is in the Ready state,
the assay protocol parameters are sent to the counter immediately, otherwise the parameters are
sent when the counter next enters the Ready state.
Add Comment
The Add comment dialogue pops up every time you make changes to the protocol. You can
type a comment (reason) for the current version or leave the Comment field empty. Click
the OK button to save the comment and close the dialogue.
30
Plate map editing
Plate map editing
The second button in the Edit box of the Protocol group window is Plate map. The Plate map
shows the sample coding and allows you to edit it. Plates are shown graphically. Samples can
be dropped into and removed from plates as you wish.
Note: in the Enhanced Security mode the OK button is only enabled for members of the WIW
Editor group.
Plate map allows you to design (or use predefined) sample types that match as close as
possible to your actual samples. You can put replicates of the samples into any position on
any plate. The program does not impose any restriction on replicate position or order (if
results are output to another program, some restrictions may apply). Sample coding can be
passed on to other programs. The positions of the samples are also sent to the counter, so it
counts only the positions that are used, cutting down the measuring time. See the Help for a
detailed description of the plate map features.
31
Protocol management
Protocol management
Manage group
In the Manage group there are four buttons for managing assay protocols:
New
When you click this button a completely new assay protocol is created. This uses the template
default values.
Copy
First select the protocol you want to copy from the list, then click Copy. It will be given the
name Copy of xxx where xxx is the name of the protocol copied. A dialogue similar to the
counter parameters dialogue appears to allow you to edit parameters. When you have made the
changes you want, save this protocol under its new name by clicking OK.
Delete
To delete a protocol, select it from the list and click Delete. If you then click OK the protocol
will be removed from the list.
32
Plate map editing
History
The Protocol history browser shows the history of the selected protocol. You can view the
Details of the protocol or Restore the protocol. The Current version is also shown but you
cannot restore it. The Restore button is enabled only for the person who has the rights to
edit WIW. After you restore and close the Protocol history browser the you can use the
restored protocol or edit it in the Protocol group dialogue.
Details
33
Protocol management
The Protocol Version Details dialogue shows the protocol parameters for the current
version.
Restore
You can use the Restore function to produce the selected protocol version i.e. a new
version of the protocol is created.
The protocol version is added to the protocol group of the current protocol, regardless of
the protocol group to which it originally belonged. When you restore a deleted counting
protocol which has no existing protocol group you must choose the protocol group for the
protocol before the restoring can be completed.
You can select a new counting protocol group using the Counting Protocol Groups drop
down list box. Click OK to confirm the choice or Cancel to close the dialogue without
selecting a group.
The ID of the restored protocol version is also set to same value as the current protocol ID,
regardless of the original ID protocol being restored. You will get a message if the ID was
not same in the original version. If you restore a deleted protocol and the ID of the restored
protocol is not free anymore you must choose a new ID for the protocol before the restoring
can be completed.
You can select a new protocol ID using the Available ID’s drop down list box. Click OK to
confirm the choice or Cancel to close the dialogue without selecting an ID.
34
Plate map editing
If the Normalization/Standardization of the restored counting protocol does not exist
anymore, the Normalization/Standardization of the restored counting protocol is set to
“None” and a message about this change is shown to you.
Protocol templates
In addition, there is the Template button in the lower right corner of the Protocol editor
window. This leads to the template editor, where you can set the default values and restrictions
for all of the assay protocols in this group. The name of the group can also be changed by
using the template editor.
35
Output definition
Output definition
The third button in the Edit box of the Protocol group window is Output. Clicking this leads
to the Output dialogue.
Output dialogue
There are eight tabs. Clicking
on one of these allows you to
edit the parameters on that
page. Parameters are only
enabled if the appropriate
check box is selected on the
General page.
In the Enhanced Security
mode the OK button is only
enabled for users who belong
to the WIW Editor group.
The General page shows
which functions in the
protocol output are enabled
and which are disabled.
There is also a short
summary of the selections.
36
Output definition
When printing is selected by checking the Print checkbox the printer is identified and the
print items page is summarized. You are also told whether the printing is done online or
after the whole assay is completed, whether the format is in a column and/or as a plate. The
selected layout is also specified, e.g. the results of two plates can be printed on one A4-page
in plate-format.
In the case of filing, two different files with each with its own file format can be produced at
the same time e.g. File1 in ASCII format and File2 in Excel format.
When filing is selected, the following information is shown: the file type, the file items
summary, the format (column and/or plate) and the full path and file name for the produced
results.
For the result post processing requirements are selections: There is also a checkbox
Execute after File1 (or File2) output. This allows selections affecting what is to be done
with the results i.e. you can select an application program to start automatically after the
result file is completed.
In a case such as when e.g. the local disk drive is full and filing cannot be done an error is
detected. The Execute on error checkbox allows an application program to be started
automatically which e.g. sends a network message to the user.
The output dialogue features are described in detail in the Help.
37
Normalization/standardization
Normalization/standardization
What is normalization?
MicroBeta has 1, 2, 3, 6 or 12 detectors allowing it to count the respective number of samples
simultaneously. In order for the results from each detector to be equivalent, irrespective of
small variations in efficiency and background between detectors, it is necessary to determine
the relative efficiency and background of each detector and then correct for it. This is called
normalization.
Normalization is done by firstly measuring an optional background plate followed by one or
two standard samples with defined activity or CPM in each detector.
Once CPMs have been measured the relative efficiencies can be calculated. The efficiency of
the detector giving the highest count rate is then defined to be one and the other detector
efficiencies are expressed as a fraction of this value. These fractions are called efficiency
coefficients. If isotope activity is given then absolute efficiencies are calculated by dividing the
count rates by the activity. In this way, sample quench and detector absolute efficiencies can be
corrected for.
When measuring a sample with a particular detector, the CPM of the sample is corrected by
dividing the CPM by the efficiency coefficient. In dual label counting, corrections are made
using dual label correction formulae (see Calculation methods in the Instrument manual).
When normalization is done the results are stored with the normalization protocol. The
normalization data can be used by one or several protocols and are selected when editing the
protocol.
When is normalization necessary?
Each counting or assay protocol requires normalization data to be stored before it can calculate
corrected CPMs for the samples counted. A fresh normalization must be done when a new
isotope is counted or when counting features, such as isotope or window, are changed. When a
new type of microtitration plate is used, crosstalk normalization may be necessary. See
Crosstalk correction.
38
Normalization/standardization
Preparing the normalization samples
A MicroBeta is supplied from the factory with a background plate and a normalization sample
plate containing standards for 3H and 14C. Samples are located in specific positions where they
can be measured by every detector. The sample positions and the activities for the standards
are shown on a label on the plate. The activity values can be inserted into the normalization
protocol. The background plate is optional and only measured if selected in protocol setting.
Be careful that the samples are in the correct positions when making your
own normalization plates.
The positions cannot be changed by modifying protocol parameters.
In 24-well plate single label counting there is one exception to the rule that isotope 1 must be
in position D5: the standard for 14C must be in the isotope 2 position (D6). This is because the
factory made normalization plate could be used for both single label 3H and 14C normalizations
and dual label 3H/14C normalizations.
For best results if 96-well sample plates are to be counted, and always for 12 detector counters,
96-well plates should be used as normalization plates.
For a 1-6 detector counter the standard for isotope 1 must be in G11 and for isotope 2 in H12.
For a 12 detector counter and single label normalization the standard must be in G11, but for
dual normalization the isotope 1 standard must be in G10 and the isotope 2 standard in G12.
See the table below.
Sample positions on a normalization plate
24-well 96-well 96-well
(12 Det.)
Single Dual
Isotope 1 standard D5
G11
G11
G10
Isotope 2 standard D6
H12
G12
14
C single label
D6
384-well
384-well
(12 Det.)
N22
M22
See Crosstalk correction for crosstalk sample positions and Luminescence counting for
luminescence sample positions.
39
Normalization/standardization
What is standardization?
When counting DPM in a multidetector counter the variation in detector efficiency, detector
energy and the effect of quenching must both be corrected for. Standardization is the name
given to the process in MicroBeta which makes this correction.
Standardization = Detector energy calibration + Sample quench correction + Detector
efficiency calibration
Quench correction
Several samples labelled with the same activity will give different count results even in the
same detector because of the difference in the amount of energy absorbed in the samples. This
is called quenching. To correct for this, a number of samples with identical DPM but differing
quench have to be counted in one detector. This establishes a relationship between a quantity
called SQP(I) or AQP(I) and efficiency. SQP(I) (or AQP(I)) is a measure of the isotope
spectrum and varies as the quench changes. Once this relationship between SQP(I) (or
AQP(I)) and efficiency is known it is possible to calculate the counting efficiency for any
measured SQP(I) (or AQP(I)) value in the range covered by the measurement of the standard
samples. Knowing the efficiency, the DPM can be calculated.
Detector energy and efficiency calibration
However closely matched detectors are, there will be some difference in their energy
calibration (affecting SQP(I) (or AQP(I)) measurement) and counting efficiency. A correction
must be made for both these differences.
Standardization
The standardization is done by first measuring a maximum of 12 DPM standards with defined
activities in detector 1 and then counting two DPM standards in every detector. The two
calibration standards should be representative of the range covered by the DPM standards, i.e.
they could be replicates of the first and last DPM standards. The quench standard measurement
produces a curve of efficiency versus SQP(I) (or AQP(I)) with as many points as
standardization samples. Energy calibration and efficiency calibration are both linear functions
so two points are sufficient to define these two calibration curves. The two points are obtained
from counting the two calibration standards mentioned earlier.
It is preferable that about the same number of counts should be collected from each standard in
order to get a curve with uniform precision. Set the precision requirement in extended edit
40
Normalization/standardization
standardization. Make sure the counting time is long enough that the precision requirement
will terminate counting and not the counting time.
How unknown DPM samples are evaluated
The actual sequence of events for counting unknown DPM samples is as follows:
1 The SQP(I)/AQP(I) value and CPM are obtained with any detector.
2 The SQP(I/AQP(I)) value is corrected from the energy calibration curve. It is now the value
it would have been if the sample had been counted in detector 1.
3 The corrected SQP(I)/AQP(I) is used to read off the detector 1 efficiency from the quench
curve made for samples counted with detector 1.
4 The efficiency calibration curve is then used to obtain the actual detector efficiency
corresponding to the detector 1 efficiency just obtained.
5 The measured CPM value is then divided by the actual detector efficiency to obtain the
activity in DPM.
Preparing single label standardization samples
2 to 12 DPM standards are placed in positions A1 to A12 in a 96 or 384-well plate or in
positions A1 to B6 in a 24-well plate. No empty positions are allowed in the beginning or
between samples. Standards are also placed as follows:
96-well
First standard
Second standard
H11
H12
96-well 24-well 384-well
(12 det.)
384-well
(12 det.)
G11
G12
M22
M23
D5
D6
P23
P24
Preparing dual label standardization samples
For dual label standardization two plates are used and the higher energy isotope samples are
counted first. A maximum of 6 DPM standards can be used on each plate.
96-well
Quench series
B1, B3 ..B11
96-well
(12 det.)
B1, B3 ..B11
First standard
Second standard
G9
G12
G10
G12
41
24-well
D5
D6
A1-A6
Normalization/standardization
JET normalization plate maps
The plate maps for different detector configurations with 96-well plates and the maximum
number of replicates are shown below. If there is less than the maximum number of replicates,
the replicates positions are from left-to-right and top-to-bottom.
3- and 6-detector models without background samples. The rows E-H are empty in the
3-detector model.
A
B
C
D
E
F
G
H
1
S1
S1
S1
S1
S4
S4
S4
S4
2
S1
S1
S1
S1
S4
S4
S4
S4
3
S1
S1
S1
S1
S4
S4
S4
S4
4
S1
S1
S1
S1
S4
S4
S4
S4
5
S2
S2
S2
S2
S5
S5
S5
S5
6
S2
S2
S2
S2
S5
S5
S5
S5
7
S2
S2
S2
S2
S5
S5
S5
S5
8
S2
S2
S2
S2
S5
S5
S5
S5
9
S3
S3
S3
S3
S6
S6
S6
S6
10
S3
S3
S3
S3
S6
S6
S6
S6
11
S3
S3
S3
S3
S6
S6
S6
S6
12
S3
S3
S3
S3
S6
S6
S6
S6
3- and 6-detector models with background samples. Rows E-H are empty in the 3-detector
model.
1
2
3
4
5
6
7
8
9
10
11
12
A
S1
S1
S1
S2
S2
S2
S3
S3
S3
B1
B2
B3
B
S1
S1
S1
S1
S2
S2
S2
S2
S3
S3
S3
S3
C
S1
S1
S1
S1
S2
S2
S2
S2
S3
S3
S3
S3
D
S1
S1
S1
S1
S2
S2
S2
S2
S3
S3
S3
S3
E
S4
S4
S4
S5
S5
S5
S6
S6
S6
B4
B5
B6
F
S4
S4
S4
S4
S5
S5
S5
S5
S6
S6
S6
S6
G
S4
S4
S4
S4
S5
S5
S5
S5
S6
S6
S6
S6
H
S4
S4
S4
S4
S5
S5
S5
S5
S6
S6
S6
S6
42
Normalization/standardization
1- and 2-detector models without background samples. Rows E-F are empty in the 1-detector
model.
1
2
3
4
5
6
7
8
9
10
11
12
A
S1
S1
S1
S1
S1
S1
S1
S1
S1
S1
S1
S1
B
S1
S1
S1
S1
C
D
E
S2
S2
S2
S2
S2
S2
S2
S2
S2
S2
S2
S2
F
S2
S2
S2
S2
G
H
1- and 2-detector models with background samples. Rows E-F are empty in the 1-detector
model.
1
2
3
4
5
6
7
8
9
10
11
12
A
S1
S1
S1
S1
S1
S1
S1
S1
S1
S1
S1
B1
B
S1
S1
S1
S1
C
D
E
S2
S2
S2
S2
S2
S2
S2
S2
S2
S2
S2
B2
F
S2
S2
S2
S2
G
H
43
Normalization/standardization
Plate maps for different detector configurations with 24-well plates and the maximum number
of replicates are shown below. If there is less than the maximum number of replicates, the
replicates positions are from left-to-right and top-to-bottom.
3- and 6-detector models without background samples. Rows C-D are empty in the 3-detector
model.
1
2
3
4
5
6
A
S1
S1
S2
S2
S3
S3
B
S1
S1
S2
S2
S3
S3
C
S4
S4
S5
S5
S6
S6
D
S4
S4
S5
S5
S6
S6
3- and 6-detector models with background samples. Rows C-D are empty in the 3-detector
model.
1
2
3
4
5
6
A
S1
S2
S3
B1
B2
B3
B
S1
S1
S2
S2
S3
S3
C
S4
S5
S6
B4
B5
B6
D
S4
S4
S5
S5
S6
S6
1- and 2-detector models without background samples. Row C is empty in the 1-detector
model.
1
2
3
4
5
6
A
S1
S1
S1
S1
B
C
S2
S2
S2
S2
D
1- and 2-detector models with background samples. Row C is empty in the 1-detector model.
1
2
3
4
5
6
A
S1
S1
S1
B1
B
C
S2
S2
S2
B2
D
44
Normalization/standardization
Normalization/standardization parameters
Creating Normalization and Standardization protocols
There are two ways to
create new Normalization
and Standardization
protocols. One way is to do
it from within the counting
protocol editor by clicking
New in the normalization/
standardization box.
When they are created in
this way, the parameters of
the counting protocol are
used as default values for
the new Normalization or
Standardization protocol.
This is the recommended
way.
The other way is to open the
Protocol groups dialogue and
select the Normalizations or
Standardizations group and
click Open.
45
Normalization/standardization
Press New in the Normalization (or Standardization) protocol group window.
A small dialogue is displayed
with label selections and sample
type options.
When you have made the
selection here, clicking OK will
lead to the normal normalization
or standardization editor where you can supply the rest of the parameters.
Displaying normalization/standardization parameters
Whichever method you use to display the normalization/standardization parameters the result
will be the same. The set of parameters available will depend on whether you have a CPM or
DPM protocol selected. In the former case a group with the title Normalization will appear and
in the latter a Standardization. See the Help for details of the parameters.
The main differences between normalization and standardization parameters are that
Background sample cannot be used with standardizations (unless AQP(I) is selected), a new
field Number of standards is added and in Standardization "Use injector module" is not
available.
There can be a maximum of 100 normalization/standardization protocols, numbered from 0 to
99. Protocol number 0 is the default protocol.
Protocols 91 to 98 inclusive are made at Wallac for isotopes 3H, 125I, 14C, 51Cr, 32P, dual label
3 14
H/ C, 35S and 32P Cerenkov respectively. These may not be deleted because they are
46
Normalization/standardization
connected to the corresponding counting protocols. Note that no normalization/standardization
except ScintiStrip normalization is done for those protocols. You must use these protocols to
do the normalization before they can be used for counting unknowns.
Saving normalizations and standardizations
When you try to save a normalization or
standardization which is not preceded by
"-", the warning message shown here
will appear.
If you click Yes, then a further
warning will appear telling that saved
data with this name will be destroyed
and you will have to do a new
normalization or standardization. Click
Yes for this to happen. If the protocol
name was preceded by "n" or "c" it
will be replaced by "_" to show that
there are no normalization/standardization data.
Normalization/standardization counting procedure
The plate with the normalization/standardization samples is placed in a cassette which is
identified with the corresponding normalization/standardization protocol number in the
protocol number area and with a NORM/STD label in the function code area.
Note: If the Background sample checkbox is checked, a separate empty background plate
should be counted before the normalization/standardization plate.
Insert the cassette into the rack and close the door. Click the Start button on the button bar for
an automatic start of counting or on the normalization/standardization protocol group window
for a manual start. If automatic counting is selected, the normalization/standardization cassette
can be placed anywhere in the rack. The NORM/STD label is needed in this case.
47
Normalization/standardization
The counting results for the normalization/standardization are output as specified in the
protocol, and after them the background and detector efficiency values are given.
Note: normalization and unknown samples should have the same quench level in dual label
CPM counting.
Results
When a normalization/standardization is done the results are stored with the
normalization/standardization protocol. The data can be used by one or several assay protocols
and is selected when editing the protocol.
Note: you only need to do normalization or standardization once for each type of isotope and
measurement (CPM or DPM) you are going to use. After that you just make use of the stored
results in your future operations. You only have to do a new normalization or standardization if
you have a new type of sample or plate or counting.
48
Crosstalk correction
Crosstalk correction
Introduction
Crosstalk is a situation in which light pulses from adjacent samples interfere with the pulses of
the sample under measurement. This may occur in the case of microtitration plates in which
you cannot use the cassettes 1450-101 or 1450-102. This is because designs of cassette other
than the 1450-101 or 1450-102 have part of the optical shielding between the wells removed to
accommodate the microtitration plate.
Crosstalk can be corrected with the MicroBeta program. Before counting the actual samples,
the amount and type of crosstalk is determined using special standardization or normalization
samples, with the type of solution as similar to the actual samples as possible.
Normalization or standardization is done first. Then the calculated crosstalk factors are used
when counting the actual samples. A CPM normalization run is needed for crosstalk corrected
CPM results and a DPM standardization run is needed for crosstalk corrected DPM results.
Crosstalk CPM normalization
Preparation of normalization samples on a 96 or 384-well plate
Take sample solution with activity (+ scintillant) corresponding to the samples to be analyzed,
i.e. has the same isotope and solvent. Pipette the same volume as in the samples into wells as
shown in the table below. Note: the second crosstalk solution is only needed for Strip plates.
Normalization sample positions on a plate
24-well 96-well 96-well 384-well
(12 det.)
Sample solution
D6
G11
G11
N22
Background
A1
A1
A1
A1
Crosstalk solution
C6
F11
F11
M22
(Strip plates only)
D5
G10
*
N21
*Strip plate not available
384-well
(12 det.)
M21
A1
M22
*
Close the sample plate with a sealing tape and place the plate on a 1450-103 or 1450-105
cassette for counting.
49
Crosstalk correction
Crosstalk DPM standardization
Preparation of DPM standardization samples
Make the standard samples in vials:
a) 6 vials for isotope standard samples and 6 vials for blank (i.e. crosstalk) samples are needed.
b) Add scintillation liquid and isotope solution into each standard sample vial (numbered from
1 to 6), or pipette the isotope solution directly into the sample wells, the same amount in each.
Add the same solution into blank vials/wells, but without the isotope. (If there is no isotope in
the standard vials, the same vials can be used for blank samples.)
c) Add quencher into each standard and blank vial, so that the samples form a quench series,
i.e. the amount of quencher increases from vials 1 to 6. The amount of quencher added (here
CCl4 is used as a quencher) forms a series as follows:
Vial No.
1
2
3
4
5
6
Amount of CCl4 / 5 ml
ml
0
5
15
30
50
75
Shake the vials. Pipette the standards and blanks onto a sample plate according to the table
(use the same total volume in standards and blanks as in the actual samples).
Normalization sample positions on a plate
24-well
96-well
Plate 1
Plate 2
(2–6 det.)
Quench solution
B1, B3, B5
B1, B3, B5
B1, B3, B5, B7, B9, B11
Crosstalk solution
A1, A3, A5
A1, A3, A5
A1, A3, A5, A7, A9, A11
Norm. standard
D5
D5
G9, G12
Crosstalk standard
D6
D6
H9, H12
For 24-well plates the standards begin on plate 1 and continue in order onto
plate 2.
The first and last quench and crosstalk solutions are used as the two normalization and
crosstalk standards respectively.
50
Crosstalk correction
Close the sample plate with a sealing tape and place it on a counting cassette.
Protocol editing
Edit a normalization/standardization protocol as described in the previous chapter. The only
change is that you have to check the Crosstalk correction checkbox.
Counting
Counting is done as for any other normalization/standardization protocol. The plate with the
normalization/standardization samples is placed in a cassette which is identified with the
corresponding normalization/standardization protocol number in the protocol number area and
with a NORM/STD label in the function code area.
Insert the cassette into the rack and close the door. Click the Start button on the button bar for
an automatic start of counting or in the normalization/standardization protocol group window
for manual start.
In the case of normalization the normalization standard is counted in every detector and the
crosstalk sample in detector 1. In standardization the active samples are automatically counted
first then the crosstalk samples.
When counting actual samples, the stored crosstalk factors are used for correcting the CPM
(DPM) values. The crosstalk corrected CPM (DPM) values are marked as CCPM1 (DPM1) in
the printout.
51
Luminescence counting
Luminescence counting
Introduction
With MicroBeta TriLux, luminescence assays designed to be completed on a solid support e.g.
nylon membrane, glass fibre or coated plate, and in solution, can be directly quantified.
Due to the high signal, luminescence reactions can be measured using single PMTs
(photomultiplier tubes). The traditional microtitration plates are totally opaque (black or
white). These plates are counted with the upper tube and a 1450-105 cassette is used. The
filters are counted with the upper or lower tube and a 1450-104 filter cassette is used.
When intense luminescence samples on filters are counted with the upper tube only, a 1450111 luminescence cassette should be used. This prevents saturation of PMTs and crosstalk
between adjacent positions is minimized by cutting the intensity of the luminescence light.
The luminescence units used are LCPS: luminescence counts per second i.e. corrected
CPS-values/100. Before counting the actual samples, the detector and hence the LCPS-values
should be normalized with a luminescence solution as similar to the actual samples as possible.
The normalization is done first and it is made use of when counting the actual samples.
Creating a luminescence normalization protocol
To make a normalization
protocol, select the
Normalizations group and
then New. From the list of
isotopes select "lumin" as
shown here.
Other parameters can be set
in the normal way.
52
Luminescence counting
Preparation of normalization samples (without JET)
Make a sample solution which corresponds to the samples to be analyzed, i.e. has the same
enzyme and substrate and pipette the same volume as in the samples, into well/membrane
position D5 (1-6 det. 24-wells), G11 (1-6 det. 96-wells), G11 (12. det. 96-wells), N22 (1-6 det.
384-wells) or M22 (12 det. 384-wells).
Luminescence normalization sample positions on a plate
24-well
96-well
96-well
384-well
(12 det.)
Sample solution D5
G11
G11
N22
384-well
(12 det.)
M22
An empty plate is used for background measurement.
Note: for 24-well plates use plate type 1450-402 and cassette type 1450-102 when setting up
the luminescence normalization protocol parameters.
Plate
Close the sample plate with 1450-461 sealing tape and place it on a 1450-105 cassette for
counting.
Filter
Enclose the filter in a 1450-432 plastic sample bag and place it on a 1450-104 filter cassette or
on a 1450-111 luminescence filter cassette.
JET normalization plate maps
These have been already shown in the chapter called "JET normalization plate maps"
beginning on page 42.
53
Luminescence counting
Luminescence normalization counting procedure
The plate with the luminescence normalization samples is placed in a cassette which is
identified with the corresponding normalization protocol number in the protocol number area
and with a NORM/STD label in the function code area.
Insert the cassette into the rack and close the door. Click the Start button on the button bar for
an automatic start of counting or on the normalization protocol group window for a manual
start.
If automatic counting is selected the normalization cassette can be placed anywhere in the rack.
The NORM/STD label is needed in this case.
The counting results for the normalization are output as specified in the protocol, and after
them the background and detector efficiency values are given.
Counting the actual samples
Edit a counting protocol and select "lumin" in the isotope selection. The counting time will be
set to the default value of 1 sec. Select Background correction and Use normalization
background. Edit the other parameters normally.
Start counting as described in the next part Operation.
When counting the samples, the CPS-values are shown on the live display. The stored
normalization factors are used for correcting the LCPS-values in the output.
54
Operation
55
56
Coding cassettes and filtermats
Coding cassettes and filtermats
Cassette code system
Barcode labels are used for cassette and sample recognition. They are attached to the marked
area of the ID support plate. This is a separate piece of plastic which can be clipped onto the
appropriate area of a cassette as shown in the figure. When fixing ID labels on the ID support
plate, take care that the fixing area is clean. If the protocol ID label is dirty or placed the wrong
way round, the barcode reader may fail to read it. In this case the default protocol (prot.No. 0 )
is used.
Cassette codes used
An ID support plate has four fields (areas) to which a barcode can be fixed. The meaning of
each field is described below. The figure shows a counting cassette. The cassette number is 1
and the counting protocol to be used is 60.
Function codes
The FUNC field can be labelled
as follows:
No label - The cassette is a normal
sample cassette without any
special function
STD - The cassette is to be used
for DPM standardization. The
number of the standardization
protocol is given in the PROT
field.
NORM - The cassette is to be
used for CPM normalization. The
number of the normalization
protocol is given in the PROT field.
STOP - counting will stop after this cassette has been counted.
57
Coding cassettes and filtermats
Cassette number
This is a simple number in the range 0-99 and can be output with the results. If the function
code is also a number then 100*cassette number + function code is output (in the range
0..9999).
Protocol number
This is normally a simple number in the range 0-99 (for the exception see Stop cassette
below). The type of protocol it refers to depends on what is specified in the FUNC field. If
nothing is specified in the FUNC field then it is the number of a counting protocol.
Assay protocol number
This field is for MultiCalc assay protocols only and is not used with MicroBeta Windows
workstation.
Stop cassette
If you fix a STOP code to the last cassette it means that this cassette will be counted also.
However it can be tedious to remove this STOP code and fix it to another cassette when more
cassettes are loaded. To avoid this a "stop cassette" can be used. Fix a STOP code on both the
protocol and function code field of an empty cassette and put that cassette after the last cassette
to be counted.
Note: a STOP cassette must have two STOP codes on it not one. If you only
put one on an empty cassette then you waste time counting it and in the worst case you may
inject liquid when there is no plate. To avoid the possibility of this see the appendix.
Cassette operation
If MicroBeta is loaded with many sample cassettes that are to be counted with different
protocols, the cassettes are barcoded with the respective protocol number. If there is no
protocol number on the cassette, the cassette is counted with the same protocol as the previous
one i.e. it is considered to be part of the same assay. Only the first plate of an assay should be
barcoded. Each new barcode found starts a new assay. To stop the counting automatically, the
STOP code should be used.
Filtermat coding
On the lower edge of the filtermat there are two groups of twelve small circles (see the figure
on the next page). They are for marking the date. This is done by cutting or clipping off
58
Coding cassettes and filtermats
appropriate circles. The first twelve circles are to specify the day and the second twelve the
month. In the figure below the leftmost 9 circles stand for the numbers from 1 to 9 and the next
three circles for 10, 20 and 30 respectively. E.g. the 25th day is marked by cutting off the 20
circle (the 11th circle from the left) and the 5 circle.
The month is marked using the rightmost 12 circles, the first circle corresponding to January,
the second to February etc.
The row of 7 small circles on the right-hand edge (next to sample column A12 to H12) is used
for sample identification. The circles stand for the sequence 1, 2, 4, 8, 16, 32, 64. By cutting
off appropriate combinations of circles the filtermat can be marked with a number in the range
1 to 127.
59
Coding cassettes and filtermats
Plate ID reader
If the optional plate ID reader is installed then it is possible to read barcode IDs from plates
directly. The Plate ID must consist of 7-bit printable ASCII characters and spaces. The
following barcodes are supported: Codabar, Code 39, Code 128, Interleaved 2 of 5, UPL and
EAN. If this is installed it will be shown in System information.
Fix plate ID
barcode
60
Starting counting
Starting counting
Automatic start
When barcode labelled cassettes are used, you can start counting by clicking the
Start button in the main window. If Automatic Start Confirmation is selected in
Options, a Confirm Automatic Start dialogue will appear. The dialogue has an
explanatory text, a check box "Do not show this confirmation again", an OK
button and a Cancel button.
If you click OK the counter is
immediately started in
automatic counting mode and
the live display maximized. It
will return to its original size
when counting ends. Click
Cancel to cancel starting."
If the check box "Do not show
this confirmation again" is checked when OK is pressed, the Confirm Automatic Start
dialogue is not shown when Start is pressed next time. You can restore this confirmation in the
Confirmations dialogue in System Settings.
Manual start
From any Protocol group,
you can select an assay and
click the Start button; the
Manual start dialogue will
appear. This shows the
basic parameters of the
selected assay protocol and
has fields for the shelf
number, delayed start and
naming and path for output
file1.
61
Starting counting
Note: in the Enhanced Security mode the Path and Browse buttons are disabled.
The file output editing in the manual start window overrides the output file name specified
in the output settings of the protocol. The value is taken from current File1 tab as default.
The name can be changed and it will be used for the next assay started with the Start button
of the Manual Start dialogue. The value entered is not saved in the protocol.
Normalizations and standardizations can be started manually by clicking Start in the
Normalization or Standardization group windows.
Counting (delayed or normal) can be started by clicking the Start button in the manual start
dialogue. If delayed start is chosen, you can give the delay time in minutes. After clicking the
Start button, a floating MicroBeta - Waiting window will be shown. The window shows the
time left before the start of counting and has two buttons: Start now and Abort. Counting can
be started any time by clicking the Start now button. The Abort button will cancel starting.
The Start button in the main window will be disabled until either Abort is clicked or counting
ends. Clicking the Stop button in the main window has the same effect as the Abort button in
the floating waiting window.
Stopping counting
Once counting has been started the Stop button and Stop item in the Counter
menu will be activated. To stop counting, click the Stop button. You will be
asked if you really want to stop counting (during this time counting will be
continuing). Click OK if you do; this will cause counting to stop and the live
display will become an icon again. Otherwise click Cancel to continue counting.
62
Starting counting
Live display
Introduction
During counting the live display shows the situation in graphical format and
allows you to monitor the counting. All plates of the currently (or most recently)
measured assay protocol can be browsed and individual CPM values of
measured wells can be viewed.
Opening and closing
The live display is automatically created and minimized when the program is started and it
cannot be closed. Selecting Close from the system menu only minimizes it. It can be sized (but
not below its minimum size), minimized and restored as you like. When counting starts, it is
automatically maximized. When counting ends, its size is restored.
Mode
The live display can be in three modes: Dot, Numeric or Spectrum. The Mode field at the
upper left corner of the live display allows you to select the mode by clicking the appropriate
button: Numeric, Dot or Spectrum:
63
Starting counting
Dot mode
In Dot mode, CPM values are shown as coloured dots superimposed on a picture of the plate
64
Starting counting
Numeric mode
In Numeric mode, values are shown as numbers written on the well positions
65
Starting counting
Spectrum mode
In Spectrum mode a spectrum is shown for a selected detector.
66
Viewing results
67
68
Viewing results
Viewing results
Introduction
The right side of the protocol group window is for result handling. The "Results of" list
contains the names and dates of the results files of the assay protocol. New results appear at the
end of the list when the assay is measured. You can adjust the size of the fields to show more
of the name or path or date as required. Use the mouse to drag the dividing line between the
column headings to make the field the size you want.
The contents of the results list changes when you change the assay protocol selection.
In the protocol group window there are three buttons which allow result file handling.
Result operations
You can Copy a result, Delete it or Open it by clicking the appropriate button. You can use a
built-in viewer or Excel (if it is installed) to open a file. Which program is started depends on
the extension (.txt or .xls respectively). You can define which ASCII viewer is started for txt
files. The default is a viewer program supplied with the workstation called (WIWView). An
69
Viewing results
alternative viewer can be defined in System/ Settings/Viewer. For viewing with other
programs, please refer to the instructions supplied by the supplier of the program.
WIWView allows you to view and print result files. It supports four different views of the data:
Text, Plates, Curves and Raw Text:
The Text view shows the contents of the file as text.
The Plate view shows graphical plate images.
The Curve view shows curves.
The Raw Text view shows the whole contents of the file as text.
Result button
Clicking the Results button on the main workstation toolbar opens a Results
dialogue. The dialogue has a list box containing all the results file names. It also
has the buttons Open, Copy, Delete, Goto group and Close.
Open, Copy and Delete
work exactly the same as in
the protocol group window
described above.
Double-clicking on the
results file has the same
effect as clicking Open.
Clicking the Goto group
button will open the
corresponding assay group
window and select the assay
and result.
Note: in the Enhanced Security mode the Delete button is only enabled for users who belong
to the WIW Editor group. The Copy button is enabled for users who belong to the WIW User
or WIW Editor group and there are no protocols running.
70
System operations
71
72
System operations
System operations
When you click System (the button or the item in the File menu) a dialogue
opens with three buttons allowing you to select System view, Settings or
System information.
Note: in the Enhanced Security mode the System view button is enabled only for a user
belong-ing to the WIW System Manager group and the Settings button is enabled only for
users belonging to the WIW Administrator, WIW System Manager or WIW Auditor
groups.
System view
You can view and modify the objects in the program
through the System view. Click the System button on
the button bar or select System from the File menu to
get the System setup dialogue. Click the System
View button. A new dialogue will open with a list of
different items (protocols, samples etc.) that you can
modify.
73
System operations
You can select any of these items and click Modify to see a list of all the items of that type
(e.g. all samples etc.). Beside the list are command buttons for the operations: Edit, Copy,
Delete and New.
Note: Some buttons may be disabled, because that particular operation is not allowed for the
item in question.
Settings
If you click the System button or select System from the File menu
and then click the Settings button, the settings dialogue is
displayed. It has eleven buttons, Counter, Results, Viewer,
MultiCalc§, Confirmations, Options, User*, Audit Trail*,
Security* and File* plus Close.
The function of each of these buttons is described in the on-line
help but note the following:
§
MultiCalc is not enabled in the Enhanced Security mode.
The following buttons are only enabled in the Enhanced Security
mode subject to the following restrictions:
User is only for the use of the WIW Administrator.
Audit Trail is only for a member of the WIW Auditor group.
All the other buttons are enabled only for a user who belongs to
the WIW System Manager group.
74
System operations
System information
The system information
window shows the settings and
features of the counter. The
system information is queried
from the counter when the
workstation is started if the
counter is in the ready state.
If system settings are changed
using terminal mode, system
information can be updated
with the Counter menu
command Update System
Information. Restarting the
workstation is a better
approach. If there have been major changes in the system information (i.e. the counter is
upgraded or changed) they may not all show unless the workstation is restarted.
Robotic loader interface
This model of MicroBeta TriLux is designed to enable a robotic loader to be used. There is
one shelf instead of the usual 16 or 32 shelves in the cassette rack. This shelf protrudes from
MicroBeta. The robotic arm can place a plate on this shelf or remove one from it. When a plate
has been placed onto the shelf it is then taken into MicroBeta for counting. The plate
orientation should be defined on the Protocol editor Counting control page, see page 29,
because the orientation of the plate when it is taken into the counter can be different from the
normal one.
Service
This function is for authorized service personnel only.
Enable GLP
You must click here if you want the GLP protocol to be enable. If this item is grey then it
means the GLP protocol has already been selected. See the chapter on GLP for more
details.
75
System operations
Exiting from Windows Workstation
To exit from the program, select File on the menu bar and
then click Exit. Confirm that you want to exit by clicking Yes
or cancel exiting by clicking No.
Demo selection
If you have the Demo program running you can see a demonstration of MicroBeta Windows
workstation working off-line. During this run, demo data is used; this data is supplied with the
program. You cannot run a demo with a protocol that has no demo data associated with it.
Use the Select demo option in the Counter menu to specify which protocol is to be used for a
demonstration run. The currently selected protocol is shown along with its protocol ID
number.
To run the demo, simply click the Start button. The Live display will appear and counts will
be accumulated in the normal way.
Note: the demo program must have been selected if you want to run a demo, otherwise the
Select demo option will not appear in the Counter menu. You must also have selected the No
port option, see Communication port in the Help.
76
GLP operation
77
78
GLP operation
GLP Operation
The GLP feature enables you to periodically monitor the twin tube detector coincidence
efficiency and background in time for tritium and carbon-14 isotopes in MicroBeta. Results
of multiple runs can be viewed and printed as a graphical trend or numerical report.
GLP plates
Two plates are needed for running a GLP protocol: a blank black background plate
followed by a Wallac 1450-471 96-well normalization plate.
GLP group and GLP protocol
The GLP group and protocol is created by selecting Enable GLP from the File menu. This
will cause the GLP group window to open as shown in the figure below. Note: in the
Enhanced Security mode Enabling GLP is allowed only for users who belong to the WIW
System Manager group. The GLP protocol cannot be created, copied or deleted.. The
History button opens the Protocol History browser. This History button is enabled only
under Enhanced Security mode. There is only one GLP protocol in the group, named GLP.
79
GLP operation
Note: in the Enhanced Security mode the GLP group window has the following restrictions:
The Start, Delete (results) and Template buttons are enabled only for users who belong to
the WIW Editor group. The Copy (results) button is enabled for users who belong to the
WIW User or WIW Editor groups providing that no protocols are currently being run.
Clicking the Protocol button allows the protocol to be changed. The following GLP
protocol parameters can be edited: Counting time for standards and background, barcode
ID, half-life correction, DPM Activities, owner name, next run ID, password, local and
validity check (in the Enhanced Security mode this is checked and disabled).
Note: in the Enhanced Security mode the OK button is only enabled for users who belong
to the WIW Editor group and the Run ID cannot be modified.
Clicking Plate map causes the GLP plate to be displayed. Clicking the Printout button
shows the printout options.
On the right of the group window is a list of all the results files that have been produced by
running the GLP protocol. A Trend plot, Report and History Report of the results can be
viewed by clicking the GLP view button. Results can be deleted using Delete button.
Note: the deletion operation cannot be undone.
Running GLP
The GLP protocol can be run in automatic mode with barcoded plates or it can be started
manually. If you use a barcode you must select the correct bar code ID (the default is 99
although this can be changed). When the protocol has been edited as required press the
Start button on the button bar. The first cassette bar code must have NORM in the FUNC
field and the second cassette must have STOP in the FUNC field.
Manual start is done by pressing the Start button in the GLP group window.
GLP View
Results from the run of the GLP assay can be accessed only with the GLP View. There are
no other output files from the GLP protocol. If there are any errors during the GLP run, the
results are not saved. This GLP view has three pages: Trend, Report and History Report.
80
GLP operation
Trend Page
The Trend page shows the selected result item as a trend for the selected detector.
Printing Trends
GLP trends can be printed by pressing the Print button on the button bar while the Trend
page is active. The dialogue has checkboxes for each label and for each of the items. There
is also a Detector drop-down list box which has all detector numbers and a special All
selection. There is also a checkbox Print detectors separately.
81
GLP operation
When the GLP Trend Print Options dialogue is opened, the settings are such that the
current contents of the trend page will be printed. Clicking OK will show the standard
windows print dialogue.
As a minimum, the printout contains one graph, single label, single item and single detector.
As a maximum, the printout contains 96 graphs (12 detectors * 4 items * 2 labels).
Two graphs are printed on the each page. The order of the output is first grouped by
detector, then by label and last by item.
Report page
The report page shows single results in table format. Each label has a separate table The
items are the columns of the tables. Tables have as many lines as there are detectors in the
counter. The report can be printed by clicking the Print button.
82
GLP operation
When GLP View is opened, the Report tab shows the result that was selected in the result
list of the GLP group. The result can be selected from the Result drop-down list above the
report.
History Report tab
The report tab shows the history of each item as a table where detectors are columns and
dates and times are rows. Report can be printed by clicking the Print button.
GLP Printout
The Printout button in the GLP group window leads to the GLP Printout dialogue.
Printout defines the automatic printout that will be done after running the GLP protocol.
The dialogue has a checkbox for each of the pages in the GLP view. Report is checked by
default.
83
GLP operation
The checked reports will be
printed automatically at the end
of the GLP measurement. If none
is checked, nothing will be
printed. The Trend Settings
button shows the GLP Trend
Print Options dialogue that
allows specifying the details for
trend printing, see Trend Printing.
Note: in the Enhanced Security mode the OK button is only enabled for users who belong
to the WIW Editor group.
84
Error messages
85
86
Error messages
Error messages
Error messages may sometimes appear; the following error messages (in block letters) are
explained below:
ASSPROT LOAD ERROR
This comes when protocol loading fails. The reason may be:
- serial communication errors (wrong parameters)
- the counter version is older than required
- the counter program has crashed.
PROGRAM NOT FOUND
The viewer program is not found.
PROGRAM EXECUTION FAILED
The Viewer/Excel program is found but could not be executed.
RESU FILE DELETED
This message comes when you try to operate on a result file that has been deleted.
CANNOT DEL COUNTING
You tried to delete a counter protocol that is being counted.
RESU FILE NOT DELETED
This comes when the result file could not be deleted because it has already been deleted
externally to the MicroBeta Windows Workstation program. The name is still on the list and
the program is asking if you want the name to be deleted from the list?
DELETE NORM/STD DATA
When you save a normalization/standardization you are warned that the existing
normalization/standardization data will be deleted.
MASTER OR RESTR EDITED
This appear when you go to counter parameter defaults after editing master plates or
restrictions and warns you that the editing is effective as a default value only after the template
has been saved.
87
Error messages
LABELCOUNT CONFLICT
This comes when you try to enter a protocol that has illegal label or single/dual values that
conflict with the template restrictions. The single/dual setting and labels are set to the default
values. If you do not want to change settings, cancel protocol editing.
FILE NOT ASSOC
This comes when the result file was opened but there was no association with the
extension
- maybe because Excel was not installed
- some other extension than xlw or xls was selected for the output file.
WARNING IN USE
This tells you that you are trying to remove a normalization/standardization that is used by
other protocols.
TOO MANY DISPL/PRINT ITEMS
Too many items were added to the list of display or print items.
CLASS VERSION TOO NEW
The program is older than the data files.
CANNOT EXIT WINDOWS
You tried to shut down Windows while dialogues were open in MicroBeta windows
Workstation.
88
Appendix
89
90
Appendix
Appendix – Setting up empty cassette
detection for MicroBeta JET
Introduction
MicroBeta JET can be set up to detect if a plate is present or absent from a cassette. This
avoids the possibility that injection can occur when there is a cassette without a plate.
Instruments are set up in the factory to detect normal 14.5 mm plates. However you may
need to redo this set up if you use plates significantly different in height from the normal
plates. You will also need to do this if you install the new software on an older instrument.
Principle
A detection level is determined. This is the level down to which the detector block can
move if a plate is present. If the detector block can move lower than this level then the
software recognizes that no plate is present. The following procedure is required to
determine this detection level.
Procedure
1) Take the program disk from your MicroBeta, load it into your PC.
Check the AUTOEXEC.BAT file on your program disk for the line: “SET
MPHINJ=xxx”. If the line begins with the word “REM” there is nothing you need to
change.
If there is no "REM" then insert it at the beginning of the line and save the
AUTOEXEC.BAT.
Put the program disk back in your MicroBeta and boot the system.
2) Make a protocol with one second count time, and injection.
Note: make sure there is no liquid for the injectors i.e. they should only dispense air.
Fill the shelves with empty cassettes. The more cassettes the more accurate the results will
be.
Run the assay.
91
Appendix
3) After the run open the “Terminal” window in the Workstation. The prompt will be:
“Ready>”.
Press “S” to enter the System menu.
Press “L” to enter the Levels prompt.
The prompt will show e.g.:
Plate Height: Min/Max/Current: 5710/5852/5780
Note that these are just example values and you must determine your own.
Write down the first two numbers.
4) Repeat steps 2 and 3 but this time with plates in position. You can use the same protocol.
The prompt will show e.g.:
Plate Height: Min/Max/Current: 3445/3710/3575
5) Now you have four numbers on paper. From these numbers you can determine the
detection level number. It should be larger than the largest number obtained with plates but
smaller that the smallest number without plates.
Note: the minimum difference between these two numbers should be more than 1000. If it is
less then contact your service engineer.
In the example:
With plates the largest number was 3710.
Without plates the smallest number was 5710.
Choose a number which is between the two e.g. 4700
6) Take the program disk from your MicroBeta, load it into your PC.
Open the AUTOEXEC.BAT file.
Select the line “REM SET MPHINJ=xxx”.
Remove the “REM” and change xxx to the value you got from your calculations e.g. 4700.
Save the AUTOEXEC.BAT file.
Put the program disk back in your MicroBeta and boot the system.
MicroBeta JET will now detect if an empty cassette is loaded and will prevent injection
occurring.
92
Index
93
94
Index
Index
Dot mode, 64
DPM
Sample, 41
Standardization, 40
A
AQP(I), 40
ASCII, 69
ASQP(I)
Quenching, 40
Assay, 58
E
Efficiency
Absolute, 38
Relative, 38
Empty cassette detection, 93
Enable GLP, 75, 80
Energy, 40
Error, 89
Excel, 69
Exiting, 76
B
Barcode, 15, 57, 60
STOP, 58
Button, 19
C
Cassette, 58
Detecting if it is empty, 93
Coding, 57, 59
Copy, 32
Counter, 29, 75
Parameters, 29
Crosstalk
Correction, 15, 49
DPM, 50
Normalization, 38, 49
Curve, 70
F
Filtermat
Coding, 59
Fonts, 28
FUNC
Function, 57
Function, 57
G
GLP Operation, 80
GLP Printout, 85
Goto, 70
D
Date, 20
Delete, 32
Demo, 76, 77
Detection level determination, 93
Disks
Progam, 14
Program, 16
Protocol, 16
Dot, 63
H
History Report, 84
I
ID
Label, 57
95
Index
Support, 57
Injector, 14, 23
Assembly, 24
Maintenance, 24
Module, 24
Preparation, 23
Robot, 23
Setting, 23
Injectors, 13
O
Online, 29
Optical, 49
Output, 36
P
Plate, 29, 60, 70, 75
Preset, 47
Printing, 27
Printing Trends, 82
Protocol, 25, 29
Groups, 25
Norm./stand., 27
Number, 58
J
JET, 53
Standardization, 46
L
LCPS, 52
Live, 63
Luminescence
Counting, 39, 52
Normalization, 53
Q
Quench, 40
Quencher, 50
Quenching, 40
R
M
Raw, 70
Ready, 19
Report, 83
Result, 70
Results, 48, 69
Viewer, 69
Robot, 23
Robotic, 75
Maintenance, 24
Menu, 18
N
New, 32
NORM, 48, 54
Function, 57
NORM/STD, 51
Normalization, 14, 38
C14, 39
Sample, 39
Normalization/standardization
Counting, 47
Parameters, 45
Numeric, 63
Numeric mode, 65
S
ScintiStrip, 47
Select, 76, 77
Service, 75
Settings, 74
Spectrum, 63
Spectrum mode, 66
SQP(I), 40
Standardization, 14, 38, 40
96
Index
Sample, 41
Start, 48, 51, 54, 61
Starting, 61
Start-up, 16
Status, 19
STD
Function, 57
Stop, 62
STOP
Function, 57
STOP barcode, 58
Stop cassette, 58
Stopping, 62
System, 75
Operations, 73
View, 73
T
Template, 35
Terminal, 15
Text, 70
Title, 18
Traffic, 19
Trend Page, 82
U
Update, 75
W
Waiting, 19
97