1
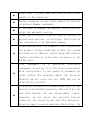
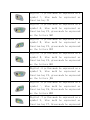
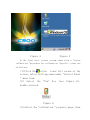
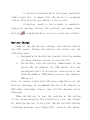
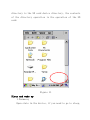
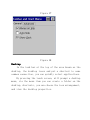
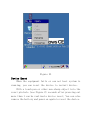
C&M
Portable Data Terminal
2010
Warming:Before operating this equipment, please
read the following content
★
Prohibit the use of wireless devices prompted the
occasion,please close
GPRS/WIFI/Bluetooth
Connection.
★
Insert SIM / SD card, make sure the external power
supply is disconnected.
★
During charging, do not force remove the battery
to prevent damage equipment.
★
If you open or damage the cabinet itself will not
enjoy the warranty service.
Please pay attention to protecting the screen, to
★
prevent wear and tear, or extrusion. Such injuries
are considered to be man-made damage.
Please backup data. The Company is not responsible
for product failure resulting in data loss caused
★
by all direct or indirect losses. Especially before
replace the battery in the more necessary to the
backup data.
★
This equipment is a precision electronic
equipment, do not put it in the static environment
with strong waves. If the tunnel or basement car
parks within the building where the wireless
network can not cover the use, GPRS may not be
effectively received.
★
This device contains a lithium-ion battery. If the
battery is not handled properly, there will be fire
and burn hazard. Do not disassemble, crush,
puncture, do not short the external battery
connector, but can not be put into fire and water.
Do not attempt to open or maintain the battery, the
battery can only be specified using the product to
be replaced. Dispose of the battery, do not be
thrown away.
This product is professional equipment, do not
★
★
install
without
our
certified
third-party
applications, otherwise it will cause system
damage.
As a result of updated version of the software
interface and functions to change without notice.
Directory
Quick Guide
Overview
Product performance
External Structure
Key features
Random Accessories
Optional Accessories
………………XPage
………………XPage
………………XPage
………………XPage
………………XPage
Getting Started
Install SIM card
………………XPage
Battery installation and replacement………XPage
Boot and shutdown
………………XPage
Battery Charge
………………XPage
The use of SD card
………………XPage
Sleep and wake-up
………………XPage
Taskbar
Desktop
………………XPage
………………XPage
Device Reset
Appendix1 Troubleshooting
………………XPage
………………XPage
Appendix2
Maintenance
………………XPage
Appendix3
Appendix4
Customer Service
Other
………………XPage
………………XPage
Quick Guide
Overview:
Smart mobile data collection terminal is Shenzhen
Justones Technology Co., Ltd. independently developed a
new wireless data acquisition products,embedded design,
with low power consumption, large screen, stable and
efficient, the entire Chinese operating system, support
GPRS / WIFI wireless network,etc., for the supermarkets,
logistics, power, storage and other industries for
applications such as bar code and RFID provides a new
solution.
Product performance
Project
Features
CPU
With ARM9 32-bit processor, the main
frequency of 400MHz
Operating System
Support for Microsoft Windows CE 5.0
simplified Chinese version
Memory
FLASH Memory
Display
Barcode
Scanning
RFID
Wireless
Data Backup
Infrared
communication
Secondary
development
Protection class
Drop resistance
Ambient
temperature
Interface
Size
Weight
Remarks
64Mb/128Mb
256Mb
2.8 inch TFT true color with 240 * 320
resolution
Handwritten touch screen
Support
the
one-dimensional
/
two-dimensional laser bar code scan engine
支持 125K/13.56M/920M 等多协议 RFID
GPRS/WIFI/Bluetooth
Double backup of SD card and FLASH
For meter reading and data transmission
applications IR
MS-EVC4.0 and above, or MS-VS2005
IP54
1.5 m free fall
Use: 0 ℃ -50 ℃ Storage: -20 ℃ -70 ℃
SIM card, SD card, USB
180MM*66MM*31MM
External Structure
Positive:
1
2
3
4
5
6
7
8
Figure 1
No.
Name
No.
Name
1
Infrared window
2
Speaker
4
Left (scan and other
3
Screen
screen
and
touch
applications)
5
Right (scanning and
6
indicator
other applications)
7
Keyboard
Power and charging
8
RESET button
Back:
1
2
3
4
5
6
7
8
Figure 2
No.
Name
No.
Name
1
Scan Window
2
Extended cover
3
Tags
4
Touch pen
6
The battery
5
The
battery
compartment
compartment cover
cover lock
7
Data socket
8
Lanyard hole
Side:
1
2
3
4
5
Figure 3
No.
Name
No.
Name
1
Scan Window
2
Touch pen jack
3
Side buttons
4
The battery
compartment cover
5
Strap buckle
Key features
Button
Function
Power button, turned off click start.
turned on, click into the sleep / wake-up
for 3 seconds after the shutdown.
Green Ribbon switch button, press the
keyboard function to switch to green
Yellow Ribbon switch button, press the
keyboard function to switch to yellow
Blue Ribbon switch button, press the blue
function after the switch to the keyboard
Arrow keys - left
Arrow keys - Right
Arrow keys –Up
Arrow keys - Down
Exit
Line or the implementation of selected
projects
Tab (the equivalent of PC-TAB), blue mode
switch to WIFI
Shift, blue for Bluetooth mode switch
SHIFT key, blue mode, adjust the volume
Delete the character before the cursor, or
indicate a sense of movement back, blue
state, said backlight adjustment
Scan key
Left softkey
Right softkey
Digital -1 yellow mode be expressed as a
symbol !, blue mode be expressed as
function key F1
Digital -2 yellow mode be expressed as a
symbol @, blue mold be expressed as
function key F2, green mode be expressed
as the letters ABC
Digital -3 yellow mode be expressed as a
symbol #, blue mold be expressed as
function key F3, green mode be expressed
as the letters DEF
Digital -4 yellow mode be expressed as a
symbol $, blue mold be expressed as
function key F4, green mode be expressed
as the letters GHI
Digital -5 yellow mode be expressed as a
symbol %, blue mold be expressed as
function key F5, green mode be expressed
as the letters JKL
Digital -6 yellow mode be expressed as a
symbol ^, blue mold be expressed as
function key F6, Green mode be expressed
as the letters MON
Digital -7 yellow mode be expressed as a
symbol *, blue mold be expressed as
function key F7, Green mode be expressed
as the letters PQR
Digital -8 yellow mode be expressed as a symbol
&, blue mold be expressed as function key F8,
Green mode be expressed as the letters TUV
Digital -9 yellow mode be expressed as a
symbol /, blue mold be expressed as
function key F9, Green mode be expressed
as the letters WXYZ
Digital -0 yellow mode be expressed as a
symbol ., blue mold be expressed as
function key F10
Symbol - (yellow mode be expressed as a
symbol +, blue mold be expressed as button
for the Start Menu
Symbol -) yellow mode be expressed as a
symbol -, blue mold be expressed as
right-click menu
Random Accessories
Item
Quanti
ty
Device Host
1
Touch pen
1
AC Adapter
1
Remarks
Charge the battery with the machine
1
USB cable
And computer sync, and charge the
battery with the machine
1
Lithium Battery
Optional Accessories
You can be paid to the Company and dealers have the
following options:
● Thick lithium-ion battery
● SD Card
● USB extension cable
● Charging / communication base
Getting Started
Install SIM card
1. Make sure the device is turned off and not charging status
2. The battery compartment cover lock screw counter-clockwise
rotation
3. Open the back cover
4. Pull out the battery from the hand
5. Put the SIM card (GPRS launched Internet-enabled SIM card) into
the deck,notice the SIM card and the contact angle of the bevel
should be with
the SIM
card
connector
and contact
the
corresponding.
6. Put the battery into the battery compartment, close the back
cover
7. The battery compartment cover lock screw clockwise, lock the
battery compartment
Battery installation and replacement
1. Make sure the device is turned off
2. The battery compartment cover lock screw counter-clockwise
rotation
3. Open the back cover
4. Put the battery into the battery compartment
5.close the back cover
6. The battery compartment cover lock screw clockwise, lock the
battery compartment
Boot and shutdown
1. Power
Put a fully charged battery into the device's battery
compartment,tap the
button
,wait a system boot screen
will appear (see Figure 4),after the boot progress,that
entered the WinCE operating system (see Figure 5),than can be
related applications.
Figure 4
Figure 5
In the first boot, please system comes with a "stylus
calibration "procedure for calibration. Specific ,steps are
as follows:
lower left corner of the
(1) Click the button
screen, select Settings menu under "Control Panel
" menu item.
(2) Select the "Pen" key (see Figure 6),
double-entered.
Figure 6
(3) Select the "calibration " property page, then
click the "recalibration" button (see Figure 7)
for calibration.
Figure 7
(4) The on-screen prompts
calibration
to
complete
the
Figure 8
If the device uses the process, that does not match
with the actual location when clicked, such as the
operation can be re-calibrated.
2. Off
When turned off, before running your device in all
applications currently shut down to prevent data
loss.
After more than three seconds long button
, the
device will automatically turn off the screen, then
release the button
,the system begins
to process shutdown until the power indicator
light turns off, it means that the device is normally
closed. This process according to the actual
situation, needs a few seconds to complete,
please be patient during this period, not many other
buttons
or keyboard keys, so as to avoid loss of data.
Battery Charge
Some of the new battery charge, the battery before
use full power. Charge the battery can choose one the
following ways:
1. Equipped with the battery charger into the random,
the plug charger access to electricity.
2. The battery into the battery compartment in the
device,The AC adapter (or USB cable) into the
appropriate port in the device, and access to the
mains AC adapter (USB cable to access the computer
USB port.)
Note:To ensure rapid and efficient completion of the
battery charging, we recommend the use of AC adapter or
USB cable charging, please turn off the machine after
charging.
When the battery is low, the task bar at the bottom
of the screen displays the low battery icon (see Figure
9), when the battery is very low, the device will display
a warning message (see Figure 10), such as the above,
please save the data immediately Later, and charge the
battery.
Figure 9
Figure 10
The use of SD card
Open the battery compartment, remove the battery, put
the SD card into your device SD card slot
SD card inserted in the "My Device " will appear in
the "Storage Card" directory (see Figure 11), the
directory is the SD card device directory, the contents
of the directory operation is the operation of the SD
card.
Figure 11
Sleep and wake up
1.Dormancy
Open state in the device, if you need to go to sleep,
to achieve power, you can light
button once (press
duration can not exceed 3 seconds,otherwise will be
treated as off operation), the device will immediately
turn off the screen.At this time to sleep, to sleep, the
keyboard and touch screen will stop responding until the
wake-up.
The state of the device open, if it is long time
operation, the device will automatically enter sleep mode
to reduce power consumption.
2. Wake
Dormant state in the device, wake the device if needed,
just a light button
,the device immediately wake up,
wake-up device can be normal after the operation.
Note:Be careful not to use
multiple clicks in a short
time frequent key sleep / wake-up operation, or may cause
screen damage and data loss.
Taskbar
In the bottom of the screen a toolbar is the system
tray, as shown in Figure 12:
Figure 12
Icon to the Start menu, click on some menu items
will, by selecting the appropriate menu item can run the
application (see Figure 13).
Figure 13
Input menu appears after clicking the menu items
currently available input method, click the menu item to
switch the input method, the menu offers soft keyboard
input method support.
Figure 14
Figure 15
Current task menu will appear after clicking the
task of all current entries can be achieved by clicking
on the task switching.
Figure 16
Clock item, display the current time, you can
double click into the "Date / Time Properties"page to set
the time, date and time zone and other attributes. You
can select ->"Settings"->"Taskbar and Start Menu " in
the "Show Clock " check box in front of the item on the
time display on and off.
Figure 17
Figure 18
Desktop
In the task bar at the top of the area known as the
desktop, the desktop icons and put a shortcut to some
common connection, you can quickly select applications.
By pressing the touch screen, will prompt a desktop
menu, via the menu item you can create a folder on the
desktop, shortcuts, you can choose the icon arrangement,
and view the desktop properties.
Desktop
area
Figure 19
Figure 20
Figure 21
Device Reset
When the equipment fails or can not boot system is
running, you can reset the device to restart device.
With a touch pen or other non-sharp object into the
reset pin hole (see Figure 2) seconds after pressing out
more than 1 can be realized a device reset; You can also
remove the battery and power on again to reset the device.
Appendix I Troubleshooting
Problems and Solutions
1.Equipment and system failures
Problem
Solution
Terminal does not start
· Ensure that the batteries are
installed correctly
· Replace the battery with enough
power
· Remove the battery and re-install
the battery
· Device Reset
Touch
screen
not
·Clean the touch screen
responding
·Re-calibration using the calibration
routine
·Restart the device
Screen does not show
·Verify that the device is in sleep
mode
·Restart the device
·Replace the battery with enough power
Keyboard does not respond
·Verify that the device is in sleep
mode
·Restart the device
·Replace the battery with enough power
SD card not recognized
·Confirm the anti-SD card is plugged
in
·Sure SD card is inserted firmly
·Confirm whether the damage to the SD
card
·Restart the device
·Replace the battery with enough power
Battery will not charge
·Confirm whether the damage to the AC
adapter
· Sure AC adapter is connected to
utility
·Sure AC adapter is plugged firmly
2.Scan failure
Problem
Solution
Left / Right-click does
·Replace the battery with enough power
not respond
Scan No data returned
·Confirm whether or damaged bar codes
·Make sure if it is in the correct
scanning range and distance
· Make sure the bar is the bar
code-based equipment can identify the
type
·Confirm if the window is clean and
free of dirt
·Confirm whether the application is
focused input box
·Replace the battery with enough power
3.Network and communication failure
Problem
Solution
GPRS can not connect
·Verify that the device has to support
GPRS functionality into the SIM card
·Confirmed support for GPRS SIM card
does not function because of arrears
has
been
suspended
from
service
providers
·May network signal is weak, replace
the location to connect again
·Replace the battery with enough power
GPRS connection to access
·Network signal may be weak, after
the network can not be
another visit to the replacement
normal
position
· Confirm whether it is normal to
provide services provider
·Replace the battery with enough power
USB
connection
not
·Confirm the USB connection is plugged
recognized
·Confirm the PC Install the driver
·Restart the device
·Re-plug USB cable
Appendix II maintenance
·Do not use this equipment dedicated charger and battery, so as
not to damage the device
·Do not touch the screen scraping. Use the provided stylus. Do
not use the screen pen, pencil or other sharp objects.
·Do not drop or subject it to strong terminal shock at high altitude
·Do not use corrosive environment terminal
·Do not use the terminal stored in direct sunlight, high humidity,
and location near heat sources
·Do not put equipment into the water
·Such as the dirty surface of the screen, use soft cloth with
diluted detergent to clean the screen.
·Disposed of in accordance with the provisions of the lithium-ion
batteries used. Do not end in fire, or they may explode.
Appendix III Customer Service
In the computer connected to the Internet through the browser
to access www.justones.com, obtain the latest information on
products and accessories
Warranty: host portion of the date of purchase, enjoy 12 months
of warranty service, accessories and parts have 3 months warranty;
when unable to provide proof of purchase, the date calculated by
the factory.
Appendix IV to the other
Note 1: For the second development of the user, upon
request and related support documents and routines.
Note 2: available from our website to obtain the latest
manual version.
Note 3: In the operation, such as the problems can not
be resolved through the manual, you can contact us or
visit our website for help.