1
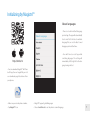
User Manual
MatiGard™ Air & Magictrl™
Dinsafe® Series Products User Manual
Designed for home and business security.
Easy to setup and use with Magictrl™.
World famous expert of smart-home alarm system
Perfectly match all Android and iOS smart phones.
MENU
The mobile app in this manual is the Android version of Magictrl™.
The snapshots and texts might be different from the version you’re using. Please refer to the latest version.
Get ready and power on
P3
How to add accessories
P13
Work with the main panel
P4
Manage and operate MatiSight™ IP Camera
P14
Initializing by Magictrl™
P7
Advanced settings and other features
P17
Add a new MatiGard™ Air/X
P8
FAQ
P20
Switch between one /two hands mode
P10
Appendix1: Accessory installing
P21
How to use the Easy Control Panel
P11
Appendix2: MatiSight™ setting
P22
How to add emergency contacts
P12
(with brief instructions about incoming alarm call)
1
2
Get ready and power on
Insert sim card and connect the power cable
• On the back of the panel, open the battery cover, you will see a slot for your
SIM Card. Insert the Sim Card and connect the power cable.
For those micro or nano SIM cards, please use sim adapter to fit the card slot.
Power ON
• Flip the switch on the back of the panel to the ON position. Replace the battery cover.
Wait 20 seconds as the system runs a start-up diagnostic with a welcome screen.
• You will hear a confirmation when the test is complete.
When you see the main screen ( left ) the system is ready.
• MatiGard™ Air uses GSM based SIM cards to send text messages and make phone calls.
• Make sure PIN-codes and voicemail are de-activated on the SIM before use with the panel.
• Make a note of the SIM telephone number, you will need it for setup.
3
Work with the main panel 1/3
Control Button
Press
LED Monitor
to enter the settings menu.
Press
to navigate.
Press
to select.
Press
to go back.
Child Lock
Lock: Long-press
Unlock: Long-press
for 6 seconds until the lock icon shows on screen.
for 6 seconds until the lock icon disappears.
Power Light & Delay Arming Button
Power Light with logo.
Long-press to activate delayed arming.
Delayed Arming means the system will wait a few seconds before going into ARM status.
This allows you to leave your home without triggering the alarm. The delay time can be adjusted in the Magictrl™.
• The MatiGard™ Air uses MicroUSB as the power cable interface..
4
• You can easily recharge it via any MicroUSB cable.
Work with the main panel 2/3
Battery Life
Indicate the remain battery life when AC power is OFF.
08:18 18°c
AC Power
External power is available.
Arm
All active sensors can trigger alarm.
Wednesday, September 15
Disarm
Stop trigger alarm, except those on 24-hours mode.
Clock
Real-time Temperature
After initializing process, the time The temperature surrounding main panel.
will synchronize with your phone’s. Users can change ºC or ºF in settings.
Home Arm
Only those on Home mode stop trigger alarm.
Arming Schedule
Indicate the Arm Schedule has been set.
Signal Bars
Alarm Clock Status
Indicate the GSM signal strength.
Indicate one or more Alarm Clock has been set.
SIM Card Status
Child Lock
Flashing when starting up or SIM card error.
Indicate the Child Lock is active.
5
Work with the main panel 3/3
Alarm Clock
Check all working alarm clocks set by Magictrl™.
6
ºC/ ºF Switch
Screen Timeout
Switch the temperature scale between Fahrenheit and Celsius.
Set the screen saving time.
Initializing by Magictrl™
About languages
• There is a build-in default language
pack on App. The app will automatically
check and fetch the latest available
language files, or use the latest saved
language pack or default one.
• You don’t have to reset App while
switching language. The setting will
http://din.bz/m
immediately effect right after the language being selected.
• You can download Magictrl™ AirX from
both App Store or Google Play, or visit
our download page listed above from
your phone.
• Make sure your smart phone is online.
• Magictrl™ supports global languages
• Tap Magictrl™ icon.
• Choose Auto Detect to use the phone’s current language.
7
Add a new MatiGard™ Air/X 1/2
• Magictrl™ is a great tool to control MatiGard™. MatiGard™ should be added to Magictrl™ before using, which we call binding.
One Magictrl™ can handle more than one MatiGard™. The phone number of MatiGard™ and the password would be asked during binding.
Different role has its default password.
Administrator: General operations and advanced settings are available. User: General operations only.
• The beginners will get kindly reminder, which could help them through the settings step by step.
• Magictrl™ supports renaming for the main panel, which is especially useful when managing multiple devices.
8
• Users without having a MatiGard™ may experience the products in the demo mode of Magictrl™.
Add a new MatiGard™ Air/X 2/2
About the reply SMS
• Because the iOS’s limitation, we can’t capture
the SMS. So you have to type in the codes by
your own.
• Few Android phones may also need to enter
codes manually due to the limitation from some
so-called security software, or the self-made ROM
by hobbyists.
• Most of the time, users only need to wait few
seconds.
• If you can’t receive the reply SMS, please check
the MatiGard™ phone numbers entered before,
or if the phone is charged.
• Magictrl™ sends an authorization request SMS to MatiGard™. Please wait for the reply.
• Magictrl™ can recognize the verification code in SMS and fill it automatically. (Android only)
• Users may need to fill the codes manually due to some limitation of iOS system or some Android phones.
9
Switch between one/two hands mode
One/two hands mode
• There are different sizes of smart phones with
Android or iOS systems, which bring operational
inconvenience for users.
• We bring convenience by offering one/two
hands modes for both small sizes phones (3.5
inches including under) and big sizes phones
and tablet PC (4 inches including above)
• It’s one good case to show Dinsafe® ’s principle:
make every effort to minimum users’ operative
difficulty.
One Hand Mode
10
Two Hands Mode
How to use the Easy Control Panel
Navigator
Swap to switch between menus.
The other two menus are [Accessories and
Device Info] and [Settings]
Easy Control Panel
Arm, Disarm, Home Arm, SOS, Etc.
Accessories QuickView
The fastest way to use your accessories.
• Arm: All accessories under none “Disable” status are on arm.
• Home arm: Only the accessories on "Instant" or "24 Hours" mode are on arm.
• Disarm: Only “24 Hours”mode accessories are on arm.
System will alarm when one or more accessories on arm is triggered.
11
How to add emergency contacts
• Slide softly on Main Panel, switch to [Accessories and Device Info] menu.
• Click [Emergency contacts]. Up to 6 emergency contacts are for settings. Tap any of them for editing.
• The MatiGard™ calls and texts to emergency contacts when alarming. You can decide which informing message to receive.
• Please set your cellphone number as the 1st emergency contact. Because only the first one could receive arming notification.
**
12
##
Press ** to monitor and talk via phone to main panel.
Press ## to cancel SOS.
88
Press 88 to listen again.
Hang up to call the next emergency contact.
When you get an incoming emergency call, you could follow the instructions above to operate via phone.
How to add accessories
• Click + on top-right of the screen.
• Scan the bar code or QR code printed on accessories with phone’s camera.
• Name the accessory.
• Set the trigger modes or other properties as you need, then save.
13
Manage and operate MatiSight™ IP Camera 1/3
• Like adding accessories, tap + to scan QR code on camera then name it.
• If you want to be informed to check the real-time video (like the camera facing the door) when alarm is trigger by certain accessory
(like the door/window sensor installed on the front door), you can use [inform when … alarms:] and tick the related accessories.
14
• You would be asked to install a video plug-in the first time visiting to the camera. It won’t bother you anymore.
Manage and operate MatiSight™ IP Camera 2/3
SYNC with phone’s timezone:
SYNC with phone’s timezone. Synchronize
the timezone with your phone’s
Wifi Setting:
Connect IP camera wirelessly.
Format your SD card:
Erase and make your SD card recordable.
Motion Detect Record:
Automatically record video when any motion
is detected (5s before + 15s after).
View Record Video:
List all the recorded video on your SD card,
can be sorted by date. Click to play.
• Move: Watch by dragging on the screen or tapping Move button and control with joystick.
• SnapShot: Snapshot the current screen and save it to phone album.
• Sound: Listen to the sound around MatiSight™.
• Talk: Talk while tapping and it plays immediately via camera speaker.
15
Manage and operate MatiSight™ IP Camera 3/3
Appendix: How MatiSight™ works when alarm occurs?
ATTENTION: An alarm message is
received. Check the live video from
your MatiSight™ now?
No
1. If a thief intrudes and triggers some acces-
2. Magictrl™ captures the informing SMS right
3. Just one tap to show you the real-time
sory alarm, the emergency contacts would
after that and reminds the user to check live
video! The thief is nowhere to hide!
get informing SMS and alarming call right
video from the camera paired before. Users get
after that.
informed immediately even when the App is
exited.
16
Yes
Advanced settings and other features 1/3
Emergency Contact:
Up to 6 contacts for setting.
Alarm Clock:
Up to 4 clocks for setting, with 4 modes each.
Temperature Setting:
An informing SMS would be received when
surrounding temperature is out of the safe
range you set.
Language Setting:
Select and apply the app language.
(Language for MatiGard™ menu and SMS needs
to be set via main panel)
Knock Over to SOS:
Punch or knock over the main panel to trigger
SOS when the switch is ON.
(Strongly recommended to those live alone)
Ready to ARM:
Needs to work with door/window sensors. The
system will inform you to check and refuse to
arm when door/window is still open.
17
Advanced settings and other features 2/3
Arming Schedule:
Up to 6 groups of settings for daily arming.
(Disarm is not supported for security consideration)
Delay Time (ARM):
Waiting time before arming when receiving an order. It can be 90 seconds longest.
Delay Time (ALARM):
If some sensors in delay mode trigger alarm, system will wait few seconds before
activating alarm. It can be 90 seconds longest.
Siren Time:
The build-in siren time, up to 30 minutes long last.
Speaker Volume:
The build-in speaker volume, with 4 grades and 1 is weakest.
Change Password:
Admin and user password settings, for authorization while initializing.
SMS Forward:
Forward the SMS from the setting number to the first emergency contact.
(Mainly used for checking Sim card balance by forwarding SMS of phone bill from local carrier)
Re-initialization:
All settings of this phone would be erased if re-initialized.
18
Advanced settings and other features 3/3
MatiGard™ sends SMS to reply your inquiry here.
Logs & Events:
List recent arm, disarm and alarm records.
Sim Card Balance:
Check the balance by sending query SMS to
local carrier from MatiGard™.
System Status:
Check current time, arm status, etc.
Arm & Alarm Delay Time:
Check delay settings for Arm/Alarm.
Informing Strategies:
• Security Accessory’s Trigger Mode:
Check types of informing SMS received from
Show names of paired accessories and
MatiGard™ when event occurs.
their trigger modes.
(Like power down, temperature alarm, etc.)
• Remote Controller List:
Arming Schedule:
Show names of paired remote controllers.
Check timing arming schedule.
• MatiSight™ List & Linking Status:
Show all paired MatiSight™s’ names and
their linking accessories status.
• Smart Switch List:
Show all paired Smart Switch.
Alarm Clock List:
Show all available alarm clocks.
Realtime Temperature:
Check temperature around MatiGard™.
Emergency Contacts:
Show added emergency contacts in MatiGard™.
19
FAQ
Can I use non-Dinsafe® branded accessories with the MatiGard™?
Sorry, MatiGard™ only supports the Dinsafe® accessories.
1. The Dinsafe® accessories use encrypted communication protocols with patented technology. This makes them safer and more stable.
2. The Dinsafe® accessories are easily paired with the system just by scanning QR codes or barcodes. All of our accessories support low-battery warning.
How can I get help with my MatiGard™ system?
1. Contact the local agency first to get the fastest support services.
2. Visit www.dinsafe.com and summit your question, or send us an email to [email protected] .
Why can’t I receive verification code after initialization?
1. Make sure the SIM card is available and installed properly. If there’s a SIM icon flashing on the main screen, please power off and reinstall the SIM
card again, then power on.
2. Make a phone call to your MatiGard™ to check if the Sim card is working.
3. If you just selected the ‘default’ country code during initialization, please choose the right one and try again.
Default Administrator Password: 123456 ; Default User Password: 1234
How can I reset my MatiGard™?
1. Power up your MatiGard™.
2. Hold down the reset button on the back of the panel until you hear 1 beep.
3. Continue holding it for 6 seconds until hearing 2 beeps.
4. System would be reset and restart.
20
Appendix1: Accessory installing
10-30o
6.5-7.5 feet
• Remember to pull out the
battery insulating pieces
before use.
• Use Magictrl™ for pairing
accessories before installing.
• It’s recommended to take
pictures for the QR codes
or barcodes printed on the
Less than 0.4 inches.
accessories and save them
to your phone’s album.
21
Appendix2: MatiSight™ setting 1/3
Pairing with MatiGard™
• Please use Magictrl™ to scan the QR code to pairing MatiSight™.
• The QR code is printed on the bottom of MatiSight™.
Insert LAN cable and power up
Audio Out
• Please always connect MatiSight™ with LAN before
powering up when you first using it.
• Make sure the the settings like DHCP Server and
UPNP are enabled on your router.
• Connect the power cable, the MatiSight™ will run
some diagnostic processes like rolling the camera.
When it stops rolling, the startup is completed.
Watch live video by Magictrl™
• Tap MatiSight™ listed in the Magictrl™.
• You might need to install a plugin in the first using.
Please follow the guide in App to install it.
• After plugin is installed, tap it again and watch the live
video or control the camera like moving or talking, etc.
22
Bottom
LAN
SD Card
Reset
Back view of P-series
(Interface differs for each series)
Power
Appendix2: MatiSight™ setting 2/3
Connect MatiSight™ to wireless network
• The SSID will be automatically filled as your phone’s , please type in the password and tap [Confirm].
• Unplug the LAN cable, restart your MatiSight™ by plugging out/in the power cable.
• If you saved the wrong password and restarted the MatiSight™, please reconnect it by LAN again,
then repeat the setting process above.
Use SD card for video recording
• If the SD card is new or needs to be erased, please tap [Format your SD card] to make it available for recording.
• Switch on [Motion Detect Record] to record videos when motion is detected by MatiSight’s lens.
• The video will be recorded as 640*480 and lasted for 20s to 30s. When the SD card is full, the old files will be
automatically deleted for recording the latest one.
Play recorded videos
• Tap [View Record Video] to list all recent videos.
• Tap the records to play online. • You can tap [Choose Date] to filter videos by date.
Synchronize the timezone with your phone’s
• Tap [SYNC with phone’s timezone]
When your phone’s timezone changed, please do it again to keep both timezone the same.
23
Appendix2: MatiSight™ setting 3/3 - FAQ
I’ve already connect my MatiSight™ with LAN, but I can’t connect to it in Magictrl™.
Please make sure your router has successfully connected to Internet.
DHCP Server/Service should be Enable on the router. UPNP should be Enable too.
You phone’s data plan should be available. Some carriers restricts the p2p connection protocol, try using Magictrl™ in the same Wi-Fi
with MatiSight™ to figure out the problem.
If you still can’t connect it, try another router if possible. Some routers’ build-in firewall also interfere the connection.
I can’t connect my MatiSight™ to Wi-Fi.
Reconnect it to LAN and re-type the password in MatiSight™ ’s setting first, always.
Unplug the LAN cable after Wi-Fi setting is completed and restart MatiSight™.
MatiSight™ can’t support 5G Wi-Fi now, please use 2.4G wireless routers instead.
I can’t save the snapshots.
Magictrl™ will need to access to your phone’s album for saving snapshots. The authorization might need you to approve while using
the function for the first time in some phones. If you mis-click the ‘No’ option during the authorization, you might need to enable it in
the system setting menu.
How to reset my MatiSight™?
PLEASE MAKE SURE YOU CLEARLY KNOW THE RESULT OF RESETING:
ALL DATA WILL BE ERASED INCLUDING THE INTERNET SETTINGS AND RECORDED VIDEOS.
Power up your MatiSight™, wait until the camera stops rolling.
Hold the reset button for a while until the camera starts rolling again ( P-series ). Release the button then the MatiSight™ would be reset.
24
http://din.bz/m
Dinsafe®, MatiGard™, Magictrl™ are trademarks of Dinsafe Ltd. ©2015. All rights reserved.
Website : www.dinsafe.com E-mail : [email protected]


![User`s Manual [(ver2_0] Label Data Storage for Printing](http://vs1.manualzilla.com/store/data/005731436_1-9878257490003fe38f3b53735b78440c-150x150.png)