1
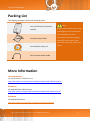
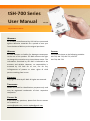
tSH-700 Series User Manual Ver.1.0 Tiny Serial Port Sharer WARRANTY All products manufactured by ICP DAS are warranted against defective materials for a period of one year from the date of delivery to the original purchaser. WARNING SUPPORT ICP DAS assumes no liability for damages consequent to the use of this product. ICP DAS reserves the right This manual relates to the following modules: tSH-722, tSH-732, tSH-725, tSH-735 to change this manual at any time without notice. The information furnished by ICP DAS is believed to be accurate and reliable. However, no responsibility is assumed by ICP DAS for its use, nor for any infringements of patents or other rights of third parties resulting from its use. tSH-724, tSH-734 COPYRIGHT Copyright © 2014 by ICP DAS. All rights are reserved. TRADEMARKS Names are used for identification purposes only and may be registered trademarks of their respective companies. CONTACT US If you have any questions, please feel free to contact us via email at: [email protected], [email protected] Tiny Serial Port Sharer TABLE OF CONTENTS PACKING LIST................................................................................................................................................................ 3 MORE INFORMATION ................................................................................................................................................... 3 1. INTRODUCTION ................................................................................................................................................... 4 1.1 SPECIFICATIONS ...................................................................................................................................................... 6 1.2 APPEARANCE ......................................................................................................................................................... 7 1.3 PIN ASSIGNMENTS .................................................................................................................................................. 9 2. SETTING UP THE TSH-700 MODULE ................................................................................................................... 10 3. WEB CONFIGURATION ....................................................................................................................................... 20 3.1 LOGGING IN TO THE TSH-700 WEB SERVER .............................................................................................................. 20 3.2 HOME PAGE ........................................................................................................................................................ 22 3.3 APPLICATION MODE.............................................................................................................................................. 23 3.4 SERIAL PORT PAGE................................................................................................................................................ 26 3.4.1 3.5 Port1 Settings .............................................................................................................................................. 26 NETWORK SETTING ............................................................................................................................................... 28 3.5.1 Network and Miscellaneous Settings .......................................................................................................... 28 3.5.2 IP Address Settings ...................................................................................................................................... 29 3.5.3 General Settings .......................................................................................................................................... 31 3.5.4 Restore Factory Defaults ............................................................................................................................. 33 3.5.5 Firmware Update ........................................................................................................................................ 35 3.6 3.6.1 FILTER PAGE ........................................................................................................................................................ 36 Accessible IP Settings (white list) ................................................................................................................ 36 3.7 MONITOR PAGE ................................................................................................................................................... 37 3.8 CHANGE PASSWORD ............................................................................................................................................. 37 3.9 LOGOUT PAGE ..................................................................................................................................................... 38 Copyright © 2015 ICP DAS CO., Ltd. All Rights Reserved. -2- Tiny Serial Port Sharer Packing List The shipping package includes the following items: Note: One tSH-700 series hardware module If any of these items are missing or damaged, please contact the local distributor for more Quick Start One Quick Start Guide information. Save the shipping materials and cartons in case you need to ship the card in the One Software Utility CD future. DC Connector Power Cable More Information Documentation CD:\NAPDOS\tSH-700\Document http://ftp.icpdas.com/pub/cd/tinymodules/napdos/tSH-700/document/ Firmware CD:\NAPDOS\tSH-700\Firmware http://ftp.icpdas.com/pub/cd/tinymodules/napdos/tSH-700/firmware/ Software CD:\NAPDOS\Software http://ftp.icpdas.com/pub/cd/tinymodules/napdos/software/ Copyright © 2015 ICP DAS CO., Ltd. All Rights Reserved. -3- Tiny Serial Port Sharer 1. Introduction Following the success of the original tGW-700/tDS-700 modules, ICP DAS has continued to develop new functions for these products in order to provide increased support for a greater number of applications. The tSH-700 module is a serial port sharer that provides a number of functions, including "Baud Rate Conversion", "Modbus RTU/ASCII Conversion" and "Two Masters Share One Slave". The built-in web server provides easy configuration interface, and no console commands are required. Baud Rate Conversion: This function allows a single master device to communicate with slave devices using different baud rates and data formats. Most query-response protocols (halfduplex), e.g. DCON, are supported in the raw data mode. Full-duplex communication should also work when the data size is smaller than the built-in 512 bytes buffer on each serial port. Modbus RTU/ASCII Conversion: This function allows a single Modbus RTU/ASCII master device to communicate with Modbus RTU/ASCII slave devices using different protocols, baud rates and data formats. Copyright © 2015 ICP DAS CO., Ltd. All Rights Reserved. -4- Tiny Serial Port Sharer Two Masters Share One Slave: This function allows two master devices connected to different serial ports to share slave devices. Modbus mode can be used to convert the Modbus RTU/ASCII protocols, while raw data mode can be used for DCON or other query-response protocols. Different baud rates and data formats can also be used on the different serial ports. The built-in cache function reduces the loading of serial communication on the slave port by removing duplicated queries when the two master devices are requesting the same information. Two Masters Share Slave Devices in Raw Data Mode with Baud Rates Conversion Two Masters Share Slave Devices with Protocols and Baud Rates Conversion Copyright © 2015 ICP DAS CO., Ltd. All Rights Reserved. -5- Tiny Serial Port Sharer 1.1 Specifications Models tSH-722 tSH-732 tSH-725 tSH-735 tSH-724 tSH-734 2-wire RS-485 5-wire RS-232 2-wire RS-485 3wire RS-232 3wire RS-232 System CPU 32-bit ARM Communication Interface Ethernet 10/100 Base-TX, 8-pin RJ-45 x 1, (Auto-negotiating, Auto-MDI/MDIX, LED indicator) PoE (IEEE 802.3af, Class 1) 5-wire 3wire RS-232 RS-232 5-wire 3wire RS-232 RS-232 3wire RS-232 2-wire RS-485 2-wire RS-485 - Self-Tuner - Yes, automatic RS-485 direction control RS- Bias Resistor - Yes, 1 KΩ 485 Node - 254 (max.) COM1 COM2 COM3 UART 2-wire RS-485 2-wire RS-485 2-wire RS-485 16c550 or compatible COM Port Format Baud Rate 115200 bps Max. Data Bit 5, 6, 7, 8 Parity None, Odd, Even, Mark, Space Stop Bit 1, 2 Power Power PoE IEEE 802.3af, Class 1 Input DC Jack +12 ~ 48 VDC Power Consumption 0.07 A @ 24 VDC Mechanism Connector 10-Pin Removable Terminal Block x 1 Mounting DIN-Rail Environment Operating Temperature -25 ~ +75 °C Storage Temperature -30 ~ +80 °C Humidity 10 ~ 90% RH, Non-condensing Copyright © 2015 ICP DAS CO., Ltd. All Rights Reserved. -6- Tiny Serial Port Sharer 1.2 Appearance Front View 1. Robust Insulated Case 2. Serial COM Ports The number of serial COM Ports available depends on the type of tSH-700 module. For more detailed information regarding 2 the pin assignments for the serial COM ports, refer to Section 1.3 Pin Assignments. 1 3 3. S1: System LED indicator Once power is supplied to the tSH-700 module, the system LED indicator will illuminate. An overview of the LED functions is given below: 4 6 Function System LED Behavior Running Firmware Steady ON 5 Network Ready Serial Port Busy 4. Slow flashing – Once every 3 seconds Rapid flashing – Once every 0.2 seconds Operating Mode Switch Init Mode: Configuration mode Run Mode: Firmware operation mode For tSH-700 series modules, the operating mode switch is set to the Run position by default. In order to update the firmware for the tSH-700 module, the switch must be moved from the Run position to the Init position. The switch must be returned to the Run position after the update is complete. Copyright © 2015 ICP DAS CO., Ltd. All Rights Reserved. -7- Tiny Serial Port Sharer 5. +12 to +48 VDC Jack: The tSH-700 is equipped with a +12 VDC to +48 VDC jack that can be used to connect a power supply. If no PoE switch is available on site, a DC adapter can be used to power the tSH-700 module. 6. PoE and Ethernet RJ-45 Jack The tSH-700 module is equipped with an RJ-45 jack that is used as the 10/100 Base-TX Ethernet port and features networking capabilities. When an Ethernet link is detected and an Ethernet packet is received, the Link/Act LED (Orange) indicator will be illuminated. When power is supplied via PoE (Power-overEthernet), the PoE LED (Green) indicator will be illuminated. Copyright © 2015 ICP DAS CO., Ltd. All Rights Reserved. -8- Tiny Serial Port Sharer 1.3 Pin Assignments Note that the CTS and RTS pins of the tSH-722 and tSH-724 are reserved and have no function. Copyright © 2015 ICP DAS CO., Ltd. All Rights Reserved. -9- Tiny Serial Port Sharer 2. Setting up the tSH-700 Module This chapter provides detailed information about the “Self-Test” process, which is used to confirm that the tSH-700 series module is operating correctly. Before beginning the “Self-Test” process, the wiring test, Ethernet configuration and eSearch utility driver installation procedures must first be fully completed. Follow the procedure described below: Step 1: Connecting the Power Supply and the Host PC 1. Ensure that the network settings on your PC are configured correctly. 2. Ensure that the Windows firewall or any Anti-Virus firewall software is correctly configured or temporarily disable these functions; otherwise the “Search Servers” function in the eSearch Utility may not work as required. You may need to contact your System Administrator for more details of how to do this. 3. Check that the Init/Run switch is in the “Run” position. Figure 2-1 4. Connect both the tSH-700 and the Host computer to the same sub-network or the same Ethernet Switch, and then power on the tSH-700. Refer to Figures 2-2 and 2-3 for illustrations of how to do this. Copyright © 2015 ICP DAS CO., Ltd. All Rights Reserved. - 10 - Tiny Serial Port Sharer Figure 2-2 Figure 2-3 5. Verify that the System LED indicator is flashing. Figure 2-4 Copyright © 2015 ICP DAS CO., Ltd. All Rights Reserved. - 11 - Tiny Serial Port Sharer Step 2: Connecting the Master and Slave Devices 1. Connect the serial port of PC (Master) to COM1 on the tSH-700. 2. Connect the Modbus device (Slave, e.g. M-7022, optional) to COM2on the tSH-700. 3. Supply power (+10 ~ +30 VDC) to the Modbus device (e.g. M-7022, Device ID: 1) Copyright © 2015 ICP DAS CO., Ltd. All Rights Reserved. - 12 - Tiny Serial Port Sharer Step 3: Installing the Software on your PC 1. Decompress eSearch Utility, which can be obtained from the companion CD-ROM, the ICP DAS FTP site, or the ICP DAS web site. The location of the install files on the CD and the download addresses are shown below: CD: \NAPDOS\software\eSearch\ http://ftp.icpdas.com/pub/cd/tinymodules/napdos/software/esearch/ 2. Install Modbus Utility, which can be obtained from the companion CD-ROM, the ICP DAS FTP site, or the ICP DAS web site. The location of the install files on the CD and the download addresses are shown below: CD: \NAPDOS\Software\Modbus_Utility http://ftp.icpdas.com/pub/cd/tinymodules/napdos/software/modbus_u tility/ Copyright © 2015 ICP DAS CO., Ltd. All Rights Reserved. - 13 - Tiny Serial Port Sharer Step 4: Configuring the Correct Network Settings 1. 2. Open the eSearch Utility and then click the “Search Servers” button to search for the tSH700 module. Factory Default Settings for the tSH-700: IP Address: 192.168.255.1 Sub-net Mask: Gateway Address: 255.255.0.0 192.168.0.1 Once the search process is complete, double-click the name of the tSH-700 module to open the “Configure Server” dialog box. 3. Enter the network settings information, including the IP, Mask and Gateway addresses, and then click “OK” button. The new settings for the tSH-700 will take effect within 2 seconds. If you don’t know the correct network configuration information, contact your Network Administrator to obtain the details. Copyright © 2015 ICP DAS CO., Ltd. All Rights Reserved. - 14 - Tiny Serial Port Sharer 4. 5. 6. Wait 2 seconds and then click the “Search Servers” button again to ensure that the tSH700 is working correctly with the new configuration. Click the name of the tSH-700 to select it. Click the “Web” button to log in to the web configuration pages. (Or enter the URL address of the tSH-700 in the address bar of the browser.) Step 5: Configuring the Application Mode 1. Enter the password (use the default password “admin”) in the Login password field and click the “Submit” button. Copyright © 2015 ICP DAS CO., Ltd. All Rights Reserved. - 15 - Tiny Serial Port Sharer 2. Click the “Application Mode” tab to display the Application Mode Settings page. 3. Check the “RAW Data (Half-Duplex)” option 4. Select the M-7022 (slave device) connected to COM port of the tSH-700 (e.g. “Port2”) from the “Slave Device Connected on:” option button. 5. Enter the timeout value of the Port2 (e.g. “500”) in the “Slave Timeout (ms)” field and click the “Submit” button to save your settings. Copyright © 2015 ICP DAS CO., Ltd. All Rights Reserved. - 16 - Tiny Serial Port Sharer Step 6: Configuring the Serial Port 1. Click the “Port1” tab to display the Port1 Settings page. 2. Select the appropriate Baud Rate and Data Format settings depending on the serial COM Port of PC (Master) from the relevant drop down options. (e.g. Baud Rate: 9600 and Data Format: 8N1) 3. Click the “Submit” button to save your settings. 4. Click the “Port2” tab to display the Port2 Settings page. 5. Select the appropriate Baud Rate and Data Format settings depending on the M-7022 (Slave) from the relevant drop down options. (e.g. Baud Rate: 115200 and Data Format: 8N1) 6. Click the “Submit” button to save your settings. Copyright © 2015 ICP DAS CO., Ltd. All Rights Reserved. - 17 - Tiny Serial Port Sharer Step 7: Testing your tSH-700 Module 1. Double click the Modbus Utility shortcut on the desktop, and then click the “Modbus/TCP” button. 2. Click on “Client tools” “Modbus/RTU Client”. Copyright © 2015 ICP DAS CO., Ltd. All Rights Reserved. - 18 - Tiny Serial Port Sharer 3. Select your COM port, Baud Rate and Data Format (e.g. COM1/9600/N,8,1) on the PC (Master) and then click the “Open” button in the “COM status” section. If you use the Modbus polling mode, please note that the Slave timeout in the port which the Slave Device connected on must be smaller than the timeout value in your application software (e.g. Modbus Utility). It cannot be less than 100 ms. 4. Refer to “Protocol Description” section and type the command in the “Command” field then click the “Send command” button. If the response data is correct, it means the test is success. Copyright © 2015 ICP DAS CO., Ltd. All Rights Reserved. - 19 - Tiny Serial Port Sharer 3. Web Configuration Once the tSH-700 module has been correctly configured and is functioning on the network normally, the configuration details can be retrieved or modified using either the eSearch Utility or a standard web browser. Note that if the tSH-700 module does not use the power supply via PoE (Power-over-Ethernet), you can remove the Ethernet cable when web configuration is completed. 3.1 Logging in to the tSH-700 Web Server The embedded tSH-700 series web server can be accessed from any computer that has an Internet connection. Step 1: Open a new browser window. Open a web browser, for example, Google Chrome, Firefox or Internet Explorer, which are reliable and popular Internet browsers that can be used to configure tSH-700 module. Note that if you intend to use Internet Explorer, ensure that the cache function is disabled in order to prevent browser access errors. Detailed instructions for how to do this can be found in “FAQ: How to avoid a browser access error that causes a blank page to be displayed when using Internet Explorer”. Step 2: Enter the URL for the tSH-700 web server Ensure that you have correctly configured the network settings for the tSH-700 module (refer to Chapter 3 Setting up the tSH-700 module for detailed instructions), and then enter the URL for the tSH-700 web server in the address bar of the browser. Copyright © 2015 ICP DAS CO., Ltd. All Rights Reserved. - 20 - Tiny Serial Port Sharer Step 3: Enter the Password After the main login page is displayed, enter a password (the factory default password is “admin”), and then click the “Submit” button to continue. Factory Default Password: admin Step 4: Log in to the tSH-700 Web Server After logging into the tSH-700 web server, the main page will be displayed. Copyright © 2015 ICP DAS CO., Ltd. All Rights Reserved. - 21 - Tiny Serial Port Sharer 3.2 Home Page The Home link connects to the main page, which contains two parts. The first part of this page provides basic information about the tSH-700 hardware and software. The second part of this page provides the status of the port settings and serial data packing. Copyright © 2015 ICP DAS CO., Ltd. All Rights Reserved. - 22 - Tiny Serial Port Sharer 3.3 Application Mode The Application Mode section enables user to configure the operations of the module. The available application modes are RAW Data (Full-Duplex), RAW Data (Half-Duplex) and Modbus RTU/ASCII Converter. Copyright © 2015 ICP DAS CO., Ltd. All Rights Reserved. - 23 - Tiny Serial Port Sharer The following is an overview of the parameters contained in the Application Mode section: Item Description Application Mode This function allows two devices to communicate with each other using different baud rates and data formats. RAW Data (Full-Duplex) When the status of the COM Port is “enable” that means the data transmission in these two devices can just like Full-duplex, the data can be transmitted in both directions at the same time. Note: The full-duplex communication is only available for RS232 and RS-422 when data length is smaller than 512 bytes of the serial buffer. This function allows two masters share all slave devices in RAW Data transmission with different Baud Rates. RAW Data (Half-Duplex) In “Slave Device Connected on:” option, select the COM port which the slave device connected to. Copyright © 2015 ICP DAS CO., Ltd. All Rights Reserved. - 24 - Tiny Serial Port Sharer Item Description This function allows two masters share slave devices with Modbus protocols and Baud Rates conversion. Modbus RTU/ASCII Converter In “Protocol:” option, set the Modbus protocol in all port related to master/slave devices. In “Slave Device Connected on:” option, select the COM port which the slave device connected to. Set the waiting time after last Tx of the request sent from the tSH-700 to device. If the device does not respond within the timeout value, the tSH-700 will skip and process next request. Slave Timeout (ms) Note that the Slave timeout in the port which the Slave Device connected on must be smaller than the timeout value in your application software (e.g. Modbus Poll, Modbus Utility, etc.). It cannot be less than 100 ms. Default: 1000 ms Submit Click this button to save the revised settings to the tSH-700. Copyright © 2015 ICP DAS CO., Ltd. All Rights Reserved. - 25 - Tiny Serial Port Sharer 3.4 Serial Port Page The Port Settings section provides basic information related to the hardware and software for the tSH-700 module, including the Firmware version and the IP Address, etc. and then provides functions allowing items such as port settings and sharer settings to be configured. 3.4.1 Port1 Settings The following is an overview of the parameters contained in the Port1 Settings section: Item Description Default Port Settings Baud Rate (bps) This parameter is used to set the Baud Rate for the COM ports. 115200 Data Size (bits) This parameter is used to set the Data Size for the COM ports. 8 Copyright © 2015 ICP DAS CO., Ltd. All Rights Reserved. - 26 - Tiny Serial Port Sharer Item Description Default Parity This parameter is used to set the Parity for the COM ports. None Stop Bits (bits) This parameter is used to set the Stop Bits for the COM ports. 1 Sharer Settings CRC/LRC Confirm Char Timeout (bytes) Read Cache (ms) This parameter is used to enable or disable CRC/LRC Confirm function. This function can check every request/response in CRC partition. If CRC partition is not correct, the command will be skipped. Yes = Enable No = Disable This parameter is used to set the waiting time (based on bytes) that should elapse after last byte of data of the response is received from the slave device is activated. If no more data is received before the timeout period expires, then the transmission of this packet is deemed to have been completed and the tSH-700 begins processing the packet. Valid range: 4 to 15 (bytes); When sharing Modbus RTU/ASCII device/data between several master devices, the read-cache function can be used to reduce the loading on the serial communication and ensure faster TCP responses. No 5 0 Valid range: 10, 20 to 65530 (ms); Disable = 0. Submit Click this button to save the revised settings to the tSH-700. Copyright © 2015 ICP DAS CO., Ltd. All Rights Reserved. - 27 - Tiny Serial Port Sharer 3.5 Network Setting 3.5.1 Network and Miscellaneous Settings The Network and Miscellaneous Settings page provides basic details of the tSH-700 module and other information related to the hardware and software. The software and hardware information section includes information related to the Model Name, the current Firmware version, the IP Address, the current position of the Initial Switch, the Alias, the MAC Address, and the TCP Port, and the System Timeout values. If you update the firmware for the tSH-700 module, this page can be used to check the version information of the tSH-700 module software. Copyright © 2015 ICP DAS CO., Ltd. All Rights Reserved. - 28 - Tiny Serial Port Sharer 3.5.2 IP Address Settings The Address Type, Static IP Address, Subnet Mask and Default Gateway values are the most important network settings and should always correspond to the LAN configuration. If they do not match, the tSH-700 module will not operate correctly. If the settings are changed while the module is operating, any connection currently in use will be lost and an error will occur. The following is an overview of the parameters contained in the IP Address Settings section: Item Description IP Address Static IP: If no DHCP server is installed on the network, the network settings can be configured manually. Refer to Section 3.5.2.1 Manual Configuration for more details. Address Type DHCP: The Dynamic Host Configuration Protocol (DHCP) is a network application protocol that automatically assigns an IP address to each device. Refer to Section 3.5.2.2 Dynamic Configuration for more details. Static IP Address Each tSH-700 connected to the network must have its own unique IP address. This parameter is used to assign a specific IP address. Subnet Mask This parameter is used to assign the subnet mask for the tSH-700 device. The subnet mask indicates which portion of the IP address is used to identify the local network or subnet. Default Gateway MAC Address Update Settings This parameter is used to assign the IP Address of the Gateway to be used by the tSH-700. A Gateway (or router) is a device that is used to connect an individual network to one or more additional networks. This parameter is used to set a user-defined MAC address, which must be in the format FF-FF-FF-FF-FF-FF. Click this button to save the revised settings to the tSH-700. Copyright © 2015 ICP DAS CO., Ltd. All Rights Reserved. - 29 - Tiny Serial Port Sharer 3.5.2.1 Manual Configuration When using manual configuration, the network settings should be assigned in the following manner: Step 1: Select the “Static IP” option from the “Address Type” drop-down menu. Step 2: Enter the relevant details in the respective network settings fields. Step 3: Click the “Update Settings” button to complete the configuration. 3.5.2.2 Dynamic Configuration Dynamic configuration is very easy to perform. If a DHCP server is connected to you network, a network address can be dynamically configured by using the following procedure: Step 1: Select the “DHCP” option from the “Address Type” drop-down menu. Step 2: Click the “Update Settings” button to complete the configuration. Copyright © 2015 ICP DAS CO., Ltd. All Rights Reserved. - 30 - Tiny Serial Port Sharer 3.5.3 General Settings The General Settings provides functions allowing items such as the Alias Name, System Timeout value, UART Watchdog value, Auto-logout value and Debug Message (UDP), etc. to be configured. The following is an overview of the parameters contained in the General Settings section: Item Description Default Network Ethernet Speed Web Auto-logout This parameter is used to set the Ethernet speed. The default value is Auto (Auto = 10/100 Mbps Autonegotiation). This parameter is used to configure the automatic logout value. If there is no activity on the web server for a certain period of time, the current user account will be automatically logged out. Auto 10 Range: 1 to 65535 (minutes); Disable = 0. UDP Configuration This parameter is used to enable or disable UDP configuration function. Enable UDP Alarm Alarm IP Address (UDP) Alarm Port (UDP) The tSH-700 can send and UDP package (include alarm message) to specified network location (Alarm IP Address/Port). Copyright © 2015 ICP DAS CO., Ltd. All Rights Reserved. - 31 - Tiny Serial Port Sharer Item Description Default This parameter is used to assign an alias for each tSH-700 to assist with easy identification. Tiny Misc. Alias Name UART Watchdog If the serial port does not communication occurs for a certain period, the system will be rebooted based on the UART Watchdog value. 0 Settings range: 30 ~ 65535 (seconds); Disable: 0. Debug Message(UDP) Reserved. Update Settings Click this button to save the revised settings to the tSH-700. Copyright © 2015 ICP DAS CO., Ltd. All Rights Reserved. 20 - 32 - Tiny Serial Port Sharer 3.5.4 Restore Factory Defaults Use the following procedure to reset all parameters to their original factory default settings: Step 1: Click the “Restore Defaults” button to reset the configuration. Step 2: Click the “OK” button in the message dialog box. Step 3: Check whether the module has been reset to the original factory default settings for use with the eSearch Utility. Refer to Chapter 3 Setting up the tSH-700 Module for more details. The following is an overview of the factory default settings: Factory Default Settings Network Settings IP Address 192.168.255.1 Gateway Address 192.168.0.1 Subnet Mask 255.255.0.0 DHCP OFF Basic Settings Alias Tiny Copyright © 2015 ICP DAS CO., Ltd. All Rights Reserved. - 33 - Tiny Serial Port Sharer The Forced Reboot function: can be used to force the tSH-700 to reboot or to remotely reboot the device. Copyright © 2015 ICP DAS CO., Ltd. All Rights Reserved. - 34 - Tiny Serial Port Sharer 3.5.5 Firmware Update Firmware update requires initialization and local network operations. Traditional firmware update requires adjusting the Init/Run Switch and reboots the module manually for the initialization of firmware update, while new firmware allows user to initialize the module via web interface without adjusting the hardware switch. Initialization via web is useful when module is installed in remote site and can be accessed by a remote PC via TeamViewer. Note: If the remote firmware update is failed, then the traditional firmware update (on-site) is required to make the module working again. For detailed information regarding how to use this function to update the Firmware for your tSH700 series module, refer to the tSH_Firmware_Update_v10_en.pdf. The location of the user manual on the CD and the download address are shown below: CD:\\ NAPDOS\tSH-700\Firmware\ http://ftp.icpdas.com/pub/cd/tinymodules/napdos/tsh-700/firmware/ Copyright © 2015 ICP DAS CO., Ltd. All Rights Reserved. - 35 - Tiny Serial Port Sharer 3.6 Filter Page 3.6.1 Accessible IP Settings (white list) The Accessible IP Settings section is used to query or edit the IP Filter List. The IP Filter List restricts the access of packets based on the IP header. If one or more IP address are saved to the IP Filter table, only clients whose IP is specified in the IP Filter List can access the tSH-700. The following is an overview of the parameters contained in the Filter Settings (white list) section: Item Description Add “IP” To The List Add an IP address to the IP Filter List. Add Range “IP”& Mask “IP” Add an IP address range to the IP Filter List. Delete IP# “Number” Delete a specific IP# address from the IP Filter List. (Number: 0 ~ 4) Delete All Delete all items from the IP Filter List. Save Configuration (finish) Save a new IP Filter List to the Flash memory. Submit Click this button to save the revised settings to the tSH-700. Copyright © 2015 ICP DAS CO., Ltd. All Rights Reserved. - 36 - Tiny Serial Port Sharer 3.7 Monitor Page After clicking the Monitor tab, the Current Connection Status page will be displayed showing detailed information regarding the current status of the serial port connection settings for the tSH700 module. 3.8 Change Password After clicking the Password tab, the Change Password page will be displayed. To change a password, first enter the old password in the “Current password” field (use the default password “admin”) and then enter a new password in the “New password” field. Re-enter the new password in the “Confirm new password” field, and then click the “Submit” button to update the password. Copyright © 2015 ICP DAS CO., Ltd. All Rights Reserved. - 37 - Tiny Serial Port Sharer 3.9 Logout Page After clicking the Logout tab, you will be immediately logged out from the system and be returned to the login page. Copyright © 2015 ICP DAS CO., Ltd. All Rights Reserved. - 38 -