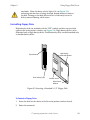
1
V+ Operating System
User’s Guide
Version 12.1
Video in
PULNIX
STP
A
SCR
B
OK
2
ESTOP
3
ACC V
4
HPE
DIO
FAIL
PASS
OK
SCSI
OK
1 2 3 4 5 6 7 8
VME
VJI
VIS
ES
1
ON
D
VGB
SIO
C
D
R
I
RESET V
E
A
F
P
/
ABORT M
C
RESET P
V
I
D
E
O
V
I
D
E
O
B
U
S
B
U
S
1
2
3
4
5
6
I
N
P
U
T
S
I
N
P
U
T
S
M
O
N
I
T
O
R
AMPLIFIER
SIGNAL
1
2
3
R
S
2
3
2
4
1 2 3 4
R
S
2
3
2
ON
R
S
4
2
2
BELT
ENCODER
#1
I
/
O
R
S
2
3
2
/
T
E
R
M
R
S
2
3
2
P
O
I
N
T
E
R
2
4
V
1
0
0
m
A
E
T
H
E
R
N
E
T
KEYBOARD
#2
C
A
M
E
R
A
S
/
S
T
R
O
B
E
S
O
U
T
P
U
T
S
O
U
T
P
U
T
S
ARM
SIGNAL
®
USE ONLY WITH
250V FUSES
WARNING:
FOR CONTINUED PROTECTION
AGAINST RISK OF FIRE,
REPLACE ONLY WITH SAME
TYPE AND RATING OF FUSE.
5AT
~100-240V
50/60HZ
Video in blue
040
SF
Video
Video in
a d e pt
V+ Operating System
User’s Guide
Version 12.1
Video in
Video in blue
Video
Video in
PULNIX
a d e pt
040
SF
STP
A
SCR
B
OK
2
ESTOP
3
ACC V
4
HPE
DIO
FAIL
PASS
OK
SCSI
OK
1 2 3 4 5 6 7 8
VME
VJI
VIS
ES
1
ON
D
VGB
SIO
C
D
R
I
RESET V
E
A
F
P
/
ABORT M
C
RESET P
V
I
D
E
O
V
I
D
E
O
B
U
S
B
U
S
1
2
3
4
5
6
I
N
P
U
T
S
I
N
P
U
T
S
M
O
N
I
T
O
R
AMPLIFIER
SIGNAL
1
2
3
R
S
2
3
2
4
1 2 3 4
R
S
2
3
2
ON
R
S
4
2
2
BELT
ENCODER
#1
I
/
O
R
S
2
3
2
/
T
E
R
M
R
S
2
3
2
P
O
I
N
T
E
R
2
4
V
1
0
0
m
A
E
T
H
E
R
N
E
T
KEYBOARD
#2
C
A
M
E
R
A
S
/
S
T
R
O
B
E
S
O
U
T
P
U
T
S
O
U
T
P
U
T
S
ARM
SIGNAL
®
USE ONLY WITH
250V FUSES
WARNING:
FOR CONTINUED PROTECTION
AGAINST RISK OF FIRE,
REPLACE ONLY WITH SAME
TYPE AND RATING OF FUSE.
5AT
~100-240V
50/60HZ
Part # 00962-01230, Rev. A
September 1997
®
150 Rose Orchard Way • San Jose, CA 95134 • USA • Phone (408) 432-0888 • Fax (408) 432-8707
Otto-Hahn-Strasse 23 • 44227 Dortmund • Germany • Phone (49) 231.75.89.40 • Fax(49) 231.75.89.450
adept
technology, inc.
41, rue du Saule Trapu • 91300 • Massy • France • Phone (33) 1.69.19.16.16 • Fax (33) 1.69.32.04.62
1-2, Aza Nakahara Mitsuya-Cho • Toyohashi, Aichi-Ken • 441-31 • Japan • (81) 532.65.2391 • Fax (81) 532.65.2390
The information contained herein is the property of Adept Technology, Inc., and shall not be reproduced in whole or in part without prior written approval of Adept Technology, Inc. The information herein is subject to change without notice and should not be construed as a commitment by
Adept Technology, Inc. This manual is periodically reviewed and revised.
Adept Technology, Inc., assumes no responsibility for any errors or omissions in this document.
Critical evaluation of this manual by the user is welcomed. Your comments assist us in preparation
of future documentation. A form is provided at the back of the book for submitting your comments.
Copyright © 1994-1997 by Adept Technology, Inc. All rights reserved.
The Adept logo is a registered trademark of Adept Technology, Inc.
Adept, AdeptOne, AdeptOne-MV, AdeptThree, AdeptThree-XL, AdeptThree-MV, PackOne,
PackOne-MV, HyperDrive, Adept 550, Adept 550 CleanRoom, Adept 1850, Adept 1850XP,
A-Series, S-Series, Adept MC, Adept CC, Adept IC, Adept OC, Adept MV,
AdeptVision, AIM, VisionWare, AdeptMotion, MotionWare, PalletWare, FlexFeedWare,
AdeptNet, AdeptFTP, AdeptNFS, AdeptTCP/IP, AdeptForce, AdeptModules, AdeptWindows,
AdeptWindows PC, AdeptWindows DDE, AdeptWindows Offline Editor,
and V+ are trademarks of Adept Technology, Inc.
Any trademarks from other companies used in this publication
are the property of those respective companies.
Printed in the United States of America
Table of Contents
Introduction
.
.
.
.
.
.
.
.
.
13
What Systems Can I Use This Manual With? . . .
What Is Covered in This Manual? . . . . . . .
What Other Manuals Might I Need? . . . . . .
What About Safety? . . . . . . . . . . . . .
Reading and Training for System Users. . .
System Safeguards . . . . . . . . . .
Computer-Controlled Robots . . . . . .
Manually Controlled Robots . . . . . . .
Other Computer-Controlled Devices . . .
Conventions . . . . . . . . . . . . . . . .
Typographic Conventions . . . . . . . .
Keyboard Conventions . . . . . . . . .
Selecting, Choosing, and Pressing . . . .
Abbreviations . . . . . . . . . . . .
How Can I Get Help? . . . . . . . . . . . .
In Europe . . . . . . . . . . . . . .
Europe/Germany . . . . . . . . . .
France . . . . . . . . . . . . . .
Italy . . . . . . . . . . . . . . .
In the United States . . . . . . . . . .
Service Calls . . . . . . . . . . . .
Application Questions . . . . . . . .
Applications Internet E-Mail Address . .
Training Information . . . . . . . . .
Outside Continental United States or Europe
Adept World Wide Web Site . . . . . . .
Adept Bulletin Board Service . . . . . .
.
.
.
.
.
.
.
.
.
.
.
.
.
.
.
.
.
.
.
.
.
.
.
.
.
.
.
.
.
.
.
.
.
.
.
.
.
.
.
.
.
.
.
.
.
.
.
.
.
.
.
.
.
.
.
.
.
.
.
.
.
.
.
.
.
.
.
.
.
.
.
.
.
.
.
.
.
.
.
.
.
.
.
.
.
.
.
.
.
.
.
.
.
.
.
.
.
.
.
.
.
.
.
.
.
.
.
.
.
.
.
.
.
.
.
.
.
.
.
.
.
.
.
.
.
.
.
.
.
.
.
.
.
.
.
.
.
.
.
.
.
.
.
.
.
.
.
.
.
.
.
.
.
.
.
.
.
.
.
.
.
.
.
.
.
.
.
.
.
.
.
.
.
.
.
.
.
.
.
.
.
.
.
.
.
.
.
.
.
.
.
.
.
.
.
.
.
.
.
.
.
.
.
.
.
.
.
.
.
.
.
.
.
.
.
.
14
14
14
16
16
17
17
18
18
19
19
21
21
22
22
22
22
22
23
23
23
23
23
23
23
24
24
.
.
.
.
.
.
.
.
.
.
.
.
.
.
V+Operating System User’s Guide, Ver 12.1
5
Table of Contents
Part 1:
Adept System Fundamentals
1
2
6
Your Adept System Hardware .
.
.
.
.
.
.
.
.
.
.
.
.
.
27
Before You Begin . . . . . . . . . .
The Controller . . . . . . . . . . .
The Keyboard . . . . . . . . . . .
Standard Keys . . . . . . . .
Function Keys . . . . . . . .
Modifier Keys . . . . . . . . .
Cursor Keys . . . . . . . . .
The Numeric Keypad . . . . .
Screen Control Keys . . . . .
The Mouse Keys . . . . . . . .
Other Special Keys . . . . . .
The Status LEDs . . . . . . . .
The Trackball . . . . . . . . .
The Controller and Memory . . . . .
Robots and Motion Devices . . . . .
The Manual Control Pendant . . . . .
Other Input and Output Devices . . . .
Cameras and Lighting Equipment
The Controller Disk Drives . . . .
Serial I/O . . . . . . . . . .
Digital I/O . . . . . . . . . .
Analog I/O . . . . . . . . . .
Remote Emergency Stop . . . .
.
.
.
.
.
.
.
.
.
.
.
.
.
.
.
.
.
.
.
.
.
.
.
.
.
.
.
.
.
.
.
.
.
.
.
.
.
.
.
.
.
.
.
.
.
.
.
.
.
.
.
.
.
.
.
.
.
.
.
.
.
.
.
.
.
.
.
.
.
.
.
.
.
.
.
.
.
.
.
.
.
.
.
.
.
.
.
.
.
.
.
.
.
.
.
.
.
.
.
.
.
.
.
.
.
.
.
.
.
.
.
.
.
.
.
.
.
.
.
.
.
.
.
.
.
.
.
.
.
.
.
.
.
.
.
.
.
.
.
.
.
.
.
.
.
.
.
.
.
.
.
.
.
.
.
.
.
.
.
.
.
.
.
.
.
.
.
.
.
.
.
.
.
.
.
.
.
.
.
.
.
.
.
.
.
.
.
.
.
.
.
.
.
.
.
.
.
.
.
.
.
.
.
.
.
.
.
.
.
.
.
.
.
.
.
.
.
.
.
.
.
.
.
.
.
.
.
.
.
.
.
.
.
.
.
.
.
.
.
.
.
.
.
.
.
.
.
.
.
.
.
.
.
.
.
.
.
.
.
.
.
.
.
.
.
.
.
.
.
.
.
.
.
.
.
.
28
29
30
32
32
32
32
33
33
33
33
34
34
34
35
35
36
36
36
36
36
37
37
.
.
.
.
.
.
.
.
.
.
.
.
39
Using the Controller . . . . . . . . . . . . . . . . . . .
Install the Equipment and Set the Hardware Configuration
Power up the System . . . . . . . . . . . . . . . .
To Power up the Controller . . . . . . . . . . . .
To Power up the Motion Device . . . . . . . . . . .
To Reenable Power to a Motion Device After
an Emergency Shutdown. . . . . . . . . . . . .
Using the V+ Command Line . . . . . . . . . . . . . . .
.
.
.
.
.
.
.
.
.
.
41
41
42
42
44
.
.
.
.
Learning the Basics
.
.
.
.
.
.
.
.
V+Operating System User’s Guide, Ver 12.1
44
45
Table of Contents
The System Prompt and Typing Cursor . . . . . . . .
The Parts of a Monitor Command . . . . . . . . . .
The Command Name . . . . . . . . . . . . .
Command Parameters . . . . . . . . . . . .
Required and Optional Parameters . . . . . . .
Using the ID
Command . . . . . . . . . . . . . . . . . . .
Monitor Command Syntax Conventions . . . . . . .
Shortcuts to Typing a Command . . . . . . . . . .
To Cancel a Command . . . . . . . . . . . . .
To Edit the Current Command . . . . . . . . . . .
To Retrieve Previously Entered Commands . . . . . .
To Enter a Command While a Program Is Executing . .
Using the A-Series Graphical Interface . . . . . . . . . .
Working with Pointing Devices . . . . . . . . . . .
To Move the Pointer . . . . . . . . . . . . . .
To Click . . . . . . . . . . . . . . . . . . .
To Drag . . . . . . . . . . . . . . . . . . .
Working in Windows . . . . . . . . . . . . . . .
To Open a Window . . . . . . . . . . . . . .
To Select a Window . . . . . . . . . . . . . .
To Move a Window . . . . . . . . . . . . . .
To Size a Window . . . . . . . . . . . . . . .
To Zoom a Window . . . . . . . . . . . . . .
To Close a Window . . . . . . . . . . . . . .
Scrolling in Windows . . . . . . . . . . . . . . .
To Turn Scroll Bars On and Off . . . . . . . . . .
To Use the Scroll Arrows . . . . . . . . . . . .
To Use the Scroll Handles . . . . . . . . . . . .
Window Menu Bars . . . . . . . . . . . . . . .
To Make a Menu Selection Using the Pointing Device
To Make a Menu Selection Using the Keyboard. . .
Using Software . . . . . . . . . . . . . . . . . . . .
The V+ Operating System Software . . . . . . . . .
Application Software . . . . . . . . . . . . . . .
+
The V Operating System . . . . . . . . . . . . . . .
Using Files and Directories . . . . . . . . . . . . . . .
Using the Wyse Terminal . . . . . . . . . . . . . . . .
3
Using Files
.
.
.
.
.
.
.
.
.
.
.
.
.
.
.
.
V+Operating System User’s Guide, Ver 12.1
.
.
.
.
.
.
.
.
.
.
.
45
45
45
46
46
.
.
.
.
.
.
.
.
.
.
.
.
.
.
.
.
.
.
.
.
.
.
.
.
.
.
.
.
.
.
.
.
.
.
.
.
.
.
.
.
.
.
.
.
.
.
.
.
.
.
.
.
.
.
.
.
.
.
.
.
.
.
.
.
.
.
.
.
.
.
.
.
.
.
.
.
.
.
.
.
.
.
.
.
.
.
.
.
.
.
.
.
.
.
.
.
.
.
.
.
.
.
.
.
.
46
47
47
48
48
48
49
49
50
50
50
50
52
52
52
52
53
53
53
53
53
54
54
54
54
55
55
56
56
56
57
57
.
.
.
59
7
Table of Contents
Understanding Disk Files . . . . . . . . . .
Disk Files. . . . . . . . . . . . . .
Subdirectories . . . . . . . . . . .
File Names . . . . . . . . . . . . .
Filename Requirements . . . . . .
Reserved File Names . . . . . . . . .
Contents of a V+ Disk File . . . . . . .
Working With Disk Files . . . . . . . .
To List the Files on a Disk Drive . . . .
To Use Wildcards to List Groups of Files
To Copy a Disk File . . . . . . . .
To Rename a Disk File . . . . . . .
To Delete a Disk File . . . . . . . .
Using Directories . . . . . . . . . . . . .
Understanding the Directory Structure . .
Understanding Paths . . . . . . . . .
The Current Directory . . . . . . . .
Full Paths . . . . . . . . . . . .
Relative Paths . . . . . . . . . .
To Display the Current Path . . . . .
Path Examples . . . . . . . . . .
Working With Subdirectories . . . . . .
To View the Contents of a Directory .
To View Groups of Files . . . . . .
To Create a Subdirectory . . . . . .
To Delete a Subdirectory . . . . . .
File Management Using Diskcopy . . . . . .
Copying Multiple Files . . . . . . . .
Deleting Multiple Files . . . . . . . .
Other Disk-Like Devices . . . . . . . . . .
4
Executing V+ Programs .
.
.
.
.
.
.
.
Understanding V+ Programs . . . . . . .
To LOAD a Disk File . . . . . . . .
To Start a Monitor Command Program .
To Start an Executable V+ Program . .
Program Startup Example . . . . . .
Which Program Do I Execute? . . . .
To Halt Execution of a Program. . . .
Emergency Stop . . . . . . . .
8
.
.
.
.
.
.
.
.
.
.
.
.
.
.
.
.
.
.
.
.
.
.
.
.
.
.
.
.
.
.
.
.
.
.
.
.
.
.
.
.
.
.
.
.
.
.
.
.
.
.
.
.
.
.
.
.
.
.
.
.
.
.
.
.
.
.
.
.
.
.
.
.
.
.
.
.
.
.
.
.
.
.
.
.
.
.
.
.
.
.
.
.
.
.
.
.
.
.
.
.
.
.
.
.
.
.
.
.
.
.
.
.
.
.
.
.
.
.
.
.
.
.
.
.
.
.
.
.
.
.
.
.
.
.
.
.
.
.
.
.
.
.
.
.
.
.
.
.
.
.
.
.
.
.
.
.
.
.
.
.
.
.
.
.
.
.
.
.
.
.
.
.
.
.
.
.
.
.
.
.
.
.
.
.
.
.
.
.
.
.
.
.
.
.
.
.
.
.
.
.
.
.
.
.
.
.
.
.
.
.
.
.
.
.
.
.
.
.
.
.
.
.
.
.
.
.
.
.
.
.
.
.
.
.
.
.
.
.
.
.
.
.
.
.
.
.
.
.
.
.
.
.
.
.
.
.
.
.
.
.
.
.
.
.
.
.
.
.
.
.
60
60
60
60
60
61
61
62
62
63
63
63
64
64
65
66
67
68
68
68
68
69
69
69
70
70
71
71
72
73
.
.
.
.
.
.
.
.
.
.
75
.
.
.
.
.
.
.
.
.
.
.
.
.
.
.
.
.
.
.
.
.
.
.
.
.
.
.
.
.
.
.
.
.
.
.
.
.
.
.
.
.
.
.
.
.
.
.
.
.
.
.
.
.
.
.
.
.
.
.
.
.
.
.
.
.
.
.
.
.
.
.
.
.
.
.
.
.
.
.
.
76
76
77
78
78
79
80
80
V+Operating System User’s Guide, Ver 12.1
Table of Contents
5
Early Program Termination . .
Removing Objects From System Memory
Understanding Program Modules .
.
.
.
.
.
.
.
.
.
.
.
.
.
.
.
.
.
.
.
.
.
.
.
.
.
.
.
.
.
.
.
.
.
.
.
.
80
80
82
Using Disk Drives .
.
.
.
.
.
.
.
.
.
.
.
.
85
Understanding Disk Drives . . . . . . . . . . . .
Types of Disk Drives . . . . . . . . . . . .
Using Hard Drives . . . . . . . . . . . . . . . .
Backing up Hard Drives . . . . . . . . . .
Formatting Hard Drives . . . . . . . . . . .
Using Floppy Disk Drives . . . . . . . . . . . . .
Care . . . . . . . . . . . . . . . . .
To Prevent Writing to or Erasing a Floppy Disk.
Inserting and Removing Floppy Disks . . . .
Formatting Floppy Disks . . . . . . . . . .
To Format a Floppy Drive . . . . . . . . .
Making System Disks . . . . . . . . . .
.
.
.
.
.
.
.
.
.
.
.
.
.
.
.
.
.
.
.
.
.
.
.
.
.
.
.
.
.
.
.
.
.
.
.
.
.
.
.
.
.
.
.
.
.
.
.
.
.
.
.
.
.
.
.
.
.
.
.
.
.
.
.
.
.
.
.
.
.
.
.
.
86
86
87
87
87
88
88
88
88
89
89
90
.
.
.
.
.
.
.
.
Part 2:
Adept System Customization
6
Customizing an Adept System
.
.
.
Customizing the Controller Hardware. . .
Wyse Type Terminal Baud Rate .
Default Boot Drive. . . . . . .
Program Autoload . . . . . .
V+ Output . . . . . . . . . .
System Software Switches . . . . . . .
The Controller Configuration Utility . . . .
The Default Path . . . . . . . . . . .
Changing the Default Path . . . .
The Default Monitor Speed . . . . . . .
Changing the Default Monitor Speed
Serial I/O Configuration . . . . . . . .
Serial I/O Groups . . . . . . . .
Changing the Serial Line Attributes .
.
.
.
.
.
.
.
.
.
.
.
93
.
.
.
.
.
.
.
.
.
.
.
.
.
.
.
.
.
.
.
.
.
.
.
.
.
.
.
.
.
.
.
.
.
.
.
.
.
.
.
.
.
.
.
.
.
.
.
.
.
.
.
.
.
.
.
.
.
.
.
.
.
.
.
.
.
.
.
.
.
.
.
.
.
.
.
.
.
.
.
.
.
.
.
.
.
.
.
.
.
.
.
.
.
.
.
.
.
.
.
.
.
.
.
.
.
.
.
.
.
.
.
.
.
.
.
.
.
.
.
.
.
.
.
.
.
.
.
.
.
.
.
.
.
.
.
.
.
.
.
.
.
.
.
.
.
.
.
.
.
.
.
.
.
.
94
95
95
95
95
97
98
99
99
100
100
102
102
103
V+Operating System User’s Guide, Ver 12.1
9
Table of Contents
7
A
B
10
Analog I/O Configuration . . .
Additional Configuration Options
.
.
.
.
.
.
.
.
.
.
.
.
.
.
.
.
.
.
.
.
.
.
.
.
.
.
.
.
.
.
Command Programs .
.
.
.
.
.
.
.
.
.
.
.
.
.
.
Creating Command Programs . . . . . . . . . . . . .
Command Program Names . . . . . . . . . . . .
Creating a Command Program . . . . . . . . . .
Running Command Programs . . . . . . . . . . . . . .
Starting Command Programs From the System Terminal
Starting Command Programs From the Manual
Control Pendant . . . . . . . . . . . . . . .
Autostarting a Command Program . . . . . . . . .
Controlling Command Programs . . . . . . . . . . . .
Command Programs and V+ Language Keywords . . .
Example Command Program . . . . . . . . . . . . . .
.
.
.
.
.
.
.
.
.
.
.
.
.
.
.
.
.
.
.
.
.
.
.
.
.
.
.
.
.
.
.
.
.
104
106
107
108
108
108
110
110
110
111
111
112
113
System Messages
.
.
.
.
.
.
.
.
.
.
.
.
.
.
.
.
.
.
.
115
Glossary .
.
.
.
.
.
.
.
.
.
.
.
.
.
.
.
.
.
.
.
.
.
.
.
141
Index
.
.
.
.
.
.
.
.
.
.
.
.
.
.
.
.
.
.
.
.
.
.
.
145
.
.
V+Operating System User’s Guide, Ver 12.1
List of Figures
Figure 1.
Figure 2.
Figure 1-1.
Figure 1-2.
Figure 1-3.
Figure 2-1.
Figure 2-2.
Figure 2-3.
Figure 2-4.
Figure 3-1.
Figure 3-2.
Figure 3-3.
Figure 3-4.
Figure 4-1.
Figure 4-2.
Figure 4-3.
Figure 5-1.
Figure 5-2.
Impacts and Trapping Points . . . . . . . . .
External Front Panel (VFP) . . . . . . . . . . .
Typical Adept MV Controllers . . . . . . . .
The Keyboard . . . . . . . . . . . . . . . . . . . .
The Adept Manual Control Pendant . . .
Initial Screen . . . . . . . . . . . . . . . . . . . . .
Window Feature Identification . . . . . . . .
Track Ball . . . . . . . . . . . . . . . . . . . . . . . .
Making a Menu Selection . . . . . . . . . . .
Contents of a Disk File . . . . . . . . . . . . . .
Disk File Structure . . . . . . . . . . . . . . . . . .
Directory Structure . . . . . . . . . . . . . . . . .
Default Directory Specification . . . . . . .
LOADing a Disk File . . . . . . . . . . . . . . . .
EXECUTING a V+ Program . . . . . . . . . . .
Deleting Objects From Memory . . . . . .
Formatted Disk . . . . . . . . . . . . . . . . . . . .
Inserting a Standard 3-1/2" Floppy Disk
. . . . . . . . . . . . . . . . . .
. . . . . . . . . . . . . . . . . .
. . . . . . . . . . . . . . . . . .
. . . . . . . . . . . . . . . . . .
. . . . . . . . . . . . . . . . . .
. . . . . . . . . . . . . . . . . .
. . . . . . . . . . . . . . . . . .
. . . . . . . . . . . . . . . . . .
. . . . . . . . . . . . . . . . . .
. . . . . . . . . . . . . . . . . .
. . . . . . . . . . . . . . . . . .
. . . . . . . . . . . . . . . . . .
. . . . . . . . . . . . . . . . . .
. . . . . . . . . . . . . . . . . .
. . . . . . . . . . . . . . . . . .
. . . . . . . . . . . . . . . . . .
. . . . . . . . . . . . . . . . . .
. . . . . . . . . . . . . . . . . .
V+Operating System User’s Guide, Ver 12.1
17
18
29
30
35
43
51
51
55
61
65
66
67
77
78
81
86
89
11
List of Tables
Table 1.
Table 2-1.
Table 4-1.
Table 6-1.
Table 6-2.
Table 6-3.
12
Related Manuals . . . . . . . . . . . . .
Wyse Terminal Special Keys . . . .
The Delete Commands . . . . . . . .
Configuration DIP Switch Settings
Basic System Switches . . . . . . . . .
Serial I/O Attributes . . . . . . . . . . .
14
. 58
. 81
. 96
. 97
102
. . . . . . . . . . . . . . . . . . . . . . .
. . . . . . . . . . . . . . . . . . . . . .
. . . . . . . . . . . . . . . . . . . . . .
. . . . . . . . . . . . . . . . . . . . . .
. . . . . . . . . . . . . . . . . . . . . .
. . . . . . . . . . . . . . . . . . . . . .
V+Operating System User’s Guide, Ver 12.1
Introduction
What Systems Can I Use This Manual With? . . .
What Is Covered in This Manual? . . . . . . .
What Other Manuals Might I Need? . . . . . .
What About Safety? . . . . . . . . . . . . .
Reading and Training for System Users. . .
System Safeguards . . . . . . . . . .
Computer-Controlled Robots . . . . . .
Manually Controlled Robots . . . . . . .
Other Computer-Controlled Devices . . .
Conventions . . . . . . . . . . . . . . . .
Typographic Conventions . . . . . . . .
Keyboard Conventions . . . . . . . . .
Selecting, Choosing, and Pressing . . . .
Abbreviations . . . . . . . . . . . .
How Can I Get Help? . . . . . . . . . . . .
In Europe . . . . . . . . . . . . . .
Europe/Germany . . . . . . . . . .
France . . . . . . . . . . . . . .
Italy . . . . . . . . . . . . . . .
In the United States . . . . . . . . . .
Service Calls . . . . . . . . . . . .
Application Questions . . . . . . . .
Applications Internet E-Mail Address . .
Training Information . . . . . . . . .
Outside Continental United States or Europe
Adept World Wide Web Site . . . . . . .
Adept Bulletin Board Service . . . . . .
V+Operating System User’s Guide, Ver 12.1
.
.
.
.
.
.
.
.
.
.
.
.
.
.
.
.
.
.
.
.
.
.
.
.
.
.
.
.
.
.
.
.
.
.
.
.
.
.
.
.
.
.
.
.
.
.
.
.
.
.
.
.
.
.
.
.
.
.
.
.
.
.
.
.
.
.
.
.
.
.
.
.
.
.
.
.
.
.
.
.
.
.
.
.
.
.
.
.
.
.
.
.
.
.
.
.
.
.
.
.
.
.
.
.
.
.
.
.
.
.
.
.
.
.
.
.
.
.
.
.
.
.
.
.
.
.
.
.
.
.
.
.
.
.
.
.
.
.
.
.
.
.
.
.
.
.
.
.
.
.
.
.
.
.
.
.
.
.
.
.
.
.
.
.
.
.
.
.
.
.
.
.
.
.
.
.
.
.
.
.
.
.
.
.
.
.
.
.
.
.
.
.
.
.
.
.
.
.
.
.
.
.
.
.
.
.
.
.
.
.
.
.
.
.
.
.
14
14
14
16
16
17
17
18
18
19
19
21
21
22
22
22
22
22
23
23
23
23
23
23
23
24
24
13
Introduction
What Systems Can I Use This Manual With?
What Systems Can I Use This Manual With?
This manual is for use with V+ version 12.0 and later.
What Is Covered in This Manual?
This manual covers the V+ operating system. After your controller and any
attached devices are installed, the material in this manual covers what you need
to know to start, operate, and shut down the system. If you are running a system
that is already programmed and configured, this manual contains most of the
information you will need.
What Other Manuals Might I Need?
If you will be modifying the system configuration, installing new equipment, or
programming in the V+ language, you may need the following manuals:
Table 1. Related Manuals
Recommended
for:
Manual
Material Covered
Robot or motion
device instruction
handbook or
user’s guide
Installation of robot or motion device.
V+Operating
System Reference
Guide
Detailed descriptions of all monitor
commands, some of which are
described only briefly in the V+Operating
System User’s Guide.
All
programmers
and users
installing or
configuring the
controller
V+ Language
User’s Guide
A description of the structure and
elements of the V+ programming
language.
All
programmers
14
Periodic maintenance of the device.
V+Operating System User’s Guide, Ver 12.1
All users,
service
personnel, and
programmers
using the robot
Introduction
What Other Manuals Might I Need?
Table 1. Related Manuals (Continued)
Recommended
for:
Manual
Material Covered
V+ Language
Reference Guide
A complete description of the keywords
used by the basic V+ programming
language. This manual contains a list of
all system messages.
All
programmers
AdeptVision
User’s Guide
A description of the structure and
elements of the AdeptVision extensions
to the V+ language.
Vision
application
programmers
and users
AdeptVision
Reference Guide
The keywords available with systems
that include the optional AdeptVision
VME system.
Vision
application
programmers
AdeptForce VME
User’s Guide
Installation, operation, and
programming of the AdeptForce VME
product.
Force
application
programmers
AdeptMotion
VME Developer’s
Guide
Installing, configuring, and tuning a
motion system.
Programmers
and installers of
AdeptMotion
VME systems
AIM application
module user’s
guides
Installing and using AIM application
modules (Vision Ware, MotionWare,
AIM PCB, etc.).
Programmers
and users of the
application
module
AIM module
reference guides
Customizing AIM baseline modules and
applications modules.
AIM
customizers
Instructions for
Adept Utility
Programs
Complete details on the Adept utility
programs. The most common uses of
the utility programs are covered in
V+Operating System User’s Guide.
All
programmers
AdeptNet User’s
Guide
Use and programming of the AdeptNet
product.
Network users
and
programmers
V+Operating System User’s Guide, Ver 12.1
15
Introduction
What About Safety?
What About Safety?
Safety is critical! Read the following section carefully and follow the cautions and
warnings that are placed throughout this manual. There are three levels of safety
notation used in Adept manuals. They are:
If the actions indicated in a warning are not complied
with, injury or major equipment damage could result. A warning
typically describes the potential hazard, its possible effect, and the
measures that must be taken to reduce the hazard.
WARNING:
CAUTION: If the action specified in a caution is not complied with,
damage to your equipment or data could result.
A note provides supplementary information, emphasizes or
supplements a point or procedure, or gives a tip for easier
operation.
NOTE:
Reading and Training for System Users
Adept robot systems include computer-controlled mechanisms that are capable of
moving at high speeds and exerting considerable force. Like all robot systems and
industrial equipment, they must be treated with respect by the system user.
We recommend you read the American National Standard for Industrial Robot
Systems−Safety Requirements, published by the Robotic Industries Association in
conjunction with the American National Standards Institute. The publication,
ANSI/RIA R15.06-1992, contains guidelines for robot system installation,
safeguarding, maintenance, testing, startup, and operator training. The document
is available from the American National Standards Institute, 1430 Broadway, New
York NY 10018. All Adept robot systems sold in Europe must conform to
European Certification requirements. Consult your robot Instruction Handbook for
details.
16
V+Operating System User’s Guide, Ver 12.1
Introduction
What About Safety?
Impact!
Trapping (Pinch)
Points
Figure 1. Impacts and Trapping Points
System Safeguards
Safeguards should be an integral part of robot workcell design, installation,
operator training, and operating procedures. Adept robot systems have various
communication features to aid you in constructing system safeguards. These
include remote emergency stop circuitry and digital input and output lines.
Computer-Controlled Robots
Adept robots are computer controlled, and the program that is running the robot
may cause it to move at times or along paths you may not anticipate. When the
amber HIGH POWER light or the blue PROGRAM RUNNING light1 on the
optional front panel is illuminated, do not enter the workcell because the robot
may move unexpectedly. (Systems not equipped with the optional front panel
should have similar user-supplied warning lights installed—see the Adept MV
Controller User's Guide.)
1
Amber and blue are the colors for the lights on the optional Adept front panel. If a remote front
panel has been installed by another party, the colors may vary.
V+Operating System User’s Guide, Ver 12.1
17
Introduction
What About Safety?
LAMP
LAMP
TEST
TEST
MANUAL
MANUAL
AUTO
AUTO
SYSTEM
SYSTEM
O POWER
I
O POWER I
HIGH POWER
POWER
HIGH
ON/OFF
ON/OFF
EMERGENCY STOP
®
EMERGENCY STOP
®
PENDANT
LOCAL
NETWORK
PROGRAM
START
PROGRAM
RUNNING
PENDANT
LOCAL
NETWORK
PROGRAM
START
PROGRAM
RUNNING
Figure 2. External Front Panel (VFP)
Manually Controlled Robots
Adept robots can also be controlled manually when the amber HIGH POWER
light on the front of the controller is illuminated. When this light is lit, robot
motion can be initiated from the system keyboard or the manual control pendant.
If you enter the workcell, set the keyswitch to MANUAL, press the MAN/HALT
button on the manual control pendant, and take the key with you. This prevents
anyone else from initiating unexpected robot motions from the keyboard.
Other Computer-Controlled Devices
In addition, these systems can be programmed to control equipment or devices
other than the robot. As with the robot, the program controlling these devices may
cause them to operate at times not anticipated by personnel. Make sure that
safeguards are in place to prevent personnel from entering the workcell when the
blue PROGRAM RUNNING light on the front of the controller is illuminated.
Entering the robot workcell when either the amber
HIGH POWER or the blue PROGRAM RUNNING light is
illuminated can result in severe injury.
WARNING:
18
V+Operating System User’s Guide, Ver 12.1
Introduction
Conventions
Adept Technology recommends the use of additional safety features such as light
curtains, safety gates, or safety floor mats to prevent entry to the workcell while
HIGH POWER is enabled. These devices may be connected using the controller’s
remote emergency stop circuitry (see the controller user’s guide).
Conventions
This section discusses:
•
Typographic conventions
•
Keyboard conventions
•
Selecting, choosing, and pressing items
Typographic Conventions
The following typographic conventions are used throughout this manual:
This
Represents
ALL CAPITALS
V+ file names, directory names, commands,
keywords, and attributes; also acronyms.
monospace
Screen displays, code examples,
nonplaceholder terms in formal syntax
definitions, and case-sensitive words
required for a UNIX-like setting associated
with the AdeptNet product.
italic monospace
Placeholders for information that you
provide in formal syntax definitions. You
must replace such a placeholder written in
bold weight but need not replace an optional
one, which is written in regular weight.
V+Operating System User’s Guide, Ver 12.1
19
Introduction
Conventions
This
Represents
bold
In a typing or entering instruction, anything
that you type exactly as it appears. For
example, if you are asked to type execute 1
a.diskcopy, you type all the bold characters
exactly as they are printed. What you type is
shown in lowercase letters unless it must be
typed in uppercase letters to work properly.
You may always substitute a currently valid
shortcut form when typing a V+ command.
In order for the V+ system to process your
typing, you must conclude your entry by
pressing the ENTER or RETURN key.
Bold type is used for lowercase names such
as subroutine names, variable names, and
program names; for example, a.diskcopy. Bold
type also is used for window items that you
choose and window items that do not have
initial capital letters in all principal words.
20
italic
Placeholders that you must provide in typed
input. This font also indicates new terms and
other emphasized words.
SMALL
CAPITALS
The name of a physical key or button that you
must press, such as the ENTER key and the
PROGRAM START button. Similarly, this
font style is also used for the setting of a
physical switch, such as the TERMINAL
setting of the VFP keyswitch.
V+Operating System User’s Guide, Ver 12.1
Introduction
Conventions
This
Represents
Initial Capitals
The name of an object such as a window,
screen, menu, button, dialog box, or dialog
box component. Examples are the Display
menu and the Task Profiler window.
The logical names of physical function keys or
buttons use regular font and follow the
interface’s capitalization, which usually has
initial capital letters in all principal words.
Examples are the Go To key in the SEE editor
and the CMD1 button on the manual control
pendant.
Keyboard Conventions
Key combinations appear in the following format:
Notation
Meaning
KEY1+KEY2
A plus sign (+) between keys means that you
must press the keys at the same time. For
example, “Press CTRL+Z” means that you
press CTRL and hold it down while you
press Z.
Selecting, Choosing, and Pressing
In a context using windows, the terms select, choose, and press have different and
specific meanings. Selecting an item usually means marking or highlighting it, as
in selecting a radio button. Selecting alone does not initiate an action.
Choosing an item carries out an action. For example, choosing a menu item might
open a window or carry out a command. You can also initiate an action by
choosing a command button (a push button or a standard button). You often need
to select an item before you can choose it.
Often you can use a combination of keyboard and mouse techniques for selecting
and choosing.
V+Operating System User’s Guide, Ver 12.1
21
Introduction
How Can I Get Help?
Pressing refers to physical keys and buttons. For example, you press the SAVE key
and the PROGRAM START button. By contrast, you select or choose a window
button.
Abbreviations
The following abbreviations may appear in this manual:
Abbreviation
Meaning
CE
European Certification
DAC
Digital-to-Analog Converter
I/O
Input/output
MCP
Manual Control Pendant
MMSP
Manual Mode Safety Package
VFP
External Front Panel
How Can I Get Help?
When calling with an equipment-related question, please have the serial number
of the Adept MV Controller, Adept PA-4 power chassis, and the part numbers of
the AdeptModules. The serial numbers are located on the product data labels on
each piece of equipment. The serial number of the Adept MV controller can also
be determined by using the ID command.
In Europe
Europe/Germany
Adept Technology maintains a European Customer Service Center in Dortmund,
Germany. The phone numbers are:
(49) 231/75 89 40 (Monday to Friday, 8:00 to 17:00, CET)
(49) 231/75 89 450 FAX
France
For customers in France, Adept Technology maintains a Customer Service Center
in Paris, France. The phone numbers are:
22
V+Operating System User’s Guide, Ver 12.1
Introduction
How Can I Get Help?
(33) 1 69 19 16 16 (Monday to Friday, 8:30 to 17:30, CET)
(33) 1 69 32 04 62 FAX
Italy
For customers in Italy, Adept Technology maintains a Customer Service Center in
Arezzo, Italy. The phone numbers are:
(39) 575 3986 11 (Monday to Friday, 8:30 to 17:30, CET)
(39) 575 3986 20 FAX
In the United States
Adept Technology maintains a Customer Service Center at its headquarters in San
Jose, CA. The phone numbers are:
Service Calls
(800) 232-3378 (24 hours per day, 7 days a week)
(408) 433-9462 FAX
Application Questions
Address all applications questions Monday to Friday, 8:00
A.M. to 5:00 P.M., in the respective time zone of the regional office
calling.
NOTE:
Western Region - (408) 434-5033
Midwestern Region - (513) 792-0266
Eastern Region - (203) 264-0564
Applications Internet E-Mail Address
If you have access to the Internet, you can send applications questions by e-mail
to:
[email protected]
Training Information
For information regarding Adept Training Courses in the USA, please call
(408) 474-3246 or fax (408) 474-3226.
Outside Continental United States or Europe
For service calls, applications questions, and training information, call the Adept
Customer Service Center in San Jose, California, USA:
V+Operating System User’s Guide, Ver 12.1
23
Introduction
How Can I Get Help?
(408) 434-5000
(408) 433-9462 FAX (service requests)
(408) 434-6248 FAX (applications questions)
Adept World Wide Web Site
Adept has a Web site at the following URL:
http://www.adept.com
You can find current information about Adept products and services. You can go
to the Technical Publications section in the Services area and find information
about Adept’s manuals, including a section on corrections and updates.
Adept Bulletin Board Service
Adept maintains a bulletin board service for Adept customers. Adept posts
application hints and utilities to this bulletin board and users may post their own
hints and application notes. There is no charge for access to the bulletin board.
The BBS number is (203) 264-5590. The first time you call you can set up an
account right from the BBS. If you have any questions, call (800) 232-3378 and ask
about the BBS.
24
V+Operating System User’s Guide, Ver 12.1
part 1
Adept System Fundamentals
1
Your Adept System Hardware
Before You Begin . . . . . . . . . .
The Controller . . . . . . . . . . .
The Keyboard . . . . . . . . . . .
Standard Keys . . . . . . . .
Function Keys . . . . . . . .
Modifier Keys . . . . . . . . .
Cursor Keys . . . . . . . . .
The Numeric Keypad . . . . .
Screen Control Keys . . . . .
The Mouse Keys . . . . . . . .
Other Special Keys . . . . . .
The Status LEDs . . . . . . . .
The Trackball . . . . . . . . .
The Controller and Memory . . . . .
Robots and Motion Devices . . . . .
The Manual Control Pendant . . . . .
Other Input and Output Devices . . . .
Cameras and Lighting Equipment
The Controller Disk Drives . . . .
Serial I/O . . . . . . . . . .
Digital I/O . . . . . . . . . .
Analog I/O . . . . . . . . . .
Remote Emergency Stop . . . .
.
.
.
.
.
.
.
.
.
.
.
.
.
.
.
.
.
.
.
.
.
.
.
.
.
.
.
.
.
.
.
.
.
.
.
.
.
.
.
.
.
.
.
.
.
.
.
.
.
.
.
.
.
.
.
.
.
.
.
.
.
.
.
.
.
.
.
.
.
.
.
.
.
.
.
.
.
.
.
.
.
.
.
.
.
.
.
.
.
.
.
.
.
.
.
.
.
.
.
.
.
.
.
.
.
.
.
.
.
.
.
.
.
.
.
.
.
.
.
.
.
.
.
.
.
.
.
.
.
.
.
.
.
.
.
.
.
.
.
.
.
.
.
.
.
.
.
.
.
.
.
.
.
.
.
.
.
.
.
.
.
.
.
.
.
.
.
.
.
.
.
.
.
.
.
.
.
.
.
.
.
.
.
.
.
.
.
.
.
.
.
.
.
.
.
.
.
.
.
.
.
.
.
.
.
.
.
.
.
.
.
.
.
.
.
.
.
.
.
.
.
.
.
.
.
.
.
.
.
.
.
.
.
.
.
.
.
.
.
.
.
.
.
.
.
.
.
.
.
.
.
.
.
.
.
.
.
.
.
.
.
.
.
.
.
.
.
.
.
.
.
.
.
.
.
.
V+Operating System User’s Guide, Ver 12.1
28
29
30
32
32
32
32
33
33
33
33
34
34
34
35
35
36
36
36
36
36
37
37
27
Chapter 1
Before You Begin
Before You Begin
In this manual you will learn the basics of using an Adept controller. You will
learn to execute programs, enter monitor commands, perform basic
pointing-device functions, and customize your controller. Before you begin you
must have the controller installed and connected to any peripheral equipment.
The minimum installation required is:
•
The controller chassis, including:
•
A system processor board
•
A system input/output board (SIO)
•
A color monitor and integrated keyboard and trackball
or
A system terminal
•
or
AdeptWindowsPC running on a IBM-compatible PC.
•
See the Adept MV Controller User's Guide for installation details.
In addition, you may have the following equipment installed:
•
A graphics board (VGB) (see the Adept MV Controller User's Guide)
•
A motion system, including:
•
A motion device (see the AdeptMotion VME User’s Guide)
•
Motion interface board (VMI) (see the Adept MV Controller User's
Guide)
•
Digital, serial, or analog I/O boards and devices (see the Adept MV
Controller User's Guide)
•
Conveyor belts (see the V+ Language User’s Guide)
•
Vision board (EVI) and equipment (see the Adept MV Controller User's
Guide)
•
Auxiliary system processor(s) (see the Adept MV Controller User's Guide)
This chapter summarizes the hardware components that may be part of your
Adept system. Chapter 2 covers the basics of using the V+ operating system
software.
28
V+Operating System User’s Guide, Ver 12.1
Chapter 1
The Controller
The Controller
An Adept system will always have the Adept controller. A system will also
normally have a monitor and keyboard, although systems in production can be
configured to run using only a touch screen or the manual control pendant. Adept
A-Series controllers use a high resolution color monitor and PC-style extended
keyboard. Adept S-Series controllers use a character-based terminal that
incorporates the keyboard and a character-based monitor.
AdeptWindowsPC equipped systems use an IBM-compatible PC connected to the
controller by ethernet or a serial cable.
The Adept MV Controller User's Guide covers the installation of the controller as
well as the interconnection to the equipment in your automation system.
All other hardware described in this chapter is optional and may or may not be
included in your system.
Figure 1-1 shows an Adept MV-8 controller and an Adept MV-10 controller. Adept
systems are flexible, modular systems that allow you to combine the needed
components for your automation task. The appearance of your system will vary
depending on the components you have selected.
040
SF
STP
A
SCR
B
OK
2
ESTOP
HPE
DIO
FAIL
PASS
OK
3
ACC V
4
SCSI
OK
1 2 3 4 5 6 7 8
VME
VJI
VIS
ES
1
ON
D
VGB
SIO
C
D
R
I
RESET V
E
A
F
P
/
ABORT M
C
RESET P
V
I
D
E
O
V
I
D
E
O
B
U
S
B
U
S
1
2
3
4
5
6
I
N
P
U
T
S
I
N
P
U
T
S
M
O
N
I
T
O
R
AMPLIFIER
SIGNAL
1
2
3
R
S
2
3
2
4
1 2 3 4
R
S
2
3
2
ON
R
S
4
2
2
BELT
ENCODER
#1
I
/
O
®
R
S
2
3
2
/
T
E
R
M
R
S
2
3
2
2
4
V
1
0
0
m
A
E
T
H
E
R
N
E
T
KEYBOARD
O
U
T
P
U
T
S
ARM
SIGNAL
O
U
T
P
U
T
S
I
N
P
U
T
S
E
T
H
E
R
N
E
T
1
0
0
m
A
2
4
V
I
/
O
R
S
2
3
2
FOR CONTINUED PROTECTION
AGAINST RISK OF FIRE,
REPLACE ONLY WITH SAME
TYPE AND RATING OF FUSE.
5AT
~100-240V
50/60HZ
~100-240V
50/60HZ
#2
#1
R
S
2
3
2
/
T
E
R
M
VME
D
5AT
R
S
4
2
2
C
B
R
S
2
3
2
R
S
2
3
2
A
FOR CONTINUED PROTECTION AGAINST RISK OF FIRE,
REPLACE ONLY WITH SAME TYPE AND RATING OF FUSE.
RESET
SCR
A
WARNING:
WARNING:
ABORT
STP
SF
S
E
R
V
O
M
A
C
H
I
N
E
DE6
E
N
C
O
D
E
R
F6
D
R
I
RESET V
E
OK
1 2 3 4 5 6 7 8
F
P
/
M
C
P
4
O
U
T
P
U
T
S
PASS
DE4
F4
SCSI
F5
DE5
I
N
P
U
T
S
FAIL
DE2
DE1
HPE
MI6
DE3
F3
F1
ES
F2
ESTOP
OK
ACC V
3
1
SIO
C
A
M
E
R
A
S
/
S
T
R
O
B
E
S
®
USE ONLY WITH
250V FUSES
ON
2
DIO
#2
040
P
O
I
N
T
E
R
O
U
T
P
U
T
S
USE ONLY WITH
250V FUSES
Figure 1-1. Typical Adept MV Controllers
V+Operating System User’s Guide, Ver 12.1
29
Chapter 1
The Keyboard
The Keyboard
Adept A-Series controllers are supplied with the integrated keyboard and
trackball shown in Figure 1-2. See the Adept MV Controller User's Guide for
details on connecting the integrated keyboard to your controller. The rest of this
section describes the special features of the A-Series keyboard.
Function Keys
Standard Keys
F1
Esc
~
`
!
1
Q
Tab
➡
Caps Lock
Shift
Ctrl
@
2
F2
F3
#
3
$
4
W
A
E
S
Z
F4
%
5
R
D
X
F5
^
6
T
F
C
Alt
Optional Mouse Keys
Figure 1-2. The Keyboard
30
V+Operating System User’s Guide, Ver 12.1
F7
&
7
Y
G
V
F6
*
8
U
H
B
(
9
I
J
N
F8
)
10
O
K
M
L
<
,
>
.
Chapter 1
The Keyboard
Adept S-Series controllers are supplied with a connection for a user-supplied,
Wyse-type terminal. See the Adept MV Controller User's Guide and
documentation provided with your terminal for details on connecting and using
character-based terminals.
Screen Control
Keys
Cursor Keys
F9
F10
+
=
{
[
"
'
:
;
?
/
Alt
F12
Backspace
}
]
Insert
←
Caps
Lock
Scroll
Lock
↑
Pg Up
Num
Lock
/
*
End
Pg Dn
7
8
↑
9
4
←
5
6
→
1
2
↓
3
Pause
Home
↓
↵
→
Home
End
Ctrl
Track ball Mode
Optional Mouse Keys
Num
Lock
Scroll
Lock
|
\
Shift
Cursor
Ball
Print
Screen
Delete
Enter
➡
P
➡
_
-
F11
Status LEDs
Track ball
-
Pg Up
+
Pg Dn
0
.
Ins
Del
Enter
Numeric Keypad
V+Operating System User’s Guide, Ver 12.1
31
Chapter 1
The Keyboard
Standard Keys
The standard keys behave like regular typewriter keys. Whenever the typing
cursor (a black rectangle, “z”) appears on the monitor, keystrokes typed on the
standard keys will be entered to the left of the typing cursor. The typing cursor
appears at the system prompt when the system is ready to accept monitor
commands, in the SEE editor, and when entering field data in Adept’s AIM
software products.1
Function Keys
The next group of keys is the function keys. These keys are not normally used for
system level operations, but have dedicated uses in the Adept programming
editors and AIM software. The dedicated uses of these keys with the program
editor are described in the V+ Language User’s Guide. The use of the function
keys with AIM software is described in the various AIM application user guides.
Modifier Keys
The Ctrl, Alt, and Shift keys are always used in conjunction with another key—
they have no function when pressed alone. The keys marked Ctrl (control) and
Alt (alternate) behave similarly to the Shift key in that you always hold down the
Ctrl or Alt key and then press another key. The Adept SEE program editor makes
extensive use of the Ctrl key—see the V+ Language User’s Guide for details.
Wherever this manual calls for one of these key combinations, it is shown in a
format similar to “Ctrl+C”, which means hold down the “Ctrl” key and press the
“C” key. “Sh+F4” means hold down the “Shift” key and press the “F4” key.
Cursor Keys
These are dual function keys. When the LED on the Insert key is lit, the Pg Up, Pg
Dn, etc., functions are performed. When the LED on the Insert key is not lit, the
keys marked with arrows move the typing cursor up, down, left, and right one
space or one line at a time. To toggle the Insert LED, press “Ctrl+Insert”.
1
32
See the V+ Language User’s Guide and the AIM documentation for details on the SEE
editor; see AIM documentation for details on AIM software.
V+Operating System User’s Guide, Ver 12.1
Chapter 1
The Keyboard
The Numeric Keypad
The numeric keypad keys have a dual function—they duplicate the number keys
from the top row of the standard keys or they duplicate the cursor keys. When
“numeric lock” is engaged (the “Num Lock” LED in the status LEDs section is lit),
the numeric keypad is used for numeric entry. When “numeric lock” is not
engaged (the “Num Lock” LED in the status LEDs section is not lit), the keys have
the same function as the correspondingly marked cursor movement keys. To
toggle the “Num lock” LED, press the Num Lock key. Note: You cannot change
the “Num lock” status when the optional mouse keys are selected (see “Mouse
Keys” below).
Screen Control Keys
The only key in this group that is used with Adept systems is the Scroll Lock key.
When this key is pressed (and the “Scroll Lock” status LED is lit), all output to the
monitor is halted and further keyboard input is “buffered” (stored but not
executed). The top-level menu bar turns red to indicate the scroll lock key has
been pressed. To turn off scroll lock and allow normal operations, press the Scroll
Lock key again.1
The Mouse Keys
There are two groups of “optional mouse keys” that can be set to mimic the left,
right, and drag lock buttons on the trackball. To enable the mouse keys, press the
key in the upper right corner of the keyboard marked with a mouse graphic.
When the LED on this key is lit, pressing the left Ctrl or “Num Lock” key is the
same as pressing the left trackball button. Pressing the blank key between the left
Ctrl and Alt keys or the “/” key on the numeric keypad is the same as pressing
the drag lock button on the trackball. Pressing the left Alt key or the “*” key on the
numeric keypad is the same as pressing the right button on the trackball (the right
button is not generally used by Adept applications).
When the mouse keys are enabled, they will not perform
their marked functions even if they are used without the trackball.
Press the key with the mouse graphic to disable the optional mouse
keys.
NOTE:
Other Special Keys
The Caps Lock key forces all characters entered from the standard keys to be
capital letters. Numbers and symbols are not affected by Caps Lock. The “Scroll
Lock” LED indicates whether scroll lock is engaged or not.
1
Pressing Ctrl+S will halt output to the monitor, and pressing Ctrl+Q will resume output.
V+Operating System User’s Guide, Ver 12.1
33
Chapter 1
The Controller and Memory
The Tab key enters a tab in the SEE editor. It also selects successive menu items on
AIM menu pages.
The Esc key is used in the special command mode of the SEE program editor.
The key marked “Cursor Ball” changes the function of the trackball. When cursor
ball is enabled (the LED on the “Cursor Ball” key is lit), the trackball will move
the typing cursor up, down, left, and right. When this mode is enabled, the
trackball will not move the cursor pointer and the mouse buttons have no effect.
The Status LEDs
These three LEDs indicate the status of the “toggle” keys. When Num Lock is lit,
the numeric keypad will produce numeric output rather than cursor movement.
When Caps Lock is lit, capital letter lock is engaged. When Scroll Lock is lit,
scrolling to the monitor or monitor window is temporarily halted.
The Trackball
See “Working with Pointing Devices” on page 50 for details on using pointing
devices.
The Controller and Memory
The controller contains the printed circuit boards that run robot and vision control
programs. Your controller contains circuit boards for running application
programs and communicating with the disk drives that store programs and
information. The controller may also contain circuit boards that drive robot joints,
circuit boards that communicate with equipment outside the controllers, and
special boards that control the machine vision system.
The main processor circuit board also contains memory chips for the system’s
Random Access Memory (RAM). Programs that are actively executing and the
data needed by those programs reside in RAM. Adept system processors can have
4 megabytes, 8 Mb, or 16 Mb of RAM.
Information that is not actively being used is stored on “mass storage” devices.
Adept systems may have three different types of mass storage devices, an internal
hard drive, an external hard drive, and a floppy disk drive. Chapter 5 covers the
different disk drives.
34
V+Operating System User’s Guide, Ver 12.1
Chapter 1
Robots and Motion Devices
Robots and Motion Devices
Your system may be equipped with the AdeptMotion VME option that provides a
means of controlling many types of motion devices. The AdeptMotion VME
User’s Guide details the installation and configuration of the Adept hardware and
the interconnection between the Adept controller and your motion device.
The Manual Control Pendant
The optional manual control pendant (MCP) shown in Figure 1-3 has its own set
of “typewriter” style keys and function keys, including keys that can be assigned
special uses by application programs. Special MCP keys allow you to move a
robot or motion device and to teach locations used by motion control programs.
The features of the MCP are covered in the robot instruction handbooks.
Liquid Crystal
Display (LCD)
User LED
"Soft"
Buttons
EDIT
CLR
ERR
DISP
USER
Speed
Bars
PROG
SET
CMD
WORLD
TOOL
Predefined
Function
Buttons
JOINT
FREE
- +
MAN
DEV
X
1
HALT
Y
2
RUN
DIS
COMP
HOLD
PWR
PWR
Z
3
NO
YES
RX
4
7
8
9
RY
5
F1
4
5
6
RZ
6
J7 – J
12
F
2
1
2
3
T1
0
•
DEL
STEP
REC
SLOW
Hold-to-Run
Switch
DEV
F3
DONE
Manual State
LEDs
Emergency Stop
Switch
Mode Control
Buttons
Joint/Axis
Control Buttons
Disable Power
Button
Figure 1-3. The Adept Manual Control Pendant
V+Operating System User’s Guide, Ver 12.1
35
Chapter 1
Other Input and Output Devices
Other Input and Output Devices
In most cases, an automation task requires coordination between the motion
device and other workcell equipment such as part feeders, conveyor belts, and
other controllers or production floor computers.
Cameras and Lighting Equipment
The AdeptVision option incorporates a machine vision system into the Adept
controller. The machine vision system may be on a system with or without a
motion device. “Stand-alone” vision systems perform quality and process-control
inspections. “Guidance” vision systems perform inspections as well as providing
a means of guiding the motion device to pick up and place objects that are not in
precise or predictable locations. The Adept MV Controller User's Guide details the
installation and hardware configuration of machine vision equipment. The
AdeptVision User’s Guide covers the basics of Adept vision systems.
The Controller Disk Drives
Disk drives store programs and information not actively being used by the
controller. System RAM is limited, and only a certain number of programs can be
resident in RAM at one time. Disk drives, on the other hand, provide extensive
storage capacity. With removable hard drives and floppy disks, storage capacity is
unlimited. See Chapter 5 for details on the system disk drives.
Serial I/O
The system I/O board (SIO) has serial I/O connectors, as does each main
processor board, for RS-232 communication with other controllers or computers.
V+ supports Kermit and DDCMP communications protocols as well as simple
serial I/O. See the Adept MV Controller User's Guide for details on installing
serial I/O devices. See the V+ Language User’s Guide for details on programming
serial I/O.
Digital I/O
Adept’s digital I/O system behaves similarly to programmable logic controllers
(PLCs), allowing input and output from devices generating a simple on/off
signal. Digital I/O uses optical isolation modules to insulate the controller from
noise generated by inductive devices in the workcell. The SIO board provides
36
V+Operating System User’s Guide, Ver 12.1
Chapter 1
Other Input and Output Devices
several digital I/O channels. Additional DIO boards can be installed in the
controller. See the Adept MV Controller User's Guide for details on installing
digital I/O devices. See the V+ Language User’s Guide for details on
programming digital I/O.
Analog I/O
The analog I/O allows communication with devices that can generate or receive
an analog signal. AIO boards respond to or generate output in several voltage or
current ranges. See the Adept MV Controller User's Guide for details on installing
analog I/O devices. See the V+ Language User’s Guide for details on
programming analog I/O.
Remote Emergency Stop
Motion systems must be able to react immediately to interruptions and dangerous
conditions in the workcell. Adept’s remote E-stop circuitry monitors series-wired
sensors that detect dangerous conditions in the workcell. The controller
connection for user emergency stop is on the SIO board. See the Adept MV
Controller User's Guide for details on installing remote E-stop devices.
V+Operating System User’s Guide, Ver 12.1
37
Learning the Basics
2
Using the Controller . . . . . . . . . . . . . . . . . . .
Install the Equipment and Set the Hardware Configuration
Power up the System . . . . . . . . . . . . . . . .
To Power up the Controller . . . . . . . . . . . .
To Power up the Motion Device . . . . . . . . . . .
To Reenable Power to a Motion Device After
an Emergency Shutdown. . . . . . . . . . . . .
Using the V+ Command Line . . . . . . . . . . . . . . .
The System Prompt and Typing Cursor . . . . . . . . .
The Parts of a Monitor Command . . . . . . . . . . .
The Command Name . . . . . . . . . . . . . .
Command Parameters . . . . . . . . . . . . .
Required and Optional Parameters . . . . . . . .
Using the ID Command . . . . . . . . . . . . . . .
Monitor Command Syntax Conventions . . . . . . . .
Shortcuts to Typing a Command . . . . . . . . . . .
To Cancel a Command . . . . . . . . . . . . . .
To Edit the Current Command . . . . . . . . . . . .
To Retrieve Previously Entered Commands . . . . . . .
To Enter a Command While a Program Is Executing . . .
Using the A-Series Graphical Interface . . . . . . . . . . .
Working with Pointing Devices . . . . . . . . . . . .
To Move the Pointer . . . . . . . . . . . . . . .
To Click . . . . . . . . . . . . . . . . . . . .
To Drag . . . . . . . . . . . . . . . . . . . .
Working in Windows . . . . . . . . . . . . . . . .
To Open a Window . . . . . . . . . . . . . . .
To Select a Window . . . . . . . . . . . . . . .
To Move a Window . . . . . . . . . . . . . . .
To Size a Window . . . . . . . . . . . . . . . .
To Zoom a Window . . . . . . . . . . . . . . .
To Close a Window . . . . . . . . . . . . . . .
Scrolling in Windows . . . . . . . . . . . . . . . .
V+Operating System User’s Guide, Ver 12.1
.
.
.
.
.
.
.
.
.
.
.
.
.
.
.
.
.
.
.
.
.
.
.
.
.
.
.
.
.
.
.
.
.
.
.
.
.
.
.
.
.
.
.
.
.
.
.
.
.
.
.
.
.
.
.
.
.
.
.
.
.
.
.
.
41
41
42
42
44
44
45
45
45
45
46
46
46
47
47
48
48
48
49
49
50
50
50
50
52
52
52
52
53
53
53
53
39
Chapter 2
To Turn Scroll Bars On and Off . . . . . . . . . .
To Use the Scroll Arrows . . . . . . . . . . . .
To Use the Scroll Handles . . . . . . . . . . . .
Window Menu Bars . . . . . . . . . . . . . . .
To Make a Menu Selection Using the Pointing Device
To Make a Menu Selection Using the Keyboard. . .
Using Software . . . . . . . . . . . . . . . . . . . .
The V+ Operating System Software . . . . . . . . .
Application Software . . . . . . . . . . . . . . .
+
The V Operating System . . . . . . . . . . . . . . .
Using Files and Directories . . . . . . . . . . . . . . .
Using the Wyse Terminal . . . . . . . . . . . . . . . .
40
V+Operating System User’s Guide, Ver 12.1
.
.
.
.
.
.
.
.
.
.
.
.
.
.
.
.
.
.
.
.
.
.
.
.
.
.
.
.
.
.
.
.
.
.
.
.
53
54
54
54
54
55
55
56
56
56
57
57
Chapter 2
Using the Controller
Using the Controller
You interact with the controller by:
•
Entering commands and responding to system requests by typing entries at
the command line. This is the most basic type of interaction and is used by all
Adept controllers. Section covers the command line basics.
•
Using a pointing device to make selections. This type of interaction is used
with programs written for the Adept A-Series graphical interface. Section
describes the basics of the graphical user interface.
•
Initiating actions and responding to system requests with the manual control
pendant. The optional MCP is generally used with motion systems. Use of the
MCP is described in Manual Control Pendant User's Guide.
The following are the minimum steps required to get an Adept system up and
running.
Install the Equipment and Set the Hardware Configuration
All the equipment must be installed and tested. The user’s guide covers
installation and hardware configuration of the controller. As delivered from
Adept, all systems have their hardware configuration set to the most common
defaults. You will not have to perform any hardware configuration changes if
these defaults are acceptable to your installation. The hardware configuration
options are detailed in the Manual Control Pendant User's Guide.
In addition to the controller, your system may include the following:
•
A motion device and the AdeptMotion VME option. Installation of the device
should be covered in the documentation provided with the device.
Interconnection of the device with the Adept controller is covered, as is the
motion servo hardware configuration, in the AdeptMotion VME User’s
Guide.
•
Safety equipment. In workcells with robots or motion devices, it is critical that
sensors be placed that will prevent personnel from entering the workcell
when the motion device might move. Make sure this equipment is installed
and functioning properly before proceeding. The interconnection of safety
devices to the Adept controller is covered in the controller user’s guide.
•
Peripheral input/output devices. The Adept MV Controller User's Guide
covers the physical interconnect of I/O devices. The V+ Language User’s
Guide covers programming considerations for accessing the peripheral
devices.
V+Operating System User’s Guide, Ver 12.1
41
Chapter 2
Using the Controller
•
Moving conveyors. The V+ Language User’s Guide describes programming
considerations for coordinating robot motions with a conveyor belt connected
to one of the external encoder ports on the controller.
•
Cameras and strobe lights (requires the AdeptVision option). The
AdeptVision User’s Guide details installing and configuring cameras and
strobe lights.
Power up the System
Before turning on the controller, make sure:
•
All safety devices are installed and operating correctly.
•
The cardboard “shipping disks” have been removed from the floppy drive.
•
The workcell is free of obstructions and personnel.
Do not turn on the controller unless all safety devices are
in place and operating correctly. Make sure the workcell is free of
obstructions and personnel.
WARNING:
Do not connect any cables or make any hardware
configuration changes with the controller turned on.
WARNING:
To Power up the Controller
With an A-Series system, turn on the monitor.
With an S-Series system that uses a Wyse-type terminal, turn on the terminal.
Turn on the controller by moving the power switch on the controller chassis to the
on position (“|”). On systems equipped with the optional front panel, turn on the
System Power switch.1 The controller will perform a series of self-tests and “load”
the operating system. The controller will first look to the A: drive for an operating
system and load from the A: drive if a system is found. If the operating system
files are not found on the A: drive, the controller will look to the C: drive for
operating system files. In order to start up successfully, there must be operating
system files on either the A: or C: drive.
1
42
This switch provides terminals for the user to connect an AC power source. If this option is not
be used on your system, the switch will be inactive.
V+Operating System User’s Guide, Ver 12.1
Chapter 2
Using the Controller
The system power-up and boot procedures will take about a minute. When
startup is complete, a screen similar to Figure 2-1. will be displayed (on S-Series
terminals, the display will fill the entire screen instead of a window on the
monitor). The exact wording will vary depending on the software version and
installed options of your system.
When the start-up (boot) process is complete, the cursor will appear next to the
system prompt. (The V+ system prompt is a period.) If you have an A-Series
system or an AdeptWindowsPC based system, read section for details on how to
use the window and pointer-device features. For S-Series systems, read section
for details on using the character-based terminal.
Figure 2-1. Initial Screen
V+Operating System User’s Guide, Ver 12.1
43
Chapter 2
Using the Controller
To Power up the Motion Device
Each time the controller is turned on, a start-up calibration procedure must be
performed for the motion device. The CALIBRATE and ENABLE POWER commands
perform this start-up procedure. Programs that send instructions to a motion
device will not execute properly unless this start-up procedure is completed.
When the controller is first turned on, power is not sent to the motion device. To
enable power, enter the command:
ENABLE POWER ↵
(See the next section for complete details on entering commands.)
WARNING: When CALIBRATE is entered, the motion device will move.
Before you enter this command, make sure the workcell is free of
obstructions and that all personnel are out of the workcell.
Once high power has been enabled, the motion device start-up calibration must
be performed. To perform start-up calibration, enter the command:
CALIBRATE ↵
The motion device will proceed through a series of motions to verify its current
location and the state of its position encoders. Once the calibration procedure is
complete, robot control programs can be executed.
You do not have to perform this procedure for systems (such as stand-alone vision
systems) that do not have an attached motion device.
When enable high power on Catagory 1 and Catagory 3
systems, you must press the High Power On/Off button on the VFP
within a programmable amount of time. Failure to press the High
Power On/Off button will result in a time-out error.
NOTE:
To Reenable Power to a Motion Device After an Emergency Shutdown
When a panic button is pressed or other emergency stop switch is tripped, high
power is immediately removed from the motion device. Power is also removed
from the device if a servo error is reported. Servo errors occur if the motion device
cannot get to a desired location (for example, if the device runs into something).
Before the motion device can be used again, you must enter the command:
ENABLE POWER ↵
44
V+Operating System User’s Guide, Ver 12.1
Using the V+ Command Line
Chapter 2
You do NOT have to reissue the CALIBRATE command.
You can also enable power by pressing the COMP/PWR
button on the manual control pendant.
NOTE:
Using the V+ Command Line
The command line is your primary access to the V+ operating system. By entering
monitor commands at the system prompt you can:
•
Load and execute program files
•
Display system status
•
Change certain characteristics of operating system behavior
The System Prompt and Typing Cursor
The V+ system prompt is a period, “.” (sometimes referred to as the “dot”
prompt). When the system prompt is displayed, system commands (known as
monitor commands) can be entered. Monitor commands allow you to access the
file structure, execute programs, and display system status. The typing cursor is a
black rectangle, “z”. When the system is first started up, the last line displayed
will show the dot prompt followed by the typing cursor. See Figure 2-1.
Whenever the typing cursor appears, the system is ready to accept input from the
keyboard.
The Parts of a Monitor Command
Every monitor command has a name. Most monitor commands will also have one
or more parameters to the command.
The Command Name
Every command has a unique name that tells V+ what action to perform.1 The
name must be typed exactly as shown.2 For example, to see the system ID line,
enter the command:
ID ↵
1
This manual covers the most commonly used monitor commands and parameters. All monitor
commands and their complete syntax are covered in the V+Operating System Reference
Guide.
V+Operating System User’s Guide, Ver 12.1
45
Using the V+ Command Line
Chapter 2
The system begins executing a command as soon as you press the Enter or Return
key (these keys are identical—some keyboards are marked “Return” and some
are marked “Enter”). The symbol “↵” indicates that the Enter or Return key
should be pressed.
Command Parameters
Most commands require additional information that tells the system exactly how
you want the command executed. This additional information is specified as
parameters to the command line. You specify unique information for each
command parameter. Command parameters must be entered in the order they are
listed, and they must be separated (delimited) in exactly the fashion shown. A
comma is normally used to separate
parameters. Occasionally an equal sign, “=”, is used. You must always type a
space between a command and its list of parameters.
Required and Optional Parameters
Command parameters can be optional or required. If a parameter is required, a
value must be entered on the command line or the command will not execute
correctly. If a parameter is optional, its value can be omitted and the system will
substitute a default value. For example, the command STATUS has one optional
parameter. If the command:
STATUS ↵
is entered, status information on all the system tasks will be displayed. If the
command:
STATUS 1 ↵
is entered, status information will be displayed only for system task number 1.
Using the ID Command
The ID command displays identity information about the components of the
system:
Software: version.revision opt1-opt2
Controller: model-serial options
Processor n: version.revision type-options memMb
Robot n: model-serial options module
2
46
This manual always shows commands in all capital letters. However, you can enter commands
in any combination of capital or small letters. See page 47 for shortcuts to typing the entire
command.
V+Operating System User’s Guide, Ver 12.1
Using the V+ Command Line
Chapter 2
A sample display from the command “ID” is:
Software: 11.0 81-1C0
Controller: 3302-108 0
Processor 1: 0.2 1-3 8Mb
Robot 1: 100-0 0 8
For more detailed information, see the V+Operating System Reference Guide.
Monitor Command Syntax Conventions
To help present the required syntax in the clearest, simplest manner, this manual
uses the following syntax conventions:
•
The command name is shown in capital letters. Some commands have
required and optional parts. The required part is shown in bold capital letters,
and the optional part is shown in regular capital letters.
•
Parameters shown in bold lowercase letters are required and should be
replaced with values you provide. For example, drive should be replaced
with a drive letter you choose.
•
Parameters shown in normal lowercase letters are optional. If you omit an
optional parameter, the system will assume a default value.
•
For example, the following sample command has one required and one
optional parameter:
SAMPLECOMMAND param_required, param_optional
If both parameters are specified, the comma separating the parameters must
be entered. If only the required argument is used, the comma is omitted.
Shortcuts to Typing a Command
Command names do not have to be typed completely—you need to type only
enough characters to uniquely identify the command. For example, the only
command that begins with “stat” is STATUS. Therefore, typing:
STAT ↵
is sufficient to execute the STATUS command. Typing:
STA ↵
will result in the error:
*Ambiguous name*
since it could refer to either the STATUS or STACK command.
V+Operating System User’s Guide, Ver 12.1
47
Using the V+ Command Line
Chapter 2
To Cancel a Command
To cancel an executing command, press Ctrl+C. These keystrokes will NOT halt a
program that was started with the EXECUTE command. The ABORT command halts
an executing program.1
Many commands output information to the monitor. This output can be
temporarily halted by pressing the “Scroll Lock” key. To restart the output, press
“Scroll Lock” again. On an A-Series monitor, the main menu bar will turn red
when output to the monitor has been halted.
To Edit the Current Command
The ⇐ Backspace key erases characters to the left of the typing cursor.
The following keys move the typing cursor on the command line:
The ← and → keys move the typing cursor left and right. Shift+ ← or Ctrl+ ←
moves the typing cursor to the beginning of the line. Shift+ → or Ctrl+ → moves
the typing cursor to the end of the line.
Ctrl+U erases all characters from the typing cursor to the beginning of the line.
The system prompt is always in insert mode. If the typing cursor is not at the end
of the line, entered characters will be inserted to the right of the cursor and the
remaining characters are pushed to the right.
To Retrieve Previously Entered Commands
The twenty most recently entered commands are stored in the command history
buffer. The ↑ key moves backward through the history displaying successive
commands. The ↓ key moves forward through the history. The displayed
command can be reexecuted by pressing ↵ Enter . The command can also be
edited as described above and then reexecuted.
1 ABORT
does not stop any robot motion that may have already begun. Use any emergency stop
button to immediately halt robot motion.
48
V+Operating System User’s Guide, Ver 12.1
Chapter 2
Using the A-Series Graphical Interface
To Enter a Command While a Program Is Executing
The Adept system is a multitasking system (multiple programs can be executing
concurrently in different tasks). This allows you to enter monitor commands any
time the monitor window is displayed. While a program is executing, you can
start other programs in different tasks, get status information, or abort programs
before they have completed.
Once a program has begun execution, the “.” prompt will disappear. However,
any time the system is not actively requesting input you can begin typing a
monitor command. As soon as you begin typing, the asterisk “∗” prompt will be
displayed along with any characters you type.
The only time you cannot enter a command is when the system is waiting for
input from the keyboard. For example, suppose the following message is
displayed in the monitor window:
Are you sure? Y/N z
The typing cursor at the end of the line tells you the system is waiting for you to
enter a response at the keyboard. (Entering Ctrl+Z at this point will abort the
program.)
NOTE: If you are entering a command while a program is executing,
the program will wait until you press ↵ before displaying to the
monitor window any output generated by the program. Therefore,
you should not leave a partially completed command in the monitor
window since it may cause programs with screen output to wait
indefinitely.
Using the A-Series Graphical Interface
The operations described in this section reference the window features shown in
Figure 2-2.
V+Operating System User’s Guide, Ver 12.1
49
Chapter 2
Using the A-Series Graphical Interface
Working with Pointing Devices
Pointing devices (such as a mouse or trackball) control the position of the pointer
on the screen (see Figure 2-2.). The pointing device selects windows, moves
windows on the screen, opens applications, and helps you interact with
application programs. The basic pointing functions described in this section use
the “click” button (the large left button on the integrated trackball, the center
button on a three-button mouse, or the left button on a two-button mouse).
To Move the Pointer
You move the pointer arrow around the screen by rolling the trackball (see Figure
2-3.) or sliding the mouse in the direction you want to move the pointer. Do not
press any pointer device buttons when you simply want to move the pointer to a
different location on the screen.
To Click
To “click” the pointing device, move the pointer until it is over the area you want
to click on, then press and release the “click” button (see Figure 2-3.). Clicking
selects windows, presses buttons, and performs other actions within an
application.
To Drag
To drag the pointing device, move the pointer to the starting location, press and
hold the “click” button, then move the pointer to a different location and release
the “click” button. Some of the uses for dragging are to move or resize windows
and to select items in pull-down menus.
The integrated trackball on the standard Adept keyboard has a special button that
“locks” the trackball in drag mode (see Figure 2-3.). Press the drag lock key to
engage the drag lock feature. The drag lock LED will light, and the trackball will
behave as if the “click” button is held down. Press the drag lock button again to
release drag mode.
50
V+Operating System User’s Guide, Ver 12.1
Chapter 2
Using the A-Series Graphical Interface
adept
Main
Menu Bar
Execute
Edit
Module
I/O
Set-Up
Show
Utilities
Scroll Bar Icon
Close Icon
Help
Special
Zoom Icon
Title Bar
Accounts
Go
Seek
Edit
Help
Scroll Handle
Window
Menu Bar
Vertical
Scroll Bar
Scroll
Arrows
Cursor
Arrow
Horizontal Scroll Bar
Size Icon
Figure 2-2. Window Feature Identification
Drag Lock LED
➟
➟
➟
"Click" Button
➟
➟
➟
➟
➟
Drag Lock
Button
Figure 2-3. Track Ball
V+Operating System User’s Guide, Ver 12.1
51
Chapter 2
Using the A-Series Graphical Interface
Working in Windows
A basic Adept system comes with a main menu and one predefined window
called the Monitor window. In this window you can execute programs, issue
commands from the system prompt, and access the SEE editor. Adept options
such as AdeptVision define additional windows. Also, application programs may
contain their own windows.
AdeptWindows PC software uses the basic Microsoft
Windows95 format. Refer to the AdeptWindows PC User’s Guide
and the Windows95 Operation Manual for more information.
NOTE:
To Open a Window
•
With the pointing device, position the pointer over the Adept logo in the
upper left side of the screen. (adept will always be the first menu item in the
main menu bar with A-series systems and the second menu item an
AdeptWindowsPC systems.)
•
Press and hold down the click button, and a pull-down menu will appear.
Drag the pointer down until the window you want to open is highlighted.
(You can use the drag lock button rather than the click button.)
•
Release the click button to open the window. (Press the drag lock button if
you are using the drag lock instead of the click button.)
•
Multiple windows can be open at one time; windows can overlap each other.
When windows overlap, the window currently selected appears on top of any
other open windows.
To Select a Window
A window is selected when its title bar is shaded blue; if the title bar is white, the
window is deselected. Also, the scroll bars disappear when a window is
deselected. Keyboard entry goes to the selected window.
•
To select a deselected window, position the pointer anywhere inside that
window, then press the click button. You can also activate a window by
selecting it from the window names appearing in the adept pull-down menu.
•
To deselect a window, position the pointer anywhere outside that window,
then press the click button.
To Move a Window
52
•
Position the pointer anywhere on the title bar of the window you want to
move.
•
Press and hold down the click button (or use the drag lock), then drag the
window to the new location.
V+Operating System User’s Guide, Ver 12.1
Chapter 2
•
Using the A-Series Graphical Interface
Release the click button.
To Size a Window
You can change the size of a window from its maximum preset size down to a
smaller size using the size icon in the lower right corner of the window (the scroll
bars have to be turned on to see the size icon; see the section on scrolling).
•
Position the pointer on the size icon, press and hold down the click button,
and drag to a new location. You will see the window change size.
•
Release the mouse button when the window is the desired size. The contents
of the window do not change: Only the amount you can see changes.
To Zoom a Window
Another way to change the size of a window is to use the zoom icon in the upper
right corner of the window (the scroll bars have to be turned on to see the zoom
icon; see the section on scrolling below). The zoom feature toggles the window
between its maximum size and the most recently set size (windows that have not
been resized since being opened will not be affected).
•
Position the pointer on the zoom icon, then press the click button. The
window changes to its previous size.
To Close a Window
To close a window, position the pointer on the close icon in the upper left corner
of the window and press the click button.
When you close the Monitor window, any system operations or processes that are
taking place continue, even though the window is closed. Subsequent output to
the window will be seen when the window is opened. For example, if you started
an application program from the monitor window, closing the monitor window
does NOT halt the program that you started. Use the adept pull-down menu to
reopen a closed window.
Scrolling in Windows
The scrolling features allow you to view the contents of a window that is larger
than its currently displayed size. You can scroll vertically or horizontally, and the
scroll bars can be turned off if they are not needed.
To Turn Scroll Bars On and Off
To turn the scroll bars on and off, position the pointer in the scroll bar icon at the
upper right corner of the window, and press the click button.
The scroll bars must be turned on to use the size icon and the zoom icon.
V+Operating System User’s Guide, Ver 12.1
53
Chapter 2
Using the A-Series Graphical Interface
To Use the Scroll Arrows
The arrows at the bottom of the vertical scroll bar, or at the right side of the
horizontal scroll bar, allow you to scroll through a window vertically or
horizontally.
•
To scroll a line at a time vertically or one character at a time horizontally, click
once when the pointer is on the arrow that points in the direction you want to
scroll.
•
To scroll continuously, use the scroll handle, which is described in the
following section.
To Use the Scroll Handles
The scroll handles appear when the window has been sized down with the size or
zoom icons. The scroll handle in each scroll bar allows you to scroll quickly to any
part of the window. The vertical scroll bar represents the height of the window;
the horizontal bar represents the width.
•
To scroll to a specific location, position the pointer on the scroll handle, then
press and hold down the click button.
•
Drag the handle to the new location, then release the click button; you will see
the contents of the window scroll by as you drag. (You do not have to keep
the pointer within the scroll bar as you drag.)
•
To go immediately to a particular location in a window, position the pointer at
a place on the scroll bar that corresponds to where you want to go to, then
click once. The portion of the window that you selected appears in the
window, and the scroll handle moves to the corresponding location in the
scroll bar.
Window Menu Bars
Windows may have pull-down menu bars that allow you to select various
options. For example, all systems will have a top-level menu bar with at least one
pull-down option. This option is labeled adept and allows you to select a particular
window.
To Make a Menu Selection Using the Pointing Device
Position the pointer above the desired menu item, as shown in Figure 2-4., and
press and hold the click button. The pull-down options for this menu item will
appear below the menu item selected. Drag down the options until the desired
option is highlighted, and release the click button.
54
V+Operating System User’s Guide, Ver 12.1
Chapter 2
Using Software
Figure 2-4. Making a Menu Selection
To Make a Menu Selection Using the Keyboard
Press Alt+5 to display the pull-down options for the first menu item in the
currently selected window. Pressing Alt+5 again will select the next window1 and
display its first menu item options (windows without menu bars are skipped).
Press the → key to display the next menu item’s options. The ← key displays the
previous menu item’s options.
Press the ↓ key to highlight the next pull-down option. The ↑ key highlights
the previous pull-down option.
Press Enter ↵ to select the highlighted option or (if a pull-down option is not
highlighted) to cancel menu selecting from the keyboard.
Using Software
In the course of using an Adept system you will deal with two primary types of
software: operating system software and application programs. If you are using
an AIM2 based application, you will also access special database software.
1
The adept menu item from the main menu bar shows the list of selectable windows.
2
Adept’s “Assembly and Information Management” software and application development
environment.
V+Operating System User’s Guide, Ver 12.1
55
The V+ Operating System
Chapter 2
The V+ Operating System Software
Before a computer can perform any work it must “boot” and make active special
software known as an operating system. The operating system is the “master
controller” that coordinates the activities of all the computer components and
external equipment the system communicates with.
When you first turn on the Adept controller this software is automatically loaded
and made ready for use. You do not have to do anything special to get this
software active. Chapter 6 lists several options for customizing and optimizing
the operating system behavior. However, as delivered from Adept, the operating
system will correctly run your basic system.
Application Software
Application software makes the Adept system perform the tasks required by your
particular automation system. Application software has many sources: Adept
provides standard utility programs; Adept system integrators provide custom
software programs; or you may create your own application software.
Application software must be specifically loaded from a disk drive to system
RAM each time the controller is turned on, or after each time the programs are
removed to make room in RAM to run other programs. Chapter 4 describes the
process of loading and unloading software.
The V+ Operating System
The V+ operating system manages the flow of information within the controller.
The operating system accepts instructions from applications programs, input
from workcell peripheral devices, and operator input from the MCP, keyboard,
and pointing device. It generates output to the monitor and peripheral devices in
the workcell. The tasks performed by the operating system include:
•
Manage the execution of applications programs
•
Manage the flow of information to and from disk drives
•
Monitor external devices attached to the controller
•
Report errors generated during processing
In general, unless you are programming applications, you do not have to be
concerned with the internal operation of the operating system.
56
V+Operating System User’s Guide, Ver 12.1
Chapter 2
Using Files and Directories
Using Files and Directories
Application programs and other data are stored in files on the disk drives when
not being actively used by the controller. If the different files are not organized
carefully, the information on your disk drives can quickly become unmanageable.
The V+operating system uses a “hierarchical file” system for organizing files and
isolating related files. This system is identical to the one used by MS-DOS and is
similar to most other operating systems.
Chapter 3 describes the file directory structure in detail.
With large hard drives, it is particularly important that you carefully organize
your file structure so you can quickly locate needed files. Carefully organized files
make common operations such as copying, deleting, and renaming files much
easier. It is very difficult to clean up a badly disorganized disk, so read Chapter 3
carefully before you begin copying large quantities of files to your hard disk.
Using the Wyse Terminal
The Wyse terminal behaves similarly to most system terminals. As you type
characters, they appear to the left side of the flashing cursor. Any commands you
type at the system prompt are executed when the return key (shown as ↵) is
pressed.
The “backspace” key will delete the character to the left of the cursor.
Cursor movement keys (left, right, up, and down arrow keys), PF keys, line-feed
key, home key, and function (F) keys are used primarily with the SEE editor.
The “local block” key has some specialized terminal functions that are explained
in the Wyse terminal manual. If you accidentally hit this key, you will not be able
to enter properly commands (or text in the SEE editor) until you press the local
block key again and then enter a return. If your cursor seems to be stuck on a
single line, you have probably pressed the local block key by mistake. (“BLK” will
appear in the upper left-hand corner of the screen when this key has been
pressed.)
The “no scroll” key will toggle screen scrolling.
V+Operating System User’s Guide, Ver 12.1
57
Chapter 2
Using the Wyse Terminal
Table 2-1 lists several useful combination key functions.
Table 2-1. Wyse Terminal Special Keys
Key Combination
Effect
Ctrl ↑
Faster scrolling rate
Ctrl ↓
Slower scrolling rate
Shift Ctrl Home
Clear the screen
Shift SetUp
Reset terminal
Shift Ctrl ↵
Toggle key click noise
Ctrl C
Abort a command (not all commands can be
aborted)
Ctrl O
Suppress terminal output
Ctrl U
Cancel current command line
Ctrl W
Toggle “slow output” mode (both
character-based monitors and the monitor
window in an A-Series system).
See the documentation provided with your terminal for additional details.
58
V+Operating System User’s Guide, Ver 12.1
3
Using Files
Understanding Disk Files . . . . . . . . . .
Disk Files. . . . . . . . . . . . . .
Subdirectories . . . . . . . . . . .
File Names . . . . . . . . . . . . .
Filename Requirements . . . . . .
Reserved File Names . . . . . . . . .
Contents of a V+ Disk File . . . . . . .
Working With Disk Files . . . . . . . .
To List the Files on a Disk Drive . . . .
To Use Wildcards to List Groups of Files
To Copy a Disk File . . . . . . . .
To Rename a Disk File . . . . . . .
To Delete a Disk File . . . . . . . .
Using Directories . . . . . . . . . . . . .
Understanding the Directory Structure . .
Understanding Paths . . . . . . . . .
The Current Directory . . . . . . . .
Full Paths . . . . . . . . . . . .
Relative Paths . . . . . . . . . .
To Display the Current Path . . . . .
Path Examples . . . . . . . . . .
Working With Subdirectories . . . . . .
To View the Contents of a Directory .
To View Groups of Files . . . . . .
To Create a Subdirectory . . . . . .
To Delete a Subdirectory . . . . . .
File Management Using Diskcopy . . . . . .
Copying Multiple Files . . . . . . . .
Deleting Multiple Files . . . . . . . .
Other Disk-Like Devices . . . . . . . . . .
.
.
.
.
.
.
.
.
.
.
.
.
.
.
.
.
.
.
.
.
.
.
.
.
.
.
.
.
.
.
.
.
.
.
.
.
.
.
.
.
.
.
.
.
.
.
.
.
.
.
.
.
.
.
.
.
.
.
.
.
.
.
.
.
.
.
.
.
.
.
.
.
.
.
.
.
.
.
.
.
.
.
.
.
.
.
.
.
.
.
.
.
.
.
.
.
.
.
.
.
.
.
.
.
.
.
.
.
.
.
.
.
.
.
.
.
.
.
.
.
.
.
.
.
.
.
.
.
.
.
.
.
.
.
.
.
.
.
.
.
.
.
.
.
.
.
.
.
.
.
.
.
.
.
.
.
.
.
.
.
.
.
.
.
.
.
.
.
.
.
.
.
.
.
.
.
.
.
.
.
.
.
.
.
.
.
.
.
.
.
.
.
.
.
.
.
.
.
.
.
.
.
.
.
.
.
.
.
.
.
.
.
.
.
.
.
.
.
.
.
.
.
.
.
.
.
.
.
.
.
.
.
.
.
.
.
.
.
.
.
.
.
.
.
.
.
.
.
.
.
.
.
.
.
.
.
.
.
.
.
.
.
.
.
.
.
.
.
.
.
V+Operating System User’s Guide, Ver 12.1
60
60
60
60
60
61
61
62
62
63
63
63
64
64
65
66
67
68
68
68
68
69
69
69
70
70
71
71
72
73
59
Chapter 3
Understanding Disk Files
Understanding Disk Files
Information used by your Adept controller is stored in files on the floppy or hard
drives. Unlike information stored in RAM, disk files provide permanent storage.
However, before the data in the files can be used, it must be loaded into RAM.
Disk Files
One of the biggest differences between V+ and other operating systems is the
nature of a disk file. In most operating systems, a disk file contains a single
executable program, text document, or data file. In V+, a file can contain several
items, the most common of which are programs and the values of global
variables.
As later chapters discuss the way V+ executes programs, handles subroutines,
and stores the values of program variables, the reasons for this file strategy will
become clear. The important thing to remember as you become familiar with the
V+ file structure is that when you load or store a file, you are not necessarily
loading or storing a single program.
Subdirectories
In normal operations, you may wind up with large quantities of files. If you had
no way of organizing and isolating related files, your disk drives would quickly
become awkward and difficult to use. V+ uses a directory structure to help
organize and manage disk files. Subdirectories and the directory structure are
covered in the next section.
File Names
Each file within a subdirectory must have a unique name. V+ uses this name to
keep track of the file and to allow you to access the file.
Filename Requirements
V+ filename requirements are similar to MS-DOS filename requirements. File
names must:
60
•
Have a maximum of eight characters plus a three-character extension.
•
Use only alphabet characters (a - z), numbers (1 - 0), and the underscore (_)
character. (V+ ignores the case of letters used in file names.)
•
Not contain any spaces or characters not listed above.
•
Use only one period, which marks the beginning of the filename extension.
V+Operating System User’s Guide, Ver 12.1
Chapter 3
Understanding Disk Files
Reserved File Names
You may use any valid file name for your files. However, Adept uses several
common naming schemes including the following filename conventions:
•
The advanced camera calibration program uses “dat” as a file extension.
•
The Adept file compression utility uses “squ” as an extension.
•
The vision system stores vision models with a “vs” extension.
•
Adept’s AIM software uses the extensions “ovr”, “ov2”, “db”, “mnu”, and
“rfd”.
Contents of a V+ Disk File
Disk files may contain three different types of objects, as illustrated in Figure 3-1.:
•
V+ programs
•
User Data
•
V+ variables and their assigned values
a
at
les
r D ariab
e
ms
Us V Progra
Figure 3-1. Contents of a Disk File
V+ programs contain coded instructions that tell the computer what to do and
which external devices to communicate with.
User data is generated by various V+ programs such as camera calibration
programs or the Adept AIM database management system.
V+ variables provide specific information needed by a program. For example, the
location values that a robot is to move to can be stored in a disk file.
V+Operating System User’s Guide, Ver 12.1
61
Chapter 3
Understanding Disk Files
In general, unless you will be writing custom programs for the V+ system, you do
not need to be concerned about creating new data files. The files will be created
already, or will be created and modified automatically by the programs that you
run. You may need to copy existing programs from one disk to another. Copying
disk files is covered in “To Copy a Disk File” on page 63.
Working With Disk Files
In the course of using your Adept controller you will most likely access files
stored on the disk drives. This section tells you how to view, load, copy, and
delete disk files.
To List the Files on a Disk Drive
The FDIRECTORY command will list all the files in a subdirectory (see section ),
along with information about each file’s size, type, and creation date. After you
enter the command:
FDIRECTORY ↵
the monitor might look like:
MY_FILE3 19-MAR-92 10:32:29
PR_FILE.V2 4 P01-JAN-92 14:45:31
UTIL 0 D 08-MAY-91 09:43:43
27768/41744 sectors used/unused
The information in this display includes:
•
The first column lists the file name.
•
The second column lists the file size in disk sectors (a high-density,
double-sided disk holds approximately 2880 sectors).
•
The third column lists special attributes of the file:
“P” indicates the program is protected and cannot be modified or copied.
“D” indicates the entry is a subdirectory.
“R” indicates the file is read-only.
62
•
The last column lists the date and time the file was created or copied.
•
The final line of the display lists the total number of used and unused sectors
on the disk. In this example, the disk drive has 27,768 sectors filled with files
and 41,744 sectors available for storing files.
V+Operating System User’s Guide, Ver 12.1
Chapter 3
Understanding Disk Files
To Use Wildcards to List Groups of Files
You can list specific groups of files using the “wildcard” character (an asterisk)
and portions of a file name. The command:
FDIRECTORY MY∗.∗ ↵
will list only the files that begin with “my”. The command:
FDIRECTORY ∗.V2 ↵
will list all the files with the extension “v2”. The command:
FDIRECTORY ∗Y∗.∗ ↵
will list all the files that have a “y” as the second character of the file name.
You can also use wildcards in certain file copying and deleting operations.
To Copy a Disk File
The FCOPY command allows you to:
•
Copy files from one disk or subdirectory to another.
•
Change the name of a file while copying the file (useful for making backup
copies of a file).
The command:
FCOPY new_file = old_file
will make a copy of “old_file”, name the copy “new_file”, and place it in the same
subdirectory as “old_file”. The command:
FCOPY my_file.v2 = a:my_file.v2
will make a copy of “my_file.v2” on the A drive, and place it in the current
subdirectory with the name “my_file.v2”.
The FCOPY command is useful for copying small quantities of files. However, if
you are copying many files, the Adept utility program “DISKCOPY” is more
convenient for copying multiple files. “DISKCOPY” is described in section on
page 71.
To Rename a Disk File
To change a file name without changing its location, use the FRENAME
command. The command:
FRENAME new_name = old_name
V+Operating System User’s Guide, Ver 12.1
63
Chapter 3
Using Directories
will change the name of disk file “old_name” to “new_name”.
To Delete a Disk File
Disk files that are no longer used or needed should be deleted from the disk. This
recovers space on the disk for other files. If you are copying or storing files to a
disk and get a “disk full” message, the only way to continue with the copy or
store operation is to delete some files from the disk. The FDELETE command
removes files from the hard or floppy drives.
To delete a single file, enter the command:
FDELETE old_file
and the file “old_file” will be removed from the current subdirectory. Note that
the file name “old_file” is different from “old_file.v2”. You must specify the entire
file name when deleting files.
To delete all the files in the current subdirectory with the extension “v2”, enter the
command:
FDELETE ∗.v2
To delete all the files in the current subdirectory, enter the command:
FDELETE ∗.∗
The DISKCOPY utility program provides a more versatile and safer way of deleting
large quantities of files. Using this program to delete files is covered in the
Instructions for Adept Utility Programs.
If you have the optional AIM software, the AIM File Manager provides a
graphical interface for copying, renaming, and storing files. See the AIM user’s
guides for details.
Using Directories
The V+ disk file structure allows you to organize your disk files in a manner
similar to a filing cabinet. A file cabinet represents a disk drive; the individual
drawers and dividers in the cabinet are referred to as “directories” or
“subdirectories”. The file folders in the drawers represent a disk file. The papers
in a file represent the programs and other objects that can be placed in a V+ disk
file. Figure 3-2 shows this file structure.
64
V+Operating System User’s Guide, Ver 12.1
Chapter 3
Using Directories
Disk Drive
Subdirectory
File
Programs
& Data
Figure 3-2. Disk File Structure
Understanding the Directory Structure
The V+ file structure is a “hierarchical file system”. Files and subdirectories are
organized in a multilevel tree structure. In order to get to the files stored in lower
levels, you must go through all the levels starting at the top. The top level
directory is the “root” directory (it forms the root of the inverted tree). The root
directory can contain files and other directories. Each directory “under” the root
directory can also contain other directories and files.
There are a few simple rules for using files and subdirectories:
•
Directories have the same naming requirements as files, except they cannot
have an extension.
•
At any one level, all directory and file names must be unique.
•
Each disk can have only one root directory.
Figure 3-3 shows a simple directory structure.
V+Operating System User’s Guide, Ver 12.1
65
Chapter 3
Using Directories
C:\ (root directory)
my_file.v2
PROGS_2
PROGS_1
new_file.v2
DATA_1
my_progs.rv
old_file.v2
my_file.v2
big_file.lc
Figure 3-3. Directory Structure
Understanding Paths
A path consists of the directions to a specific file or directory within the directory
structure. Paths are used with LOAD, FCOPY, FDELETE, and other file-related
commands to identify a particular file. A full path always starts at the root
directory and moves through each level until you reach the desired file. In the
above example, the path to “new_file” starts at the root directory and goes
through subdirectory “PROGS_2” before arriving at “new_file.v2”.1
To specify a path in a command:
1
66
•
Start with the letter of the drive you want to access followed by a colon (“:”)
•
Separate the elements of the path with backslash (“\”)
•
Enter the names of the elements exactly as they were created
Directory names and file names are shown here in capital and small letters to help illustrate the
directory structure. They are normally both shown in all capital letters.
V+Operating System User’s Guide, Ver 12.1
Chapter 3
Using Directories
To load the file “big_file”, enter the command:
LOAD C:\PROGS_2\DATA_1\big_file.lc
The Current Directory
When you are working exclusively within a single subdirectory, it is inconvenient
to specify the full path for every file operation. The DEFAULT command specifies
a default path to use with all commands. To make “DATA_1” the current (default)
directory, enter the command:
DEFAULT DISK = C:\PROGS_2\DATA_1
Figure 3-4 shows the effect of the above command.
DEFAULT DISK = c:\PROGS_2\DATA_1\
C:\ (root directory)
my_file.v2
PROGS_2
PROGS_1
new_file.v2
DATA_1
my_progs.rv
old_file.v2
my_file.v2
big_file.lc
Figure 3-4. Default Directory Specification
After the above default path has been set, the command:
LOAD my_file.v2
will load the copy of “my_file.v2” that is in the subdirectory “DATA_1” rather
than the copy in the root directory.
V+Operating System User’s Guide, Ver 12.1
67
Chapter 3
Using Directories
You can also change the current directory with the CD command. If the current
directory is C:\PROGS_Z and you enter the command:
CD DATA_1
The current directory will change to C:\PROGS_Z\DATA_1. If you now enter the
command:
CD ..
the current directory will become C:\PROGS_Z\. The “..” tells the system to go
up one level in the directory structure (note that there is a space between “CD”
and “..”.
Full Paths
The default subdirectory set with a DEFAULT command can always be
overridden by using a “full path” specification. A full path starts with a backslash
and may include the drive designation. The command:
LOAD C:\PROGS_1\my_progs.rv
will load the disk file “my_progs.rv” in the “PROGS_1” subdirectory regardless
of the default set with a DEFAULT command.
Relative Paths
A partial path can be added to any default path that has been set with the
DEFAULT command. The following commands will load the file “old_file.v2” (as
shown in Figure 3-4.):
DEFAULT DISK = C:\PROGS_2
LOAD DATA_1\old_file.v2
NOTE: A DEFAULT path can be set at system startup using the
controller configuration utility. See “Changing the Default Path” on
page 90.
To Display the Current Path
To show the current path, enter the command:
DEFAULT
The current directory path will be displayed.
Path Examples
Assume you set the default path to C:\PROGS_2\. The following commands will
attempt to load the indicated files (as shown in Figure 3-3):
68
V+Operating System User’s Guide, Ver 12.1
Chapter 3
Using Directories
LOAD my_file.v2
Loads the disk file “my_file.v2” located in C:\PROGS_2\
LOAD DATA_1\my_file.v2
Loads the disk file “my_file.v2” located in C:\PROGS_2\DATA_1\
LOAD C:\PROGS_2\DATA_1\my_file.v2
Loads the disk file “my_file.v2” located in C:\PROGS_2\DATA_1\
The following examples load files from the floppy drive:
LOAD A:my_file.v2
Loads the disk file “my_file.v2” located in A:\
DEFAULT DISK = A:\
LOAD my_file.v2
Loads the disk file “my_file.v2” located in A:\
CD PROGS
LOAD my_file.v2
Loads the disk file “my_file.v2” located in A:\PROGS\
Working With Subdirectories
To View the Contents of a Directory
To view all the files in the current subdirectory, enter the command:
FDIRECTORY
To view all the files in a subdirectory other than the current one, use a path. The
instruction:
FDIRECTORY C:\PROGS_1\DATA_1\
will display the contents of the “DATA_1” subdirectory.
To View Groups of Files
Use wildcards to view a group of files. The command:
FDIRECTORY ∗.v2
V+Operating System User’s Guide, Ver 12.1
69
Chapter 3
Using Directories
will display the files in the current directory that have the extension “v2”. The
command:
FDIRECTORY C:\PROGS_1\file∗.∗
will display the files in the current directory that begin with “file”.
To Create a Subdirectory
To create a new subdirectory directly below the current directory, enter the
command:
FDIRECTORY/C dir_name\
A full path can also be used when creating a subdirectory:
FDIRECTORY/C C:\PROGS_1\DATA_1\DATA_A\
To Delete a Subdirectory
Before a subdirectory can be deleted, the subdirectory must be empty (no disk
files and no subdirectories can be below the directory).
The command:
FDELETE ∗.∗
will delete all the files in the current subdirectory. Since all file-related commands
look only at the current directory or the directory specified at the end of a path, no
files will be touched in any other subdirectories regardless of whether they are
above, below, or on the same level as the current subdirectory. The subdirectory
“DATA_1” can be deleted with either of the following groups of commands
(assuming there are no files in “DATA_1”):
FDELETE C:\PROGS_2\DATA_1\*.*
FDIRECTORY/D C:\PROGS_2\DATA_1\
or:
DEFAULT DISK= C:\PROGS_2\
FDELETE data_1\*.*
FDIRECTORY/D DATA_1\
70
V+Operating System User’s Guide, Ver 12.1
Chapter 3
File Management Using Diskcopy
File Management Using Diskcopy
The Adept utility program DISKCOPY.V2 provides a convenient method of
copying and deleting large groups of disk files. It is particularly useful if you are
installing application programs such as AIM application programs or getting rid
of disk files you no longer use.
To start the diskcopy program:
LOAD \UTIL\DISKCOPY.V21
EXECUTE a.diskcopy
The main menu for the diskcopy program will be displayed.
Copying Multiple Files
1.
From the diskcopy main menu select:
4 => COPY multiple FILES
2.
The program will ask you for the drive that contains the files you want to copy.
Enter a drive letter and press ↵. For example, if the A: drive contains the files
you want to copy, enter “A” after the prompt:
What is the INPUT disk device (e.g. A/C)? A z
3.
The program will ask you which drive you want to copy the files onto. Enter a
drive letter and press ↵. For example, if the files are being copied to the C:
drive, enter “C” after the prompt:
What is the OUTPUT disk device (e.g. A/C)? C z
4.
The program will show the default subdirectory of the output disk and ask
you which files you want to copy. You will generally want to use wildcards to
specify a group of files. For example, to copy all files from the default
subdirectory on the input drive, enter “∗.∗”. In the following example, all files
that end with “.V2” will be copied:
Enter spec of file(s) to copy (blank to exit): *.V2 z
An absolute or relative path can be included in the file
specification.
NOTE:
1
The program can also be loaded from another directory if the correct path is
specified.
V+Operating System User’s Guide, Ver 12.1
71
Chapter 3
File Management Using Diskcopy
5.
The program will show you the default subdirectory of the output drive and
ask you for a subdirectory. To use the default subdirectory, simply press ↵. To
add a relative path, enter the subdirectory path from the default subdirectory.
To ignore the default subdirectory and specify an absolute path, begin the path
specification with a backslash. In this example, the relative path “new\” will
be added to the current default path:
Enter output subdirectory (default is "\vision\"): new\ z
6.
The program will ask you if you want to overwrite automatically disk files
with the same names as new files. If you answer “Y”, any files with the same
name will be deleted and overwritten without warning. If you answer “N”,
you will be advised if files with the same name exist and be given the
opportunity to overwrite or save the existing file.
Do you want existing files automatically superseded
(Y/N)?
7.
The program will now display the name of the first file that matches the “spec
of files to copy”:
NEW.V2
100
22-MAR-93 7:58:34
Copy this file (Y/N/G/Q)
The options are:
•
(Y)es, copy the file and show the next file.
•
(N)o, skip the file and show the next file.
•
(G)o ahead and copy all files matching the “spec of files to copy” without
further prompts (unless you have chosen not to supersede existing files
automatically, in which case the program will stop and ask you what you
want to do each time a duplicate file name is found).
•
(Q)uit and enter a new file specification.
8.
When all the files matching the file specification have been copied, the
program will ask you for a new specification. You can enter a new file
specification and repeat the above process or you can simply press ↵ to return
to the diskcopy main menu.
Deleting Multiple Files
1.
From the diskcopy main menu select:
5 => DELETE multiple FILES
2.
The program will ask you for the drive that contains the files you want to
delete. Enter a drive letter and press ↵. For example, if the A: drive contains the
files you want to delete, enter “A” after the prompt:
What is the letter for the disk unit (e.g. A/C)? A z
72
V+Operating System User’s Guide, Ver 12.1
Chapter 3
Other Disk-Like Devices
3.
The program will show you the default subdirectory and ask you which files
you want to delete. You will generally want to use wildcards to specify a
group of files. For example, to delete all files from the default subdirectory in
the specified drive, enter “∗.∗”.1 In the following example, all files that end
with “.V2” in the default subdirectory will be deleted:
Enter the file spec for deletion (blank to exit): *.V2 z
4.
The program will now display the name of the first file that matches the “file
spec for deletion”:
NEW.V2
100
22-MAR-93 7:58:34
Copy this file (Y/N/G/Q)
The options are:
•
(Y)es, delete the file and show the next file.
•
(N)o, skip the file and show the next file.
•
(G)o ahead and delete all files matching the “file spec for deletion” without
further prompts.
•
(Q)uit and enter a new file specification.
5.
When all the files matching the file specification have been deleted, the
program will ask you for a new specification. You can enter a new file
specification and repeat the above process or you can simply press ↵ to return
to the diskcopy main menu.
Other Disk-Like Devices
Adept offers several options for performing file operations on “disk-like” devices.
The current options for disk-like devices are:
1
•
Remote access to services using the Kermit protocol. See the V+ Language
User’s Guide for details.
•
Remote access using the DDCMP protocol. See the V+ Language User’s Guide
for details.
•
Remote access to services running the NFS (network file services) or FTP (file
transfer protocol). These options require the AdeptNet option and
appropriate licenses. See the AdeptNet User’s Guide for details.
A full or relative path can be included in the file specification.
V+Operating System User’s Guide, Ver 12.1
73
4
Executing V+ Programs
Understanding V+ Programs . . . . . . .
To LOAD a Disk File . . . . . . . .
To Start a Monitor Command Program .
To Start an Executable V+ Program . .
Program Startup Example . . . . . .
Which Program Do I Execute? . . . .
To Halt Execution of a Program. . . .
Emergency Stop . . . . . . . .
Early Program Termination . . . .
Removing Objects From System Memory . .
Understanding Program Modules . . .
.
.
.
.
.
.
.
.
.
.
.
.
.
.
.
.
.
.
.
.
.
.
.
.
.
.
.
.
.
.
.
.
.
.
.
.
.
.
.
.
.
.
.
.
.
.
.
.
.
.
.
.
.
.
.
.
.
.
.
.
.
.
.
.
.
.
.
.
.
.
.
.
.
.
.
.
.
.
.
.
.
.
.
.
.
.
.
.
.
.
.
.
.
.
.
.
.
.
.
.
.
.
.
.
.
.
.
.
.
.
V+Operating System User’s Guide, Ver 12.1
76
76
77
78
78
79
80
80
80
80
82
75
Understanding V+ Programs
Chapter 4
Understanding V+ Programs
Your Adept controller will not perform any useful work until you “run” a
program. Running a V+ program is a two-step process: First you LOAD a disk
file, then you EXECUTE or COMMAND one of the programs that is contained in
the file.
A disk file may contain two different types of programs, Monitor Command
Programs and/or Executable V+ Programs. Monitor command programs perform
system-level functions such as loading files, changing the default path, and
starting executable V+ programs. These programs are similar to MS-DOS batch
programs or UNIX scripts. The commands detailed in the rest of this manual can
be put into monitor command programs. Chapter 7 provides details on writing
basic monitor command programs.
Executable V+ programs contain the logic, motion control, and vision instructions
that actually control a workcell. Creating and modifying executable V+ programs
is covered in the V+ Language User’s Guide and V+ Language Reference Guide.
The documentation for program files delivered by Adept specifies which program
in a disk file is the main program, and whether the main program is a monitor
command program or an executable V+ program. The documentation for
program files supplied by third parties should include this same information.
You can “peek” at a disk file to see what type of programs it contains by entering
the command:
FLIST file_name
The contents of the file will scroll up the monitor window. Use the Scroll Lock
key to pause scrolling. If a program is a monitor command program, all lines in
the program will be preceded with an “MC”. Remember, a disk file can contain
many programs, including both monitor command and executable V+ programs.
To LOAD a Disk File
The controller cannot use the programs and information stored in disk files until
they are loaded into system memory (RAM). The LOAD command takes a copy
of the contents of a disk file and places it in RAM. Figure 4-1 shows the command:
LOAD my_file
This command places the contents of the disk file “my_file” into RAM. “my_file”
contains two programs and the values of variables used by those programs.
76
V+Operating System User’s Guide, Ver 12.1
Understanding V+ Programs
Chapter 4
The LOAD command does not actually start a program: It simply places a copy of
the disk file contents into system RAM so additional commands can start the
program or modify the values of the program variables.
.LOAD my_file
my_file
prog_main
File on
Disk Drive
prog_sub
loc_1
loc_2
names[]
Programs and
Variables in RAM
Figure 4-1. LOADing a Disk File
To see all the programs that have been loaded with the LOAD command, use the
DIRECTORY command. (FDIRECTORY lists files on a disk, DIRECTORY lists
programs in RAM.)
To Start a Monitor Command Program
Once a monitor command program is resident in system memory, the
COMMANDS command starts the program. If the program “init.system” is in
RAM (loaded using the LOAD command) and it is a monitor command program,
the command:
COMMANDS init.system
will start the program. If “init.system” is an executable V+ program, the
preceding instruction will result in the error:
*Can’t mix MC & program instructions*
V+Operating System User’s Guide, Ver 12.1
77
Understanding V+ Programs
Chapter 4
To Start an Executable V+ Program
Once an executable V+ program (and possibly its related programs and variables)
has been LOADed into RAM, the EXECUTE command actually initiates execution
of the program.
Figure 4-2 shows the command:
EXECUTE prog_main ↵
(The program “prog_main” was loaded with the disk file “my_file”.) When
Enter ↵ is pressed, the program begins executing. In the course of execution,
“prog_main” makes use of “prog_sub” and the variables that were loaded with
the disk file “my_file”.
.EXECUTE prog_main
prog_main
prog_sub
loc_1
loc_2
names[]
Programs and
Variables in RAM
Figure 4-2. EXECUTING a V+ Program
If the executable program will control a motion device, the
device must be powered up and calibrated before the program is
executed. See “To Power up the Motion Device” on page 44.
NOTE:
Program Startup Example
Every V+ system is provided with a disk that contains utility programs for
configuring various features of your Adept system. This example will load the
controller configuration file from the floppy disk and execute the configuration
utility. To make sure we are all at the same spot, we will start this example with
the controller turned off. To execute the controller configuration utility:
78
V+Operating System User’s Guide, Ver 12.1
Understanding V+ Programs
Chapter 4
1.
Turn on the controller.
2.
After the start-up sequence is complete, place the Adept Utilities Disk in the
floppy drive.
3.
LOAD the controller configuration file by entering the following command
(the “↵” indicates that the Return or Enter key should be pressed):
LOAD A:CONFIG_C.V2 ↵
4.
EXECUTE the main program by entering the command:
EXECUTE a.config_c ↵
5.
The main menu for the controller configuration utility will be displayed. Select
the “EXIT to system monitor” option by typing “0 ↵”.
6.
Remove the programs from memory. (See section .)
DELETEM a.config_c
NOTE: On A-Series controllers, monitor commands cannot be
entered when the monitor window is closed. To redisplay a closed
monitor window, select “Monitor” from the adept main menu
option.
Which Program Do I Execute?
Normally, a disk file containing programs will have one main program that uses
the other programs in the file. All program files delivered by Adept follow these
conventions:
•
There is only one main program per disk file.
•
The name of the main program is the name of the disk file (without any
extension) proceeded by “a.”. In the previous example, the disk file that holds
the controller configuration files is named “CONFIG_C.V2”. The main
executable program in that file is “a.config_c”.
These conventions are not requirements: Programs that are not supplied by Adept
may follow other conventions. See the documentation provided with the files for
details on which program to execute.
V+Operating System User’s Guide, Ver 12.1
79
Chapter 4
Removing Objects From System Memory
To Halt Execution of a Program
Emergency Stop
To immediately halt a robot or motion device and halt execution of a program,
activate any remote emergency stop connected to the system (such as the red
panic button on the optional remote front panel). This will immediately turn off
power to the motion device and stop the execution of any program currently
attached to the robot or motion device.
Early Program Termination
To halt a program in a nonemergency situation, enter the command:
ABORT ↵
ABORT can be entered even though the normal system prompt (“.”) is not
displayed during program execution. When you type the first letter, an “∗” will
appear where the dot prompt would normally appear. This special prompt is
displayed when commands are being entered while a program is executing.
If a robot is in motion when the ABORT command is entered,
the robot will NOT halt immediately, but will complete the current
motion.
NOTE:
The only time you cannot enter the ABORT command is when the system is
waiting for input from the keyboard. For example, suppose the following
message is displayed in the monitor window:
Are you sure? Y/N z
The typing cursor at the end of the line tells you the system is waiting for you to
enter a response at the keyboard. To halt program execution at this point, hold
down the Ctrl key and press Z. Program execution will halt.
Removing Objects From System Memory
When a program completes, it is not automatically removed from system memory
(RAM). To free up the RAM for use by other programs and data, objects in
memory must be specifically removed with a DELETE_ command. Also, the
LOAD command will not overwrite programs that reside in system memory.
Therefore, if you want to load new programs with identical names, you must
delete the programs currently in RAM. Figure 4-3 shows the various delete
commands and the objects each command removes from memory.
80
V+Operating System User’s Guide, Ver 12.1
Chapter 4
Removing Objects From System Memory
Disk Drive
System RAM
program_a
FDELETE
DELETEM
DELETE
DELETEP
ZERO
data
DELETE
DELETEP
ZERO
loc_1
loc_2
names[]
DELETE
DELETEL
DELETES
DELETER
ZERO
Figure 4-3. Deleting Objects From Memory
Remember, the FDELETE command removes disk files from a disk drive. Once a
disk file is deleted, it cannot be recovered. FDELETE does not remove objects
from RAM (if they have been loaded). The DELETE_ commands remove objects
from RAM—they do not affect the disk files the objects were loaded from. After
objects have been removed from RAM, they can be reloaded using the LOAD
command.
Figure 4-1 summarizes the various delete commands.
Table 4-1. The Delete Commands
Command
Action
DELETE
Deletes all named programs and any programs or variables that are used in
the named programs.
DELETEM
The DELETEM command removes all programs in a module. The
variables used by the programs are not deleted. See “Understanding
Program Modules” on page 82.
DELETEP
Deletes the specified programs from memory. Other programs used by the
specified programs are not deleted, and variables used by the program are
not deleted.
V+Operating System User’s Guide, Ver 12.1
81
Chapter 4
Removing Objects From System Memory
Table 4-1. The Delete Commands (Continued)
Command
Action
DELETEL
Deletes specified location variables.
DELETES
Deletes specified string variables.
DELETER
Deletes numeric (real) variables.
ZERO
Clears ALL system memory (except the operating system).
In normal operations, you are most likely to use the DELETE and ZERO
commands.
Objects do not have to be removed from RAM before different disk files are
loaded and other programs are executed (unless you are loading a program with
the same name as one already in RAM). However, if you get an “out of memory”
message while loading a disk file, the only way to complete the load operation is
to delete objects from system memory.
Understanding Program Modules
When a disk file is loaded, a “module” is created that holds the names of all
programs loaded from the disk file. The name of the created module is the same
as the first program loaded. A module allows you to remove easily all the
programs loaded from a disk file without disturbing programs loaded from other
disk files. For example, if the command:
.LOAD my_file.v2 ↵
loaded the following programs:
a.my_file
mf.check.stuff
mf.do.stuff
mf.init
The MDIRECTORY command will list the modules resident in system memory:
.MDIRECTORY ↵
a.my_file
The DELETEM command will remove the module and all programs in the
module from system memory:
82
V+Operating System User’s Guide, Ver 12.1
Chapter 4
Removing Objects From System Memory
.DELETEM a.my_file ↵
.MDIRECTORY ↵
.
.DIRECTORY ↵
.
V+Operating System User’s Guide, Ver 12.1
83
5
Using Disk Drives
Understanding Disk Drives . . . . . . . . . . . .
Types of Disk Drives . . . . . . . . . . . .
Using Hard Drives . . . . . . . . . . . . . . . .
Backing up Hard Drives . . . . . . . . . .
Formatting Hard Drives . . . . . . . . . . .
Using Floppy Disk Drives . . . . . . . . . . . . .
Care . . . . . . . . . . . . . . . . .
To Prevent Writing to or Erasing a Floppy Disk.
Inserting and Removing Floppy Disks . . . .
Formatting Floppy Disks . . . . . . . . . .
To Format a Floppy Drive . . . . . . . . .
Making System Disks . . . . . . . . . .
V+Operating System User’s Guide, Ver 12.1
.
.
.
.
.
.
.
.
.
.
.
.
.
.
.
.
.
.
.
.
.
.
.
.
.
.
.
.
.
.
.
.
.
.
.
.
.
.
.
.
.
.
.
.
.
.
.
.
.
.
.
.
.
.
.
.
.
.
.
.
.
.
.
.
.
.
.
.
.
.
.
.
86
86
87
87
87
88
88
88
88
89
89
90
85
Chapter 5
Understanding Disk Drives
Understanding Disk Drives
Disk drives provide permanent storage for programs and data. Unlike
information in system memory, information on a disk drive is retained after the
controller is turned off. External hard drives and floppy disks provide almost
unlimited storage capacity. They also allow exchange of information between
controllers.
Types of Disk Drives
The Adept controller uses two types of drives:
•
Internal hard drive
•
Internal floppy drive
Before a disk can store information, it must be formatted. The format process
divides the disk into tracks and sectors that allow data to be accurately stored and
retrieved. Formatting also places a special “directory” file on the disk that keeps
track of where directories and files have been stored, and where free space is
available for storing new data. Figure 5-1 shows how a disk is organized.
Sector
Track
Figure 5-1. Formatted Disk
All drives are formatted with tracks and sectors. When V+ reports the size of a
file, or the amount of free space on a disk, it is reported in sectors. (A sector
contains 512 bytes of information.) The FDIRECTORY command will display the size
of files in a directory.
86
V+Operating System User’s Guide, Ver 12.1
Chapter 5
Using Hard Drives
The system disk drives are assigned letters. Each drive has a unique letter that
allows you to load information from and store information to the different drives.
In an Adept system, the internal hard drive is designated drive C:. The floppy
disk is designated drive A:.
Using Hard Drives
Backing up Hard Drives
Hard disk drives are very reliable storage devices, but they can fail. Data on a
failed disk drive may not be readable and may be completely lost. We strongly
recommend that you make periodic backups of your hard drive. The DISKCOPY
utility is an easy way to copy the contents of your hard disk onto multiple floppy
disks. In the event of a drive failure, these floppy disks can be used to restore the
contents to a new hard drive.
Formatting Hard Drives
The internal hard drive is preformatted and should never need formatting unless
a drive failure occurs and the drive must be replaced.
The FORMAT.V2 utility program formats hard drives—the FORMAT monitor
command will not format hard drives. To format a hard drive:
1.
Place the Adept Utility disk in the floppy drive and enter:
LOAD A:FORMAT.V21
EXECUTE a.format
2.
The main menu for the format program will be displayed. Select:
1 => Format the hard drive
3.
The program will prompt you for verification before beginning the format
process.
CAUTION: Formatting erases ALL information on a disk. The data
on the disk cannot be reclaimed.
1
The program can also be loaded from the C: drive if the correct path is specified.
V+Operating System User’s Guide, Ver 12.1
87
Chapter 5
4.
Using Floppy Disk Drives
When formatting is complete, press ↵ to return to the main menu.
Using Floppy Disk Drives
The internal floppy drive uses either 3.5" HDDS or 3.5" DDDS hard-jacketed
floppy disks. HDDS (High-Density, Double-Sided) disks have twice as many
sectors as DDDS (Double-Density, Double-Sided) disks. High-density disks are
marked with the HD symbol and have an extra window opposite the
write-protect window (see Figure 5-2).1
Care
The 3-1/2" floppy disks are hard-jacketed disks that are protected against damage
from handling. However, all disks, whether hard or soft jacketed, should be
protected from exposure to dust, heat, and magnetic fields to prevent data loss.
To Prevent Writing to or Erasing a Floppy Disk
Figure 5-2 shows a standard 3-1/2" floppy disk. If the write protect window on
the front of the disk is open, the disk is write protected. Any attempt to store or
delete files on a write-protected disk will result in the error:
*Protection error*
Opening the write-protection window prevents accidental deletion or alteration
of disk files. Closing the write-protection window allows storing, deleting, and
alteration of disk files. Remember:
•
window open means the disk is write protected;
•
window closed means the disk is not write protected.
Inserting and Removing Floppy Disks
To insert a disk, place the disk in the drive slot as shown in Figure 5-2 and seat
with slight finger pressure. To remove a disk, press the eject button. This will eject
the disk from the drive.
1
88
Adept allows formatting of single sided floppy disks. However, single-sided disks are almost
obsolete, and you are unlikely to use them. The most common floppy disks are double-sided,
double-density and double-sided, high-density.
V+Operating System User’s Guide, Ver 12.1
Chapter 5
Using Floppy Disk Drives
CAUTION: When the drive activity light is lit (see Figure 5-2),
indicating that the drive is being accessed, do not attempt to remove
the disk. Damage to the disk drive and loss of data may occur if a
disk is removed during a disk access.
Formatting Floppy Disks
High-density disks are marked with the “HD” symbol and have an extra hole
opposite the write-protect window (see Figure 5-2). High-density disks can be
formatted only as high-density disks. Double-density disks can be formatted only
as double-density disks.
High Density
Mark and Window
Eject Button
Drive Activity Light
Insertion Arrow
Write-Protect
Window
Figure 5-2. Inserting a Standard 3-1/2" Floppy Disk
To Format a Floppy Drive
1.
Insert the disk into the drive (with the write-protect window closed).
2.
Enter the command:
V+Operating System User’s Guide, Ver 12.1
89
Chapter 5
Using Floppy Disk Drives
FORMAT a: ↵(for high-density formatting)
or
FORMAT a:/h ↵(for double-density formatting)
3.
Respond “Y” when the system asks for verification that you want to format the
disk.
Formatting erases ALL information on a disk. The data
on the disk cannot be reclaimed.
CAUTION:
Making System Disks
To make a backup copy of your current operating system, use the DISKCOPY or
CONFIG_C utility. These utilities are described in Instructions for Adept Utility
Programs..
90
V+Operating System User’s Guide, Ver 12.1
part 2
Adept System Customization
6
Customizing an Adept System
Customizing the Controller Hardware. . .
Wyse Type Terminal Baud Rate .
Default Boot Drive. . . . . . .
Program Autoload . . . . . .
V+ Output . . . . . . . . . .
System Software Switches . . . . . . .
The Controller Configuration Utility . . . .
The Default Path . . . . . . . . . . .
Changing the Default Path . . . .
The Default Monitor Speed . . . . . . .
Changing the Default Monitor Speed
Serial I/O Configuration . . . . . . . .
Serial I/O Groups . . . . . . . .
Changing the Serial Line Attributes .
Analog I/O Configuration . . . . . . .
Additional Configuration Options . . . .
.
.
.
.
.
.
.
.
.
.
.
.
.
.
.
.
.
.
.
.
.
.
.
.
.
.
.
.
.
.
.
.
.
.
.
.
.
.
.
.
.
.
.
.
.
.
.
.
.
.
.
.
.
.
.
.
.
.
.
.
.
.
.
.
.
.
.
.
.
.
.
.
.
.
.
.
.
.
.
.
.
.
.
.
.
.
.
.
.
.
.
.
.
.
.
.
.
.
.
.
.
.
.
.
.
.
.
.
.
.
.
.
.
.
.
.
.
.
.
.
.
.
.
.
.
.
.
.
.
.
.
.
.
.
.
.
.
.
.
.
.
.
.
.
.
.
.
.
.
.
.
.
.
.
.
.
.
.
.
.
.
.
.
.
.
.
.
.
.
.
.
.
.
.
.
.
V+Operating System User’s Guide, Ver 12.1
94
95
95
95
95
97
98
99
99
100
100
102
102
103
104
106
93
Chapter 6
Customizing the Controller Hardware
This chapter includes directions on making the following changes to your system:
•
Enable autoload of a program at system startup.
•
Selecting an A-Series or S-Series monitor.
•
Setting the default path specification that is set each time the controller is
turned on.
•
Setting the start-up robot monitor SPEED.
•
Setting the serial I/O configuration.
•
Setting the analog I/O configuration.
•
Setting of certain system switches.
The majority of custom operations are made with the controller configuration
utility CONFIG_C.V2. A few operations require setting switches on the controller.
Most controller configuration changes will not take effect until the controller has
been restarted.
The changes made with the controller configuration utility are written to the
operating system disk. Therefore, if you make changes to the controller
configuration and then start the system with a different system disk, a different
controller configuration may be in place. The user-definable characteristics of the
operating system can be stored in a separate file. In the event a drive failure
results in the loss of your operating system, these files can be used to configure a
new operating system copy to the exact configuration of the lost operating
system. You can also make an exact copy of the operating system and its current
configuration on a floppy disk for backup (see the Instructions for Adept Utility
Programs).
Customizing the Controller Hardware
When the controller is turned on, the system looks at the setting of the
configuration DIP switch on the SIO module. This switch determines several
options the system uses during the boot procedure. See the Adept MV Controller
User's Guide for the location of the configuration DIP switch on the SIO module.
The options are:
94
•
Whether to autoload a program at startup.
•
Where V+ output should be displayed.
V+Operating System User’s Guide, Ver 12.1
Chapter 6
Customizing the Controller Hardware
Wyse Type Terminal Baud Rate
To change the baud rate for a Wyse type terminal, you will have to make a
hardware and a software change. The hardware change affects the
communication rate during the system boot procedure and the software change
affects the rate during normal operation. The hardware change is made to the
Configuration DIP switch on the system processor. Table 6-1 shows the switch
settings for various baud rates. The software change is described in the next
section.
Default Boot Drive
If your system has a hard drive, it should be configured to boot from that drive.
Otherwise it will attempt to boot from drive A. (If the default boot drive does not
contain the operating system files, you will be asked to specify a different drive.)
To change the default boot drive to “A” or “C”, change position 8 on the
Configuration DIP switch as shown in Table 6-1. The default drive is used only to
select a drive for loading the operating system. Once the operating system is
loaded, the default path becomes active and is used for file related commands (see
section ).
Program Autoload
To configure the system to autoload a disk file and run a program at startup, set
position 1 on the Configuration DIP switch as shown in Table 6-1 If the switch is
set to autoload, the system will load a file named “AUTO.V2” when it boots and
then execute a monitor command program named “AUTO”. The default path is
used when attempting to LOAD the auto file. See section for details on setting the
default path. The user must write the program “auto”, and store it in the file
“AUTO.V2” on the default disk. See Chapter 7 for more information about
autoload command programs.
V+ Output
On S-Series systems switch position 3 is not used and the V+ output is
automatically sent to the terminal.
On A-Series systems, switch position 3 is normally off. However, if you have a
terminal attached to the system processor board, you can direct V+ output to the
terminal by setting switch position 3 to open. Graphics and vision output will still
be sent to the color monitor.
V+Operating System User’s Guide, Ver 12.1
95
Chapter 6
Customizing the Controller Hardware
If your system includes the optional AdeptWindows PC interface, switch position
4 directs V+ output to the serial or ethernet connection to the PC running
AdeptWindows PC
Table 6-1. Configuration DIP Switch Settings
Position
Setting
Effects
Off
Do not autostart
On
Autostart
Autostart
1:
DDT editions
2:
Off
Reserved, set to Off
Off
V+ output to the monitor window via graphics (if
possible)
On
V+ output to a terminal connected to CPU #1
Monitor
3:
AdeptWindows PC
4:
Off
V+ graphics via VGB
On
V+ graphics via AdeptWindows
Network connection (Switch 5 is ignored if Switch 4 is Off)
5:
Off
AdeptWindows via Ethernet
On
AdeptWindows via serial port (if switch 4 is on)
Network Addressing
6:
Off
Use network address data in controller NVRAM
On
Use default network address data
Diagnostics
7 and 8
96
Off
Reserved for diagnostics (Set to Off)
V+Operating System User’s Guide, Ver 12.1
Chapter 6
System Software Switches
System Software Switches
Several controller options can be enabled/disabled with the ENABLE/DISABLE
monitor commands. Most of these switches should be controlled by executing
programs and not changed from the monitor prompt. Table 6-2 shows the
switches you are likely to change from the monitor prompt,
Table 6-2. Basic System Switches
Switch
Use
Default
BELT
Used to turn on the conveyor tracking features of V+ (if
the option is installed).
OFF
This switch must be enabled before any of the special
conveyor tracking instructions can be executed. When
BELT is disabled, the conveyor tracking software has a
minimal impact on the overall performance of the
system.
DRY.RUN
Enable/disable sending of motion commands to the
robot. Enable this switch to test programs for proper
logical flow and correct external communication
without having to worry about the robot running into
something.
OFF
(Also see the TRACE switch, which is useful during
program checkout.) The manual control pendant can
still be used to move the robot when DRY.RUN is
enabled.
FORCE
Controls whether the stop-on-force feature of the V+
system is active (to enable this switch the force option
must be installed on your system).
OFF
POWER
Tracks the status of Robot Power; this switch is
automatically enabled whenever Robot Power is
turned on. This switch can also be used to turn Robot
Power on or off—enabling the switch turns on Robot
Power, and disabling the switch turns off Robot Power.
OFF
To enable a switch, type ENABLE followed by a space and the switch name. For
example:
ENABLE DRY.RUN
V+Operating System User’s Guide, Ver 12.1
97
Chapter 6
The Controller Configuration Utility
To disable a switch, use the DISABLE monitor commands. For example:
DISABLE DRY.RUN
The Controller Configuration Utility
The remaining sections in this chapter use the Adept controller configuration
utility to customize the controller. The controller configuration utility is supplied
on the Adept Utility disk.
To run the utility:
1.
Place the utility disk in drive A (if the utility programs have been copied to
the hard disk, the controller configuration utility can be run from the hard
drive by substituting “A:” with the correct drive and path in step 2)
2.
Load the controller configuration utility “CONFIG_C.V2”:
LOAD A:CONFIG_C
3.
When the file is loaded, execute the program “a.config_c”.
EXECUTE a.config_c
4.
The following main menu will be displayed.
0 =>EXIT to system monitor
1 =>V+ Installation
2 =>V+ System Configuration Data
3 =>Robots and Device Modules
4 =>Controller NVRAM
To edit the system configuration:
1.
Select menu item 2:
2 =>V+ system Data
2.
Select menu item 2:
2=> EDIT system CONFIGURATION
3.
You will be asked to enter the letter of the drive containing the system files. If,
for example, the system files are on the hard drive, respond:
C ↵
98
V+Operating System User’s Guide, Ver 12.1
Chapter 6
The Default Path
4.
The configuration submenu will be displayed. At this point, you can edit the
various system configuration options. The most commonly changed options
are covered in the following sections. The complete set of options is detailed in
the Instructions for Adept Utility Programs.
To activate system configuration changes:
1.
Turn off the controller, wait five seconds, and turn the controller back on.
(Changes made to the system configuration file will not take effect until the
system is restarted.)
The Default Path
The default disk specifies the drive unit and directory path that file-related
commands such as LOAD and FDIRECTORY will use when accessing a disk
drive.
The default disk is set at system startup and is in effect until it is changed by a
DEFAULT monitor command. The default disk can always be ignored by
specifying a full path (a path that starts with a disk designation—see Chapter 3).
Changing the Default Path
To change the default path set at system startup:
1.
Start the controller configuration utility as described in Chapter 6.
2.
From the configuration submenu, select:
10
=> Change SYSTEM configuration
3.
The program will display all system configuration options and display the first
option for editing. If the line beginning with “DEFAULT_DISK =” is not
displayed, enter “N” and press ↵ until it is displayed.
4.
The program will show you the current default disk and then ask if you want
to edit it. Enter “Y” and press ↵.
5.
The program will ask if you want to delete the statement containing the
default disk. Enter “N” and press ↵.
6.
The program will show you the current default path. Enter the new path
immediately after the displayed path. For example, if the current path is “A:”
and you want to change it to “C:\utilities\”, the program will display:
: Value = "a:" z
7.
Type “c:\utilities\” immediately after the displayed path:
V+Operating System User’s Guide, Ver 12.1
99
Chapter 6
The Default Monitor Speed
: Value = "a:" c:\utilities\z
and press ↵.
8.
The program will show you the new value and ask you if you want to edit it.
If you have specified the correct path, enter “N” and press ↵.
9.
The next configuration option will be displayed. Enter “Q” and press ↵.
10. The program will ask if you want to add a new statement. Enter “N” and
press ↵ to return to the edit configuration submenu.
11. From this submenu select:
0 =>Done editing
12. The program will ask if you want to save the configuration to disk. Enter “Y”
and press ↵. The new configuration data will be written to the disk. When the
data is stored, press ↵ and the main menu will be displayed.
13. To see if your changes have been made correctly, select:
1 => DISPLAY system CONFIGURATION
Enter the system drive letter and the system configuration will be displayed.
Press the spacebar until the “.SYSTEM” section is displayed. The new default
disk specification should appear in the “.SYSTEM” section.
14. Press the spacebar until all options have been displayed and then press ↵ to
display the main menu.
15. Exit the controller configuration utility by selecting:
0 =>EXIT to system monitor
The Default Monitor Speed
The default monitor speed specifies the monitor speed that will be in effect for all
programs that control a motion device. As delivered from Adept, the default
monitor speed is 50. The default monitor speed is set at system startup and is in
effect until it is changed by a SPEED monitor command.
Changing the Default Monitor Speed
To change the default monitor speed set at system startup:
100
1.
Start the controller configuration utility as described in Chapter 6.
2.
From the configuration submenu, select:
V+Operating System User’s Guide, Ver 12.1
Chapter 6
The Default Monitor Speed
10
=> Change SYSTEM configuration
3.
The program will display all system configuration options and display the first
option for editing. If the line beginning with “DEFAULT_SPEED =” is not
already displayed, enter “N” and press ↵ until it is displayed.
4.
The program shows you the current default speed and then asks if you want
to edit it. Enter “Y” and press ↵.
5.
The program will ask if you want to delete the statement containing the
default speed. Enter “N” and press ↵.
6.
The program will show you the current default speed. Enter the new speed
immediately after the displayed path. For example, if the current speed is 50
and you want to change it to 100, the program will display:
: Value = "50" z
7.
Type “100” immediately after the displayed speed:
: Value = "50" 100z
and press ↵.
8.
The program will show you the new value and ask you if you want to edit it.
If you have specified the correct speed, enter “N” and press ↵.
9.
The next configuration option will be displayed. Enter “Q” and press ↵.
10. The program will ask if you want to add a new statement. Enter “N” and
press ↵ to return to the edit configuration submenu.
11. From this submenu select:
0 =>Done editing
12. The program will ask you if you want to save the configuration to disk. Enter
“Y” and press ↵. The new configuration data will be written to the disk. When
the data is stored, press ↵ and the main menu will be displayed.
13. To see if your changes have been made correctly, select:
1 => DISPLAY system CONFIGURATION
Enter the system drive letter and the system configuration will be displayed.
Press the spacebar until the “.SYSTEM” section is displayed. The new default
speed specification should appear in the “.SYSTEM” section.
14. Press the spacebar until all options have been displayed, and then press ↵ to
display the main menu.
15. Exit the controller configuration utility by selecting:
0 =>EXIT to system monitor
V+Operating System User’s Guide, Ver 12.1
101
Chapter 6
Serial I/O Configuration
Serial I/O Configuration
The default serial IO configuration is set at system startup and is in effect until
changed with an FSET monitor command. (Executing programs may also change
the serial IO configuration). The serial IO attributes, attribute use, default value,
and possible values are shown in Table 6-3.
Serial I/O Groups
There are two groups of serial lines, the global serial lines on the SIO module and
the local serial lines available on each system processor module. The global serial
lines can be accessed by all system processor modules. The local serial lines can be
accessed only by the system processor module they are attached to. As delivered
by Adept, each serial line has a statement in the configuration file (statements that
reference uninstalled lines are ignored). The configuration utility identifies the
serial lines on the SIO module as GLOBAL_PORT followed by a number that
refers to the serial port numbers on the SIO front panel (port #4 is the FP/MCP
connection). The serial lines on the system processor modules are shown as
LOCAL_PORT followed by a number that corresponds to the processor board
number, and a number that refers to the serial port numbers on the system
processor. The processor board number is determined by an addressing switch on
the processor board (see the Adept MV Controller User's Guide). The person
setting up a controller with multiple processors should identify the number of
each system processor.
Table 6-3. Serial I/O Attributes
Attribute
Use
Default
Other possible
Driver
Specifies the device attached to the
serial line or the communications
protocol used by the line.
Serial
Pendant,
Monitor, Kermit,
DDCMP
Speed
Specifies the communication baud
rate used by the serial line. Must
match the rate of the connected
device.
9600
110, 300, 600,
1,200, 2,400,
4,800, 7,200,
19,200, 38,400
Byte
length
Specifies whether ASCII bytes are
transmitted with 7 or 8 bits.
8
7
Parity
Specifies the parity checking
scheme used.
None
Odd, Even
102
V+Operating System User’s Guide, Ver 12.1
Chapter 6
Serial I/O Configuration
Table 6-3. Serial I/O Attributes (Continued)
Attribute
Use
Default
Other possible
Stop bits
Specifies the number of stop bits
used.
1
2
Flow
Specifies the modem flow control
to use.
None
XON_XOFF,
Modem
Flush
Determines if a Ctrl+O character
(ASCII 15) received by V+ should
flush the output of the associated
transmitter (applies only to
TERMINAL and SERIAL devices).
Off
On
DTR
Specifies whether the Data
Terminal Ready signal is asserted.
On
Off
Multidrop
Controls whether the RS-485 line
on the Adept CPU is to be used in
multidrop mode.
Off
On
Buffer size
Specifies the size of the
communications buffer.
100
100 - 25,500 bytes
Changing the Serial Line Attributes
To change the serial line attributes set at system startup:
1.
Start the controller configuration utility as described in Chapter 6.
2.
From the configuration submenu, select:
8
=> Change SERIAL configuration
3.
The program will display all the defined serial I/O lines and display the first
definition for editing. If the serial line you want to configure is not displayed,
enter “N” and press ↵ until the correct line is displayed.
4.
The program will show you the current configuration and then ask if you want
to edit it. Enter “Y” and press ↵.
5.
The program will ask if you want to delete the statement. Enter “N” and press
↵.
6.
The program will now cycle through each serial line attribute, display the
current and the possible settings, and allow you to change the attribute. To
leave the attribute unchanged, simply press ↵. To change the attribute, enter
the number corresponding to the desired value.
V+Operating System User’s Guide, Ver 12.1
103
Chapter 6
Analog I/O Configuration
7.
After all individual attributes for a given serial line have been displayed for
editing, the program will display the current attributes and ask if you want to
edit them. If you have specified the correct attributes, enter “N” and press ↵.
8.
The next serial line configuration will be displayed. If you have made all the
desired configuration changes, enter “Q” and press ↵.
9.
The program will ask if you want to add a new statement. Enter “N” and
press ↵ to return to the edit configuration submenu.
10. From this submenu select:
0 =>Done editing
11. The program will ask if you want to save the configuration to disk. Enter “Y”
and press ↵. The new configuration data will be written to the disk. When the
data is stored, press ↵ and the main menu will be displayed.
12. To see if your changes have been made correctly, select:
1 => DISPLAY system CONFIGURATION
Enter the system drive letter and the system configuration will be displayed.
Press the spacebar until the “.SERIAL” section is displayed. The new
configuration for each serial line will be displayed.
13. Press the spacebar until all options have been displayed, and then press ↵ to
display the main menu.
14. Exit the controller configuration utility by selecting:
0 =>EXIT to system monitor
Analog I/O Configuration
The analog I/O configuration is set during system startup and cannot be
changed. The configuration must match the hardware setup of the analog I/O
module. See the Adept MV Controller User's Guide for details on hardware setup.
The change that can be made to both analog input and output channels is:
•
Bipolar vs. unipolar I/O. If any of the ± voltage ranges (±5V, ±10V, etc.) are
selected in the hardware setup, the software setup must specify bipolar I/O.
If a positive-only voltage range is hardware selected, the software must
specify unipolar I/O. For input channels, bipolar/unipolar must be selected
for all channels on the board. For output channels, bipolar/unipolar can be
selected for each channel.
The change that can be made to analog input channels is:
104
V+Operating System User’s Guide, Ver 12.1
Chapter 6
•
Analog I/O Configuration
Single-end vs. differential input. Single-ended input uses the returned value
of each input channel. Differential input uses the difference between returned
values on pairs of input channels. The software setup must match the
hardware setup.
To change the analog line attributes set at system startup:
1.
Start the controller configuration utility as described in Chapter 6.
2.
From the configuration submenu, select:
3
=> Change ANALOG_INPUT configuration
4
=> Change ANALOG_OUTPUT configuration
or
3.
The program will display all the defined analog input boards or all the defined
output channels and display the first definition for editing. If the analog board
or channel you want to configure is not displayed, enter “N” and press ↵ until
the correct line is displayed.
4.
The program will show you the current configuration and then ask if you want
to edit it. Enter “Y” and press ↵.
5.
The program will ask if you want to delete the statement. Enter “N” and press
↵.
6.
The program will now cycle through each analog board or channel, display the
current and the possible settings, and ask if you want to change the attribute.
To leave the attribute unchanged, simply press ↵. To change the attribute,
enter the number corresponding to the desired value.
7.
After all attributes have been displayed for editing, the program will display
the new set of attributes and ask if you want to edit them. If you have specified
the correct attributes, enter “N” and press ↵.
8.
The next analog board or channel configuration will be displayed. If you have
made all the desired configuration changes, enter “Q” and press ↵.
9.
To see if your changes have been made correctly, select:
1 => DISPLAY system CONFIGURATION
Enter the system drive letter, and the system configuration will be displayed.
Press the spacebar until the “ANALOG_INPUT” or “ANALOG_OUTPUT”
section is displayed. The new configuration for each analog board or channel
will be displayed.
10. Press the spacebar until all options have been displayed and then press ↵ to
display the main menu.
11. Exit the controller configuration utility by selecting:
V+Operating System User’s Guide, Ver 12.1
105
Chapter 6
Additional Configuration Options
0 =>EXIT to system monitor
Additional Configuration Options
There are several other controller configuration options that may be changed.
These options can significantly change the way programs execute and should be
made only by system programmers who are very familiar with the Adept
operating system. These options are detailed in the Instructions for Adept Utility
Programs. The additional options are:
106
•
Which system processors can run V+ programs (default is all system
processors)
•
Use of the high-speed digital I/O signals for position latches or vision
triggers (default is no high-speed latches or triggers)
•
Assignment of kinematic modules to robots (see the AdeptMotion VME
User’s Guide)
•
Assignment of servo boards to system processor boards (see the AdeptMotion
VME User’s Guide)
•
The number of graphics windows (default = 10) and icons (default = 20) that
may be open at one time
•
The time interval for pointer device double-clicks (default = 10ms)
•
The servo interrupt rate (see the AdeptMotion VME User’s Guide)
•
The task/program priority matrix (see the V+ Language User’s Guide)
•
The vision memory allocation (see the AdeptVision User’s Guide)
V+Operating System User’s Guide, Ver 12.1
Command Programs
Creating Command Programs . . . . . . . . . . . . .
Command Program Names . . . . . . . . . . . .
Creating a Command Program . . . . . . . . . .
Running Command Programs . . . . . . . . . . . . . .
Starting Command Programs From the System Terminal
Starting Command Programs From the Manual
Control Pendant . . . . . . . . . . . . . . .
Autostarting a Command Program . . . . . . . . .
Controlling Command Programs . . . . . . . . . . . .
Command Programs and V+ Language Keywords . . .
Example Command Program . . . . . . . . . . . . . .
V+Operating System User’s Guide, Ver 12.1
7
.
.
.
.
.
.
.
.
.
.
.
.
.
.
.
.
.
.
.
.
.
.
.
.
.
.
.
.
.
.
108
108
108
110
110
110
111
111
112
113
107
Chapter 7
Creating Command Programs
Command programs are special programs that consist of a series of monitor
commands. Monitor command programs automate system startup and other
frequently executed monitor command sequences. Command programs can be
started from the system terminal or from the manual control pendant. With the
autostart feature, they can be started automatically when the Adept system is
turned on.
Creating Command Programs
Command programs are created using the SEE program editor. Complete details
on running the SEE editor are contained in the V+ Language User’s Guide. This
chapter shows you how to create simple command programs.
Command programs can contain all the V+ monitor commands except the DONE,
TEACH, and ZERO commands and editor commands. (The SEE editor can be
invoked by a command program.)
Several commands require subsequent input from the user. For example,
CALIBRATE and DELETEP normally require confirmation, and POINT and
HERE normally require responses to the query “Change?”. When commands
such as these are processed in a command program, the commands will be
performed without any prompts being issued. Make sure your monitor command
programs can execute correctly without operator response.
Every nonblank line of a monitor command program must contain either a
monitor command or a comment.
Command Program Names
Command programs are stored as elements in a V+ disk file. The disk file, but not
the file name, must conform to V+ disk file name conventions (see “File Names”
on page 60). Command program names can have up to 15 characters, must begin
with a character, and can contain characters, numbers, periods, and underline
characters.
Creating a Command Program
To create a monitor command program:
1.
108
Open the SEE editor with the SEE command followed by the name of the
program you want to create. For example, to create a program named
“my.cmd.program”, enter the command:
V+Operating System User’s Guide, Ver 12.1
Chapter 7
Creating Command Programs
SEE my.cmd.program ↵
2.
The SEE editor will open, and a message at the bottom of the editor will tell
you that “my.cmd.program” does not exist and ask if you want to create it.
Respond “y” and the SEE editor will open the program and display the
program name at the top of the editor window.
3.
Place the SEE editor in “insert” mode by pressing the “i” key. (When the SEE
editor is first opened, it is in “command” mode and expects you to enter editor
instructions rather than the text of monitor commands.)
4.
Enter the commands you want the command program to perform. The SEE
editor normally expects instructions from the V+ programming language and
not monitor commands from the V+ operating system. To let the SEE editor
know you are entering a monitor command, precede each command with
“MC” and a space. For example, to enter the instructions to load the file
“my_file” and execute a program “a.my_file”, type:
MC LOAD MY_FILE ↵
MC EXECUTE A.MY_FILE ↵
The SEE editor ignores the case of command program
statements. You can enter command lines in any combination of
lower- and uppercase letters.
NOTE:
If you enter a line and the SEE editor places a question mark in front of it, the
line is not acceptable to the editor. Most likely you have not preceded the line
with “MC” and a space. To correct the line, use the up and down arrow keys
to move the cursor to the line, use the left and right arrow keys to place the
cursor to the right of the incorrect character, and use the backspace key to
erase it. Then enter the correct character.
When editing regular programs, the V+ editors
automatically check the syntax of each line as it is completed. That is
not done when entering lines in a command program. Thus, you
must make sure the command on each “MC” line has a valid
monitor command, the command is spelled correctly, and any
required parameters are included.
NOTE:
5.
Exit the SEE editor. When you have finished entering monitor commands,
press the Exit (F4) key. If all lines in the program are acceptable, you will be
returned to the system prompt.
6.
Store your program to a disk file. Your program now exists only in RAM and
must be saved to a disk drive. To store the program “my.cmd.program” on the
disk file “my_cmd.pg” in the default subdirectory, enter the command:
STOREP MY_CMD.PG = MY.CMD.PROGRAM ↵
7.
The program can now be loaded and run.
V+Operating System User’s Guide, Ver 12.1
109
Chapter 7
Running Command Programs
Running Command Programs
There are three ways to run command programs: from the system terminal, from
the manual control pendant, or automatically when the controller is turned on.
Starting Command Programs From the System Terminal
The EXECUTE command expects programs that contain V+ program instructions,
not monitor commands. If you use the EXECUTE command to run a program
with lines that begin with “MC”, the program will abort and you will get a
message indicating that you cannot mix program instructions and monitor
commands. The COMMANDS monitor command starts a command program. To
run the command program that was created in the previous section, enter the
commands:
LOAD my_cmd.pg
COMMANDS my.cmd.program
Starting Command Programs From the Manual Control Pendant
The CMD buttons on the pendant will start monitor command programs. (The
key switch on the optional front panel of the controller must be at the
“PENDANT” position before command programs can be initiated from the
pendant.)
The pendant display will show:
Enter last two digits of file name:
auto_
Enter one or two digits and press REC/DONE. The pendant LCD will prompt
you to place the controller key switch in the “terminal” position and press the
controller
“PROGRAM START “ button on the controller. The system will then attempt to
load the file “AUTOxx.V2” from the default disk, and COMMAND the program
“autoxx” (xx refers to the digits you entered). The program file AUTOxx.V2 must
reside on the default disk, and it must contain a monitor command program
named “autoxx”. If the file does not exist, or does not contain a correctly named
program, the operation will be aborted and the appropriate error message will be
displayed on the LCD. For example, if you had entered “9”, the system would
attempt to load the file AUTO9.V2 and COMMAND the program “auto9”.
110
V+Operating System User’s Guide, Ver 12.1
Chapter 7
Controlling Command Programs
NOTE: As a safety feature, you will have to press the program start
button on the optional front panel before programs commanded
from the MCP will begin.
Autostarting a Command Program
A monitor command program can be loaded and started automatically when the
controller is turned on if the following conditions have been met:
1.
The autoload option must be selected on the controller configuration DIP
switch.
2.
A disk file with the name “AUTO.V2” must reside on the default disk. See
“The Default Path” on page 99 for details on specifying the default disk.
3.
The “AUTO.V2” disk file must contain a program named “auto”. “Auto” must
be a monitor command program. (Other programs can be stored in the disk file
“AUTO.V2”.)
When the controller is turned on, the operating system is loaded, the default disk
specification is set, and:
1.
The command “LOAD auto” is issued.1
2.
The command “COMMANDS auto” is issued.
The V+ system does not wait for Robot Power to be turned
on, or for any other event or condition. The autostart command
program must explicitly invoke any such functions, or they must be
performed by programs invoked by the command program. For
example, if you want to require that the operator press the
PROGRAM START button on the controller when the command
program is processed, you must include a WAIT.START command
in the command program.
NOTE:
Controlling Command Programs
After a command program is initiated, it will process all the commands in the
program until one of the following events occurs:
1.
1
The end of the command program is reached.
In multiple CPU systems, CPU #2 will load the file “AUTO02.V2” and execute the program
“auto02”, CPU #3 will load “AUTO03.V2” and execute the program “auto03”, etc.
V+Operating System User’s Guide, Ver 12.1
111
Chapter 7
Controlling Command Programs
2.
A WAIT.START command is processed in the command program. (This will
suspend processing of the command program until the PROGRAM START
button is pressed or until a specified condition is satisfied.)
3.
A CYCLE.END command is processed in the command program, and the
referenced program task is executing. (That will suspend processing of the
command program until the referenced program task finishes executing.)
A command program will not be suspended when an
EXECUTE command is processed. The command program will
continue with the next command after initiating execution of the
specified application program. A CYCLE.END command must be
included in the command program to make it wait for the
application program to complete before processing the next step in
the command program.
NOTE:
4.
The Ctrl key is held down while the “C” key is pressed. (This will terminate
processing of the command program.)
5.
Another command program is invoked from within the active command
program. (Unlike starting an executable program, control will not return to the
first command program when the second command program completes.)
6.
An error condition results when a statement is processing in the command
program.
Command Programs and V+ Language Keywords
The V+ programming language is described in the V+ Language User’s Guide and
the V+ Language Reference Guide.
Normally, a command program contains only monitor commands. However,
language keywords can be included by using the DO monitor command. To
include a language keyword in a monitor command program, type a line with the
format:
MC DO keyword param1
Any parameters to the language keyword must be specified by value—variable
names will not be accepted.
V+ control instructions (for example, GOTO and IF) will be ignored in a
command program. Command programs can proceed only in a top-down
manner, from the first line to the last.
112
V+Operating System User’s Guide, Ver 12.1
Chapter 7
Example Command Program
Example Command Program
The following monitor command program shows a simple autostart program:
1 .PROGRAM auto()
2 ;This program will perform startup procedures for the
3 ; motion device, load a program file, move the device
4 ; to a safe location, and execute the main program.
5
MC WAIT.START
6
MC ENABLE POWER
7
MC CALIBRATE
8
MC LOAD main.v2
9
MC DO MOVE safe
10 MC EXECUTE motion, -1
11 .END
The lines in this monitor command program are described below:
1.
This line is entered automatically when the program is created.
2.
These are comment lines. Notice that each line begins with a semicolon, “;”.
Lines beginning with a semicolon are ignored during execution.
1.
If the system controller has an optional front panel, wait for the operator to
press the PROGRAM START button.
Before processing a command program that turns on
High Power, the operator must make sure the robot area is clear.
WARNING:
2.
Turn on High Power.
3.
Initiate the CALIBRATE sequence.
4.
Load the file “main.v2” using the default path specification.
5.
Move the robot to the location named “safe” (assumed to be stored in
“main.v2” or already in memory).
6.
Initiate continuous execution of the program “motion” (assumed to have been
loaded from “main.v2” or already in memory).
V+Operating System User’s Guide, Ver 12.1
113
Chapter 7
7.
Example Command Program
This line is added automatically after you exit the SEE editor.
This program could be initiated by the monitor command “COMMANDS auto”.
The program could also be initiated automatically when the system is turned on
(as described in “Autostarting a Command Program” on page 111).
114
V+Operating System User’s Guide, Ver 12.1
System Messages
A
While the V+ system is being used, it is possible for hardware and software errors
to occur. For example, if commands or instructions are not entered in the correct
way, V+ rejects the input. The usual response is to output an error message to the
system terminal indicating what is wrong so the user can correct the error.
The following section lists the most common errors and suggests remedies to
correct the problems. The list of all possible messages is contained in the
V+ Language Reference Guide.
If the system has more than one robot connected and an error is associated
with a specific one of the robots, the robot number is appended to the error
message in the form “(Robot #)”.
Aborted
(–400)
Explanation: The last command requested, or the program that was executing,
has been aborted at the operator’s request.
User action: None.
*Ambiguous name*
(–453)
Explanation: The abbreviation used for the last command, instruction, or system-defined name was not long enough to identify the operation
intended.
User action: Reenter the last line, using a longer abbreviation.
Auto Startup
(None)
Explanation: The automatic startup procedure has begun. (See the discussion of
command programs for more information.)
User action: None required for this message, but subsequent commands in the
auto-startup command program may require user action.
The robot may begin to move during the automatic
startup procedure. If necessary, you can stop the robot by pressing
EMERGENCY STOP on the controller front panel or PANIC on the
manual control pendant.
WARNING:
V+Operating System User’s Guide, Ver 12.1
115
Appendix A
*Bad block in disk header*
(–523)
Explanation: While formatting a disk, a bad disk block has been found in the disk
header area. The format operation has failed and the disk is not
usable.
User action: Enter the FORMAT command again—use a different diskette if the
error persists.
*Calibration sensor failure* Mtr n
(–1106)
Explanation: During calibration, the calibration sensor for the indicated motor
could not be read correctly. Either the robot is blocked from moving,
or a hardware error has occurred.
User action: Retry the CALIBRATE command or instruction after making sure
that the robot is not blocked. If the problem persists, contact Adept
Field Service.
*Camera interface board absent*
(–722)
Explanation: The vision interface board is not responding to a command from the
vision system.
User action: Make sure that the vision interface board is installed properly. After
saving all the programs and prototypes in memory, power down the
controller and power it up again. Consult Adept Field Service if the
problem persists.
*Can’t go on, use EXECUTE or PRIME*
(–313)
Explanation: An attempt has been made to continue the execution of a program
that has completed or stopped because of a HALT instruction. Normally, an error results when a PROCEED, RETRY, or XSTEP command is entered (or the pendant RUN/HOLD button is pressed)
after a program has completed all its cycles.
User action: Use the EXECUTE or PRIME command, or the pendant PRIME
function, to restart the program from the desired instruction.
*Can’t interpret line*
(–450)
Explanation: V+ could not interpret the last command or instruction entered.
User action: Check the spelling and usage, and reenter the line. In the case of an
error while loading from the disk, edit the affected programs to correct the indicated lines—they have been converted to bad lines.
116
V+Operating System User’s Guide, Ver 12.1
Appendix A
*Can’t mix MC & program instructions*
(–414)
Explanation: A program instruction has been encountered during processing of a
command program, or an MC instruction has been encountered in a
normal program.
User action: Edit the command program to use the DO command to include the
program instruction, or remove the MC instruction from the normal
program.
*Can’t start while program running*
(–312)
Explanation: An attempt has been made to start execution of a program from the
manual control pendant while a program is already executing as
task #0.
User action: Stop the program currently executing and then retry the operation.
*Communication time-out*
(–531)
Explanation: An I/O operation has not completed within the allotted time interval. For data communications, the remote communications device
has not properly acknowledged data that was sent.
User action: Make sure the remote device is communicating. Make sure connections to the remote device are operating properly.
*Communications overrun*
(–524)
Explanation: Data has been received on an I/O device faster than V+ is processing it, and some data has been lost. This will happen only on the
serial interface line or the network.
User action: Modify the program to service the I/O device more often, add a
handshaking protocol, or slow down the transmission rate to V+.
*COMP mode disabled*
(–603)
Explanation: The command attempted requires computer control of the robot, but
COMPUTER mode was not selected on the pendant.
User action: Select COMP mode on the pendant or enable DRY.RUN mode from
the terminal, then reissue the command.
V+Operating System User’s Guide, Ver 12.1
117
Appendix A
*Controller overheating*
(–631)
Explanation: The temperature sensor in the controller power supply has detected
an overheating condition. Robot power is switched off.
User action: Make sure the controller fans are operating and are not obstructed.
Make sure the fan filters are clean. Power down the controller to let
it cool off.
*Data checksum error*
(–510)
Explanation: An error was detected while transferring information to or from an
external device.
User action: Attempt the transfer again. If the problem persists, contact Adept
Customer Service.
*Data error on device*
(–522)
Explanation: An error was detected while attempting to read information from an
external device, possibly because a diskette has been damaged or
was not formatted properly.
User action: Attempt the read again. Make sure the correct diskette is being
used, that it is properly installed in the drive, and that it is formatted. (Recall that formatting a diskette erases its contents.)
*Device full*
(–503)
Explanation: There is no more space available on a device. If received for a disk
file, the disk is full (if there are many small files on the device, this
error indicates the disk directory is full). If received for a servo
device, an attempt has been made to assign too many servo axes to a
single CPU.
User action: Delete unneeded disk files, or use another drive or diskette. Reconfigure your system so the maximum number of axes per CPU is not
exceeded.
Check the program code to make sure the requested device has not
already been attached.
*Device not ready*
(–508)
Explanation: (1) The requested disk device (or remote network task) is not prepared to communicate with the V+ system.
(2) A limited-access device like the terminal, the manual control
pendant, or a serial line is attached to a different program task.
118
V+Operating System User’s Guide, Ver 12.1
Appendix A
(3) You have tried to write into a pull-down window while it is displayed.
User action: (1) If the intended device is a system microfloppy disk drive, make
sure the diskette is correctly inserted and formatted.
(2) If a limited-access device is specified, ABORT and KILL the program task that has it attached, or wait for the program task to
release the device. If the intended device is on the network, check
that the proper connections are made and that the remote system is
operating correctly.
(3) The pull-down menu should not be modified with the FSET
instruction while it is being displayed. A suitable time for modifying the pull-down menu is immediately after receiving a
menu-selection event.
*Directory error*
(–509)
Explanation: An error occurred while accessing a disk directory, possibly because
the diskette was not formatted or the diskette has been damaged in
some way.
User action: Make sure the correct diskette is being used, that it is properly
installed in the drive, and that it is formatted. (Recall that formatting
a diskette erases its contents.)
*Duty-cycle exceeded* Mtr n
(–1021)
Explanation: The indicated motor has been driven fast for too long a period of
time. The servo system has disabled Arm Power to protect the robot
hardware.
User action: Turn on Arm Power; reduce the speed and/or acceleration for the
motion that was in progress or for motions that preceded that
motion; and repeat the motion that failed.
*Encoder quadrature error* Belt n
(–1013)
Explanation: The position encoder signal from the specified conveyor belt is
sending information that is not phased correctly. The encoder or its
cabling may be defective. (Encoder error checking is initiated by the
DEFBELT instruction and by enabling the BELT switch while a belt
is defined.)
User action: Make sure the encoder cable is properly connected. Try to run the
conveyor at a slower speed. Contact Adept Customer Service if the
error persists.
V+Operating System User’s Guide, Ver 12.1
119
Appendix A
*Encoder quadrature error* Mtr n
(–1008)
Explanation: The position encoder signal from the specified motor is sending
information that is not phased correctly. The encoder or its cabling
may be defective.
User action: Turn on high power, calibrate the robot, and try to perform the
motion at a slower speed. If the error persists, contact Adept Customer Service.
*Envelope error* Mtr n
(–1006)
Explanation: The indicated motor was not tracking the commanded position with
sufficient accuracy, indicating a failure in the hardware servo system
or something impeding the path of the robot.
User action: Turn on high power and try to perform the motion at a slower
speed. Make sure nothing is obstructing the robot motion. If the
error recurs, contact Adept Customer Service.
Executing in DRY.RUN mode
(50)
Explanation: The DRY.RUN switch is enabled and program execution has been
requested. Thus, no motion of the robot will occur.
User action: None unless motion of the robot is desired. In that case, abort execution of the program and disable the DRY.RUN switch.
*External E-STOP*
(–608)
Explanation: The hardware panic button on the controller or pendant has been
pressed, or the external panic circuit has been interrupted, causing
Robot Power to be turned off. This message is also displayed if the
MANUAL button is pressed or the PANIC command is entered
while a robot control program is executing.
User action: If Robot Power is off, release the panic button or restore the external
panic circuit. Then turn on Robot Power. If Robot Power is not off,
reselect COMP mode on the manual control pendant. Then resume
program execution.
*[Fatal] any message
(None)
Explanation: An internal problem has occurred with the V+ software or with the
system hardware.
User action: It would be appreciated if you would report the error to Adept
Application Engineering. Please include the details of the error mes-
120
V+Operating System User’s Guide, Ver 12.1
Appendix A
sage and exactly what you were doing at the time the error
occurred.
To save programs that are in memory, you can restart V+ temporarily by typing Ctrl+G. The robot servos will not function, but you
can STORE the programs. Then power down the controller and
restart the system.
*File already exists*
(–500)
Explanation: There is already a disk file or a graphics window with the name supplied to the last storage request.
User action: Reissue the storage request with a different file name or delete the
old file.
*File format error*
(–512)
Explanation: The requested disk file is not in a format acceptable to V+ because
either it was not created by V+ or the file has been corrupted.
User action: Use another diskette or reference another file.
*File or subdirectory name error*
(–514)
Explanation: The specified file name or subdirectory was not a valid disk file
name, the directory path contained invalid syntax, or the directory
path was too long.
User action: Retry the operation with a correct file name or subdirectory name.
Verify that syntax of the directory path is correct. Check that any
default directory path specified by the DEFAULT command is correct. Check that the total directory path is not too long when the
default is combined with the current file specification.
*Graphics processor timeout*
(–552)
Explanation: The graphics processor (on the system processor) failed to respond
to a command from V+ within five seconds.
User action: Save all your programs and variables on disk and then reboot the
system from disk. Contact Adept Customer Service if the problem
repeats.
*Graphics software checksum error*
(–558)
Explanation: The code on the graphics board has been corrupted.
V+Operating System User’s Guide, Ver 12.1
121
Appendix A
User action: Save new or modified programs, restart the controller, reload the
programs. If the problem persists, contact Adept Customer service.
*Graphics storage area format error*
(–555)
Explanation: During execution of a FREE command, V+ has detected that the
information in graphics memory may have been corrupted. This
may have been caused by a momentary hardware failure or a software error.
User action: Attempt to save as much as possible onto disk. Issue ZERO 1 and
ZERO 2 monitor commands to delete graphics data. If the error persists, power down the controller and restart the system.
(HALTED)
(8)
Explanation: A HALT instruction has been executed, and thus execution of the
current program has terminated.
User action: Any monitor command can be entered, but PROCEED cannot be
used to resume program execution.
(–805)
*Hardware not in system*
Explanation: An instruction has attempted to access optional hardware (such as a
FORCE board) that is not installed in the system.
User Action: Install the needed hardware or remove the instruction that
addresses the hardware.
(–300)
*Illegal monitor command*
Explanation: The name of the command just attempted was not recognized by the
system, possibly because it was mistyped, or because it was a program instruction and not a command.
User action: Check the spelling of the command name and enter the command
again. Use the DO command to invoke a program instruction from
the terminal.
*Illegal value*
(–402)
Explanation: A numeric or expression value that is not in the allowed range was
specified within a command or instruction.
User action: Edit the program to use a legal value.
122
V+Operating System User’s Guide, Ver 12.1
Appendix A
*Illegal when command program active*
(–419)
Explanation: A command program is active and an attempt has been made to
execute a command that would interfere with operation of the command program. (For example, processing a ZERO command would
cause the command program to be deleted from the system memory.)
User action: Edit the command program and delete the command causing the
error.
*Image processing board failure*
(–728)
Explanation: The controller circuit board that processes vision images has failed
to respond while processing a request to grab a frame.
User action: After saving the programs, variables, and vision prototypes in
memory, power down the controller. Make sure the image processor
is firmly seated in the controller backplane. Contact Adept Customer Service if the problem persists.
*Initialization failure* Belt n
(–1015)
Explanation: The indicated belt encoder monitoring system failed to respond to
V+ during the initialization caused by the DEFBELT instruction.
User action: Power down the controller and restart. If the problem persists, contact Adept Field Service. (You can prevent this error from being
reported by enabling the DRY.RUN system switch.)
*Input block error*
(–511)
Explanation: A read error has occurred while reading a binary-data file from the
floppy disk. This indicates that the wrong file was specified or that
the data in the file is corrupted.
User action: Try the operation again. If the error recurs, use another diskette.
*Input error* Try again:
(16)
Explanation: The input provided was not consistent with what V+ expected.
User action: Provide another response.
*Invalid argument*
(–407)
Explanation: An argument for a function, program instruction, or SEE editor
command is not in the accepted range.
V+Operating System User’s Guide, Ver 12.1
123
Appendix A
User action: Check the range of arguments for the function, program instruction,
or editor command being used.
*Invalid disk format*
(–520)
Explanation: An attempt has been made to read a disk that is not formatted or is
formatted improperly, or a FORMAT command has been entered
that specifies invalid format parameters for the device specified.
User action: If a FORMAT command has been entered, check the command syntax and retry the command. Otherwise, try a different diskette or
reformat the current one. Remember that formatting erases all
information on the diskette. If the diskette was created on an IBM
PC, be sure it was formatted with one of the formats accepted by the
V+ system.
*Invalid program or variable name*
(–455)
Explanation: A user-defined name used in a command or instruction was not recognized by V+.
User action: Check the name and retype the line.
*Invalid qualifier*
(–476)
Explanation: An invalid qualifier was specified on the last command.
User action: Enter the command again, with a valid qualifier.
*Invalid servo error* Mtr n
(–1001)
Explanation: An unrecognized error was reported for the indicated robot motor.
User action: Attempt the operation again. Contact Adept Customer Service if the
error repeats.
*Invalid servo initialization data*
(–625)
Explanation: During V+ system initialization after booting from disk, servo initialization data in the wrong format was found. This can be caused
by using a version of the SPEC utility that is incompatible with the
V+ system.
User action: Make sure your system disk has been configured correctly. Contact
Adept Application Engineering for assistance.
124
V+Operating System User’s Guide, Ver 12.1
Appendix A
*Invalid software configuration*
(–315)
Explanation: During initial startup, V+ has detected that the system software is
not configured properly for the options or hardware present.
User action: Power down the controller and try starting it again. Make sure that
the boot disk you are using is valid for your controller. If the problem persists, contact Adept Customer Service for assistance.
*Invalid when program task active*
(–311)
Explanation: An attempt has been made to begin execution of a robot or PC program task when that task is already active.
User action: Abort the currently executing task or execute the program as a different task, if possible.
*I/O communication error*
(–507)
Explanation: A hardware error has been detected in the I/O interface.
User action: Try your command again. If the problem persists, contact Adept
Customer Service.
*I/O queue full*
(–517)
Explanation: Too many I/O requests have been issued to a device too quickly,
and there is no more room to queue them.
User action: Retry the operation. If the problem persists, it would be appreciated
if you would report the error to Adept Application Engineering.
Please include the details of the error message and exactly what you
were doing at the time the error occurred.
*Joint 1 in brake track or robot overheated*
(–606)
Explanation: (1) Robot joint 1 has been moved into the hardware brake track area,
which causes robot power to be turned off and prevents the robot
from moving.
(2) The robot base has become overheated.
User action: (1) Push the brake release button at the robot base and move the
joints back into the normal working range. Turn on robot power and
continue program execution.
(2) Check the fan filter on the robot base, and check the ambient
temperature of the robot. Allow the robot to cool down, turn on
robot power, and continue program execution.
V+Operating System User’s Guide, Ver 12.1
125
Appendix A
*Keyswitch not set to AUTO*
(–303)
Explanation: An attempt has been made to PRIME or otherwise initiate program
execution from the terminal when the front-panel keyswitch is not
set to the AUTO position.
User action: Move the keyswitch to the AUTO position or start program execution from the selected device.
*Keyswitch not set to MANUAL*
(–304)
Explanation: An attempt has been made to PRIME or otherwise initiate program
execution from the manual control pendant, when the front-panel
keyswitch is not in the MANUAL position. If you do not have a
front panel, the keyswitch is assumed to be set to the AUTO position.
User action: Move the keyswitch to the MANUAL position, or start program
execution from the selected device.
*Keyswitch not set to NETWORK*
(–317)
Explanation: An attempt has been made to use a serial line configured for network use, but the controller keyswitch is not in the “NETWORK”
position. If you do not have a front panel, the keyswitch is assumed
to be in the “TERMINAL” position.
User action: Move the keyswitch to the “NETWORK” position and retry the operation.
*Location out of range*
(–610)
Explanation: V+ has encountered a location that is too far away to represent, possibly within an intermediate computation. This probably indicates
an error in a location function argument value or in a compound
transformation.
User action: Check to make sure you are using location functions and operations
correctly, and edit the program as required.
*Location too close*
(–618)
Explanation: An attempt has been made to move the robot to a location that is too
close to the robot column. This probably indicates an error in the
value of a location function argument or an incorrect compound
transformation.
User action: Check to make sure you are using location functions and operations
correctly and edit the program as required.
126
V+Operating System User’s Guide, Ver 12.1
Appendix A
*Manual control pendant failure*
(–650)
Explanation: A program has attempted to access the manual control pendant
when it is disconnected or has failed.
User action: Make sure the pendant is connected properly. If the problem persists, contact Adept Customer Service.
*Memory Err* at aaaaaa
(None)
Explanation: During initialization, V+ detected a hardware failure at the indicated memory location.
User action: Power down the controller and start it again. If the error persists,
contact Adept Customer Service.
*Missing argument*
(–454)
Explanation: A valid argument was not found for one or more of the arguments
required for the requested command or instruction. That is, the
argument was not present at all or an invalid argument was present.
A possible cause is the use of a single equal sign (“=”) for the equality relational operator (“==”).
User action: Check the operation syntax and reenter the line.
*Motion interface E-STOP*
(–630)
Explanation: The AdeptMotion system has detected an error or problem and has
asserted the BRKSTOP signal on the VME bus.
User action: Correct the problem generating the error from the motion system.
*Motor amplifier fault* Mtr n
(–1009)
Explanation: The power amplifier for the indicated motor has signaled a fault
condition. A momentary power failure or a hardware error may
have occurred.
User action: Turn Robot Power back on and restart the program. If the error persists, contact Adept Field Service.
*Motor amplifier fault 1* Mtr n
(–1018)
Explanation: The power amplifier for the indicated motor has signaled a fault
condition on fault line 1. This fault occurs only for devices controlled by the AdeptMotion Servo system. The interpretation of this
fault depends on the particular device being controlled.
V+Operating System User’s Guide, Ver 12.1
127
Appendix A
User action: Turn Robot Power back on and restart the program. If the error persists, implement procedures appropriate for your AdeptMotion system. If the robot is a standard Adept product, contact Adept
Customer Service.
*Motor amplifier fault 2* Mtr n
(–1019)
Explanation: The power amplifier for the indicated motor has signaled a fault
condition on fault line 2. This fault occurs only for devices controlled by the AdeptMotion Servo system. The interpretation of this
fault depends on the particular device being controlled.
User action: Turn Robot Power back on and restart the program. If the error persists, implement procedures appropriate for your AdeptMotion system. If the robot is a standard Adept product, contact Adept
Customer Service.
*Motor amplifier fault 3* Mtr n
(–1020)
Explanation: The power amplifier for the indicated motor has signaled a fault
condition on fault line 3. This fault occurs only for devices controlled by the AdeptMotion Servo system. The interpretation of this
fault depends on the particular device being controlled.
User action: Turn Robot Power back on and restart the program. If the error persists, implement procedures appropriate for your AdeptMotion system. If the robot is a standard Adept product, contact Adept
Customer Service.
*Motor overheating* Mtr n
(–1016)
Explanation: The indicated motor is overheating.
User action: Reduce the speed, acceleration, and/or deceleration of the robot
motions; or introduce delays in the application cycle to give the
motor an opportunity to cool.
*Motor power failure* Mtr n
(–1017)
Explanation: The power source for the indicated motor has signaled a fault condition. A momentary power failure or a hardware error may have
occurred.
User action: Turn Robot Power back on and restart the program. If the error persists, contact Adept Customer Service.
128
V+Operating System User’s Guide, Ver 12.1
Appendix A
*Motor stalled* Mtr n
(–1007)
Explanation: The indicated motor has stalled while being driven. This is usually
caused by the robot encountering an obstruction.
User action: Turn Robot Power back on and restart the program. Remove the
obstruction or modify the program to have the robot follow a different path.
*Motor startup failure* Mtr n
(–1105)
Explanation: During calibration, the indicated motor did not move as expected.
The problem may be: (1) the motor is obstructed or up against a
limit stop, (2) the load on the robot is too large for calibration, (3) the
motor drive hardware is not functioning, or (4) the position encoders are not functioning.
User action: Move the robot away from its limit stops and remove any unusual
load. Turn Robot Power back on and try to calibrate again. Contact
Adept
Customer Service if the error persists.
*No air pressure*
(–607)
Explanation: V+ detected that the air supply to the robot brakes and hand has
failed. Robot Power is turned off and cannot be turned on until the
air pressure is restored.
User action: Restore the air pressure, turn Robot Power back on, and resume program execution. If the error persists, contact Adept Customer Service.
*No program specified*
(–301)
Explanation: No program was specified for an EXECUTE or SEE command or
instruction or DEBUG command, and no previous program is available as a default.
User action: Type the line again, providing a program name.
*No robot connected to system*
(–622)
Explanation: An attempt has been made to attach a robot with a system that does
not support control of a robot. (Note that some commands, instructions, and functions implicitly attach the robot.)
User action: Make sure the system has been booted from the correct system disk
(for example, use the ID command to display the system identifica-
V+Operating System User’s Guide, Ver 12.1
129
Appendix A
tion). Change the program so that it does not attempt to attach the
robot.
*No vision system selected*
(–751)
Explanation: The current task has not selected a vision system. By default, vision
system 1 is selected. This error may indicate the vision option is not
installed.
User action: Use the SELECT() function to select a vision system.
*Nonexistent file*
(–501)
Explanation: (1) The requested file is not stored on the disk accessed. Either the
name was mistyped or the wrong disk was read.
(2) The requested graphics window title, menu, or scroll bar does
not exist.
User action: (1) Check the file name—use the FDIRECTORY command to display
the directory of the disk.
(2) Check the name of the graphics window element specified.
*Nonexistent subdirectory*
(–545)
Explanation: The subdirectory referenced in a file specification does not exist on
the disk that is referenced. Note that the subdirectory may be part of
a default directory path set by the DEFAULT monitor command.
User action: Check that the subdirectory name was entered correctly. Check that
the correct disk drive was referenced and that the correct diskette is
loaded. Use an FDIRECTORY command to display the directory
containing the subdirectory. Check that the default directory path is
correct.
*Not enough program stack space*
(–413)
Explanation: An attempt was made to call a subroutine, process a reaction subroutine, or allocate automatic variables when the stack for the program task was too full.
User action: Reorganize the program logic to eliminate one or more nested subroutine calls or reactions; eliminate some of the automatic variables
that are allocated by the programs; use the STACK monitor command to increase the size of the stack for the program task. The program may be restarted with the RETRY command.
130
V+Operating System User’s Guide, Ver 12.1
Appendix A
*Not enough storage area*
(–411)
Explanation: There is no more space in RAM for programs or variables.
User action: Delete unused programs and variables. If the memory is fragmented because of numerous deletions, it can be consolidated by
issuing the commands “STORE save_all”, “ZERO”, and “LOAD
save_all”. This will write the memory contents to the disk and read
them back into memory. Note, however, that this procedure will not
retain any variables that are not referenced by any program in memory, nor will it retain the values of variables that are defined to be
AUTO or LOCAL.
*NVRAM battery failure*
(–665)
Explanation: The nonvolatile RAM battery backup has failed and the RAM may
not hold valid data.
User action: Replace NVRAM battery.
*NVRAM data invalid*
(–661)
Explanation: The nonvolatile RAM has not been initialized or the data has been
corrupted.
User action: Power down your controller and reboot your system. If the error
persists, contact Adept Customer Service.
*Option not installed*
(–804)
Explanation: An attempt has been made to use a feature of a V+ system option
that is not present in this robot system.
User action: Power down the controller and try starting it again. Contact Adept
Application Engineering if the problem repeats.
*Out of graphics memory*
(–549)
Explanation: There is no more space in the graphics memory on the system processor for windows, icons, fonts, or other graphics items.
User action: Delete unused graphics items or reduce the size of windows to free
up graphics memory.
*Out of I/O buffer space*
(–532)
Explanation: An I/O operation cannot be performed because the V+ system has
run out of memory for buffers.
V+Operating System User’s Guide, Ver 12.1
131
Appendix A
User action: Delete some of the programs or data in the system memory and
retry the operation. (Also see “*Not enough storage area*”.)
*Out of vision transform memory*
(–753)
Explanation: The space allocated for vision transformations in inadequate. (A
vision transformation may be defined for each task for each CPU
running V+ user tasks.) Vision transformations are defined with the
VTRANS instruction.
User action: Define only the vision transformations that you need. If more memory must be allocated to vision transformations, see the description
of the DEVICE instruction.
(–633 )
*PANIC command*
Explanation: The operator has entered a V+ PANIC monitor command which has
stopped the current robot motion. High power is still enabled.
User action: To continue with the current motion, enter the RETRY monitor command. To continue after the current motion, enter the PROCEED
monitor
command.
(9)
(PAUSED)
Explanation: A PAUSE instruction has been executed, and thus the current program has suspended execution.
User action: Any monitor command can be entered. To continue execution of the
program, type “PROCEED”.
*Position out of range* Jt n
(–1002)
Explanation: (1) The requested motion was beyond the software-limited range of
motion for the indicated joint; (2) while enabling high power, V+
detected that the indicated robot joint was outside the software
limit.
User action: (1) Modify the program as required to prevent the invalid motion
request. (Because the robot did not actually move out of range, you
do not need to move the robot before continuing); (2) move the
robot back into the working envelope. Correct whatever caused the
robot to get into the restricted area. Then enable power.
*Position out of range* Mtr n
(–1023)
Explanation: (1) The requested motion was beyond the software-limited range of
motion for the indicated motor; (2) while enabling high power, V+
132
V+Operating System User’s Guide, Ver 12.1
Appendix A
detected that the indicated robot motor was outside the software
limit.
User action: (1) Modify the program as required to prevent the invalid motion
request. (Because the robot did not actually move out of range, you
do not need to move the robot before continuing); (2) move the
robot back into the working envelope. Correct whatever caused the
robot to get into the restricted area. Then enable power.
( –667)
*Power failure detected*
Explanation: Indicates that a controller AC power fail condition has been
detected. If battery backup is installed, this error will be reported
(when power is restored) by any I/O operations that were canceled
due to the power failure. This error code may be trapped by a program using the REACTE instruction in order to provide some level
of automatic power failure response.
User action: The user may need to restart or repeat any operations that were
interrupted by the controller AC power failure. Some reinitialization
of the system may be required: for example, any robot(s) connected
to the controller will need to be recalibrated after a controller power
failure.
*Power failure detected by robot*
(–632)
Explanation: Indicates that a controller power failure condition has been detected
by the robot control software while a robot is attached to a program.
This error is issued in addition to −667 if a program has a robot
attached and has a REACTE routine defined. Unlike error −667, if no
REACTE routine is defined and a robot is attached, the V+ program
stops with this error.
User action: The user may need to restart or repeat any operations that were
interrupted by the controller AC power failure. Some reinitialization
of the system may be required. For example, any robot(s) connected
to the controller will need to be recalibrated after a controller power
failure
*Processor crash* CPU = n
(None)
Explanation: V+ has detected that the specified CPU within the controller has
entered a fatal error state. Following a crash message from that processor is then displayed immediately. A software error or hardware
problem with that processor is likely.
V+Operating System User’s Guide, Ver 12.1
133
Appendix A
User action: It would be appreciated if you would report the error to Adept
Application Engineering. Please include the details of the error message and exactly what you were doing at the time the error
occurred. You should store the programs that are in memory, power
down the controller, and start it again. (If the processor ID shown is
“1”, you can restart V+ by typing Ctrl+G. The robot servos will not
function, but you can STORE the programs in memory.) If the problem persists, contact Adept Customer Service.
*Program already exists*
(–309)
Explanation: An attempt has been made to LOAD a program that already exists
or to COPY or RENAME a program to a name that is already in use.
User action: Delete the conflicting program or use a different name.
Program completed
(3)
Explanation: The program has been executed the number of times specified in the
last EXECUTE command or instruction.
User action: Any monitor command can be entered, except that PROCEED cannot be used to resume program execution.
Program HOLD
(15)
Explanation: The RUN/HOLD button on the pendant has been pressed while a
robot program was executing, and it is now suspended.
User action: Any monitor command can be entered. To continue execution of the
program, type PROCEED or RETRY, or press the PROGRAM
START button on the controller. (The RUN/HOLD button can be
held down to temporarily resume execution of the program if the
controller keyswitch is in the “MANUAL” position.)
Program task # stopped at program_name, step step_number date time
(4)
Explanation: Execution of the program task indicated by “#” has terminated for
the reason indicated in the message that preceded this message. The
step number displayed corresponds to the NEXT program step that
would be executed (for example, if PROCEED were entered). The
current date and time are displayed if the system date and time
have been set.
User action: None. This is only an informational message.
134
V+Operating System User’s Guide, Ver 12.1
Appendix A
*Protection error*
(–530)
Explanation: An I/O operation cannot be performed because (1) it attempted to
write to a disk that is write protected, or (2) the user does not have
the proper access status.
User action: Check the diskette to make sure the write-protect tab is in the correct position. Use an FDIRECTORY command to display the disk
directory. If the file has protected (”P”) or read-only (”R”) protection, you cannot access it in the way attempted.
Return manual control pendant to background display (^C to exit)
(None)
Explanation: The manual control pendant display must be in “background” for
the operation you have selected.
User action: Press the “DONE” button on the pendant one or more times to exit
the current function.
*Robot module not loaded* ID: n
(-628)
Explanation: This error occurs only during startup when a robot module has been
configured using the CONFIG_C or DM_UTIL utilities, but the
robot module is not present in memory.
This error will also occur if the encoder module is not present in
memory.
User Action: Use the DM_UTIL or CONFIG_C utility to add the robot module or
the encoder module to the boot disk before rebooting.
Note that the encoder module is selected in a way that is different
from other modules. While normal robot modules are selected by
specifying an ID using the DM_UTIL utility, the encoder module is
selected using the CONFIG_C utility.
*Robot not calibrated*
(–605)
Explanation: An attempt has been made to execute a robot-control program when
the robot is not calibrated. No motion is allowed until the robot is
calibrated.
User action: If you want to use the robot, issue a CALIBRATE command or have
your program execute a CALIBRATE instruction. Or enable the
DRY.RUN switch to allow program execution without using the
robot.
V+Operating System User’s Guide, Ver 12.1
135
Appendix A
*Robot power off*
(–604)
Explanation: High power is not turned on or cannot be turned on because of a
hardware failure. On a system with the Manual Mode Safety
Package (MMSP), you can get this error if you press the HIGH
POWER ON/OFF button before it starts to flash.
User action: (1) Turn on high power and reenter the last command; (2) on a system with the MMSP, wait for the HIGH POWER ON/OFF button to
start to flash before you press it.
*Robot power on*
(–627)
Explanation: An attempt has been made to perform an action that requires robot
power to be off.
User action: DISABLE POWER and reexecute the action.
*RSC any message*
Explanation: V+ has received incorrect data from the robot signature card.
User action: Retry the operation. If the problem persists, contact Adept Customer Service.
*Subdirectory in use*
(–547)
Explanation: An attempt has been made to delete a subdirectory that still contains files or that is being referenced by another operation (for example, an FDIRECTORY command).
User action: Check that all the files within the subdirectory have been deleted.
Check that no other program tasks are referencing the subdirectory.
Retry the delete operation.
*Subdirectory list too long*
(–546)
Explanation: A directory path contains too many subdirectories, or the directory
path is too long to be processed. The path is a combination of subdirectories in the file specification and the default directory path set by
the DEFAULT monitor command. Directory paths are limited to a
total of 16 subdirectories and 80 characters (including any portion of
the directory path specified by the current default path).
User action: Specify a shorter directory path in the file specification or in the
DEFAULT command. If you are accessing a foreign disk that contains more than 16 nested subdirectories, you cannot read the files in
subdirectories nested deeper than 16 levels. In that case you will
136
V+Operating System User’s Guide, Ver 12.1
Appendix A
need to use the system that created the disk to copy the files to a
directory that is nested less deeply.
(–314)
*Switch can’t be enabled*
Explanation: An ENABLE command for a certain switch has been rejected
because of some error condition. For example, ENABLE POWER
will fail if the system is in FATAL ERROR state.
User action: Review the description for the switch you are trying to enable, correct the error condition, and try again.
(–629)
*SYSFAIL asserted*
Explanation: A board on the VME bus has encountered a severe error and
asserted SYSFAIL which turns off robot power.
User action: Restart the system. Check for proper seating of the system boards
and correct device connections to the boards. Test the system with as
many boards removed as possible, adding boards back in until the
problem board is identified. If the problem persists, contact Adept
Customer
Service.
*Time-out nulling errors* Mtr n
(–1003)
Explanation: The indicated motor took too long to complete the last motion, possibly because the robot is blocked and cannot reach its destination.
User action: Turn on Robot Power and retry the motion after making any necessary program changes. If this error occurs repeatedly, contact Adept
Application Engineering for assistance.
*Too many arguments*
(–553)
Explanation: Too many arguments were specified for the last command or
instruction.
User action: Reenter the command or instruction, but with the correct number of
arguments.
*Undefined program or variable name*
(–406)
Explanation: The program or variable, referenced in a command or program step,
does not exist—possibly because the name was mistyped.
User action: If the correct name was entered, create the program or variable
using one of the V+ editors or the appropriate V+ monitor commands, or by loading from a disk file.
V+Operating System User’s Guide, Ver 12.1
137
Appendix A
*Unexpected text at end of line*
(–451)
Explanation: The previous command or instruction could not be recognized by
V+, possibly because of a mistyped function name or because an
argument was specified where none is allowed.
User action: Reenter the line, correcting the syntax error.
*Unexpected zero index* Mtr n
(–1005)
Explanation: A zero index signal was received from the encoder for this motor at
an unexpected time. The encoder may be gaining or losing counts,
there may be a hardware problem with the zero index signal, or the
“Counts per zero index” configuration parameter may be set incorrectly.
User action: Turn on Robot Power and continue to use the system. If this error
occurs repeatedly, contact Adept Customer Service.
*VISION not enabled*
(–701)
Explanation: A vision command was entered before the vision system has been
enabled.
User action: Enter an ENABLE VISION command and retry the previous command.
*Warning* Not calibrated
(51)
Explanation: The robot servo system and joint position sensors are not calibrated.
Thus, any location variables that are defined may not represent the
locations desired.
User action: Enter a CALIBRATE command or have your program execute a
CALIBRATE instruction.
*Warning* Watchdog timer disabled
(56)
Explanation: Displayed at startup by all CPUs if the watchdog timer on the board
is disabled. For Adept CPUs, the timer is enabled by removing a
jumper. This timer is a hardware device that asserts SYSFAIL on the
VME bus (which drops robot power) if the CPU halts or gets hung.
On the Adept 030 board, the green light goes out if SYSFAIL is
asserted.
This message also is displayed whenever a user task is started from
the monitor and the watchdog timer is disabled.
138
V+Operating System User’s Guide, Ver 12.1
Appendix A
User action: Replace the watchdog timer jumper. See the Adept MV Controller
User's Guide.
*Wrong disk loaded*
(–521)
Explanation: The diskette in a disk drive has been changed while a file was still
open. Further attempts to access the file result in this error. Data
being written into the file may be lost.
User action: Check your diskette to see if any data was lost. If so, it’s too late
now. Be more careful in the future.
V+Operating System User’s Guide, Ver 12.1
139
Glossary
B
A
Absolute pathDisk drive path specification that starts at the root (top-level) directory of a disk.
Alt
Alternate key. This is one of the special modifier keyboard keys.
Analogue I/O
System I/O that is based on analogue values as represented by a voltage range from –1V
to +1V or 0V to +1V. Used with peripheral devices that generate a similar analgue signal.
A-series
Adept contollers that are graphics based and use a color monitor and pointing device.
AutostartOperating system features that allows a program to to loaded and executed when the controller
is turned on.
C
Caps Lock
Special key that forces all letter keys to capital letters.
Command ProgramSee Monitor Command Program
Ctrl
Control key. This is one of the special modifier keyboard keys.
D
Default driveThe drive unit the controller will attempt to load the operating system from when it is turned
on or reset.
Default pathDefault directory specifications used with disk file related commands that do not specify a full
path name.
Digital I/O
System input/output that is based on a one bit state (on/off, high/low). Digital I/O is
commonly used to control devices such as warning signals, feeders, and other peripheral workcell equipment.
DirectoryOrganizational unit of a disk drive hierarchical file structure. Allows you to organize and isolate
groups of disk files.
E
E Stop
Emergency Stop. Special controller circuitry that allows the immediate halting of a motion device and any executing programs.
Executable ProgramA V+ program that is initiated with the EXECUTE command. Contrasted with Monitor
Command programs, which are initiated with the COMMANDS command.
F
Floppy DriveMagnetic data storage device that uses removable magnetic disks.
FormattingBefore data can be reliably written to and read from a disk drive, the drive must be “formatted”.
The format process places track and sector information on a disk.
Function Keys
The keys at the top of the keyboard labeled F1, F2, etc. These keys have special functions
V+Operating System User’s Guide, Ver 12.1
141
Appendix B
in various application programs.
M
MCP
Manual Control Pendant. Hand-held device for controlling Adept systems.
Memory
Adept controllers have two types of memory, volitole and non-volitole. Non-volitole
memory is permanent storage on hard or floppy disks. Before data in non-volitole
memory can be used it must be loaded to volitole system
Modifier Keys
These keys are used in conjunctions with the standard keyboard keys to perform special
functions. The modifier keys are the alternate (Alt), control (Ctrl), and Shift keys.
Monitor Command ProgramA special V+ program that contains only monitor commands. Similar to
MS-DOS batch programs.
MV19
The Adept 19-slot VME controller chassis.
MV8
The Adept eight-slot VME controller chassis.
N
Num Lock
Special key that toggles the numeric keypad from numeric entry to cursor movement.
R
RAM
Random Access Memory, also known as system memory. The program code and data for
executing programs must be resident in system memory. Before a program can be executed, it must be loaded from disk memory to system memory.
Relative pathDisk drive path specifications that is relative to (appended to) an existing path specification.
S
SCSISmall Computer Systems Interface. A defined standard for interfacing computers and peripheral devices, particularly data storage devices. Adept controllers equippped with the SCSI option can read from and write to storage devi
SectorUnit of storage capacity on a disk drive. Drives are divided in the circular tracks and then further divided into anular shaped sectors.
Serial I/O
System I/O based on RS232 protocols. Most commonly used for communicating with
other compputers or computer controlled devices.
S-series
Adept controllers that use a Wyse type character based terminal.
Sub-directorySee “Directory”.
SYSIO
System Input/Ouput board. This board controls basic system communications with a
system terminal, serial I/O devices, the MCP, and digital I/O devices.
System MemorySee “RAM”.
T
Terminal Used on Adept S-Series systems, a terminal incorporates the functions of a monitor and keyboard.
Trackball
A pointing device used with Adept A-series controllers. The trackball controls the postion of the screen pointer.
TrackUnit of storage capacity on a disk drive. Drives are divided in the circular tracks and then further divided into anular shaped sectors.
142
V+Operating System User’s Guide, Ver 12.1
Appendix B
V
VGB
VME Graphics Board. This board is included in A-series controllers. It provides the
graphics functions and memory.
VIS
Vision Board. This board is included in AdeptVision VME systems. It controls vision processing and image acquistion.
VJI VME Joint Interface Board. This board is included in systems that include an Adept robot. It generates
commands for driving the robot joints.
VMI
VME Motion Interface Board. This board is included in systems with the AdeptMotion
VME option. It generates commands to drive the motion device joints.
V+Operating System User’s Guide, Ver 12.1
143
Index
A
ABORT 80
Aborting program execution 80
Adept 604-S robot 35
Adept A-series keyboard 30
Adept PackOne robot 35
Adept S-series keyboard 31
Adept UltraOne robot 35
AdeptNet User’s Guide 14
AdeptOne robot 35
AdeptThree robot 35
AdeptVision Reference Guide 15
AdeptVision User’s Guide 15
Alternate (Alt) key 32
Analog I/O 37
Auto
command program 111
AUTO.V2 95
autostart disk file 111
Autoload option 95
Autostart
and command program 111
B
BELT 97
Boot drive
default 95
selecting 95
Buffer
monitor command 48
Buffer size, serial IO 103
Byte length, serial IO 102
C
Cameras 36
Caps lock key 33
Command 108
program 108
controlling 111
creating 108
example 113
invoking 110
syntax 47
Command (see “Monitor commands”)
Command program
creating 108
Command programs
autostarting 111
naming 108
running 110
starting from MCP 110
storing 109
Command programs (see monitor
command programs)
COMMANDS 77, 110
vs. EXECUTE 110
Commands
editing 48
retrieving previously entered 48
Compatability
with this manual 14
Control (Ctrl) key 32
Controller
MV10 chassis 29
MV8 chassis 29
options 28
starting 42
Copying files 63
with disk copy 71
Creating directories 69
Current directory 67
Cursor
moving 32
Cursor ball 34
Cursor keys 32
Customer service assistance
phone numbers 19
D
Debugging
suppressing robot commands 97
DEFAULT 68
Default boot drive 95
V+Operating System User’s Guide, Ver
12.1
145
Index
changing 95
DEFAULT DISK 67
DEFAULT monitor command 99
Default path
changing 99
DELETE 81
DELETEL 82
DELETEM 81
DELETEP 81
DELETER 82
DELETES 82
Deleting directories 69
Deleting files
with Diskcopy 72
Deleting objects from system memory 82
Digital I/O 36
Directories 64–70
and files 60
and paths 66
creating 69
deleting 69
displaying with FDIRECTORY 62
naming 65
Directory
current 67
viewing contents 69
Disk
displaying free space 62
Disk drives 36, 86–90
sectors 86
tracks 86
Disk file
displaying 76
Disk file names 60
Disk files 60
loading 75
loading to RAM 76
Disk files (see also “Files”)
Displaying the contents of a disk file 76
Dot prompt (see “System prompt”)
Driver, serial IO 102
Drives
listing files on 62
DRY.RUN system switch 97
DTR, serial IO 103
E
Editing monitor commands 48
Emergency stop 80
146
Emergency stop circuitry 37
Error messages
*Protection error* 88
list of 115–139
Escape (Esc) key 33
EVI (see “Vision board”)
Executable V+ programs 78
starting 78
Executable vs. command programs 76
EXECUTE 76
Executing
programs 110
Executing programs 76–83
F
FCOPY 63
FDELETE 64
FDIRECTORY 62, 69
displaying file size 86
used to create directory 69
used to delete directories 69
File
contents of a V + file 61
File names 60
File size
displaying 62
File structure 59
Files 60–64
and program execution 75
copying 63, 71
copying multiple 71
deleting all in a directory 70
deleting from disk 64
deleting multiple 72
naming 60
protected 62
renaming 63
Files names
reserved 61
Files vs. programs 60
FLIST 76
Floppy disks
handling 88
insertion and removal 88
write protection 88
Floppy drive
write protecting 88
Flow, serial IO 103
V+Operating System User’s Guide, Ver 12.1
Index
Flush, serial IO 103
Formatting hard drives 87
FRENAME 63
FSET
changing serial IO configuration 102
Full paths 68
Function keys 32
G
Graphics board (VGB) 28
H
Hard drives
formatting 87
HIGH POWER 17
History
monitor command 48
I
I/O devices
workcell 36
ID Command 46
Input/output
analog 37
digital I/O 36
serial 36
K
Keyboard 30–34
cursor keys 32
function keys 32
making menu selections with 55
modifier keys 32
mouse keys 33
numeric keypad 33
standard keys 32
summary of keys 31
L
LEDs
keyboard status 34
LOAD 76
Loading disk files 76
M
Manual Control Pendant 35
MCP (see “Manual Control Pendant”)
MDIRECTORY 82
Memory
RAM 34
system 34
Menu selection
with the keyboard 55
Messages 115
Modifier keys 32
Modules
displaying 82
program 82
Monitor
command program 108
controlling speed of output to 58
Monitor command
canceling 48
parameters 46
Monitor command programs 77
see also “Command programs”
starting 77
Monitor command vs. executable
programs 76
Monitor commands 45–48
ABORT 80
DEFAULT 68
DEFAULT DISK 67
DELETE 81
DELETEL 82
DELETEM 81
DELETEP 81
DELETER 82
DELETES 82
editing 48
EXECUTE 76
FCOPY 63
FDELETE 64
FDIRECTORY 62, 69
FRENAME 63
LOAD 76
MIDRECTORY 82
retrieving previously entered 48
shortcuts to entering 47
ZERO 82
Monitor output
stopping 33
Monitor speed
default 100
Motion interface board (VMI) 28
V+Operating System User’s Guide, Ver 12.1
147
Index
Mouse (see “Pointer device”)
Mouse keys 33
Moving the typing cursor 32
Multidrop, serial IO 103
MV19 controller chassis 29
MV8 controller chassis 29
N
Names
command programs 108
Num lock 33
Numeric keypad 33
O
Overview of V+ 14
RAM 80
controlling modules in 82
deleting contents of 82
system memory 34
Relative paths 68
Remote emergency stop 37
Renaming files 63
Reserved file names 61
Robot Power (see HIGH POWER)
Robots
Adept 35
Running programs (see “Executing
programs”)
S
P
Parity, serial IO 102
Path
displaying current 68
Paths 66
and directories 66
full 68
relative 68
Pointer device
buttons 50
clicking 50
dragging 50
POWER system switch 97
Program
command 108
monitor command 108
Program execution
halting 80
Program modules 82
Programmer’s terminal baud rate 95
Programs
executable V+ 78
executing 76
loading from disk files 76
monitor command 77, 108
Programs vs. files 60
Protected files 62
Protection error
error message 88
Pull-down menus
using keyboard for 55
148
R
Screen control keys 33
Scroll lock 33
Scroll lock key 33
Scrolling
controlling speed of 58
Sectors
disk drive 86
Serial I/O 36
Serial IO
setting defaults 102
Serial IO configuration 102
Software
applications 56
V + operating system 56
SPEED
changing monitor speed 100
SPEED monitor command 100
Speed, serial IO 102
Standard keys 32
Startup 41
Start-up messages 42
Start-up procedures 42
Start-up screen 43
Status LEDs 34
Stop bits, serial IO 103
Stopping
command programs 112
Stopping program execution 80
Subdirectories (see “Directories”) 64
Switch
BELT 97
DRY.RUN 97
V+Operating System User’s Guide, Ver 12.1
Index
POWER 97
SYSIO (see System I/O board)
System I/O board (SYSIO) 28
System memory 34
deleting objects from 80
System prompt 45
System safeguards
computer controlled devices 17
System startup 41
System terminal
output to 95
scrolling 53
arrows 54
handles 54
scroll bars 52, 53
selecting a window 52
sizing a window 53
zooming a window 53
Write protecting floppy drives 88
Wyse terminal 31, 57
special keys 58
Z
T
ZERO 82
Tab key 33
Terminal
output to 95
Trackball 31
keyboard mouse keys 33
moving typing cursor with 34
Trackball (see also “Pointer device”)
Tracks
disk drive 86
Typing cursor 42, 45
moving 32
moving on command line 48
V
V+ operating system 56
V+ files 60
V+ Language User’s Guide 14, 15
V+ Operating System Reference Guide 14
V+ output
redirecting 95
+
V programs
command vs. executable 76
starting 78
V+messages 115
VGB (see “Graphics board”)
Vision board (VIS) 28
VMI (see “Motion interface board”)
W
WAIT.START 113
Windows 52–55
closing a window 53
moving a window 52
opening a window 52
V+Operating System User’s Guide, Ver 12.1
149
Adept User’s Manual
Comment Form
We have provided this form to allow you to make comments about this manual, to point out any
mistakes you may find, or to offer suggestions about information you want to see added to the
manual. We review and revise user’s manuals on a regular basis, and any comments or feedback
you send us will be given serious consideration. Thank you for your input.
NAME__________________________________________ DATE______________________
COMPANY _________________________________________________________________
ADDRESS___________________________________________________________________
PHONE_____________________________________________________________________
MANUAL TITLE: ____________________________________________________________
PART NUMBER and REV level:________________________________________________
COMMENTS:
______________________________________________________________________________
______________________________________________________________________________
______________________________________________________________________________
______________________________________________________________________________
______________________________________________________________________________
______________________________________________________________________________
______________________________________________________________________________
______________________________________________________________________________
______________________________________________________________________________
MAIL TO: Adept Technology, Inc.
Technical Publications Dept.
11133 Kenwood Road
Cincinnati, Ohio 45242
FAX: (513) 792-0274
00962-01230, Rev. A