1
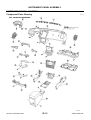
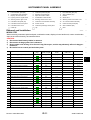
INSTRUMENT PANEL ASSEMBLY
REMOVAL
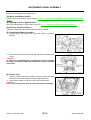
(A) Front Kicking Plate (RH/LH)
Remove front kicking plate (RH/LH). Refer to EI-37, "BODY SIDE TRIM" .
(B) Dash Side Finisher (RH/LH)
1.
2.
Remove plastics nut.
Remove dash side finisher (RH/LH). Refer to EI-37, "BODY SIDE TRIM" .
(C) Front Pillar Garnish (RH/LH)
Pull to inside of vehicle, disengage metal clips and remove front pillar garnish. Refer to EI-37, "BODY SIDE
TRIM" .
(D) A/T Select Lever Knob
1.
2.
3.
Pull down knob cover.
Remove lock-pin of select lever knob.
Lift up select lever knob and remove select lever knob. Refer to AT-229, "Control Device Removal and
Installation" .
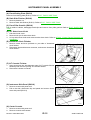
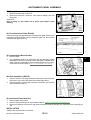
(E) Instrument Clock Finisher
1.
2.
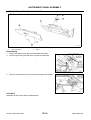
Remove screw and then pull back to your side of instrument
clock finisher.
Disconnect clips and harness connector, and remove instrument
clock finisher.
PIIB8535E
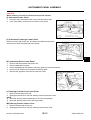
(F) A/T Console Finisher
1.
2.
Insert a remover into side between gaps of A/T console finisher
assembly and remove by lifting A/T console finisher.
Disconnect harness connector.
PIIB8534E
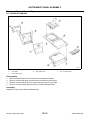
(G) Instrument Side Panel (RH/LH)
1.
2.
Remove screws with power tool.
Pull to the side, disconnect clip and pawls and remove instrument side panel (RH/LH).
PIIB8536E
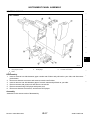
(H) Center Console
1.
2.
Remove screws with power tool.
Remove console sub-harness
Revision: 2006 December
IP-12
2006 FX35/FX45